We have previously explained how to access GDrive content through the KODI addon and how to import content via FTP . The problem with accessing 4K content through the KODI addon is that it is very slow, causing problems such as momentary freezes or unwanted delays. Combining PlexDrive and exporting content via FTP works reasonably well, but exporting via HTTP will improve performance. Additionally, if the server is NATed, it will be easier to use it from the outside since HTTP uses a single port.
In this article, we will use PlexDrive and Nginx to serve GDrive content to a KODI installed on AndroidTV.
The article consists of several steps:
PlexDrive:
We must keep in mind that access to GDrive from PlexDrive is read-only:
Please note that plexdrive doesn't currently support writes (adding new files or modifications), it only supports reading existing files and deletion.
In my case, I will use a jail under IOCage from which I will import GDrive content and serve it via FTP.
We mount the file system via FUSE in the parent and pass it to the jail so that we do not have to modify special permissions in it.
We install the necessary software:
We load the fusefs module:
Now there should be a device called fuse:
crw-rw-rw- 1 root operator 0xe3 Nov 30 23:28 /dev/fuse
We configure the OS to load the module automatically at each boot:
kld_list="fusefs ..."
We find out the drive-id by copying it from the browser URL shown when we access GDrive. In my case, the URL looks like this:
https://drive.google.com/drive/folders/0ANN6pzUlNUgXUk9PVA
The drive-id is: 0ANN6pzUlNUgXUk9PVA
We download PlexDrive, which we can see the available versions at
this github link
chmod 700 plexdrive-freebsd-amd64
We create the directory where we will mount the GDrive unit:
We manually start PlexDrive:
1. Please go to https://console.developers.google.com/
2. Create a new project
3. Go to library and activate the Google Drive API
4. Go to credentials and create an OAuth client ID
5. Set the application type to 'other'
6. Specify some name and click create
7. Enter your generated client ID:
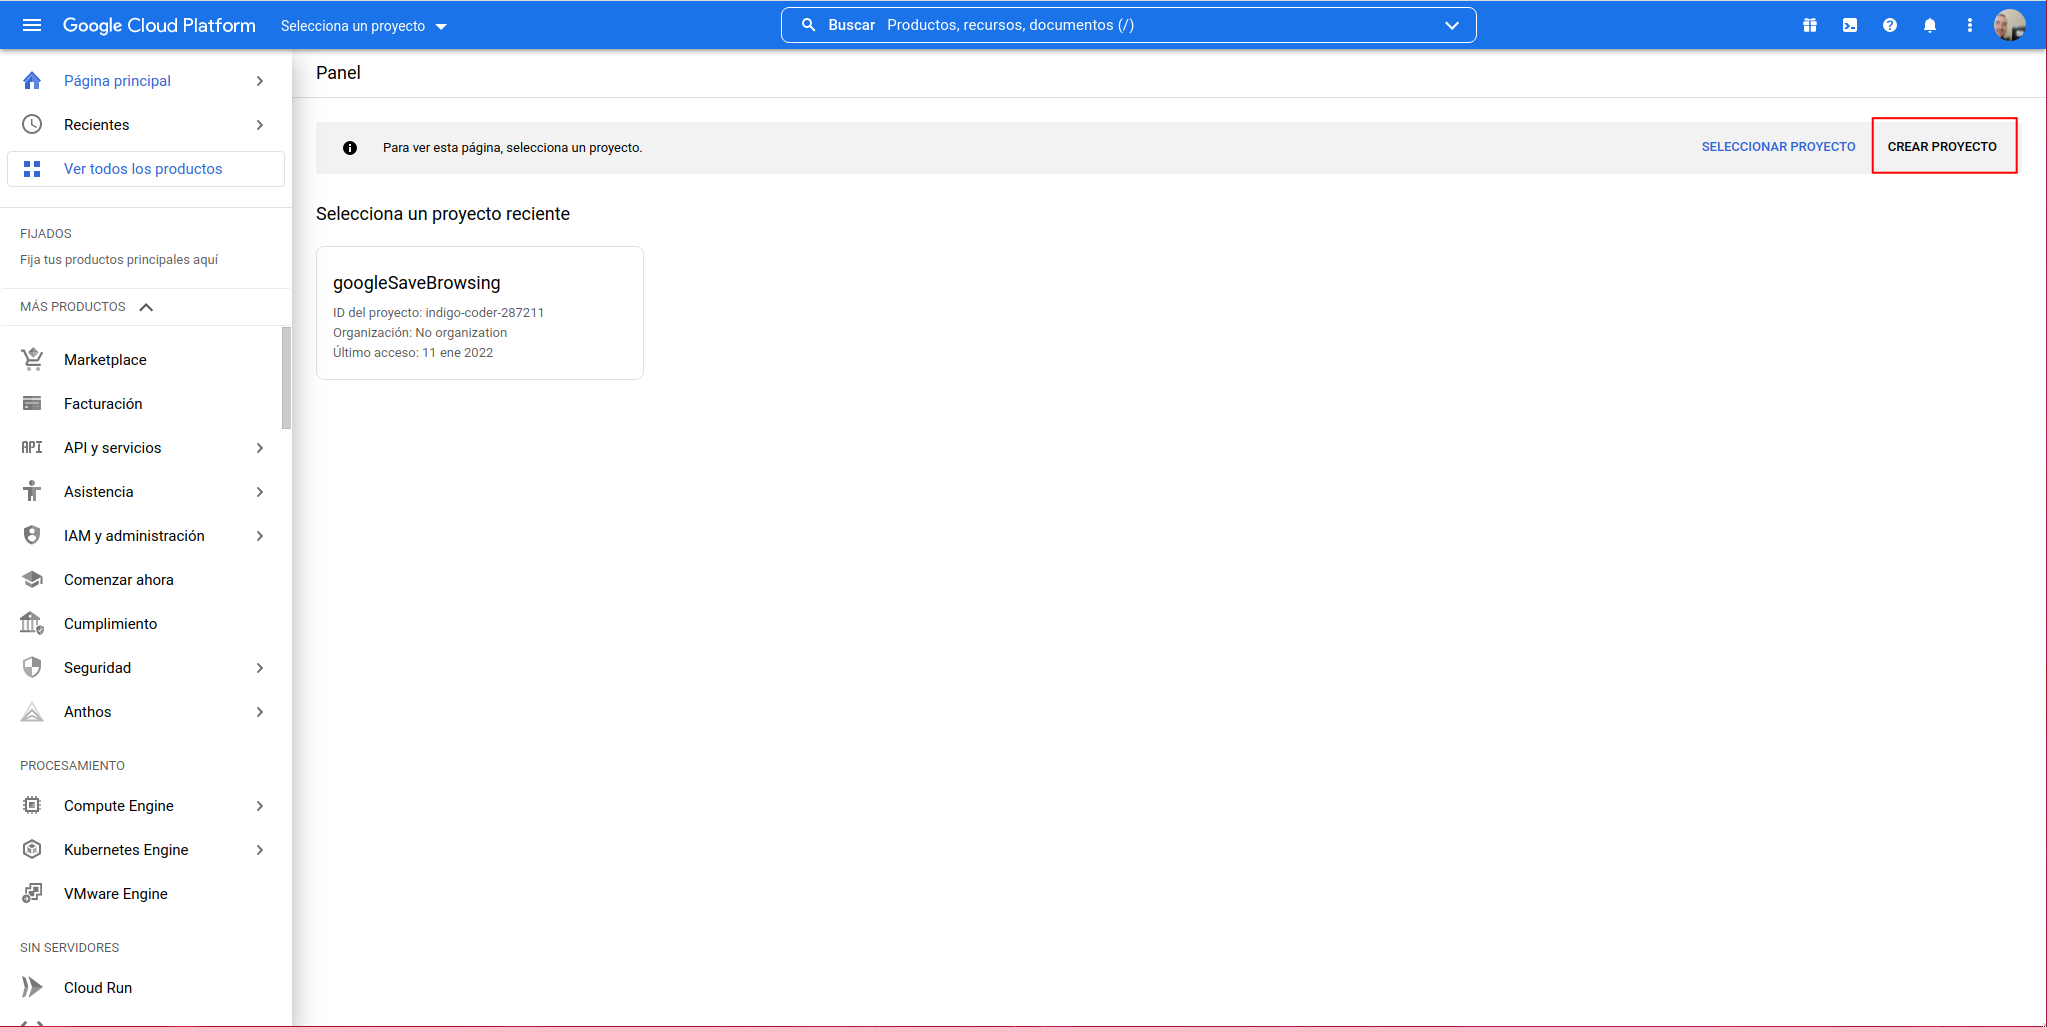
When we access the shown URL, we will see the following interface where we must click on the button on the right “CREATE PROJECT”:
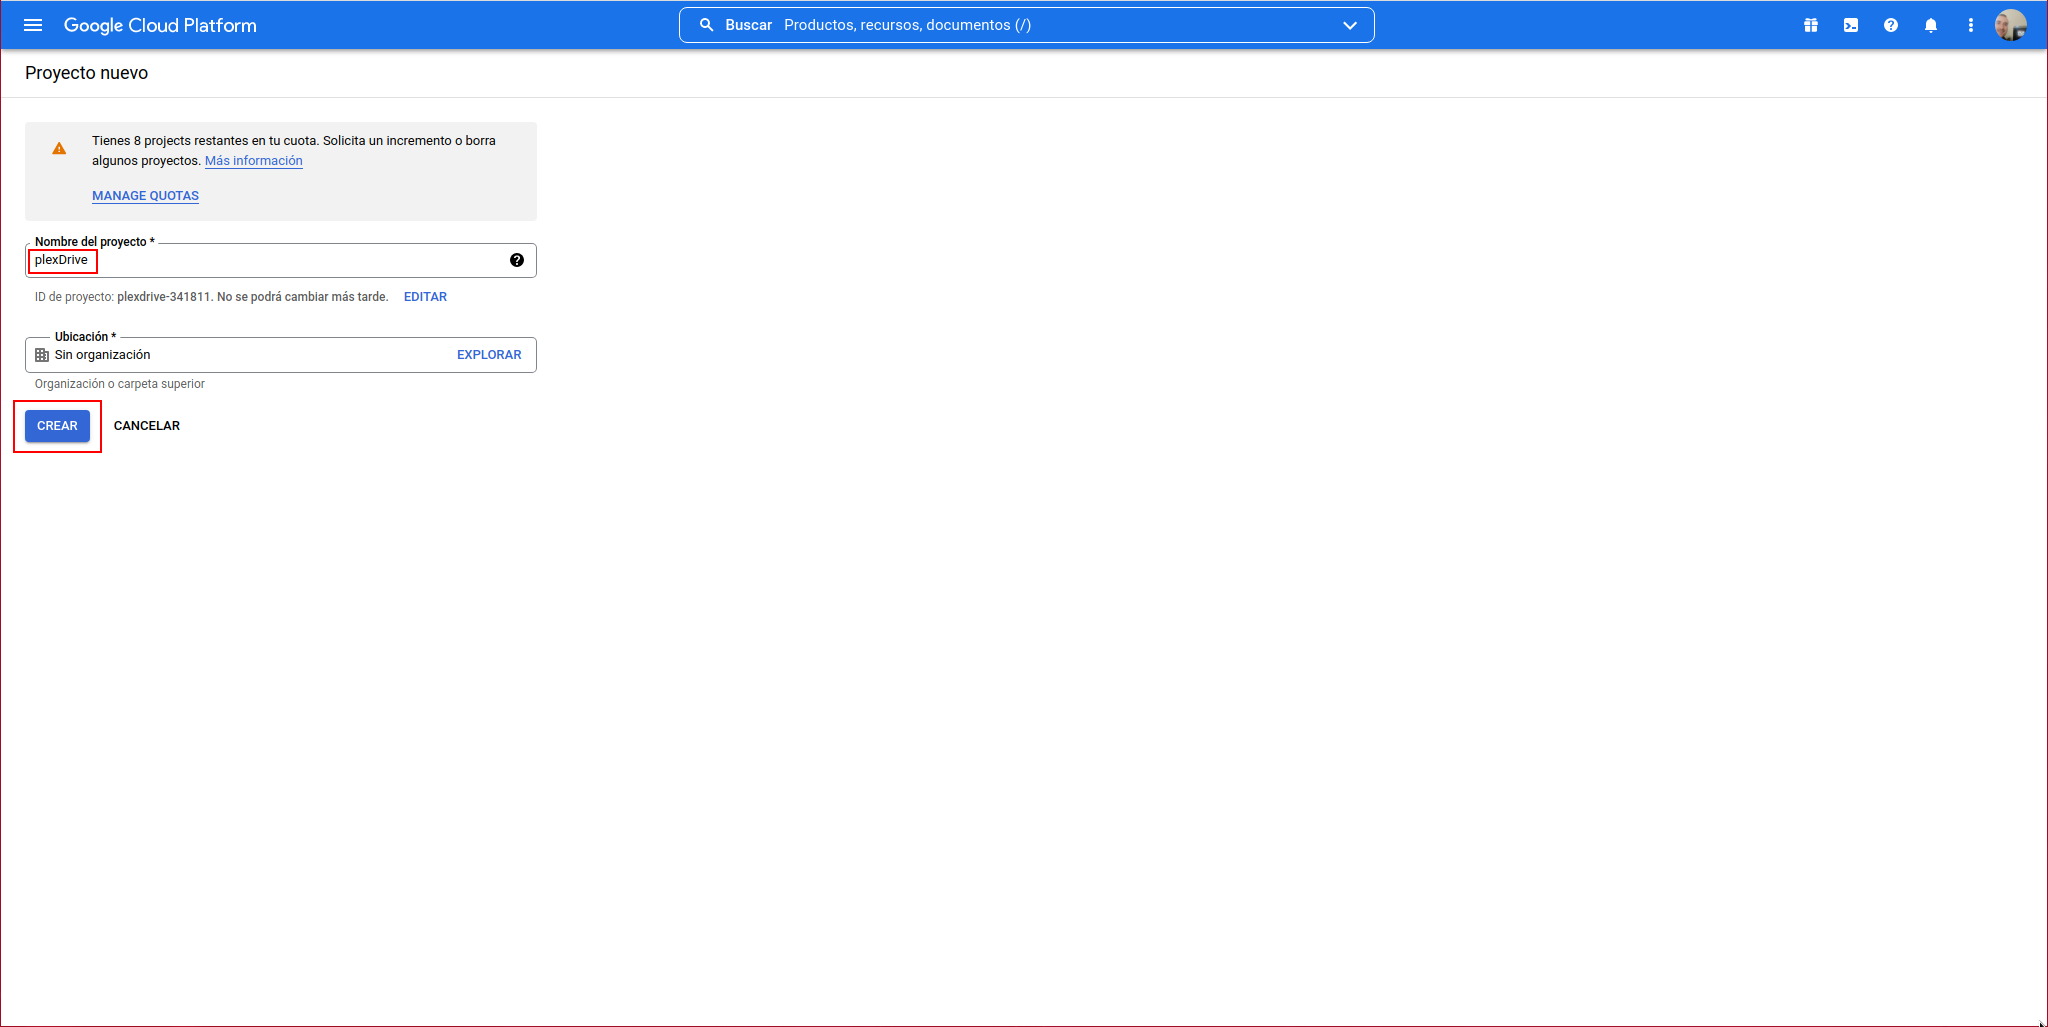
We indicate a name and click on create:
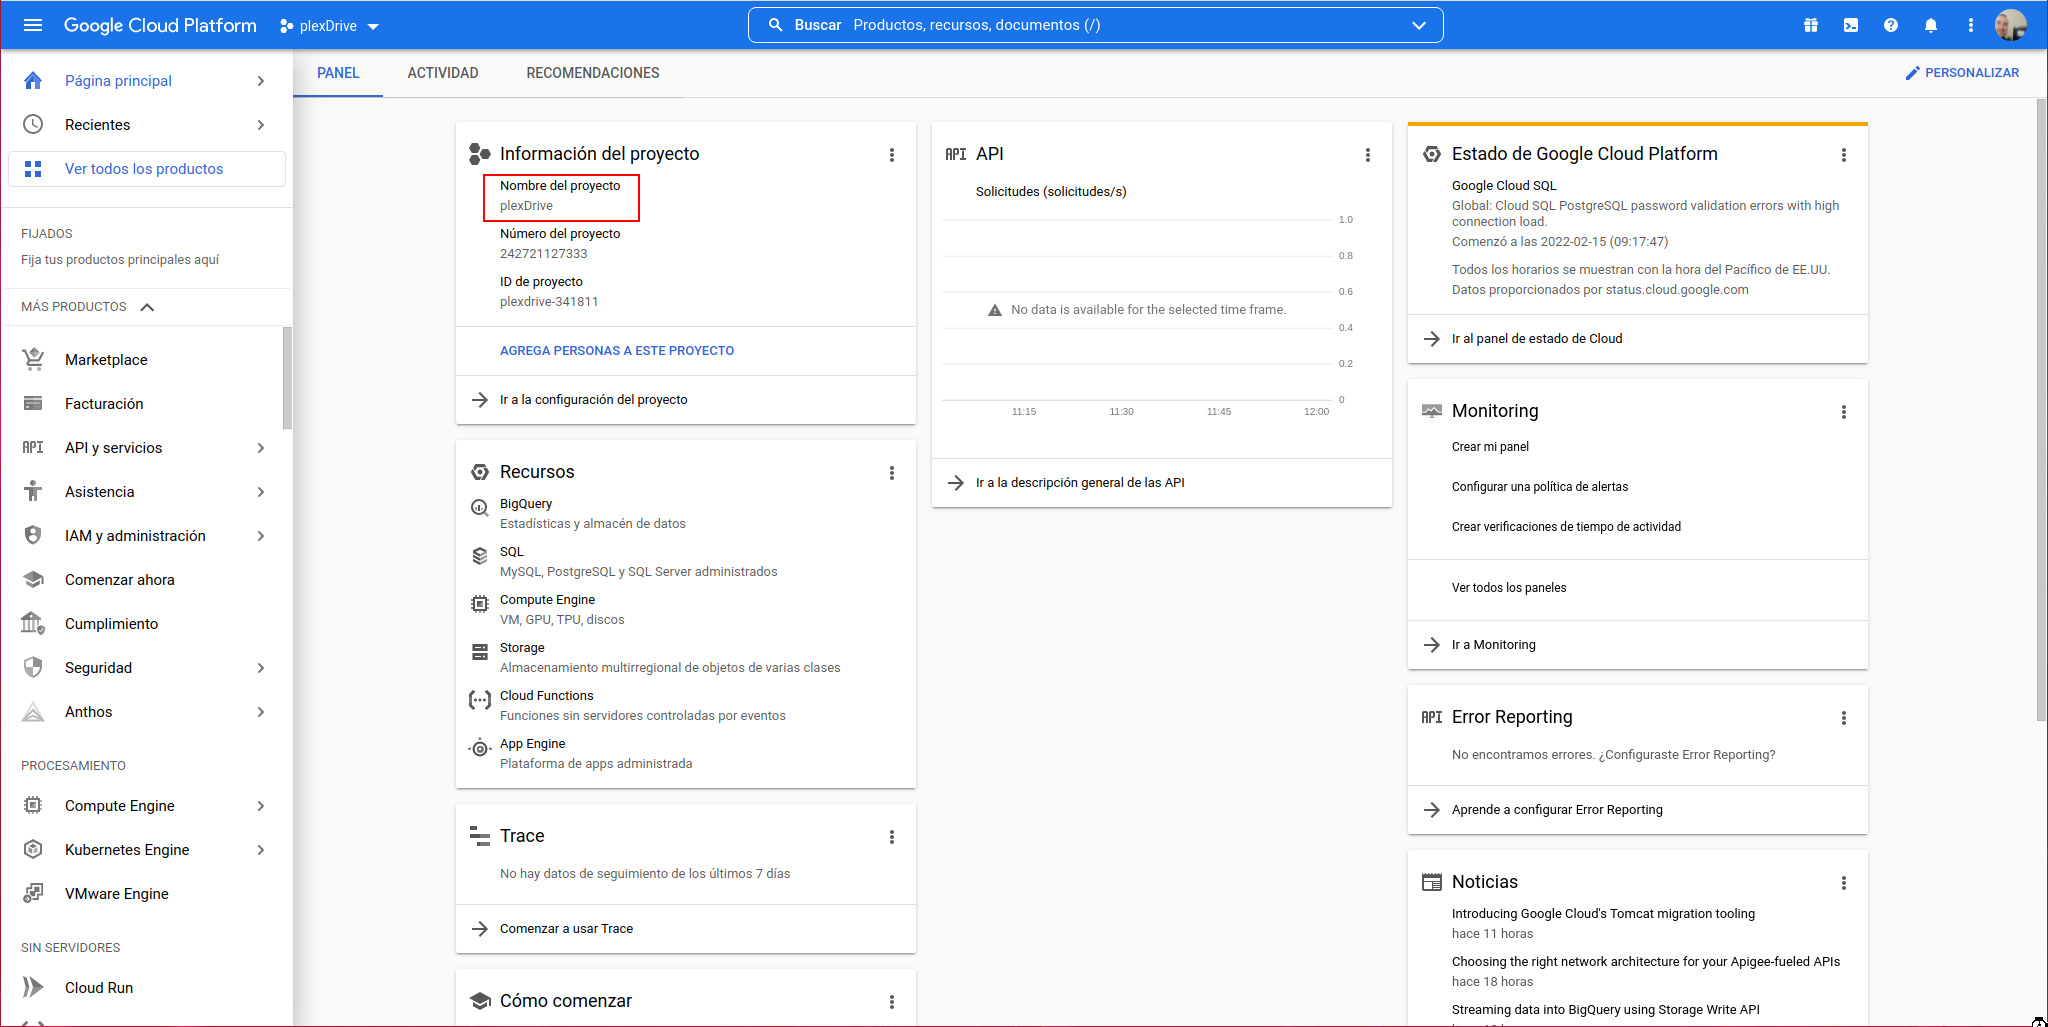
We already have the project created:
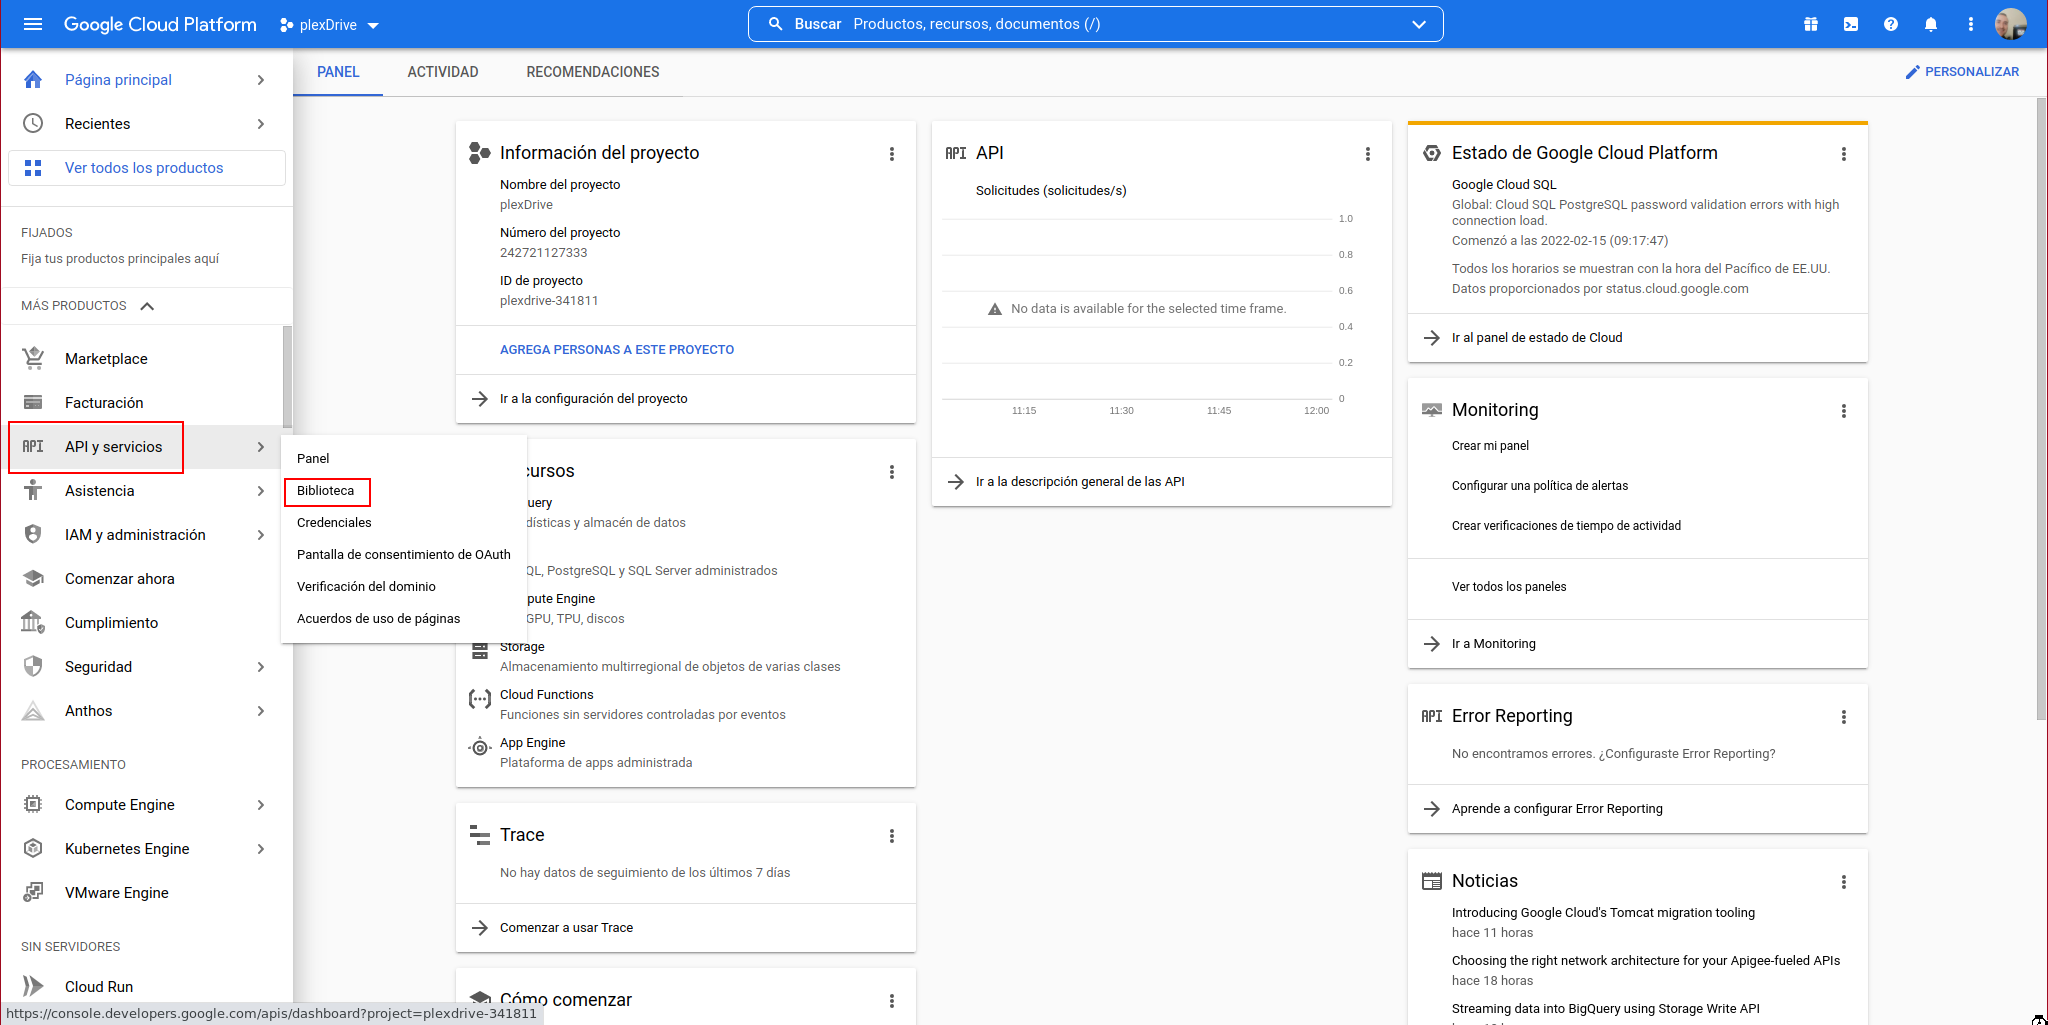
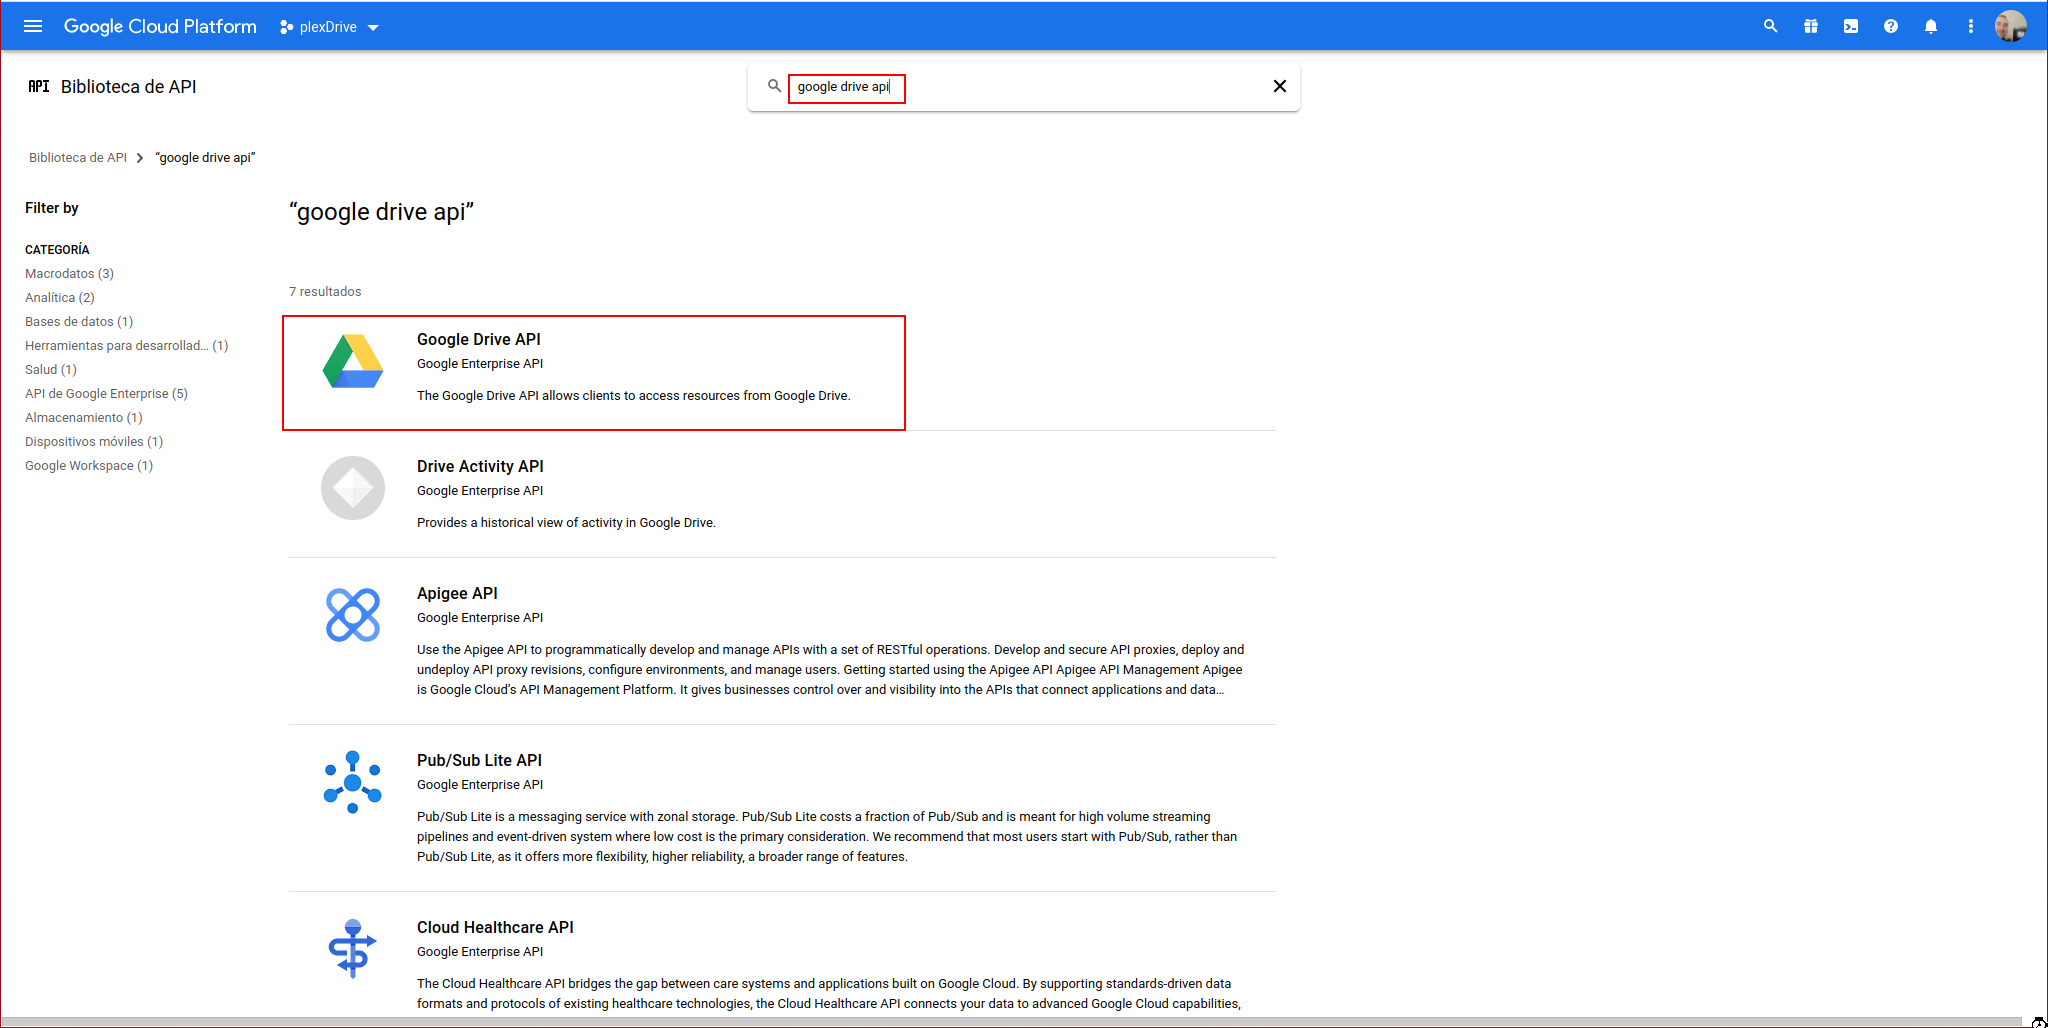
We activate the Google Drive API in the project, for this we access “APIs & Services” -> Library:
We search for “Google Drive API” and click on it:
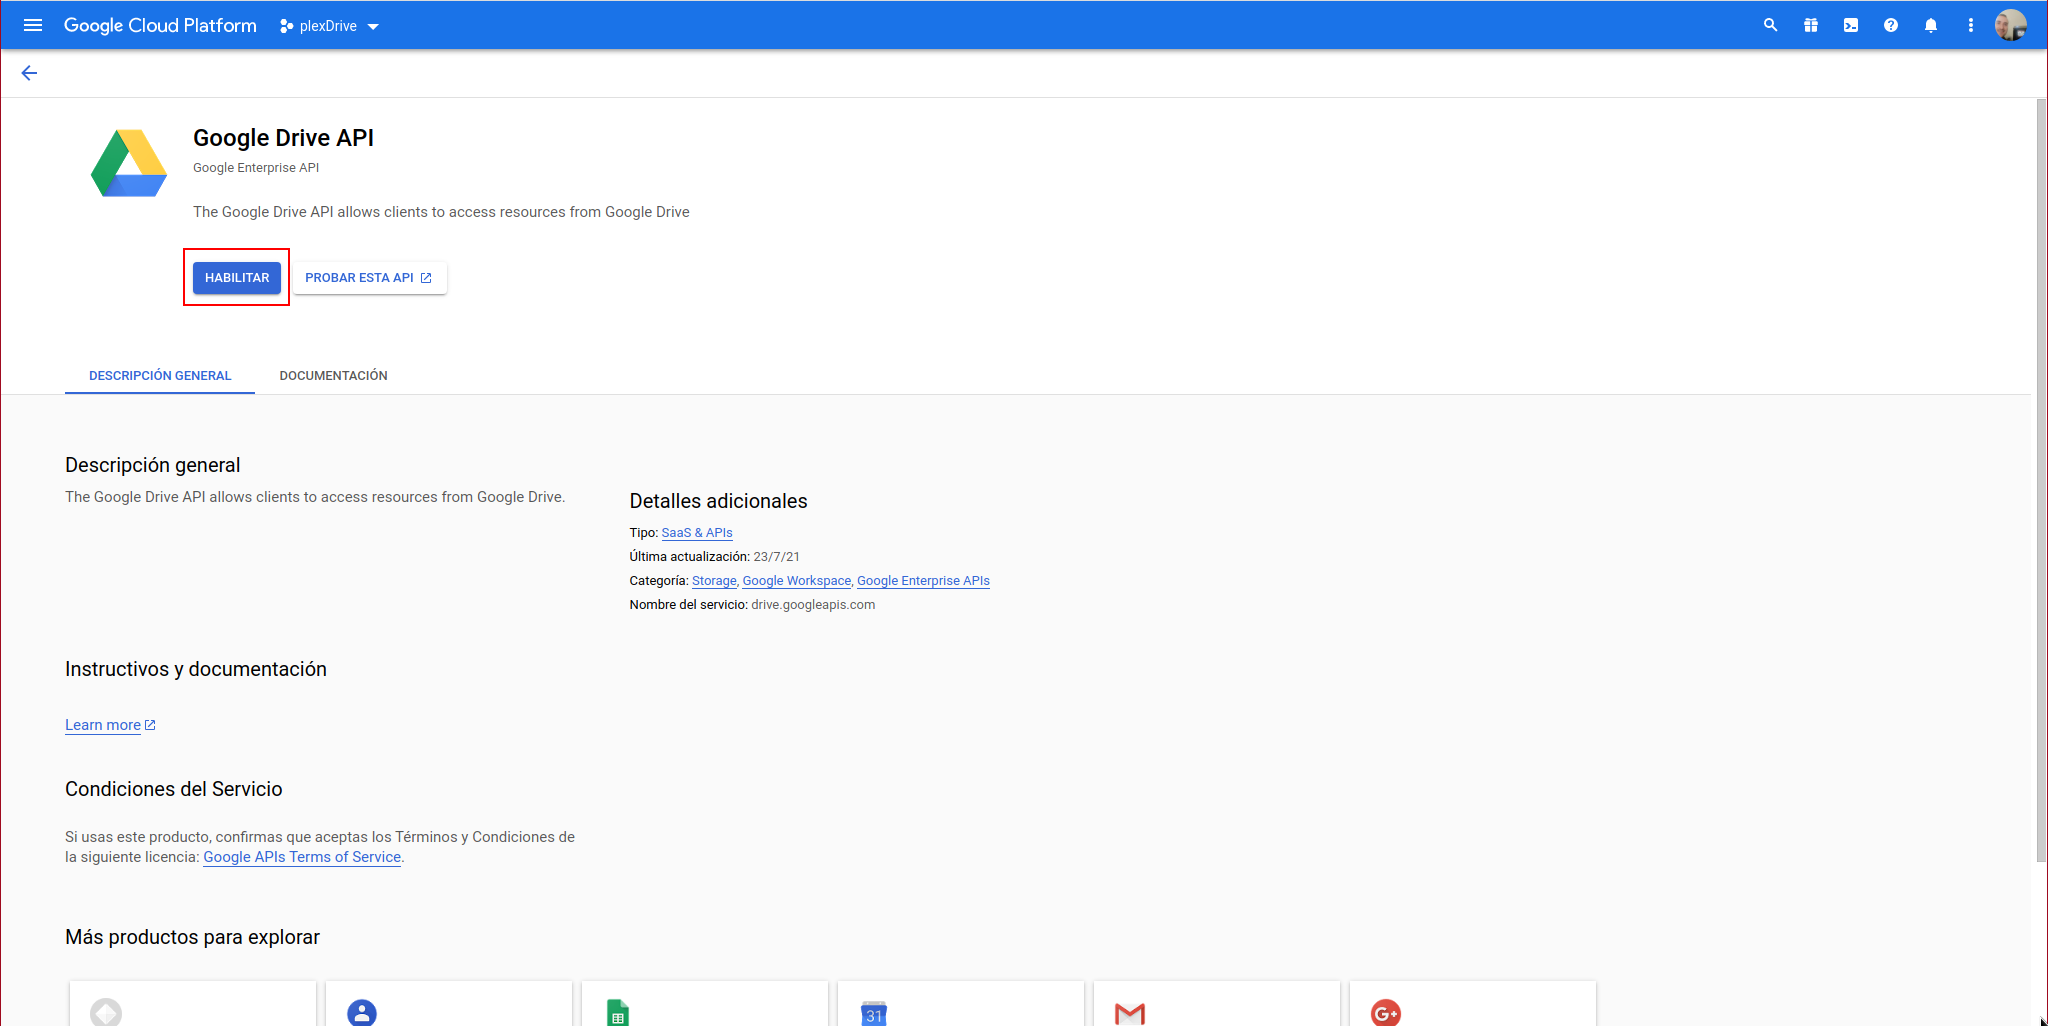
We click on enable:
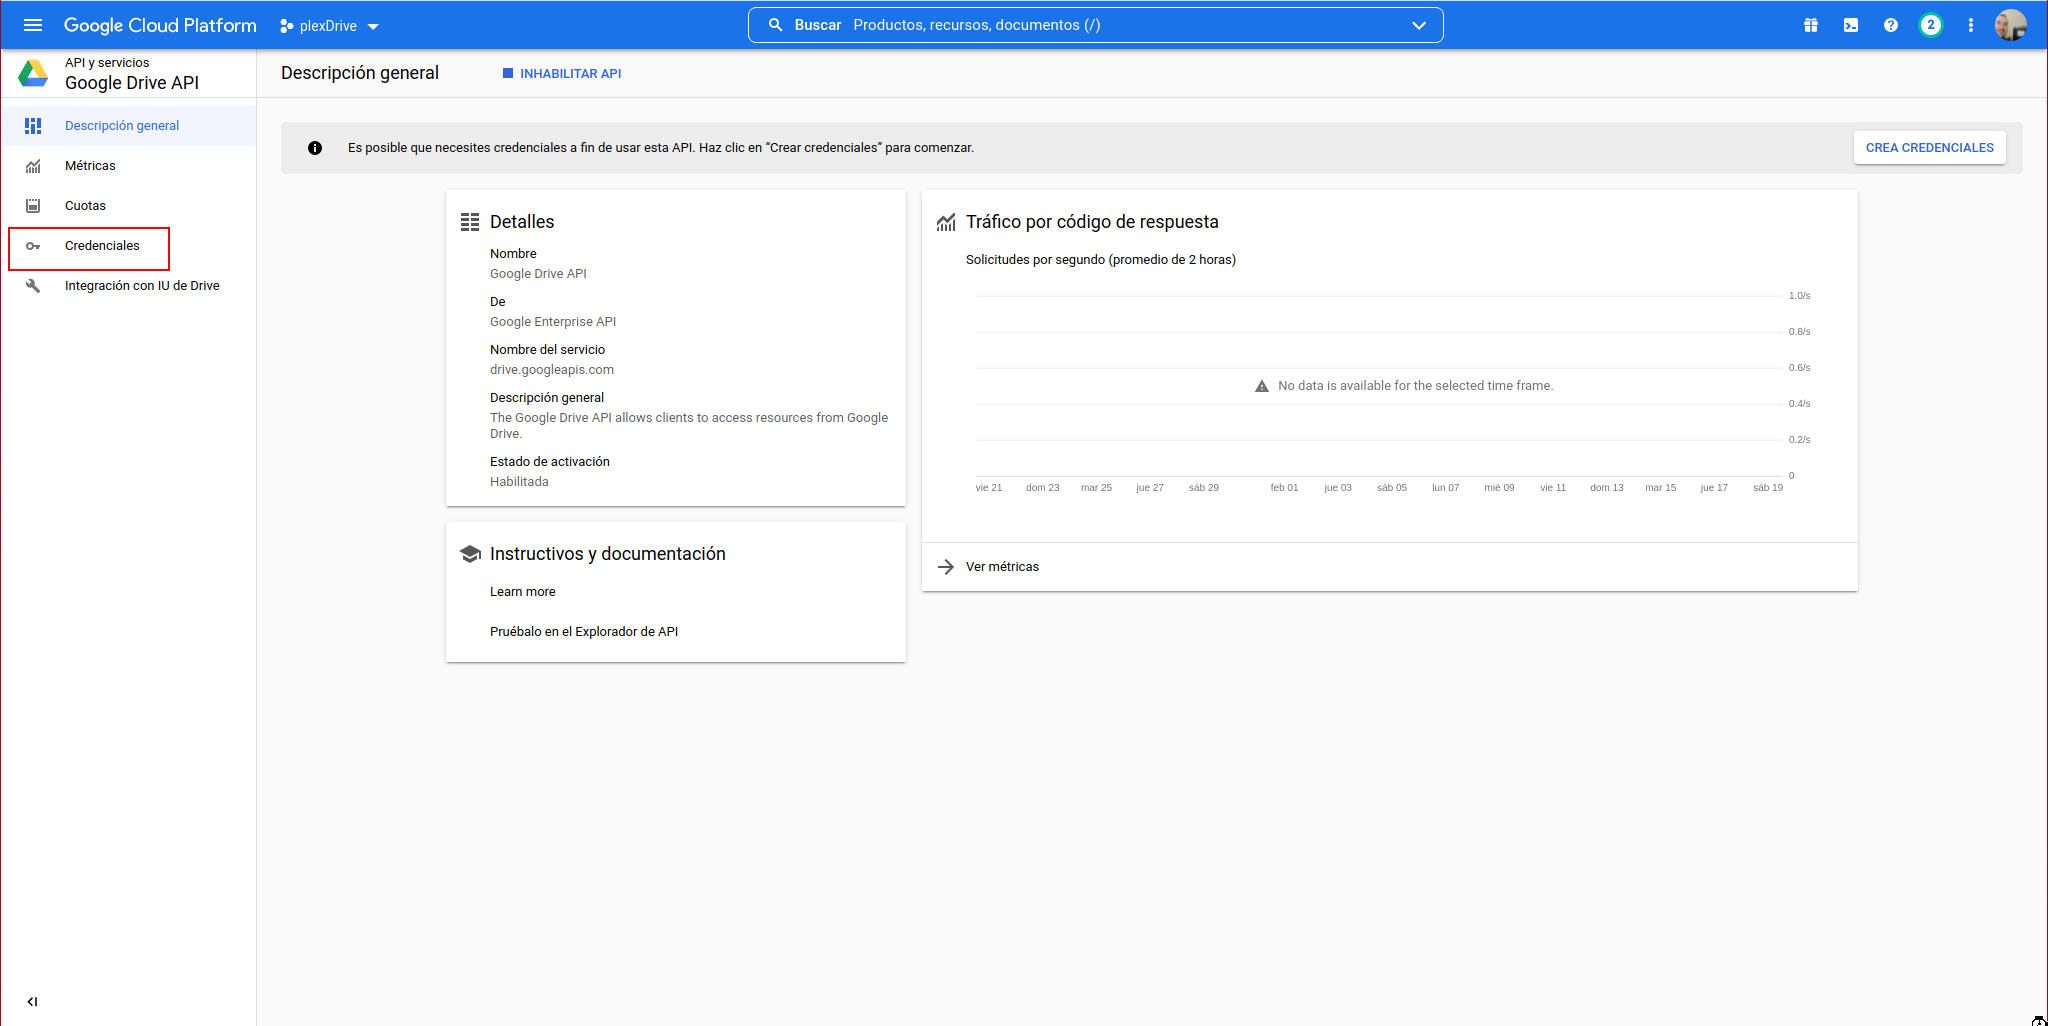
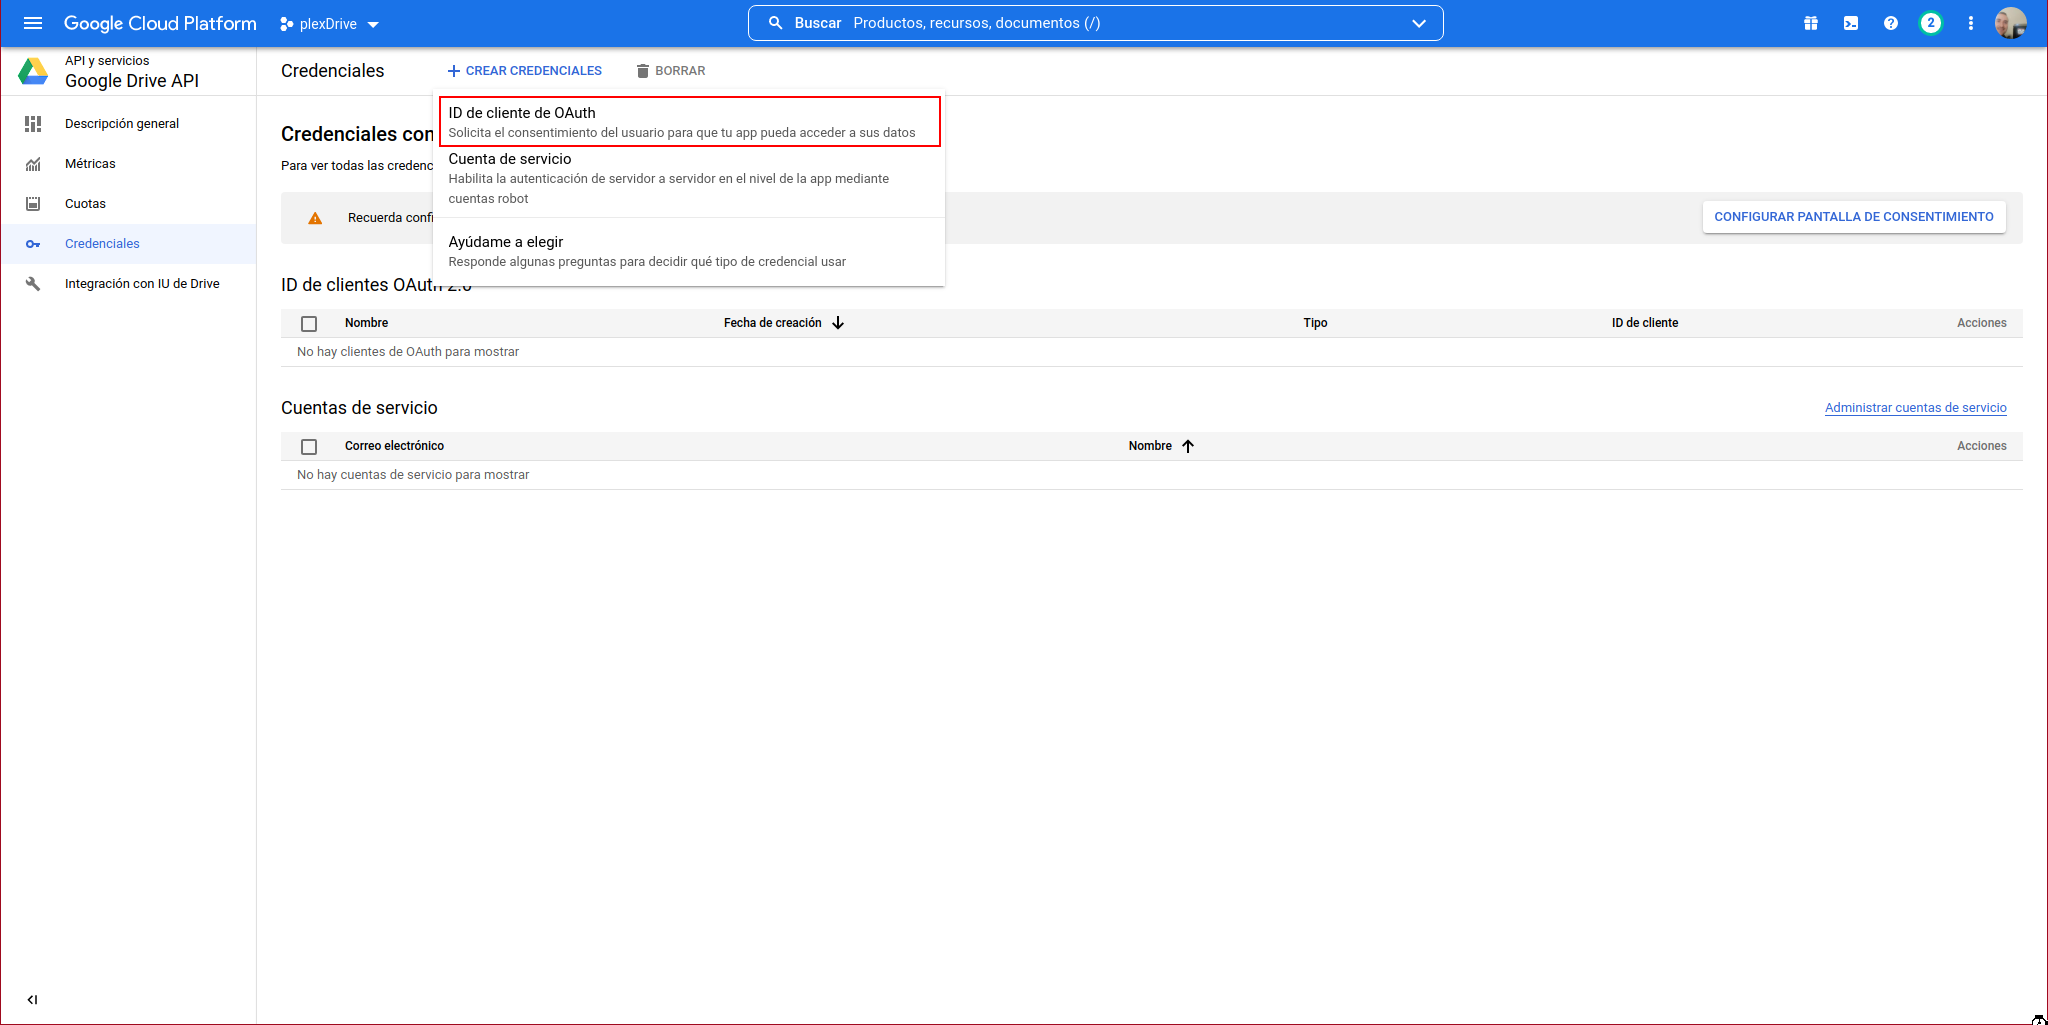
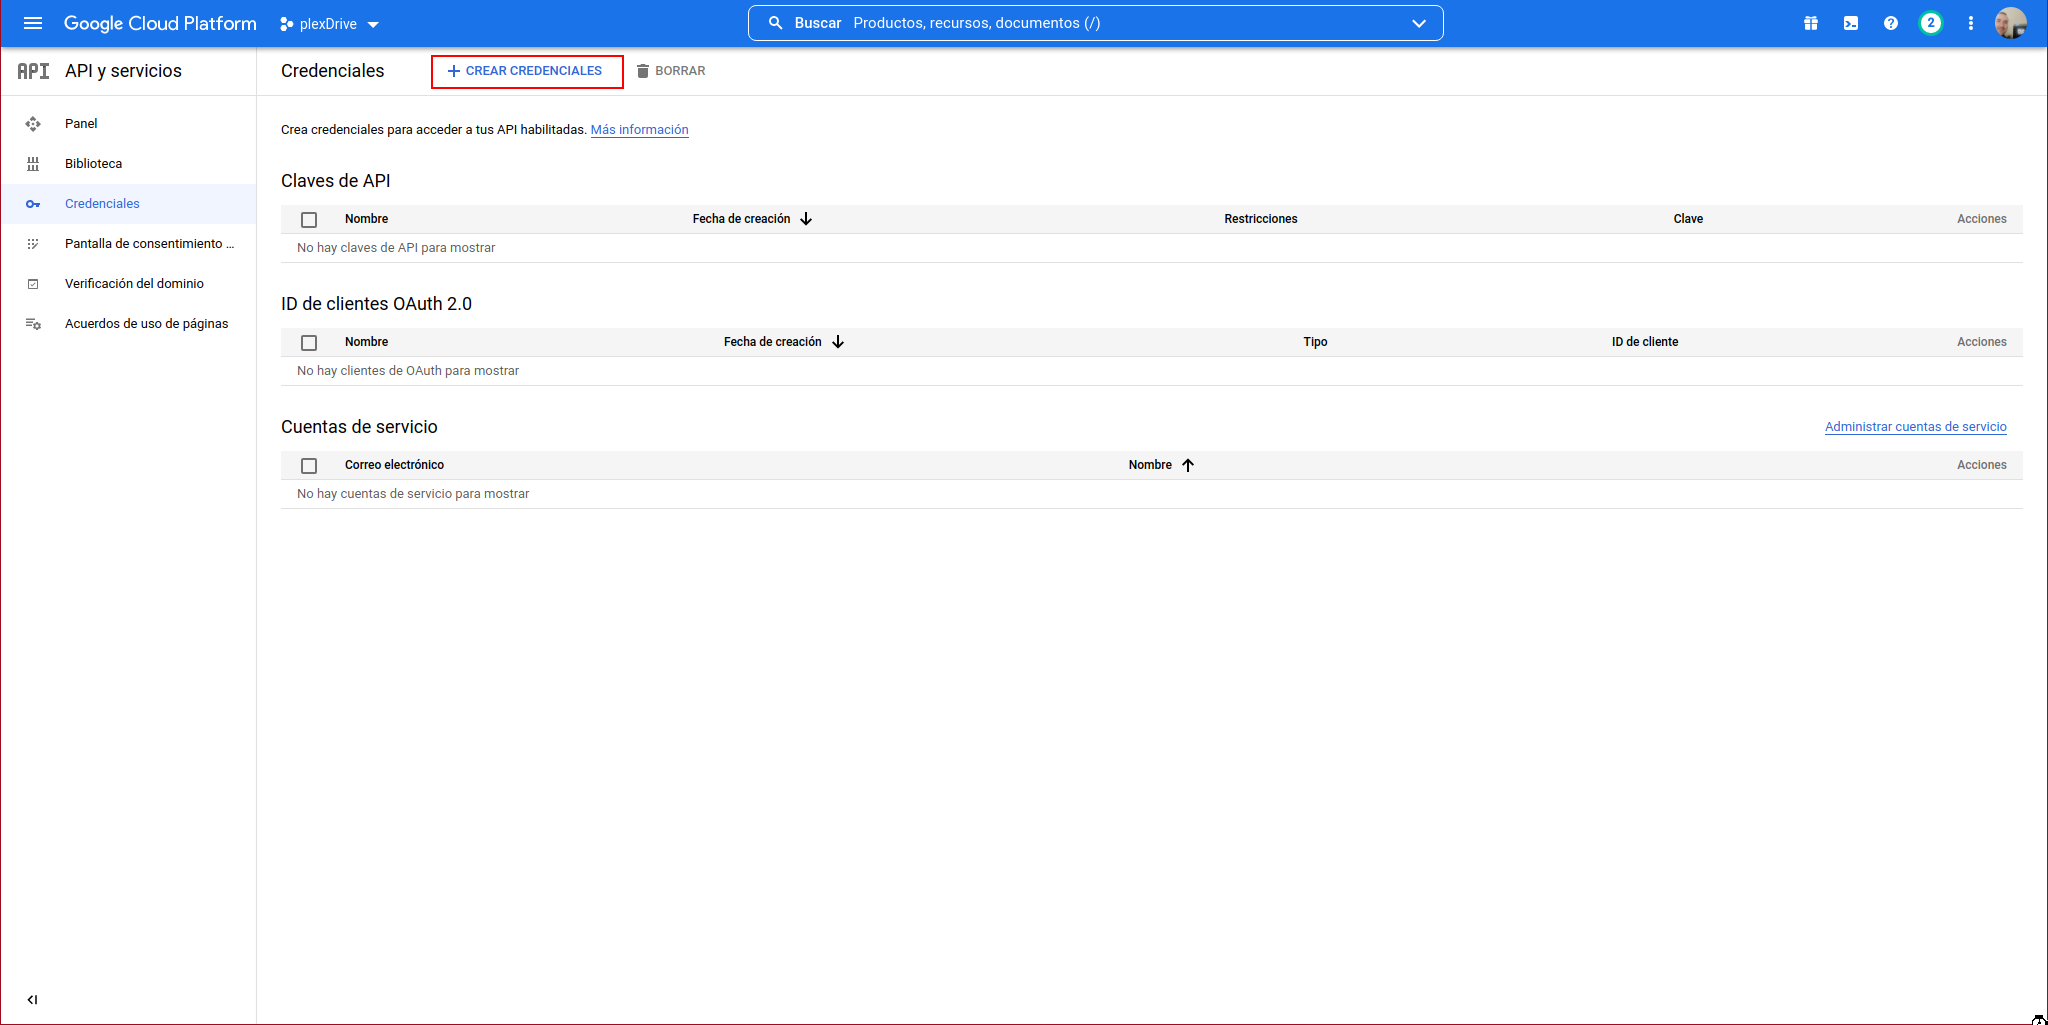
We will see the following window from which we must create the access credentials:
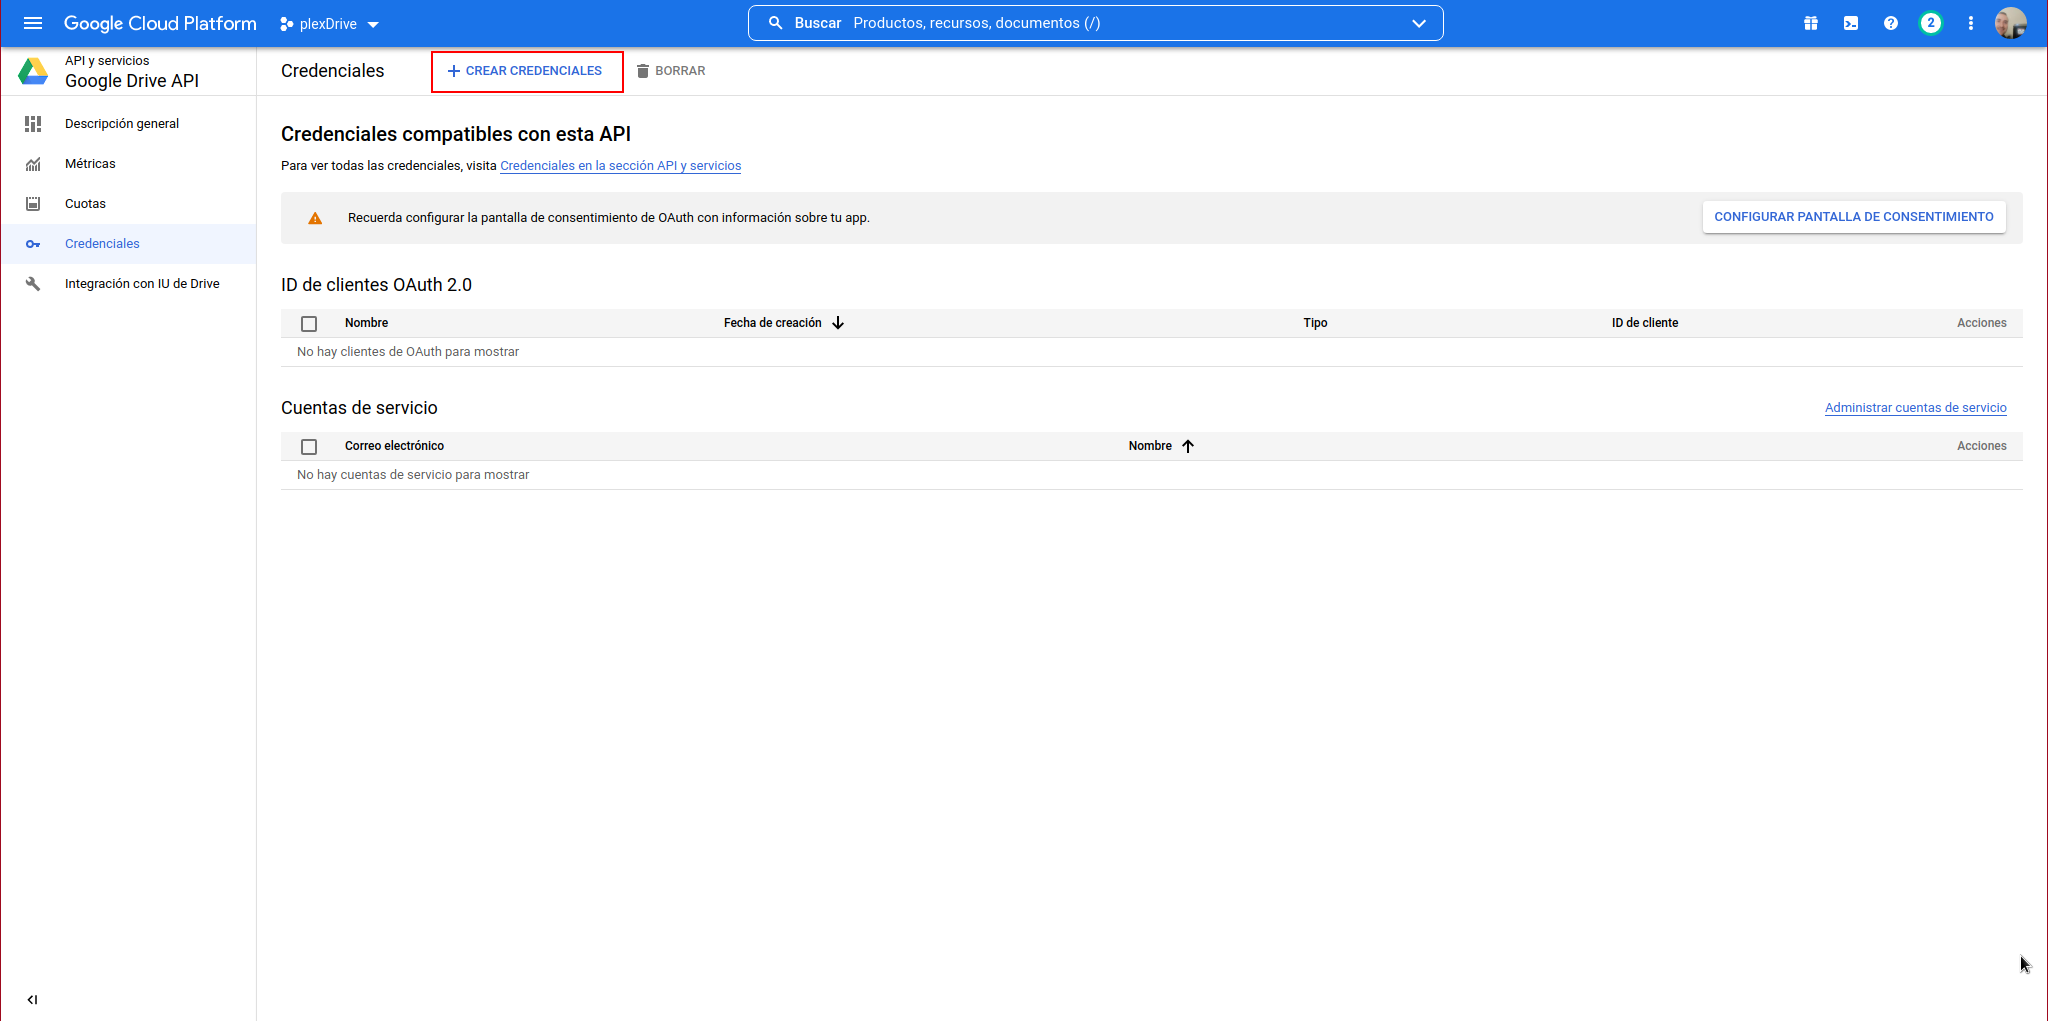
We click on “CREATE CREDENTIALS”:
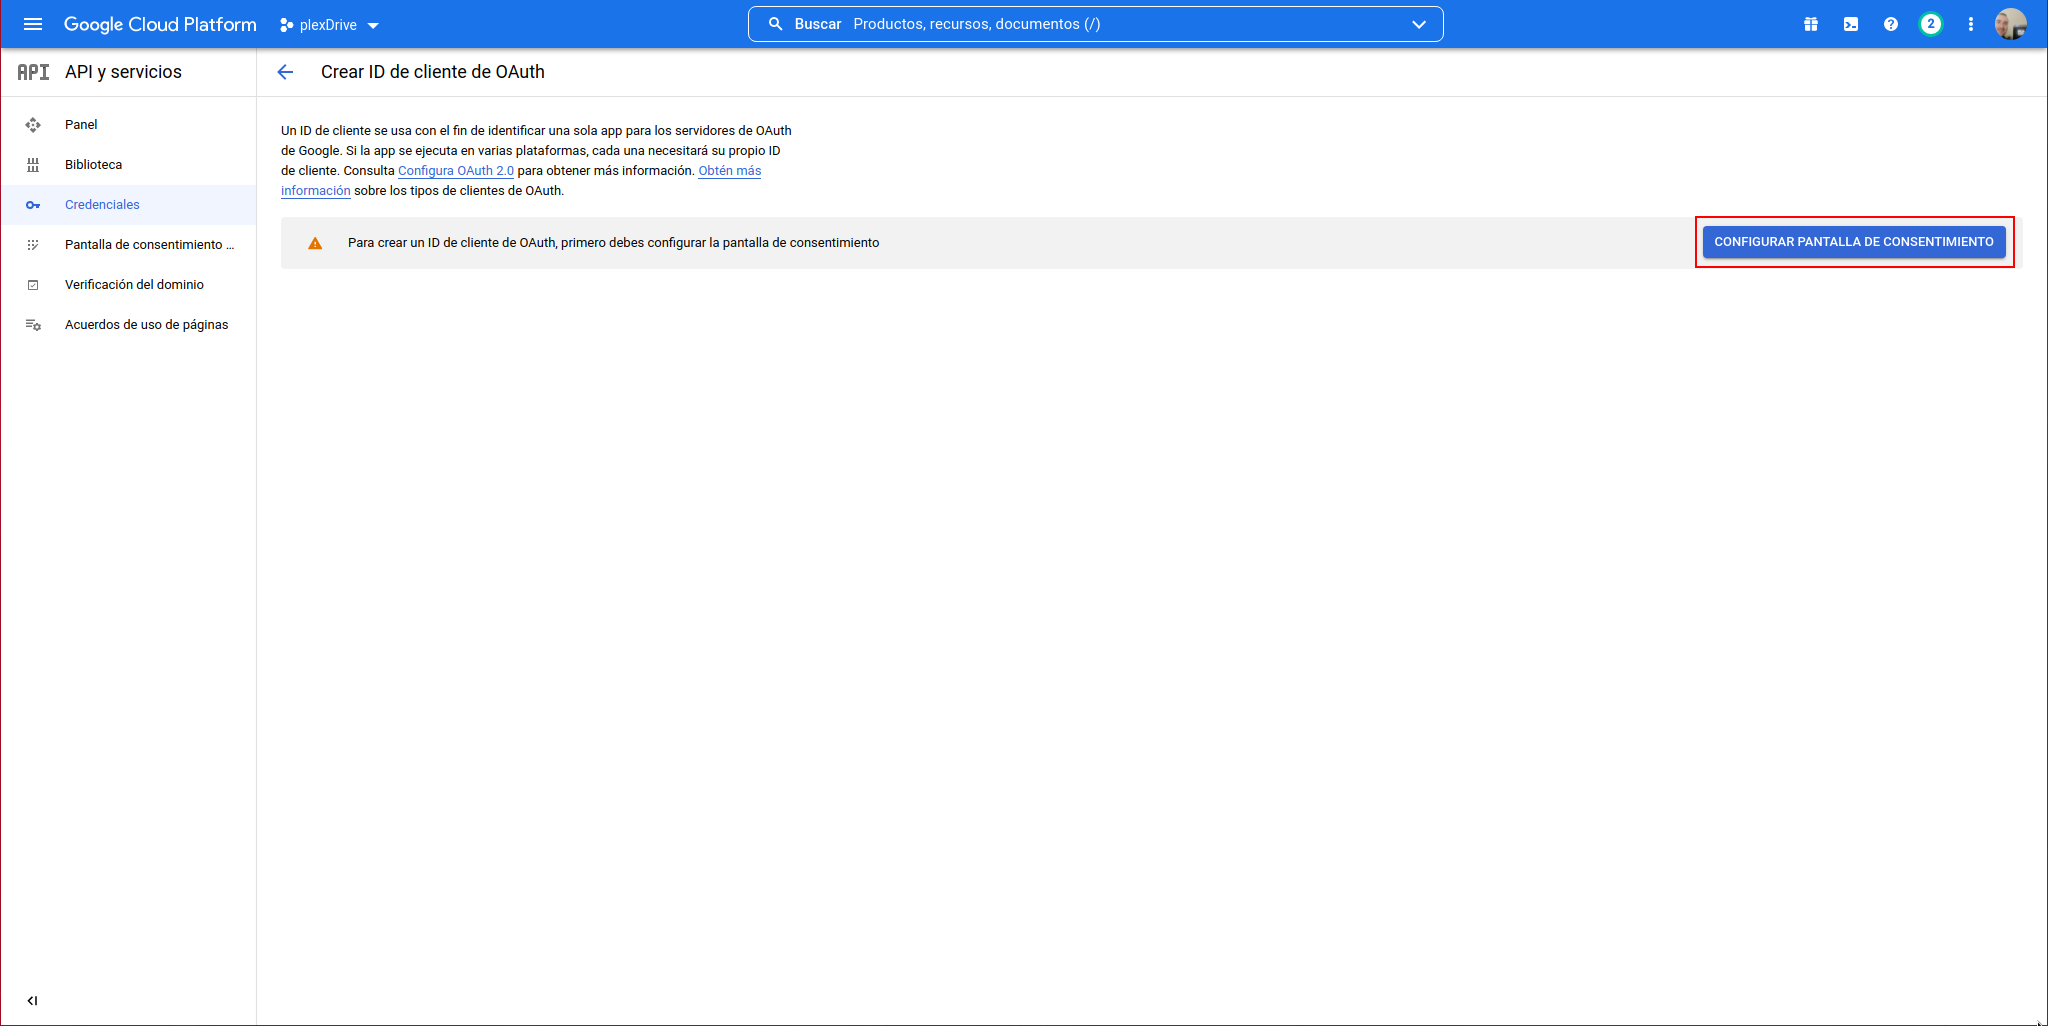
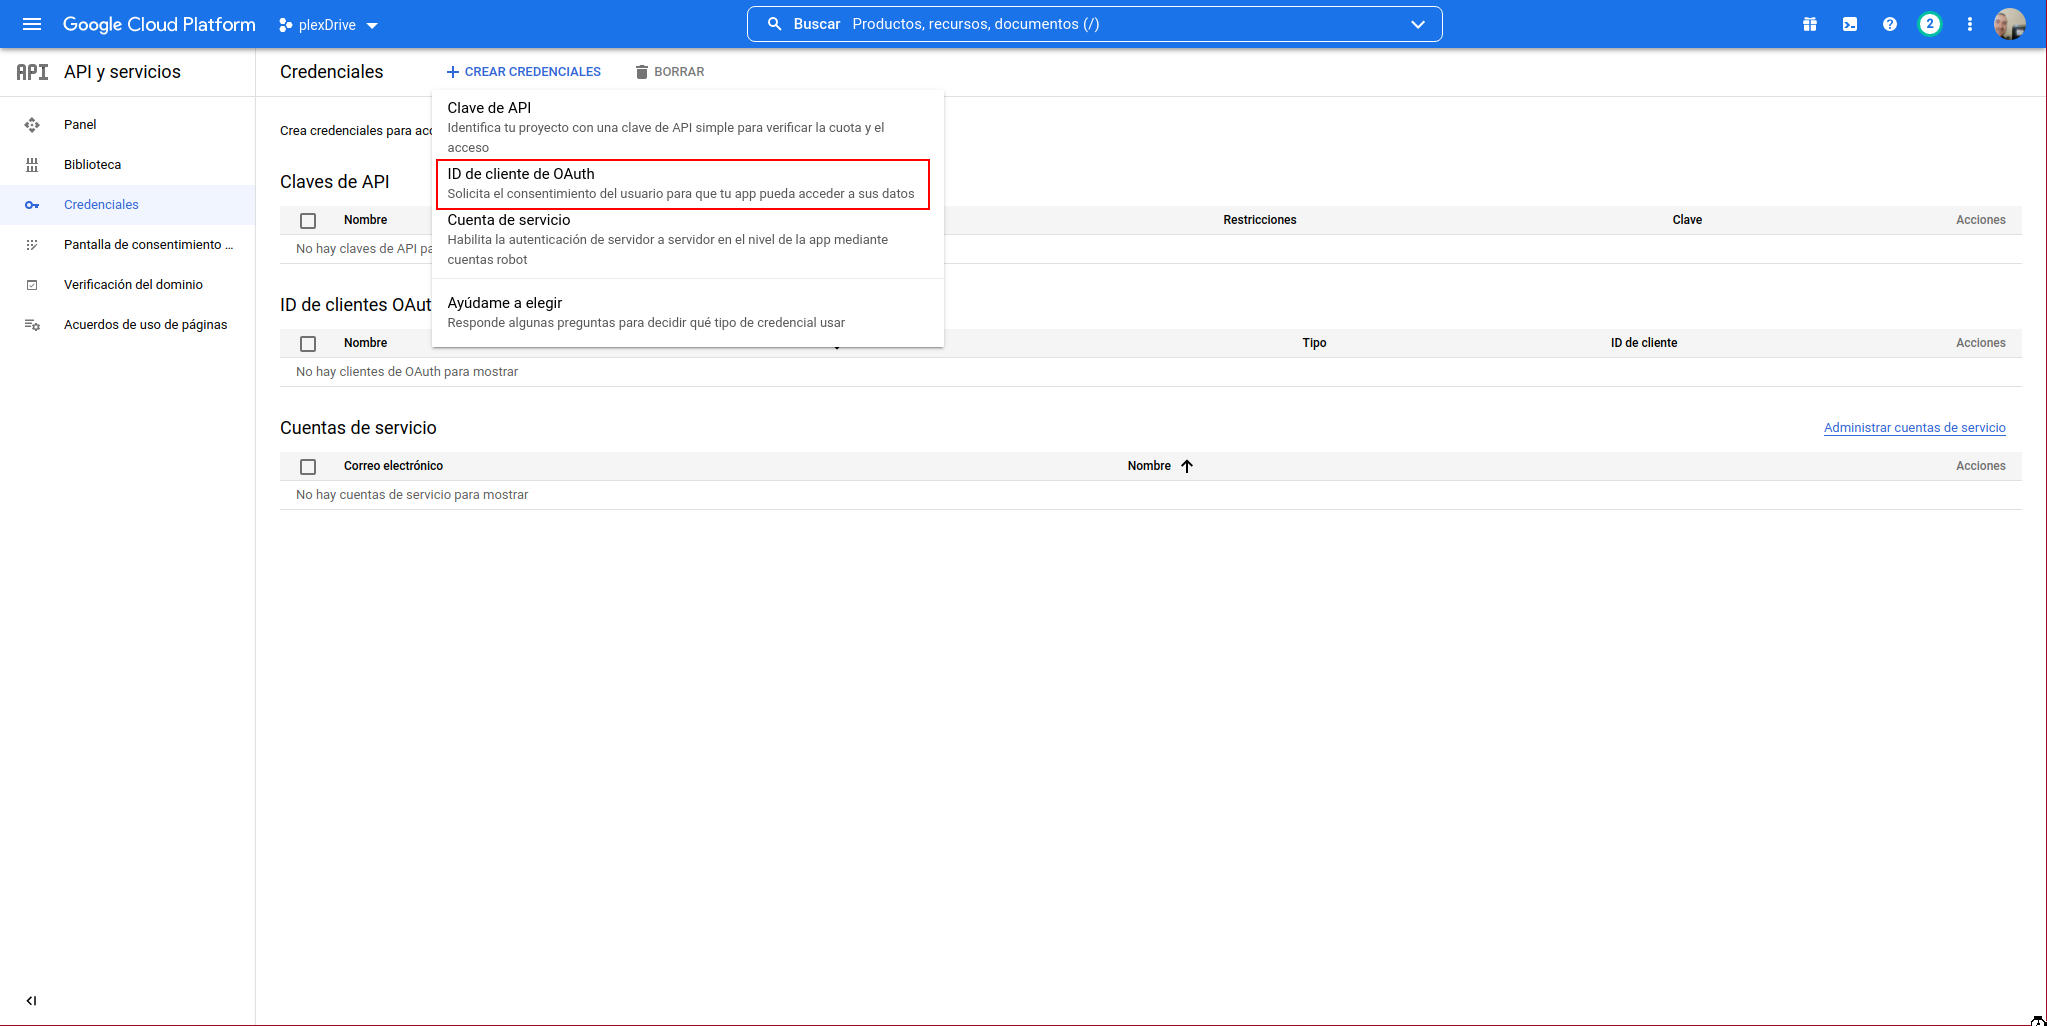
We select “OAuth client ID”:
We will see the following window where we must click on “CONFIGURE CONSENT SCREEN”:
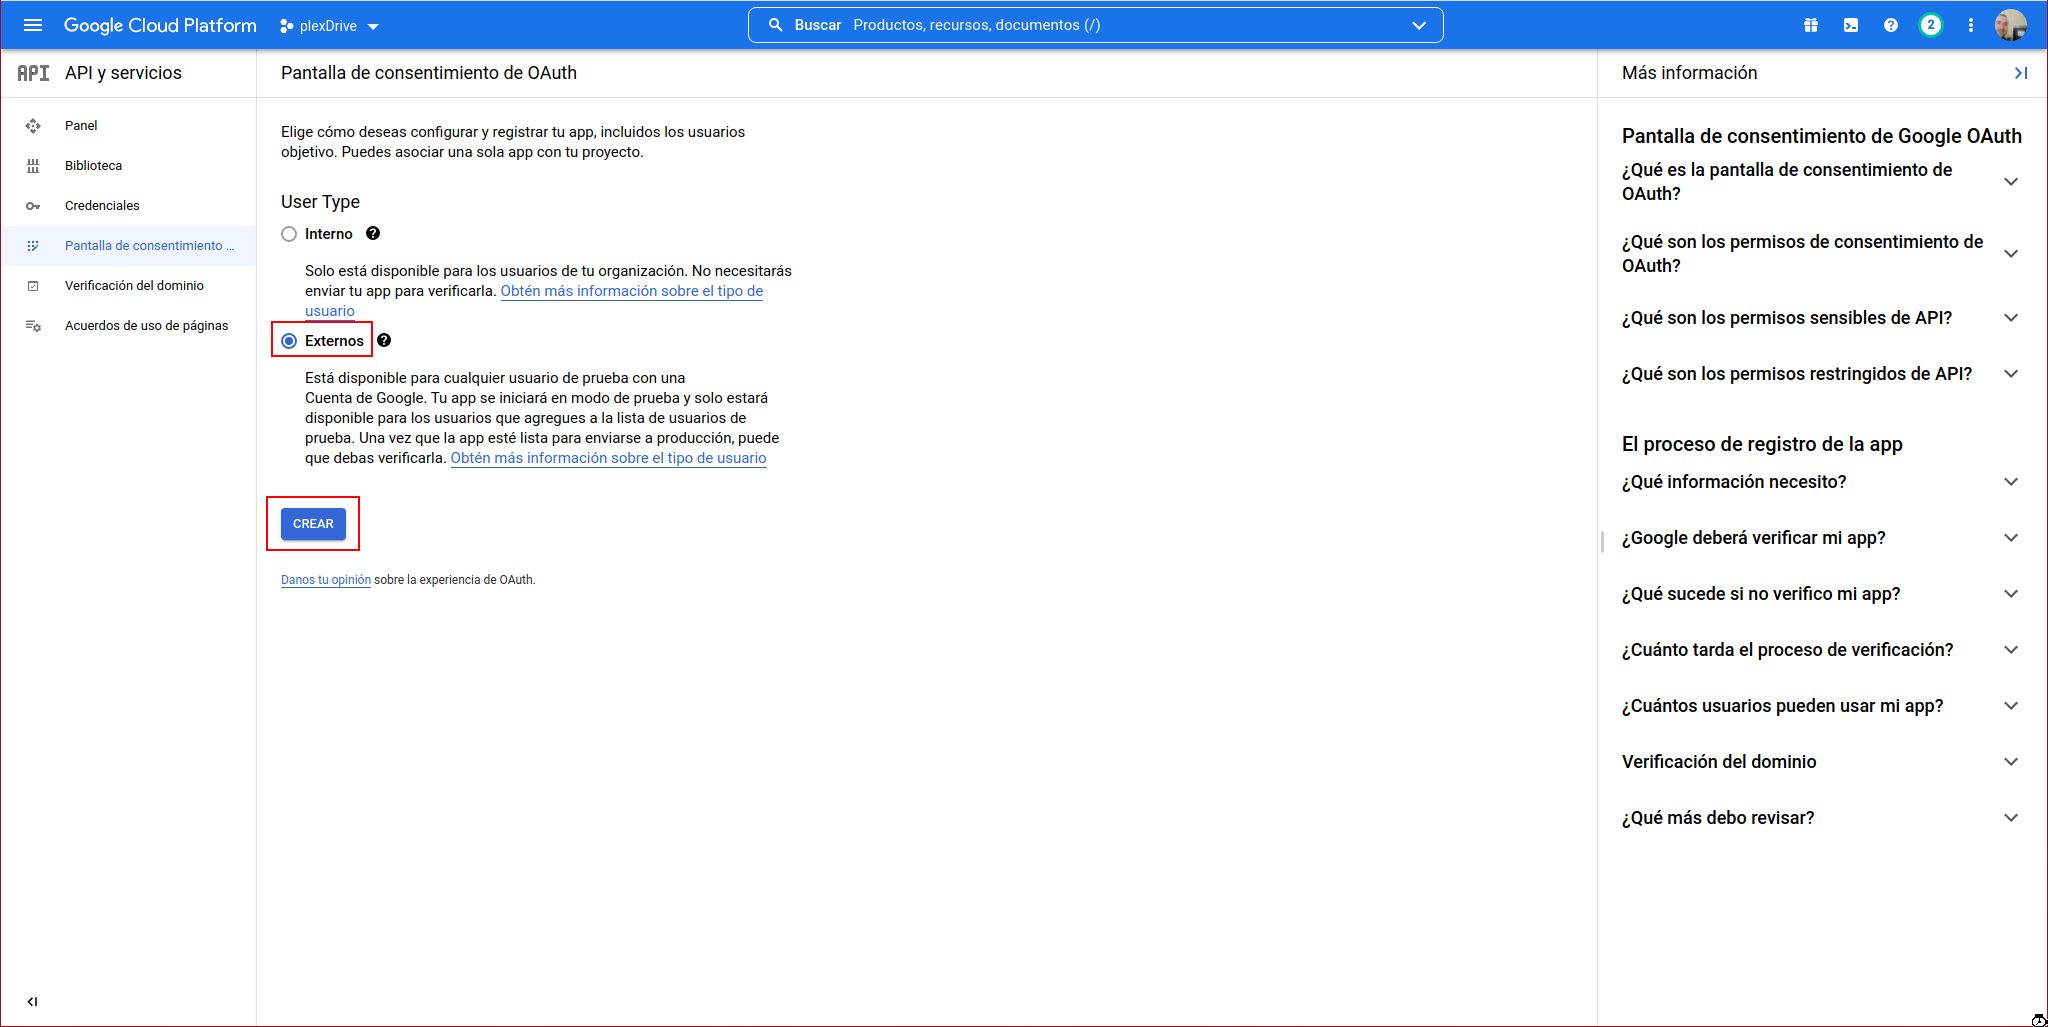
In User Type, we indicate: External and click on “CREATE”:
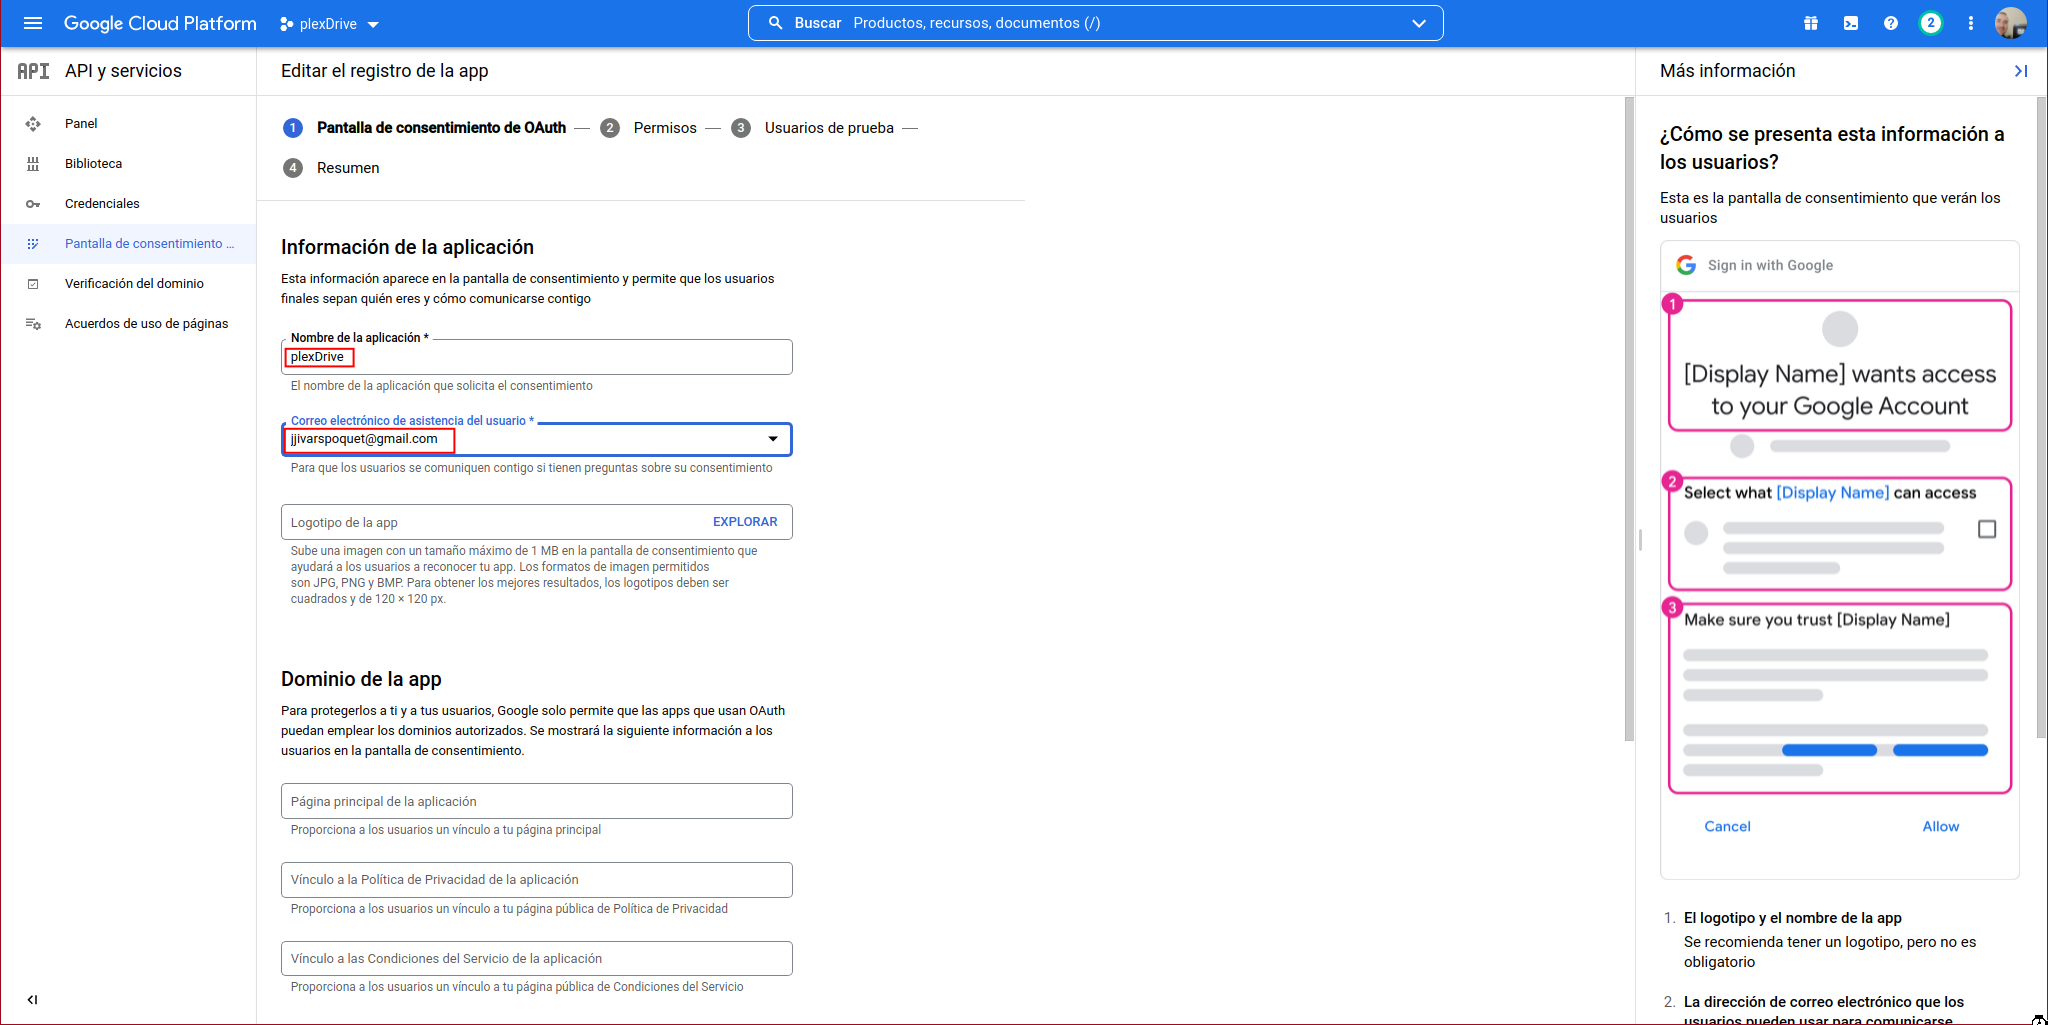
We fill in the mandatory form data and click on “SAVE AND CONTINUE”:
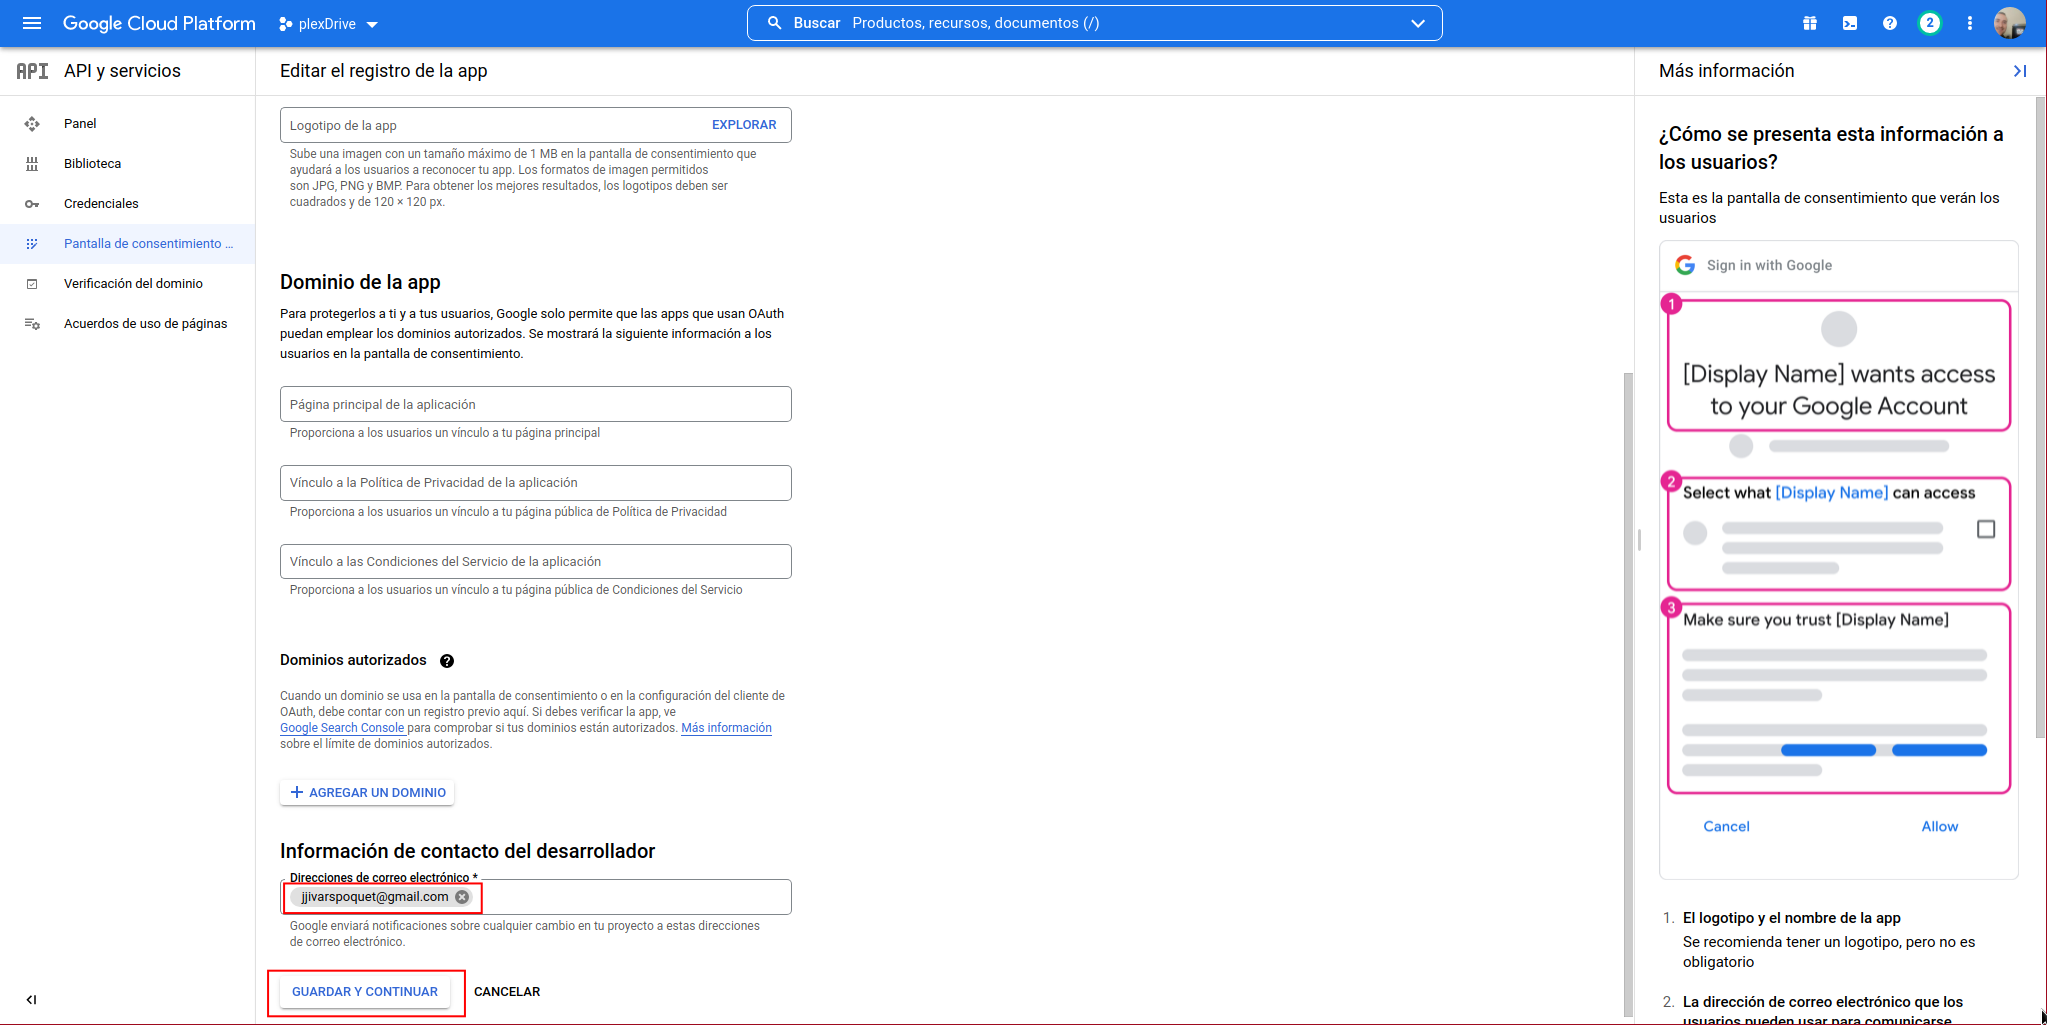
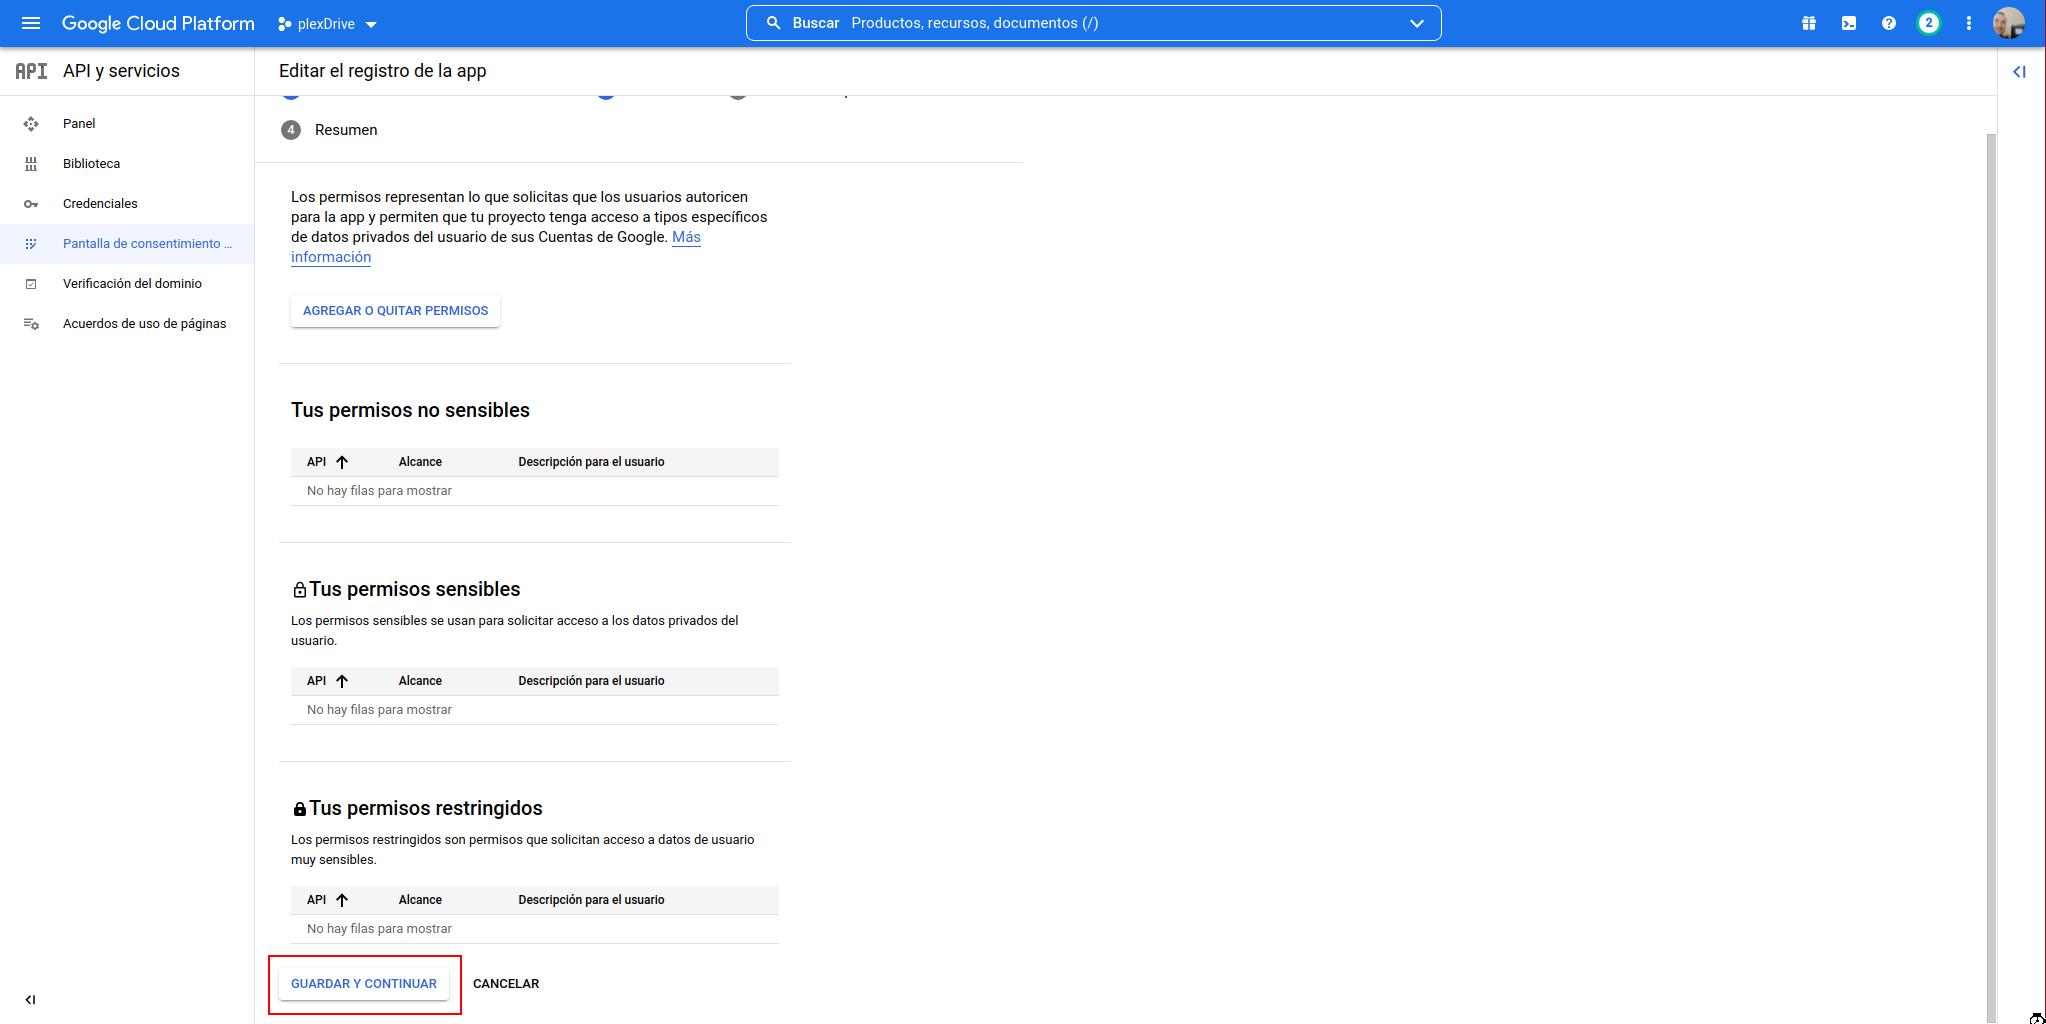
We don’t need any special permission, so we click on “SAVE AND CONTINUE”:
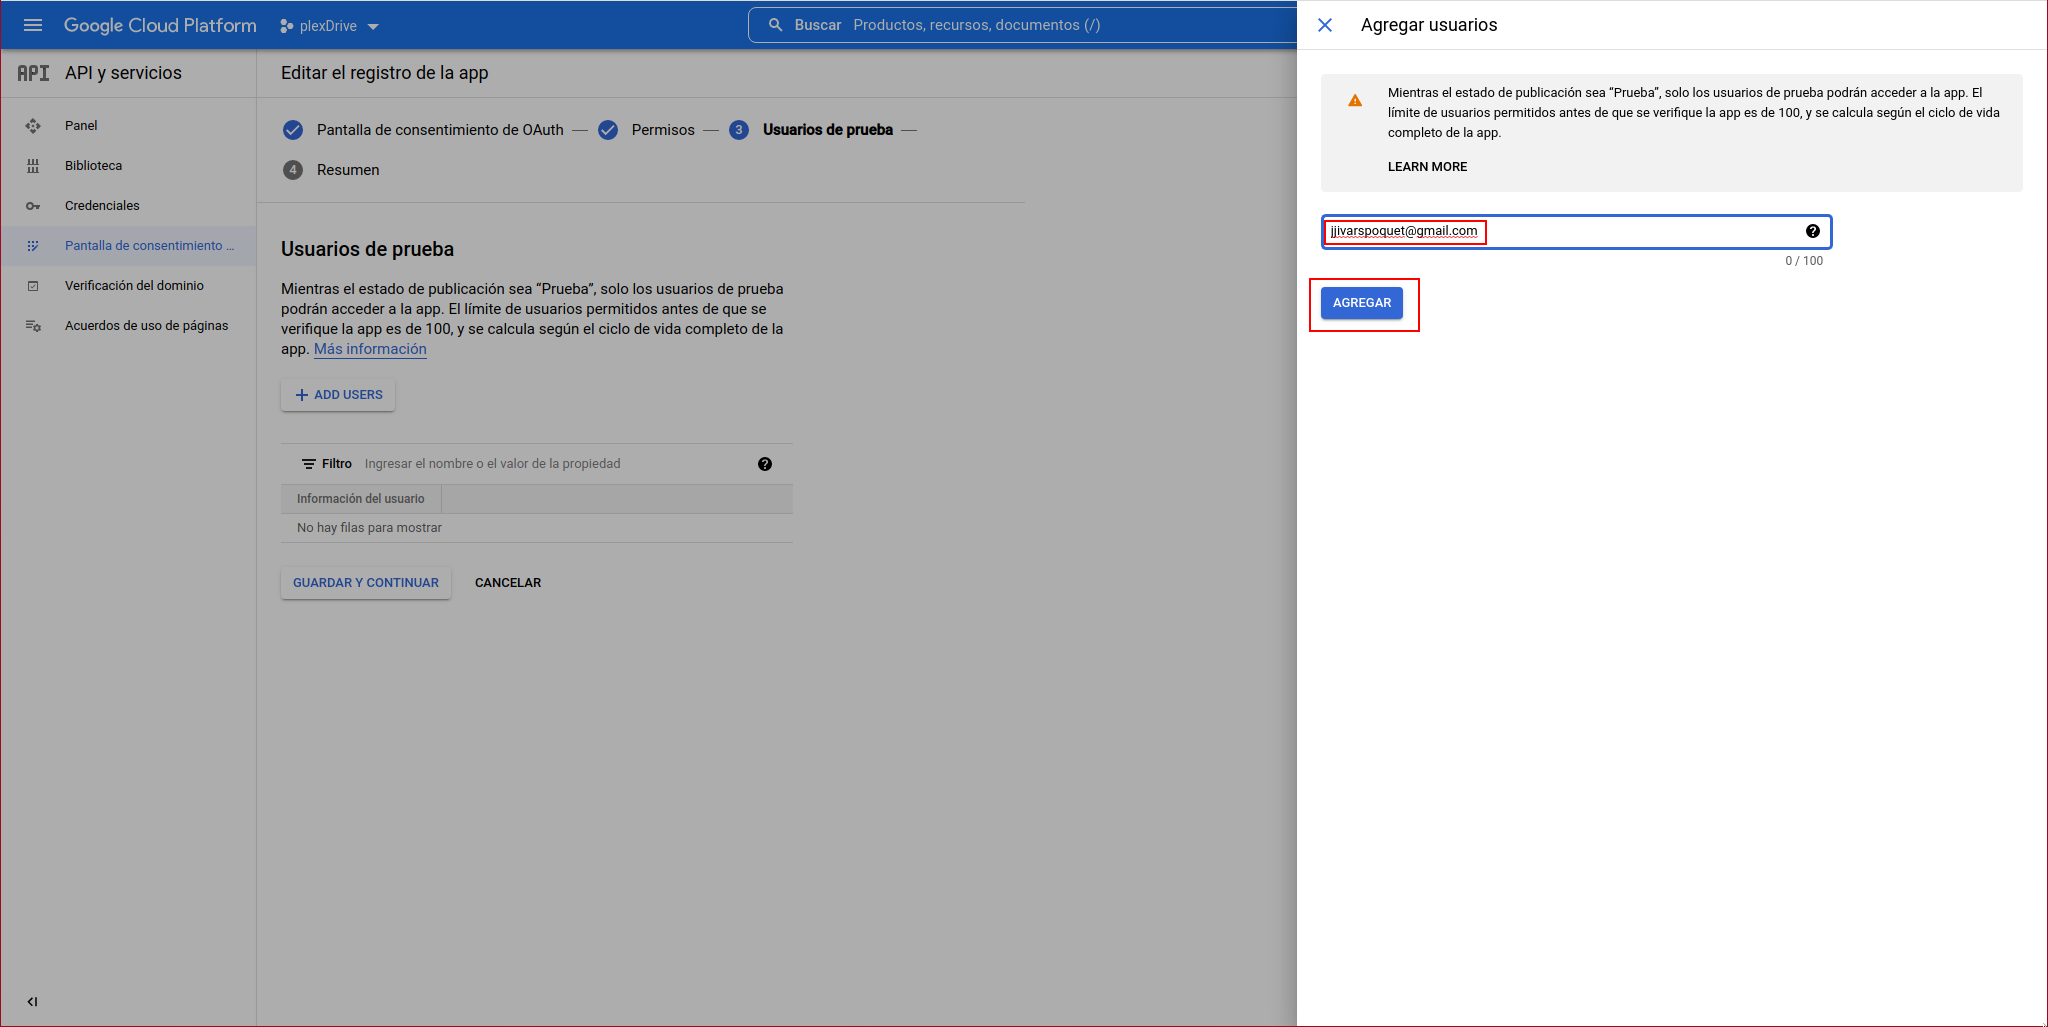
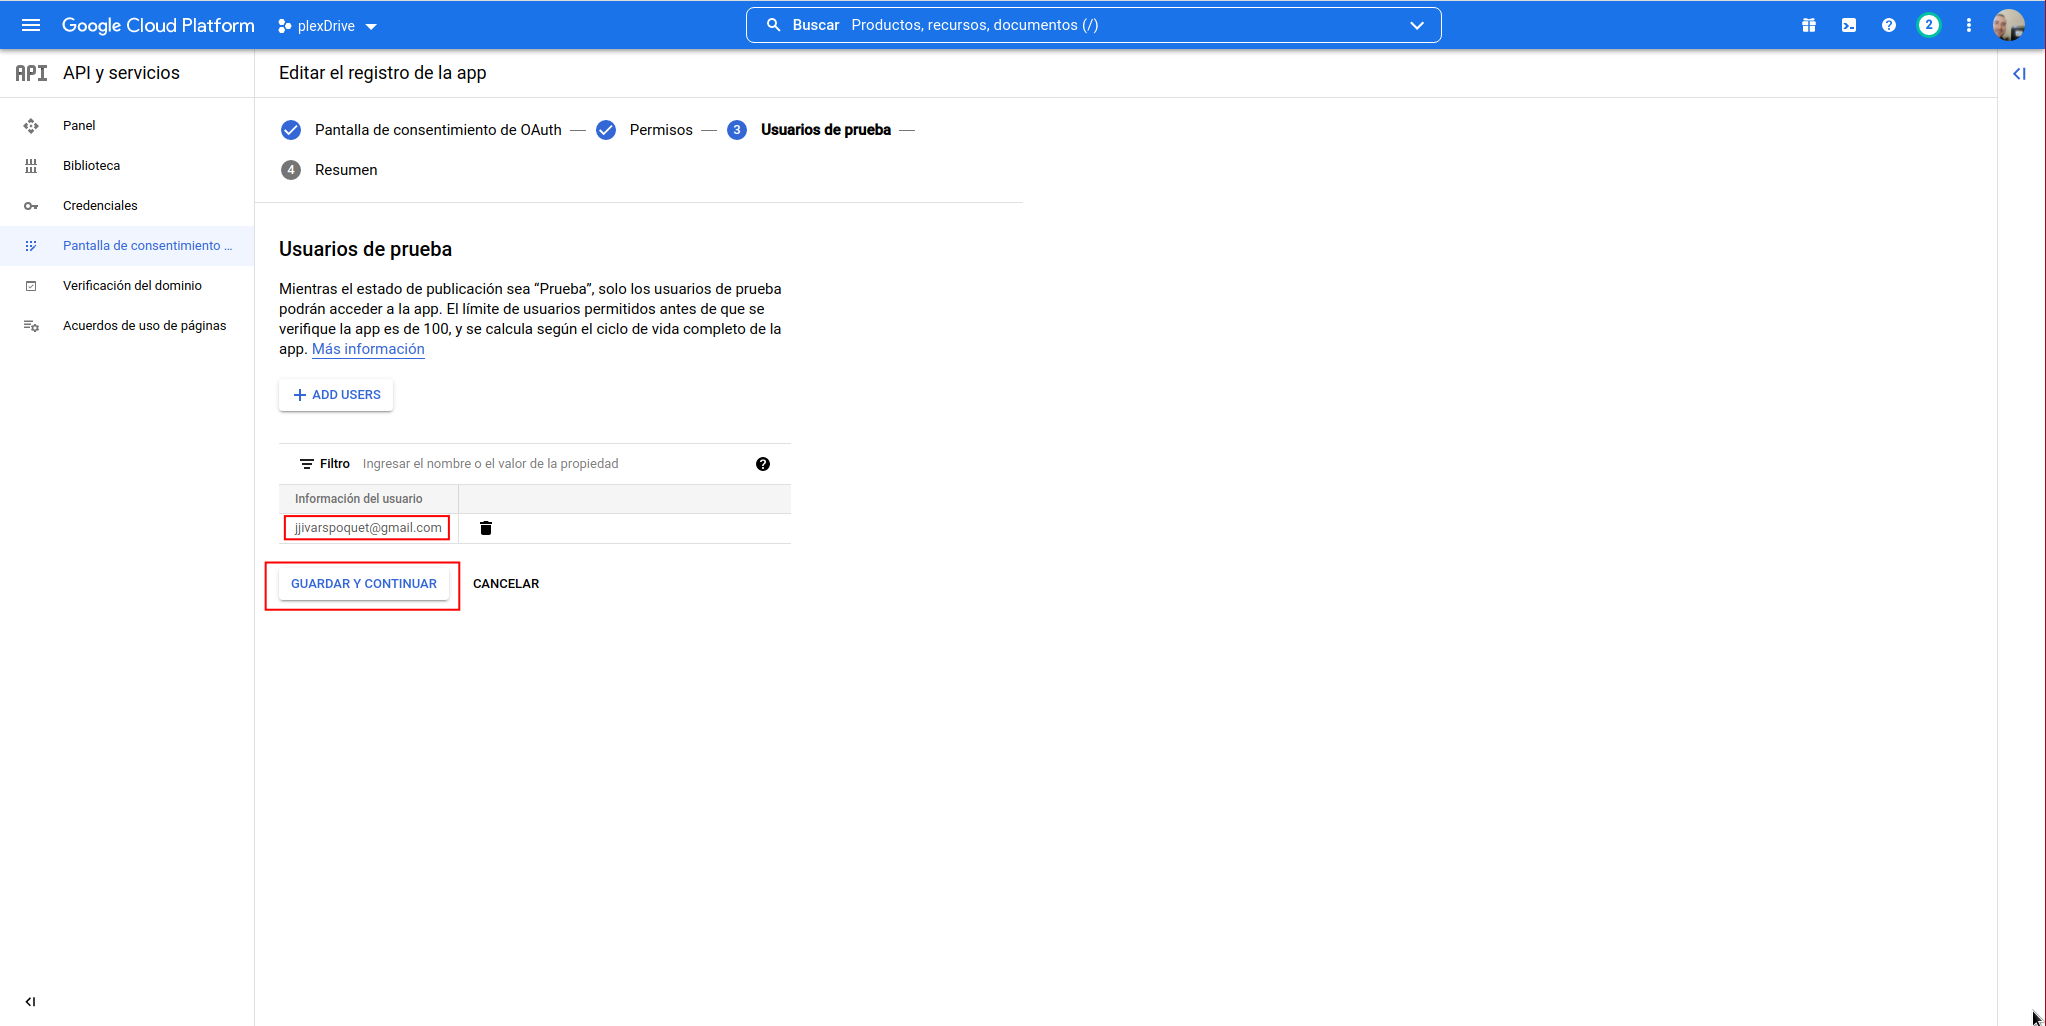
We add a user, click on “ADD USER”:
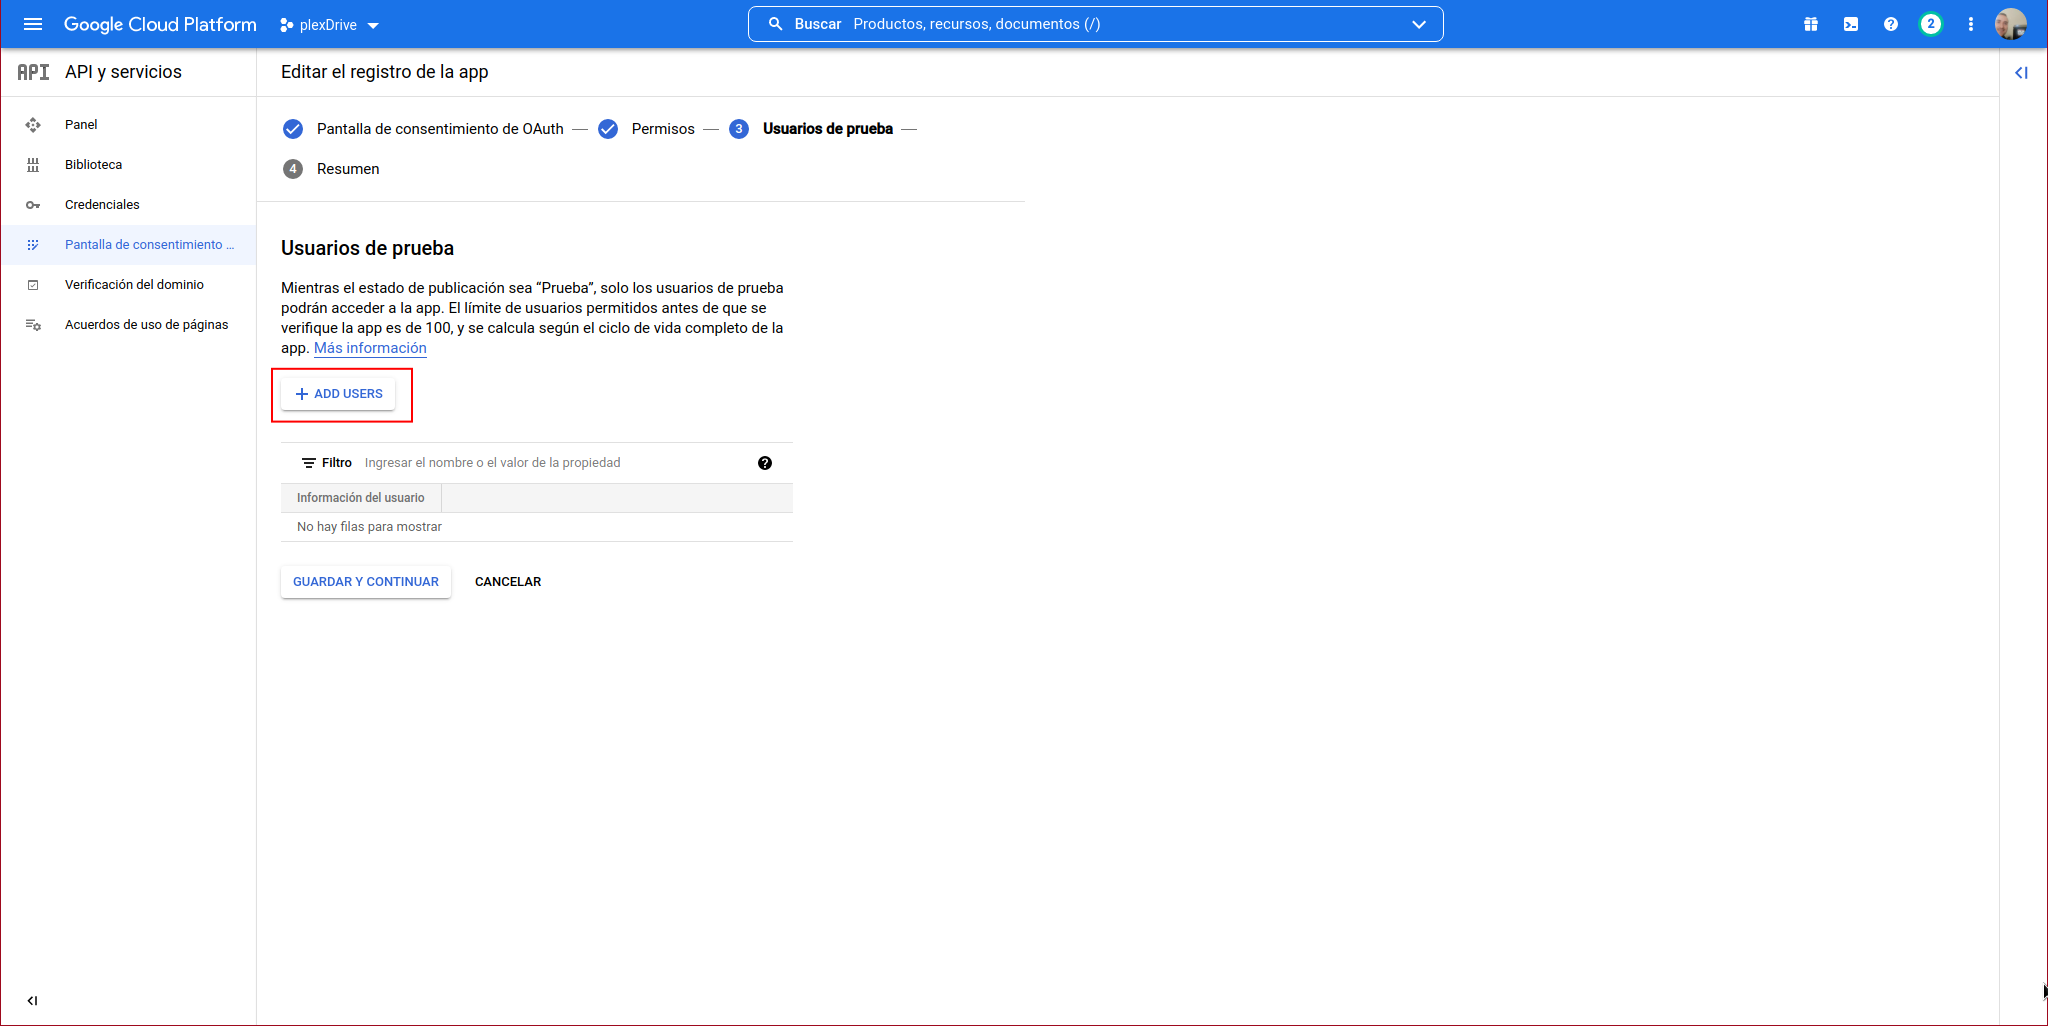
We indicate the user and click on “ADD”:
It should appear on the list, click on “SAVE AND CONTINUE”:
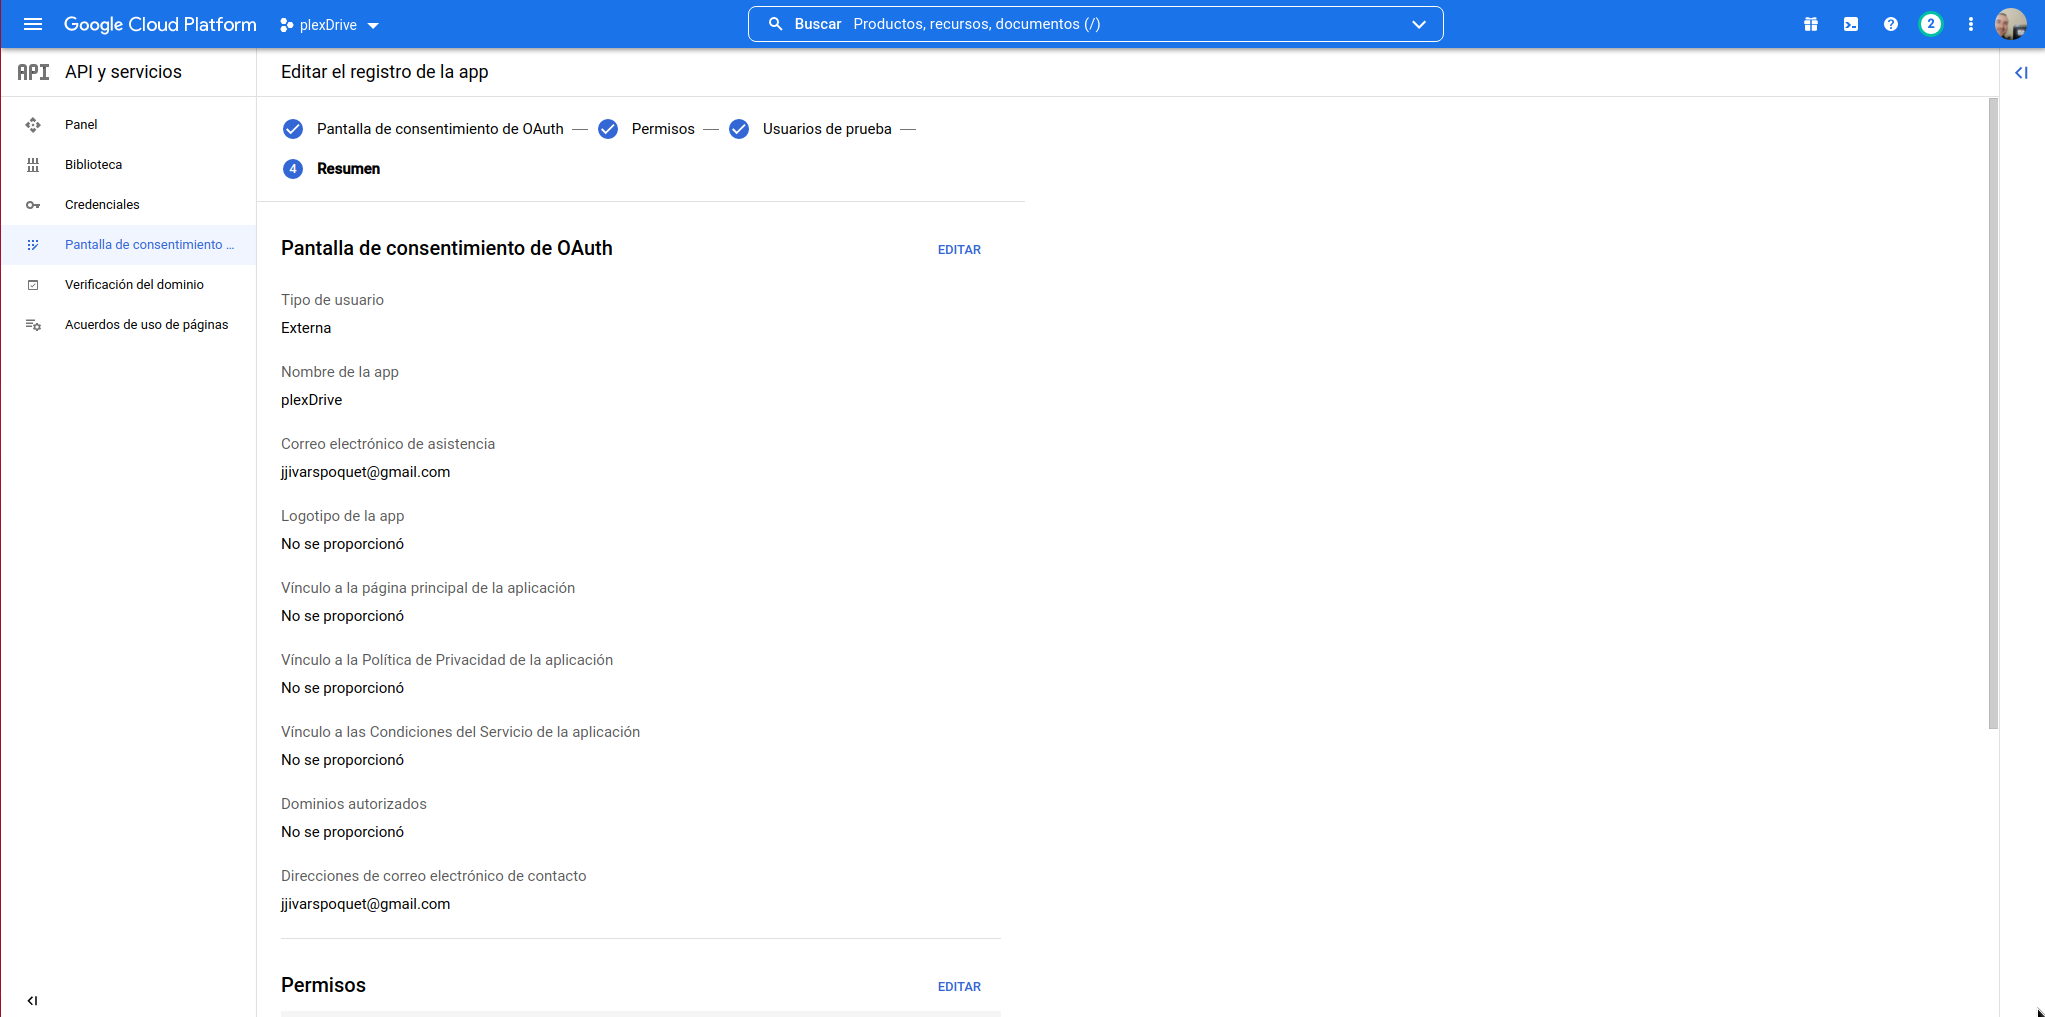
A summary will appear, click on “BACK TO DASHBOARD”:
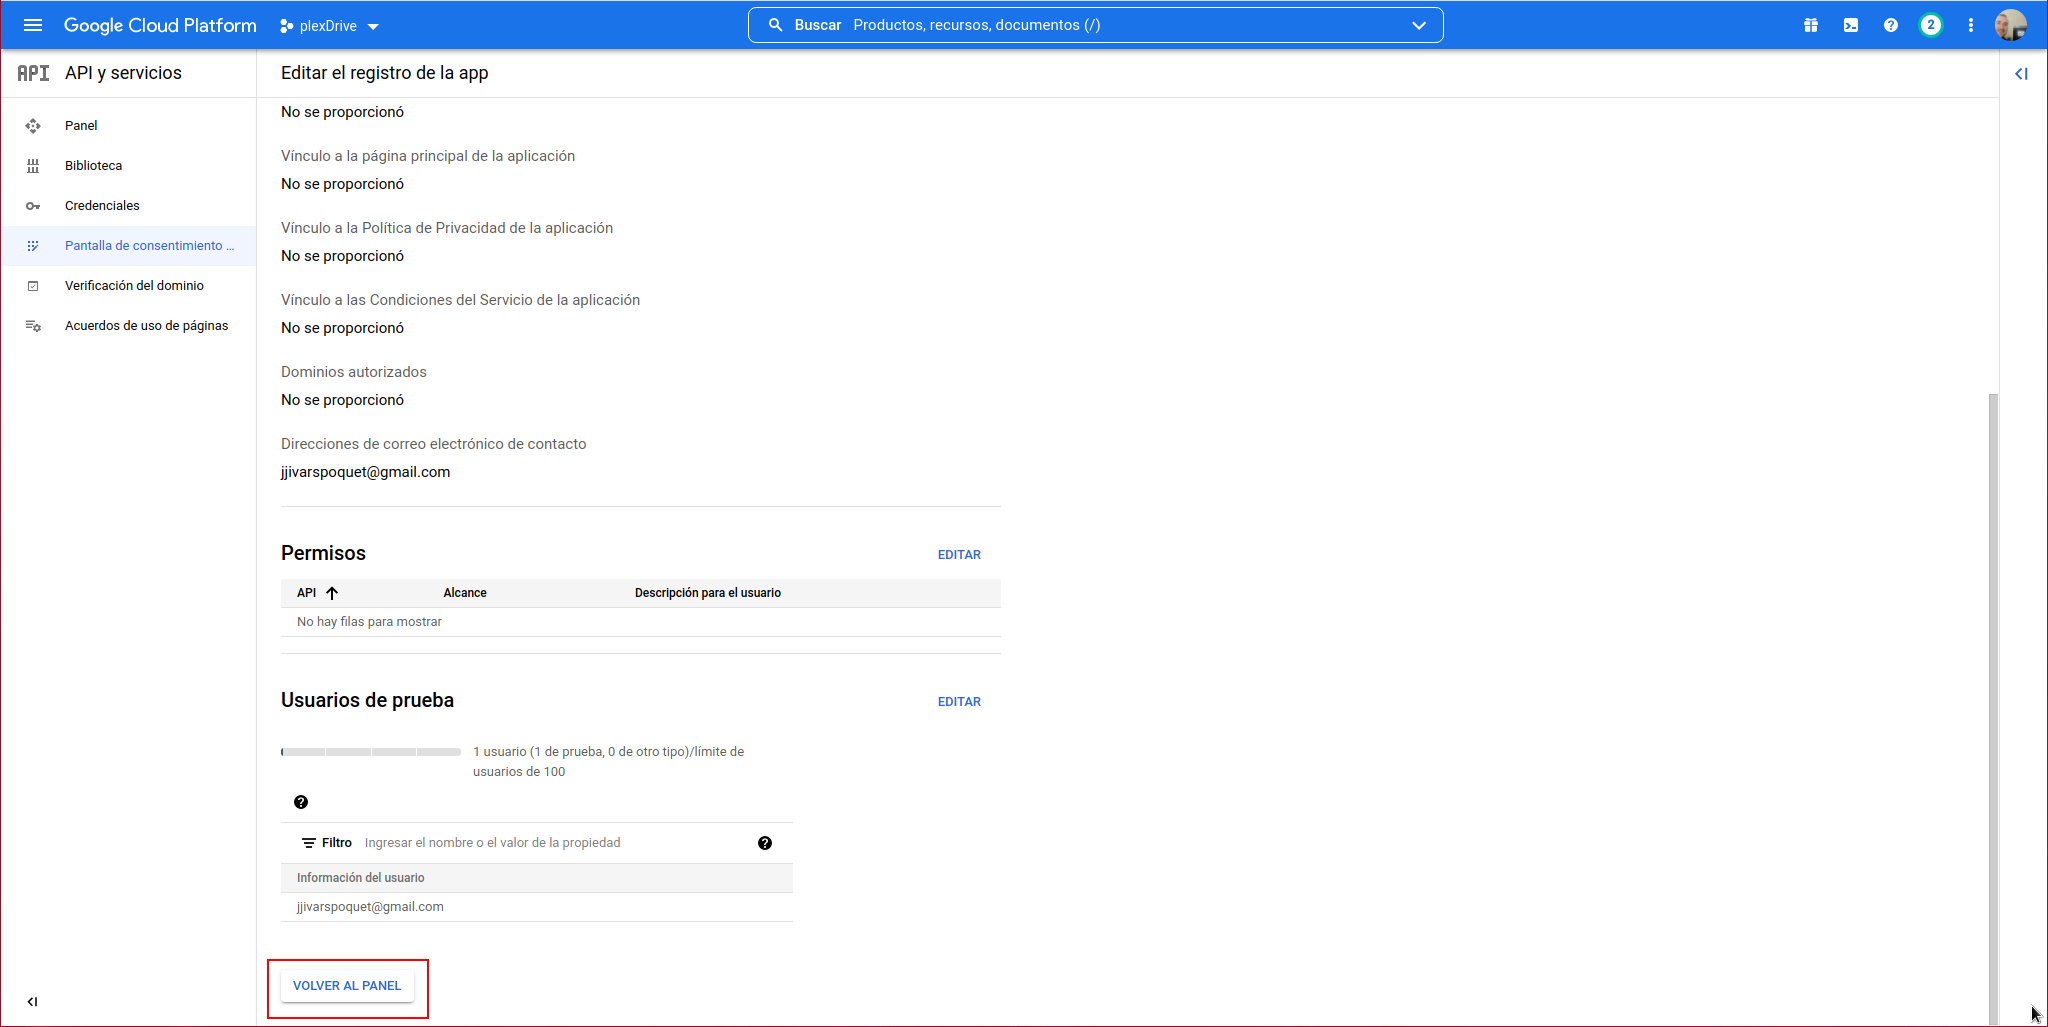
It will take us to the “OAuth Consent Screen”, from here we access the “Credentials” section:
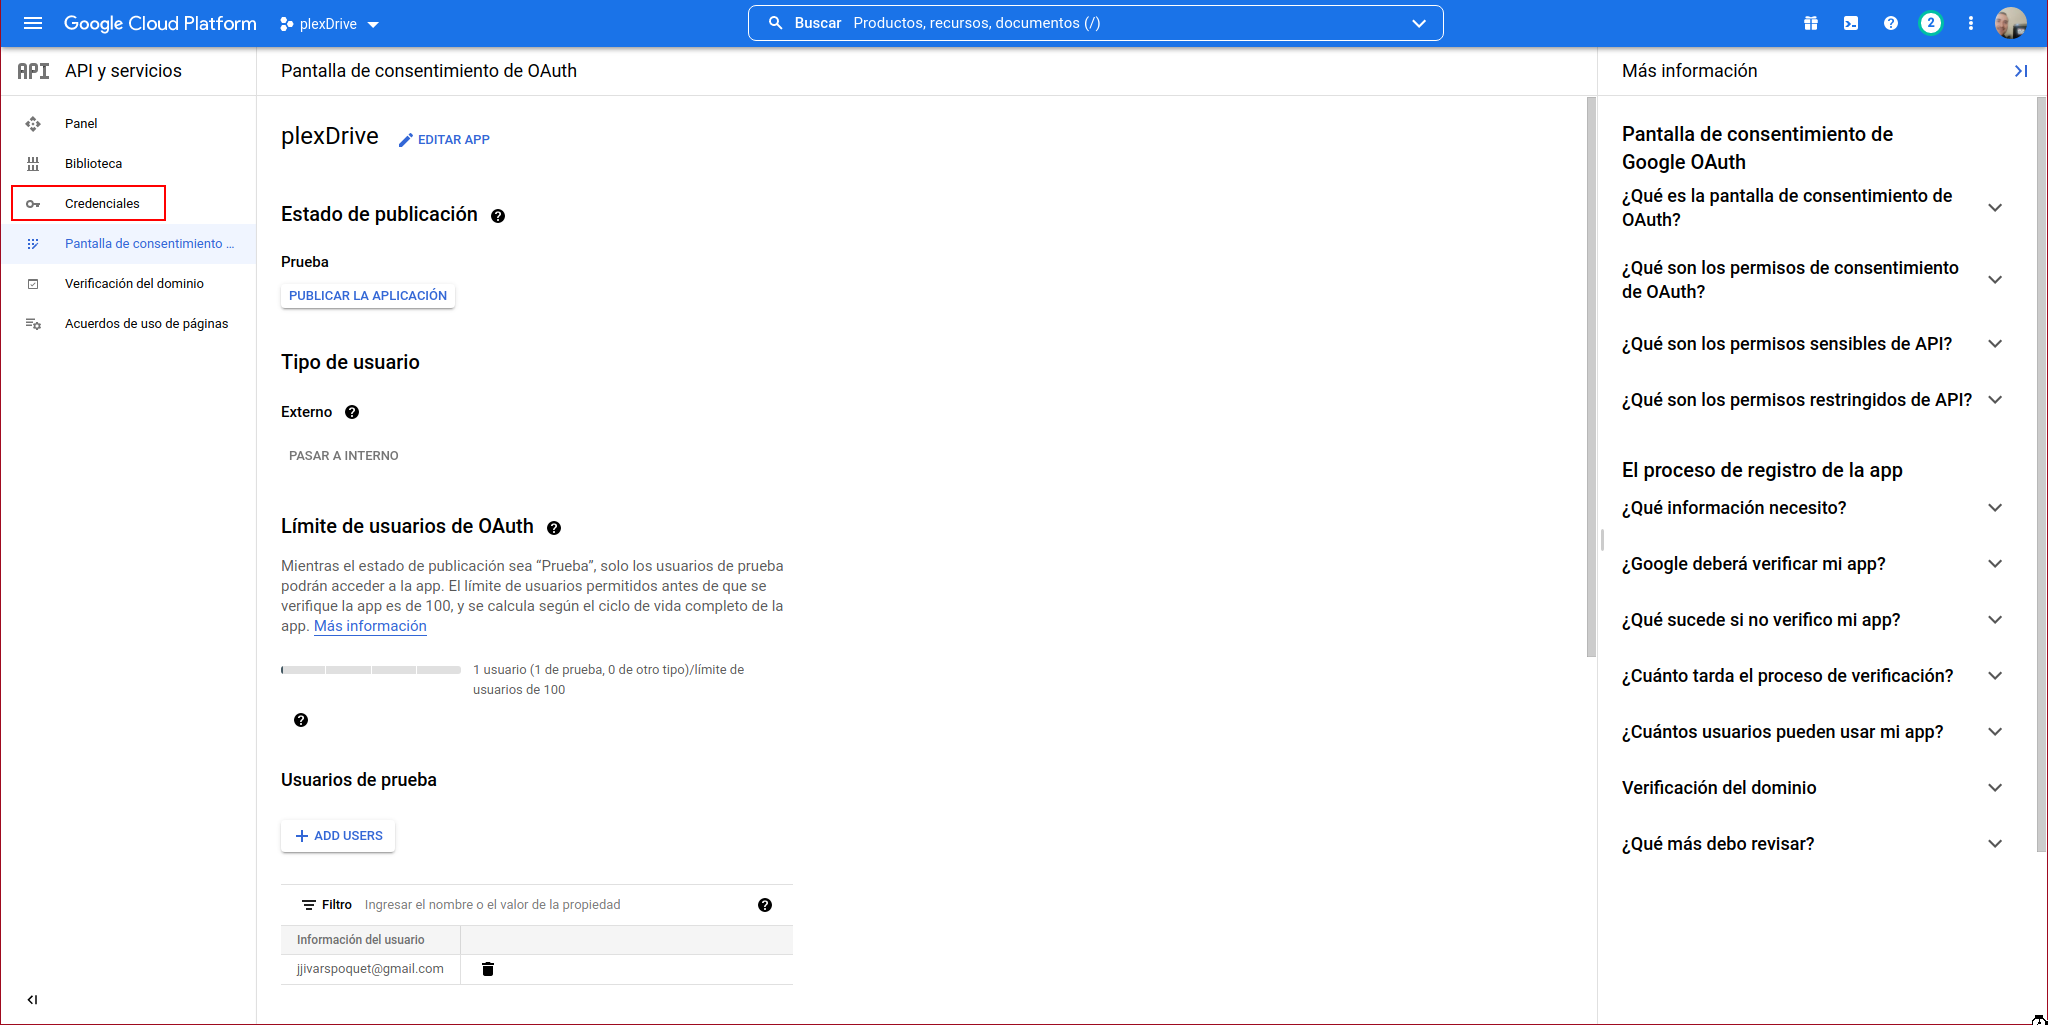
Click on “CREATE CREDENTIALS” again:
Select “OAuth client ID”:
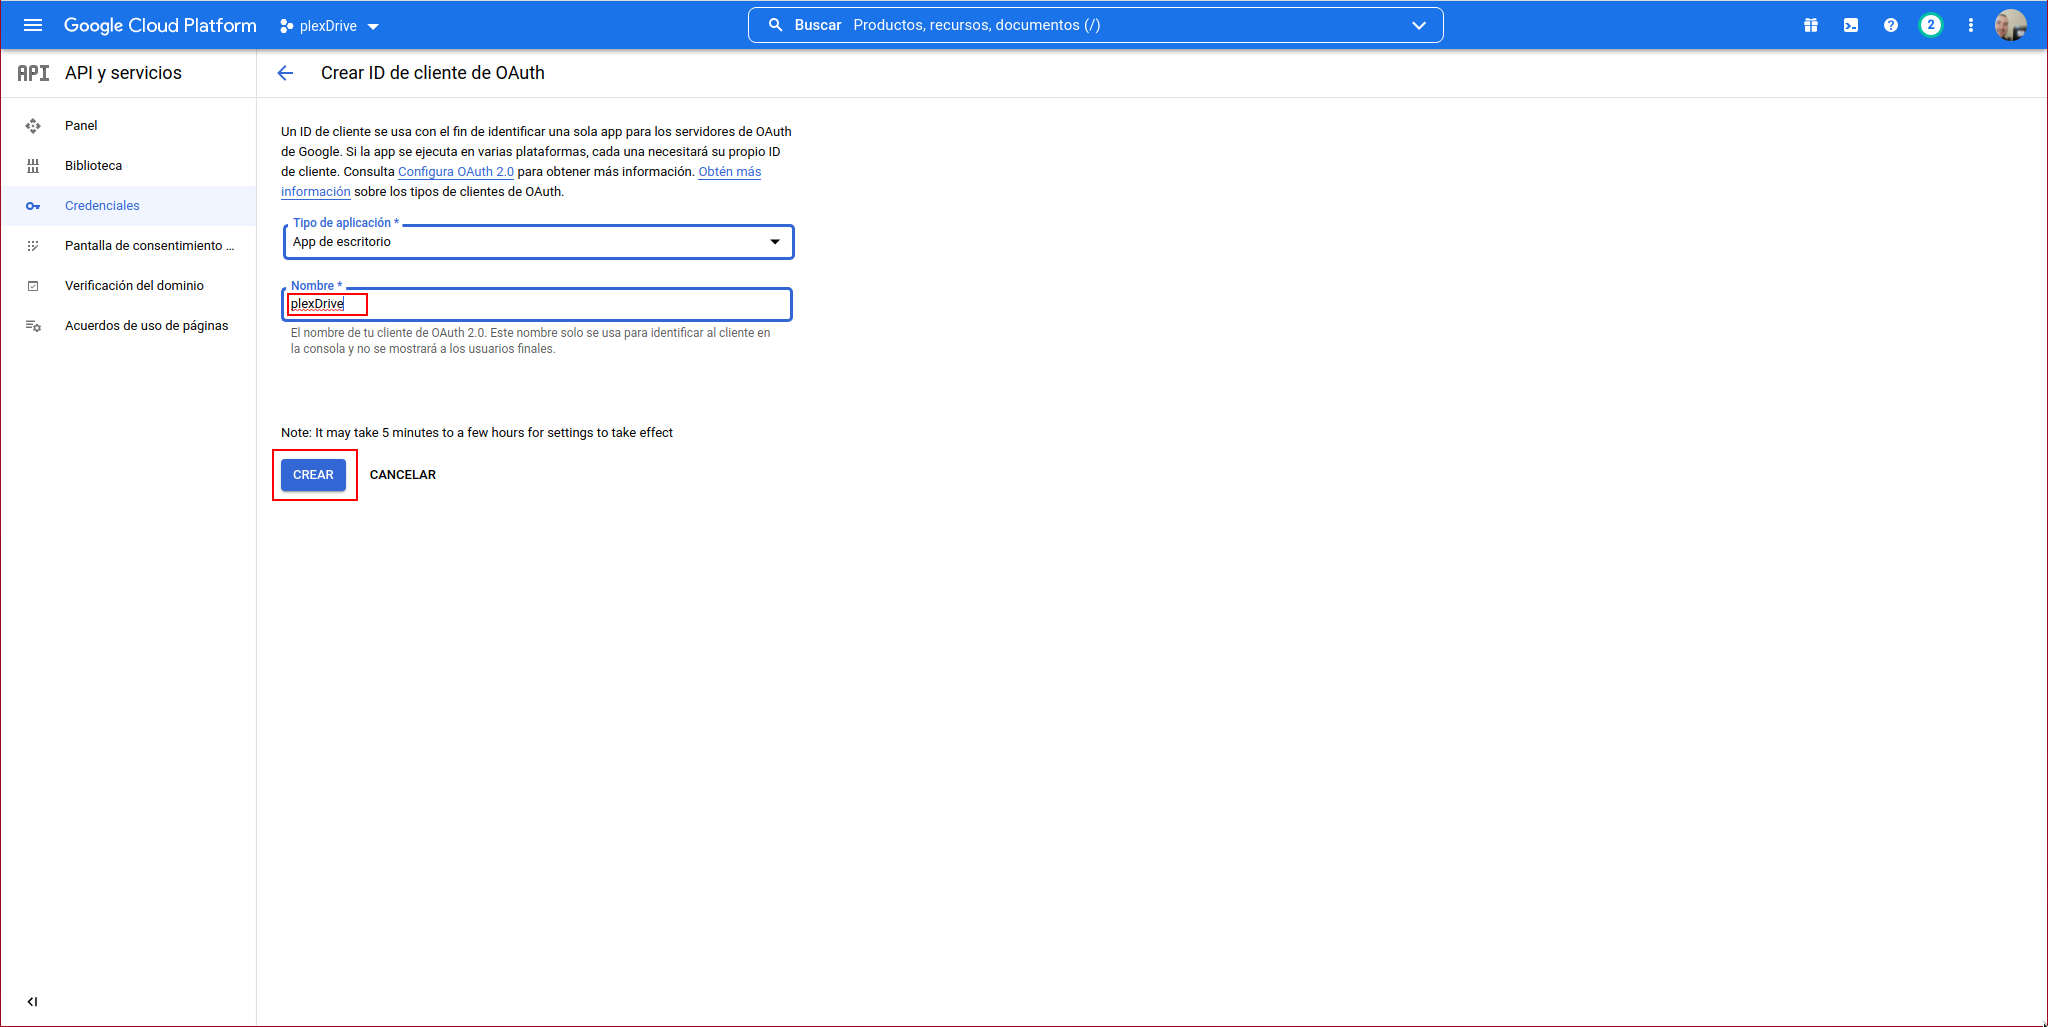
In the application type, select “Desktop App”, give it a name and click on “CREATE”:
It will show us the following information:
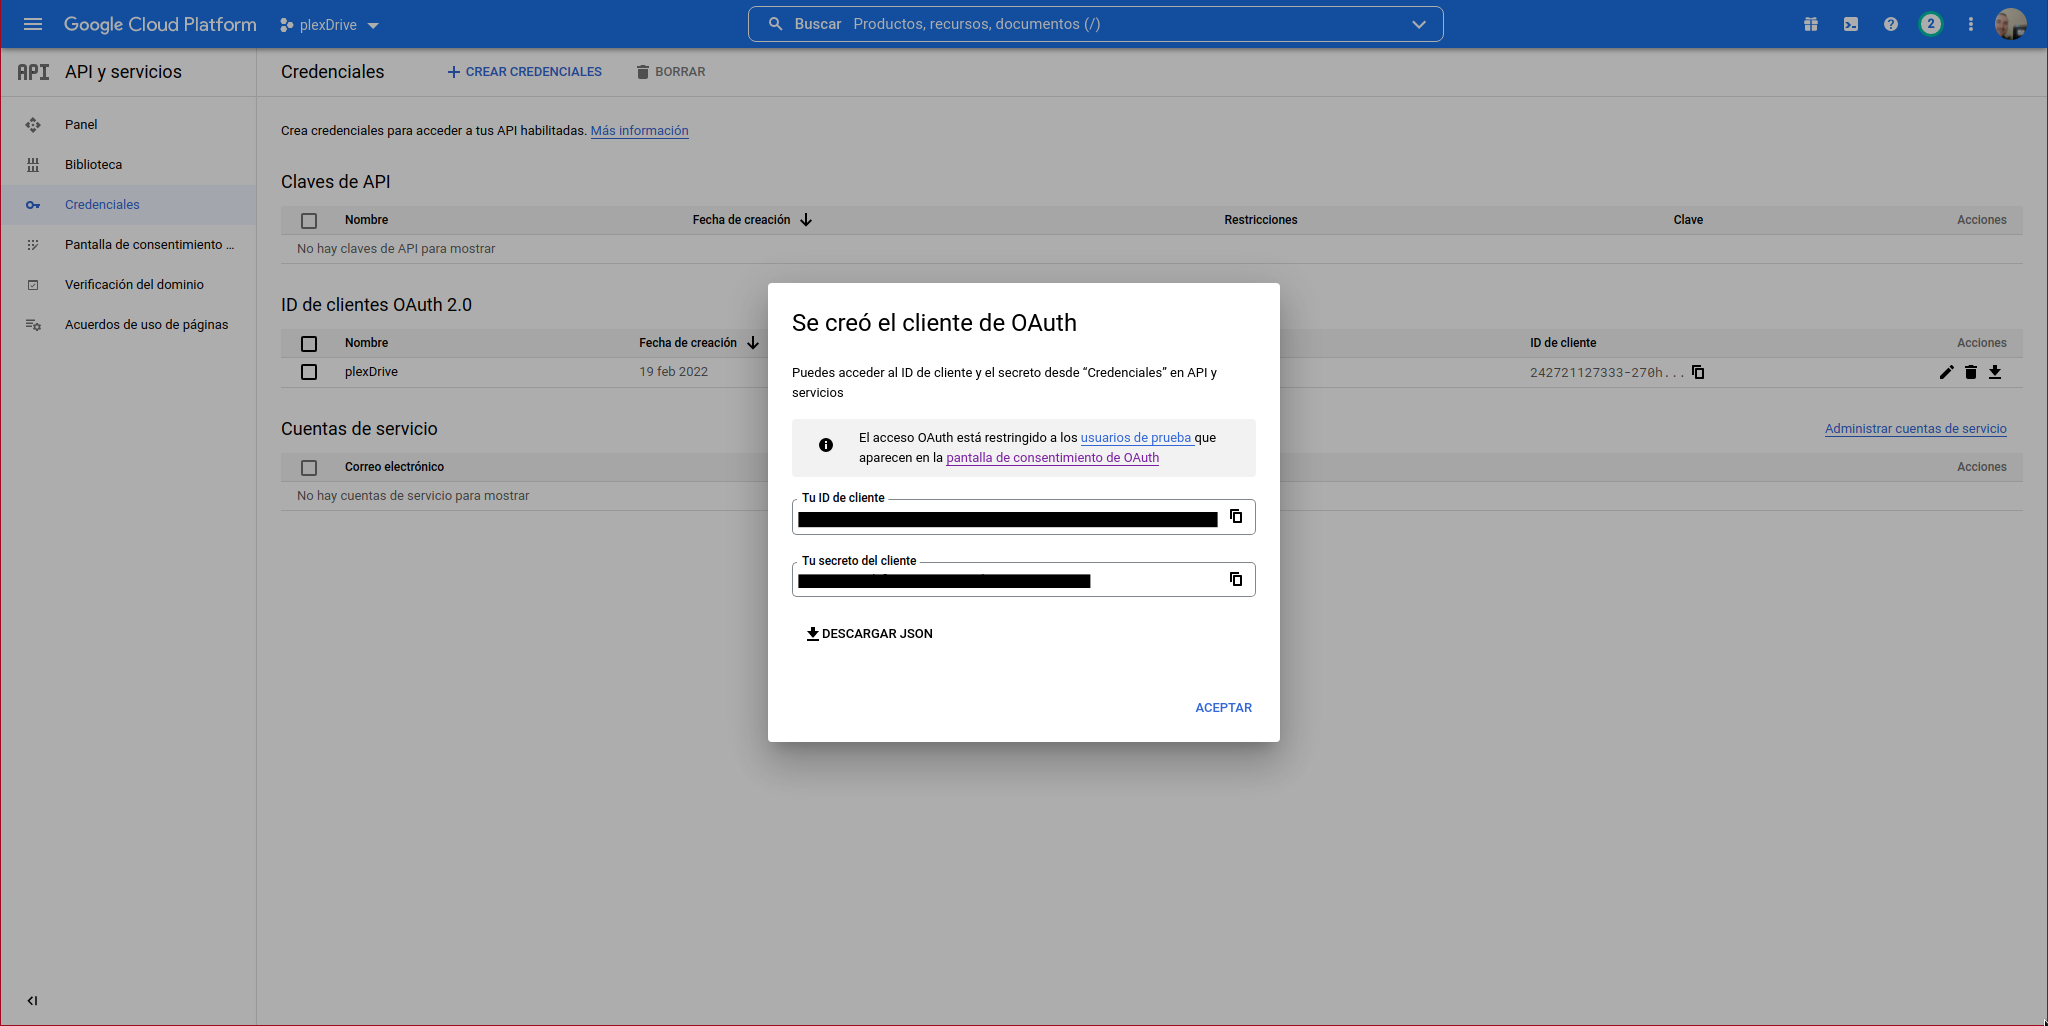
We can see the OAuth client:
We continue with the PlexDrive console:
1. Please go to https://console.developers.google.com/
2. Create a new project
3. Go to library and activate the Google Drive API
4. Go to credentials and create an OAuth client ID
5. Set the application type to 'other'
6. Specify some name and click create
7. Enter your generated client ID: XXXXXXXXXXXXXXXXXXXXXXX
8. Enter your generated client secret: YYYYYYYYYYYYYYYYYYY
Go to the following link in your browser https://accounts.google.com/o/oauth2/auth?access_type=offline&client_id=ZZZZZZZZZZZZ-270hoqea0pinv0nc3sbpfkuja68alask.apps.googleusercontent.com&redirect_uri=urn%3Aietf%3Awg%3Aoauth%3A2.0%3Aoob&response_type=code&scope=https%3A%2F%2Fwww.googleapis.com%2Fauth%2Fdrive&state=state-token
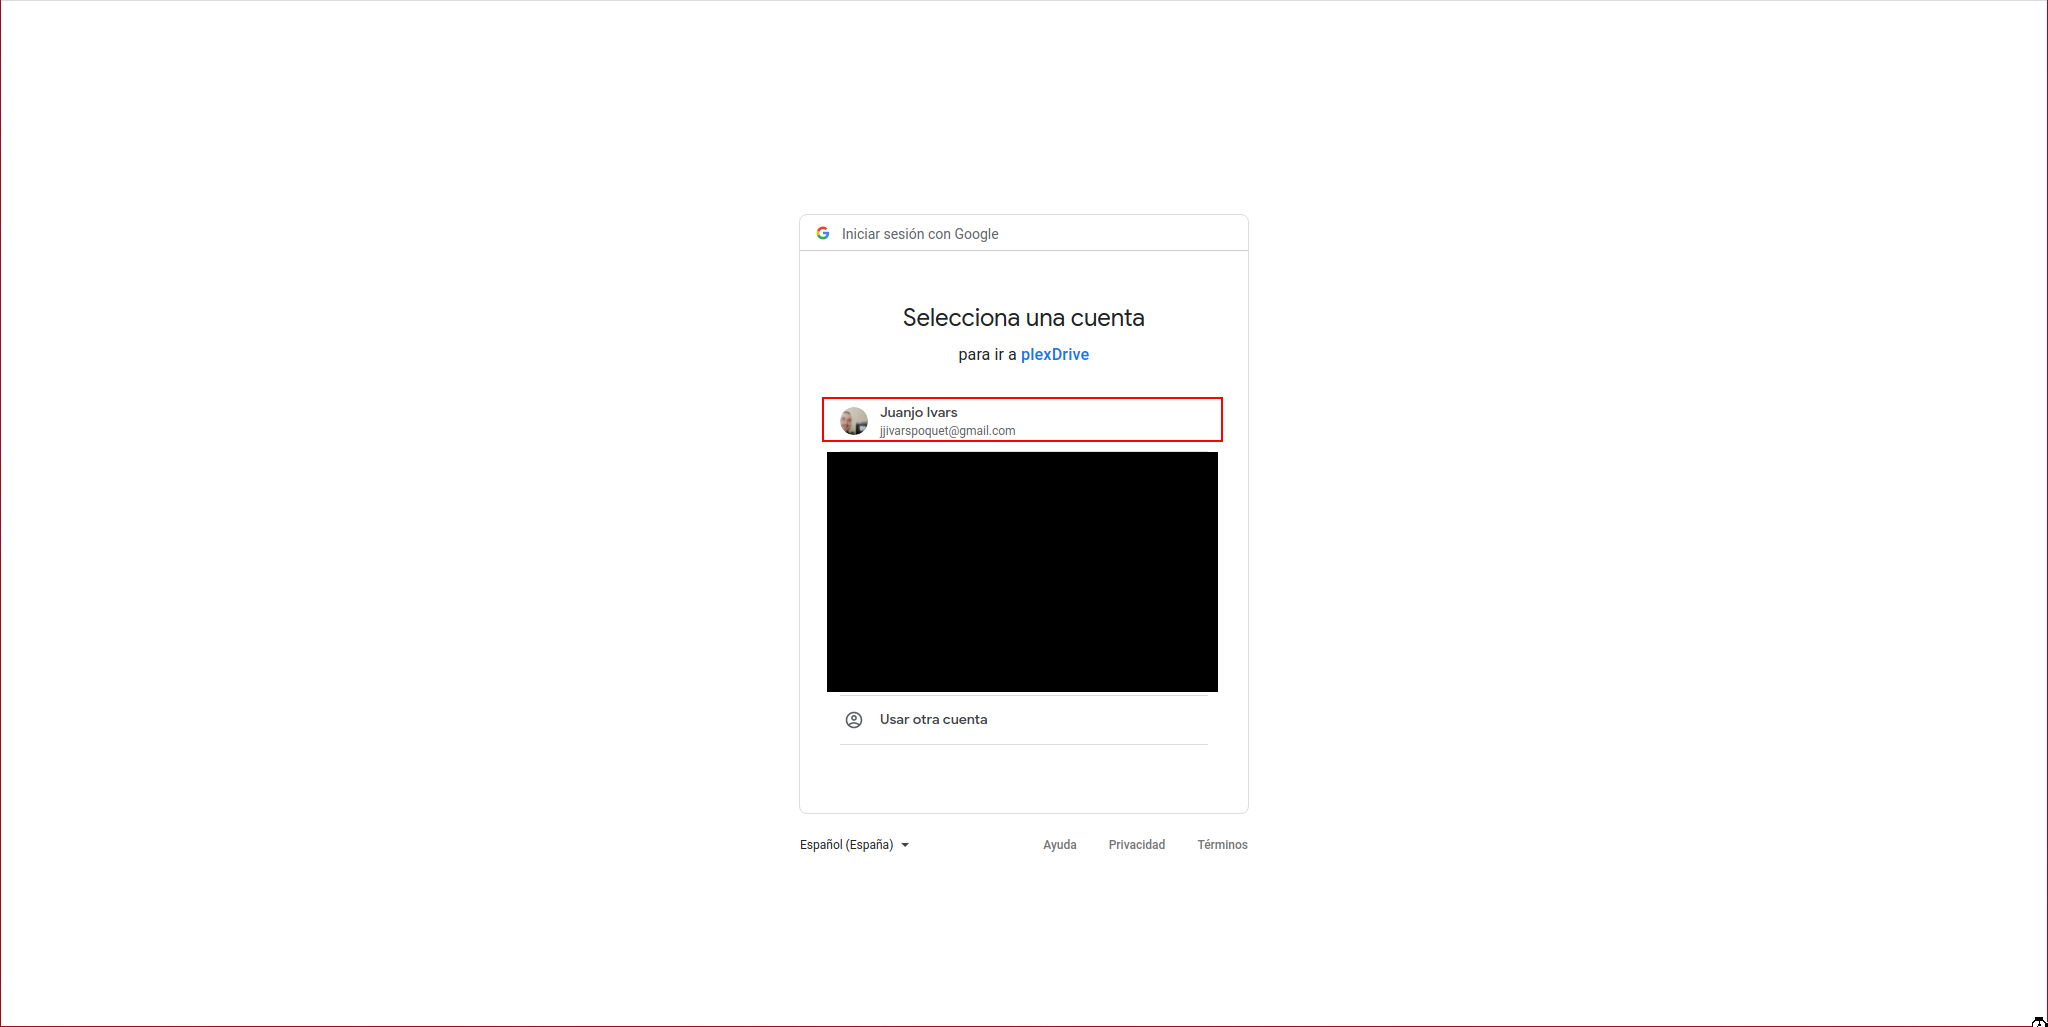
We access the URL indicated by PlexDrive using the previously authorized user:
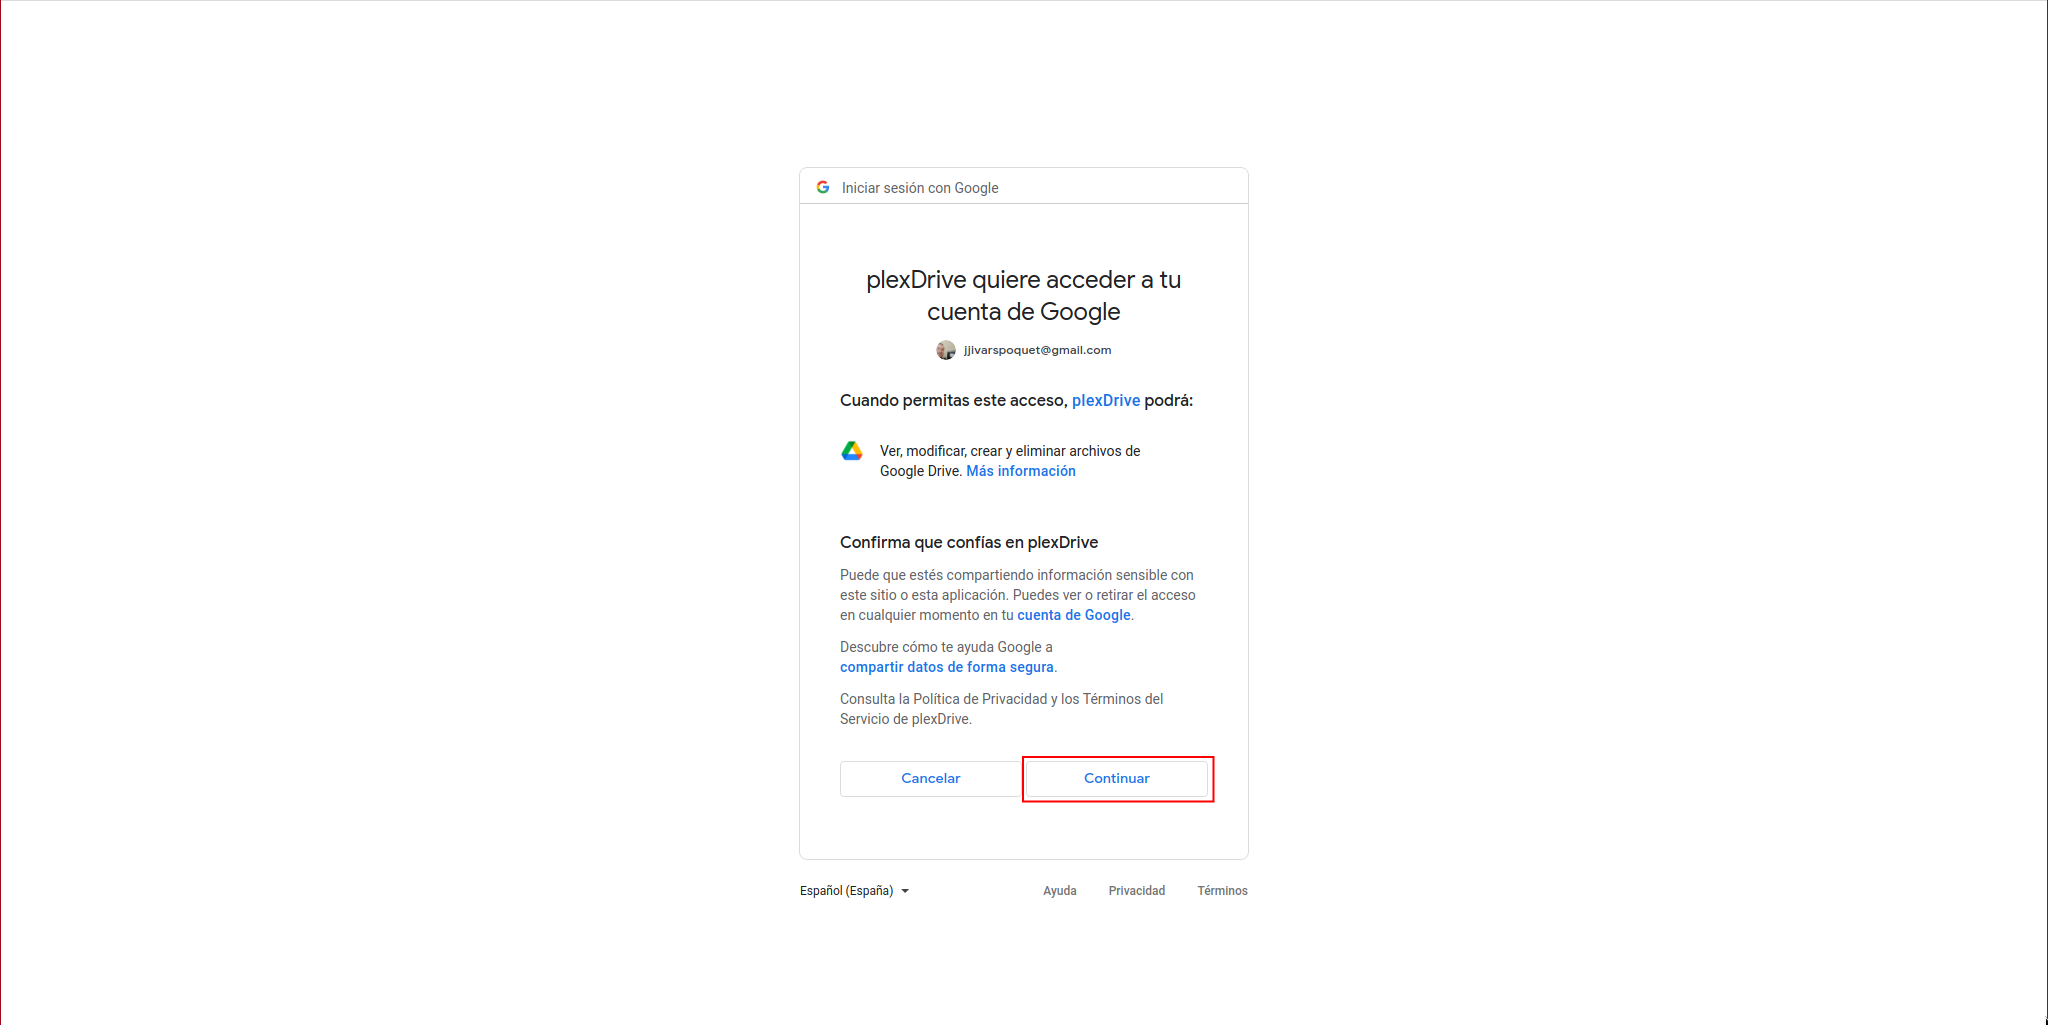
The following message will appear where we click on continue:

We click on “Continue”:
It will show us a code:
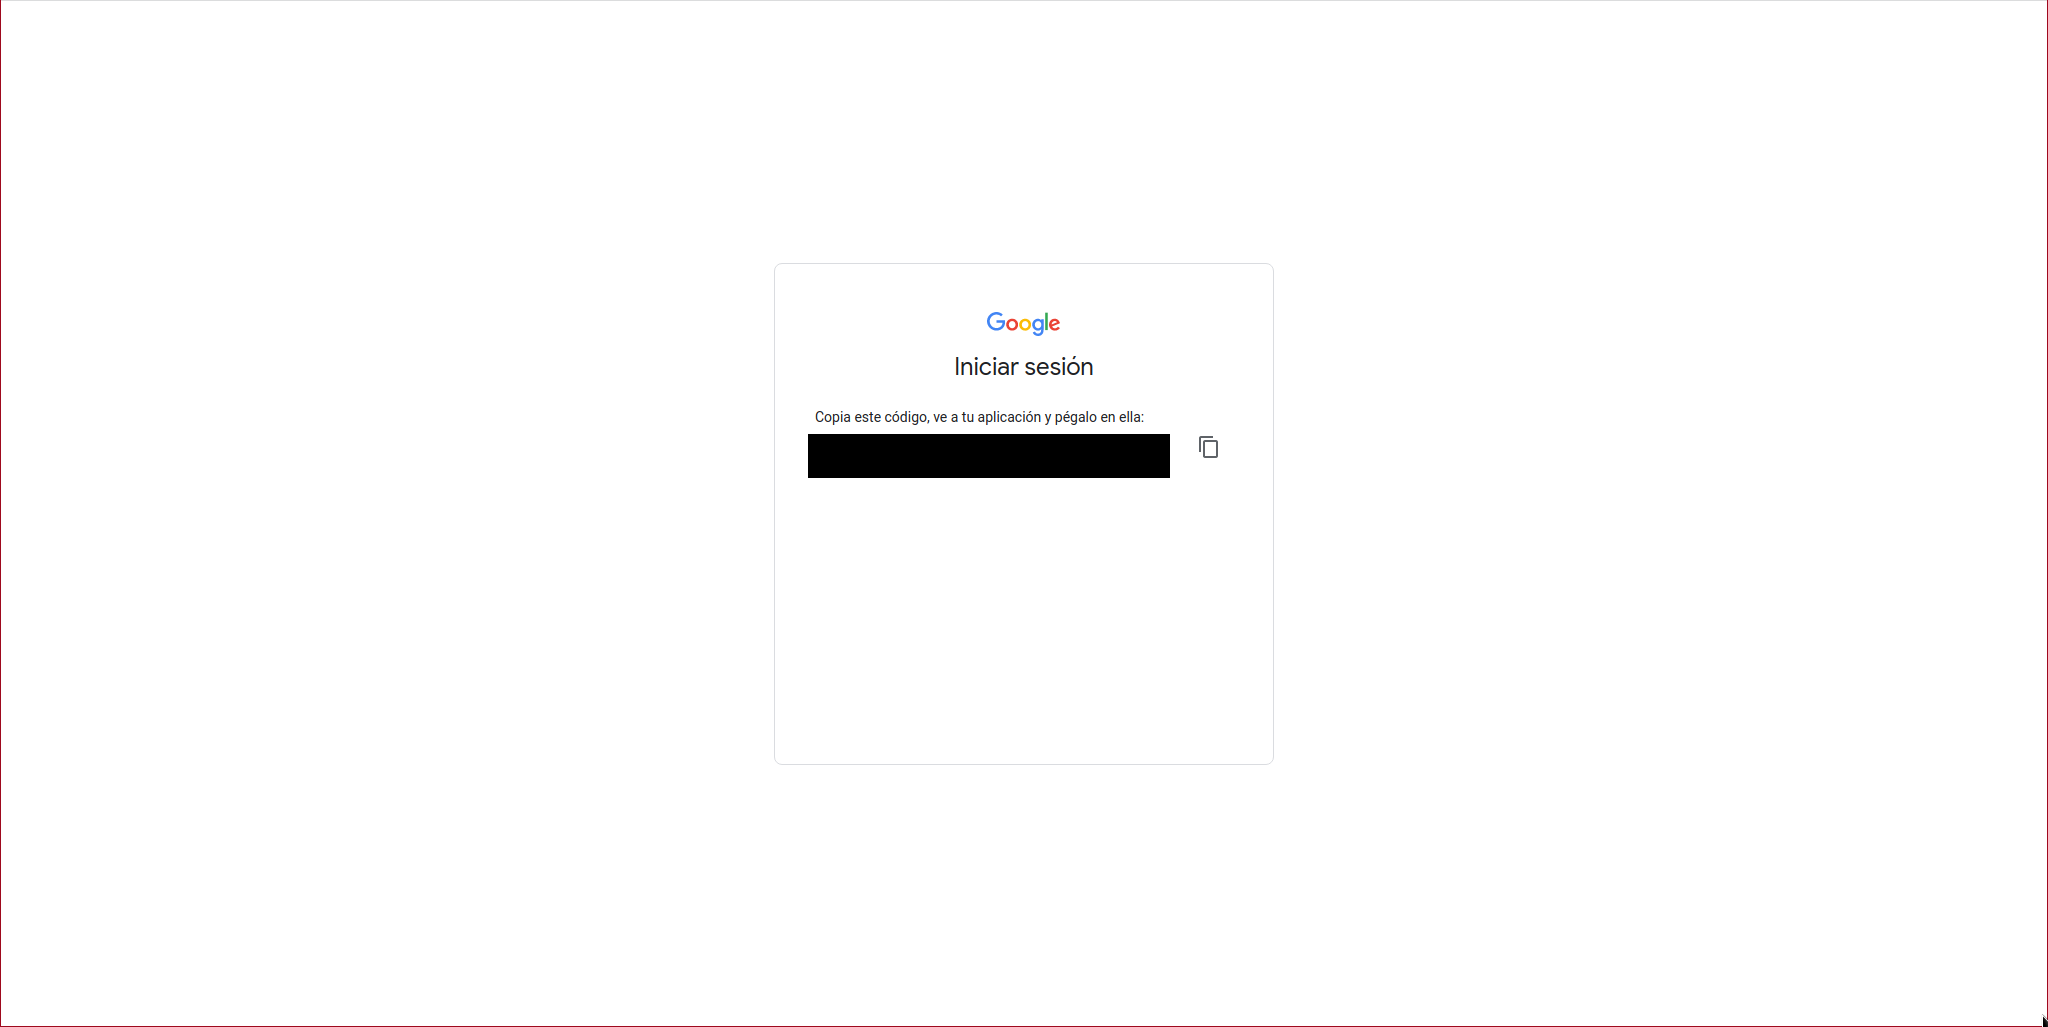
We paste that code into the console:
Paste the authorization code: XXXXXXXXXXXXXXXXXXXX
We press Ctrl+C and demonize the mounting of the GDrive unit:
#! /bin/sh
#
# $FreeBSD$
#

# PROVIDE: gdrive
# REQUIRE: DAEMON
# KEYWORD: shutdown

. /etc/rc.subr

name="gdrive"
rcvar="${name}_enable"
extra_commands="status"

start_cmd="${name}_start"
stop_cmd="${name}_stop"
status_cmd="${name}_status"

gdrive_start(){
    echo "Clearing cache files: ${name}"
    rm /root/.plexdrive/cache.bolt
    echo "Starting service: ${name}"
    /usr/sbin/daemon -S -p /var/run/${name}.pid -T gdrive -u root /root/plexdrive-freebsd-amd64 mount -o allow_other -v 3 --drive-id=0ANN6pzUlNUgXUk9PVA /mnt/gdrive
}

gdrive_stop(){
    if [ -f /var/run/${name}.pid ]; then
        echo "Stopping service: ${name}"
        kill -s INT $(cat /var/run/${name}.pid)
        sleep 3
    else
        echo "It appears ${name} is not running."
    fi
}

gdrive_status(){
    if [ -f /var/run/${name}.pid ]; then
        echo "${name} running with PID: $(cat /var/run/${name}.pid)"
    else
        echo "It appears ${name} is not running."
    fi
}


load_rc_config ${name}
run_rc_command "$1"
We assign the necessary permissions:
chown root:wheel /usr/local/etc/rc.d/gdrive
We enable the service and start it:
service gdrive start
Now we will import the /mnt/gdrive directory from the parent to the jail.
We create the directory in the jail:
mkdir /mnt/gdrive
exit
We import the directory using the IOCage fstab command:
Successfully added mount to GDrive's fstab
Nginx:
Now we access the jail and mount the server. Access from the outside will be via HTTPS since we will require authentication to access the content and we do not want these credentials to be compromised. However, it would also be convenient to use HTTPS from the LAN, but for this we would have to use the public domain name from the LAN computers, which causes problems due to Hairpinning . To solve this, there are three options:
- Mount an internal DNS server with RPZ and configure internal clients to use that DNS.
- Modify the /etc/hosts file on clients so that the domain resolves to the LAN IP, but in my case it is not possible because it is an AndroidTV.
- Use HTTP (the option I chose).
We install Nginx and Socat since it is a dependency of ACME, the tool with which we will issue the HTTPS certificate:
We install ACME:
We issue the certificate:
The Nginx configuration is vanilla but with an additional include:
worker_processes  1;
events {
    worker_connections  1024;
}
http {
    include       gdrive.alfaexploit.conf;
    include       mime.types;
    default_type  application/octet-stream;
    sendfile        on;
    keepalive_timeout  65;
    server {
        listen       80;
        server_name gdrive.alfaexploit.com;
        location / {
            root   /usr/local/www/nginx;
            index  index.html index.htm;
        }
        error_page   500 502 503 504  /50x.html;
        location = /50x.html {
            root   /usr/local/www/nginx-dist;
        }
    }
}
Our specific configuration:
server {
    listen 443 ssl default_server proxy_protocol;
    server_name gdrive.alfaexploit.com;

    set_real_ip_from 192.168.69.11;
    real_ip_header proxy_protocol;

    root   /mnt/gdrive;

    location / {
	autoindex on;
	auth_basic "Login Required";
	auth_basic_user_file /usr/local/etc/nginx/.htpasswd;
    }

    ssl_certificate "/root/.acme.sh/gdrive.alfaexploit.com/fullchain.cer";
    ssl_certificate_key "/root/.acme.sh/gdrive.alfaexploit.com/gdrive.alfaexploit.com.key";
}

# Direct IoT devices wich cant change /etc/hosts and evade hairpinning problem
server {
    listen       80 default_server;
    server_name  _;

    root   /mnt/gdrive;

    location / {
        autoindex on;
        auth_basic "Login Required";
        auth_basic_user_file /usr/local/etc/nginx/.htpasswd;
    }
}

# LetsEncrypt cert renew
server {
    listen       81 default_server;
    server_name  _;

    root   /usr/local/www/nginx;
}
We have Nginx clear on port 80/81, the first one is for IoT devices on the LAN such as TVs that cannot change the /etc/hosts file and therefore hairpinning causes problems, they access directly to 80. On the other hand, if we leave it like this, LetsEncrypt will not be able to renew the certificate since the docroot of port 80 is RO, in HaProxy we will send LetsEncrypt traffic to port 81 which is associated with a RW docroot.
We generate the credentials file:
The final result should be very similar to this:
kr0m:$apr1$gypxo60s$6vKdmpNM3J8gJ7pdcLkeg/
We restart the service:
HaProxy:
In my case, the traffic is balanced by a HaProxy where the traffic will be sent by HTTP in case of ACME renewing the certificate or by HTTPS otherwise, when it is by HTTPS, ProxyProtocol will be used to assign the source IP of the requests:
frontend HTTP
    bind :80
    option forwardfor

    # Allow http access only for LetsEncrypt:
    acl letsencrypt path_beg /.well-known/acme-challenge/
    http-request redirect scheme https unless letsencrypt

    acl gdrive hdr(host) -i gdrive.alfaexploit.com
    http-request deny if !gdrive
    use_backend gdrive if gdrive

frontend HTTP-SSL
    bind :443
    mode tcp

    acl gdrive_ssl req.ssl_sni -i gdrive.alfaexploit.com

    tcp-request inspect-delay 2s
    tcp-request content reject if !gdrive_ssl
    use_backend gdrive_ssl if gdrive_ssl

# GDrive is a special case:
# Nginx:80 -> Direct IoT devices wich cant change /etc/hosts and evade hairpinning problem docroot: /mnt/gdrive RO
# Nginx:81 -> Letsencrypt docroot: /usr/local/www/nginx RW
backend gdrive
    server gdrive 192.168.69.14:81 check

backend gdrive_ssl
    mode tcp
    option ssl-hello-chk
    server gdrive 192.168.69.14:443 check sni req.ssl_sni send-proxy-v2
KODI:
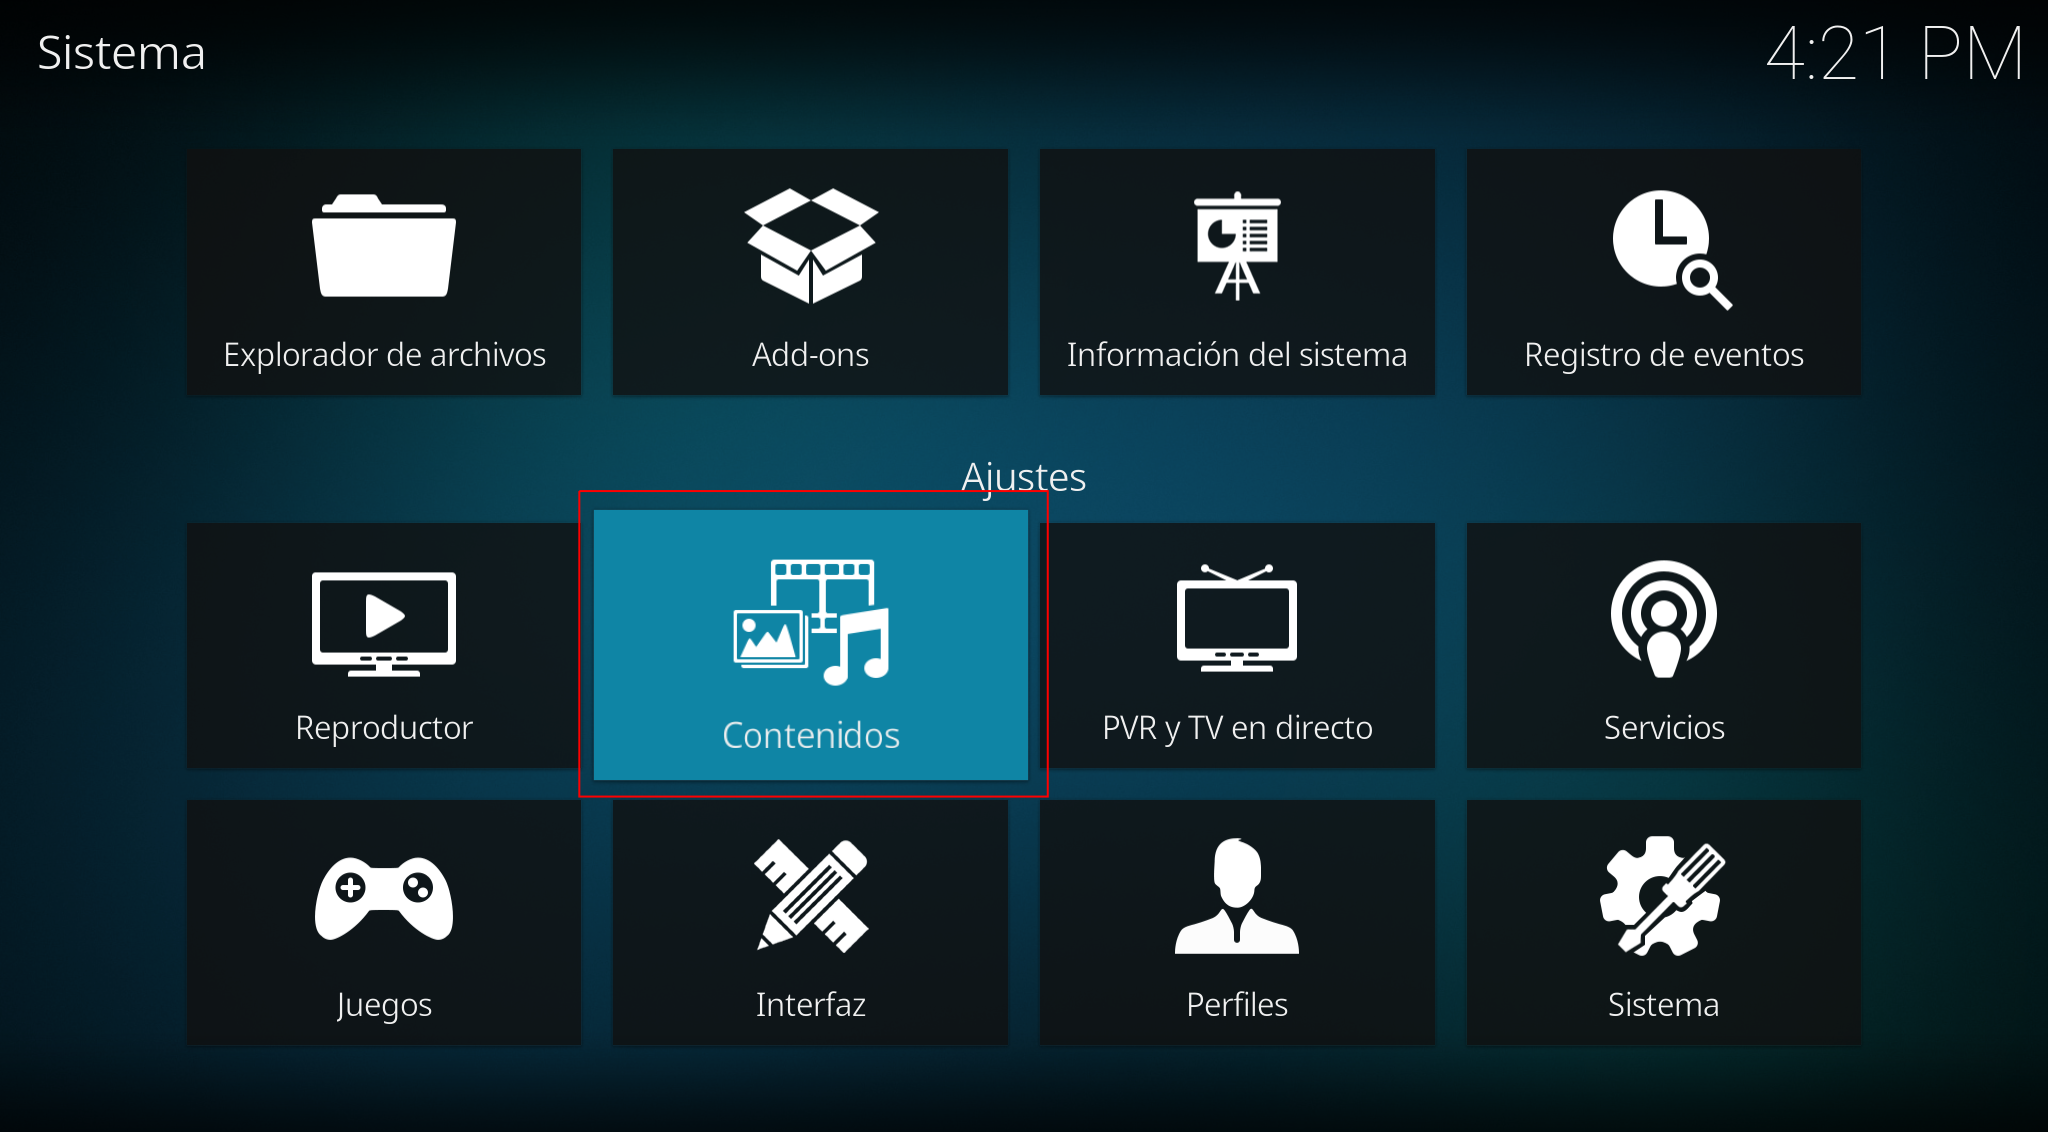
Now it’s time to add the source in KODI, we access the configuration parameters:
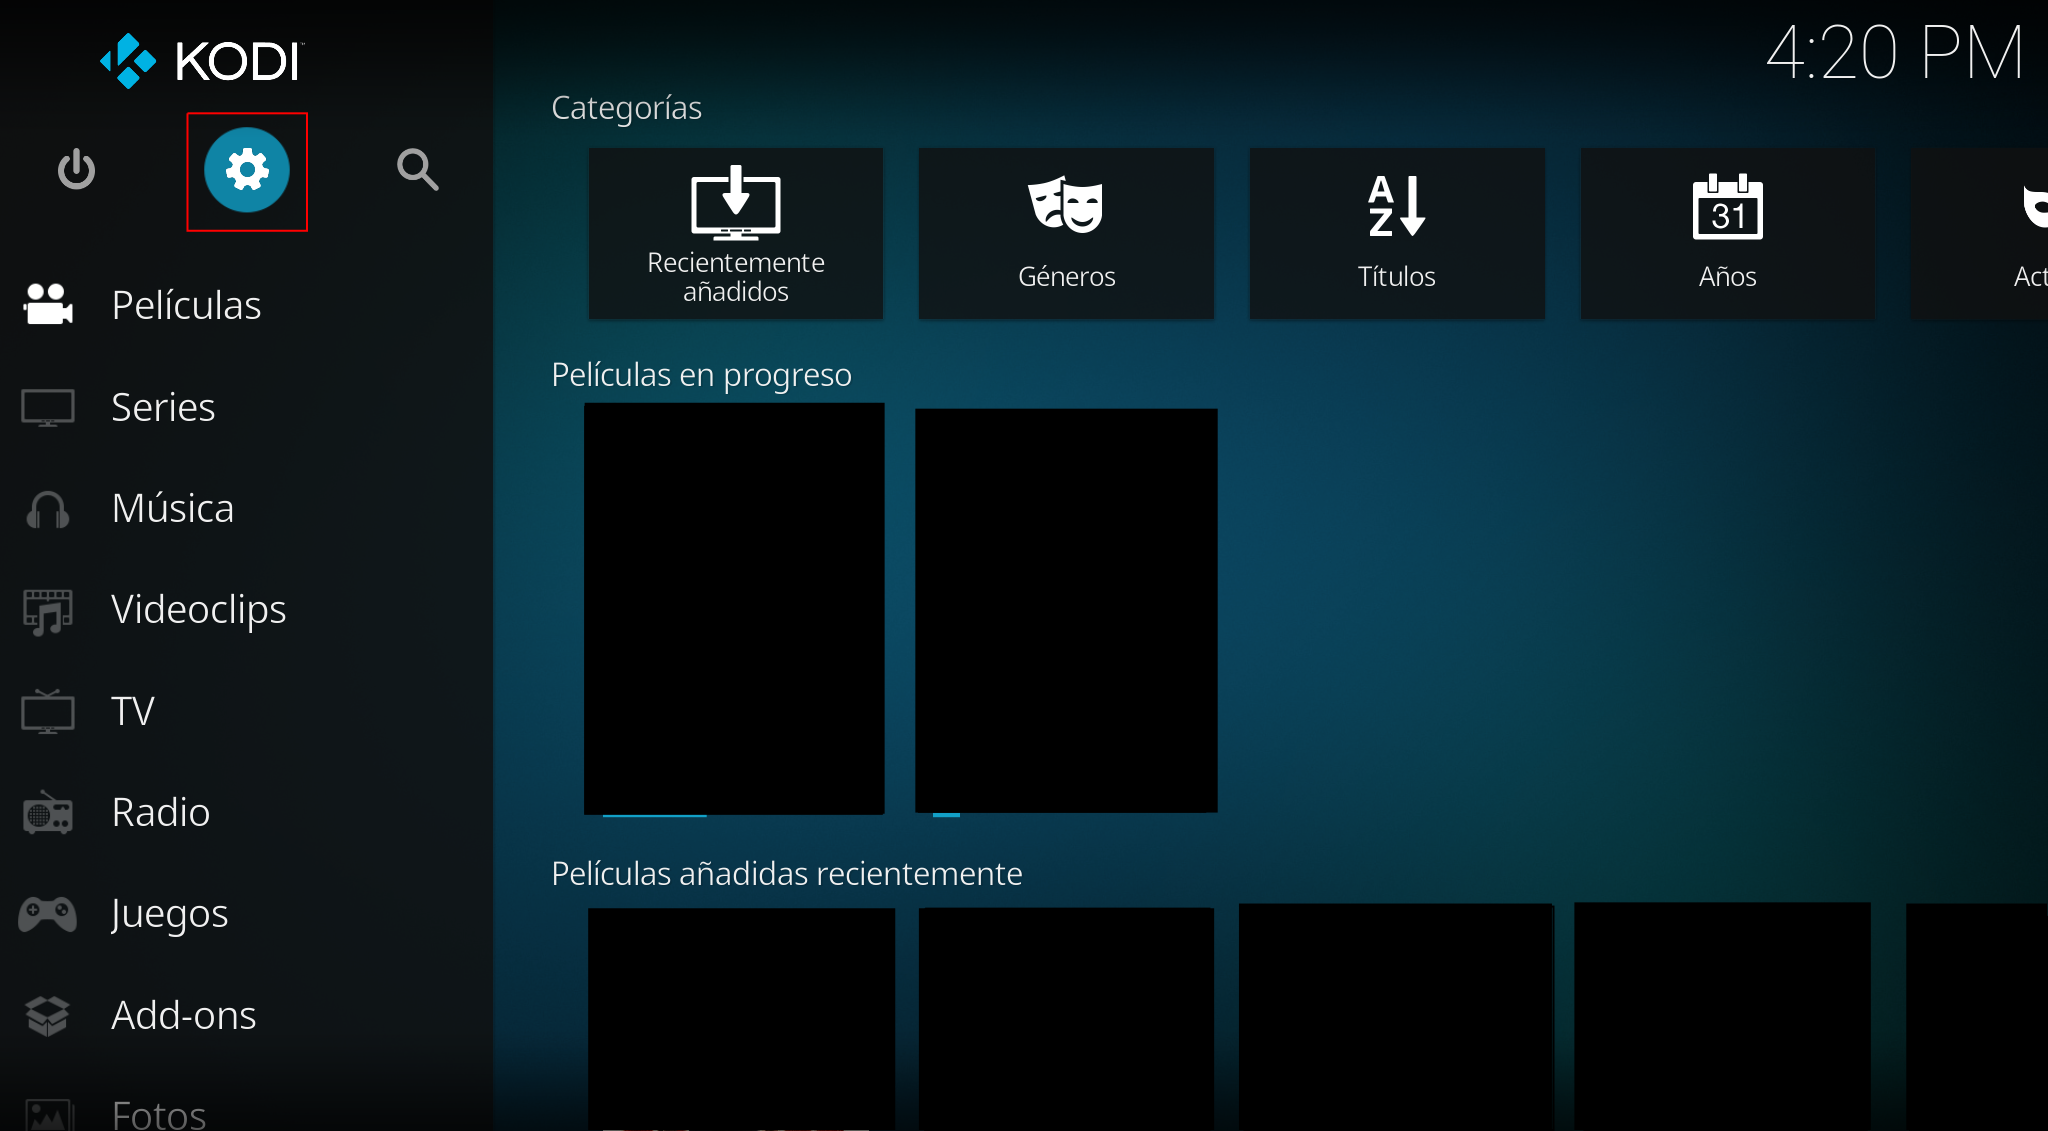
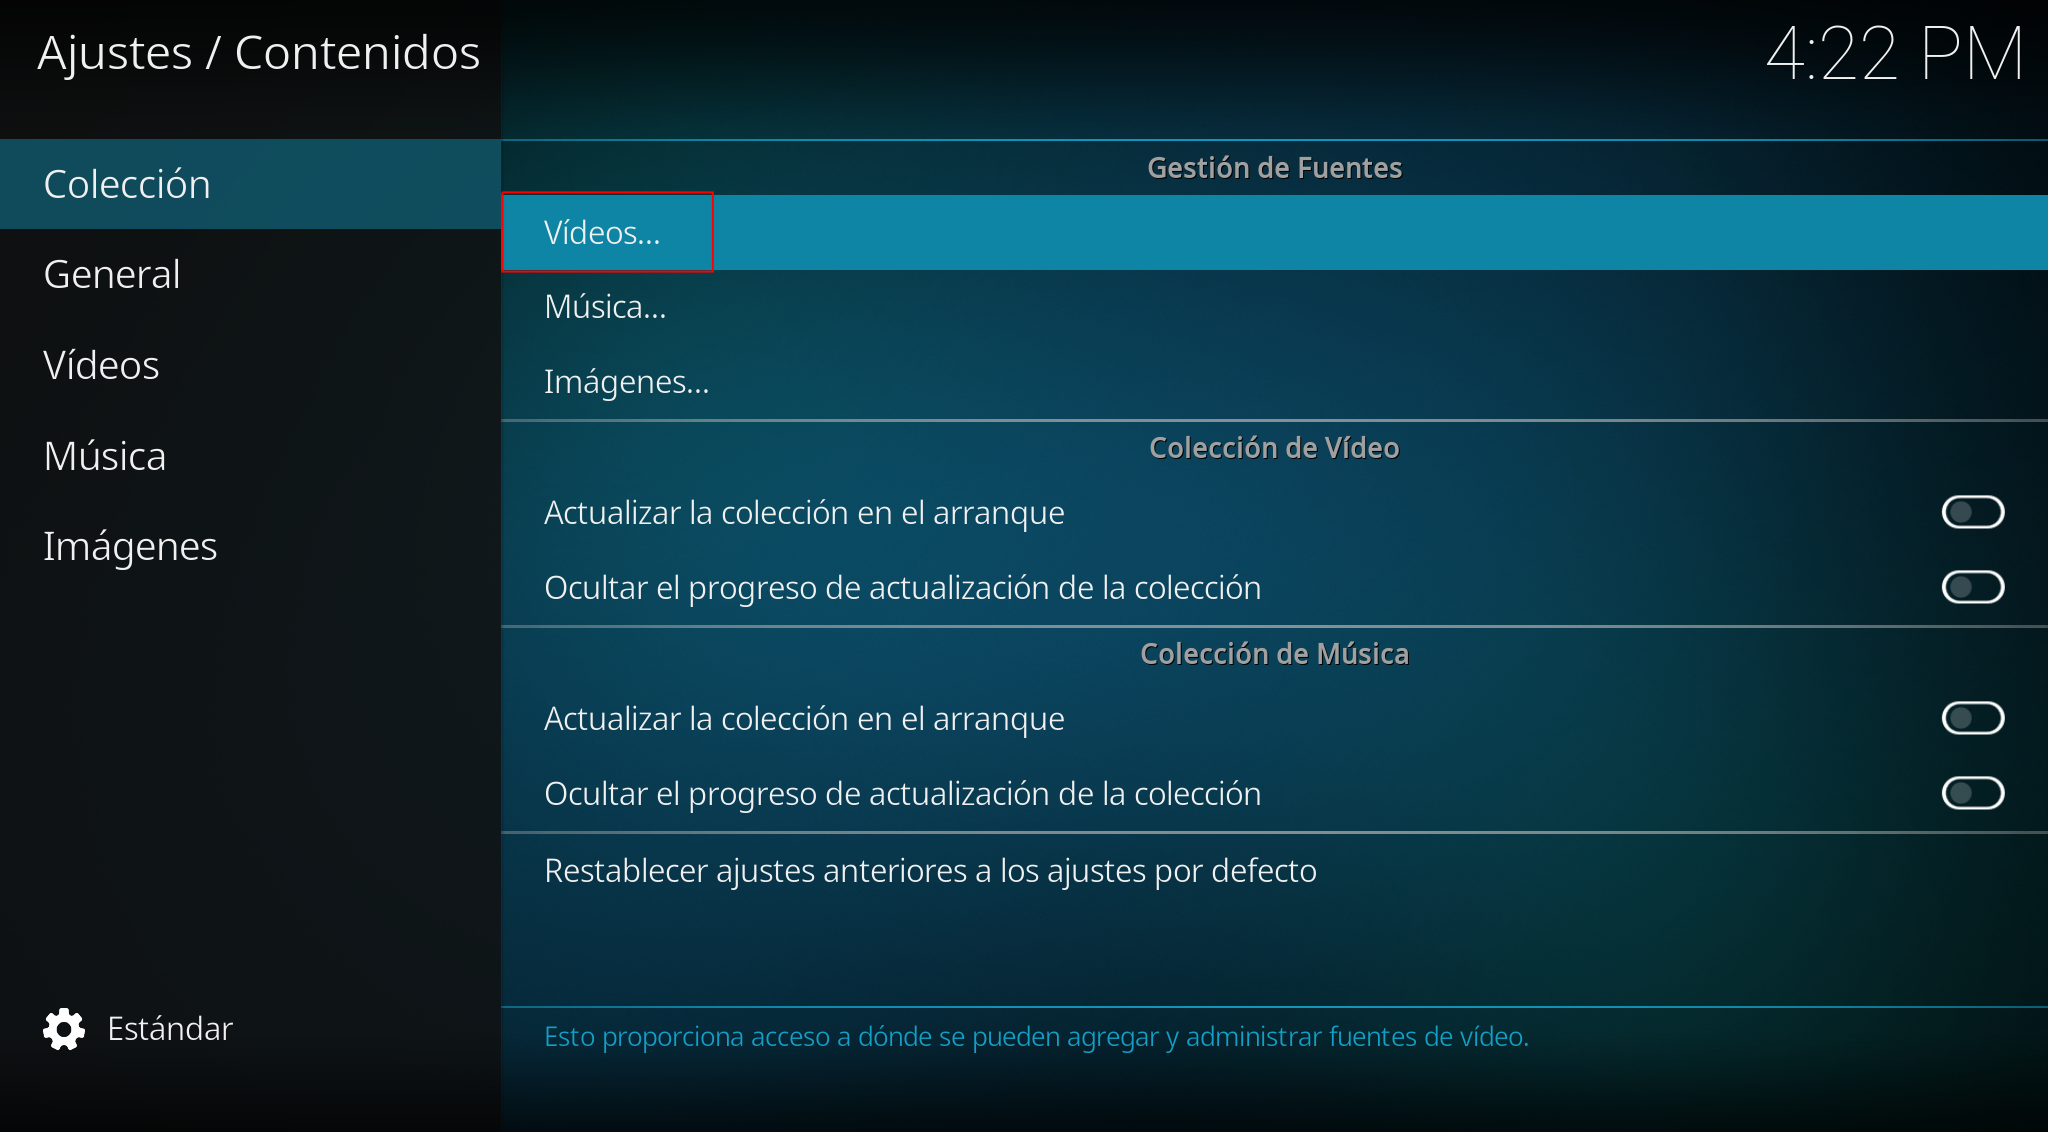
Contents:
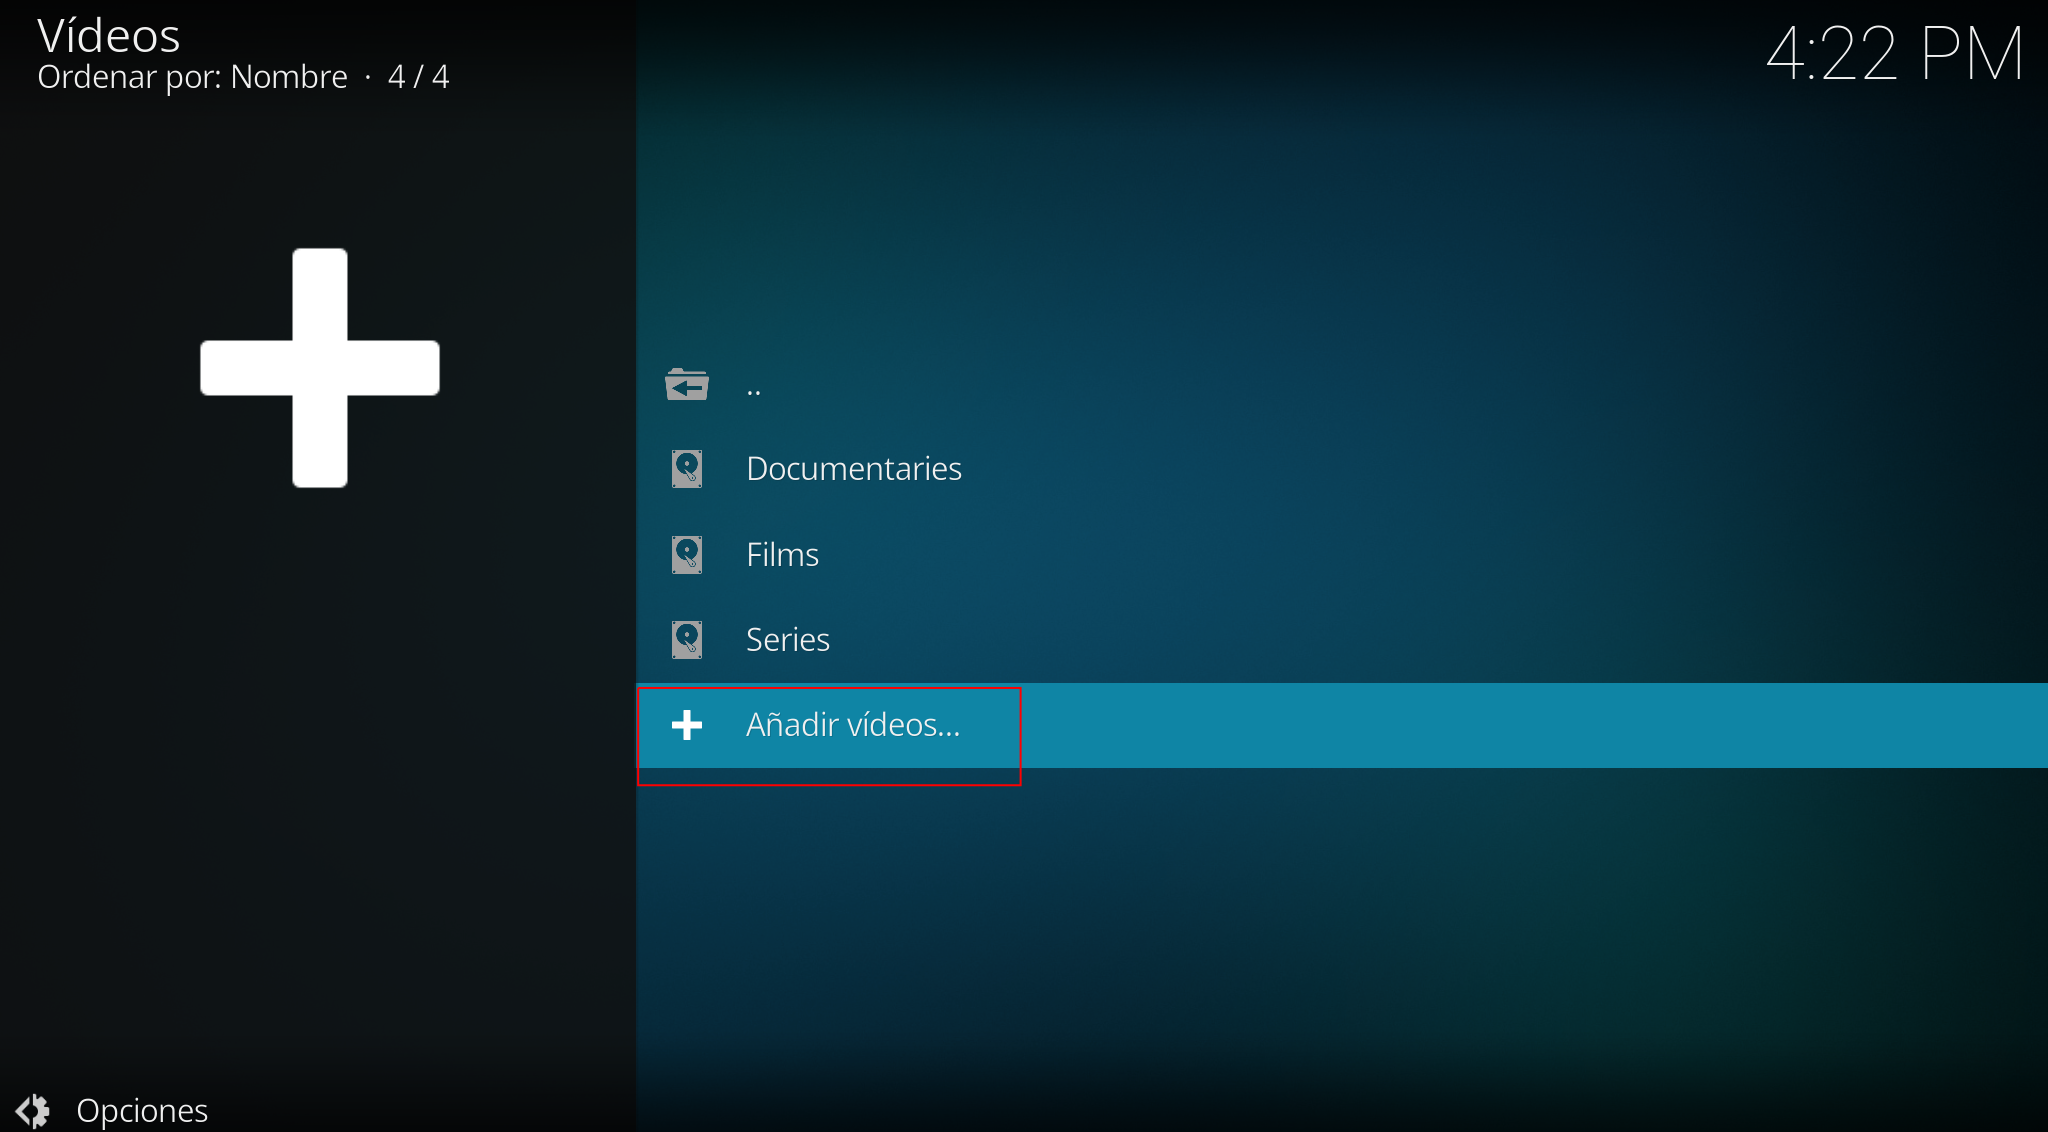
Videos:
Add videos:
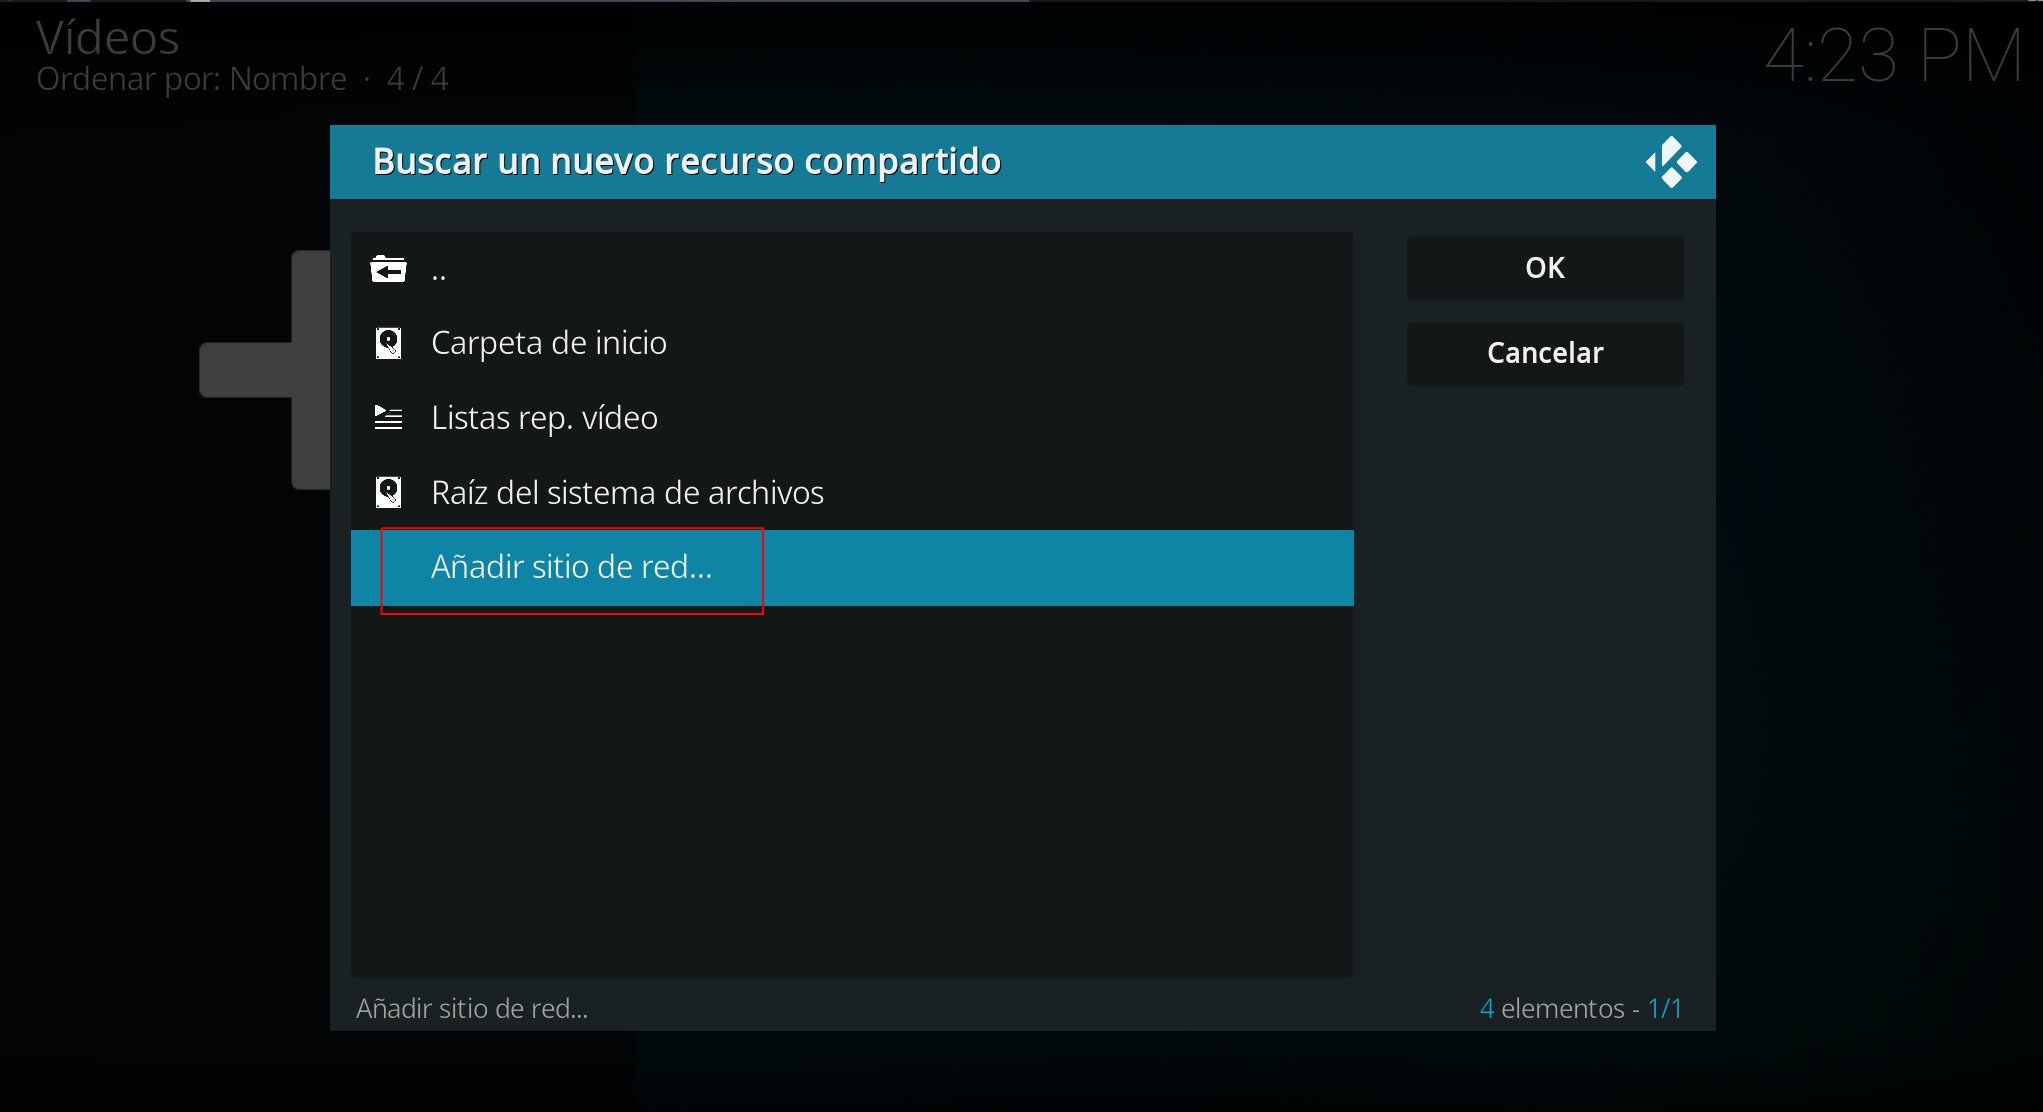
Search:

Add network site:
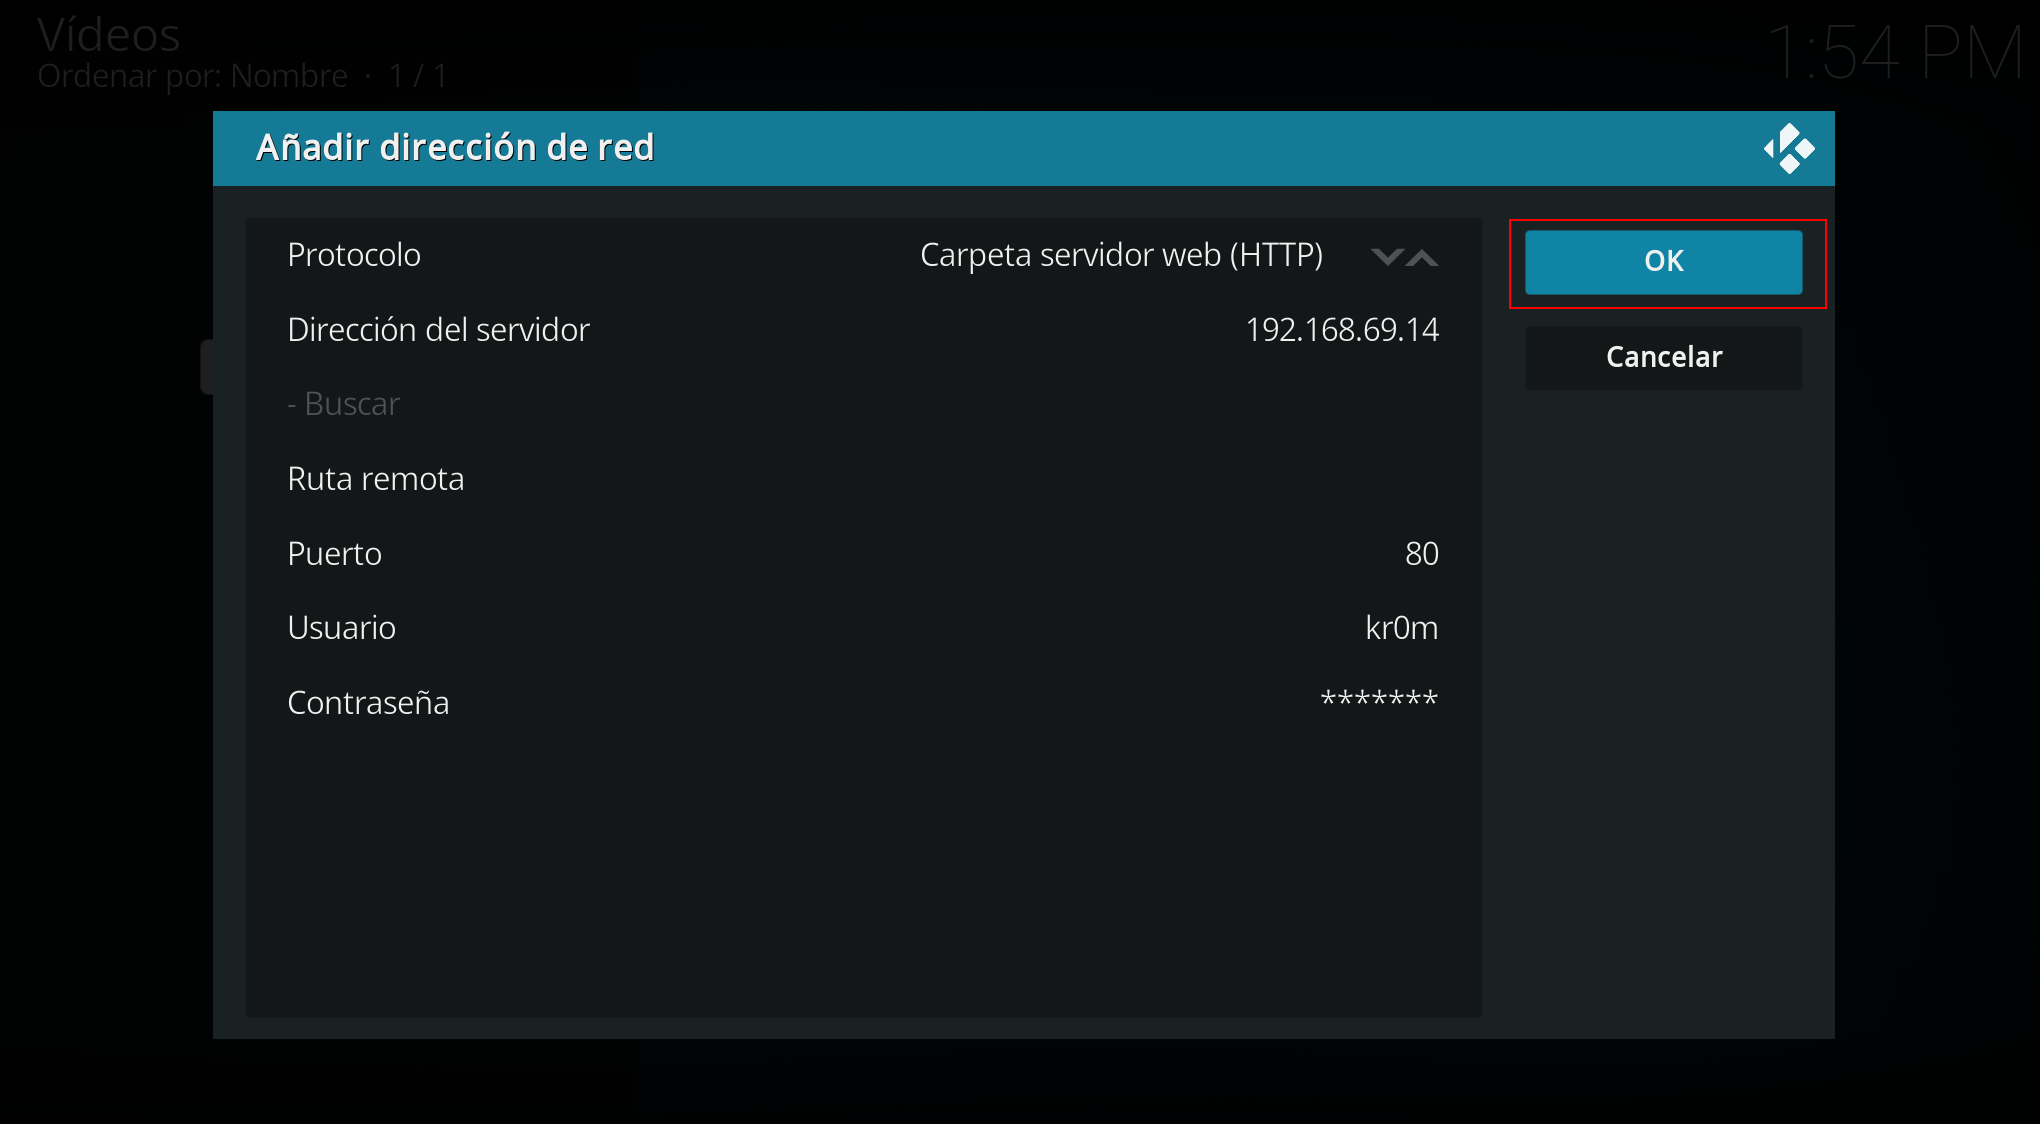
We add our HTTP or HTTPS server if we access from outside the LAN, if we access from inside we will put the gdrive.alfaexploit.com domain name, if we do it directly from the LAN we will put the Nginx server IP address, in all cases we must indicate the credentials defined in the htaccess:
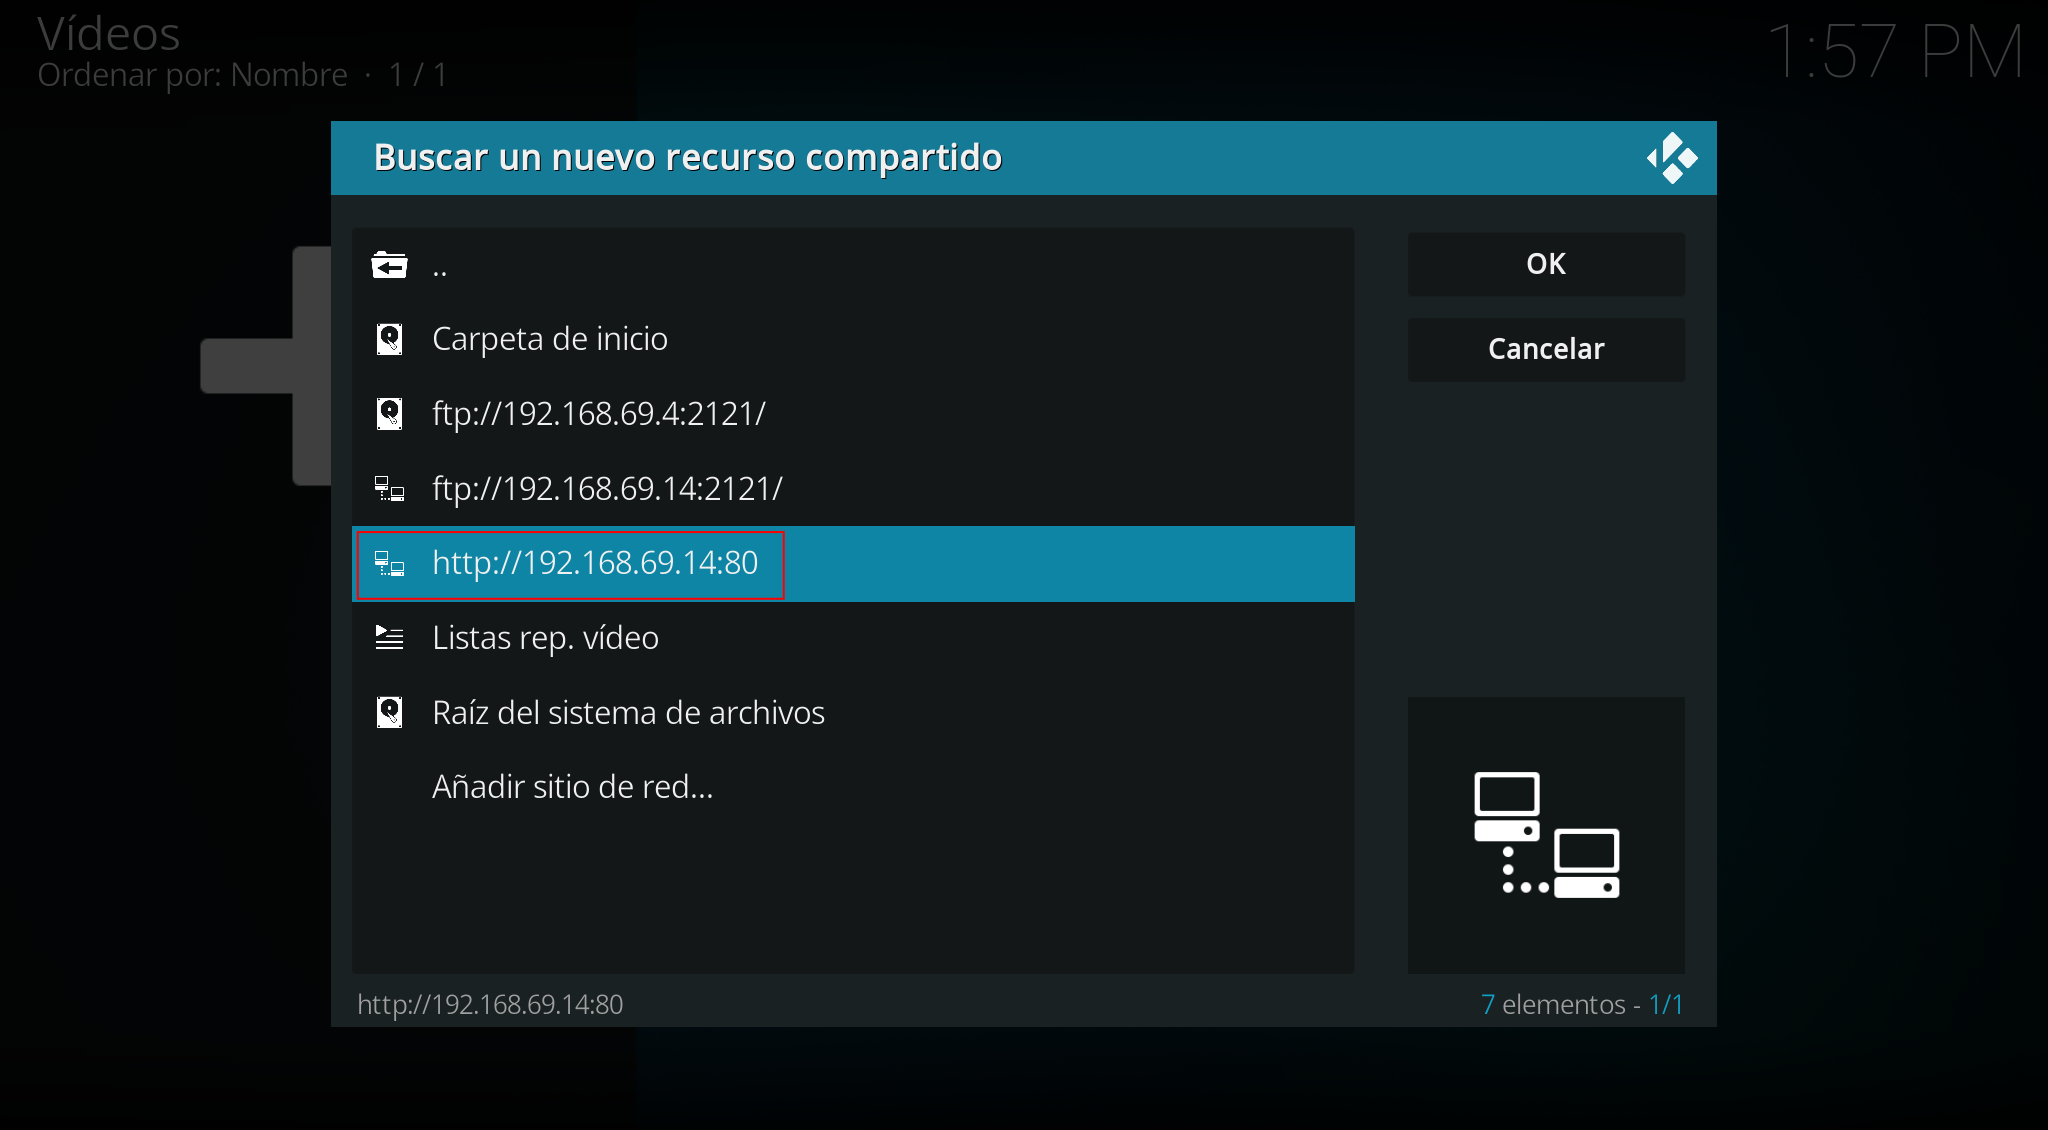
Now it will appear in the resource list:
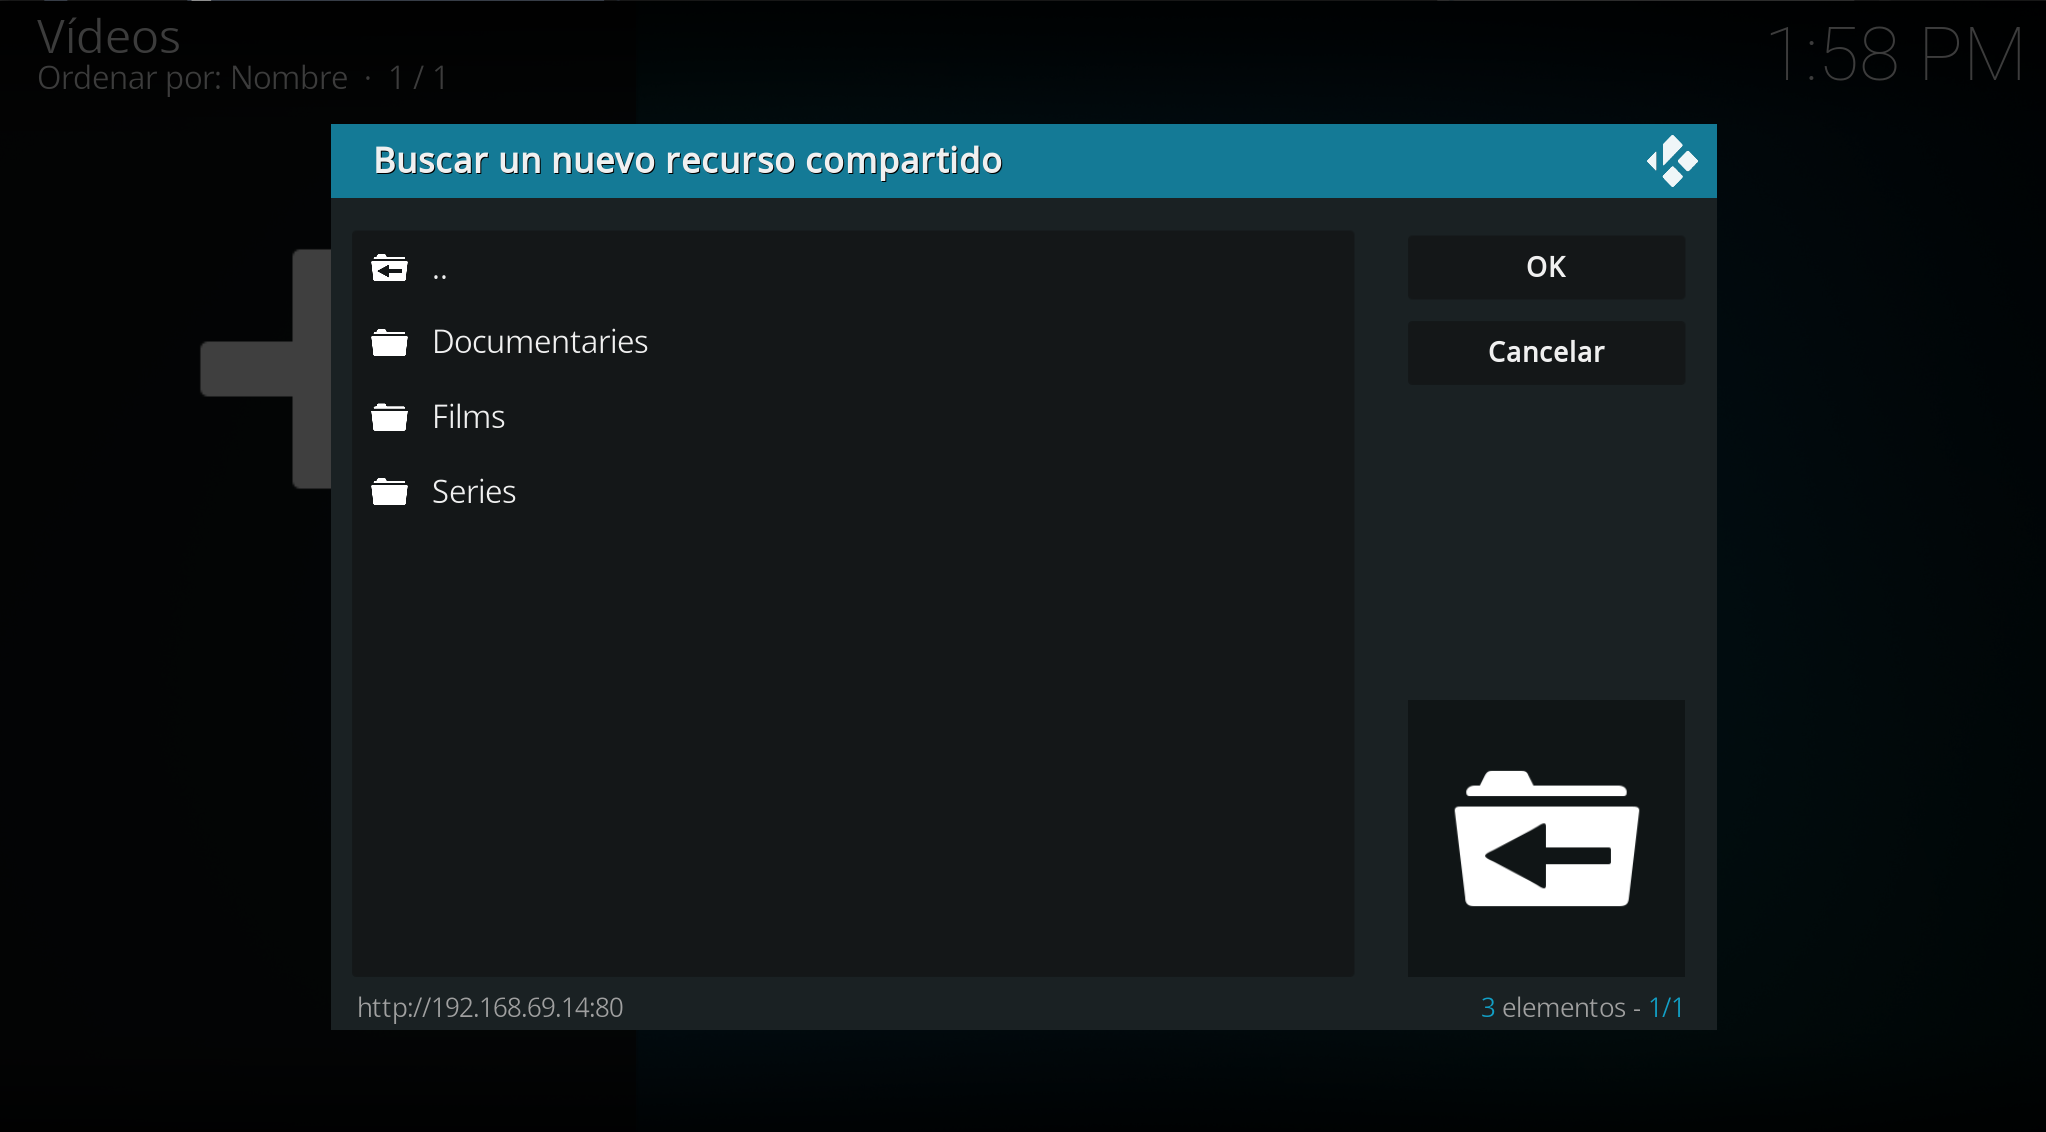
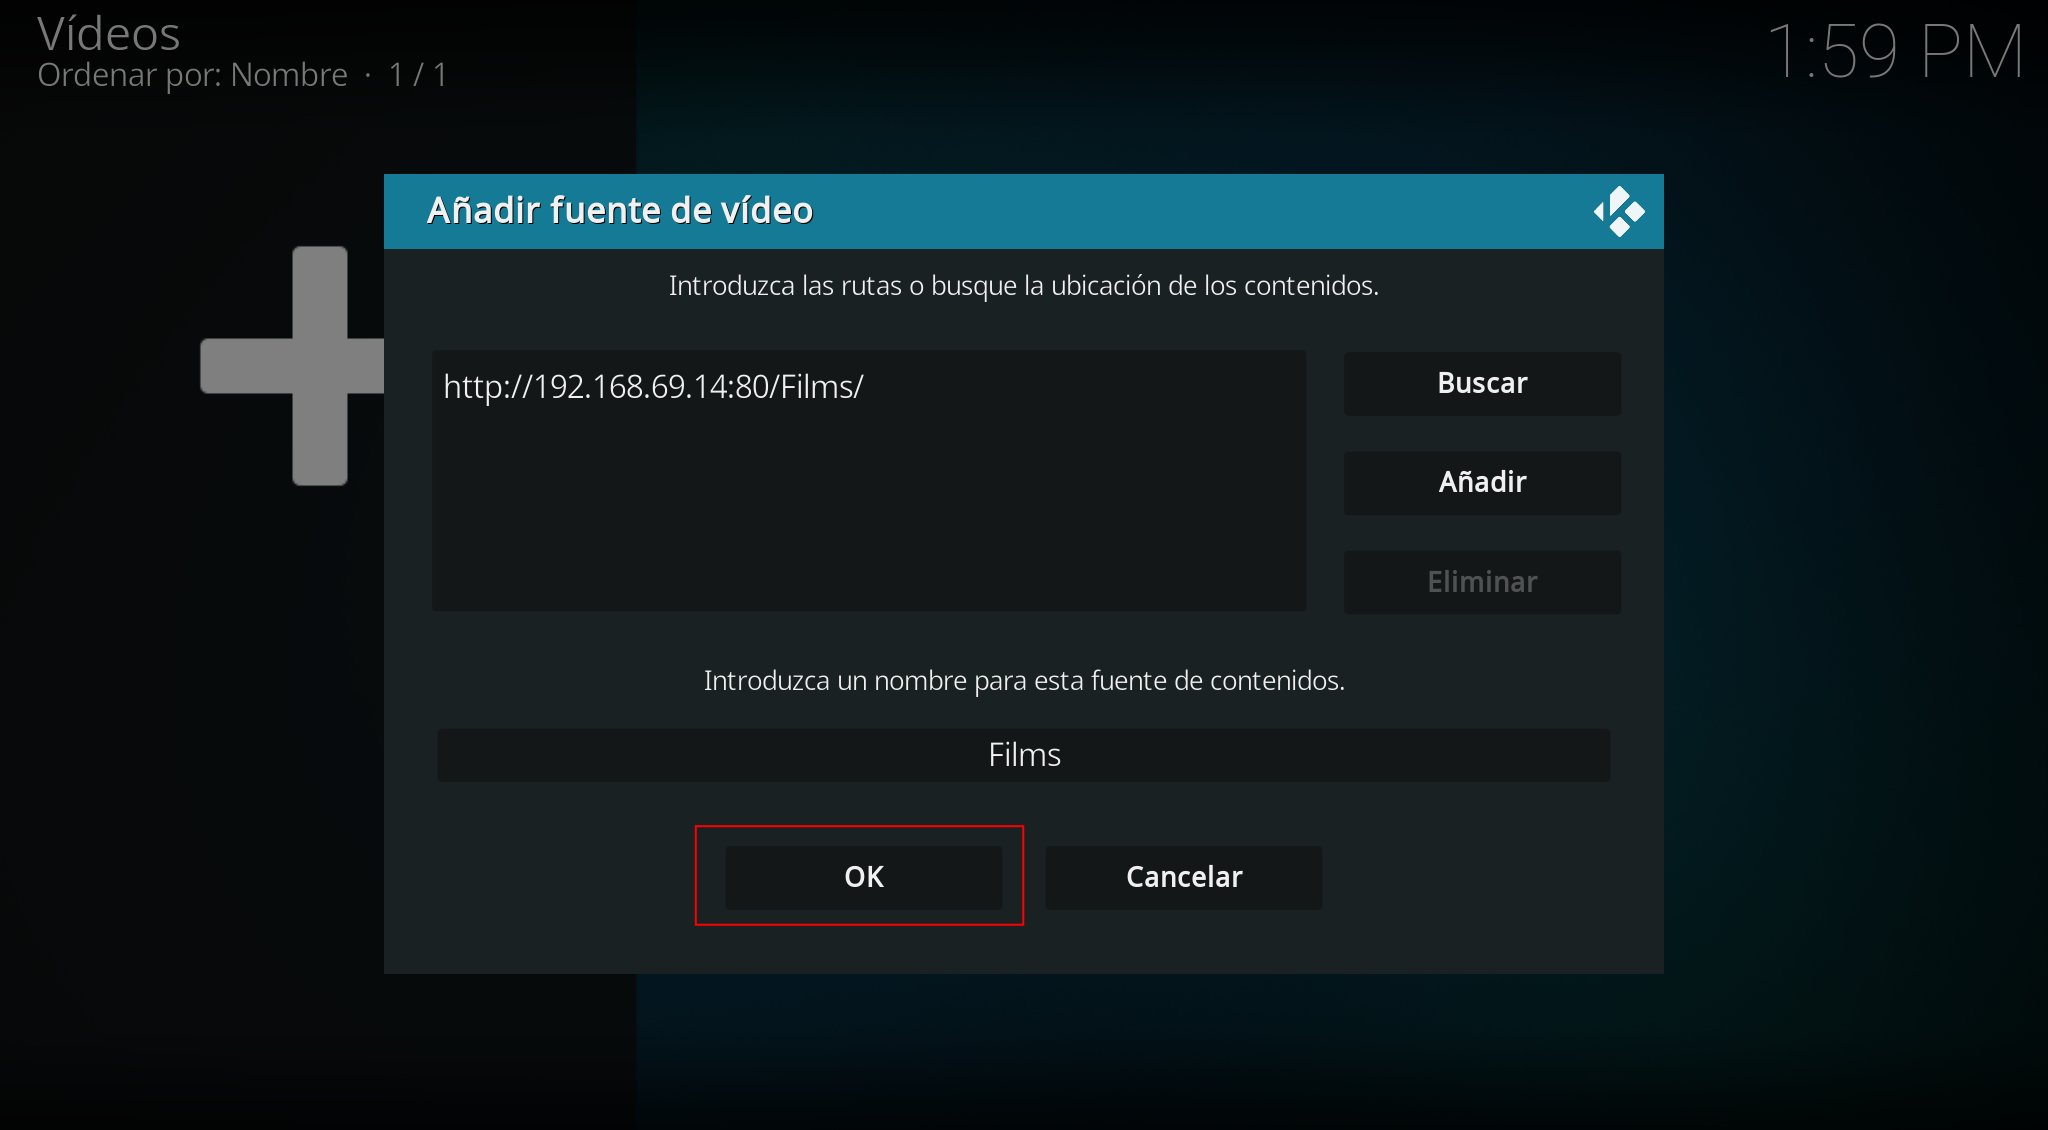
We browse the HTTP server and add the desired directory:
We click OK:
We configure how we want to “scrape” the directory and click OK:
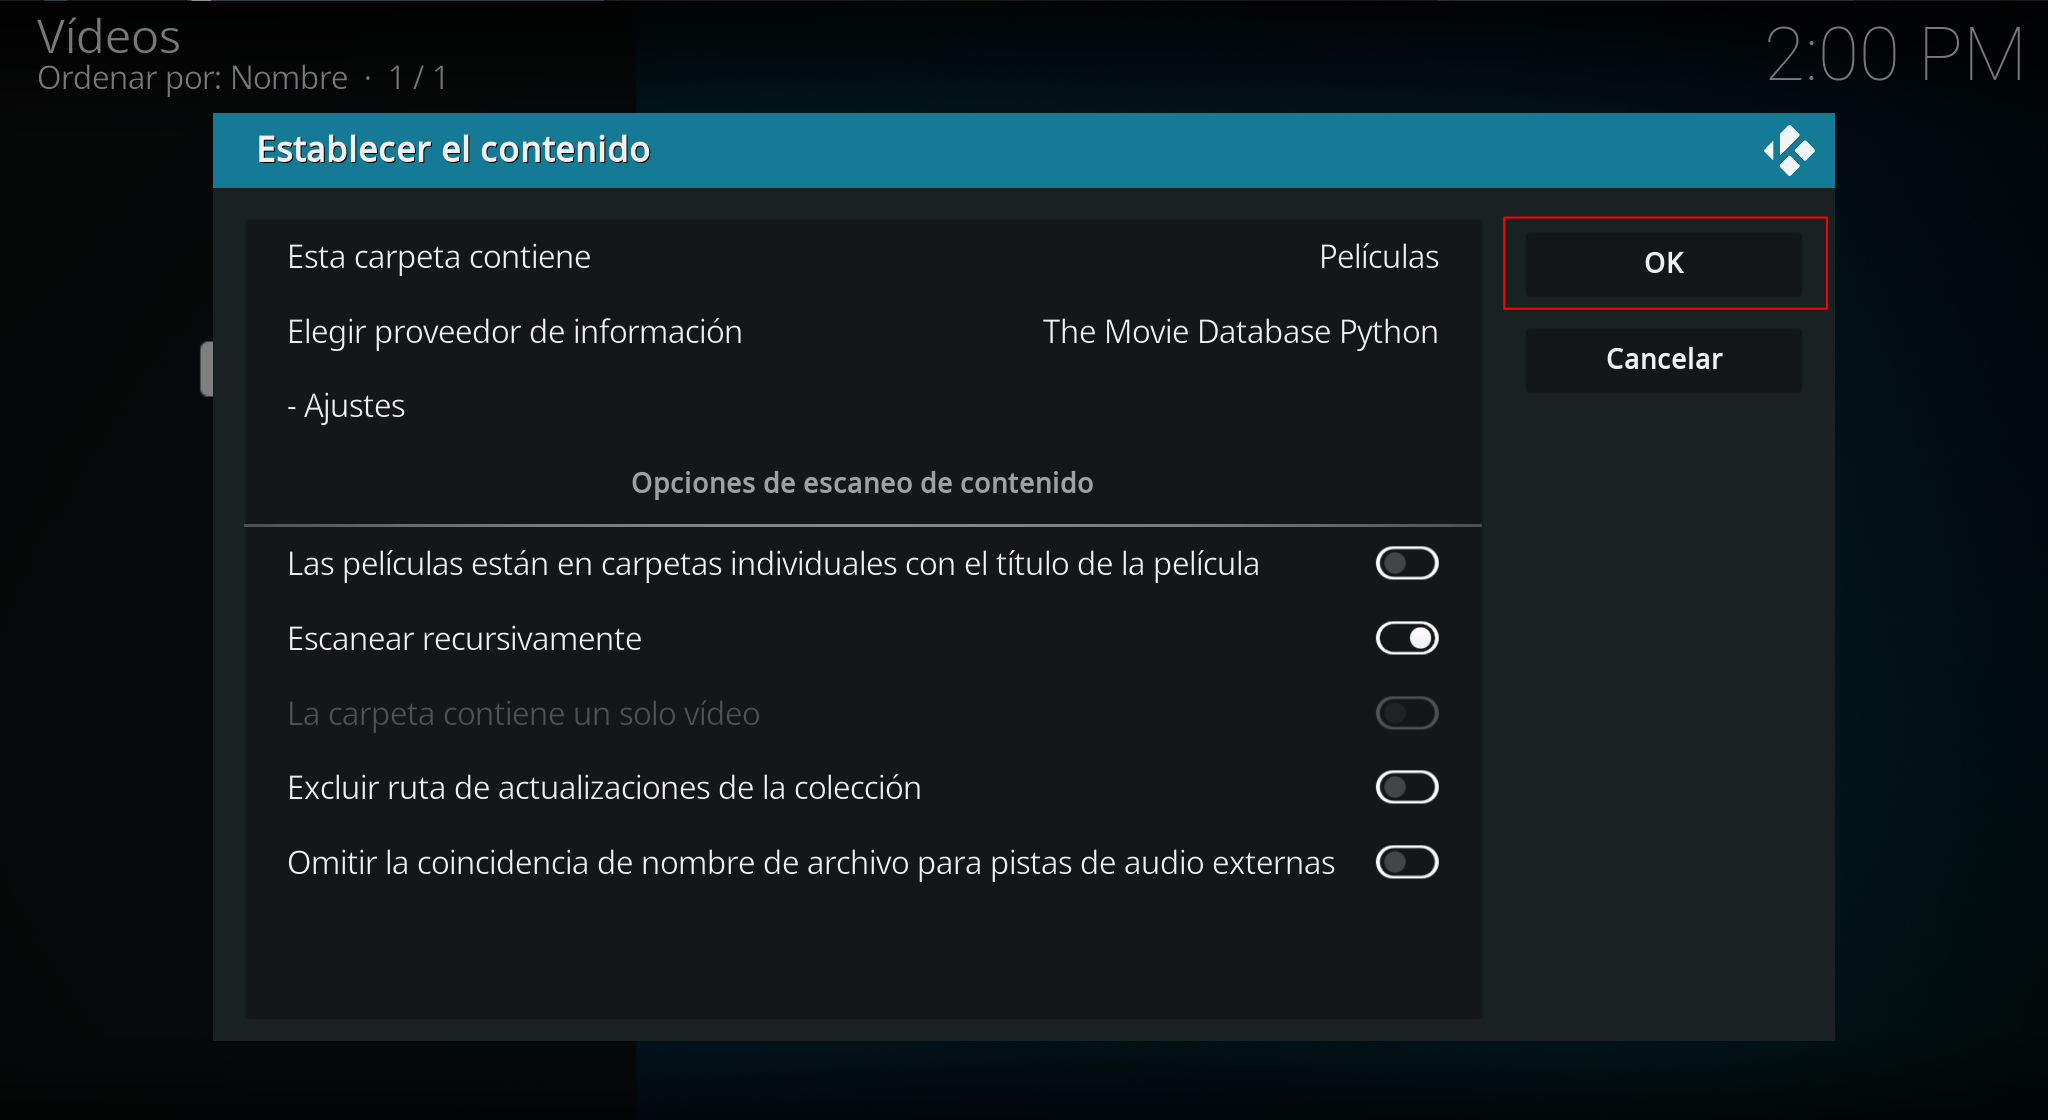
From here we can already see the movies in the corresponding section of KODI.
Expired Token:
Google generates tokens for unpublished apps in “Testing” mode:
- A Google Cloud Platform project with an OAuth consent screen configured for an external user type and a publishing status of "Testing" is issued a refresh token expiring in 7 days.
This causes the following error in PlexDrive every 7 days:
Response: {
  "error": "invalid_grant",
  "error_description": "Token has been expired or revoked."
}
Publishing the app would make this limitation disappear, but to publish an app many additional steps are required such as configuring DNS with specific Google entries and others.
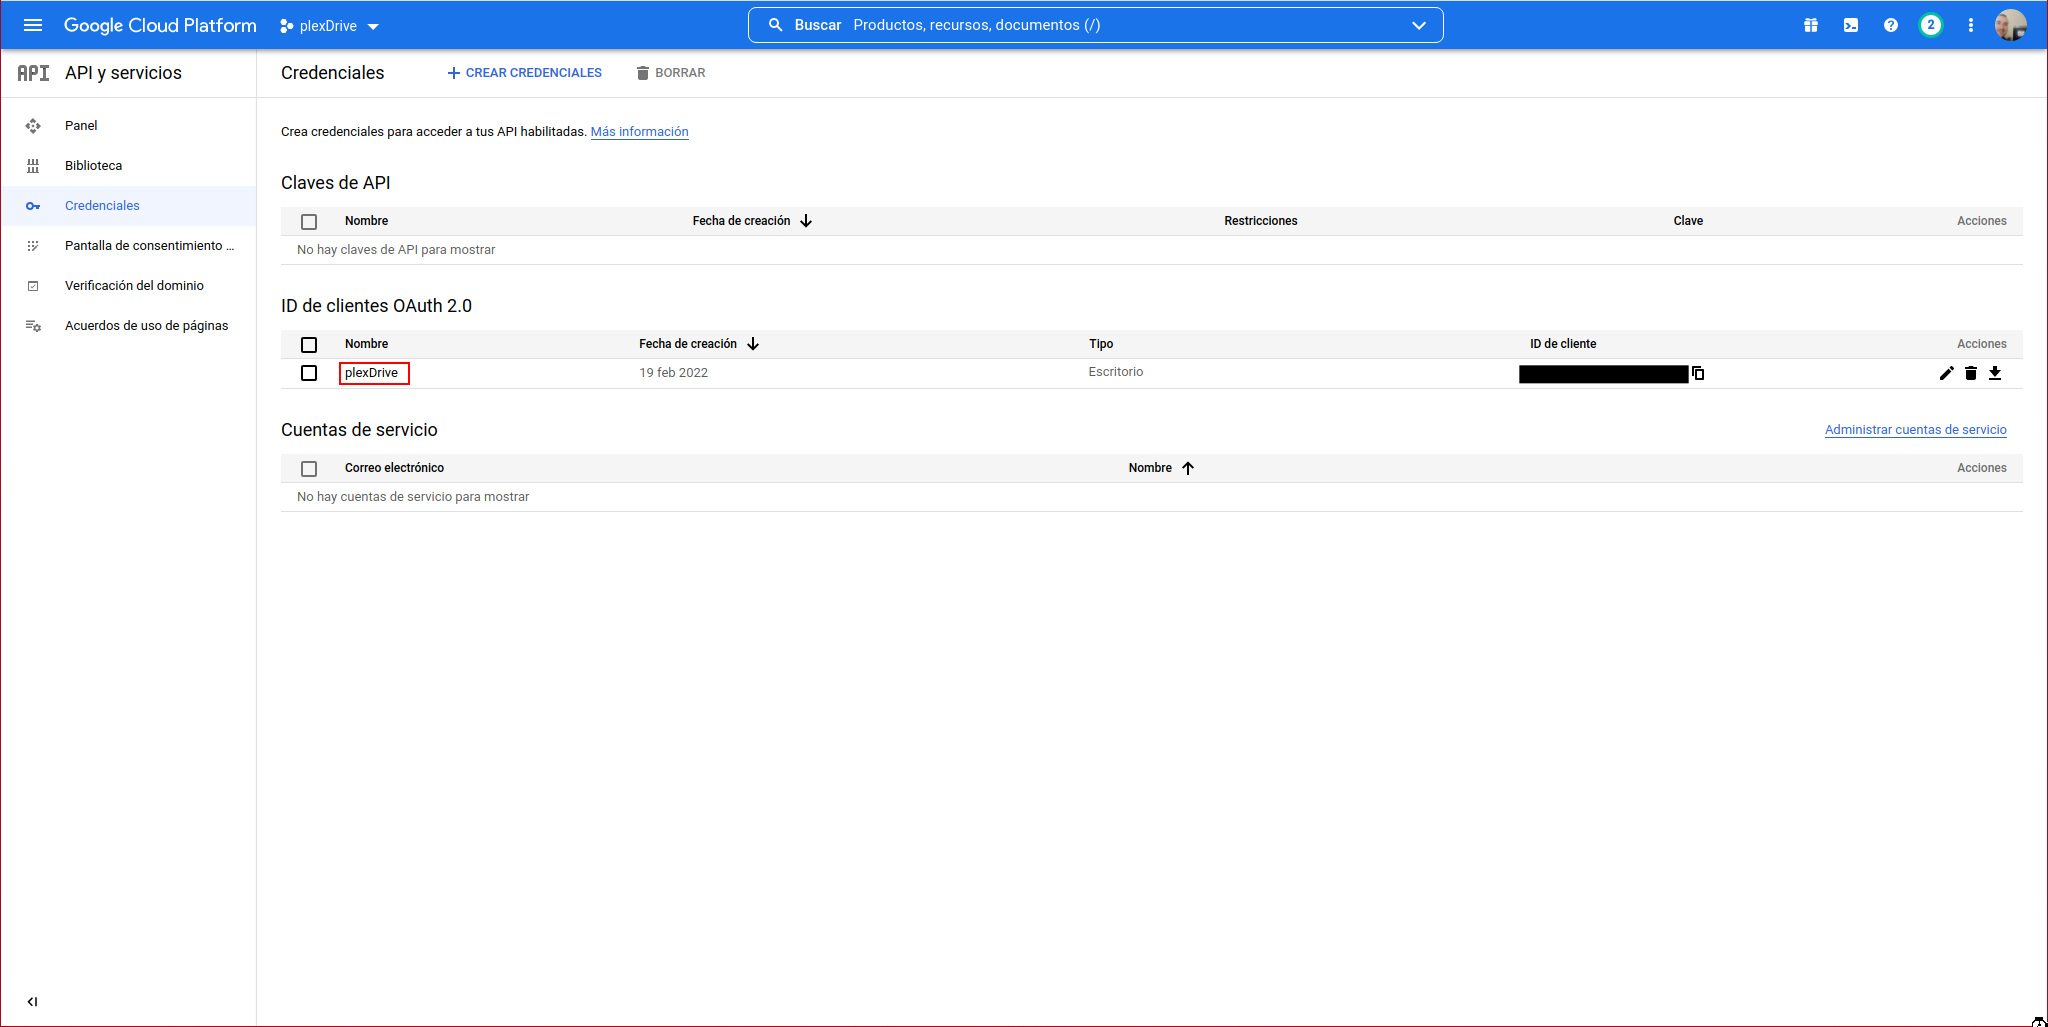
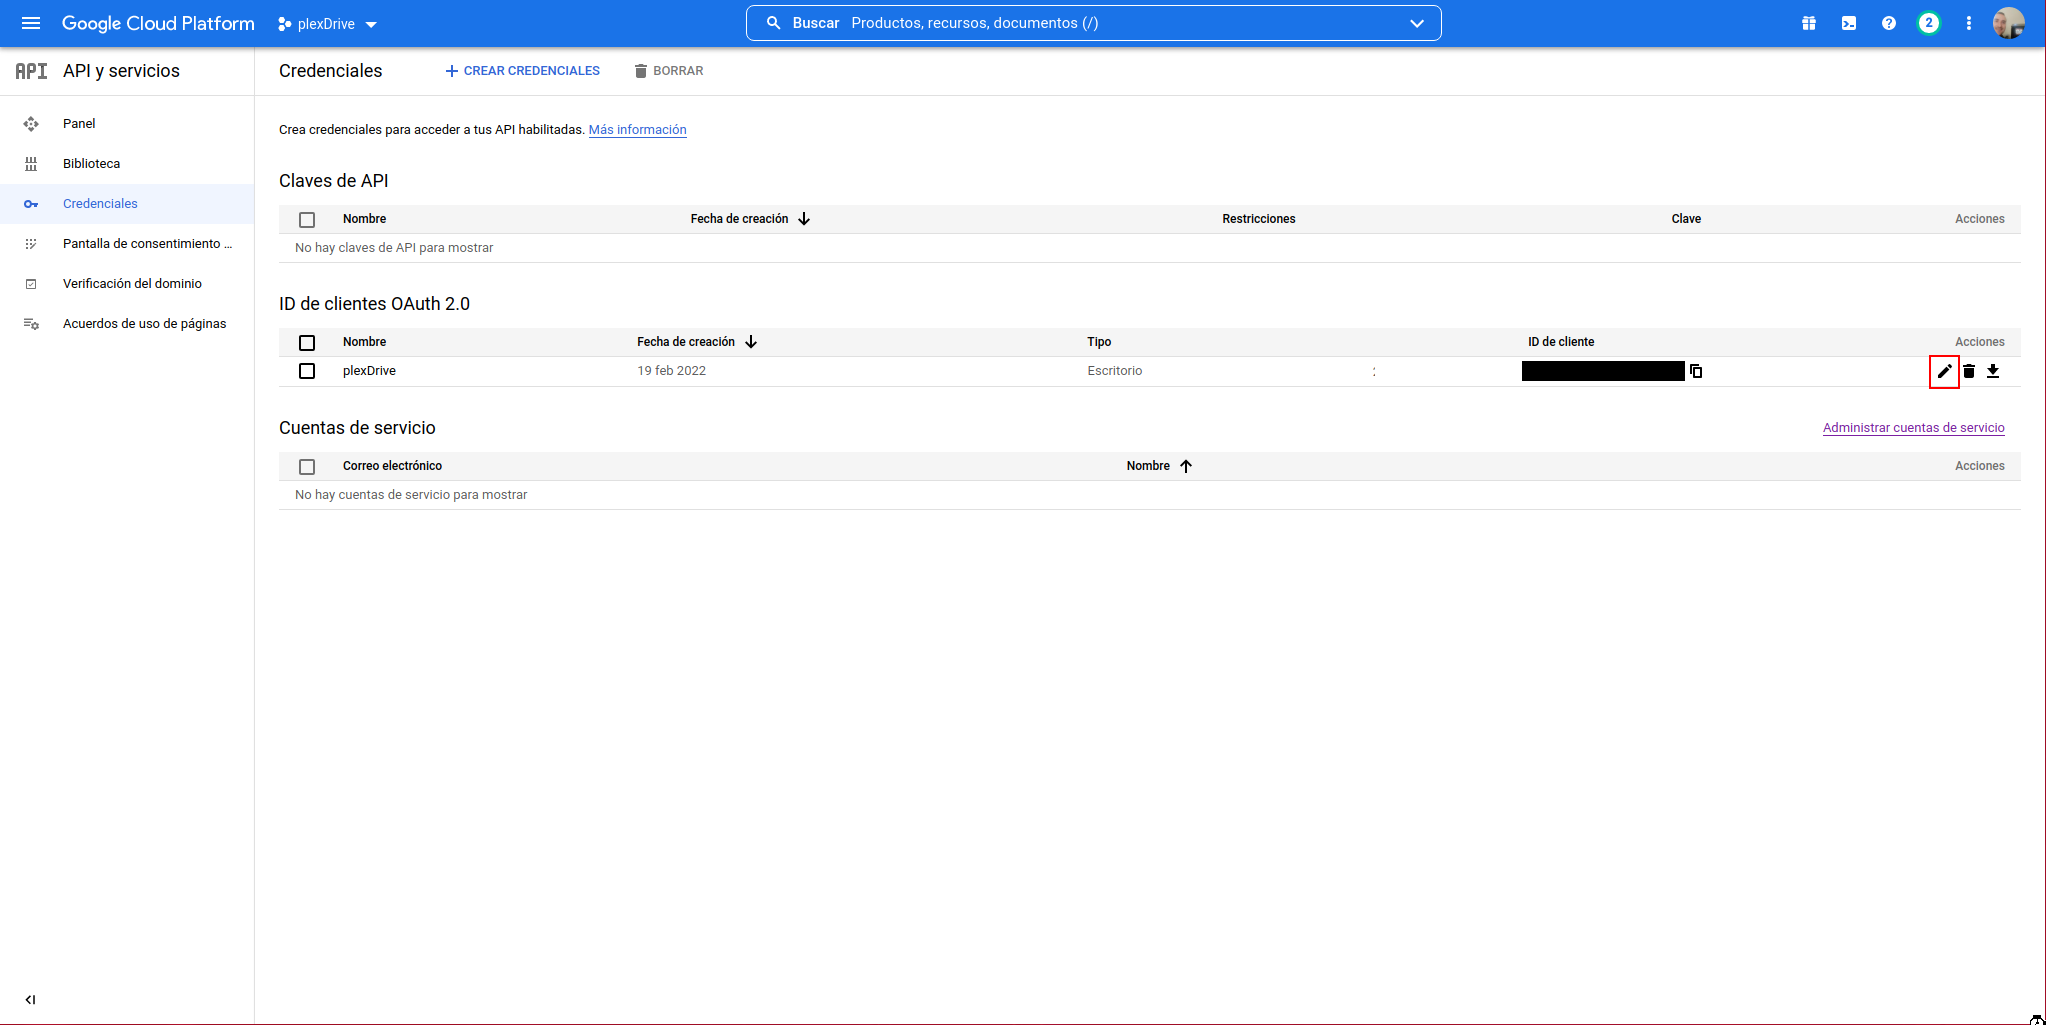
A simple but manual way to solve it is to enter every week and regenerate the user’s token, for this we access the credentials section of the project:
https://console.developers.google.com/apis/credentials
We edit the previously created client ID:
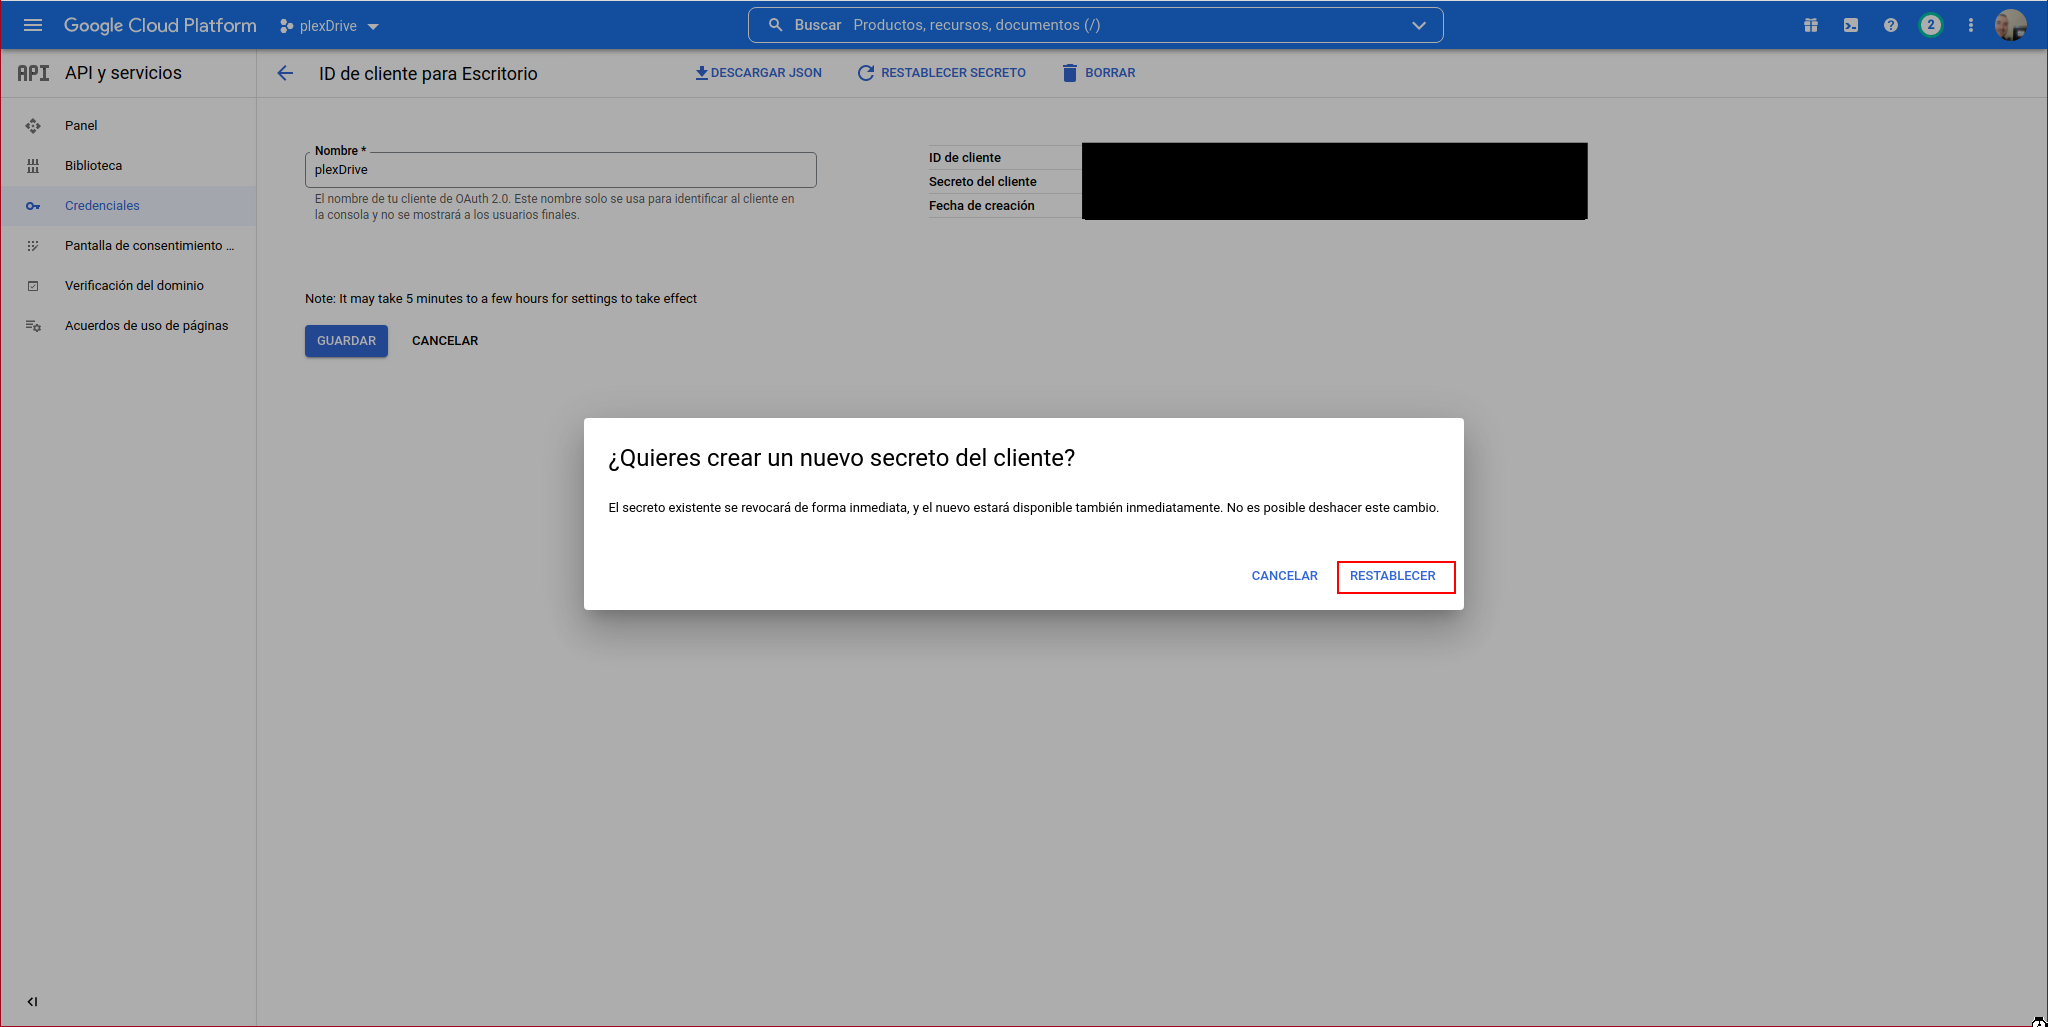
Click on “RESET SECRET”:
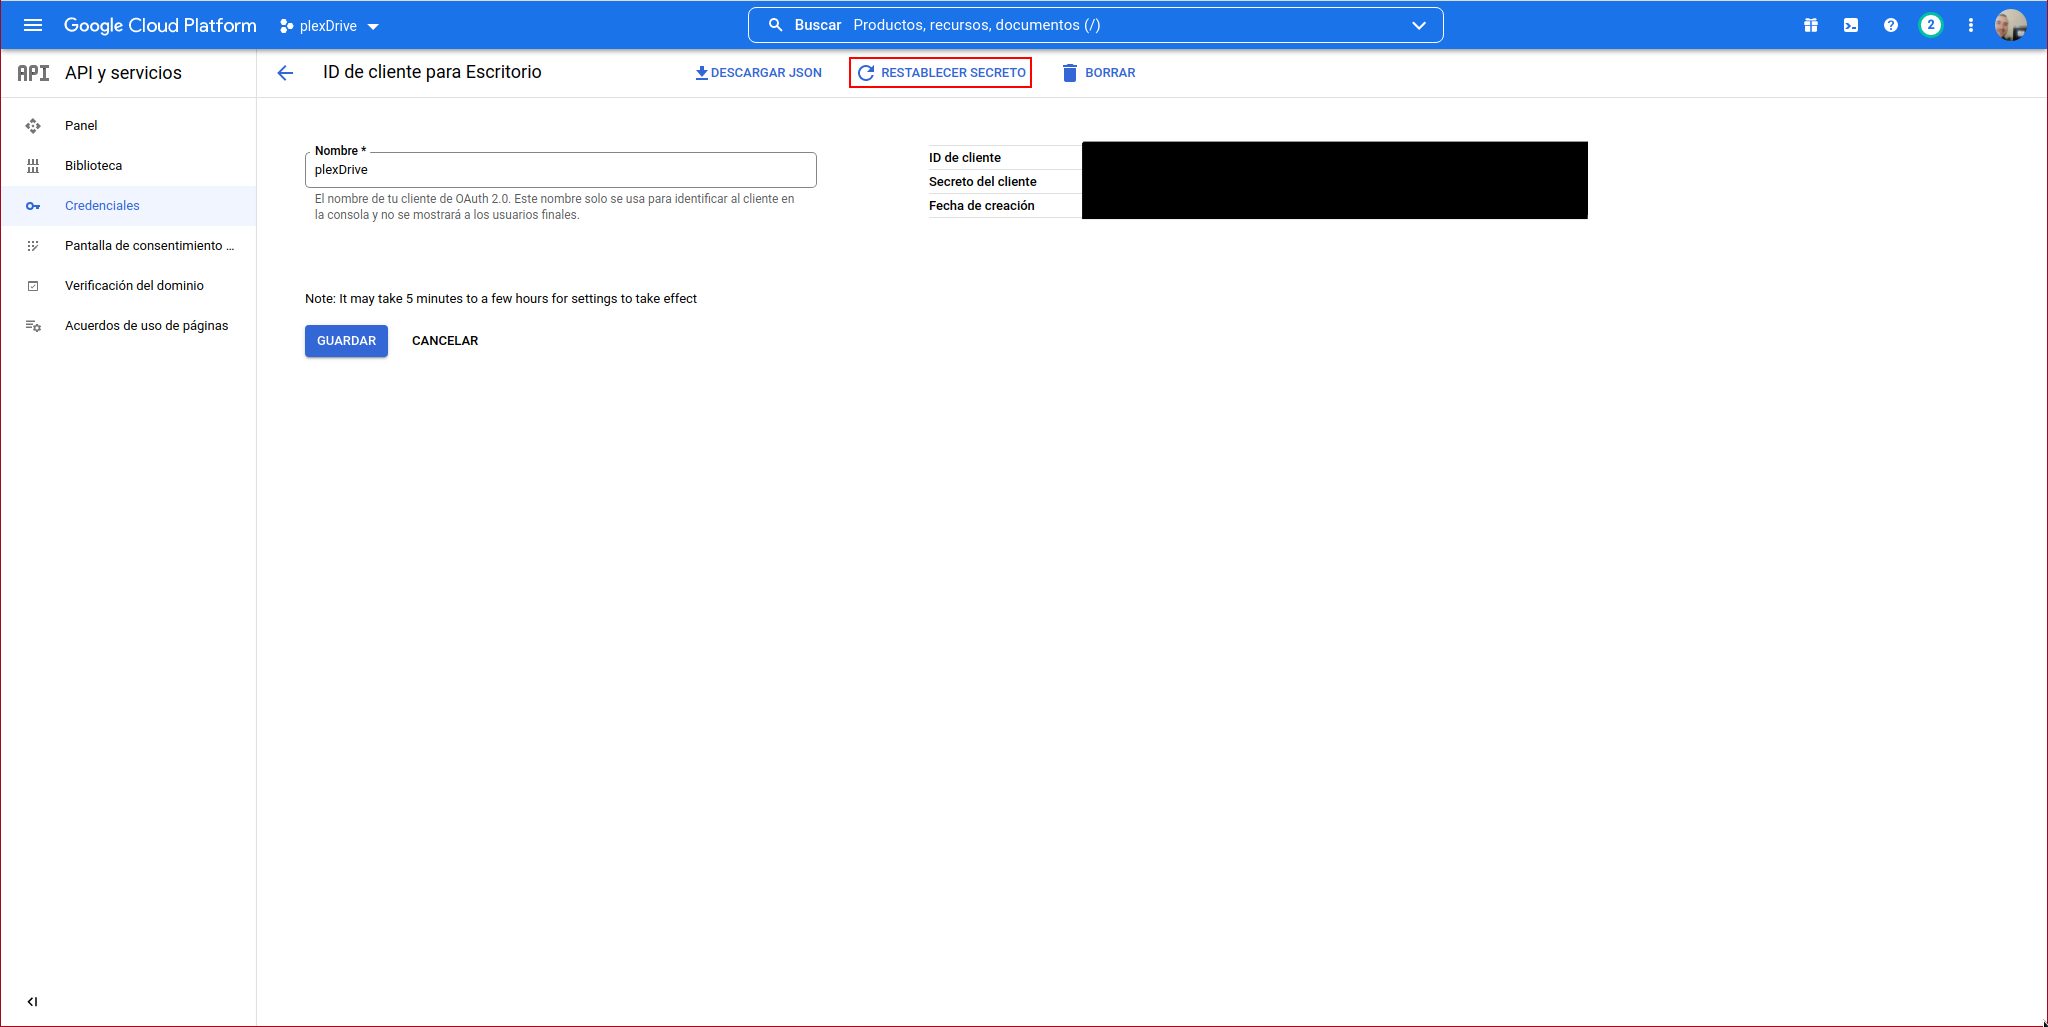
Confirm that you want to reset the secret:
Now we need to reset PlexDrive from scratch. In my case, I first stop the jail that serves the content:
Stop the service:
Delete the PlexDrive configuration:
Manually start PlexDrive where it will ask for access data again:
1. Please go to https://console.developers.google.com/
2. Create a new project
3. Go to library and activate the Google Drive API
4. Go to credentials and create an OAuth client ID
5. Set the application type to 'other'
6. Specify some name and click create
7. Enter your generated client ID: XXXXXXXXXXXXXXXXXXXXX
8. Enter your generated client secret: YYYYYYYYYYYYYYYYYYYY

Go to the following link in your browser https://accounts.google.com/o/oauth2/auth?access_type=offline&client_id=ZZZZZZZZZZZZ-270hoqea0pinv0nc3sbpfkuja68alask.apps.googleusercontent.com&redirect_uri=urn%3Aietf%3Awg%3Aoauth%3A2.0%3Aoob&response_type=code&scope=https%3A%2F%2Fwww.googleapis.com%2Fauth%2Fdrive&state=state-token
Paste the authorization code: 4/1AX4XfWgwVi61FfxtHN0WpBUh_b3UvGhXfWscjb_B-oNQyl4zVniUtdqbQQg
When it has connected correctly, stop it:
Start the service:
Finally, start the jail: