One of the most interesting features that Zabbix offers us is alert escalation. With this system, we will be able to execute actions sequentially. In my case, there are two schedules: working hours and non-working hours.
During working hours, the first notification will be to send a Telegram message to the sysadmins, followed by a phone call. On the other hand, if it is outside working hours, it will send a Telegram message, call the on-call sysadmin, and if the problem is not resolved or an ACK is not received after the third call, it will call all sysadmins.
Let’s start by compiling the Zabbix client on our test client:
net-analyzer/zabbix agent curl -frontend ipv6 -java ldap libxml2 mysql odbc openipmi -oracle postgres -proxy -server snmp sqlite ssh ssl -static xmpp
Next, we perform the basic configuration:
PidFile=/run/zabbix/zabbix_agentd.pid
LogFile=/var/log/zabbix/zabbix_agentd.log
LogFileSize=128
Server=ZBXSERVER
ServerActive=ZBXSERVER
Hostname=Zabbix server
Start the service and add it to the default runlevel:
rc-update add zabbix-agentd default
We can check if it starts successfully by reviewing the logs:
Now we proceed with the server, we will use Docker as it is a quick way to have it up and running without complications.
We create the Docker container, changing the port to 8080 since in my case port 80 is being used by another container:
Access the web interface and change the default password for the Admin user:
http://ZBXSERVER:8080
Admin
zabbix
Navigate through the interface menus to:
Administration -> Users
Admin -> Password -> Change password
To send notifications via Telegram, we will use the ableev scripts:
https://github.com/ableev/Zabbix-in-Telegram/
Create the necessary bot to send Telegrams:
https://core.telegram.org/bots#creating-a-new-bot
Search for BotFather on Telegram and create the bot:
/newbot
In botfather, you will see:
Done! Congratulations on your new bot. You will find it at t.me/zbx4bot.
Use this token to access the HTTP API:
XXXXXXXXX:YYYYYYYYYYYYYYYYY
Start a conversation with the bot:
/start
If we want to use a group, create it, add the bot, and inside it:
/start@BOTNAME
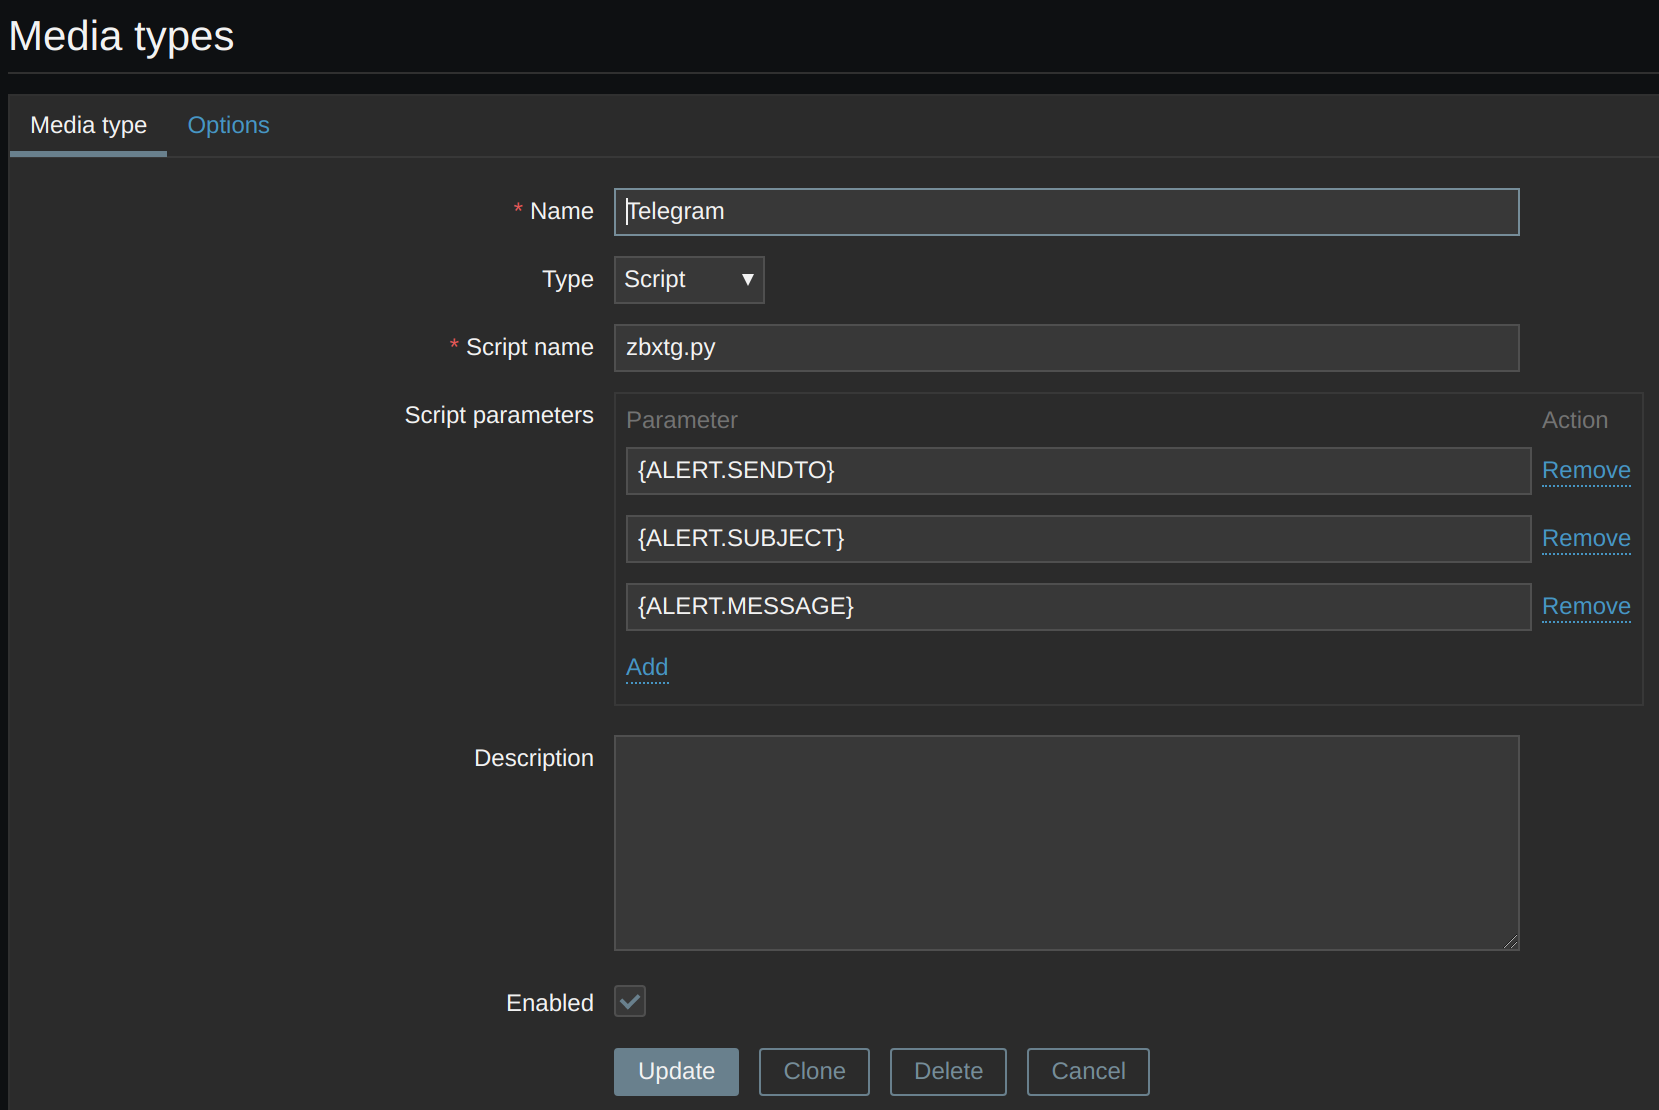
Add a media type.
Administration -> Media types

Create Media type
Name: Telegram
Type: Script
Script name: zbxtg.py
Script parameters
{ALERT.SENDTO}
{ALERT.SUBJECT}
{ALERT.MESSAGE}
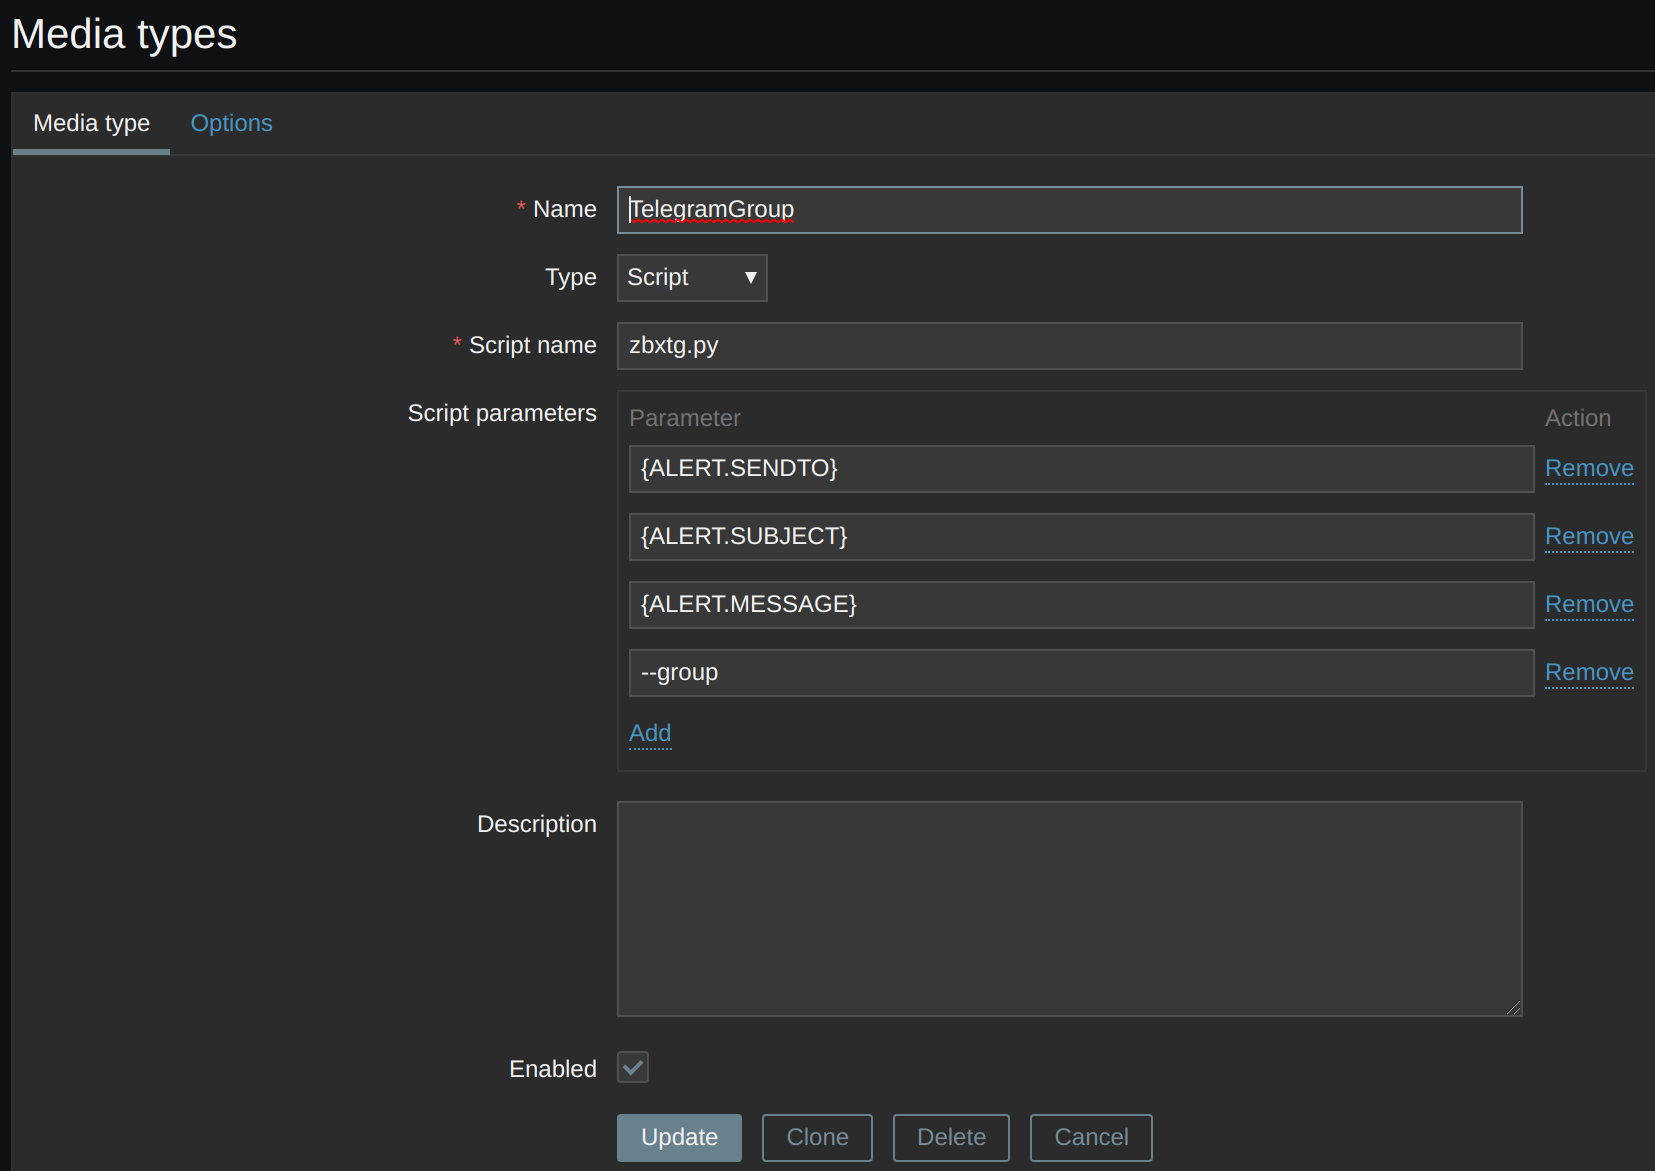
And another one for sending notifications to groups:
Create Media type
Name: TelegramGroup
Type: Script
Script name: zbxtg.py
Script parameters
{ALERT.SENDTO}
{ALERT.SUBJECT}
{ALERT.MESSAGE}
--group
Add the media type for phone calls.
Create Media type
Name: Phonecall
Type: Script
Script name: phonecall.sh

Find out the path where Zabbix will look for alarm notification scripts:
AlertScriptsPath=/usr/lib/zabbix/alertscripts
Create the call script:
#! /bin/bash
curl -X POST http://PBXSERVER:PORT/alertSysAdminsFromZabbix --data "$1"
chmod 700 /usr/lib/zabbix/alertscripts/*
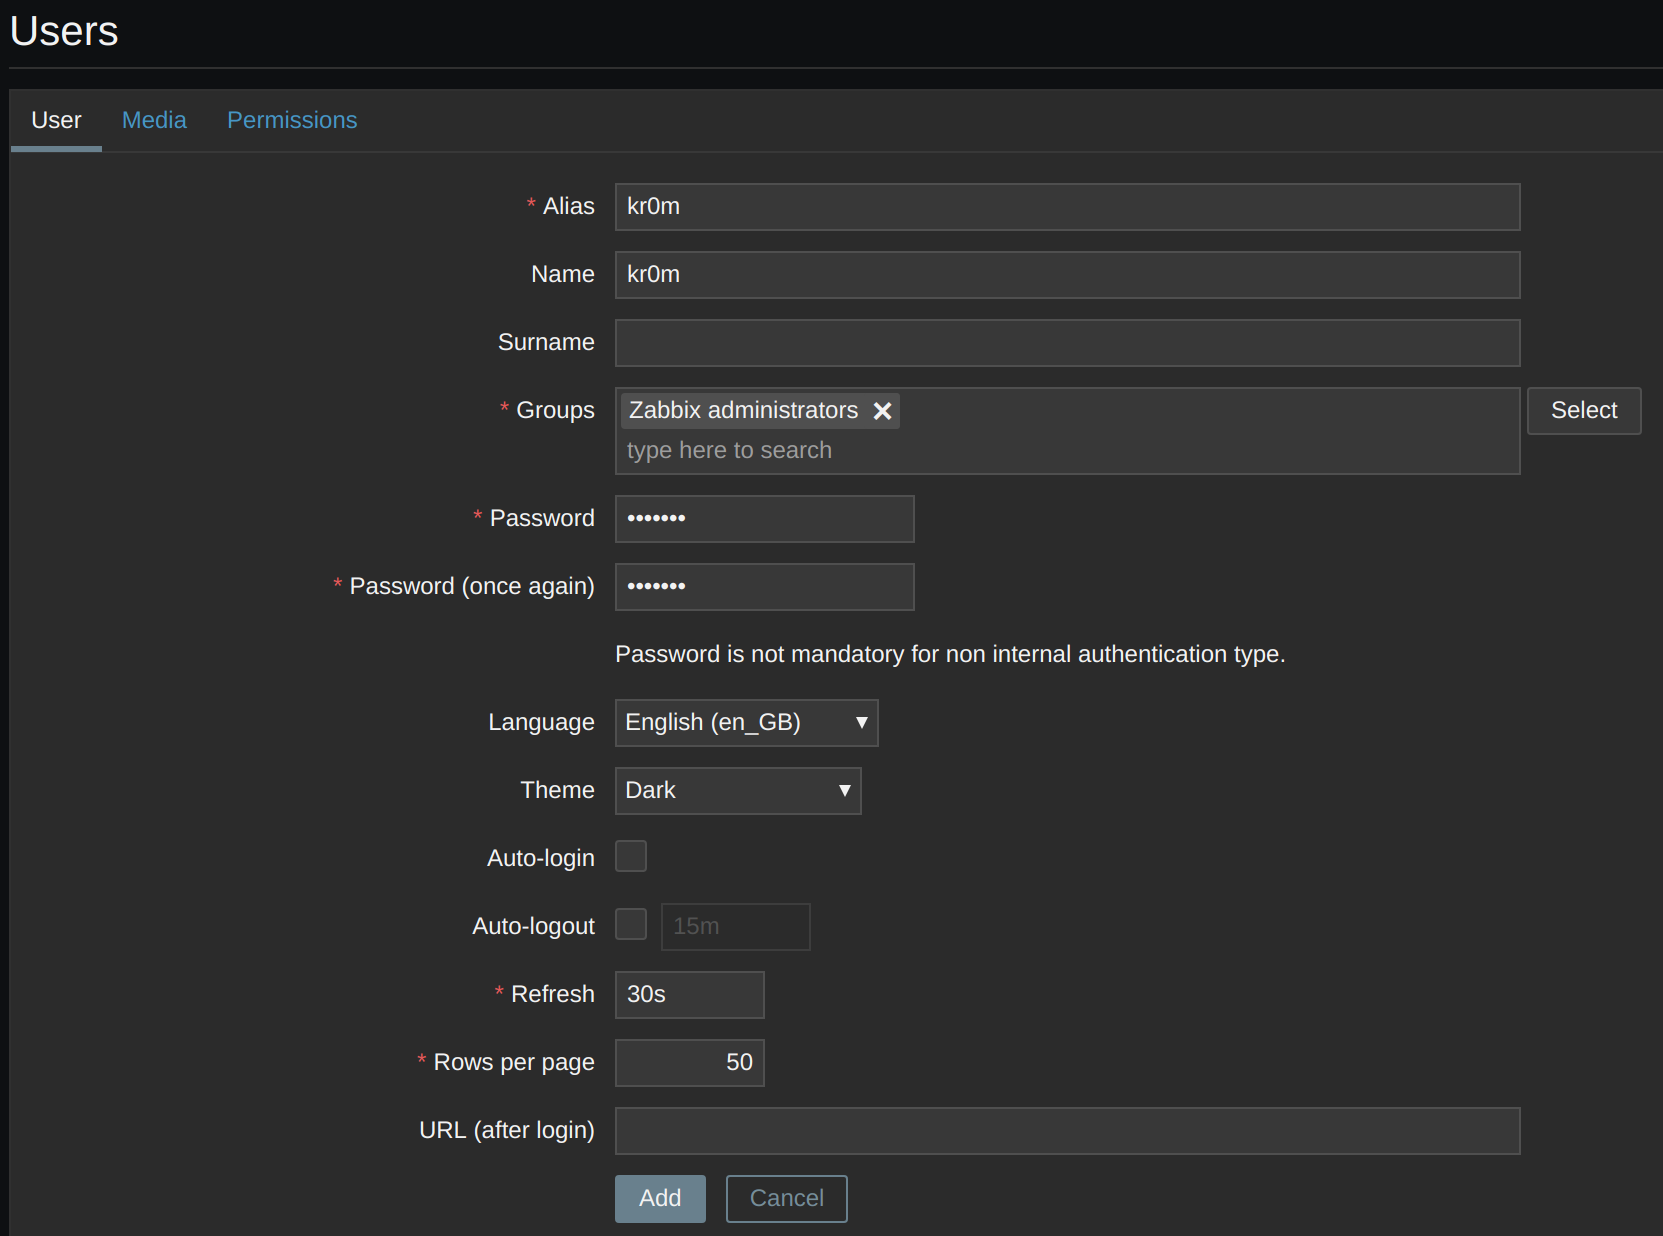
We create a user for each sysadmin with the media types we have defined:
Administration -> Users

Create user
Alias: kr0m
Name: kr0m
Groups: Zabbix administrators
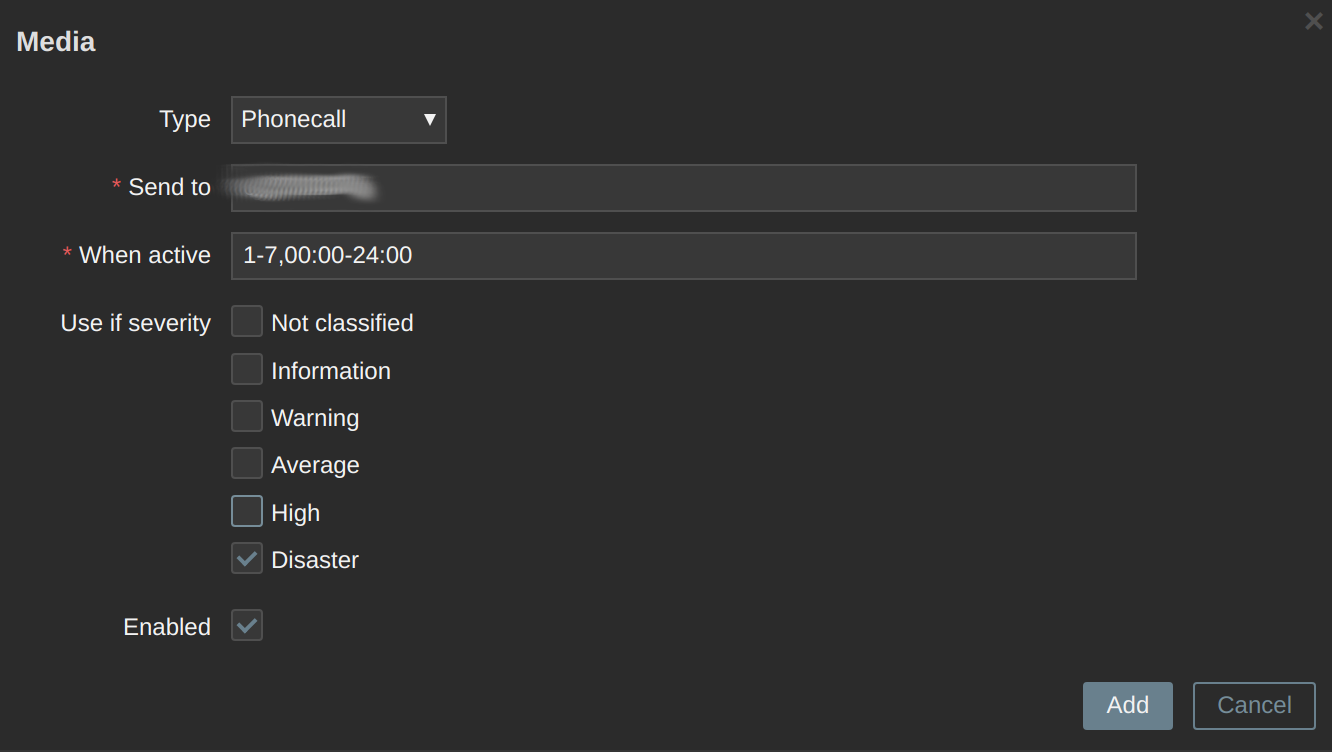
In Media, we define the phone number of that sysadmin:
Send to: PHONE
We also define the Telegram username of that sysadmin:
Send to: @USERNAME
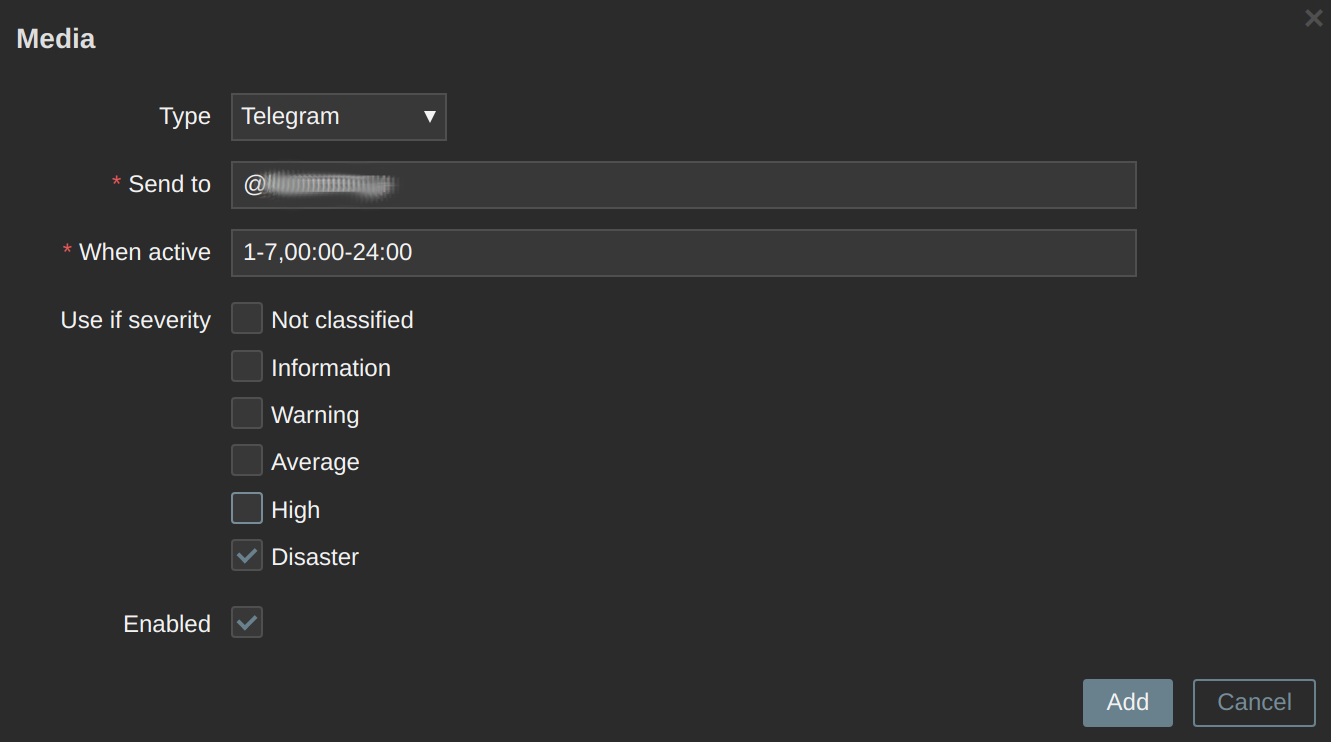
The media for this sysadmin will be as follows:

The users must be of type Zabbix Super Admin:

NOTE: We must define a media type for the Admin user even if we are not going to use it for anything; otherwise, we will get the following error when trying to notify alerts:
No media defined for user.
We define an email media type, for example, and an invented email, but we disable it. The error will still appear, but the notifications will work.
By default, there is already a group of administrators (Zabbix administrators), we create another one for the on-call sysadmin.
Administration -> User groups

Create user group
Group name: sysadminsGuardia
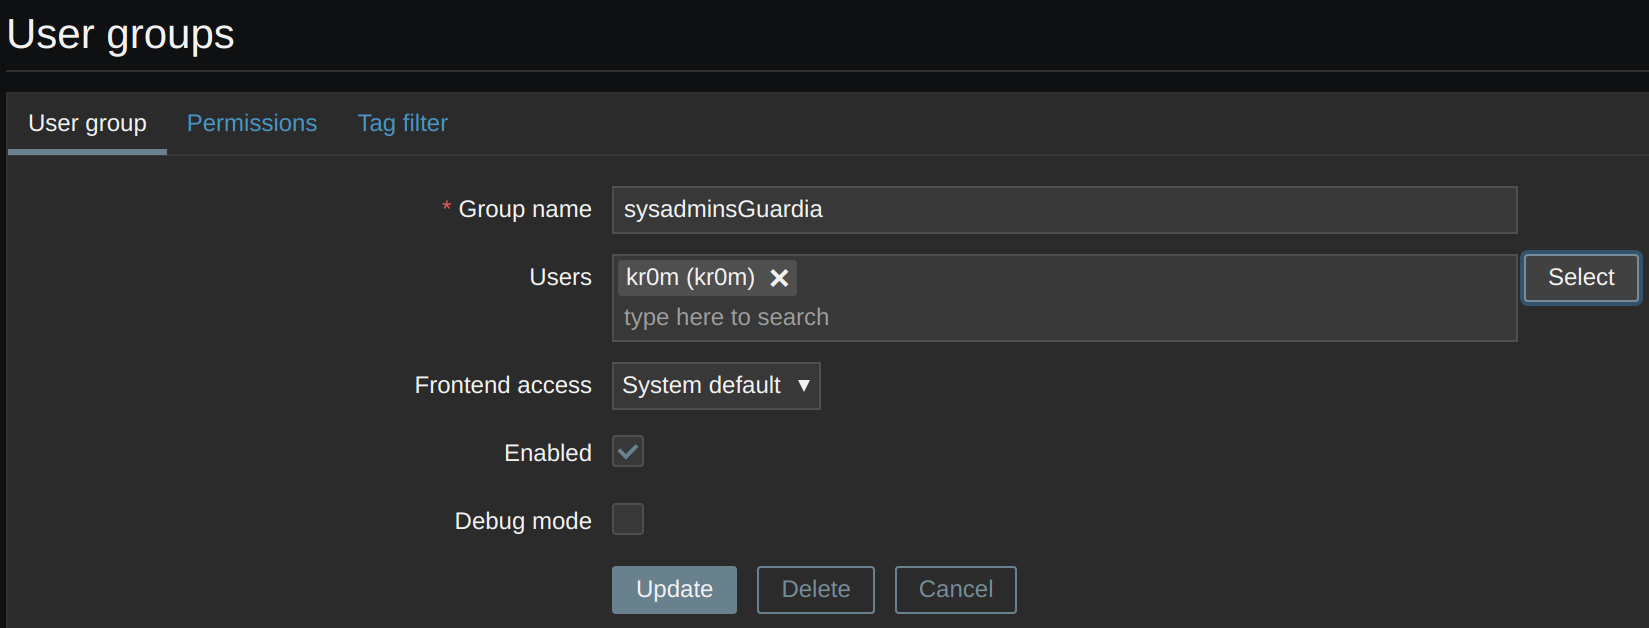

We install the necessary scripts for Telegram notifications:
We install git and clone the alert scripts repository:
We install pip and the script requirements:
pip install -r requirements.txt
We copy the scripts to the AlertScriptsPath:
cp zbxtg_group.py /usr/lib/zabbix/alertscripts/
cp zbxtg_settings.example.py /usr/lib/zabbix/alertscripts/zbxtg_settings.py
We change the owner and adjust the permissions:
chmod 700 /usr/lib/zabbix/alertscripts/*
We configure the script parameters with the data of the bot and the user we have created in Zabbix so that the script can obtain the alert images via API:
tg_key = "XXXXXXX:YYYYYYYYYYYYYYY" # telegram bot api key
zbx_server = "http://127.0.0.1" # zabbix server full url
zbx_api_user = "zbxtg"
zbx_api_pass = "zbxtgPASSWORD"
NOTE: If we want to use graphs, we would need to use a Zabbix RO user and configure it in zbxtg_settings.py
zbx_api_user
zbx_api_pass
First, we create the RO group:
Administration -> User groups

Create user group
Group name: zbxtgRO
En Permissions: Linux servers Read

Administration -> Users

Create user
Alias: zbxtg
Groups: zbxtgRO
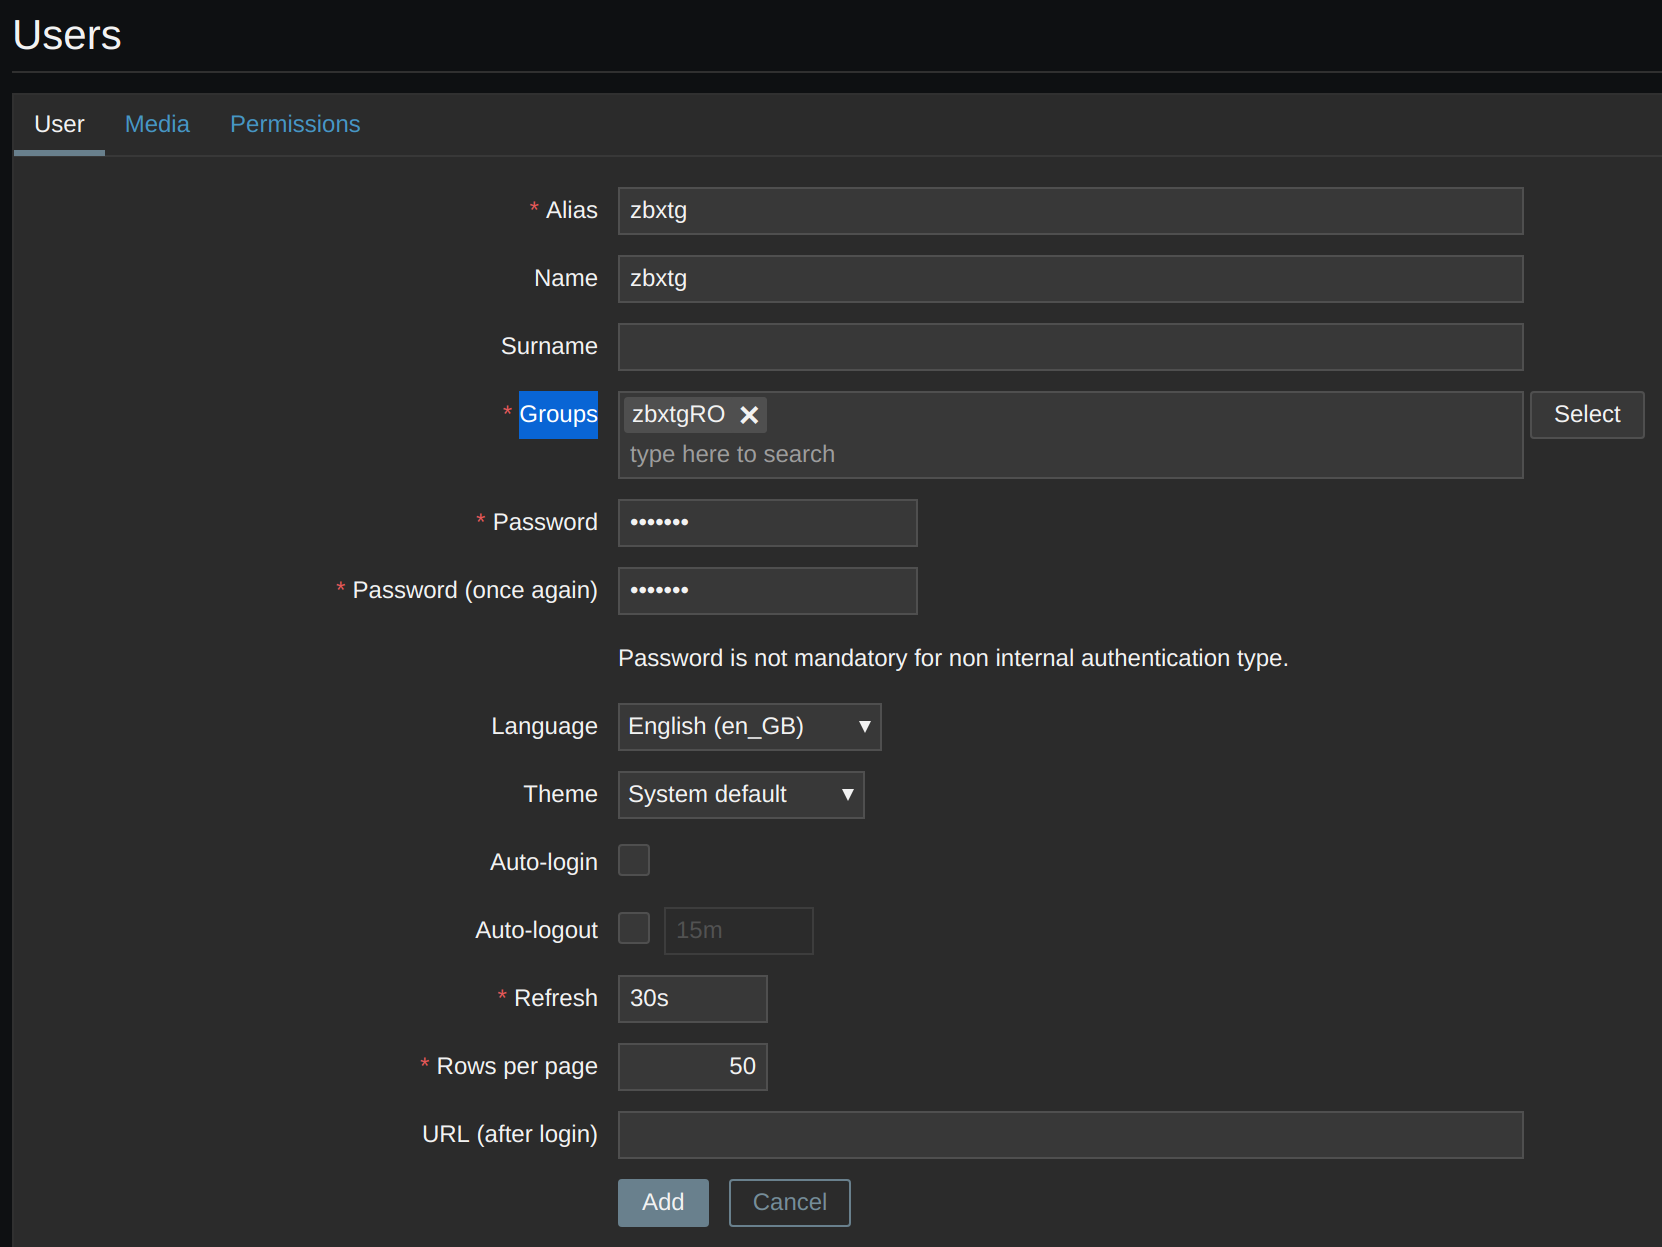
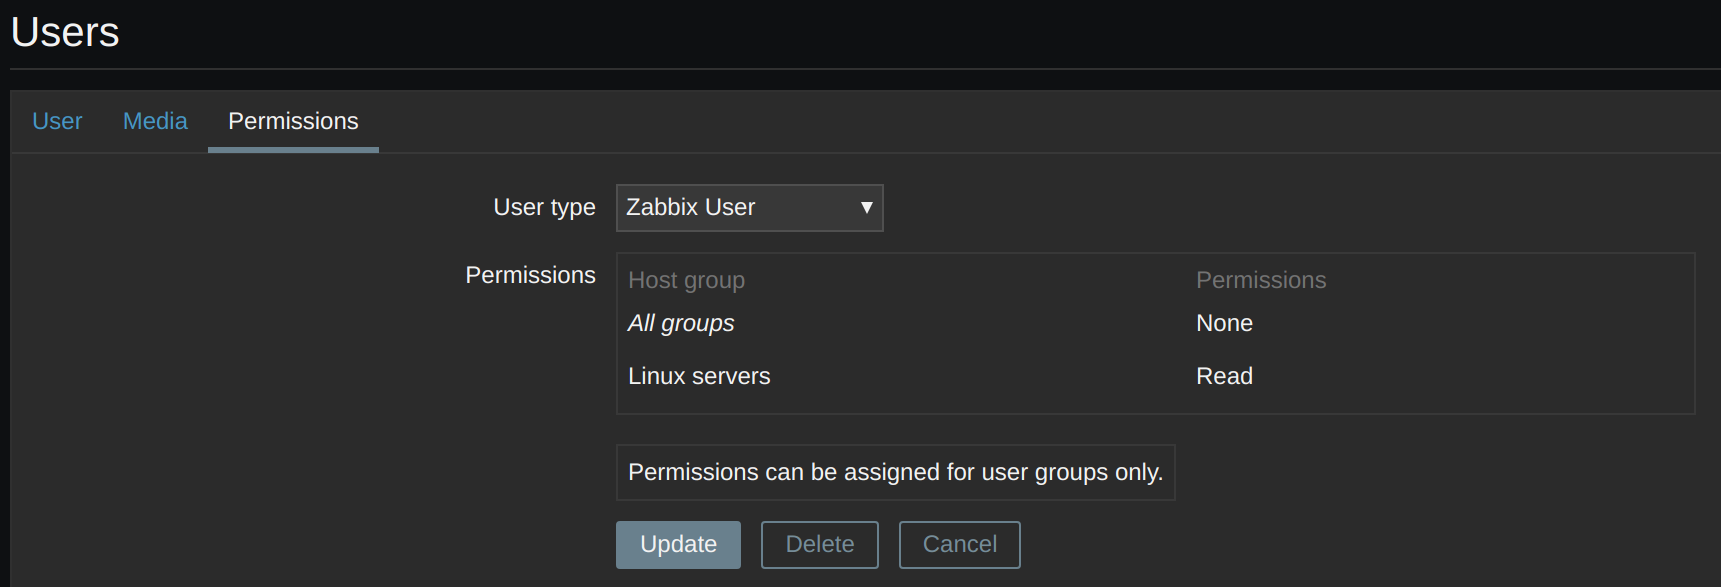
After saving, if we go back to the Permissions tab, we will see:
The notifications will be executed in chronological order:
- Zabbix alarm
- 6m Telegram sysadmins alarm or sysadmin on duty according to schedule
- 12m - every 6m Call sysadmins or sysadmin on duty according to schedule
- 30m Call all sysadmins
To make the notifications work, we will have to edit the action: Report problems to Zabbix administrators.
Configuration -> Actions
Event source: Triggers
Report problems to Zabbix administrators
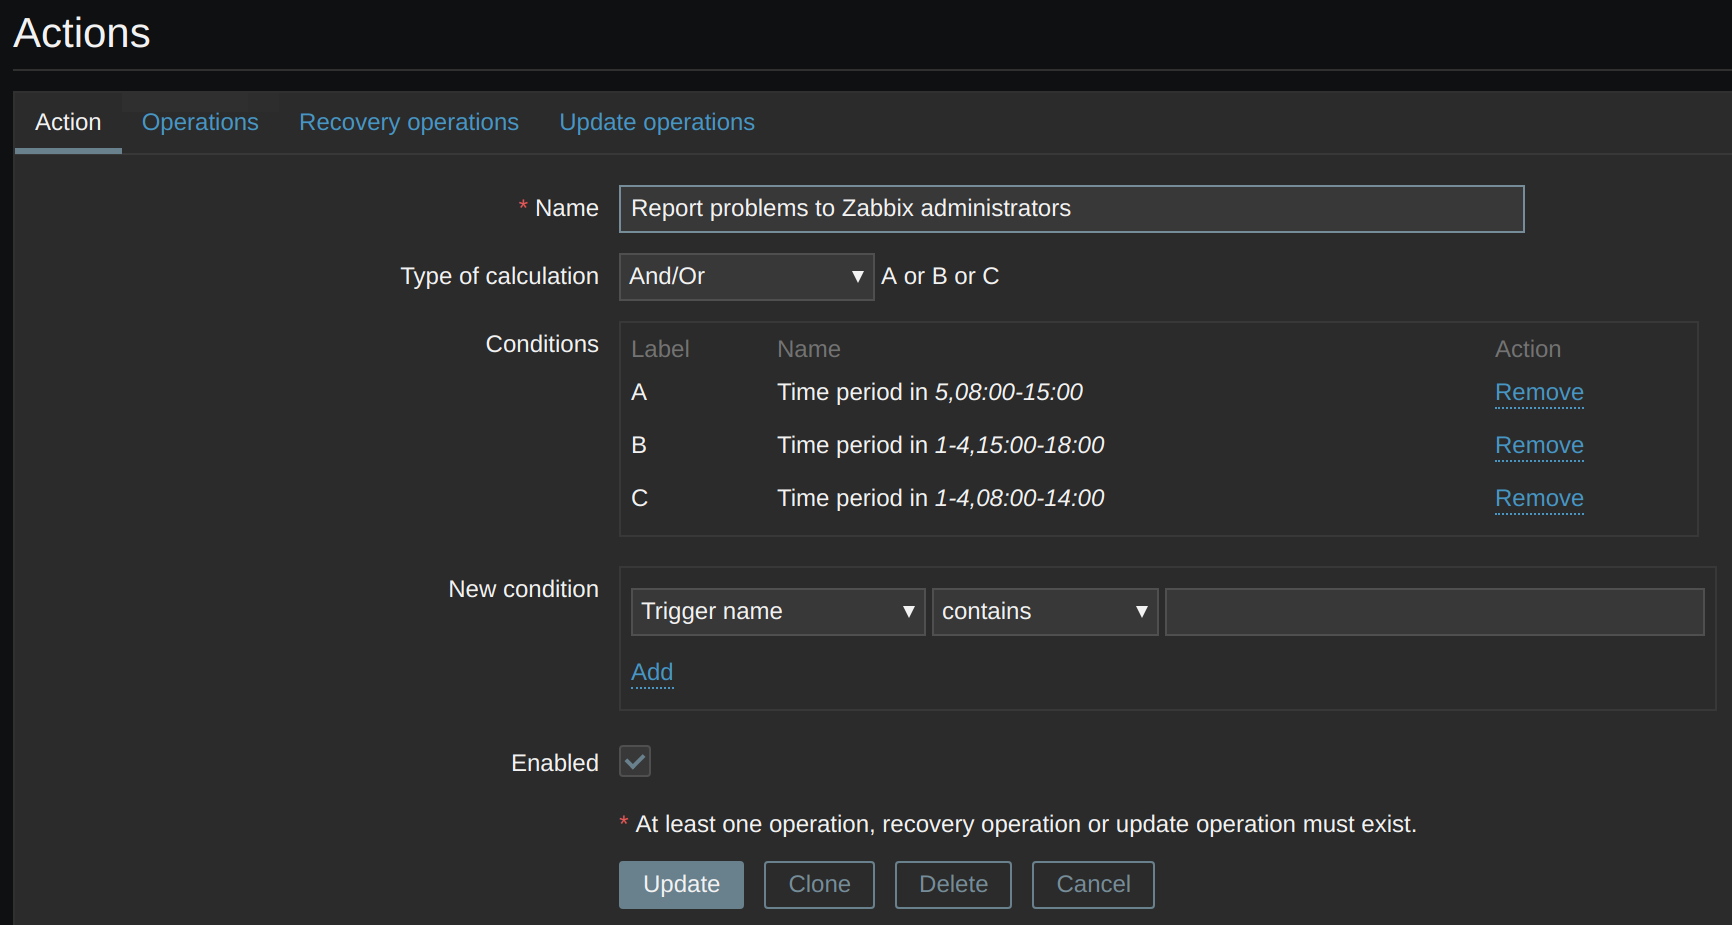
We define the working hours:
Conditions:
Type of calculation: And/Or
Time period in 1-4,08:00-14:00
Time period in 1-4,15:00-18:00
Time period in 5,08:00-15:00
Enabled: True
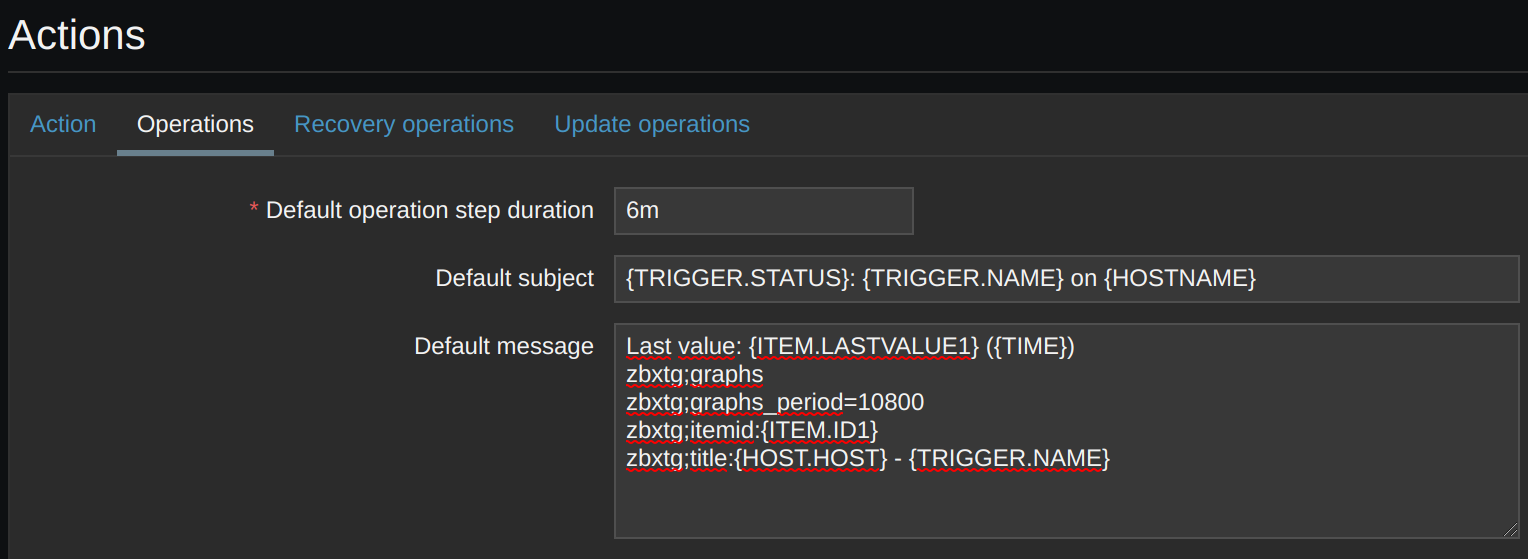
We edit the operations associated with the action, as the call API has a limit of one call every 5m, we adjust the step duration to 6m to not exceed the limit.
Default operation step duration: 6m
Default subject: {TRIGGER.STATUS}: {TRIGGER.NAME} on {HOSTNAME}
If we want to use graphs:
Default message:
Last value: {ITEM.LASTVALUE1} ({TIME})
zbxtg;graphs
zbxtg;graphs_period=10800
zbxtg;itemid:{ITEM.ID1}
zbxtg;title:{HOST.HOST} - {TRIGGER.NAME}
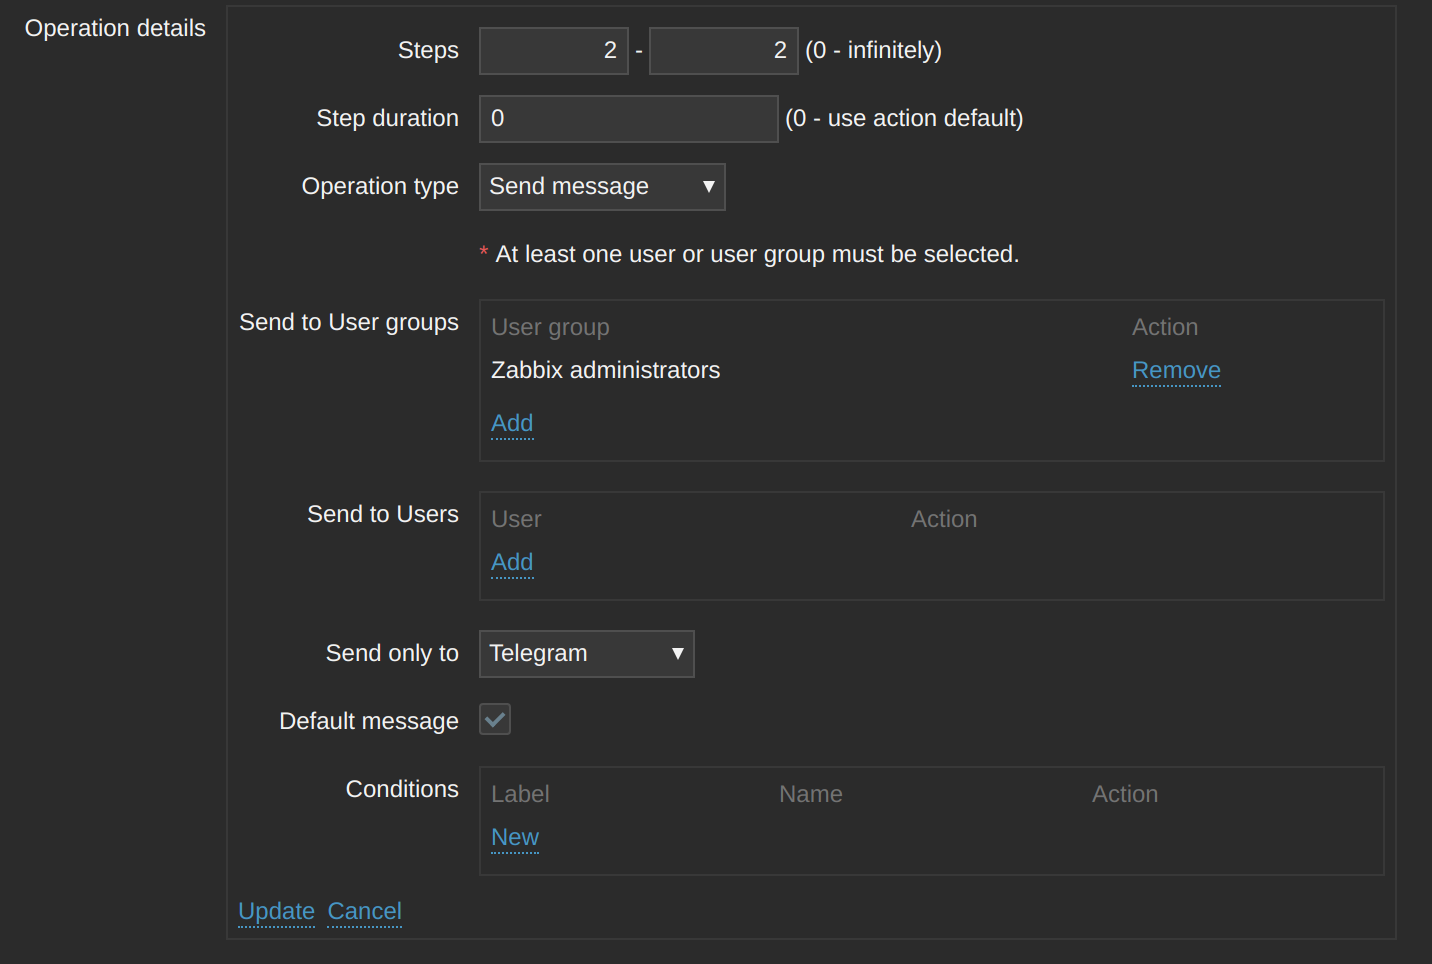
In the Operations subsection, we edit the default one:
Steps: 2 - 2
Step duration: 0
Operation type: Send message
Send to User groups: Zabbix administrators
Send only to: Telegram
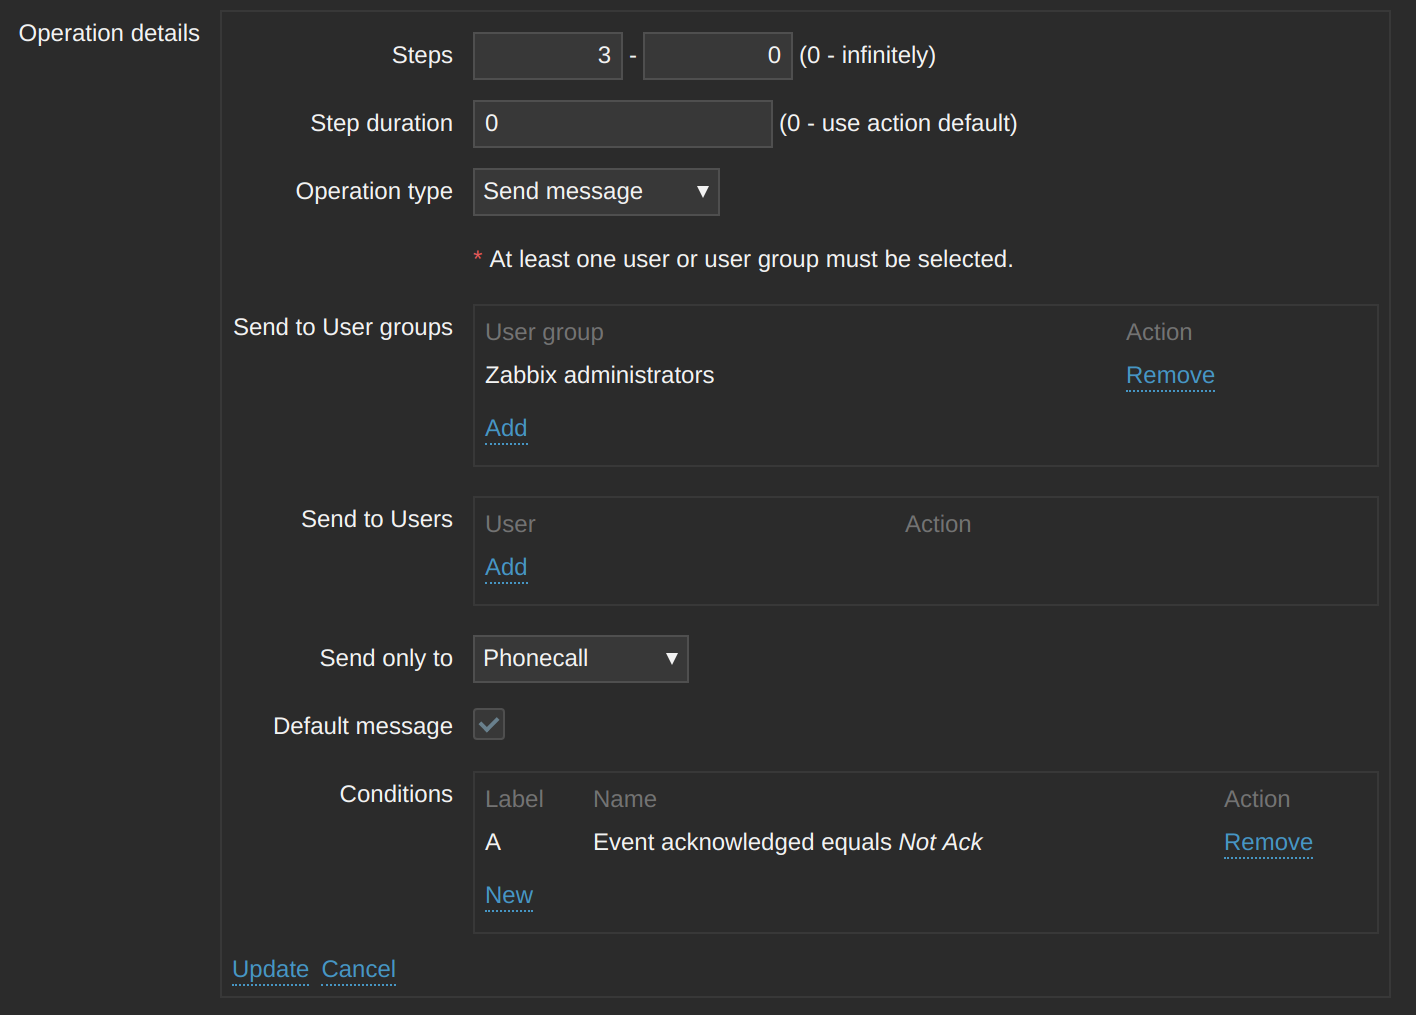
We define a second operation:
Steps: 3 - 0
Step duration: 0
Operation type: Send message
Send to User groups: Zabbix administrators
Send only to: Phonecall
Operation condition: Event acknowloedged equals Not Ack
Finally, it will look like this:

We create a new Action for the guards:
Configuration -> Actions
Event source: Triggers
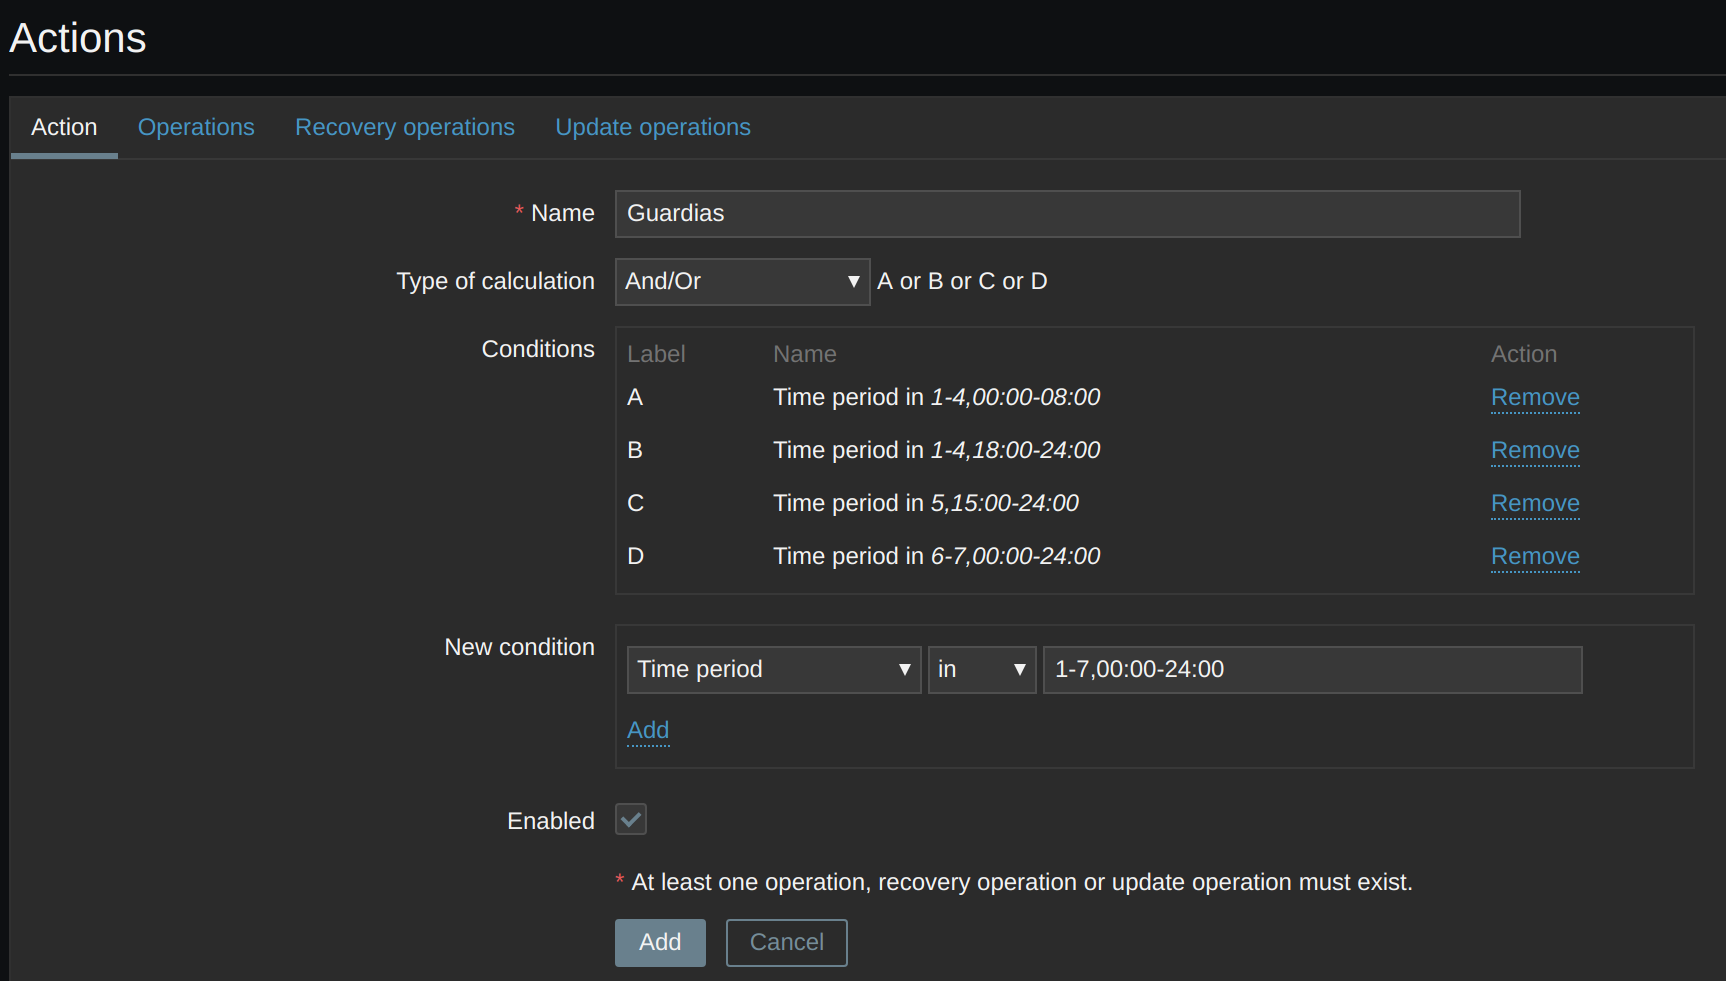
We define the non-working hours:
Create action
Name: Guardias
Type of calculation: And/Or
Time period in 1-4,00:00-08:00
Time period in 1-4,18:00-24:00
Time period in 5,15:00-24:00
Time period in 6-7,00:00-24:00
In operations, we change the step duration:
Default operation step duration: 6m
Default subject: {TRIGGER.STATUS}: {TRIGGER.NAME} on {HOSTNAME}
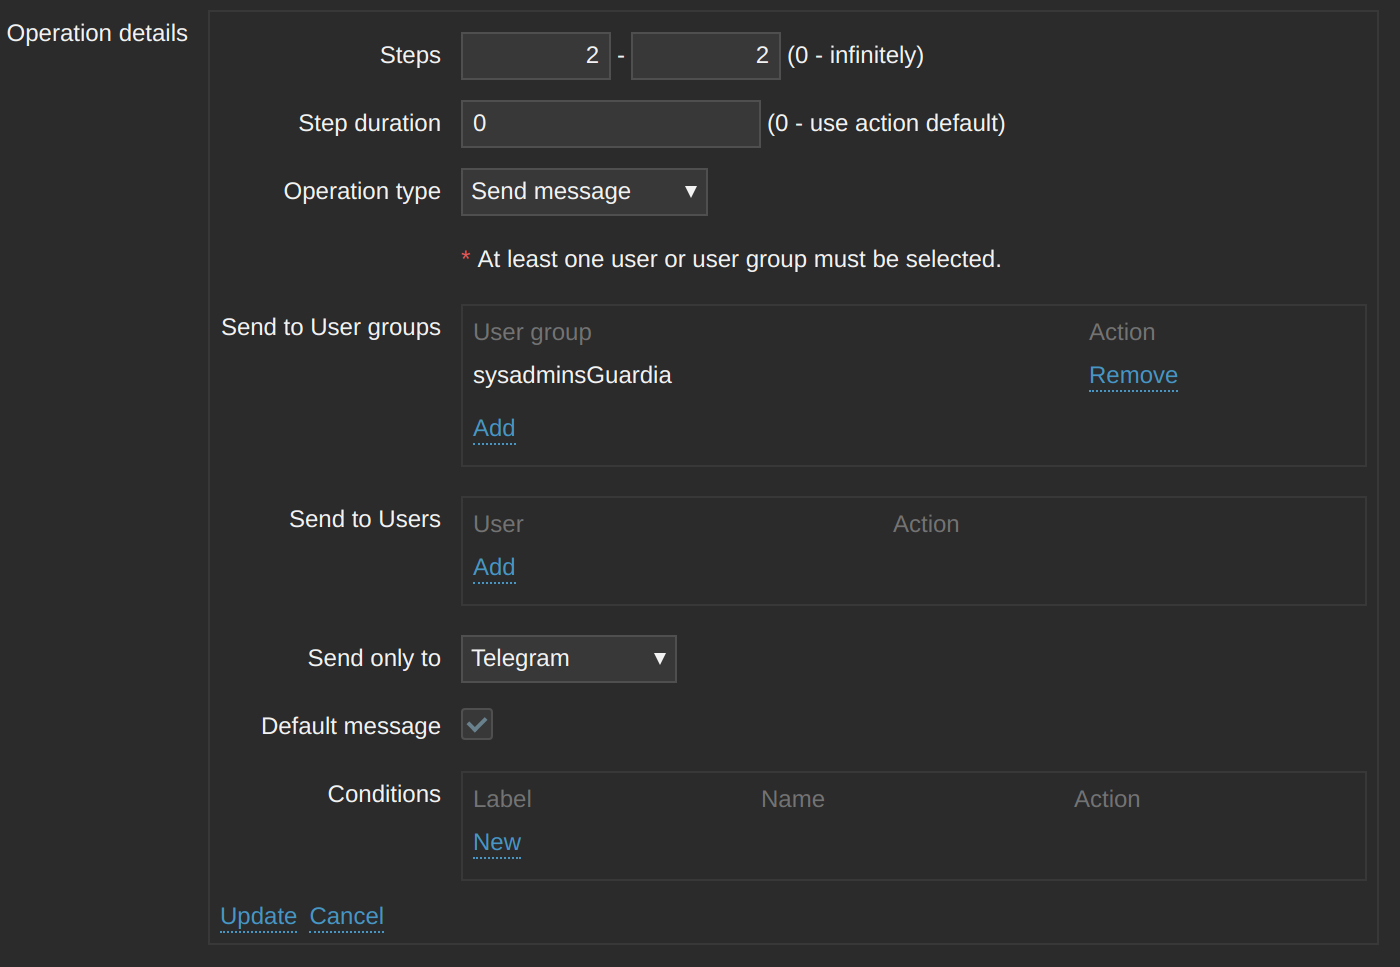
We add an operation:
Steps: 2 - 2
Step duration: 0
Operation type: Send message
Send to User groups: sysadminsGuardia
Send only to: Telegram
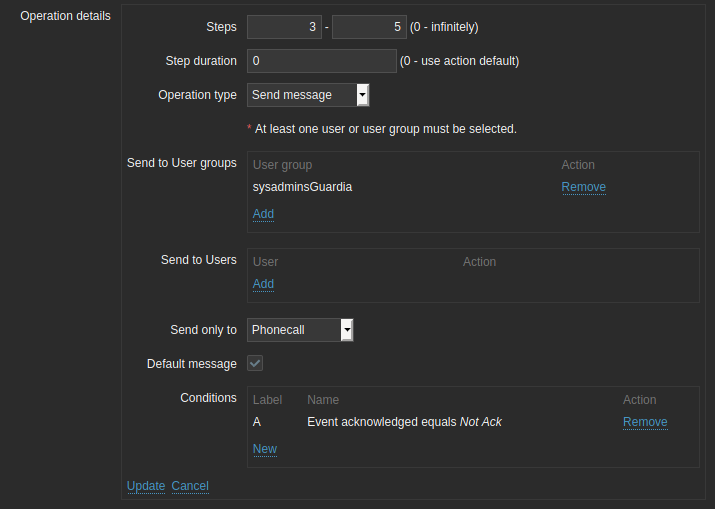
After Telegram, we will call the on-call sysadmin:
Steps: 3 - 5
Step duration: 0
Operation type: Send message
Send to User groups: sysadminsGuardia
Send only to: Phonecall
Operation condition: Event acknowloedged equals Not Ack
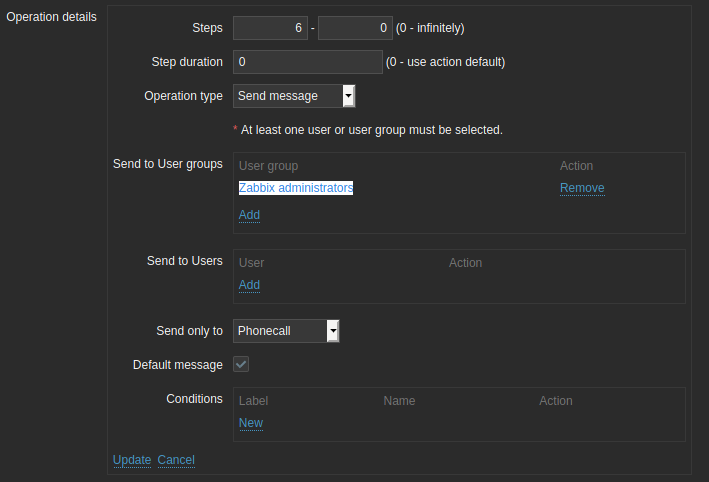
Finally, we will call all sysadmins:
Steps: 6 - 0
Step duration: 0
Operation type: Send message
Send to User groups: Zabbix administrators
Send only to: Phonecall
Operation condition: Event acknowloedged equals Not Ack
Finally, it will look like this:

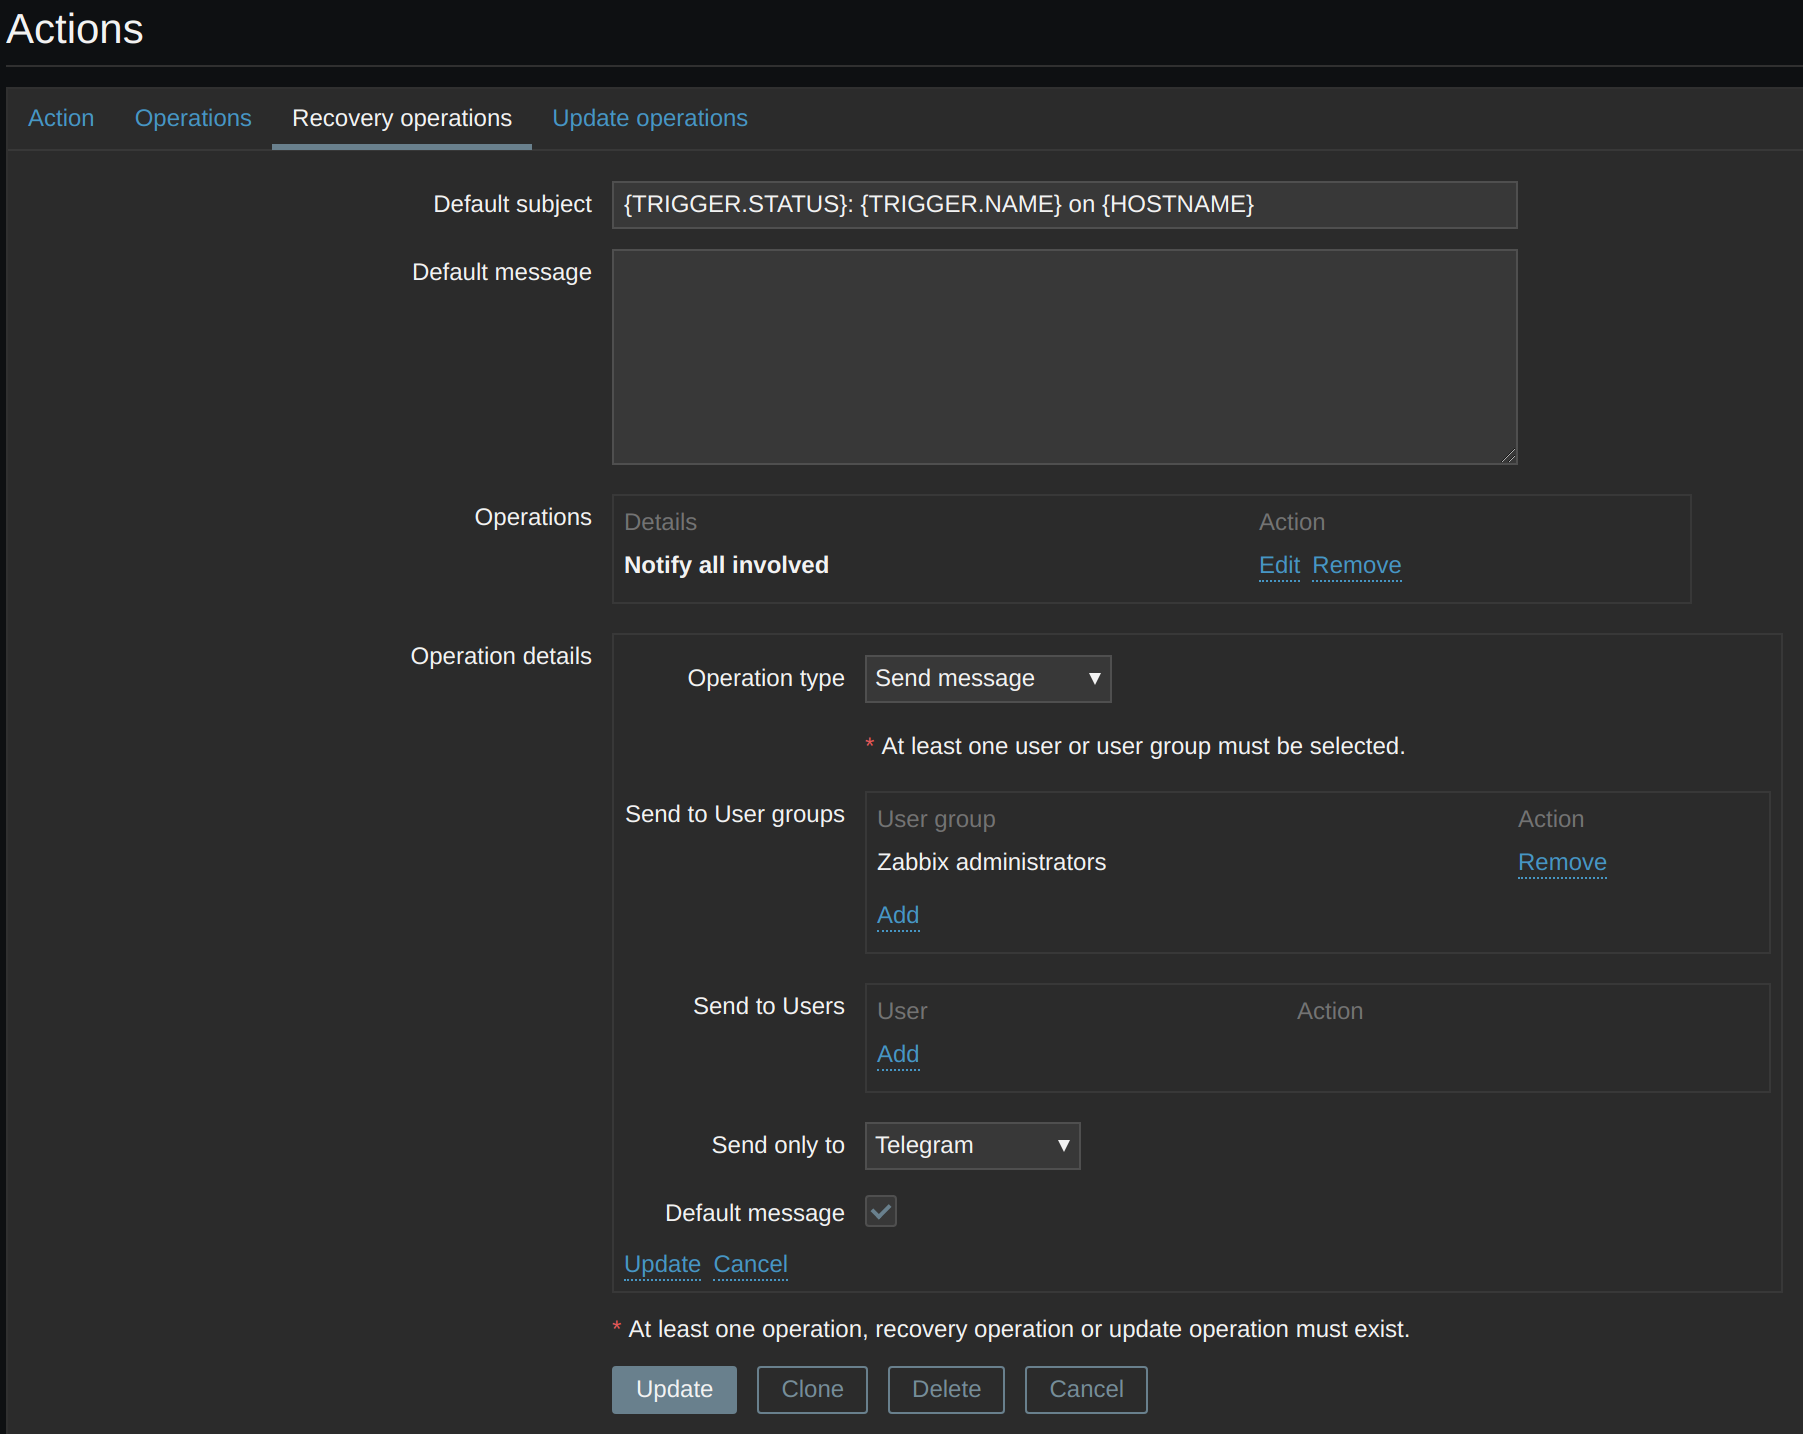
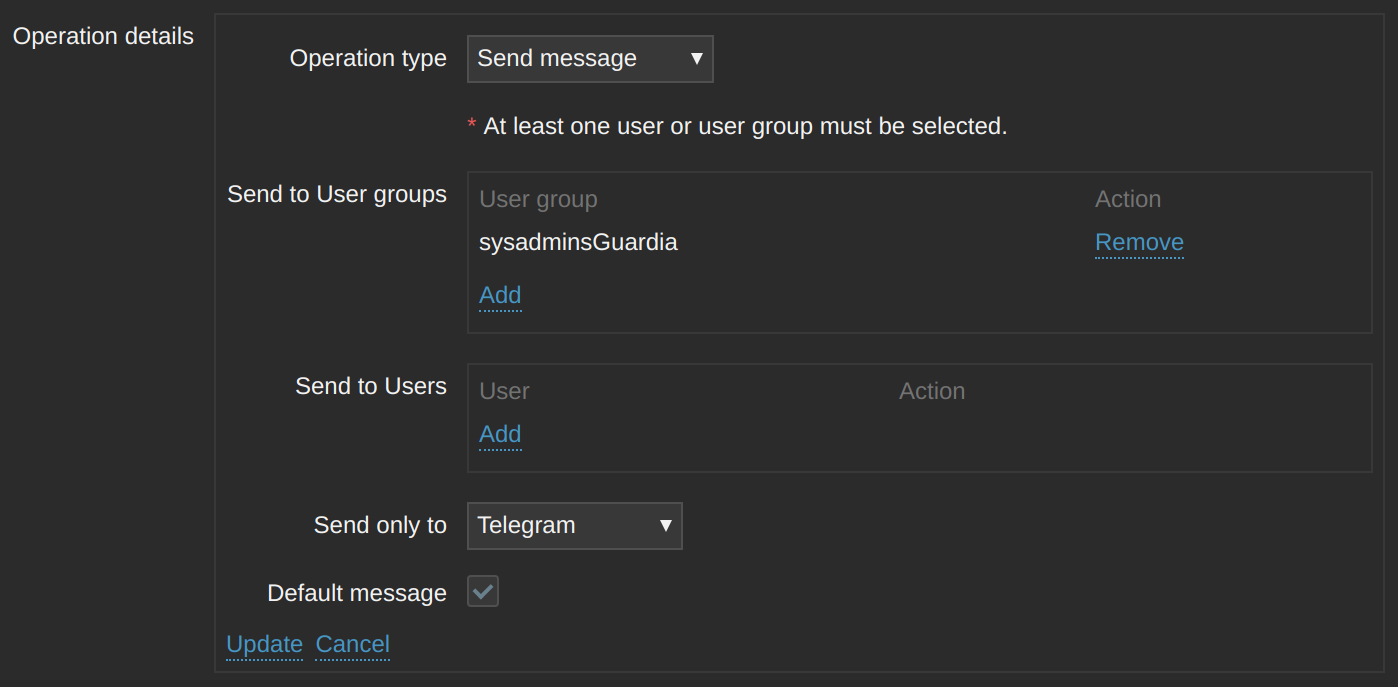
We assign a recovery operation in both actions.
Recovery operations:
Default subject: {TRIGGER.STATUS}: {TRIGGER.NAME} on {HOSTNAME}
We can manually check the sending of Telegrams:
cd /usr/lib/zabbix/alertscripts/
./zbxtg.py "@USERID" "first part of a message" "second part of a message" --debug
We also check if we can make calls through our API:
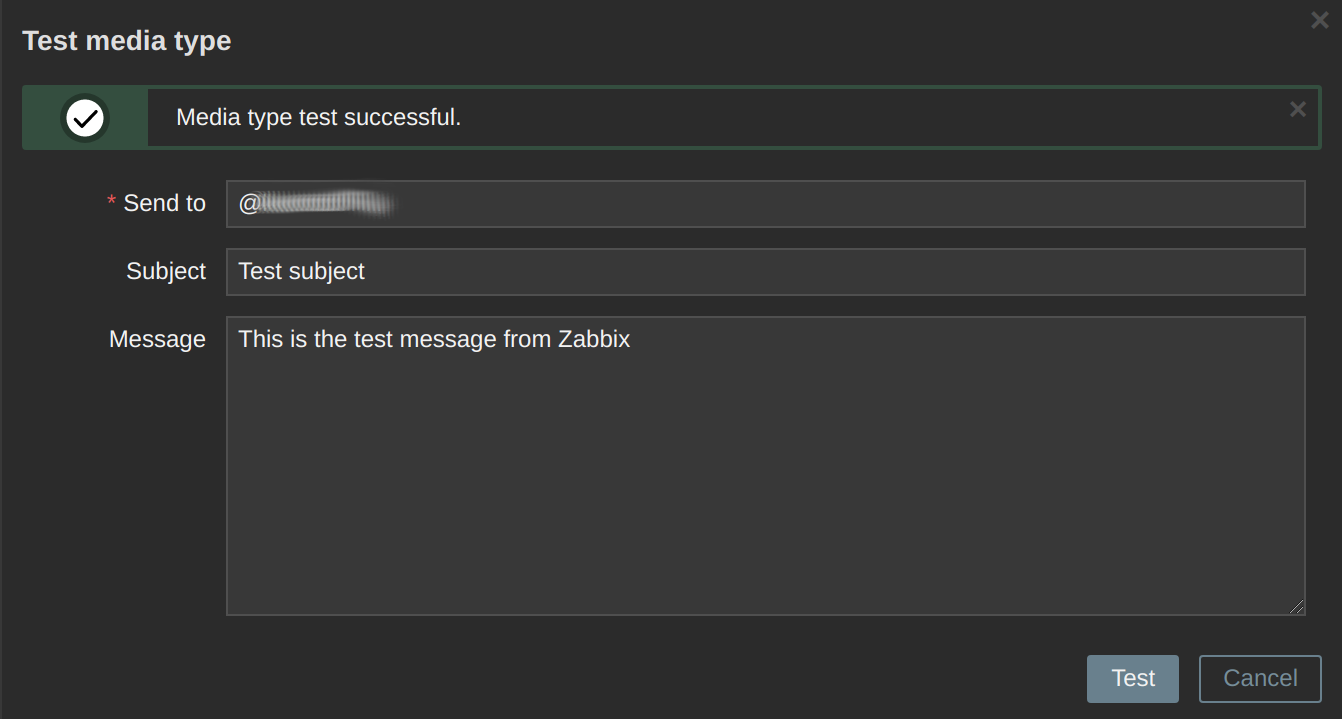
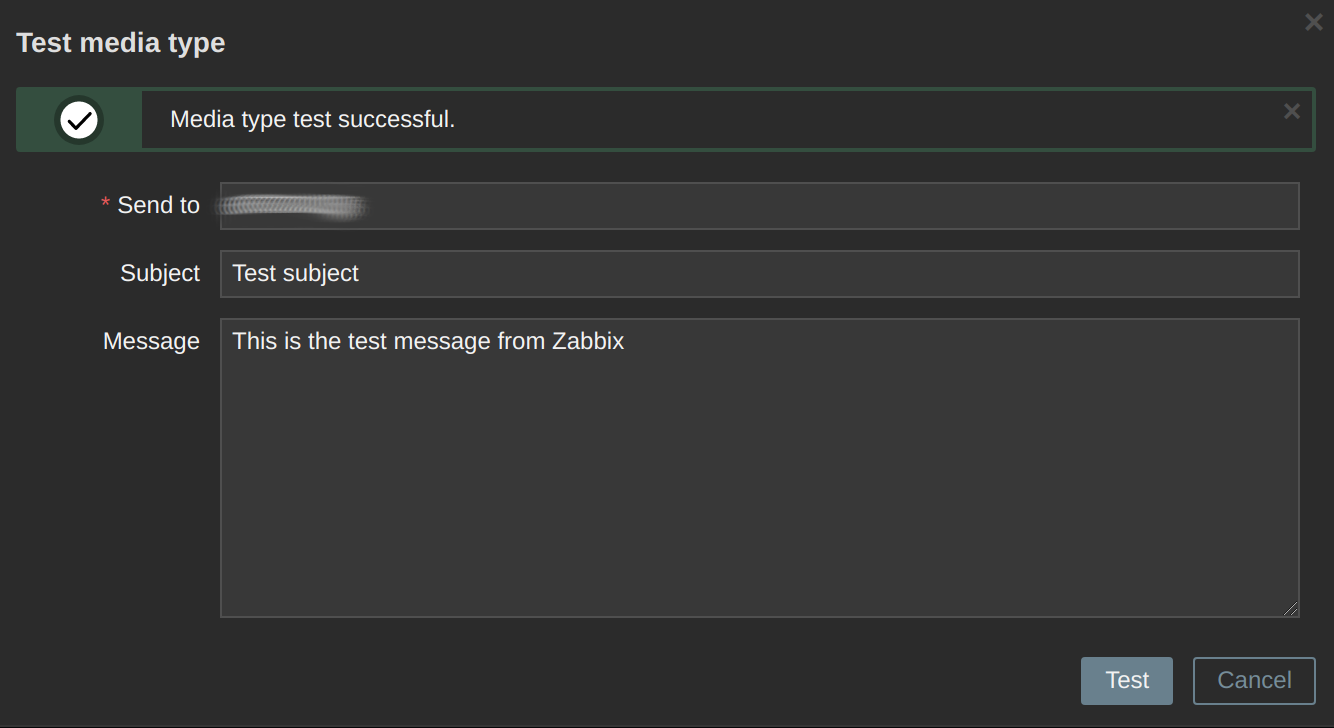
Or from the Zabbix web interface:
Administration -> Media types -> Test

We register our test server.
Configuration -> Hosts
Create Host
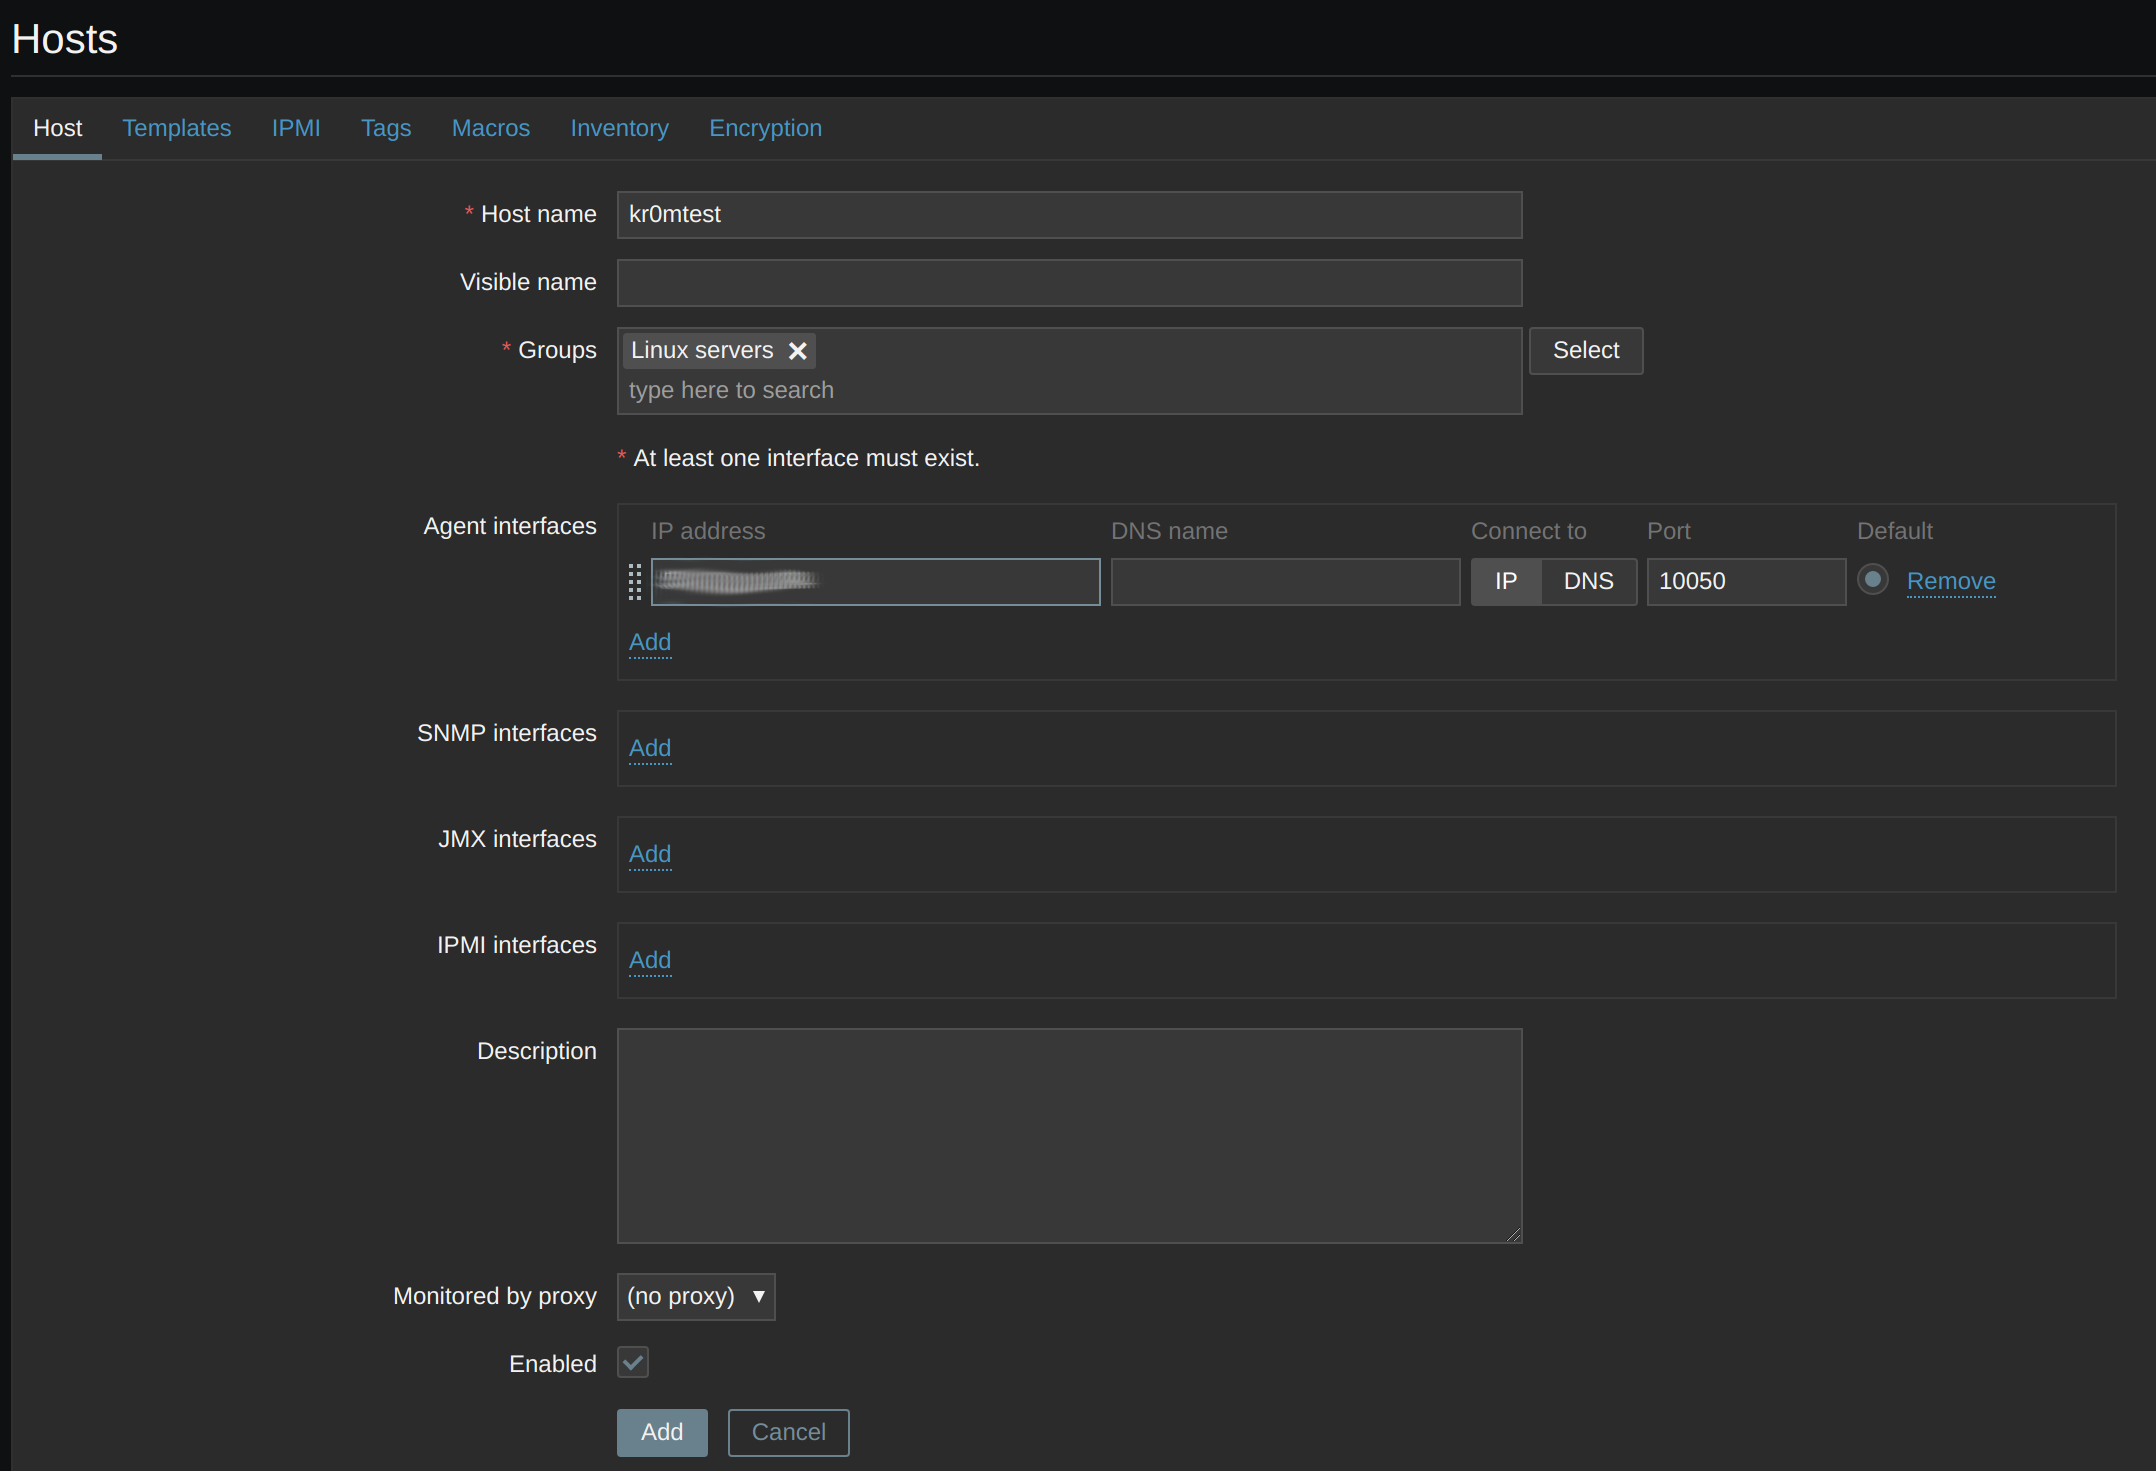
We assign the OS Linux template:
Template OS Linux by Zabbix agent

We configure the loss of communication with the Zabbix agent to be a disaster alarm.
Configuration -> Hosts
Triggers -> Zabbix agent is not available
Severity: Disaster

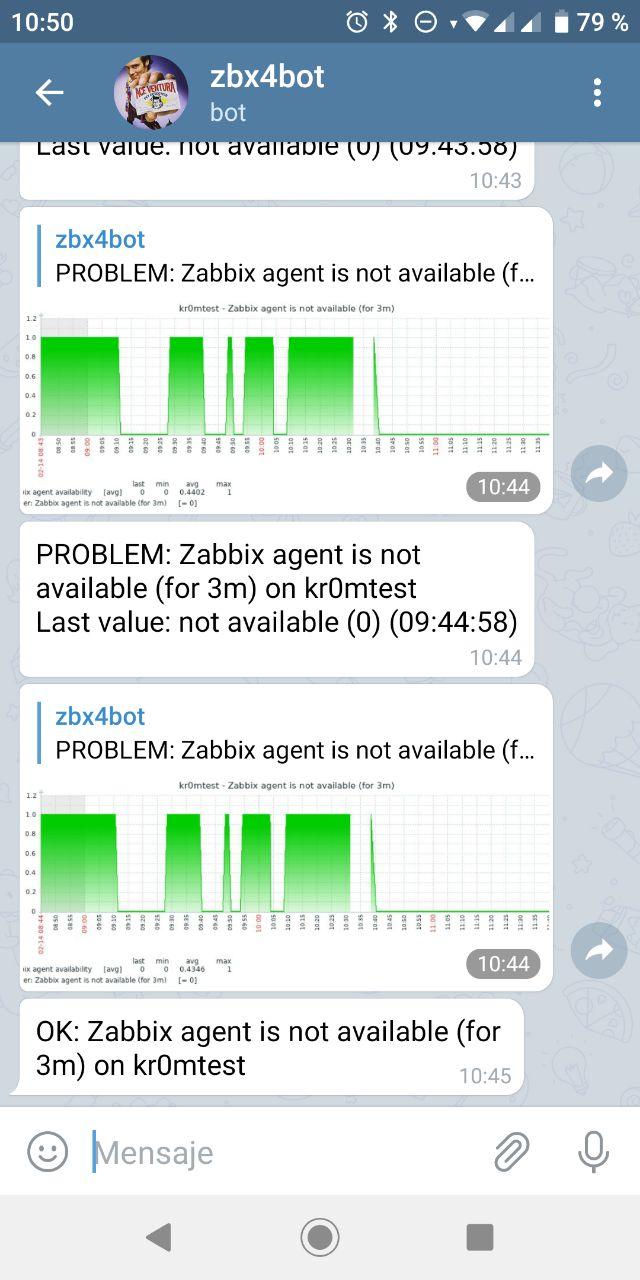
We verify that it works by stopping the client:
The notifications via Telegram will appear as follows:
DEBUG:
Testing Telegram scripts:
https://github.com/ableev/Zabbix-in-Telegram/wiki/How-to-test-script-in-command-line
We can see a log of the actions taken by Zabbix at:
Administration -> Action log
If we want to view the CT logs:
docker logs zabbix-appliance --follow
If we want to debug further, we need to modify the Zabbix server configuration. To do this, we temporarily modify the Docker entrypoint so that it does not overwrite our changes:
We comment out all the places where update_zbx_config is called.
Modify the Zabbix server configuration:
DebugLevel=5
If we want to debug the sending of Telegrams in the Telegram media type, we need to add the --debug parameter:
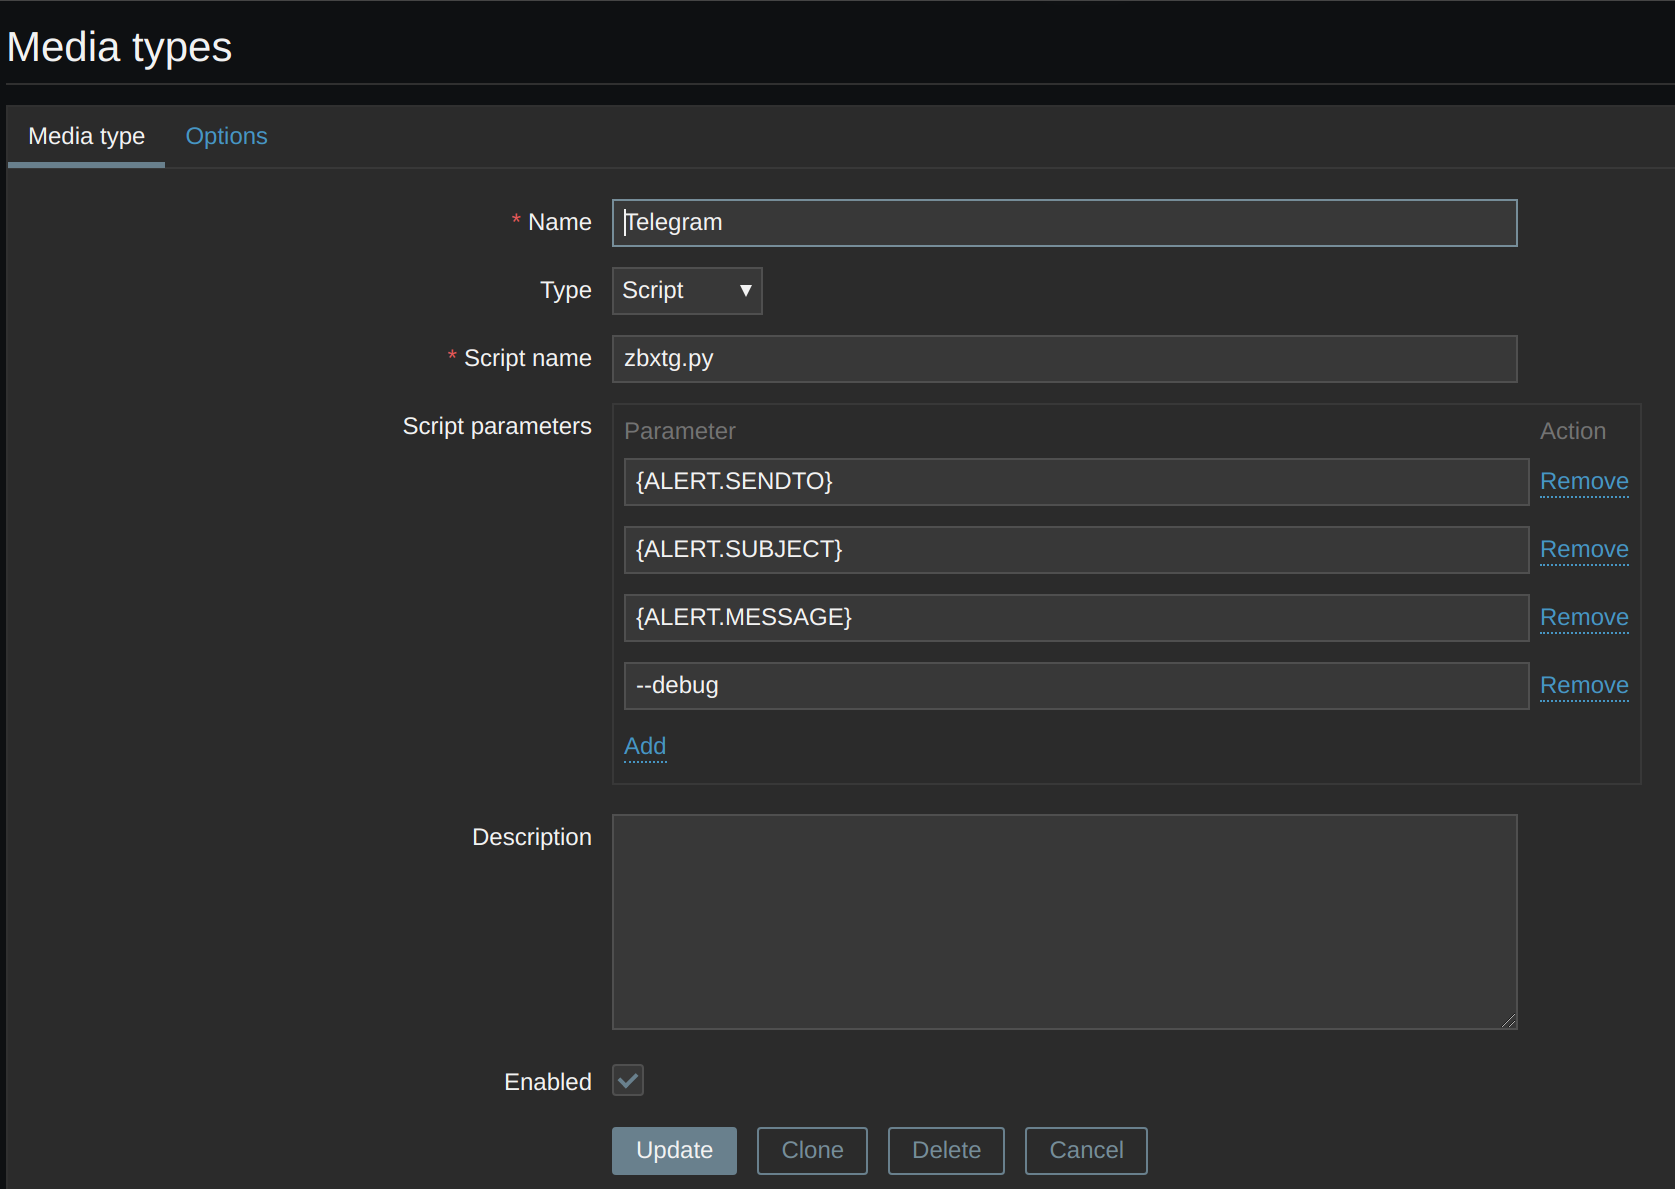
Restart the container and verify that we can see the logs:
docker start zabbix-appliance
docker logs zabbix-appliance --follow
The obtained graphs will be stored in /var/tmp/zbxtg/ as long as the --debug parameter is enabled:
ls -al /var/tmp/zbxtg/
We can manually send Telegrams with graphs using:
cd /usr/lib/zabbix/alertscripts/
./zbxtg.py @TELEGRAMUSERID test "$(echo -e ‘zbxtg;graphs: \nzbxtg;graphs_period=3600\nzbxtg;itemid:30471\nzbxtg;title:ololo’)" --debug
NOTE: We can obtain the itemid by checking the previous logs using docker logs zabbix-appliance --follow.
Once we finish debugging, we will need to uncomment the calls to update_zbx_config in the entrypoint script.
Some interesting links can be: