WebZFS
is a system with a web interface that lets you manage ZFS filesystems; this software is compatible with FreeBSD, Linux and NetBSD. The web interface makes it much easier to manage the most frequent operations on ZFS systems, but what really makes this software special is the ability to manage snapshot policies and replication on remote systems, thus allowing you to have a backup system that is also PITR.
The manual consists of the following sections:
- Installation
- System Dashboard
- Pools
- Datasets
- Snapshots
- Replication
- Observability
- Utilities
- Fleet View
- Bastille Replication
- Monitoring
- Troubleshooting
Installation
We clone the WebZFS repository:
git clone https://github.com/webzfs/webzfs.git
cd webzfs
We install it using the script for the corresponding platform.
NOTE: It will ask some questions about whether the service should start at system boot; answer as appropriate.
pkg install rsync bash
bash install_freebsd.sh
bash install_linux.sh
WebZFS could be bound to the IPs available on the system, but since it is software that will run as root, it is preferable to leave it bound to the loopback and create an SSH tunnel for access:
ssh -L 26619:127.0.0.1:26619 SERVER_IP
Now we just need to access it through the tunnel:
http://127.0.0.1:26619
System Dashboard
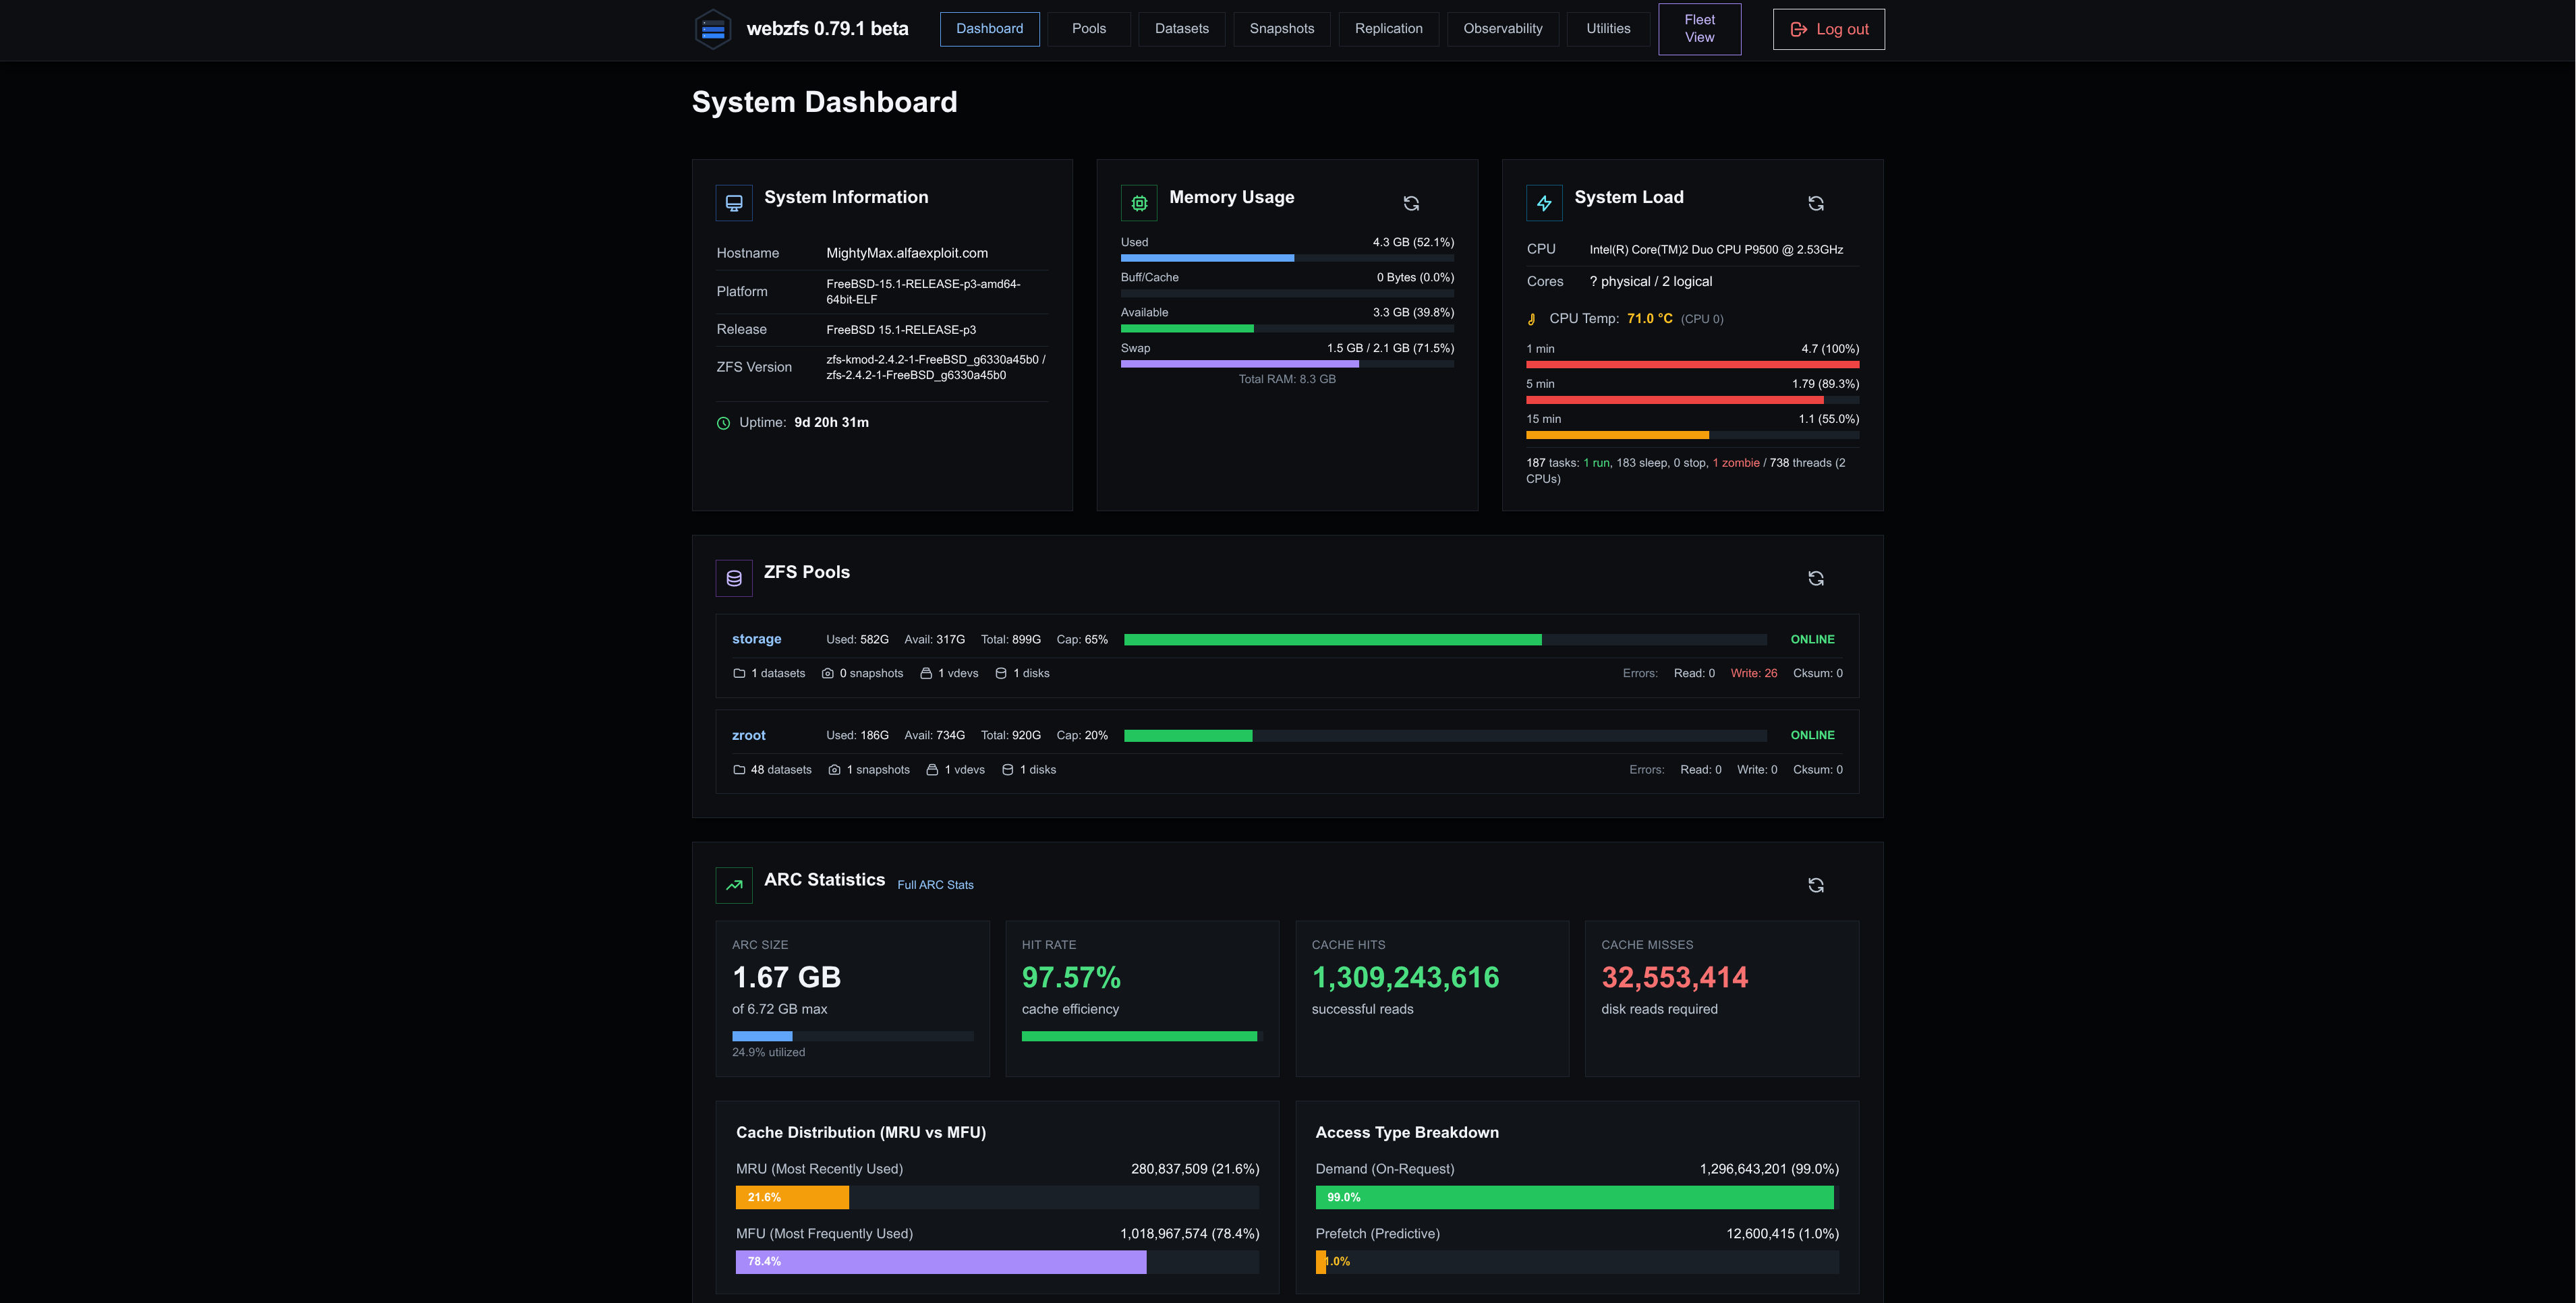
This section simply shows general information about the system, the status of the ZFS pools and RAM usage:
Pools
From this section we can manage the ZFS pools; below are the actions we can perform.
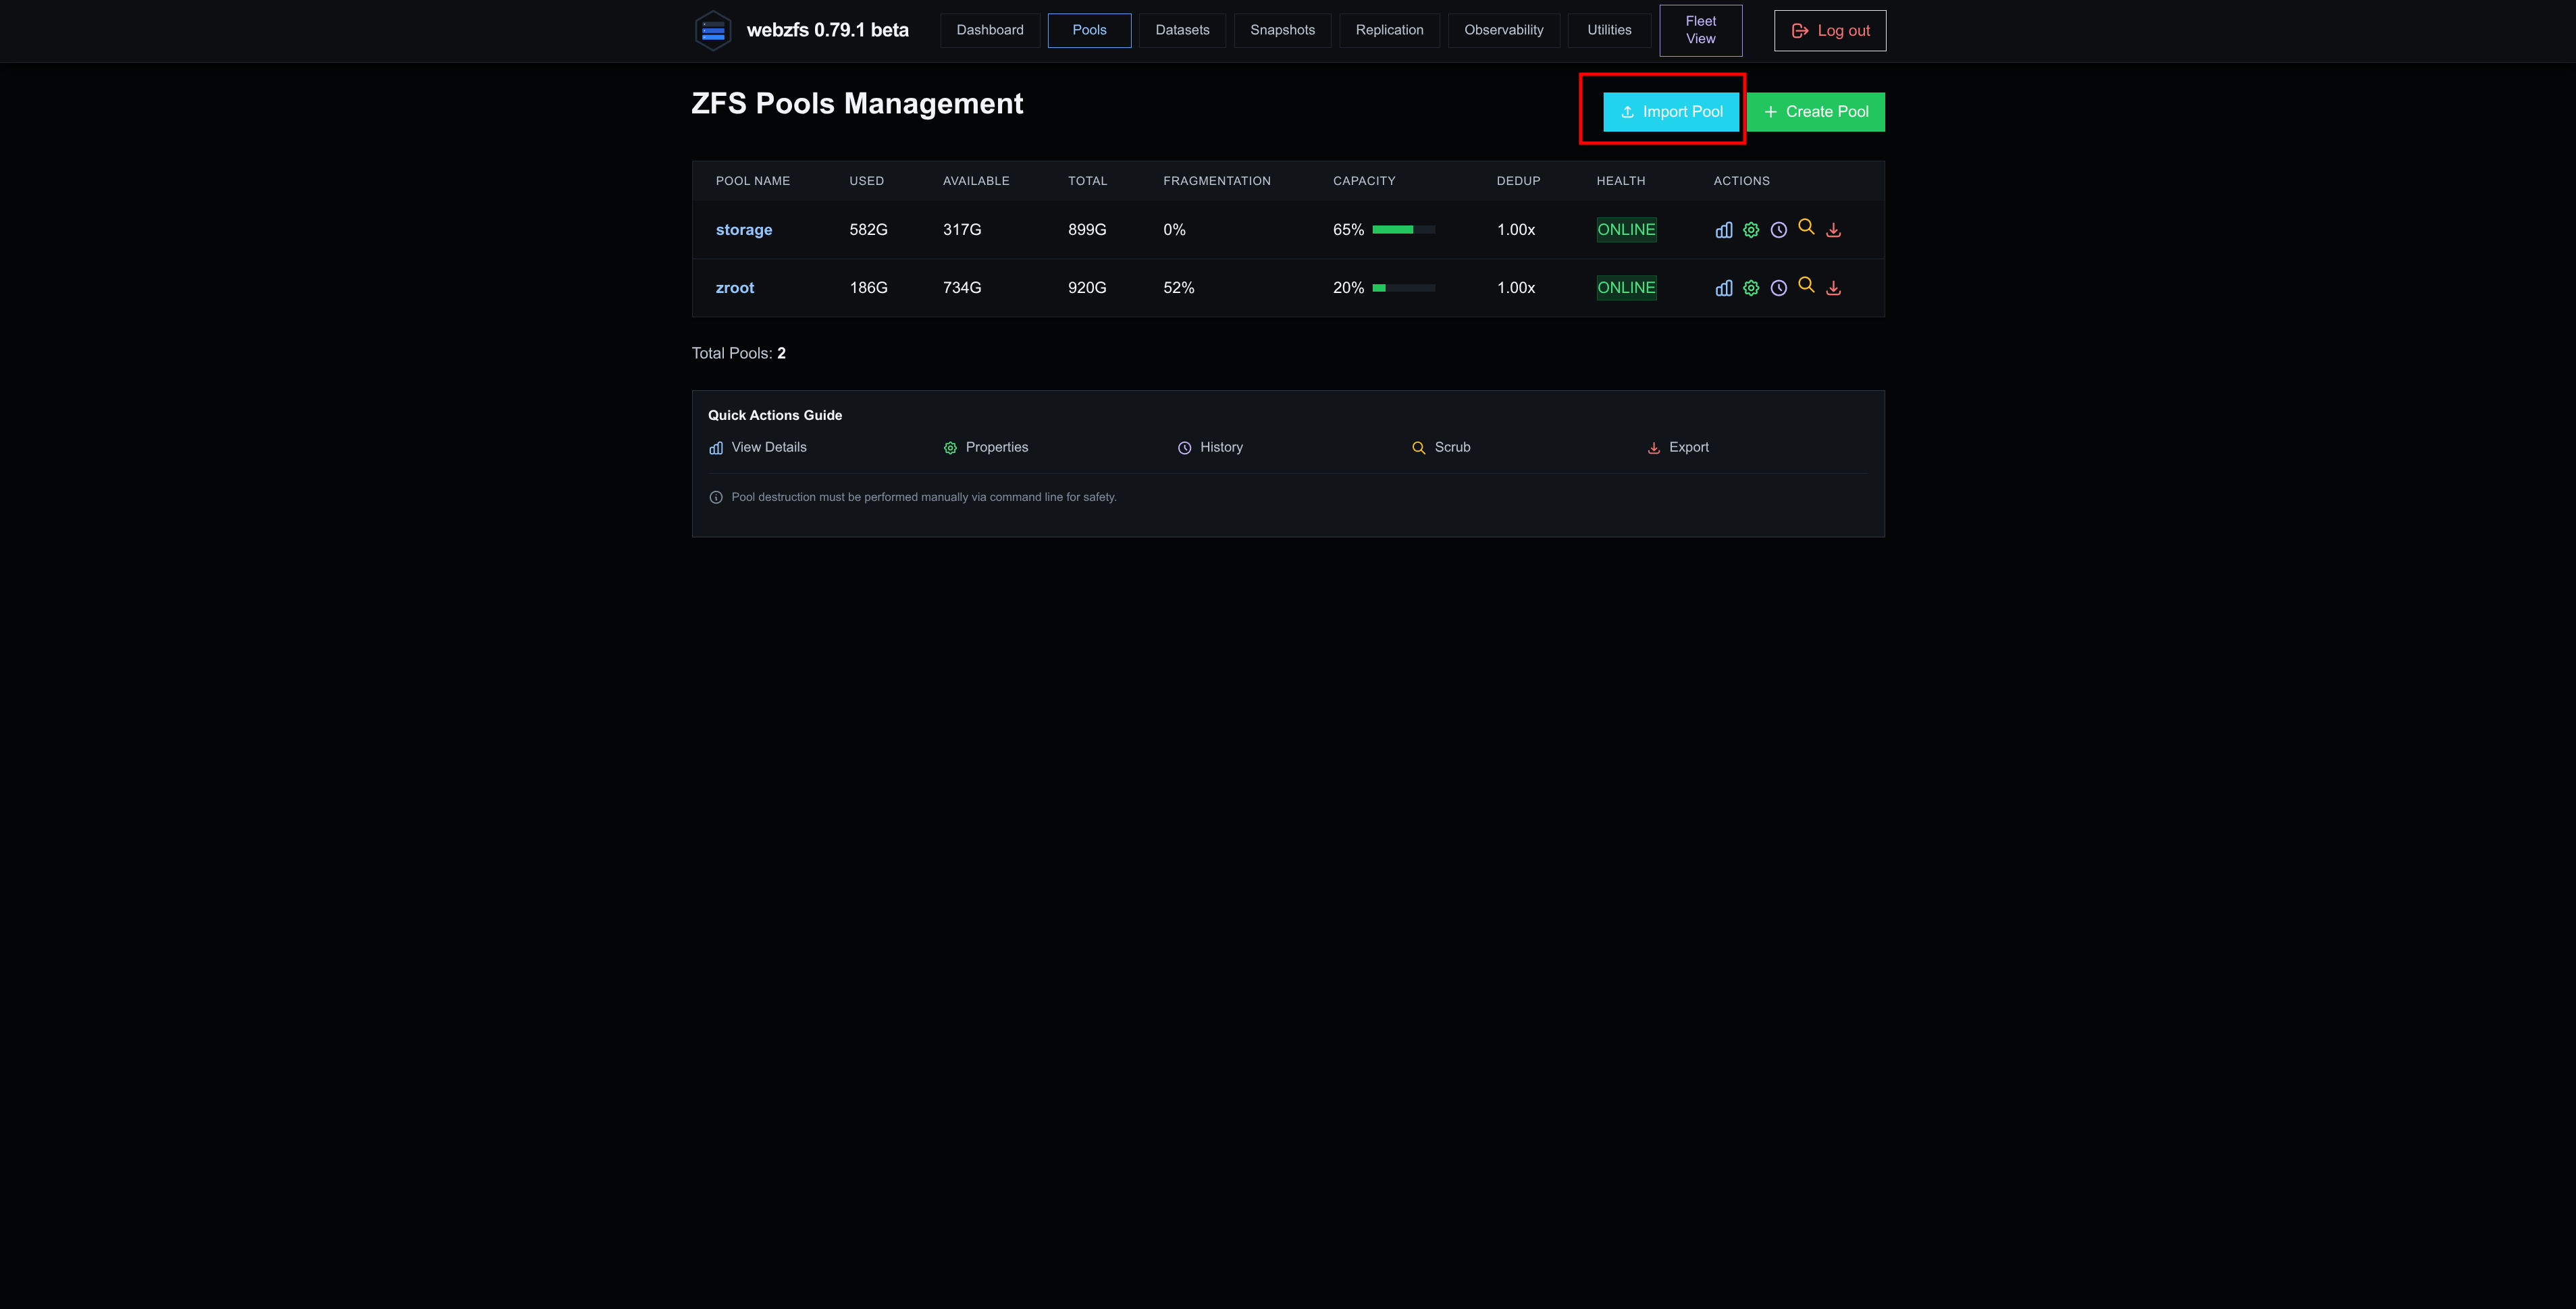
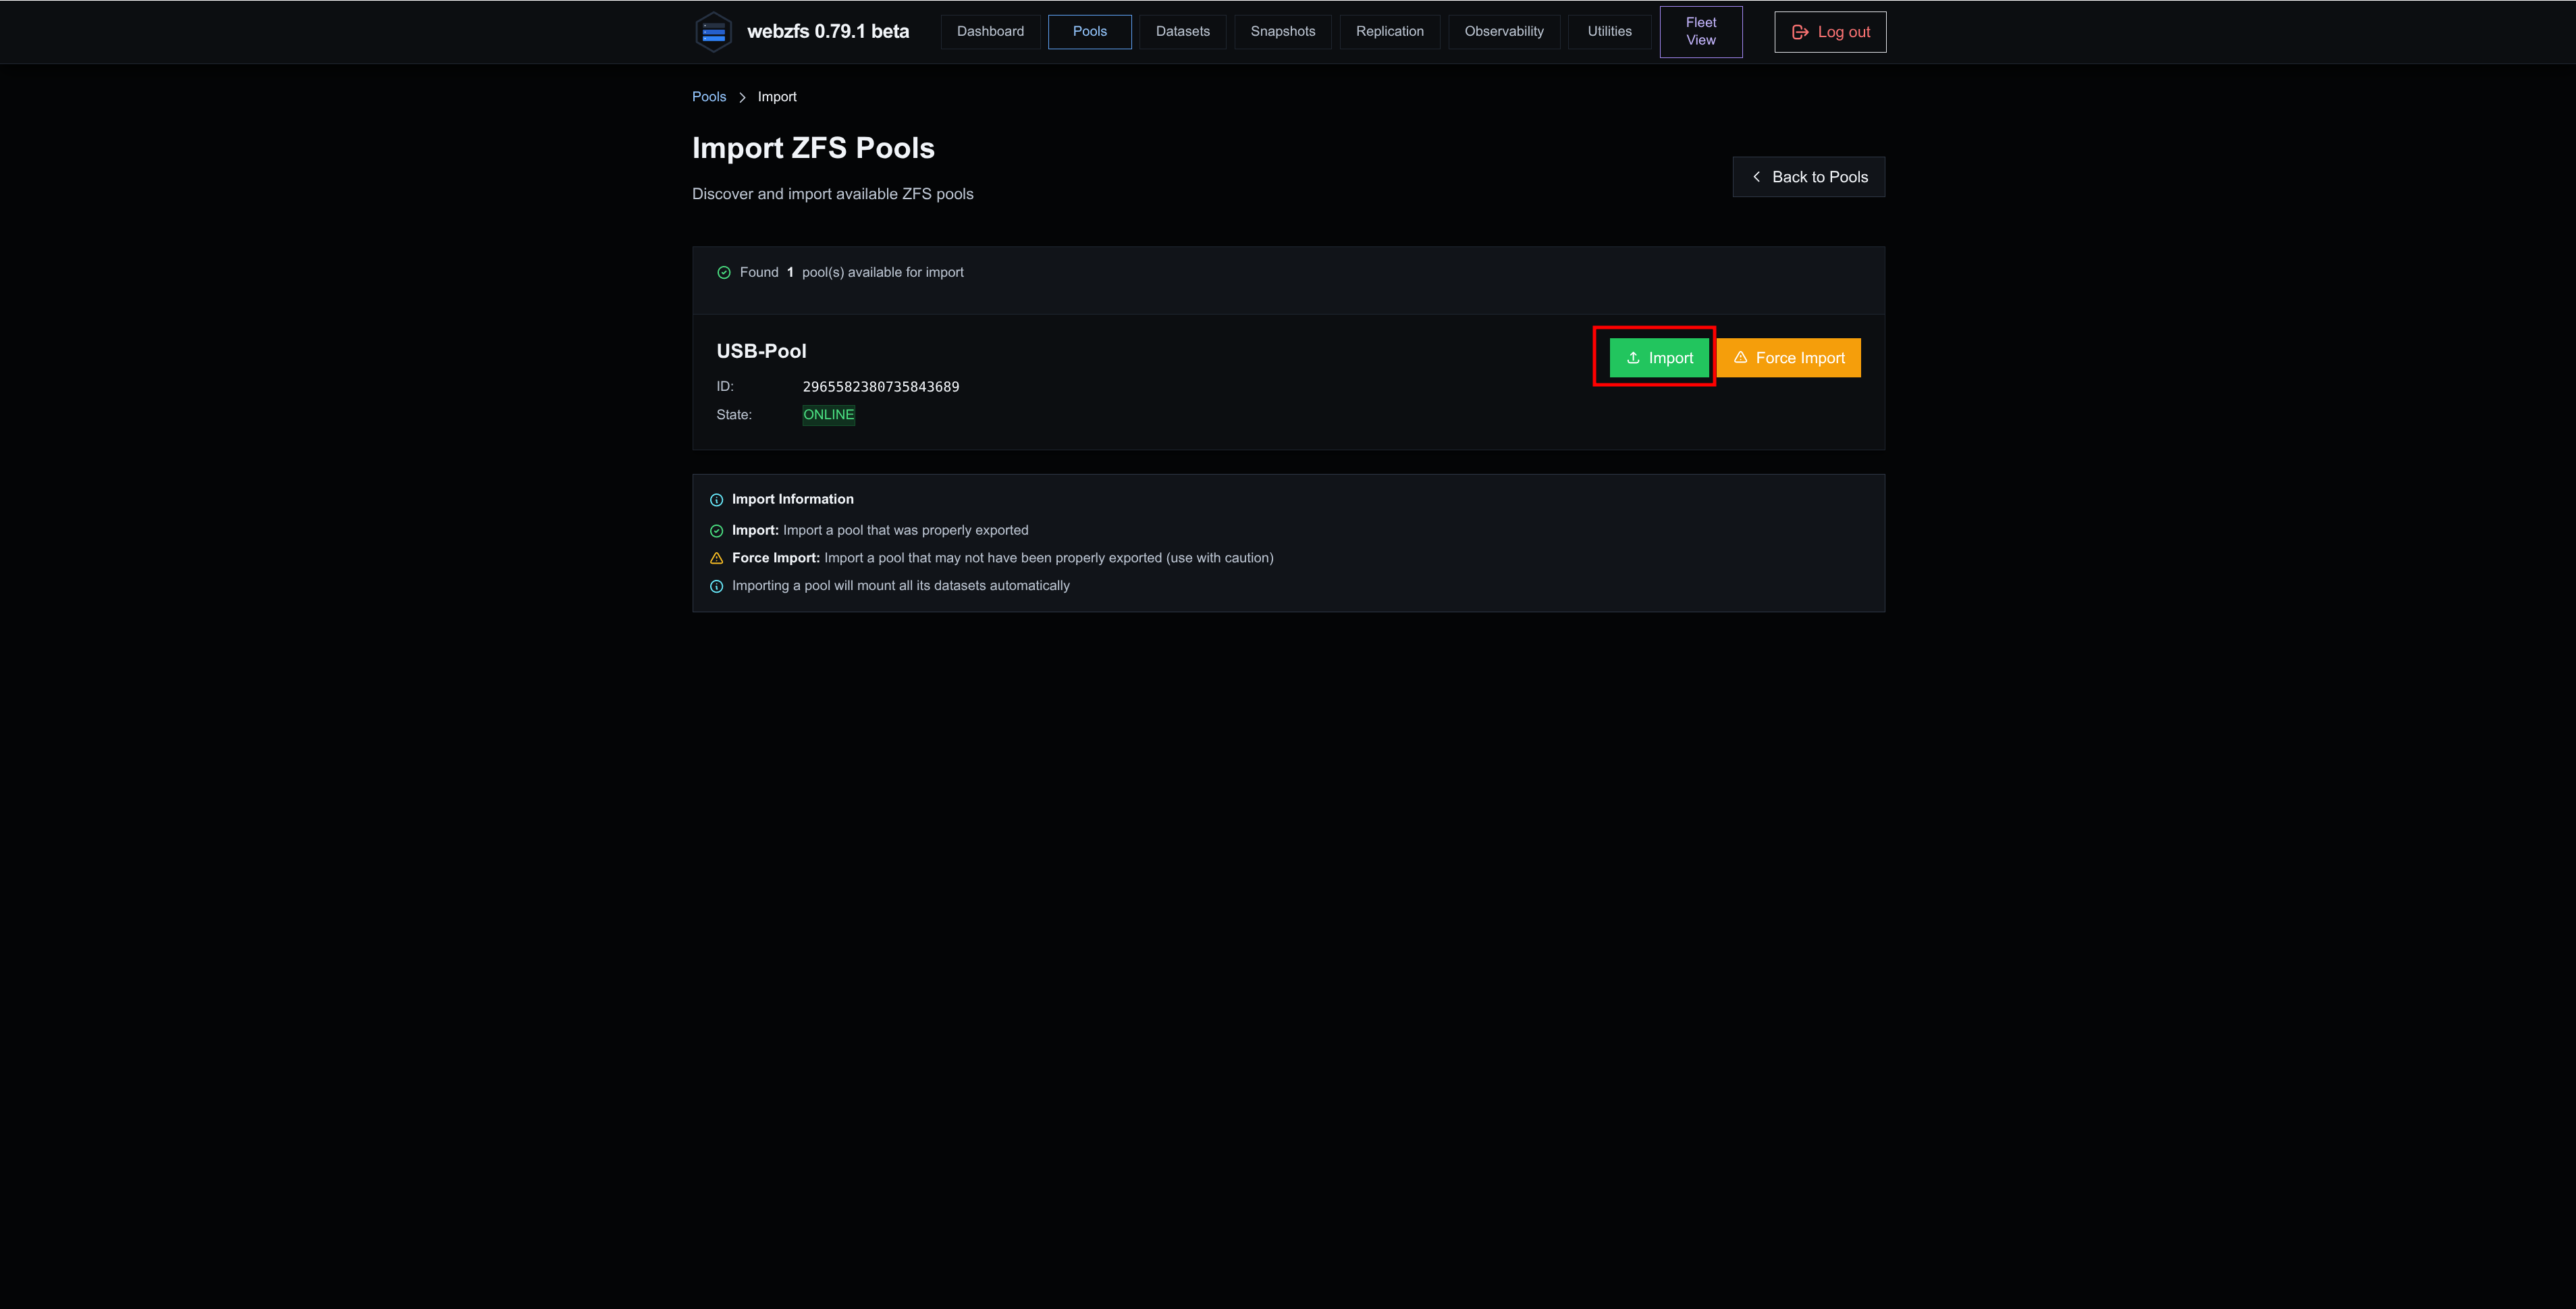
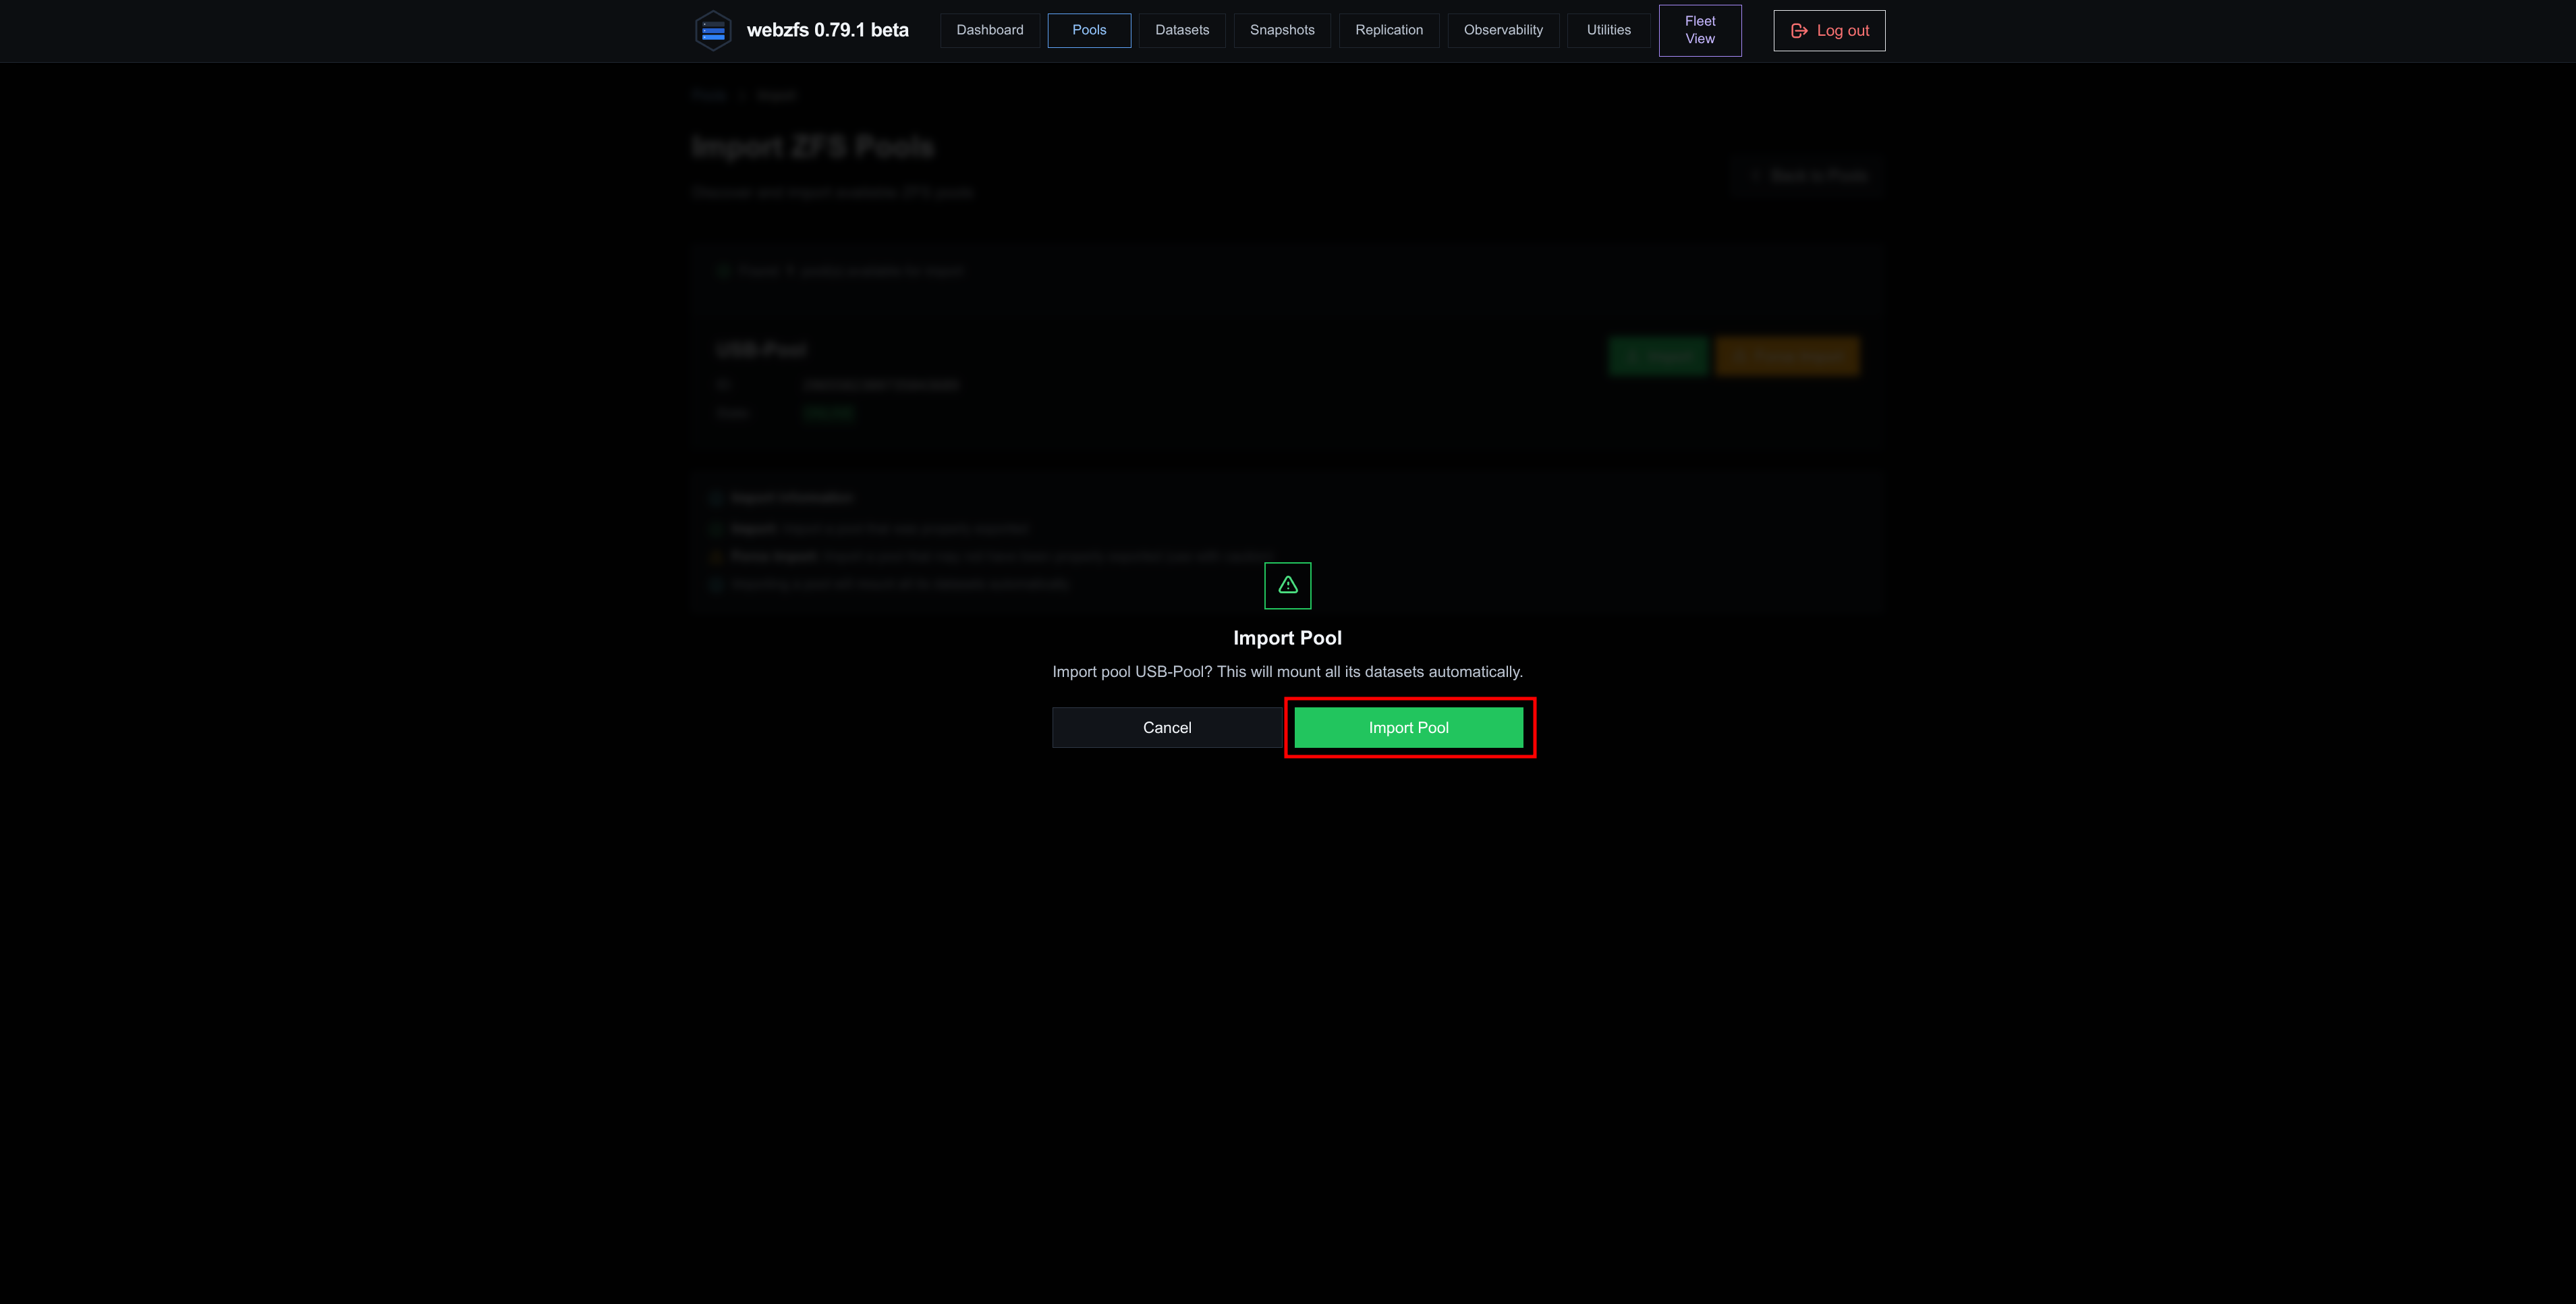
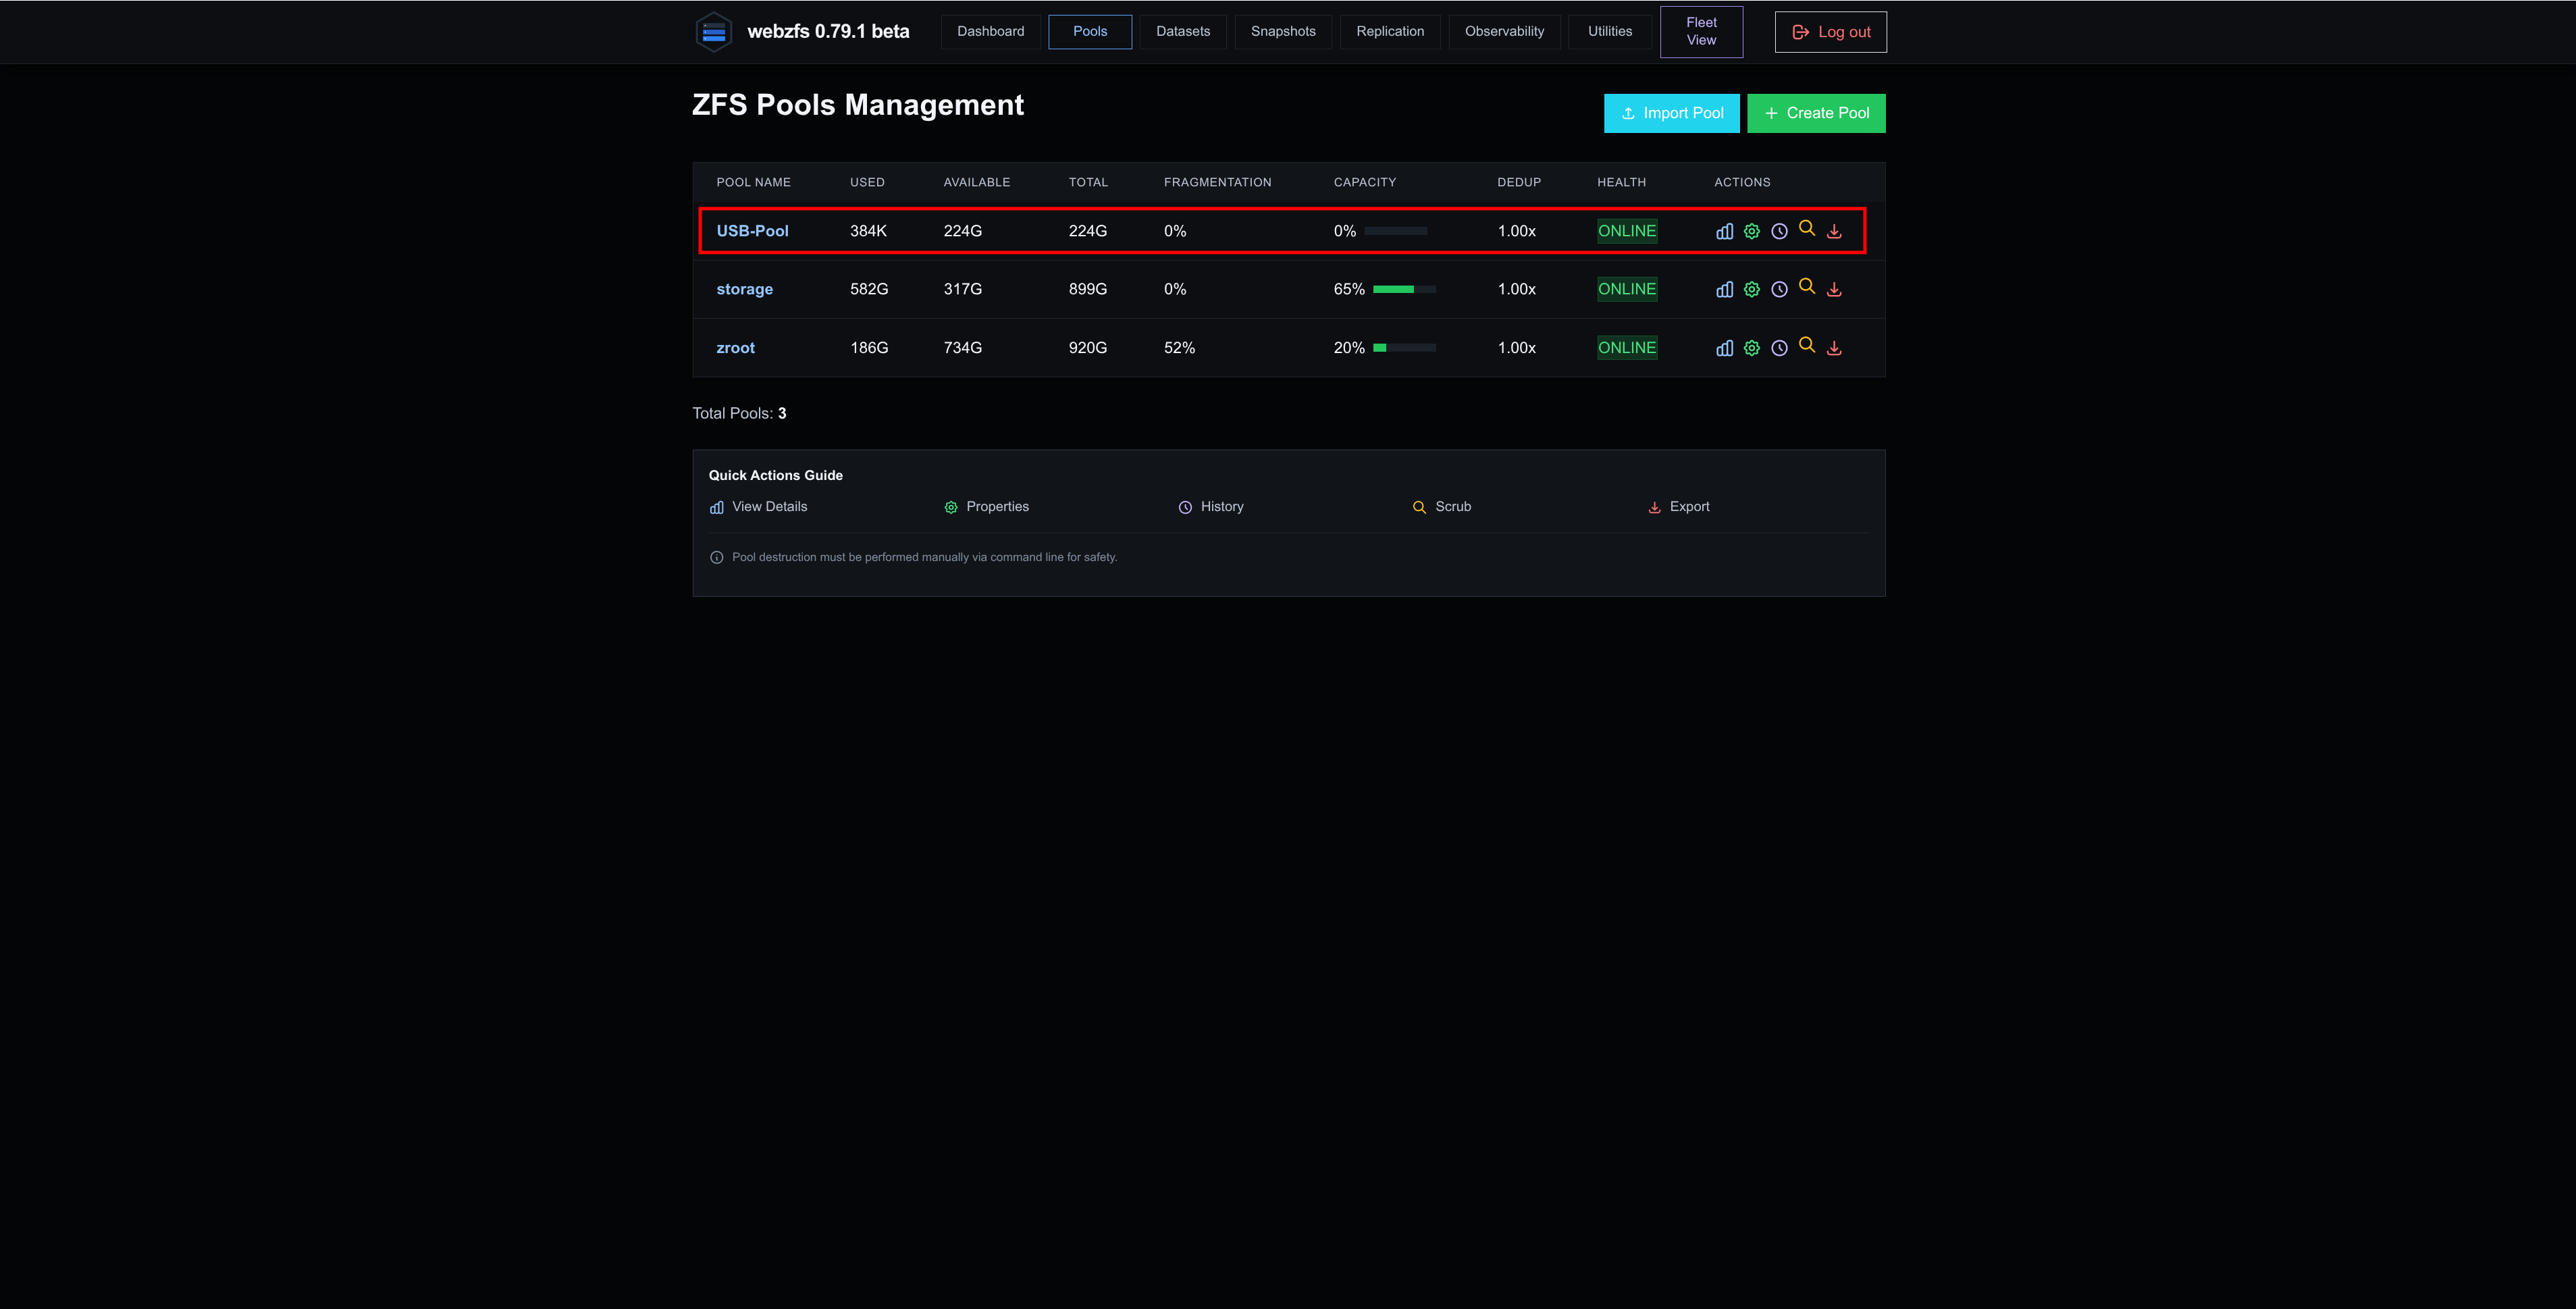
Import Pool:
Import pools; these are usually ZFS disks/partitions that were created from an external system or pools that were previously exported to perform some kind of maintenance on them.
|
|
|
|
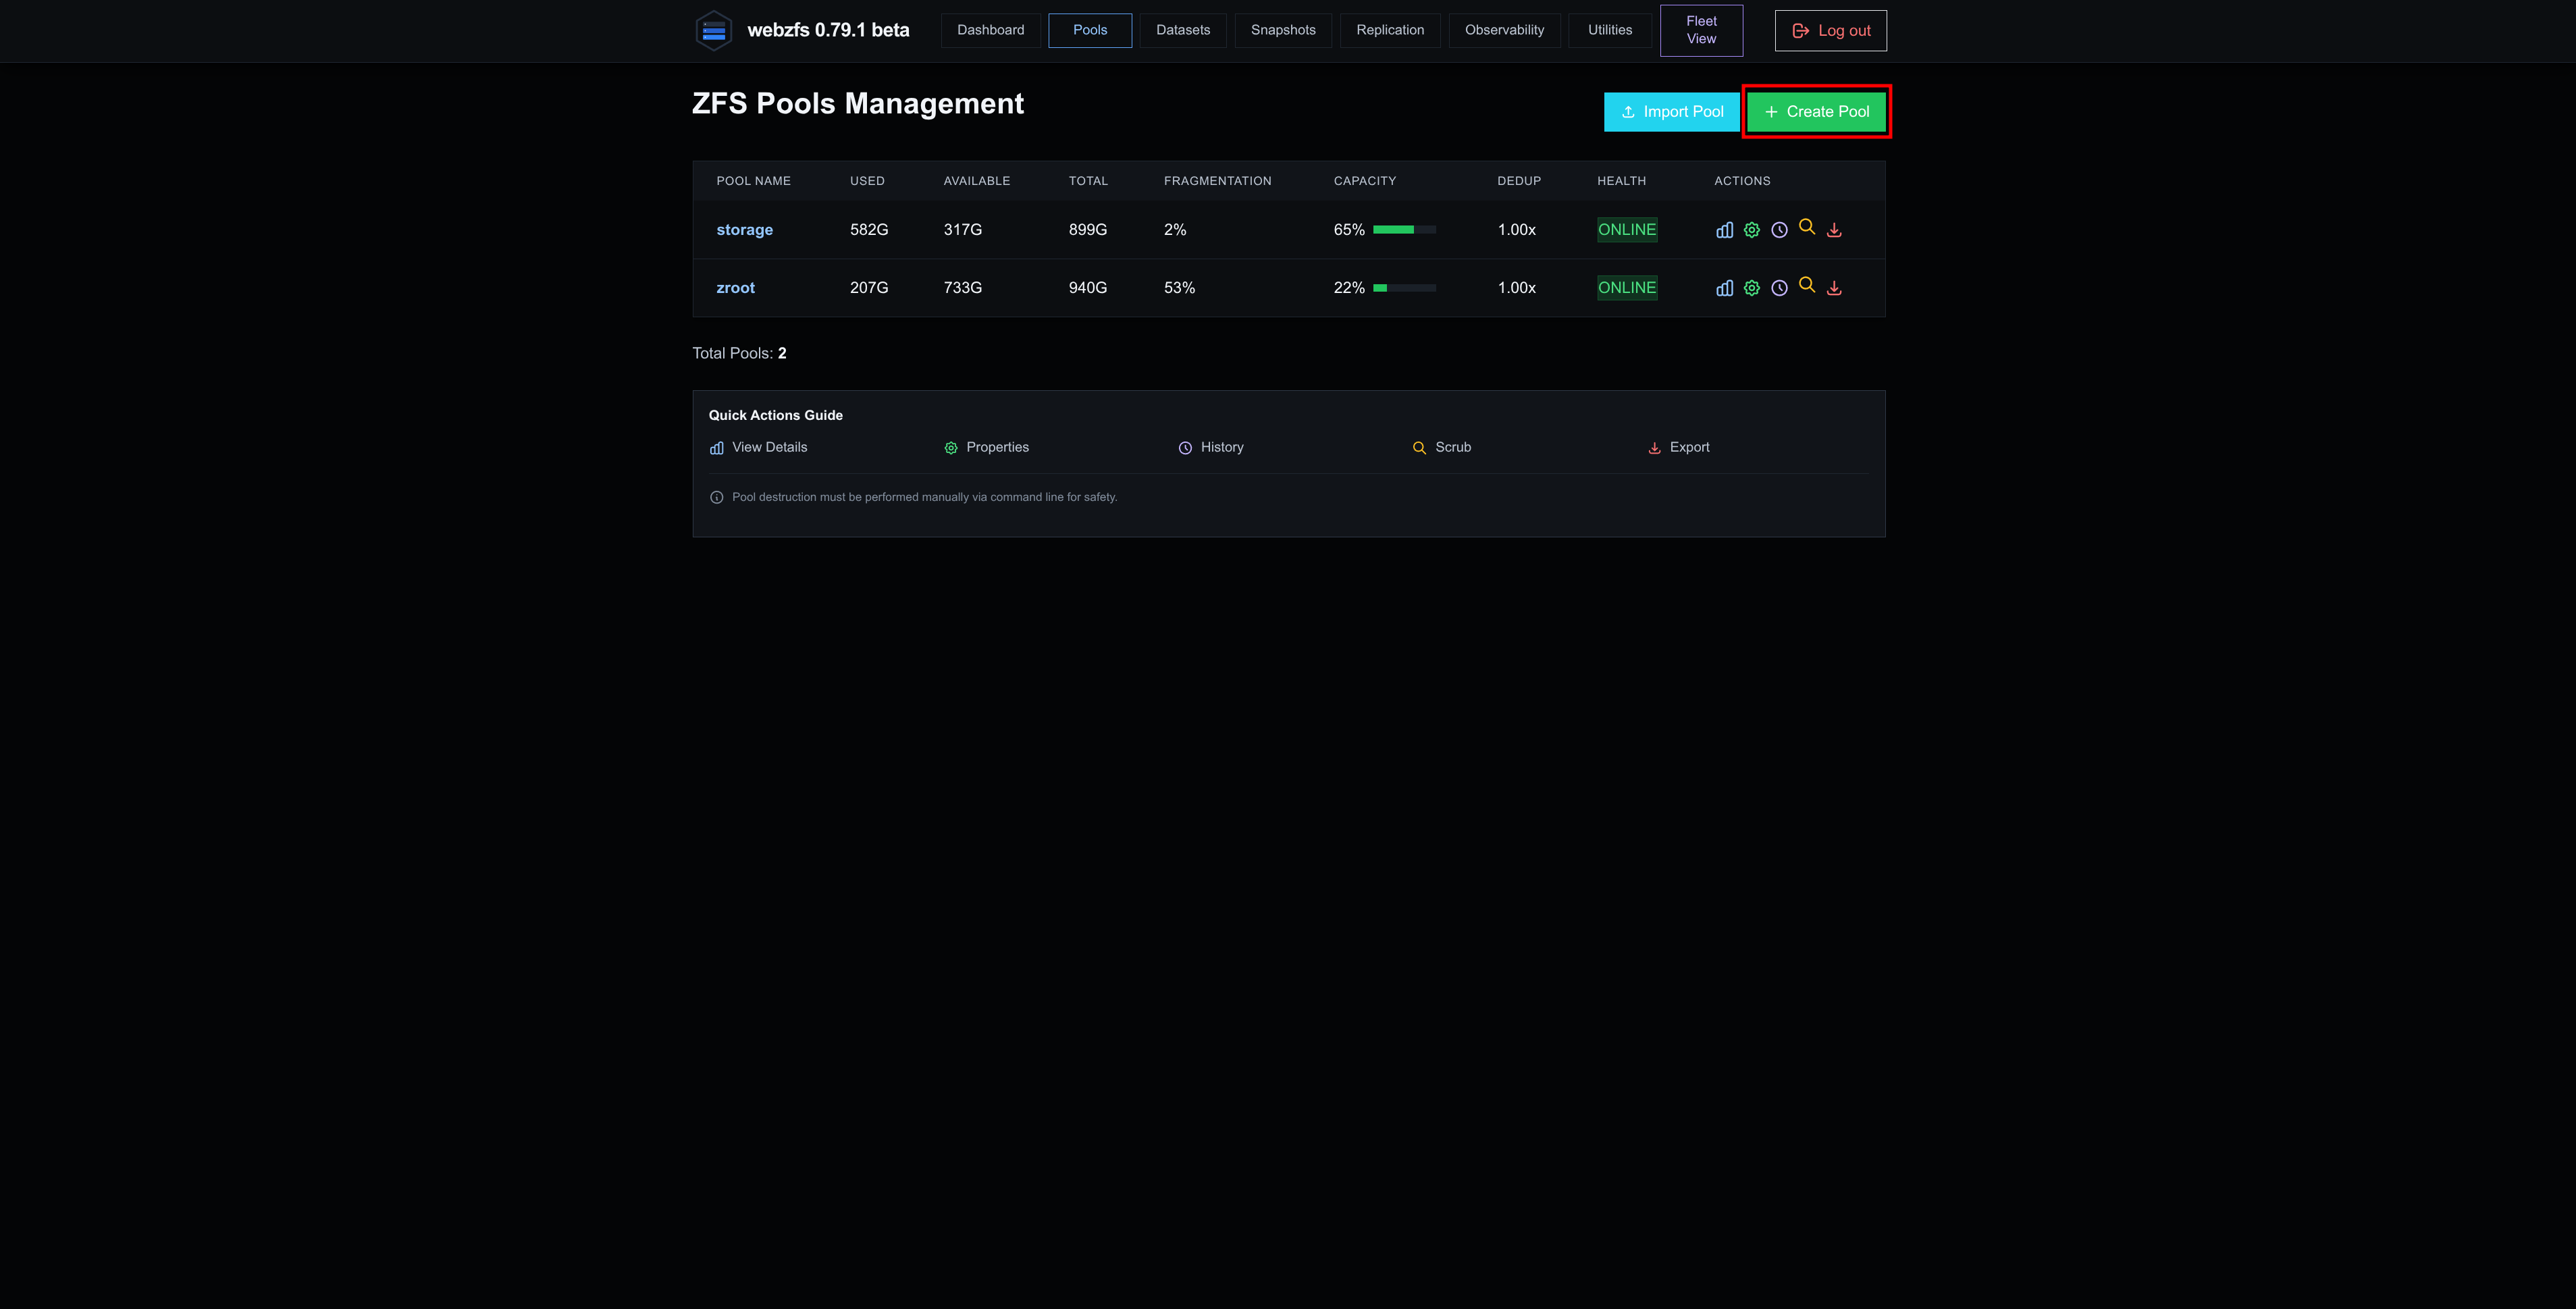
Create Pool:
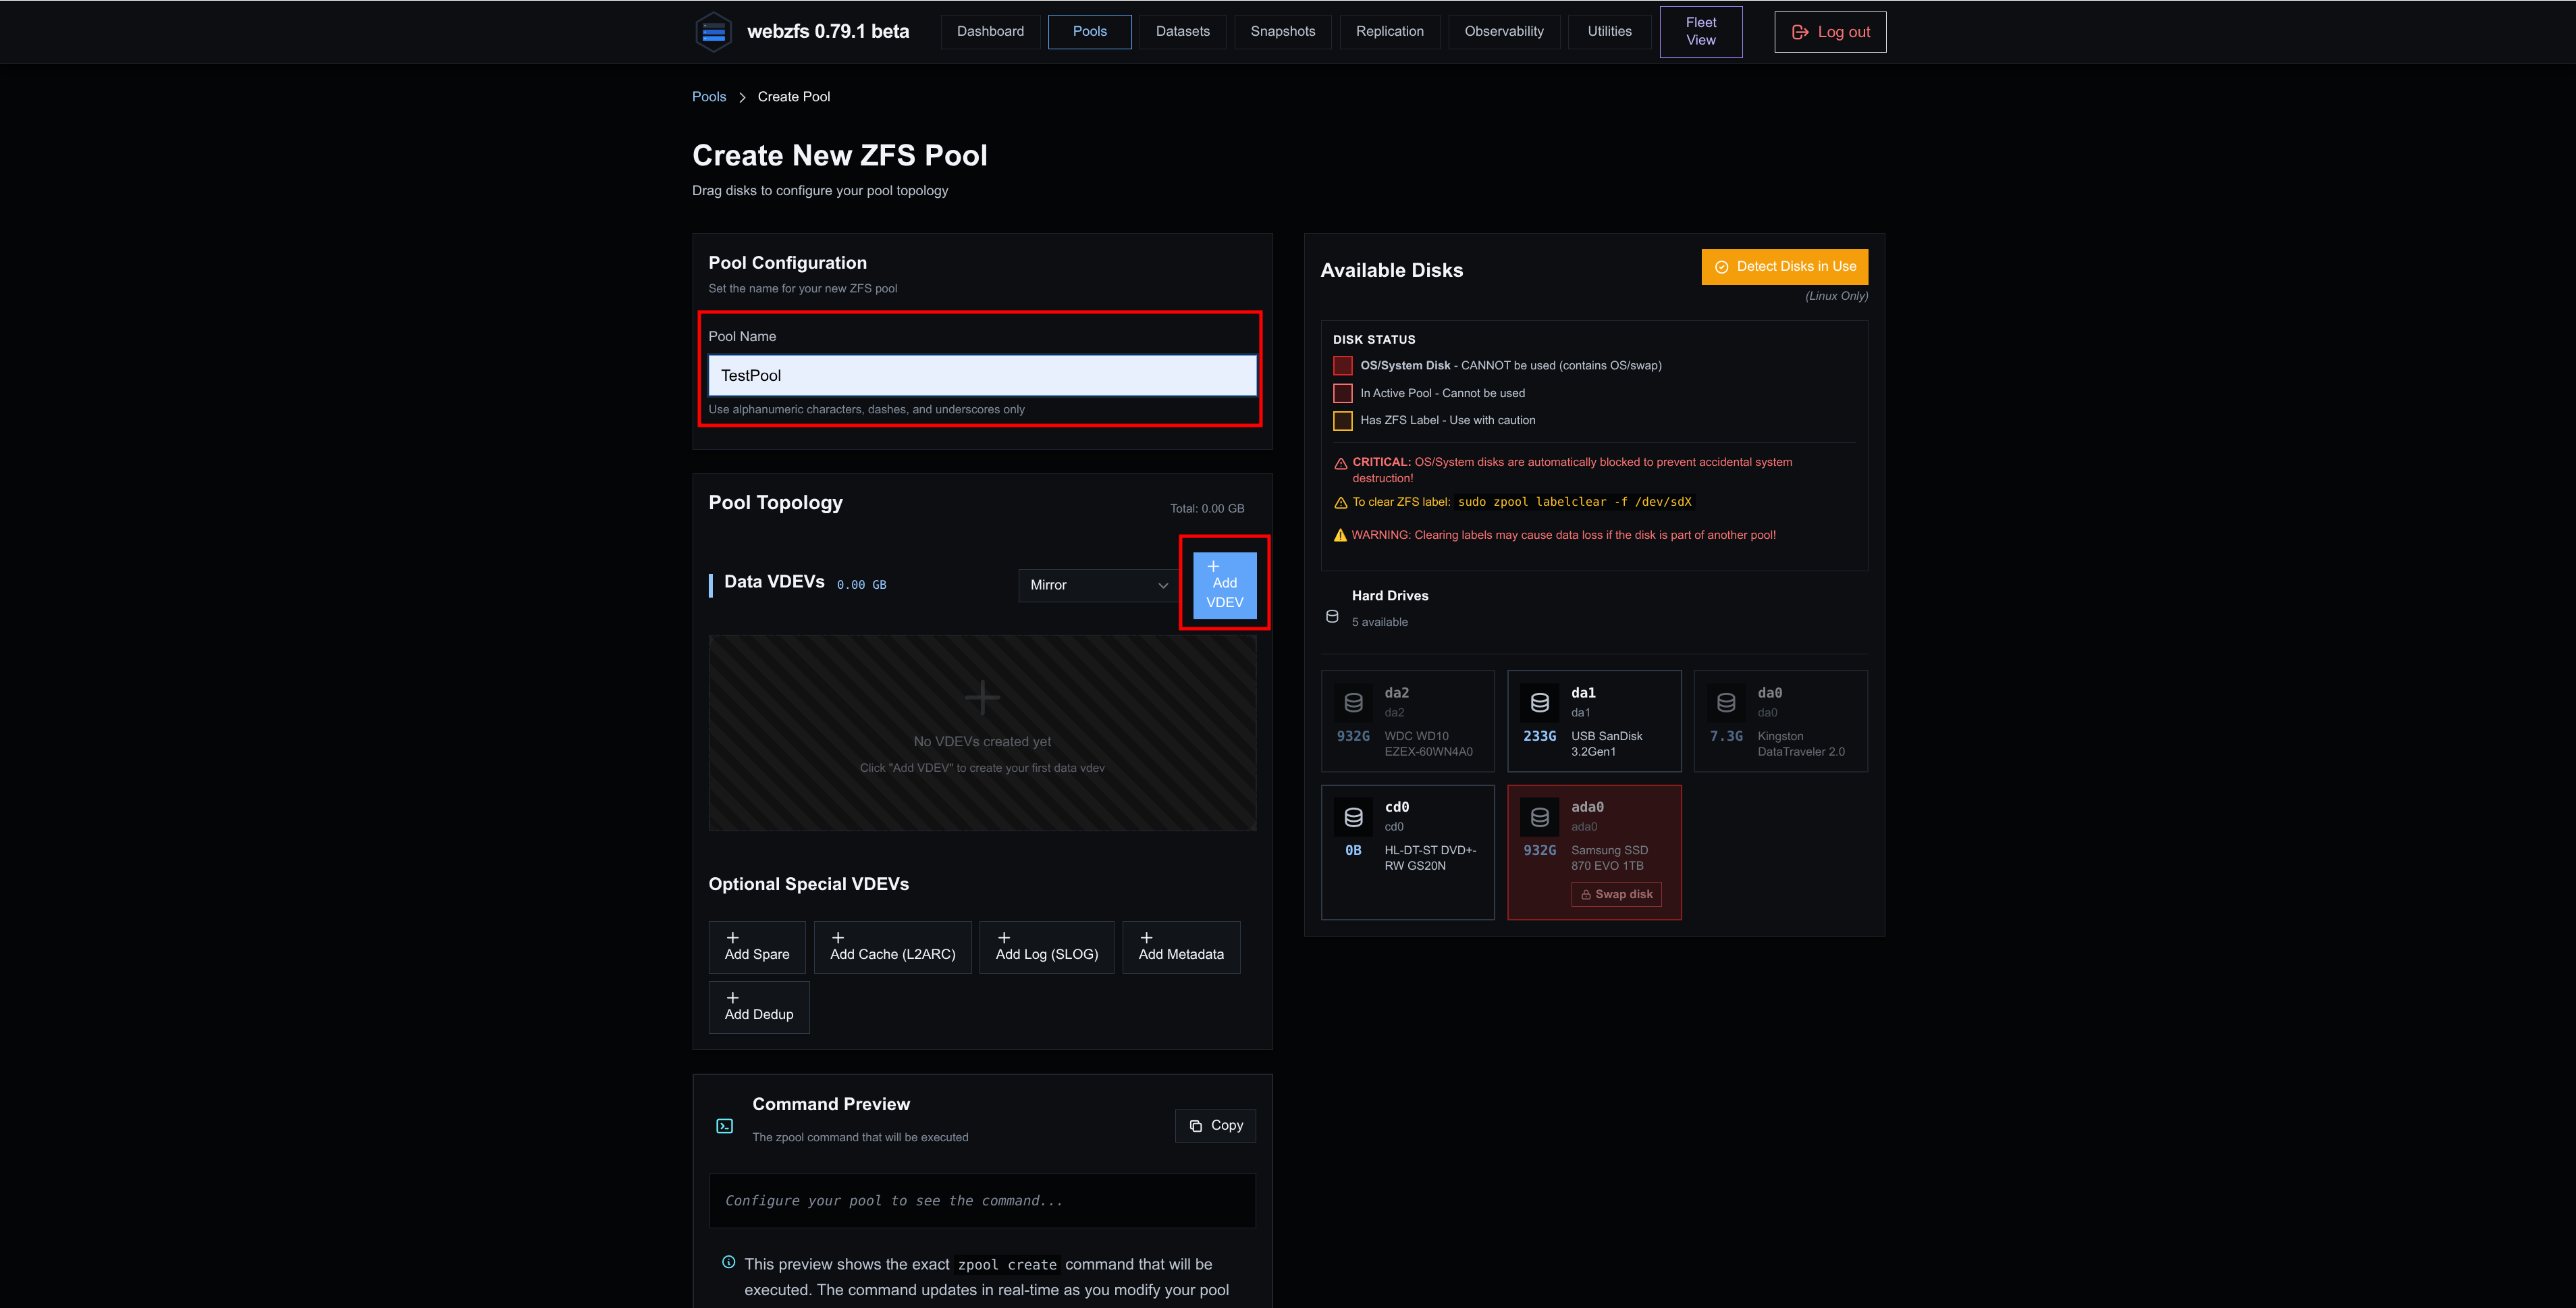
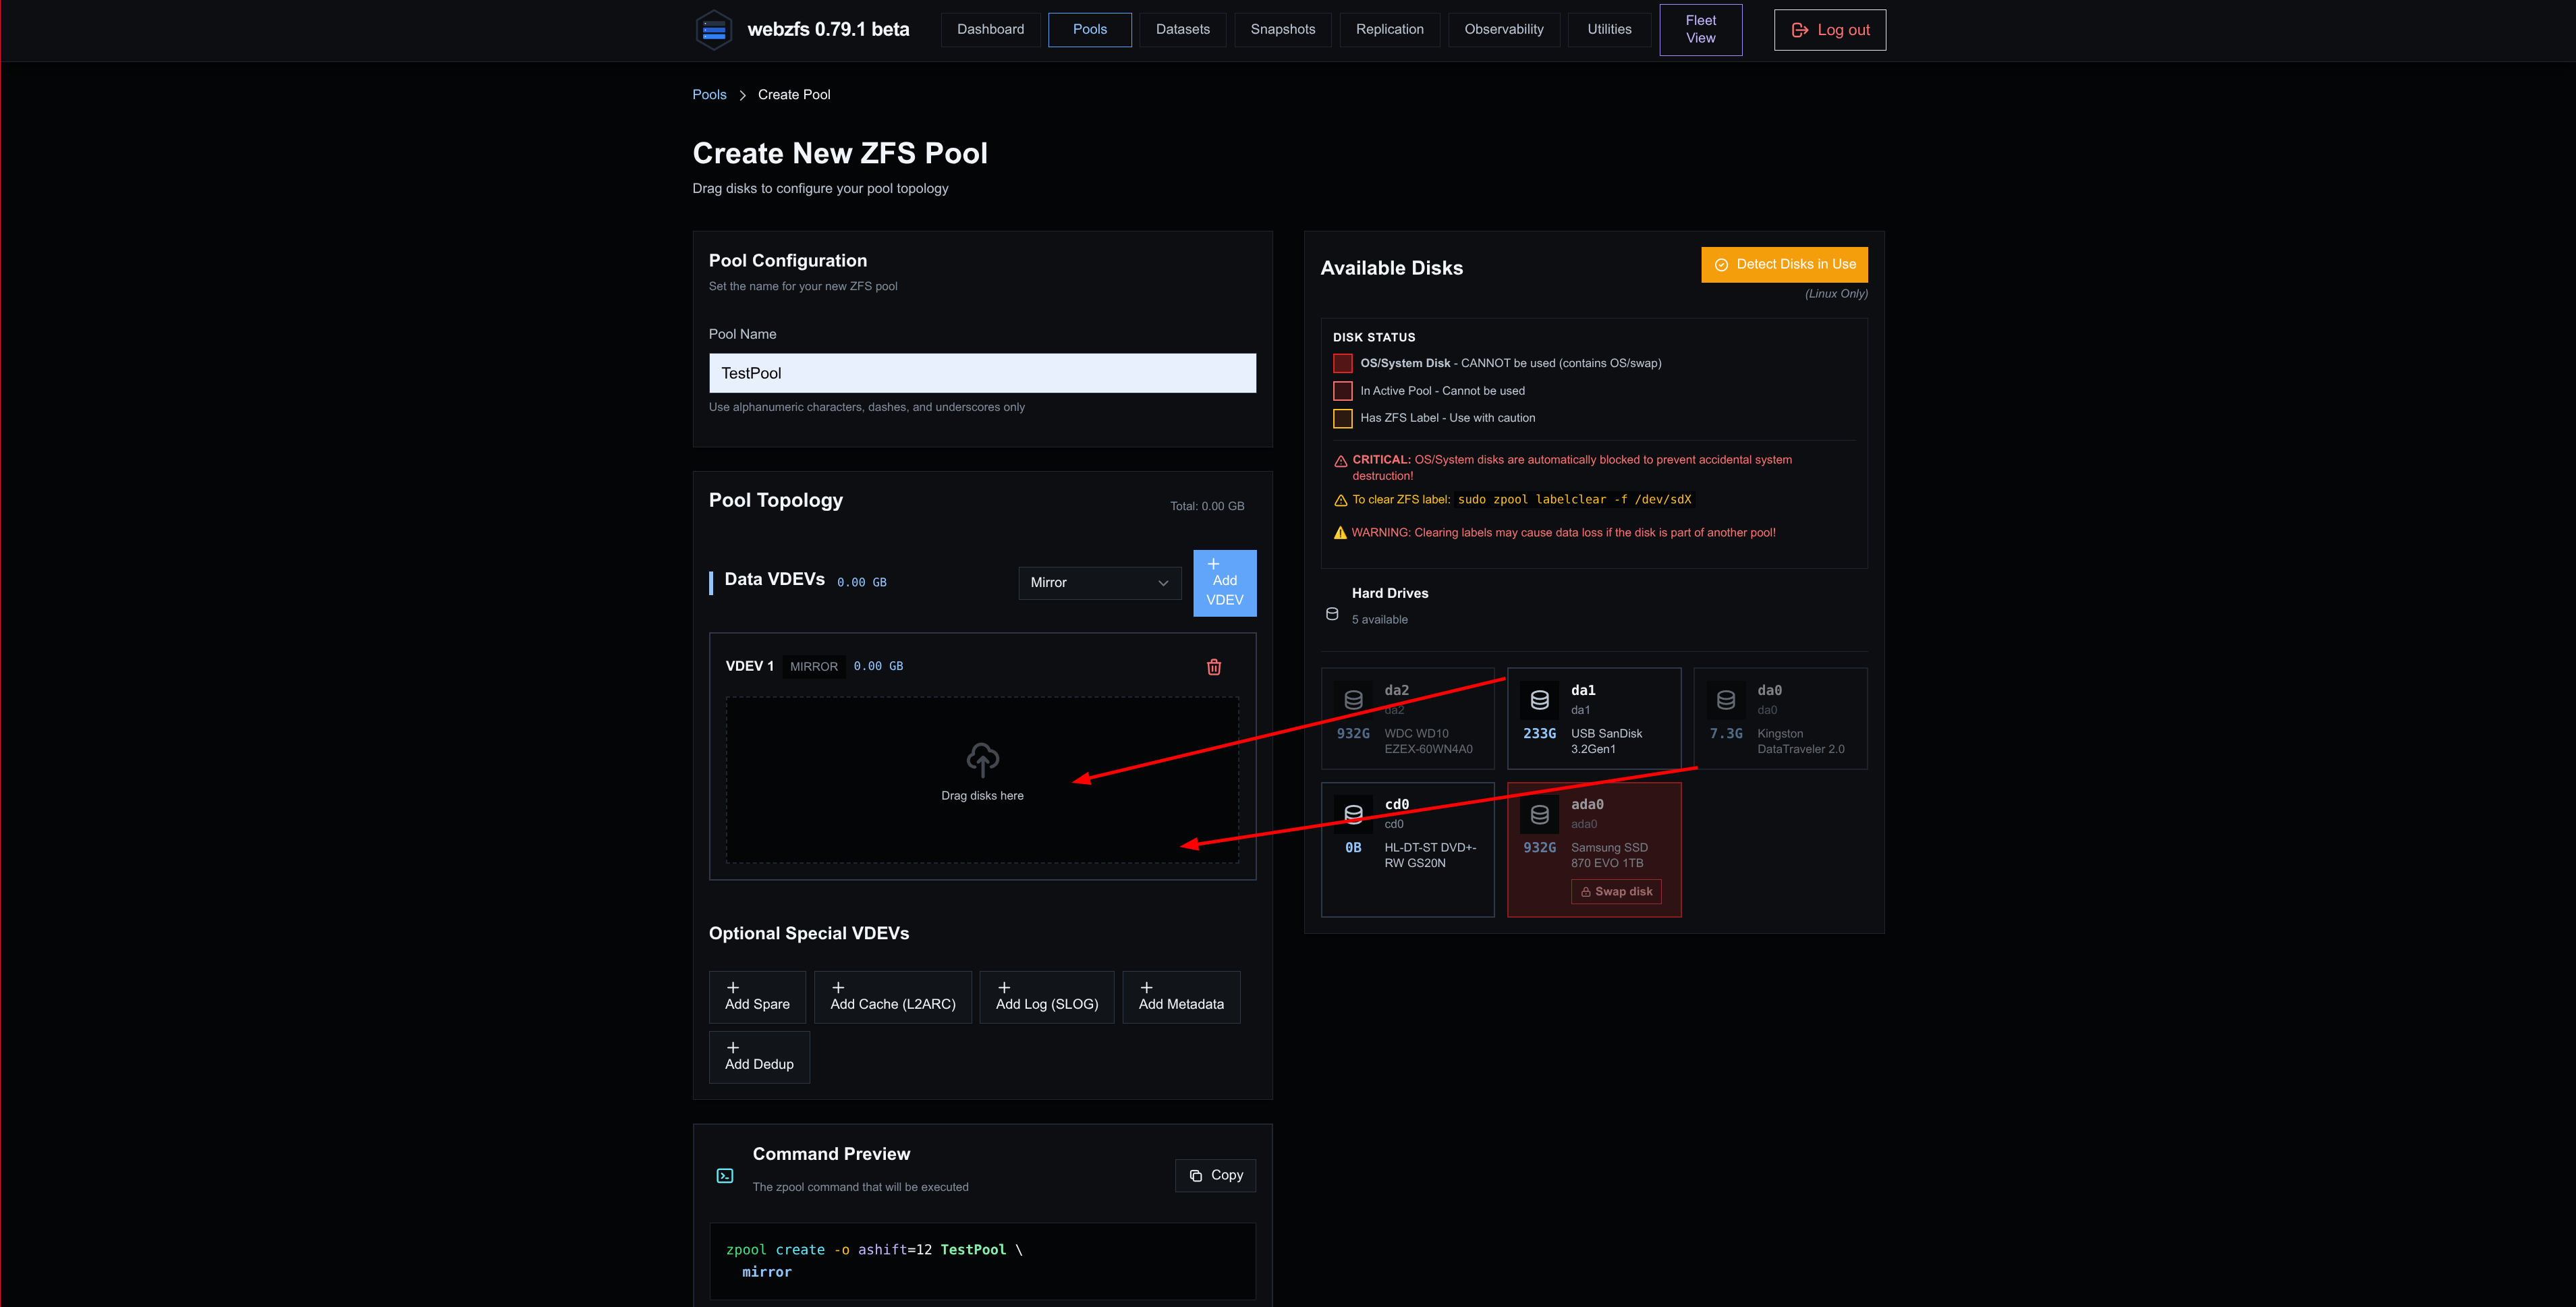
Create new pools. In my case I am going to create a Mirror with two disks of different sizes; this will fail unless we check the Force creation if devices in use option, my devices are not in use but since this option adds the -f parameter to the ZFS command, it works for me.
|
|
|
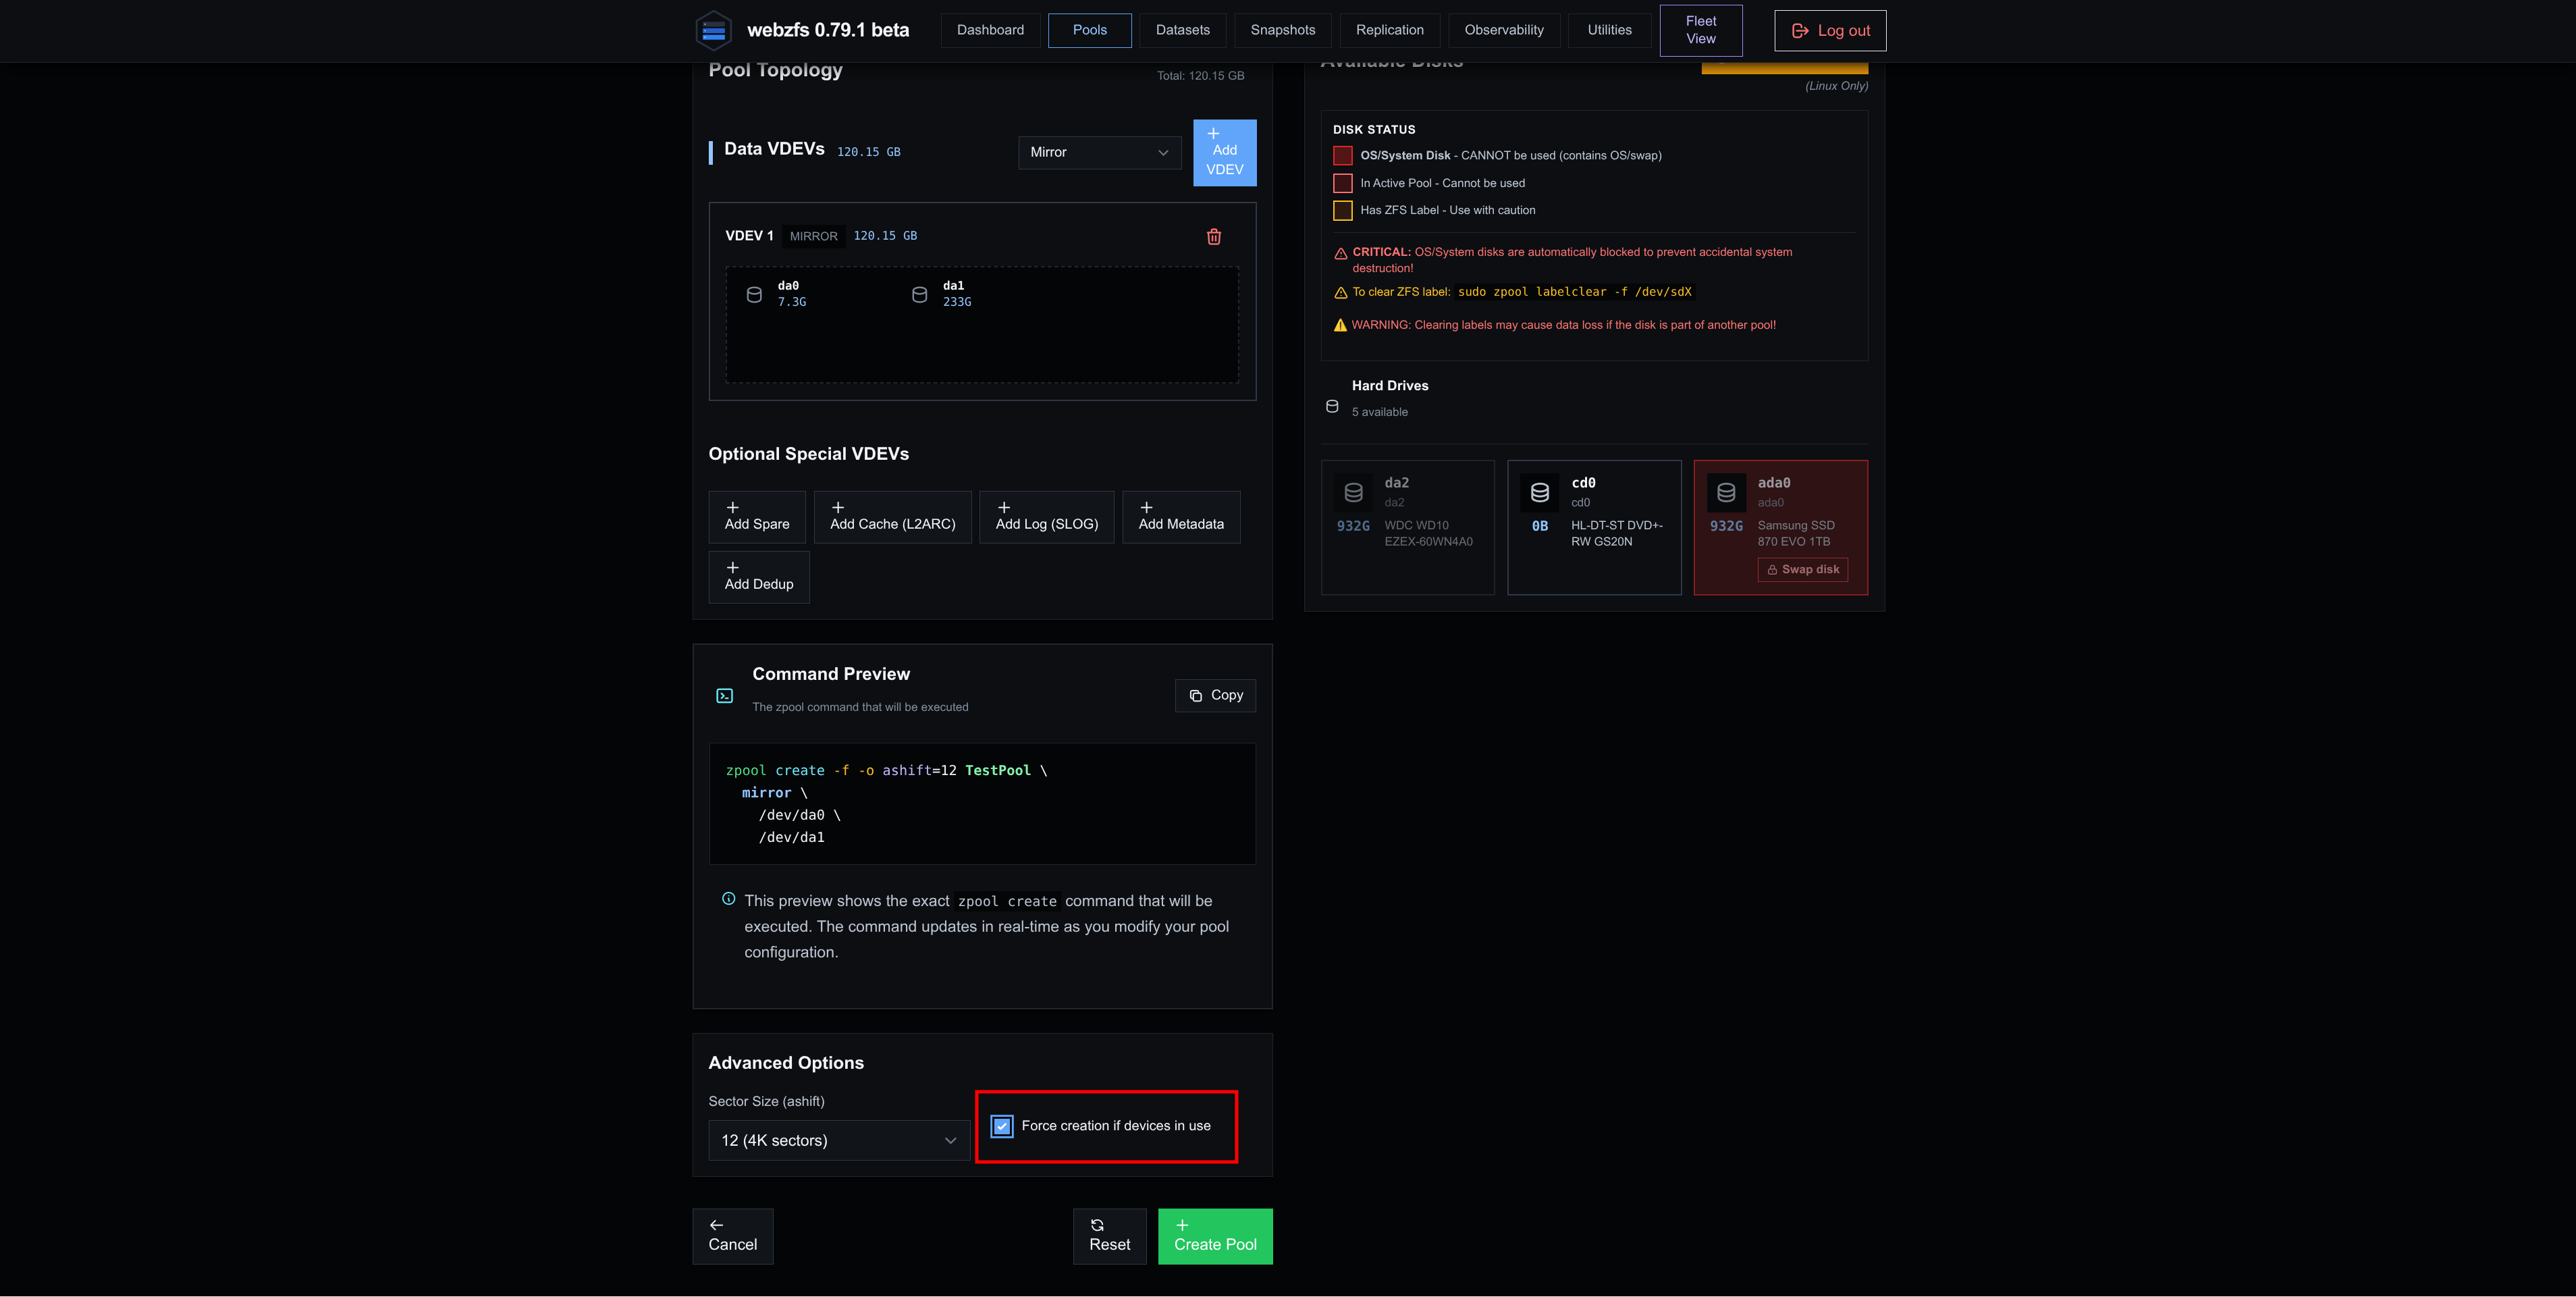
|
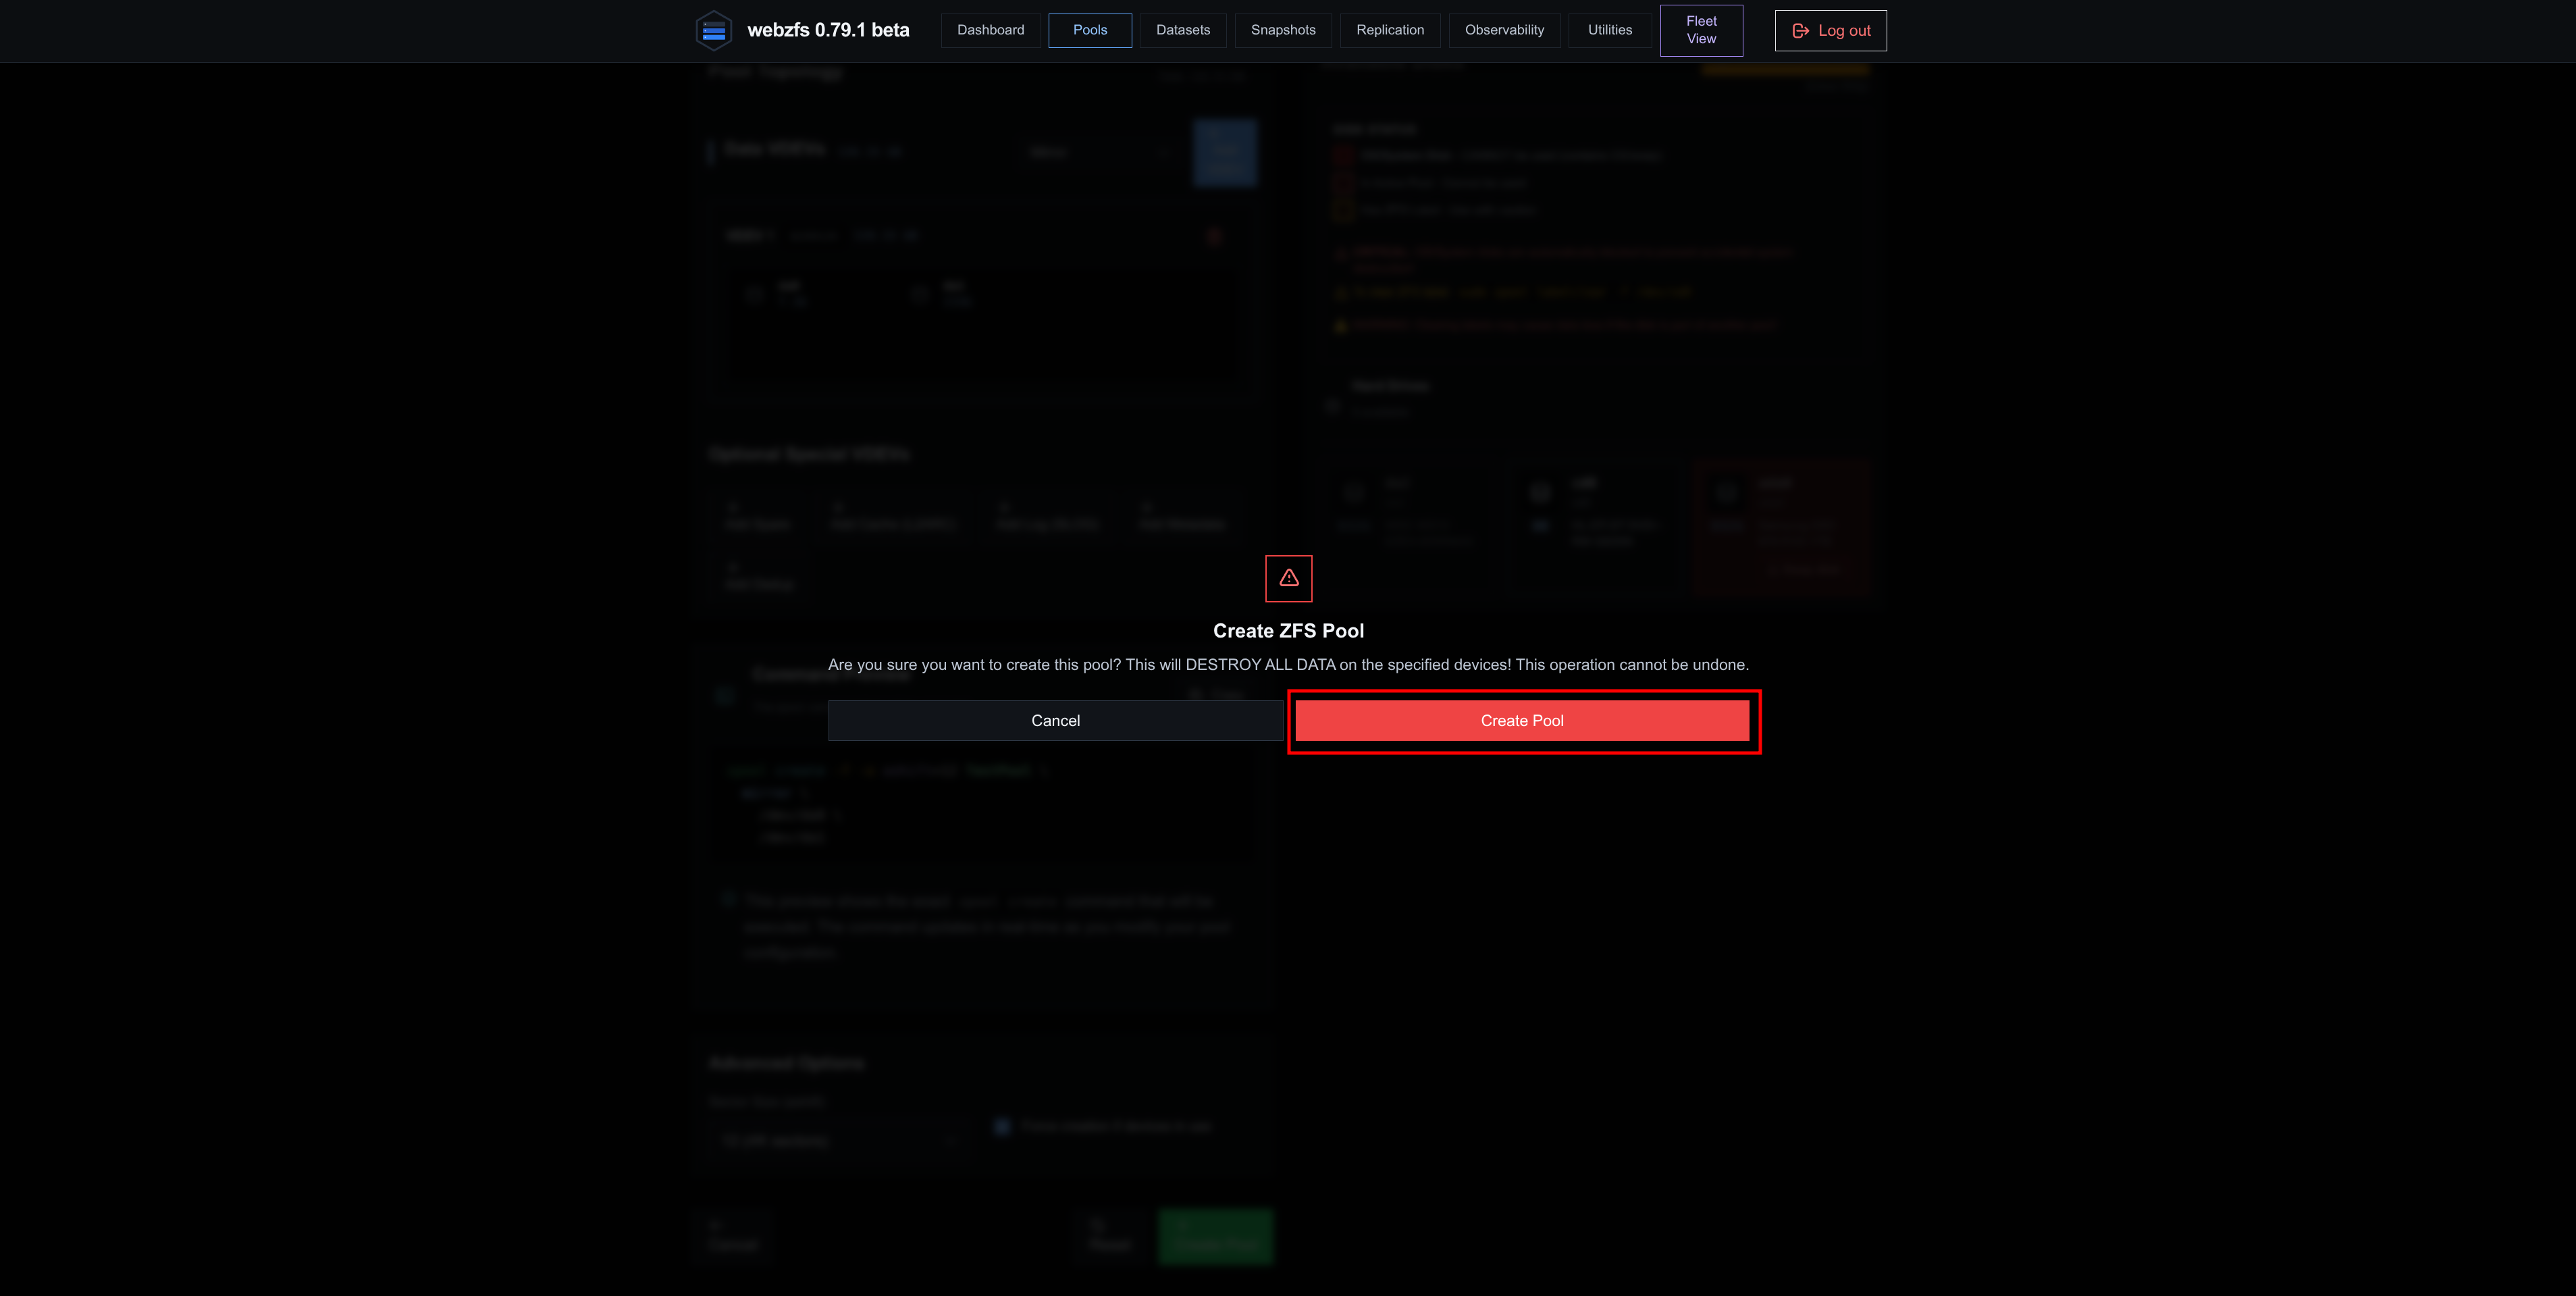
|
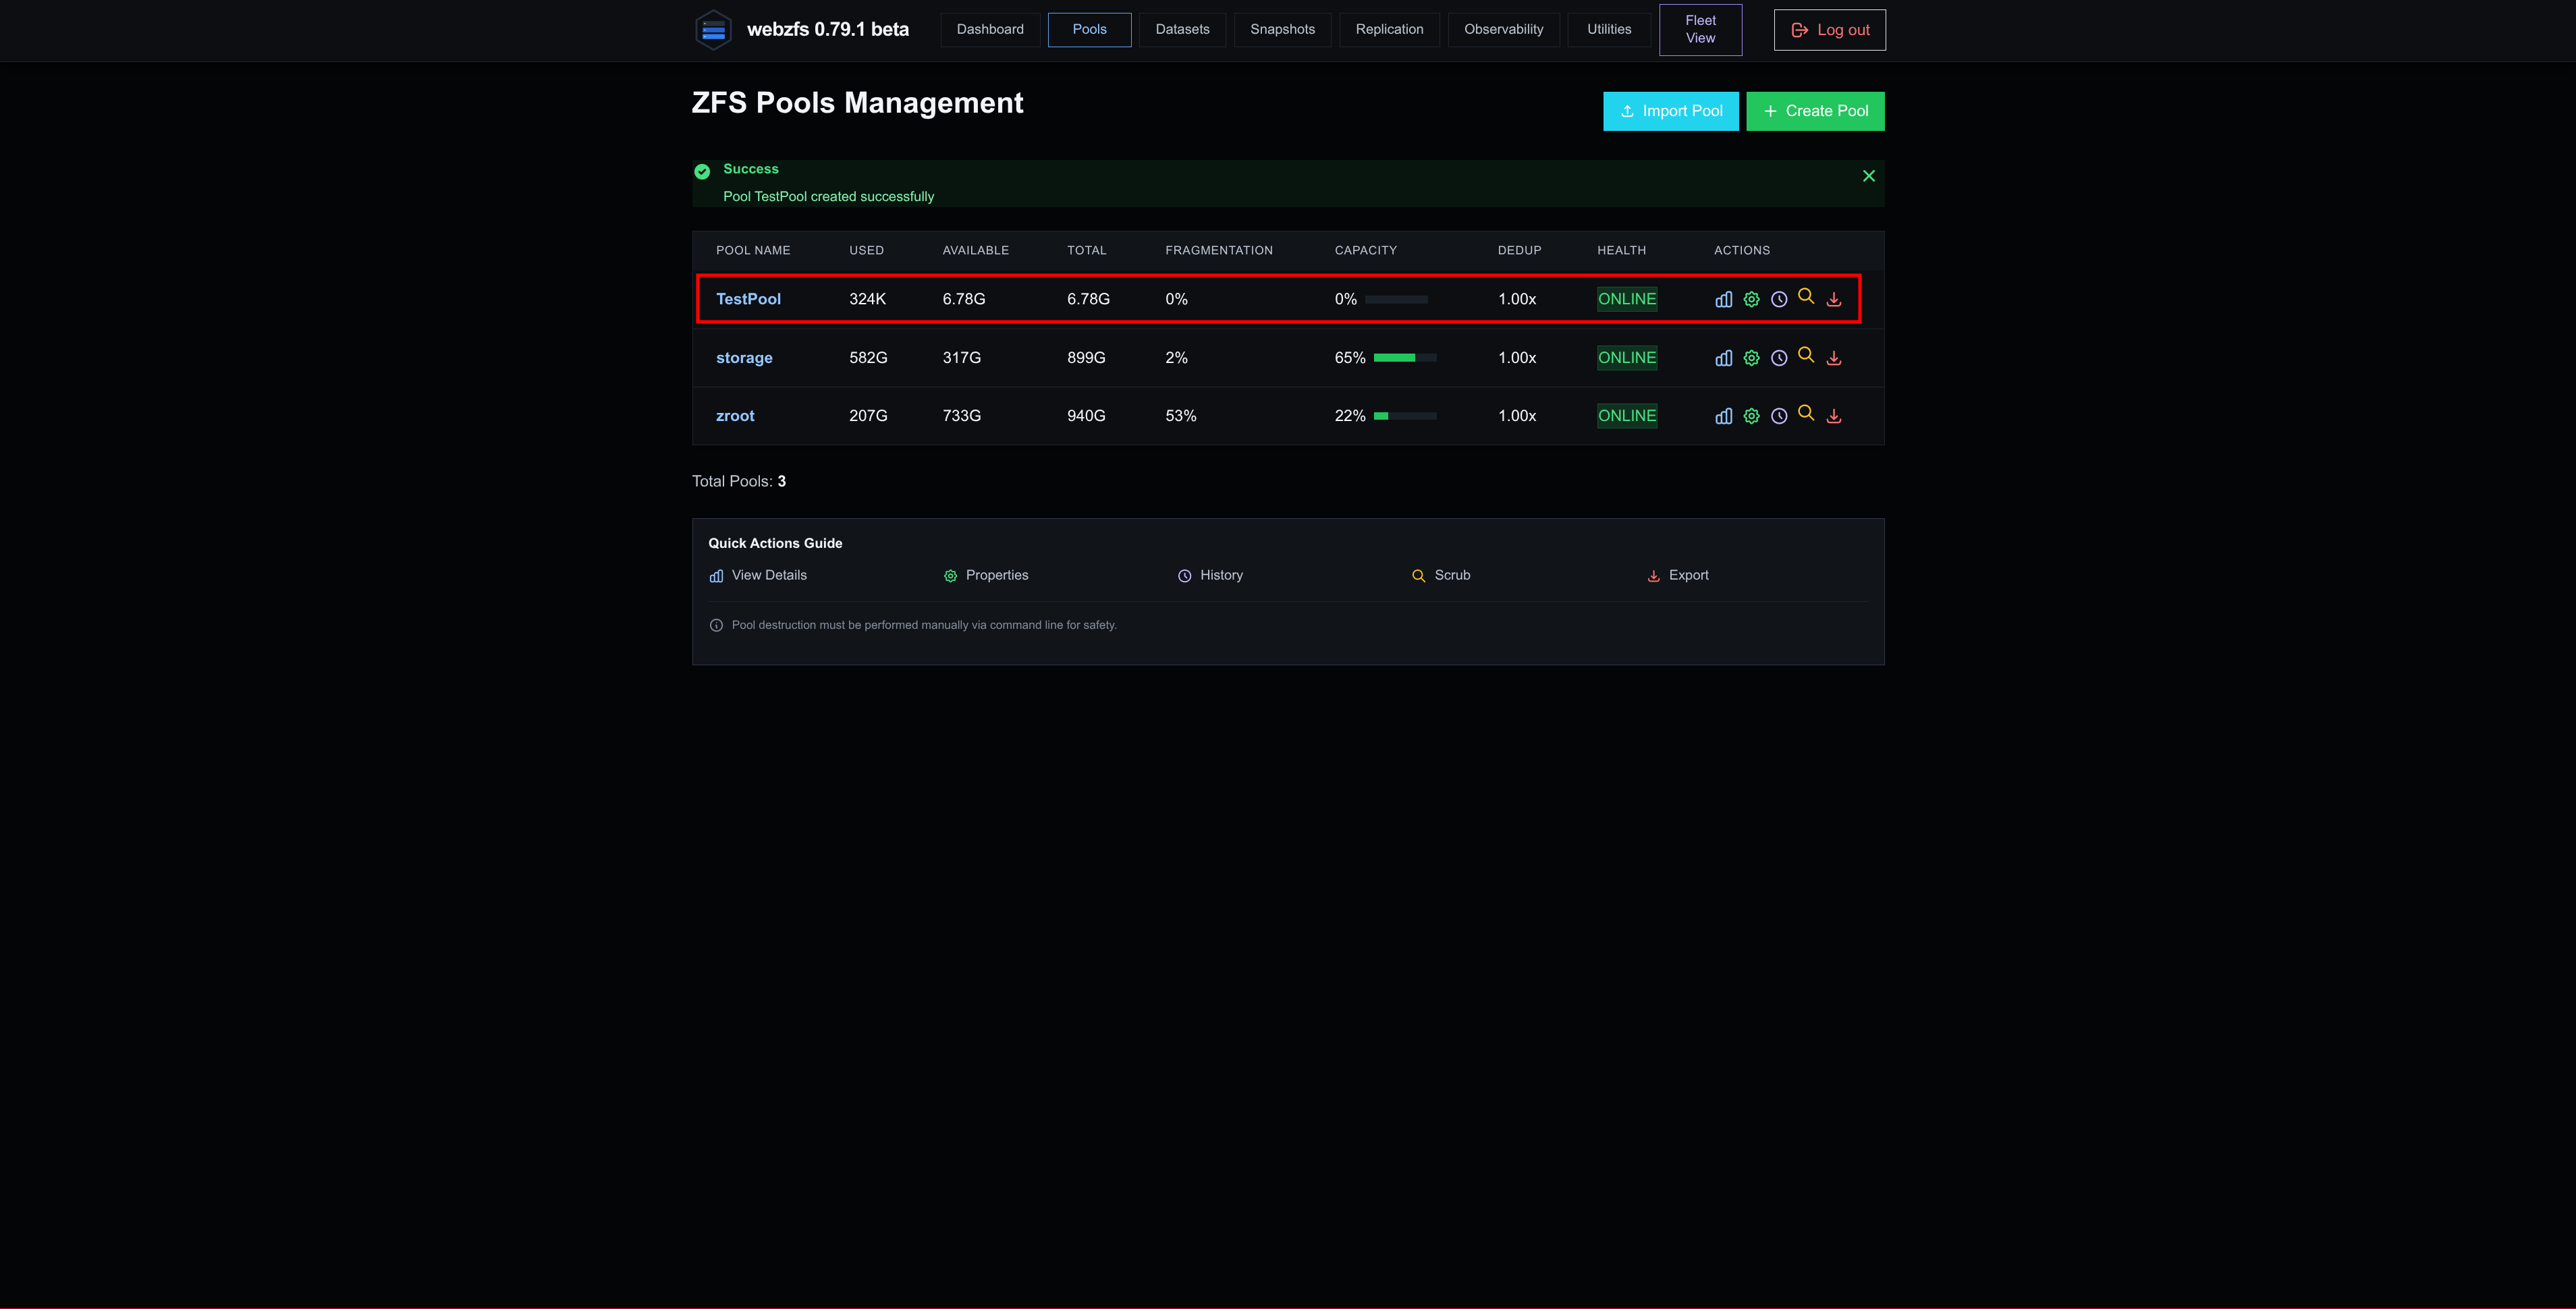
|
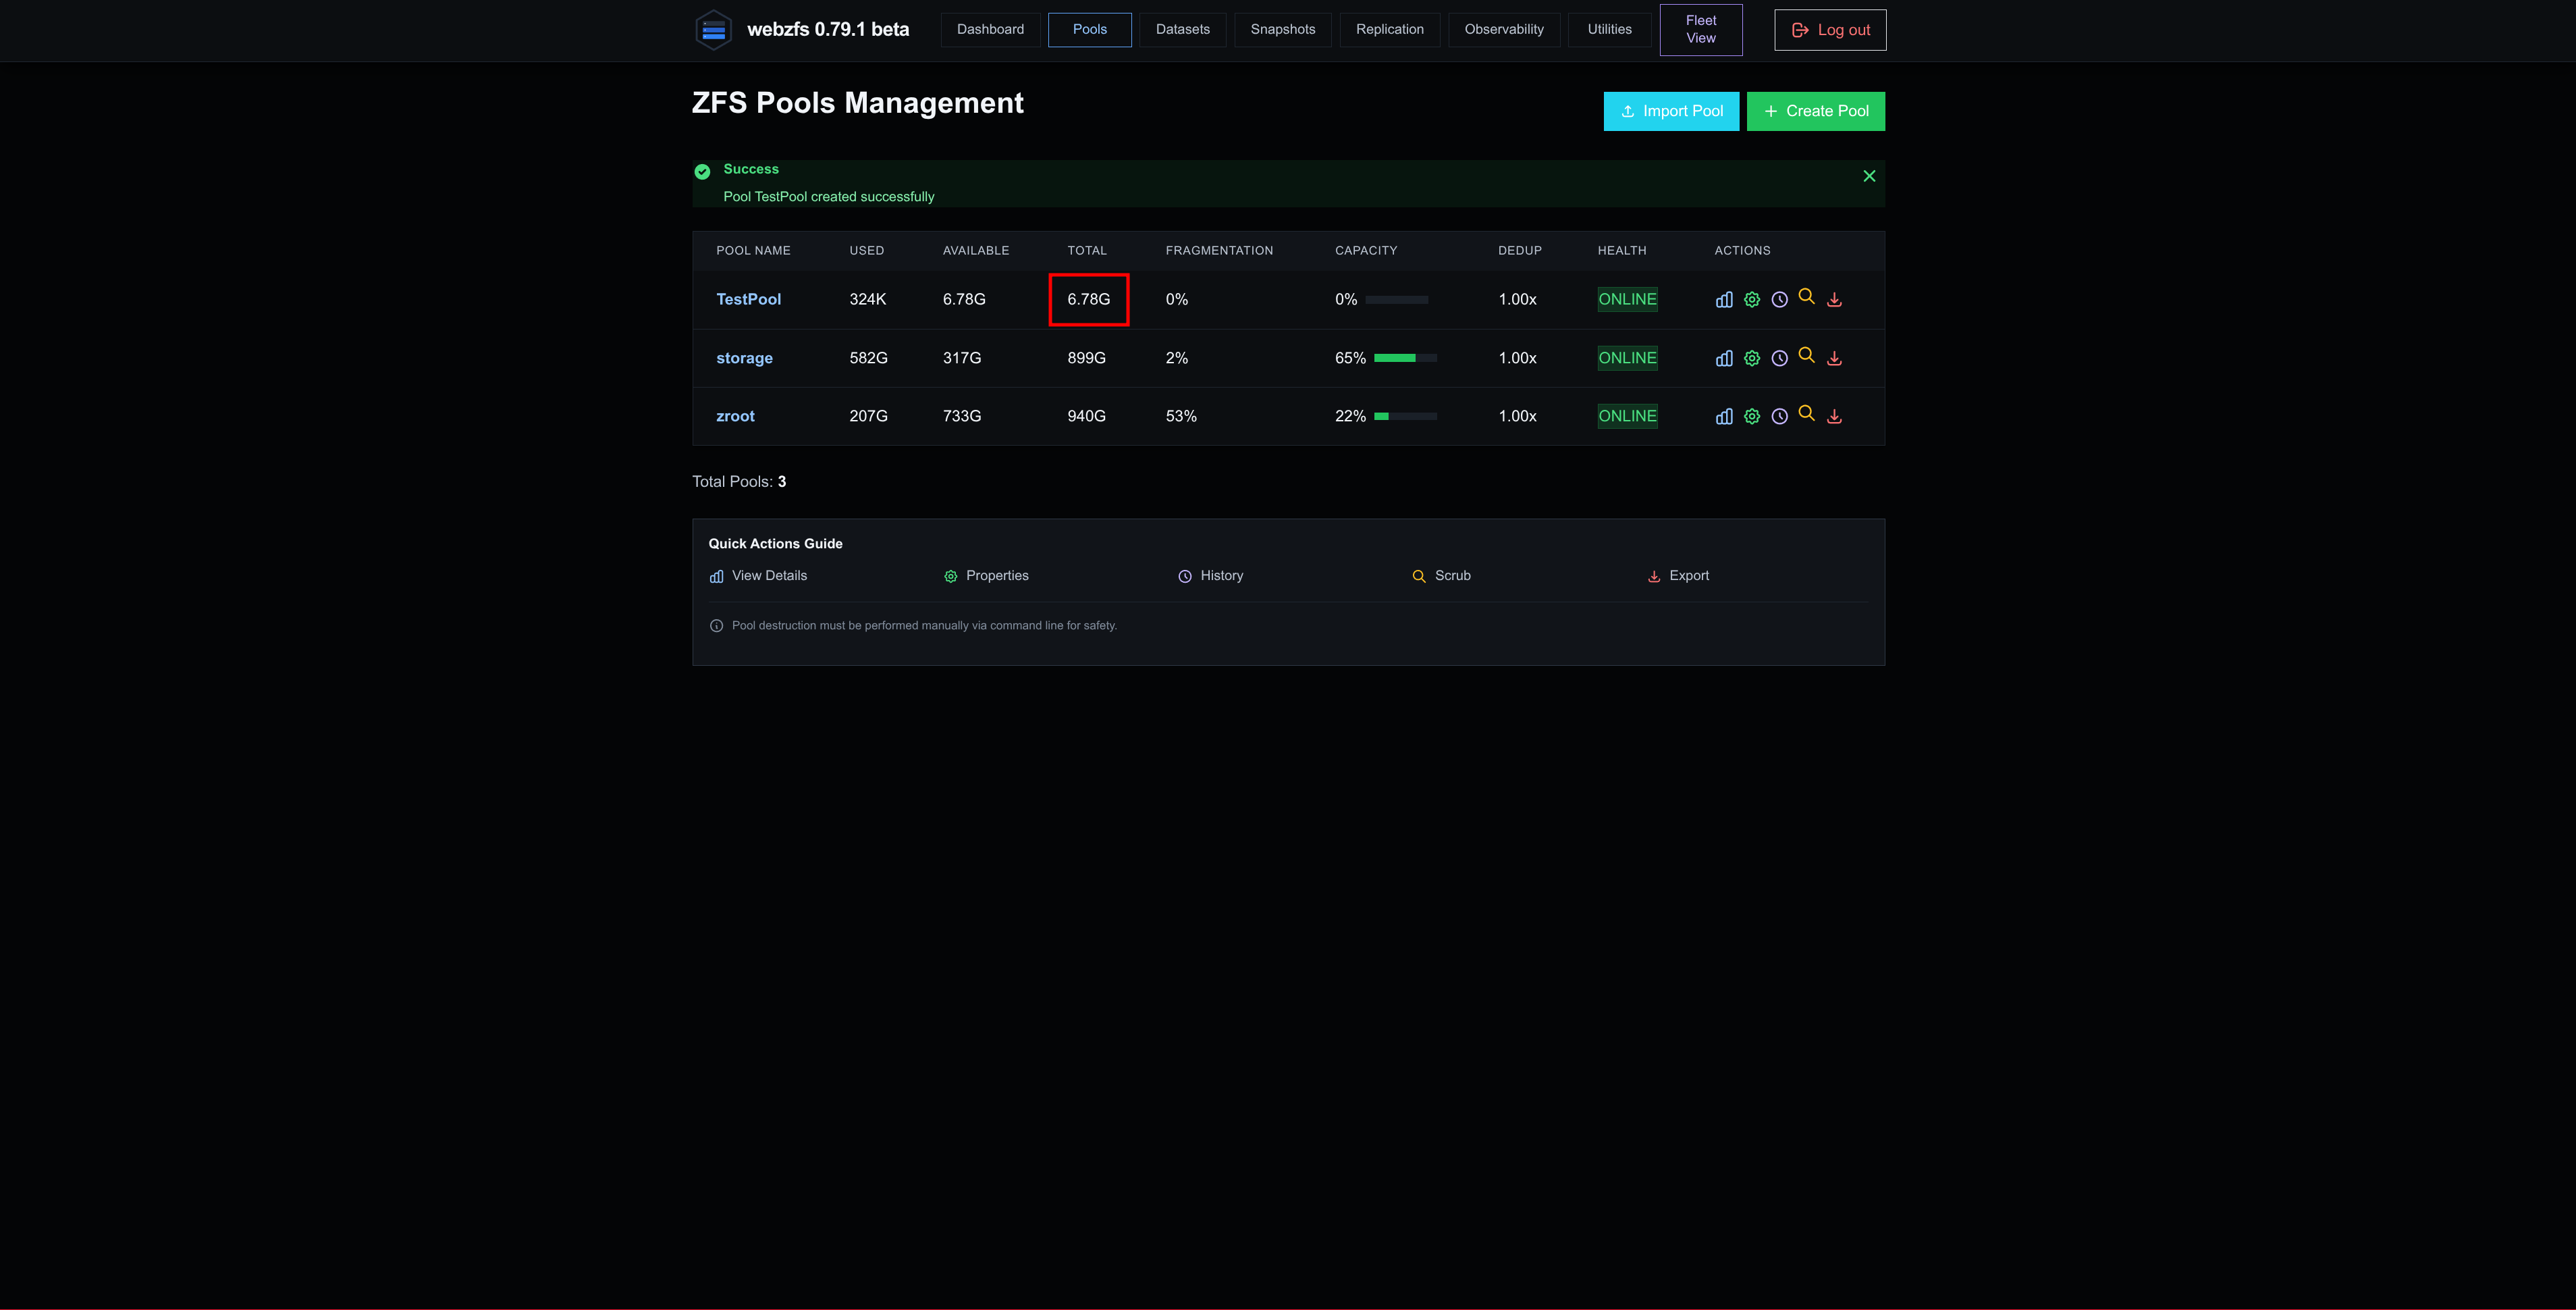
When creating the Mirror with two disks of different sizes, we can see that WebZFS is buggy since it is assuming that the two disks are the same size, miscalculating the final space even though the final pool is the correct size.
We can see it clearly in these screenshots:
| Zpool creation | Zpool list |
|---|---|
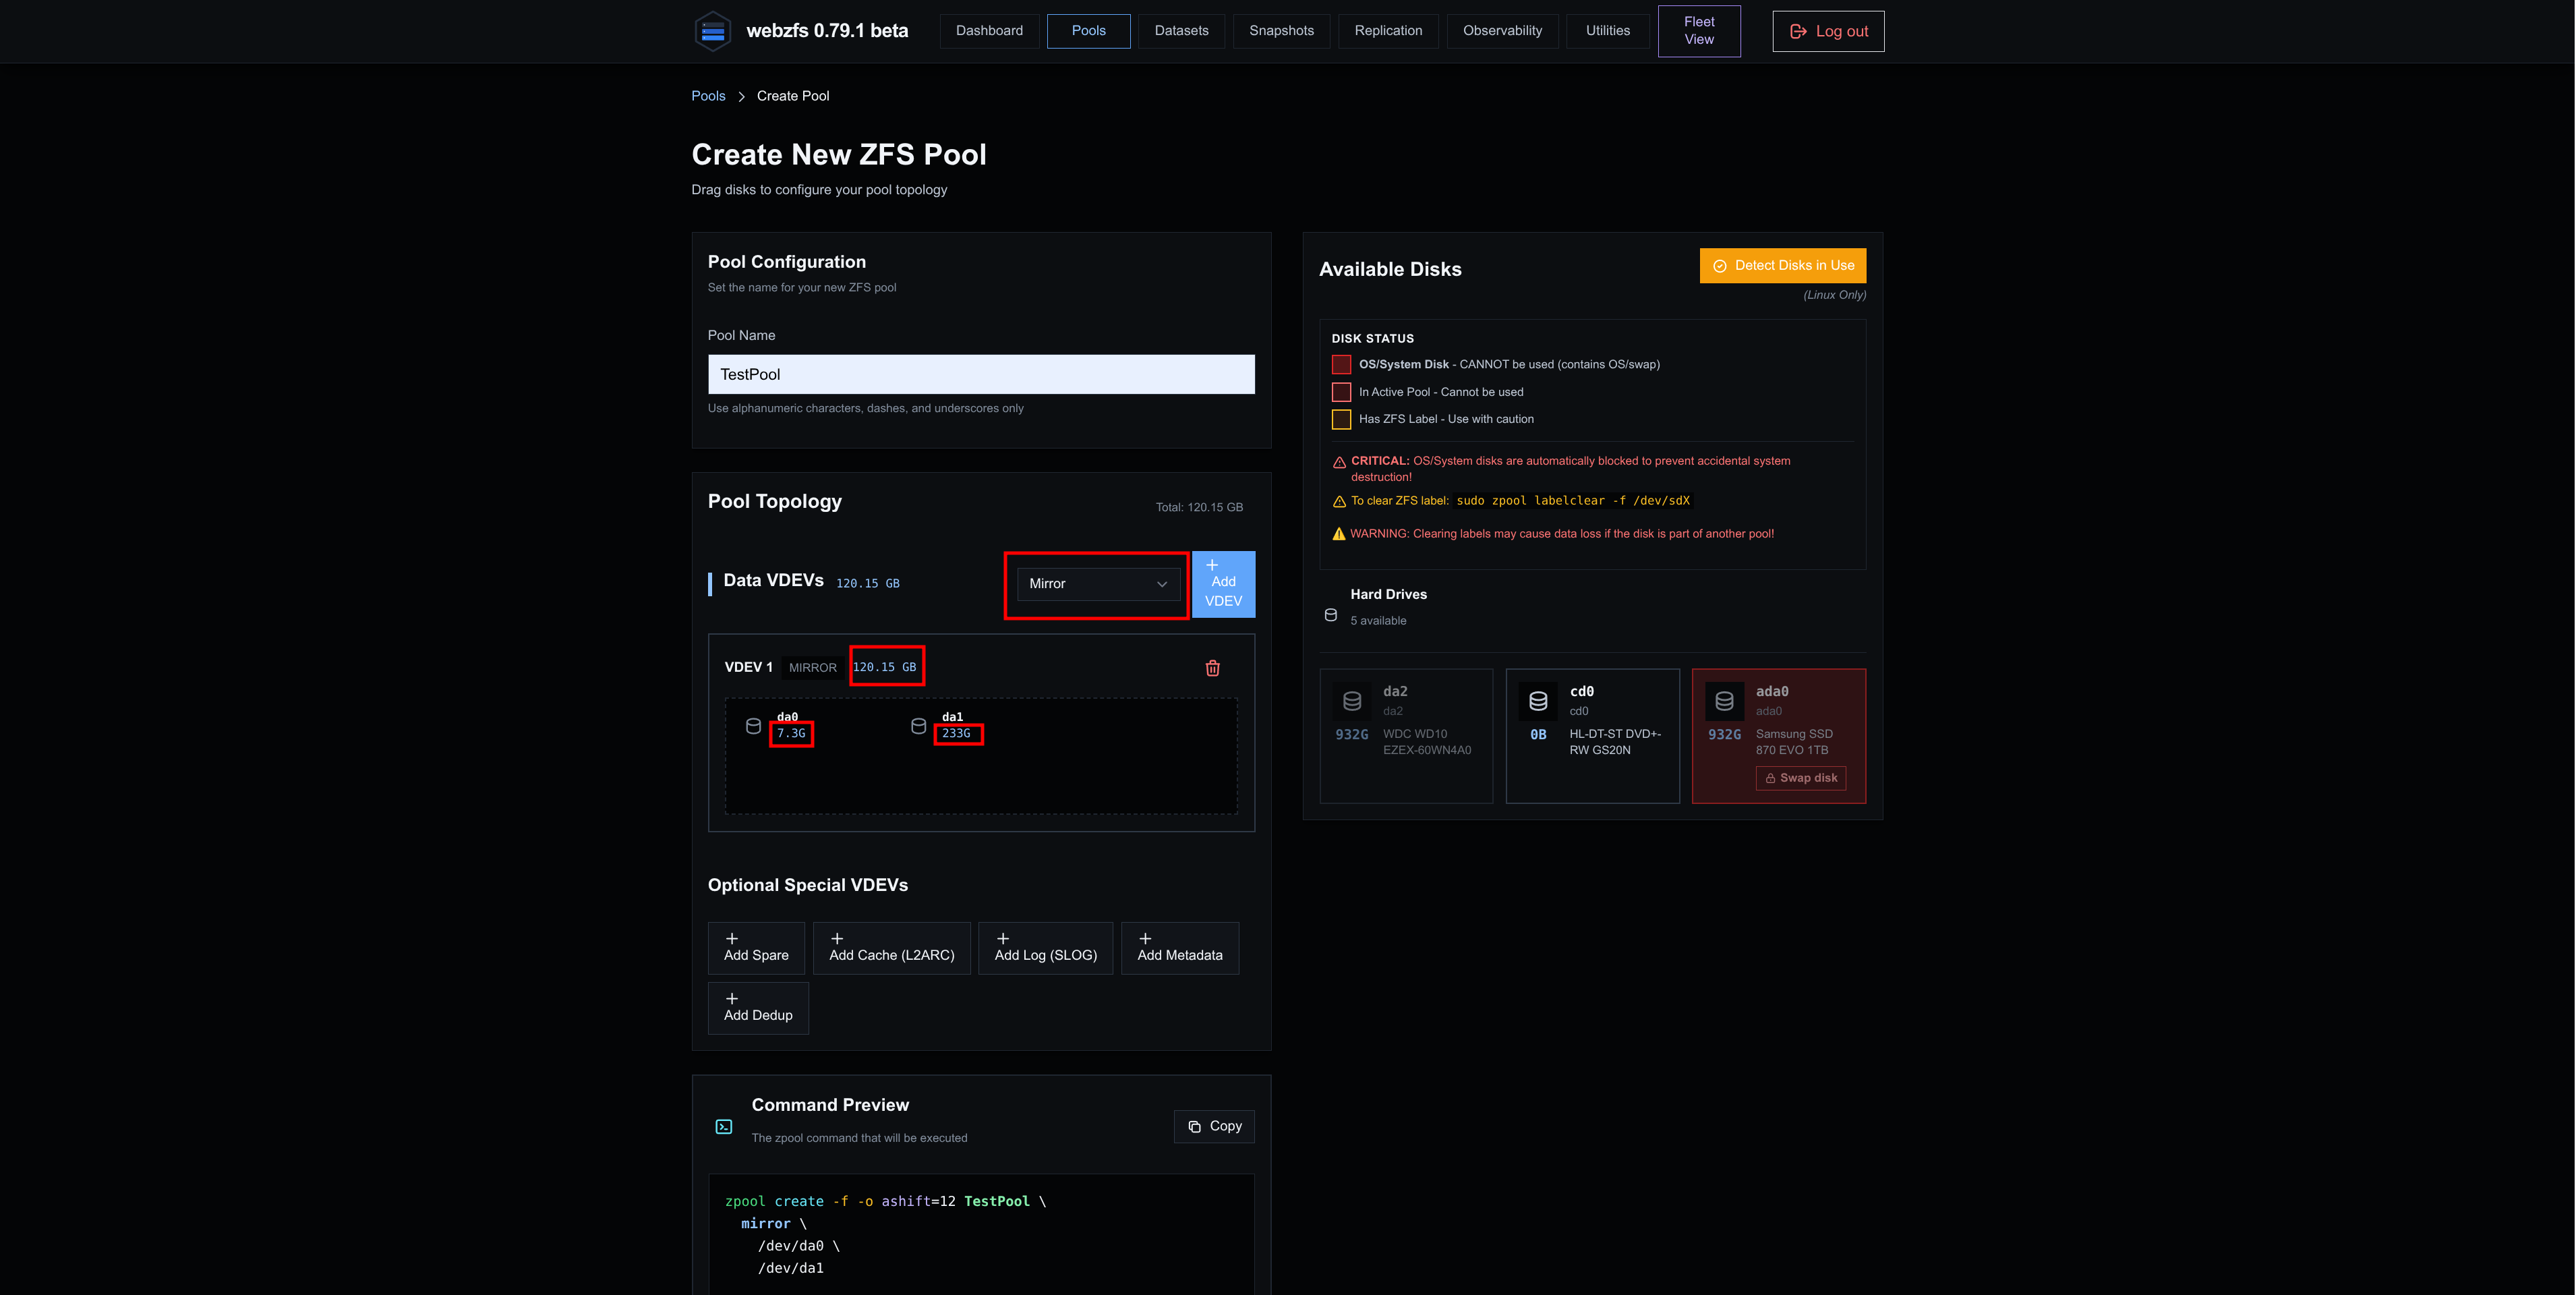
|
|
View details:
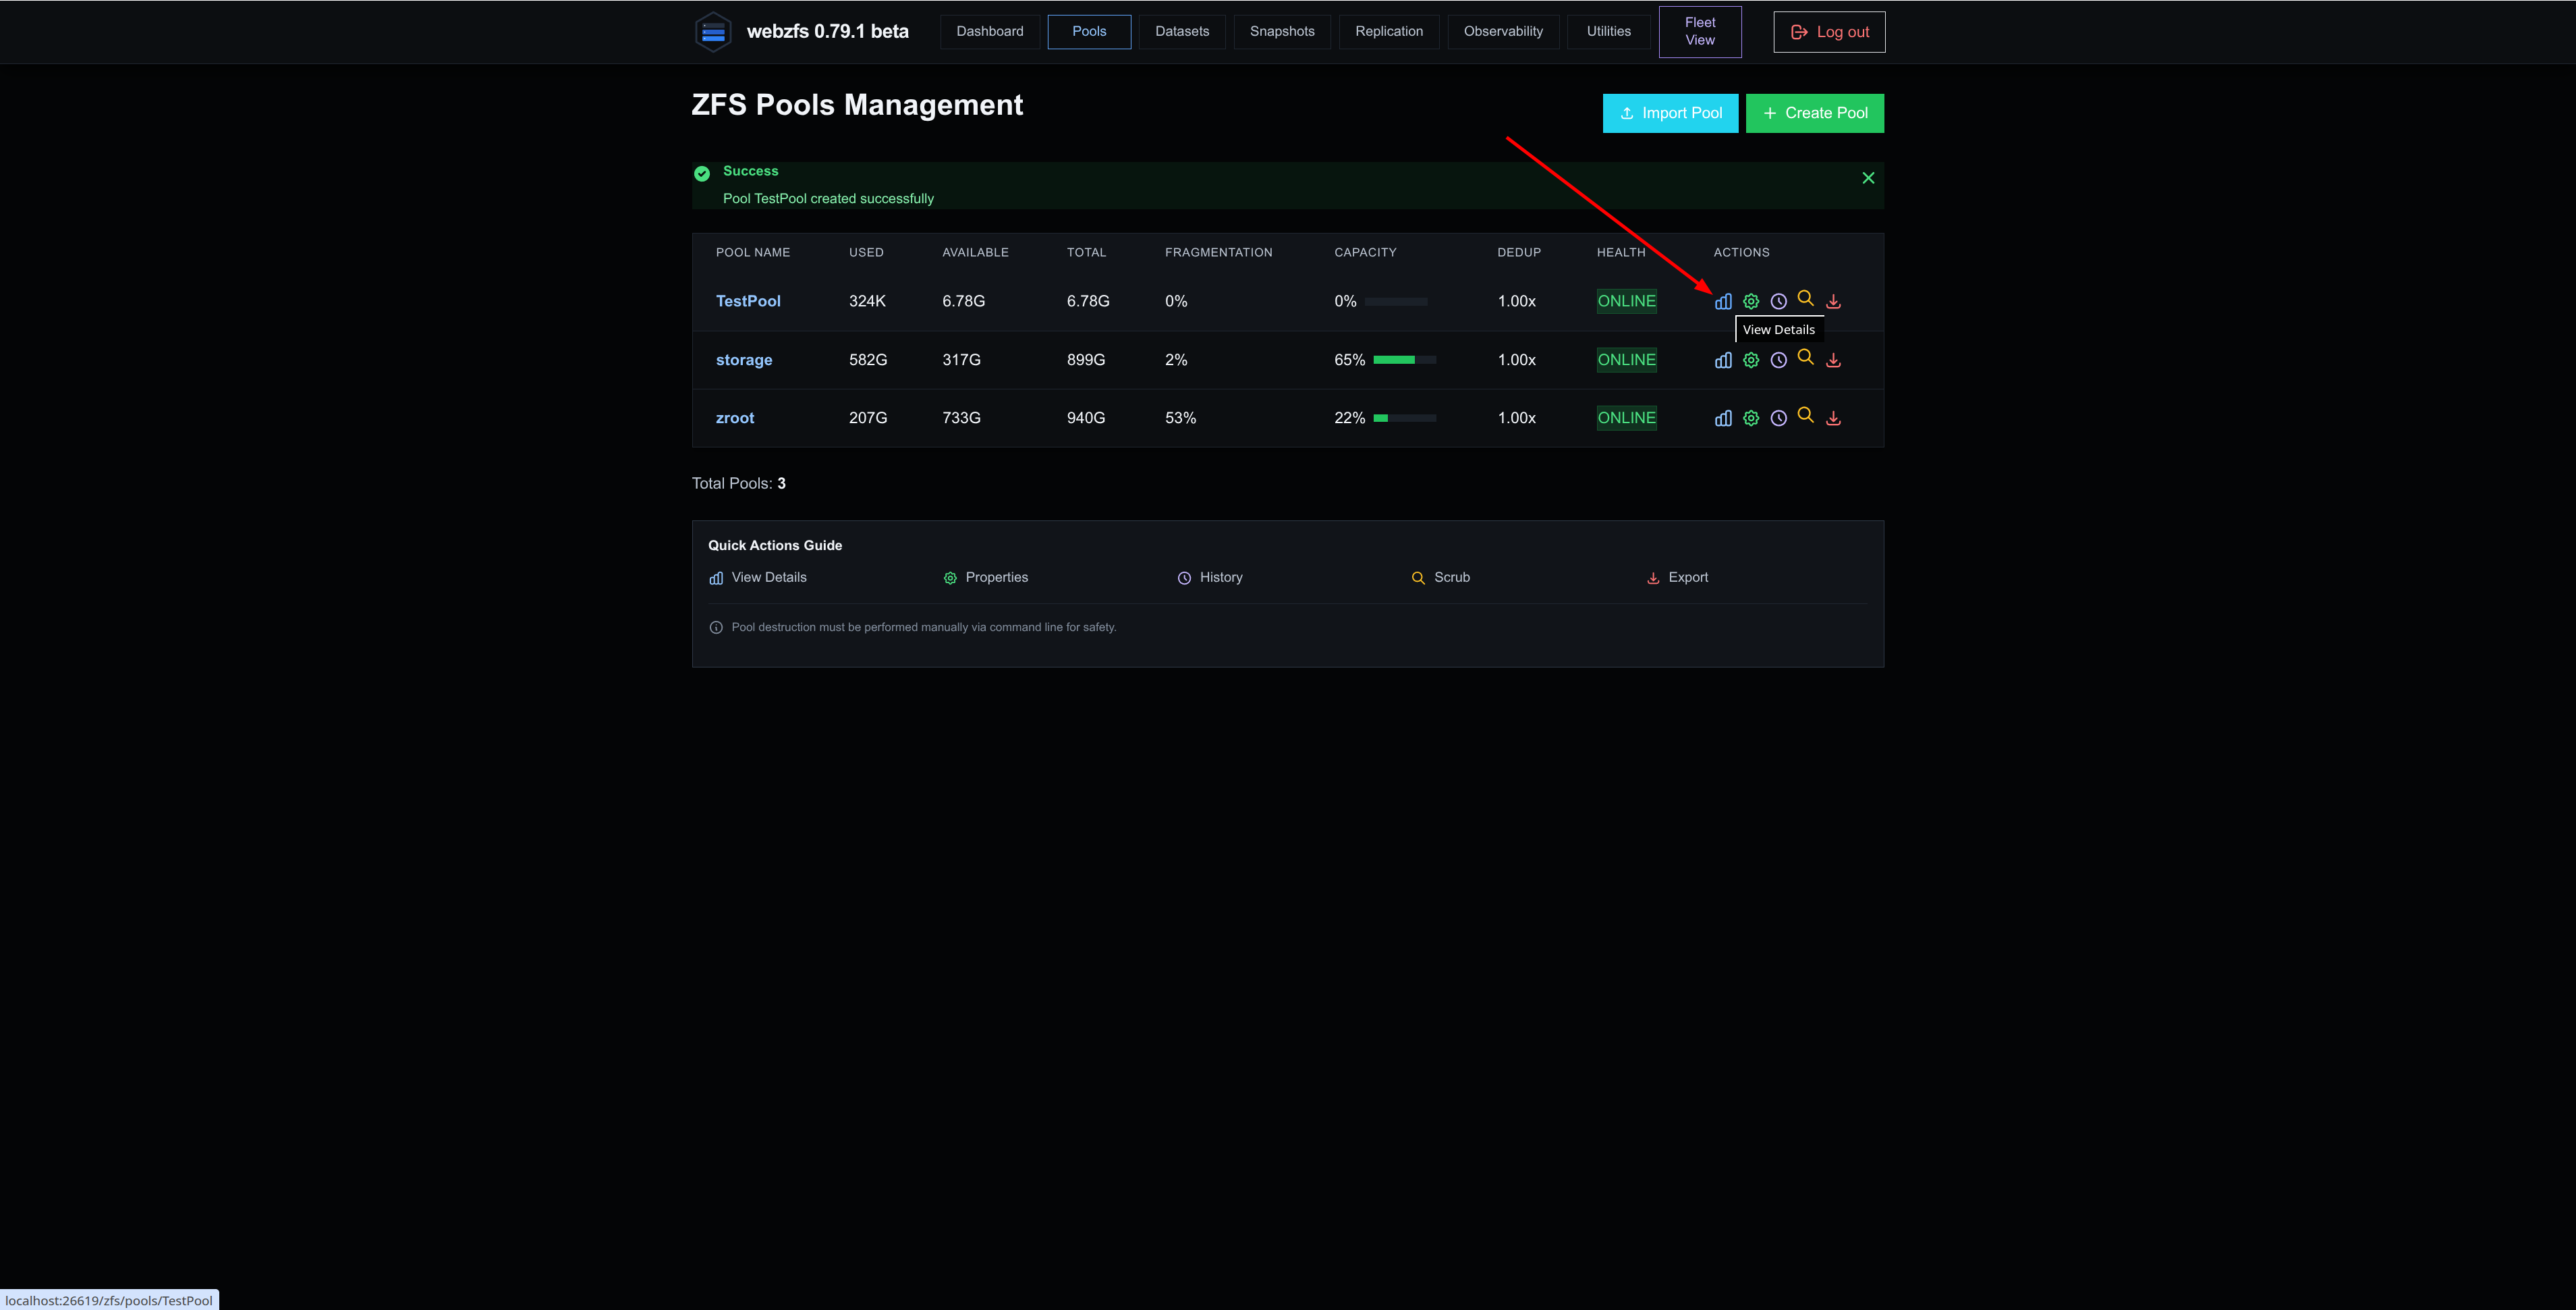
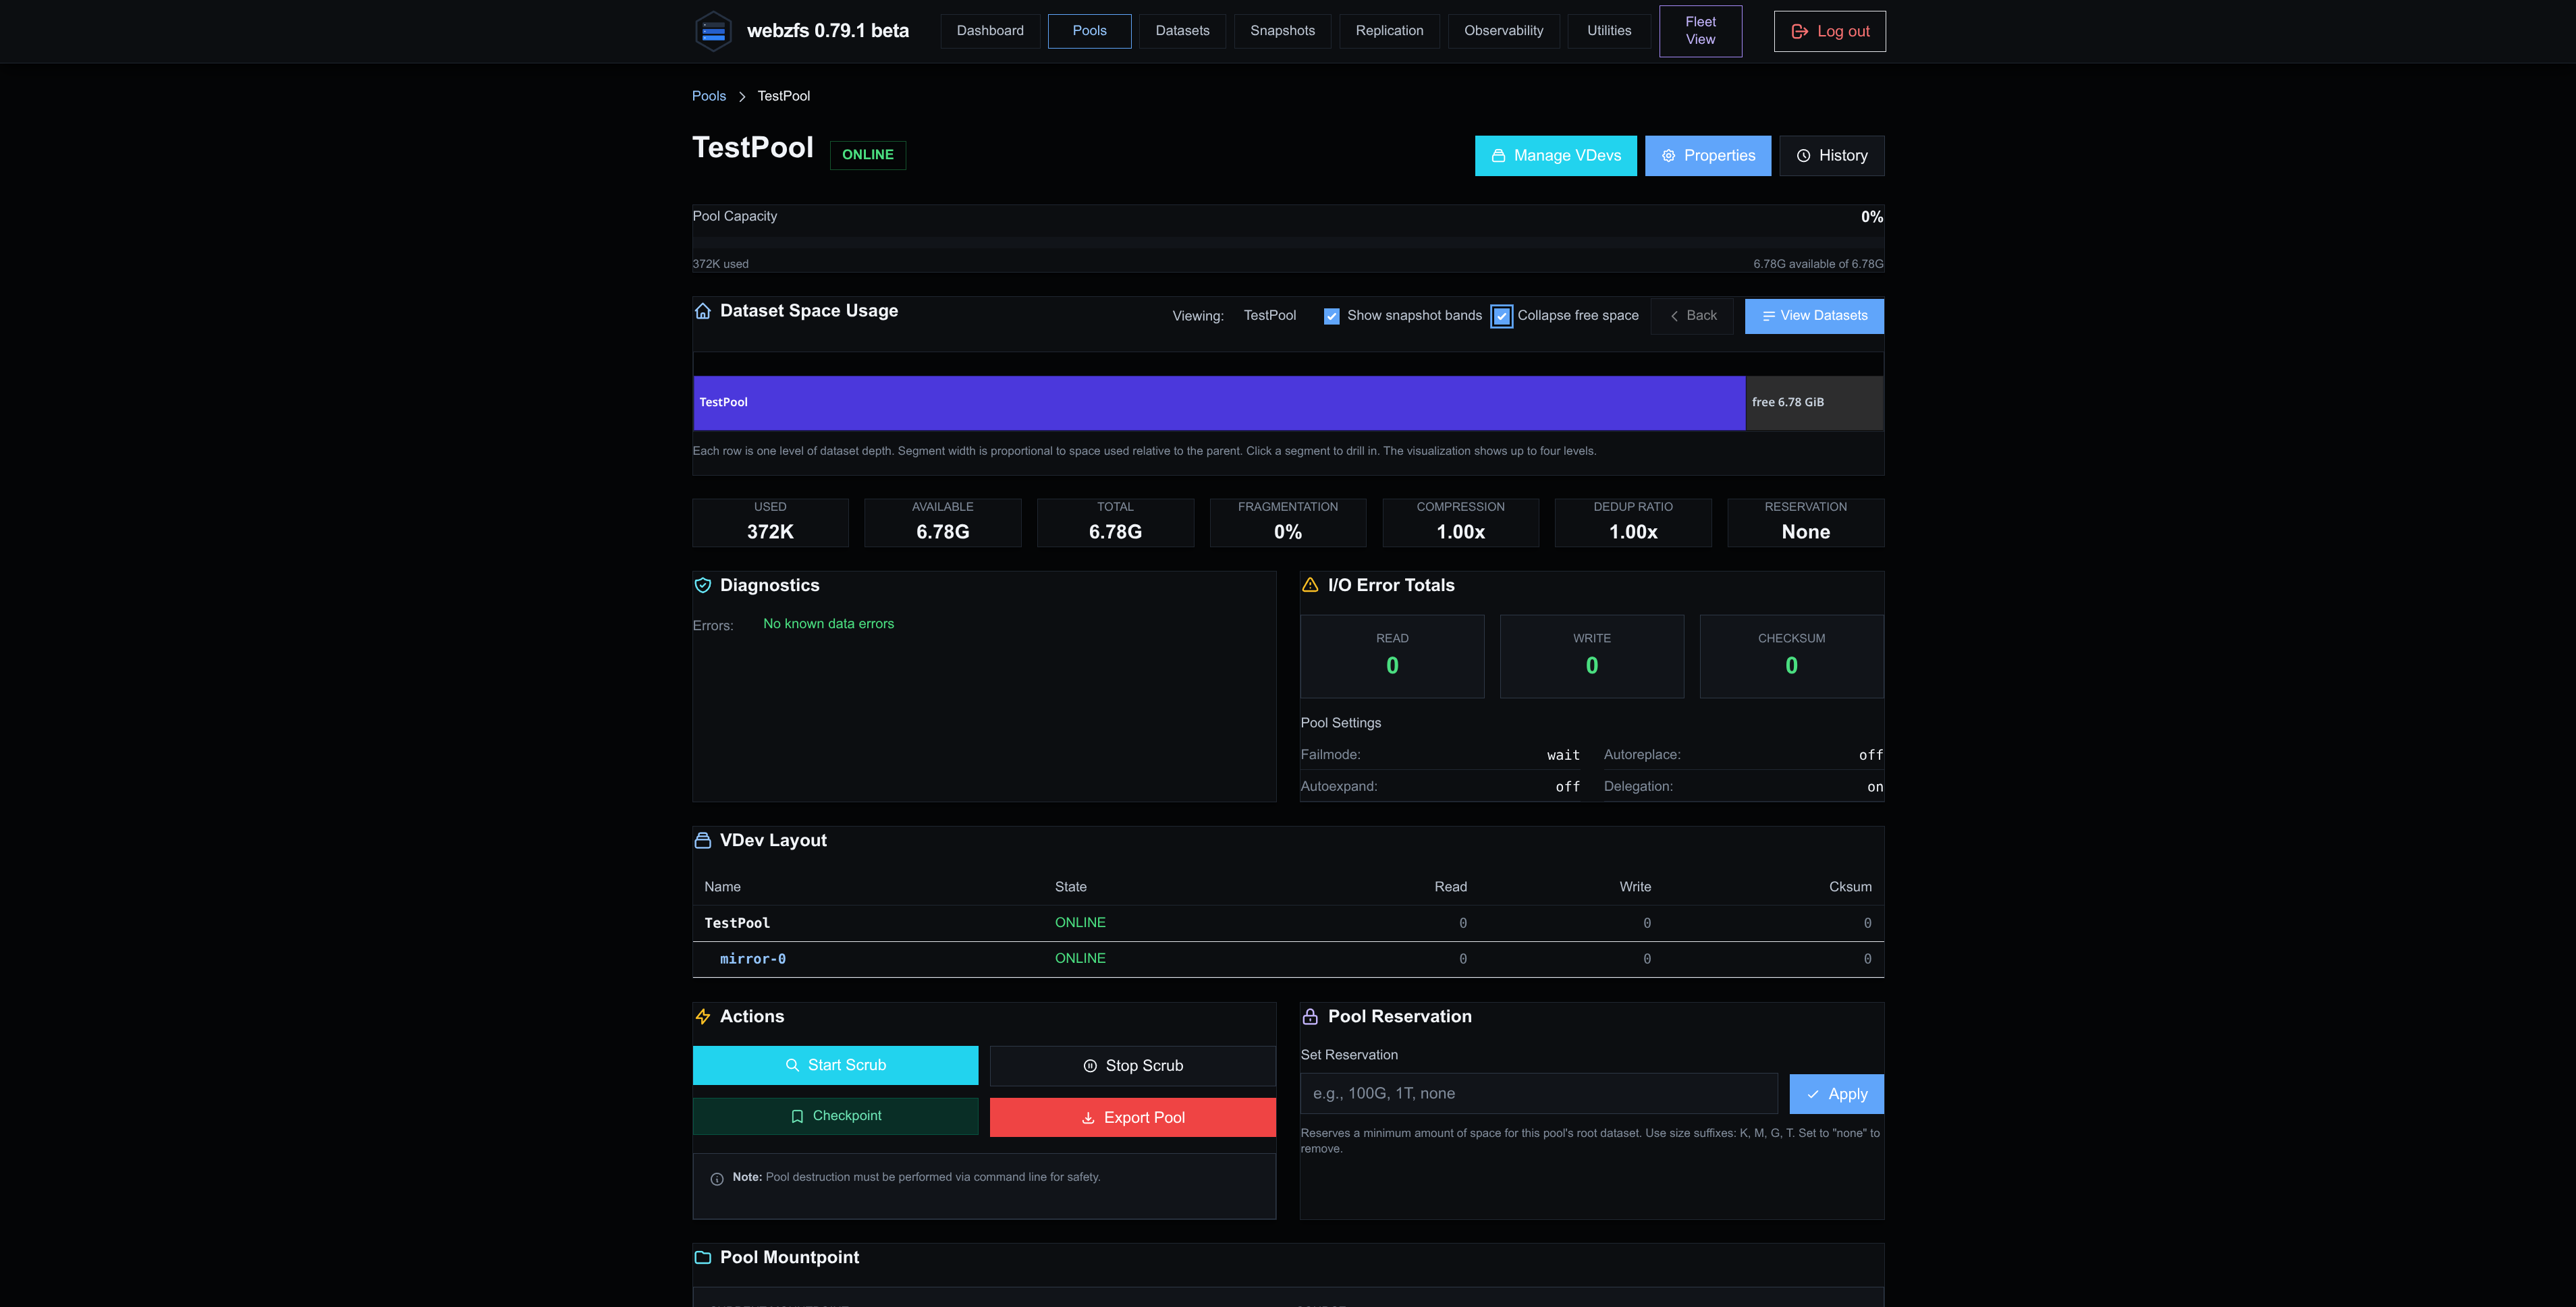
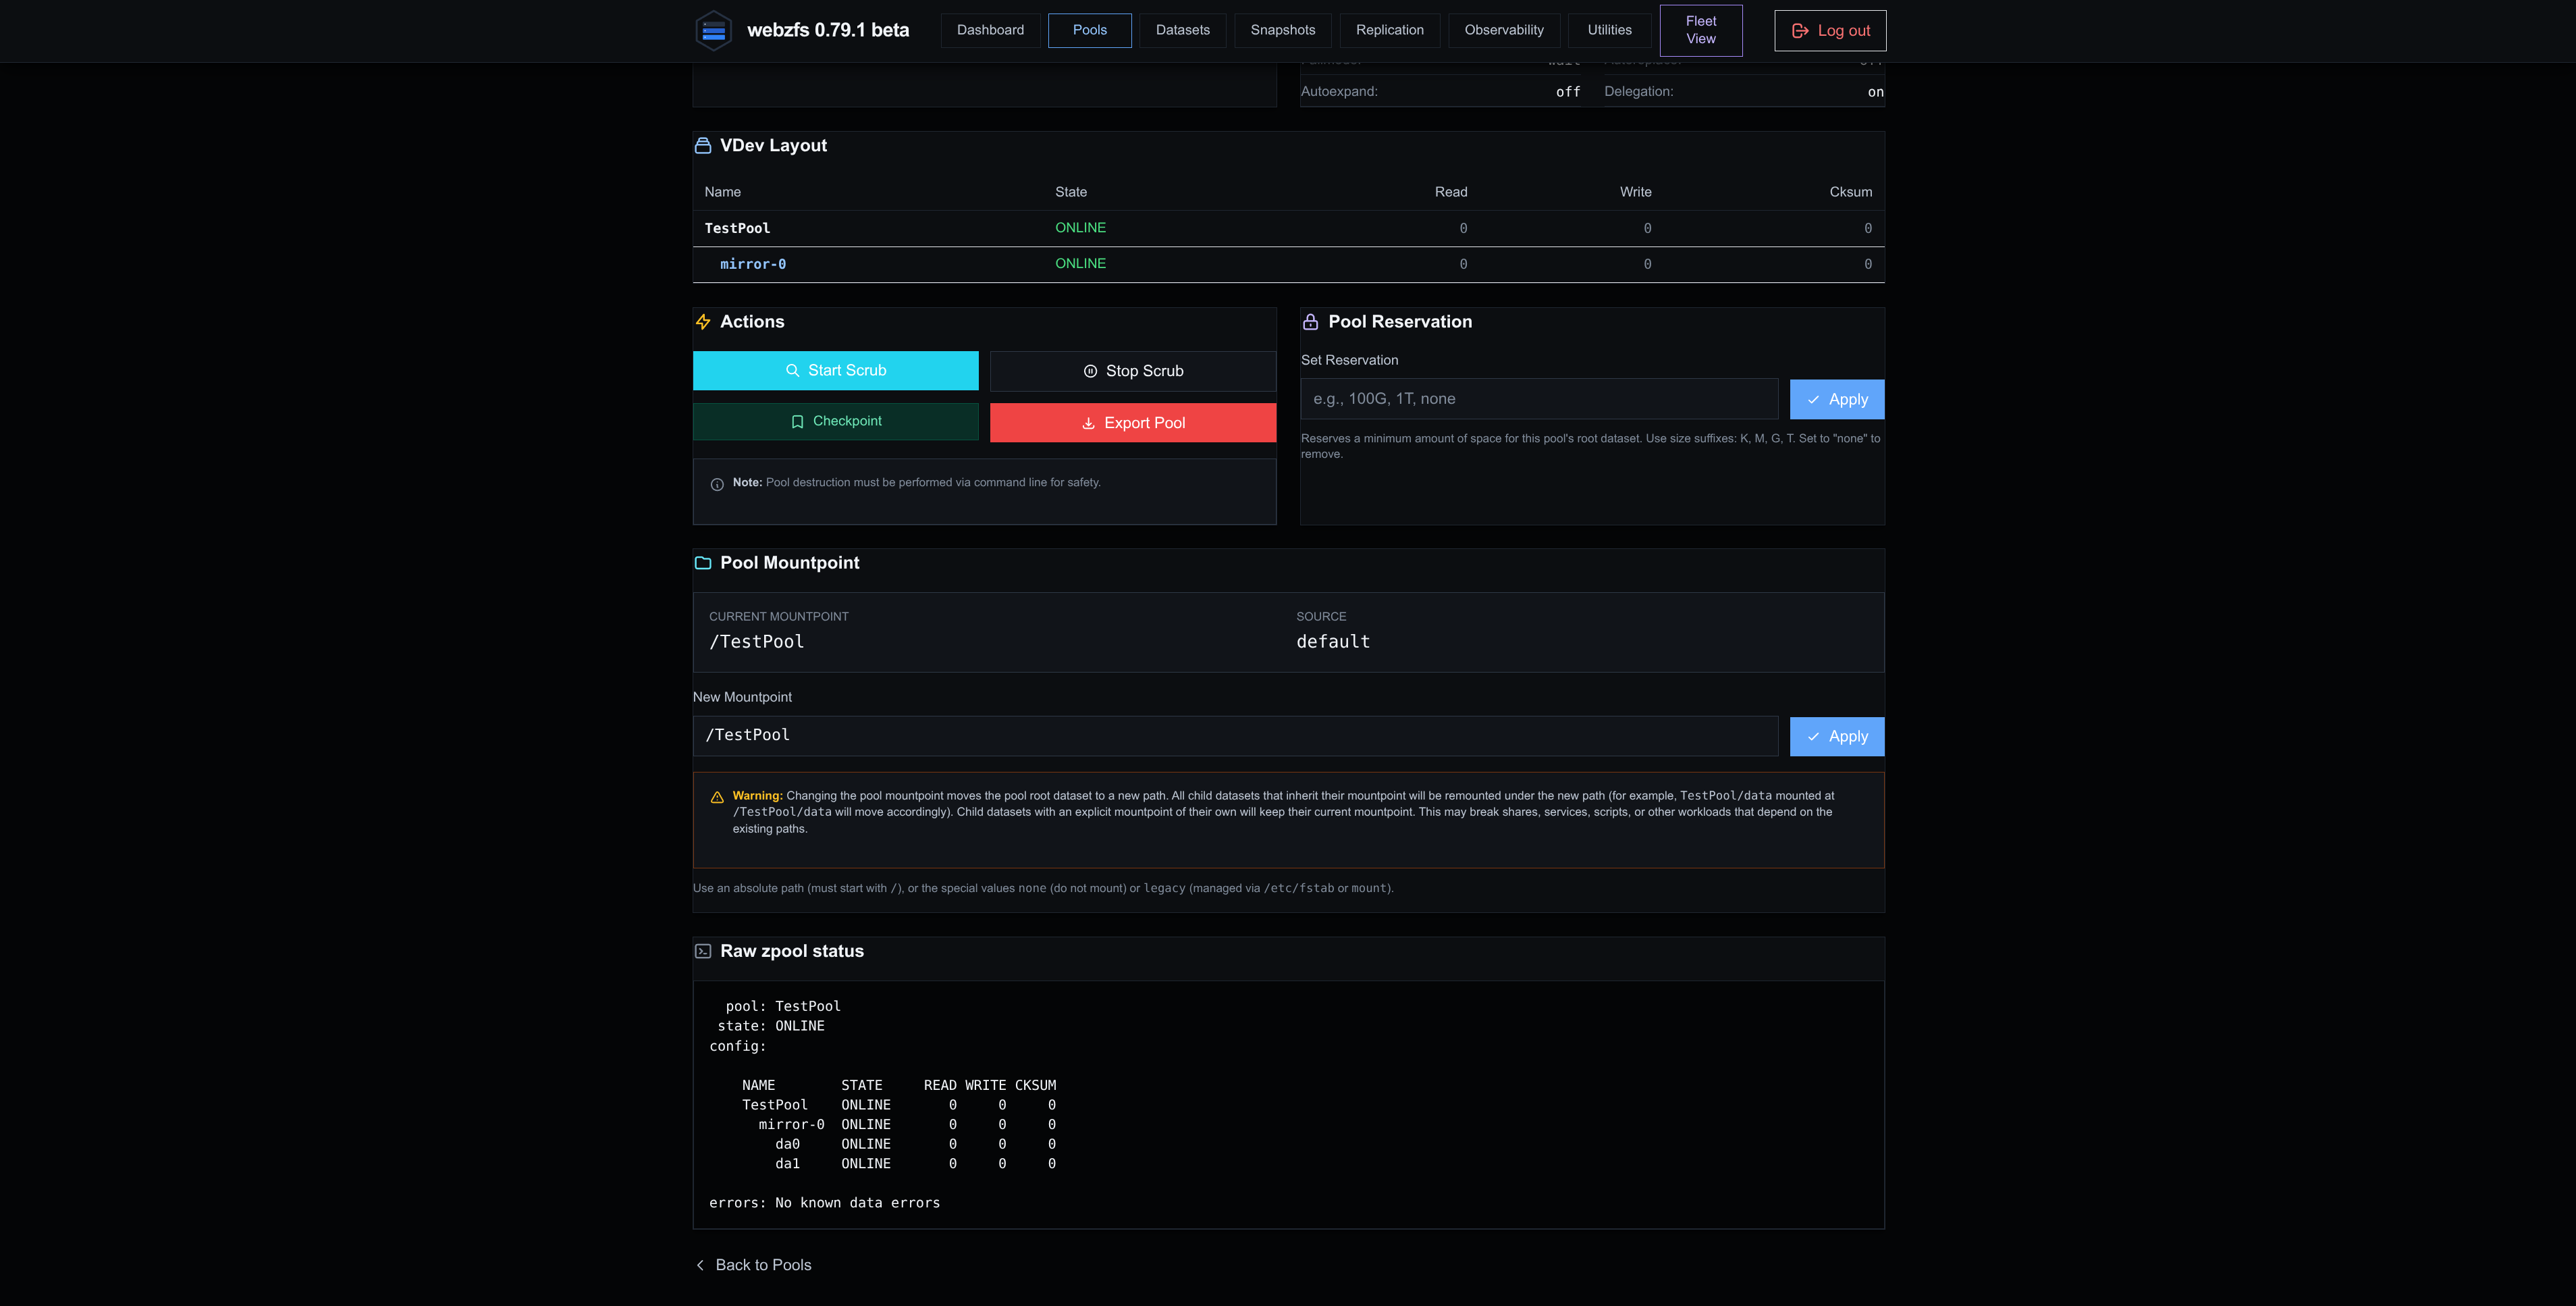
From this section we can see the pool details such as consumed space, errors, the VDevs that make it up, mount points and the status of the physical devices:
|
|
|
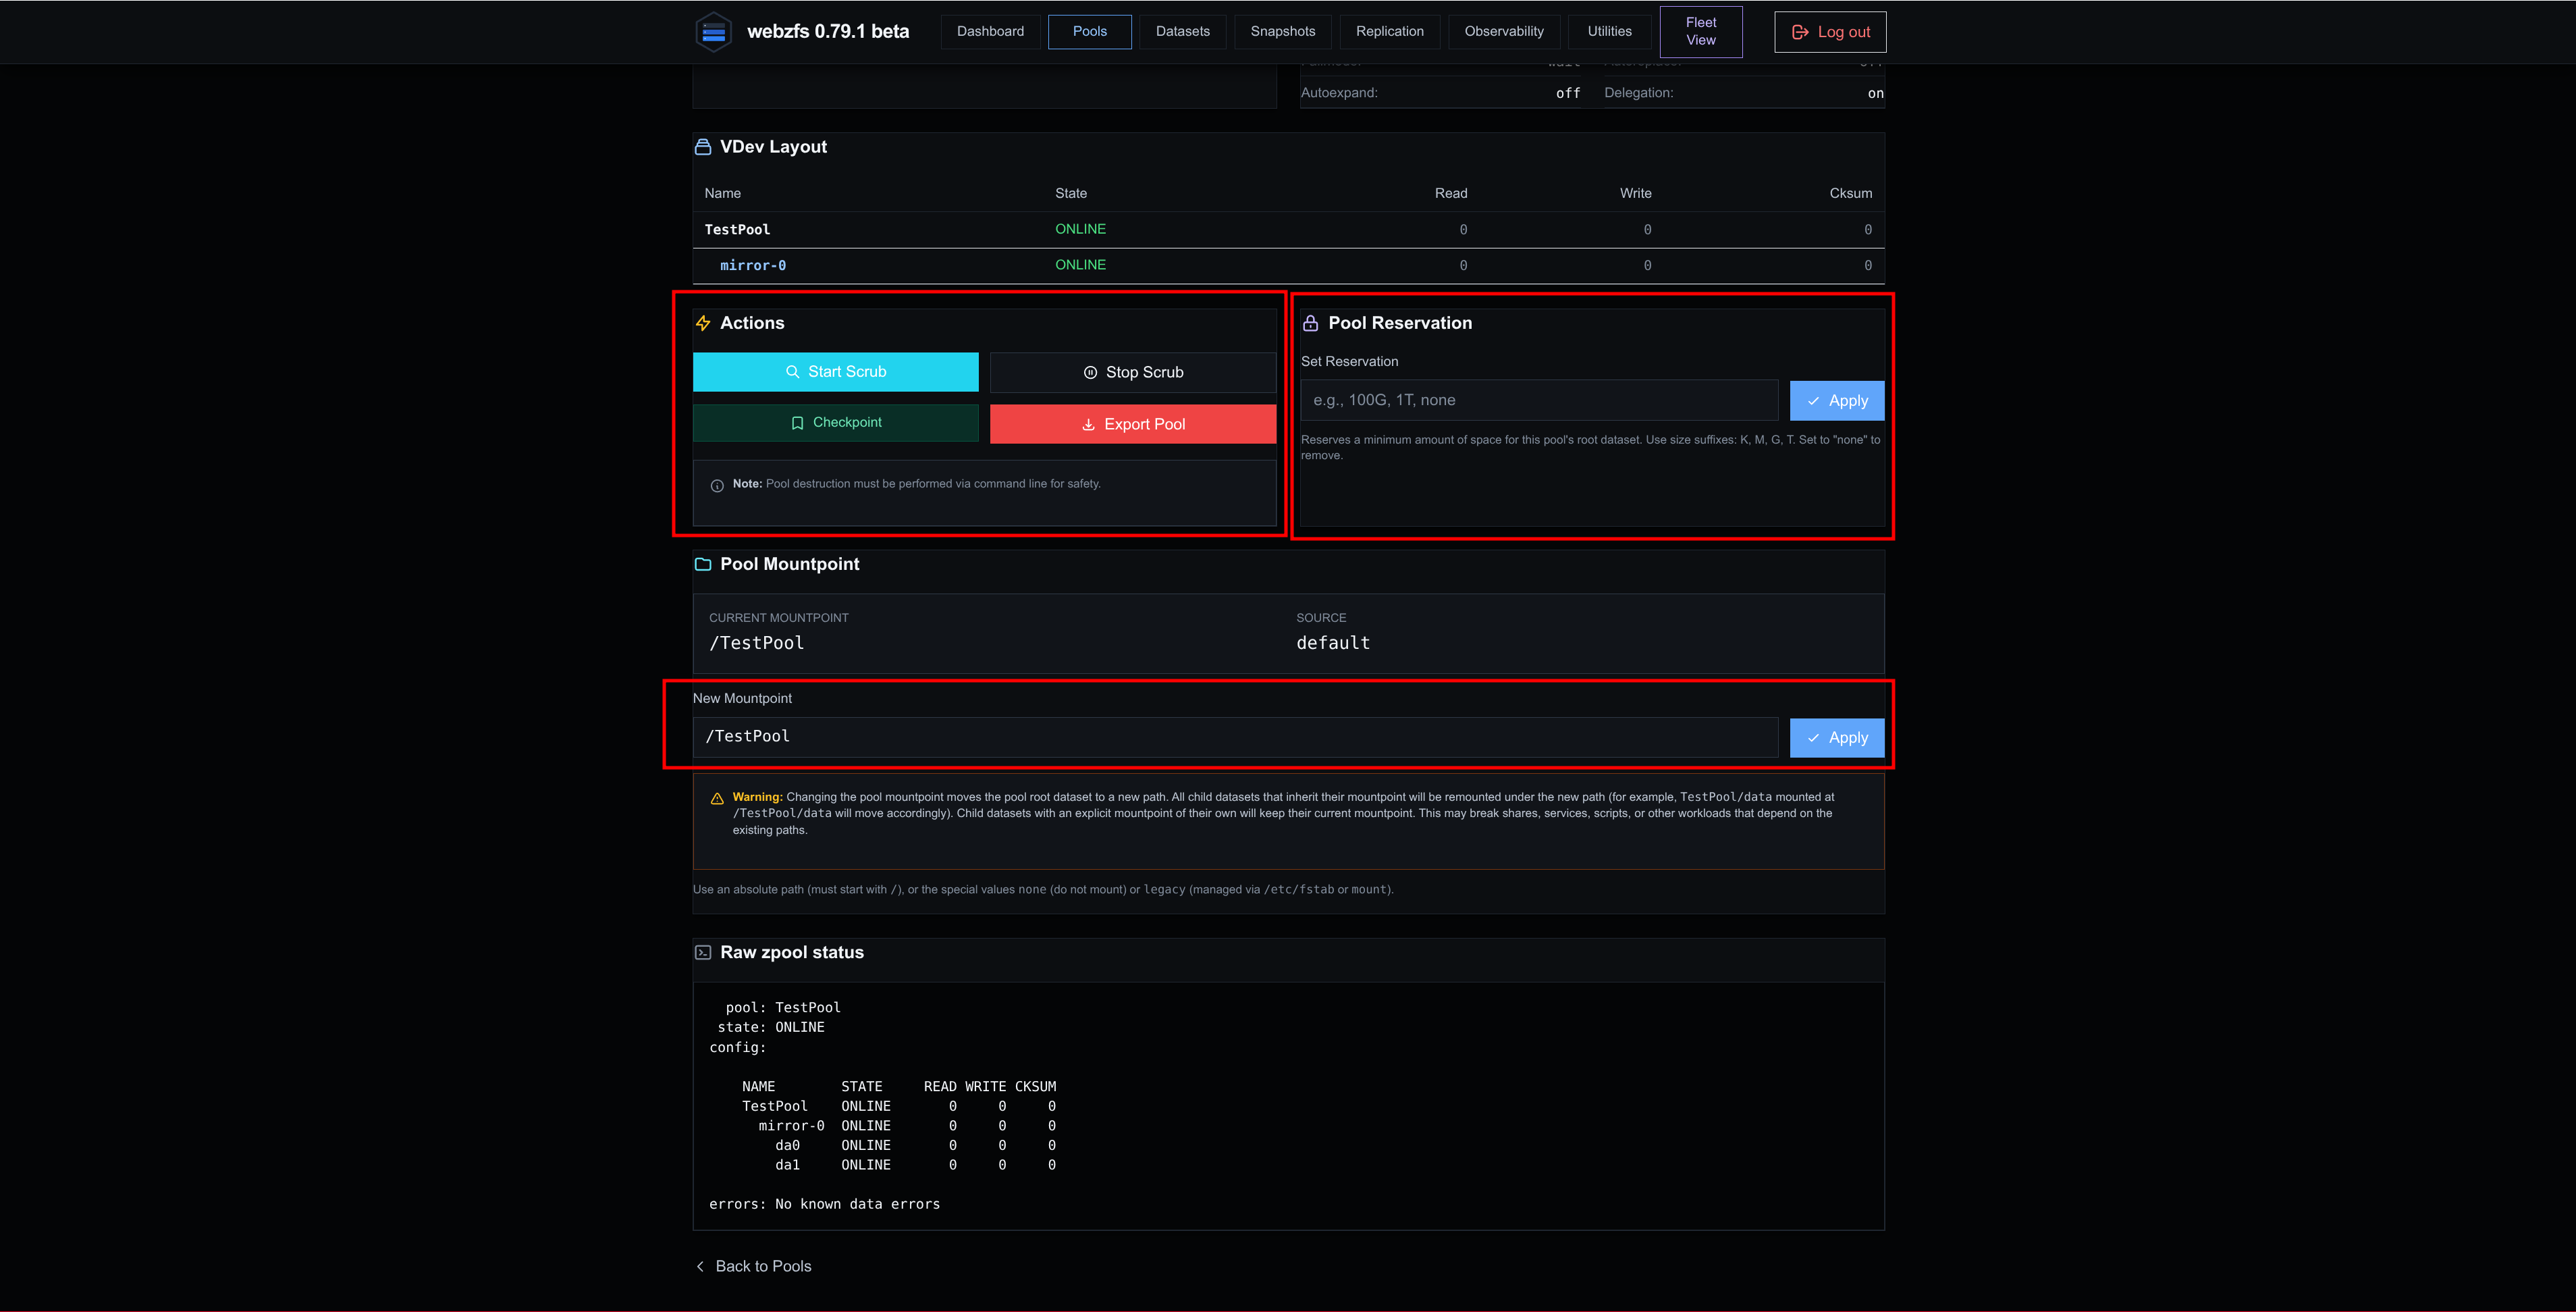
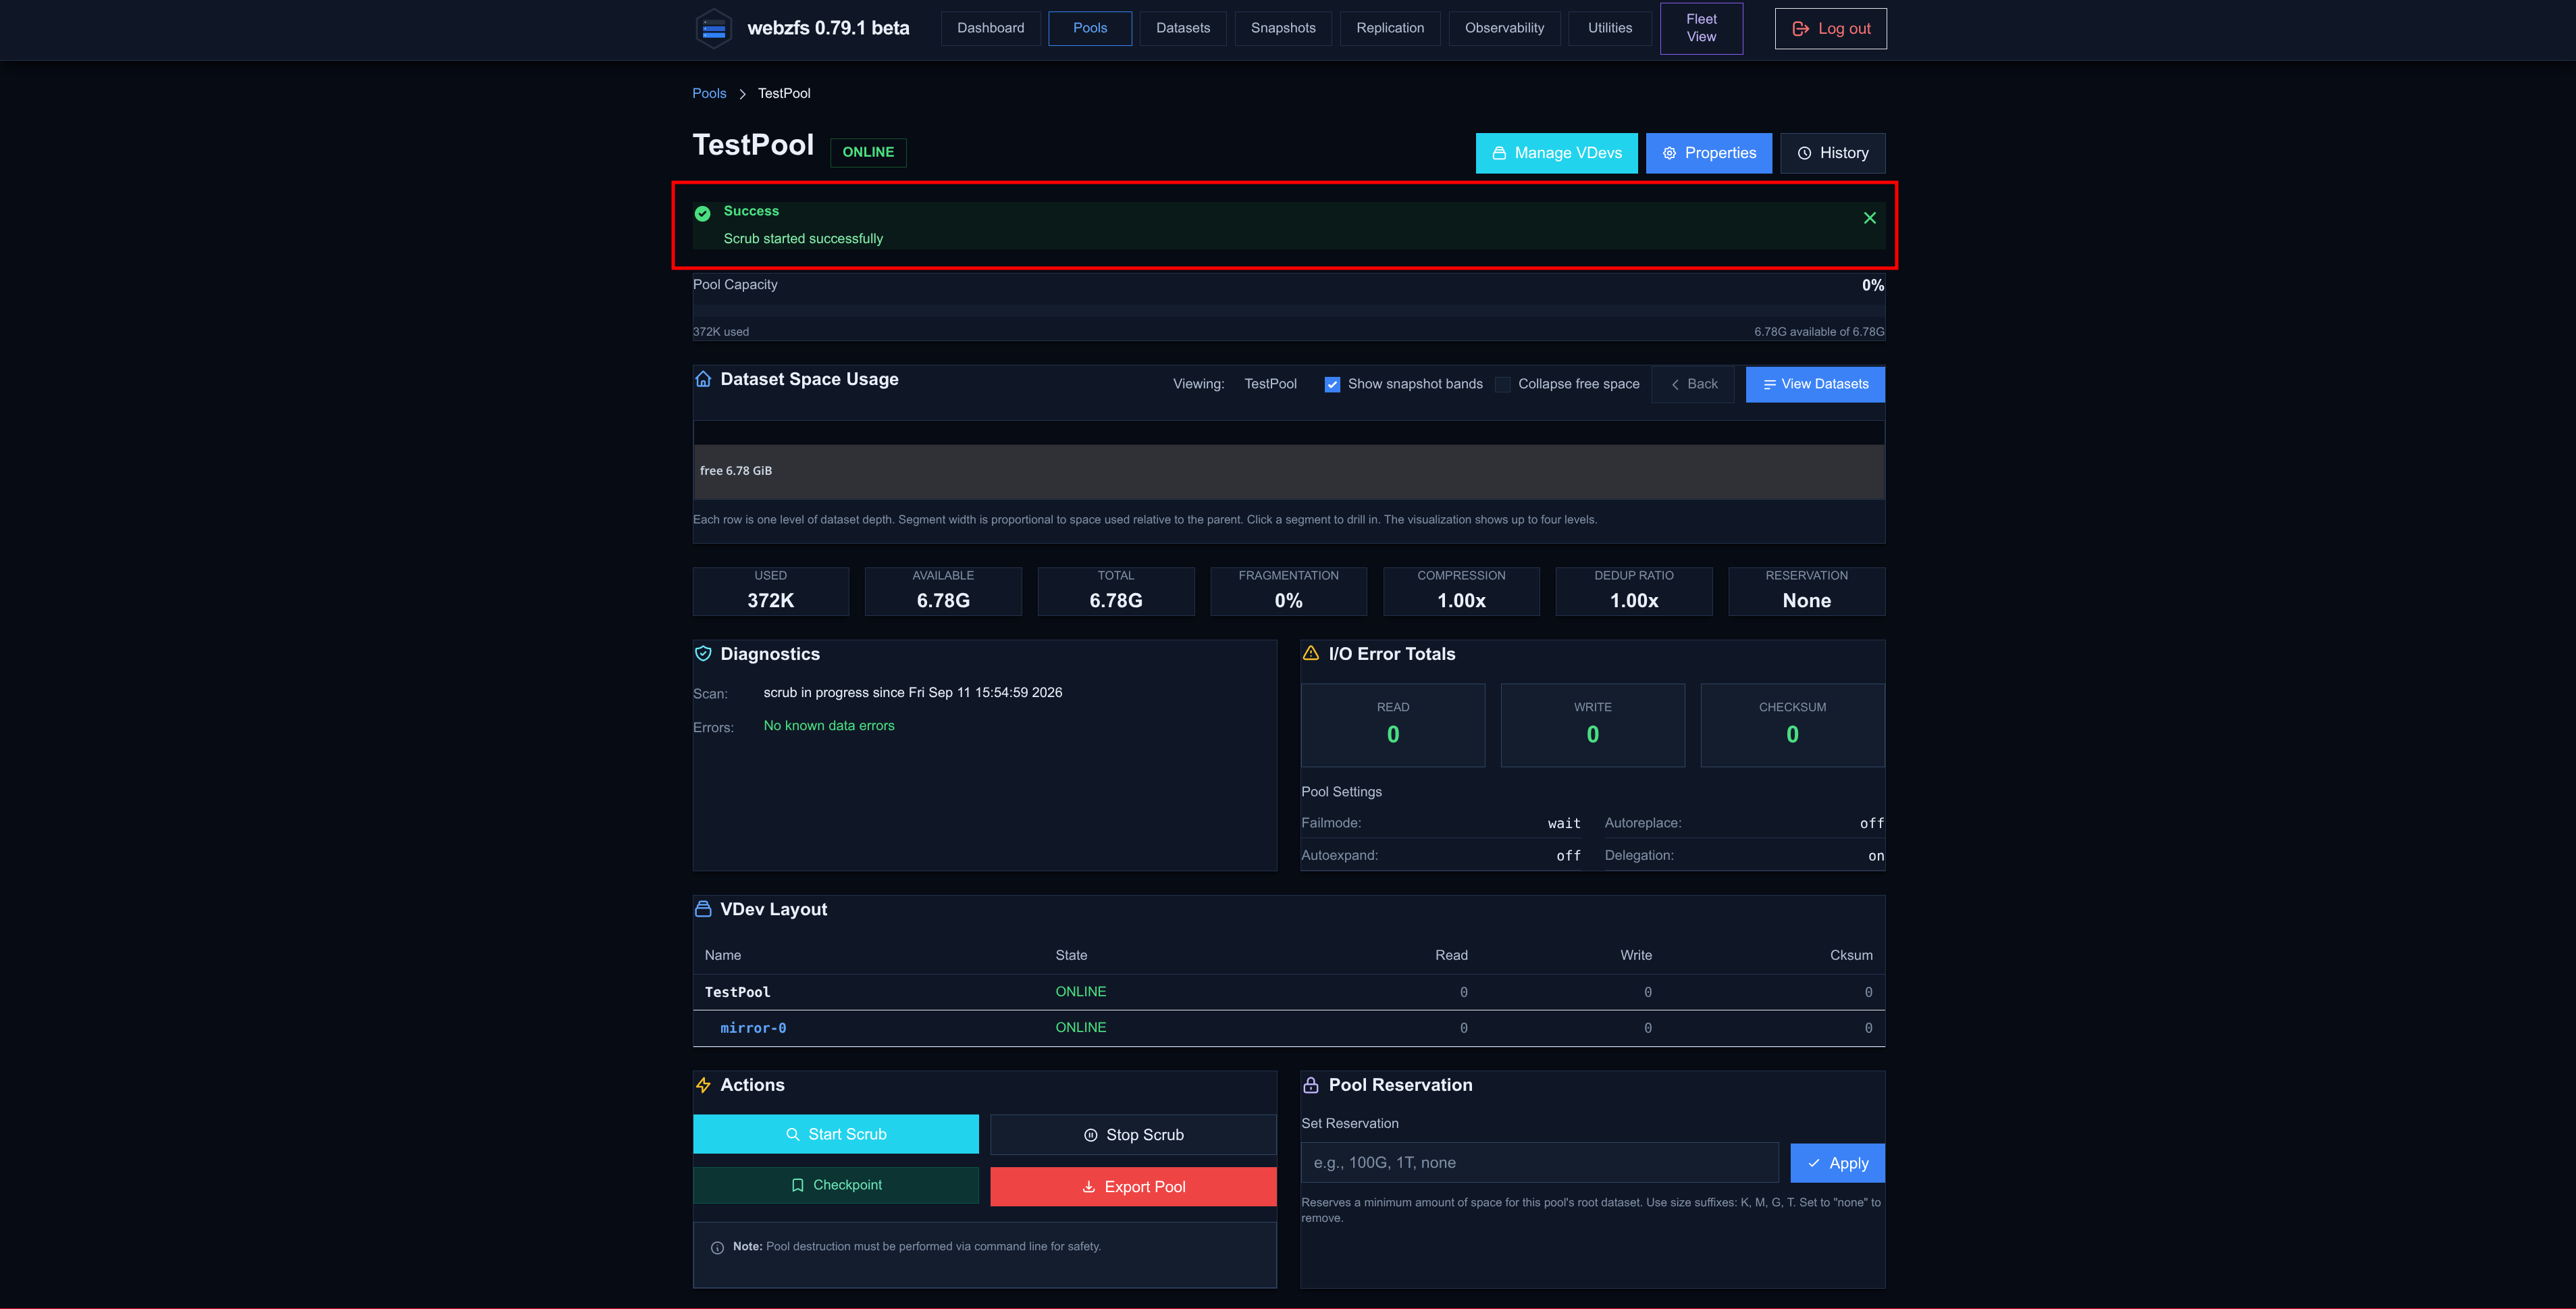
We can also perform certain actions on the pool, such as starting and stopping a Scrub, creating a checkpoint (a pool-level snapshot), exporting the pool, reserving space or changing the mount point:
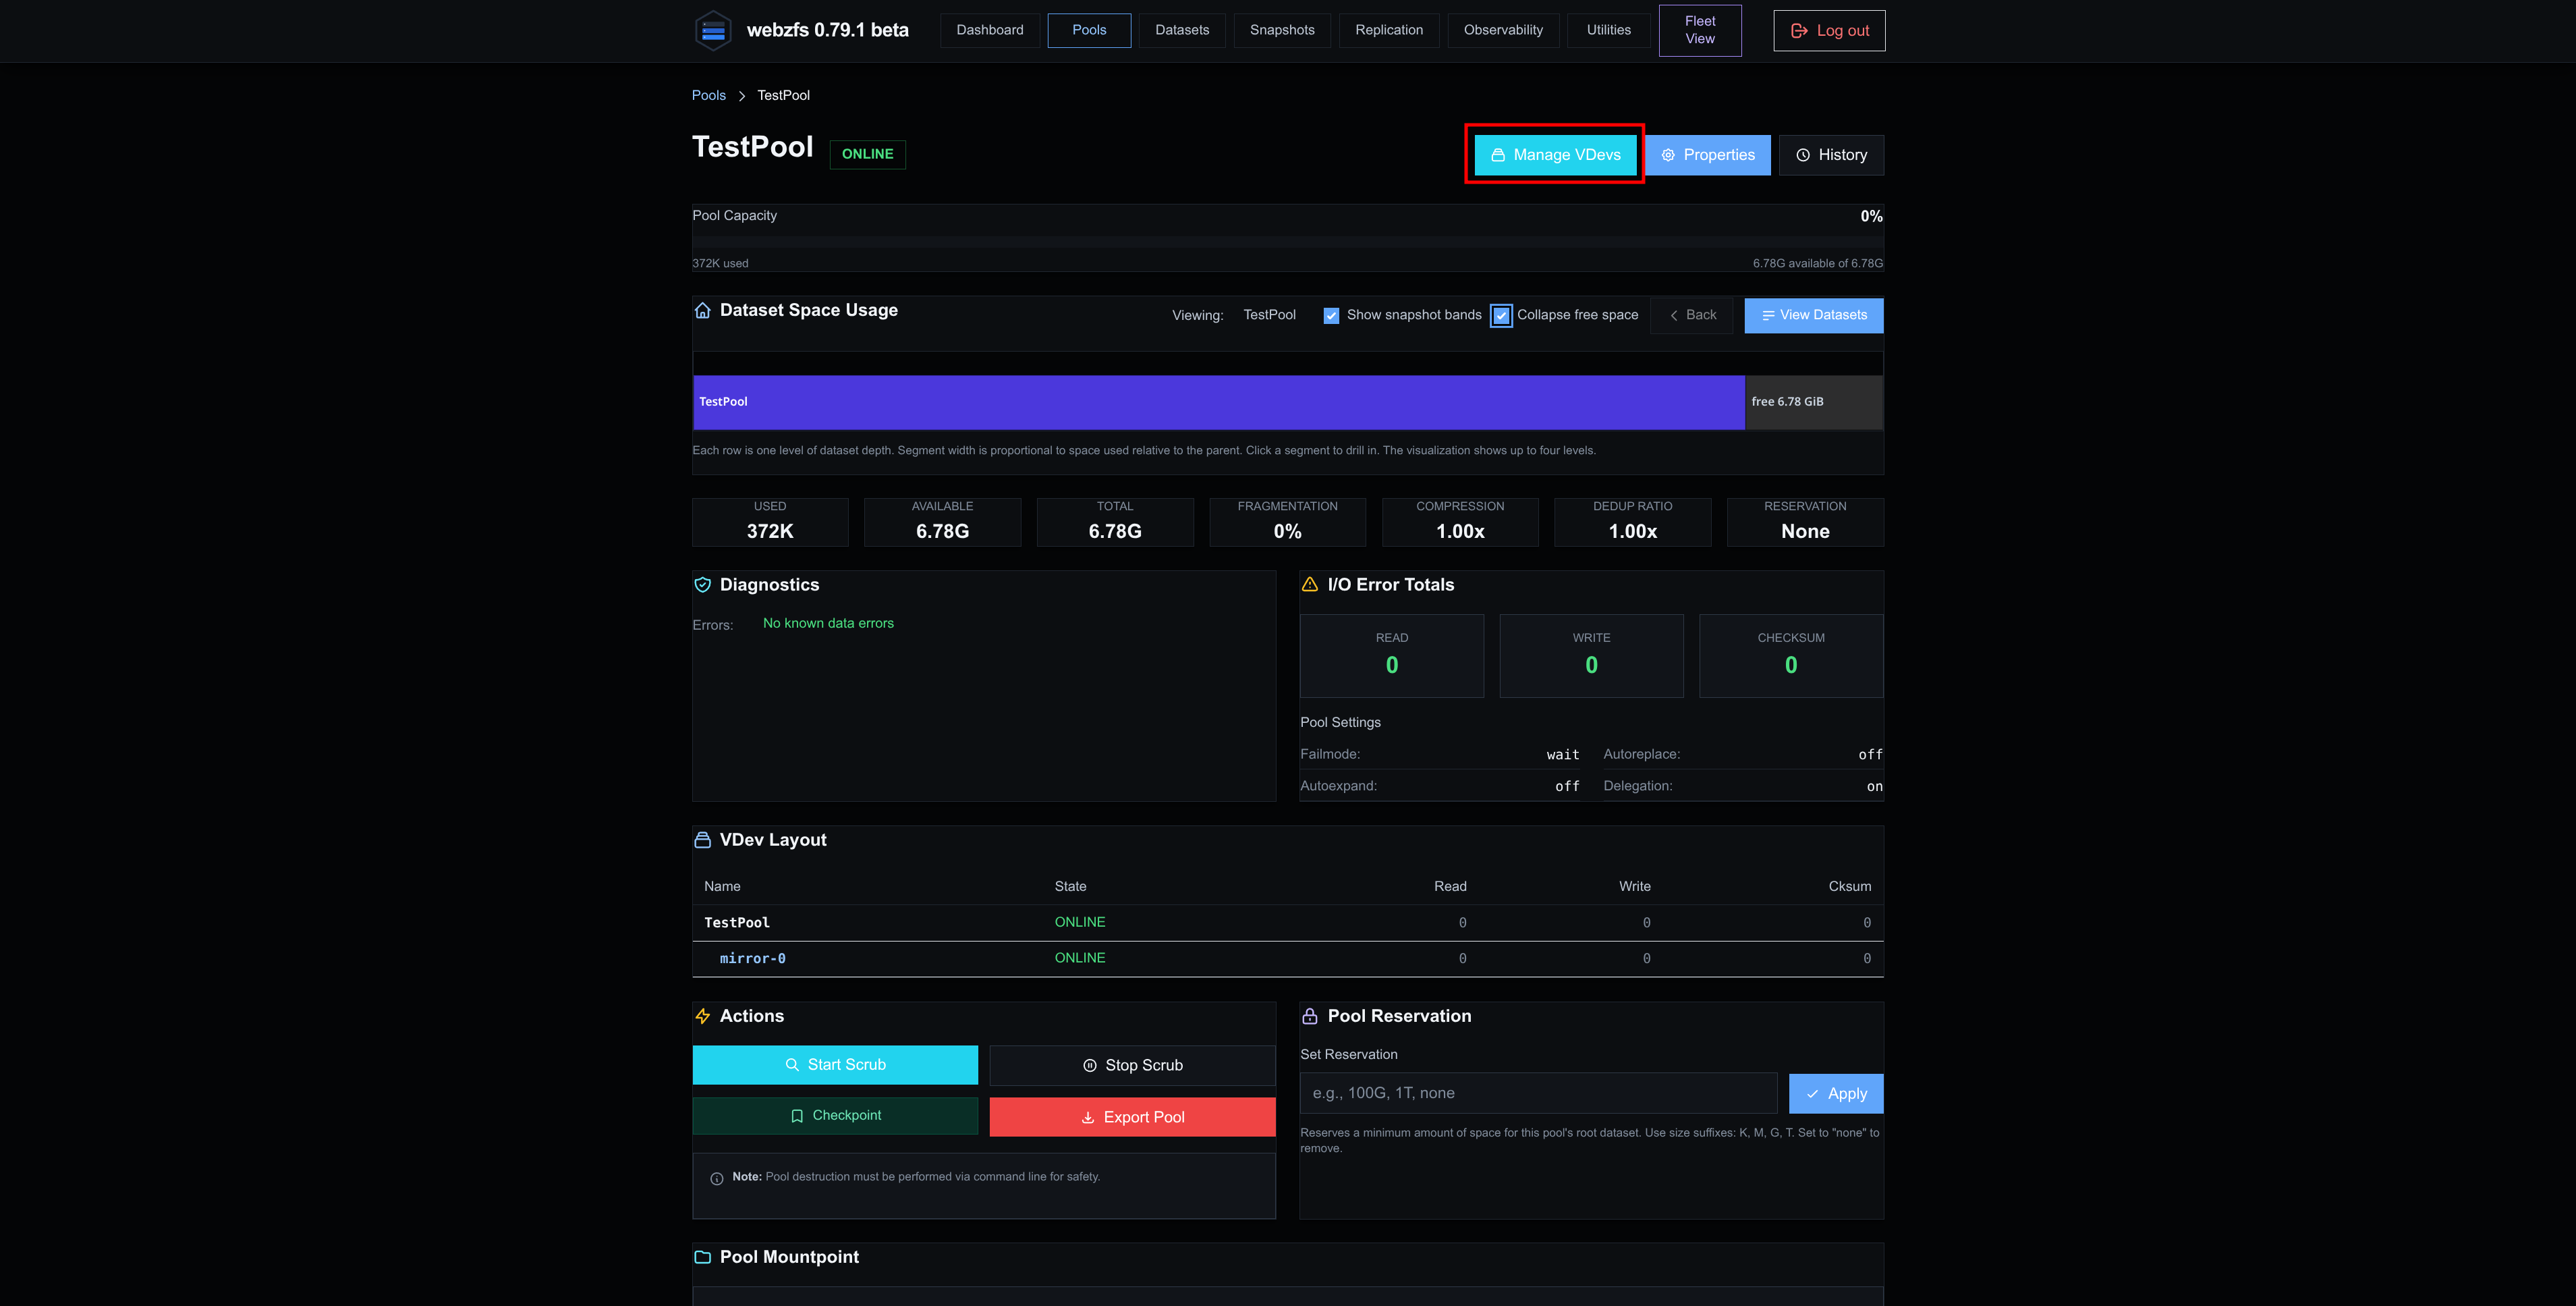
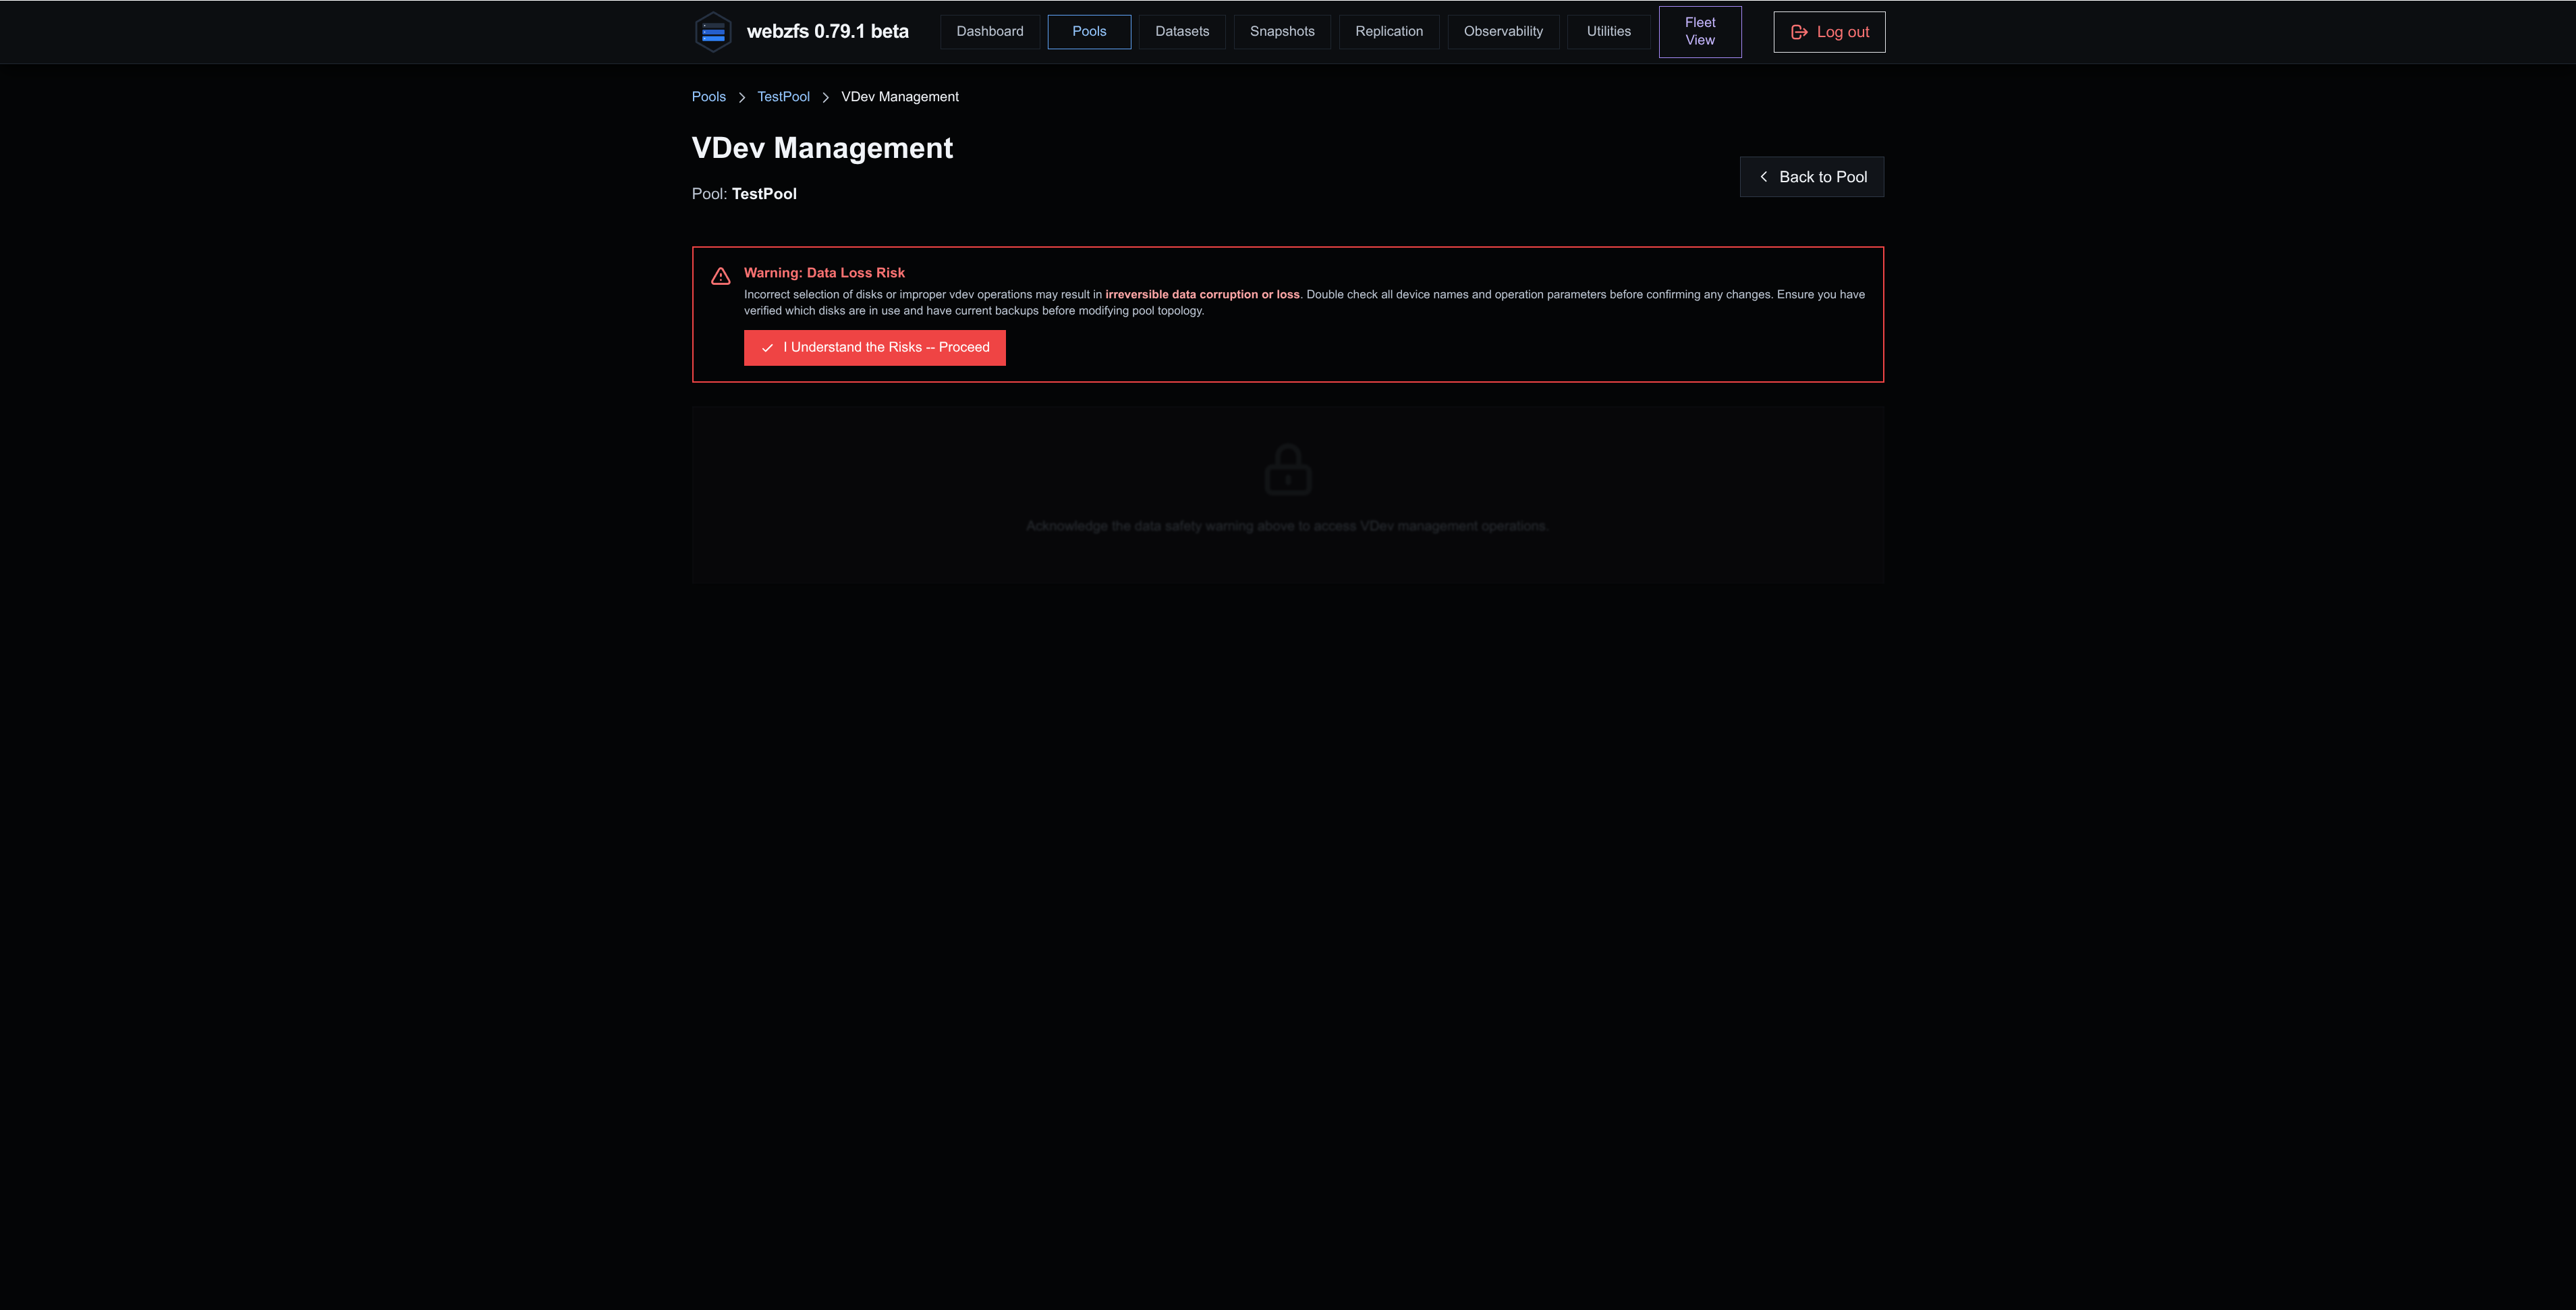
If we click Manage VDevs it will let us modify the physical composition of the disks that form the pool; this operation is really delicate and WebZFS warns us about it:
|
|
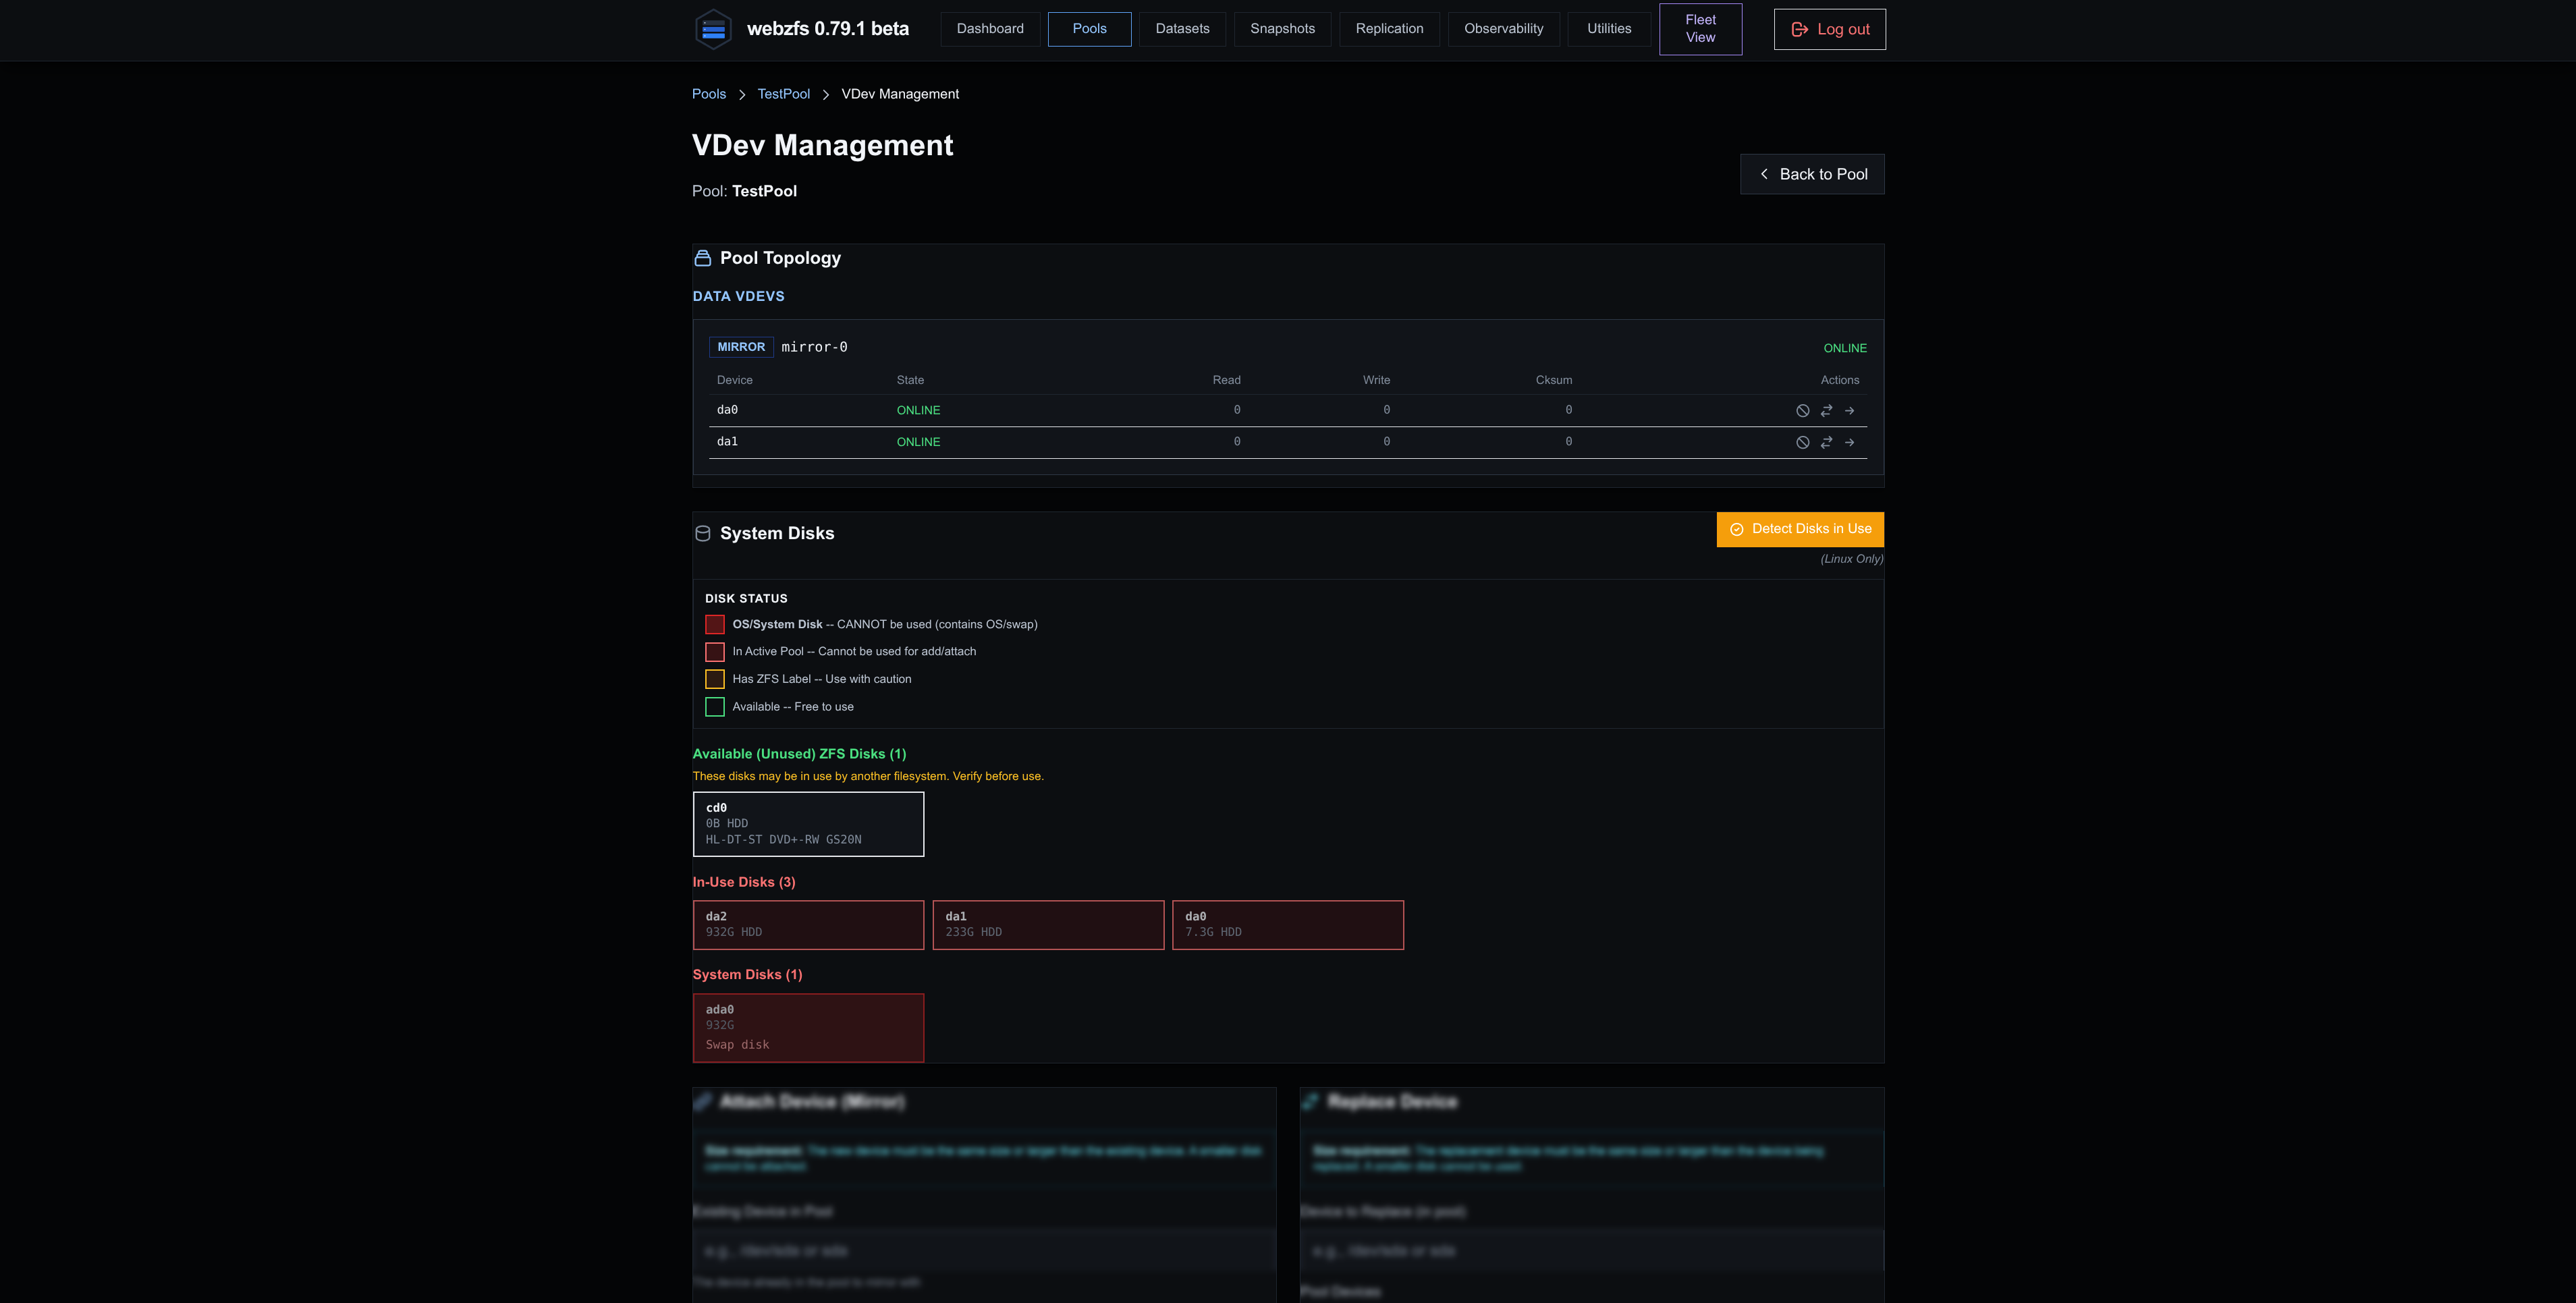
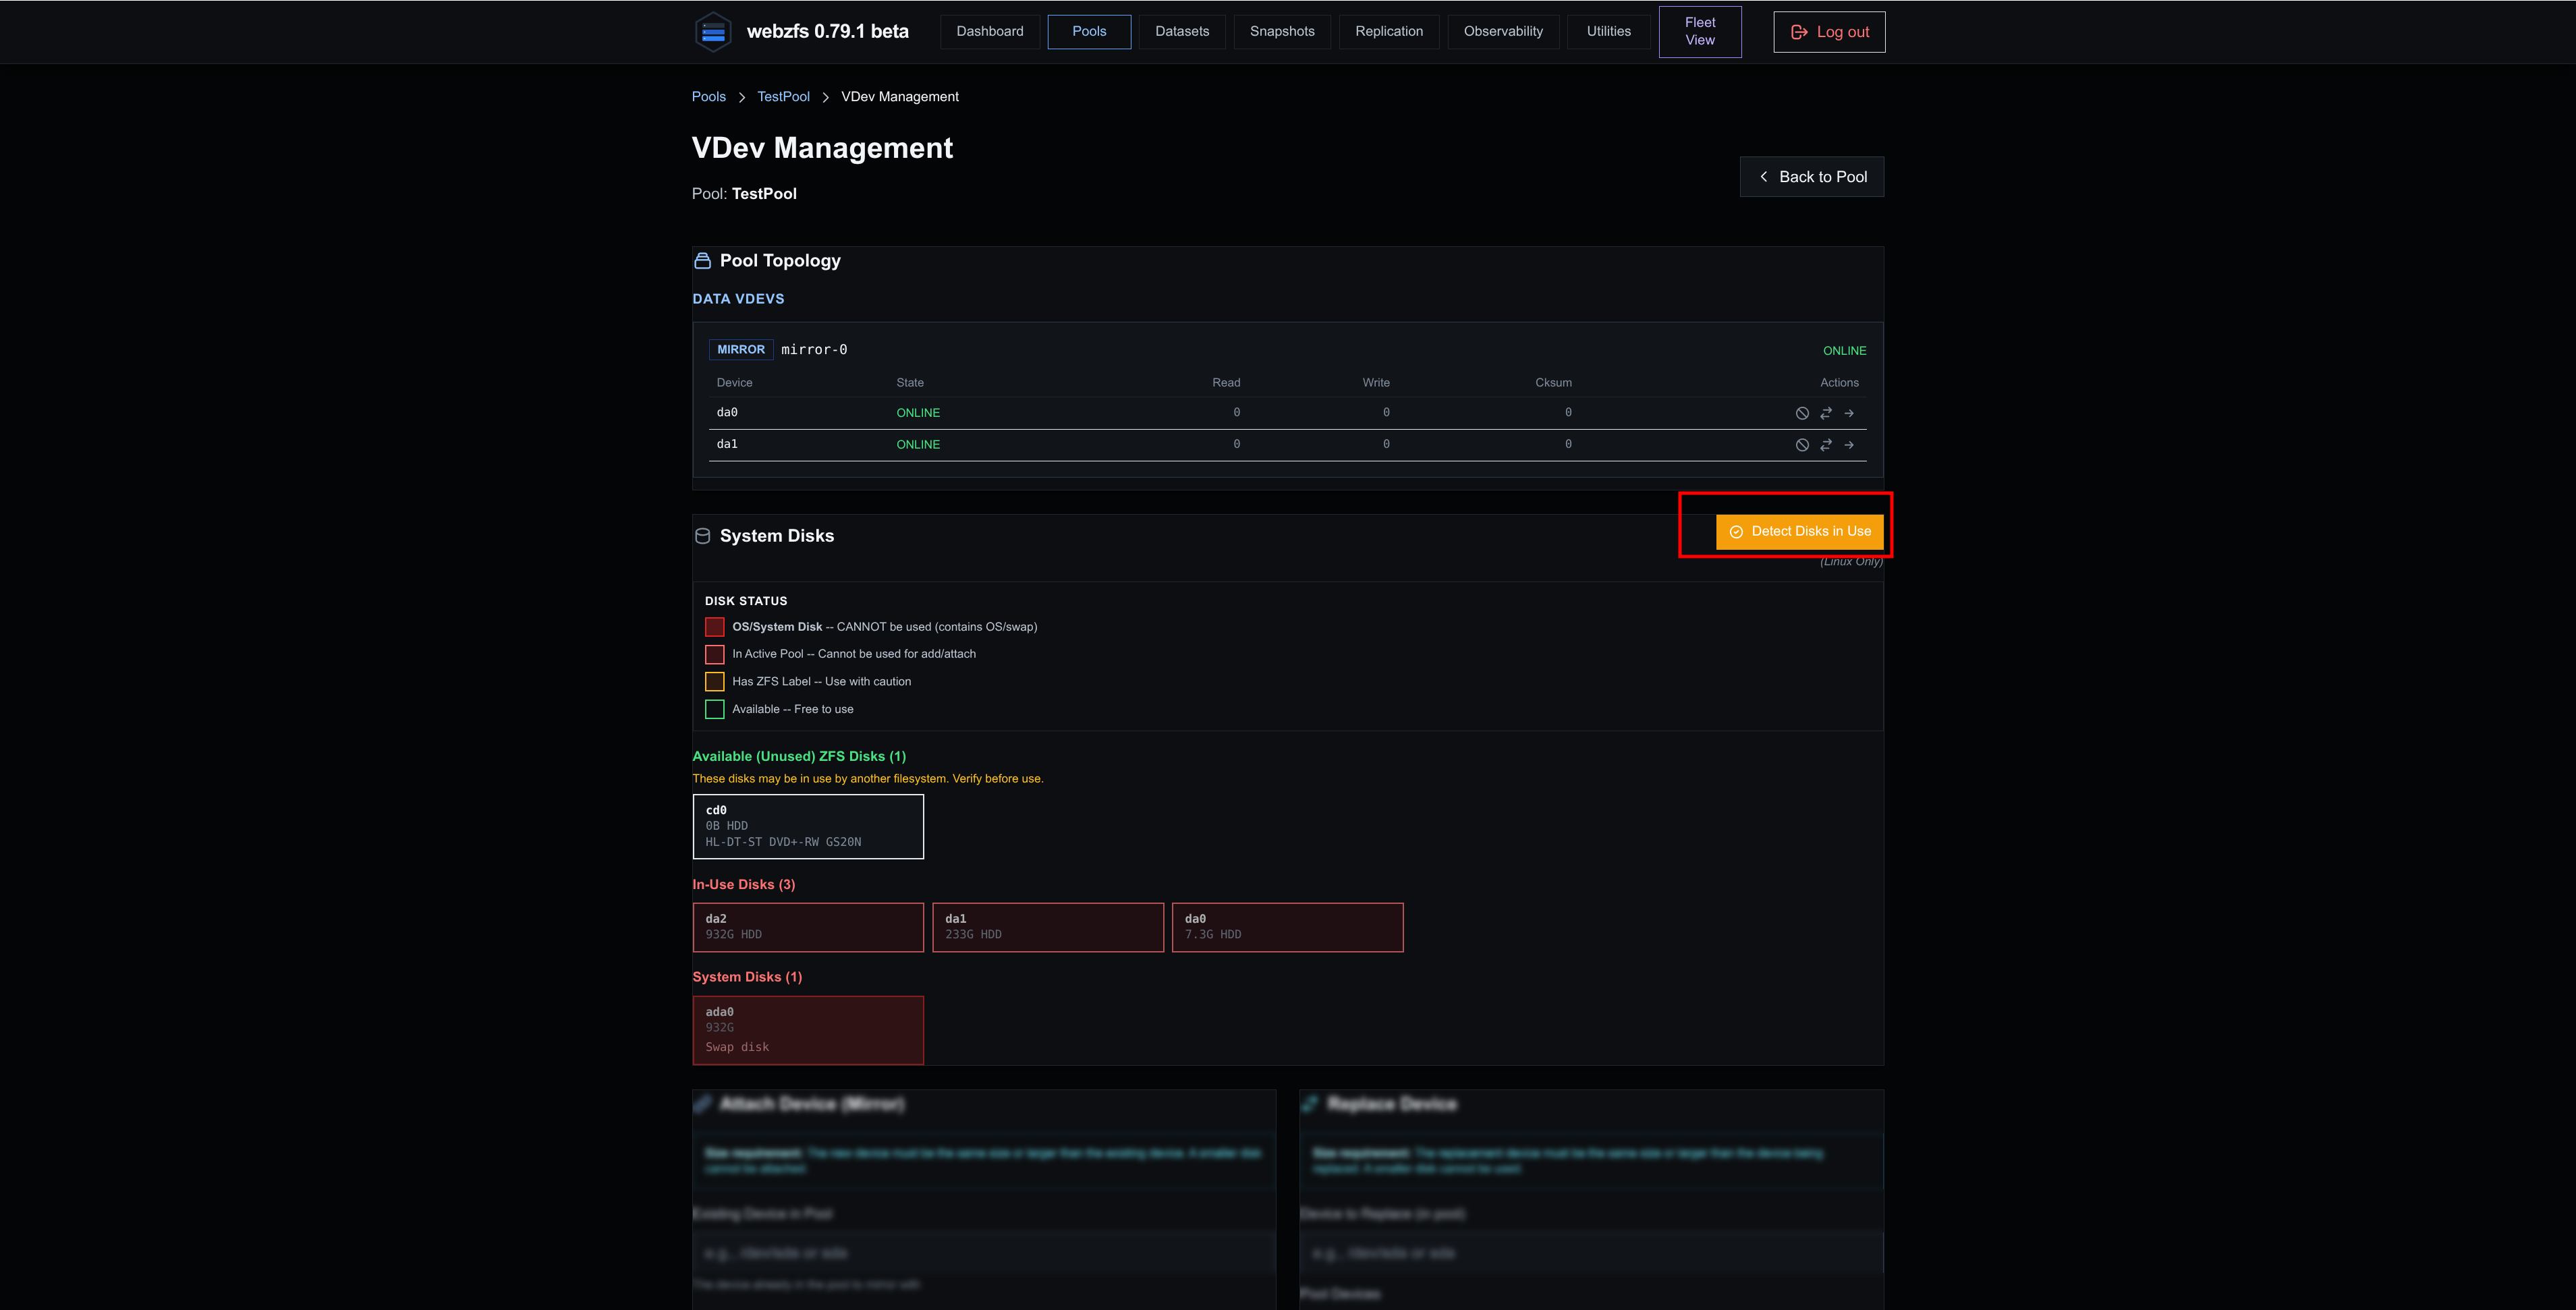
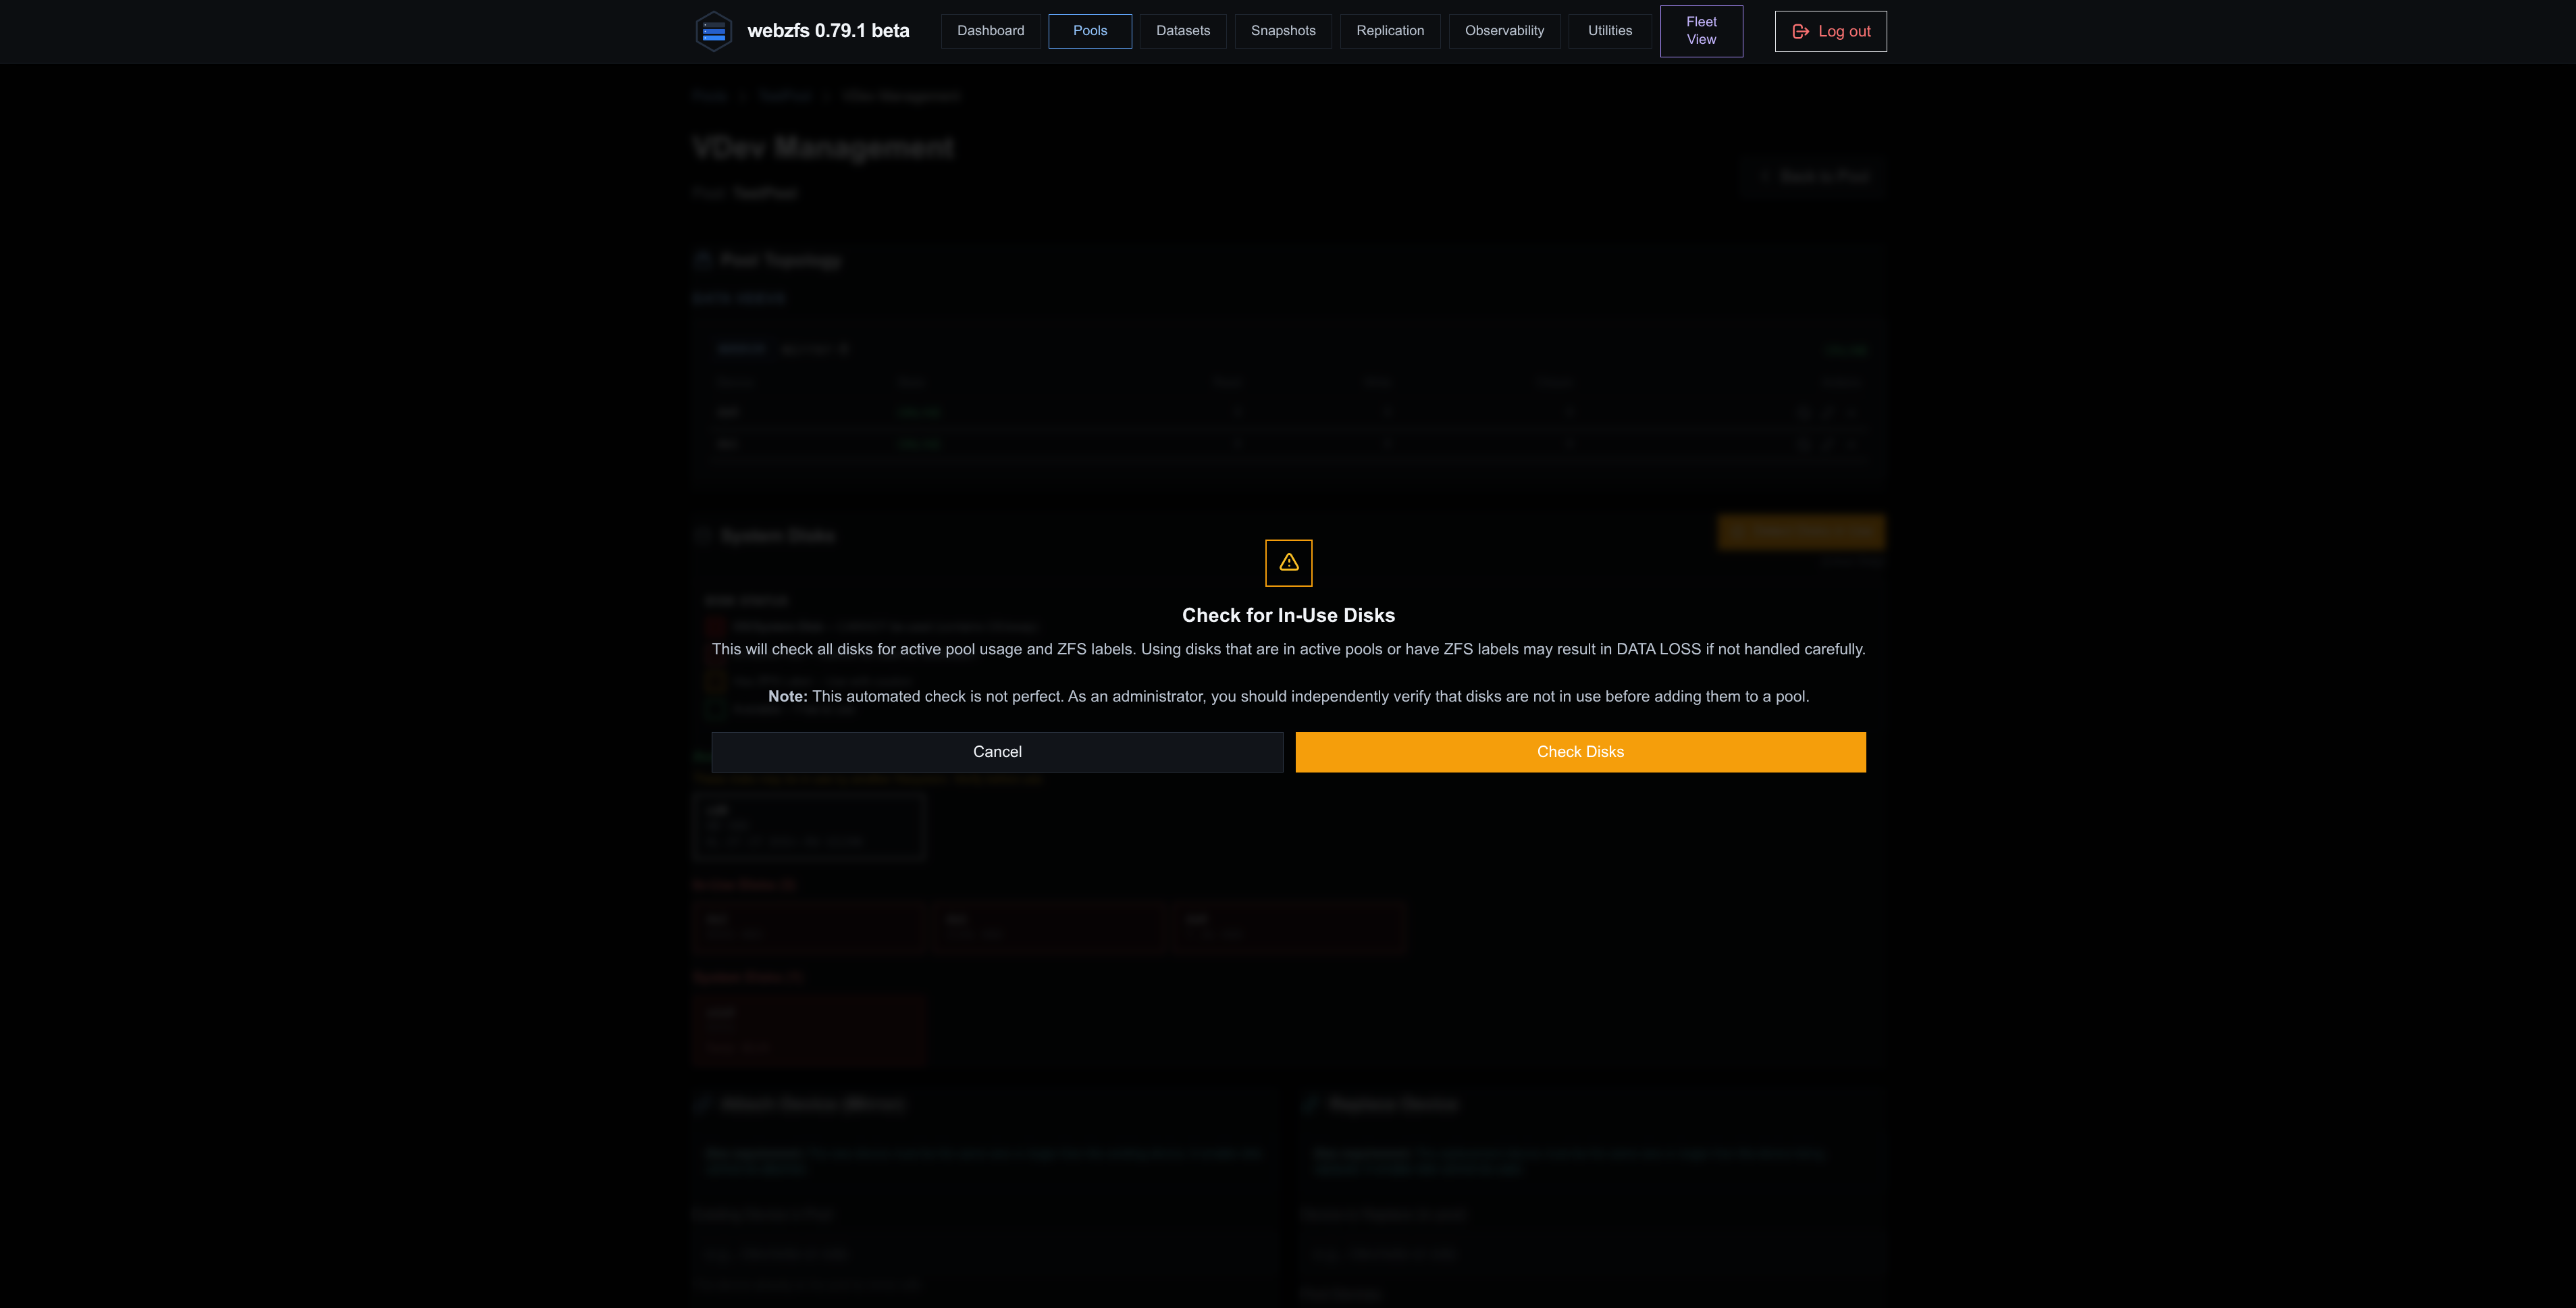
First of all we must detect the system disks in order to access all the options:
|
|
|
|
Now all the options should appear enabled:
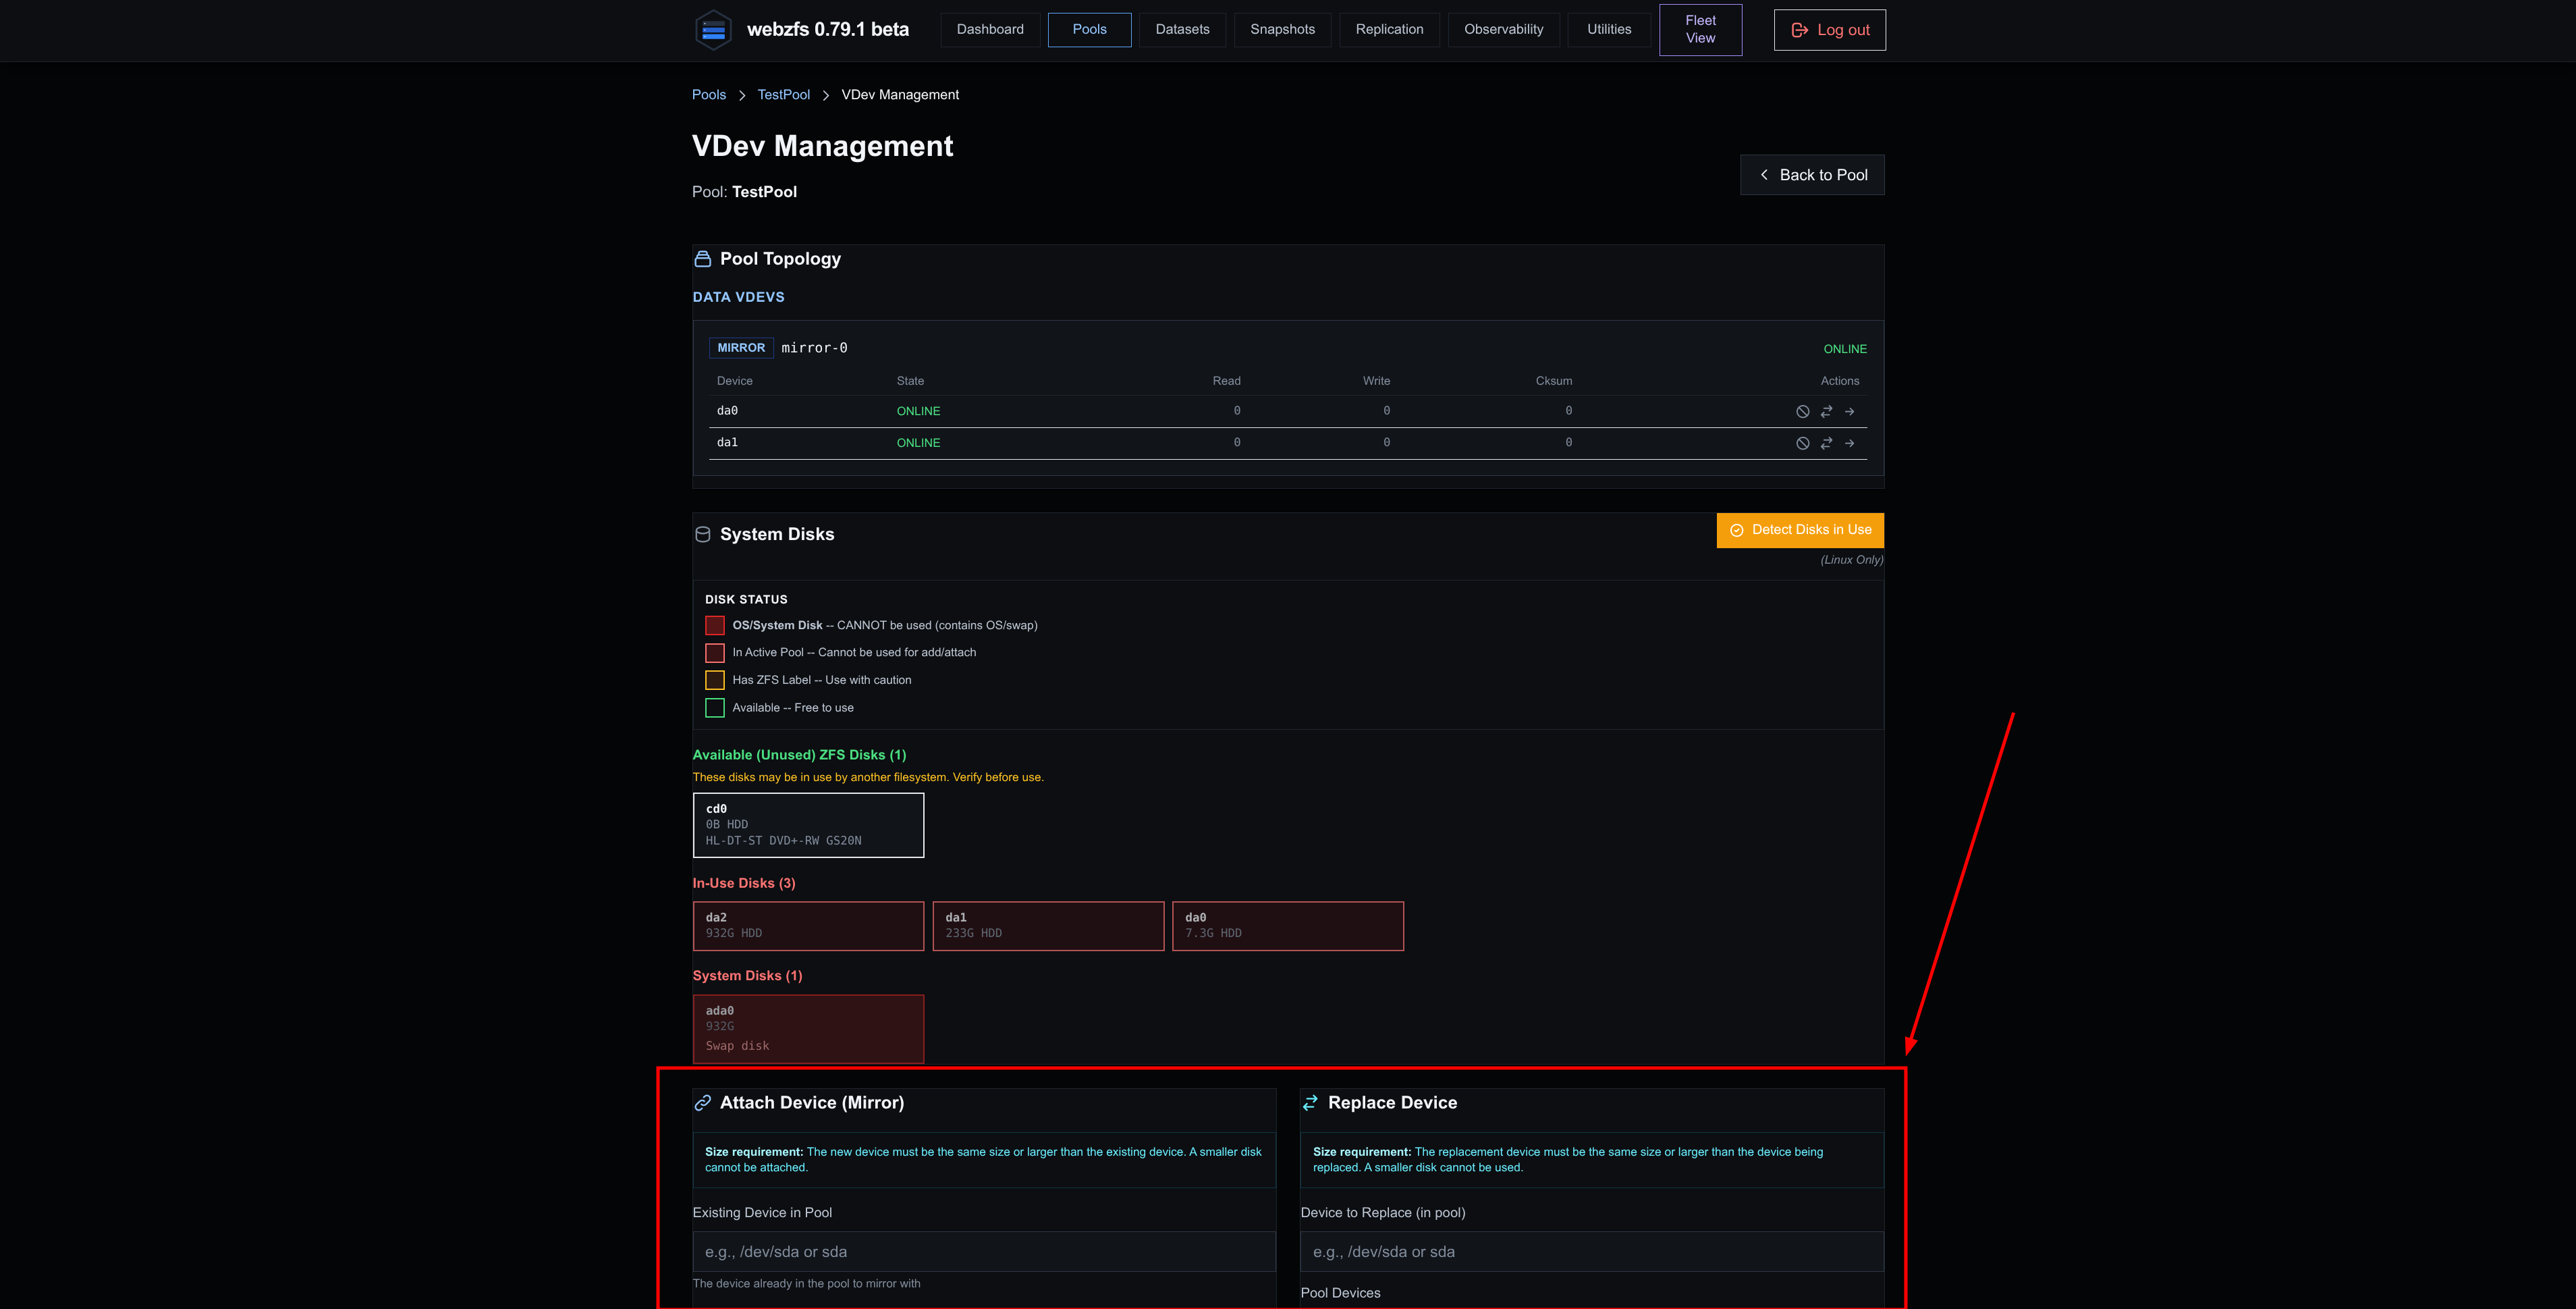
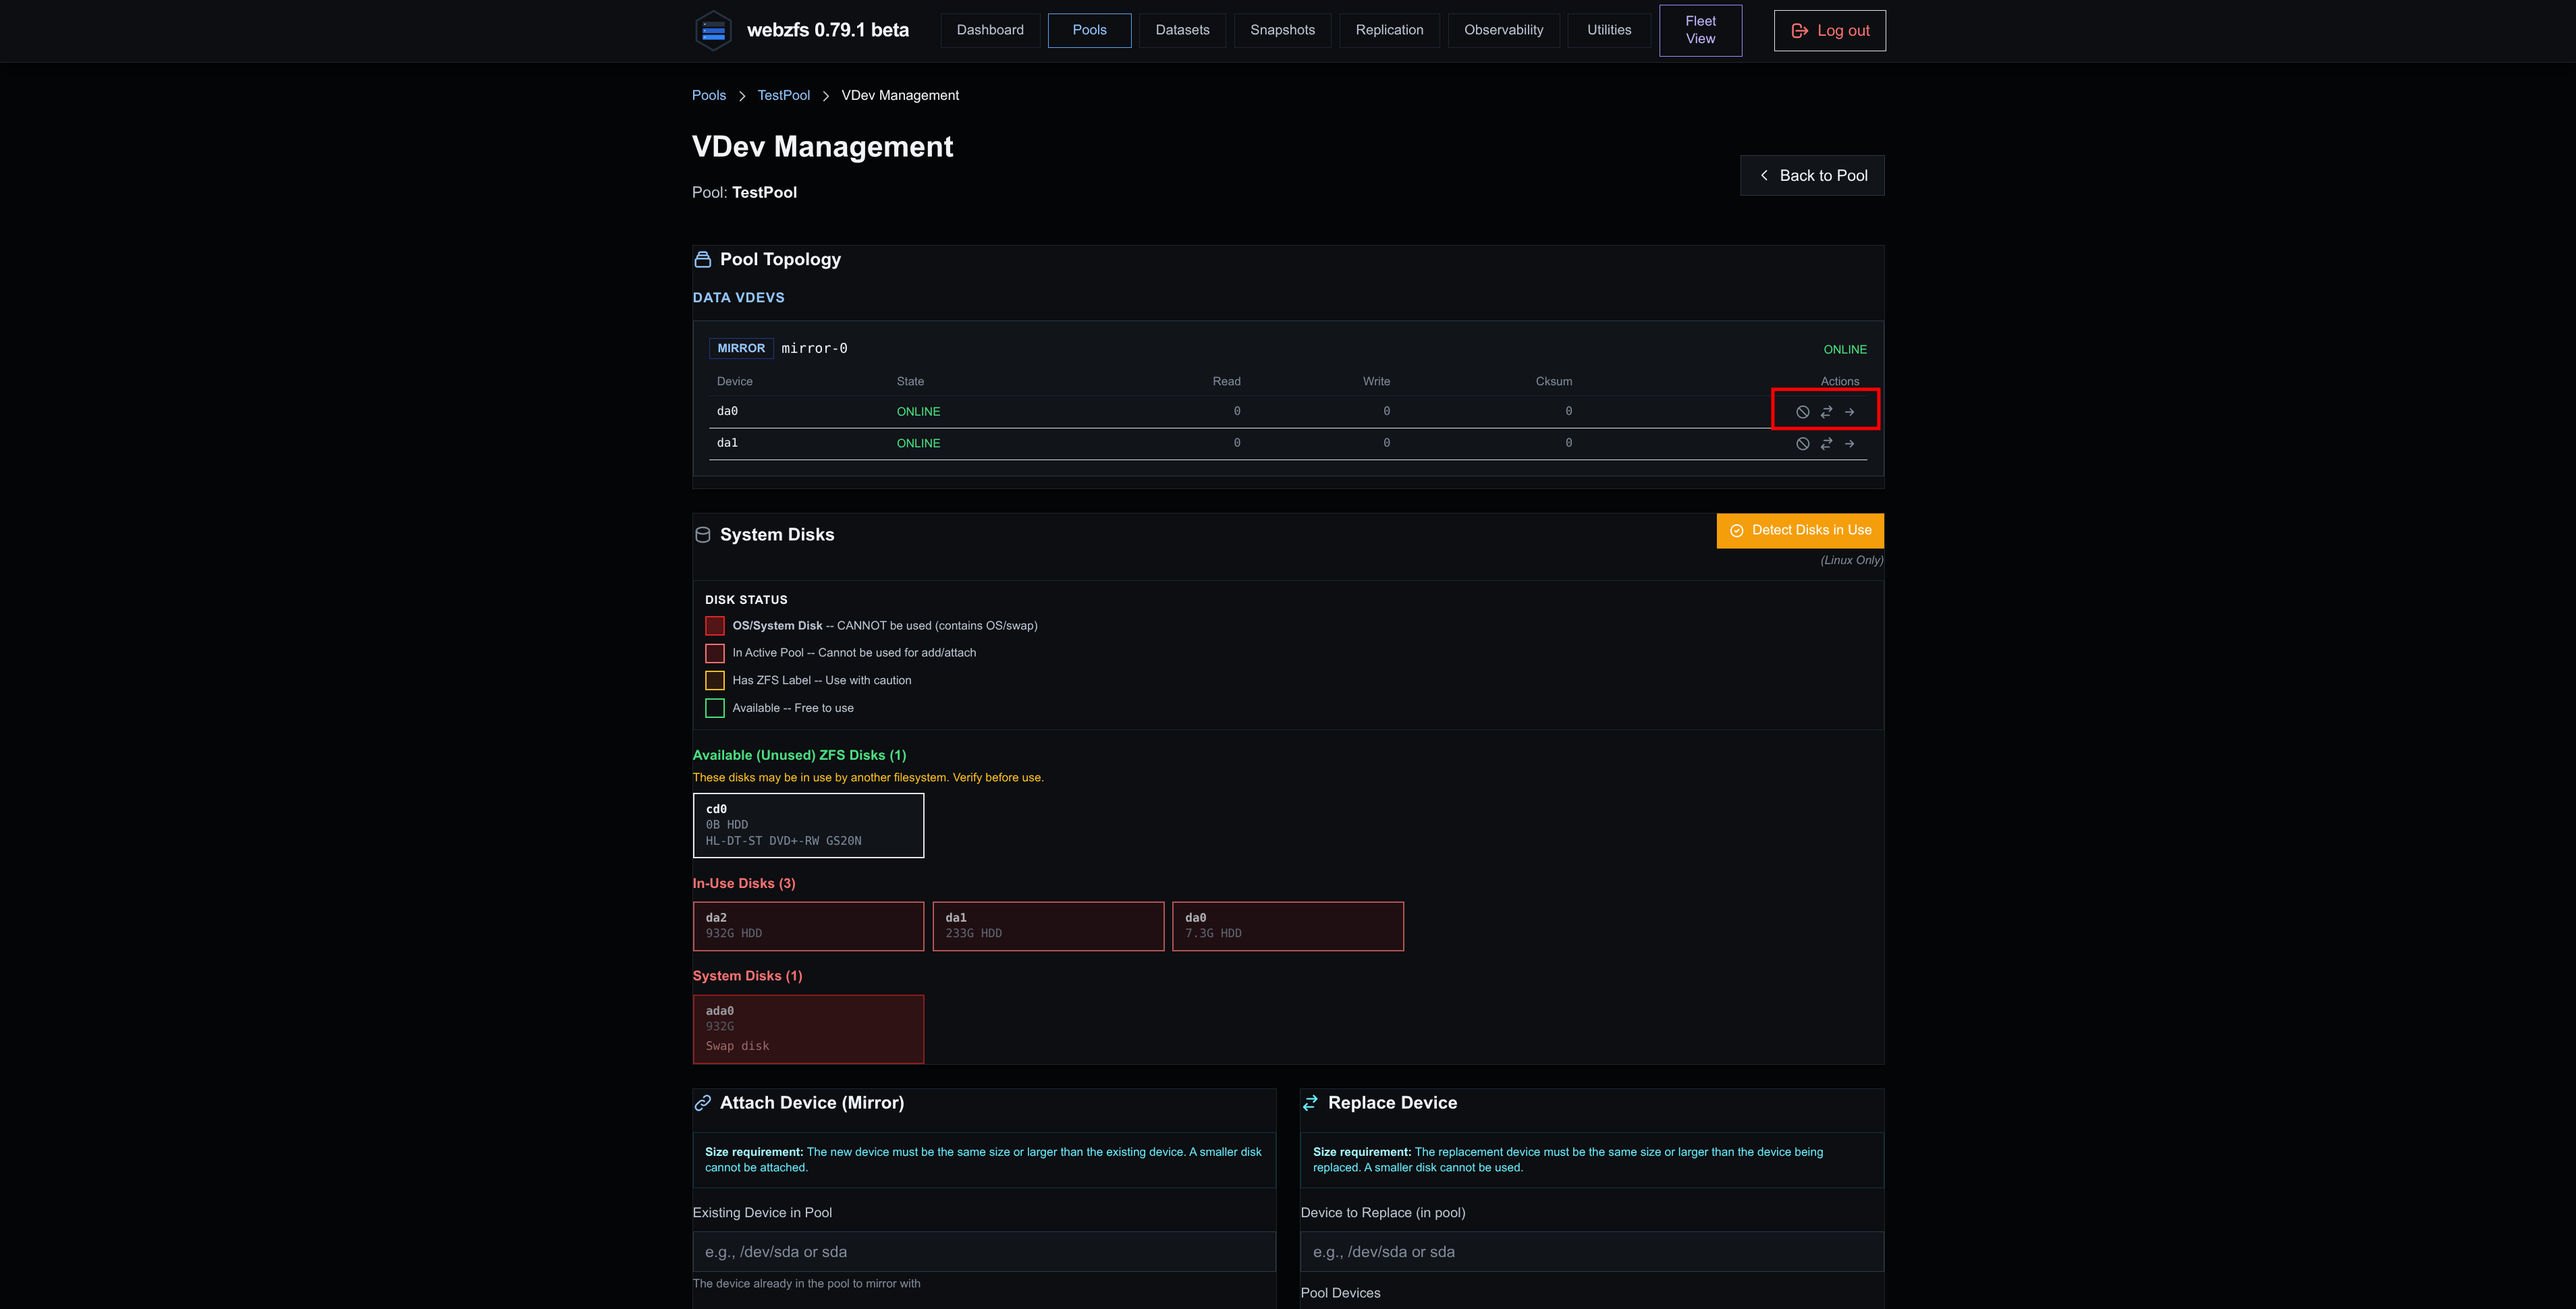
From the Pool Topology section we can disable, change and remove disks from the VDev:
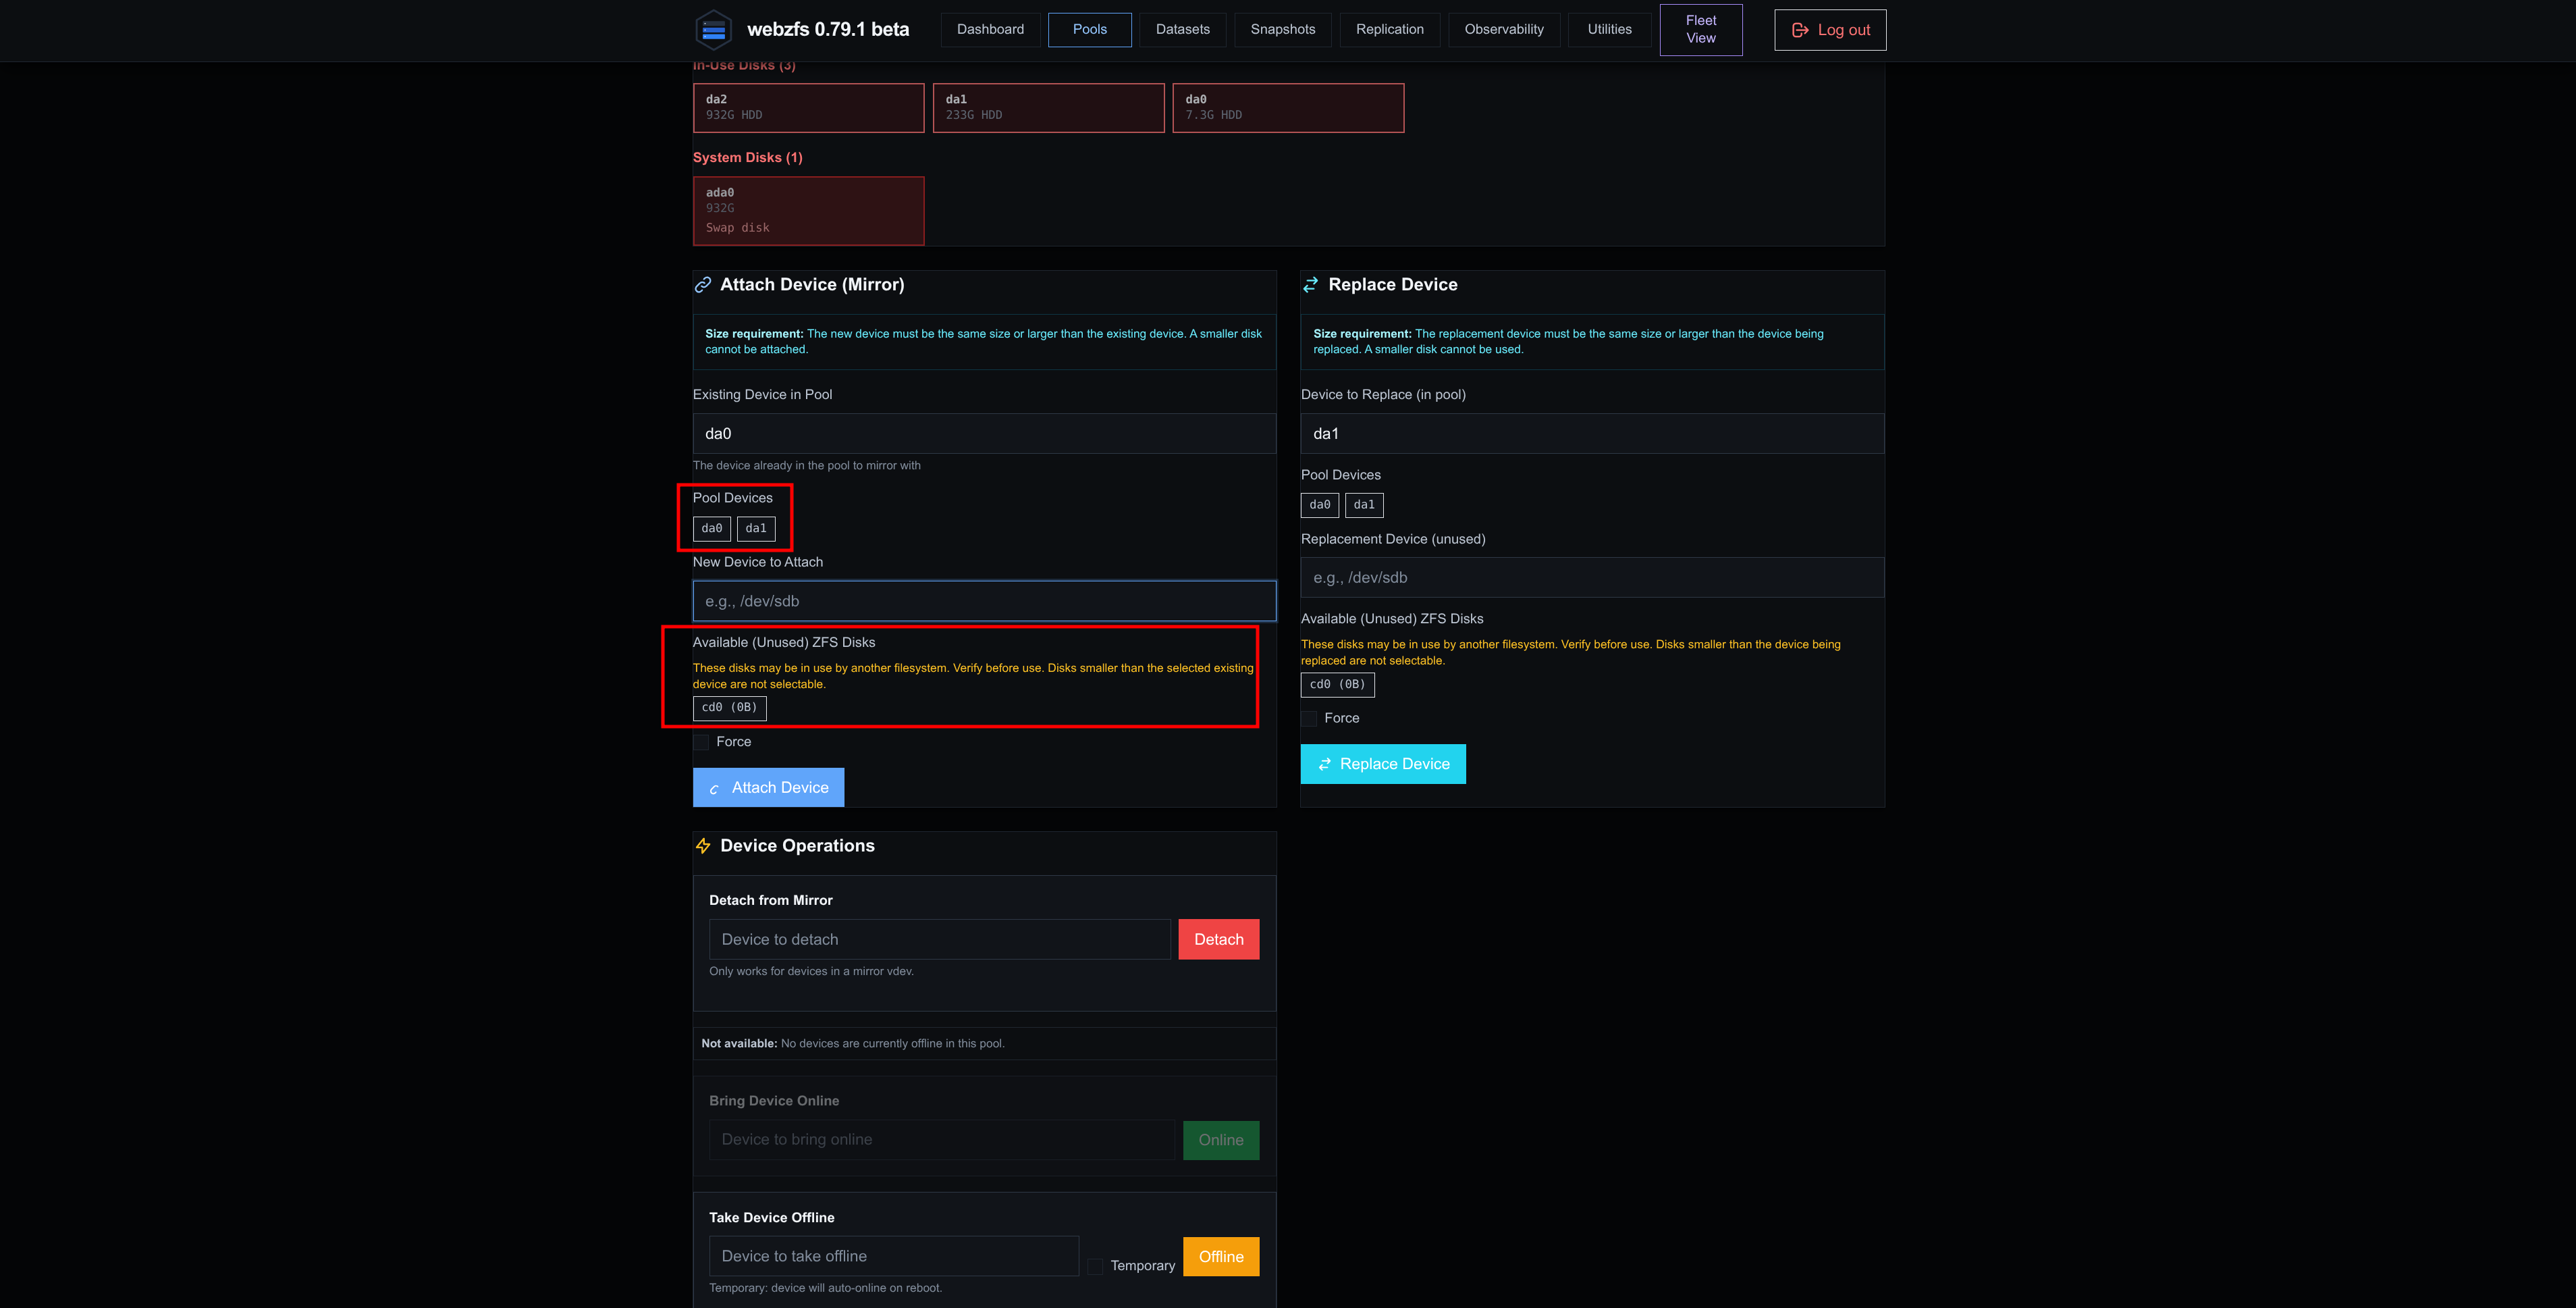
From the Attach Device section we can add disks; we just need to select the disk to mirror from and the new disk:
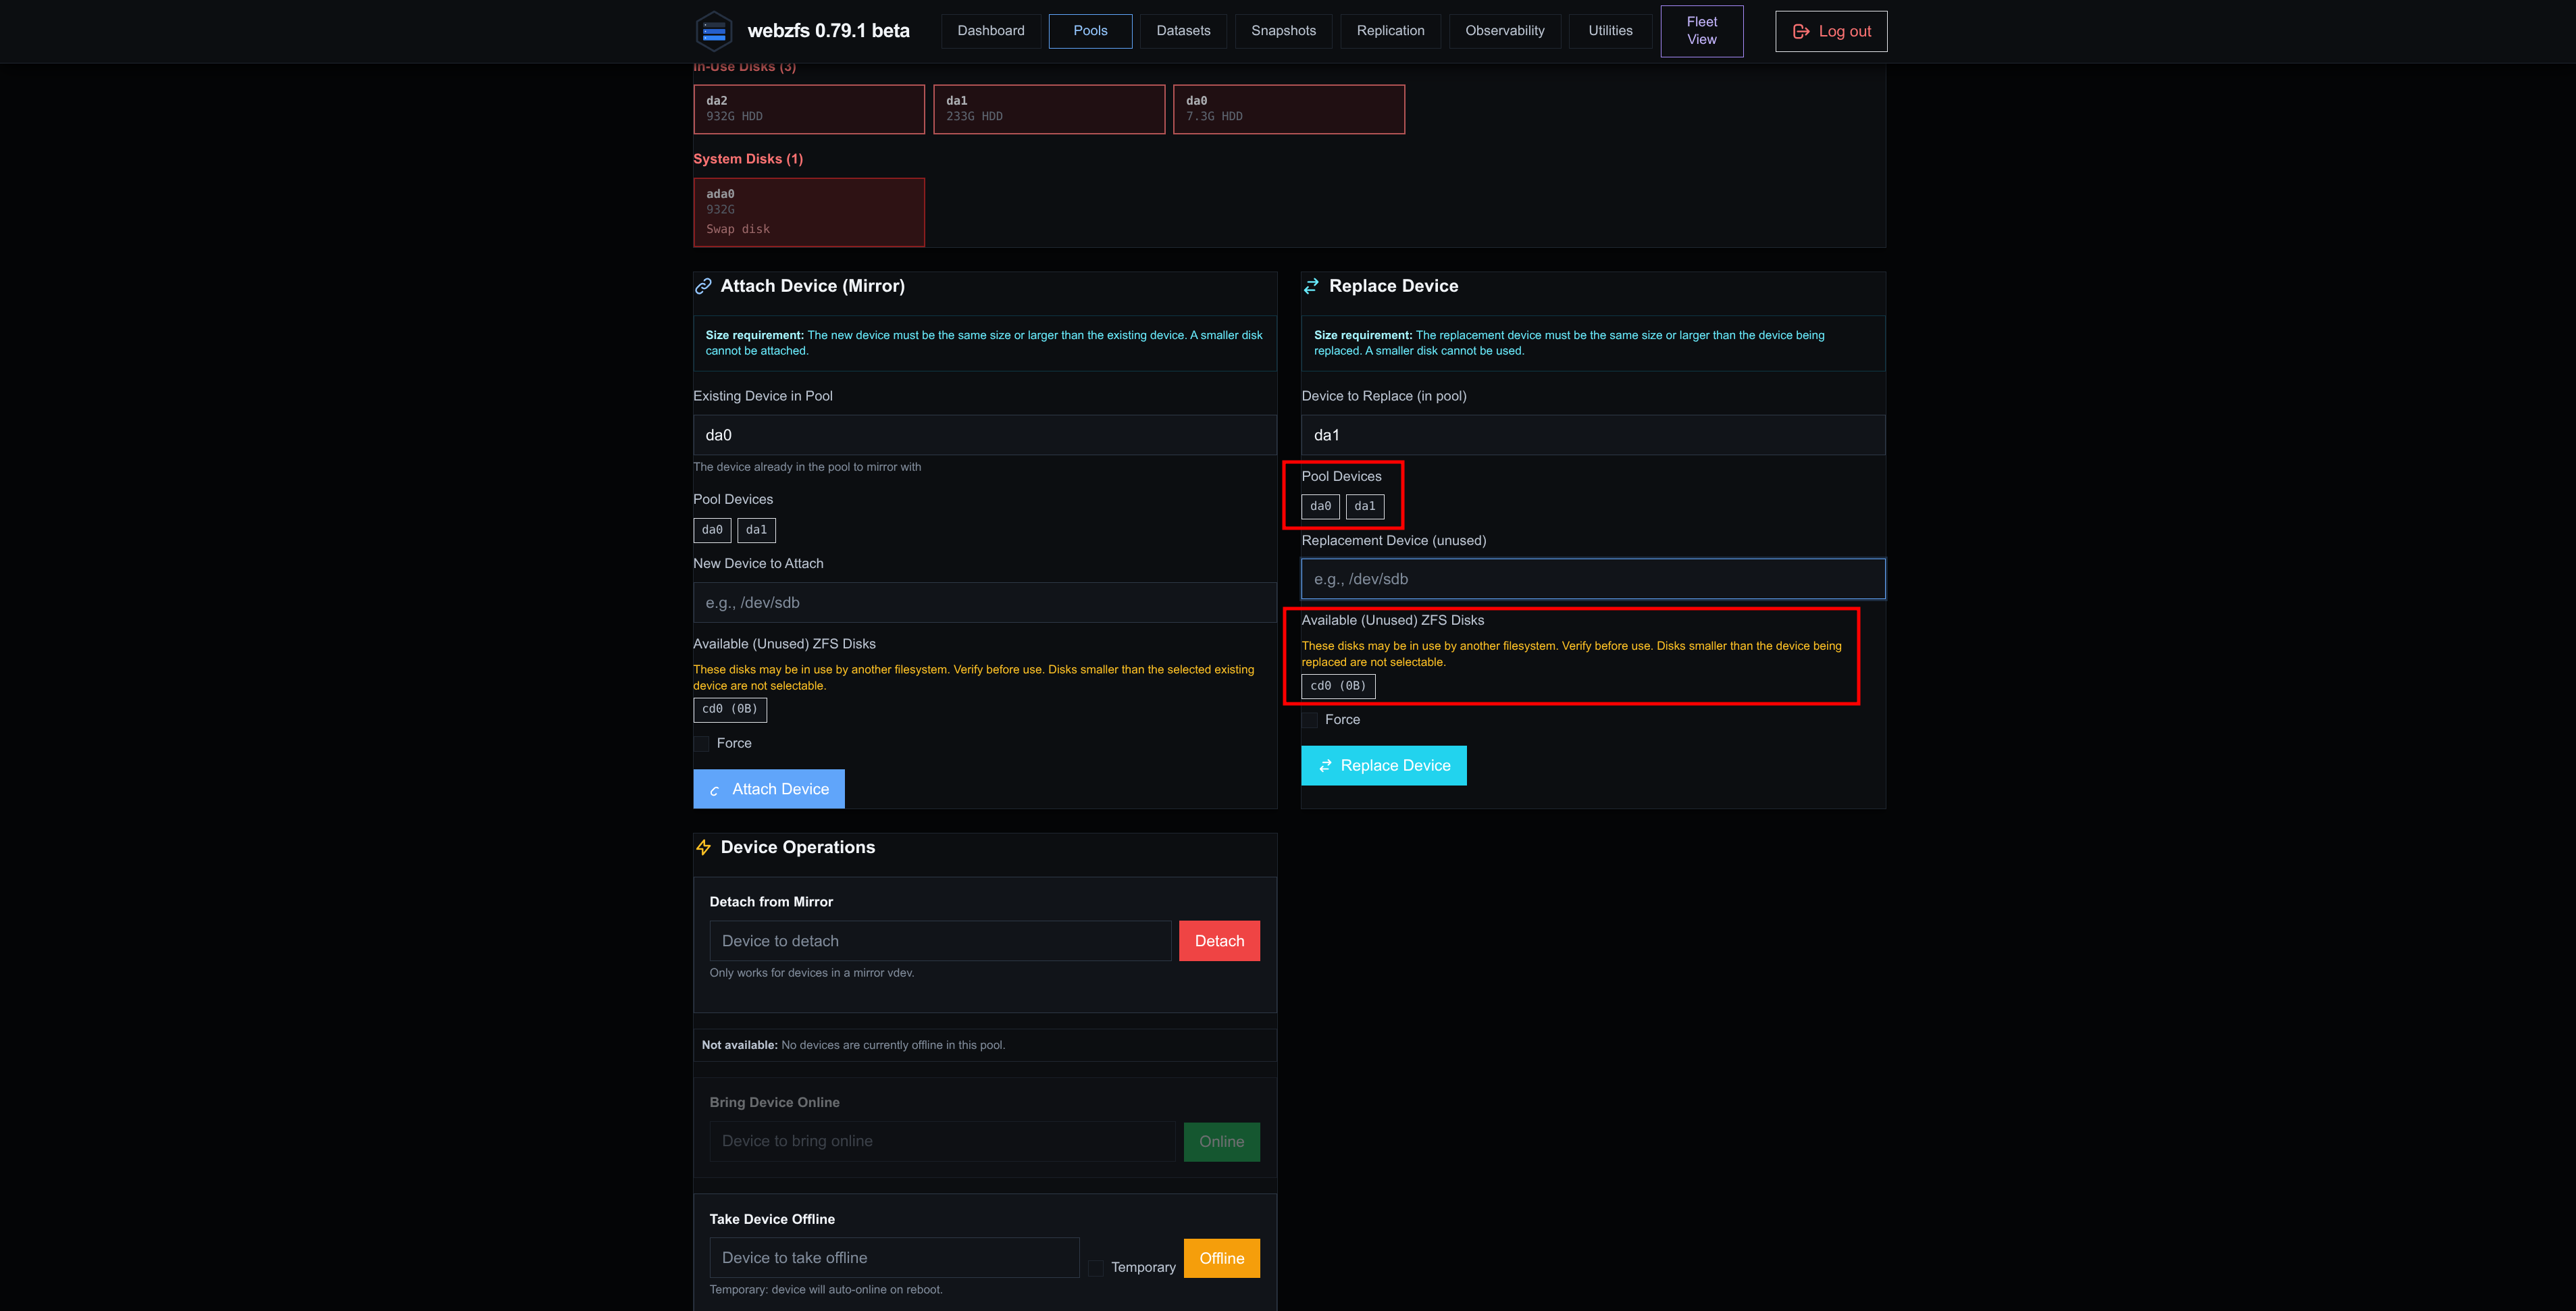
From the Replace Device section we can replace disks; we just need to select the disk we want to replace and the new disk:
In the same way as we could in the Pool Topology section, from Device Operations we can change and remove disks from the VDev, but also restore them:
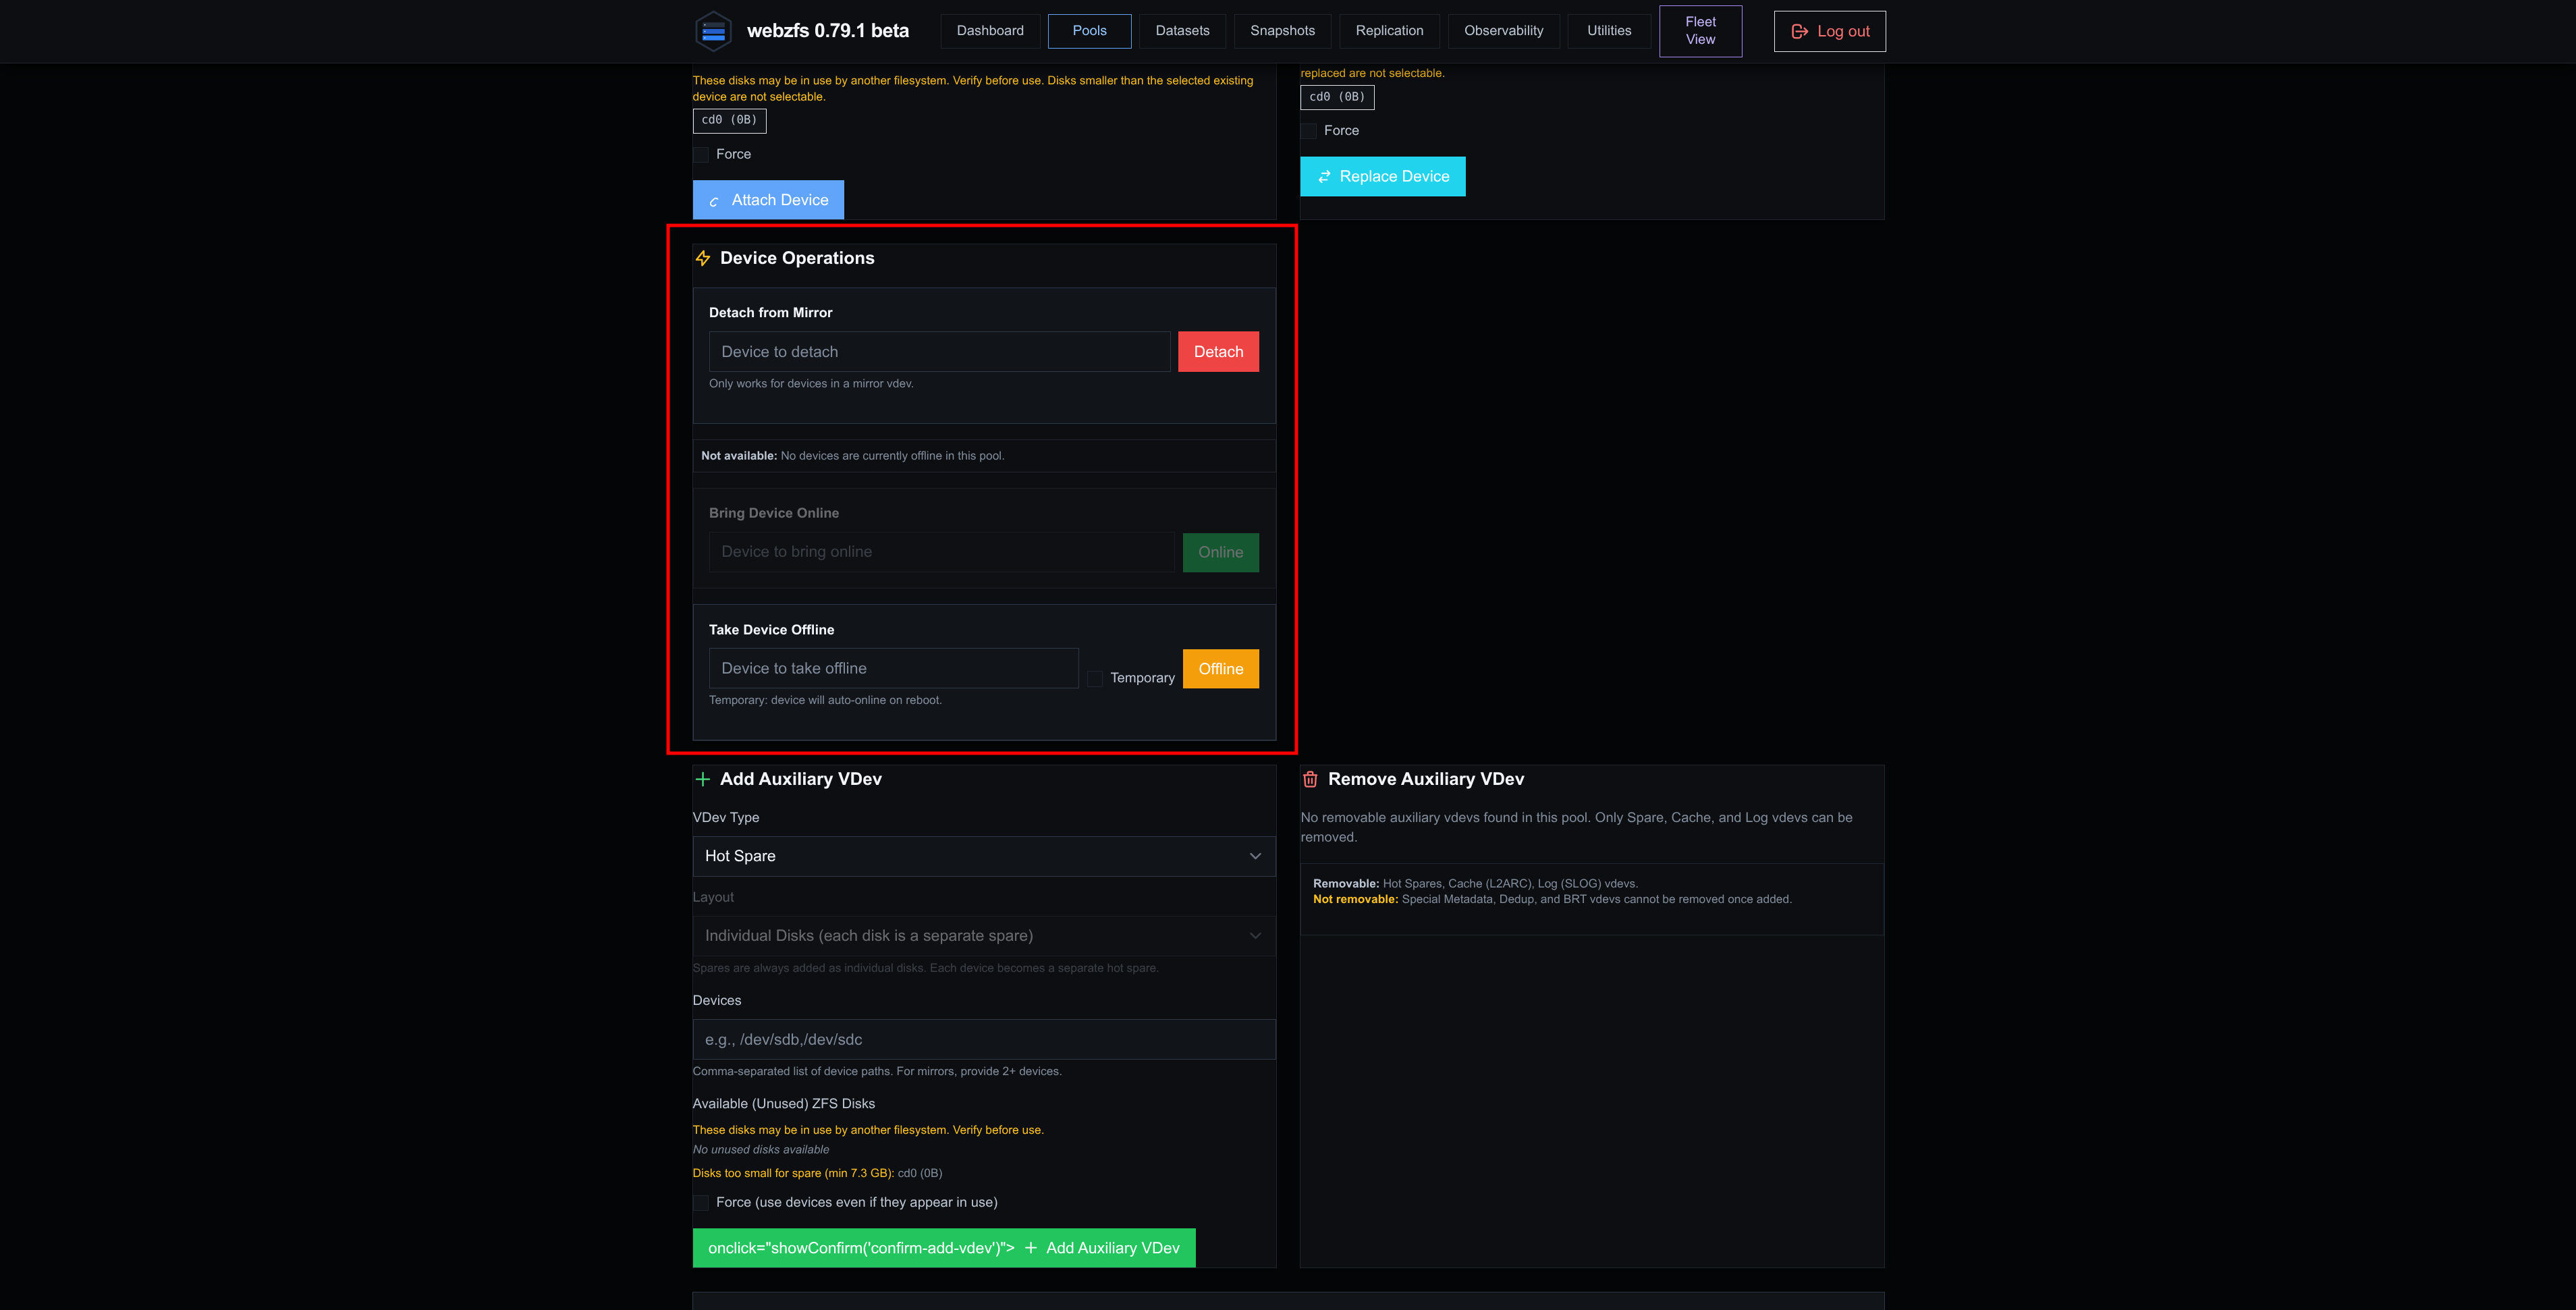
We can also add disks for specific functions such as Hot Spare, L2ARC, SLOG, Special Metadata VDev or Dedup VDev. Right next to it we have the box to remove this type of disks:
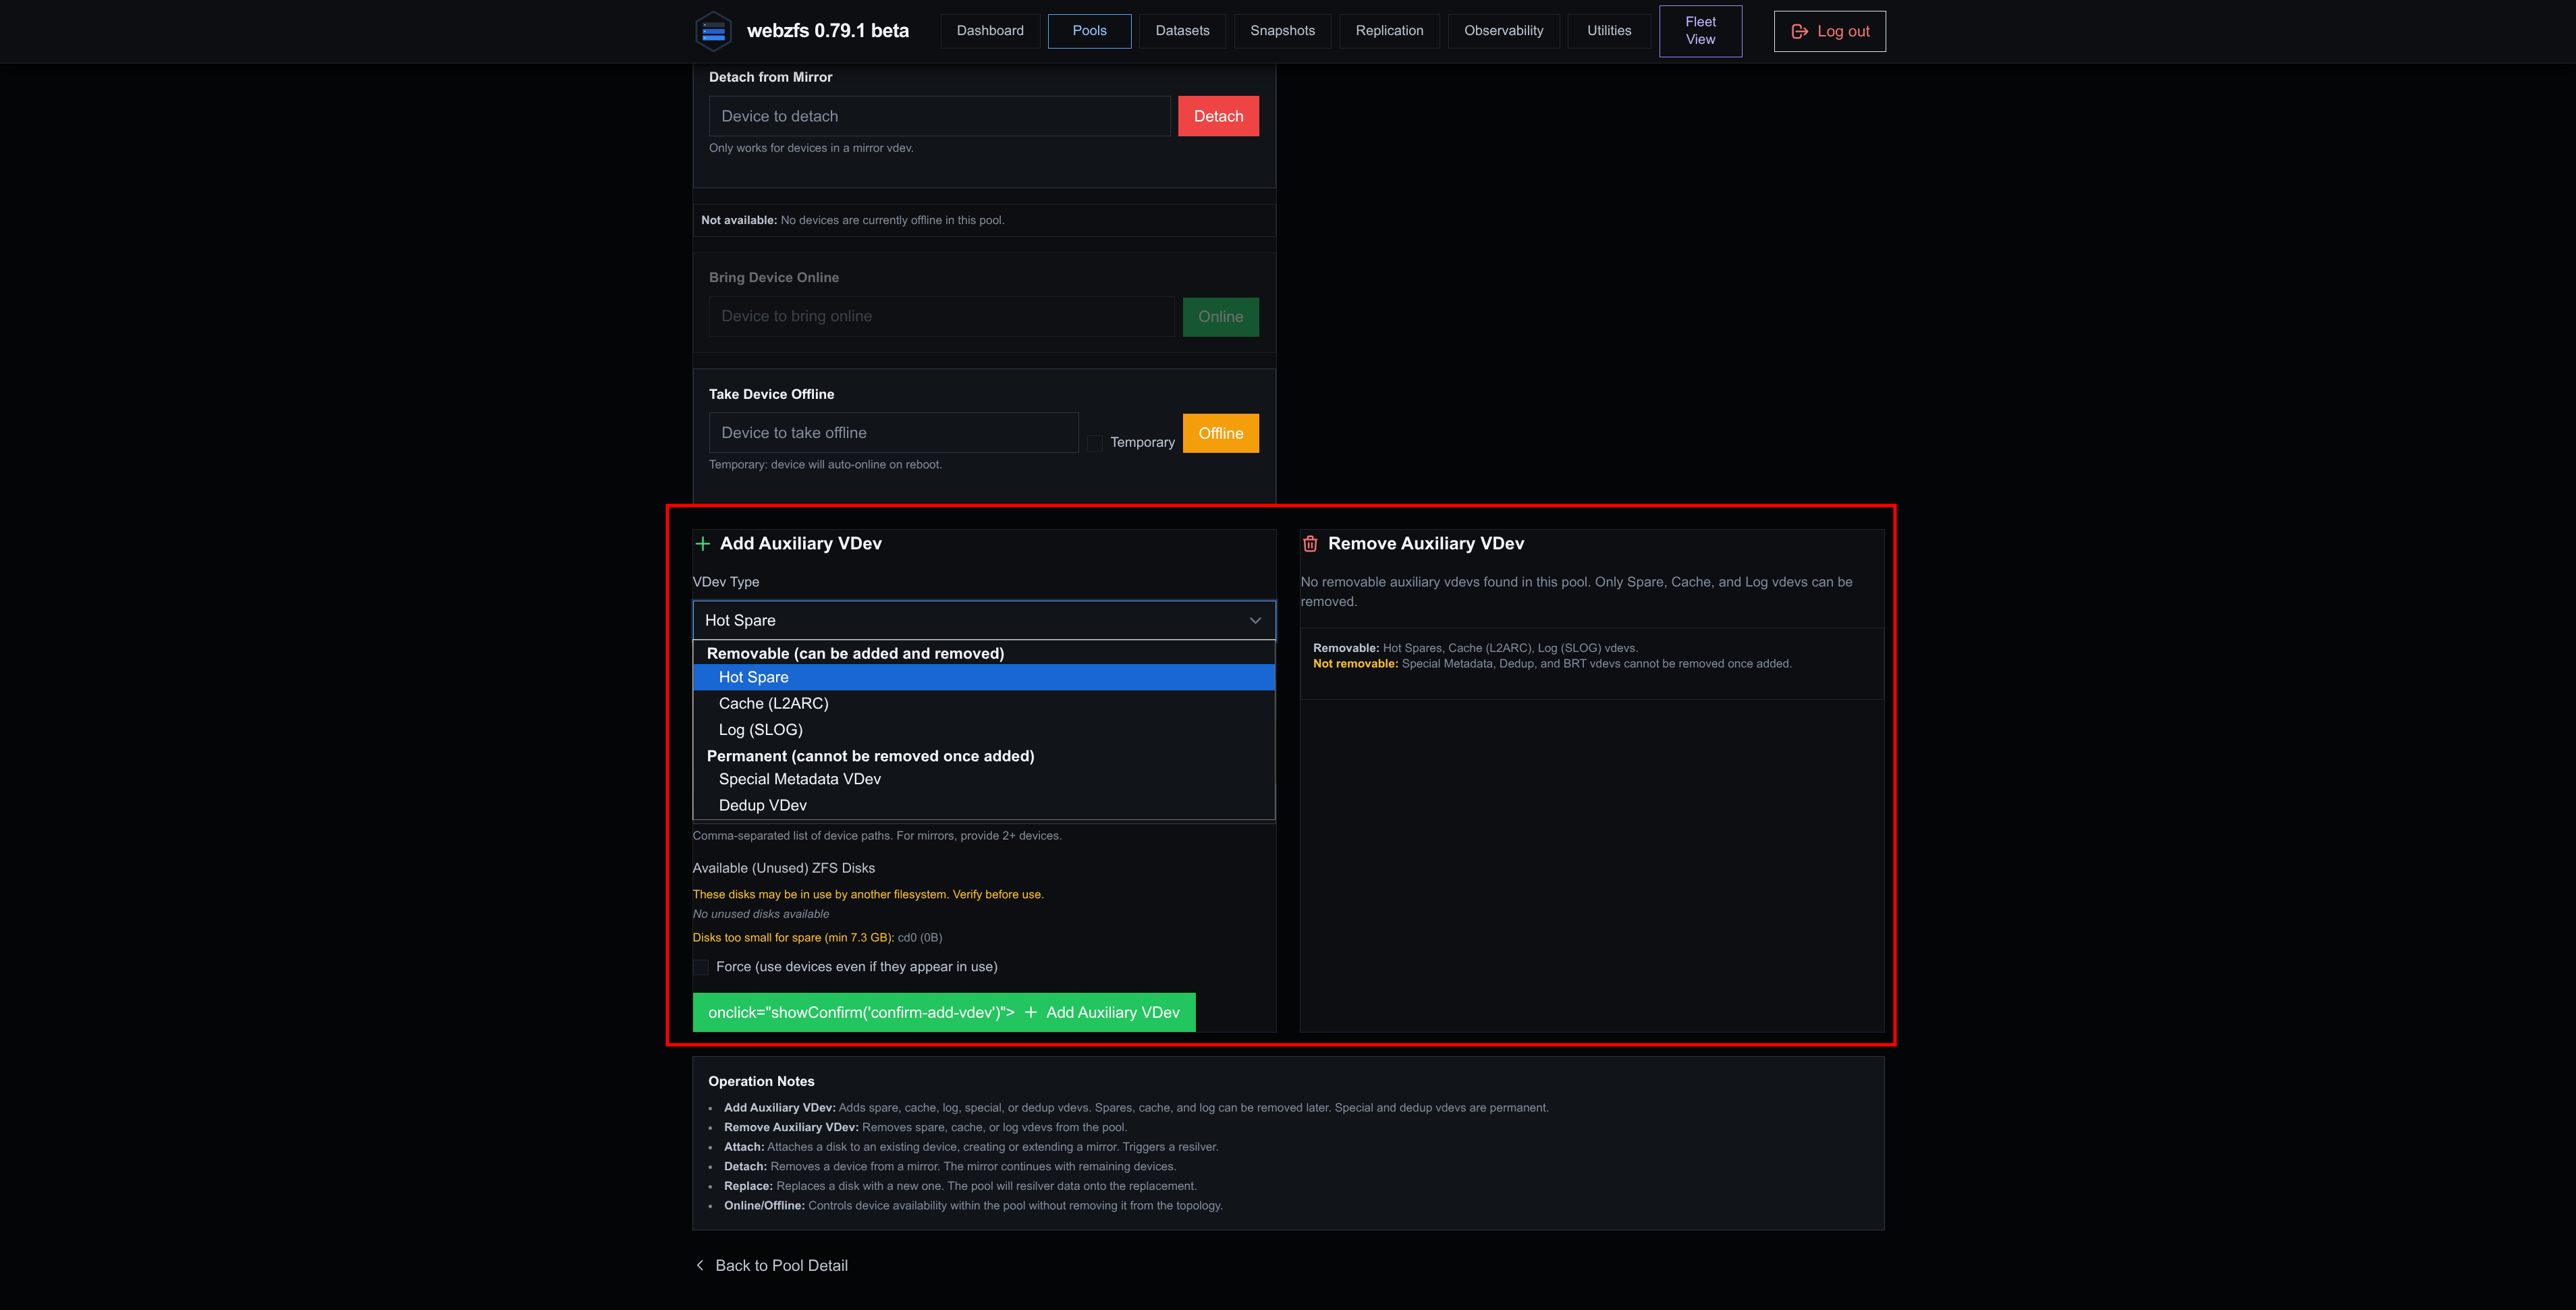
NOTE: In this last screenshot we can see another bug; on the button we can see it says: onclick=“showConfirm(‘confirm-add-vdev’)"> + Add Auxiliary VDev
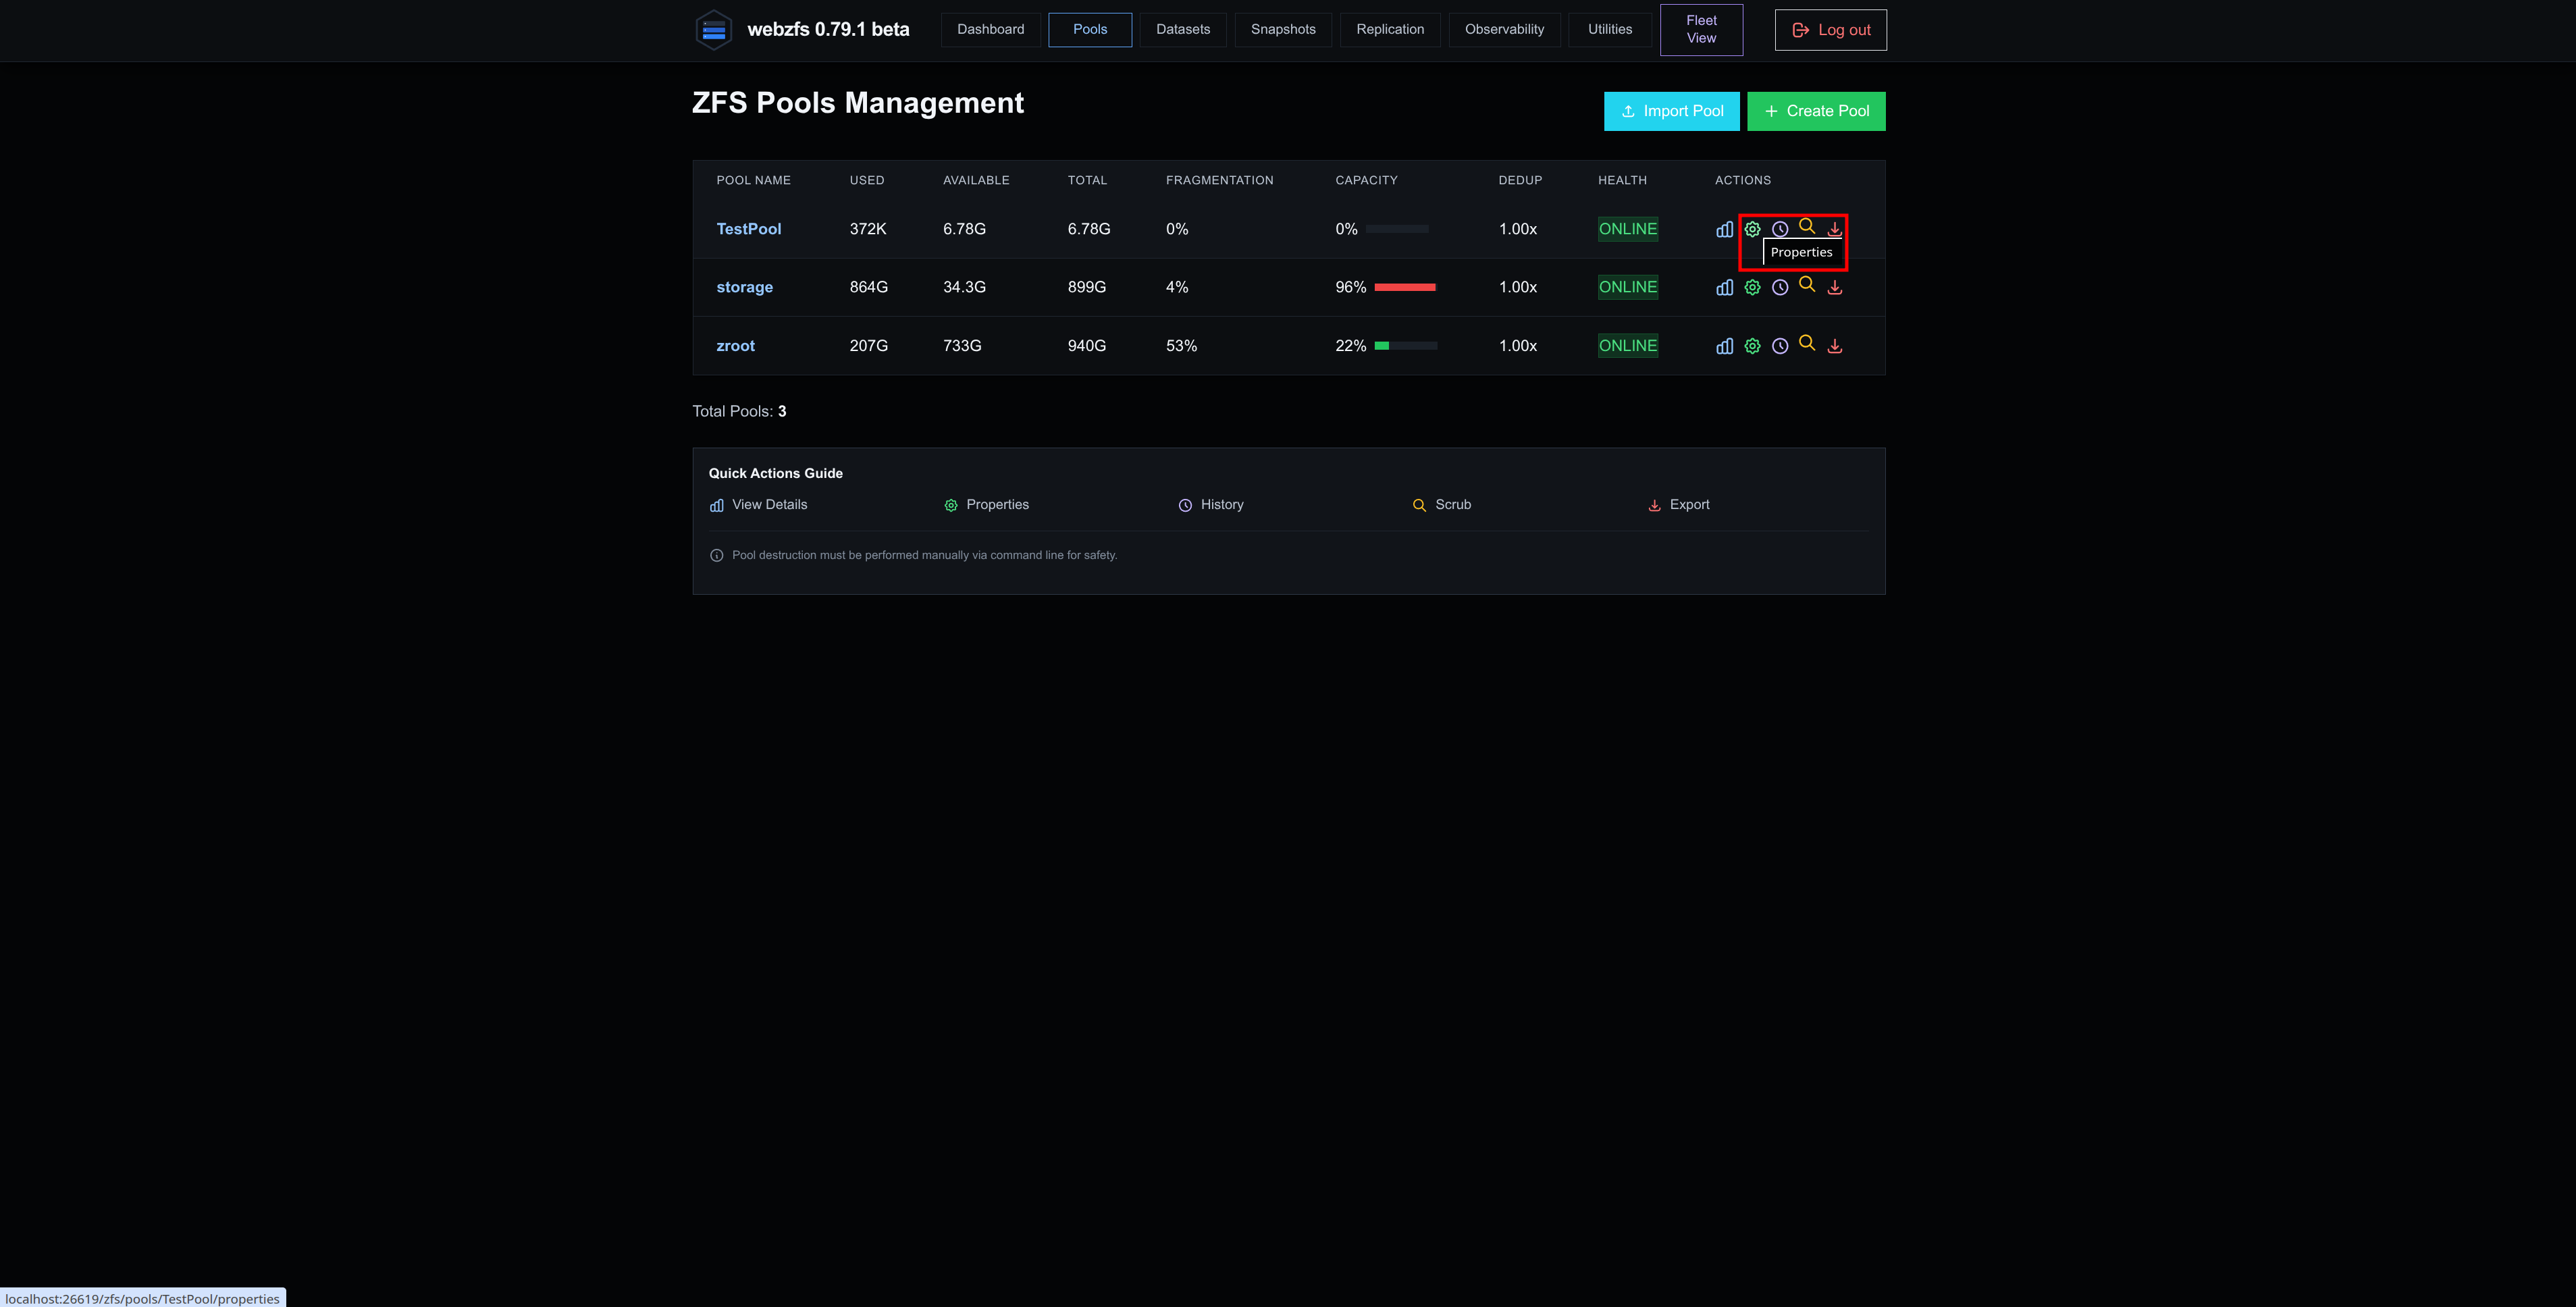
Properties:
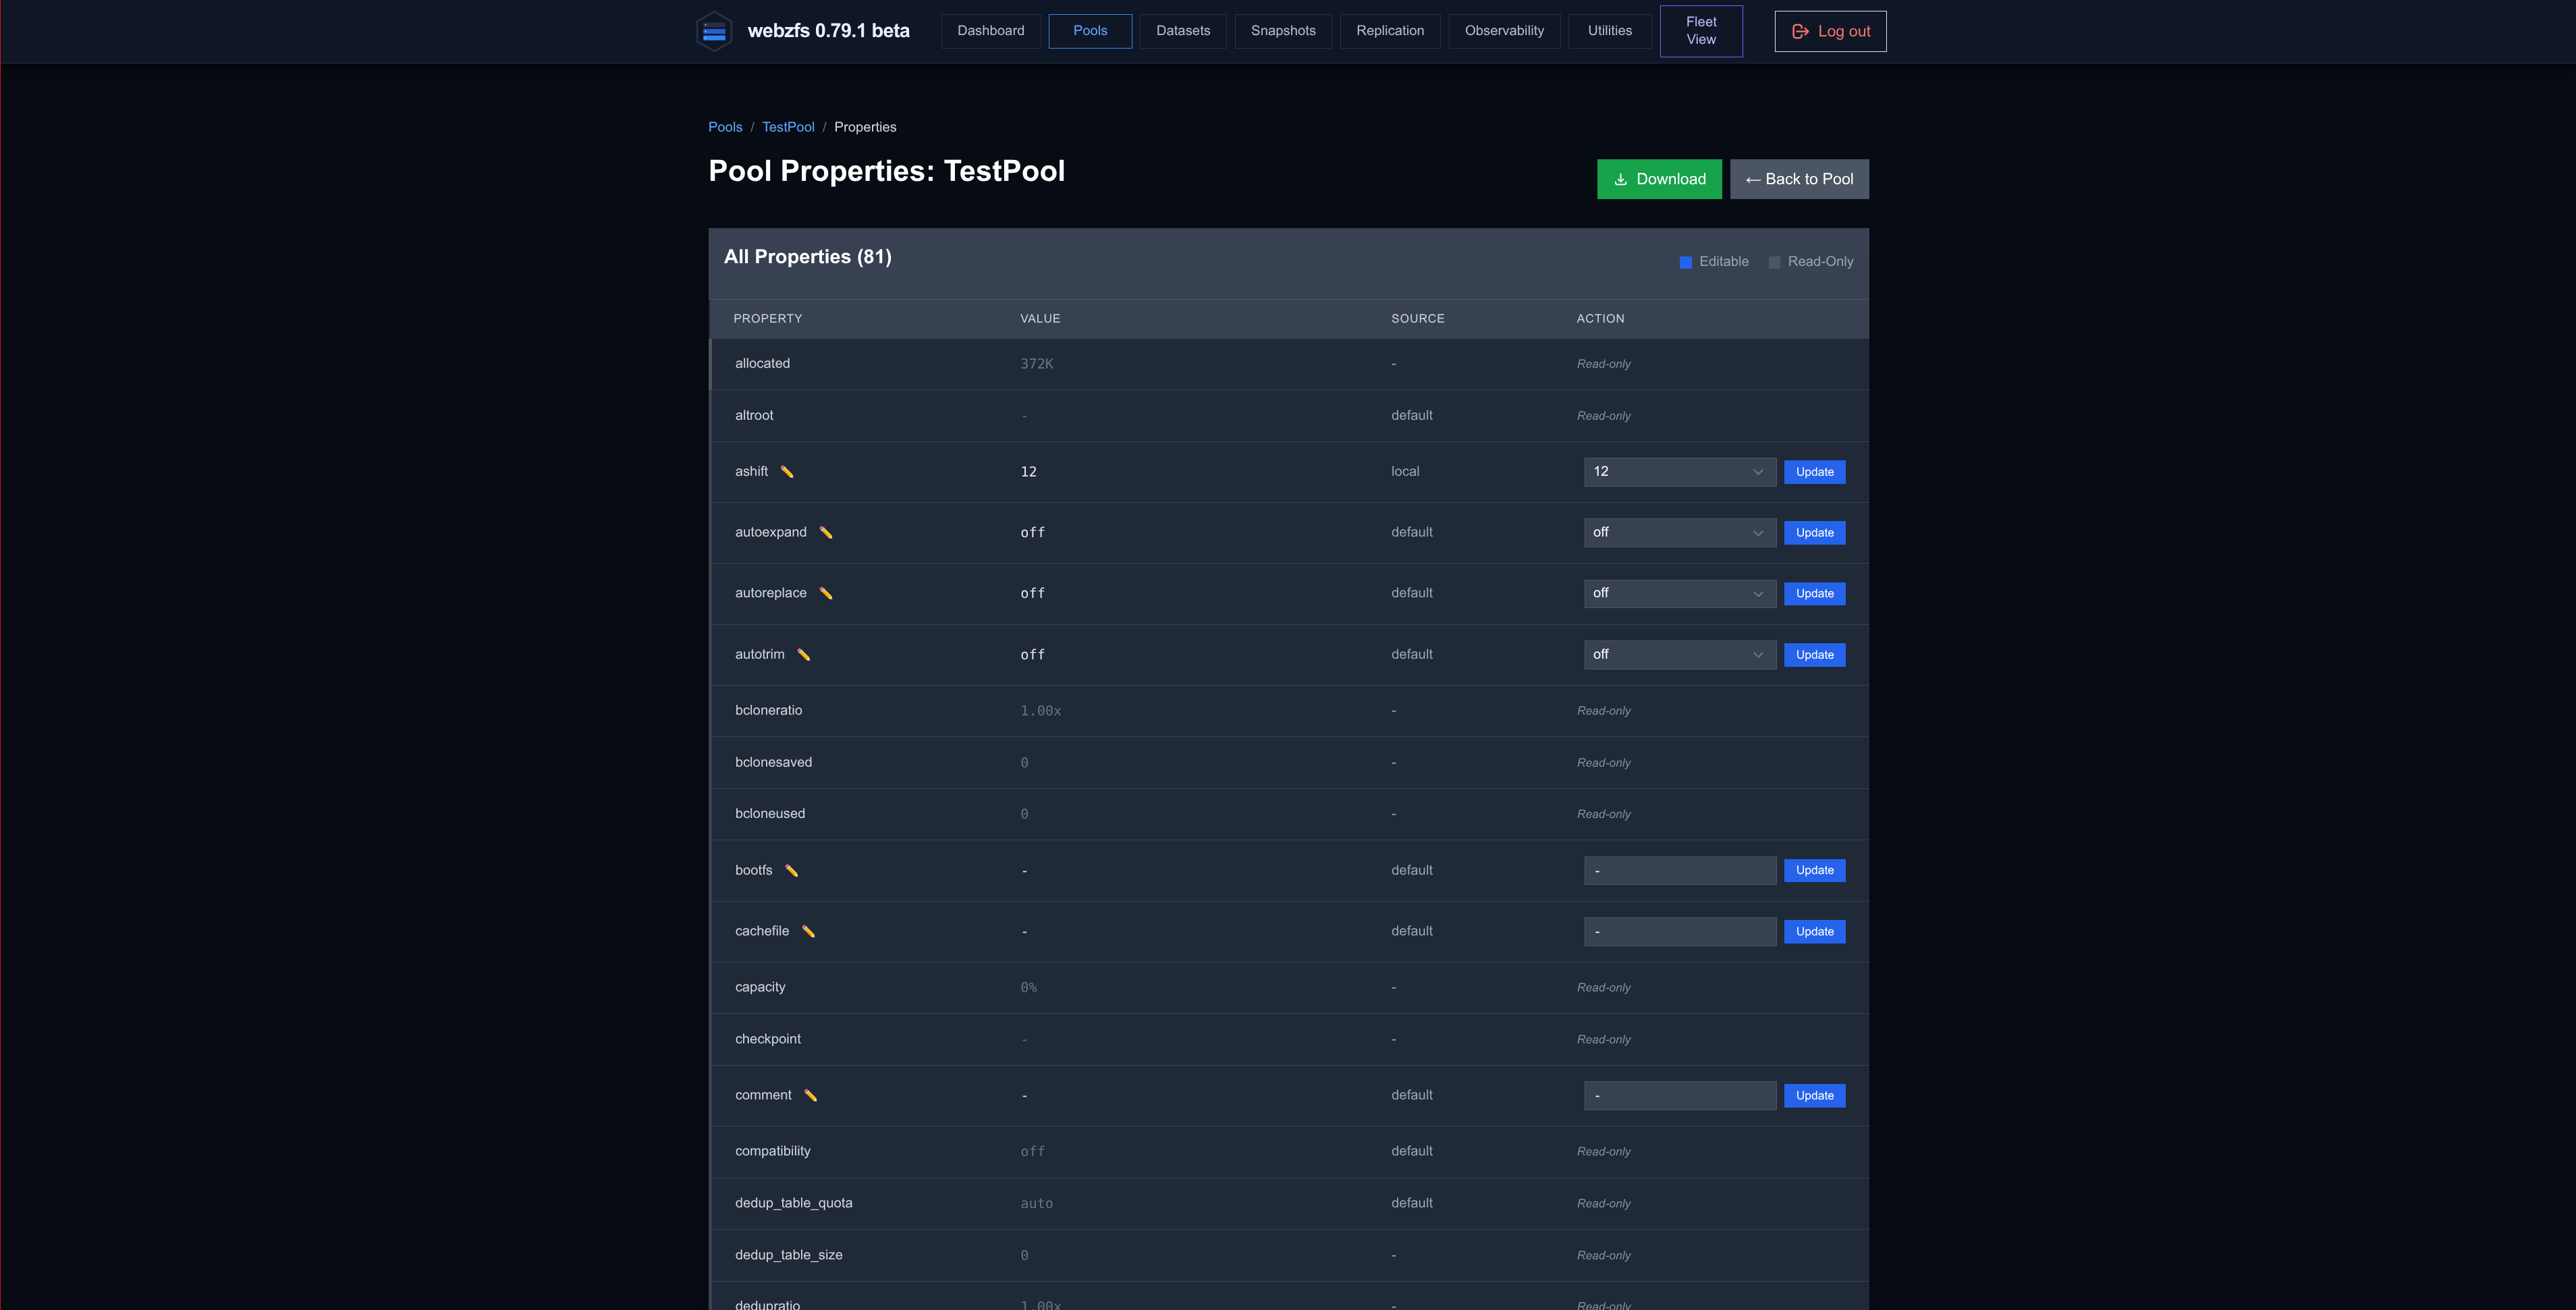
In properties we can view and modify all the properties of a ZFS Pool:
|
|
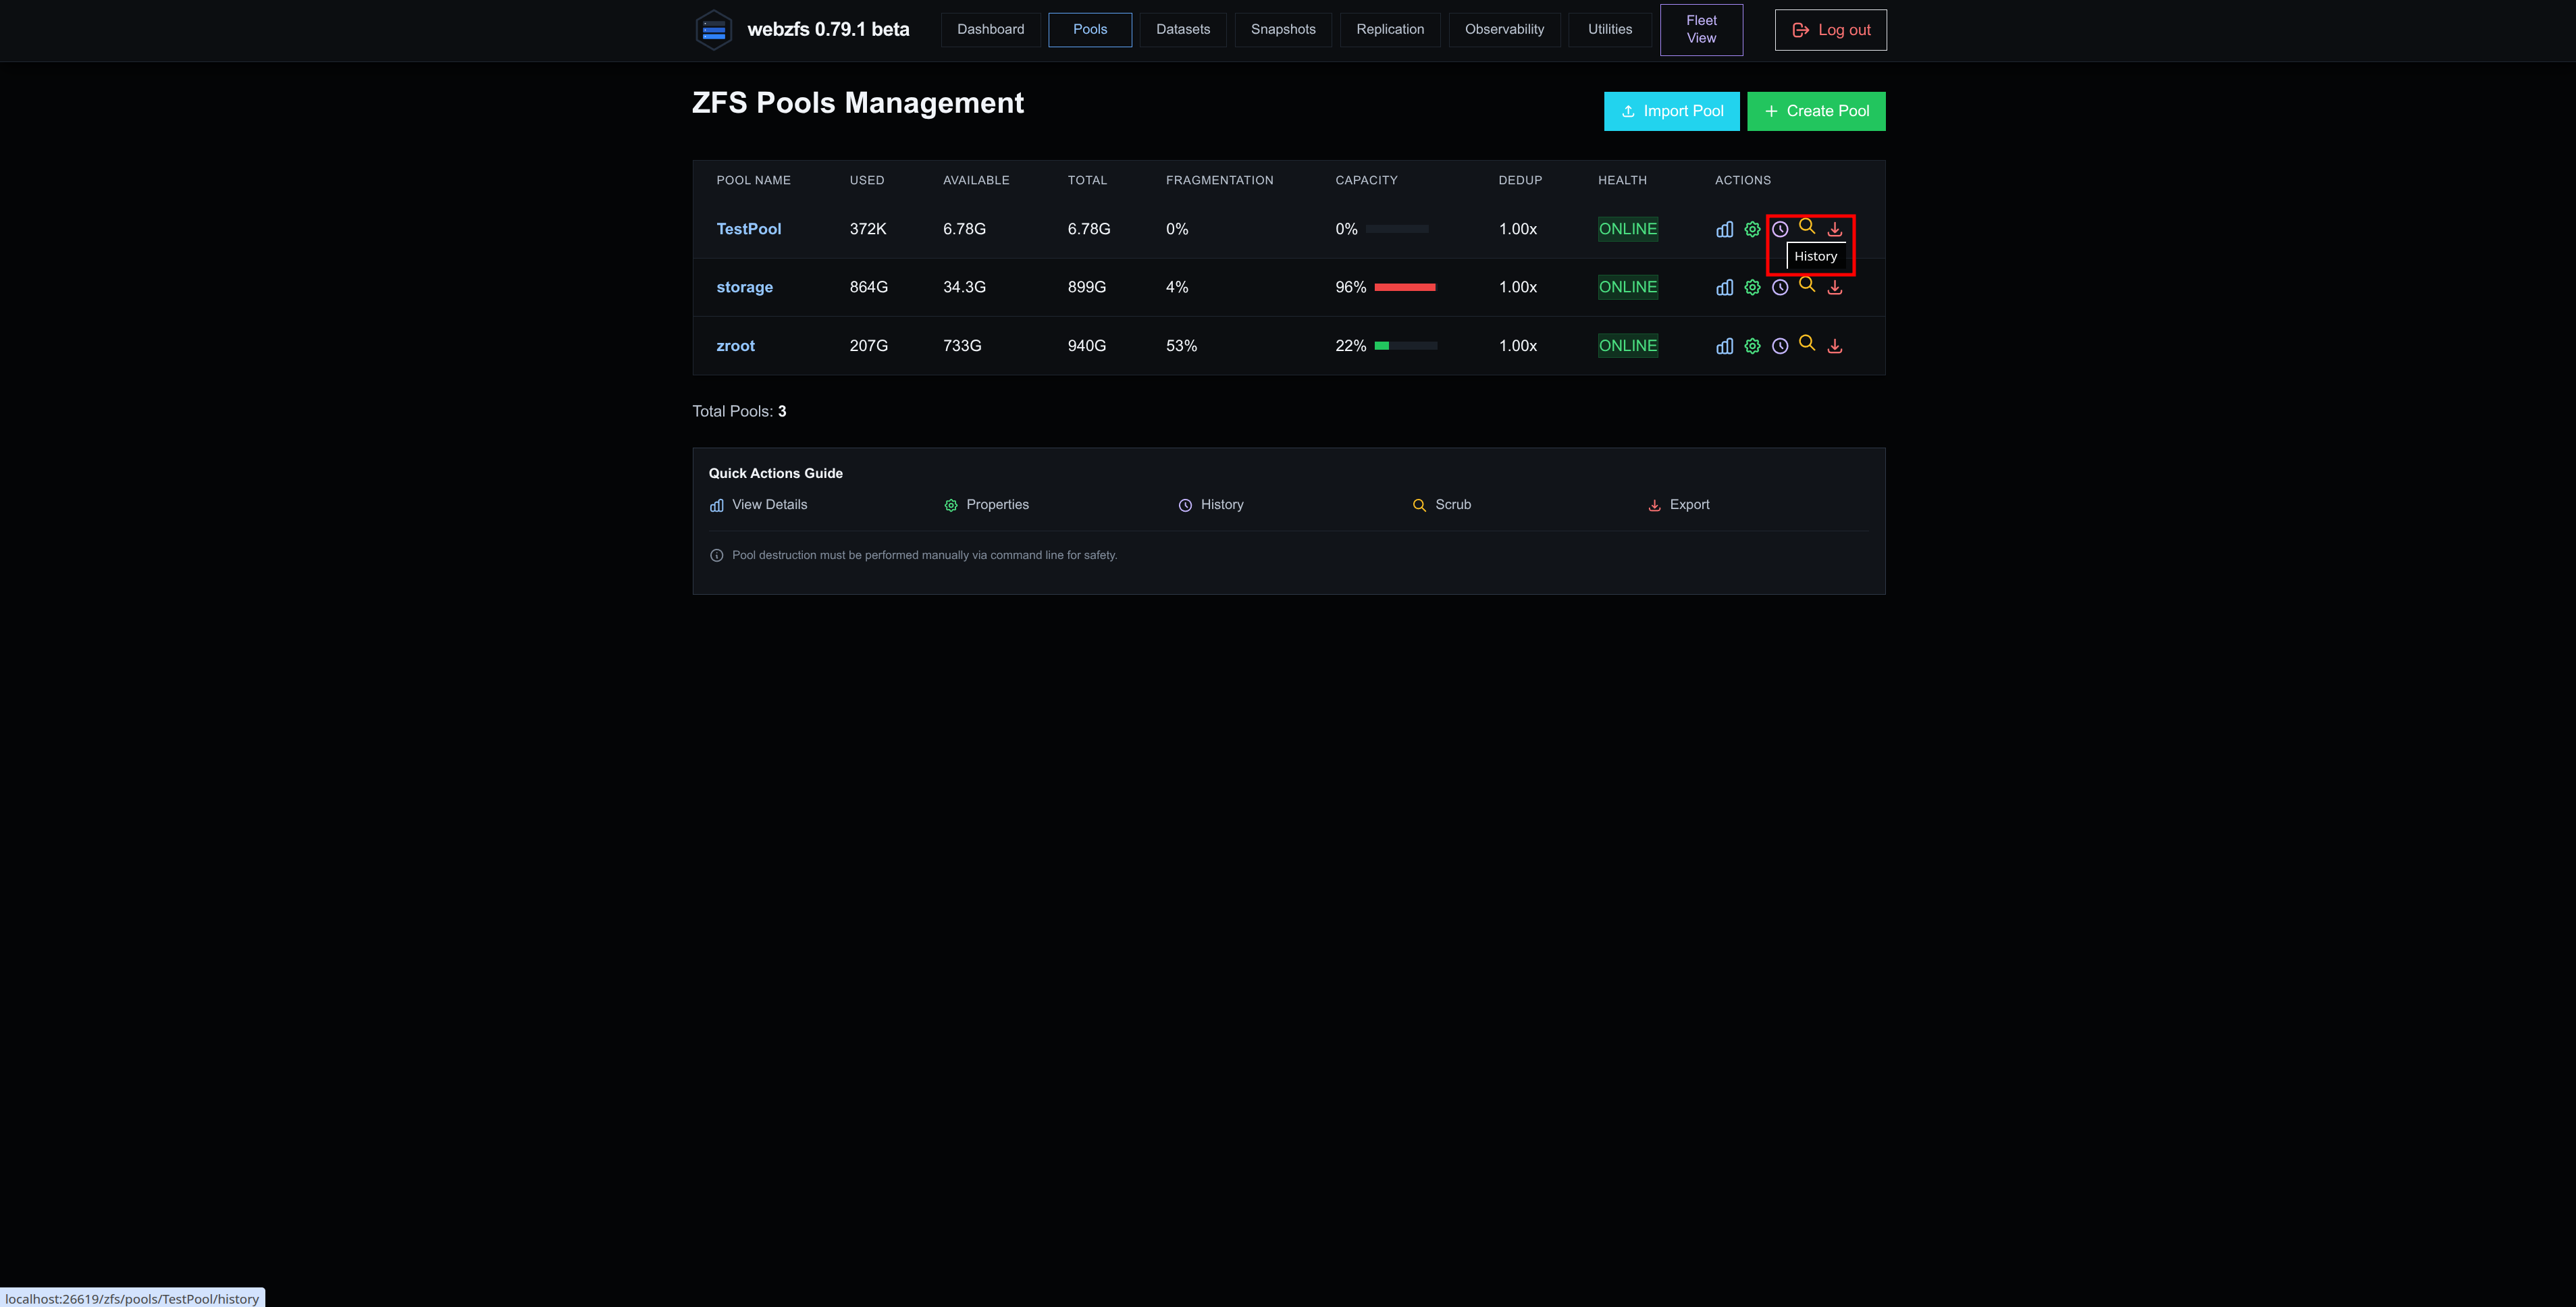
History:
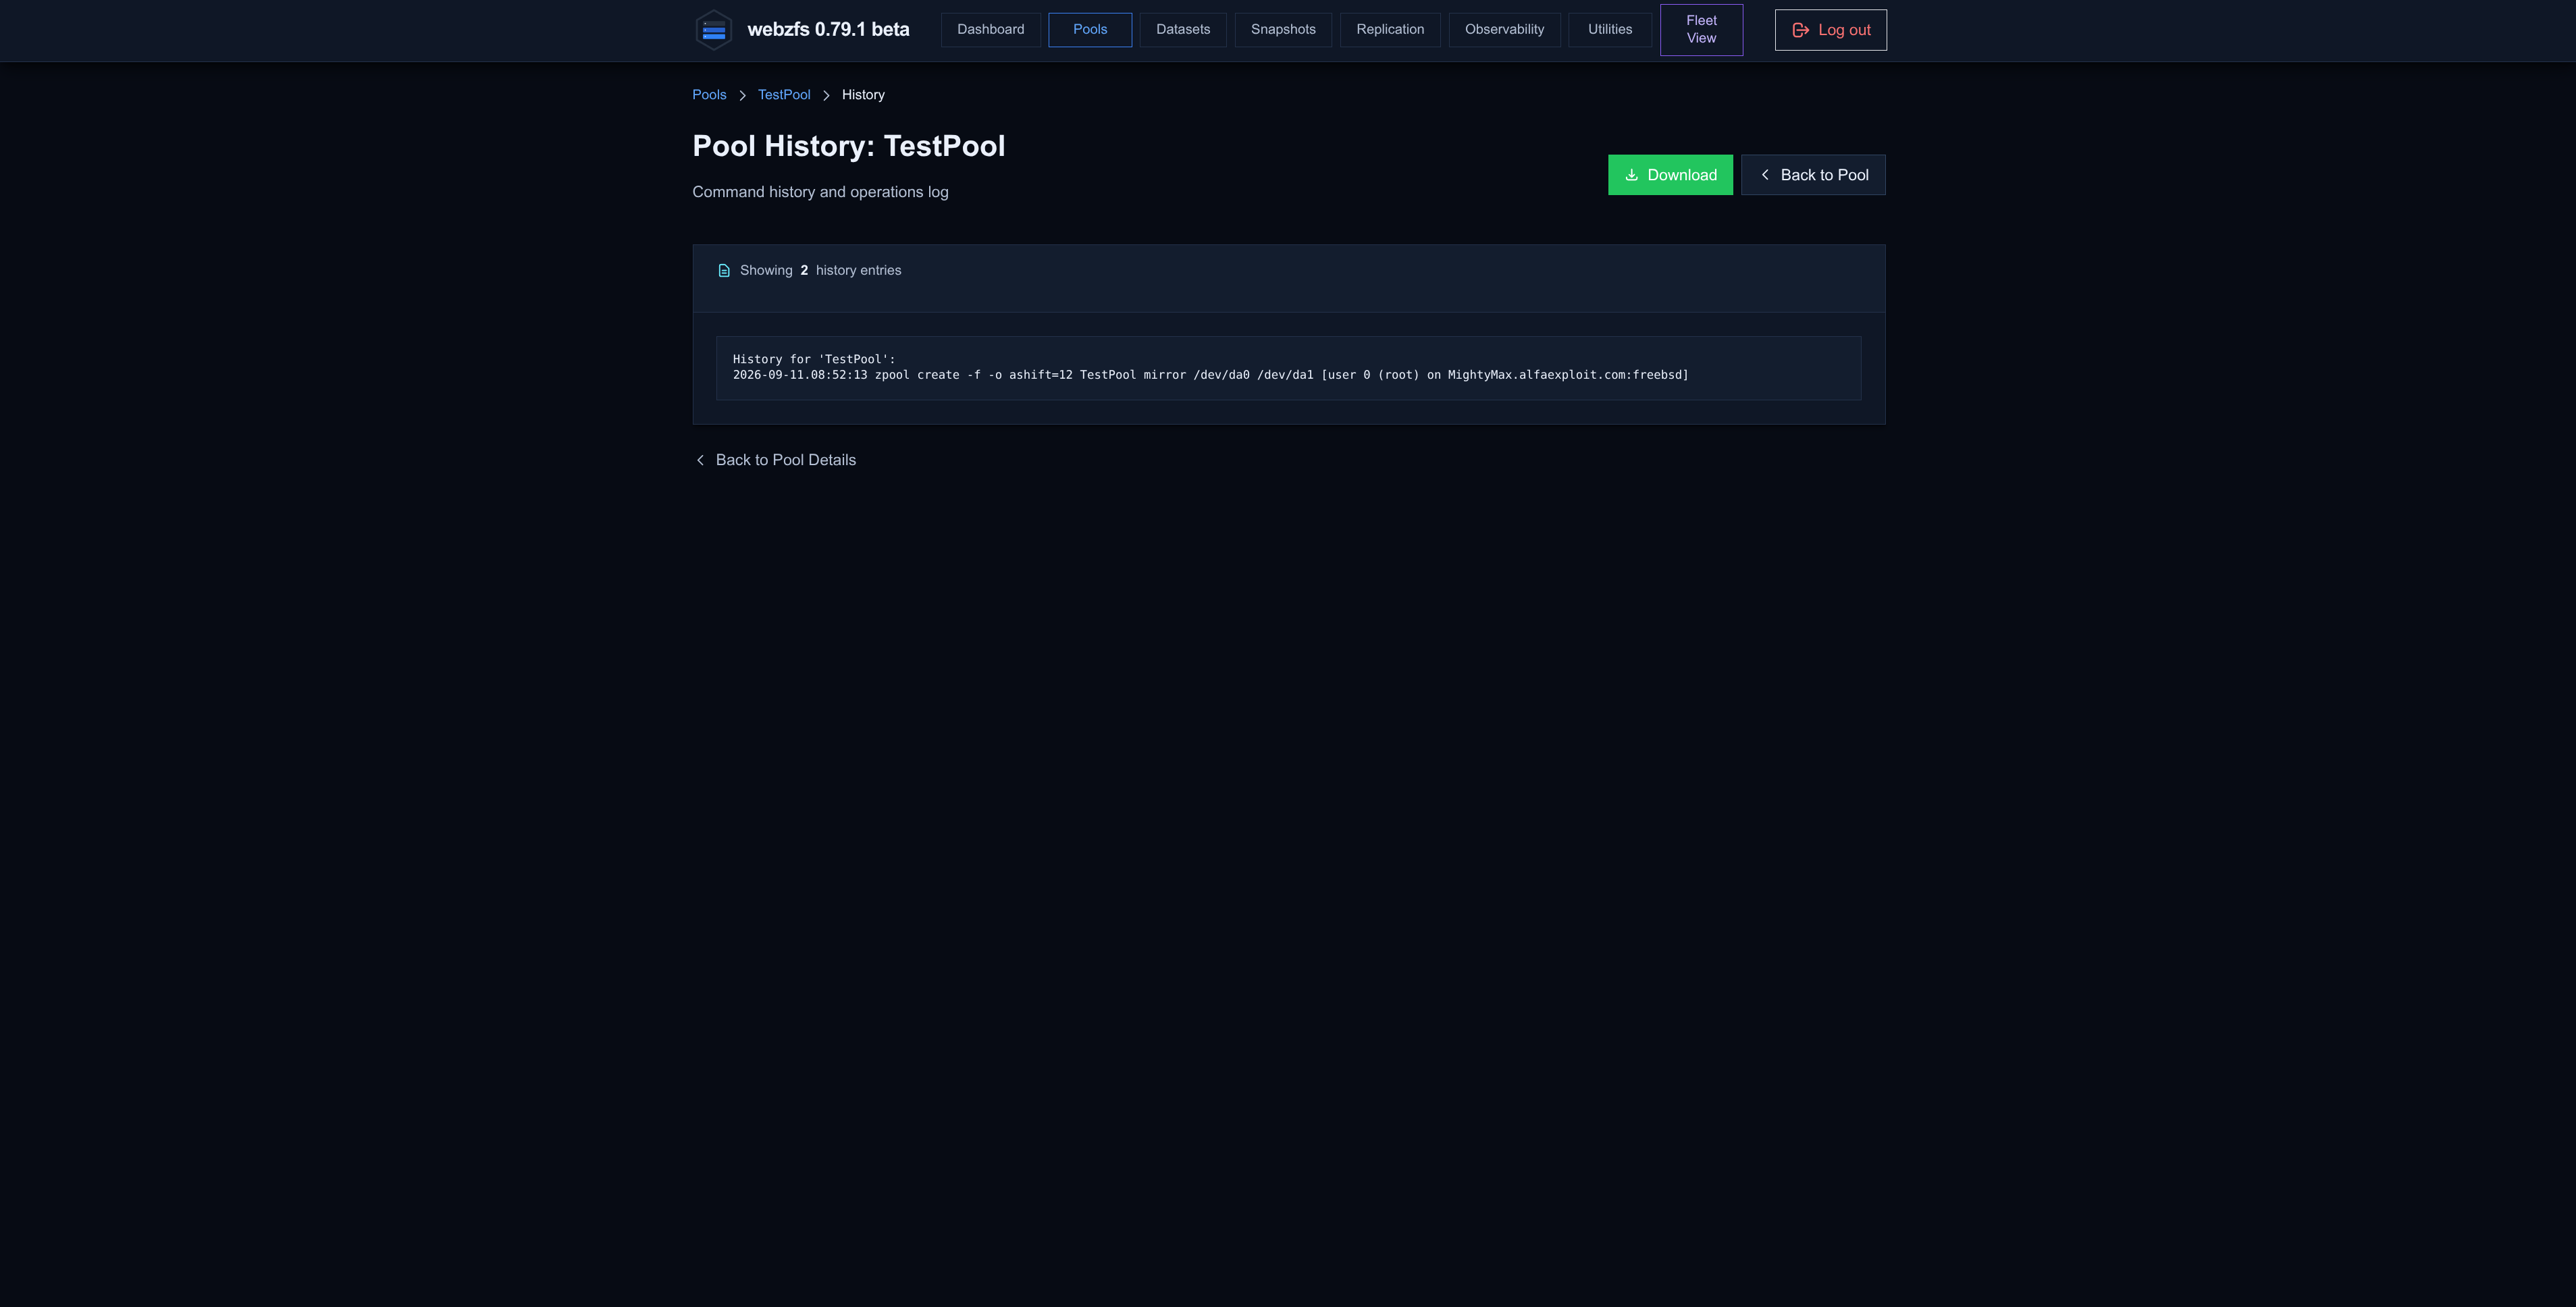
The History section will show us the pool history:
|
|
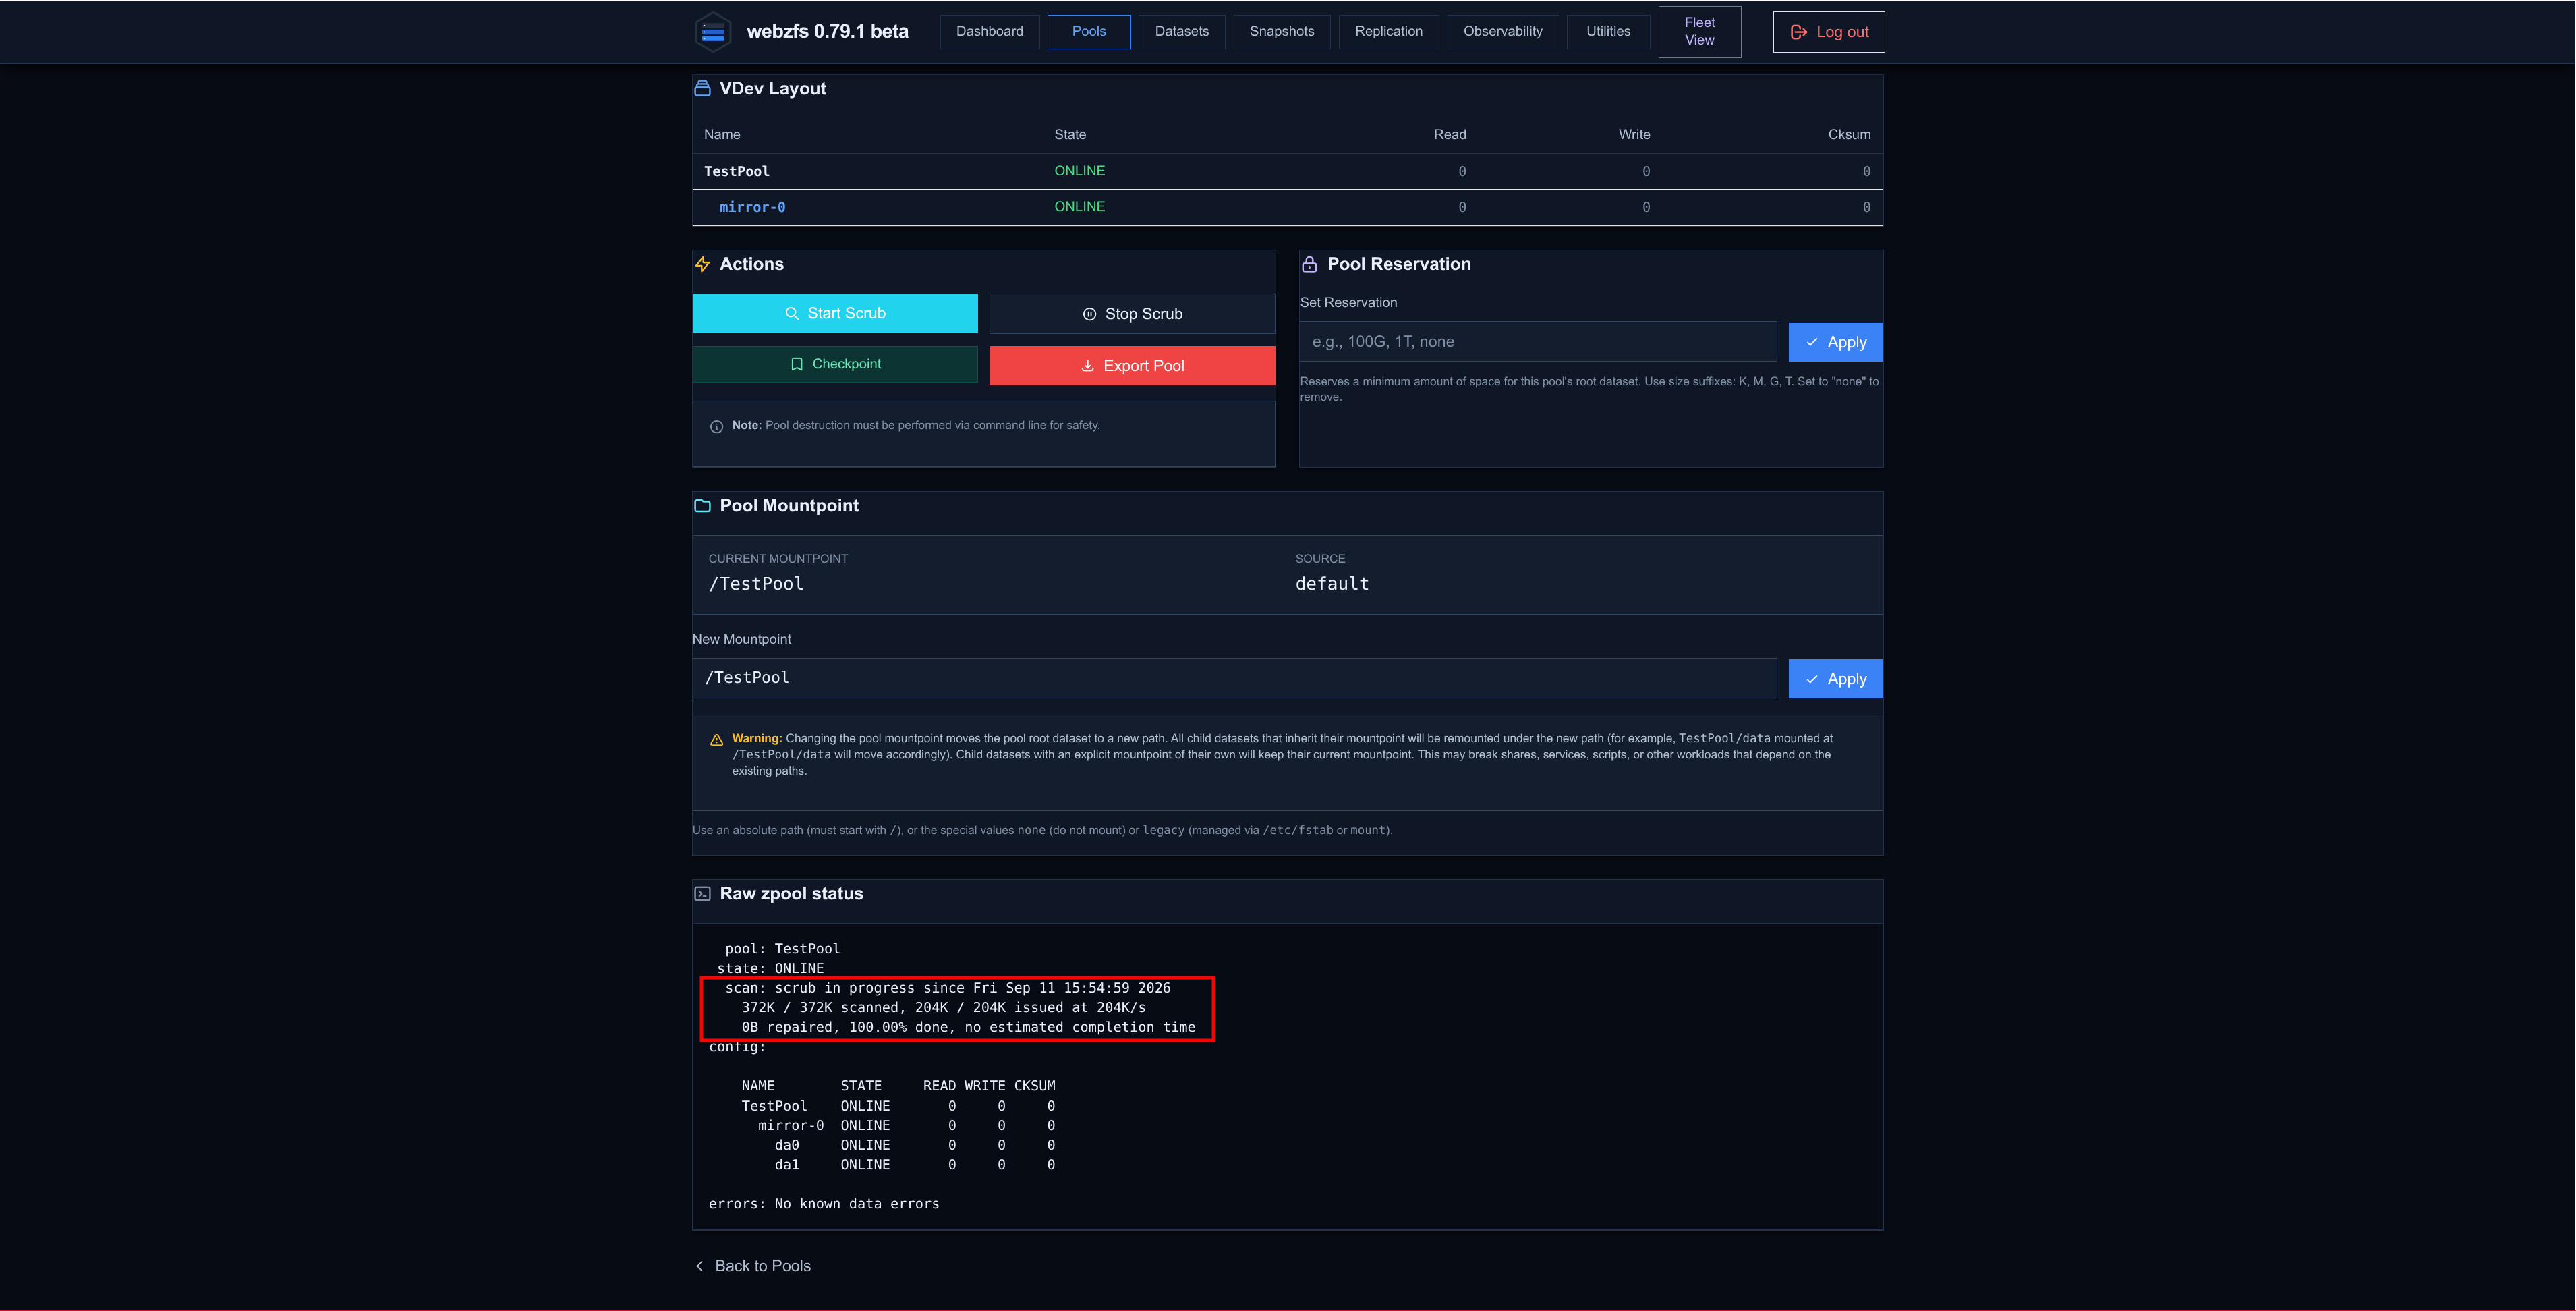
Start Scrub:
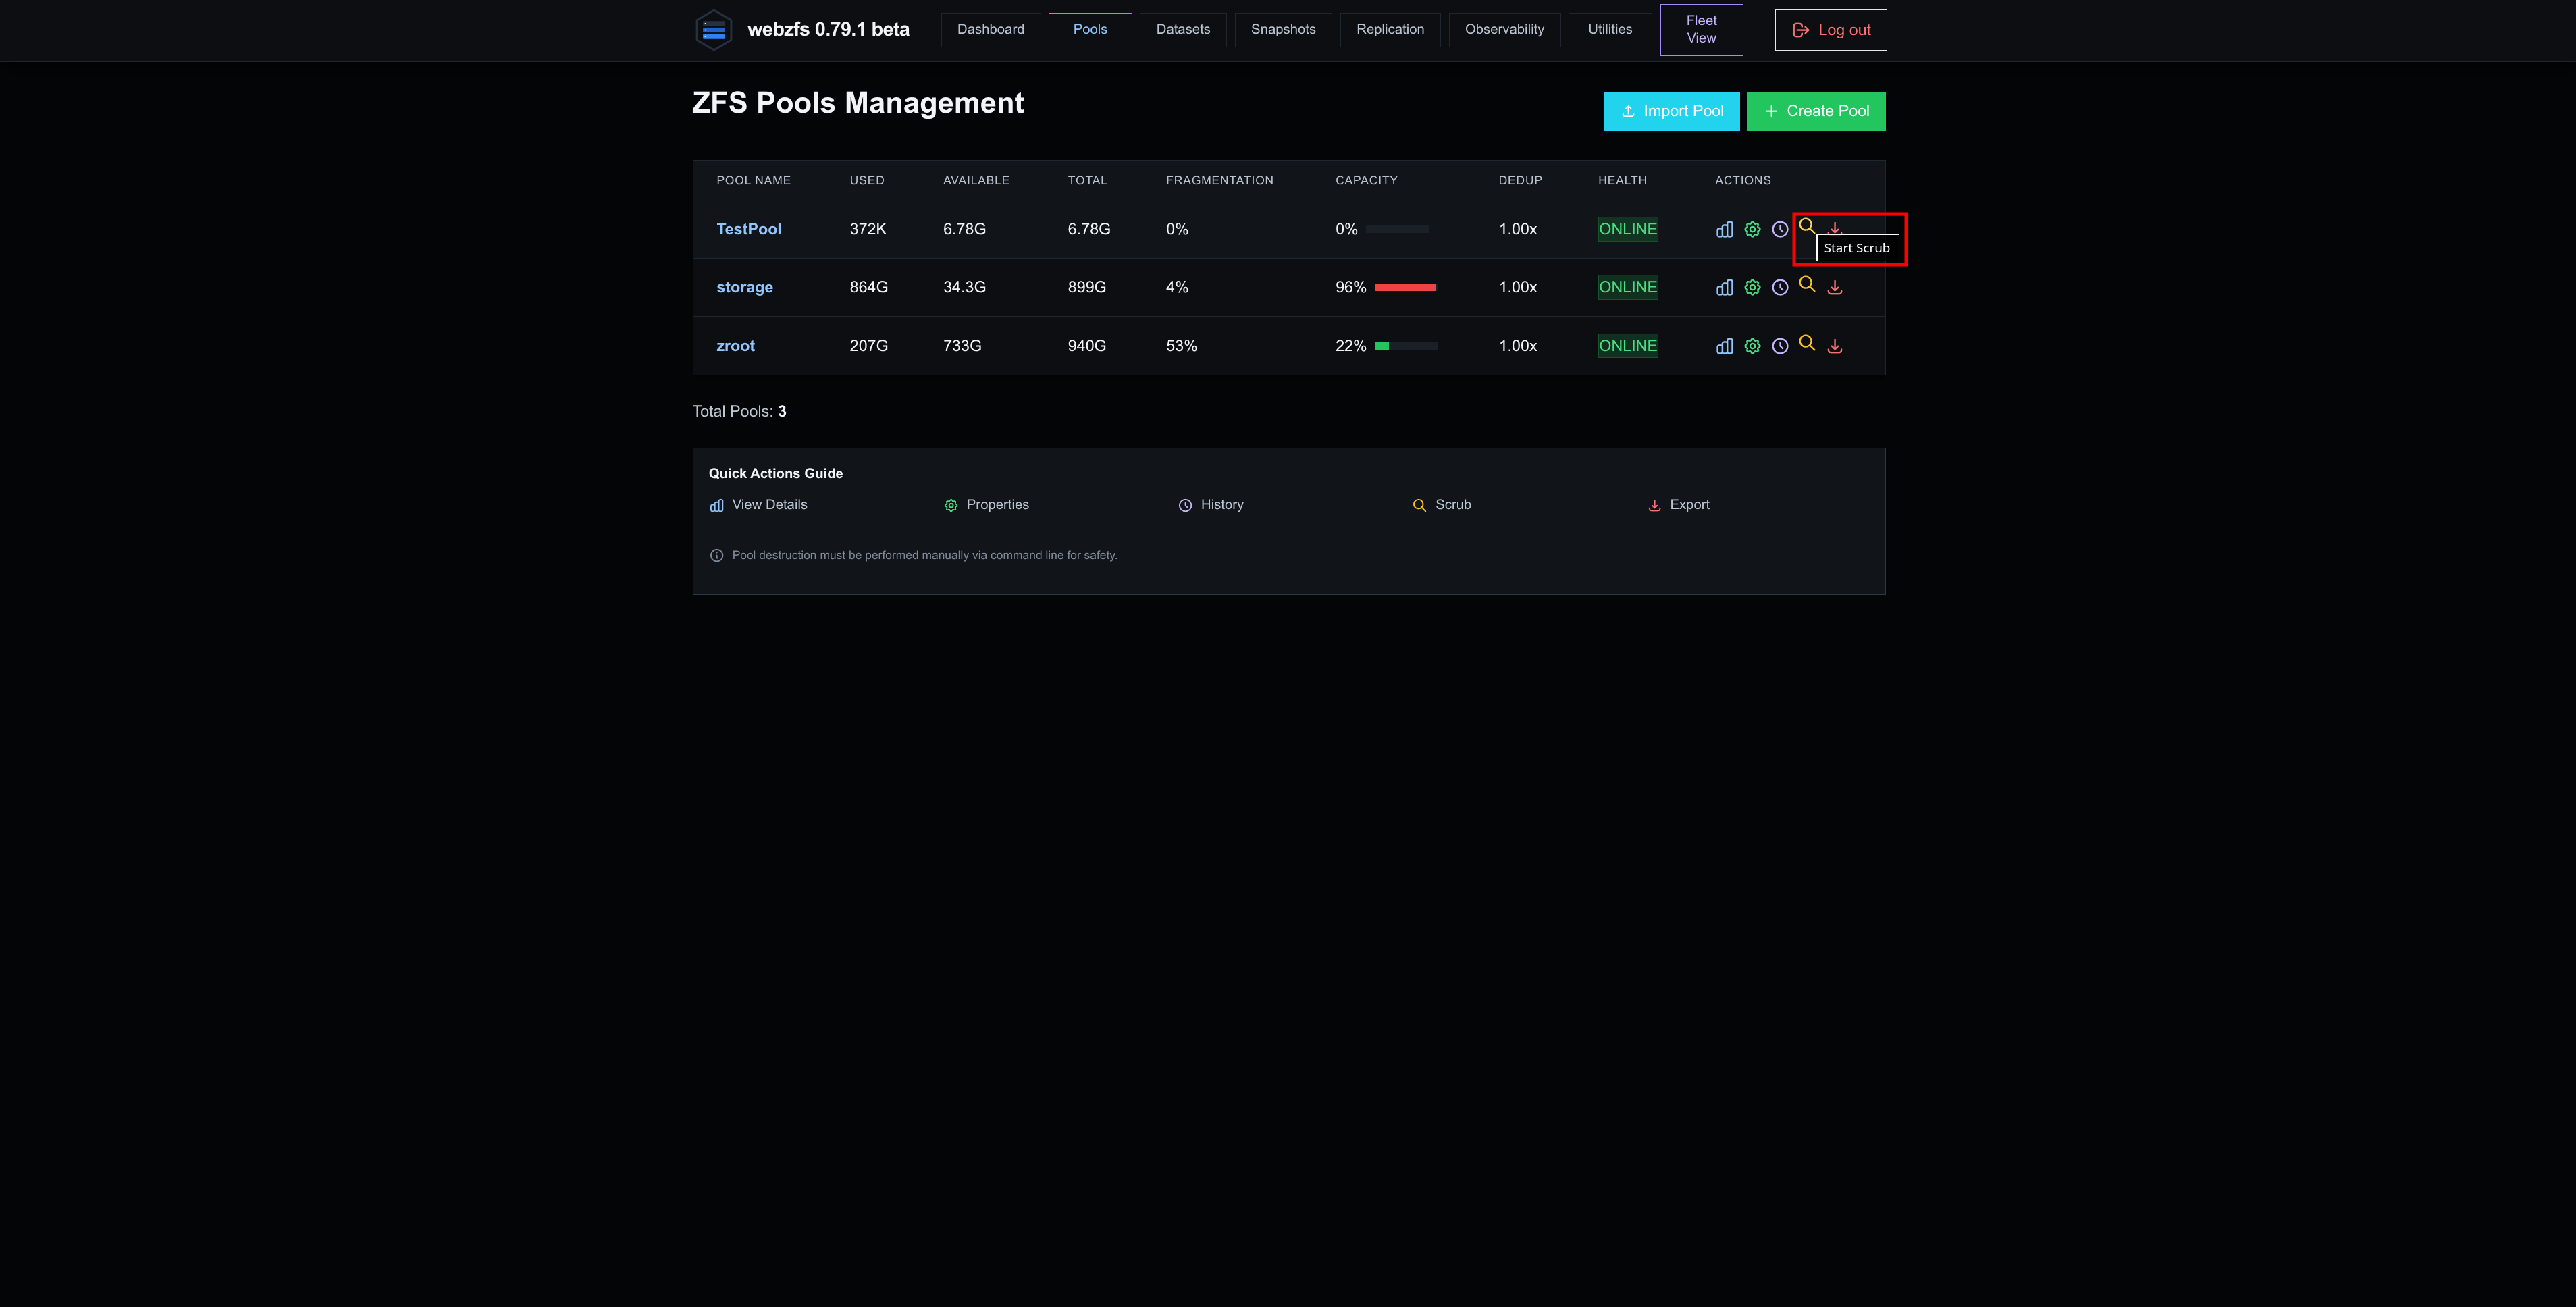
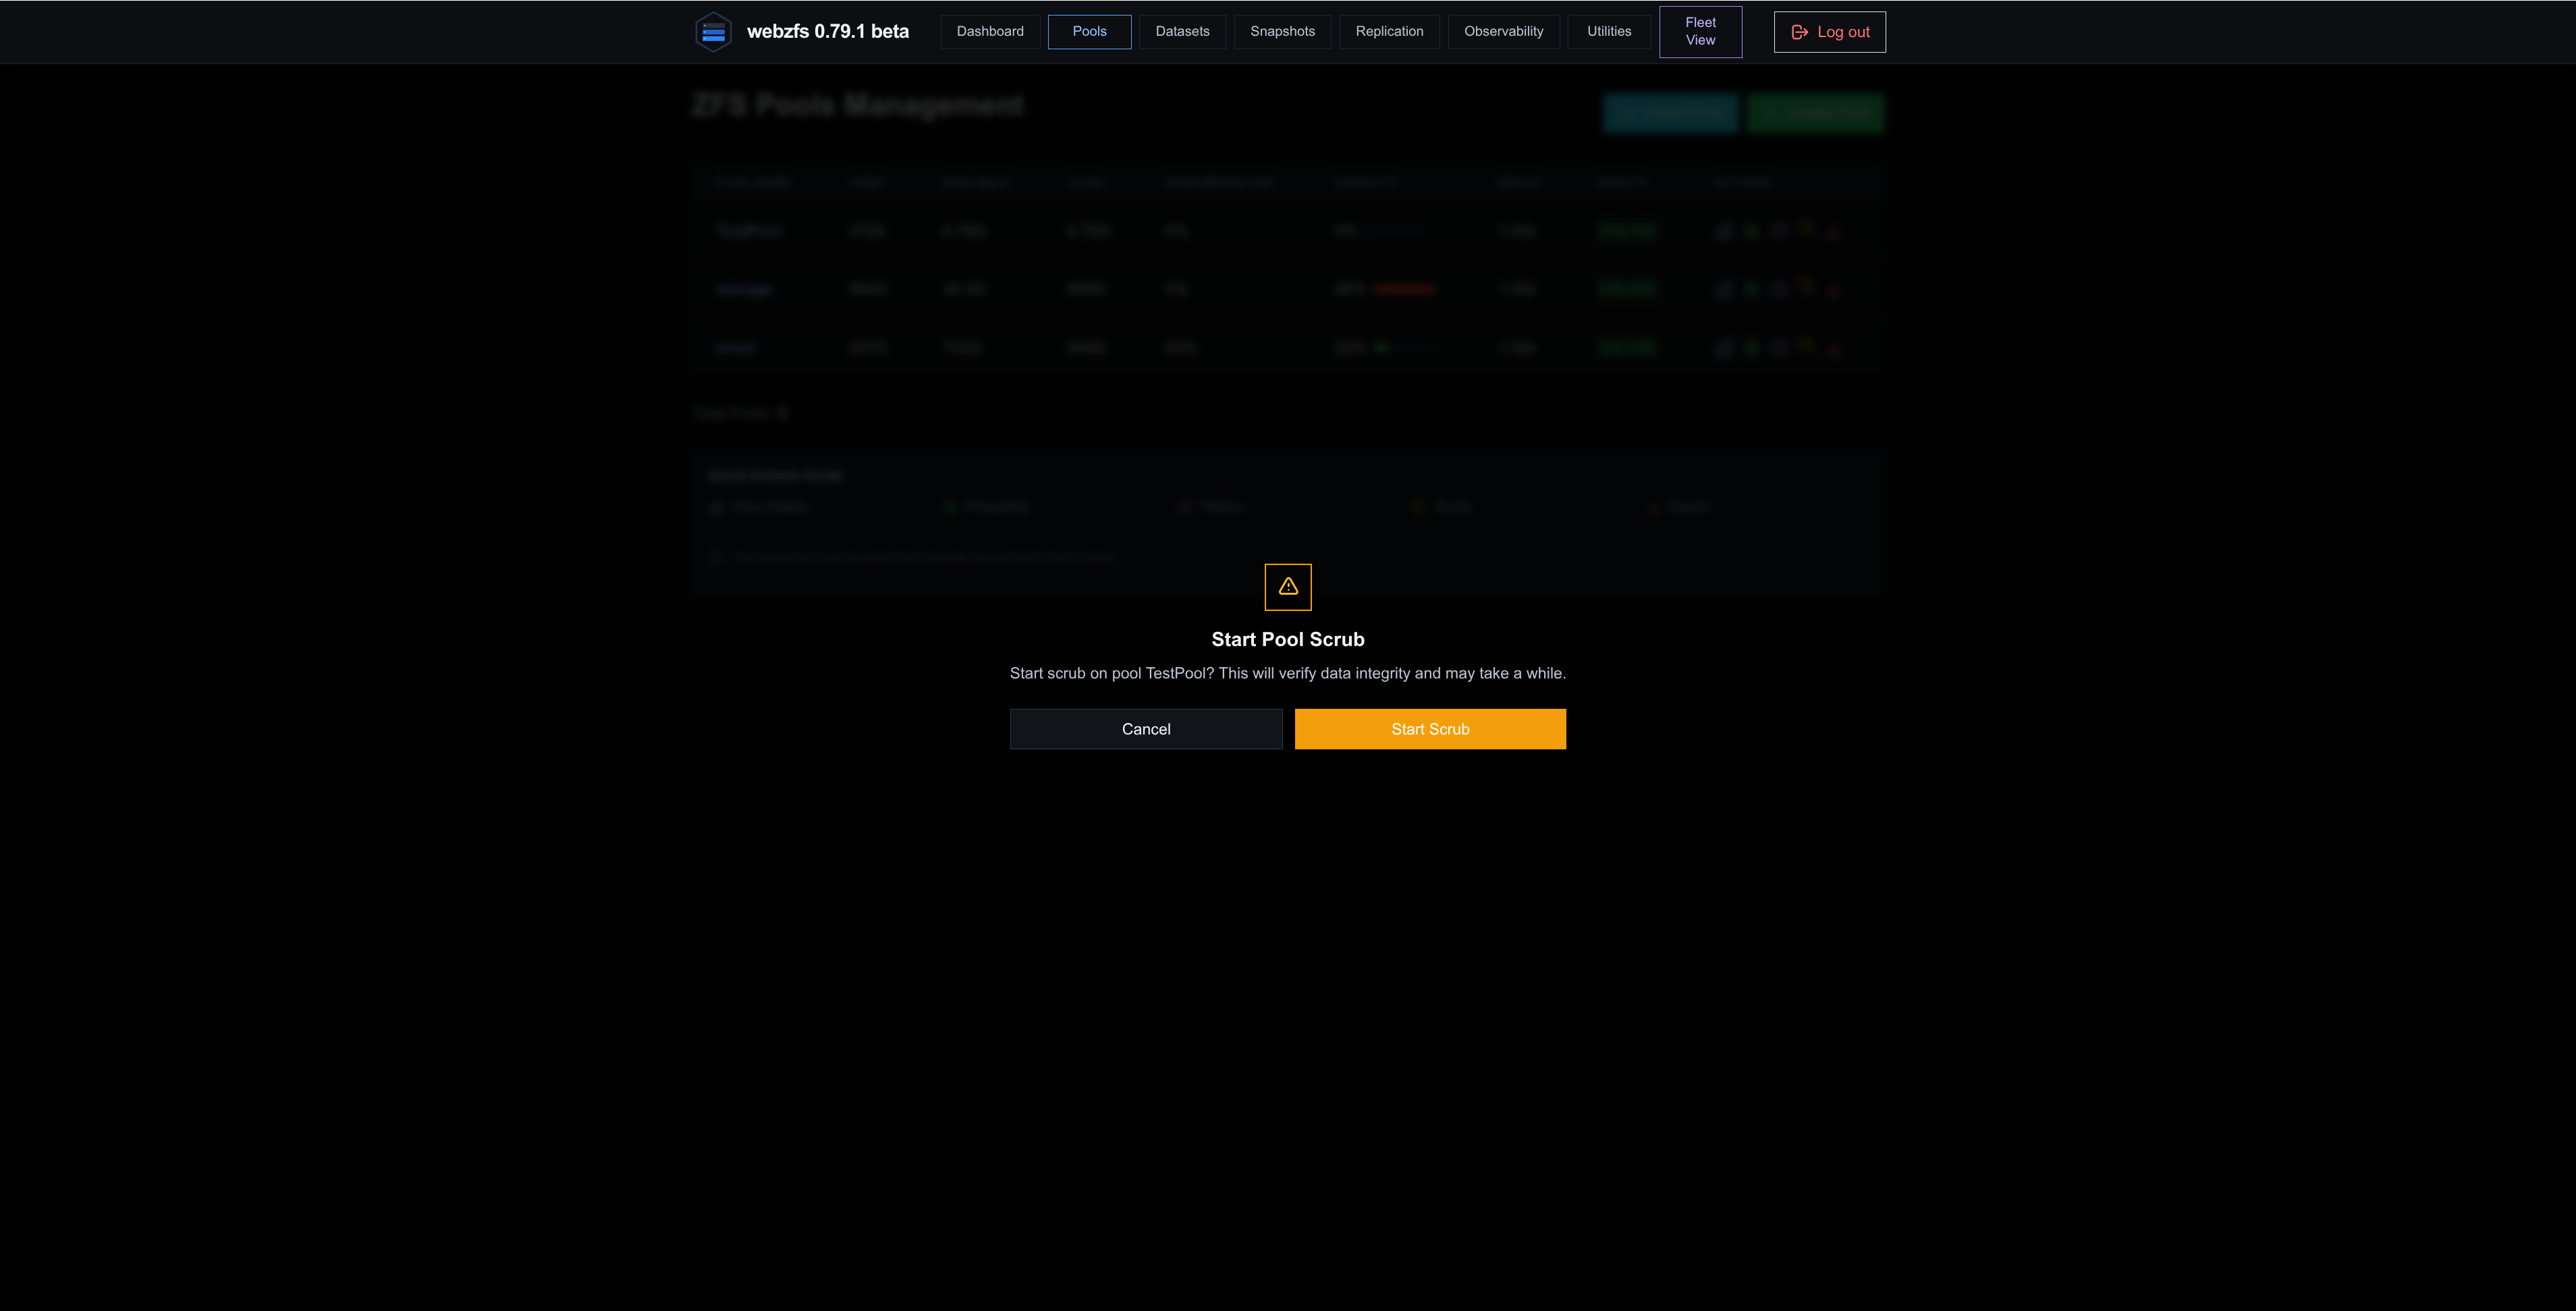
If we want to perform a Scrub we can also do so:
|
|
|
|
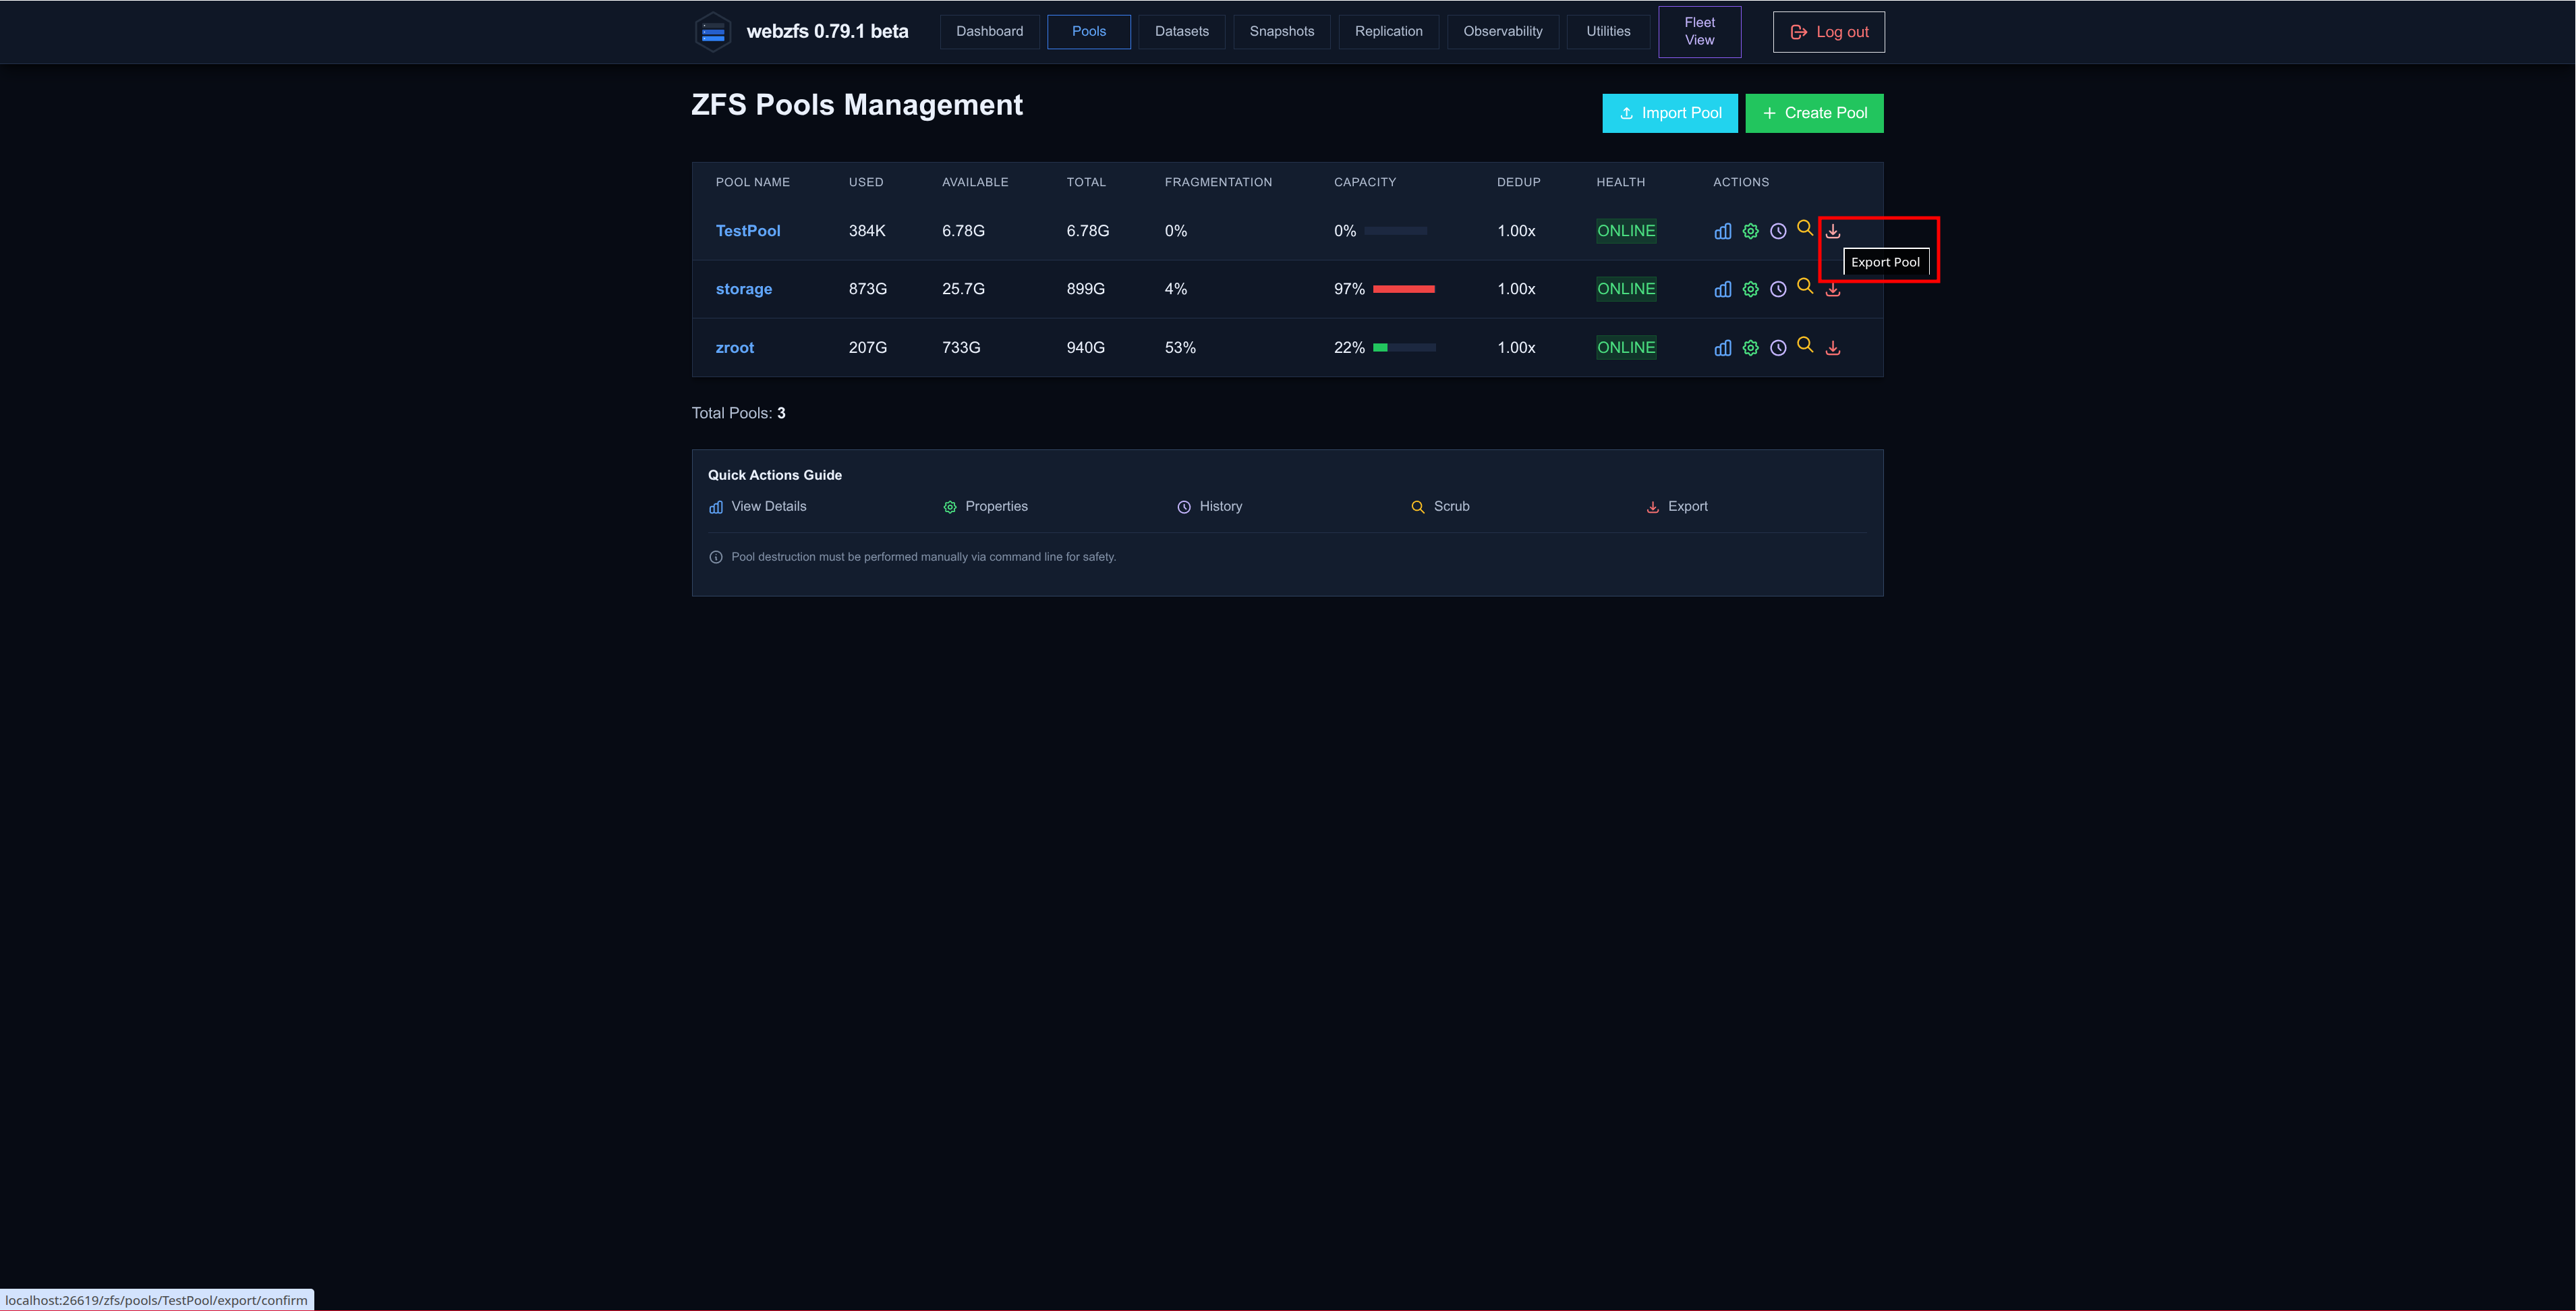
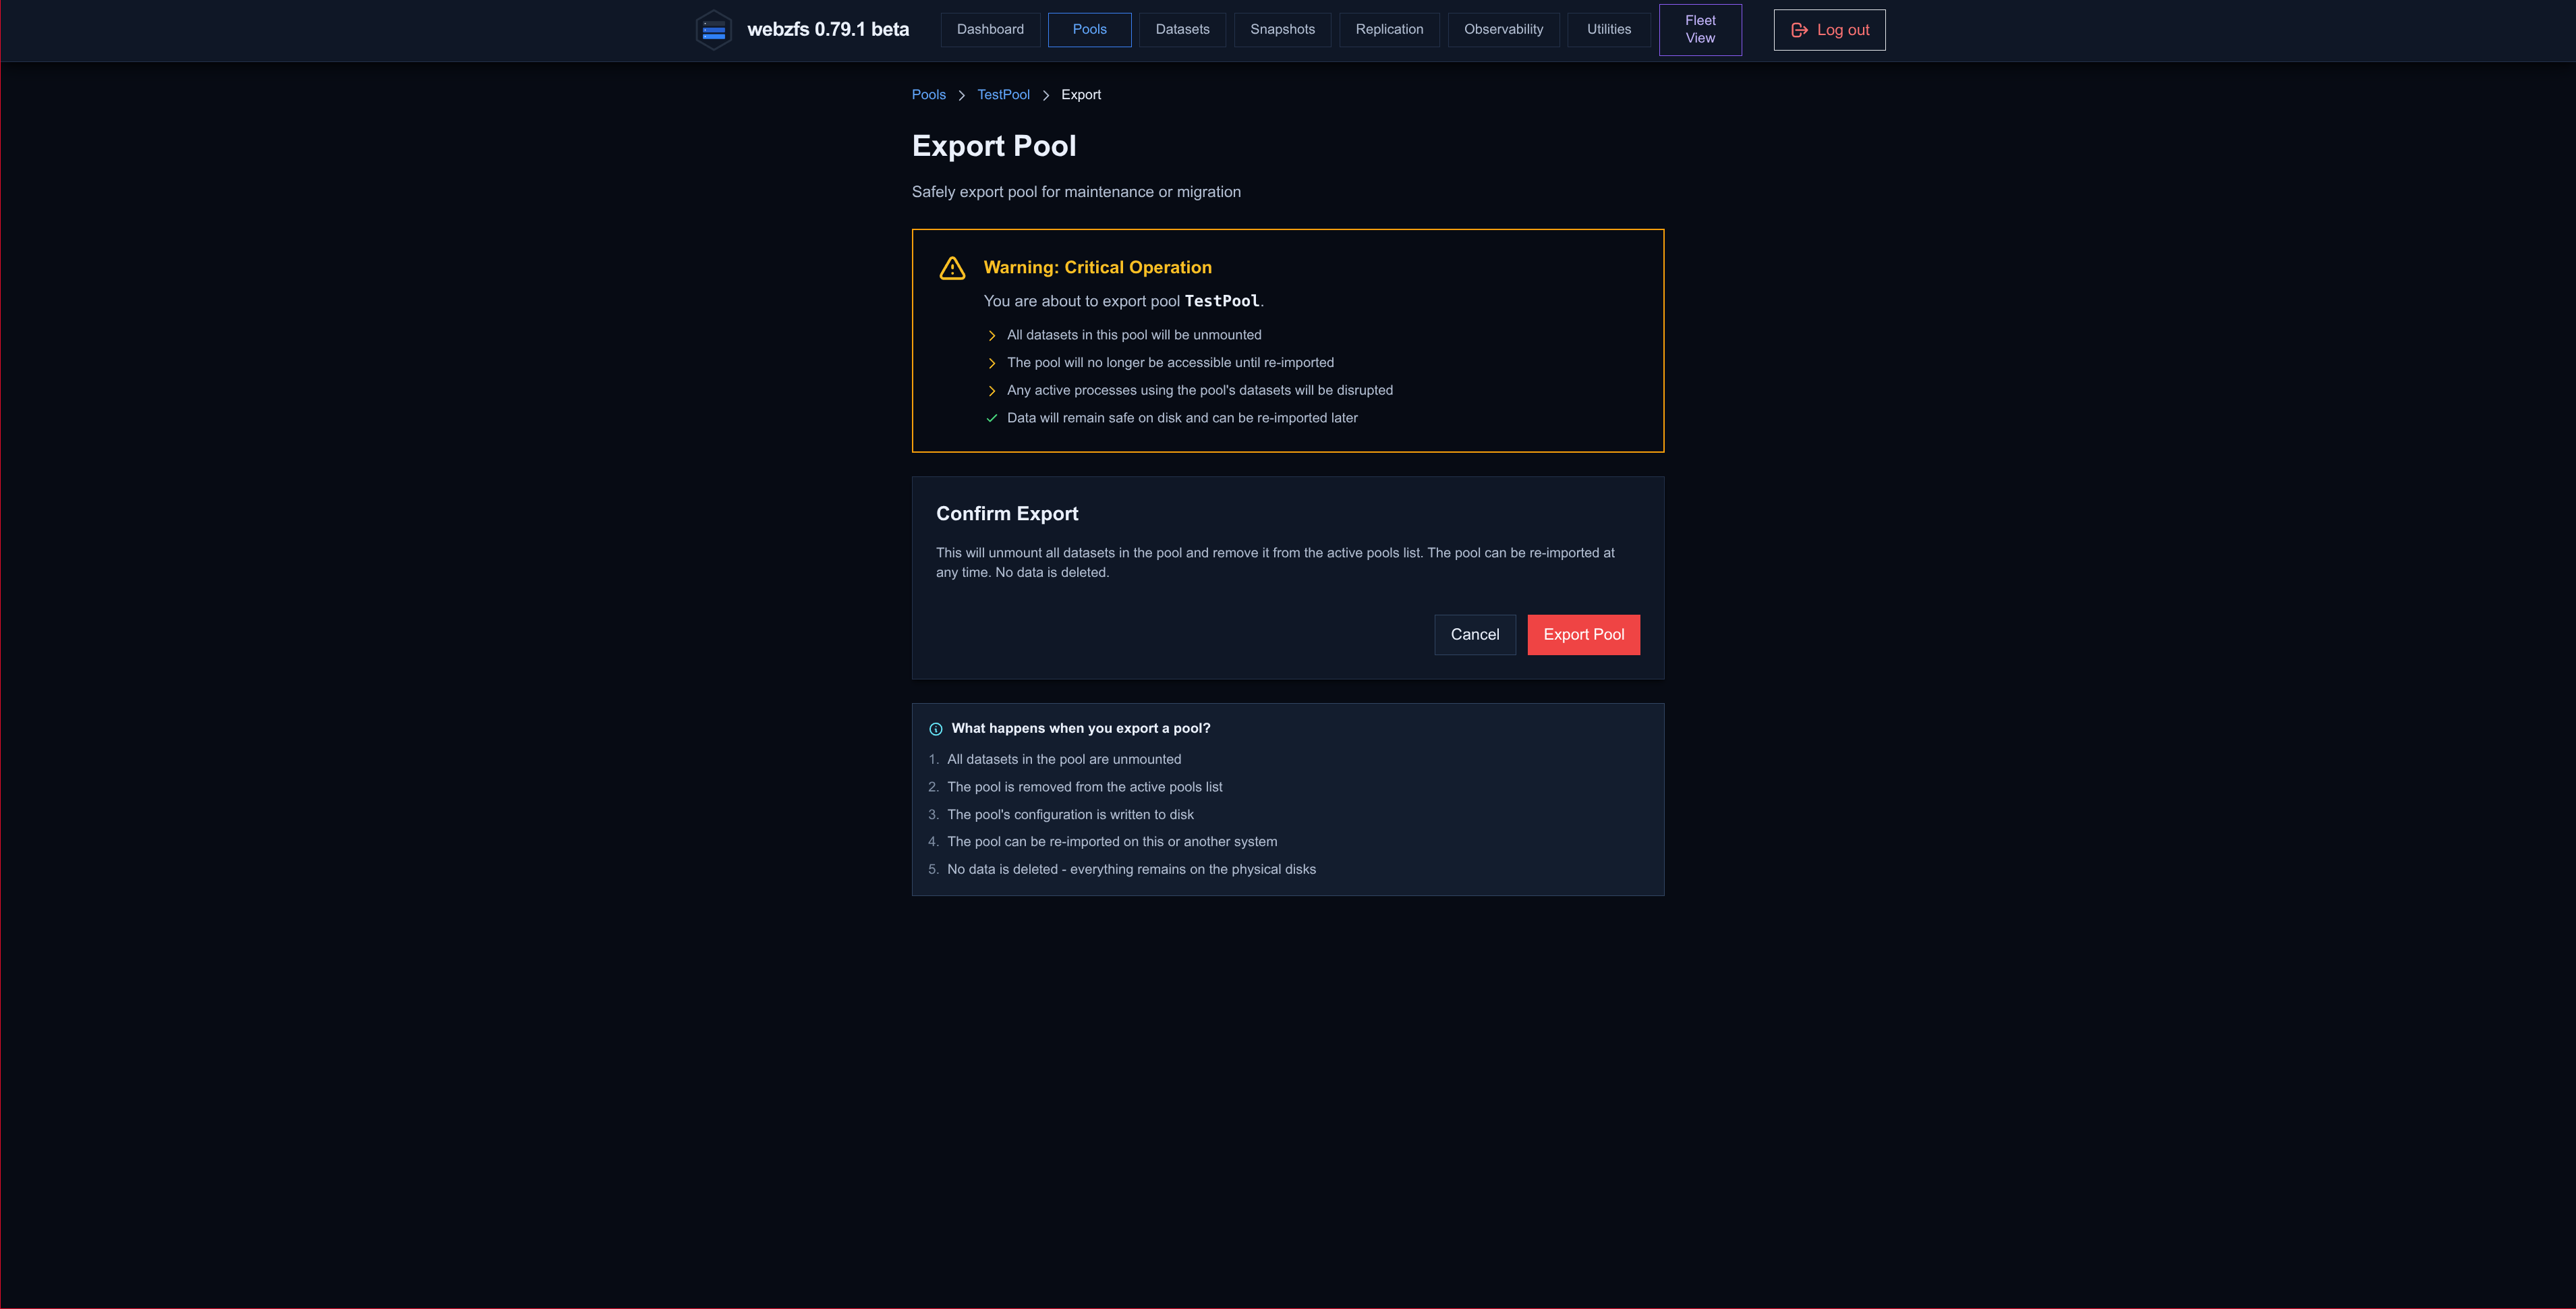
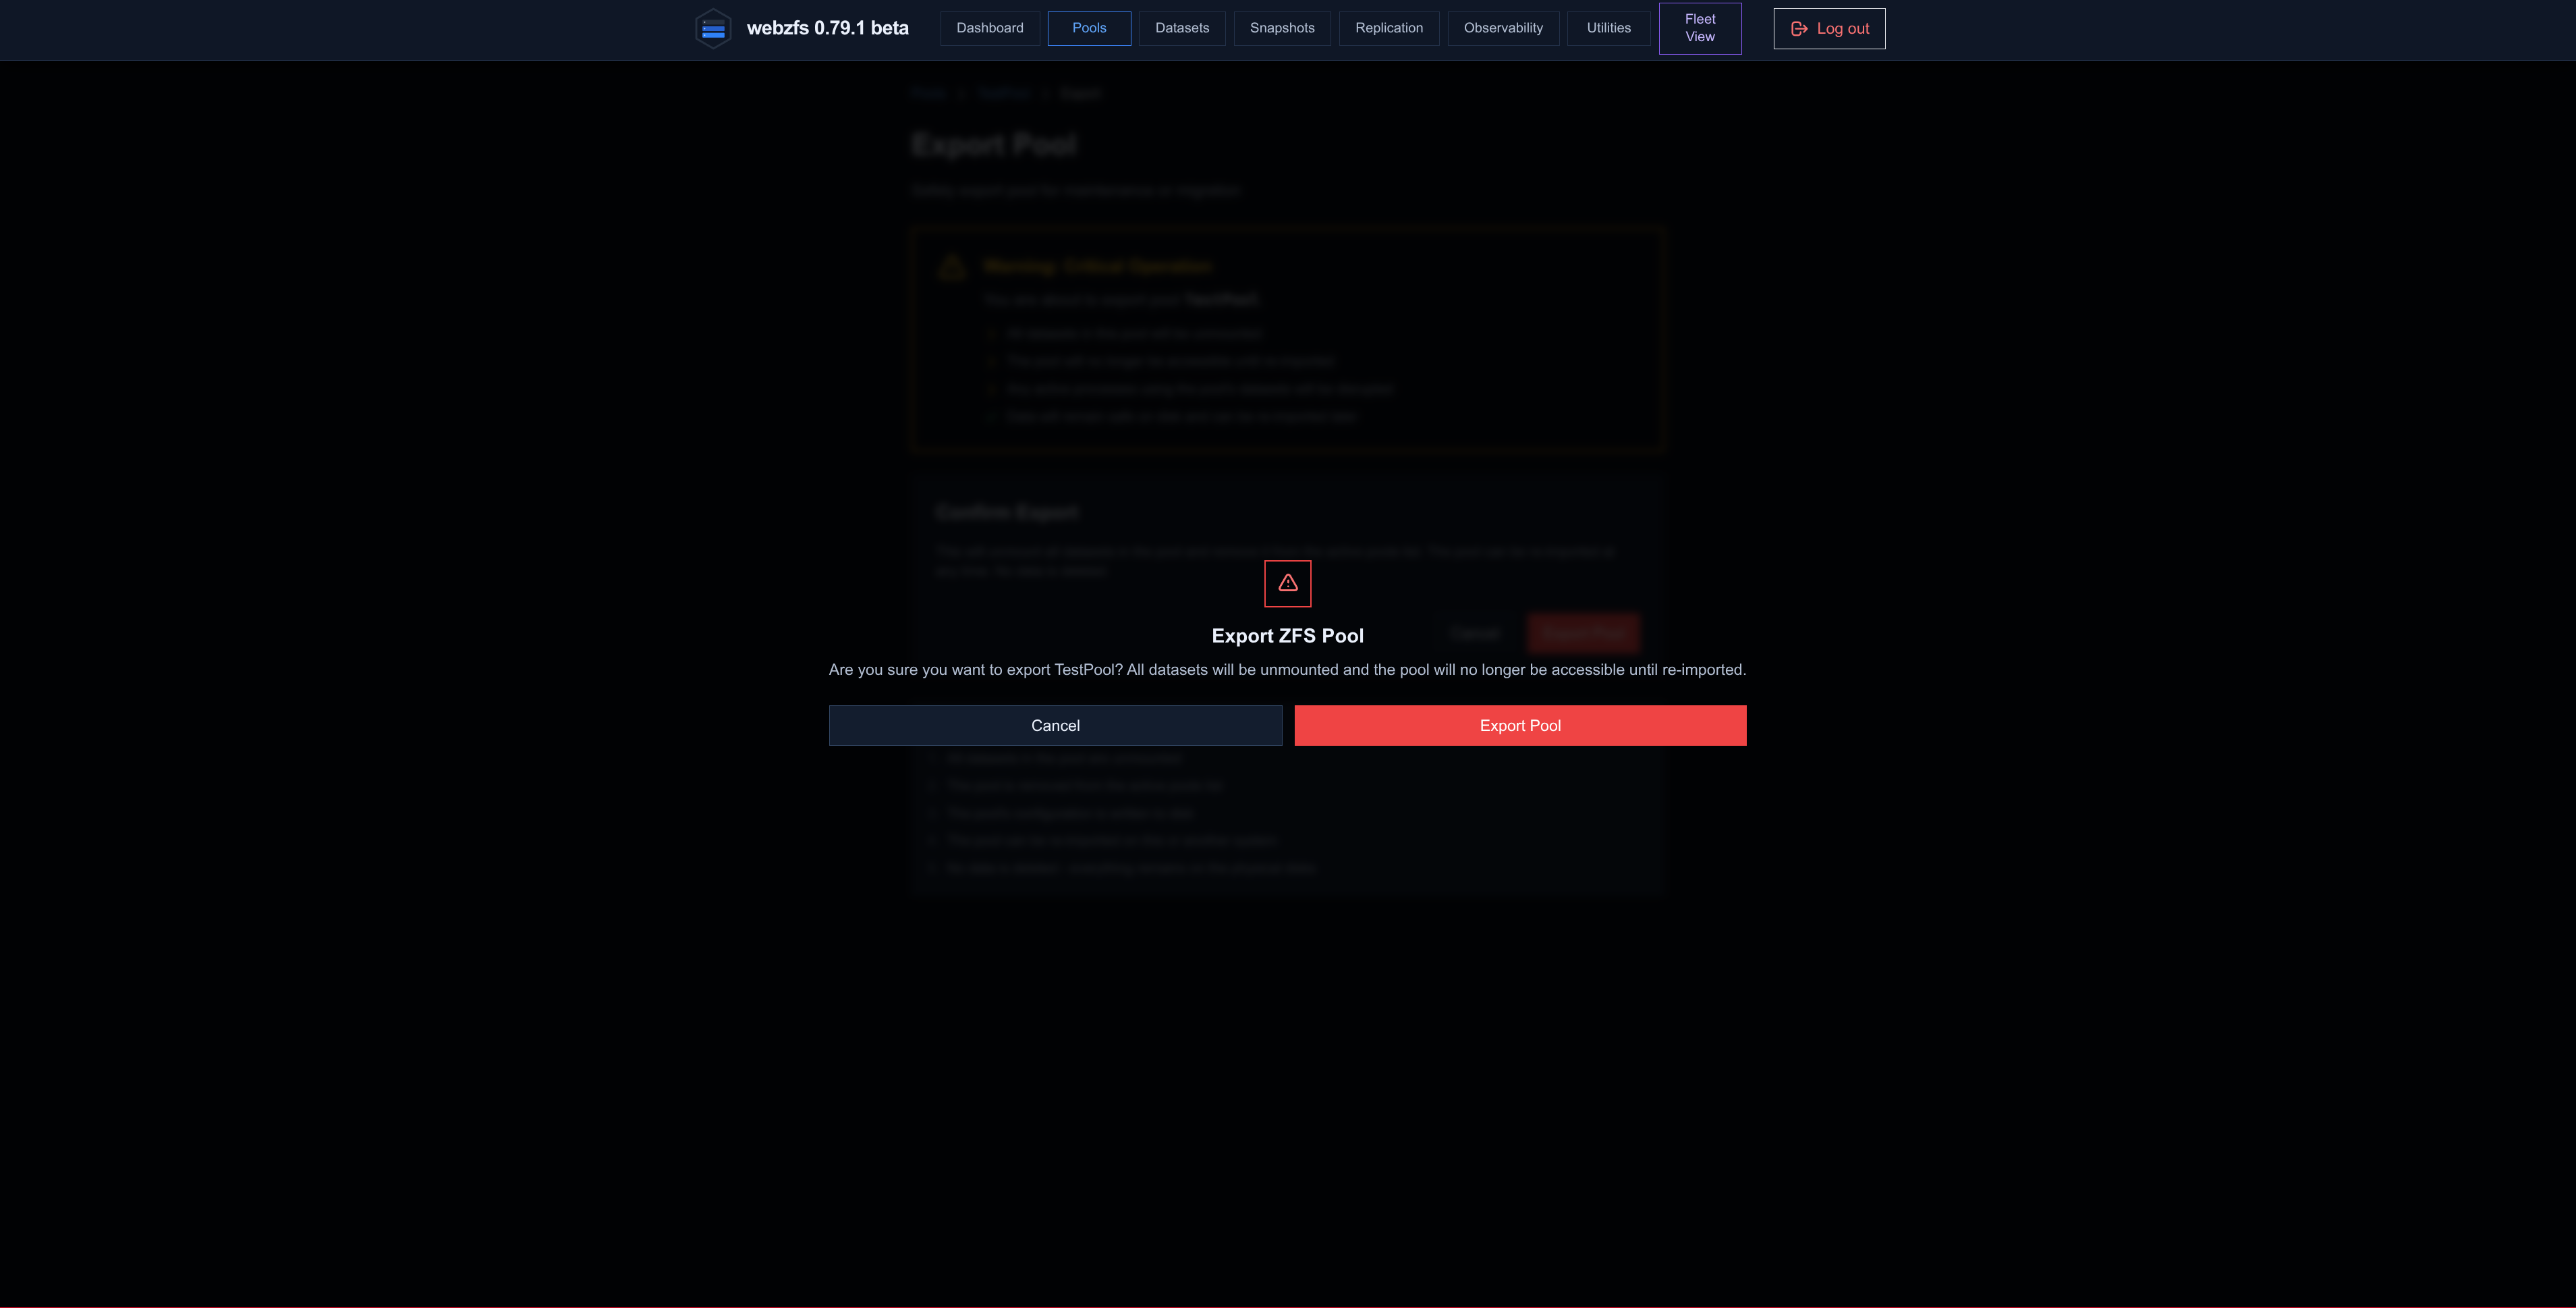
Export Pool:
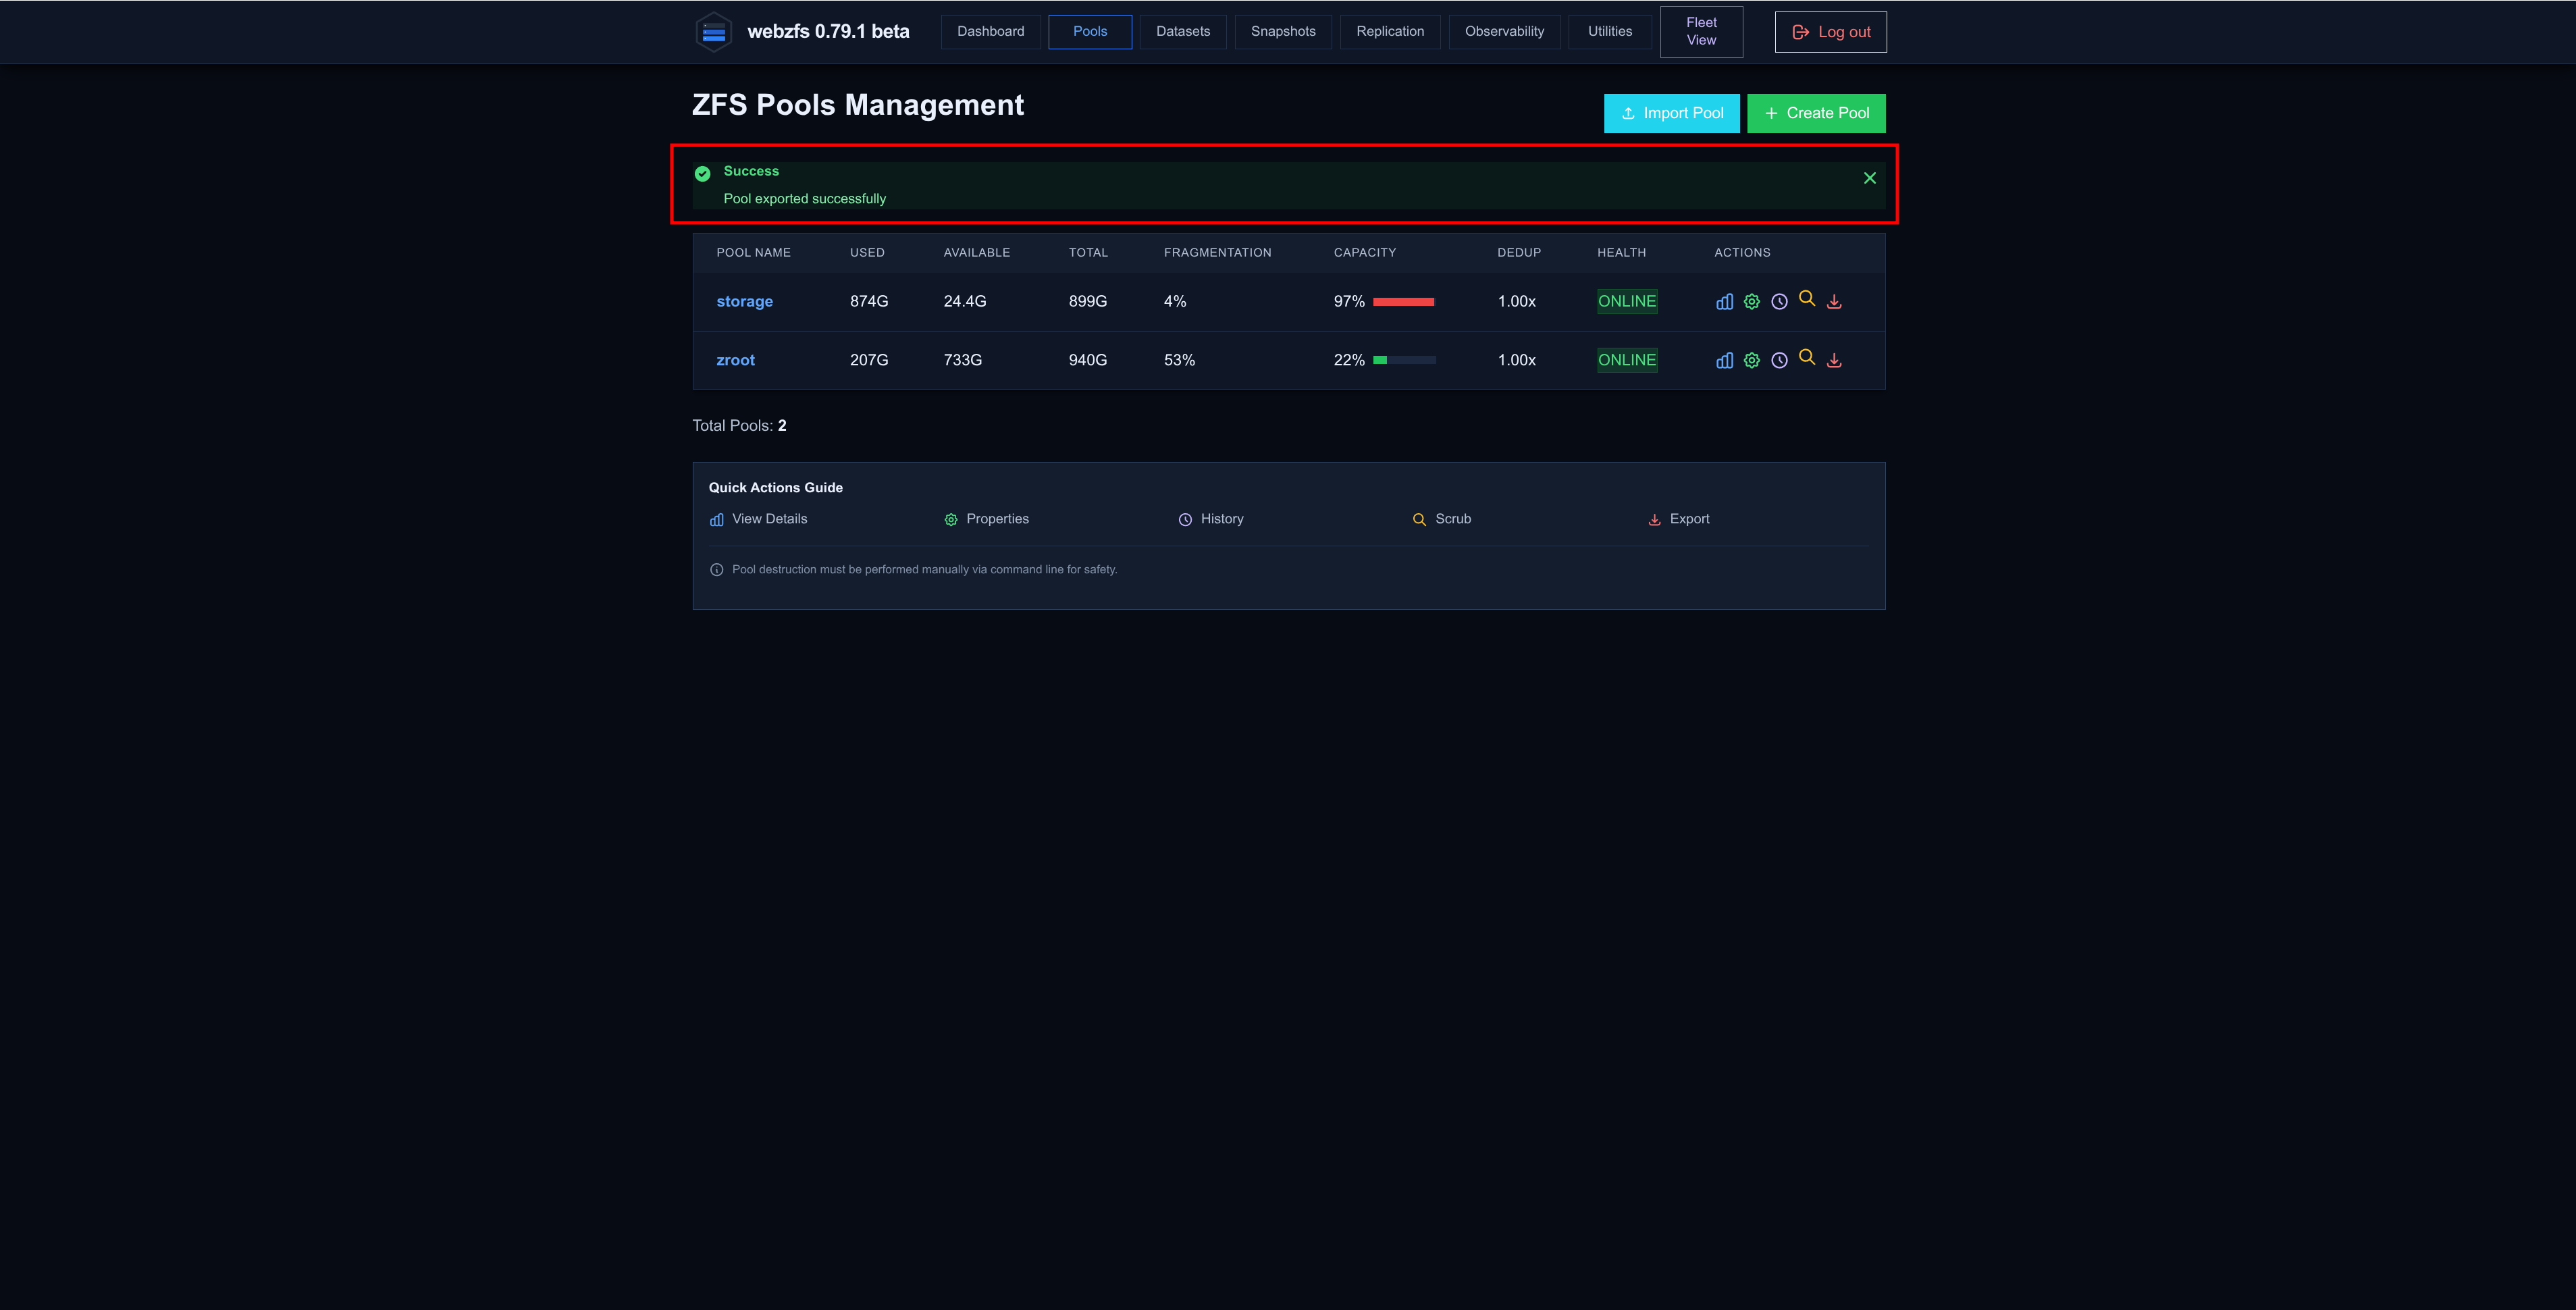
We can also export pools:
|
|
|
|
Datasets
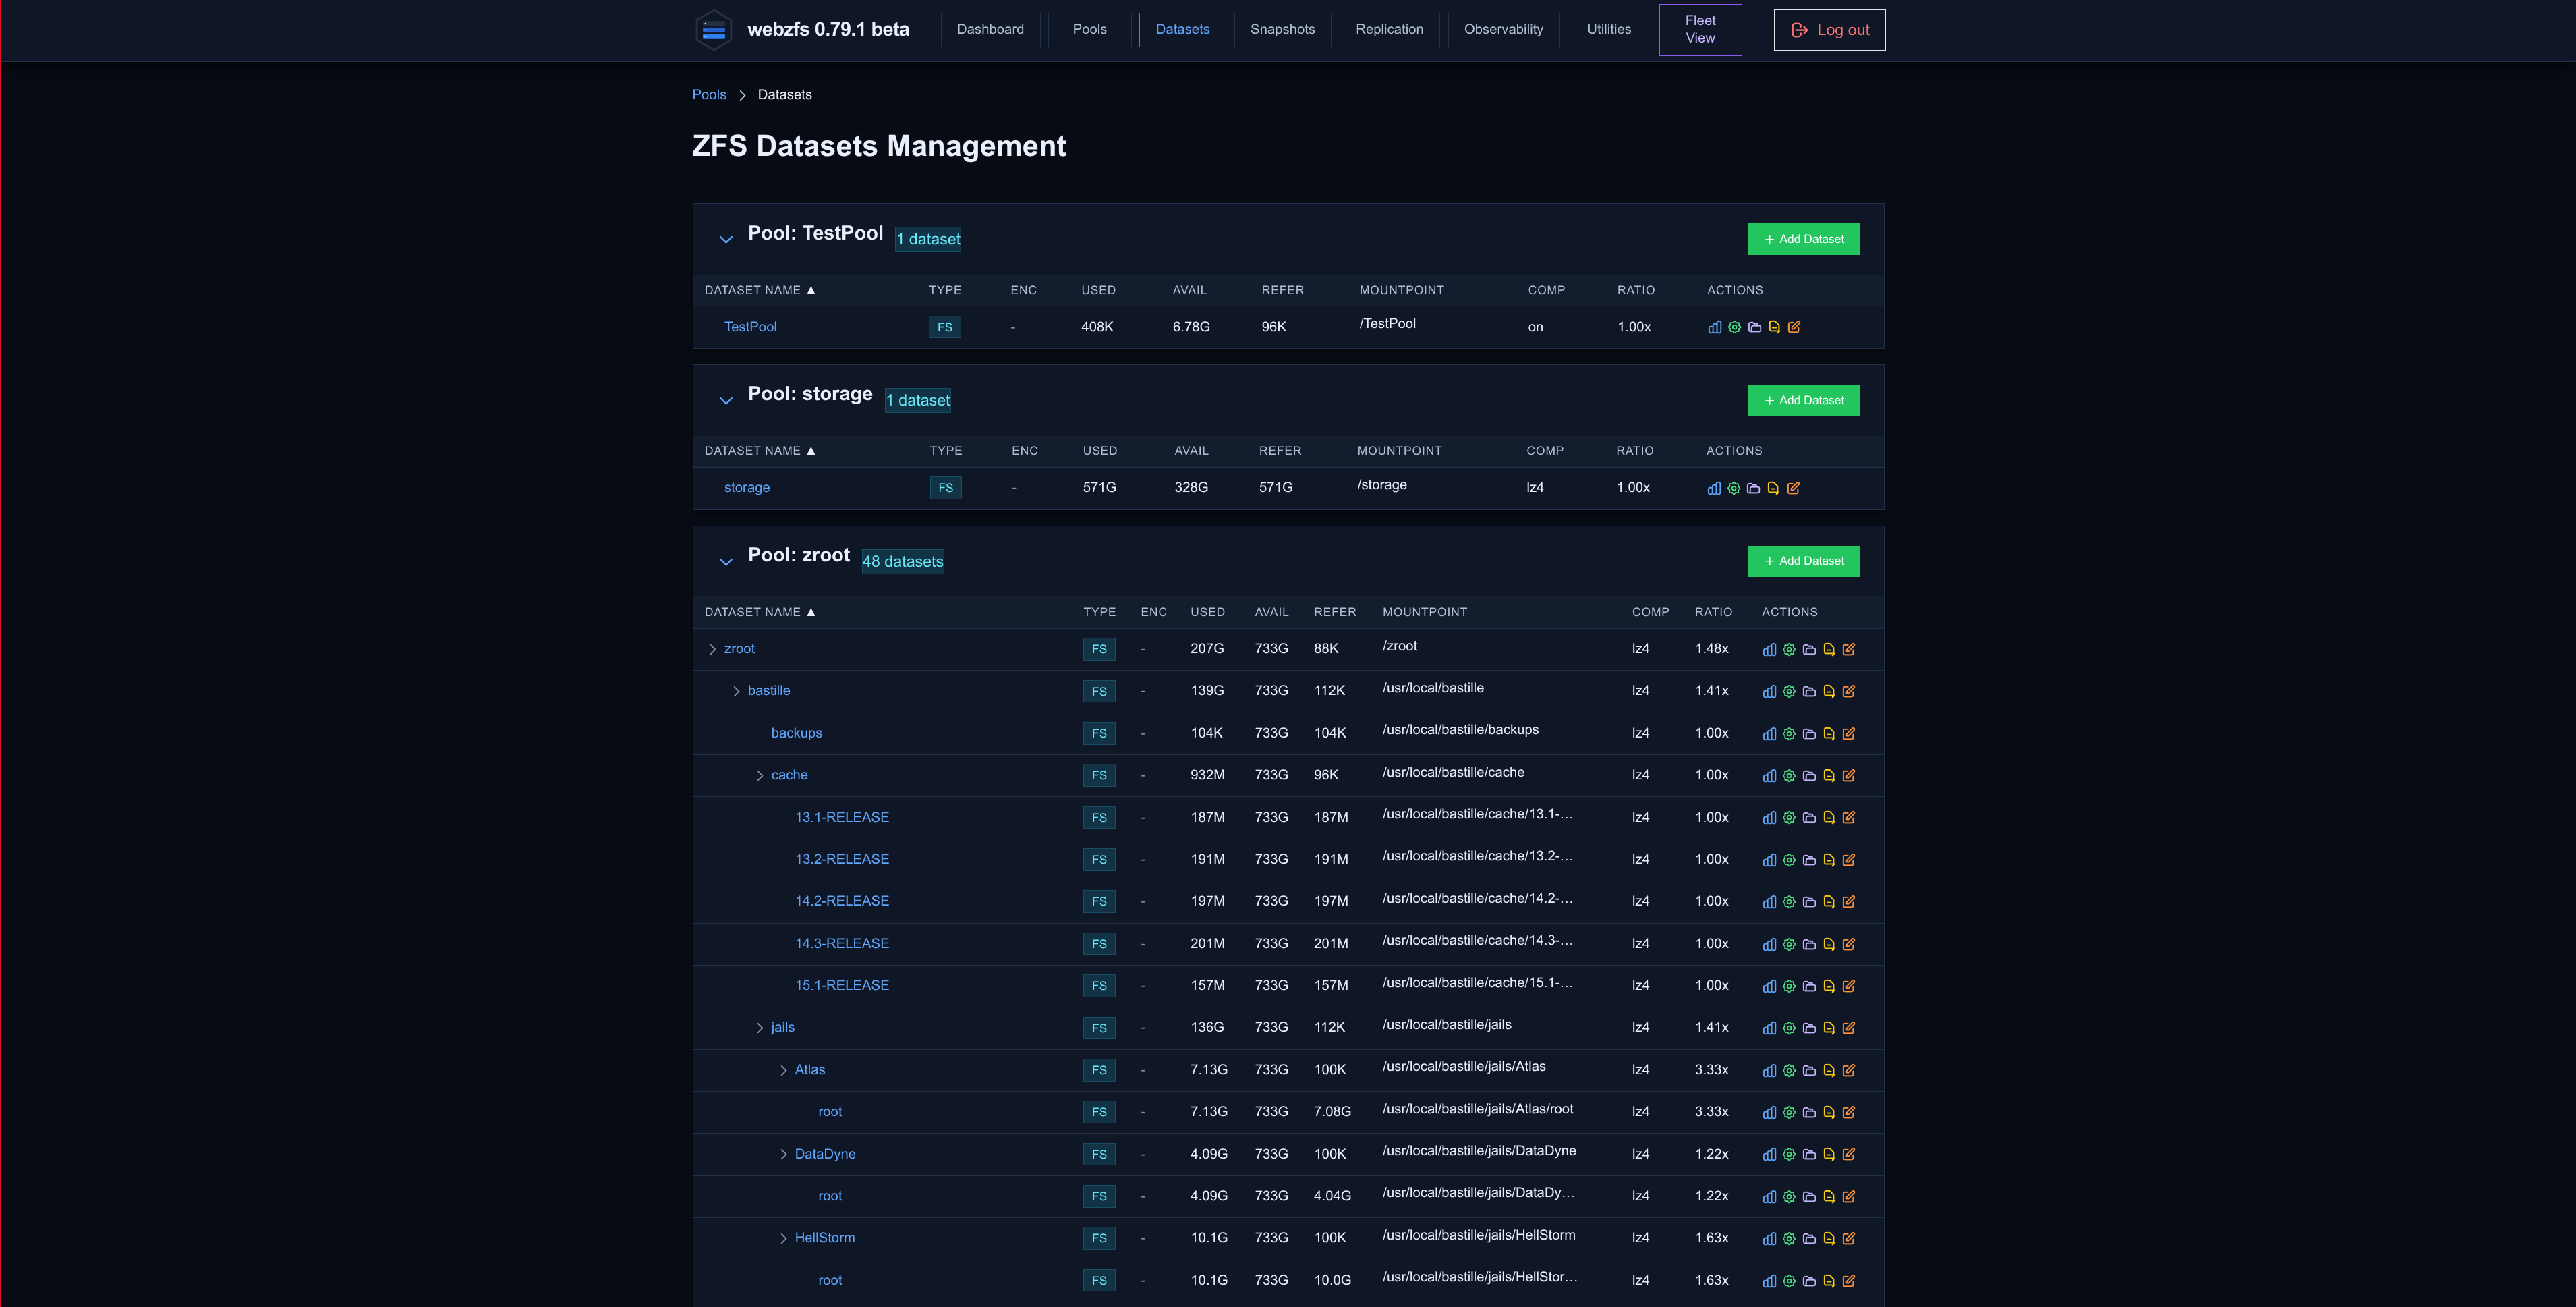
From this section we can view or add datasets to the Pools:
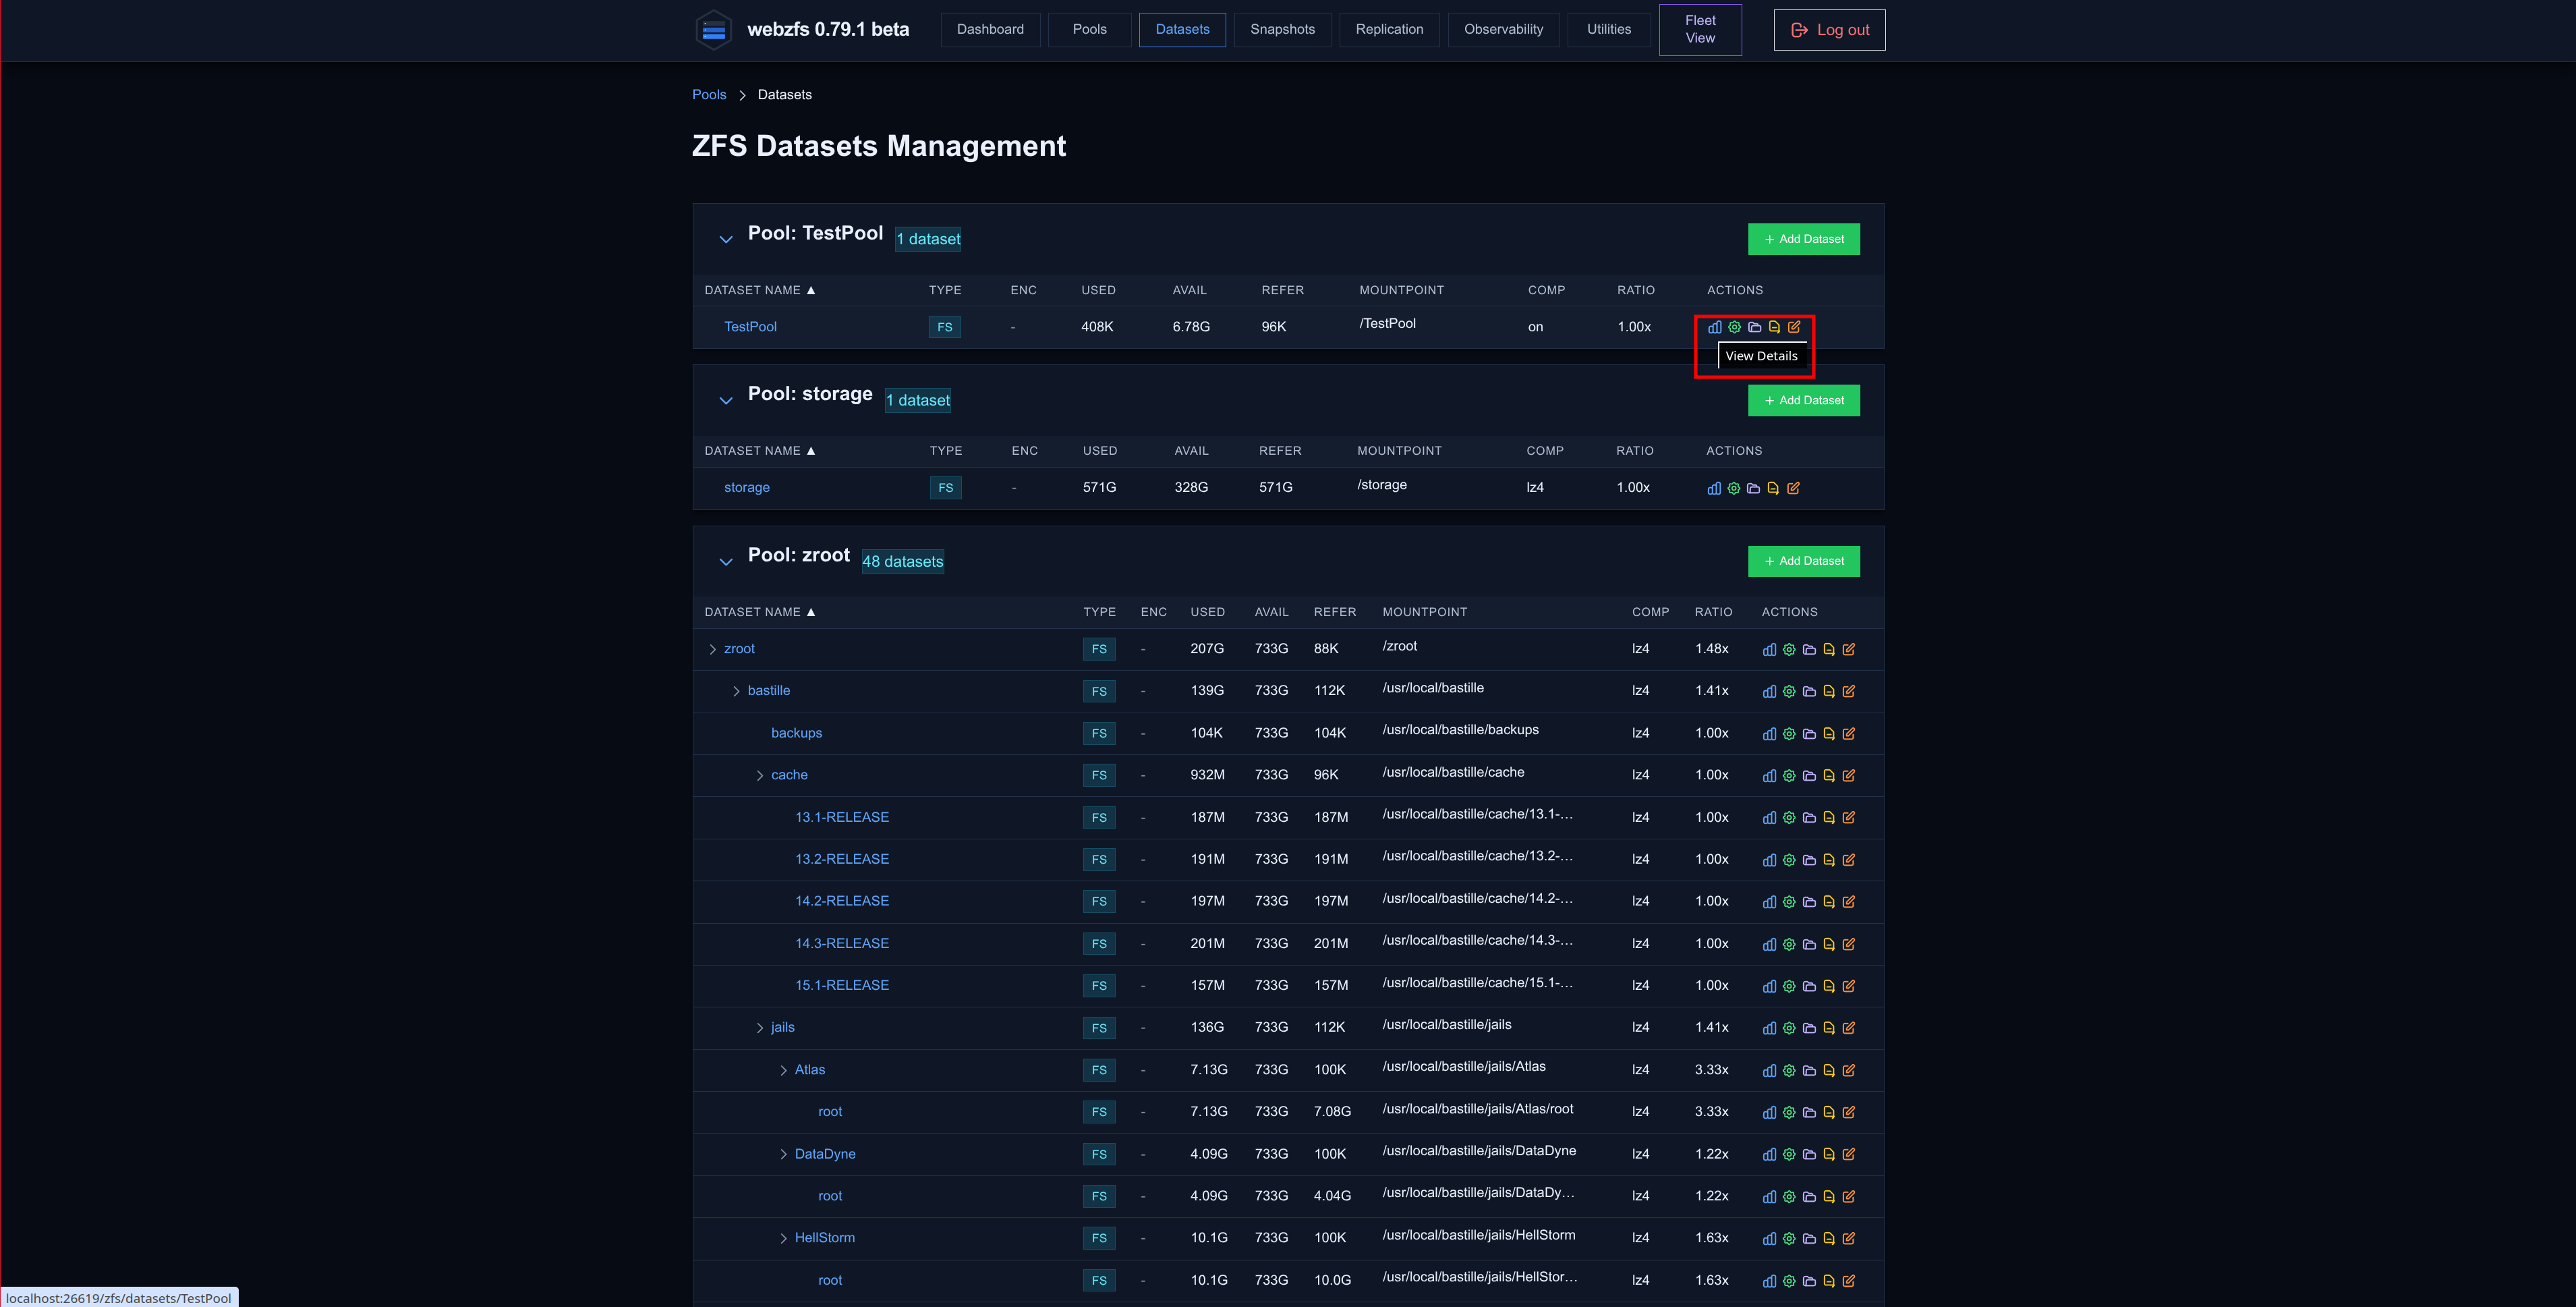
Details:
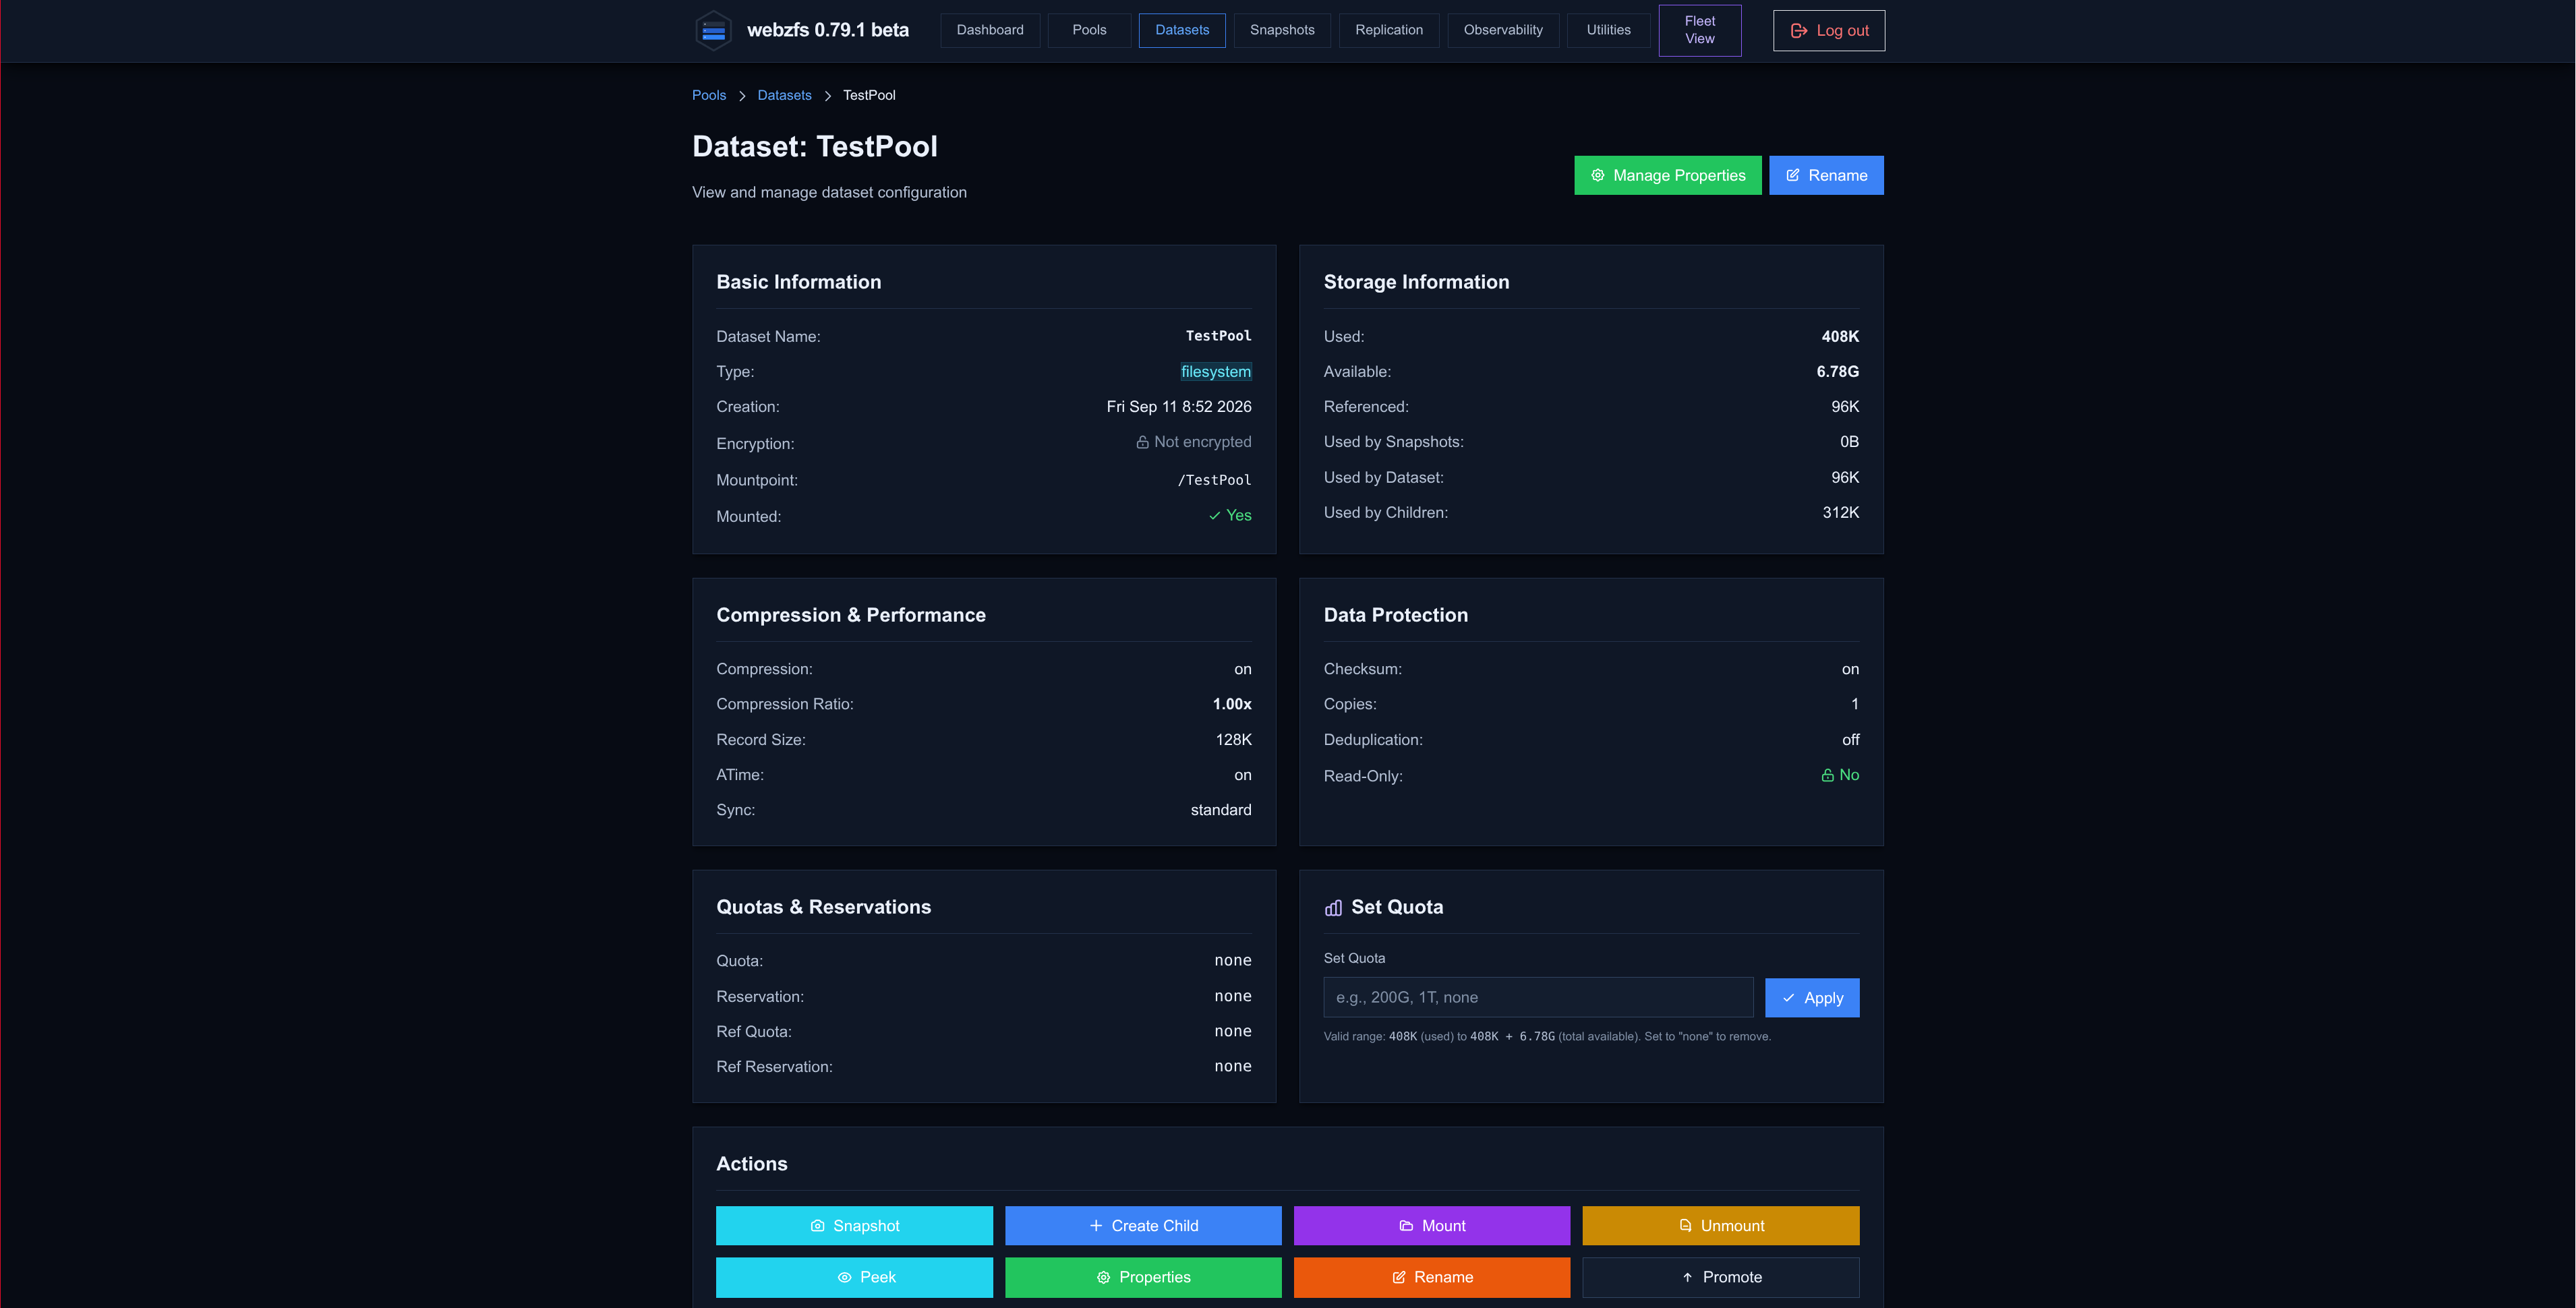
From Details we can view the basic data of the dataset:
|
|
Also manage its properties:
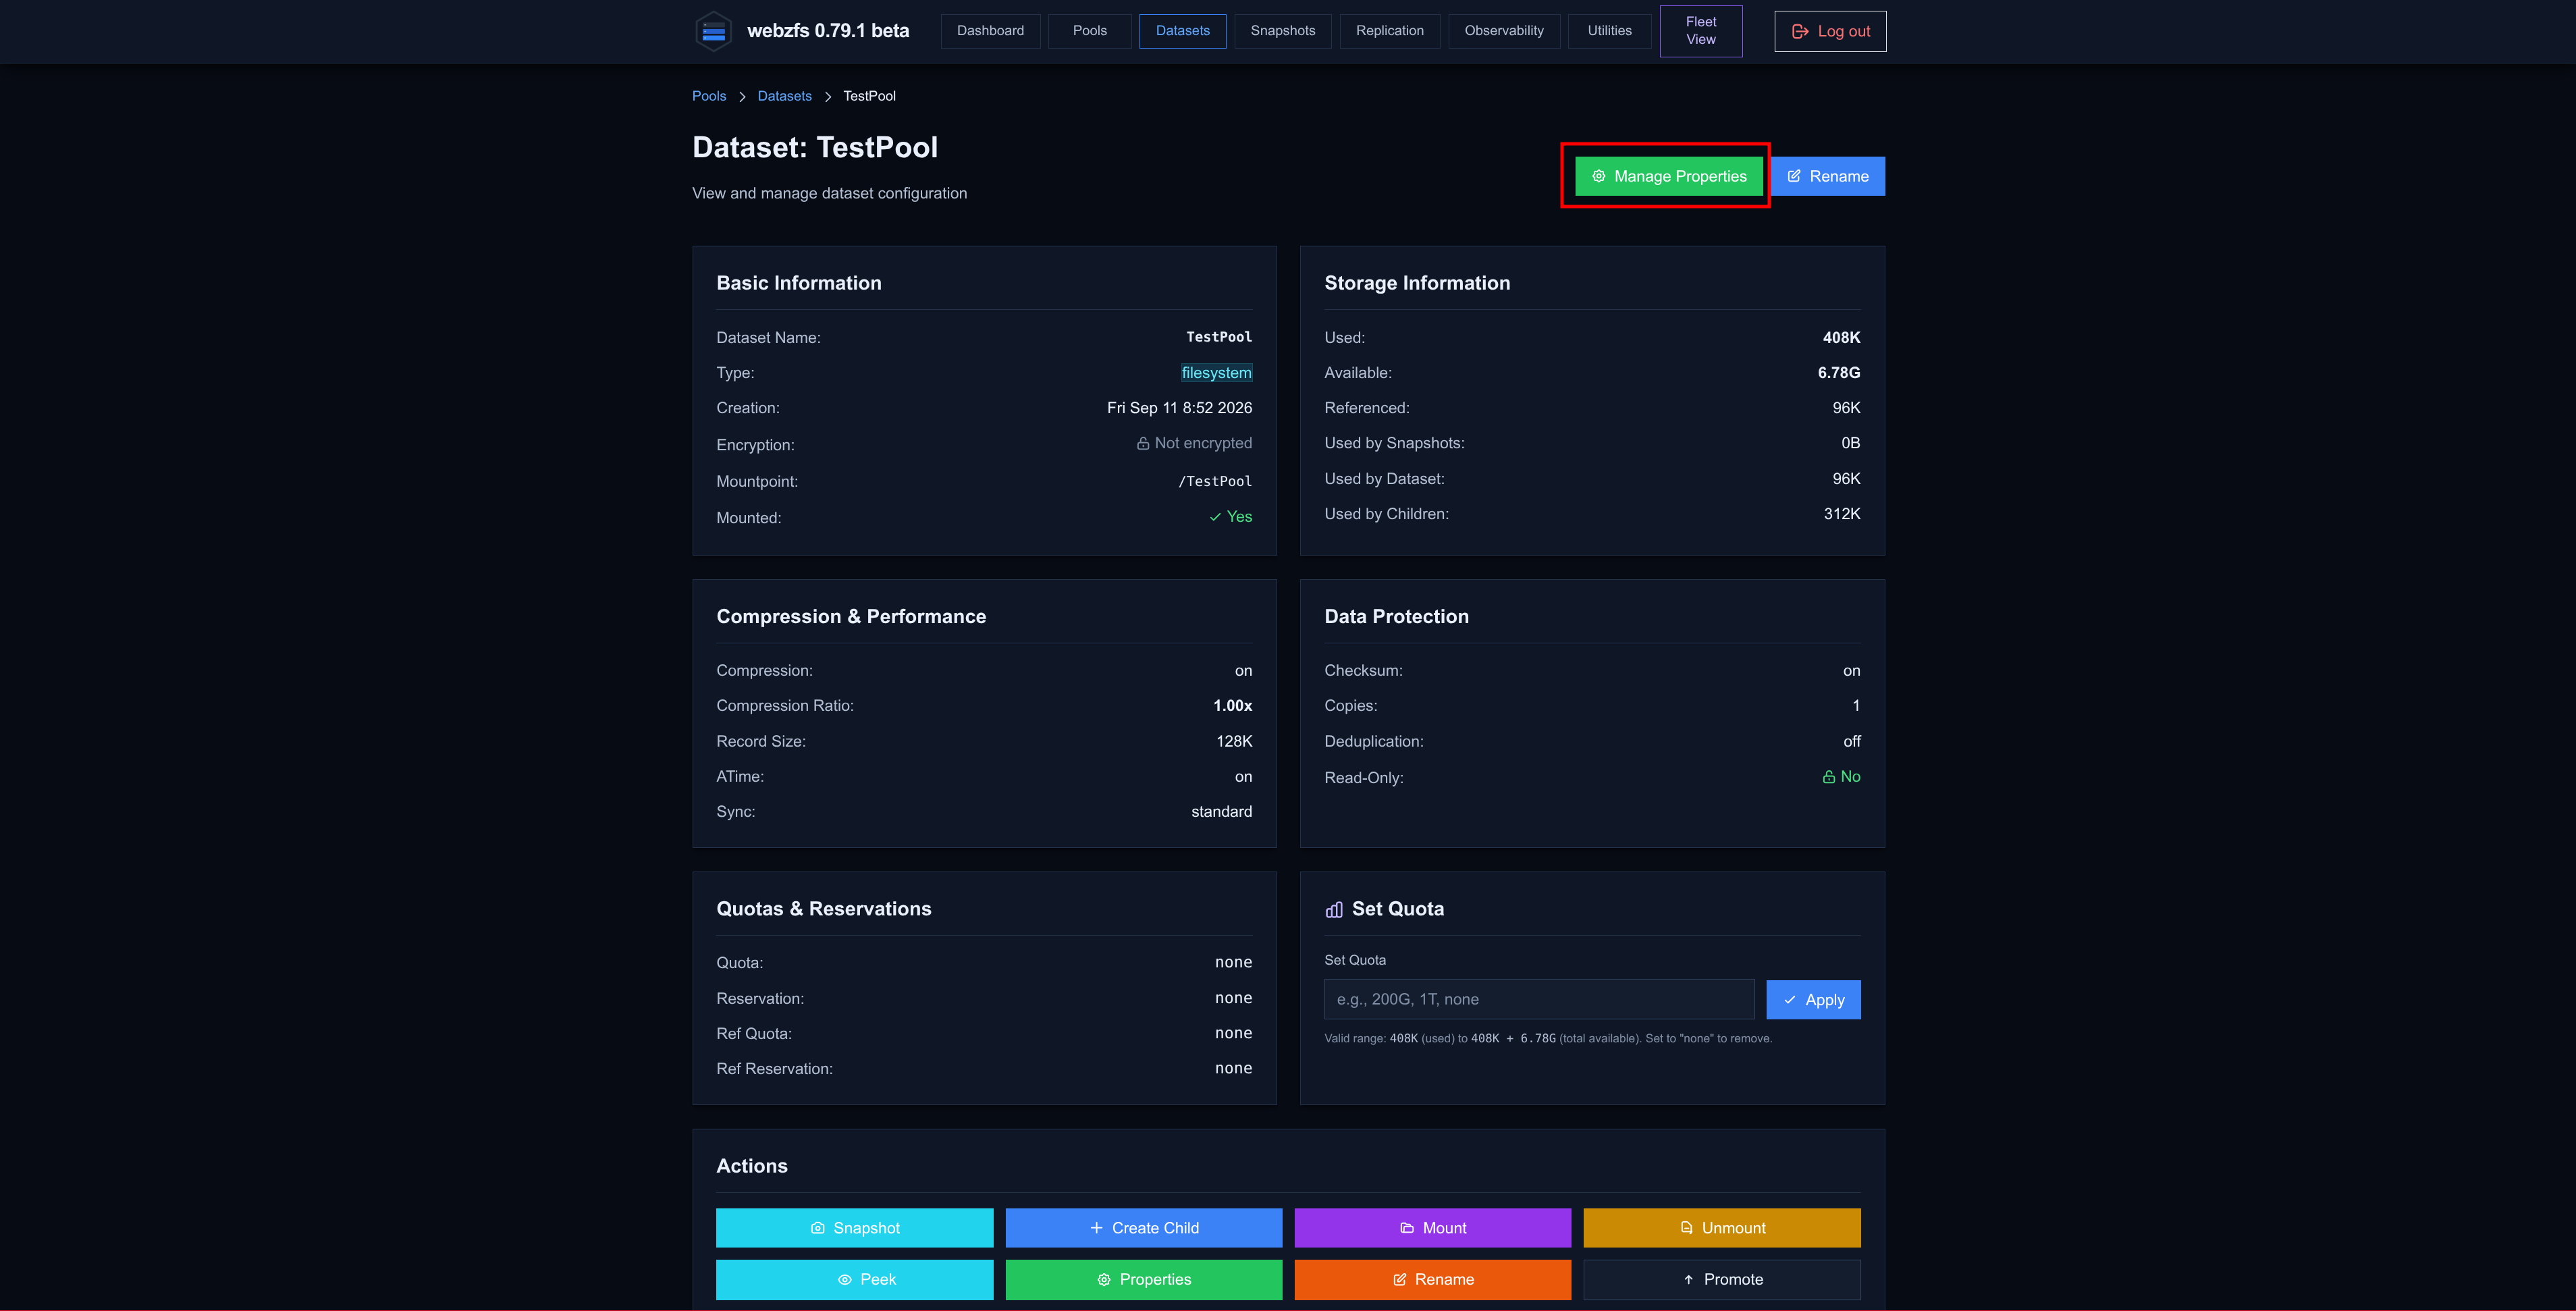
|
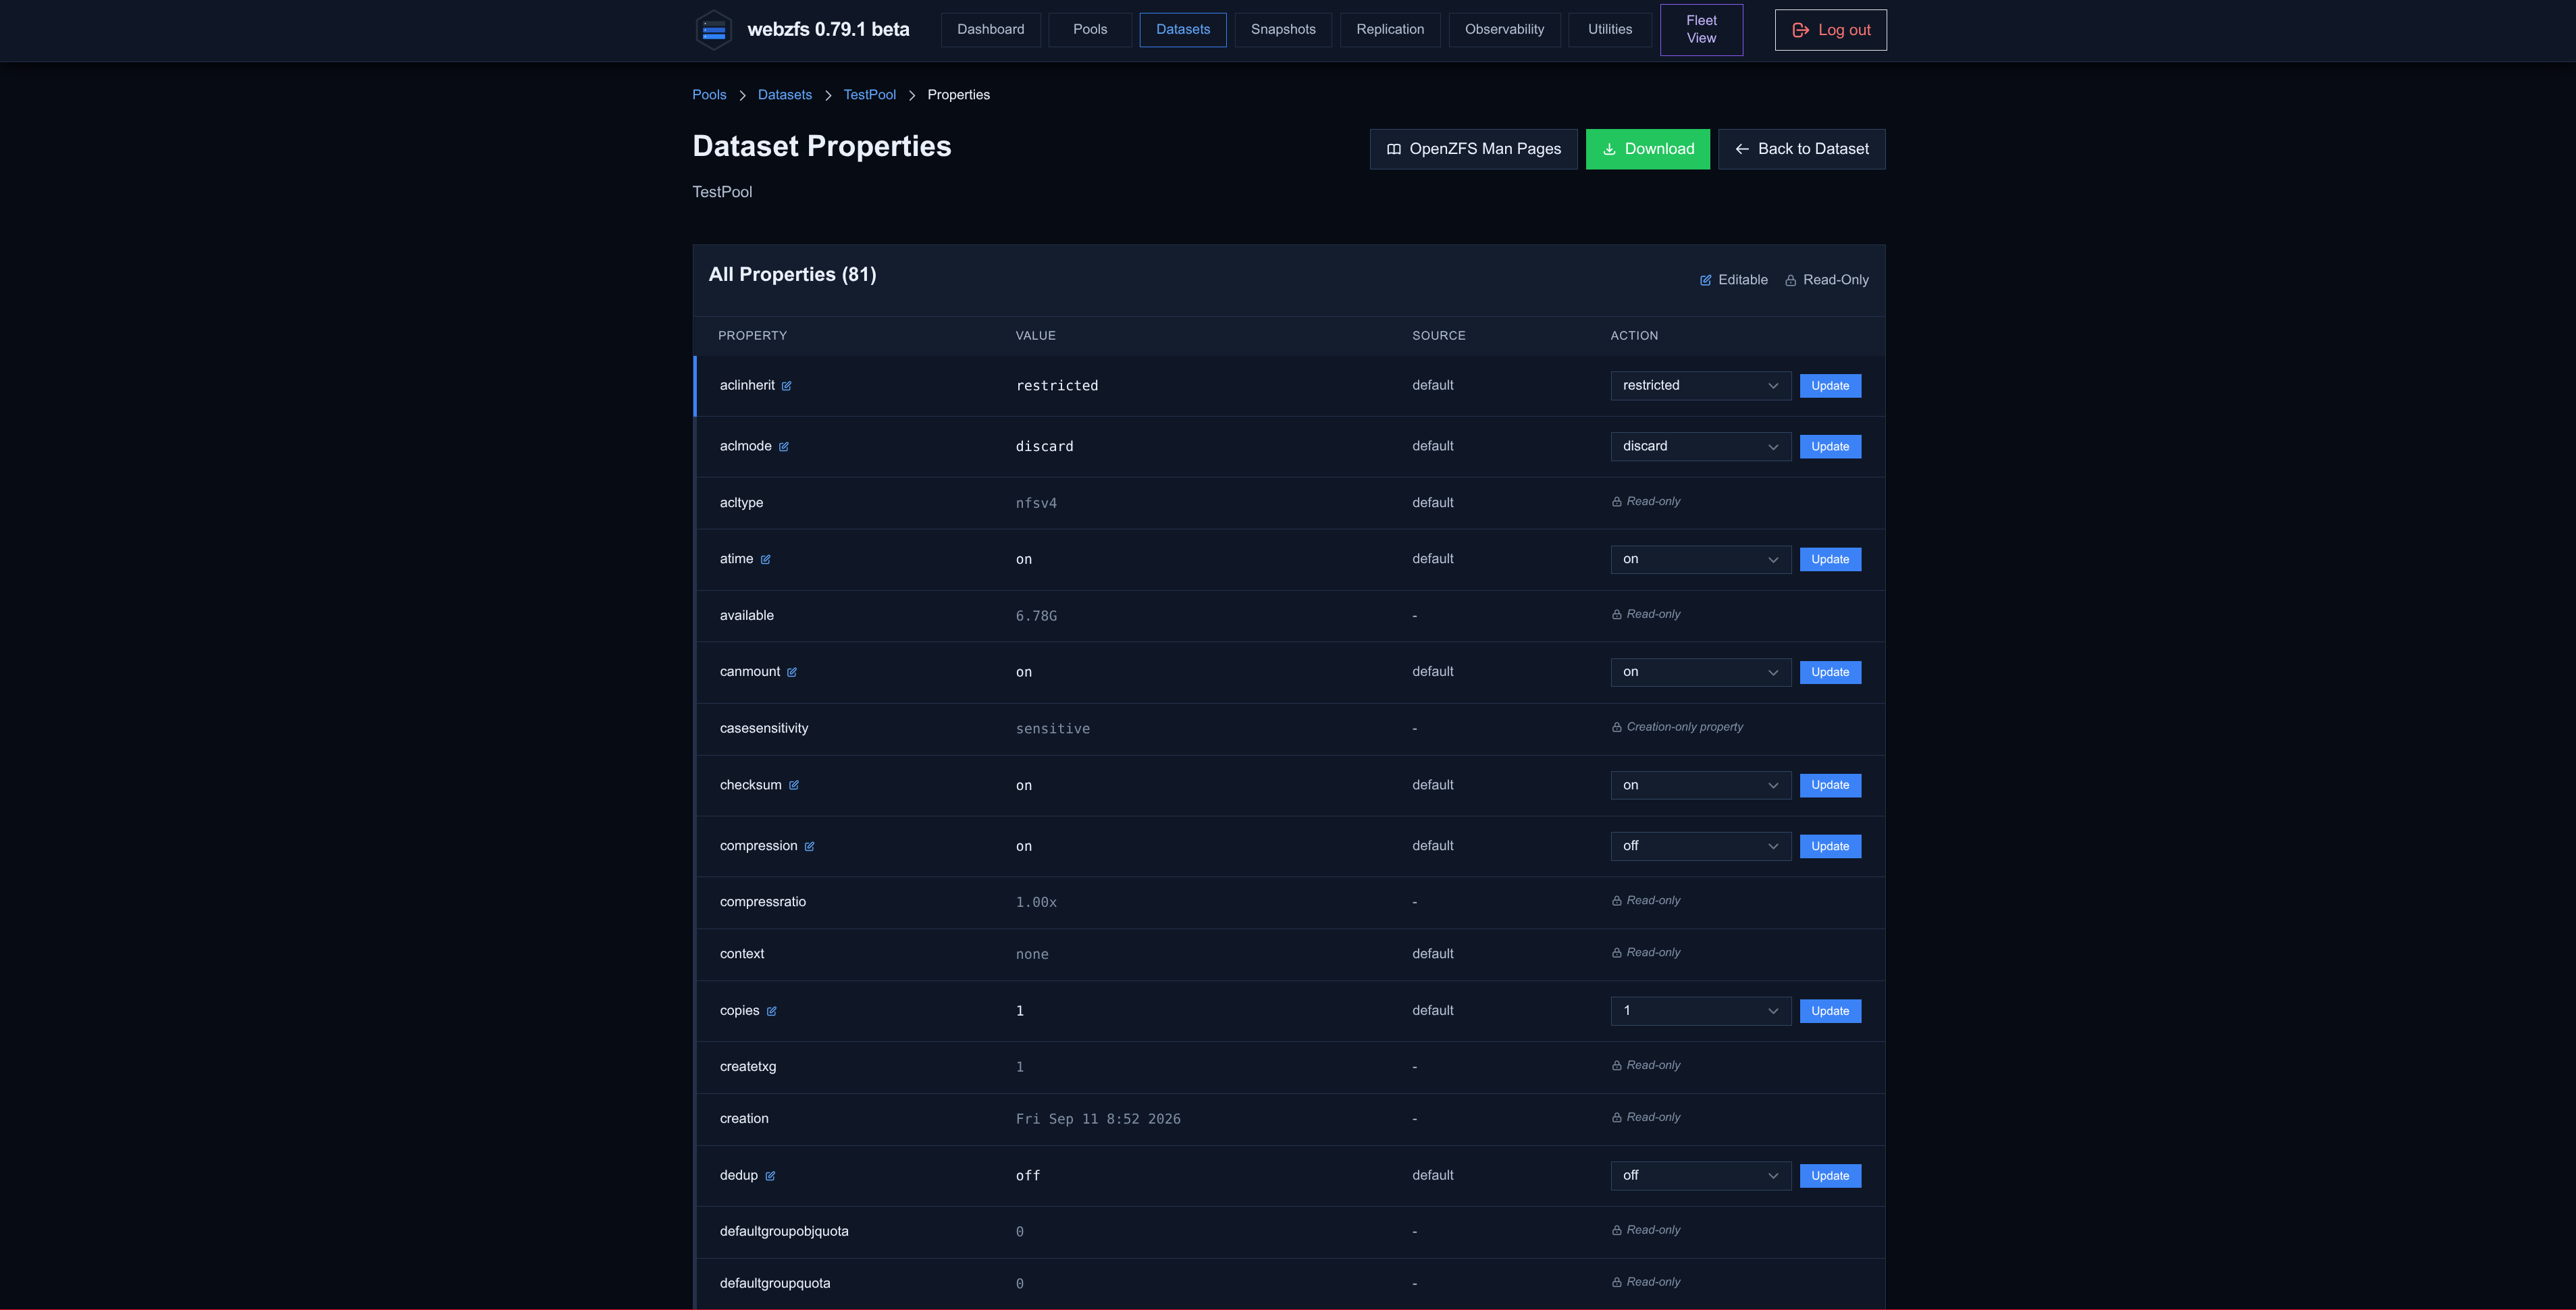
|
Rename the dataset:
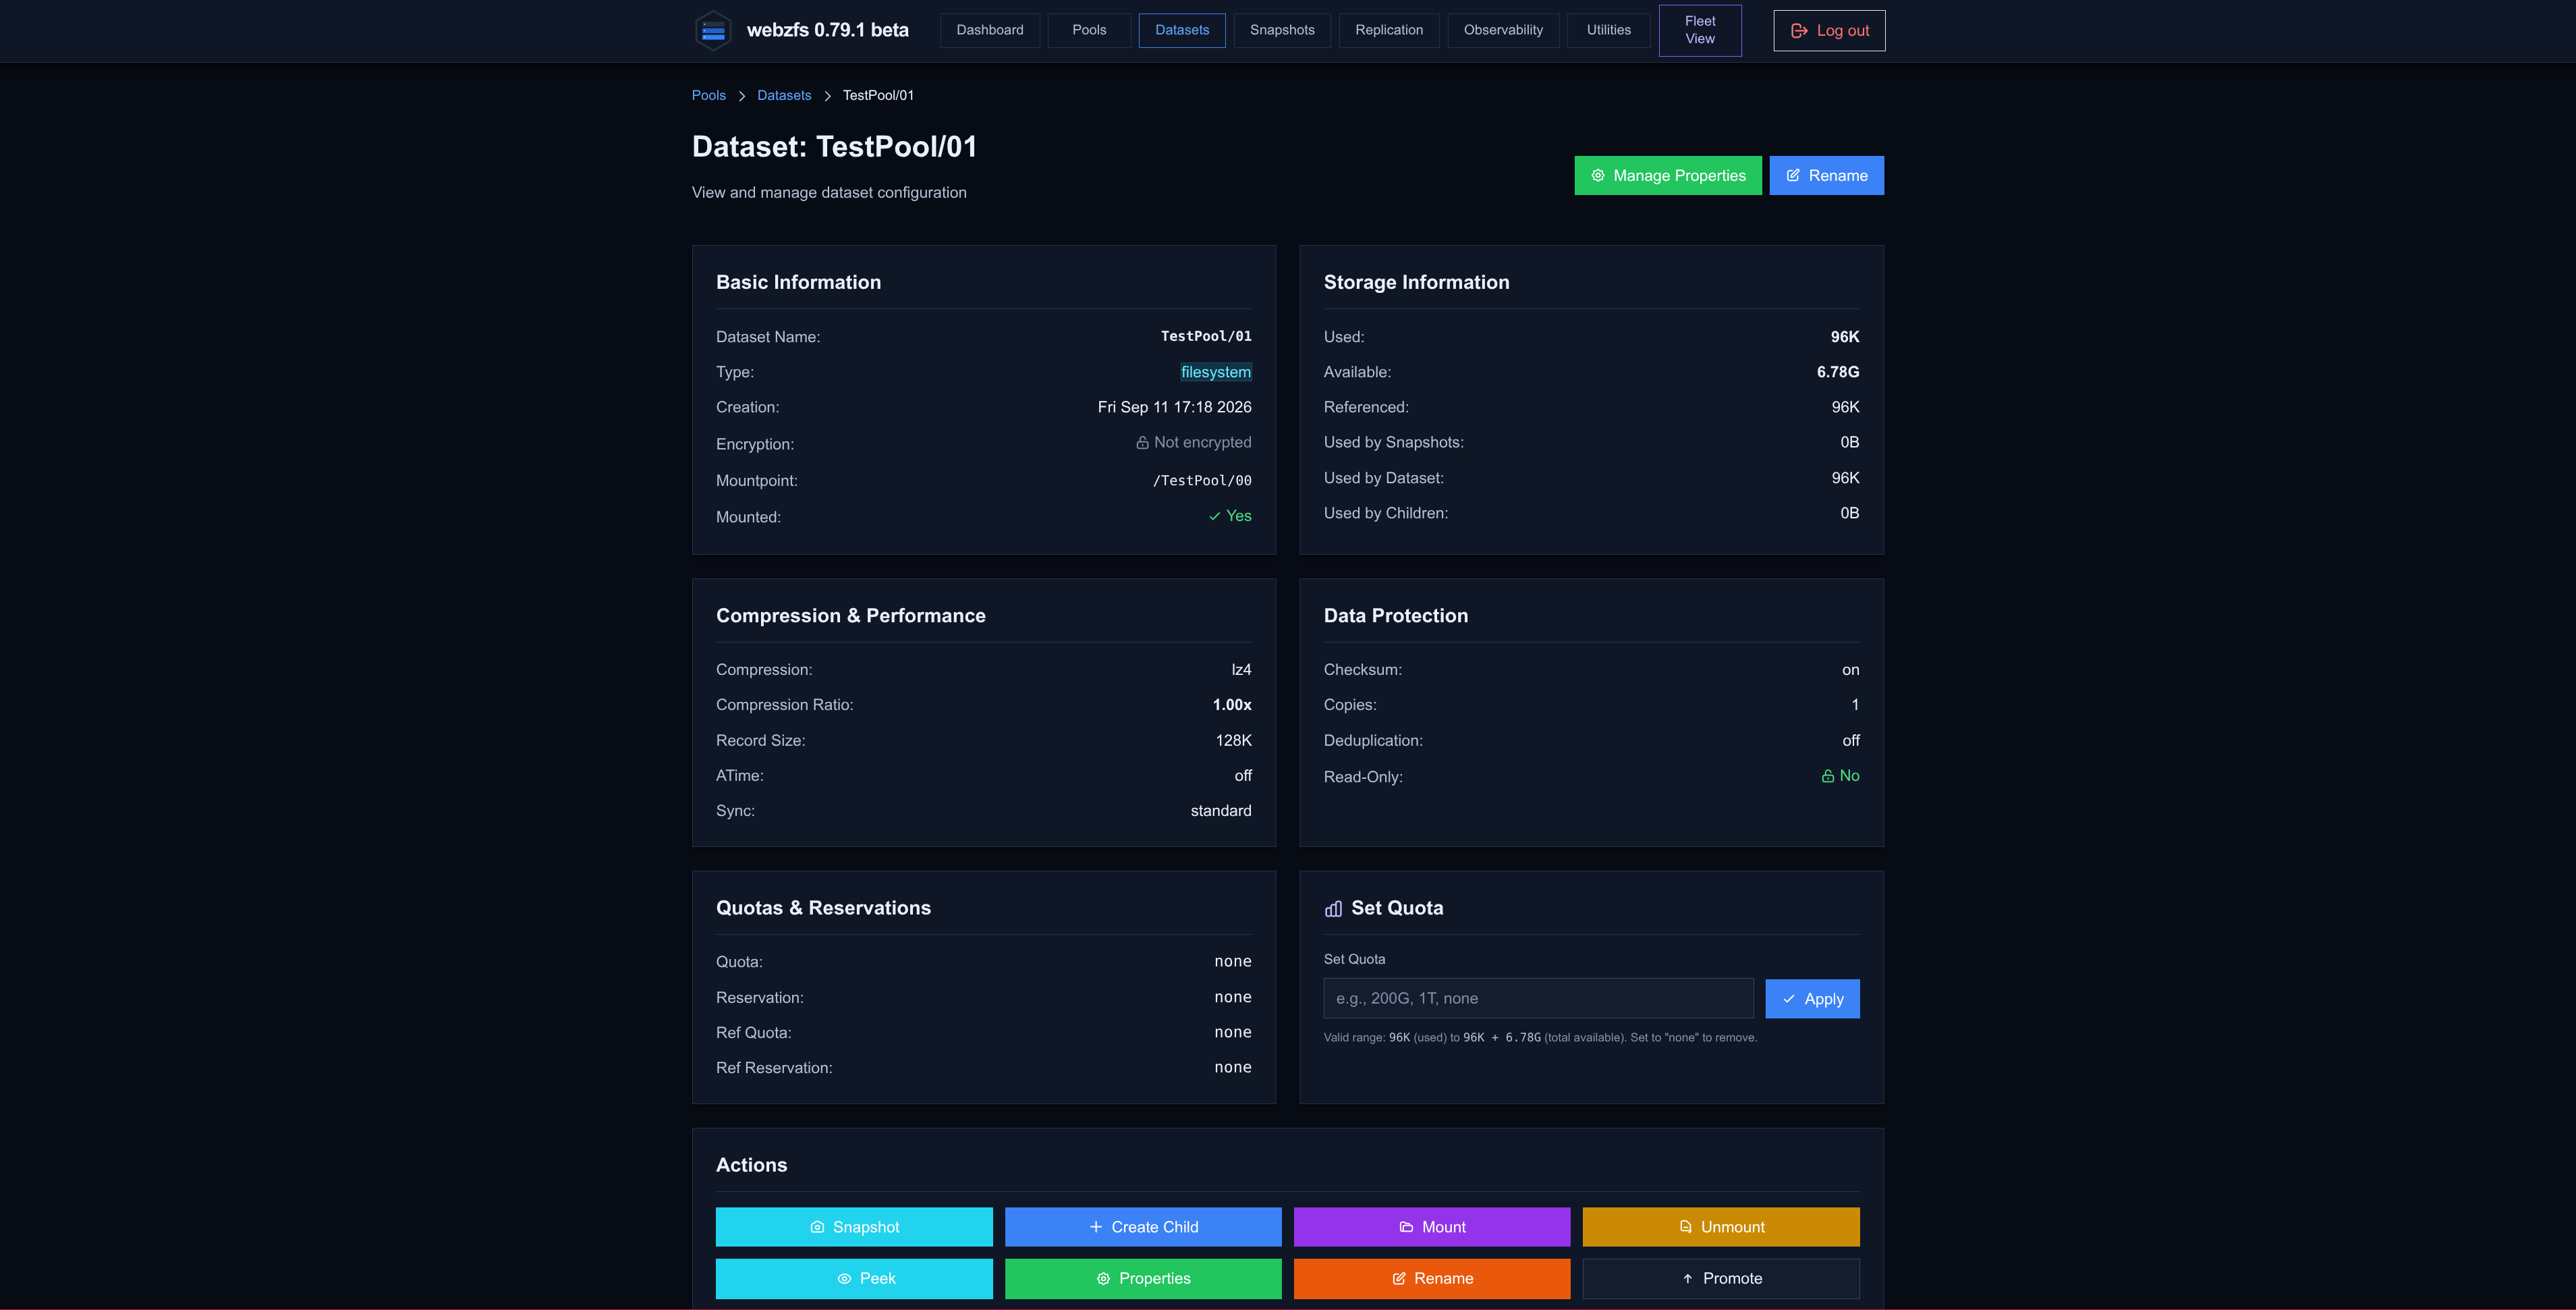
We must keep in mind that we must indicate the full path, POOL_NAME/NEW_DATASET_NAME and that it only supports renaming second-order datasets, for example TestPool -> TestPool2 would not work, but TestPool/00 -> TestPool/01, yes.
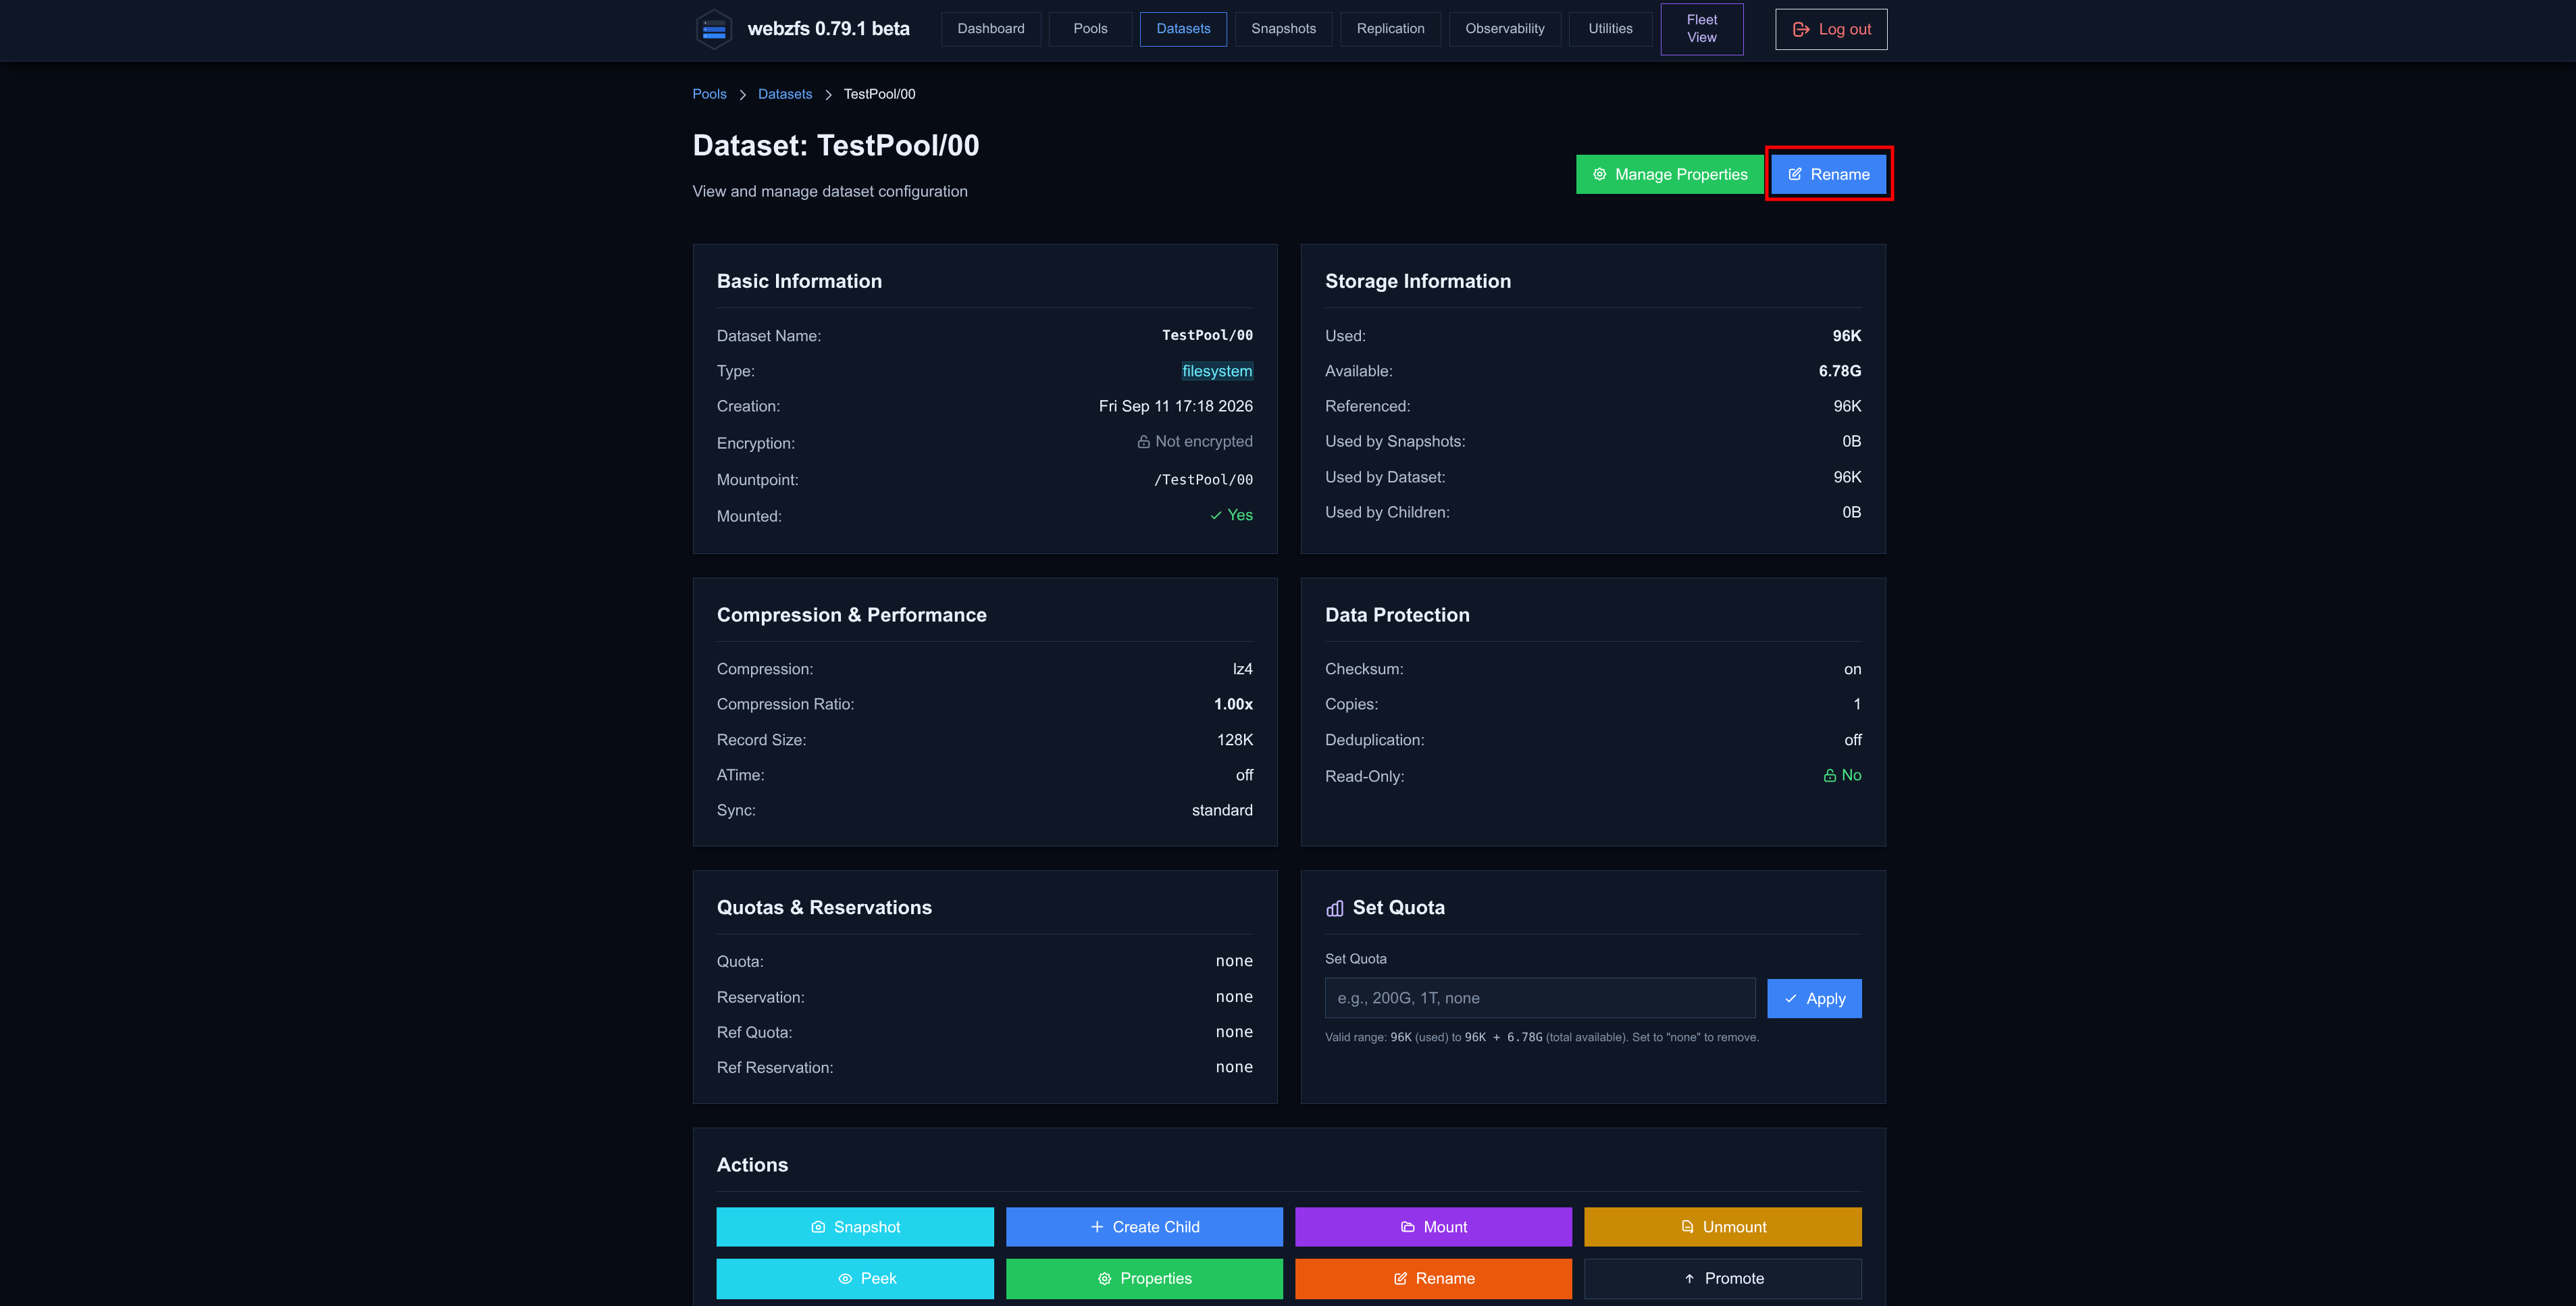
|
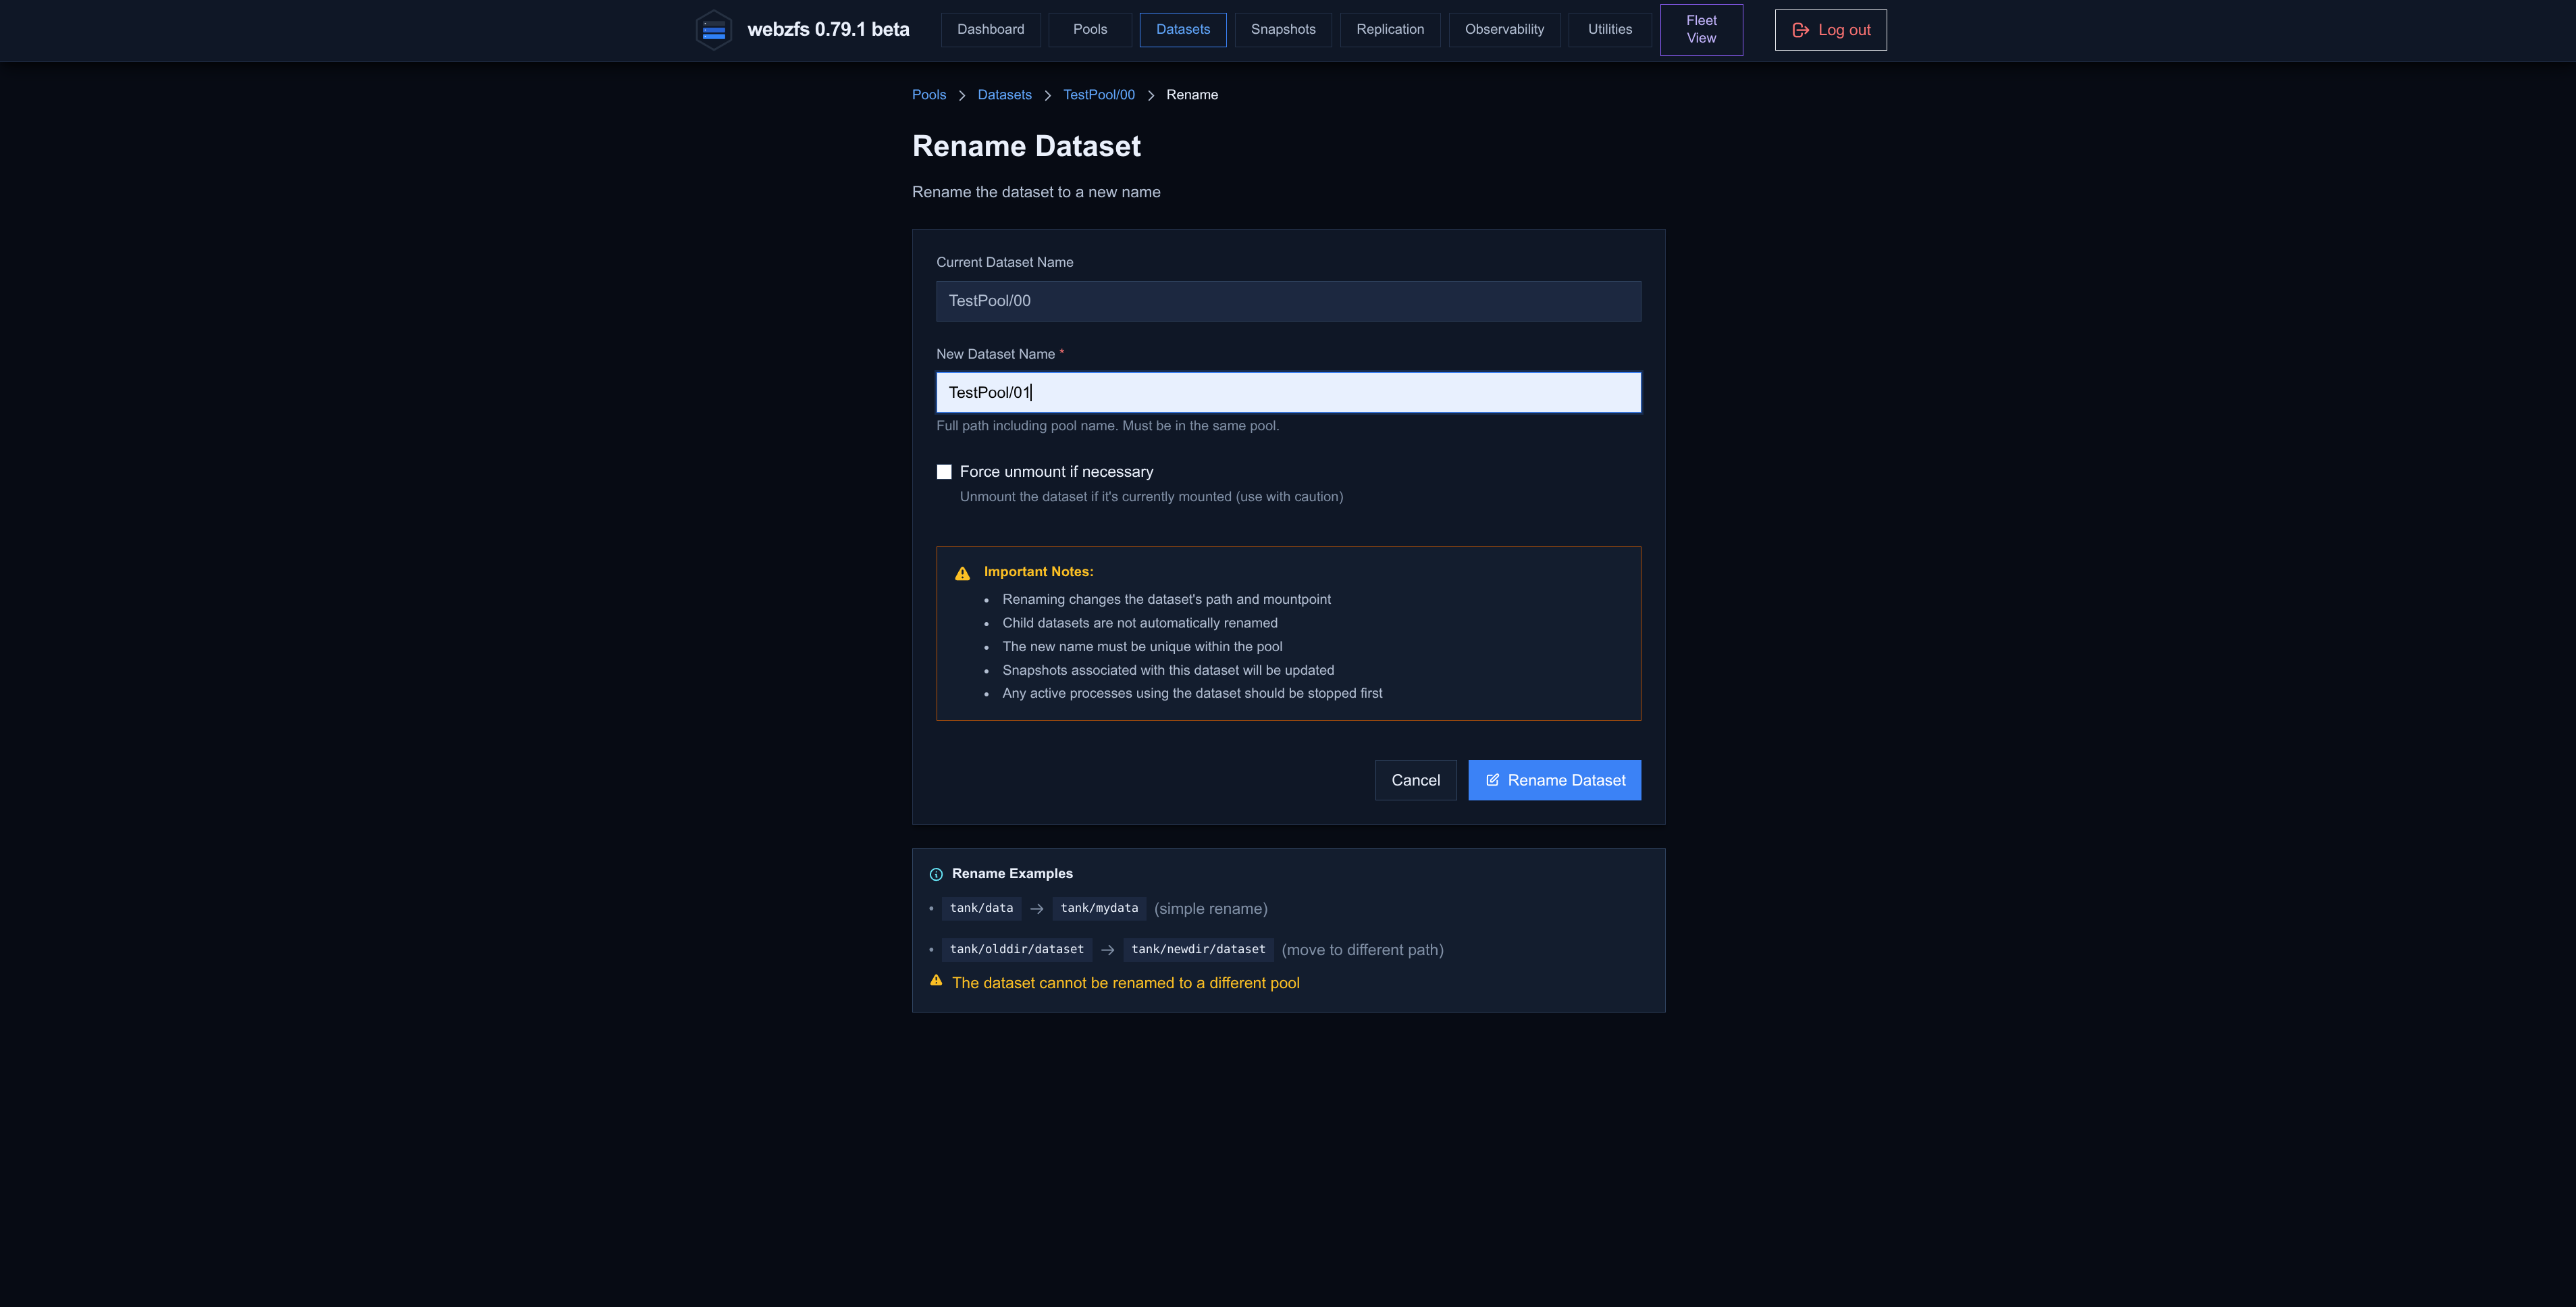
|
|
Or perform certain actions on the dataset.
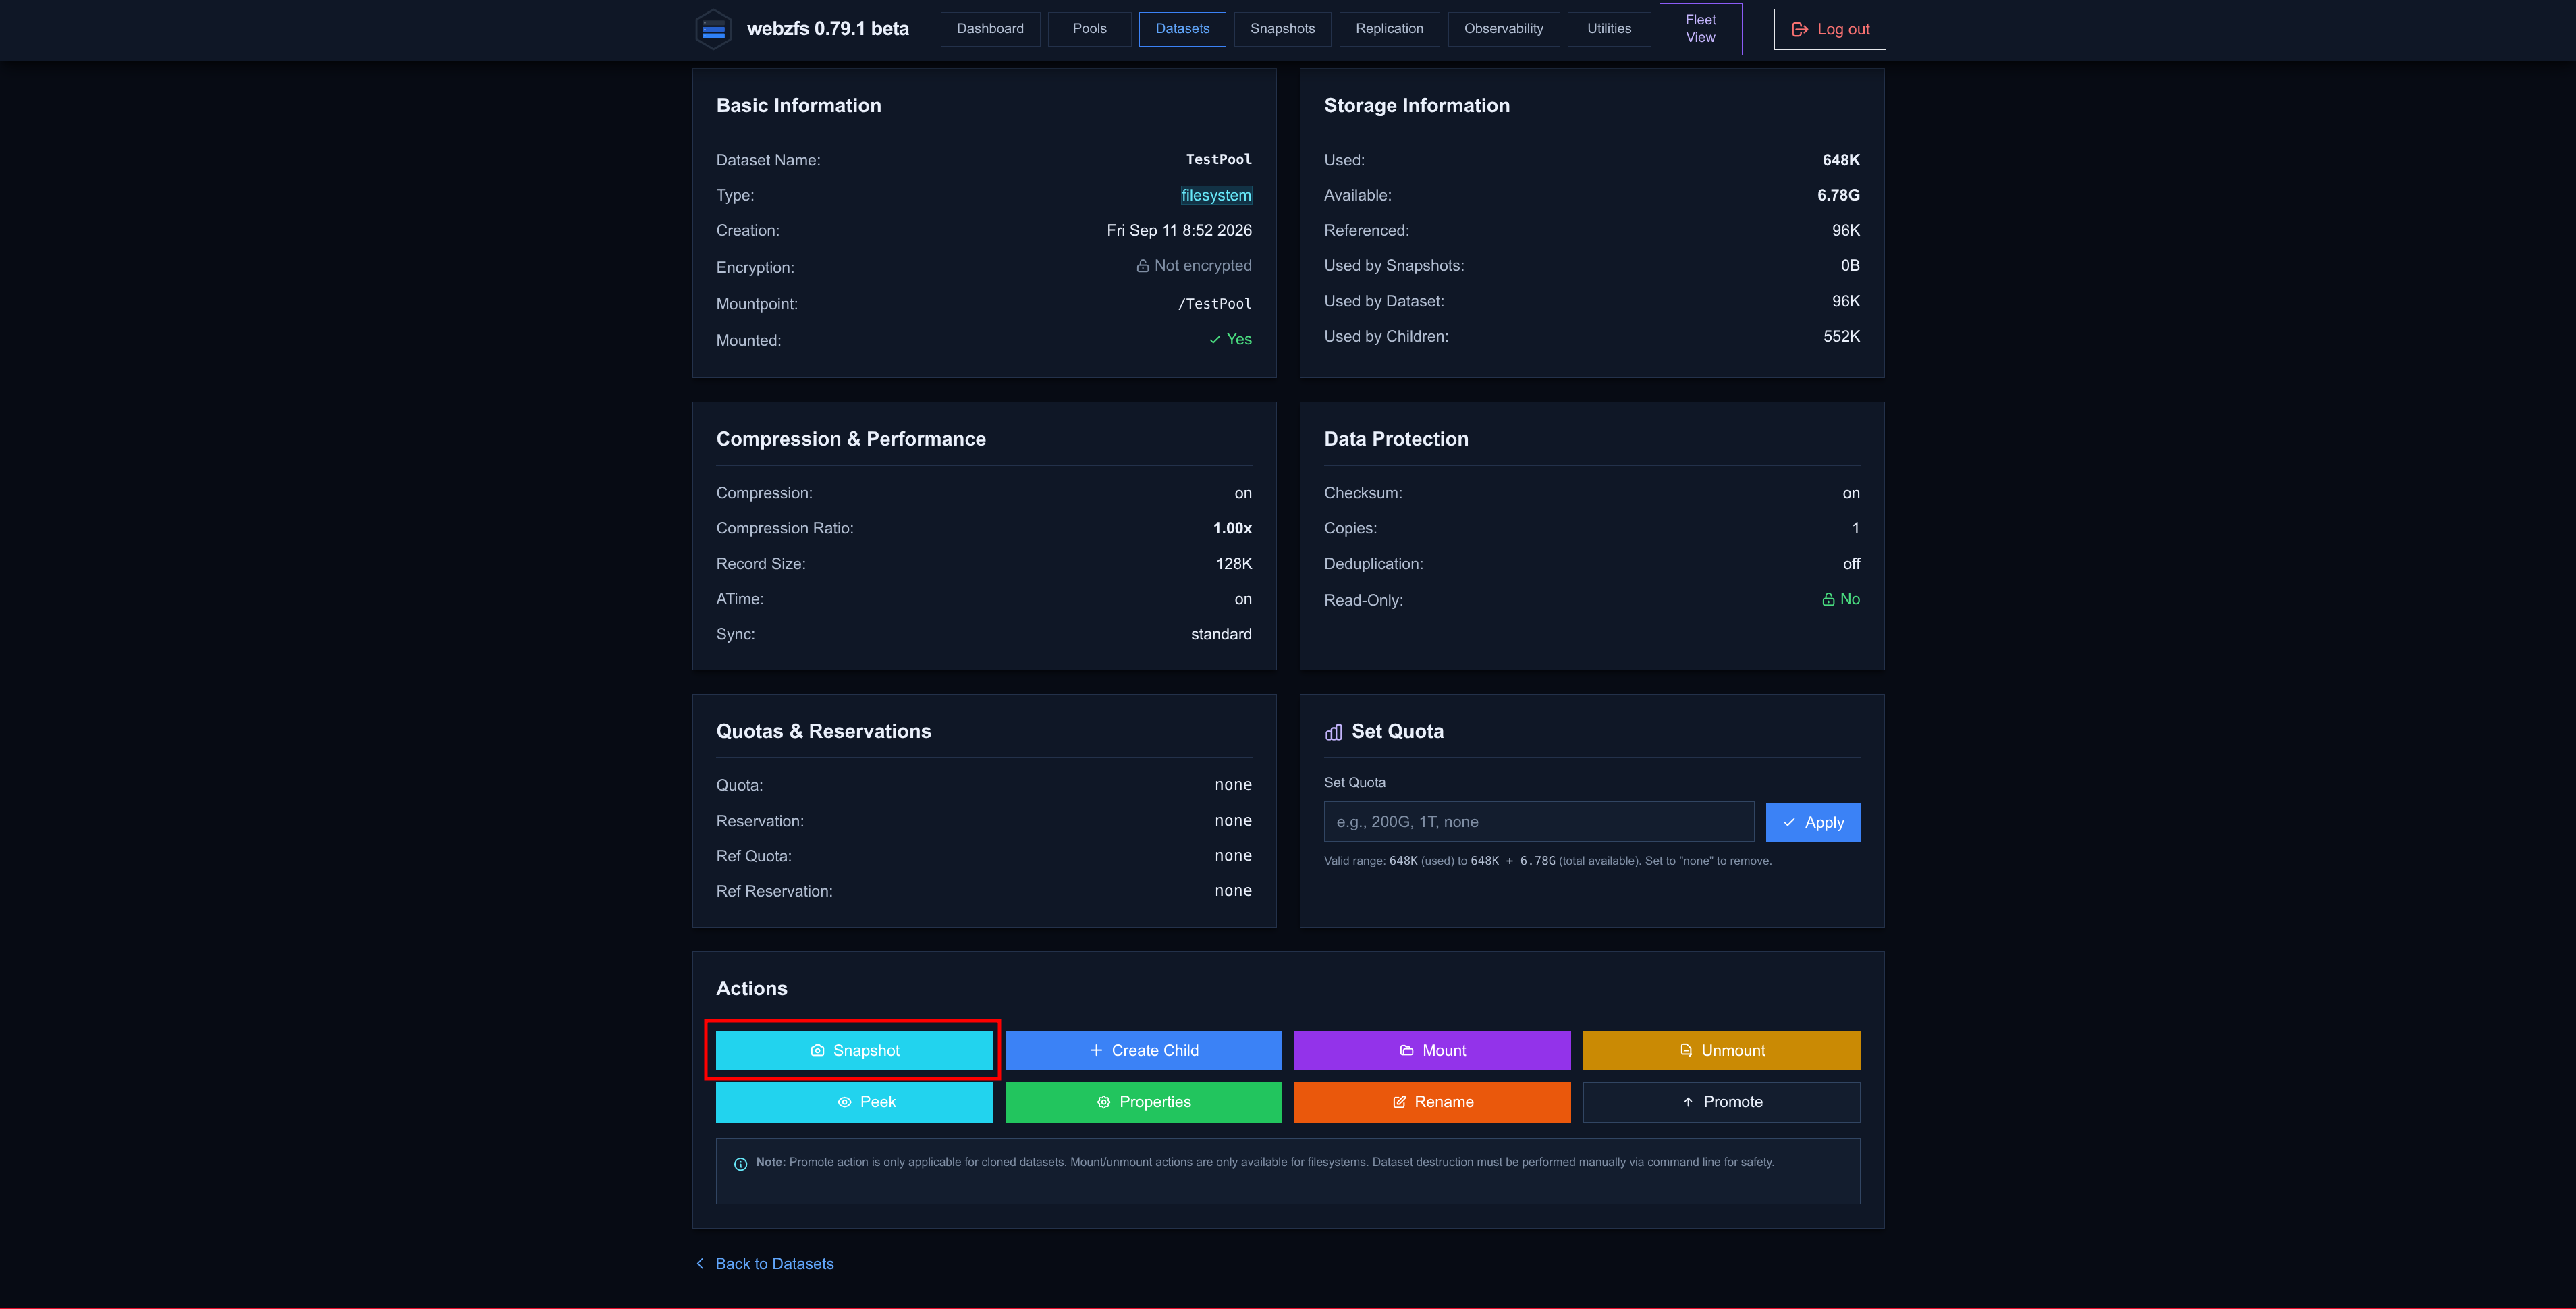
Snapshot:
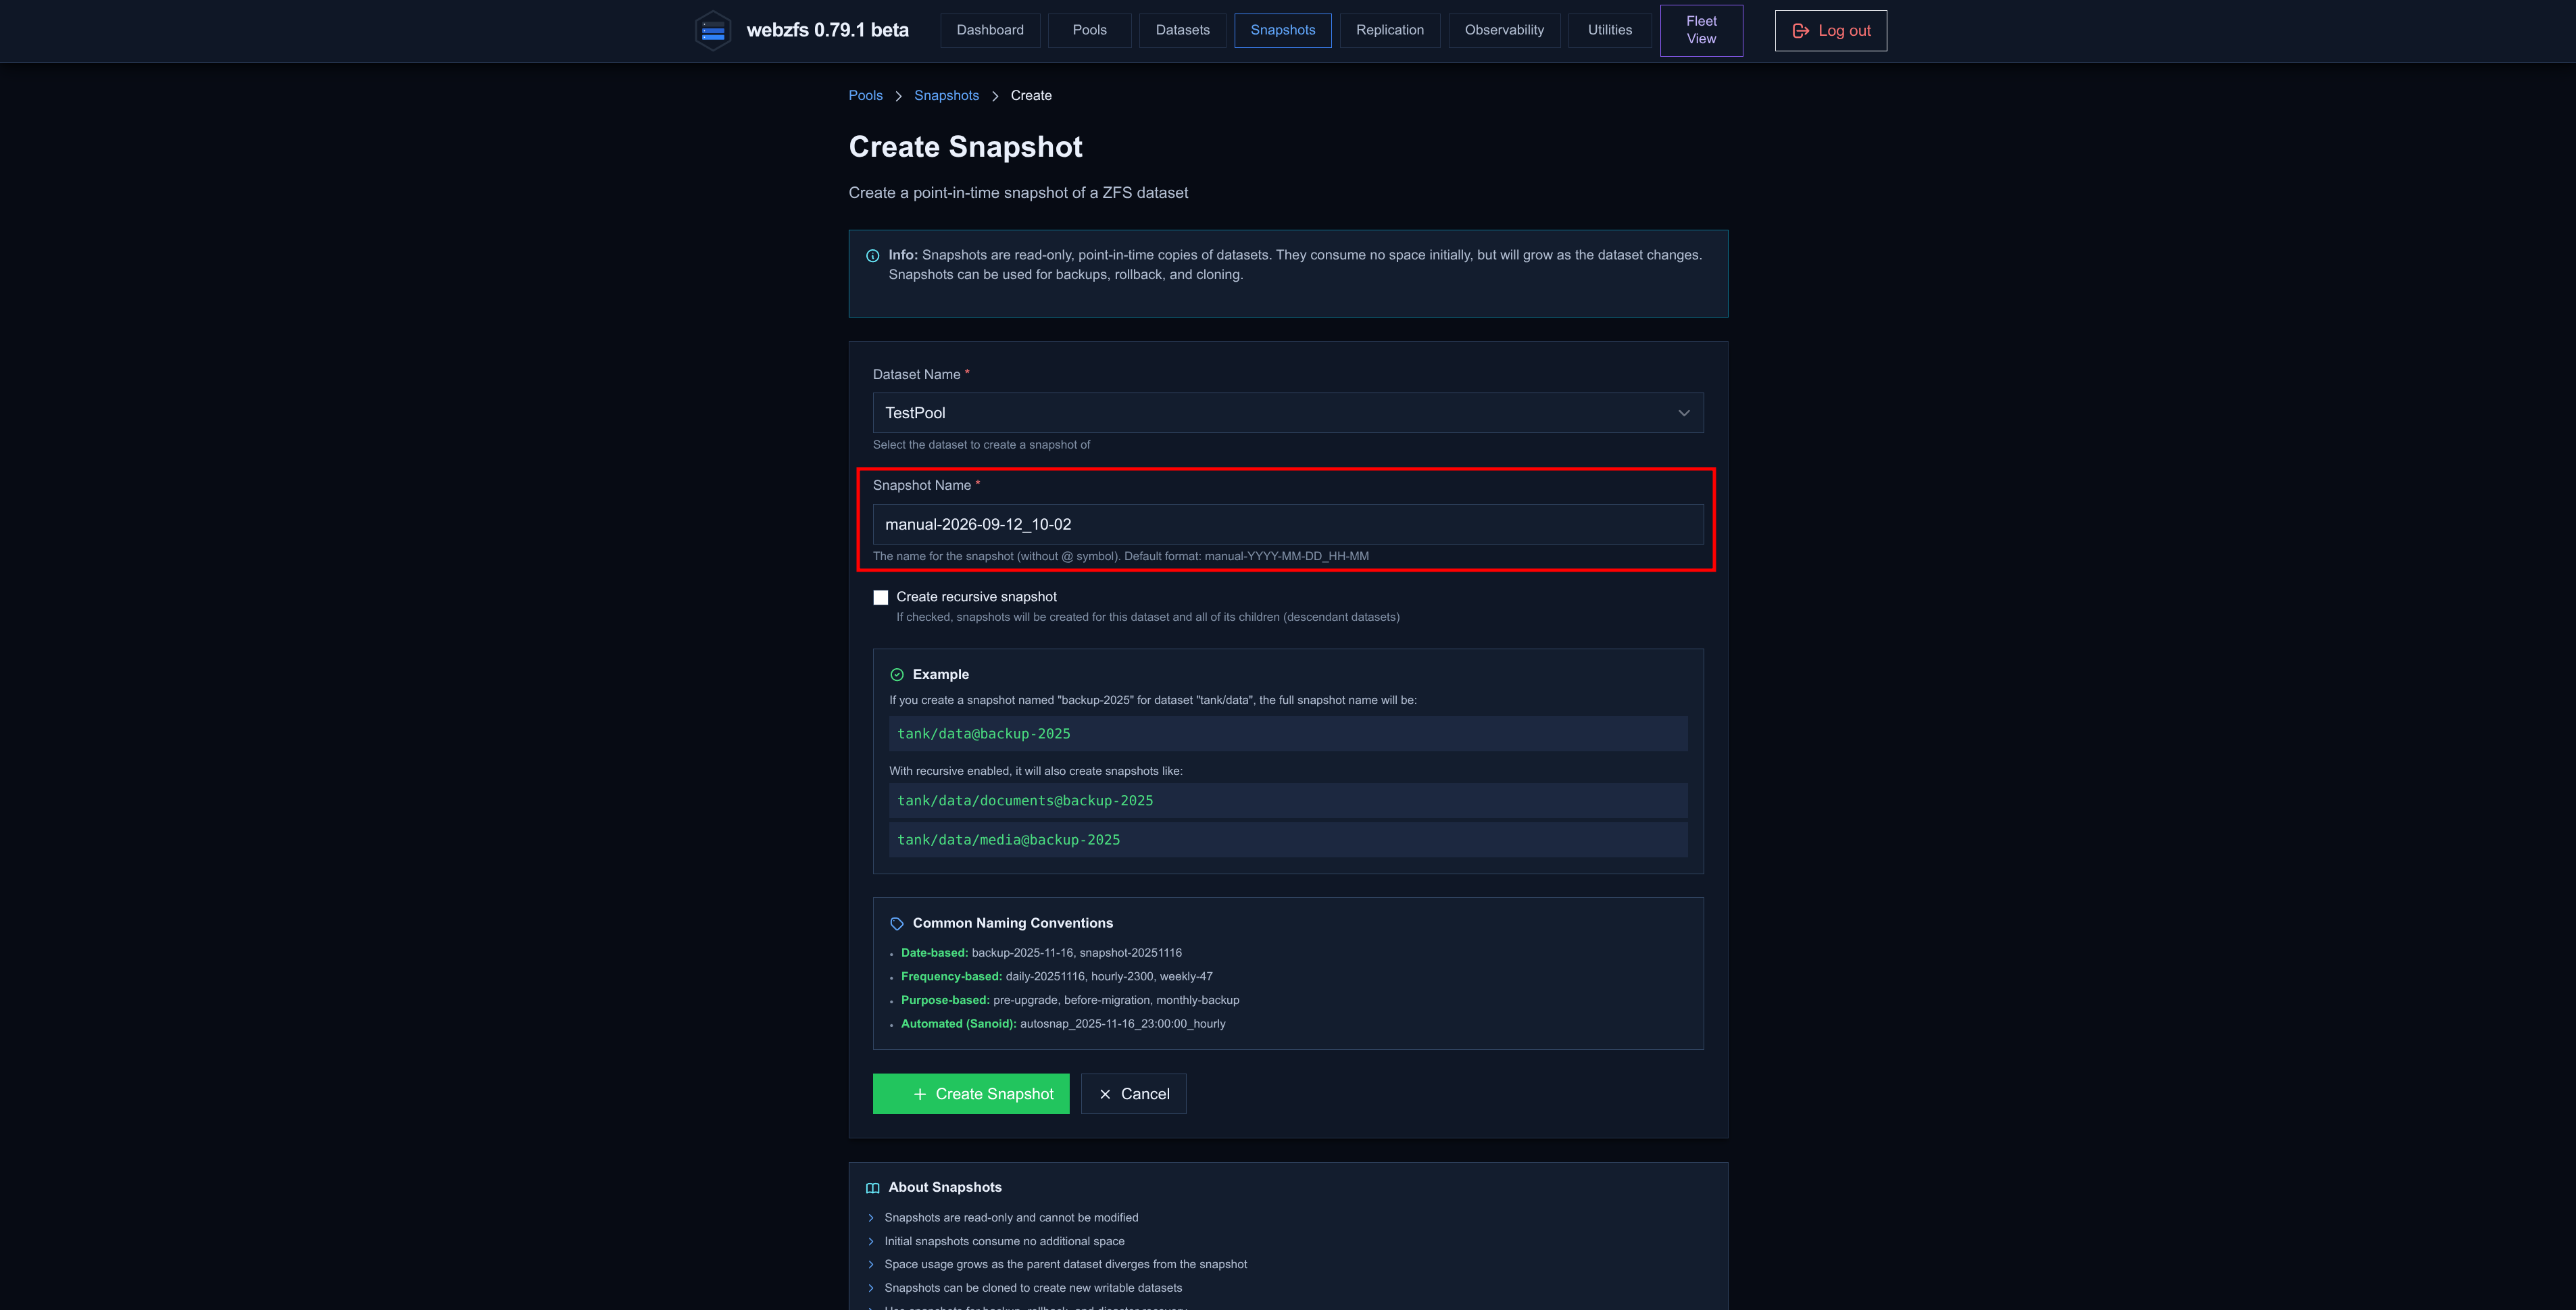
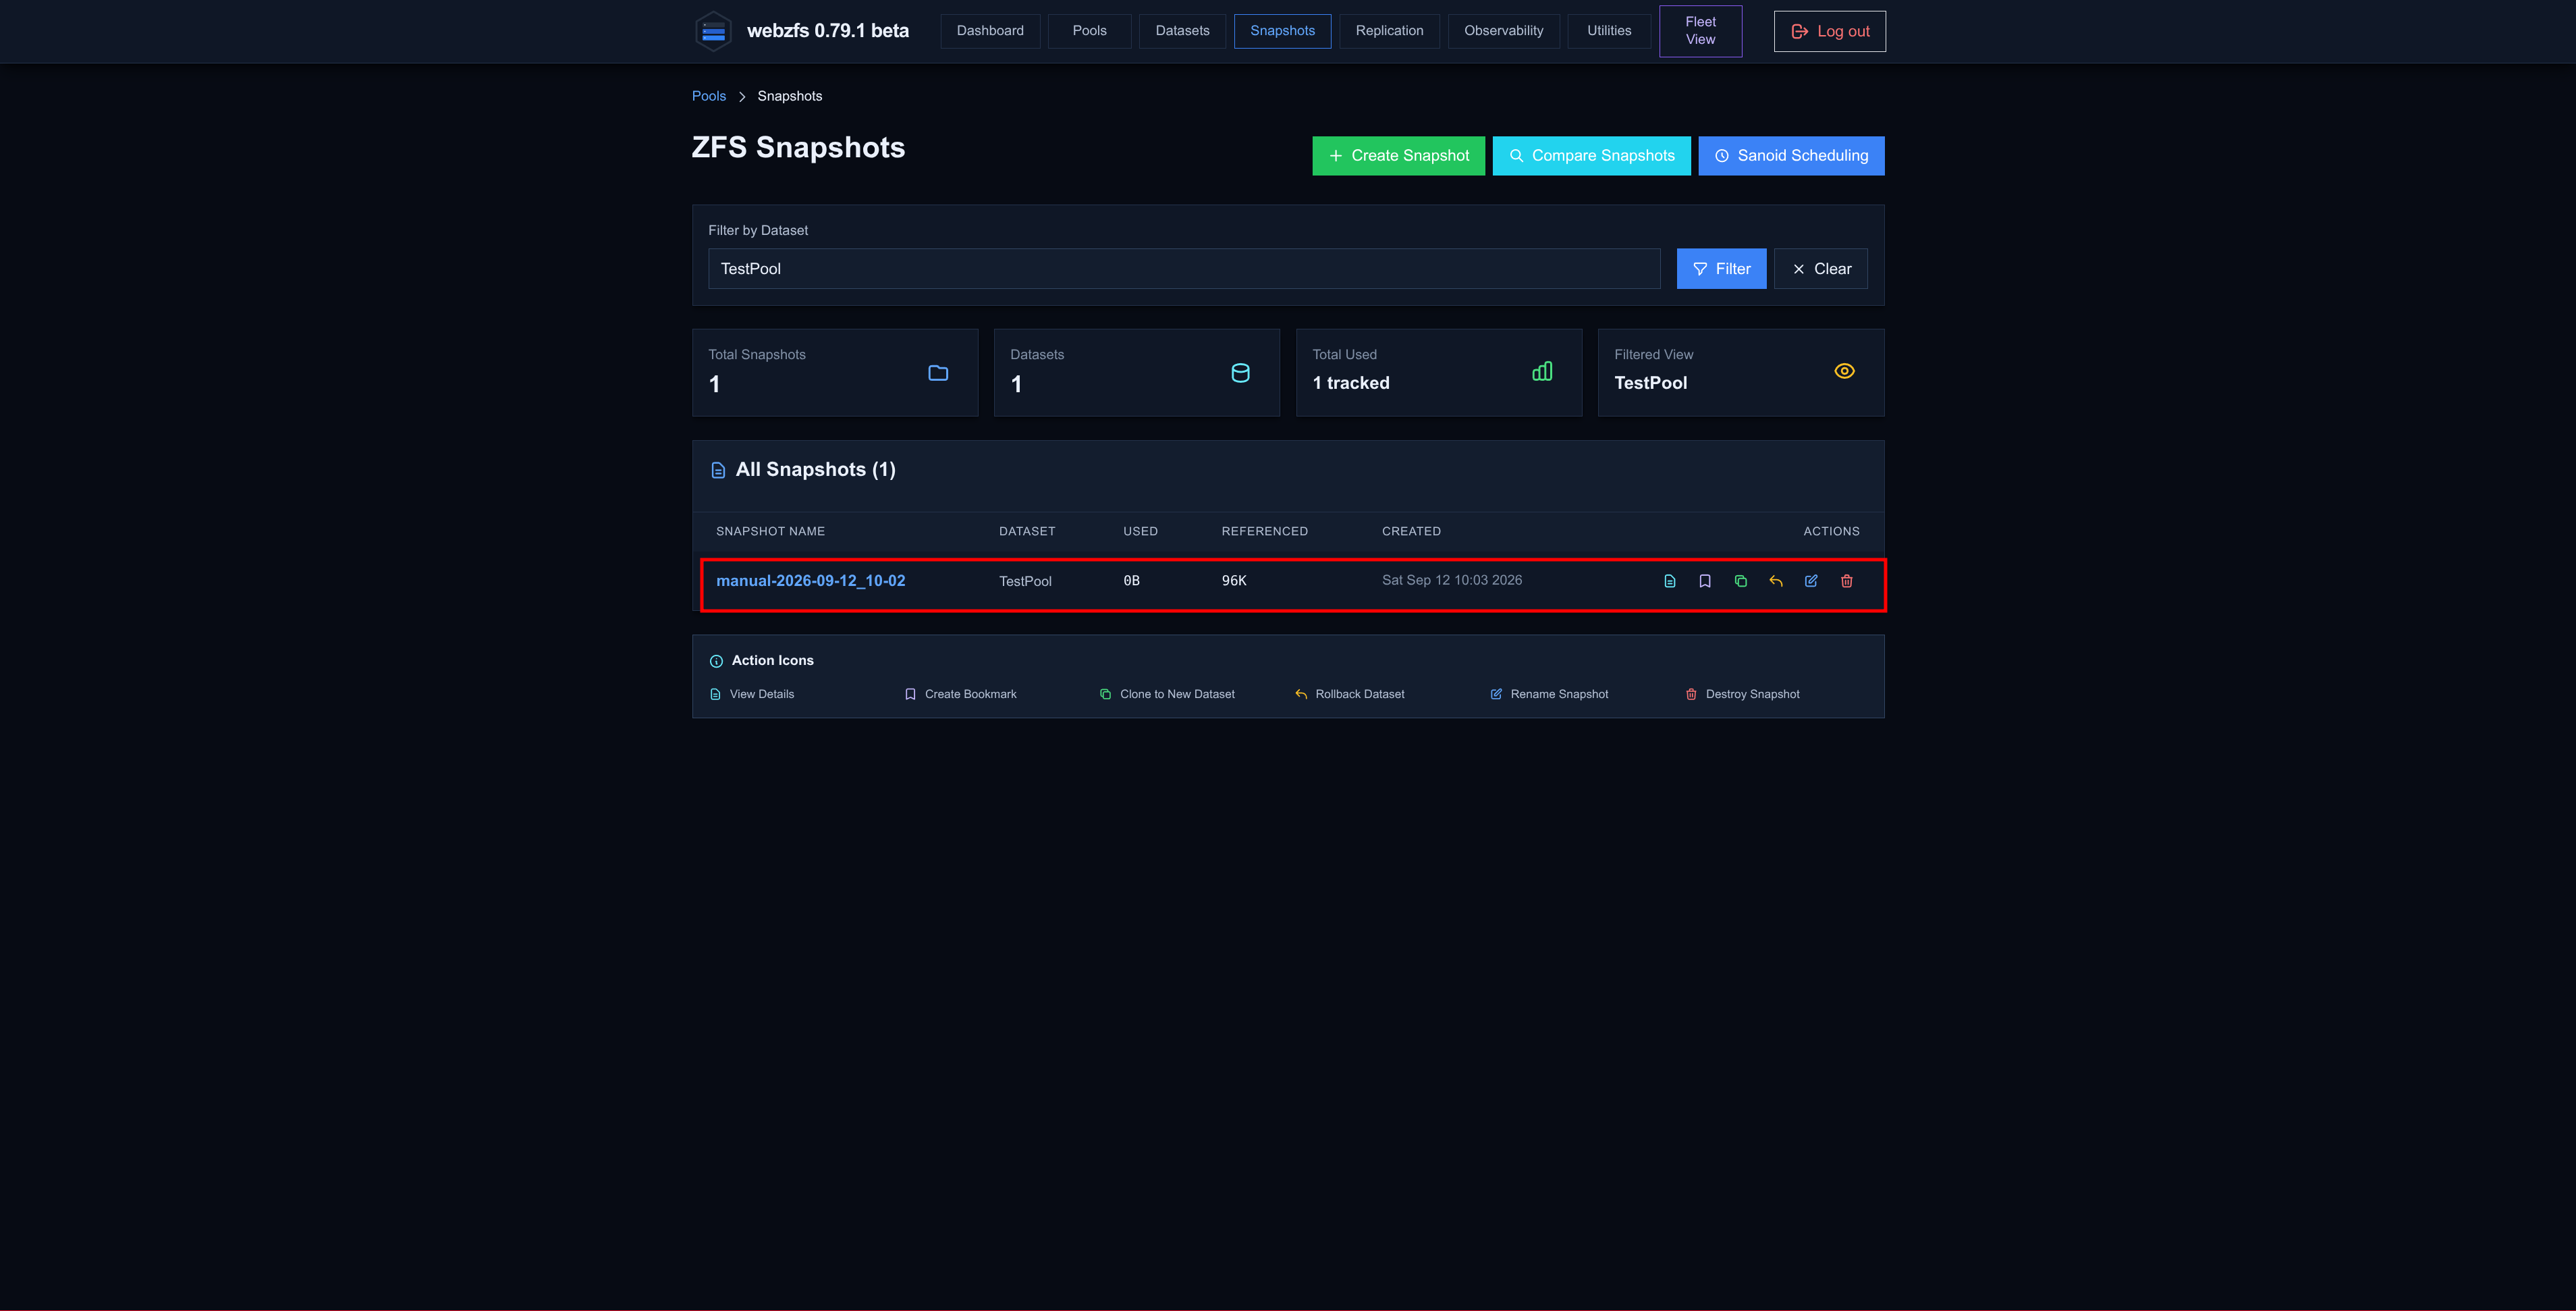
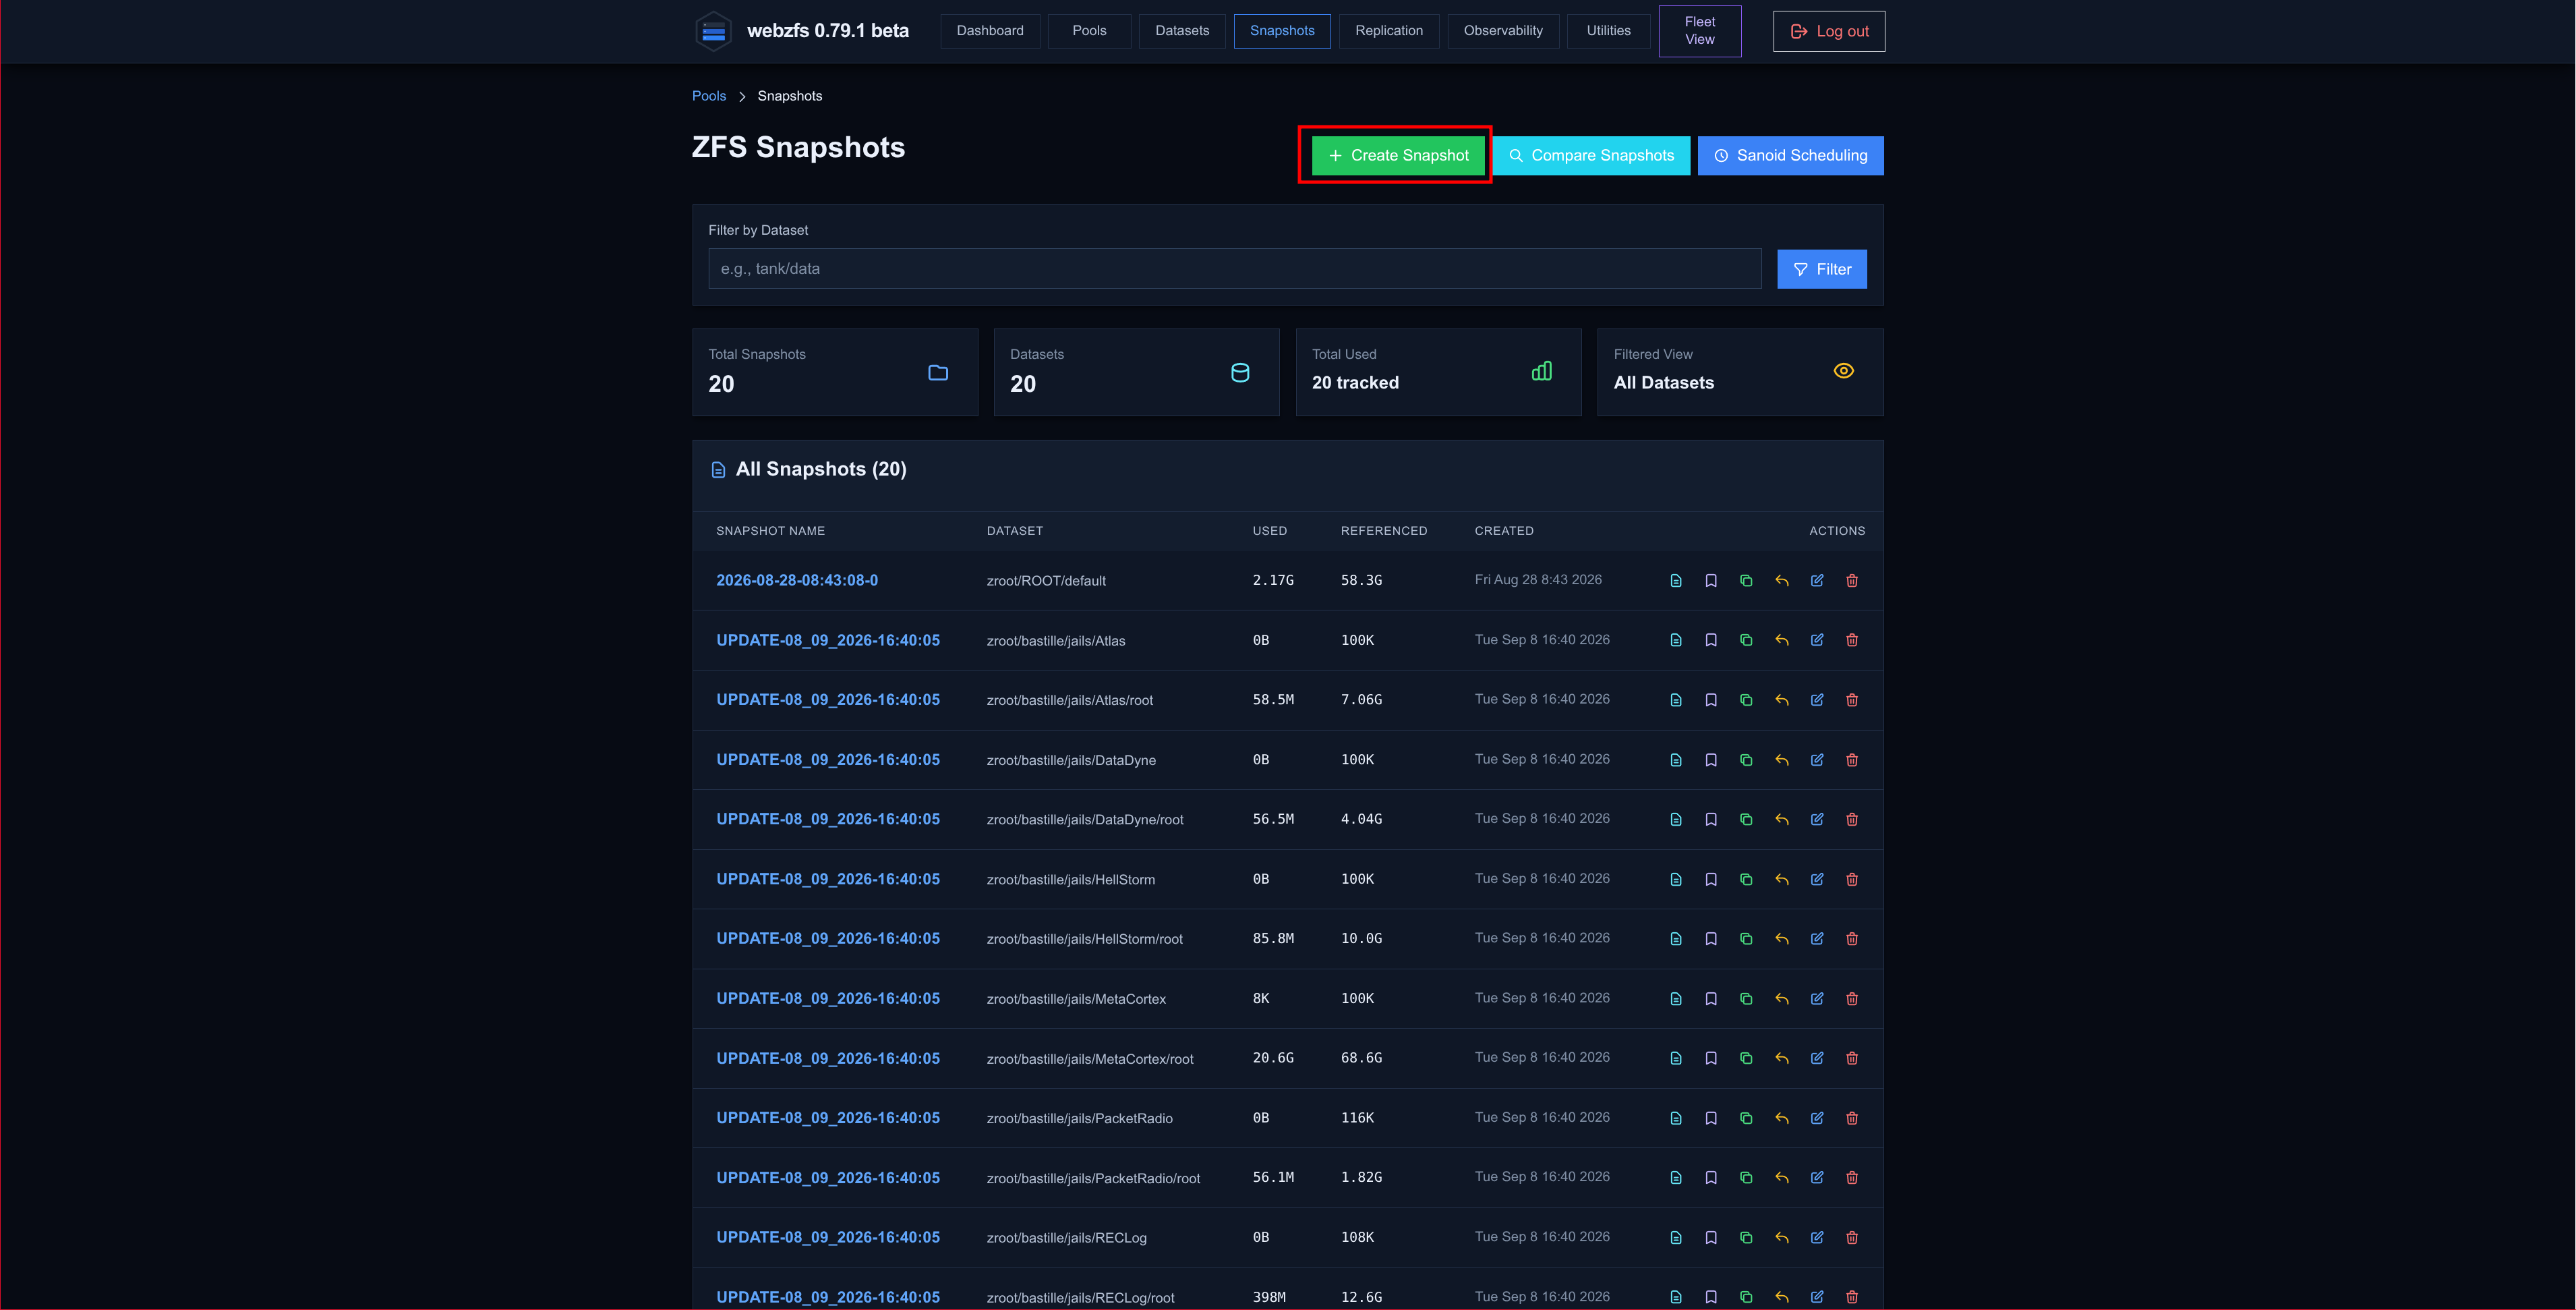
Creating a snapshot of the dataset is as simple as clicking the Snapshot button and giving it a name:
|
|
|
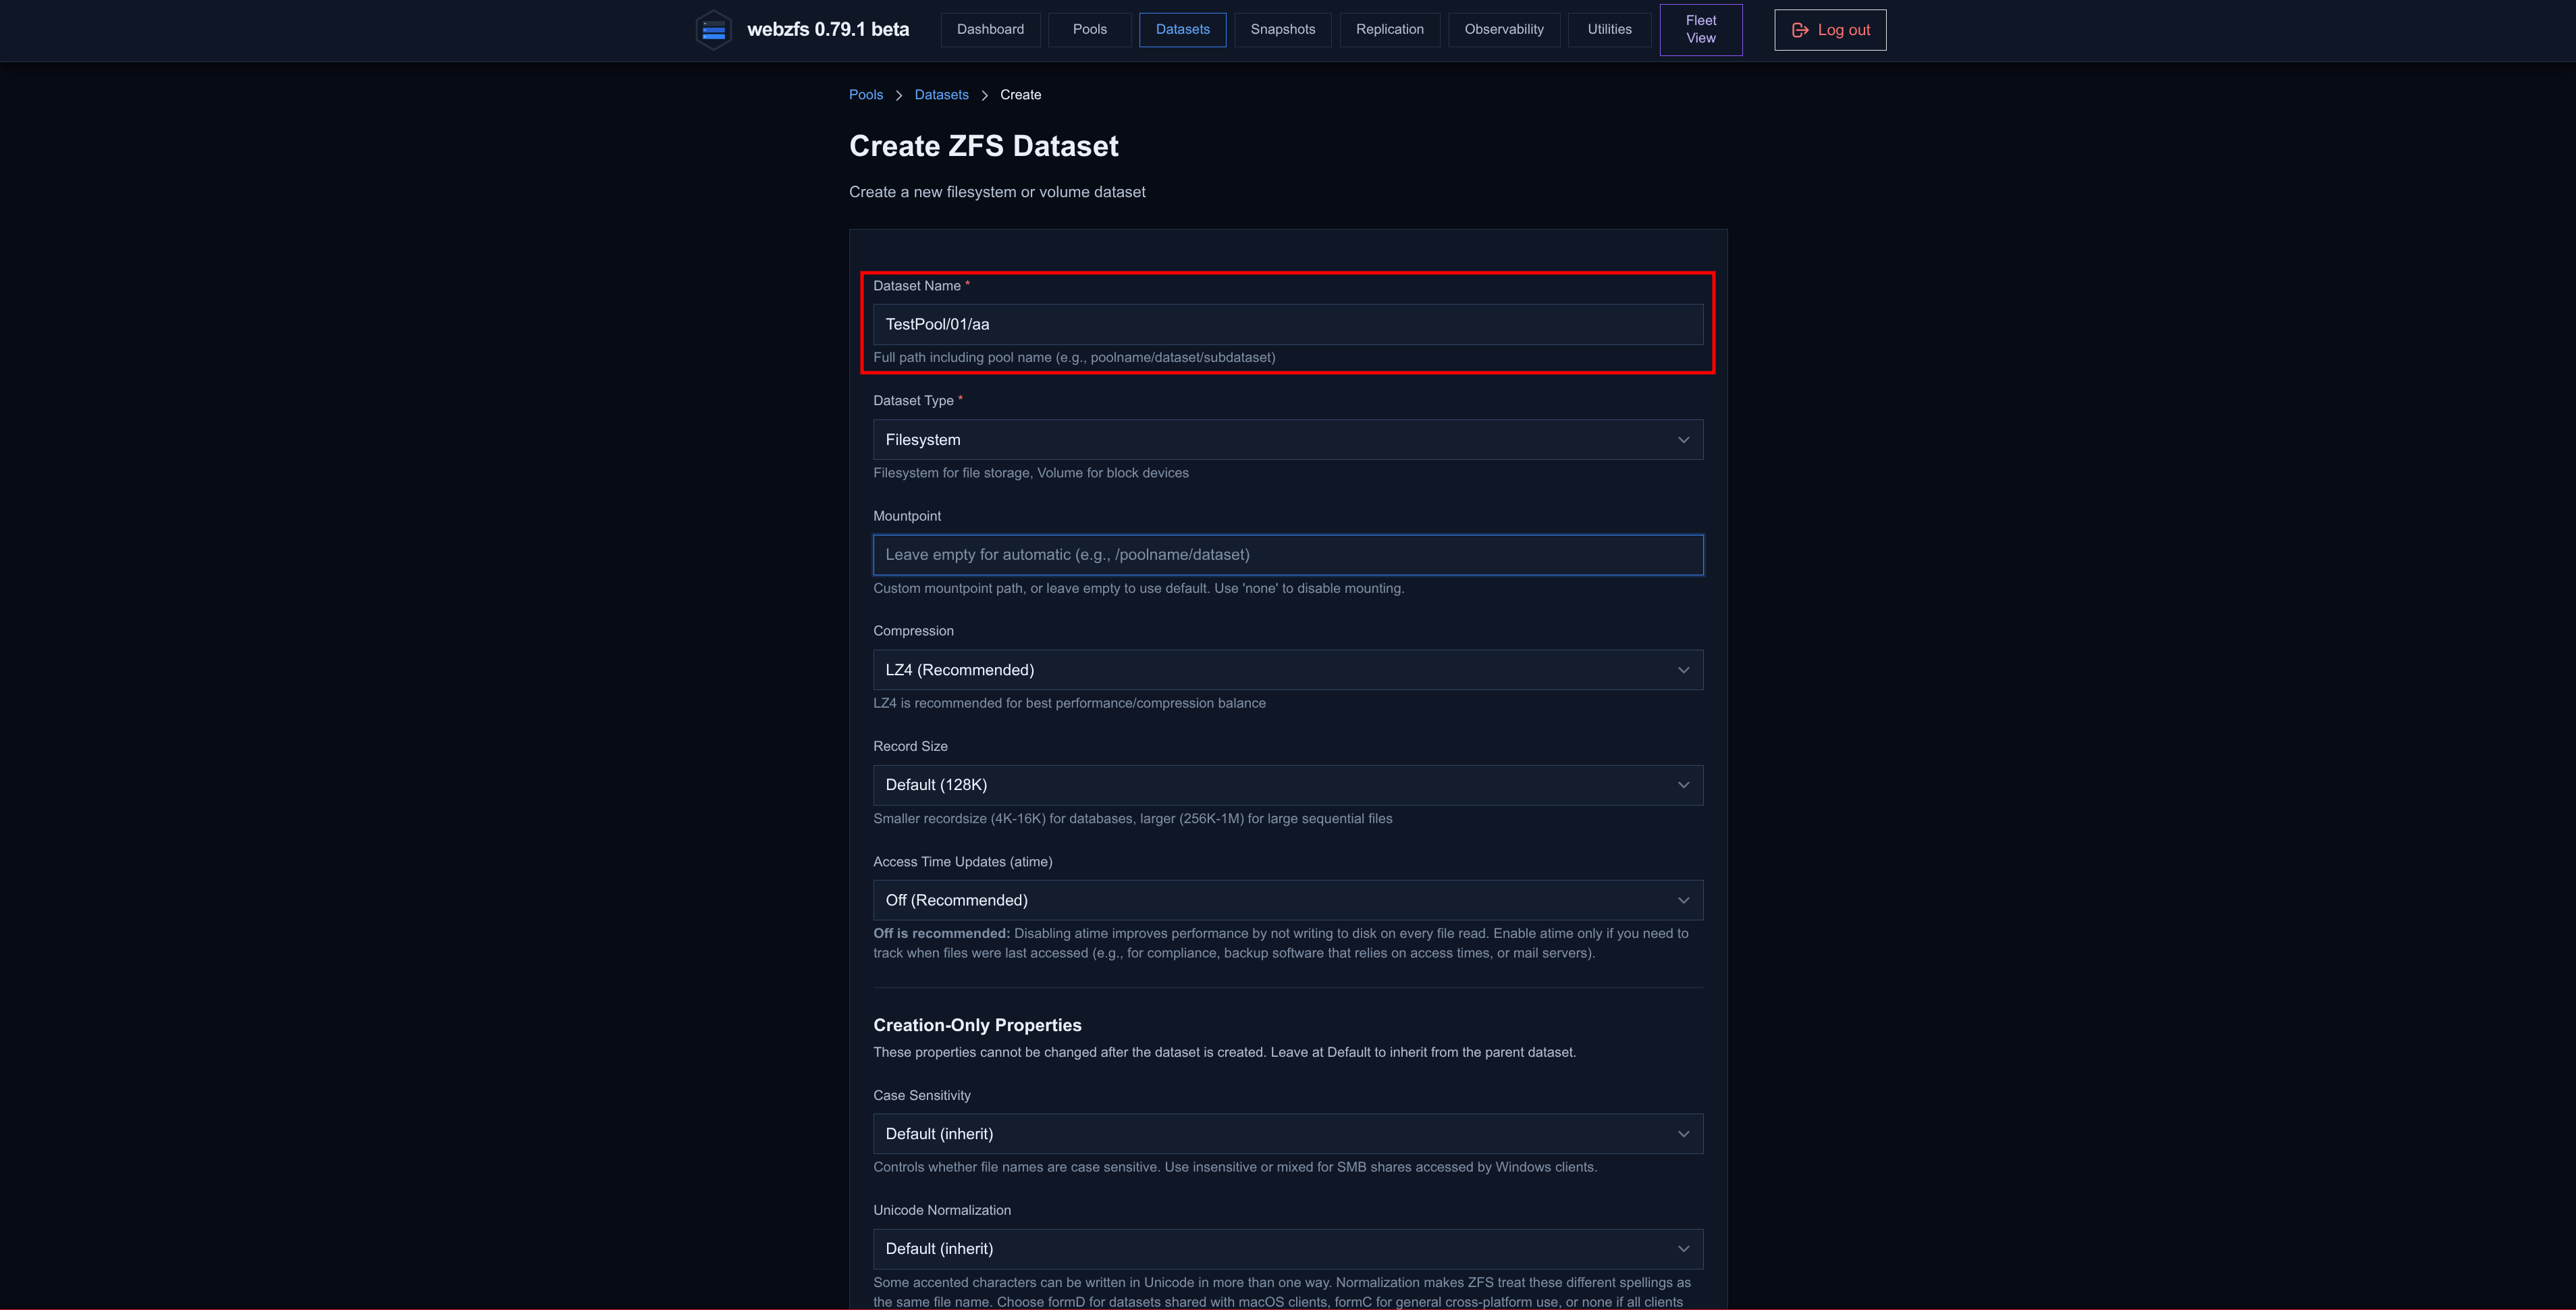
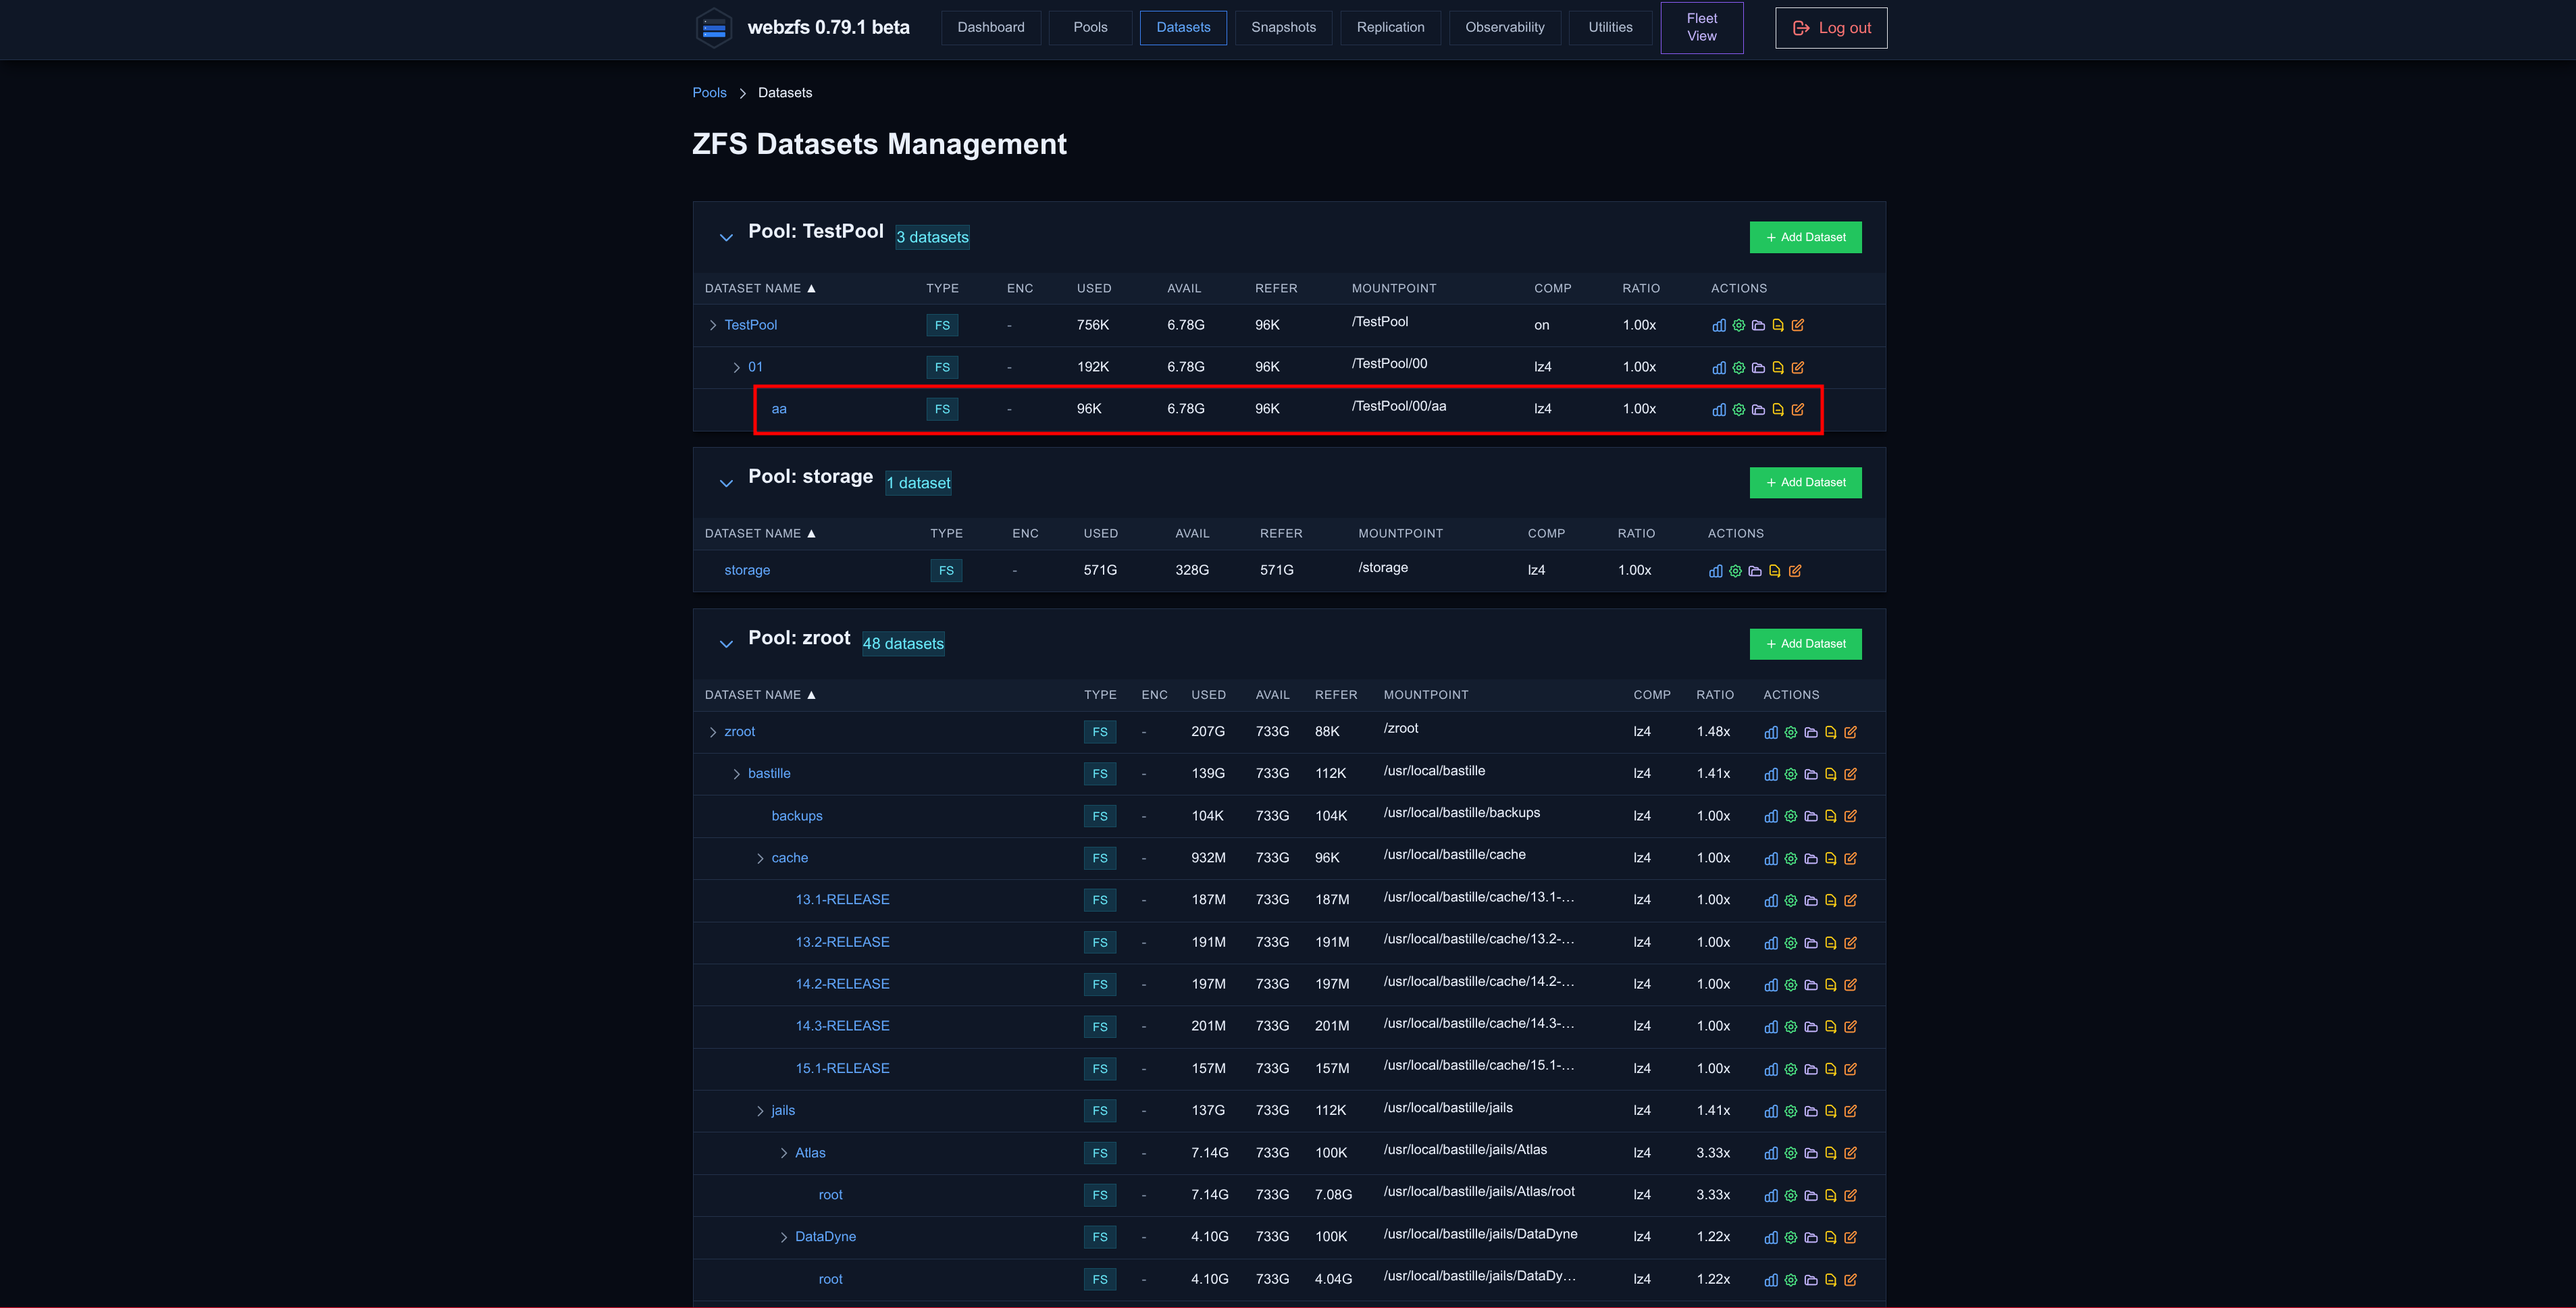
Create Child:
It is the same as creating a new dataset except that it lets you specify the path without any depth limit.
|
|
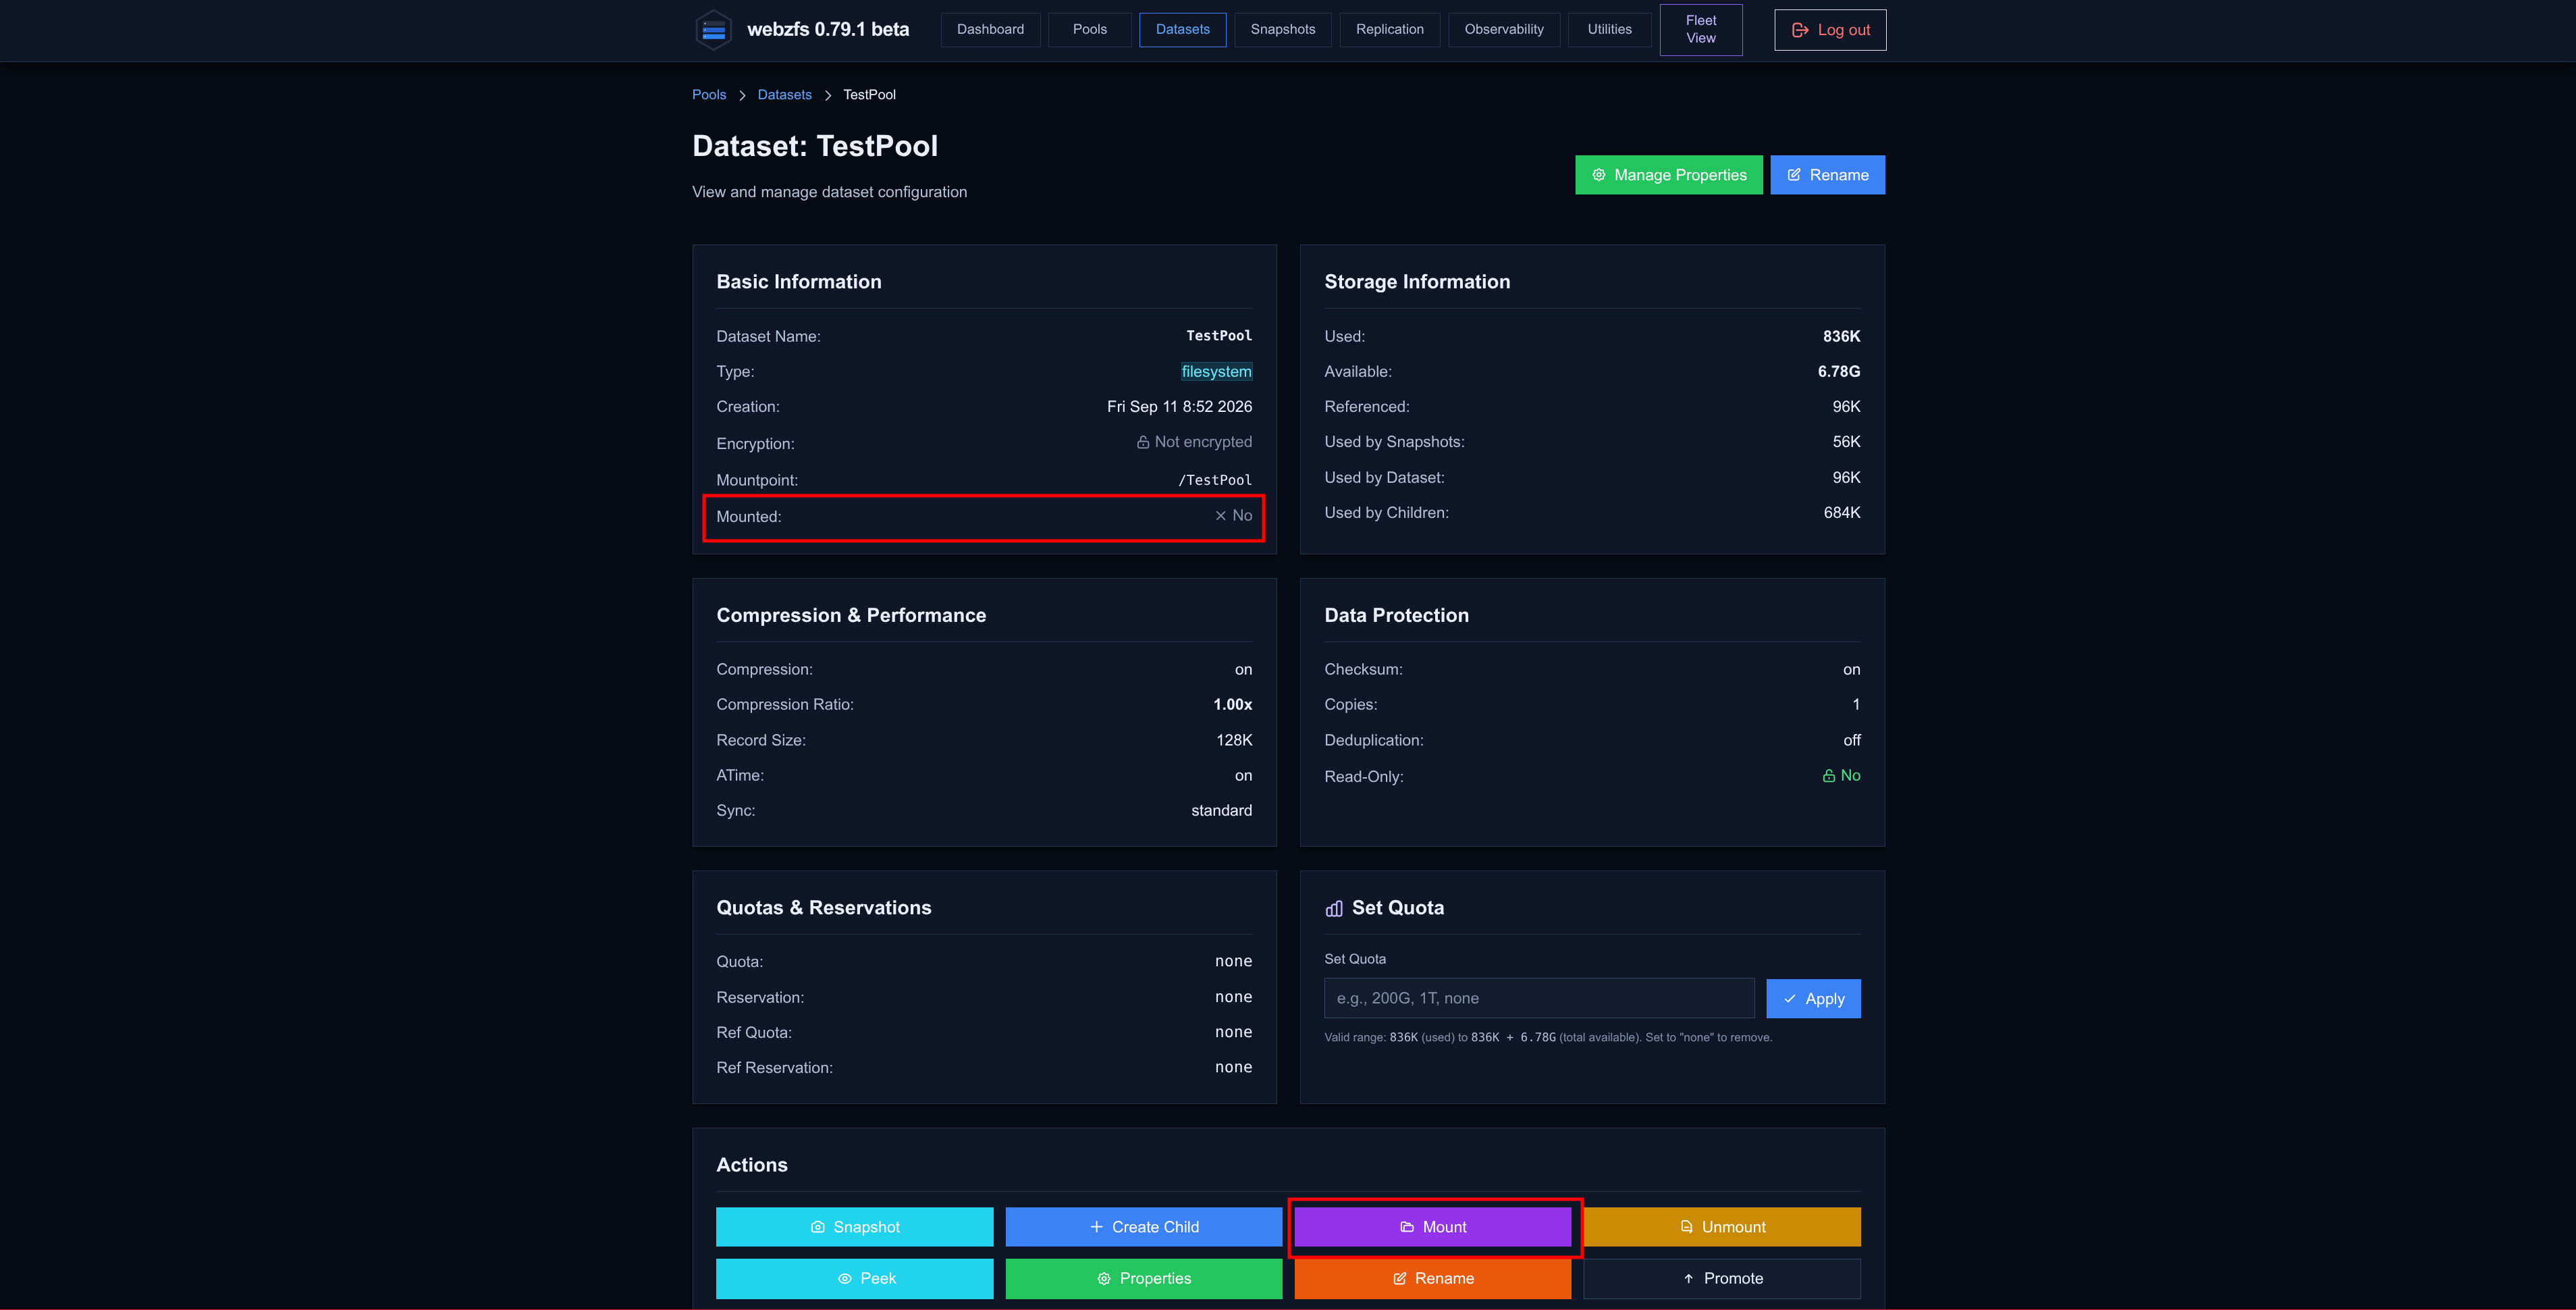
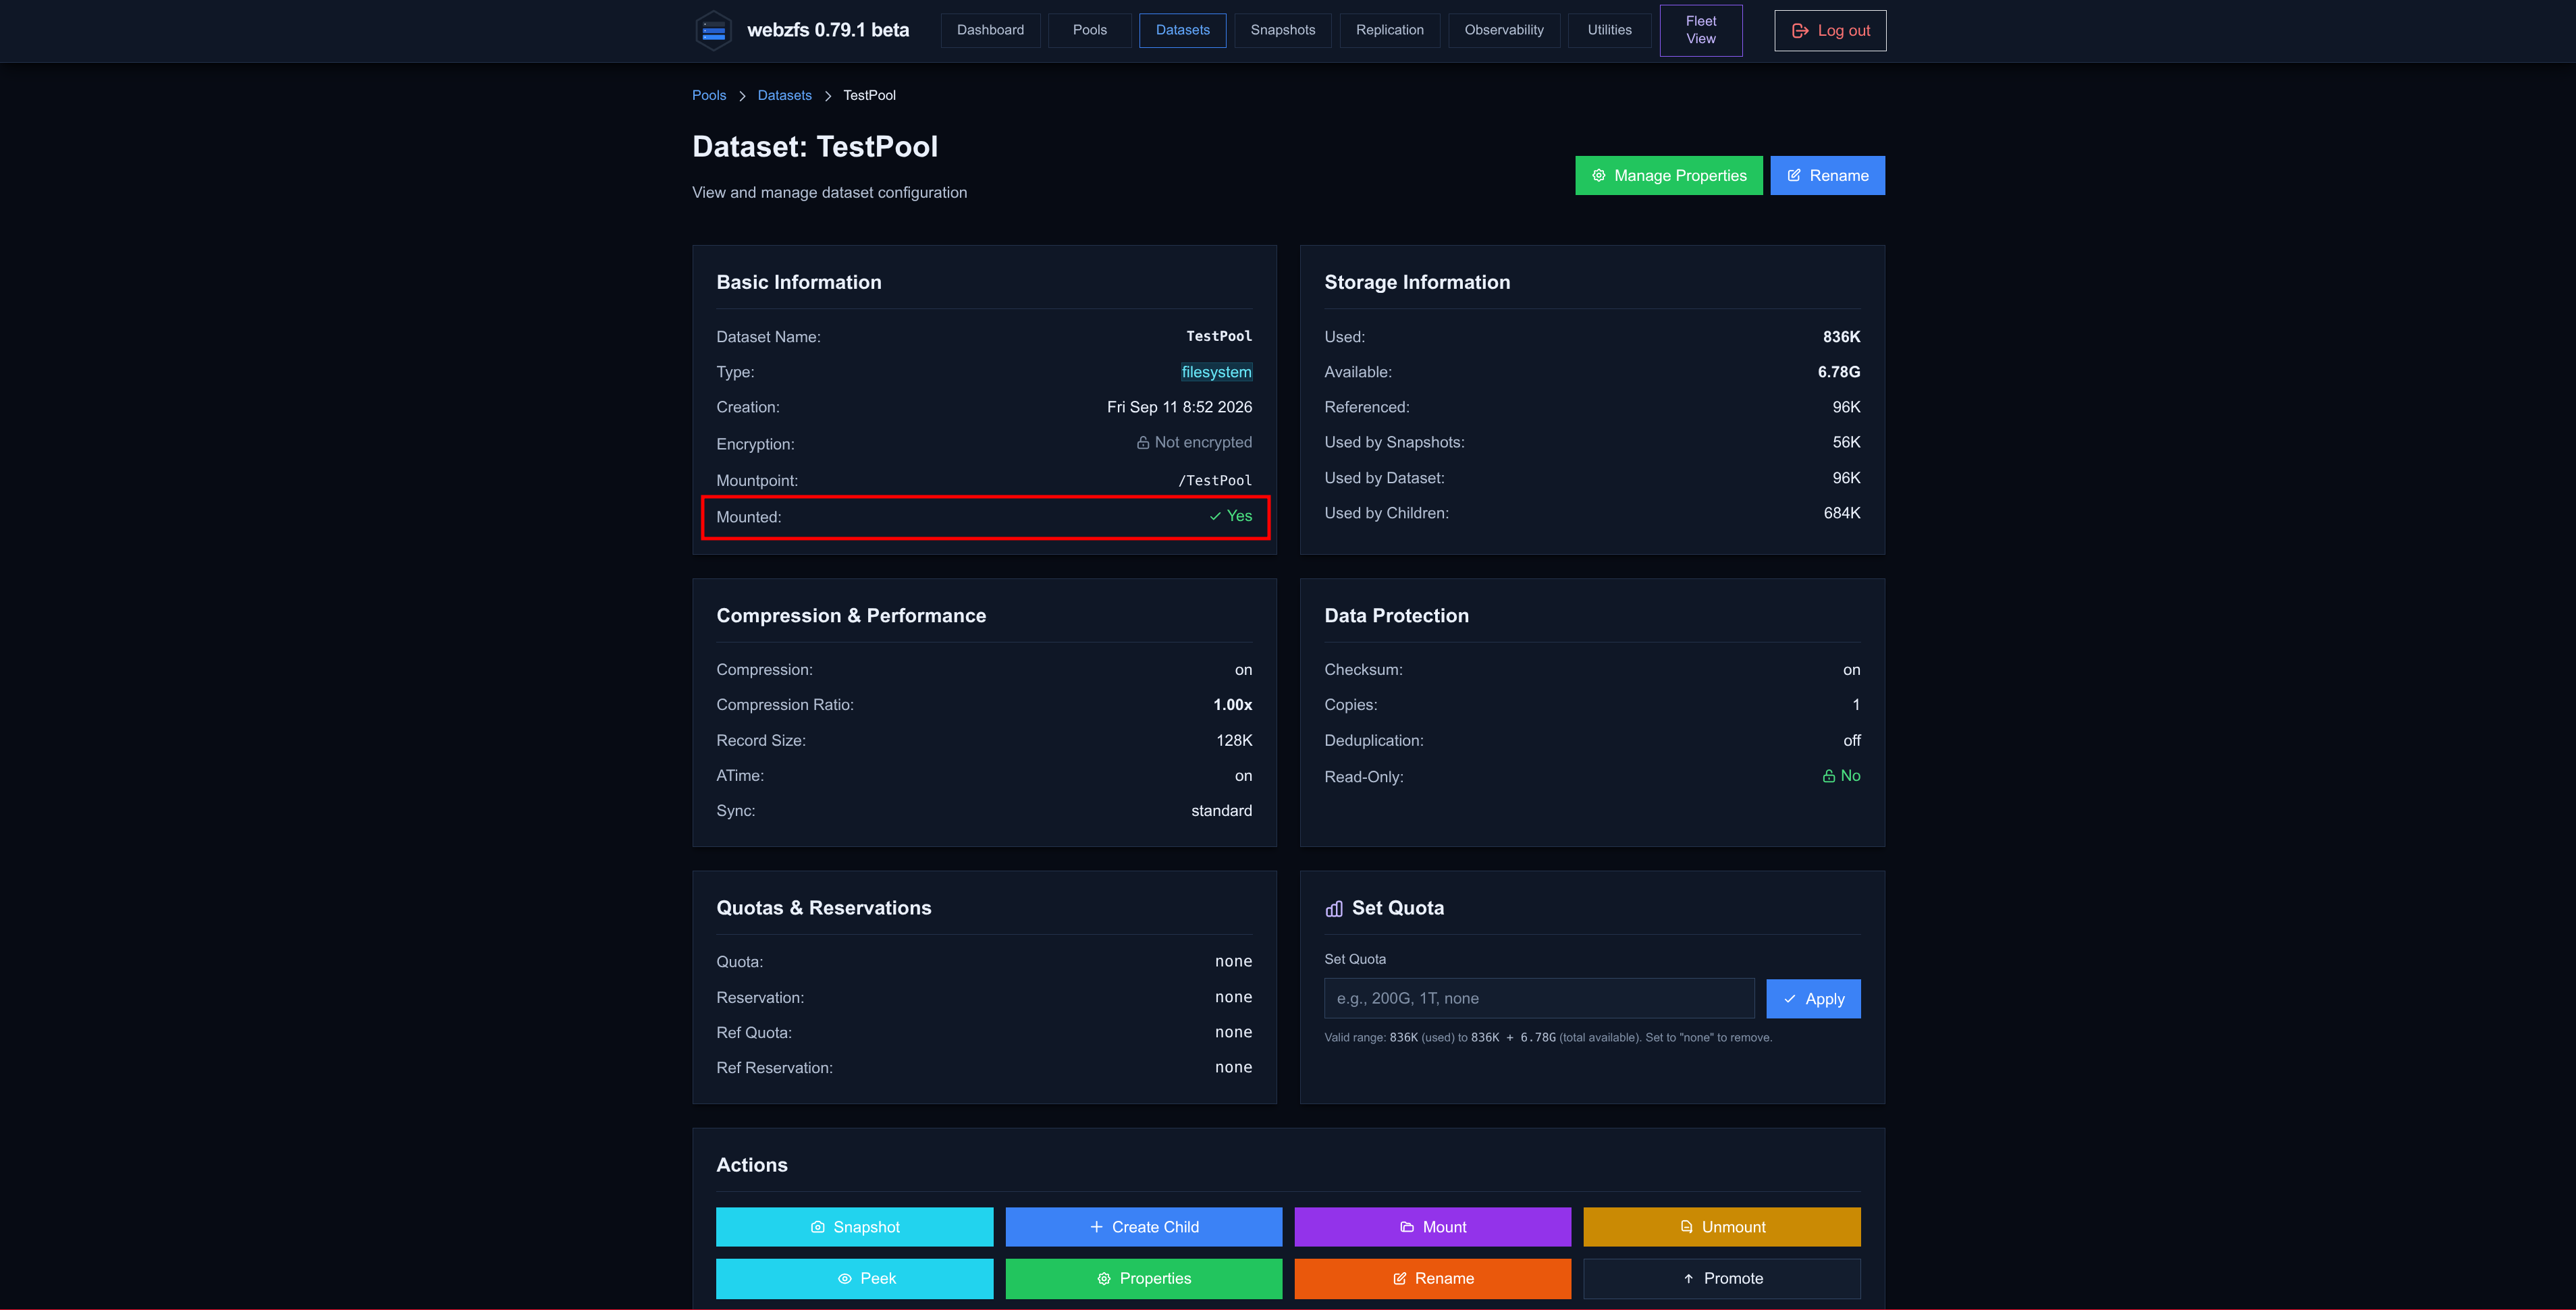
Mount:
As its name suggests, it lets you mount the dataset:
|
|
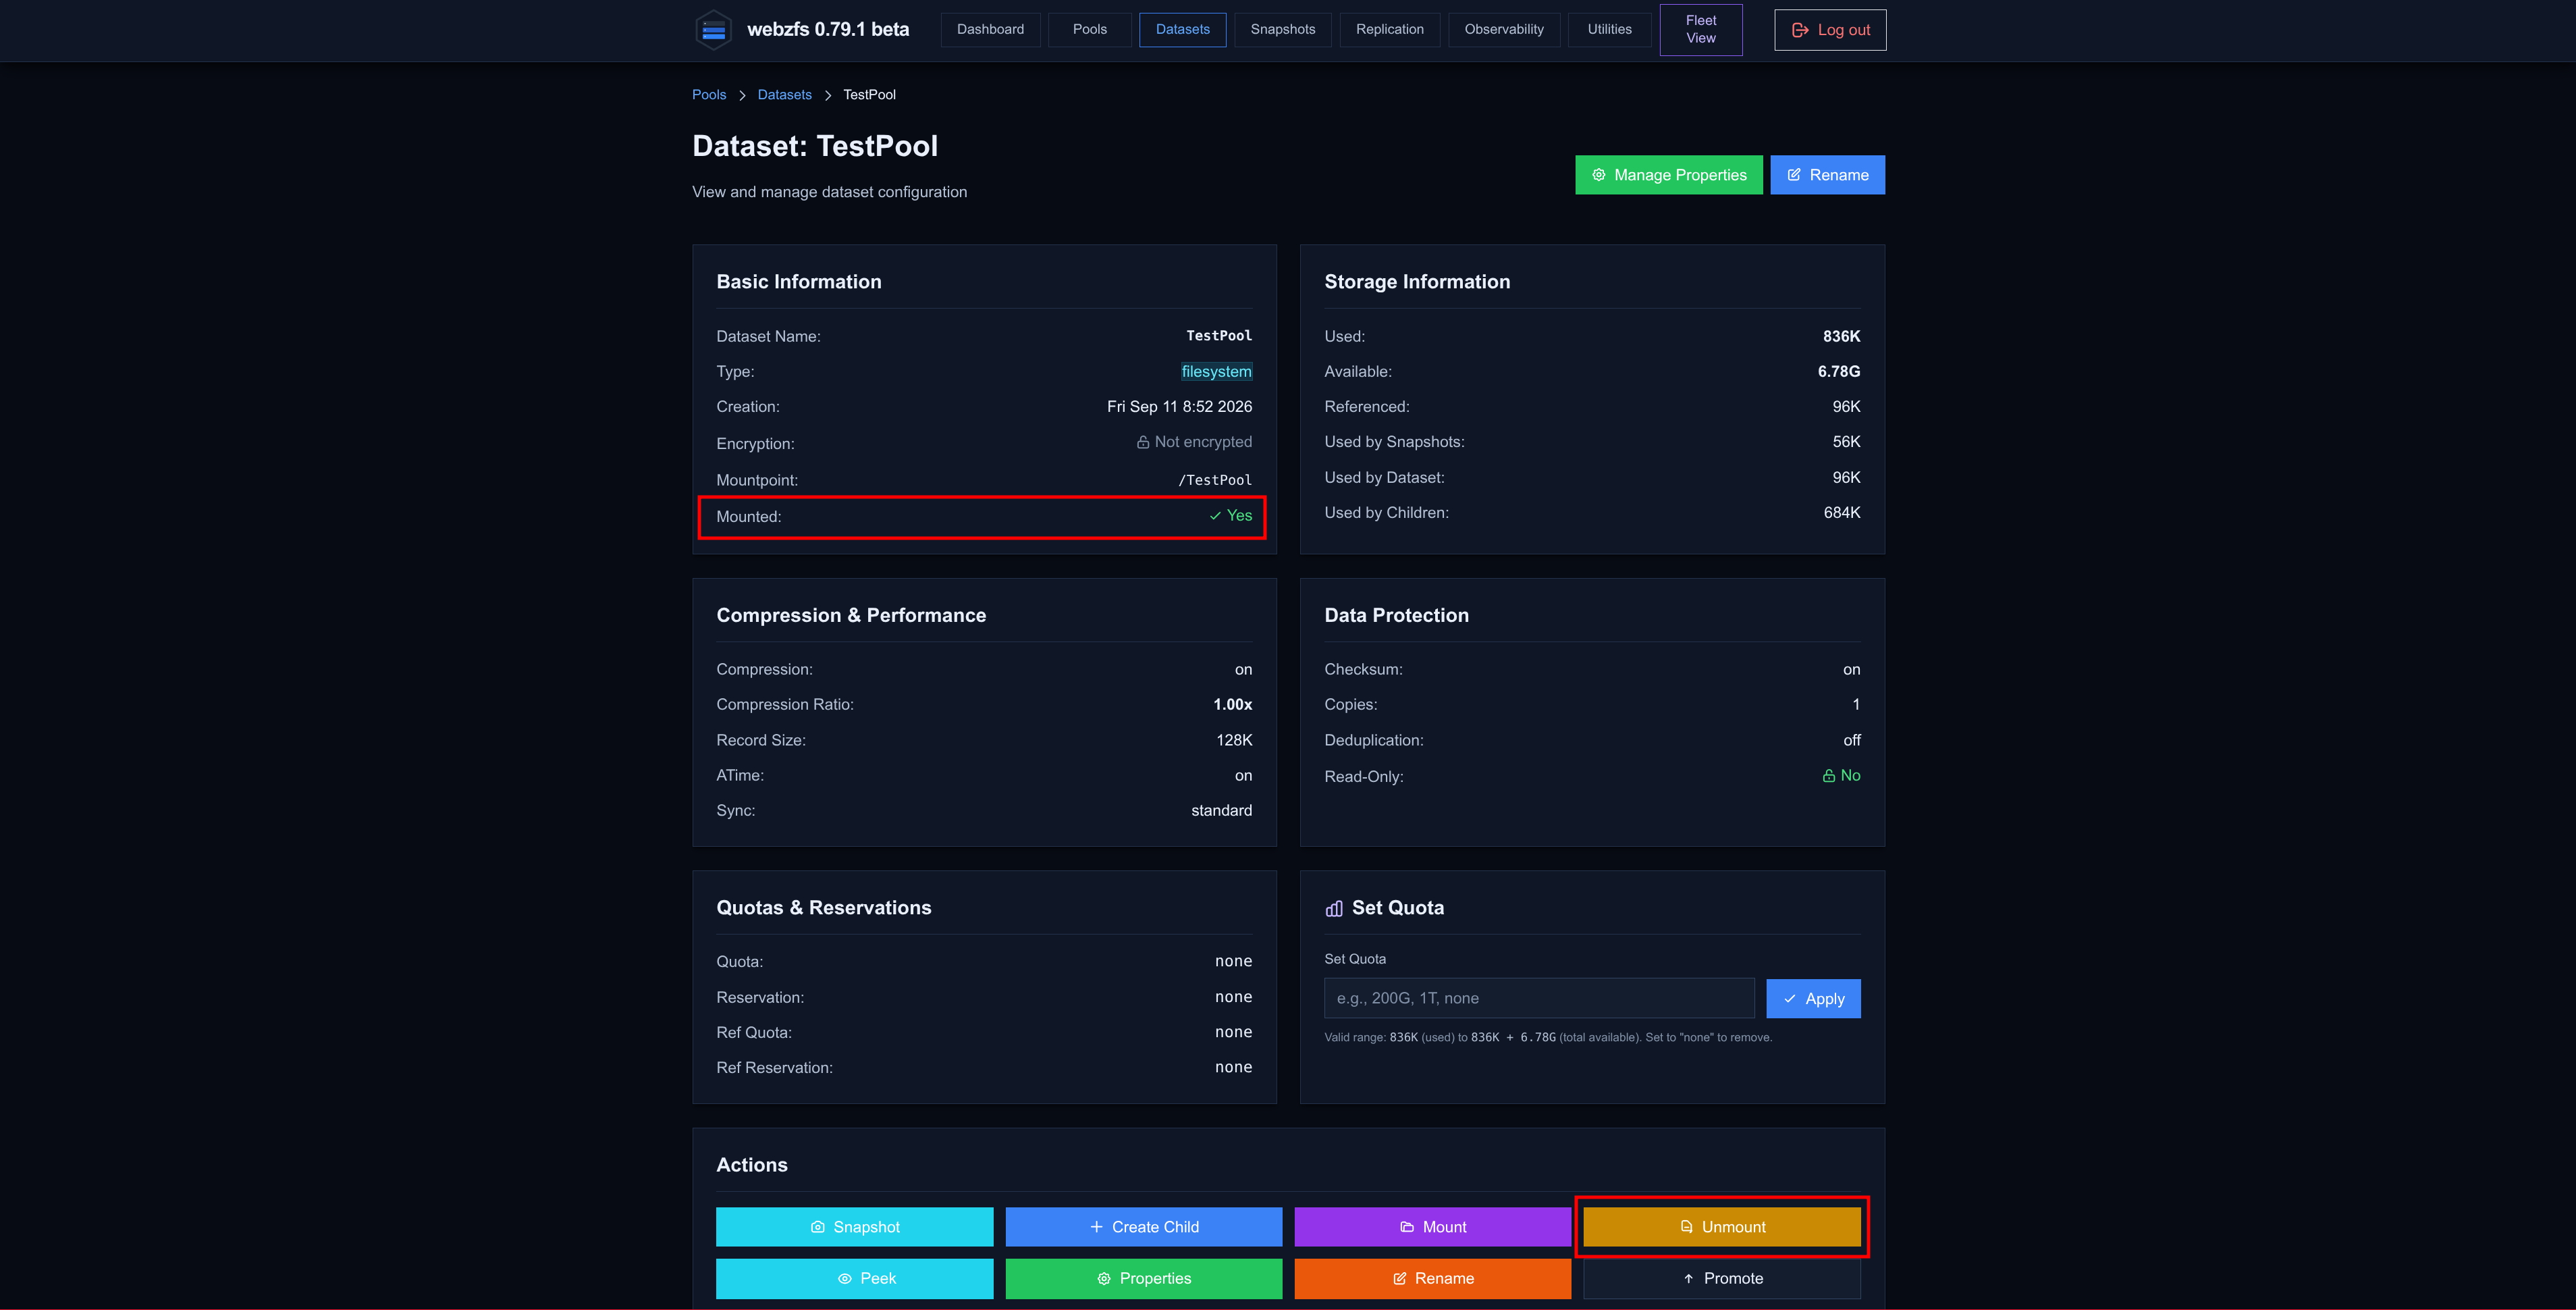
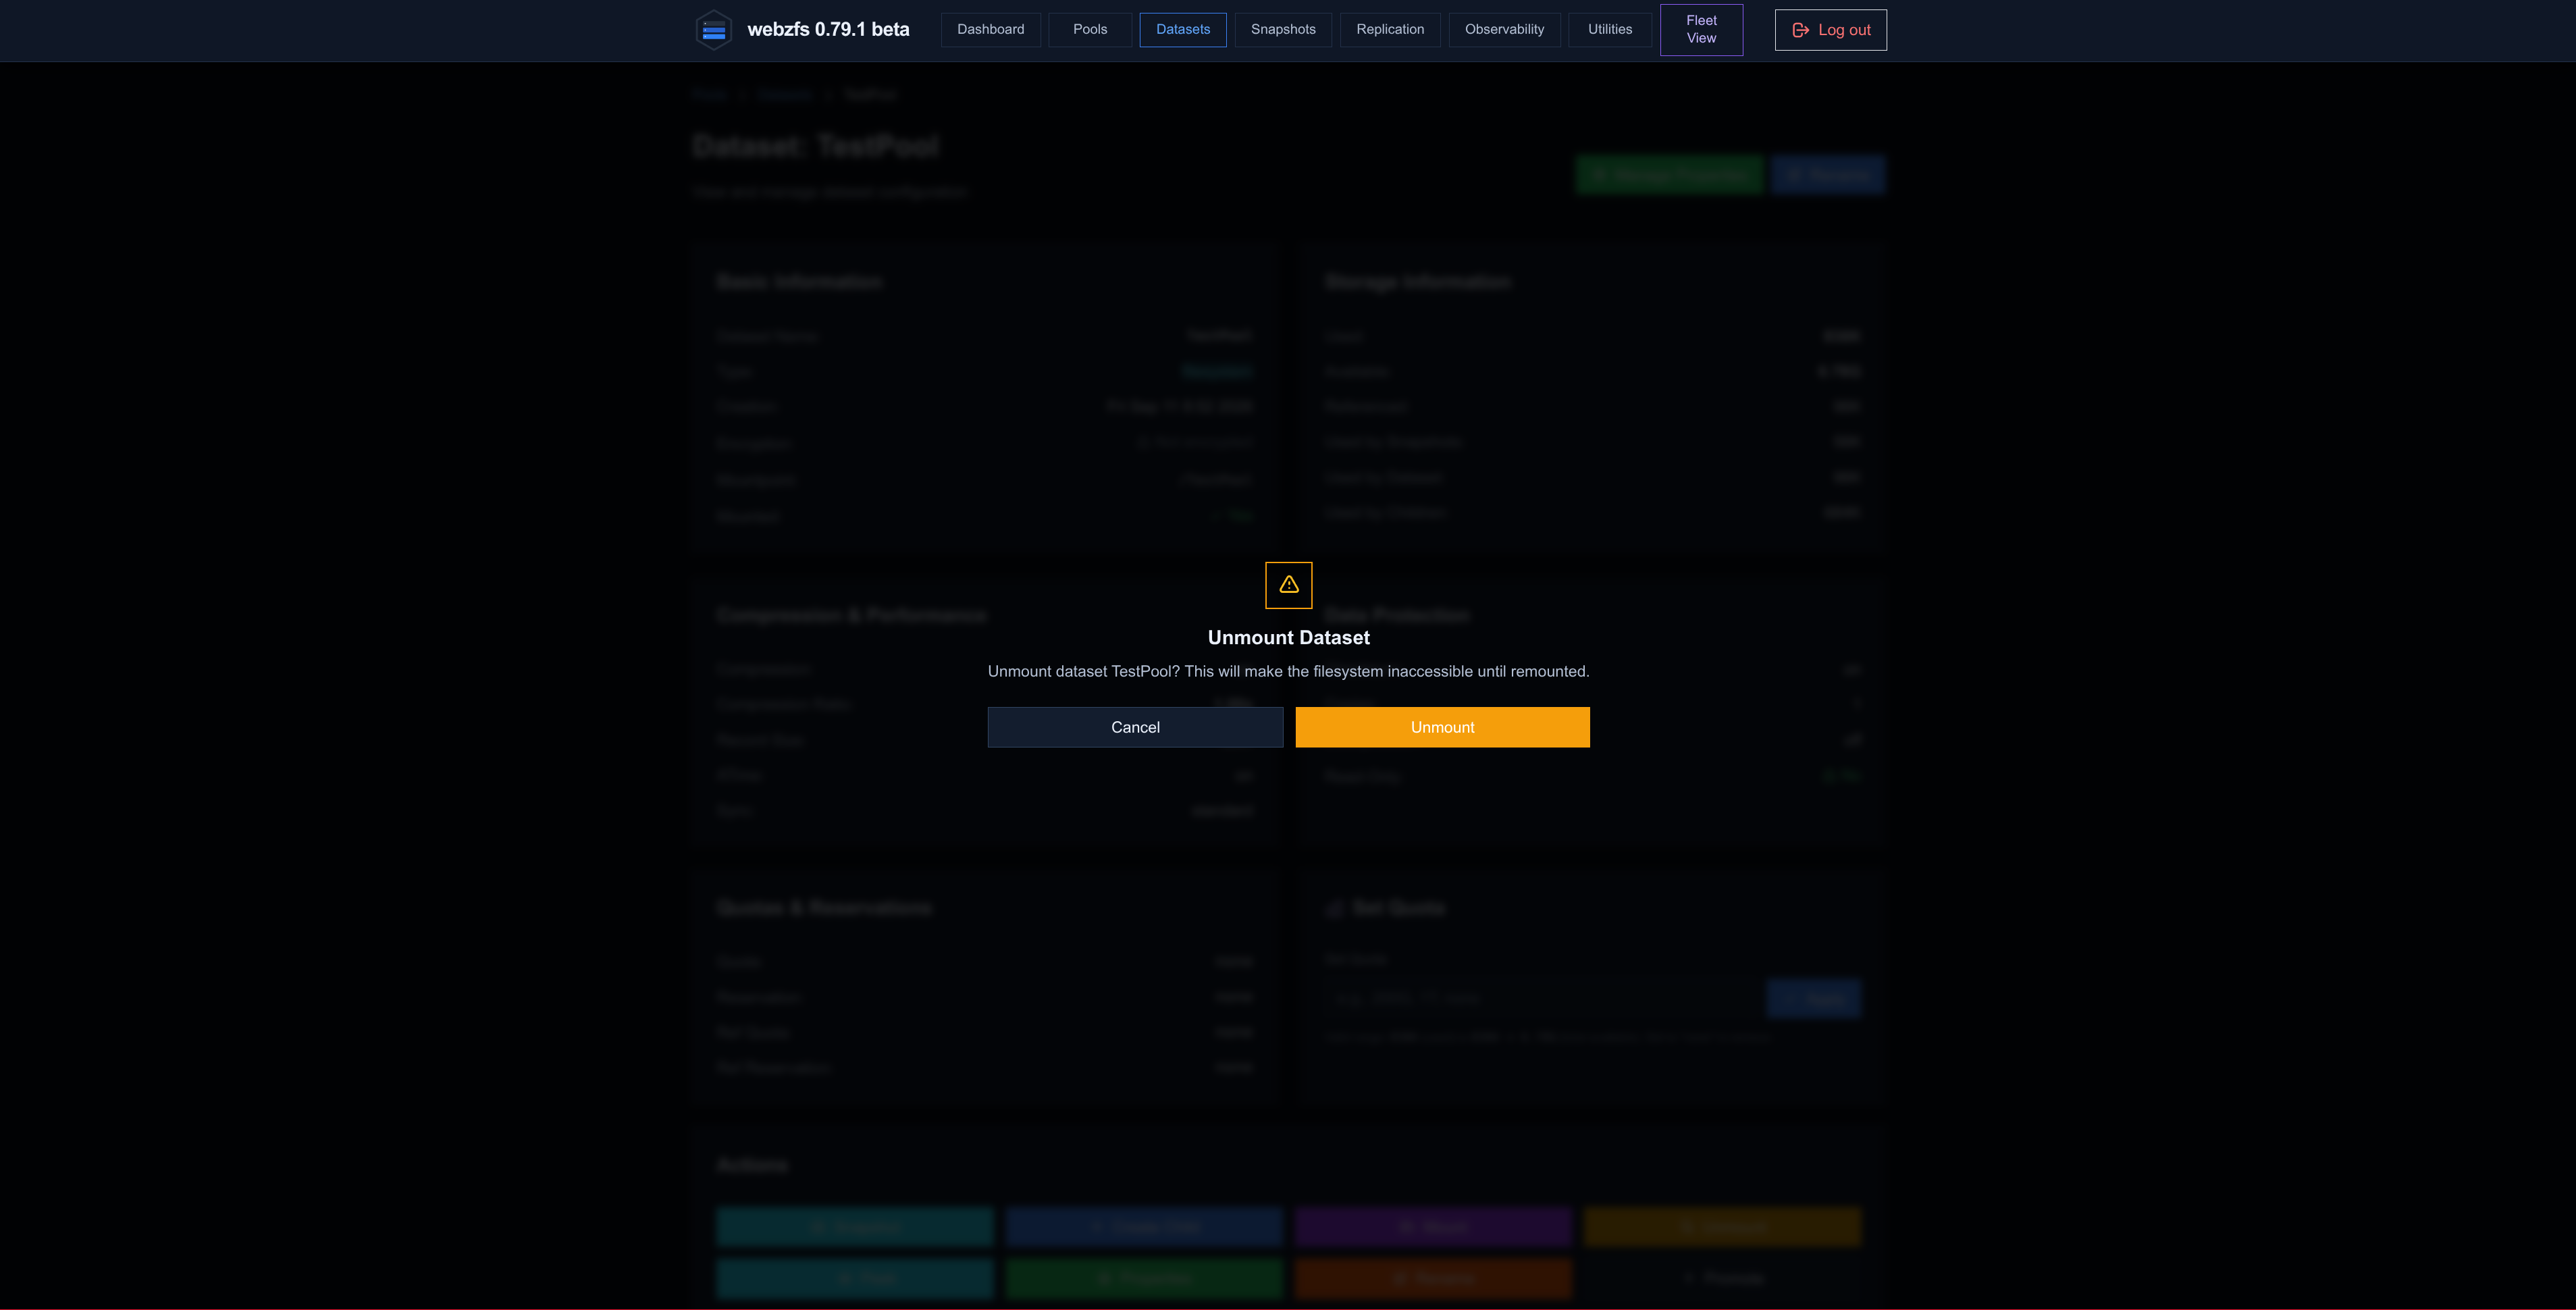
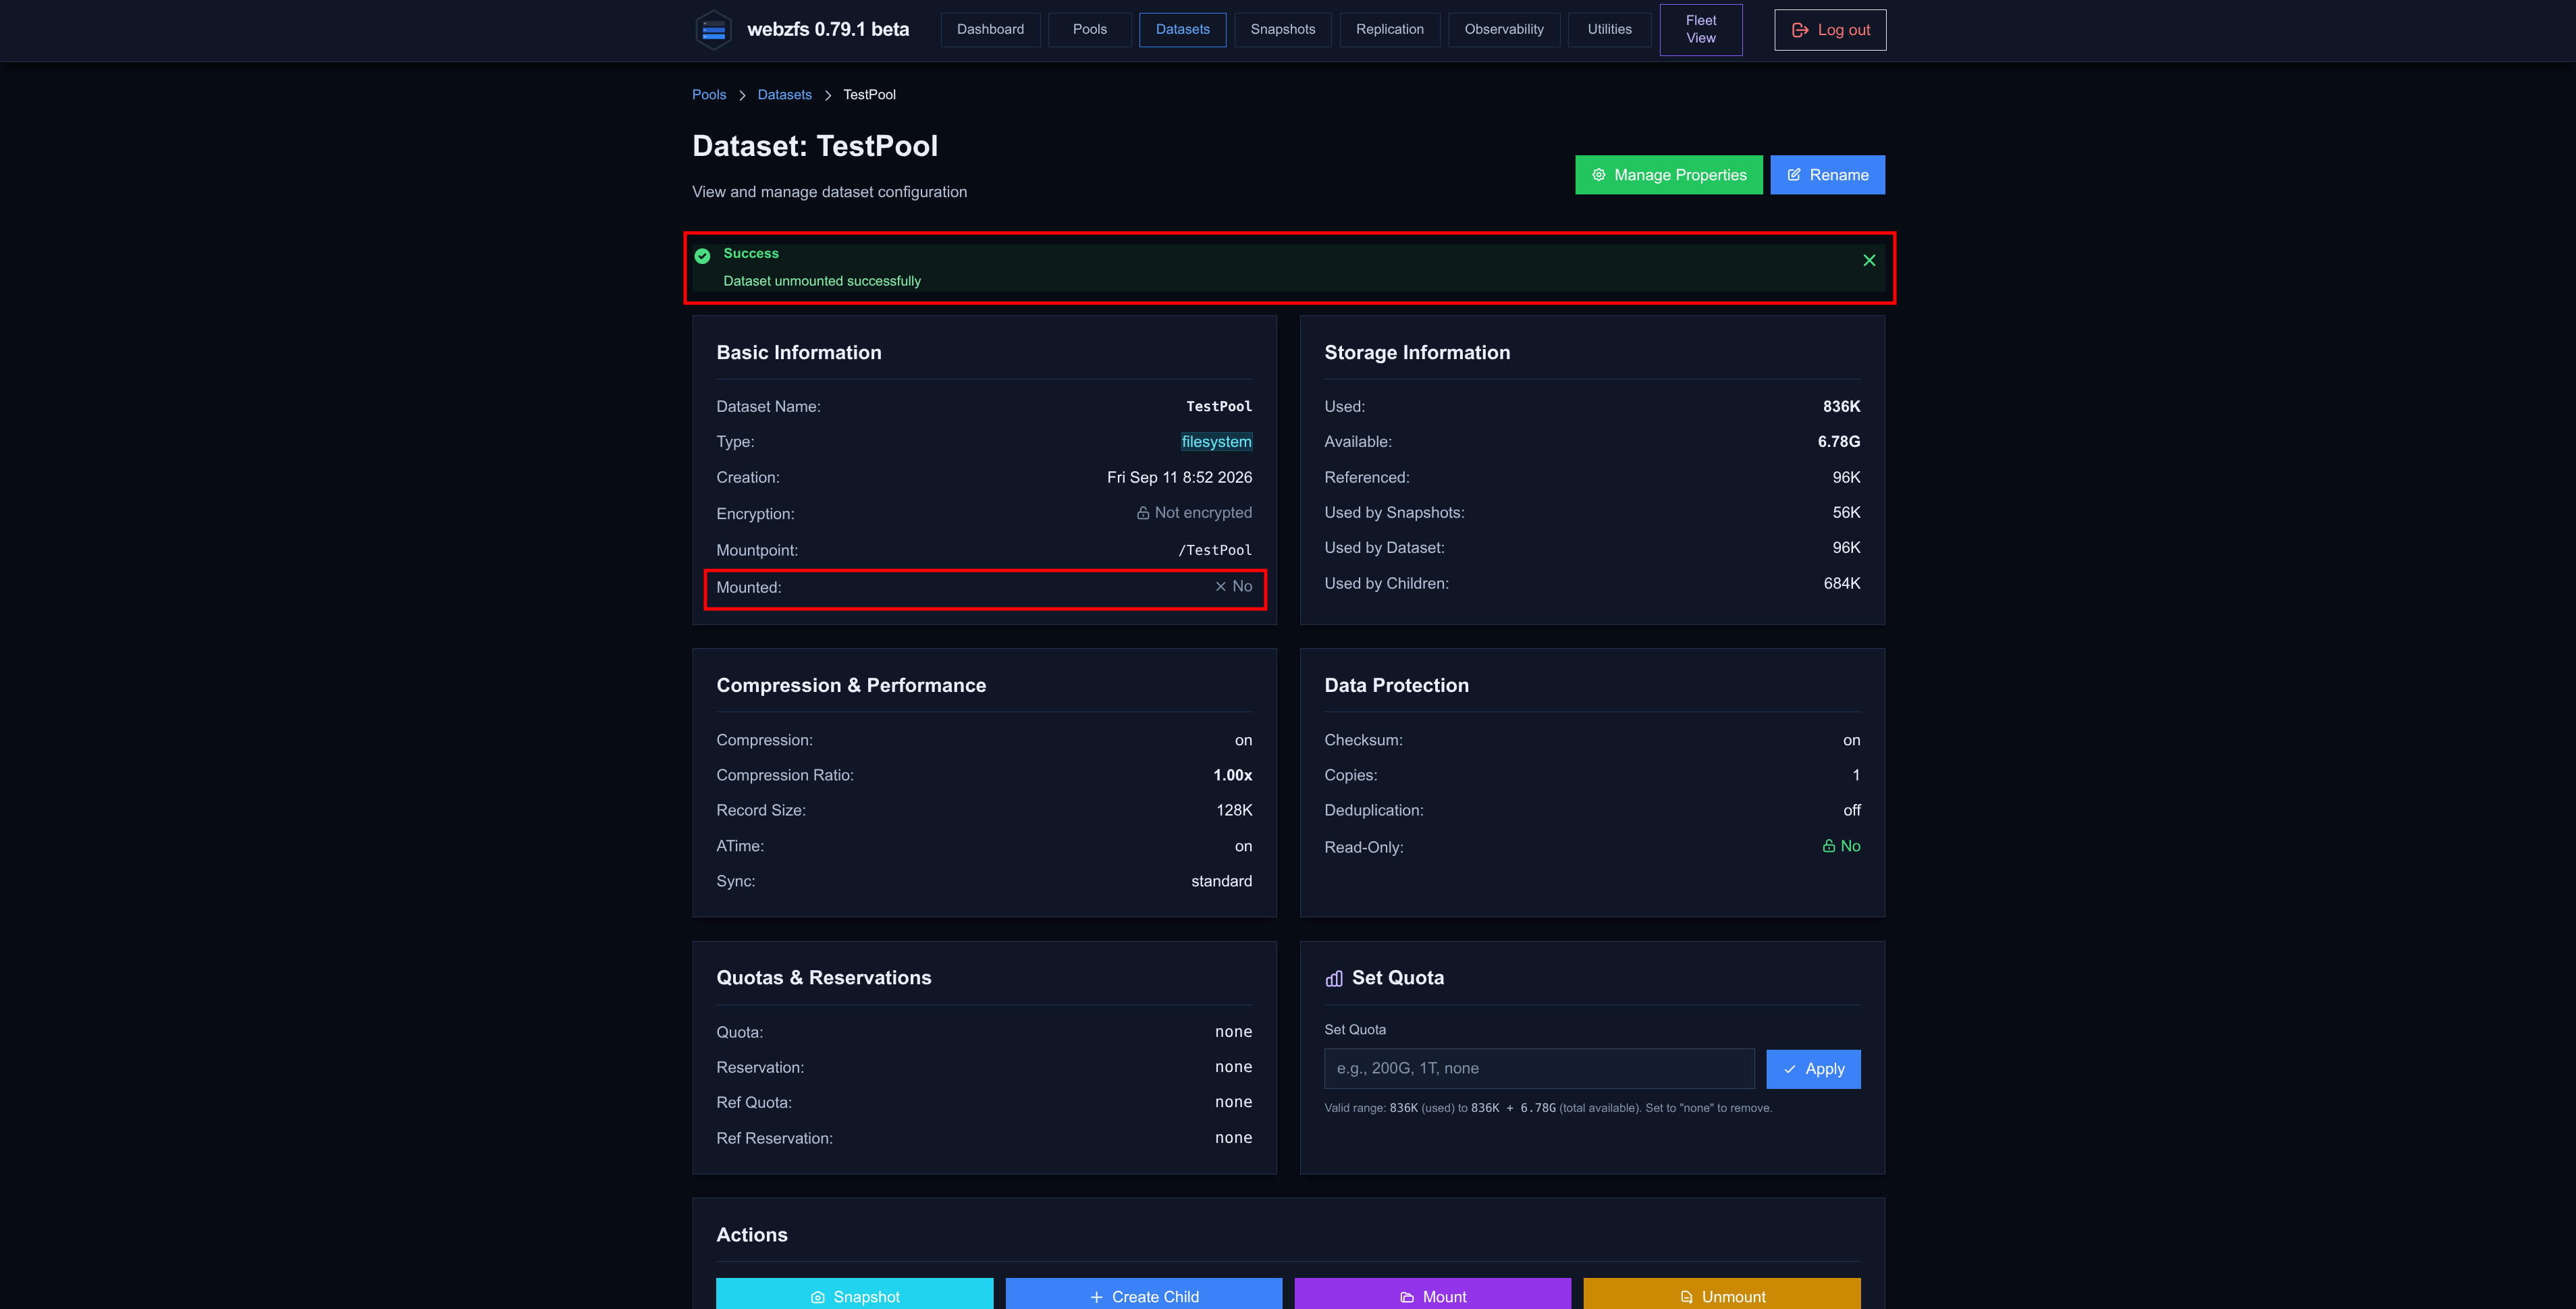
Umount:
As its name suggests, it lets you unmount the dataset:
|
|
|
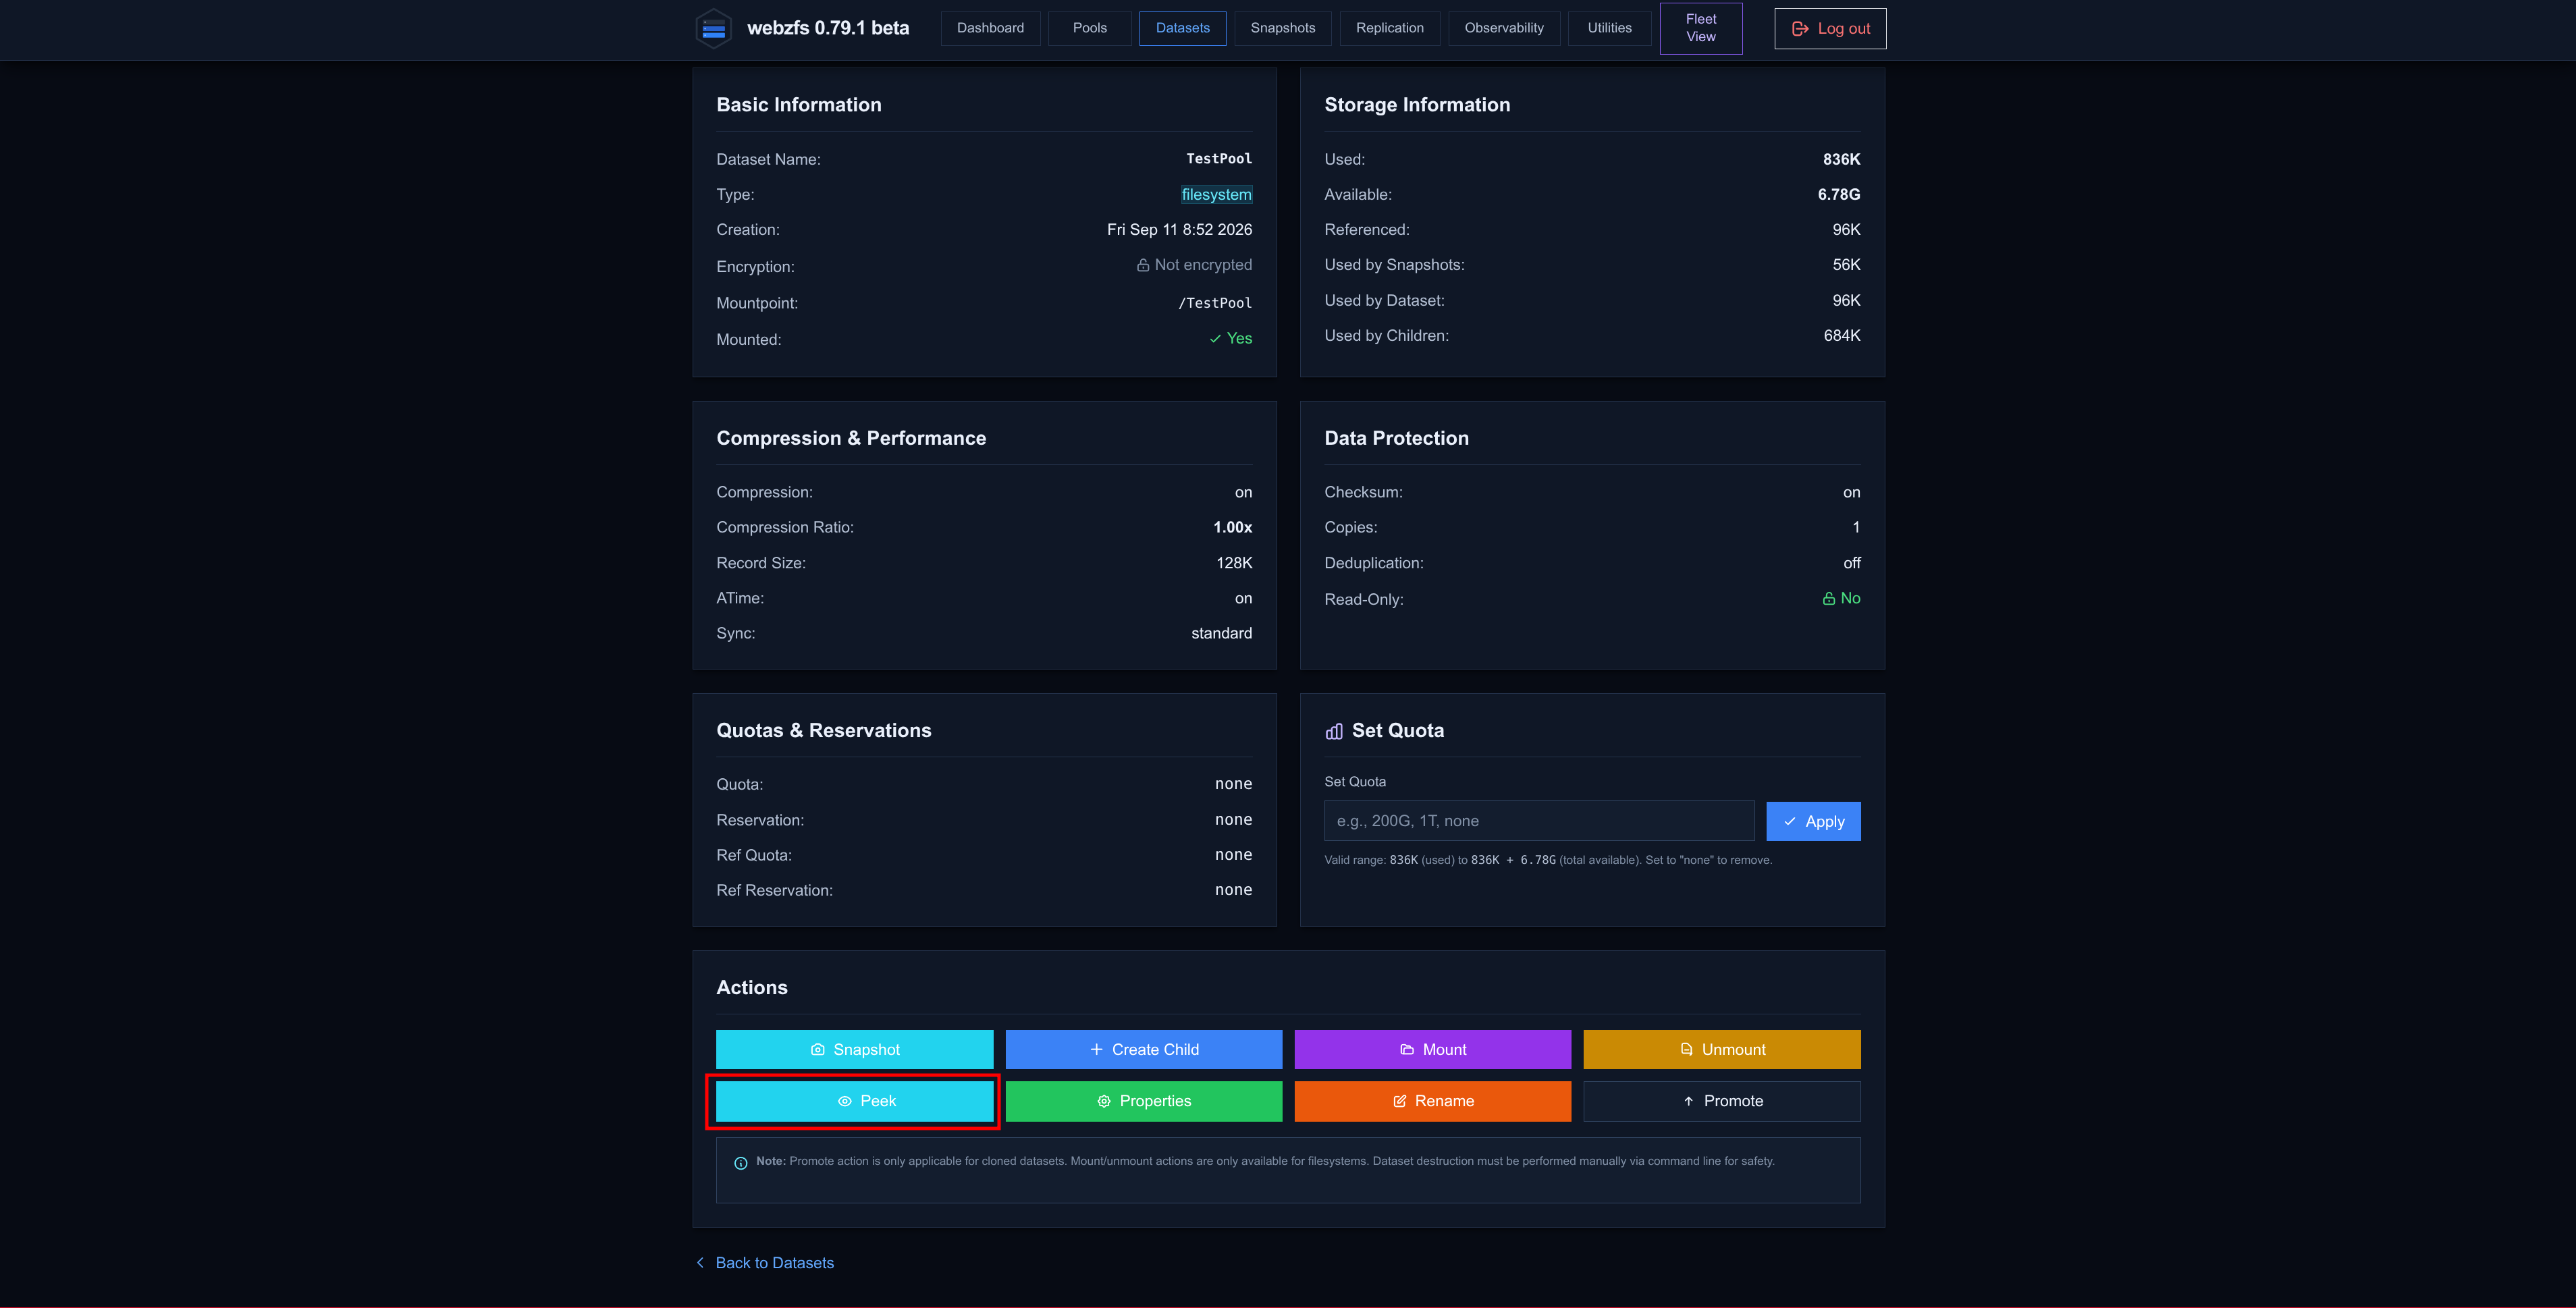
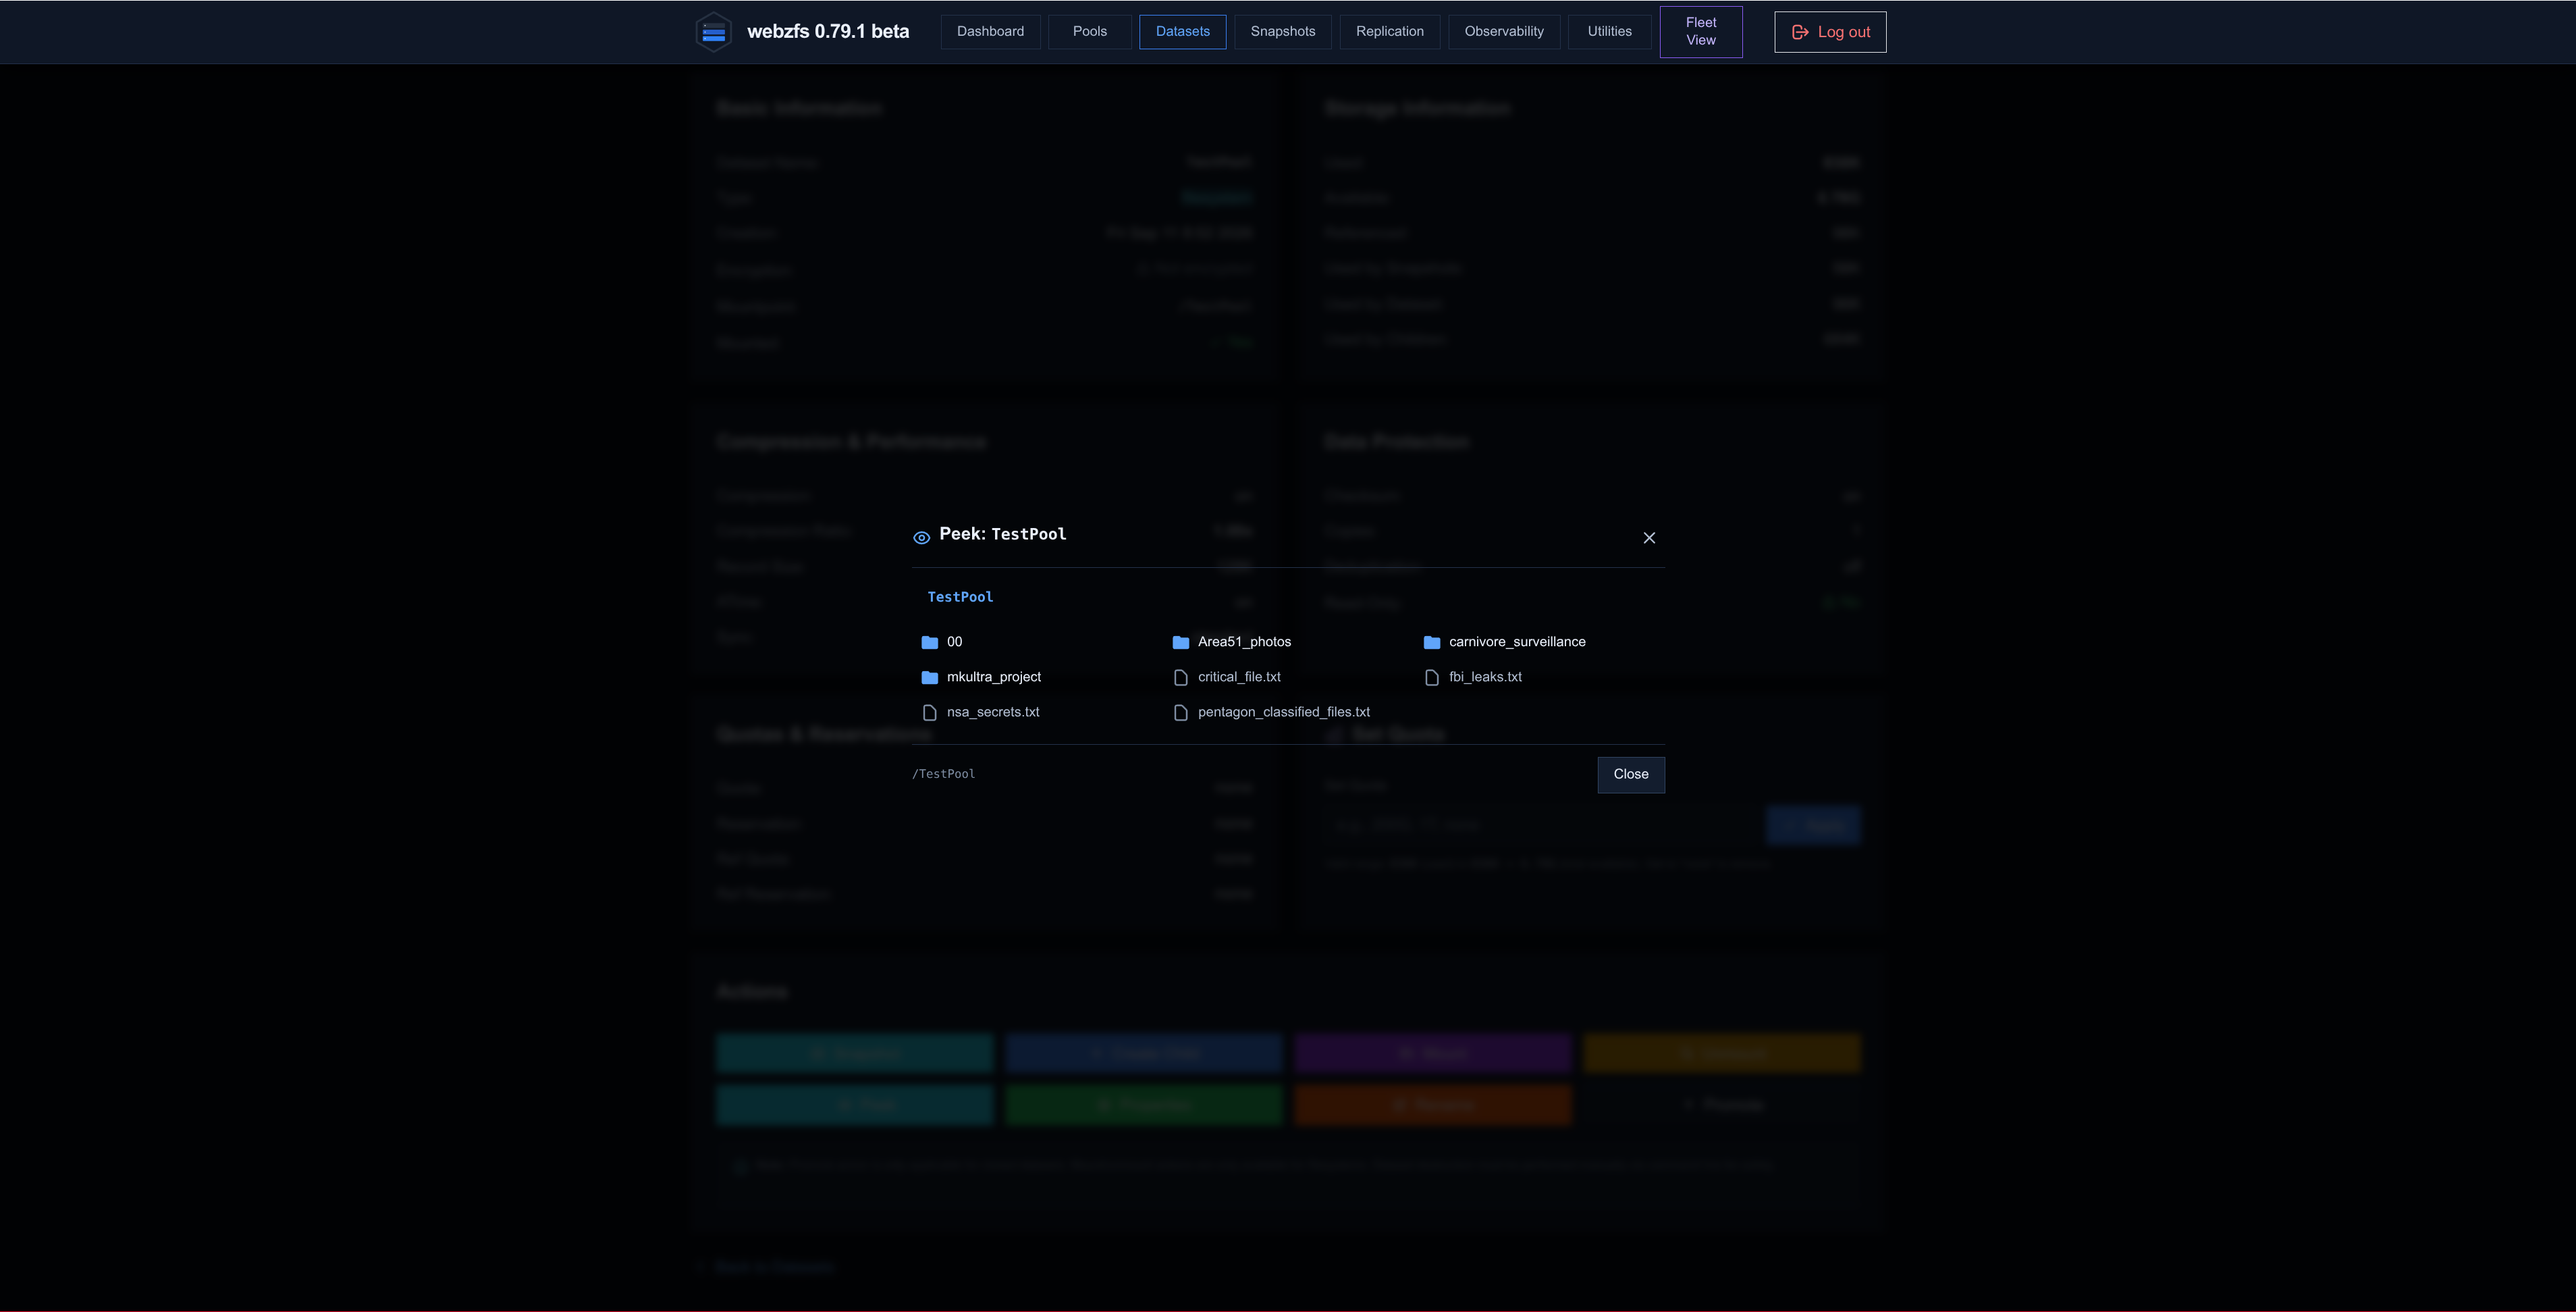
Peek:
Using Peek we can graphically browse the contents of the dataset:
|
|
Properties:
This button does exactly the same as the Manage Properties button above in that same window.
Rename:
This button does exactly the same as the Rename button above in that same window.
Promote:
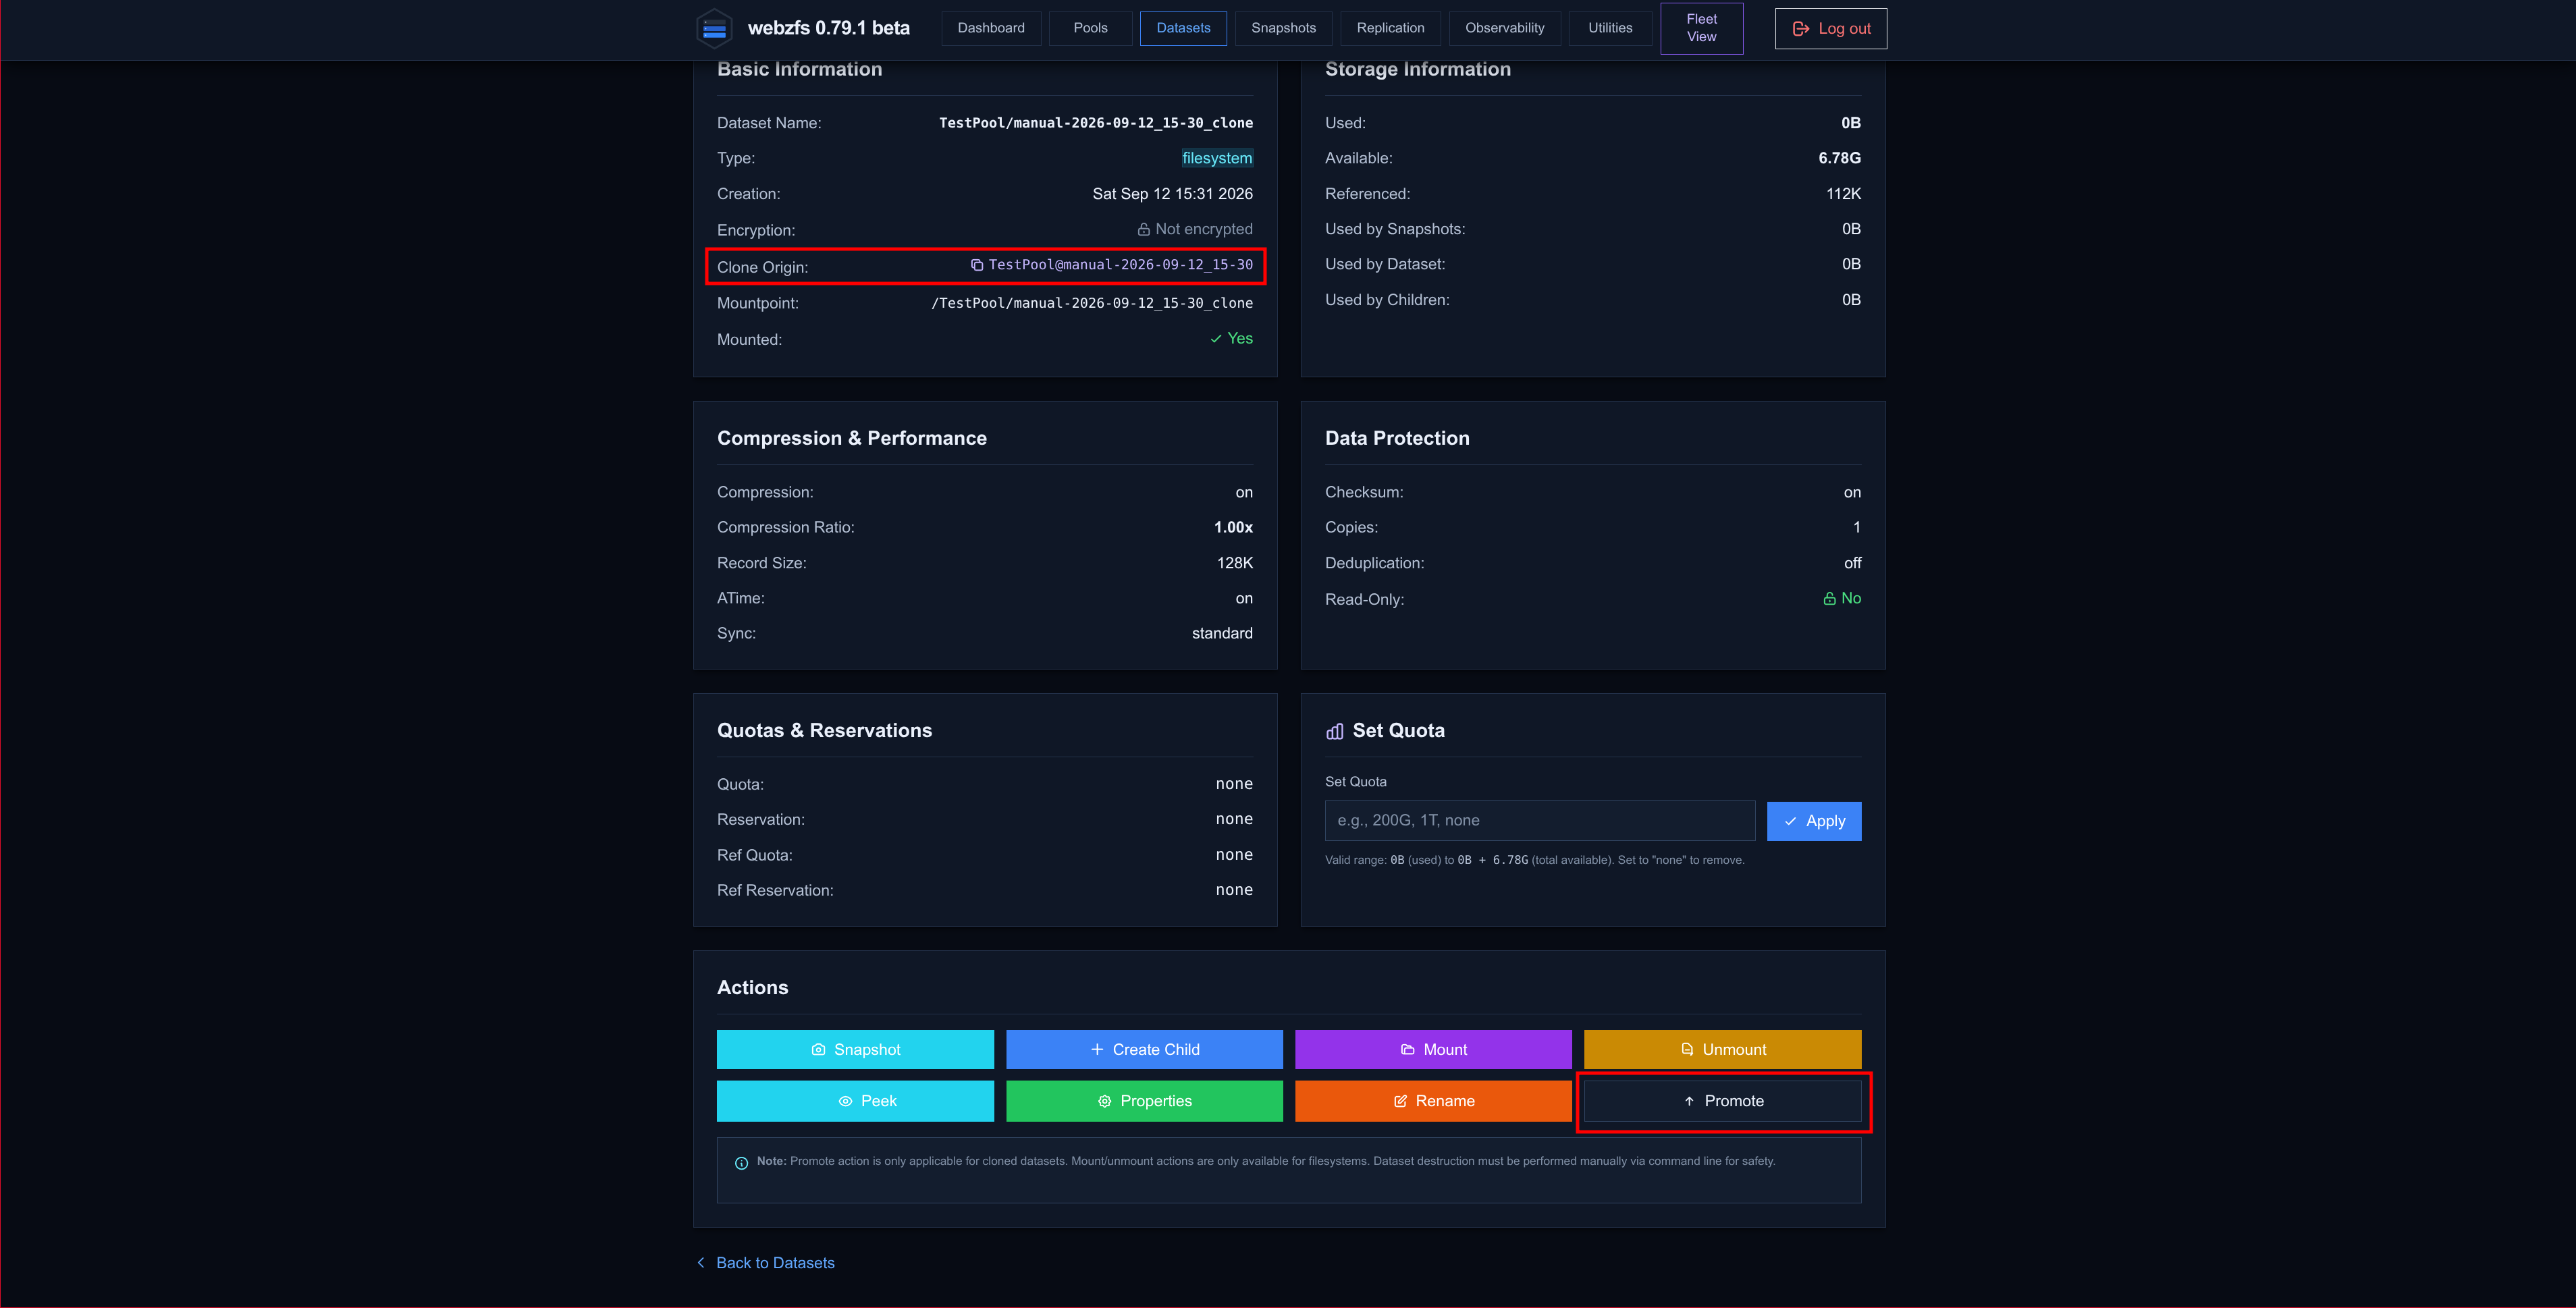
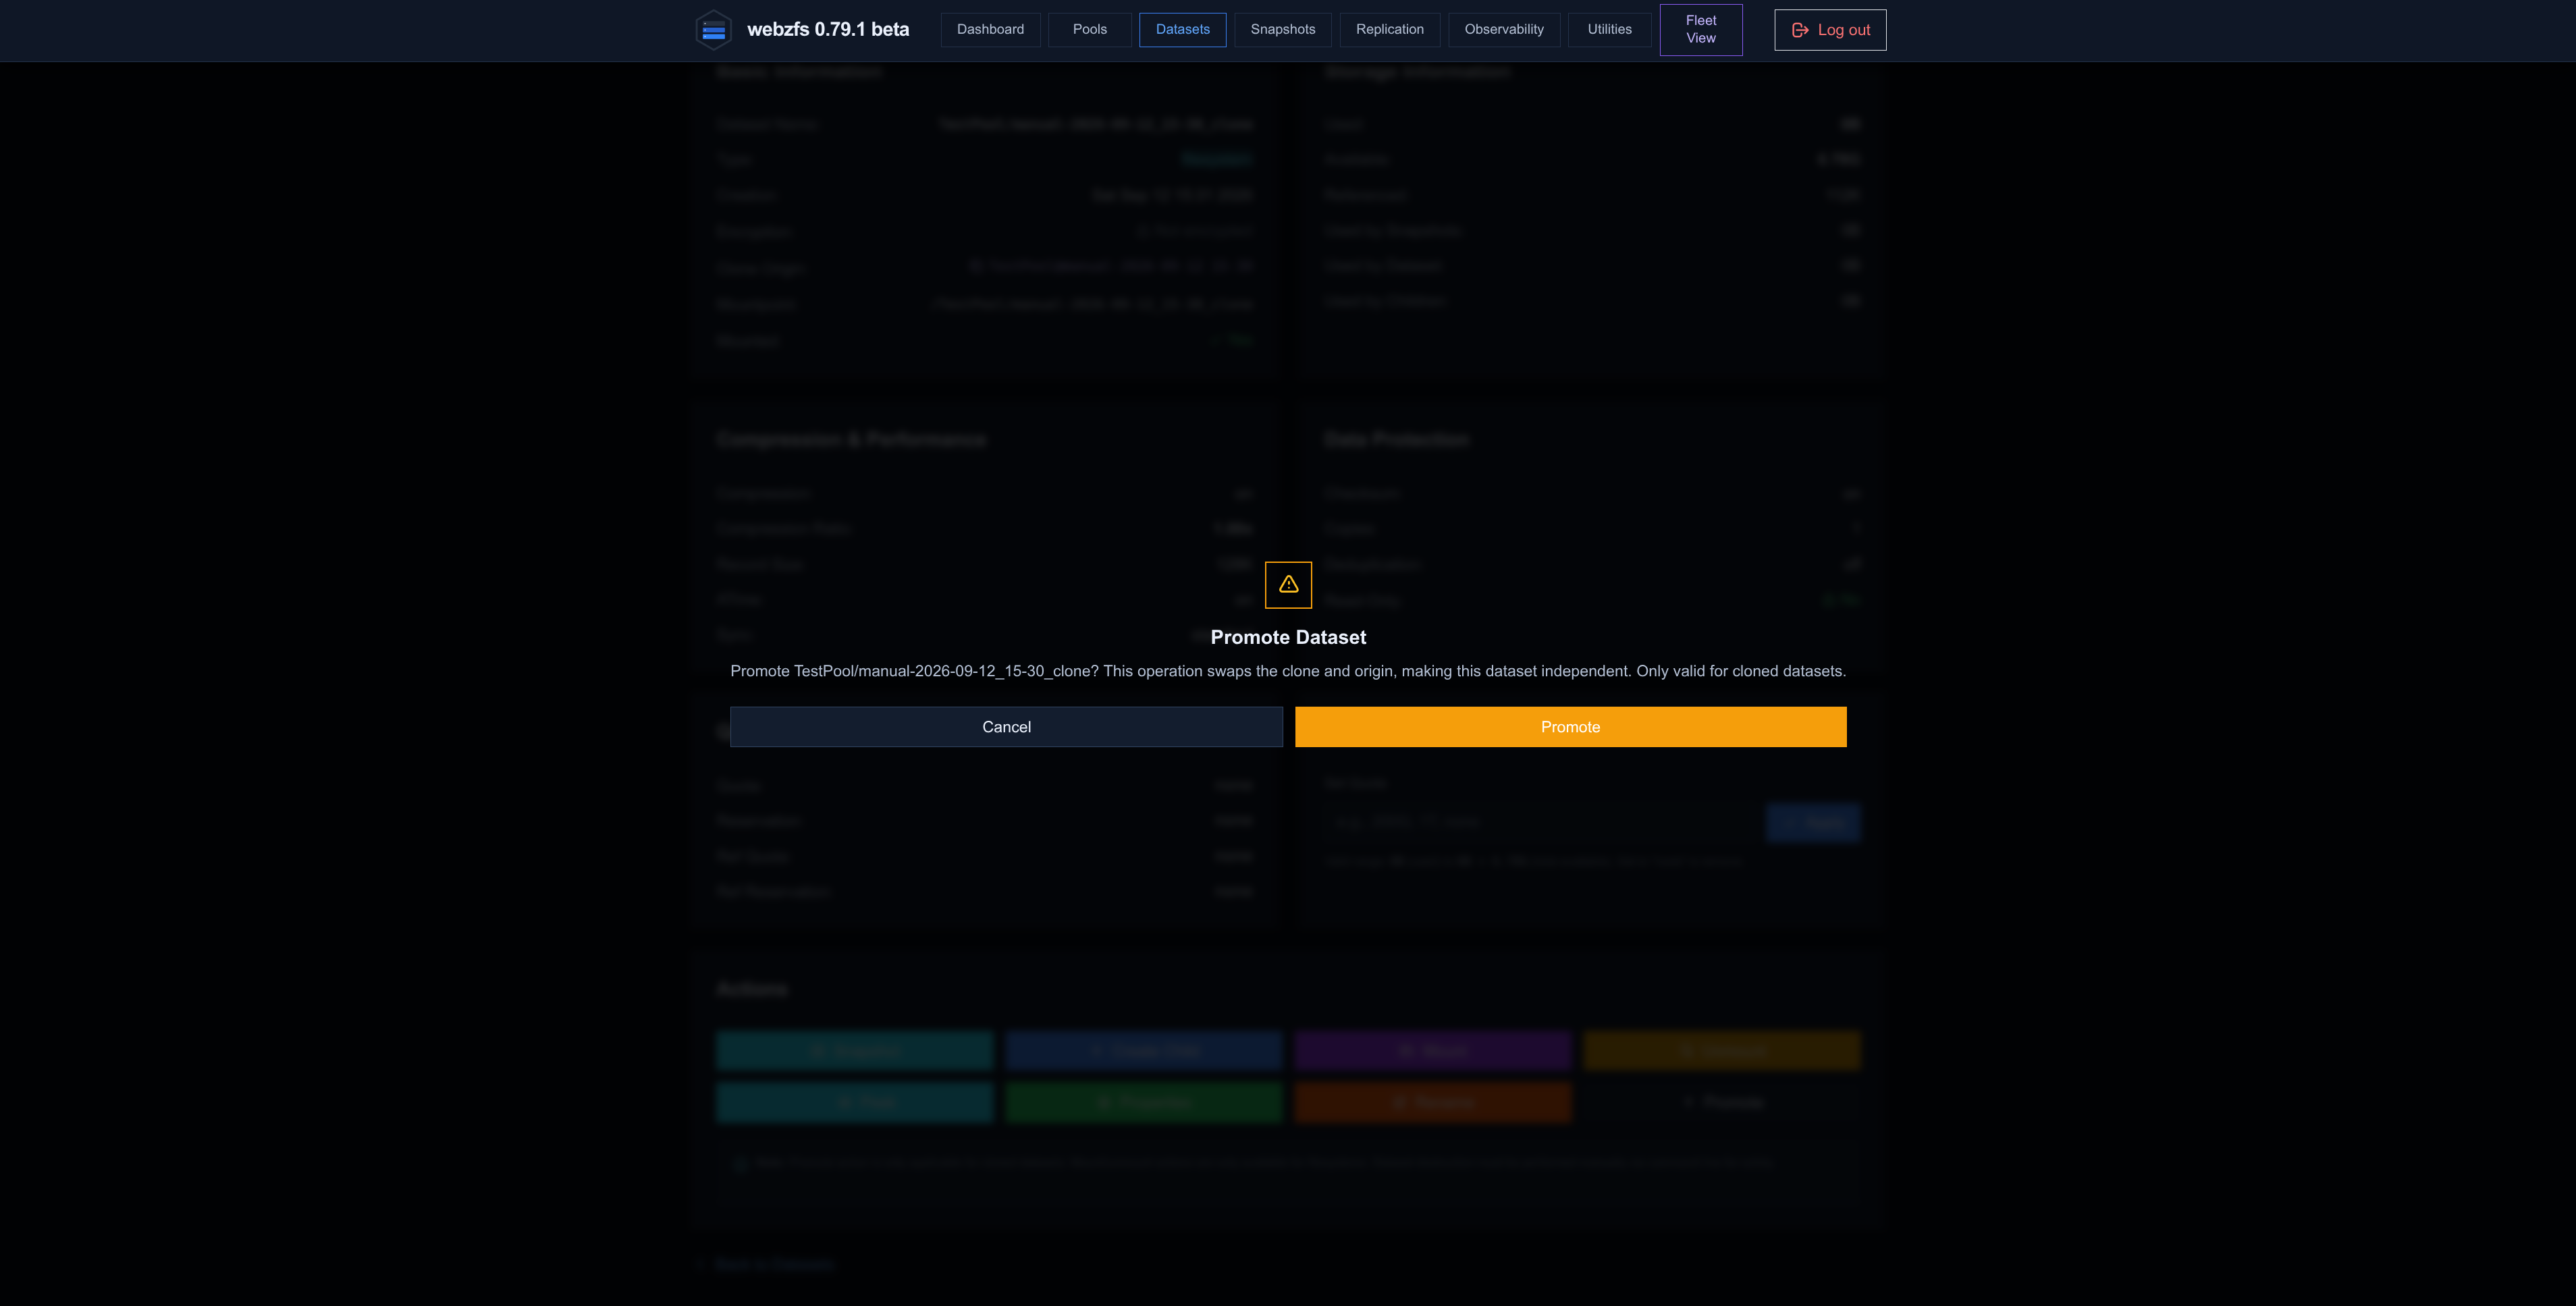
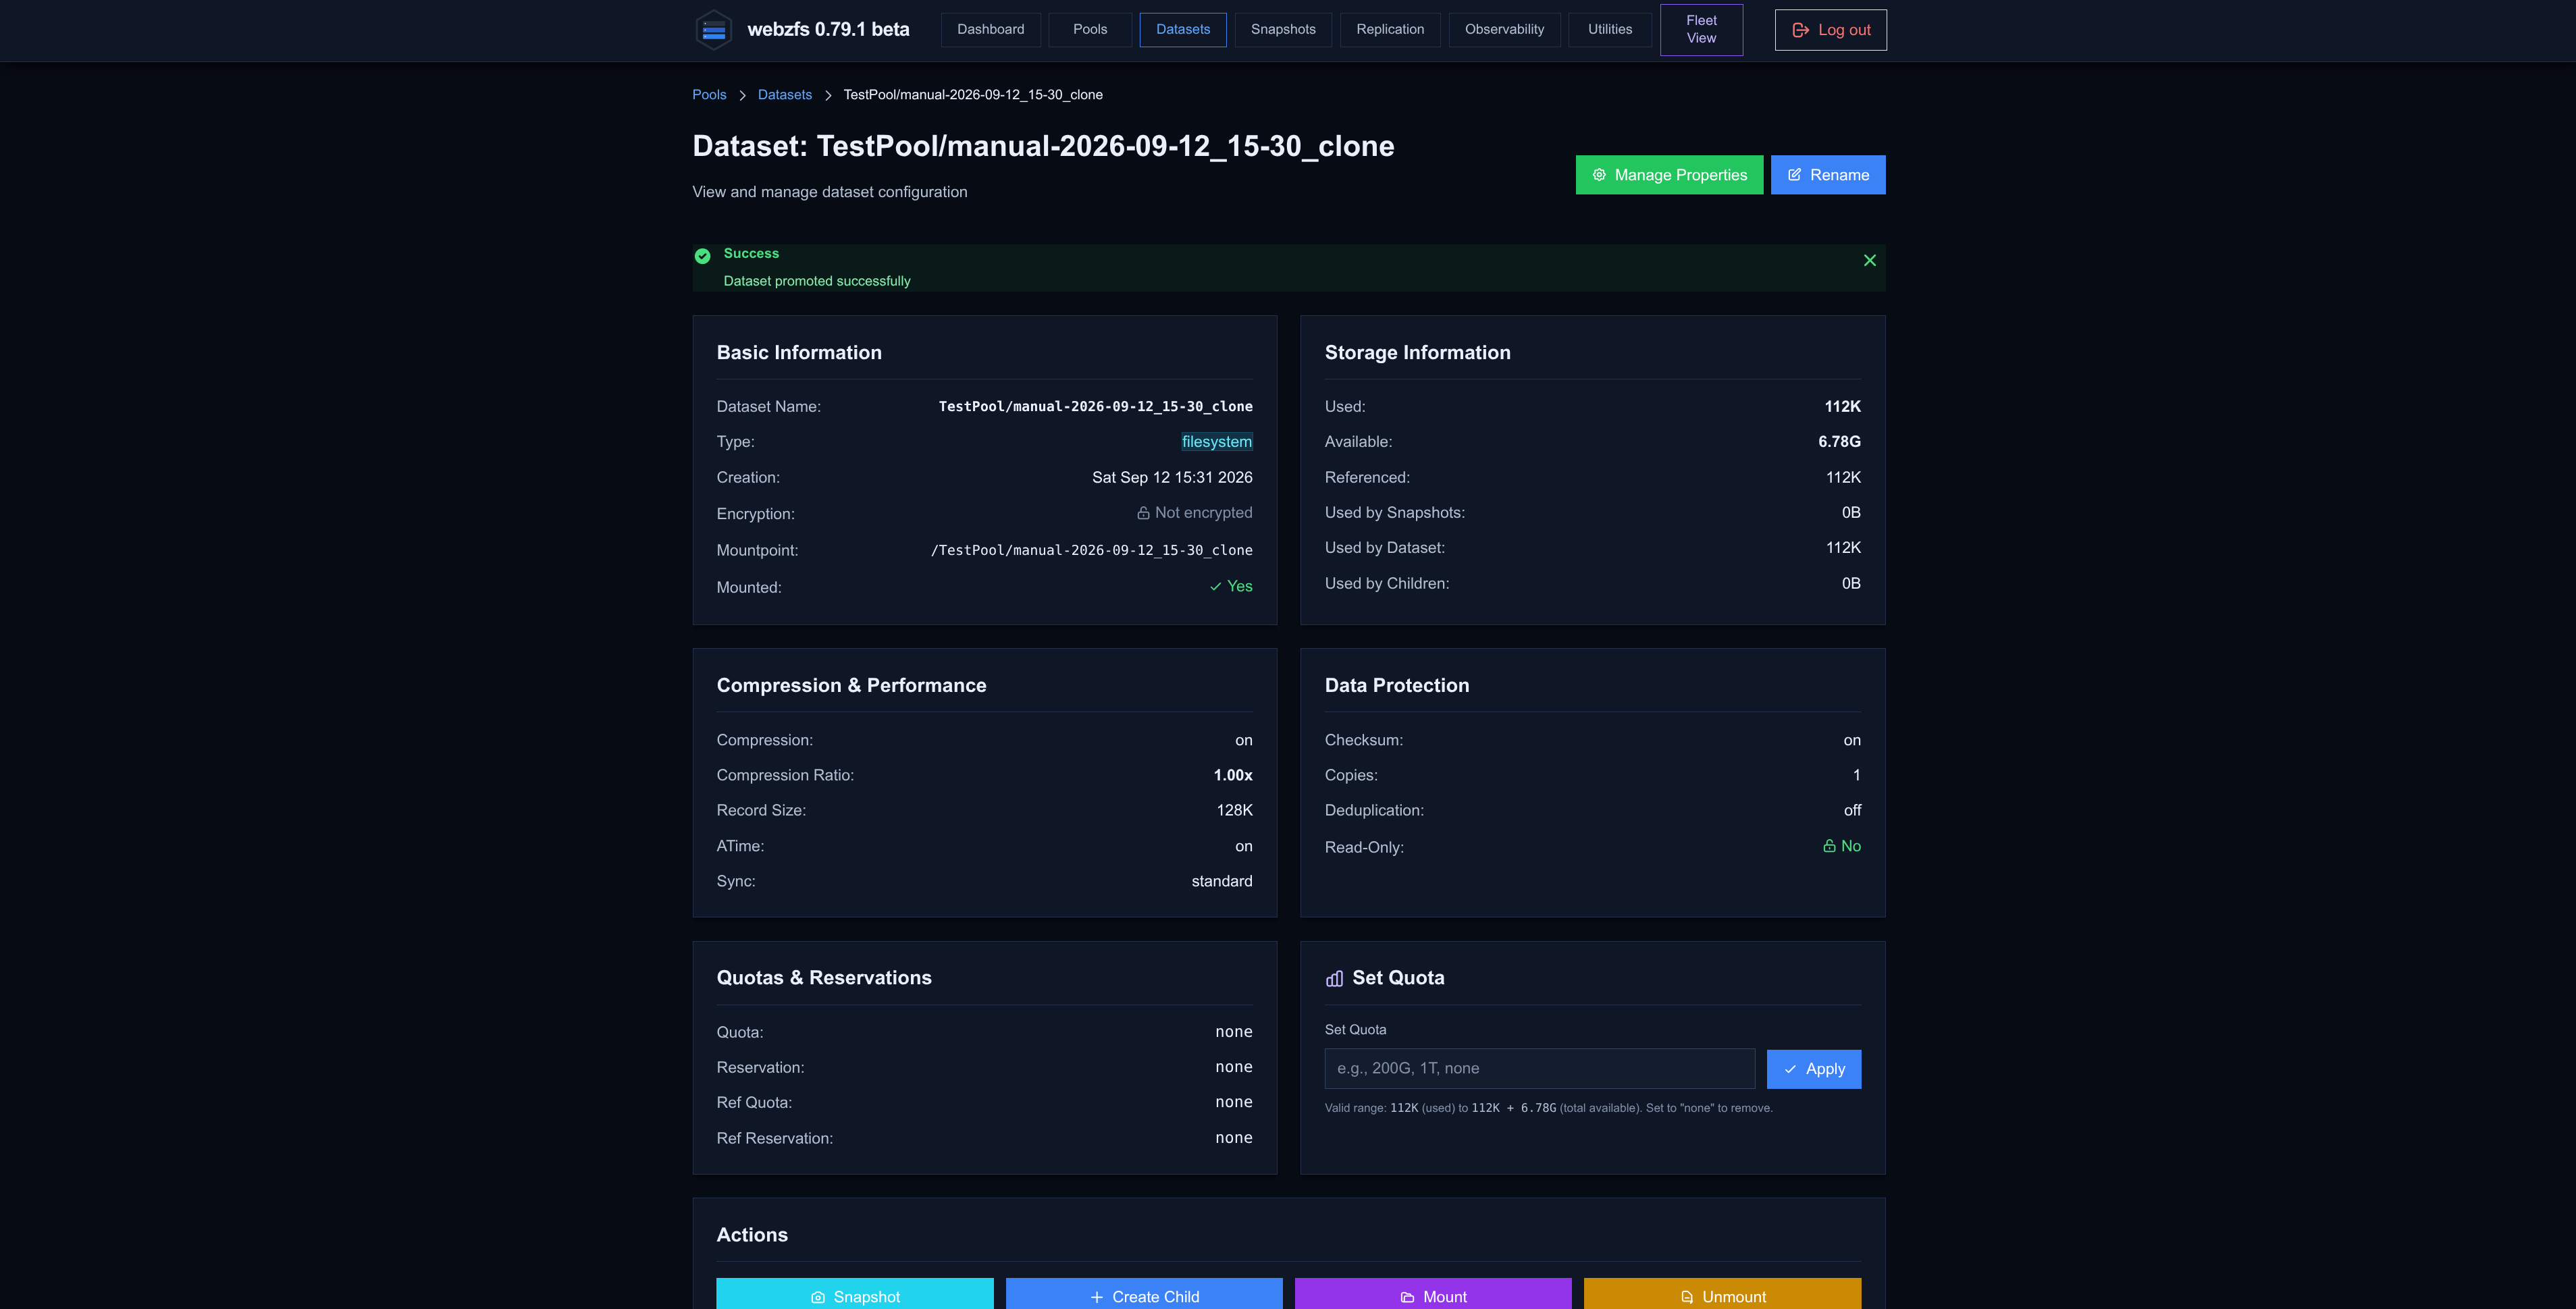
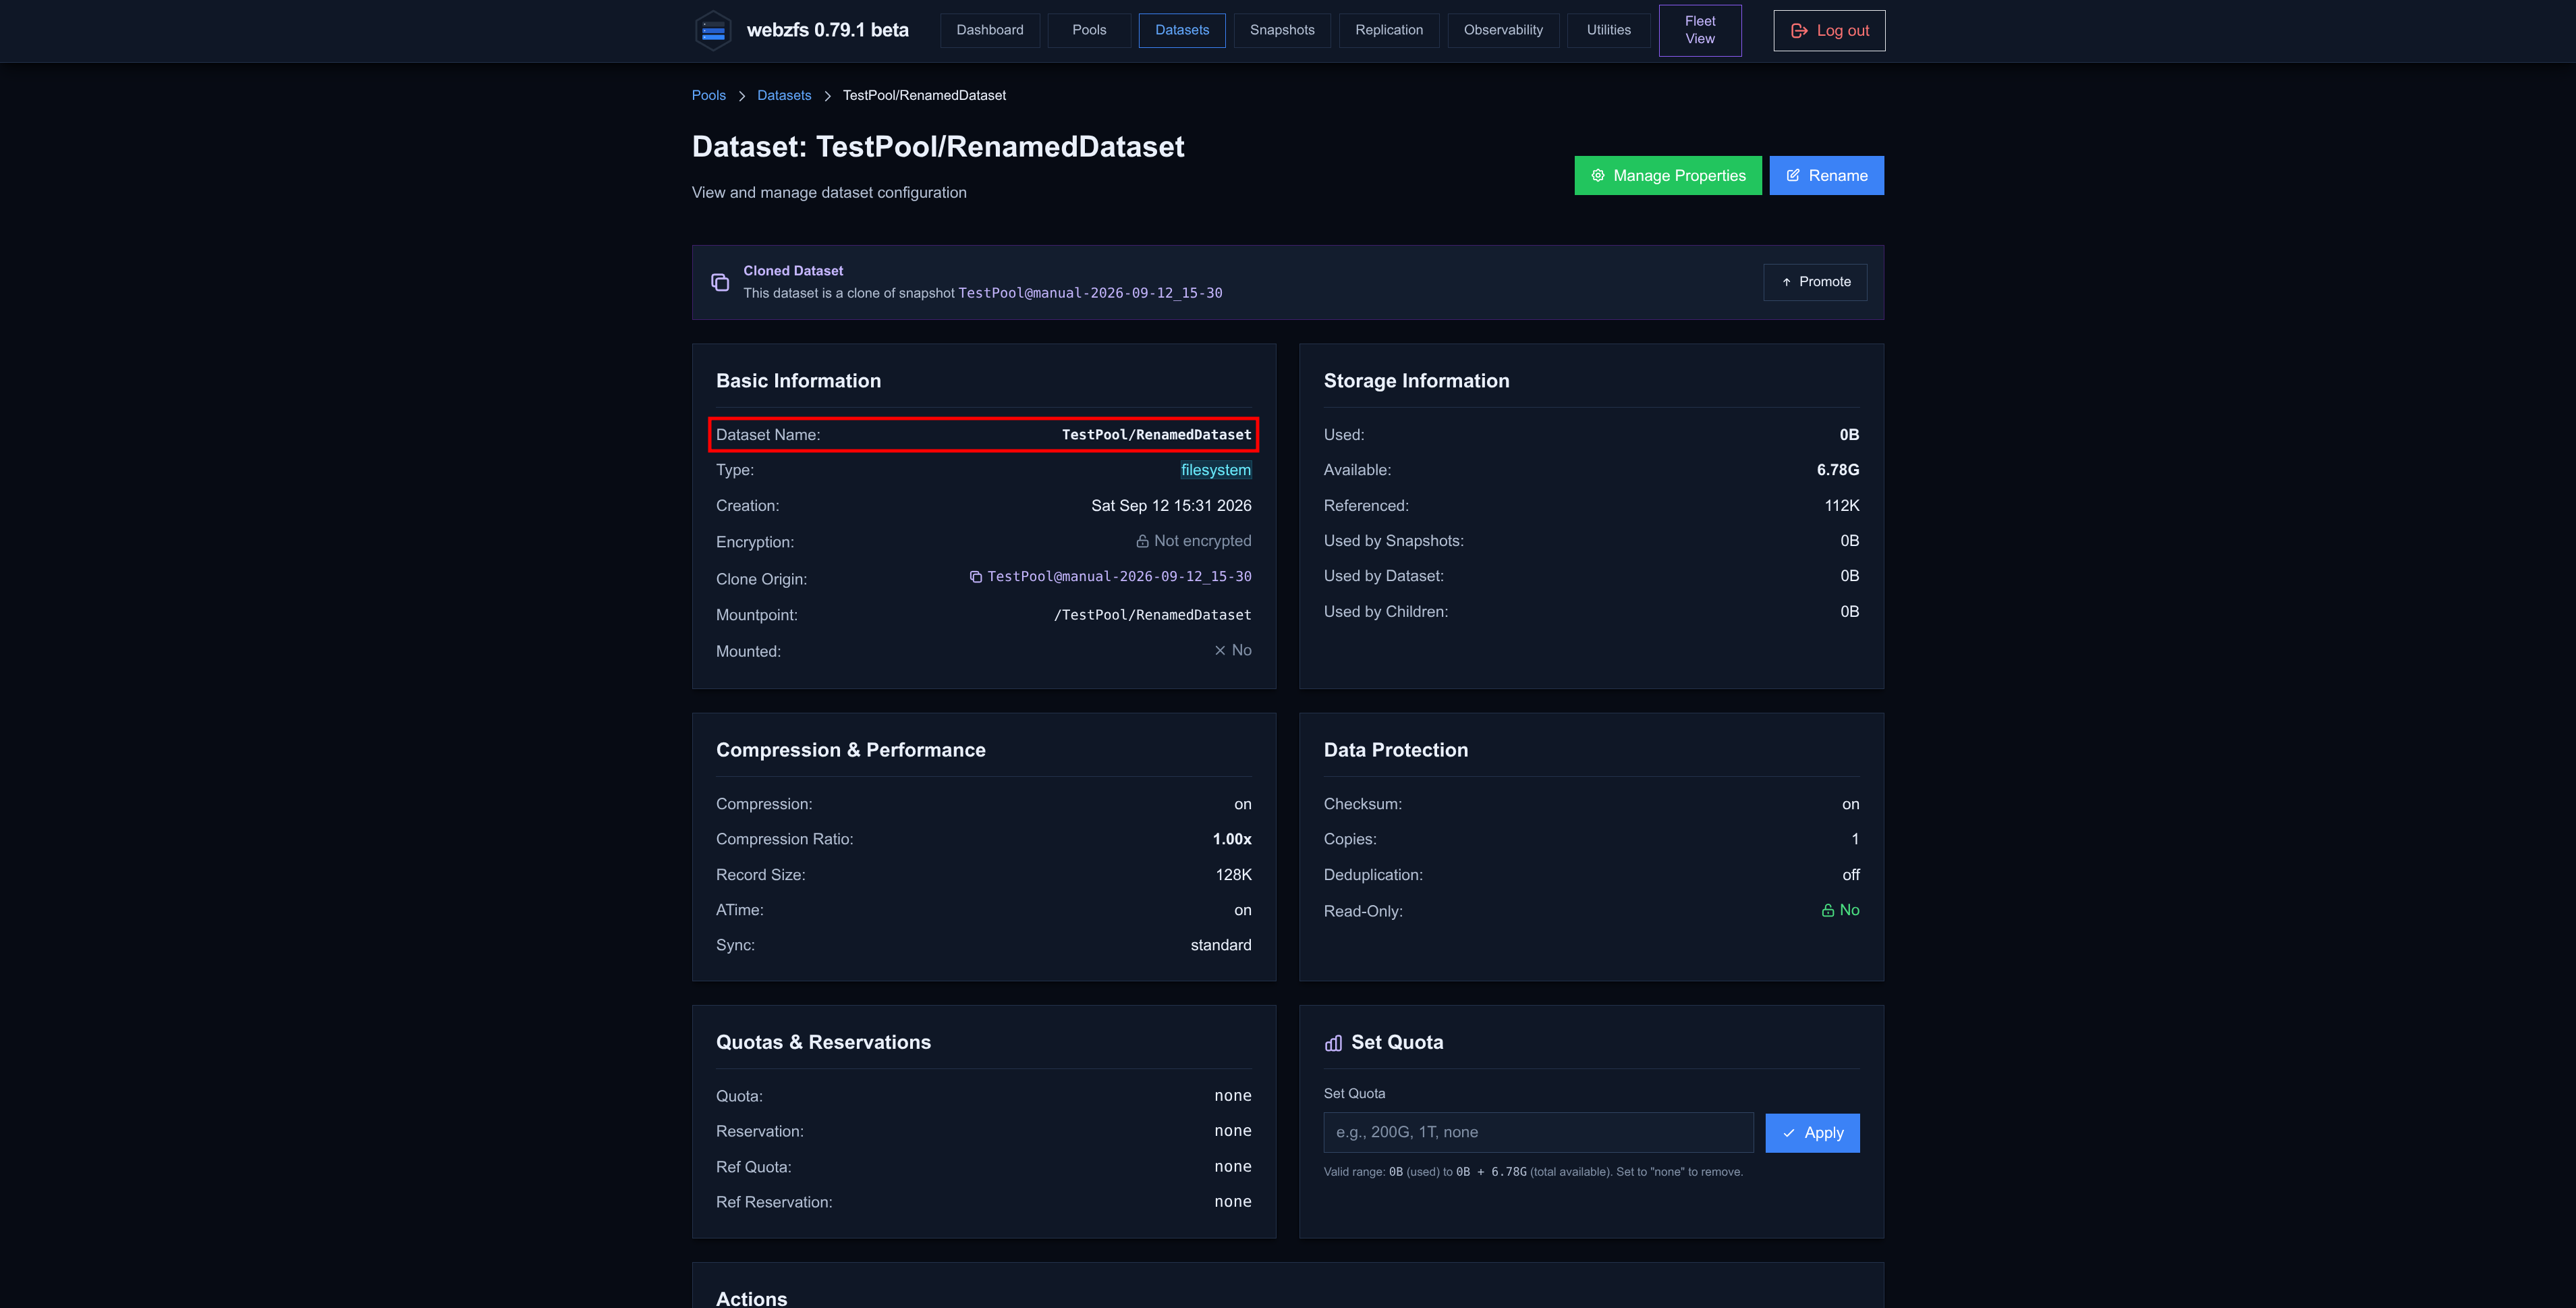
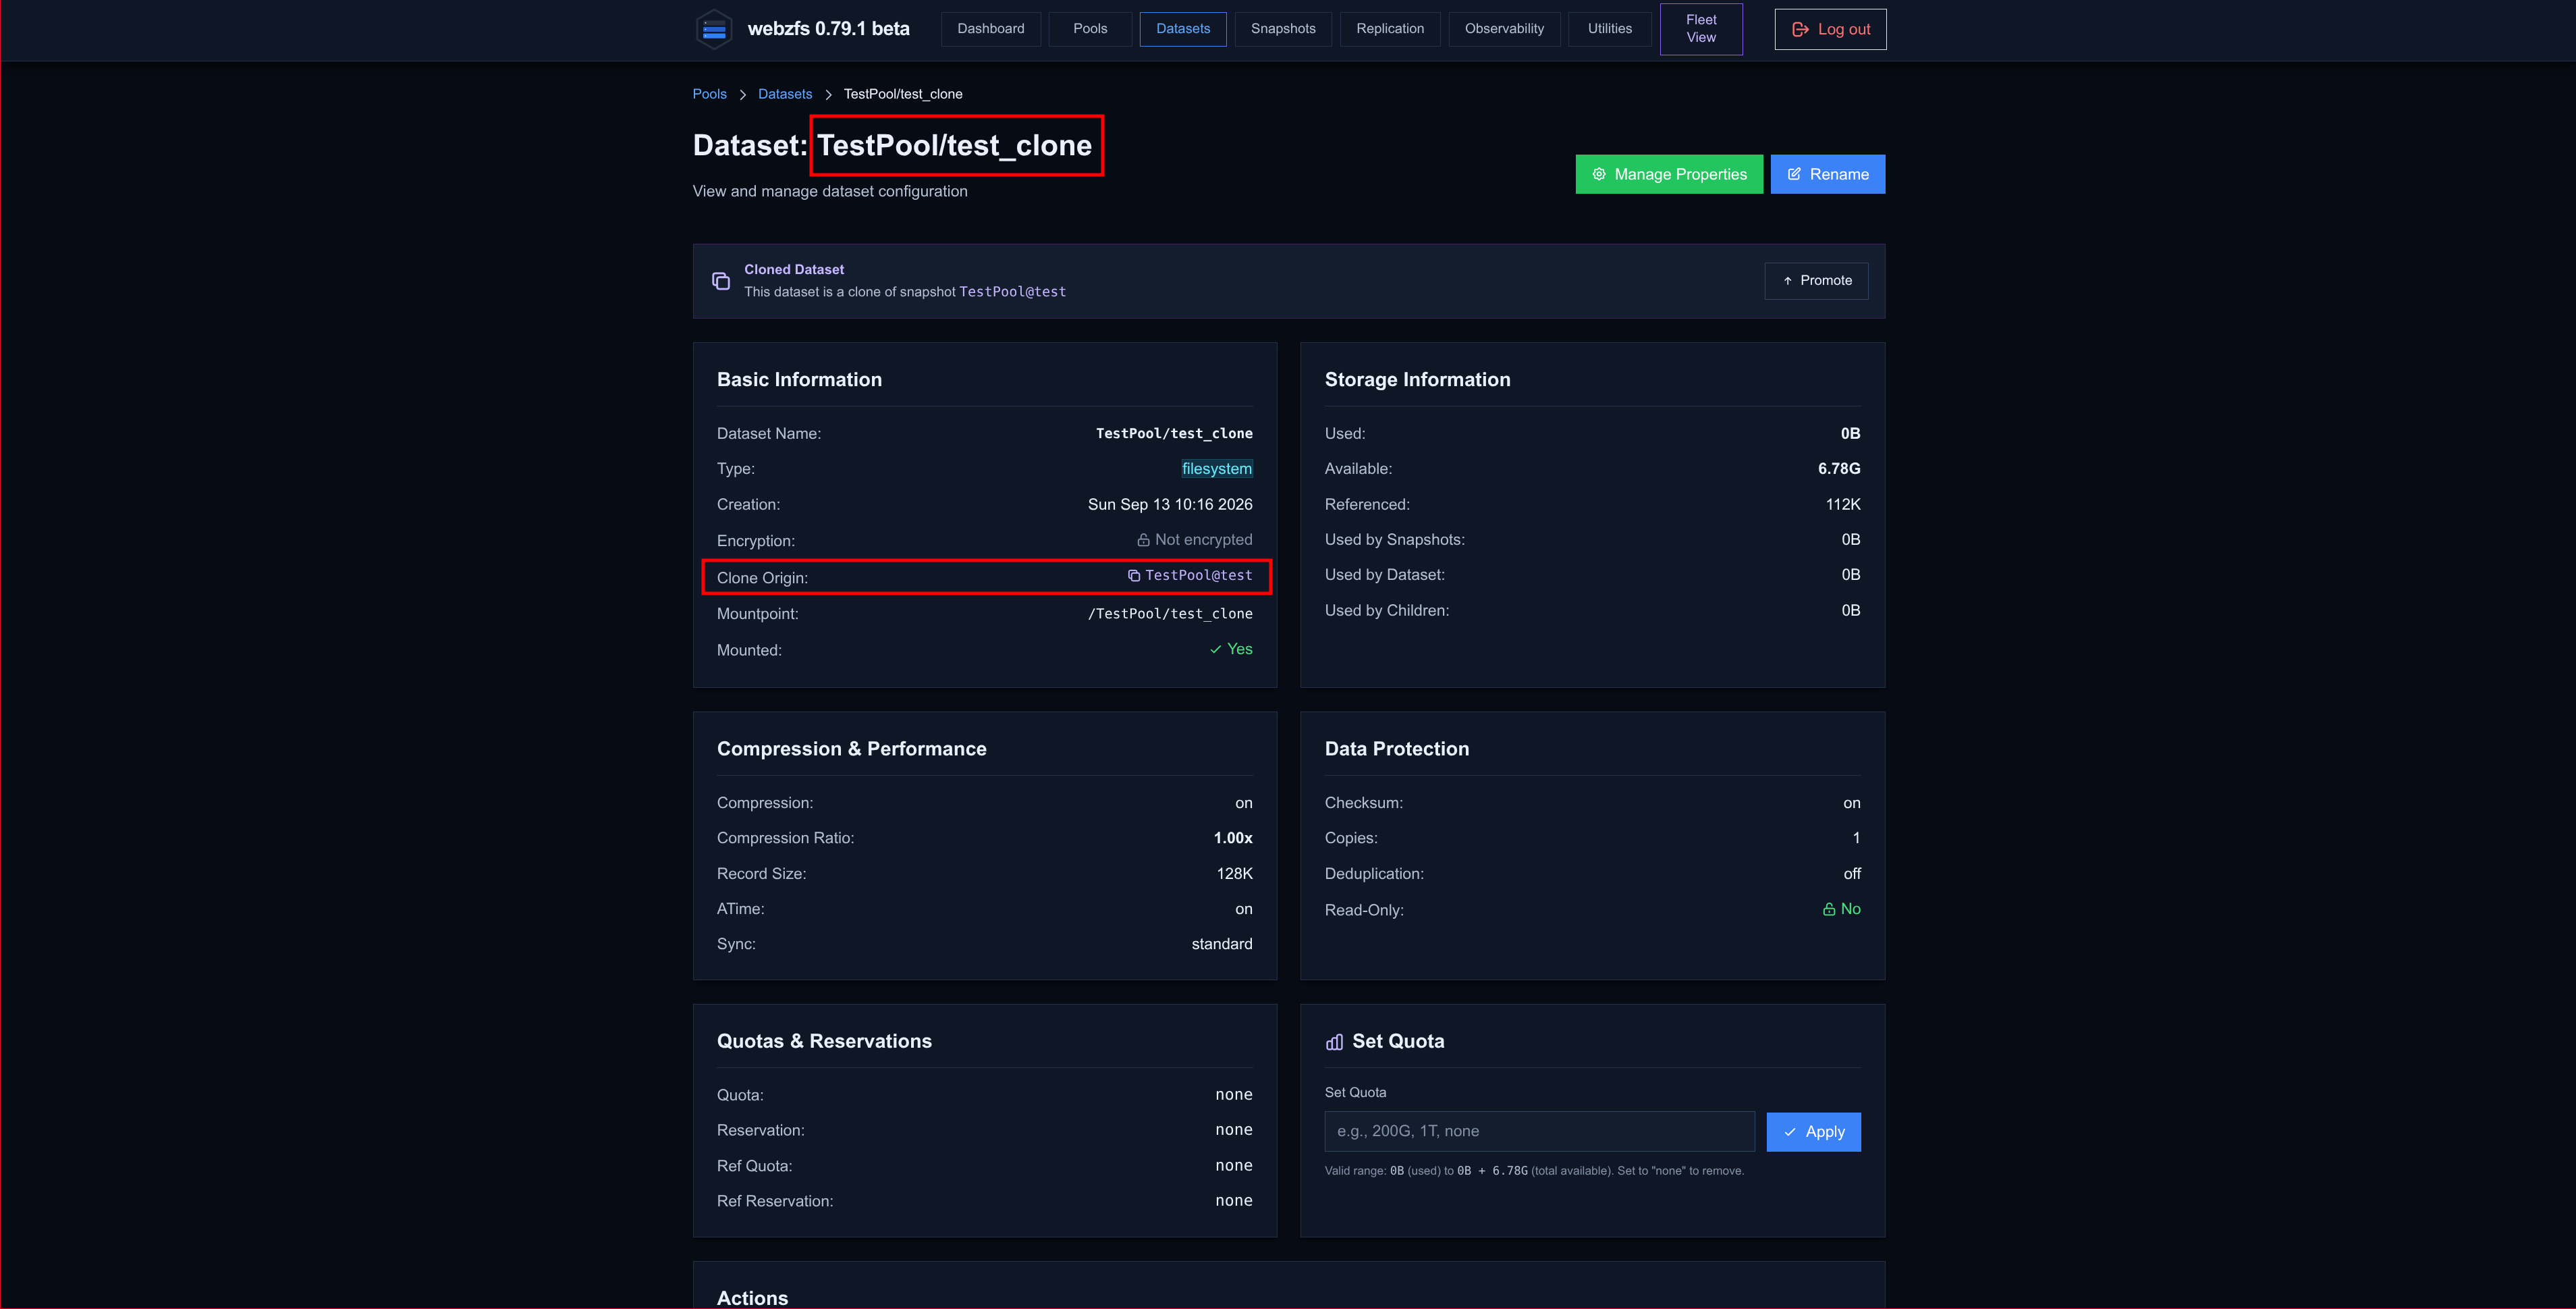
This last button only works if it is a dataset that originated from cloning a snapshot; as an example I have generated a clone to be able to run the test.
We must keep in mind that clones share the “root” with the snapshot they were cloned from, occupying only the space of the changes made in the clone; moreover, the parent cannot be removed while there are clones that depend on it. Only when we promote the clone will it inherit the parent’s snapshots and the parent will become a child of the promoted dataset; in short, the roles between datasets will be reversed.
|
|
|
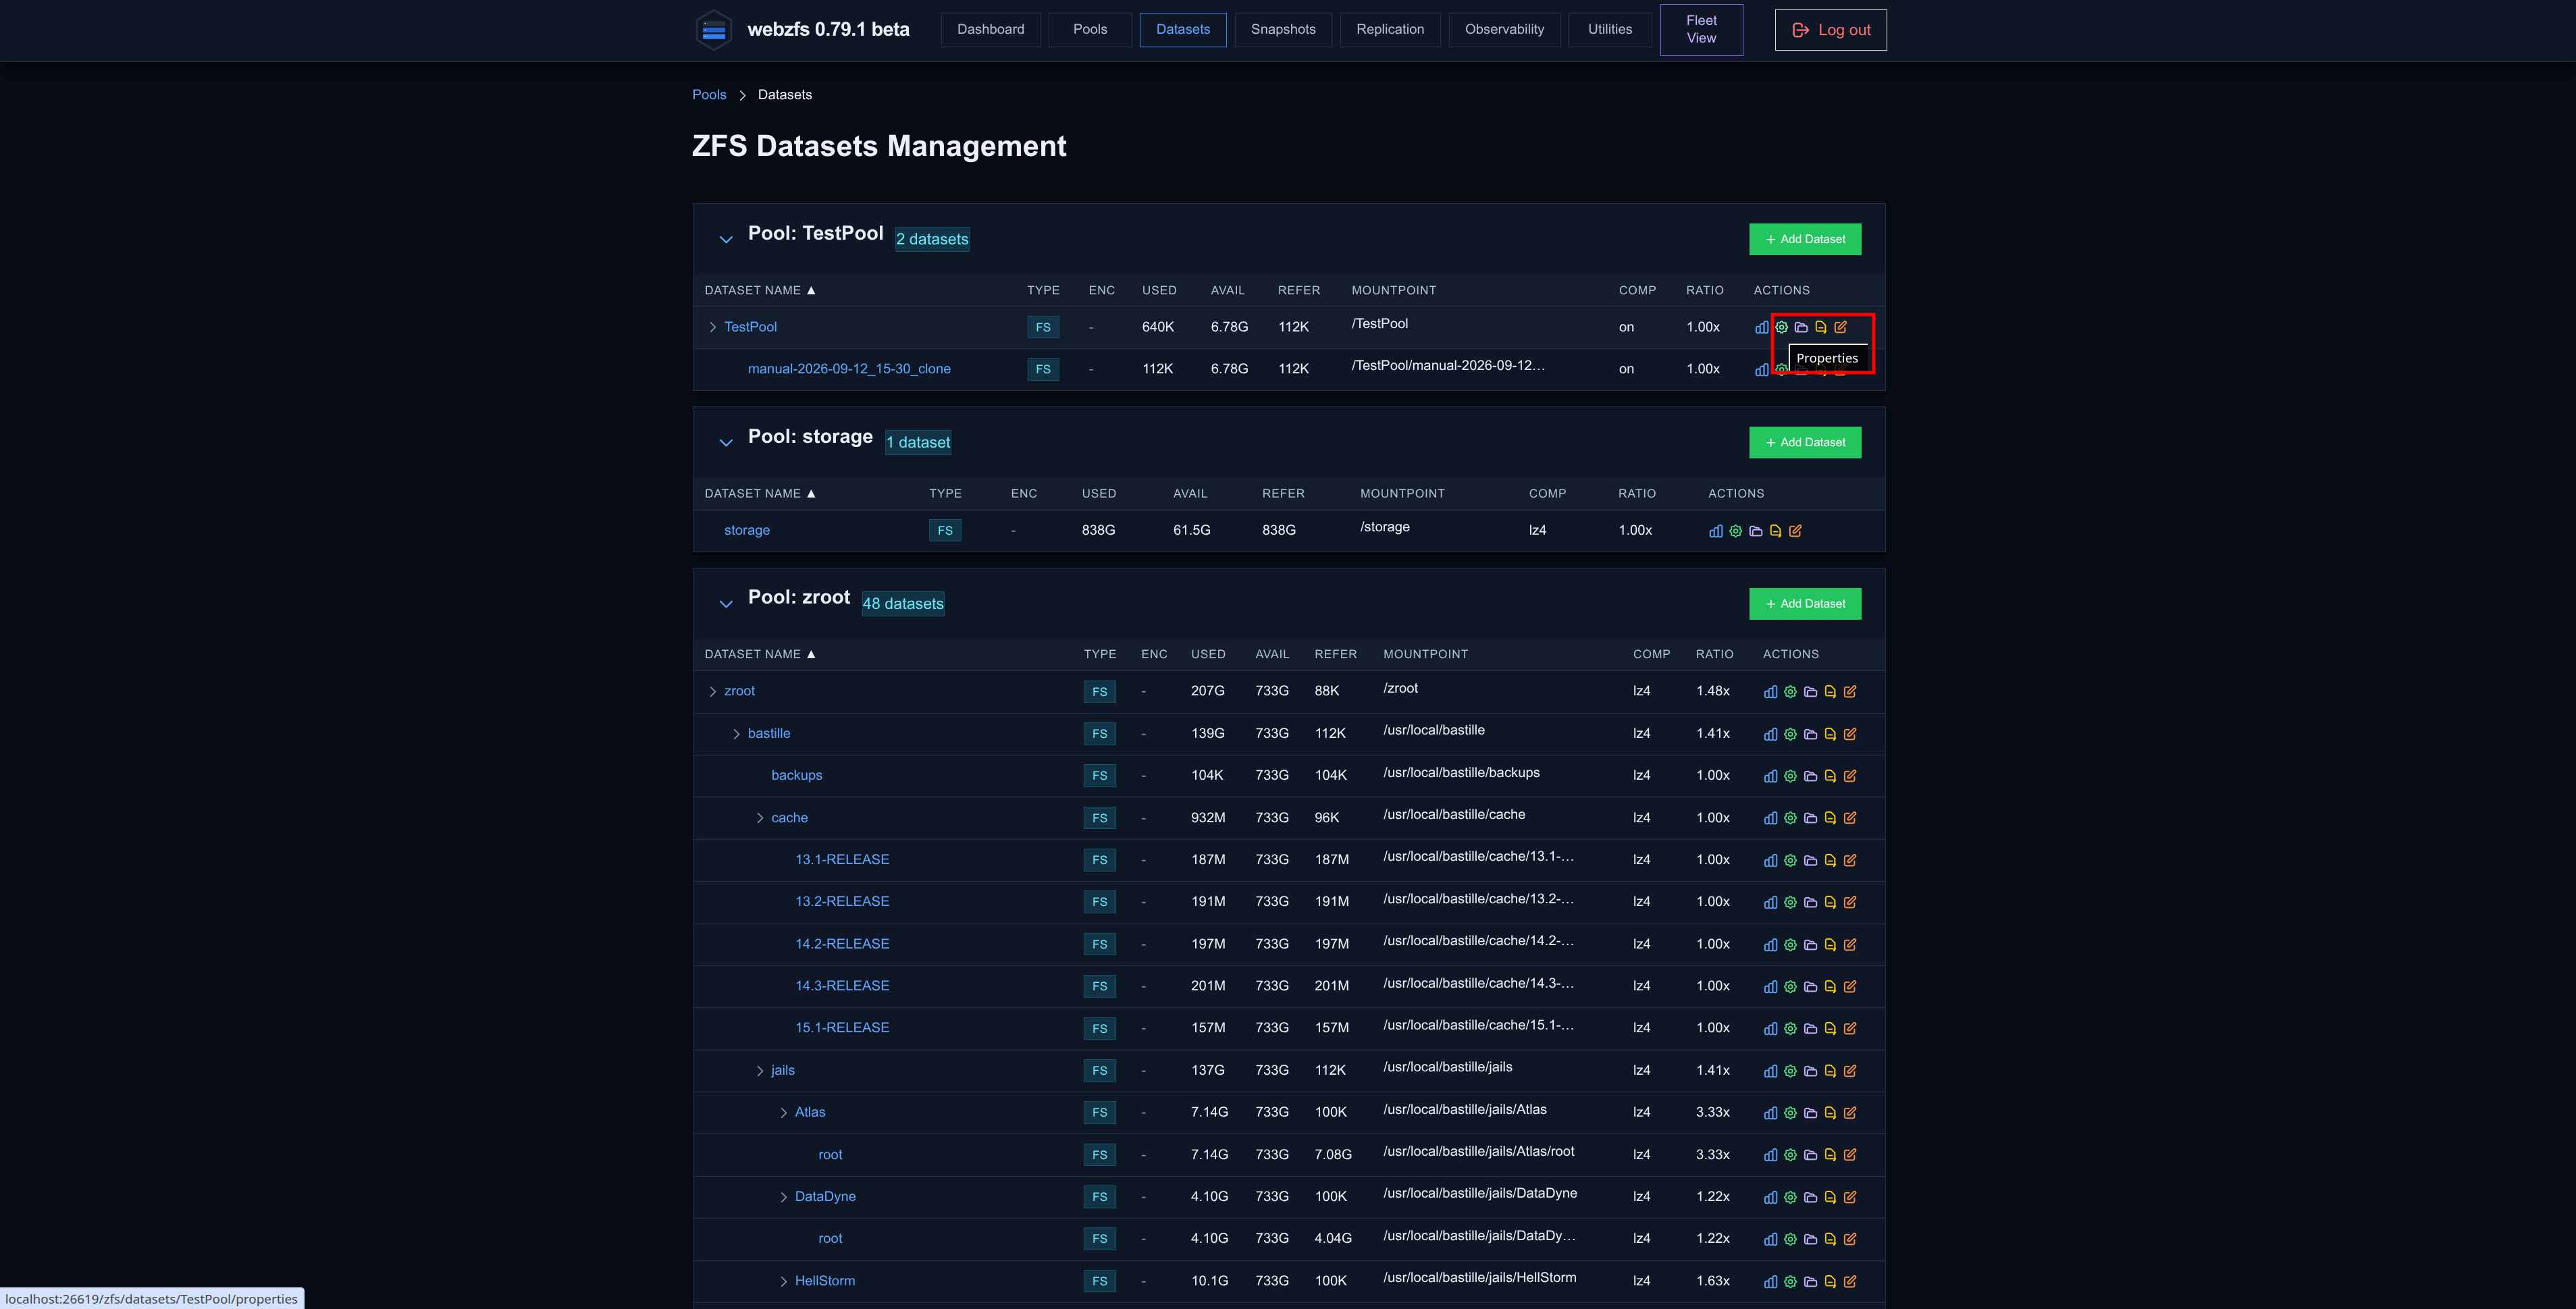
Properties:
We can manage the dataset properties:
|
|
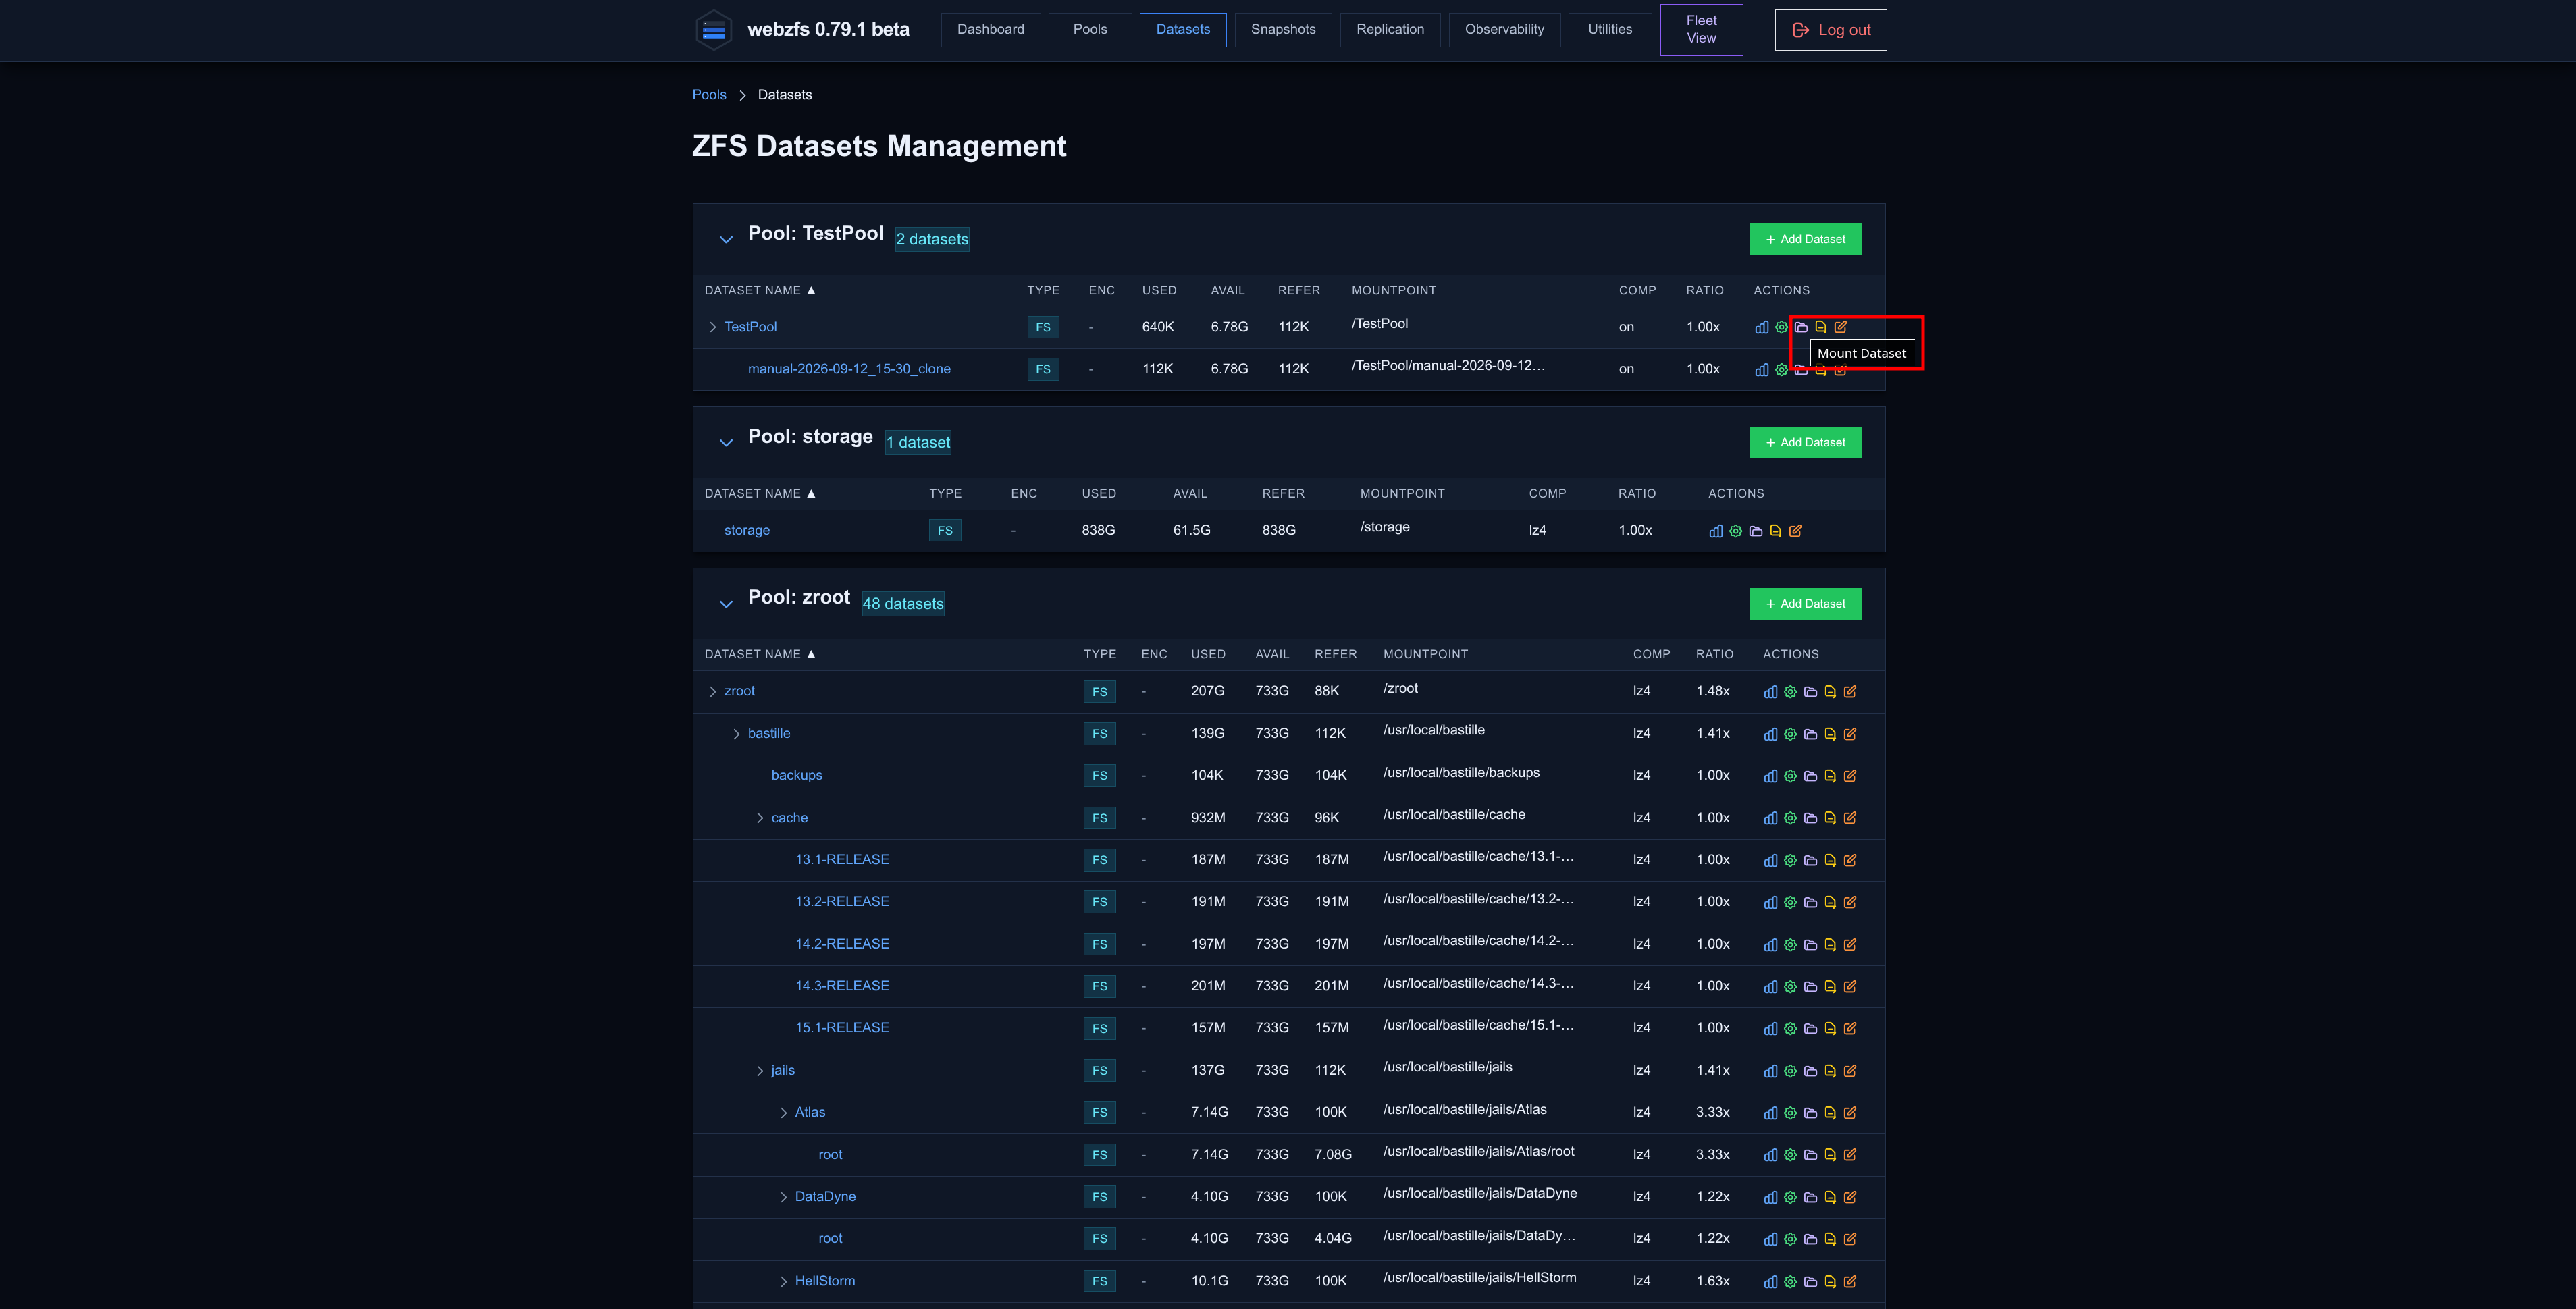
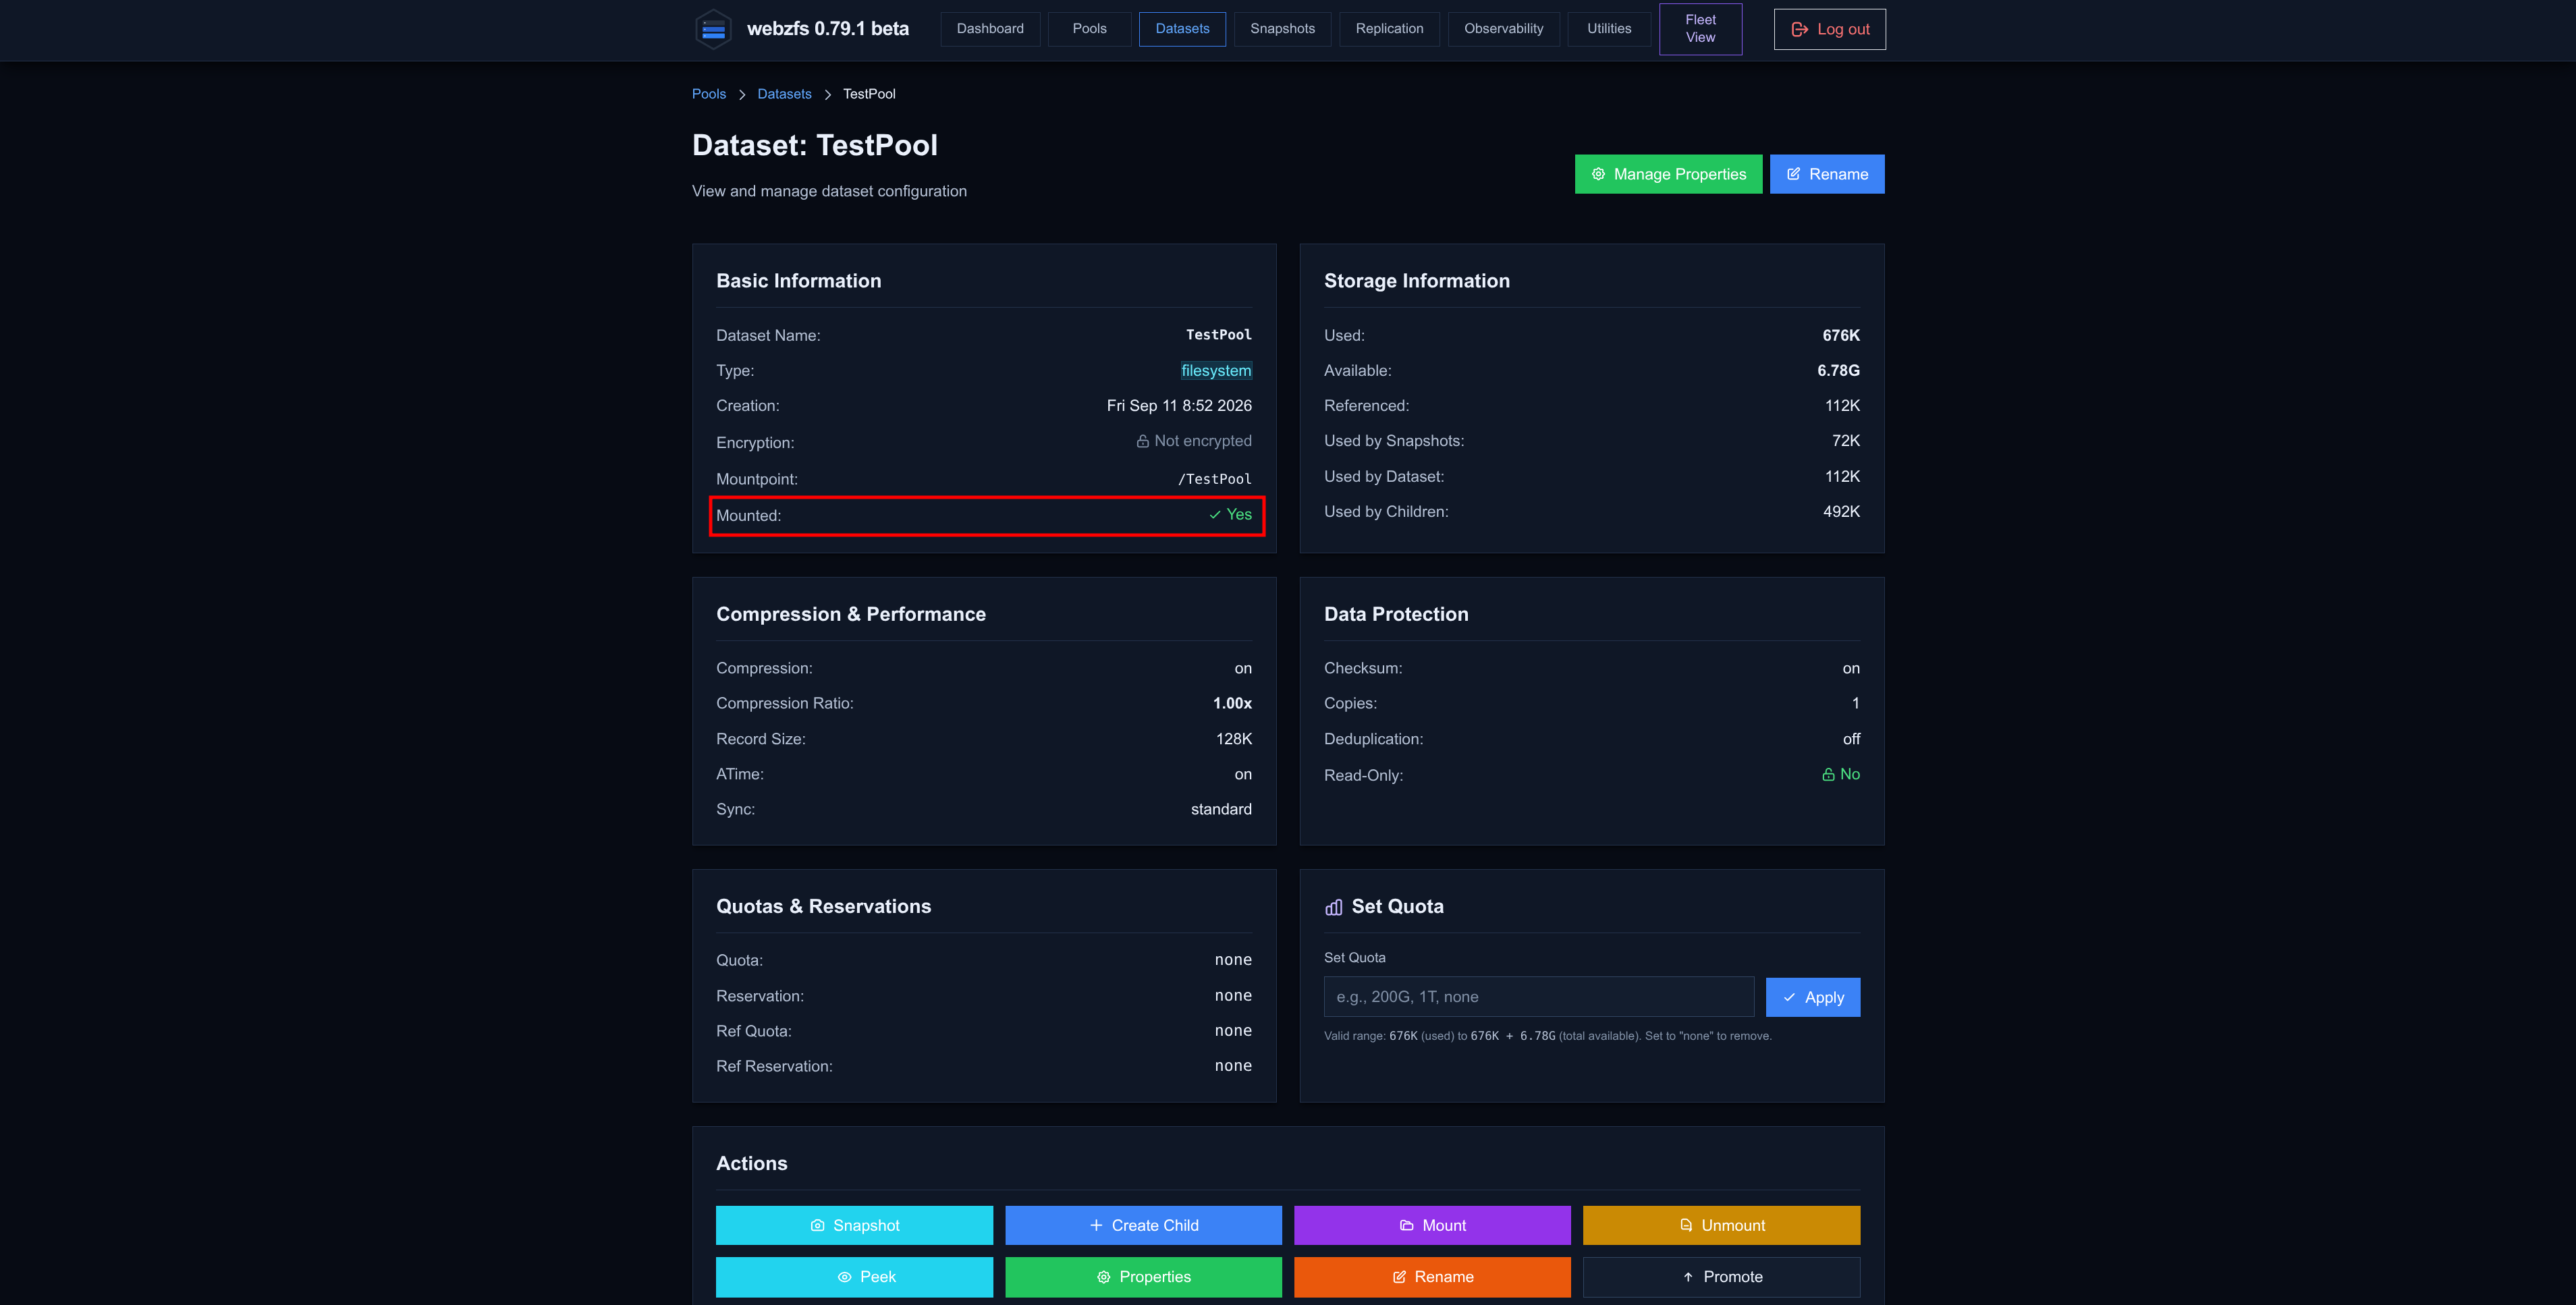
Mount Dataset:
As its name suggests, it lets you mount the dataset:
|
|
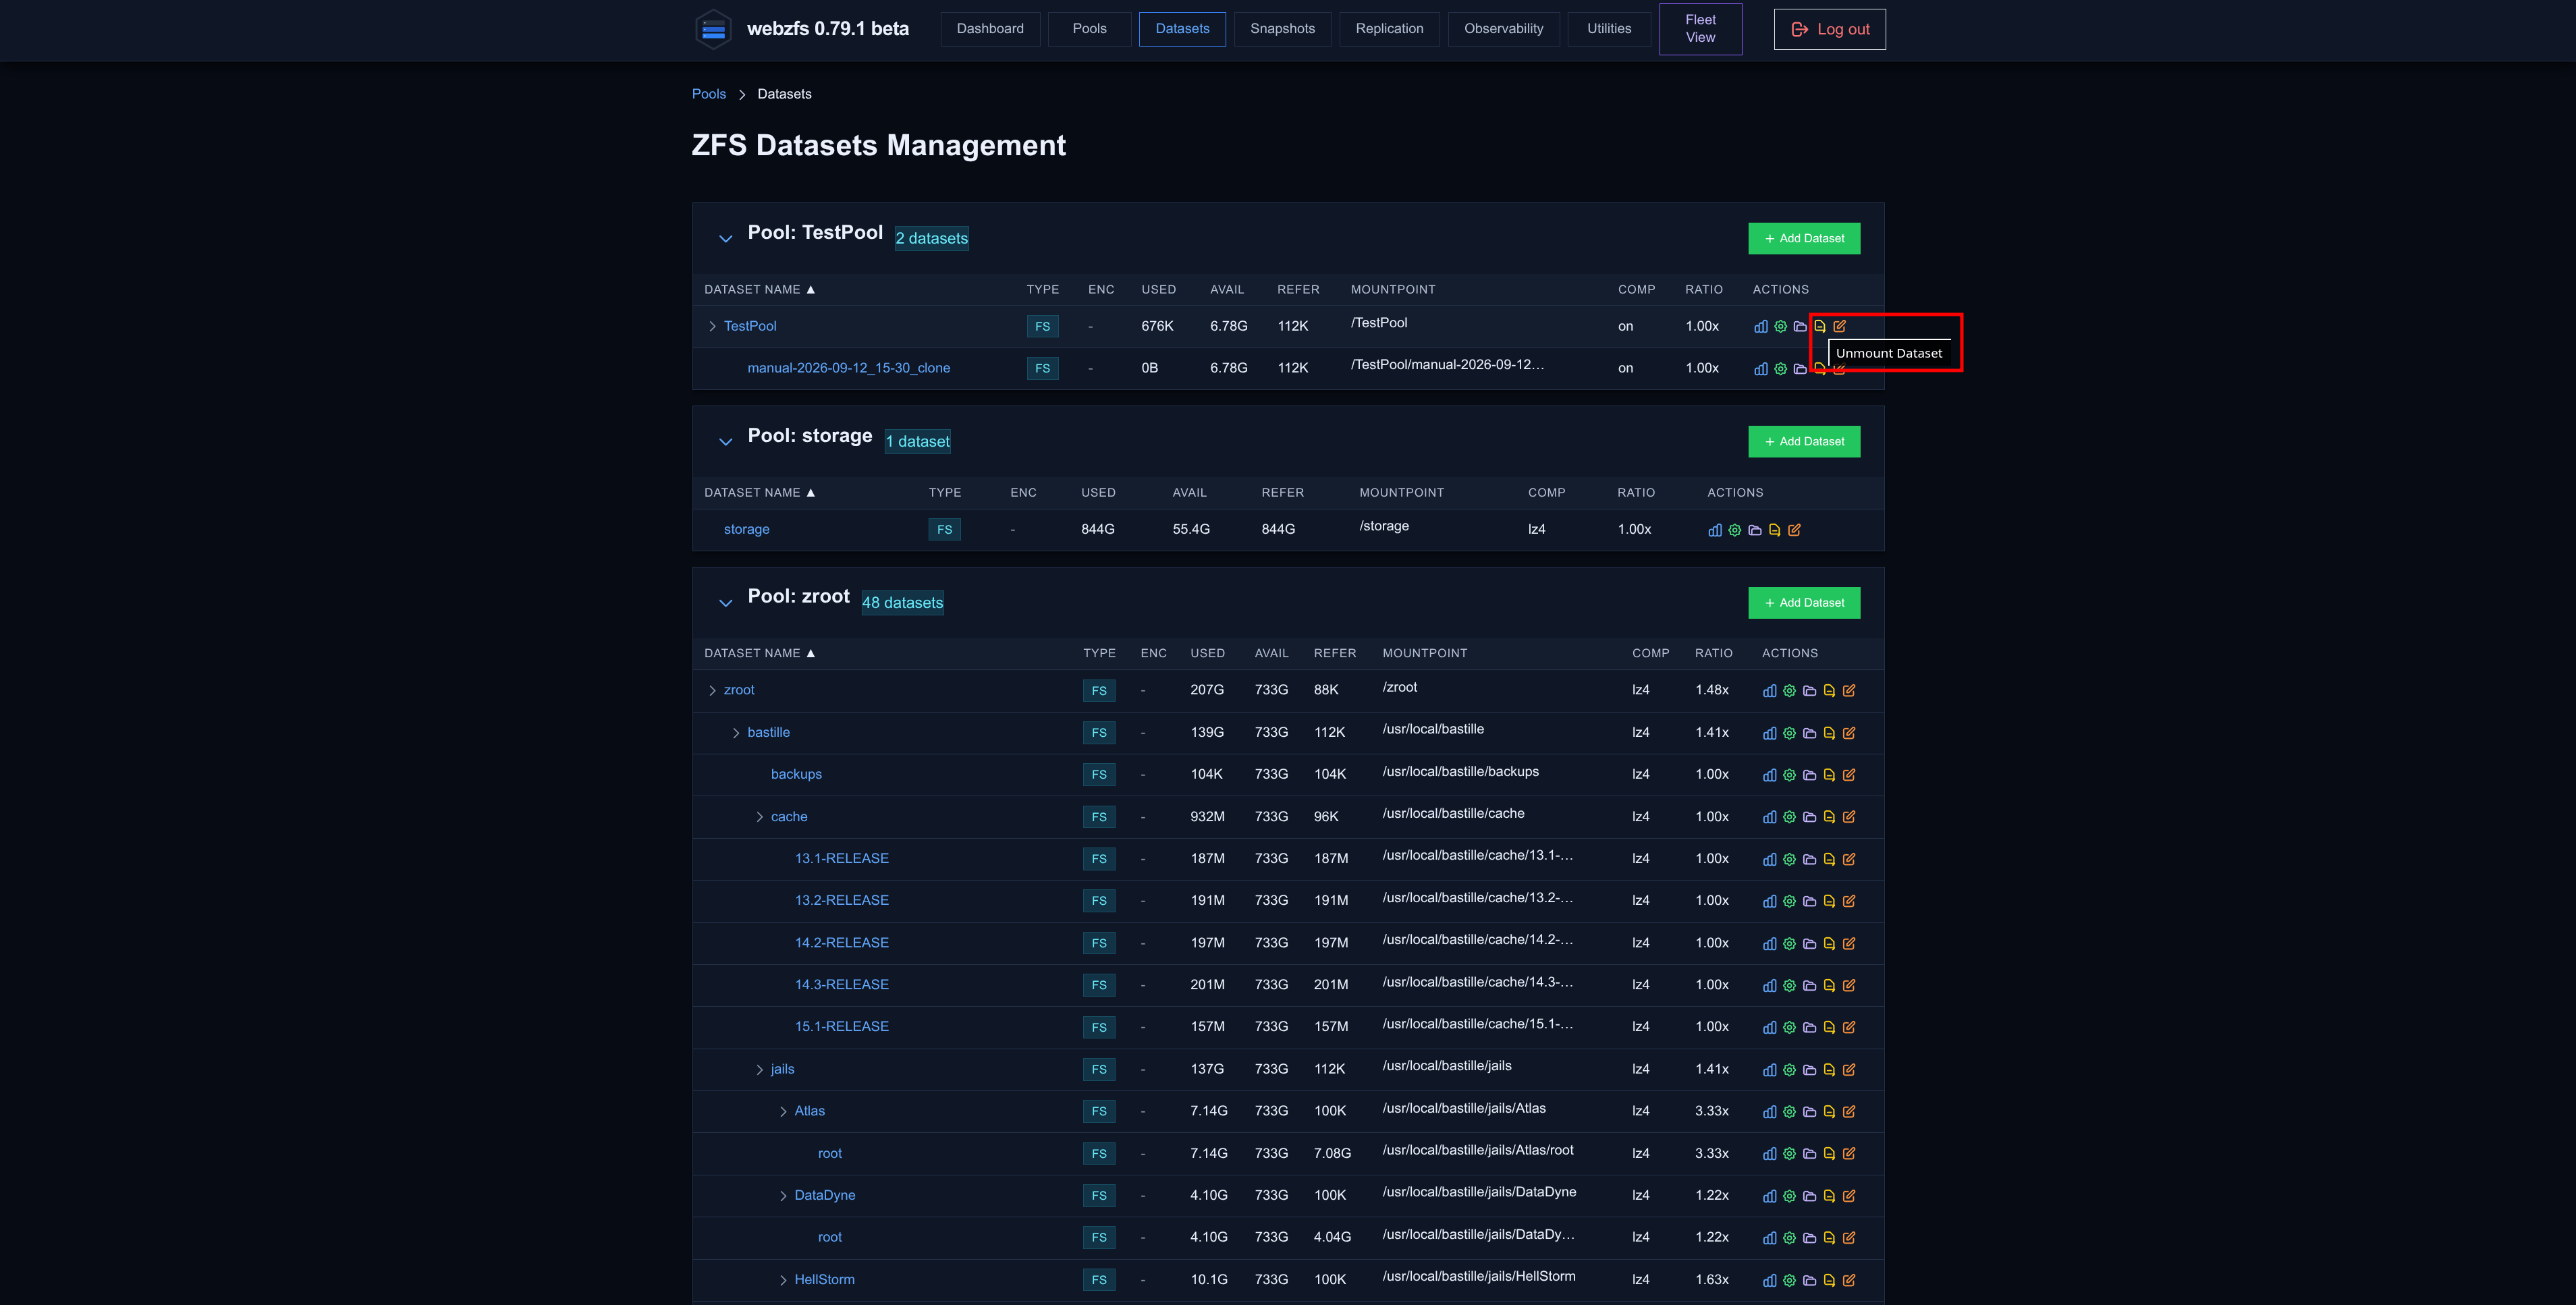
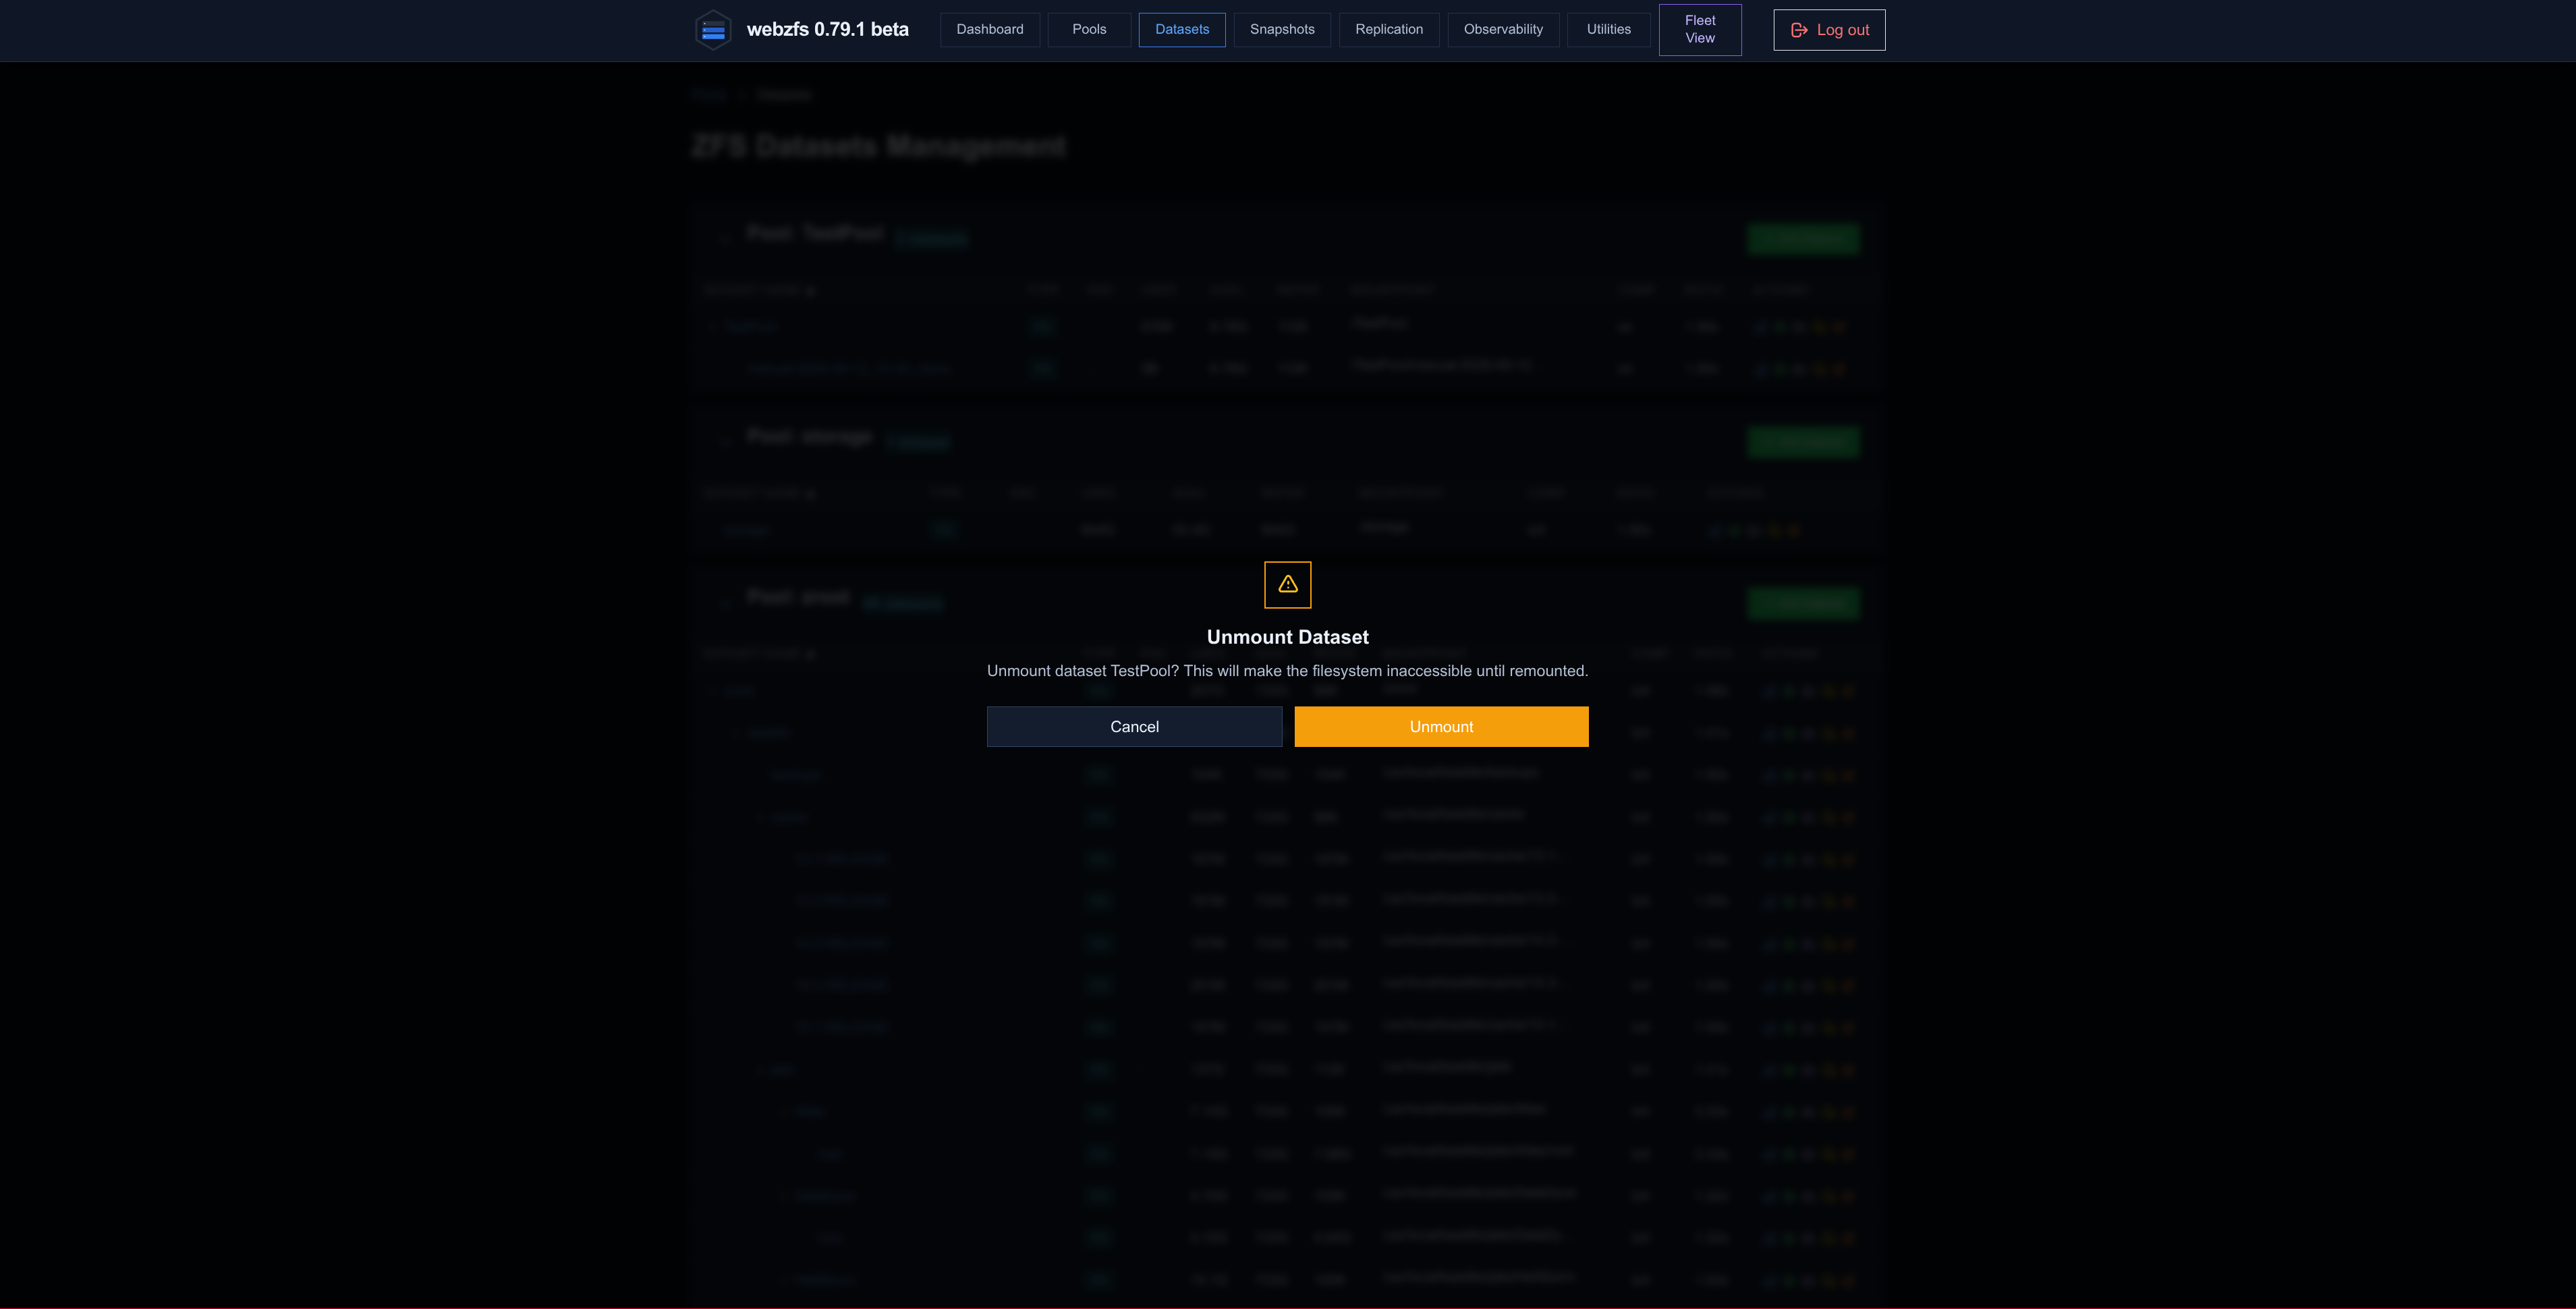
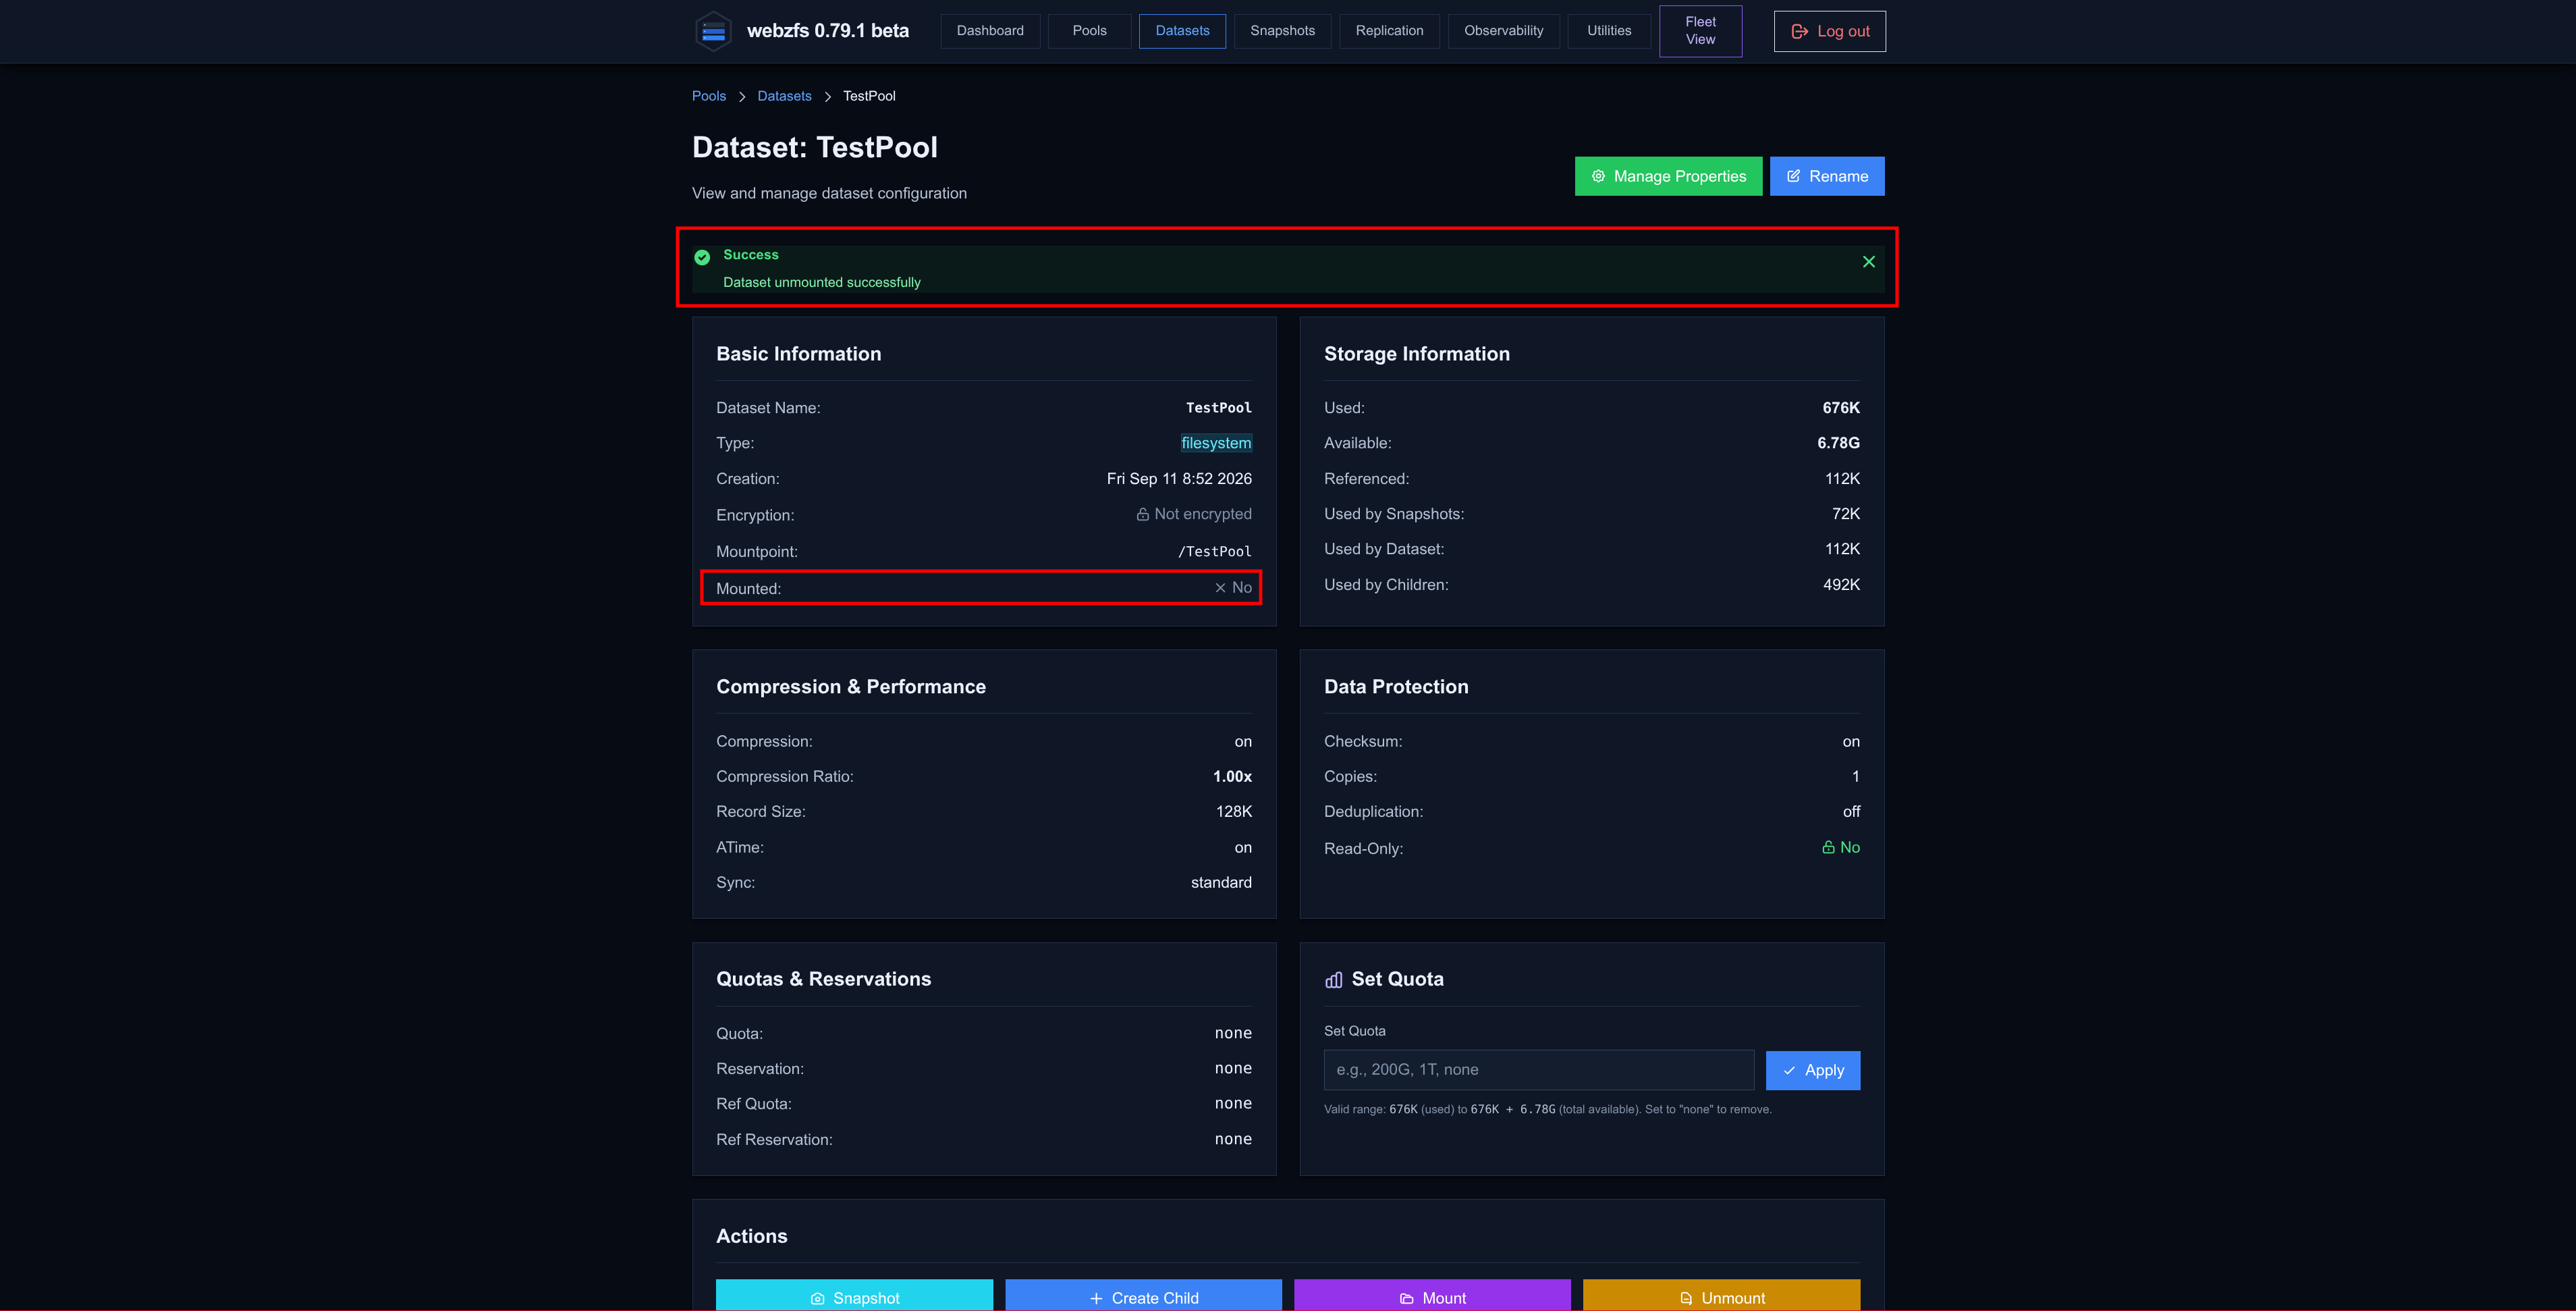
Umount Dataset:
As its name suggests, it lets you unmount the dataset:
|
|
|
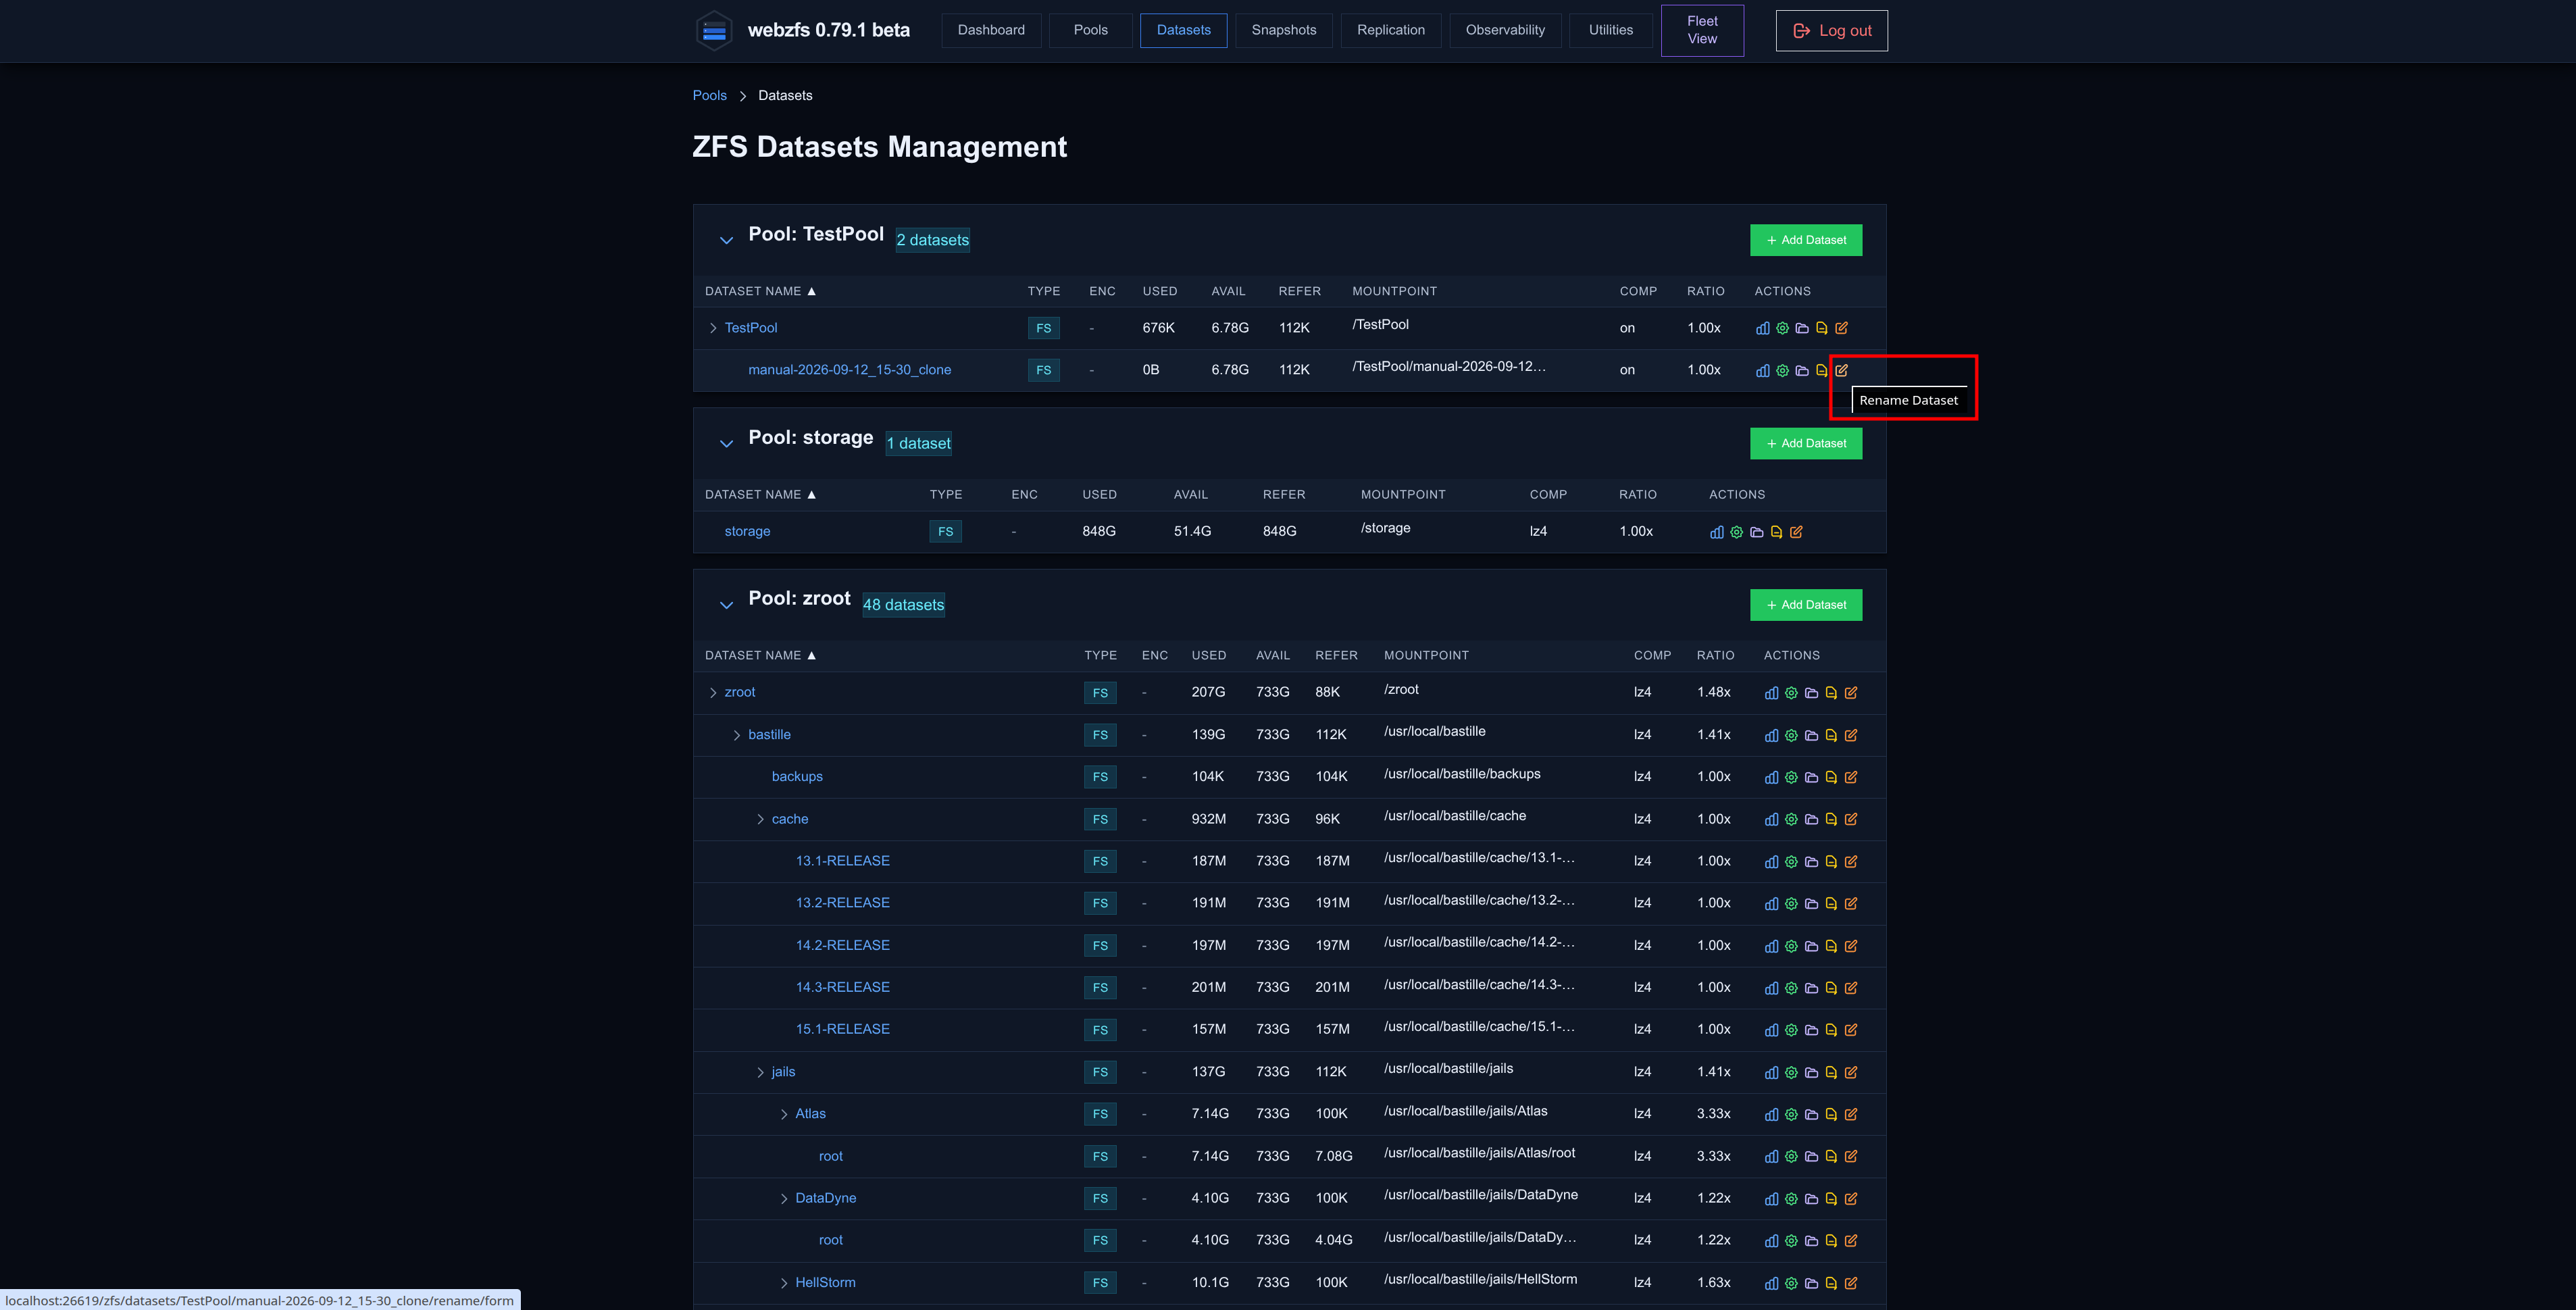
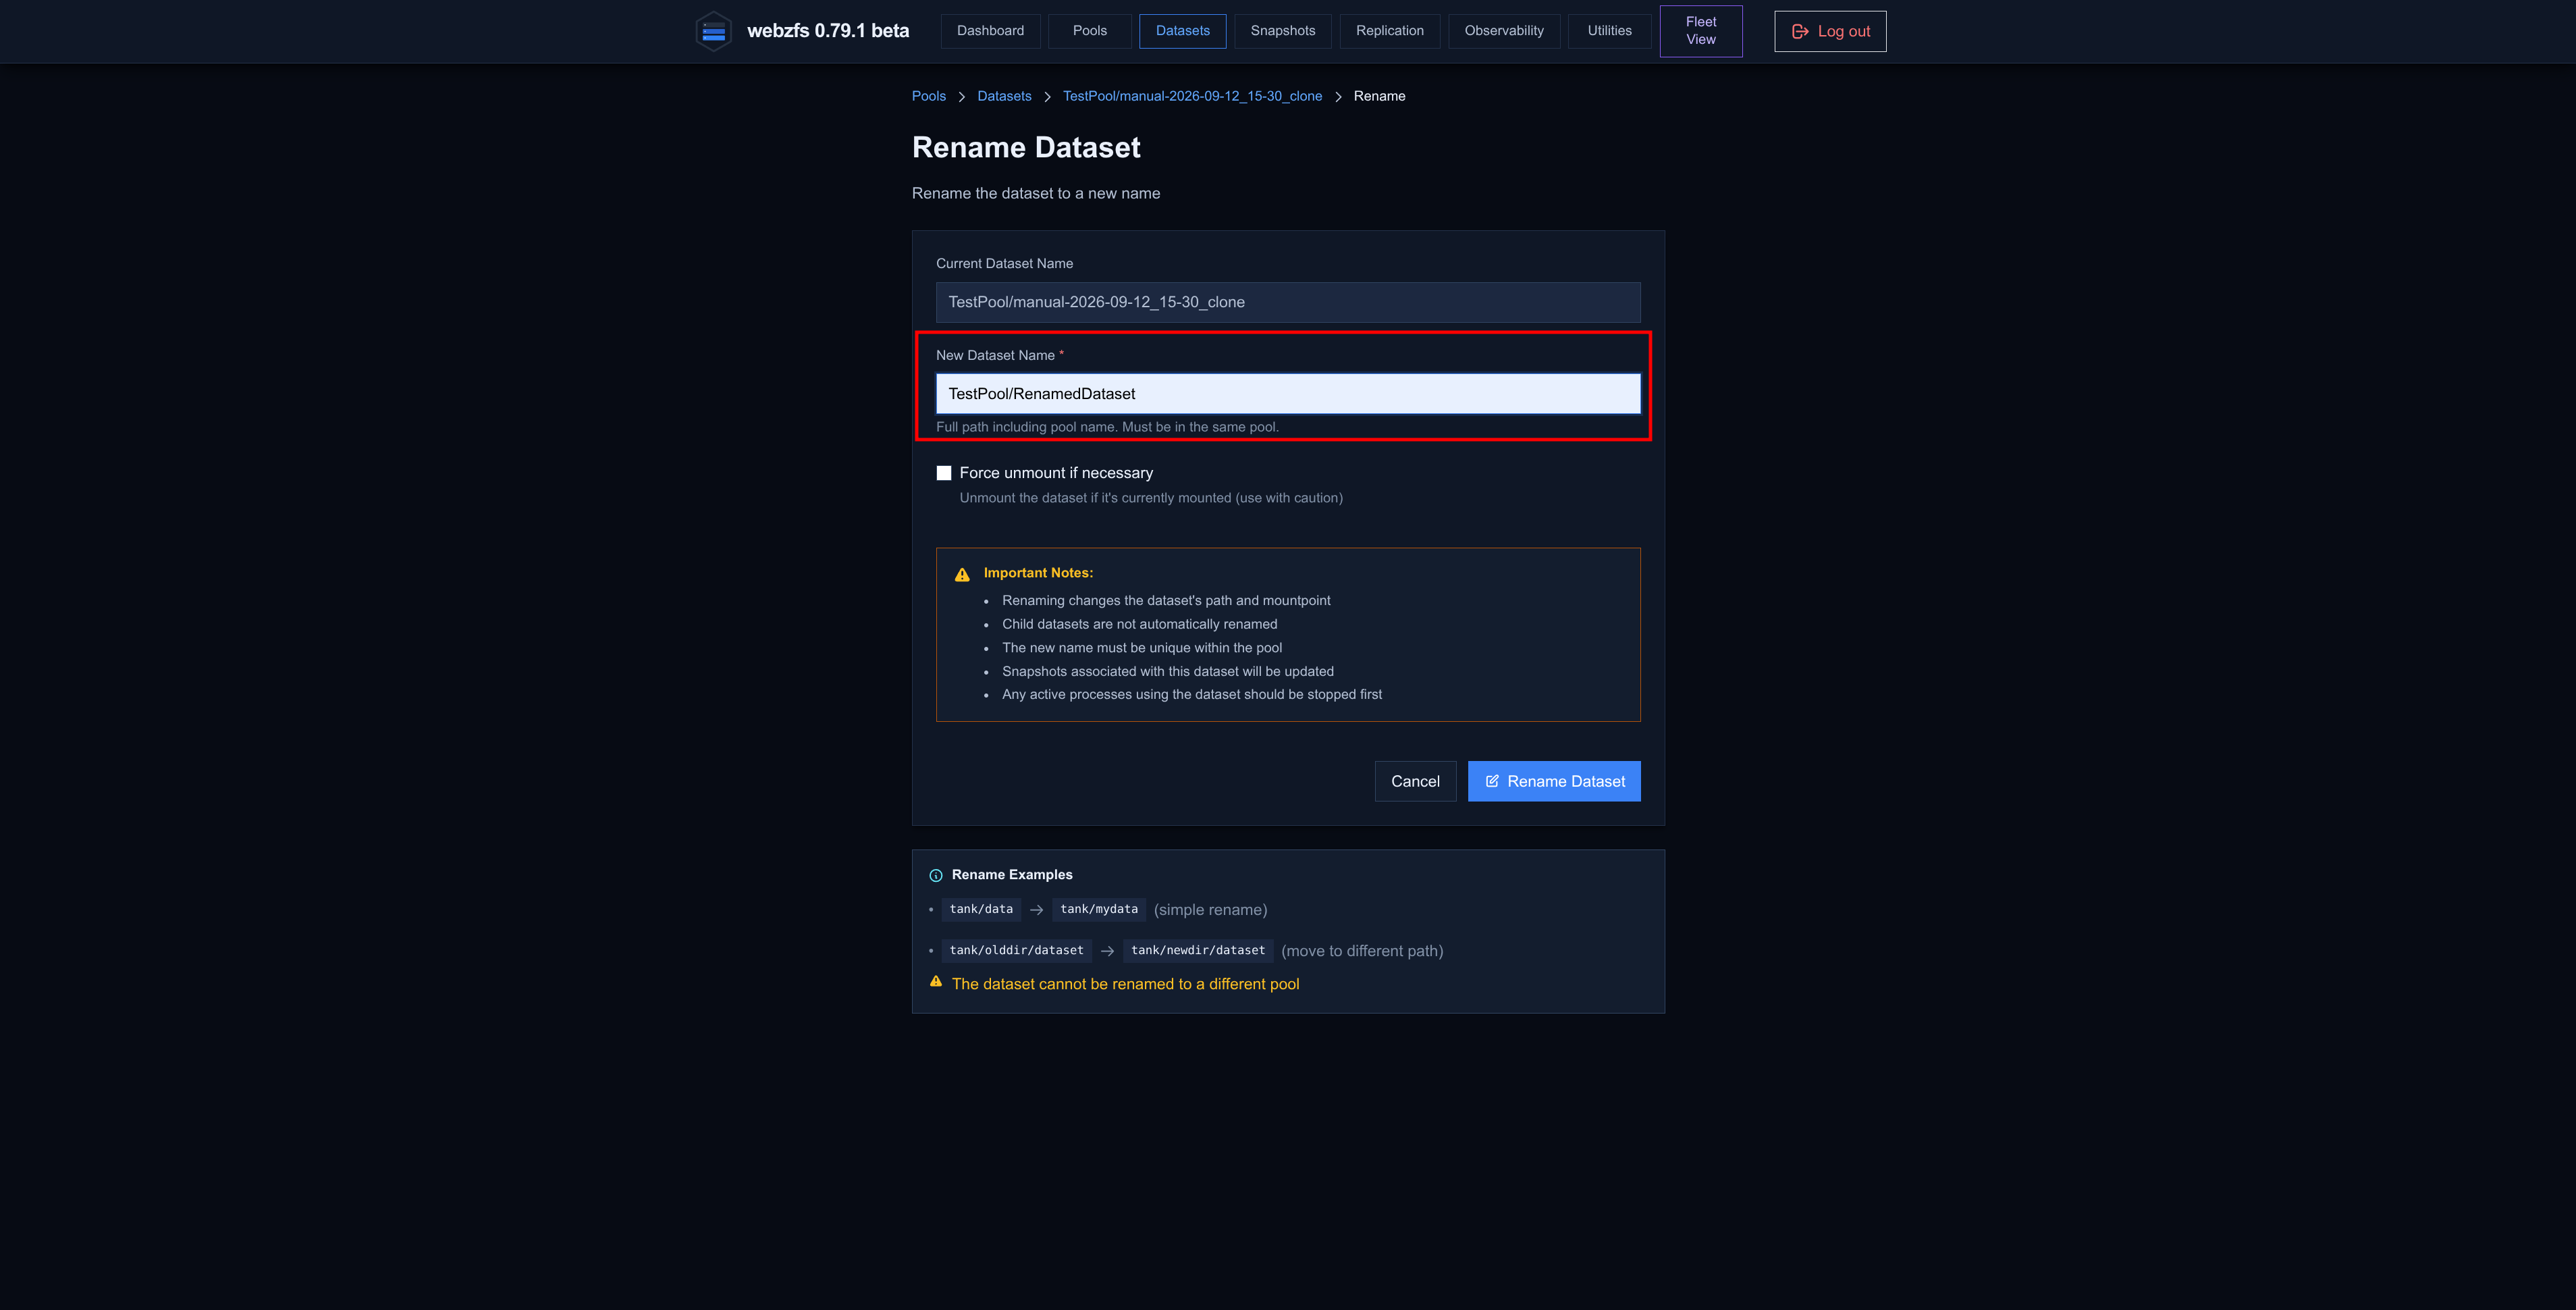
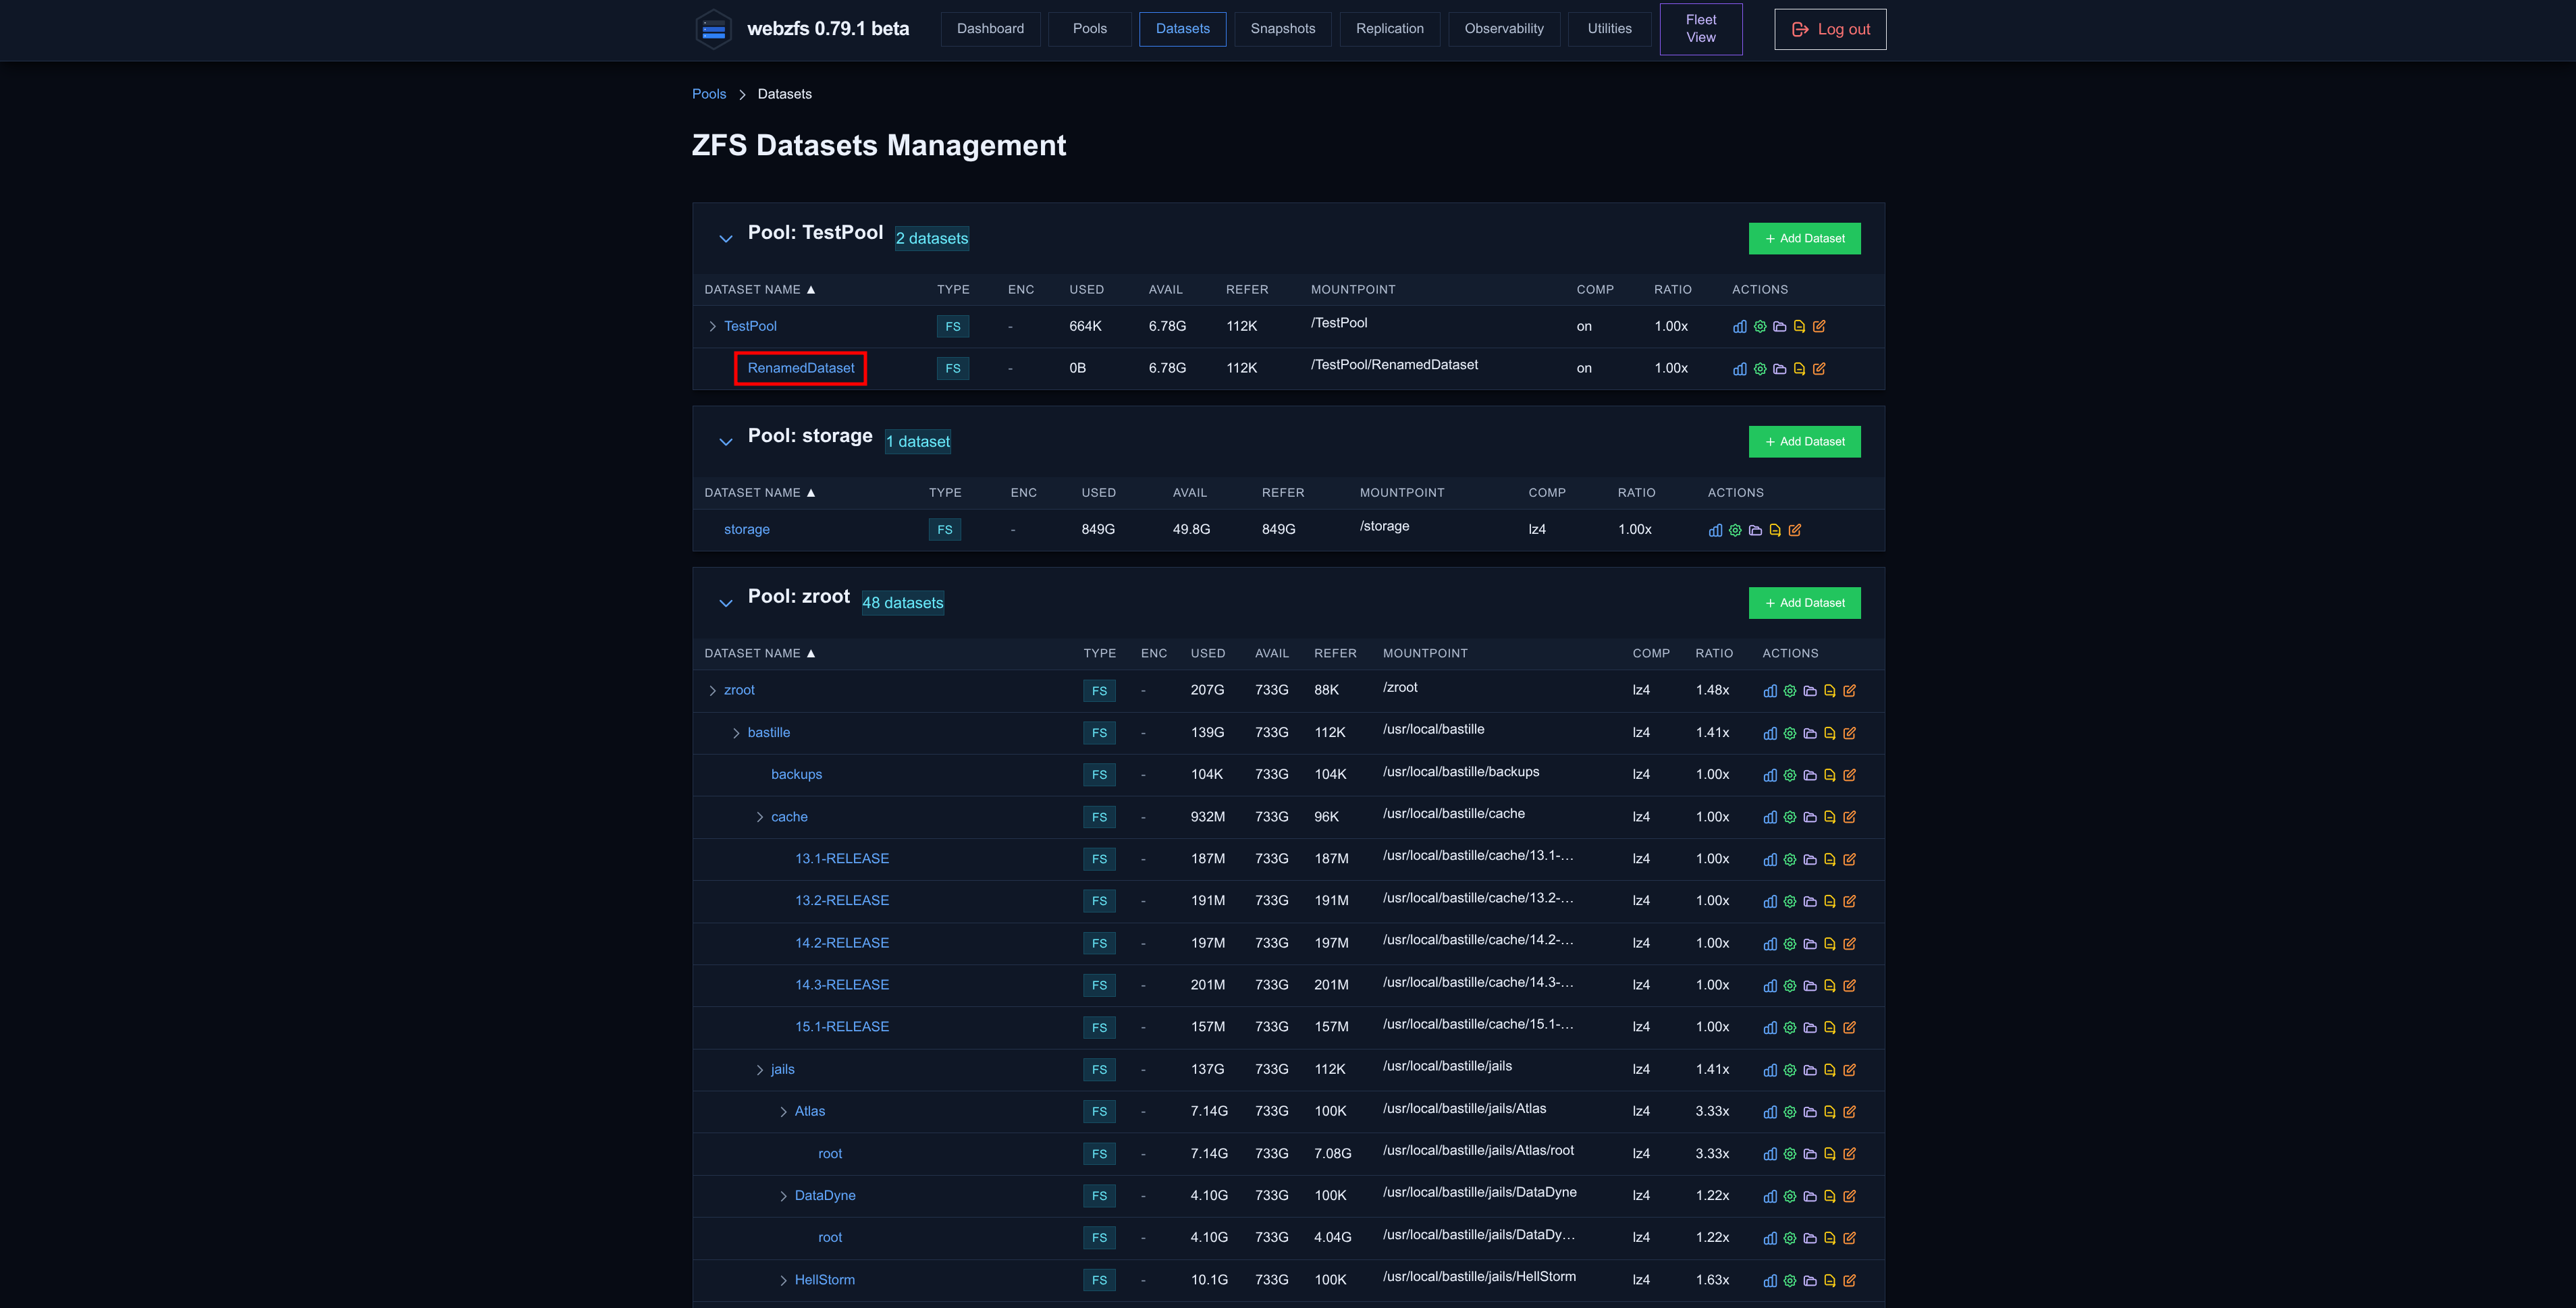
Rename Dataset:
We must keep in mind that we must indicate the full path, POOL_NAME/NEW_DATASET_NAME and that it only supports renaming second-order datasets, for example TestPool -> TestPool2 would not work, but TestPool/00 -> TestPool/01, yes.
|
|
|
|
Snapshots
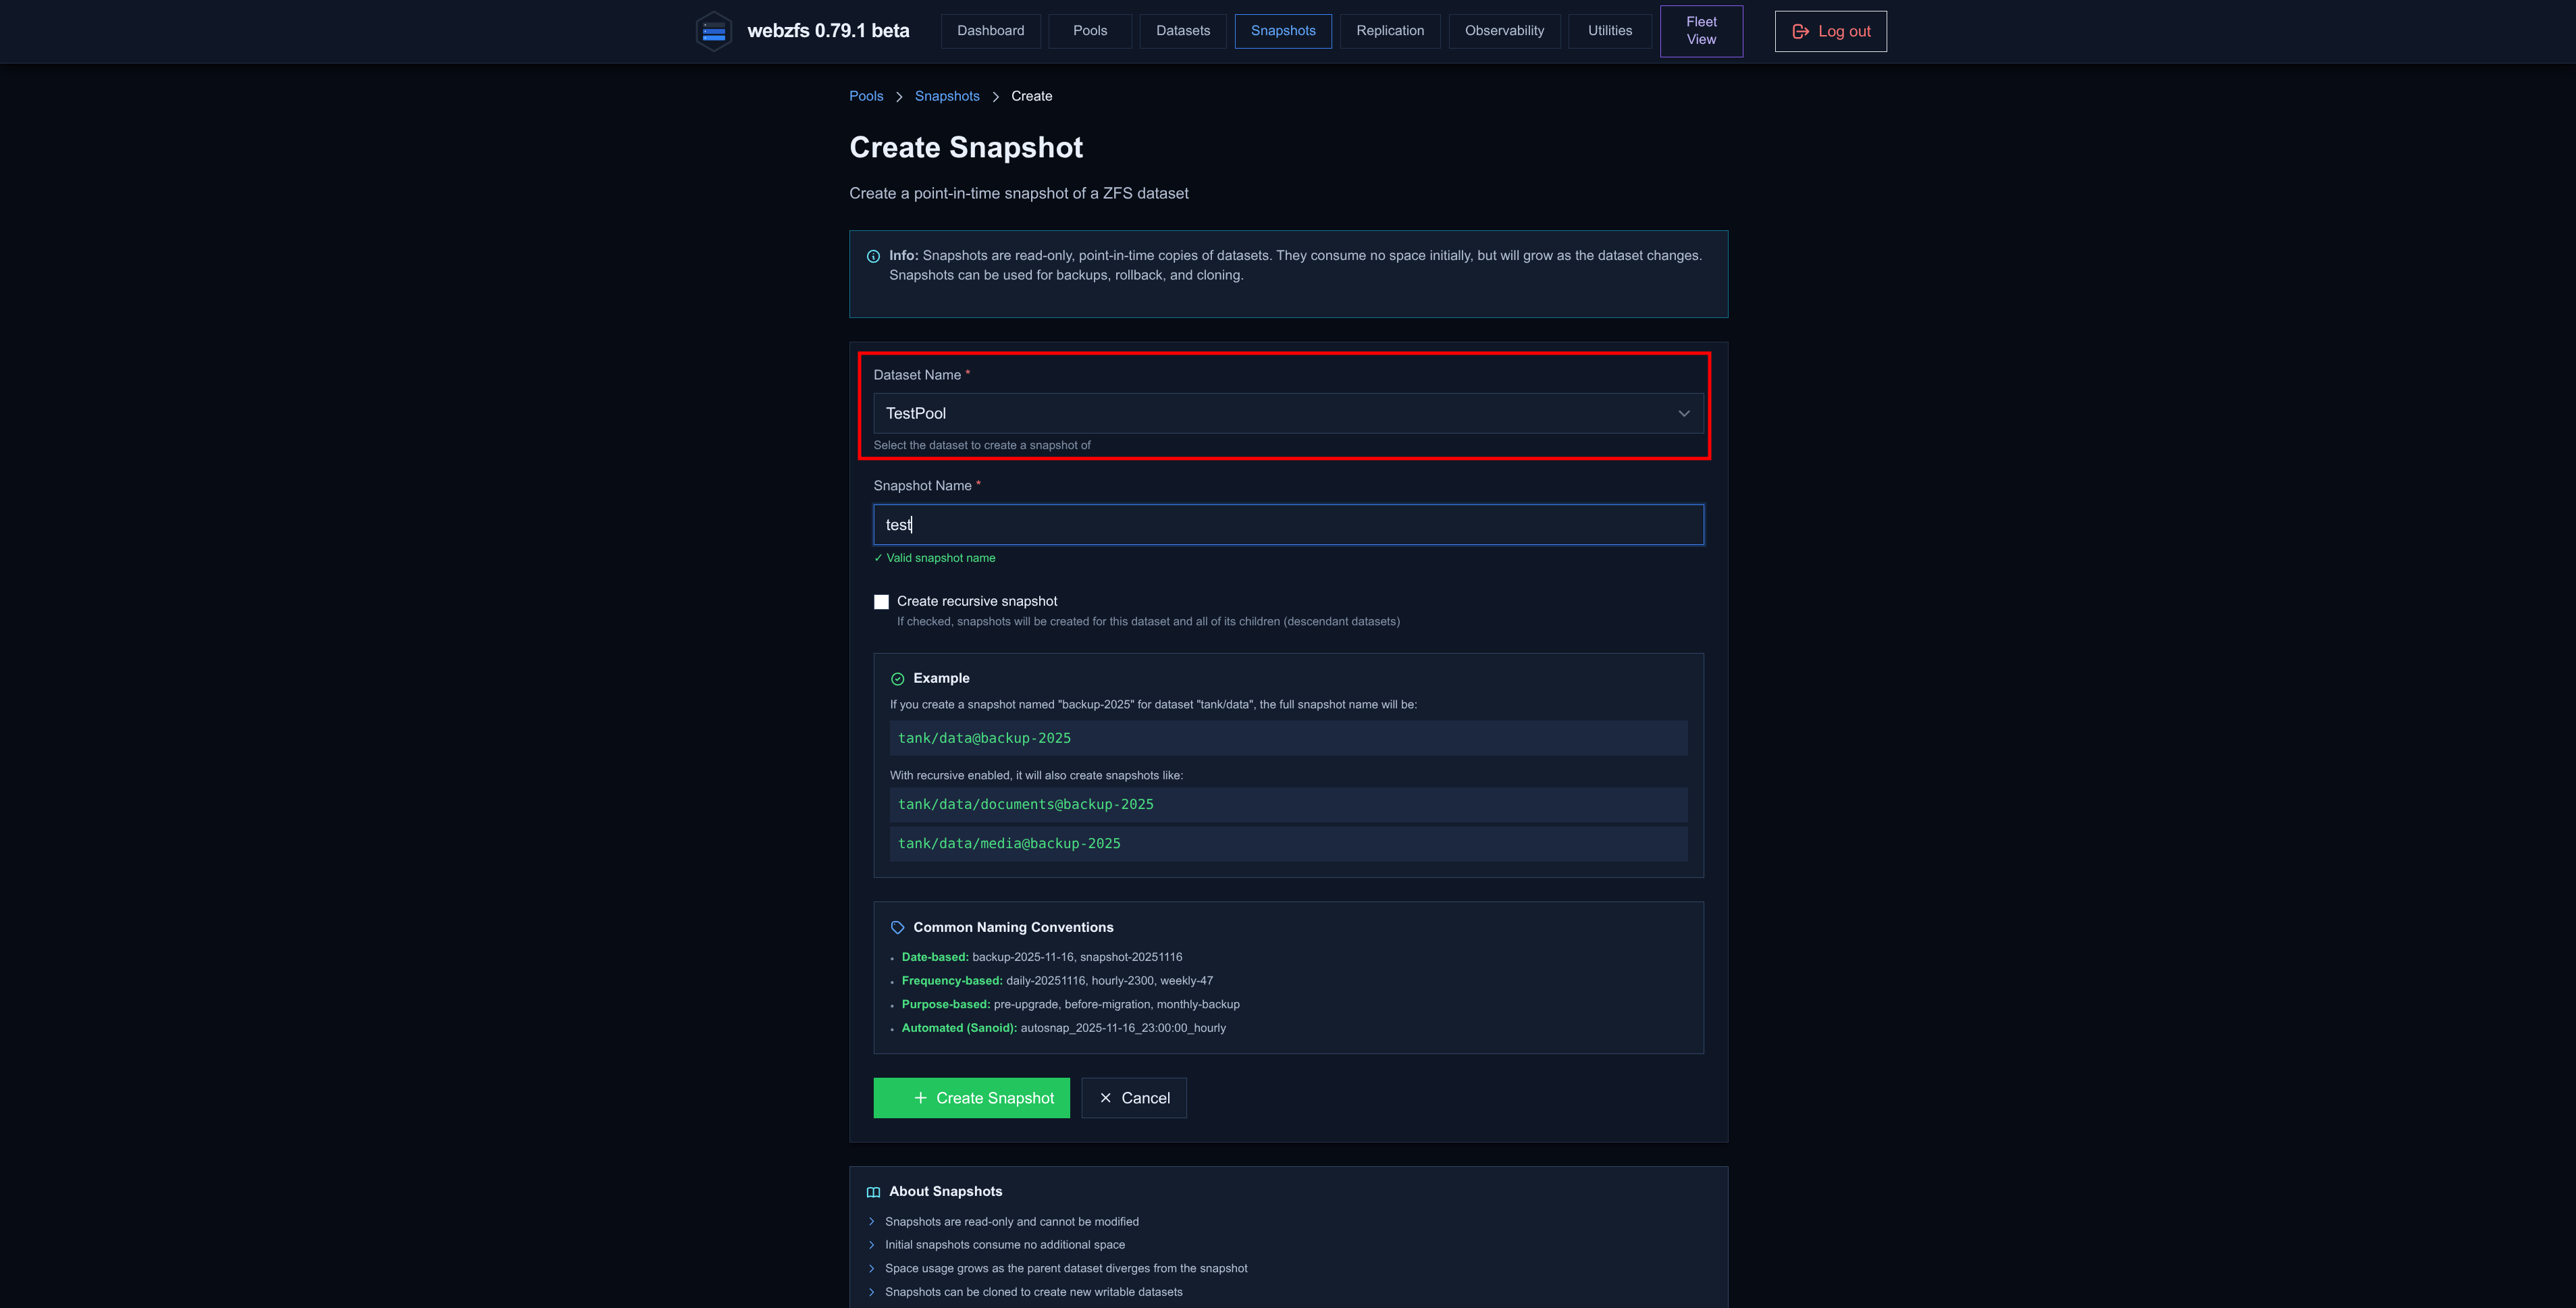
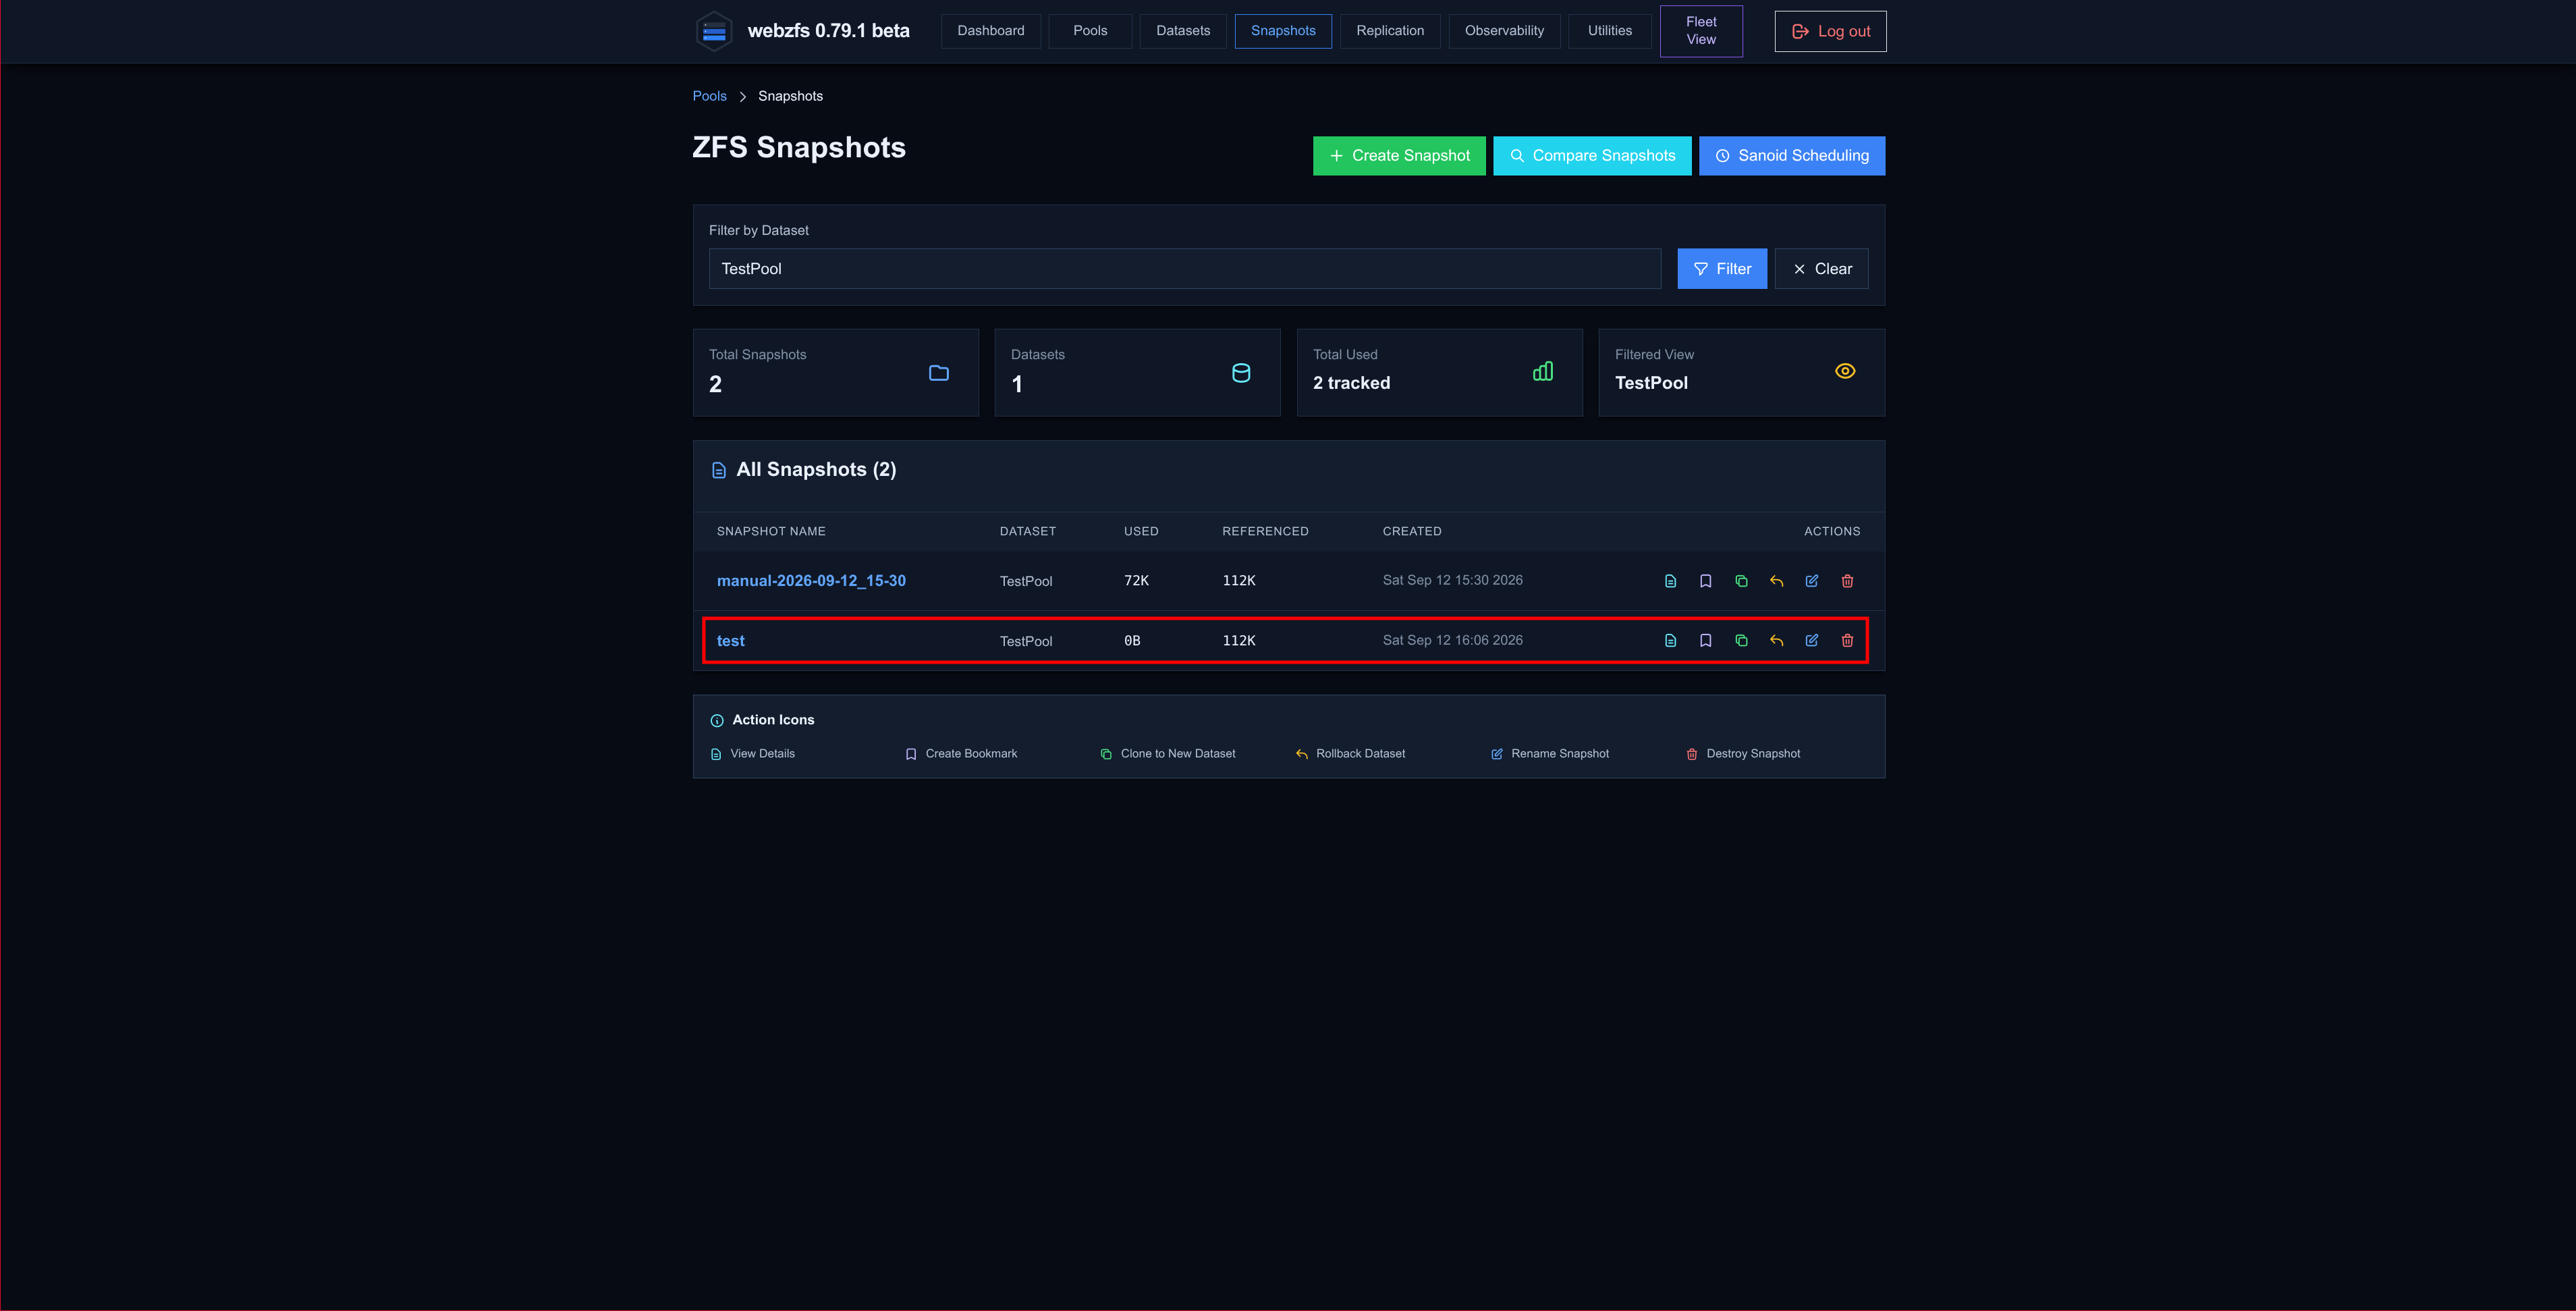
We enter one of the most interesting sections of ZFS: snapshots.
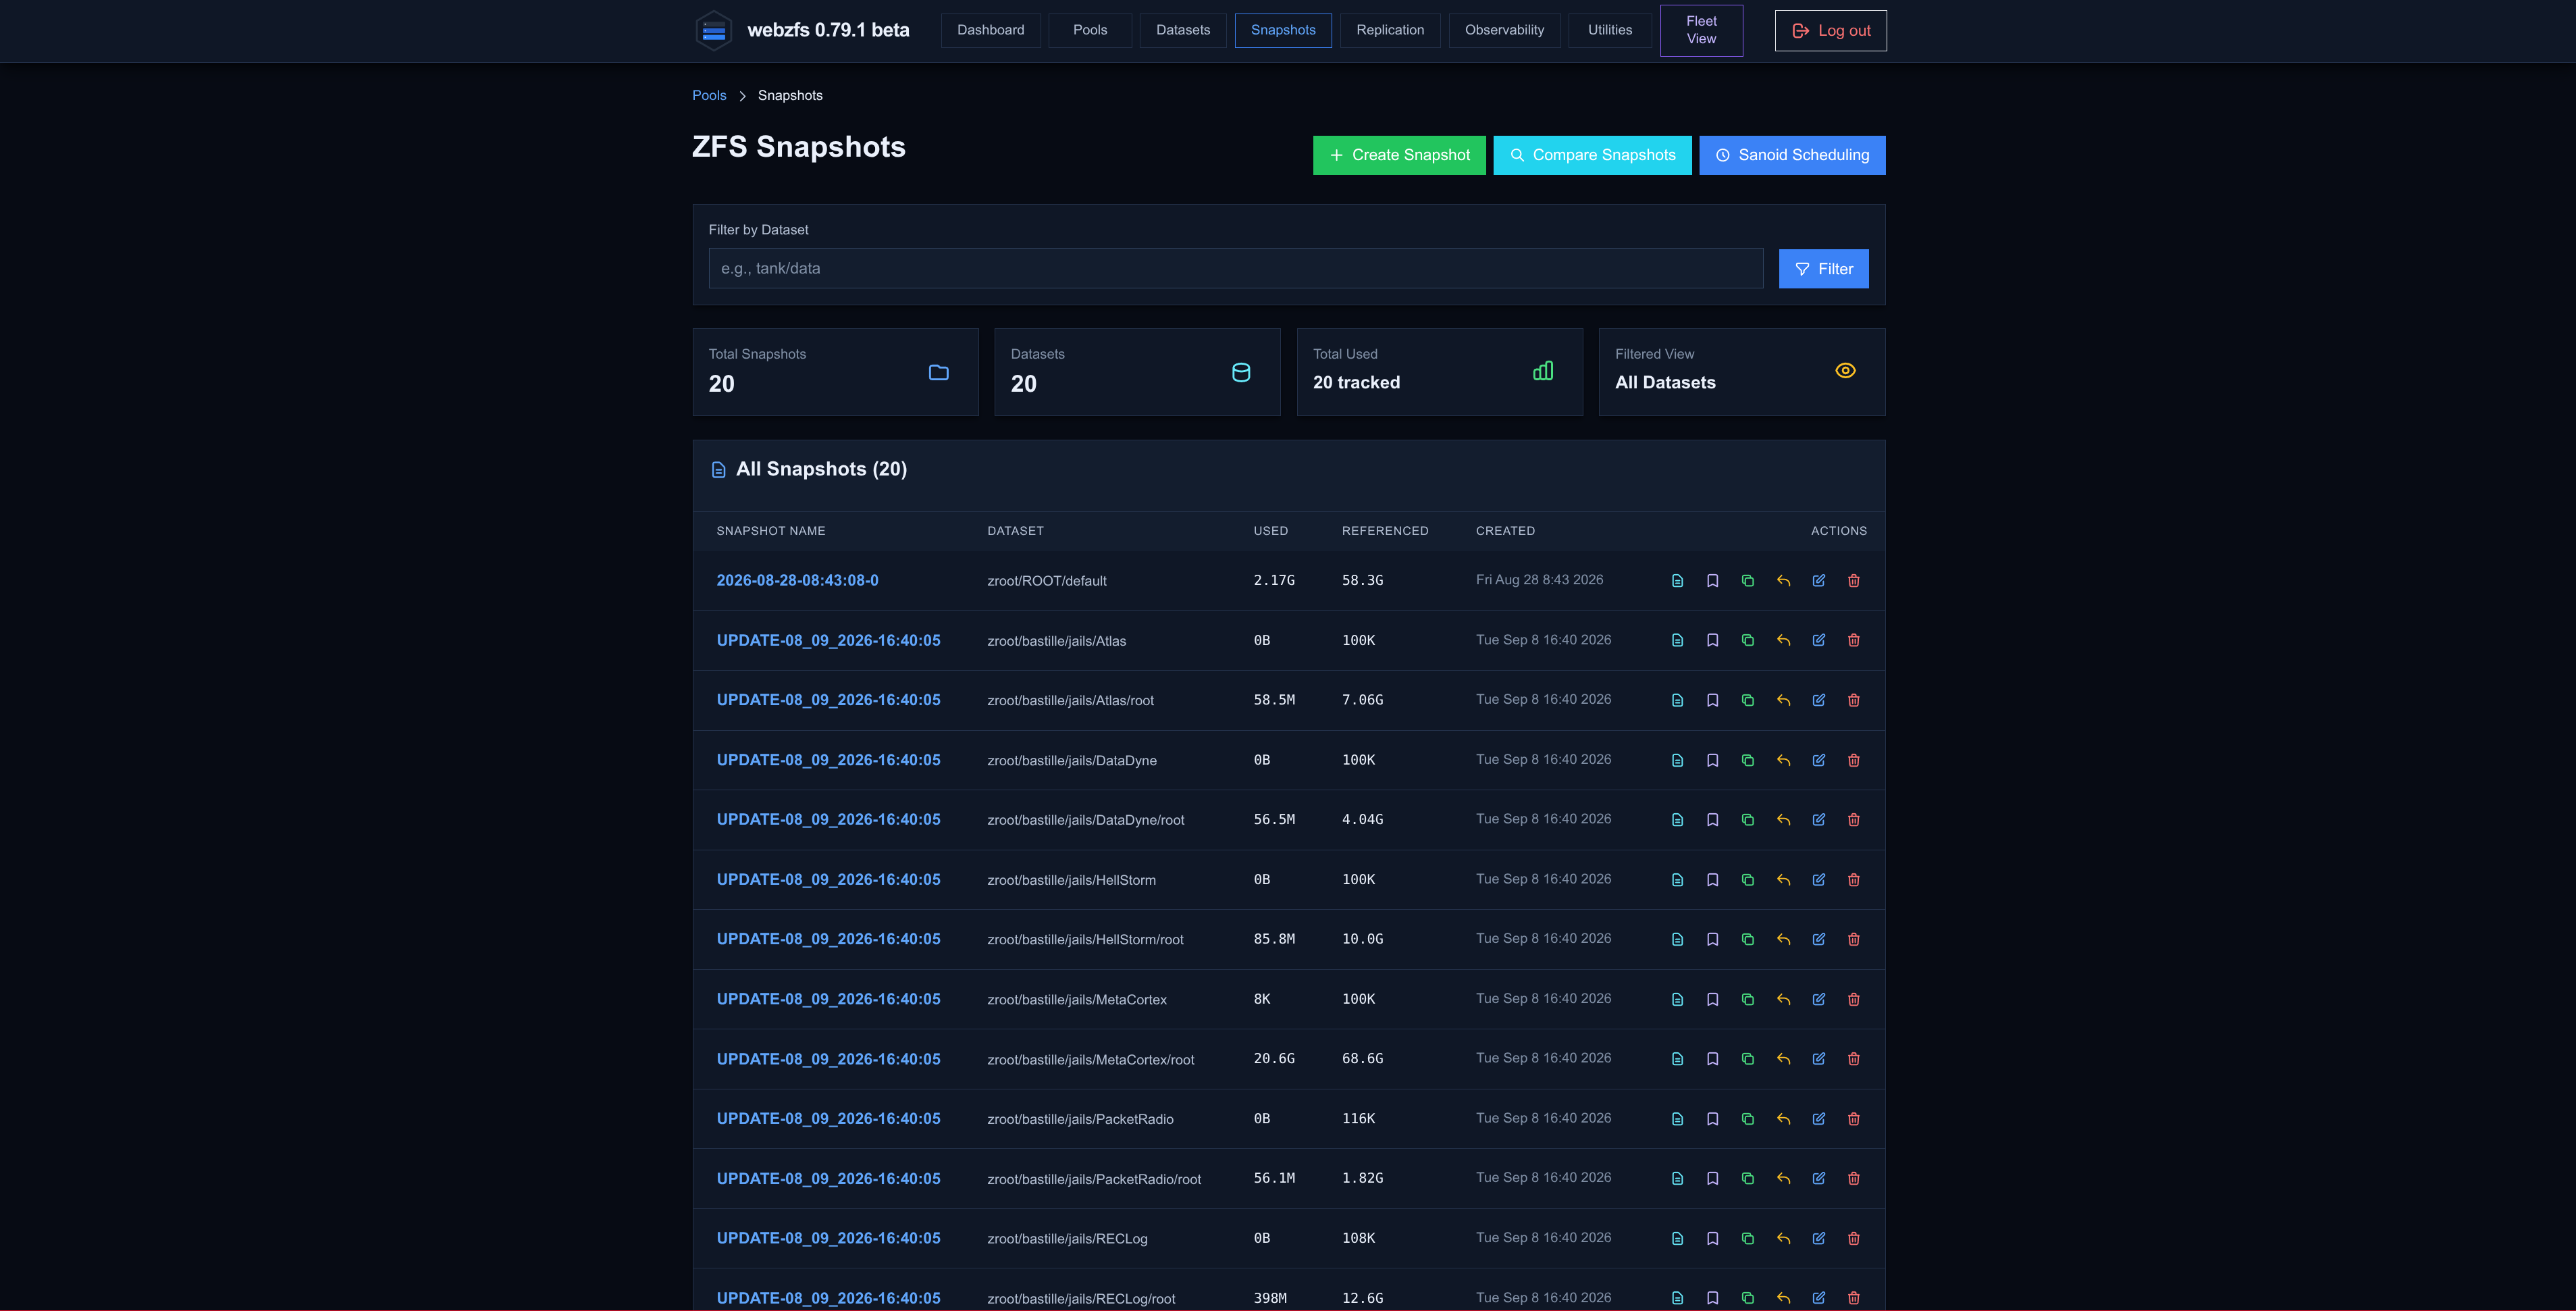
From this section we can create snapshots:
|
|
|
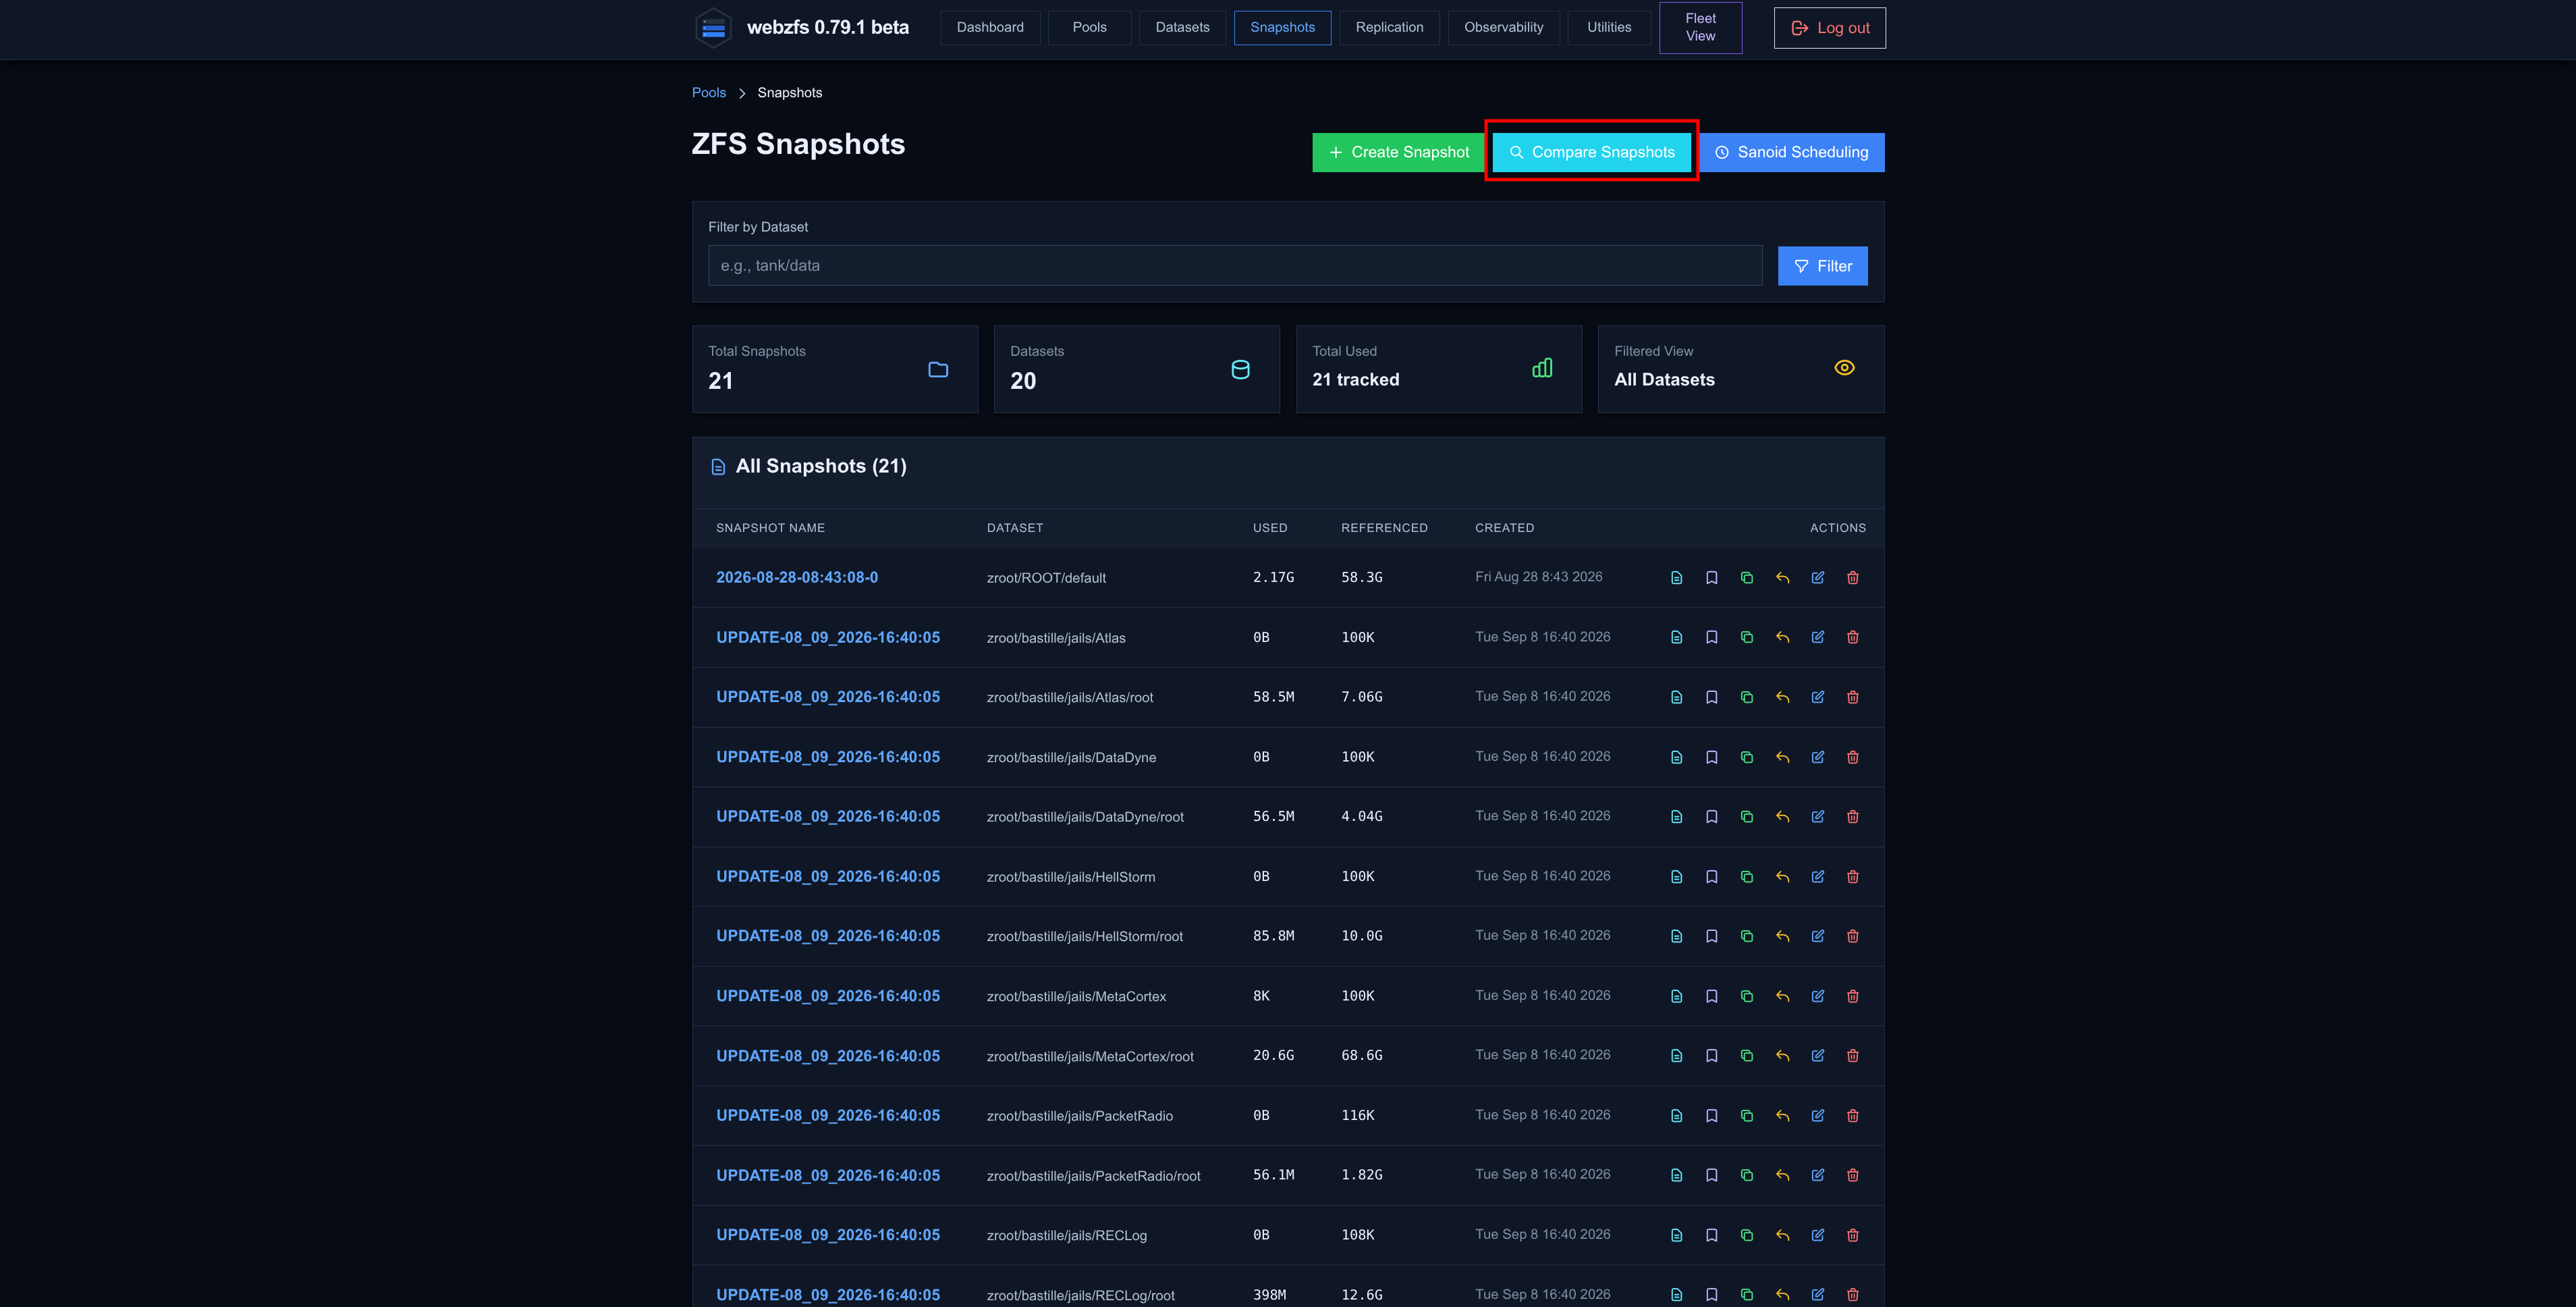
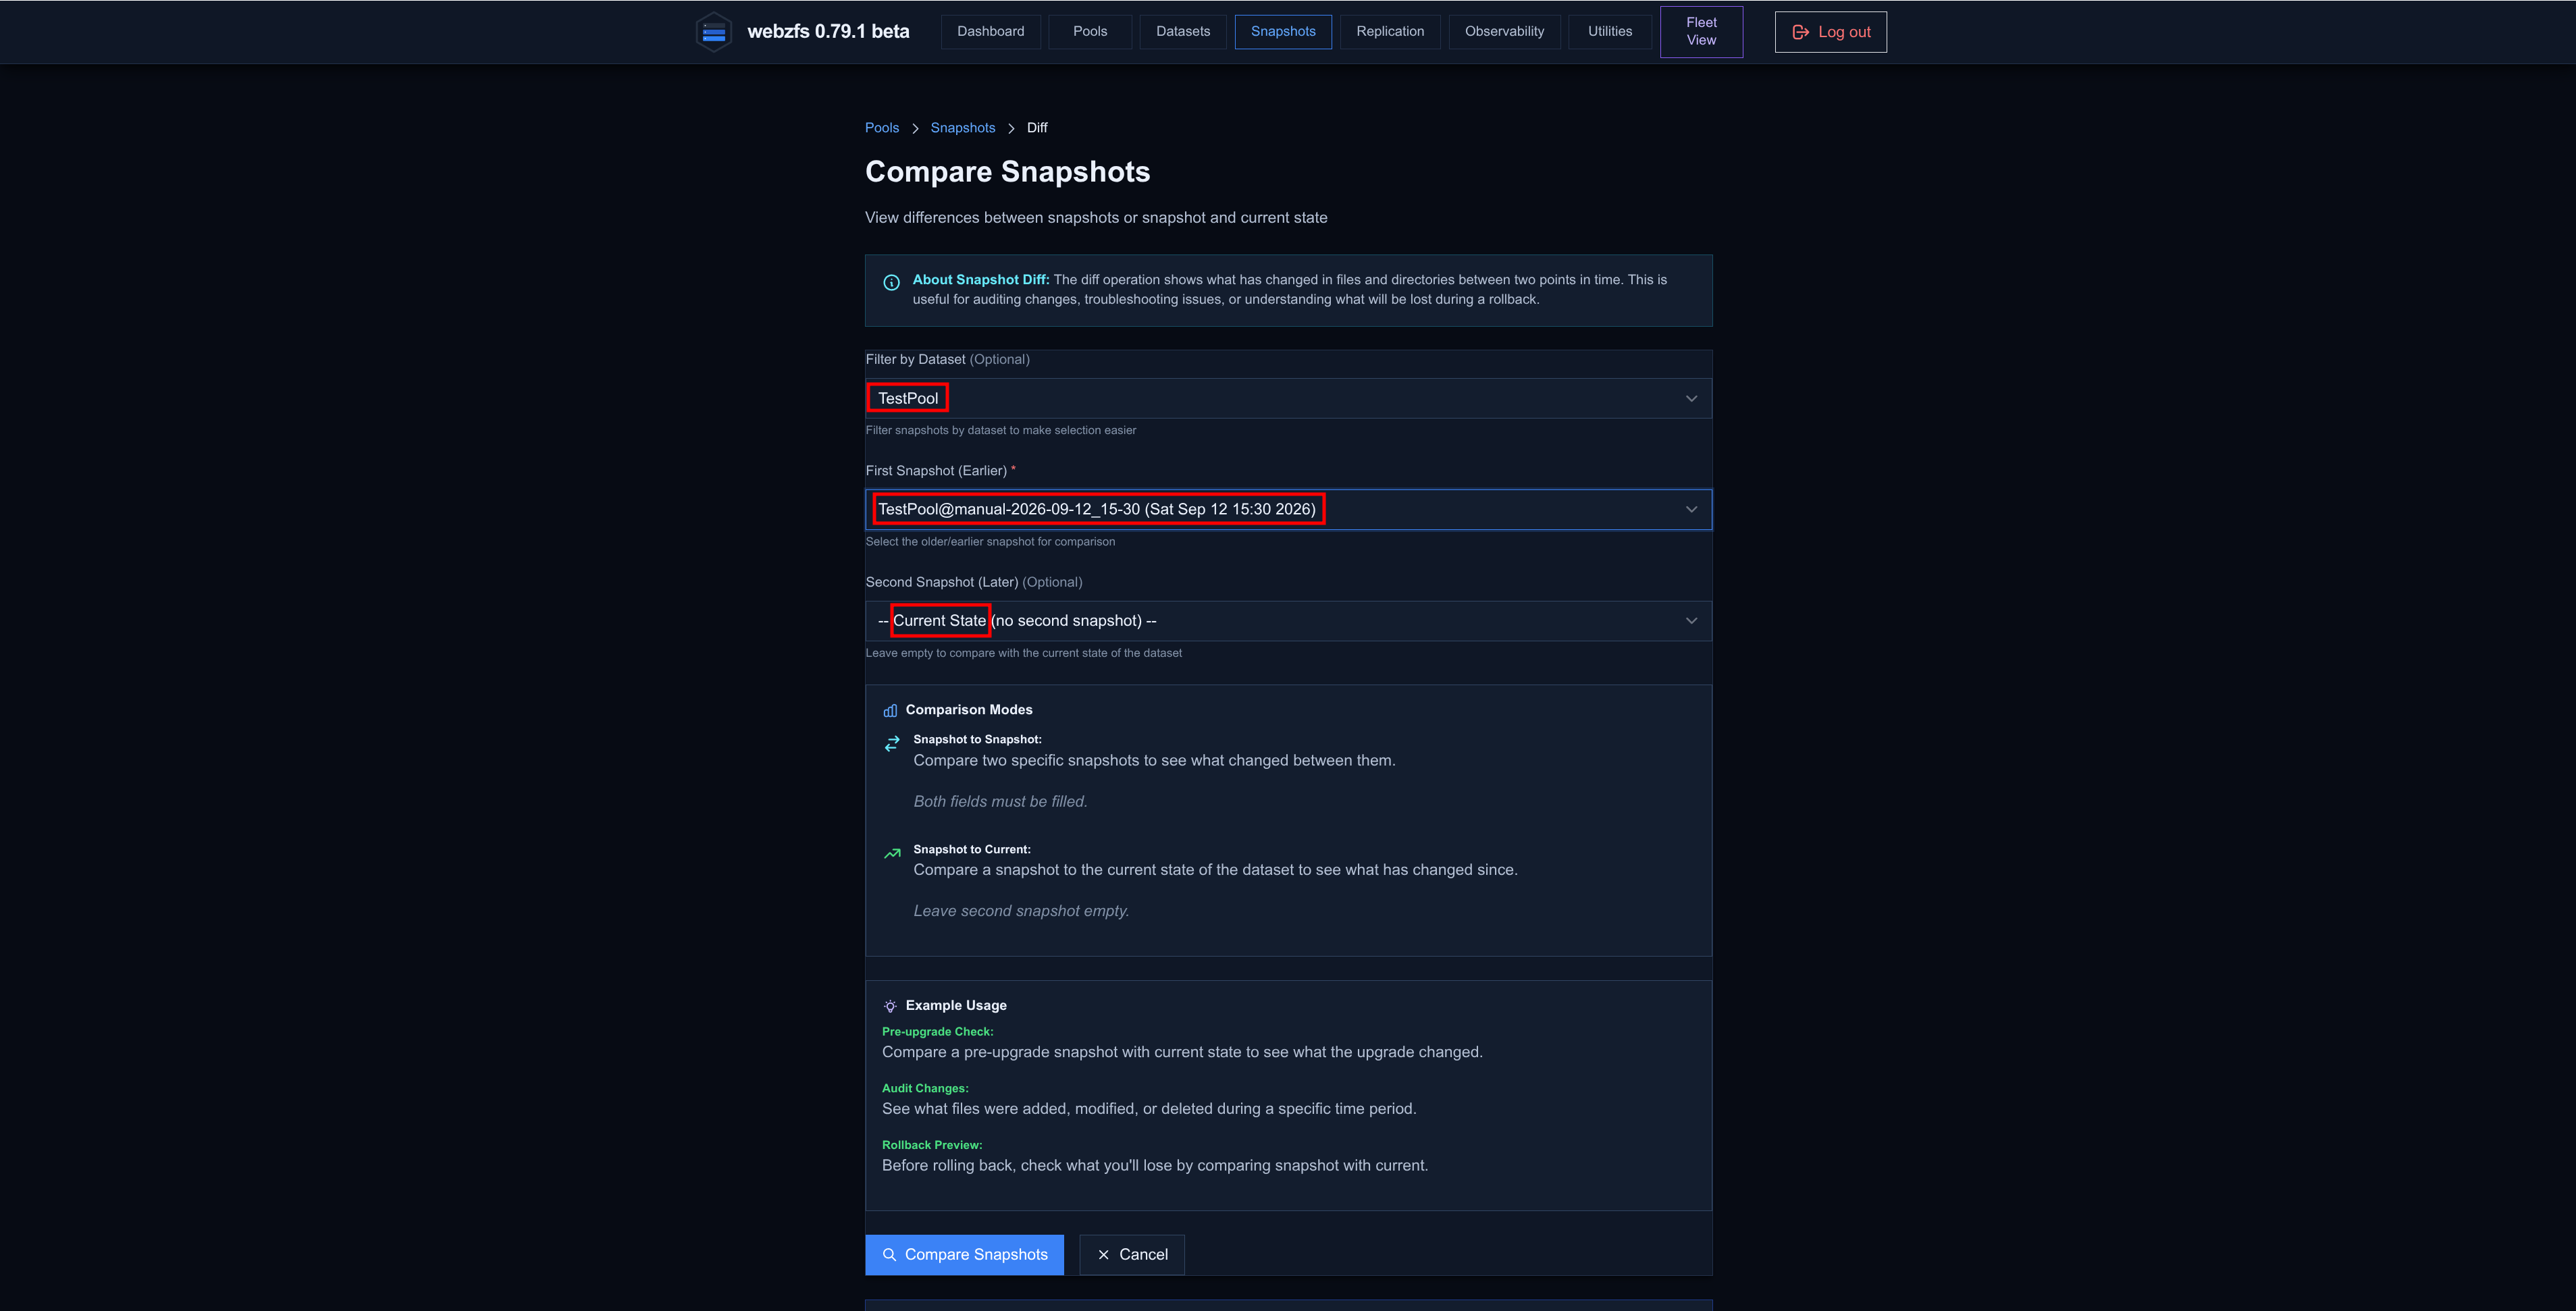
It also lets us compare snapshots:
|
|
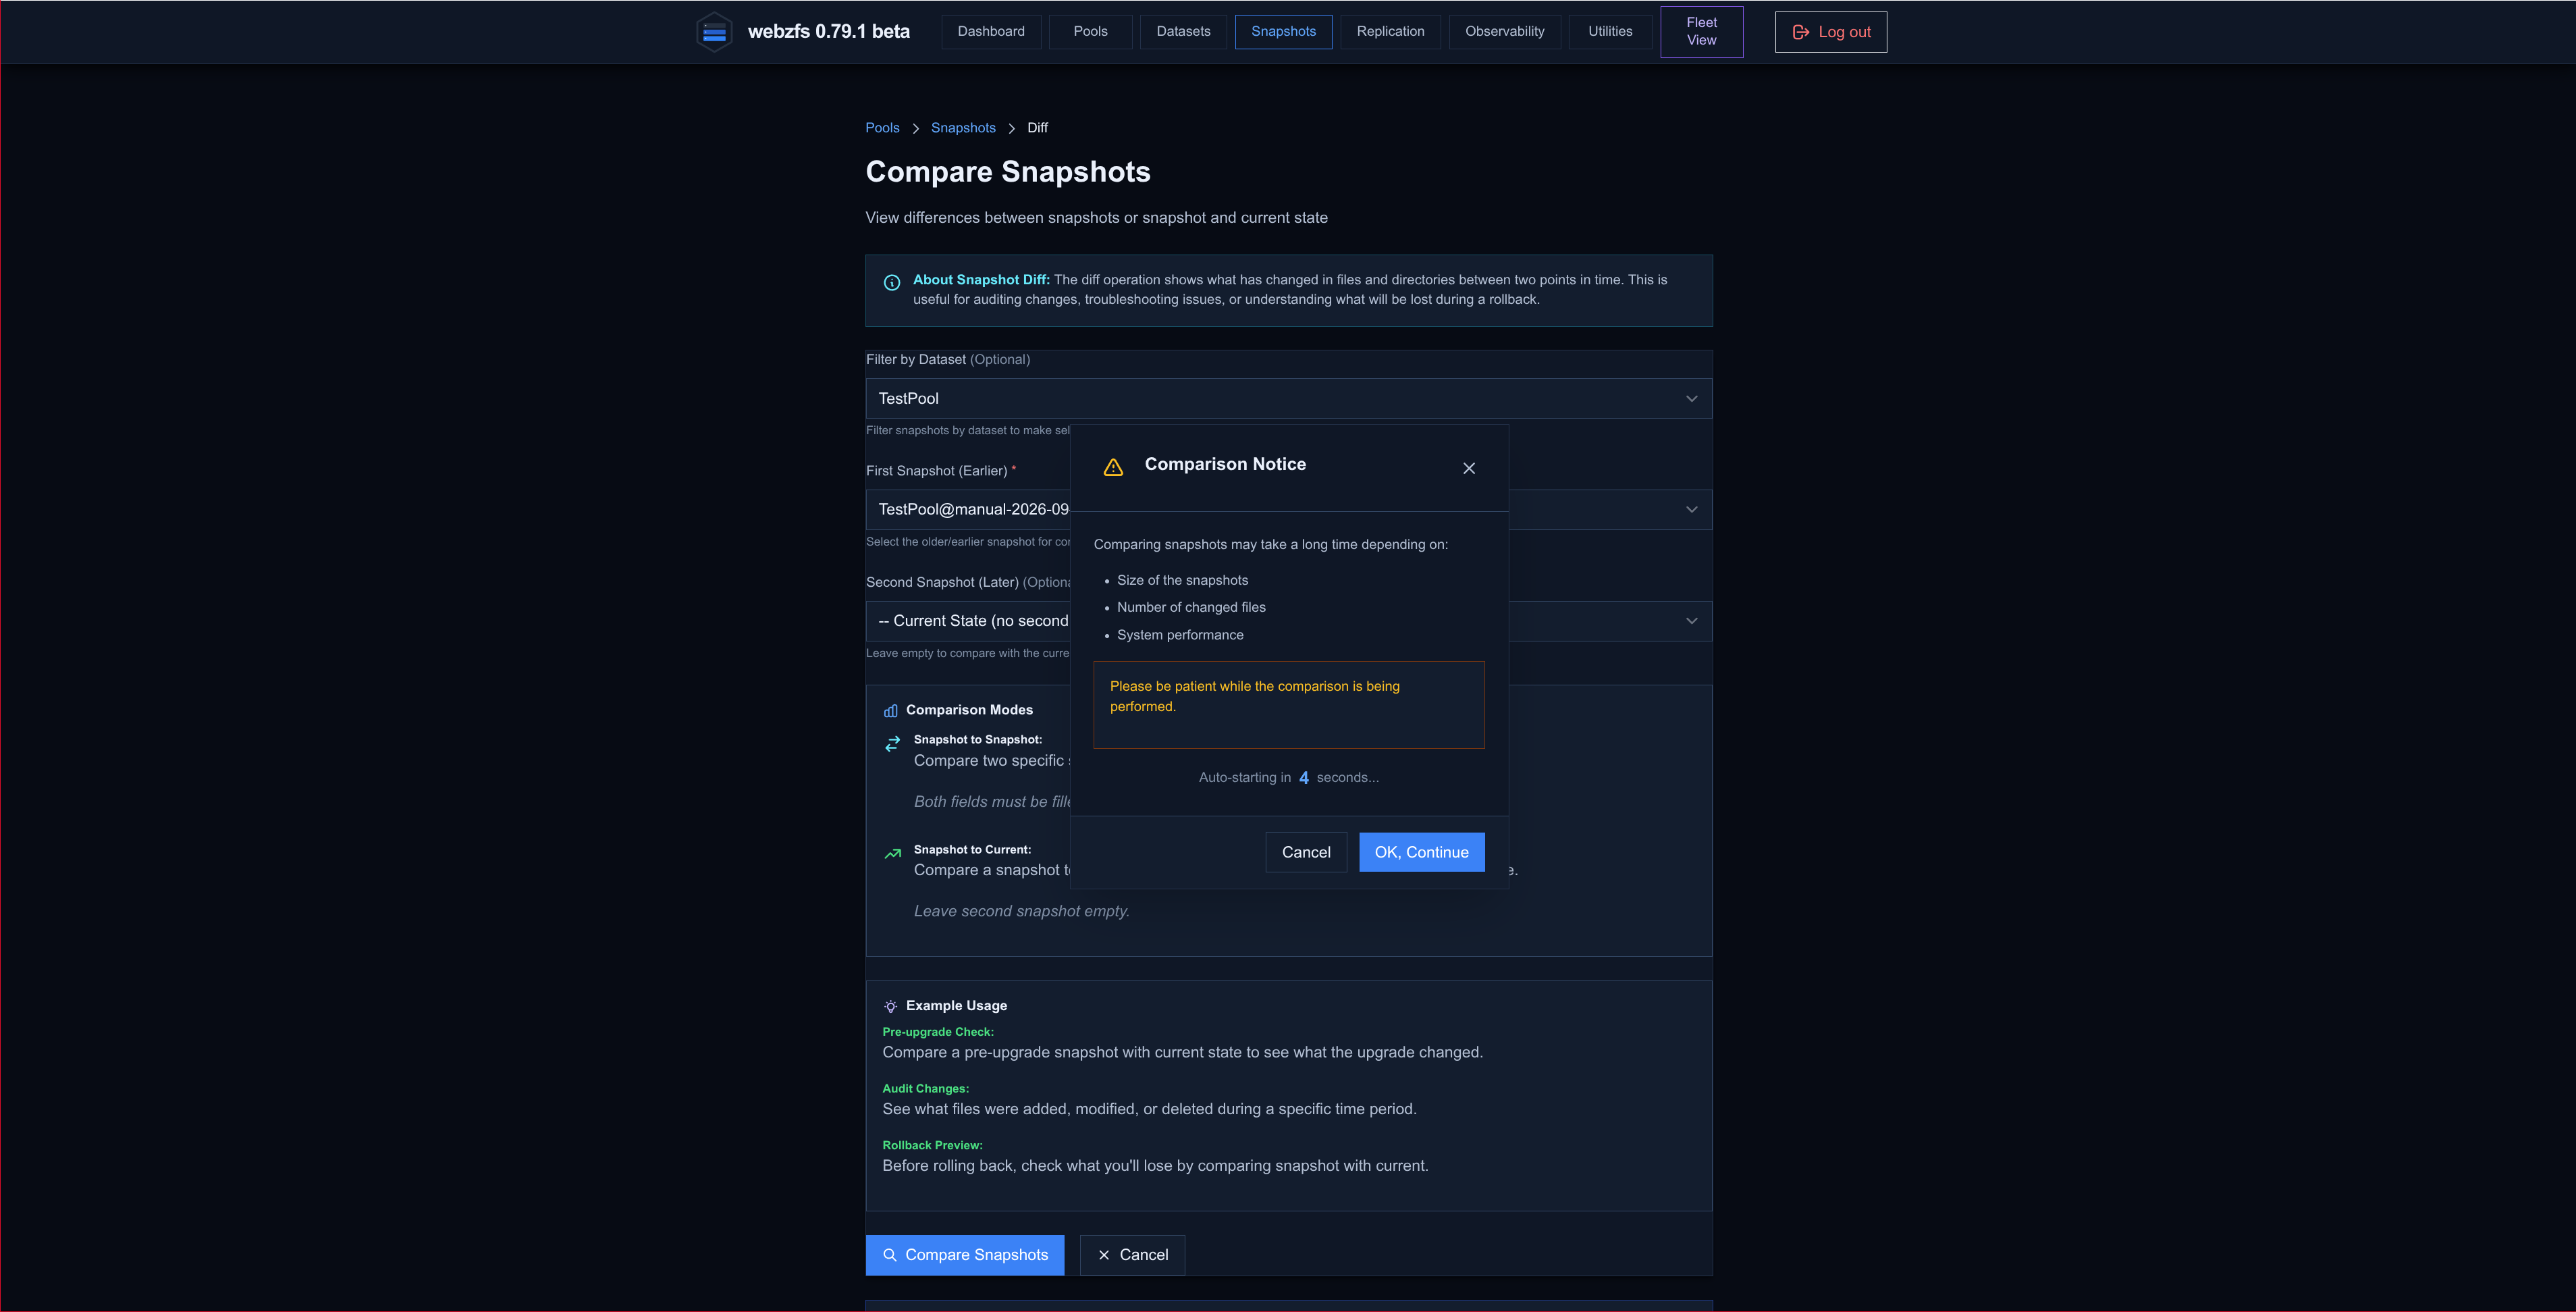
|
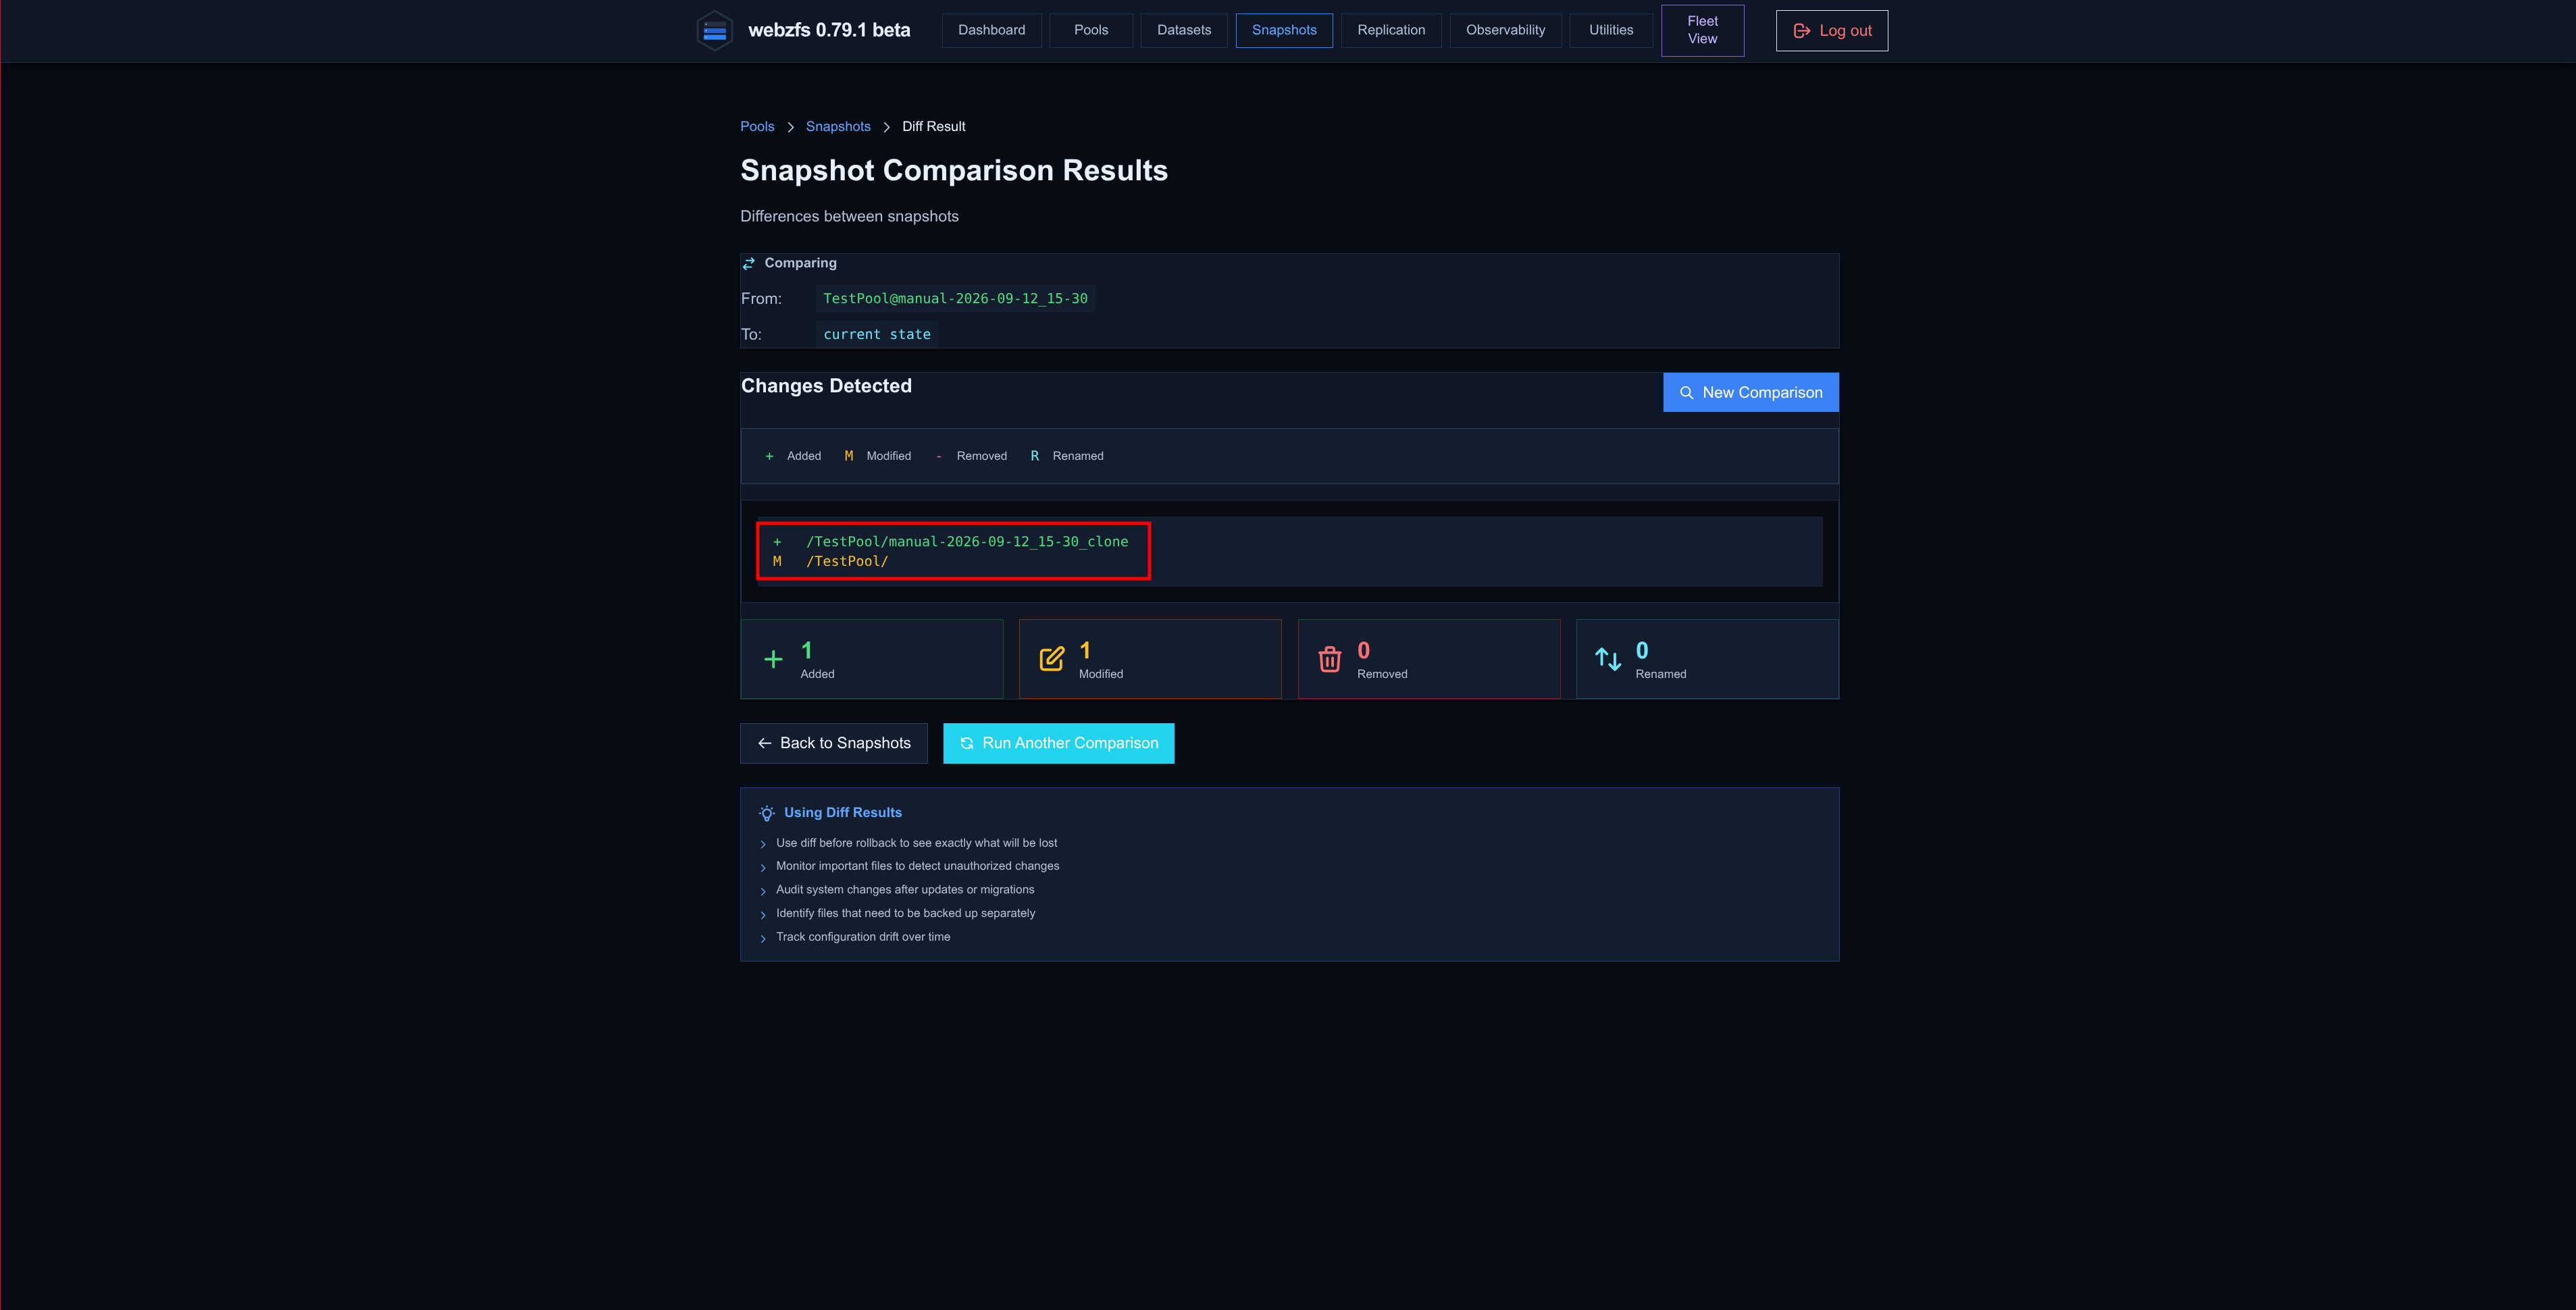
|
And schedule automatic snapshots using
Sanoid
:
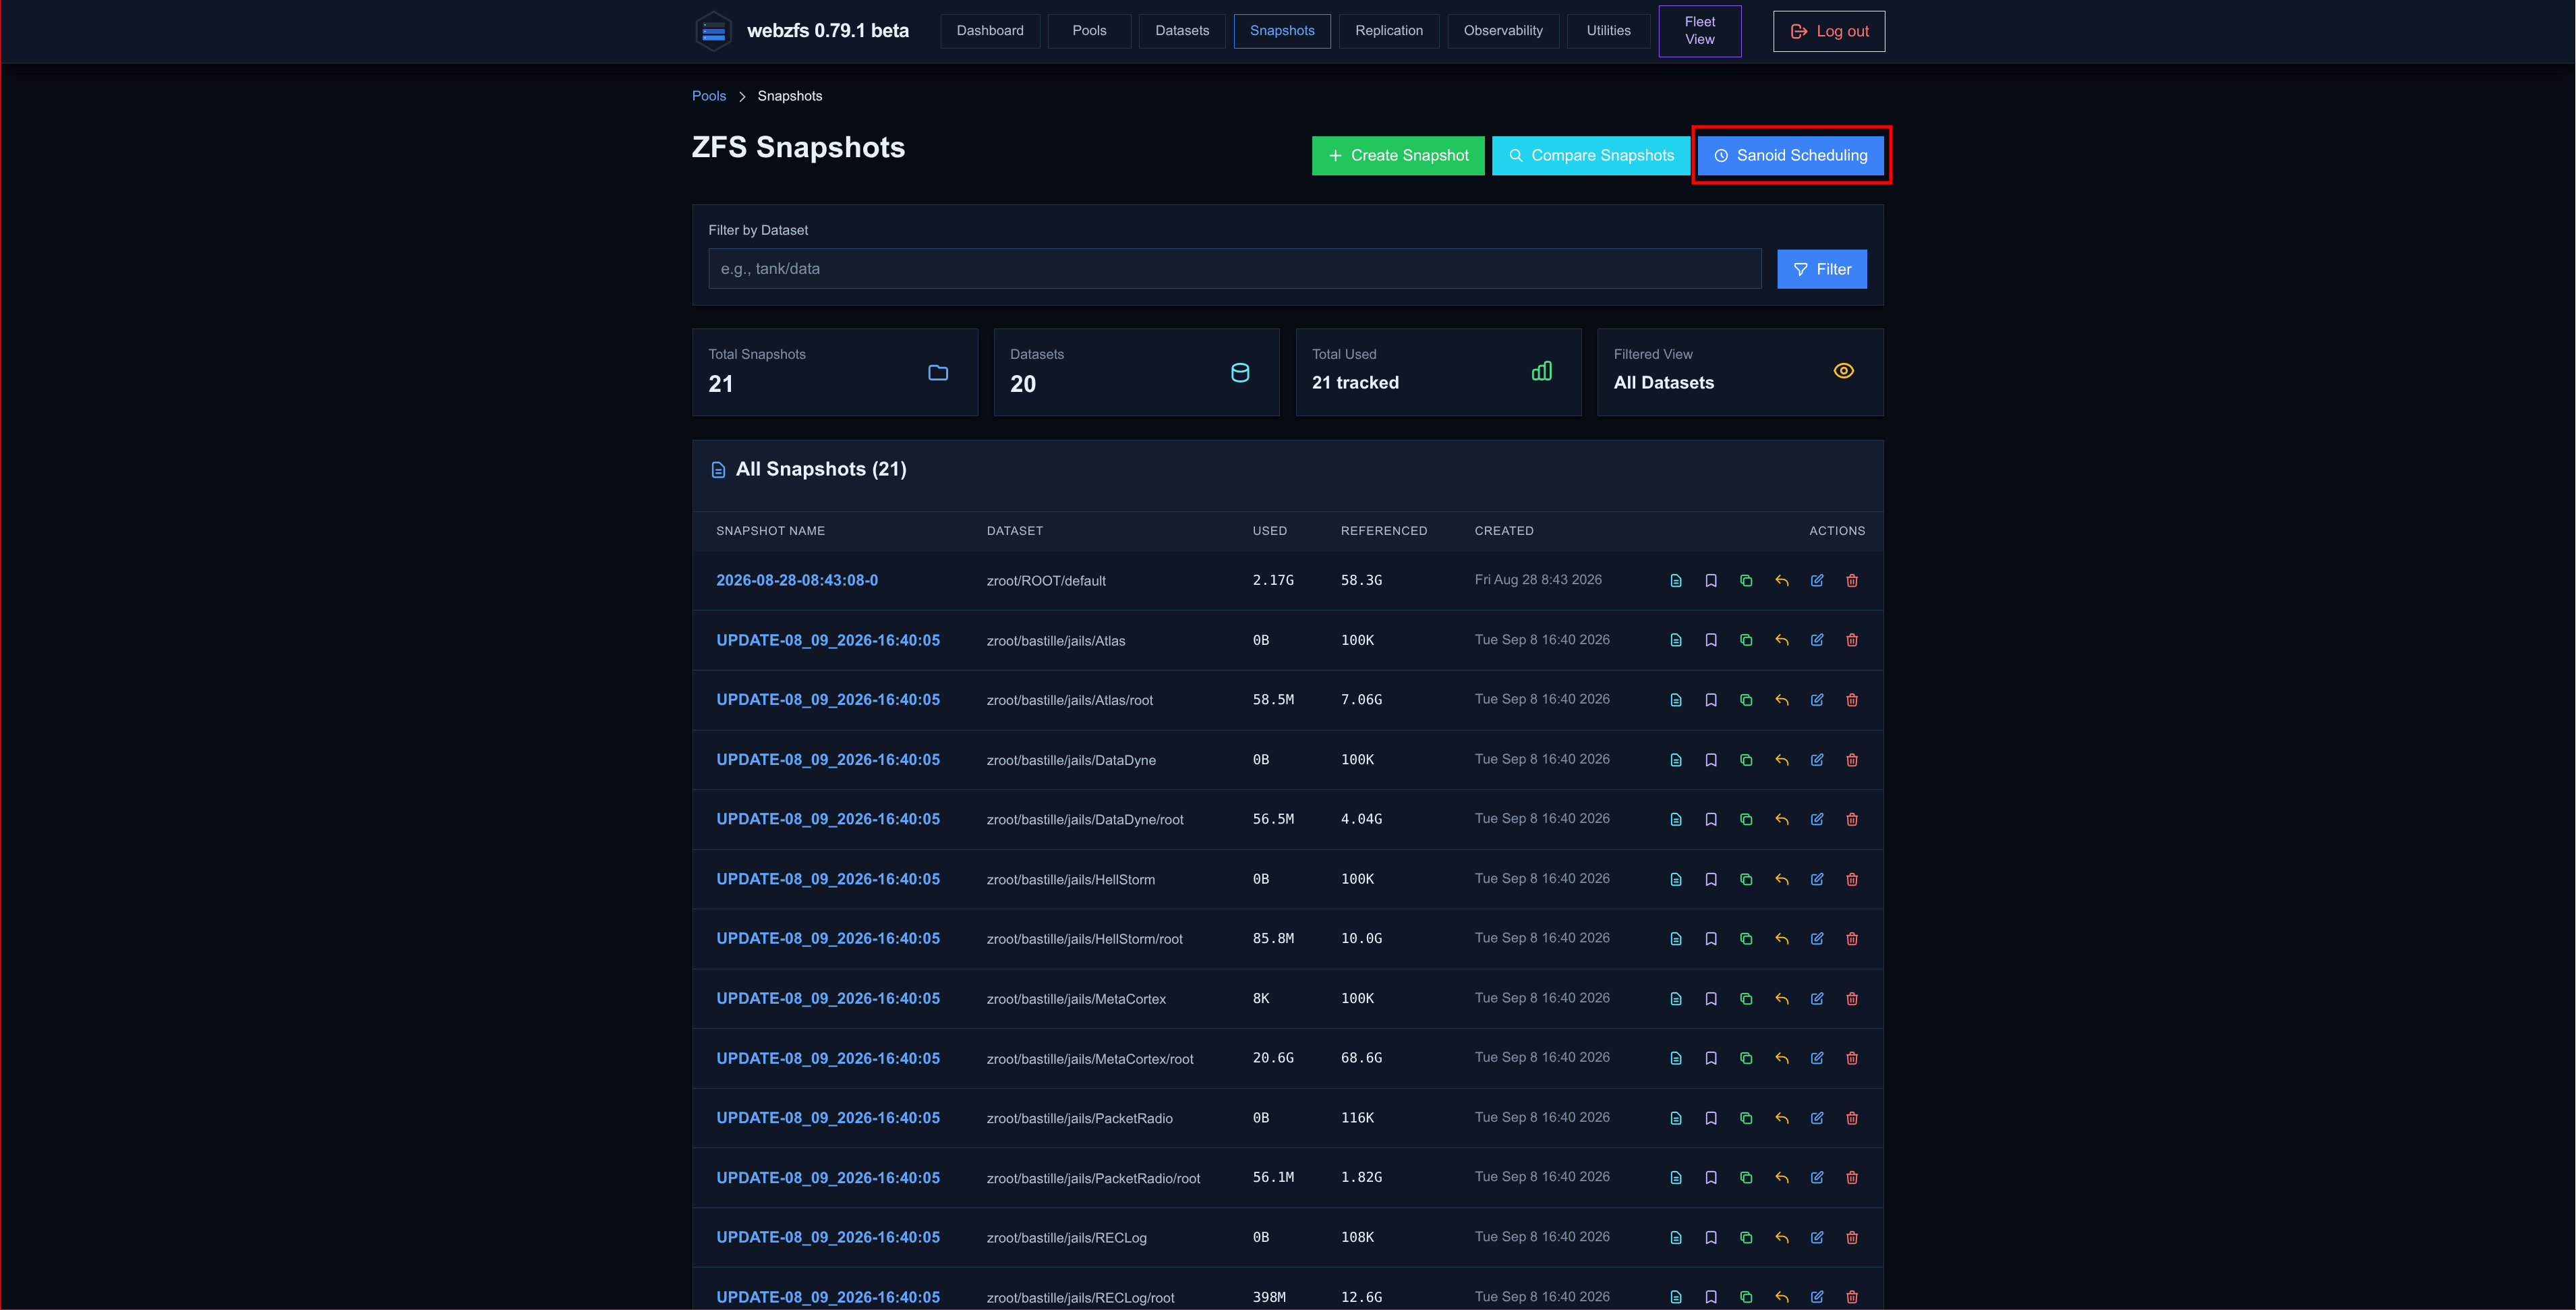
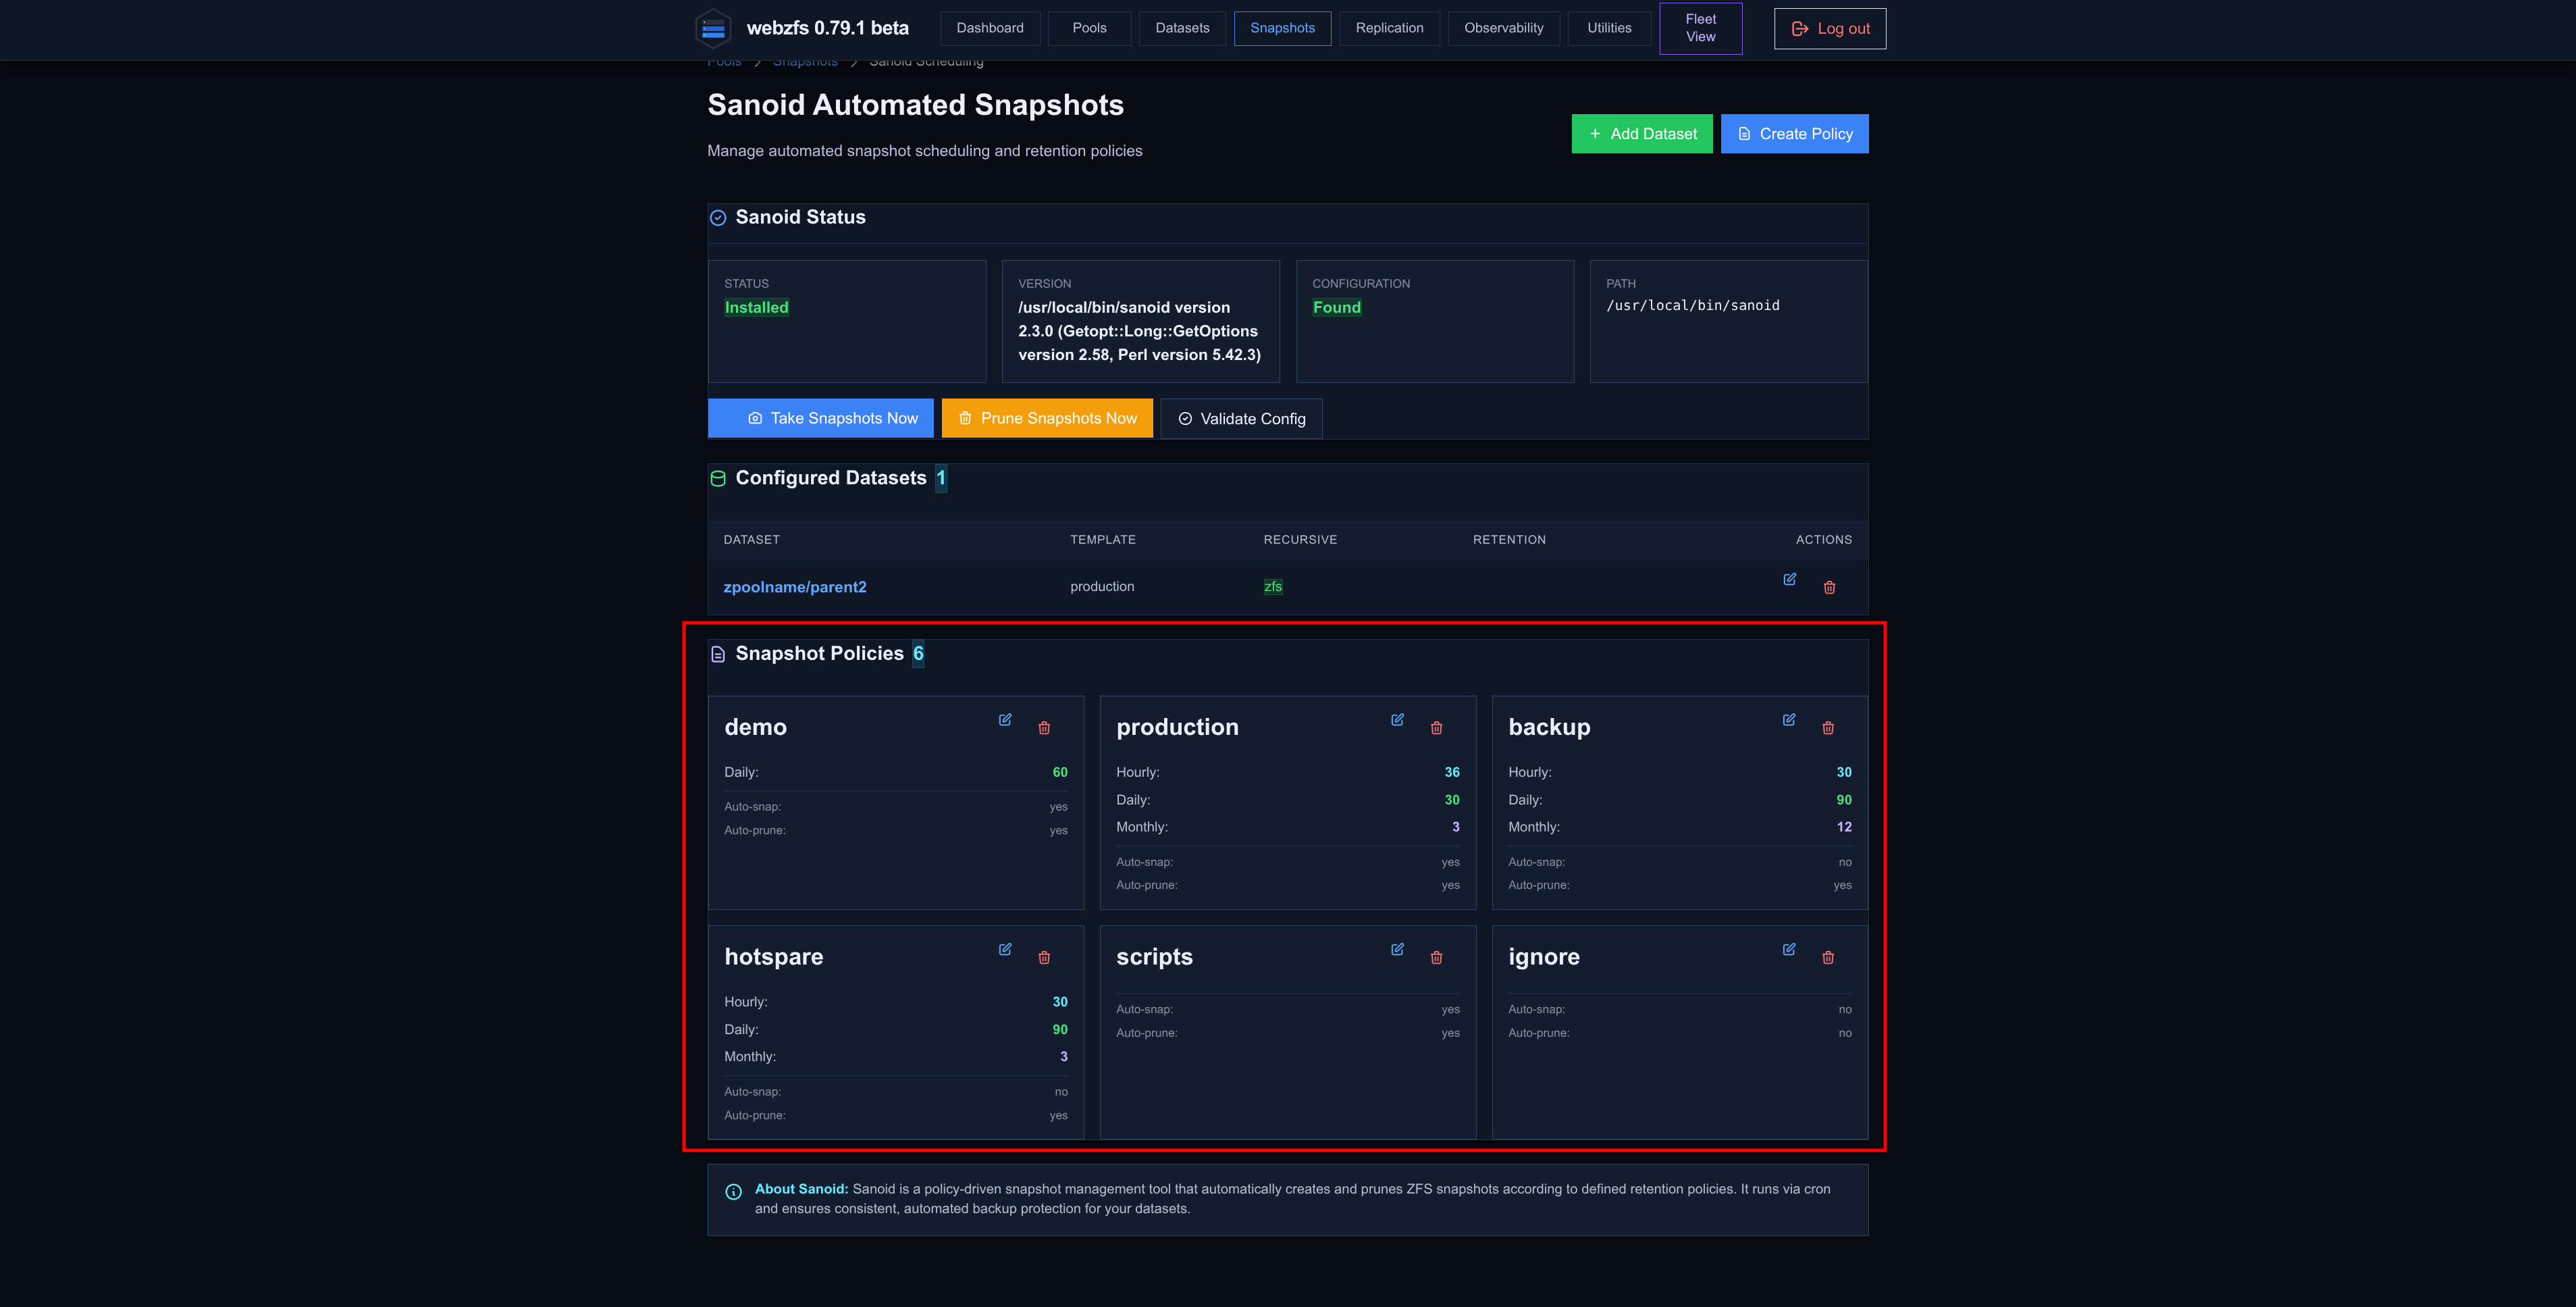
First we must define a snapshot policy or use one of the existing ones:
| New policy | Already created policies |
|---|---|
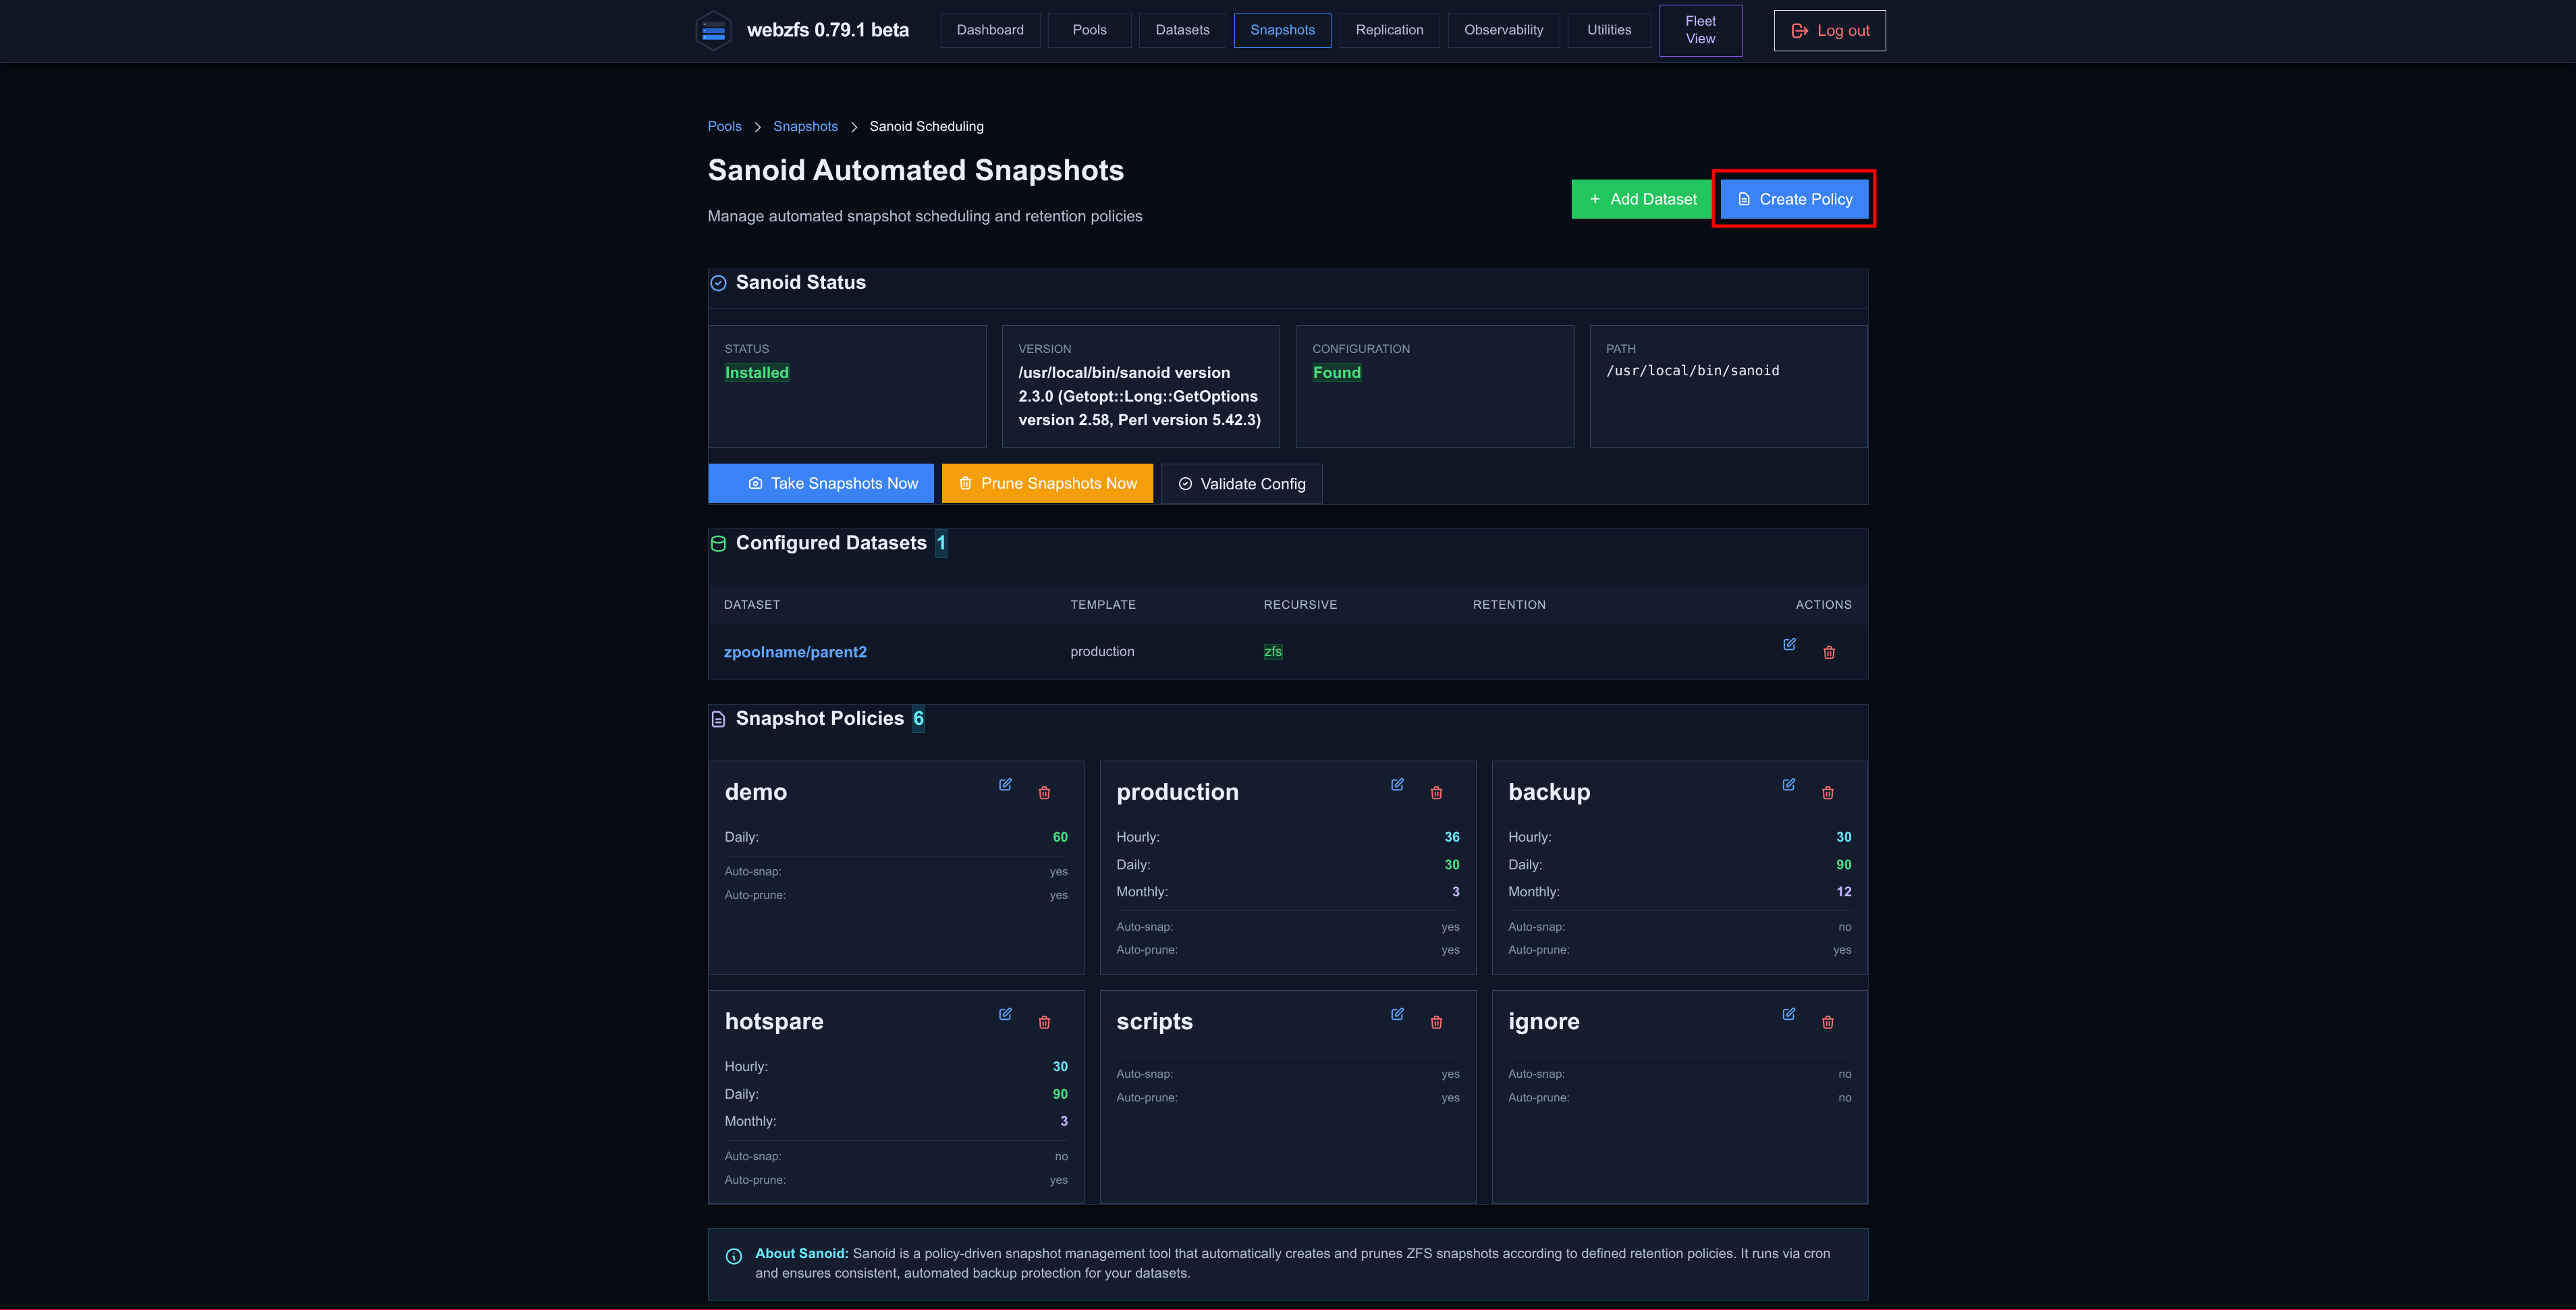
|
|
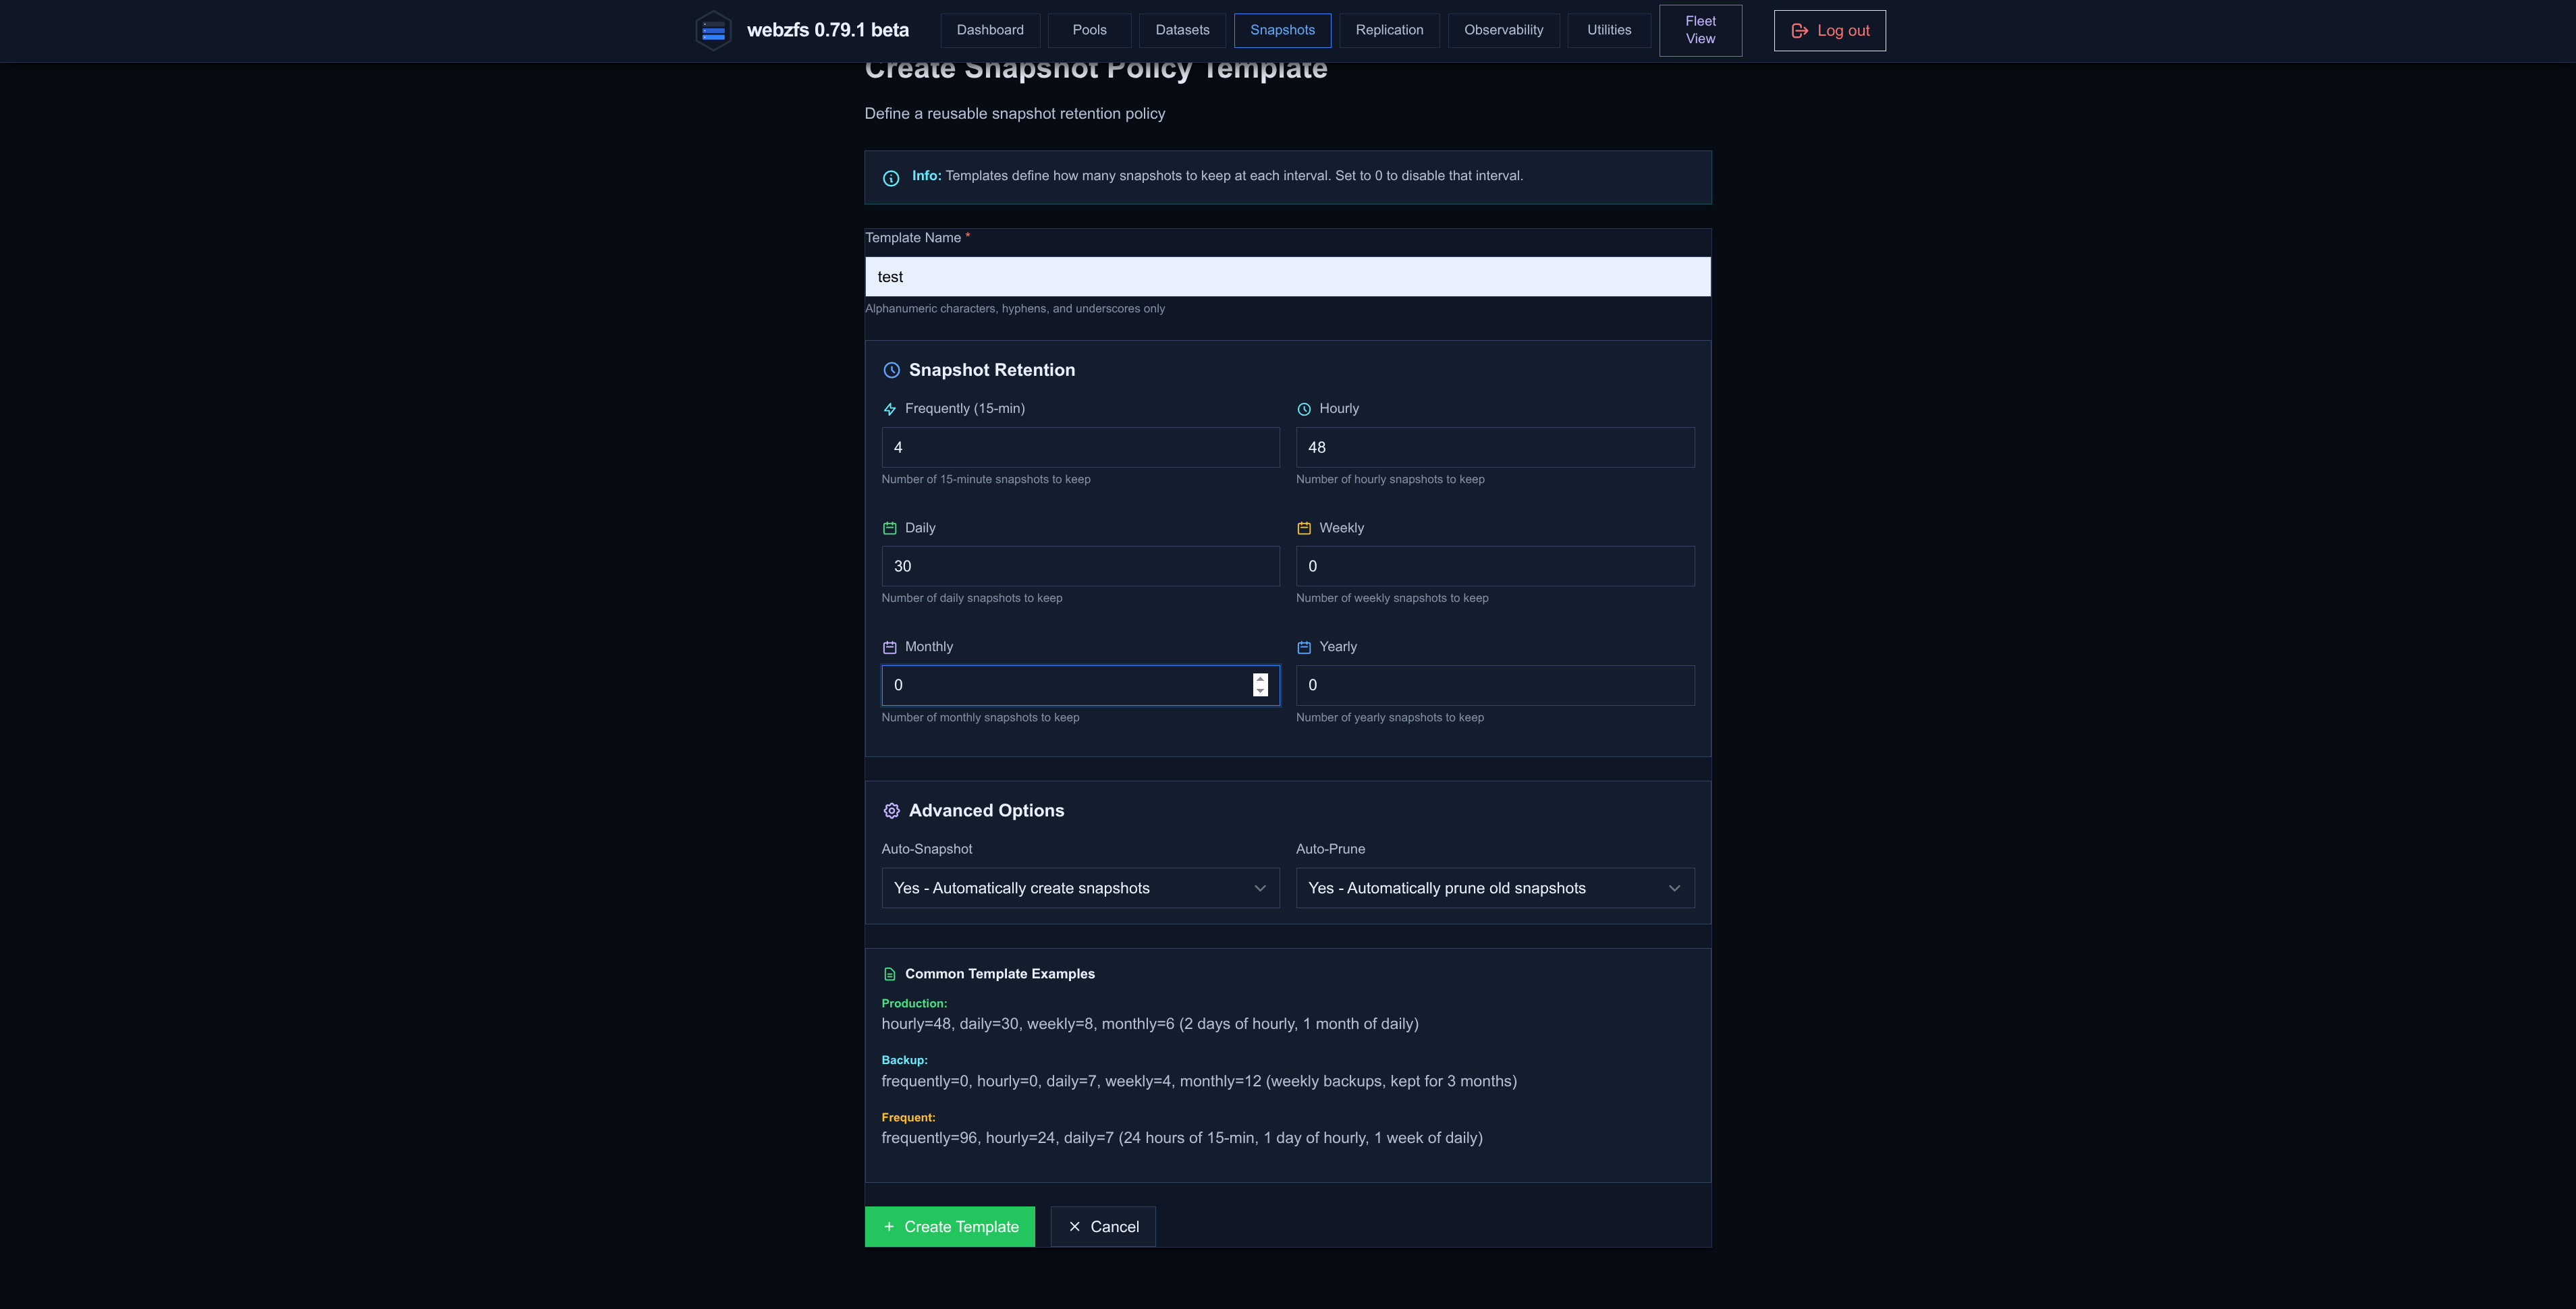
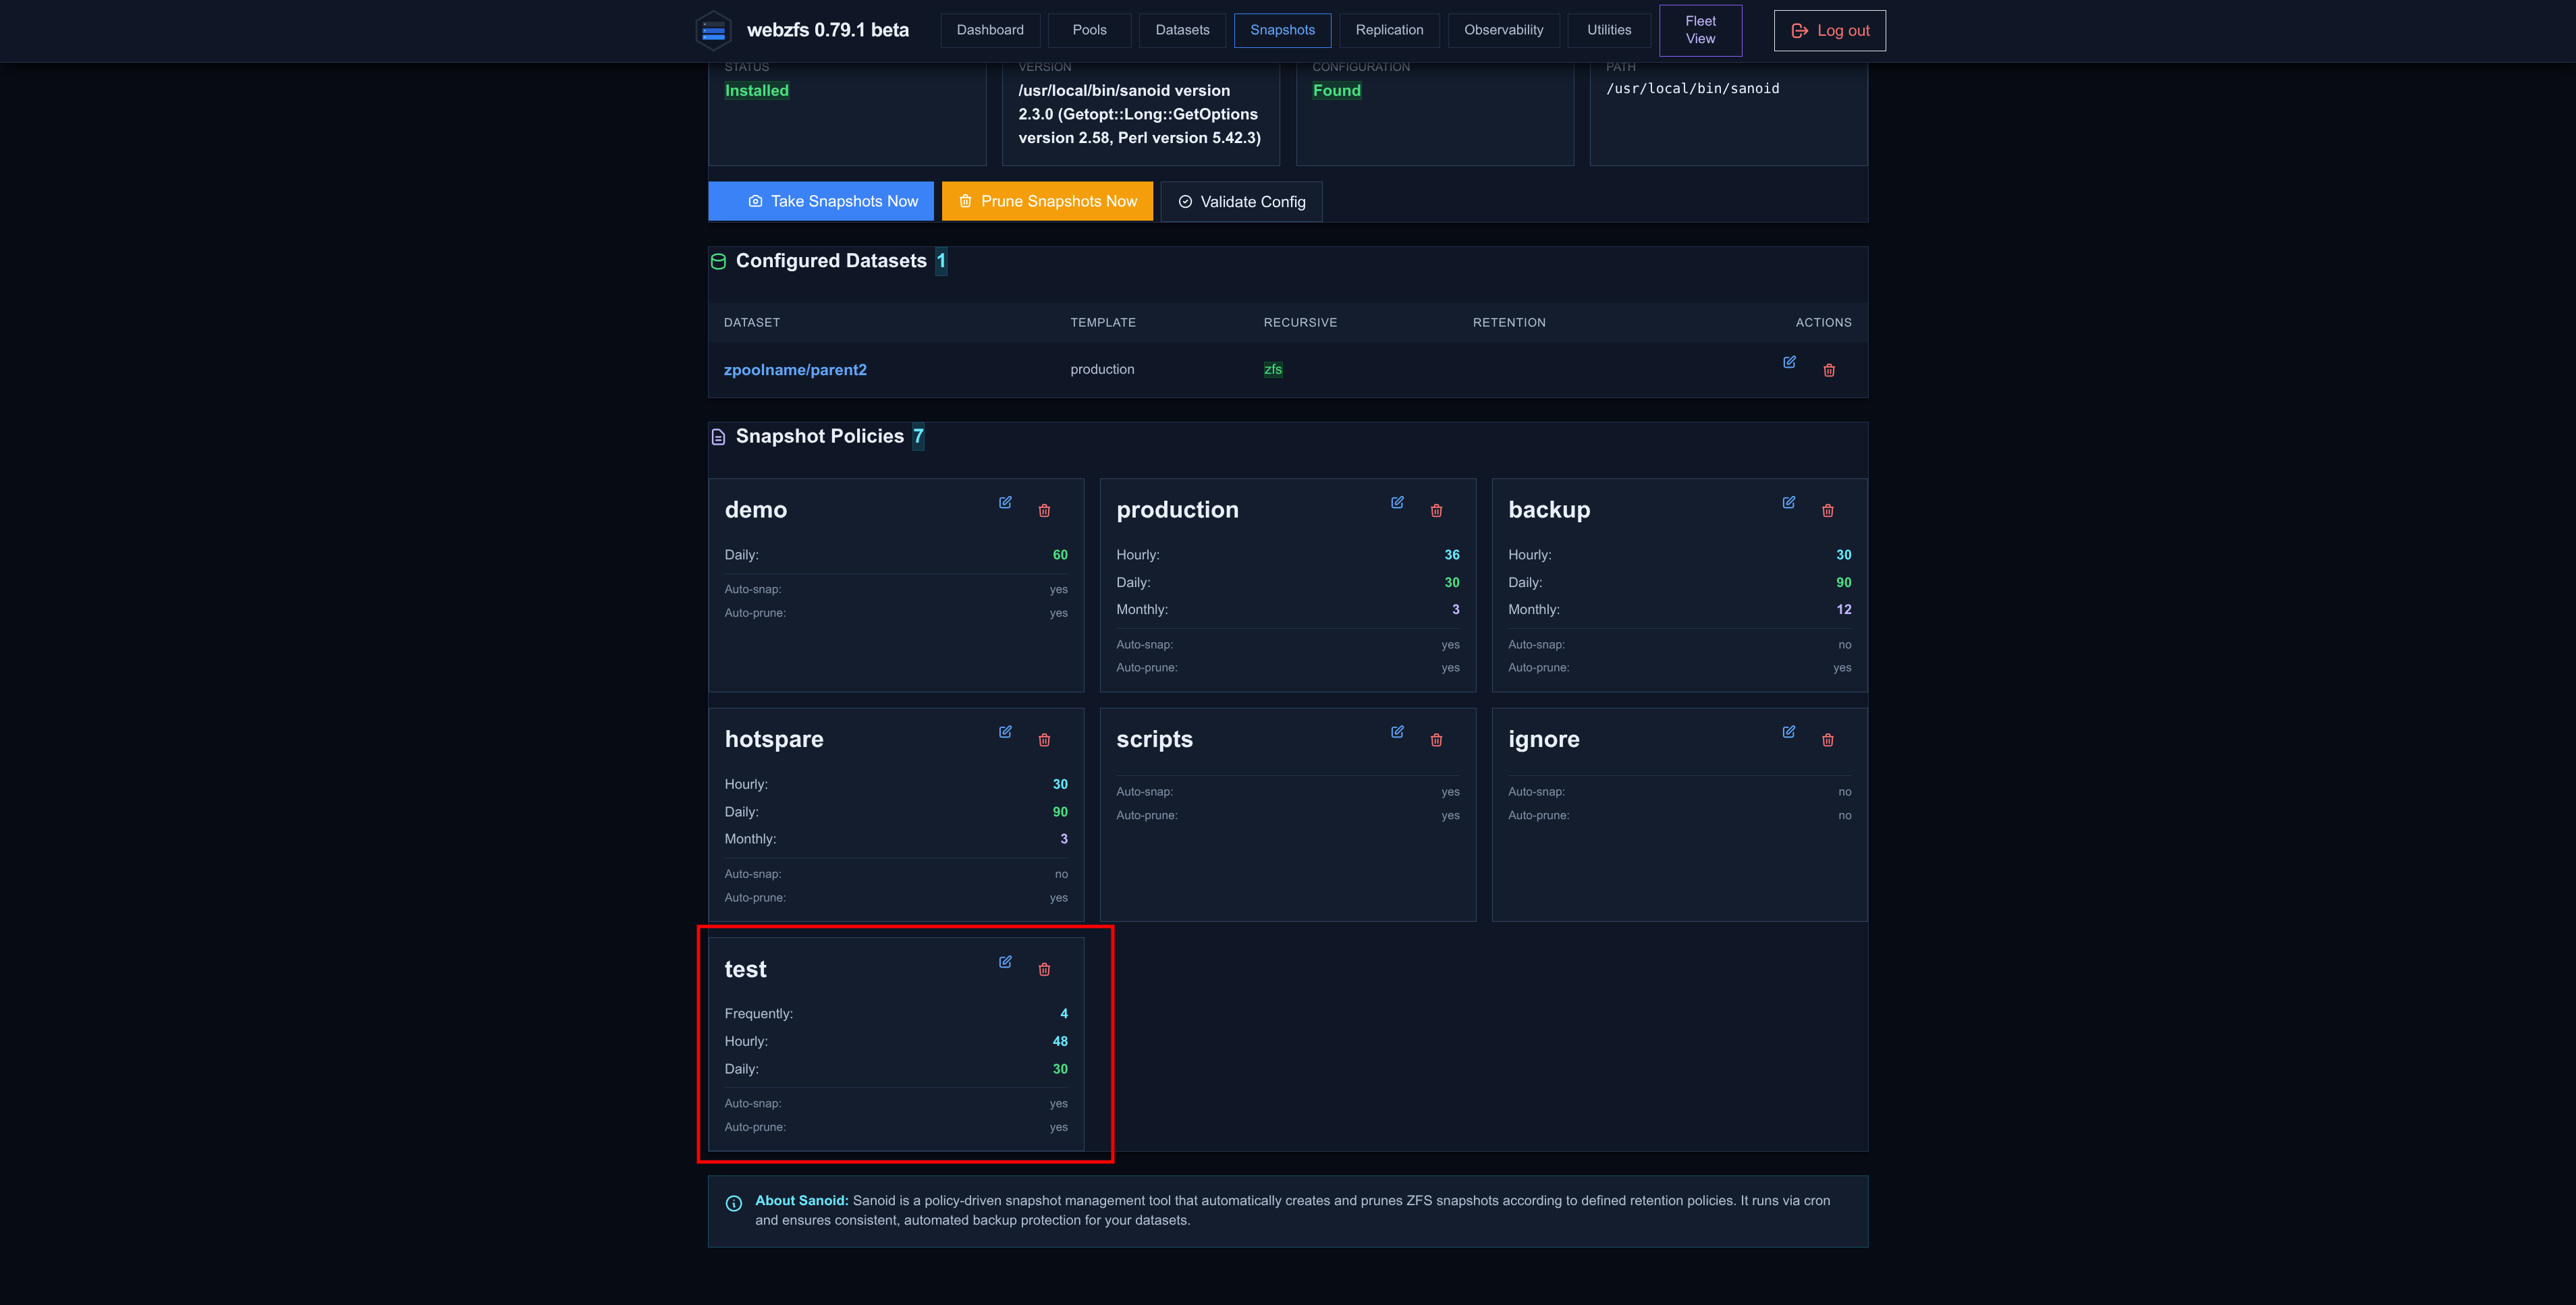
We proceed to create a new policy as an example, with automatic snapshots of the last hour every 15m, then two days of snapshots every hour and one month of snapshots every day.
We leave the Auto-Snapshot and Auto-Prune options enabled because we want Sanoid to handle both taking the snapshots and cleaning them up. It could also be the case that the snapshots or the cleanup are done by an external process and Sanoid only handles one of the two actions.
|
|
|
|
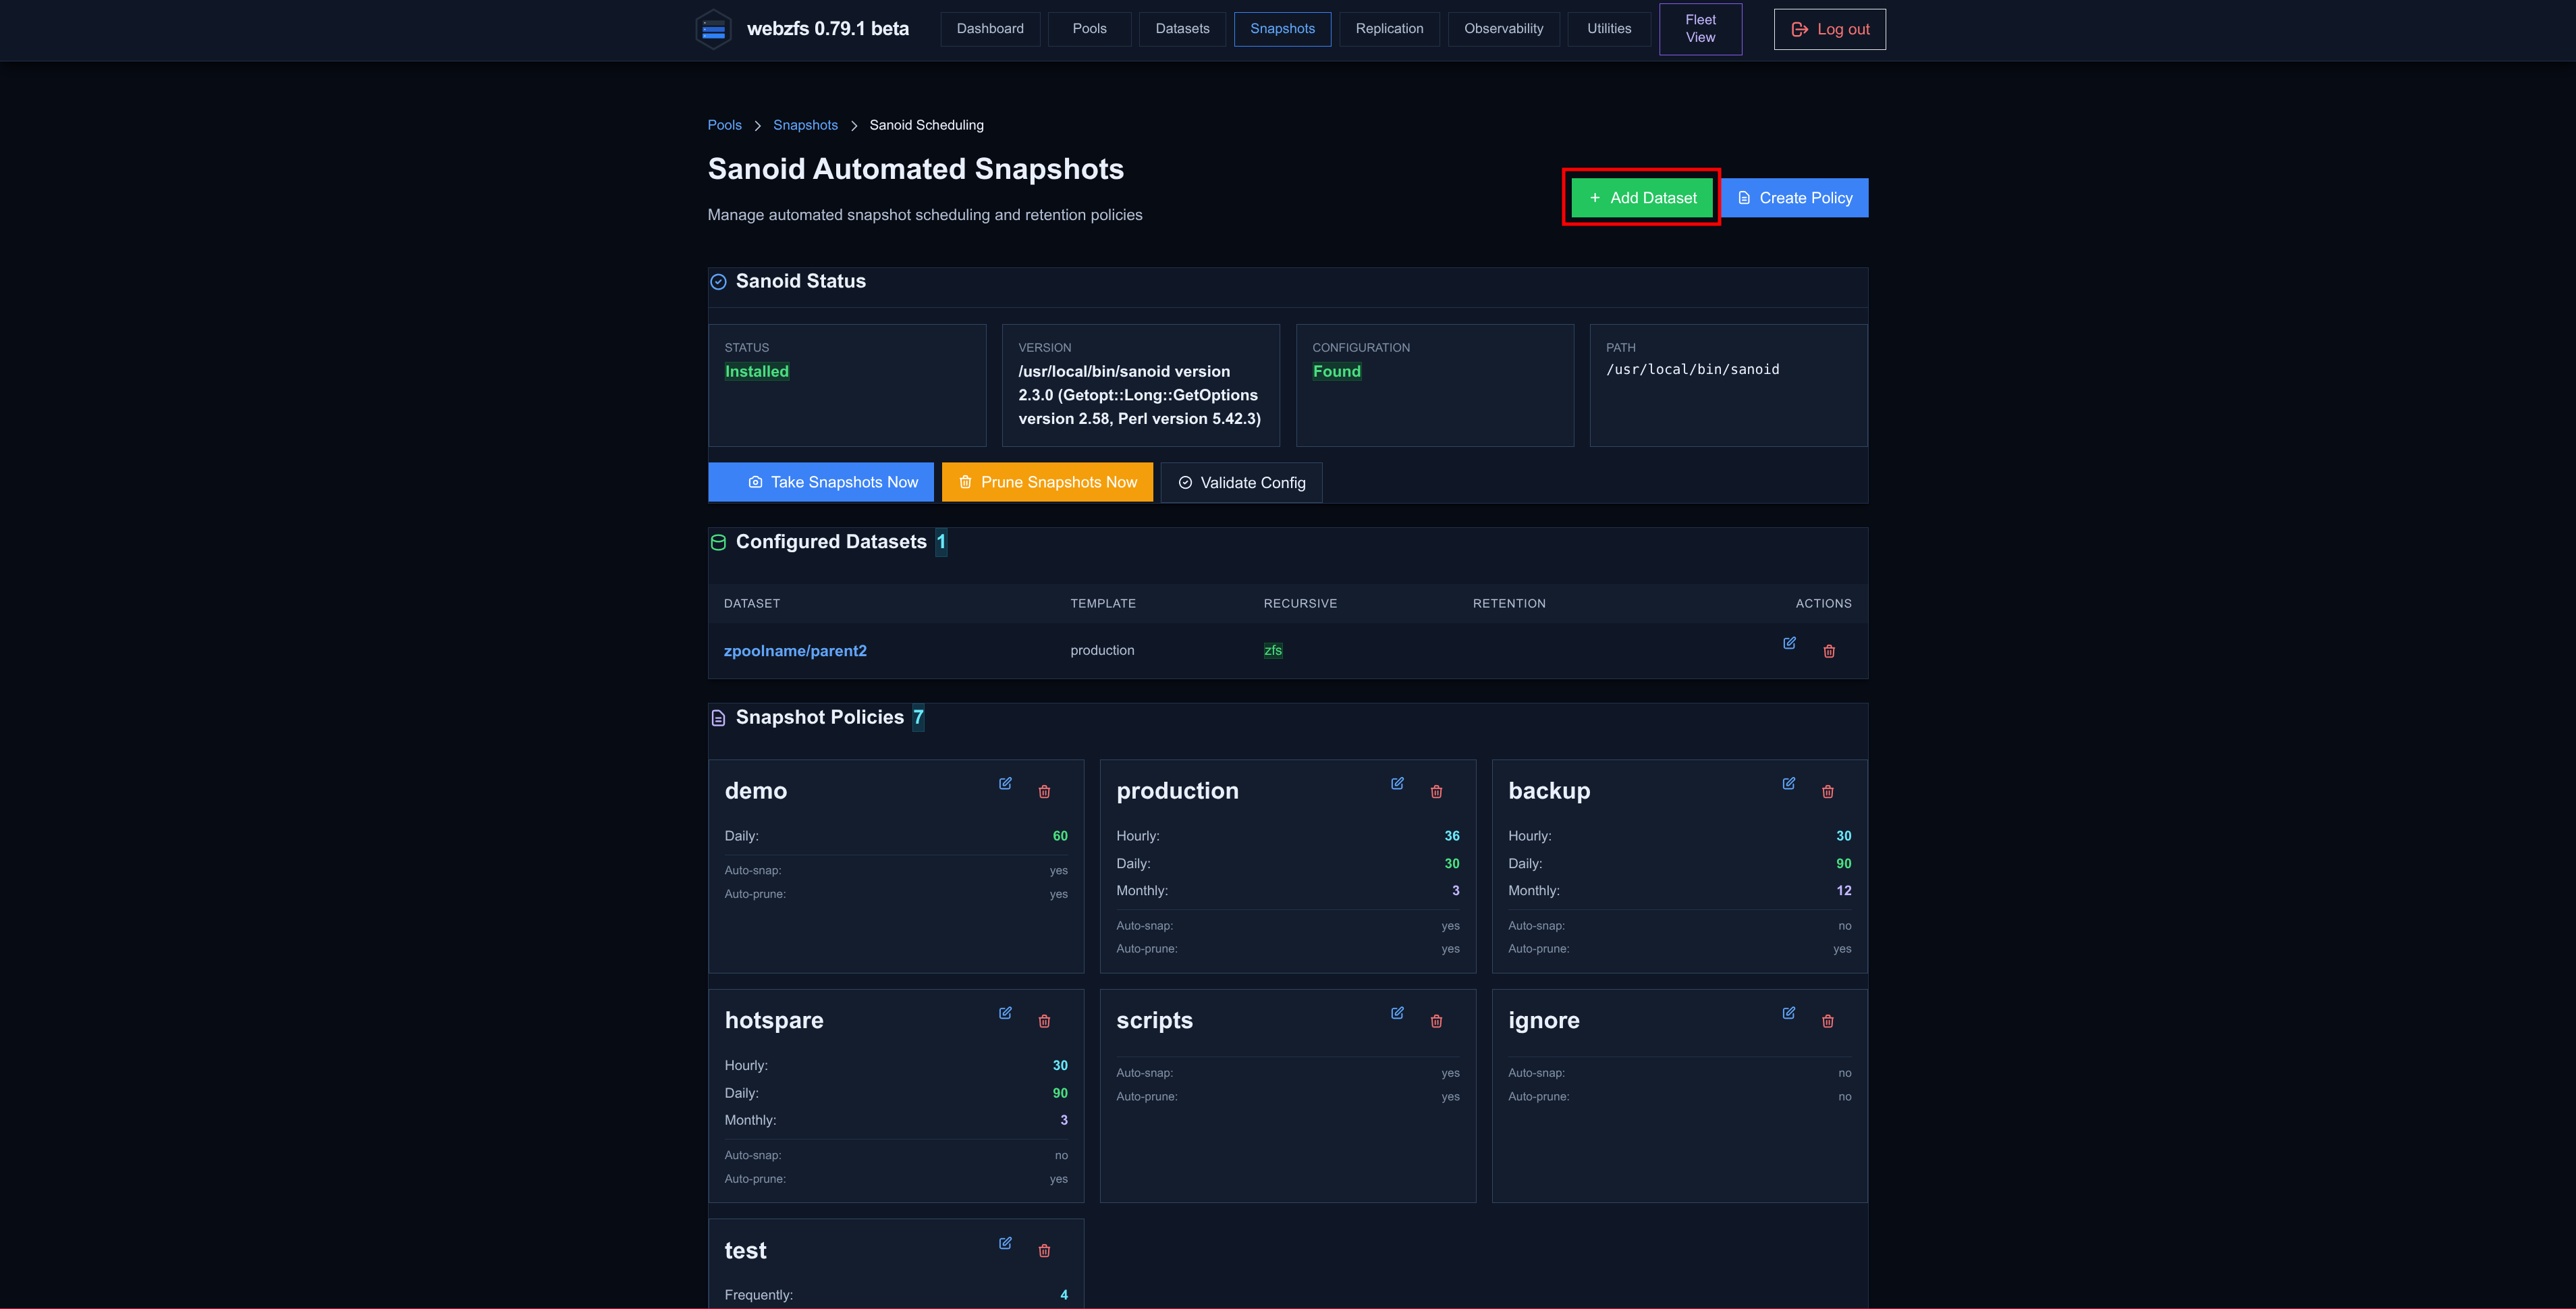
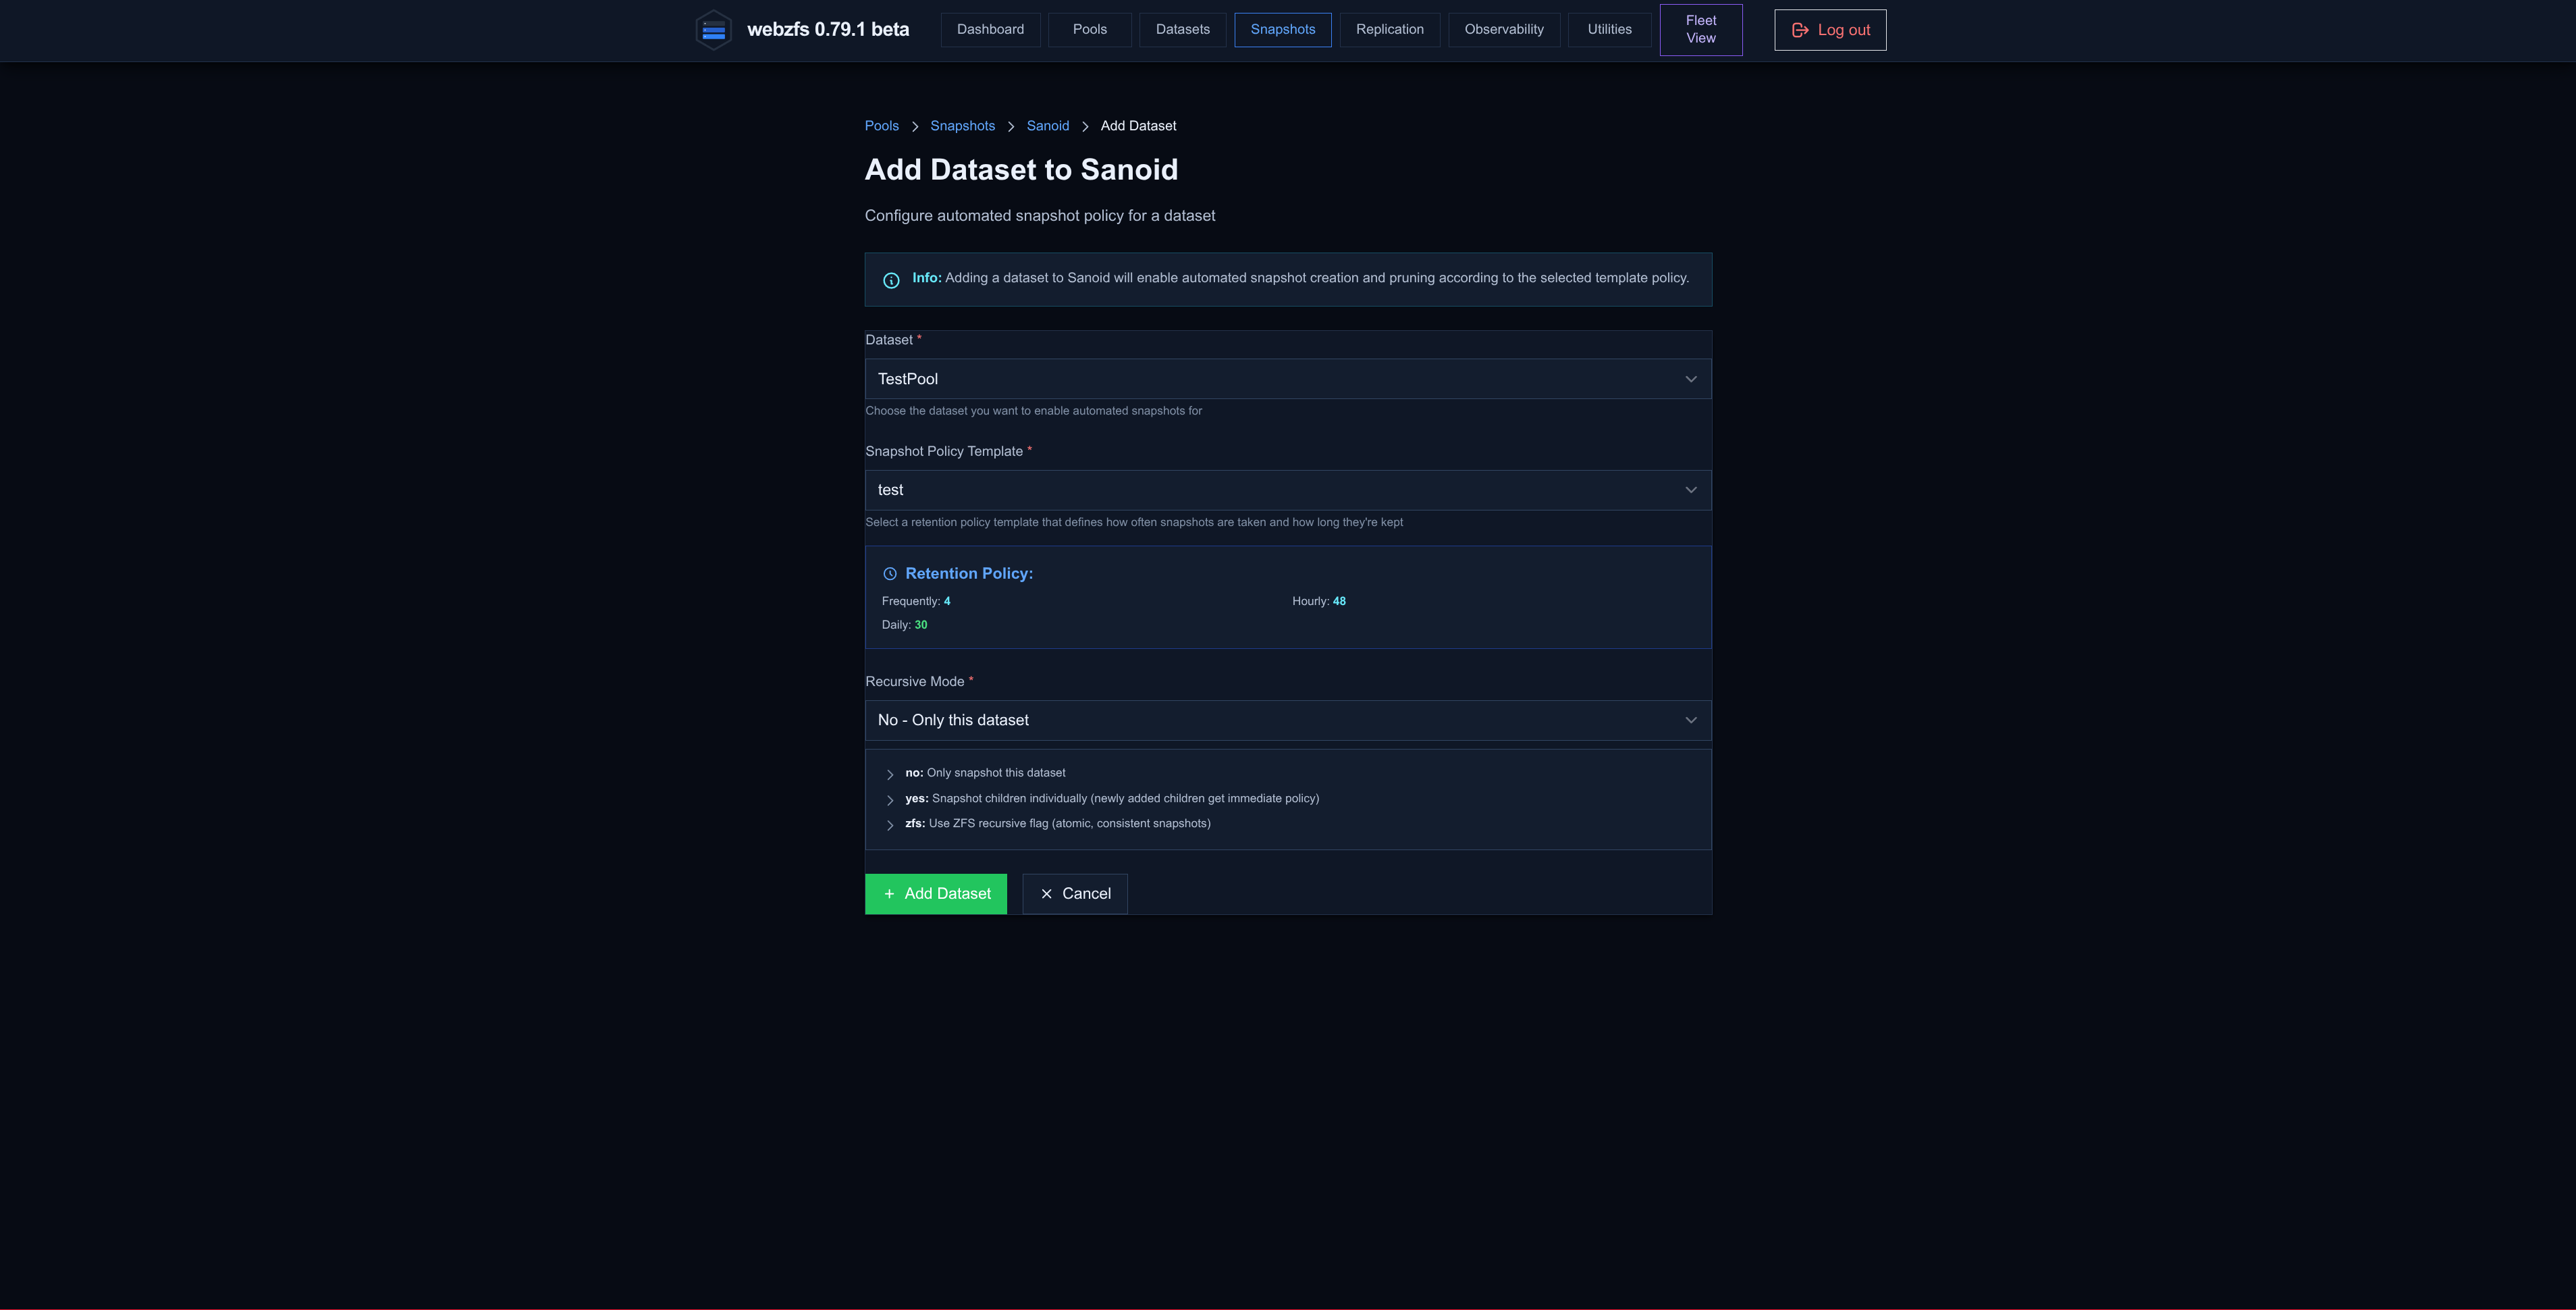
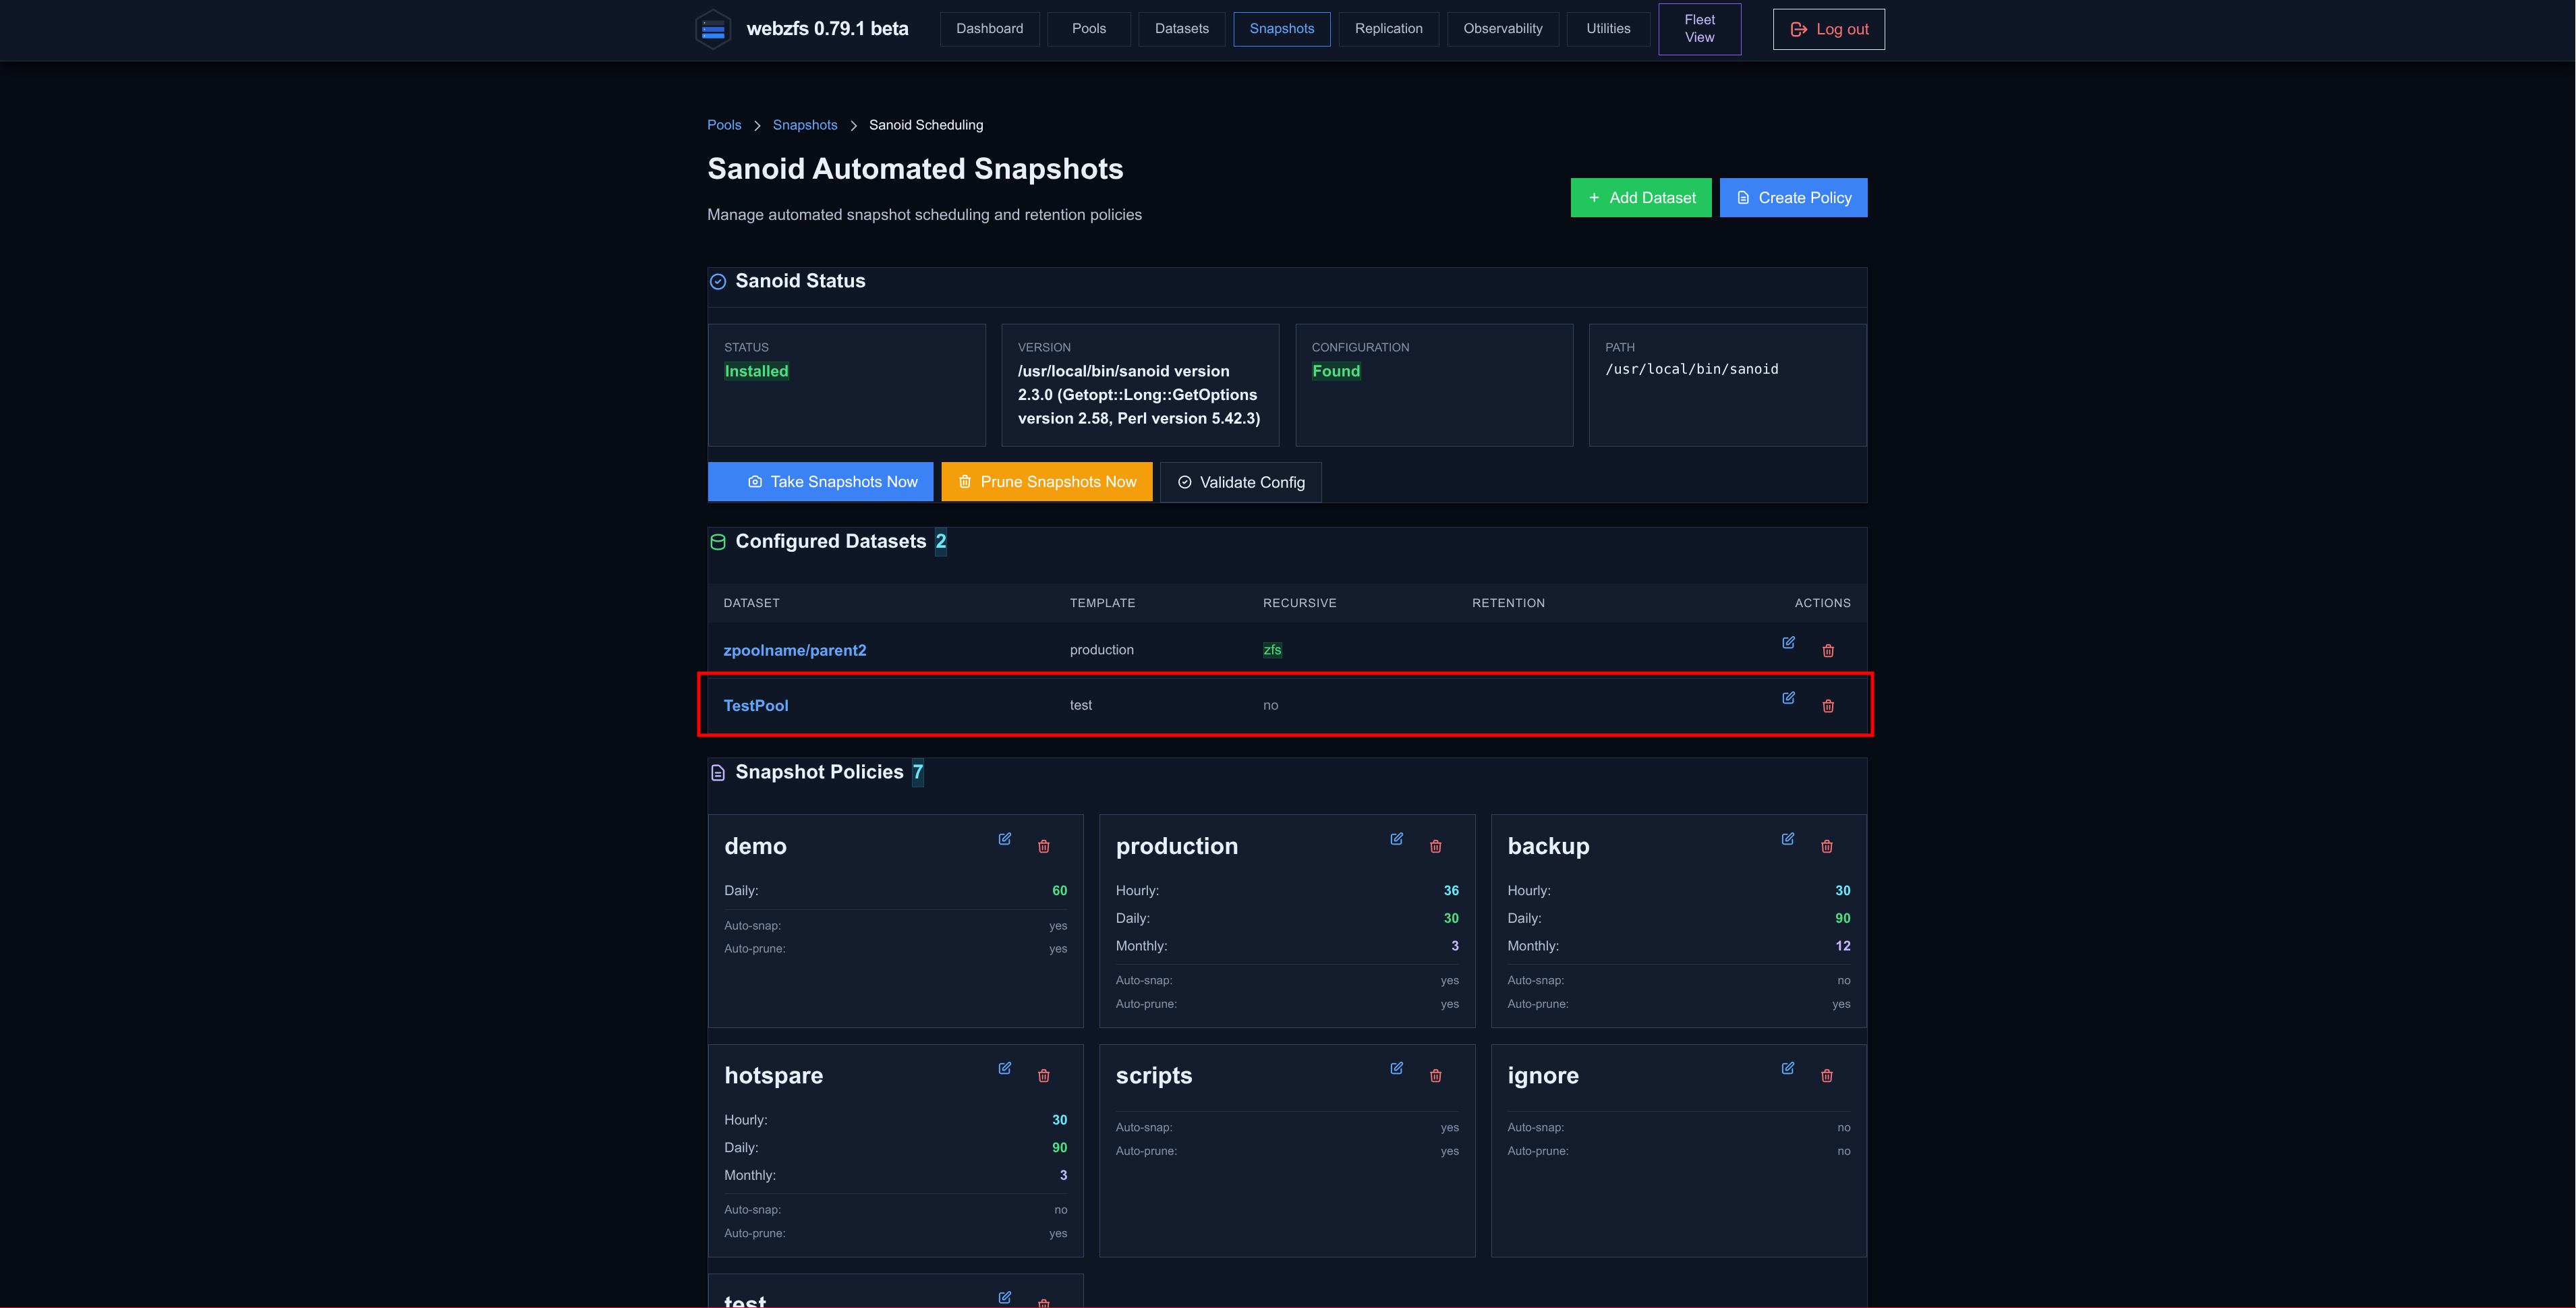
Now we can add a dataset to snapshot:
|
|
|
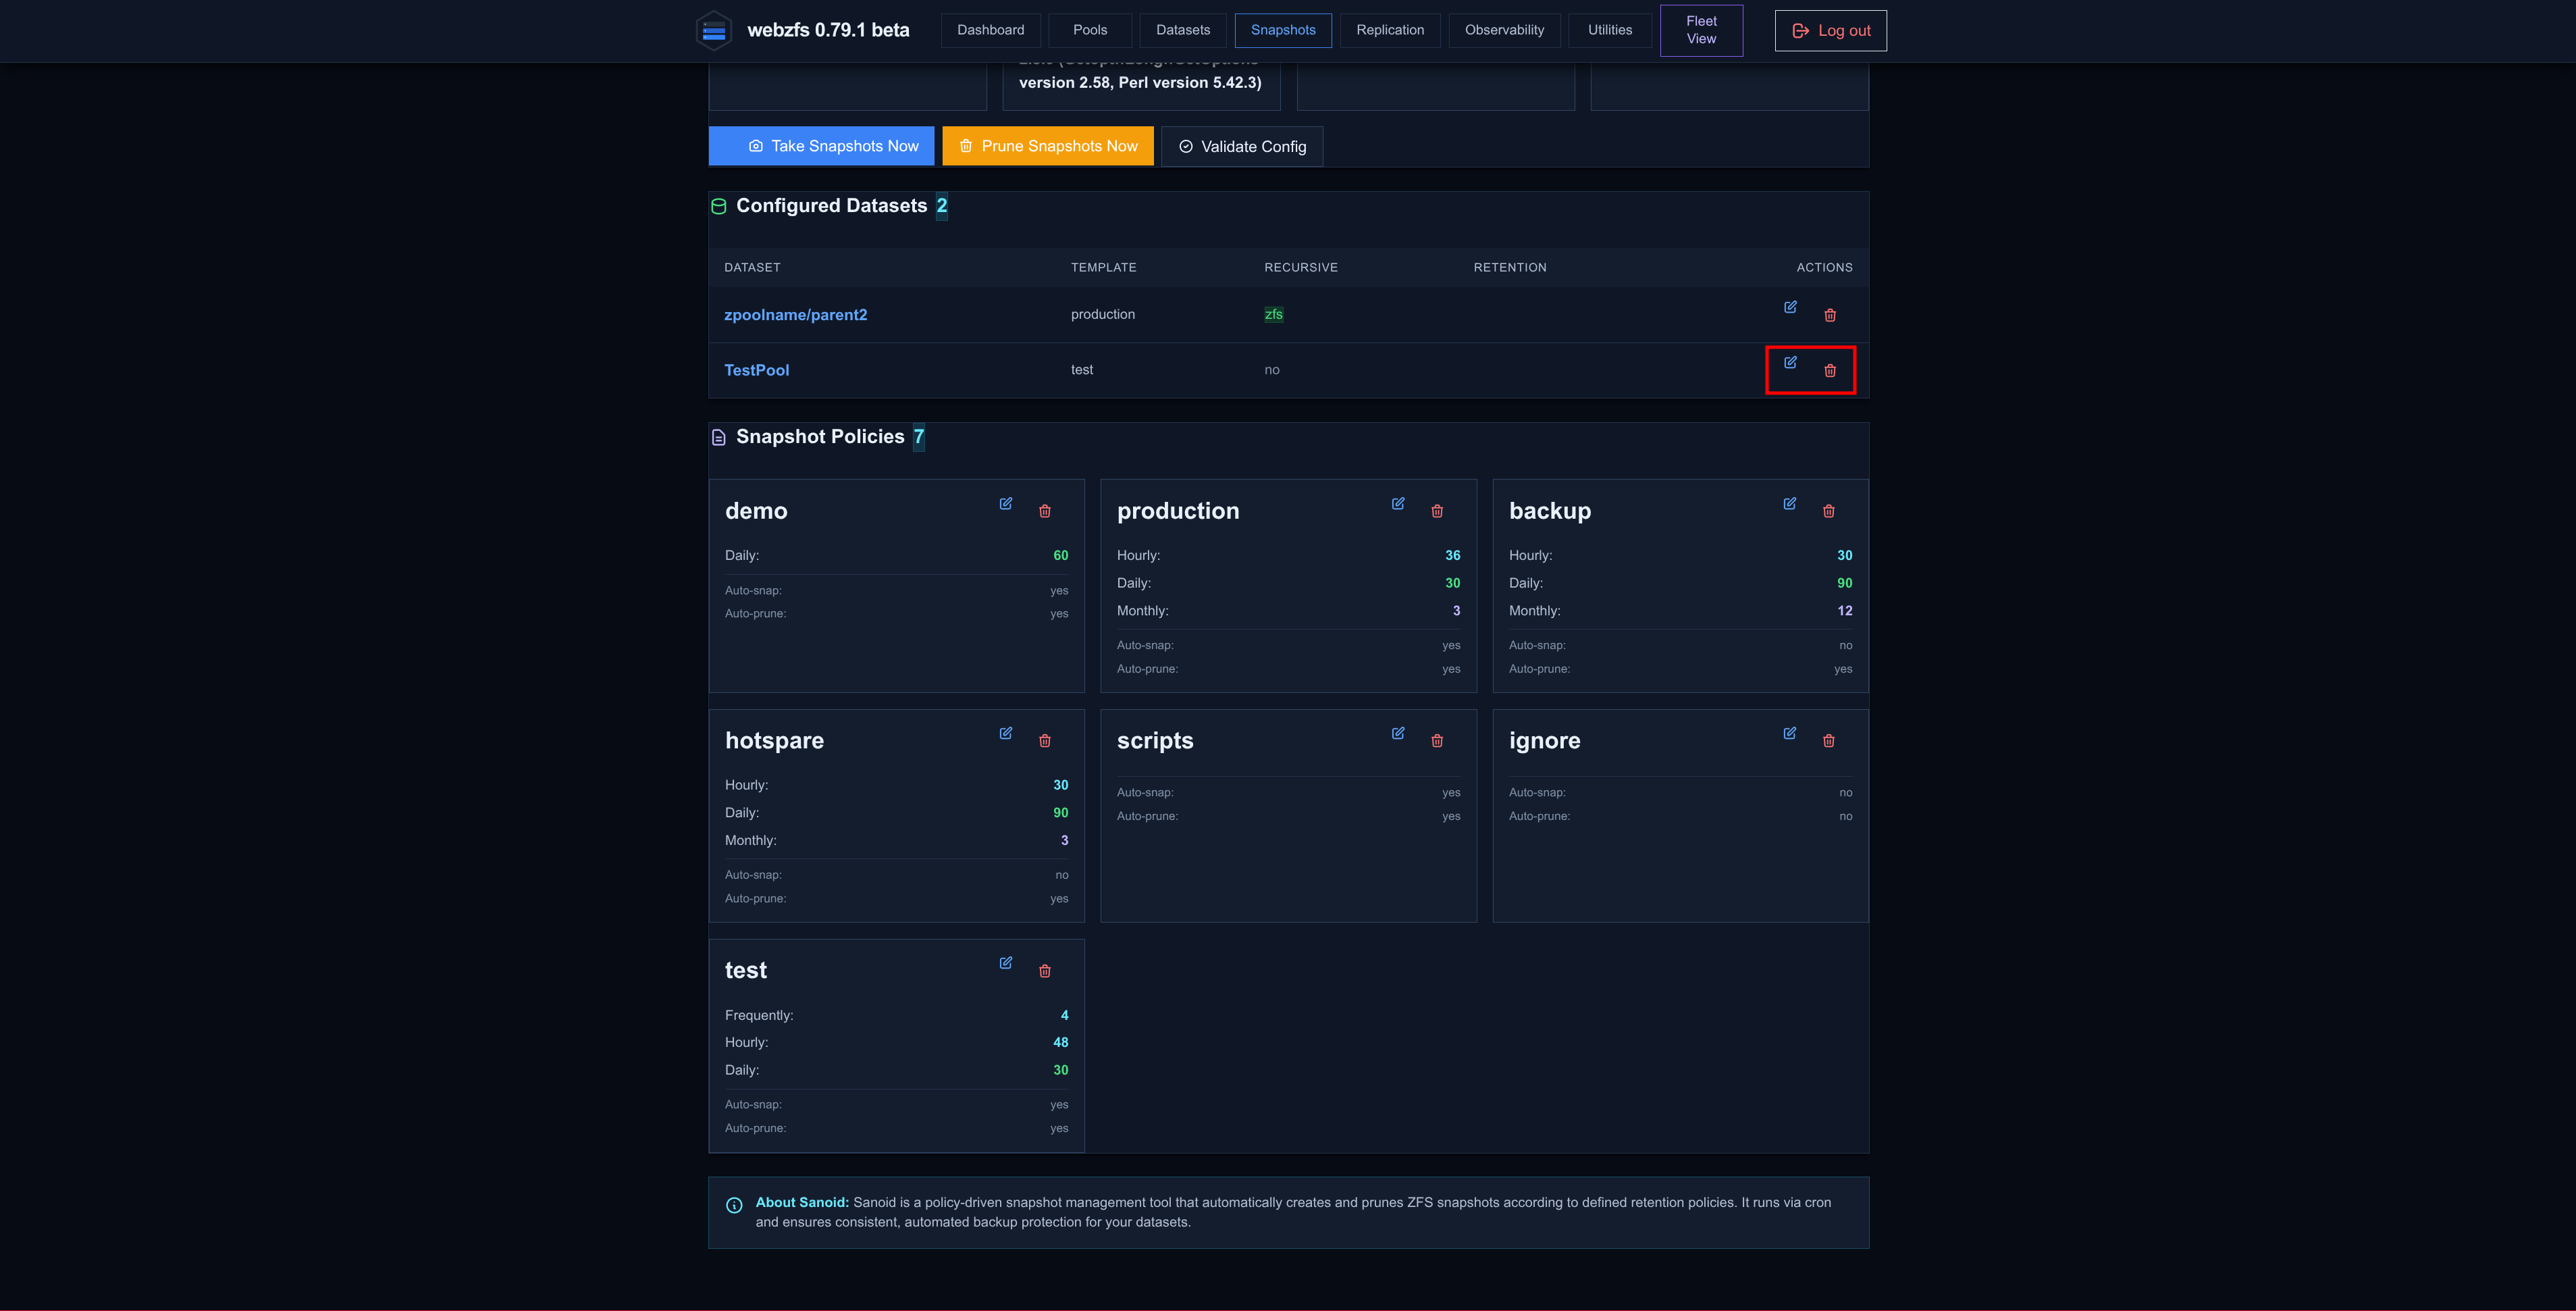
We can edit or delete the dataset from the interface:
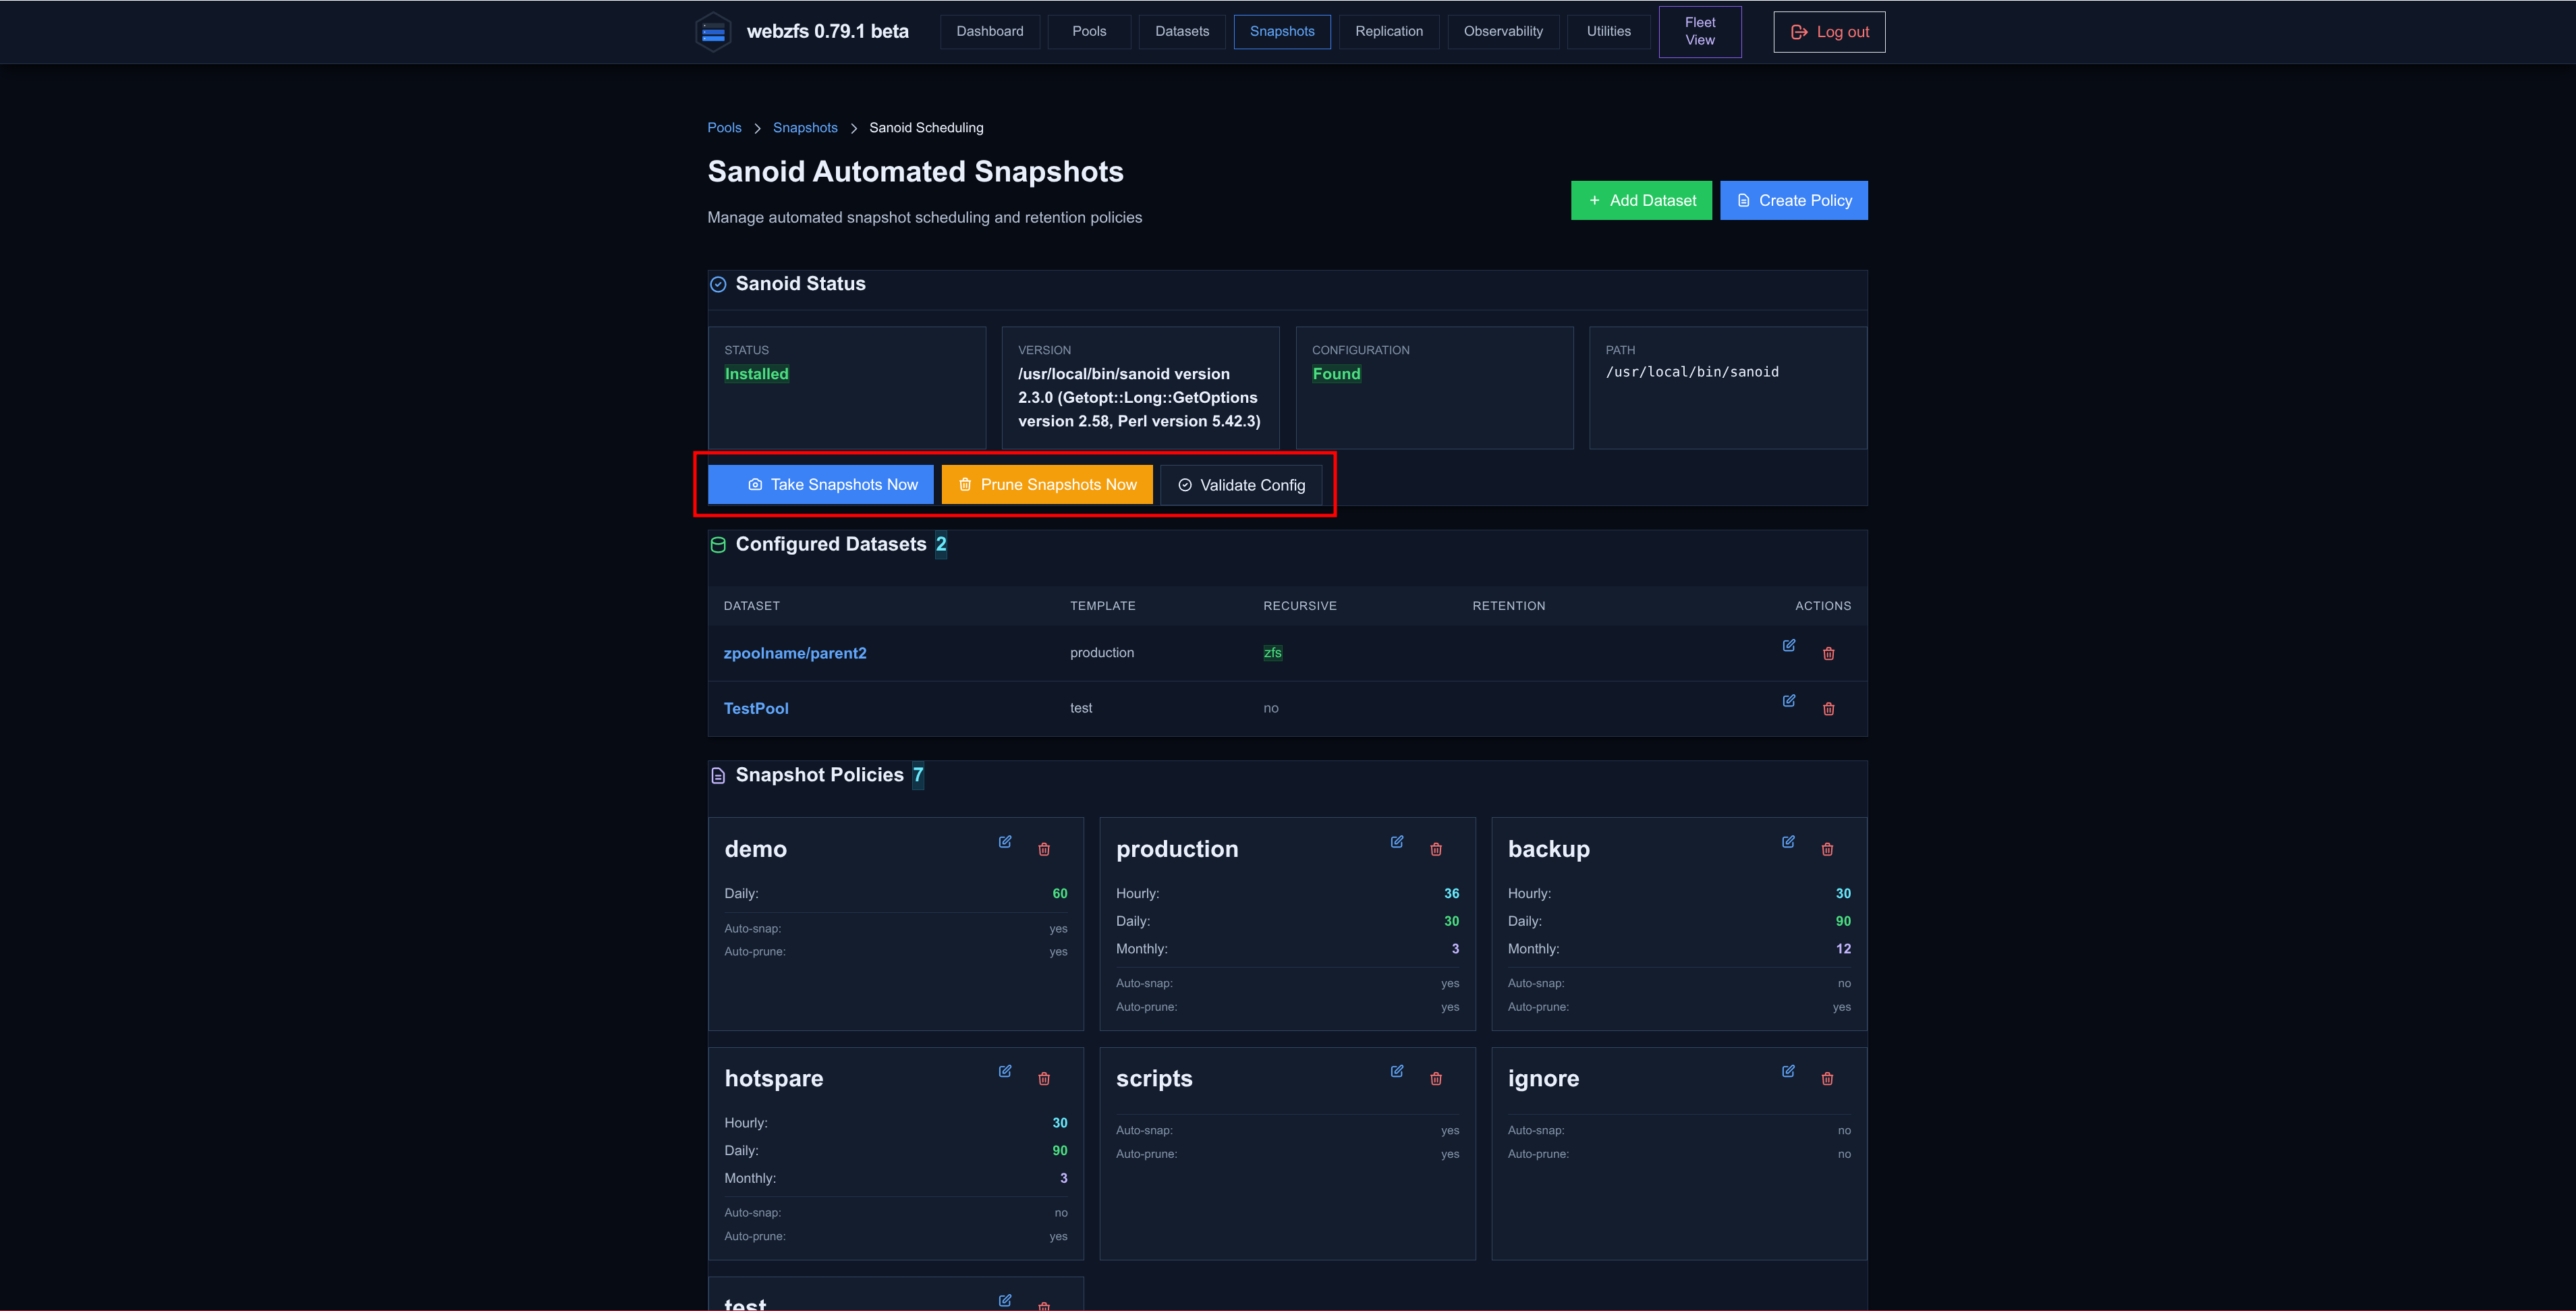
In addition to creating a snapshot at that very moment, pruning existing snapshots or validating the configuration:
The integration of WebZFS with Sanoid must be buggy; it generates the configuration correctly but does not leave the execution scheduled to generate/prune the snapshots.
It has to be crontab’d manually:
crontab -e
# SANOID
* * * * * /usr/local/bin/sanoid --cron >/dev/null 2>&1
We can see how the snapshots have been generated automatically:
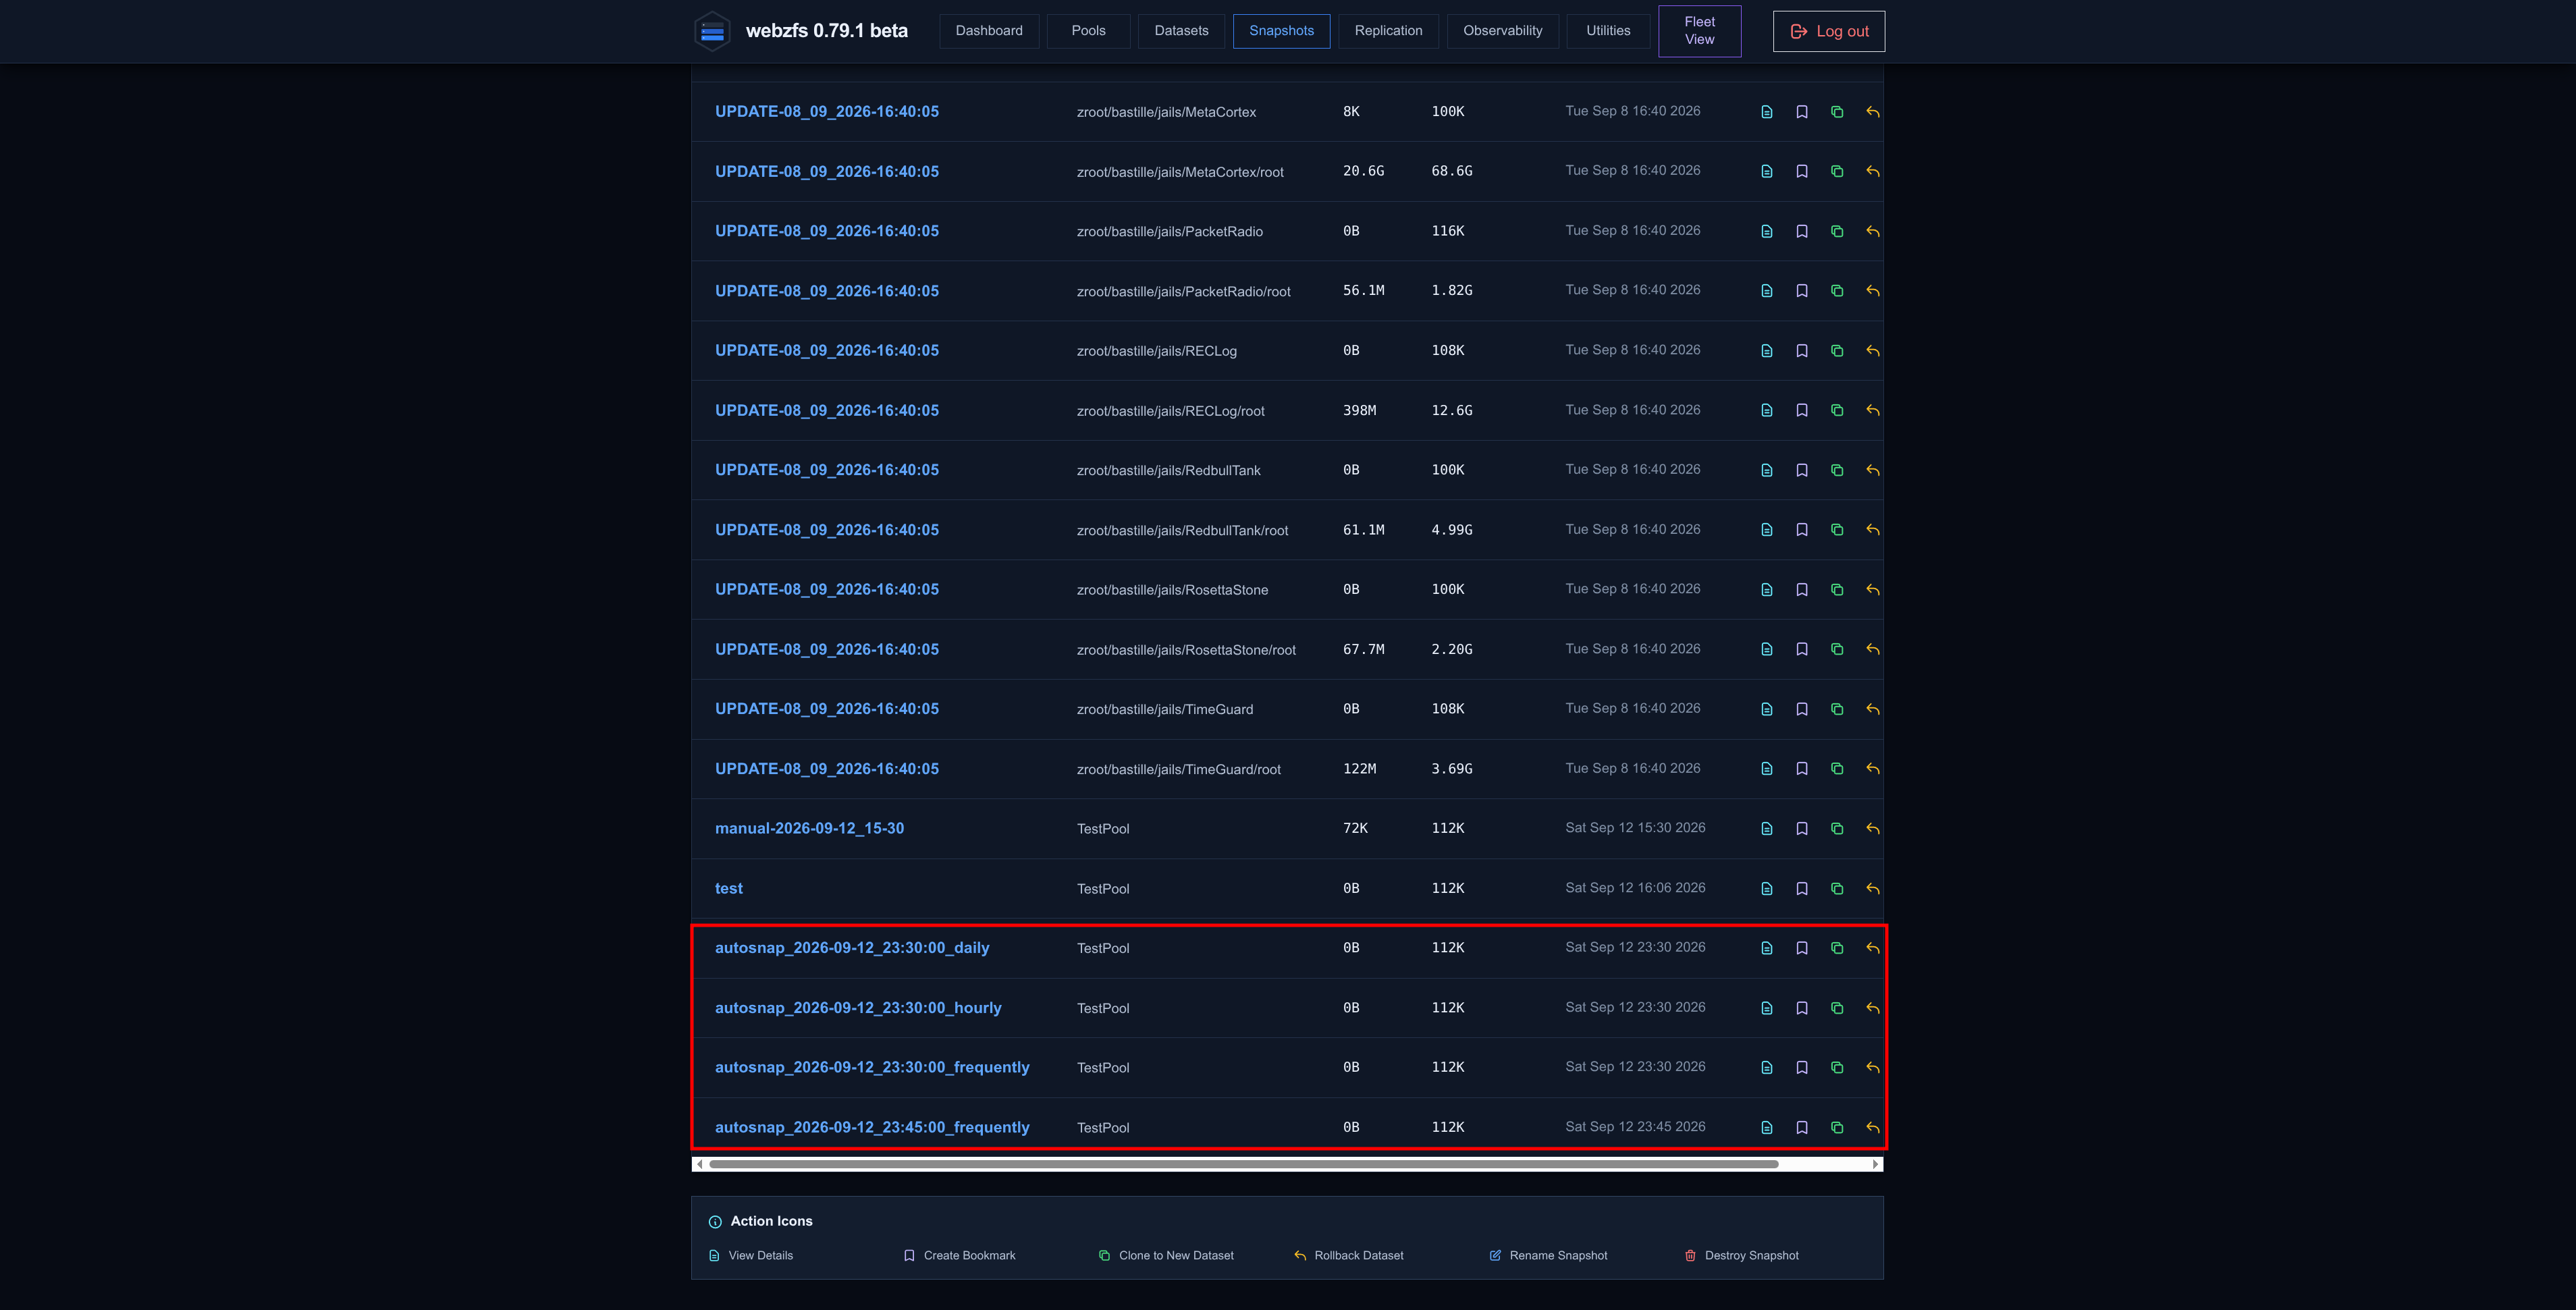
Continuing in the main menu, we can perform several actions on the snapshots.
View Details
We can see the details and properties of the snapshot as well as perform operations on it:
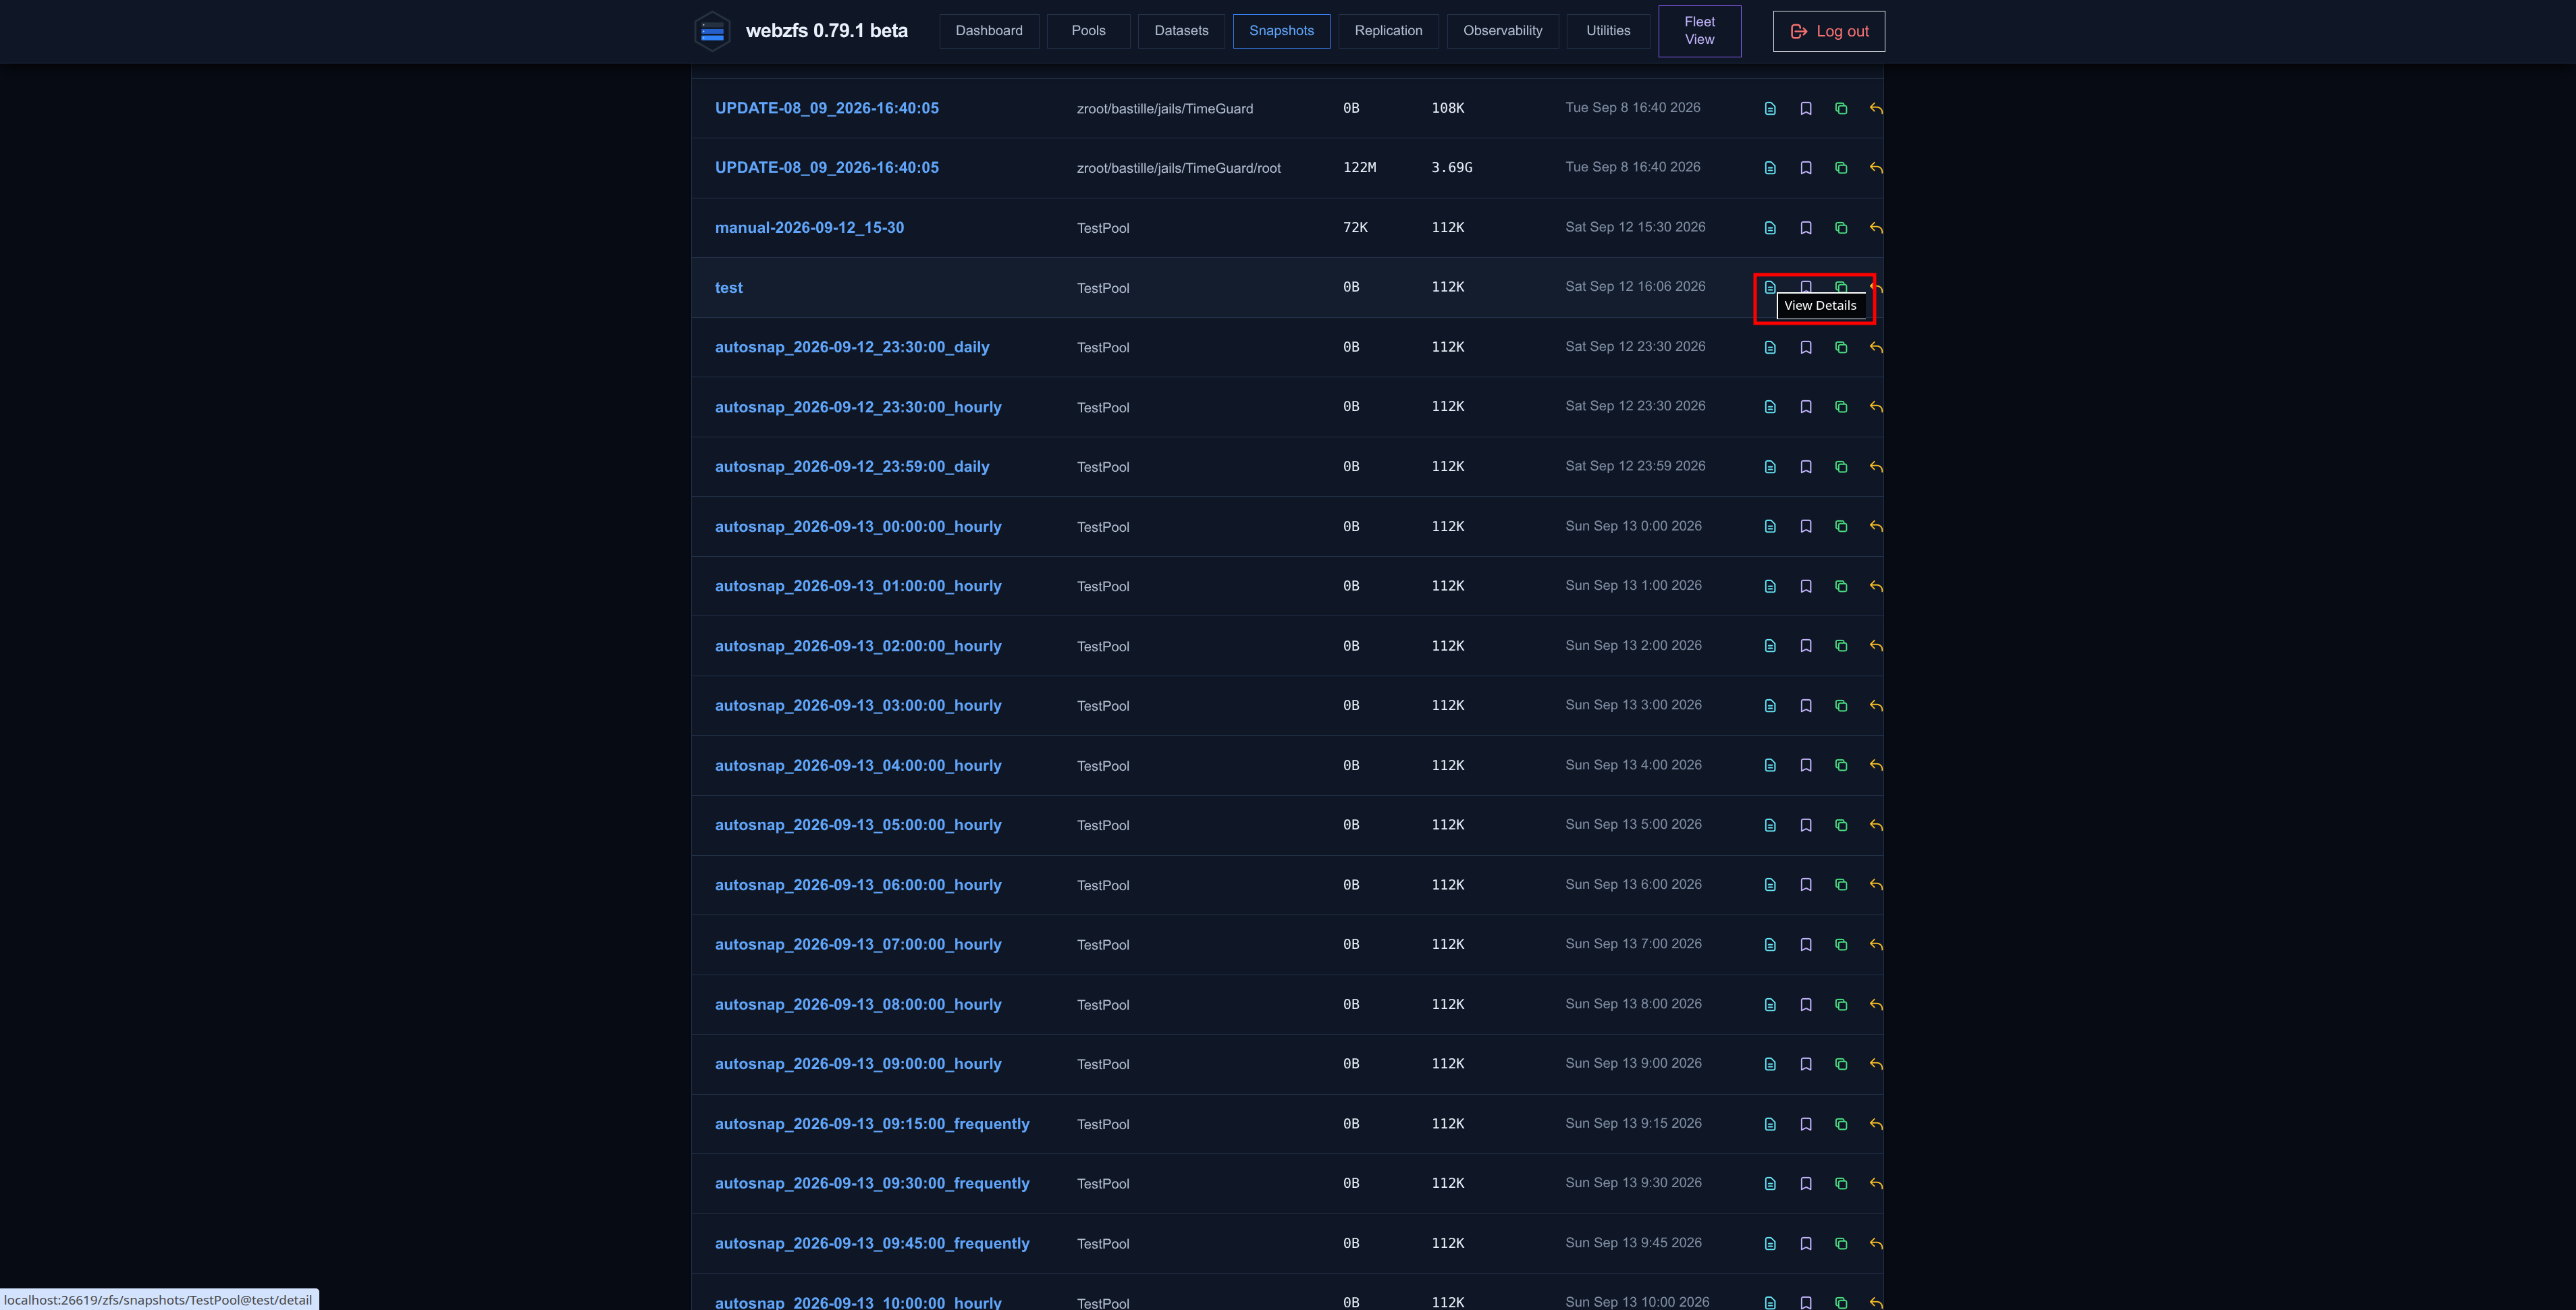
|
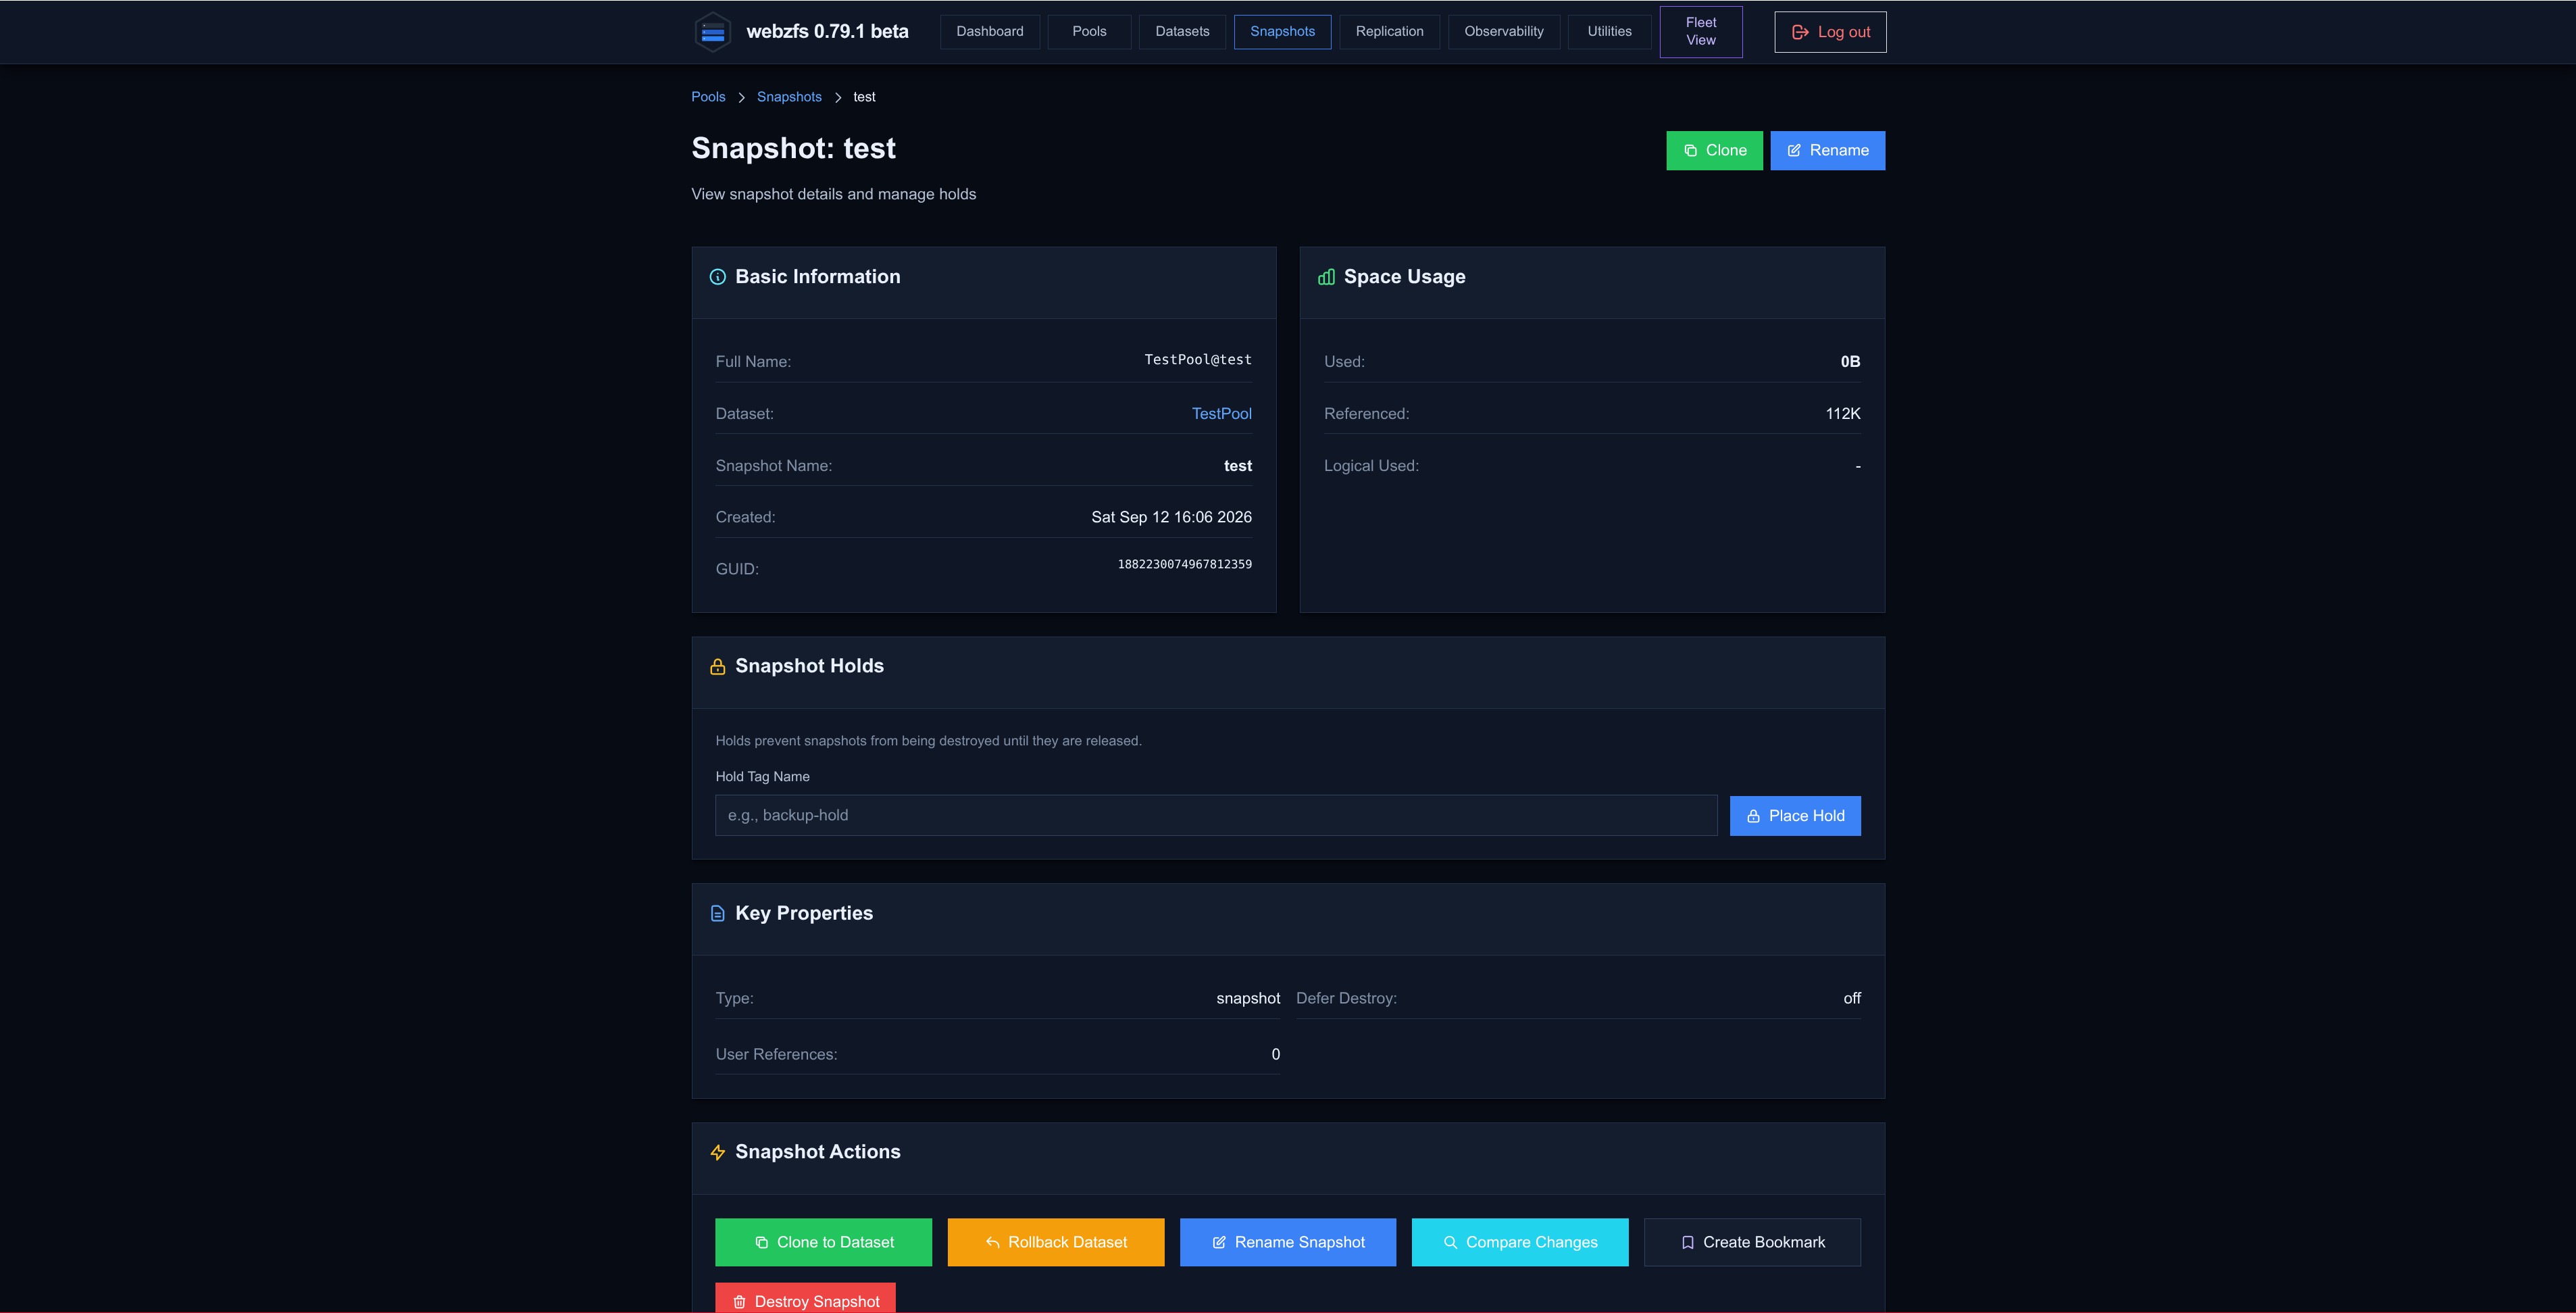
|
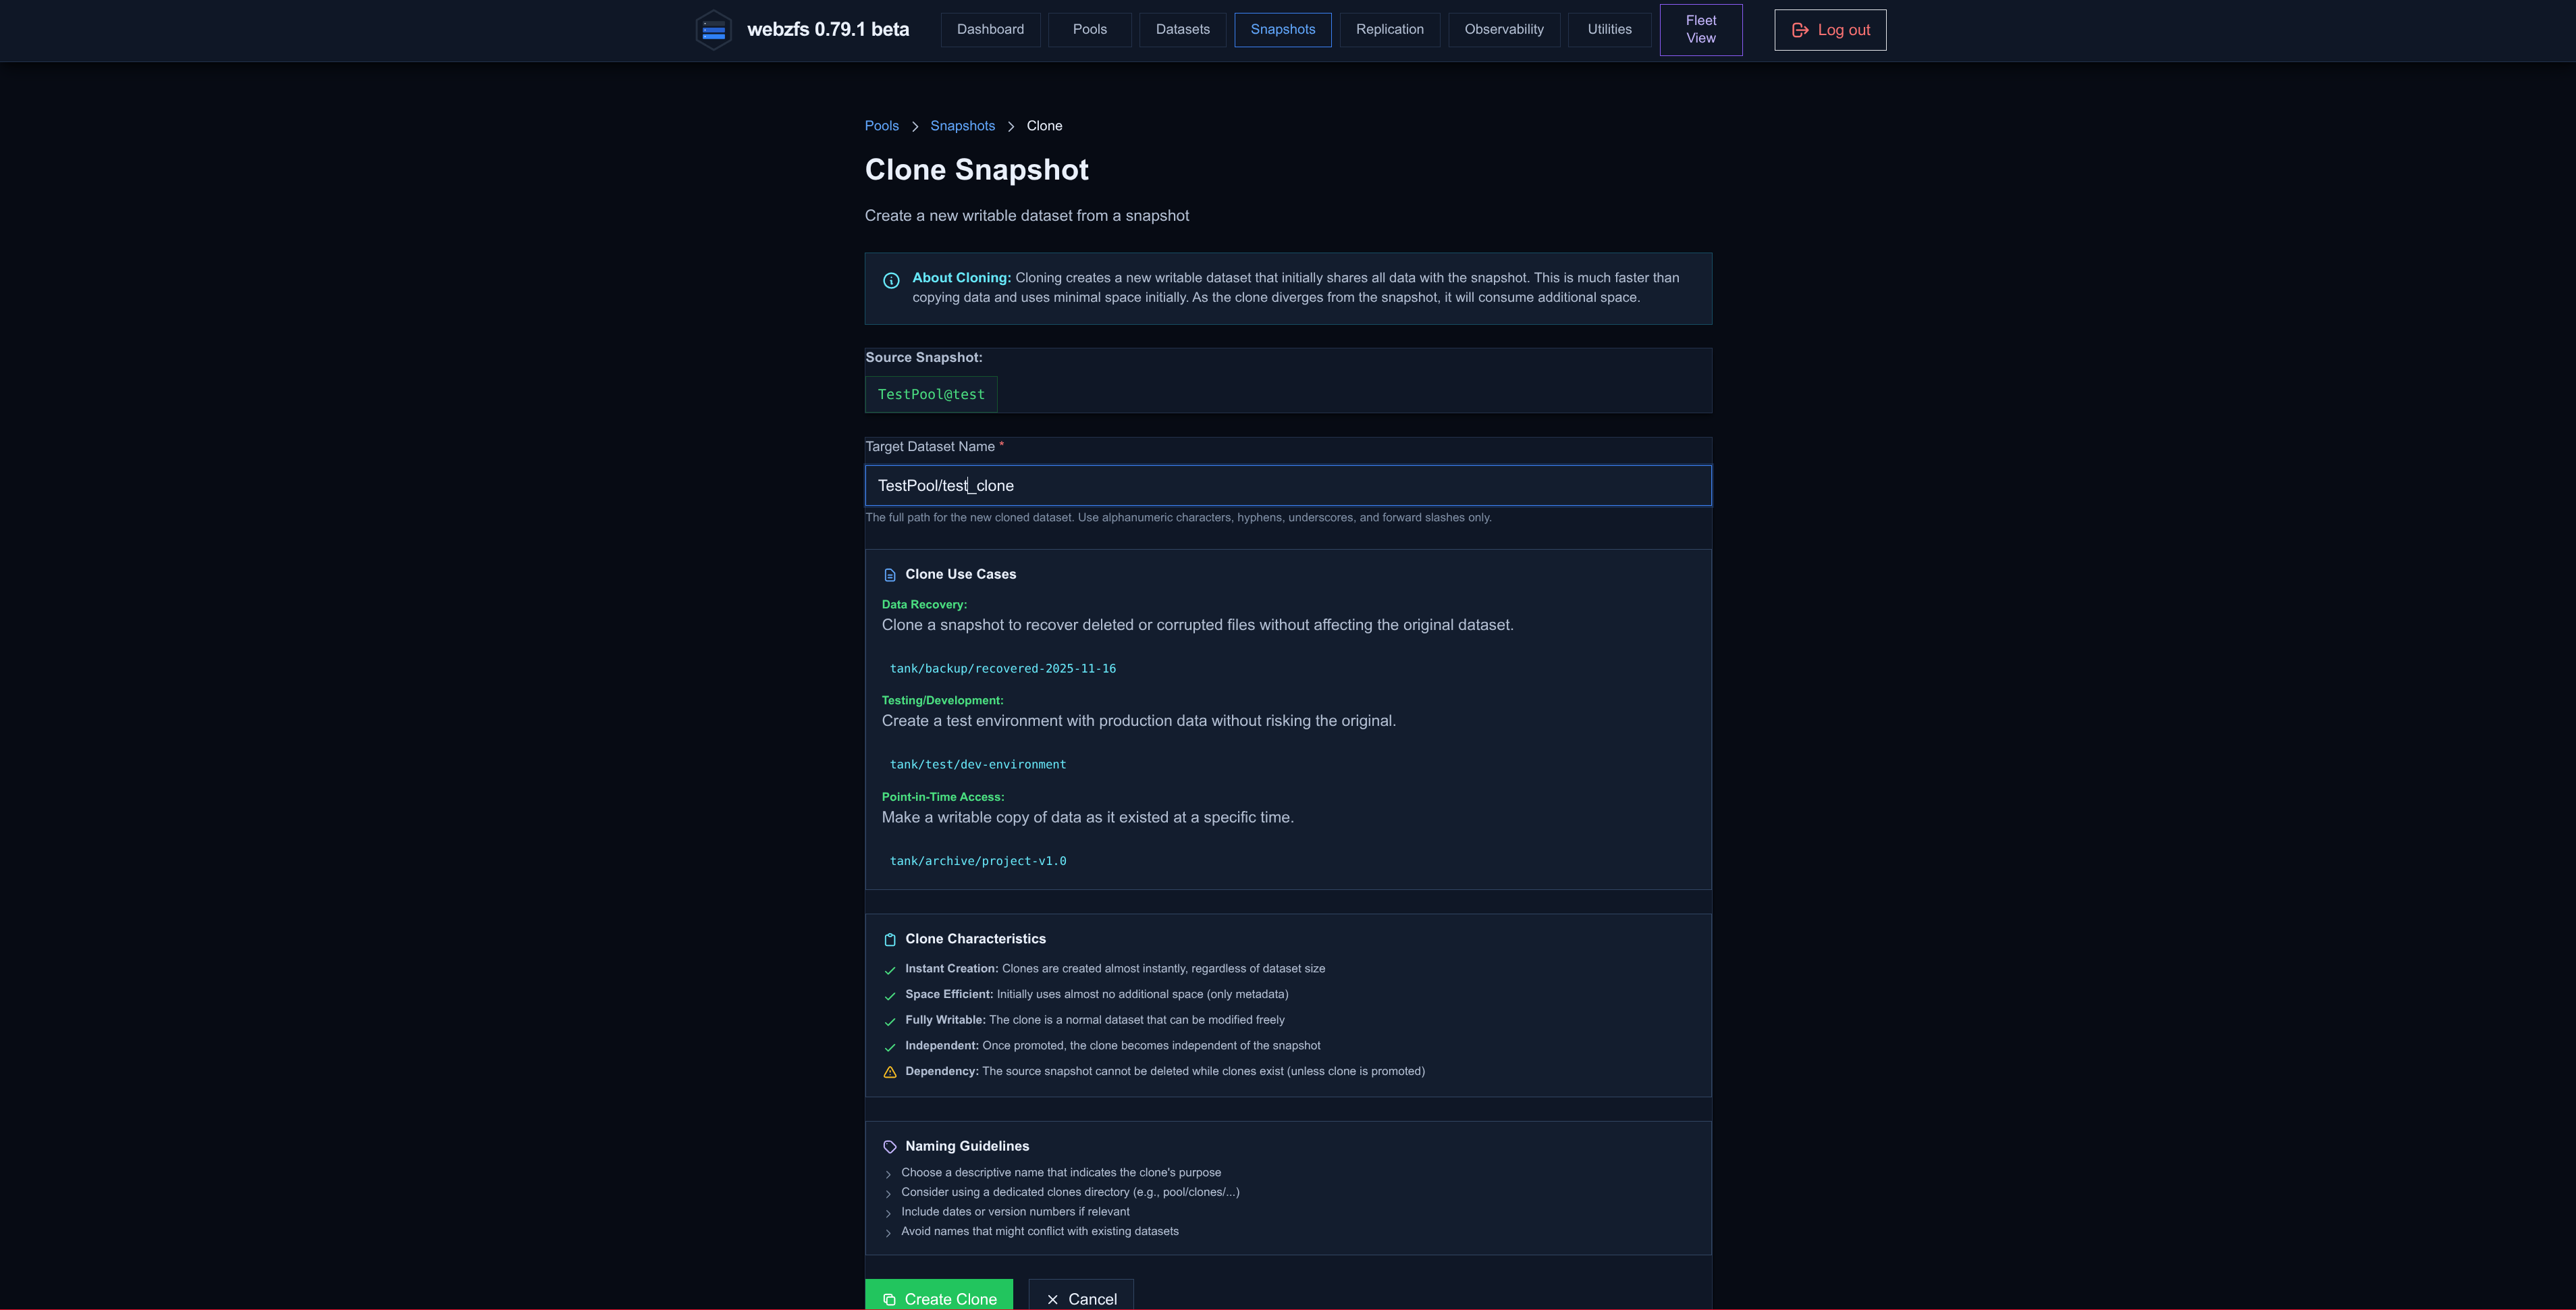
From here we can clone the snapshot to create a dataset from it; the clone will be dependent on the parent and will only occupy additional space as we make changes to the data shared with the parent:
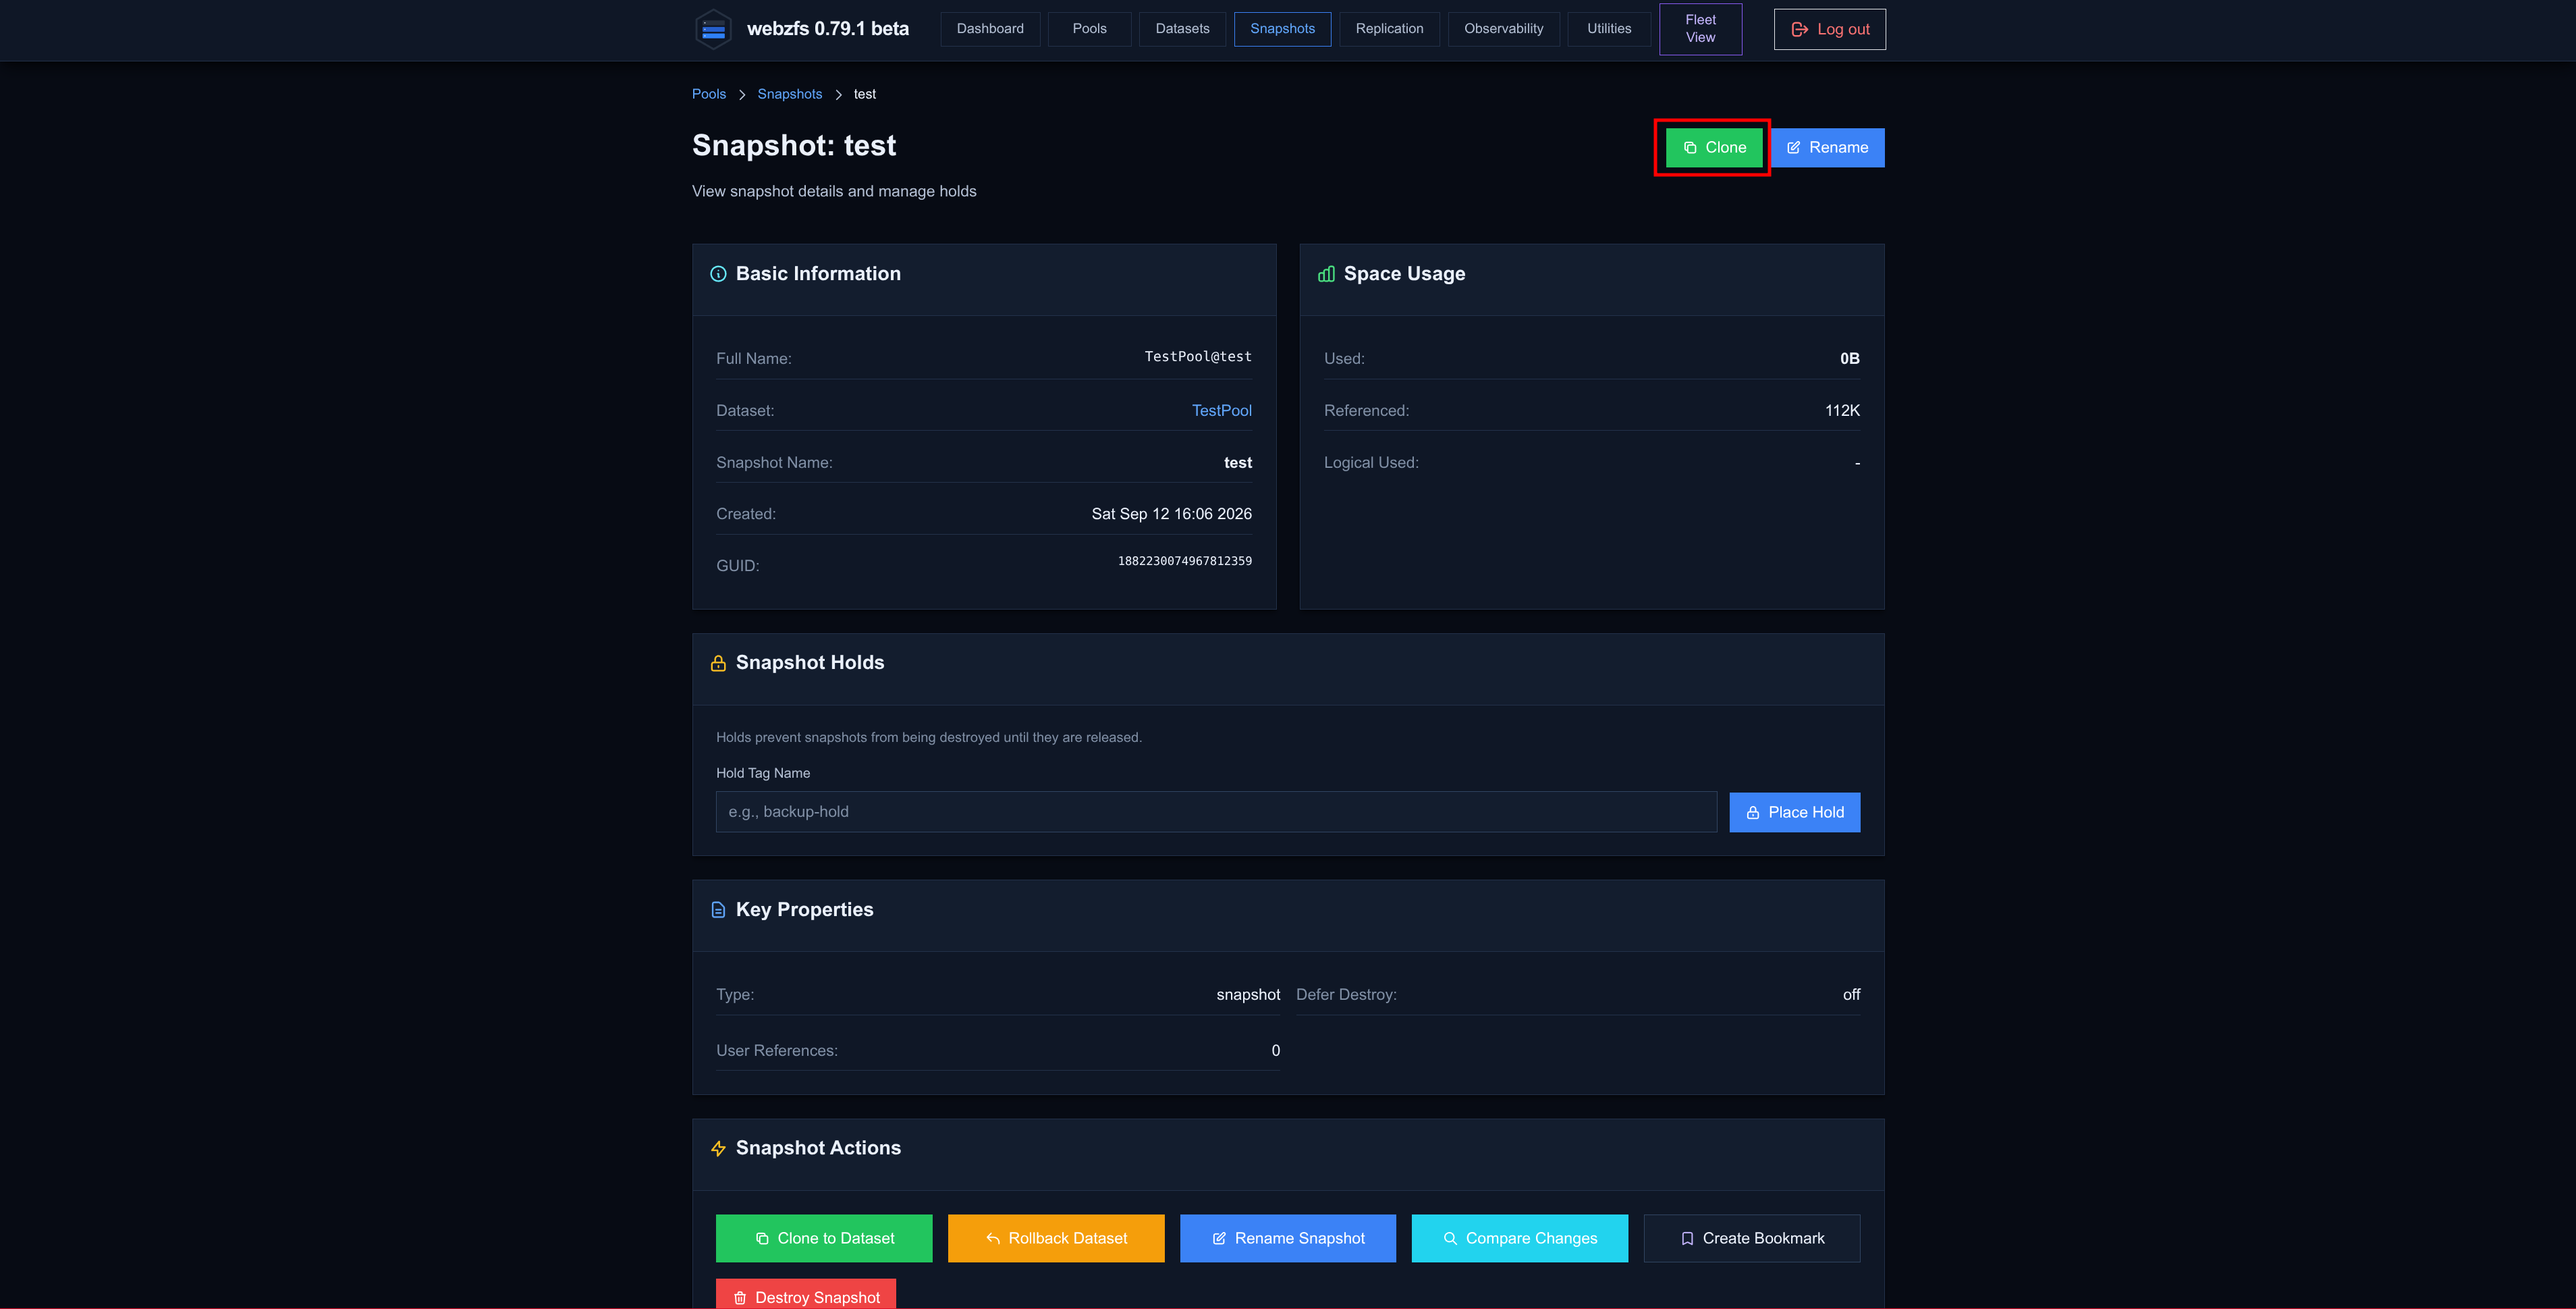
|
|
|
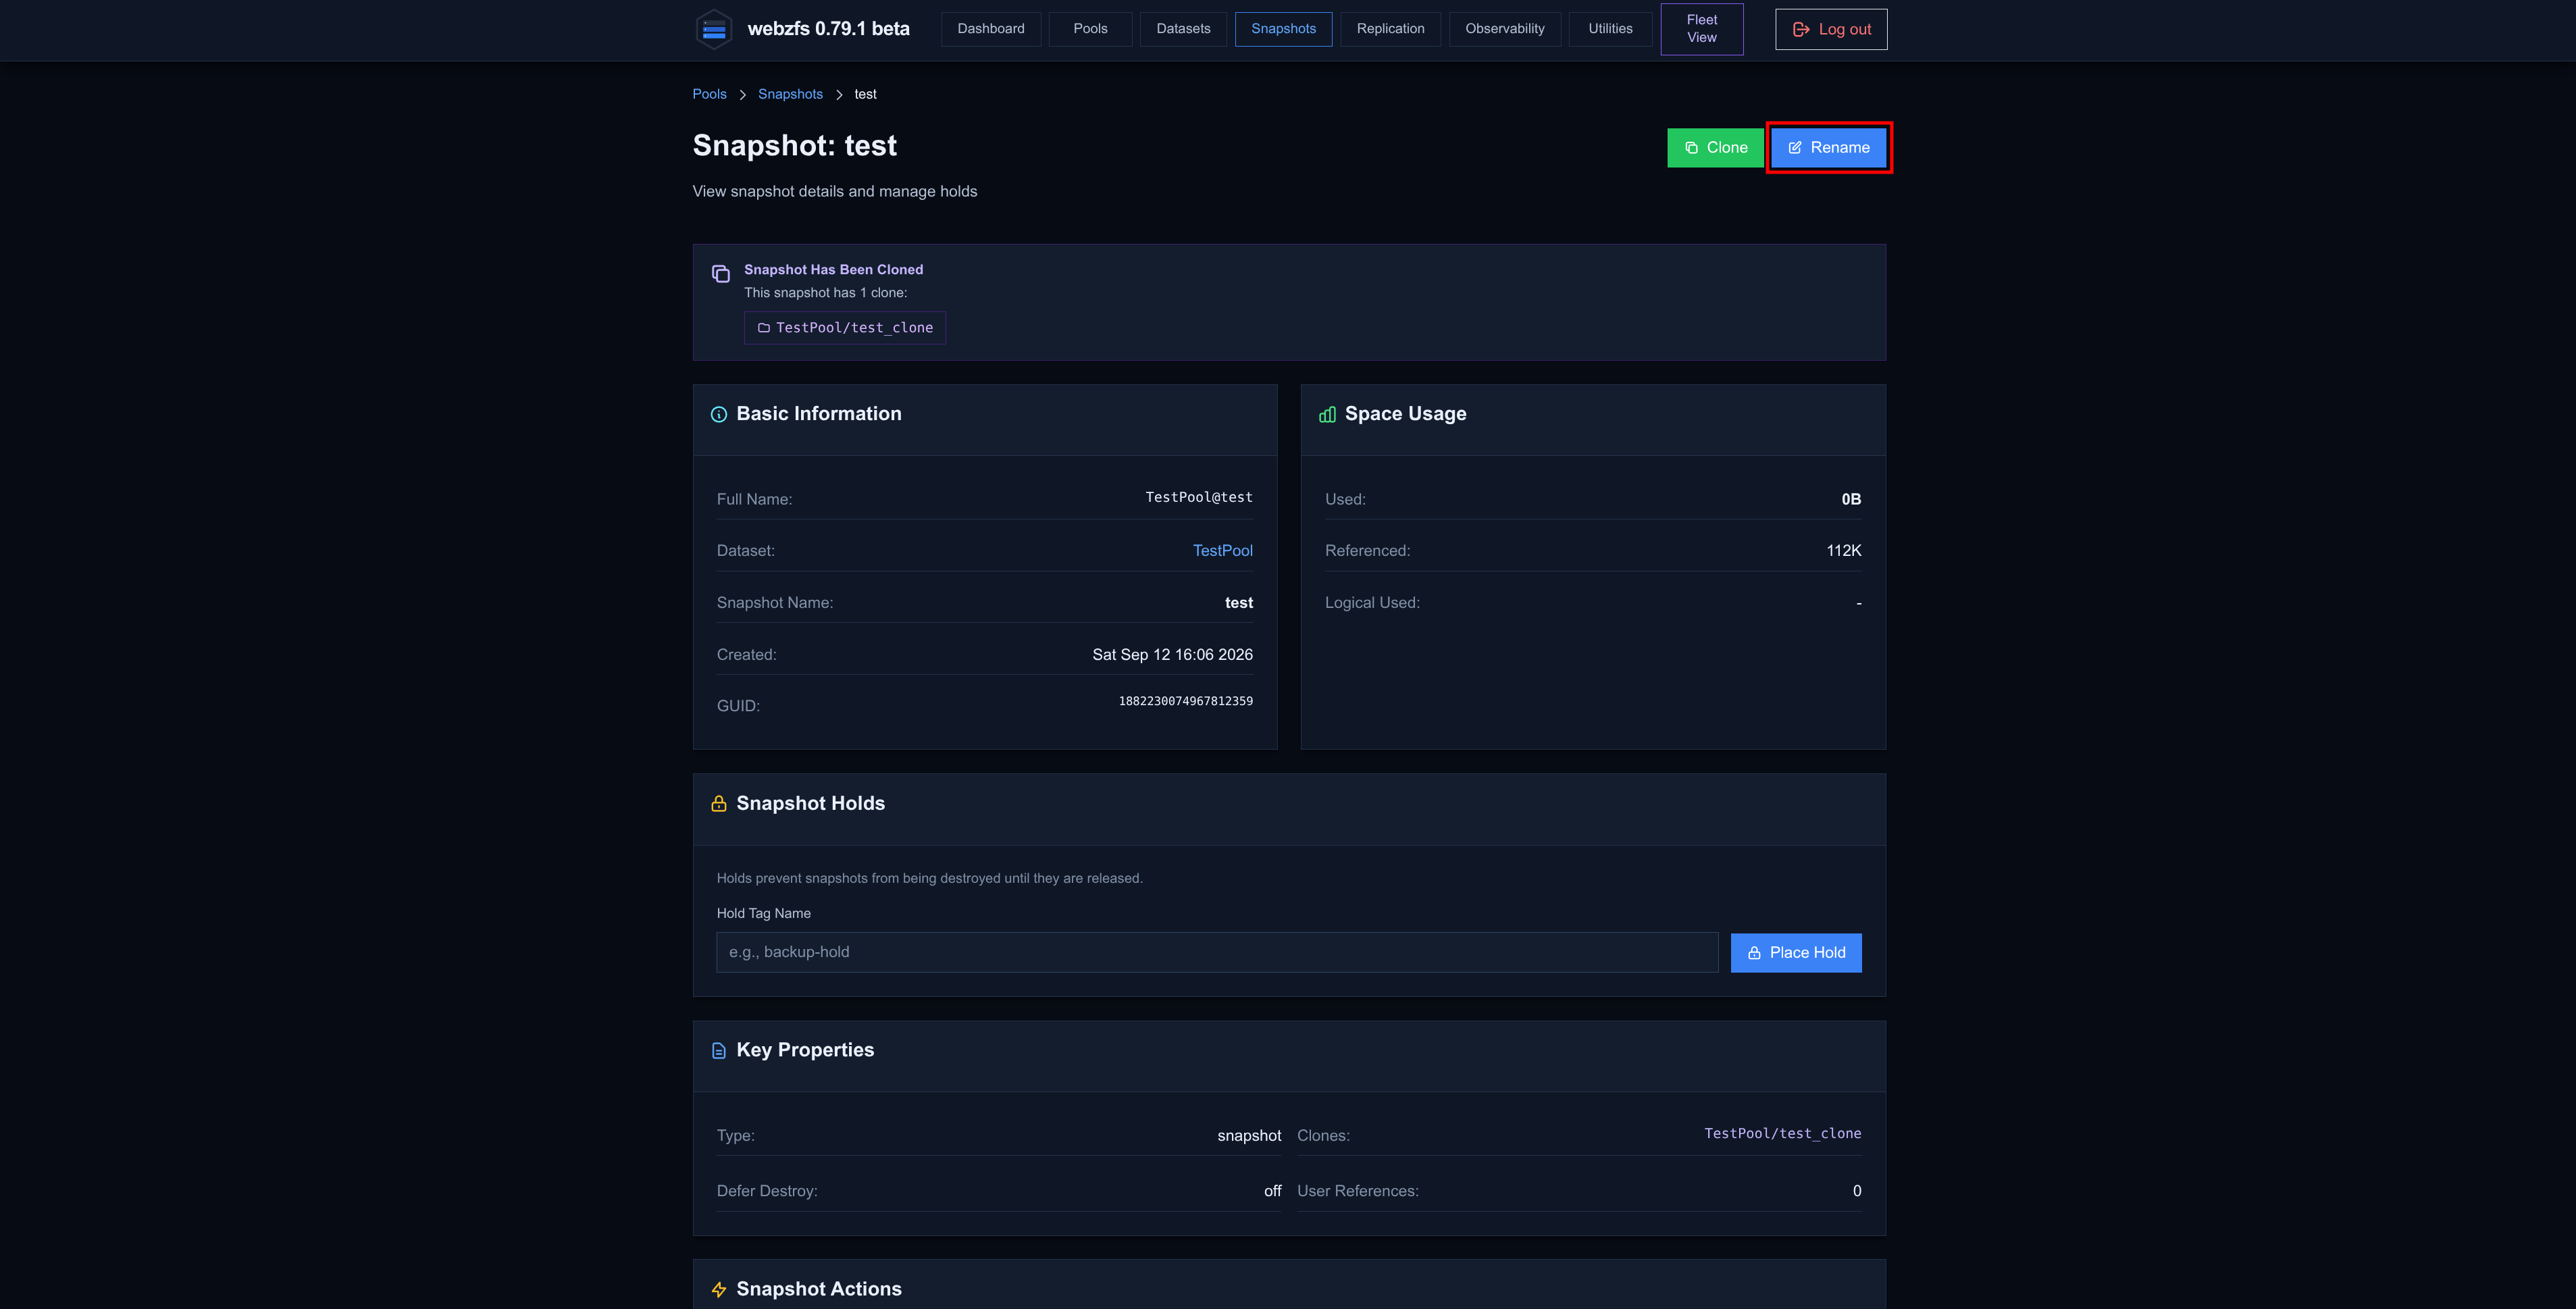
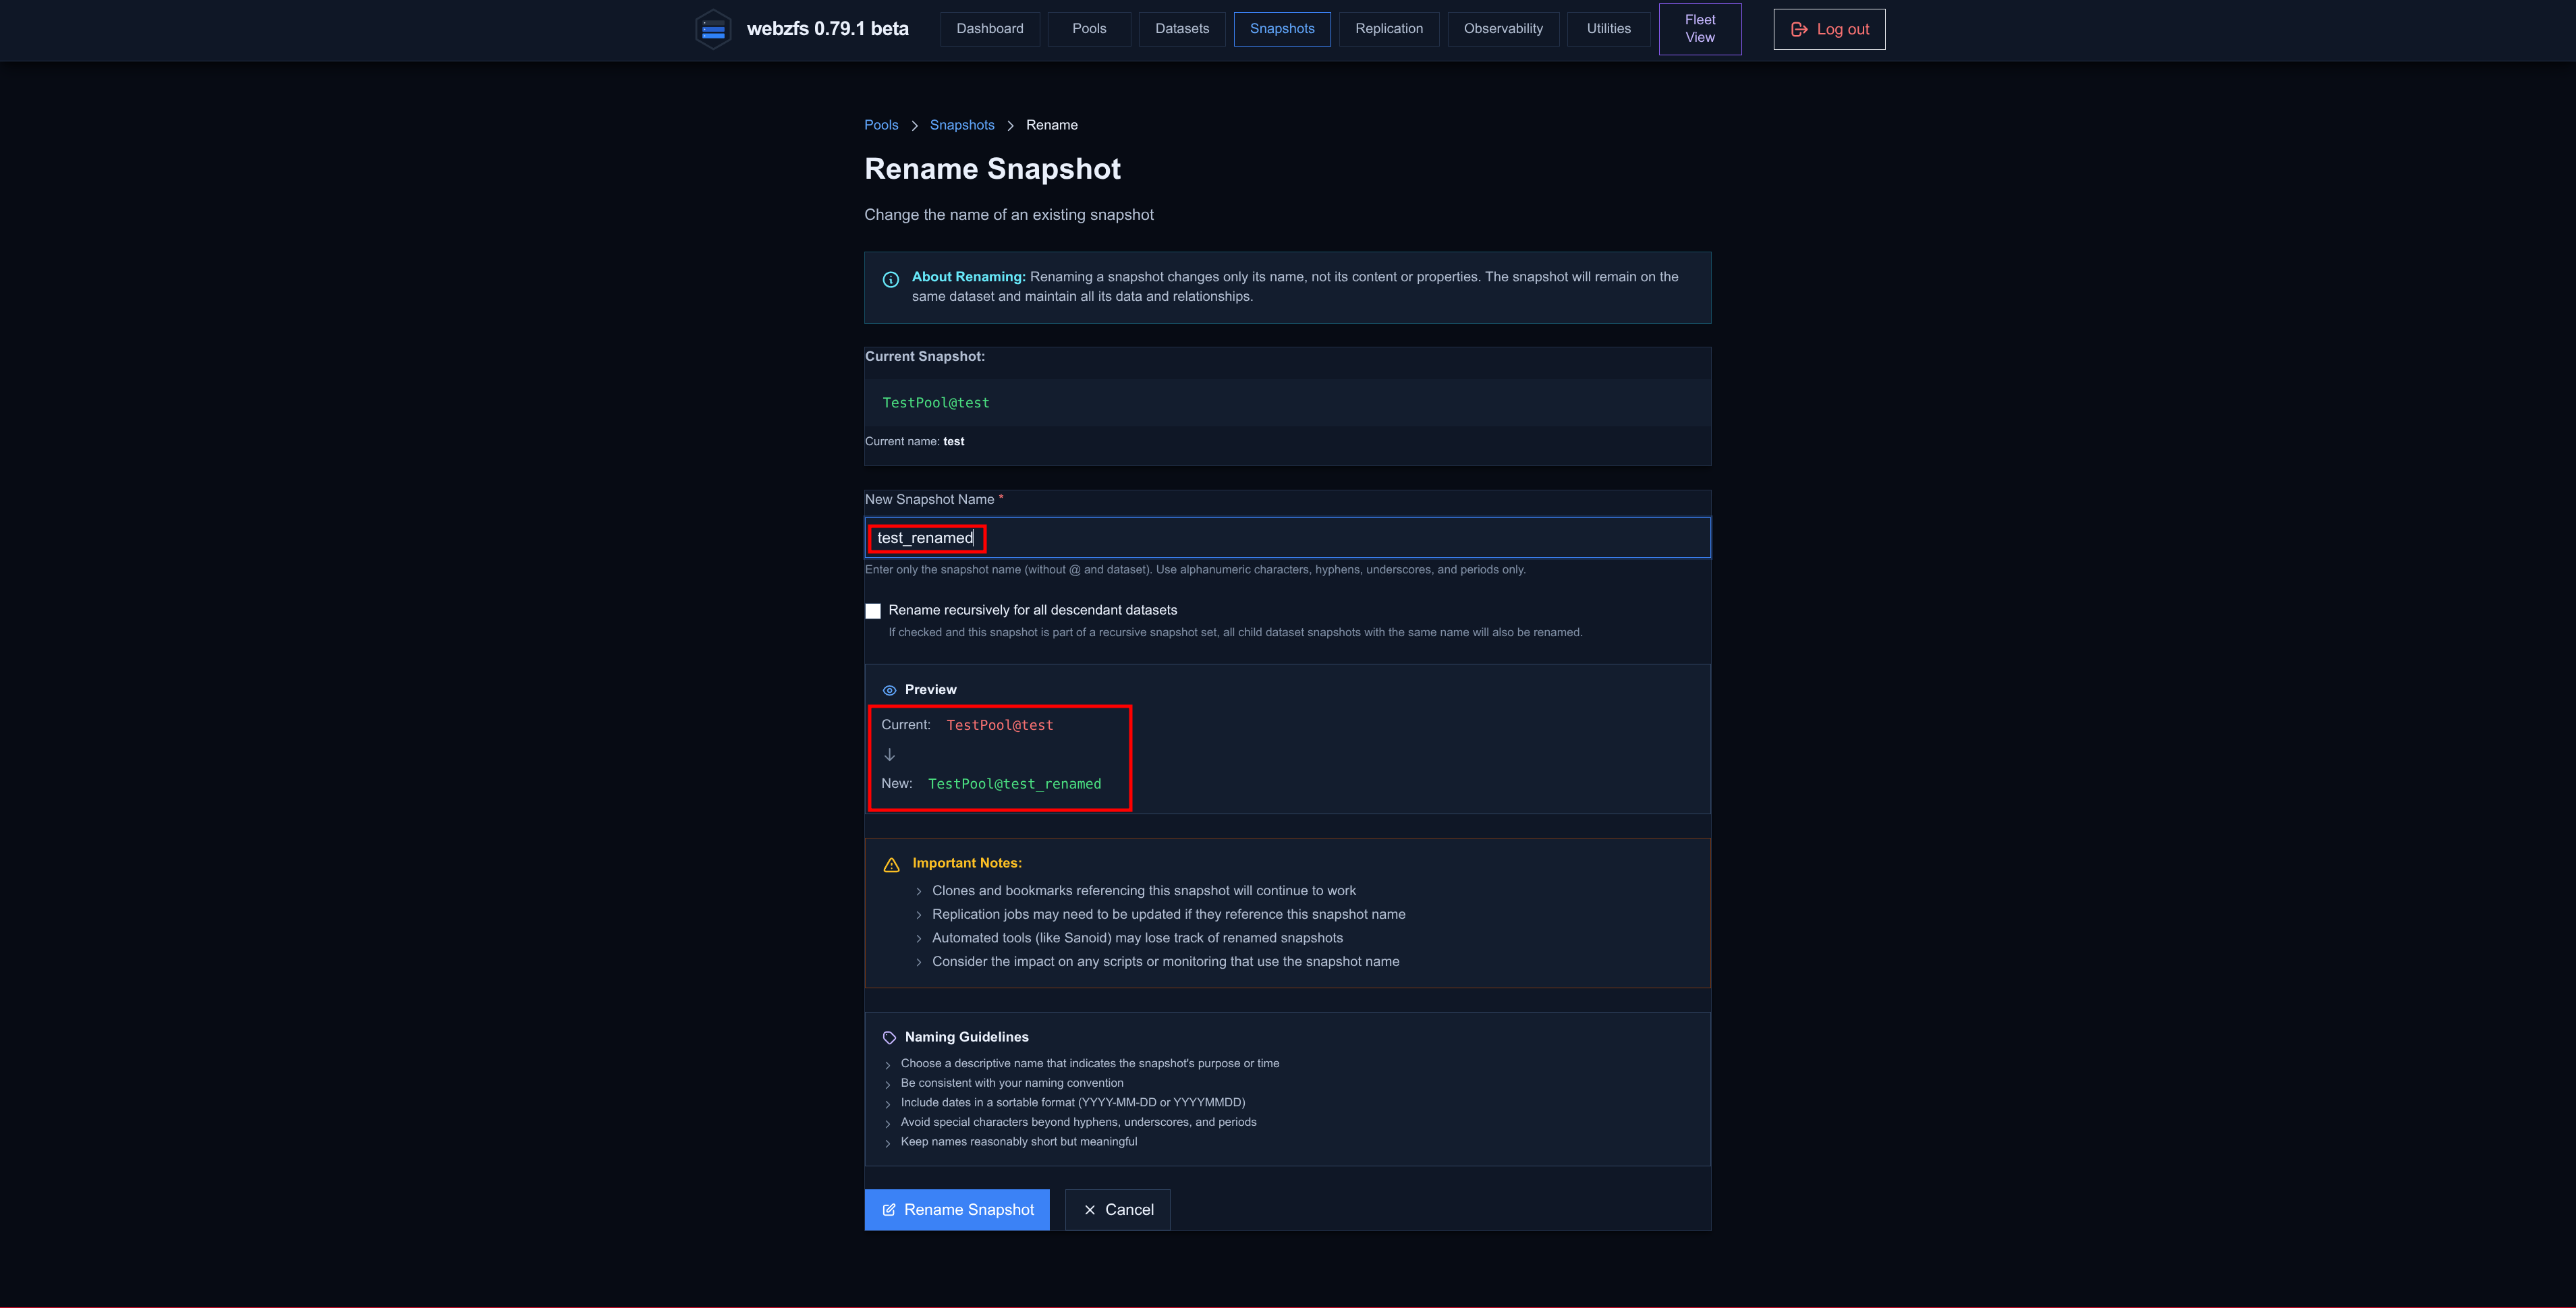
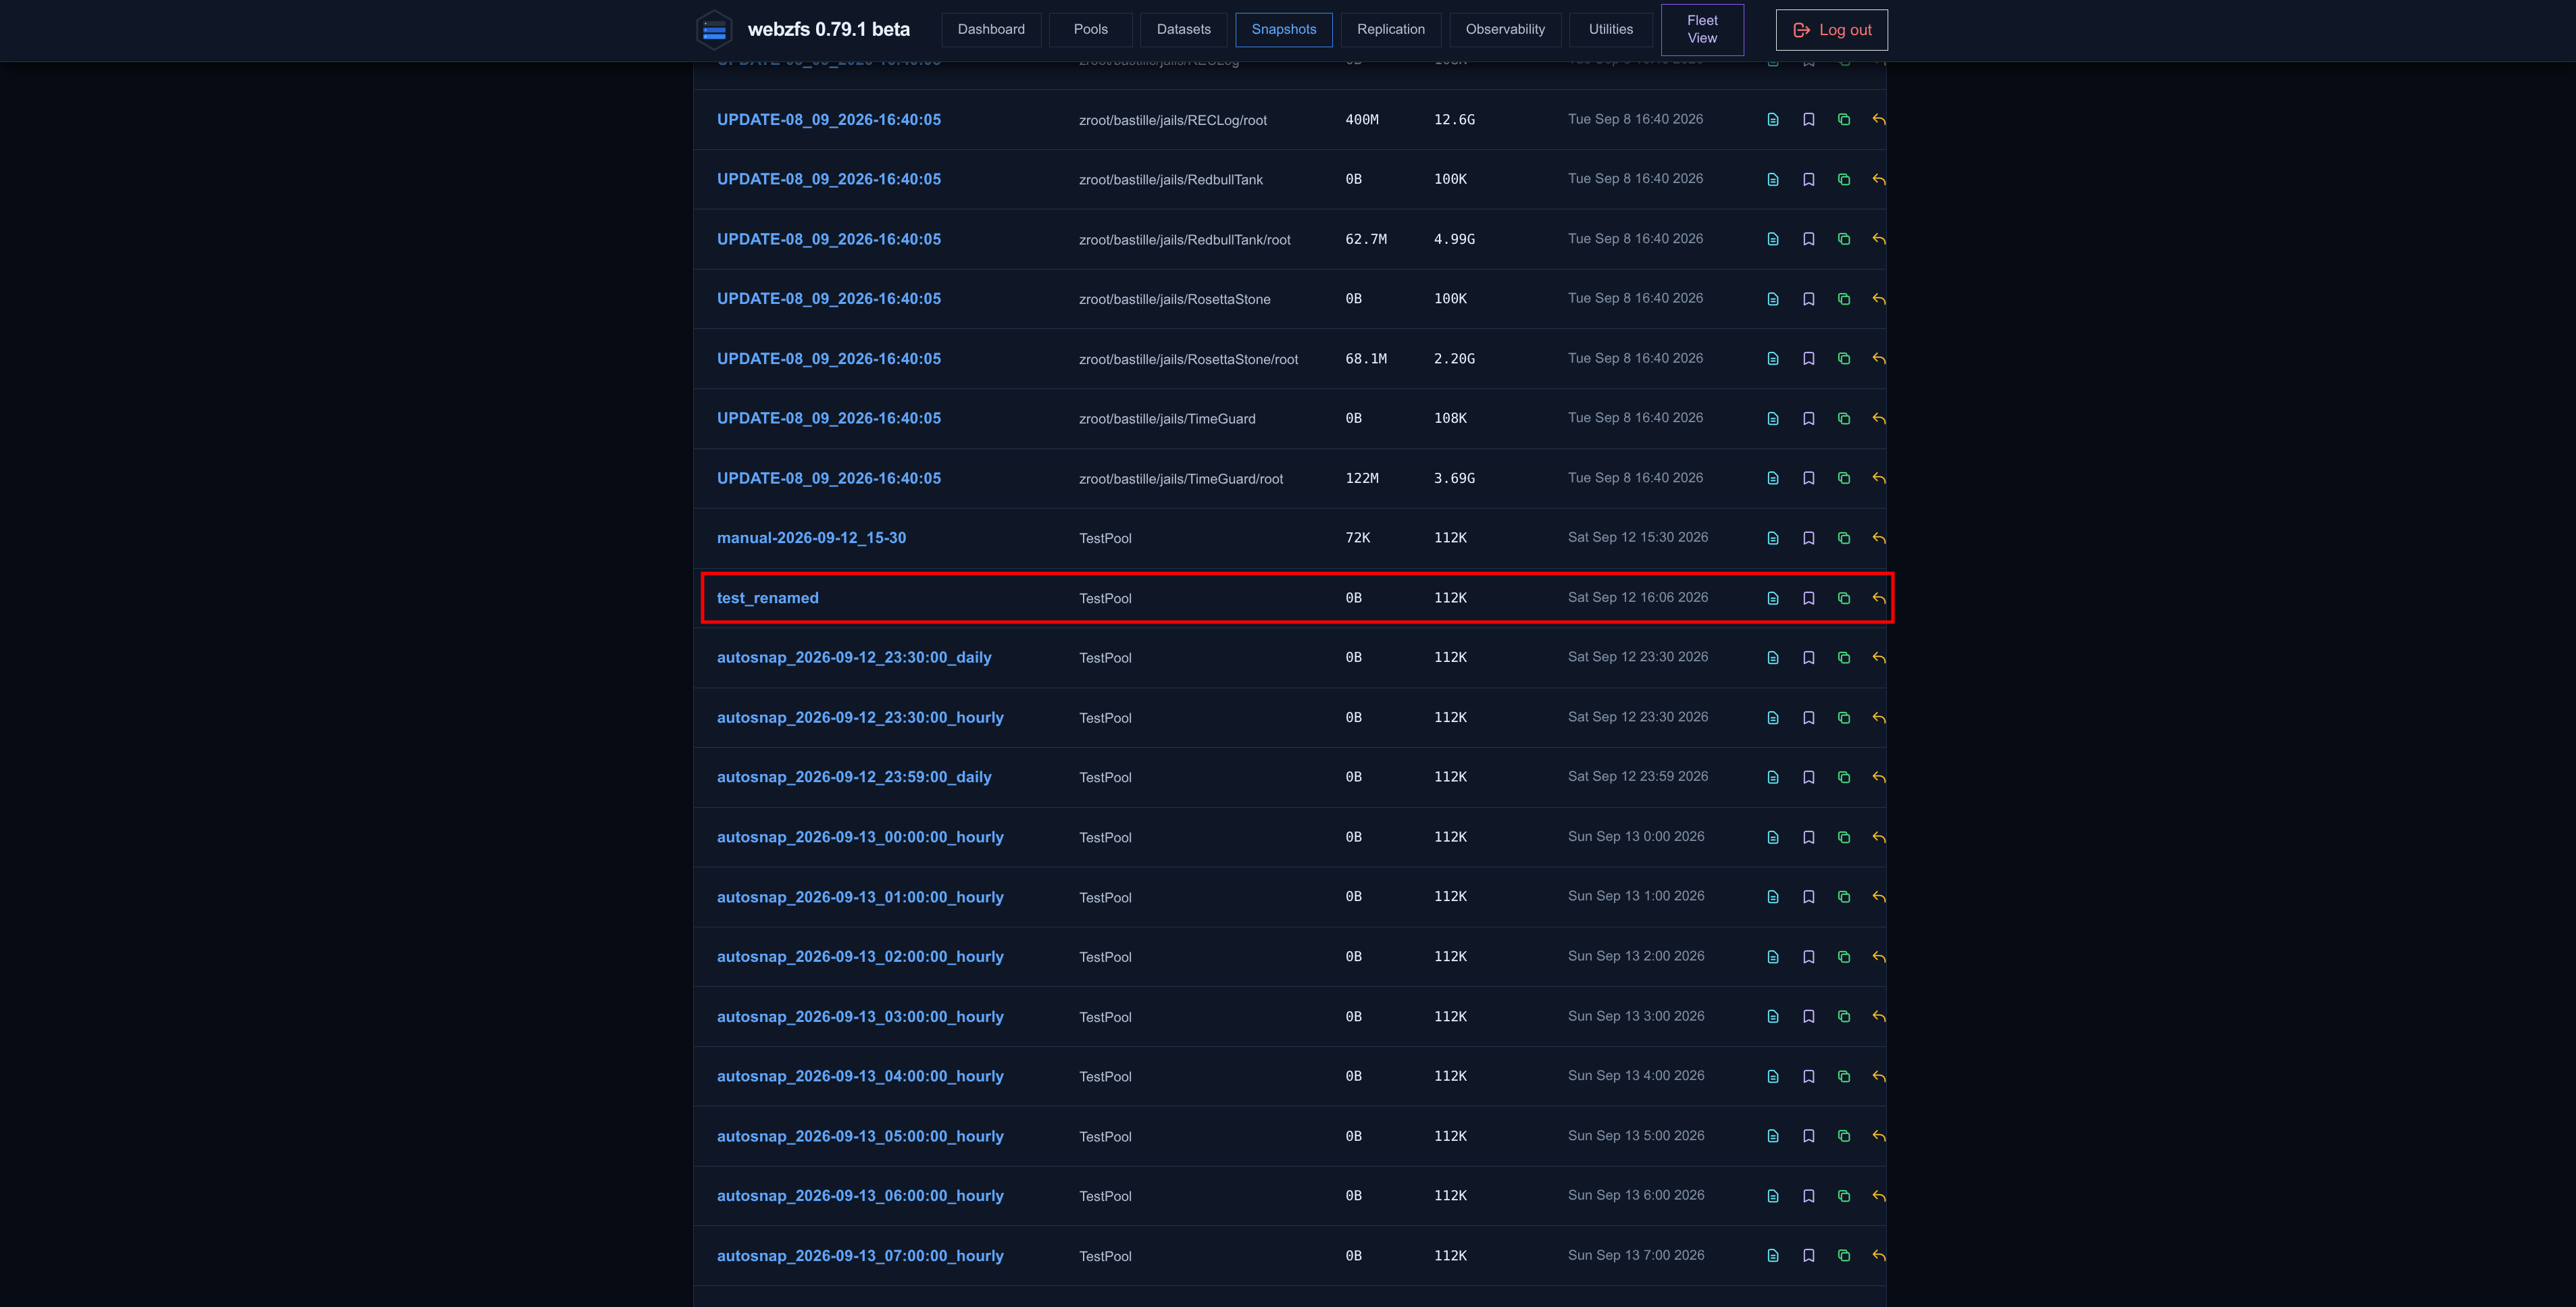
We can also rename the snapshot:
|
|
|
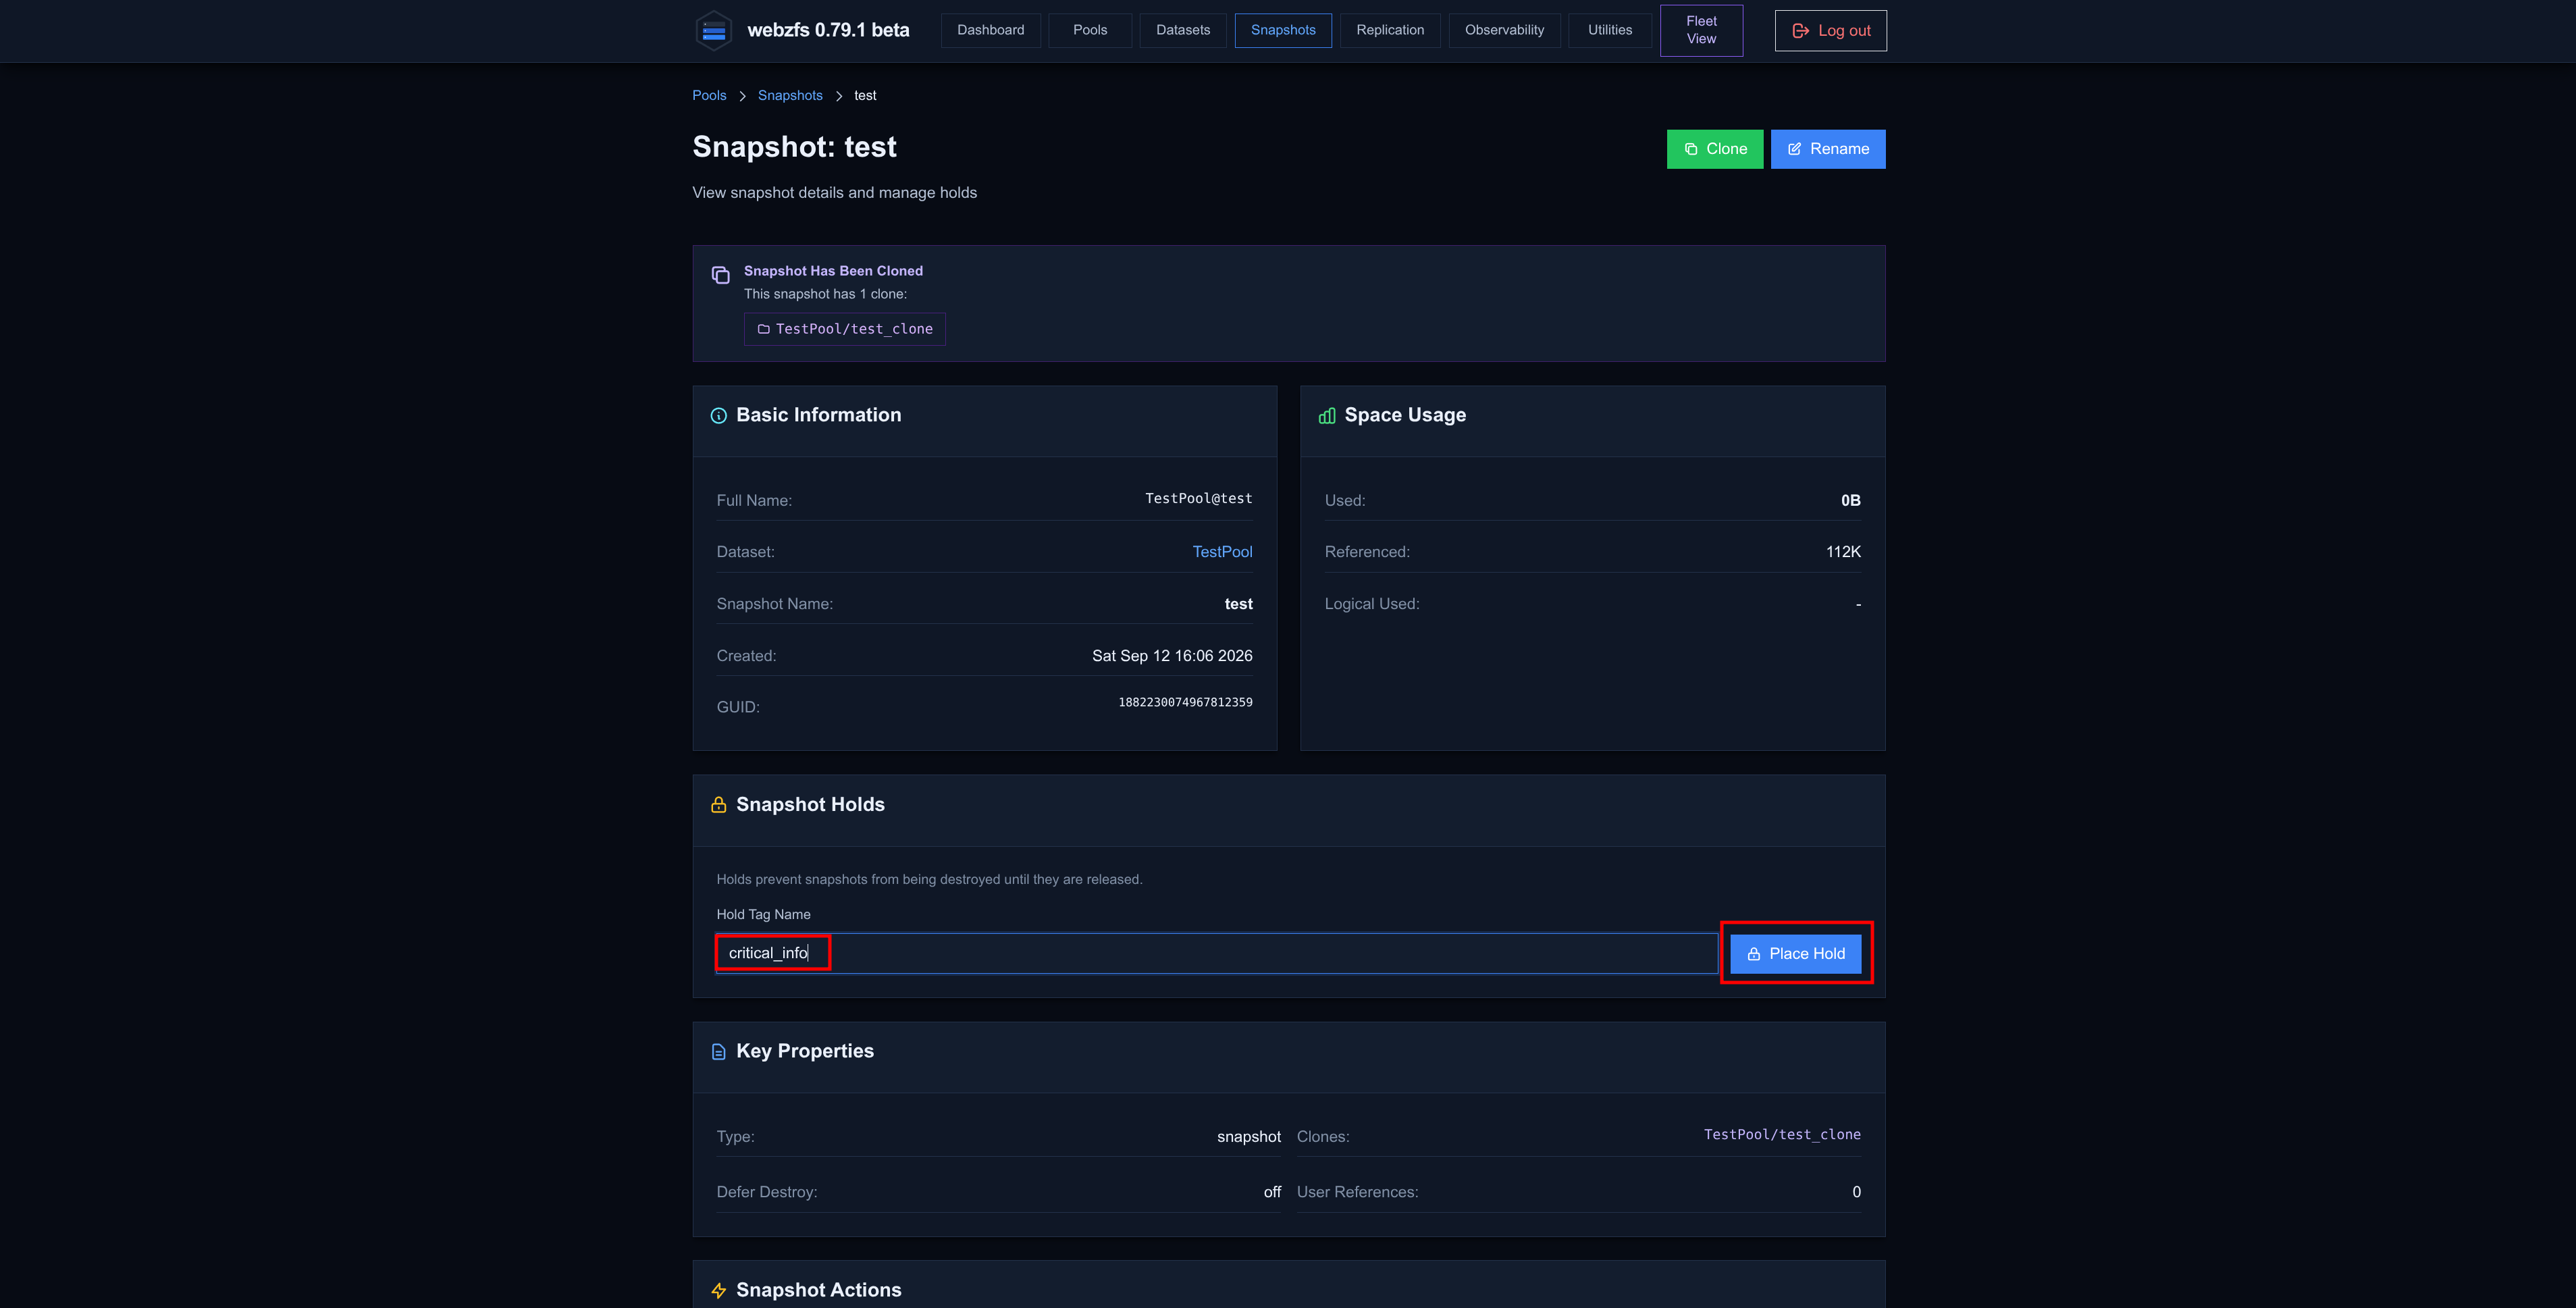
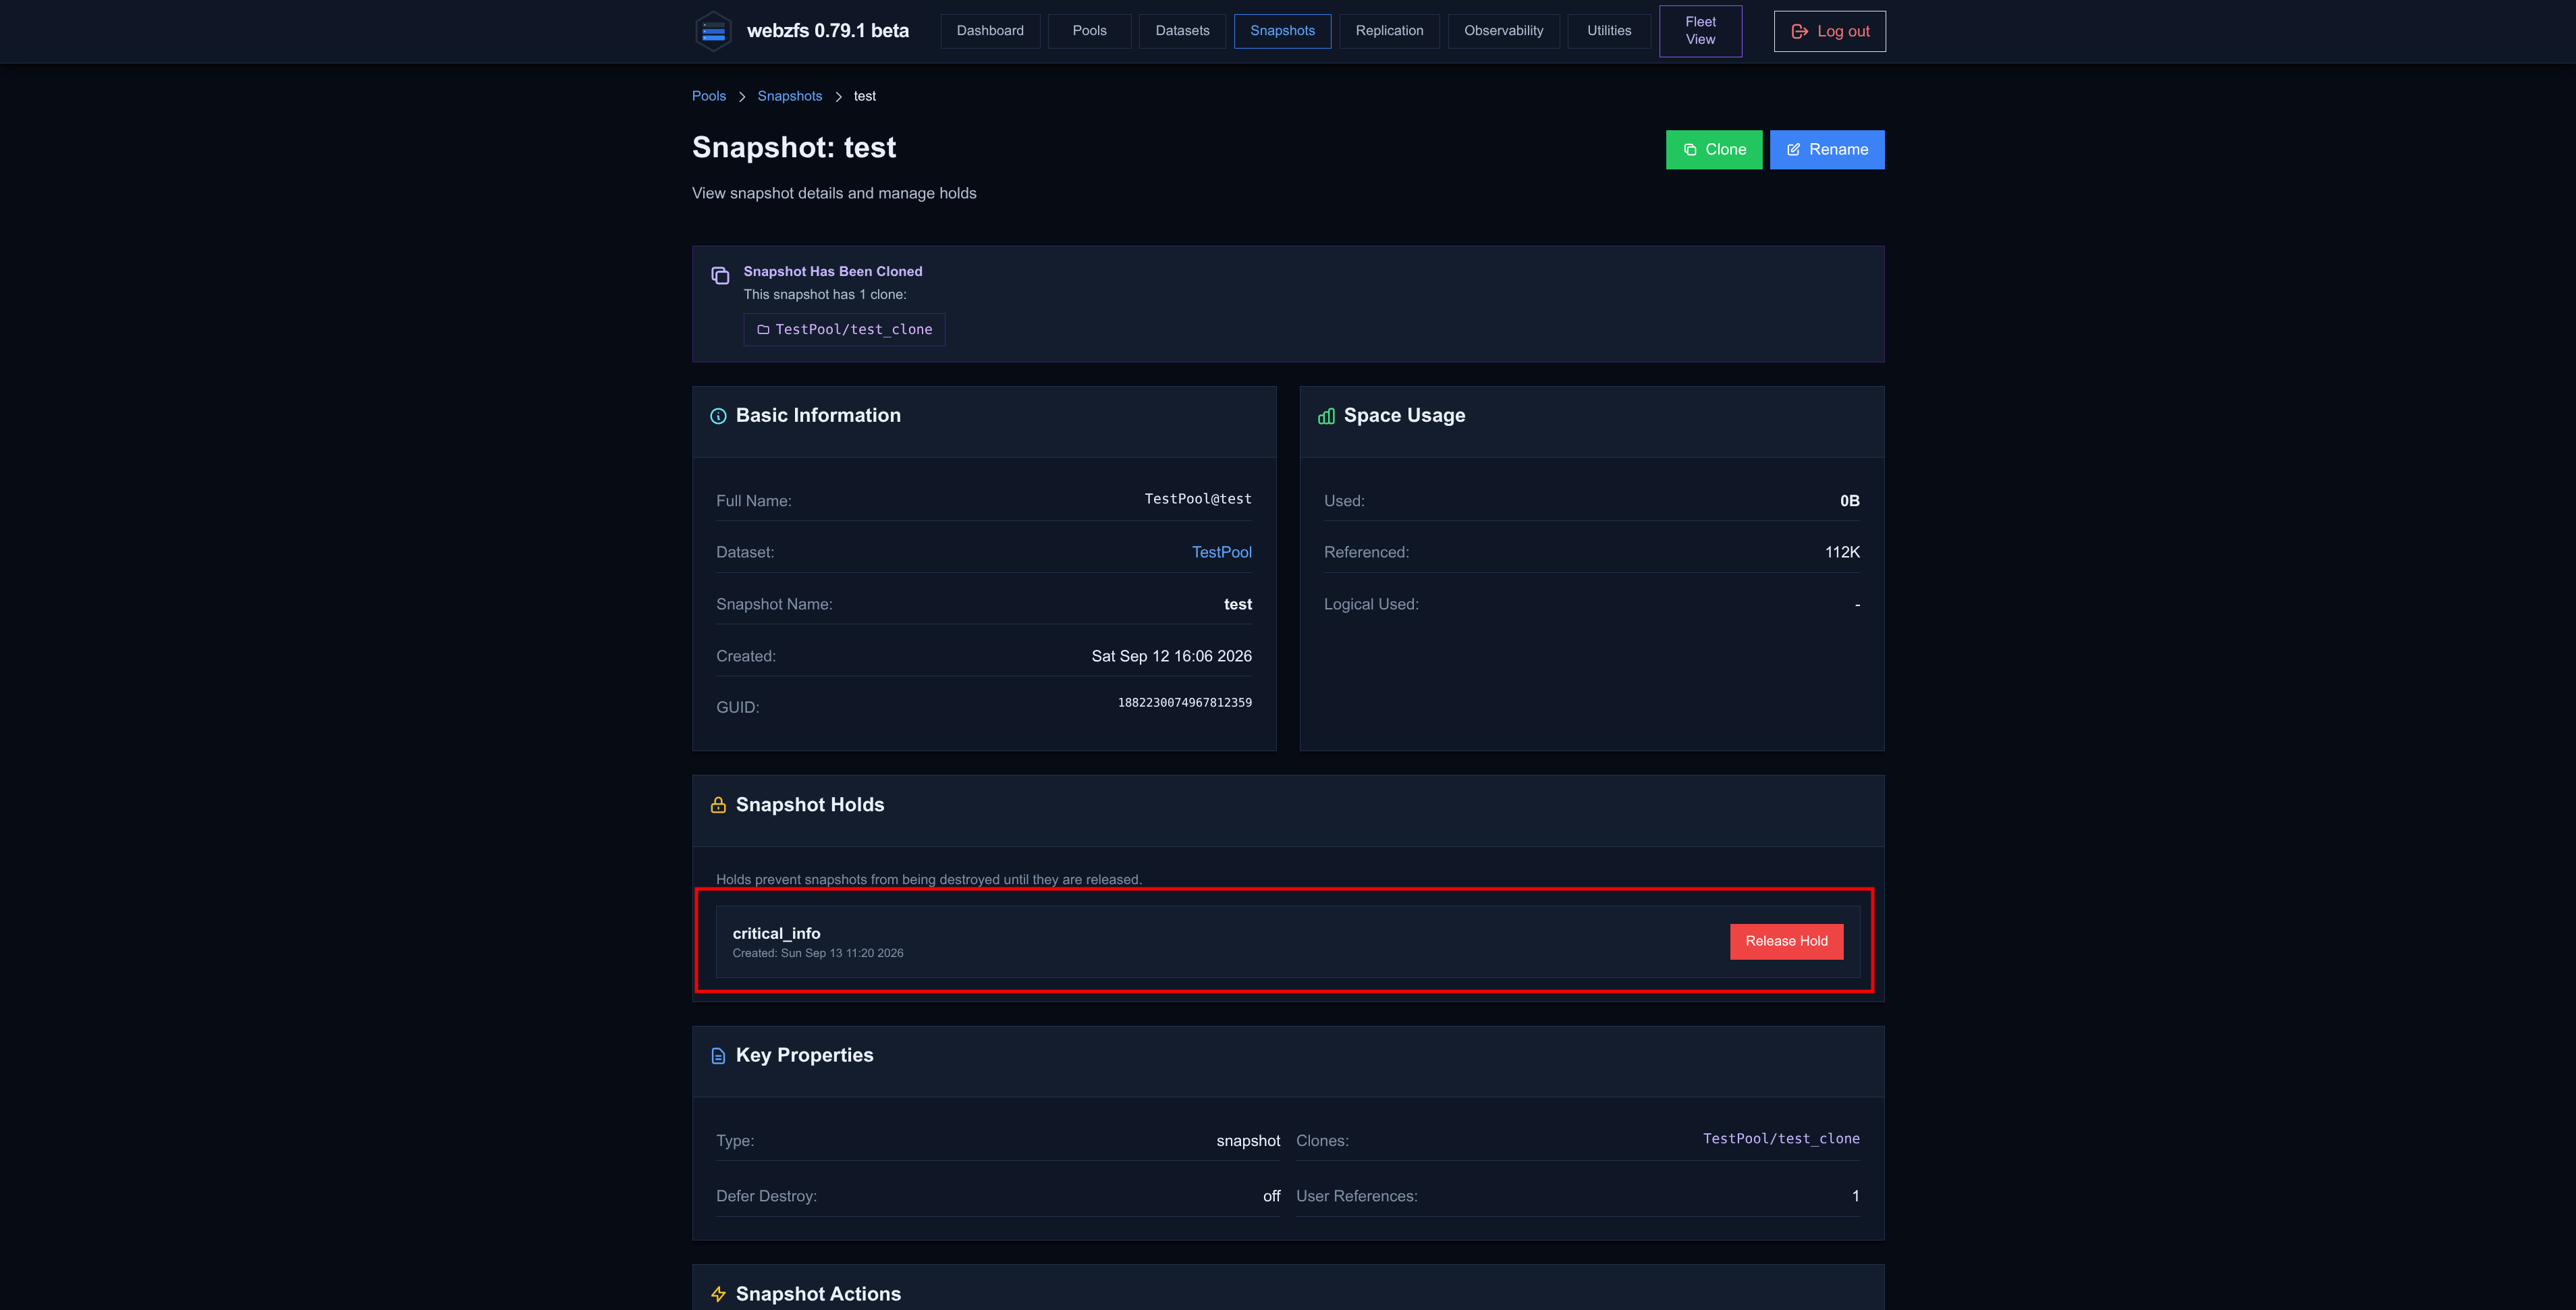
Hold the snapshot, an option that will let us protect the snapshot from accidental deletion:
|
|
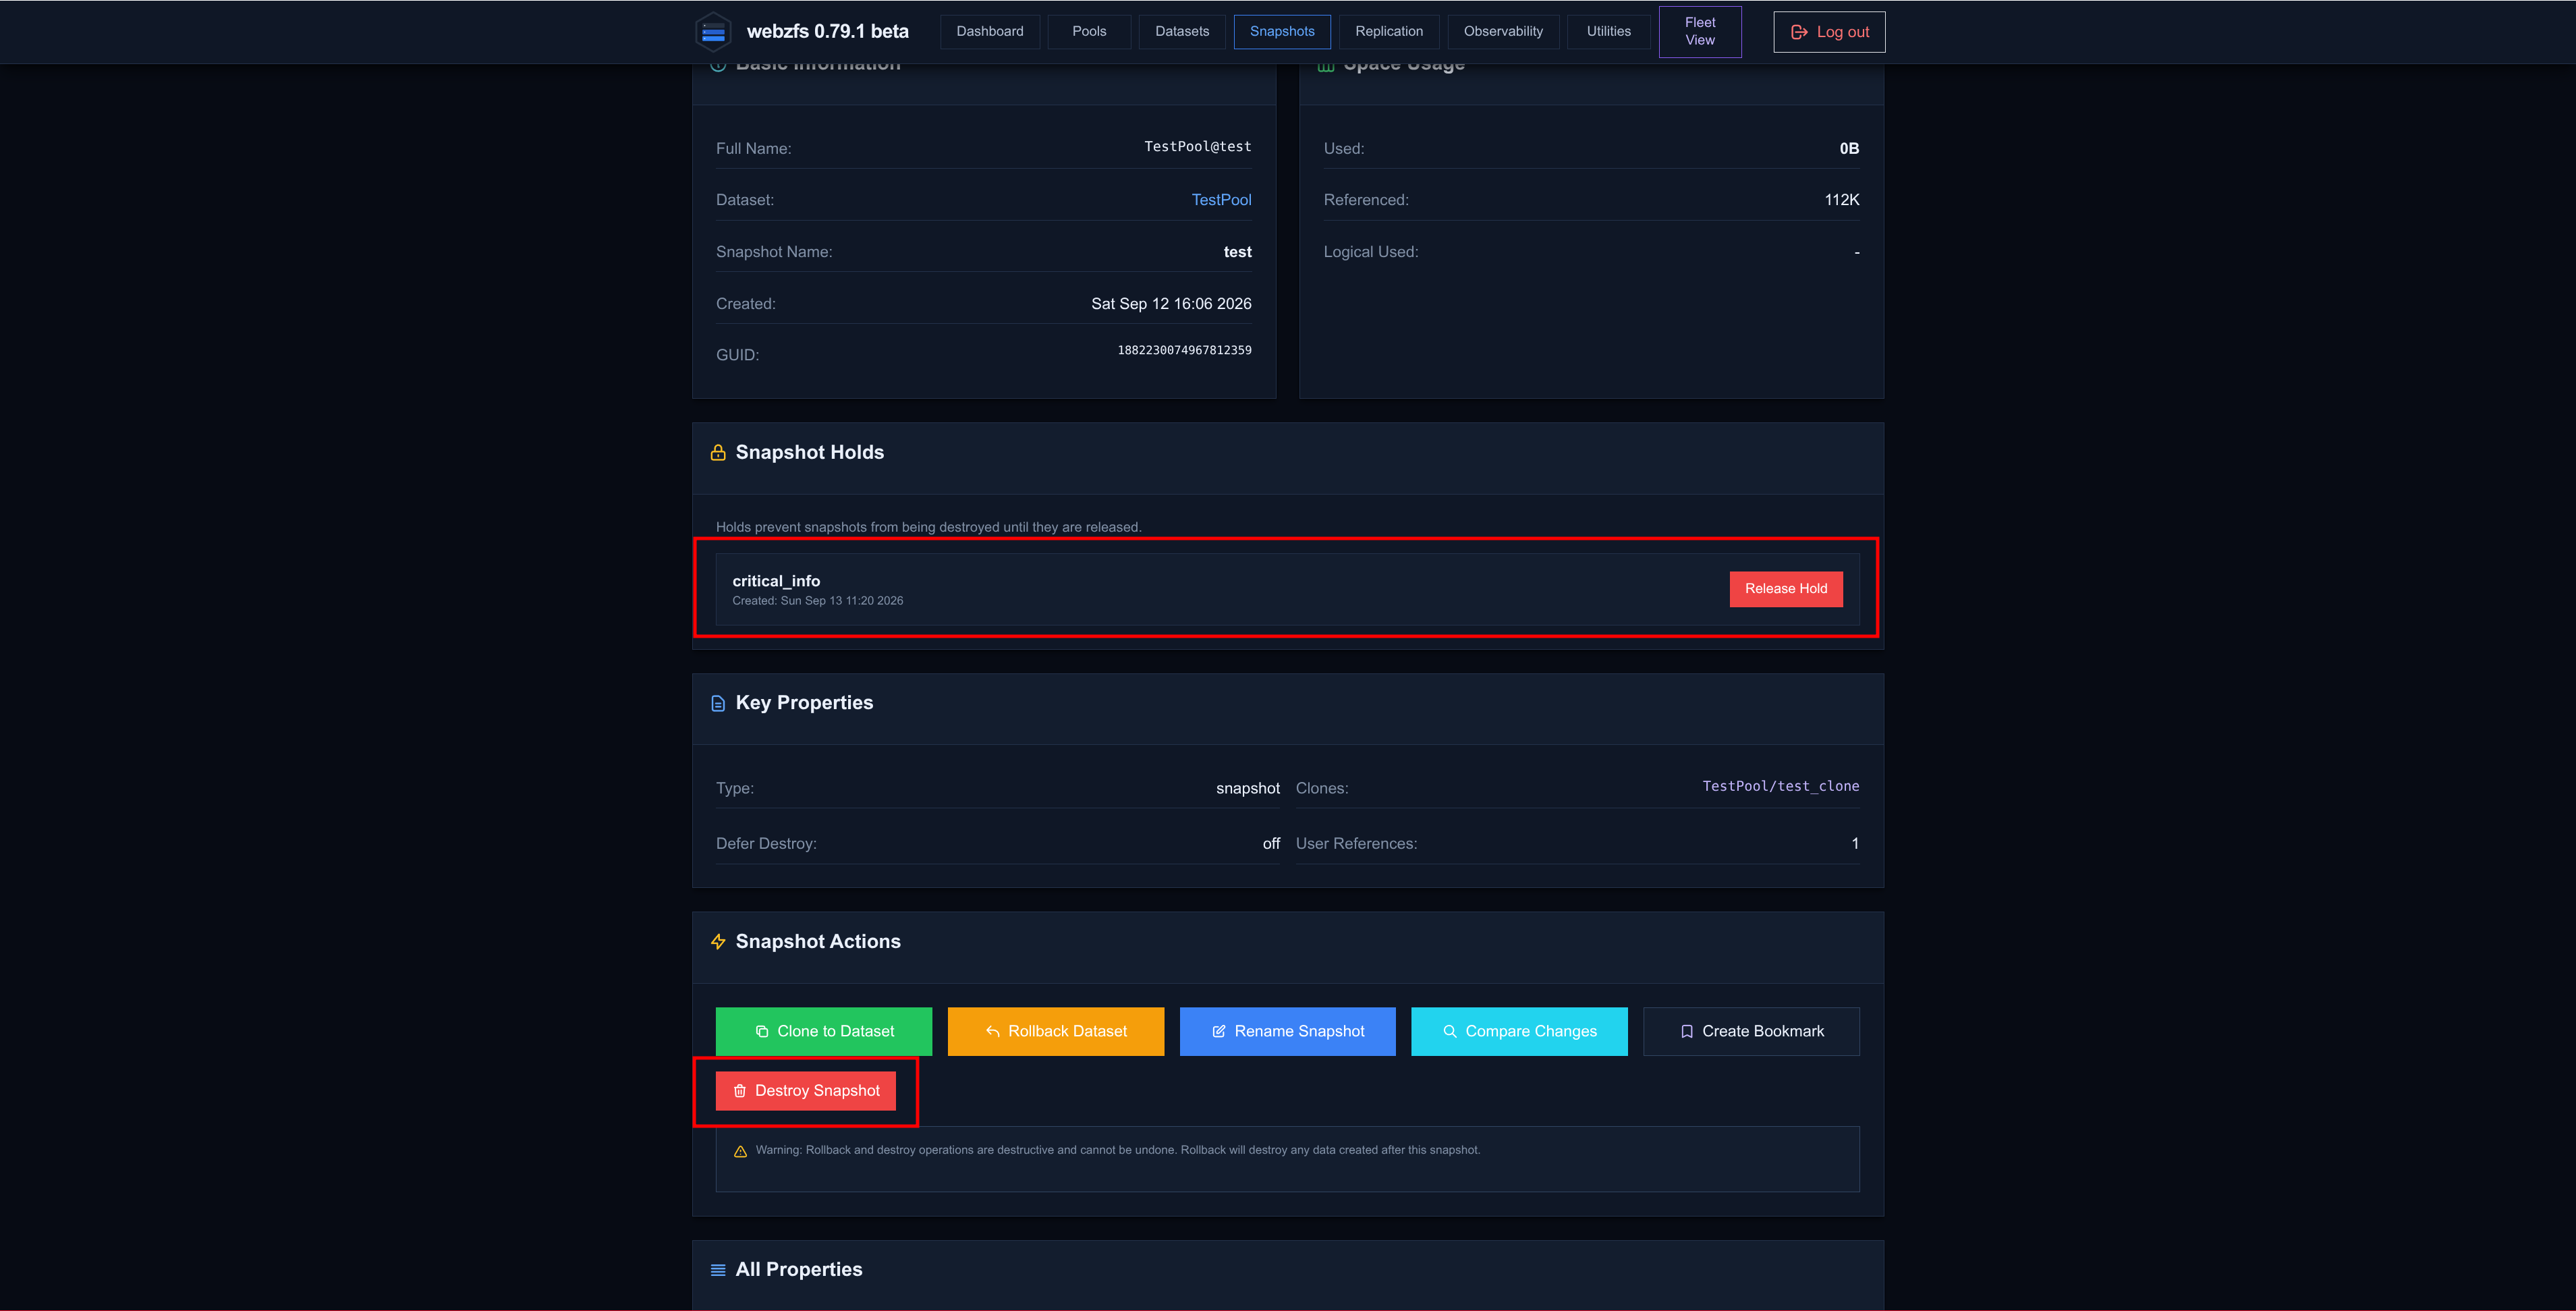
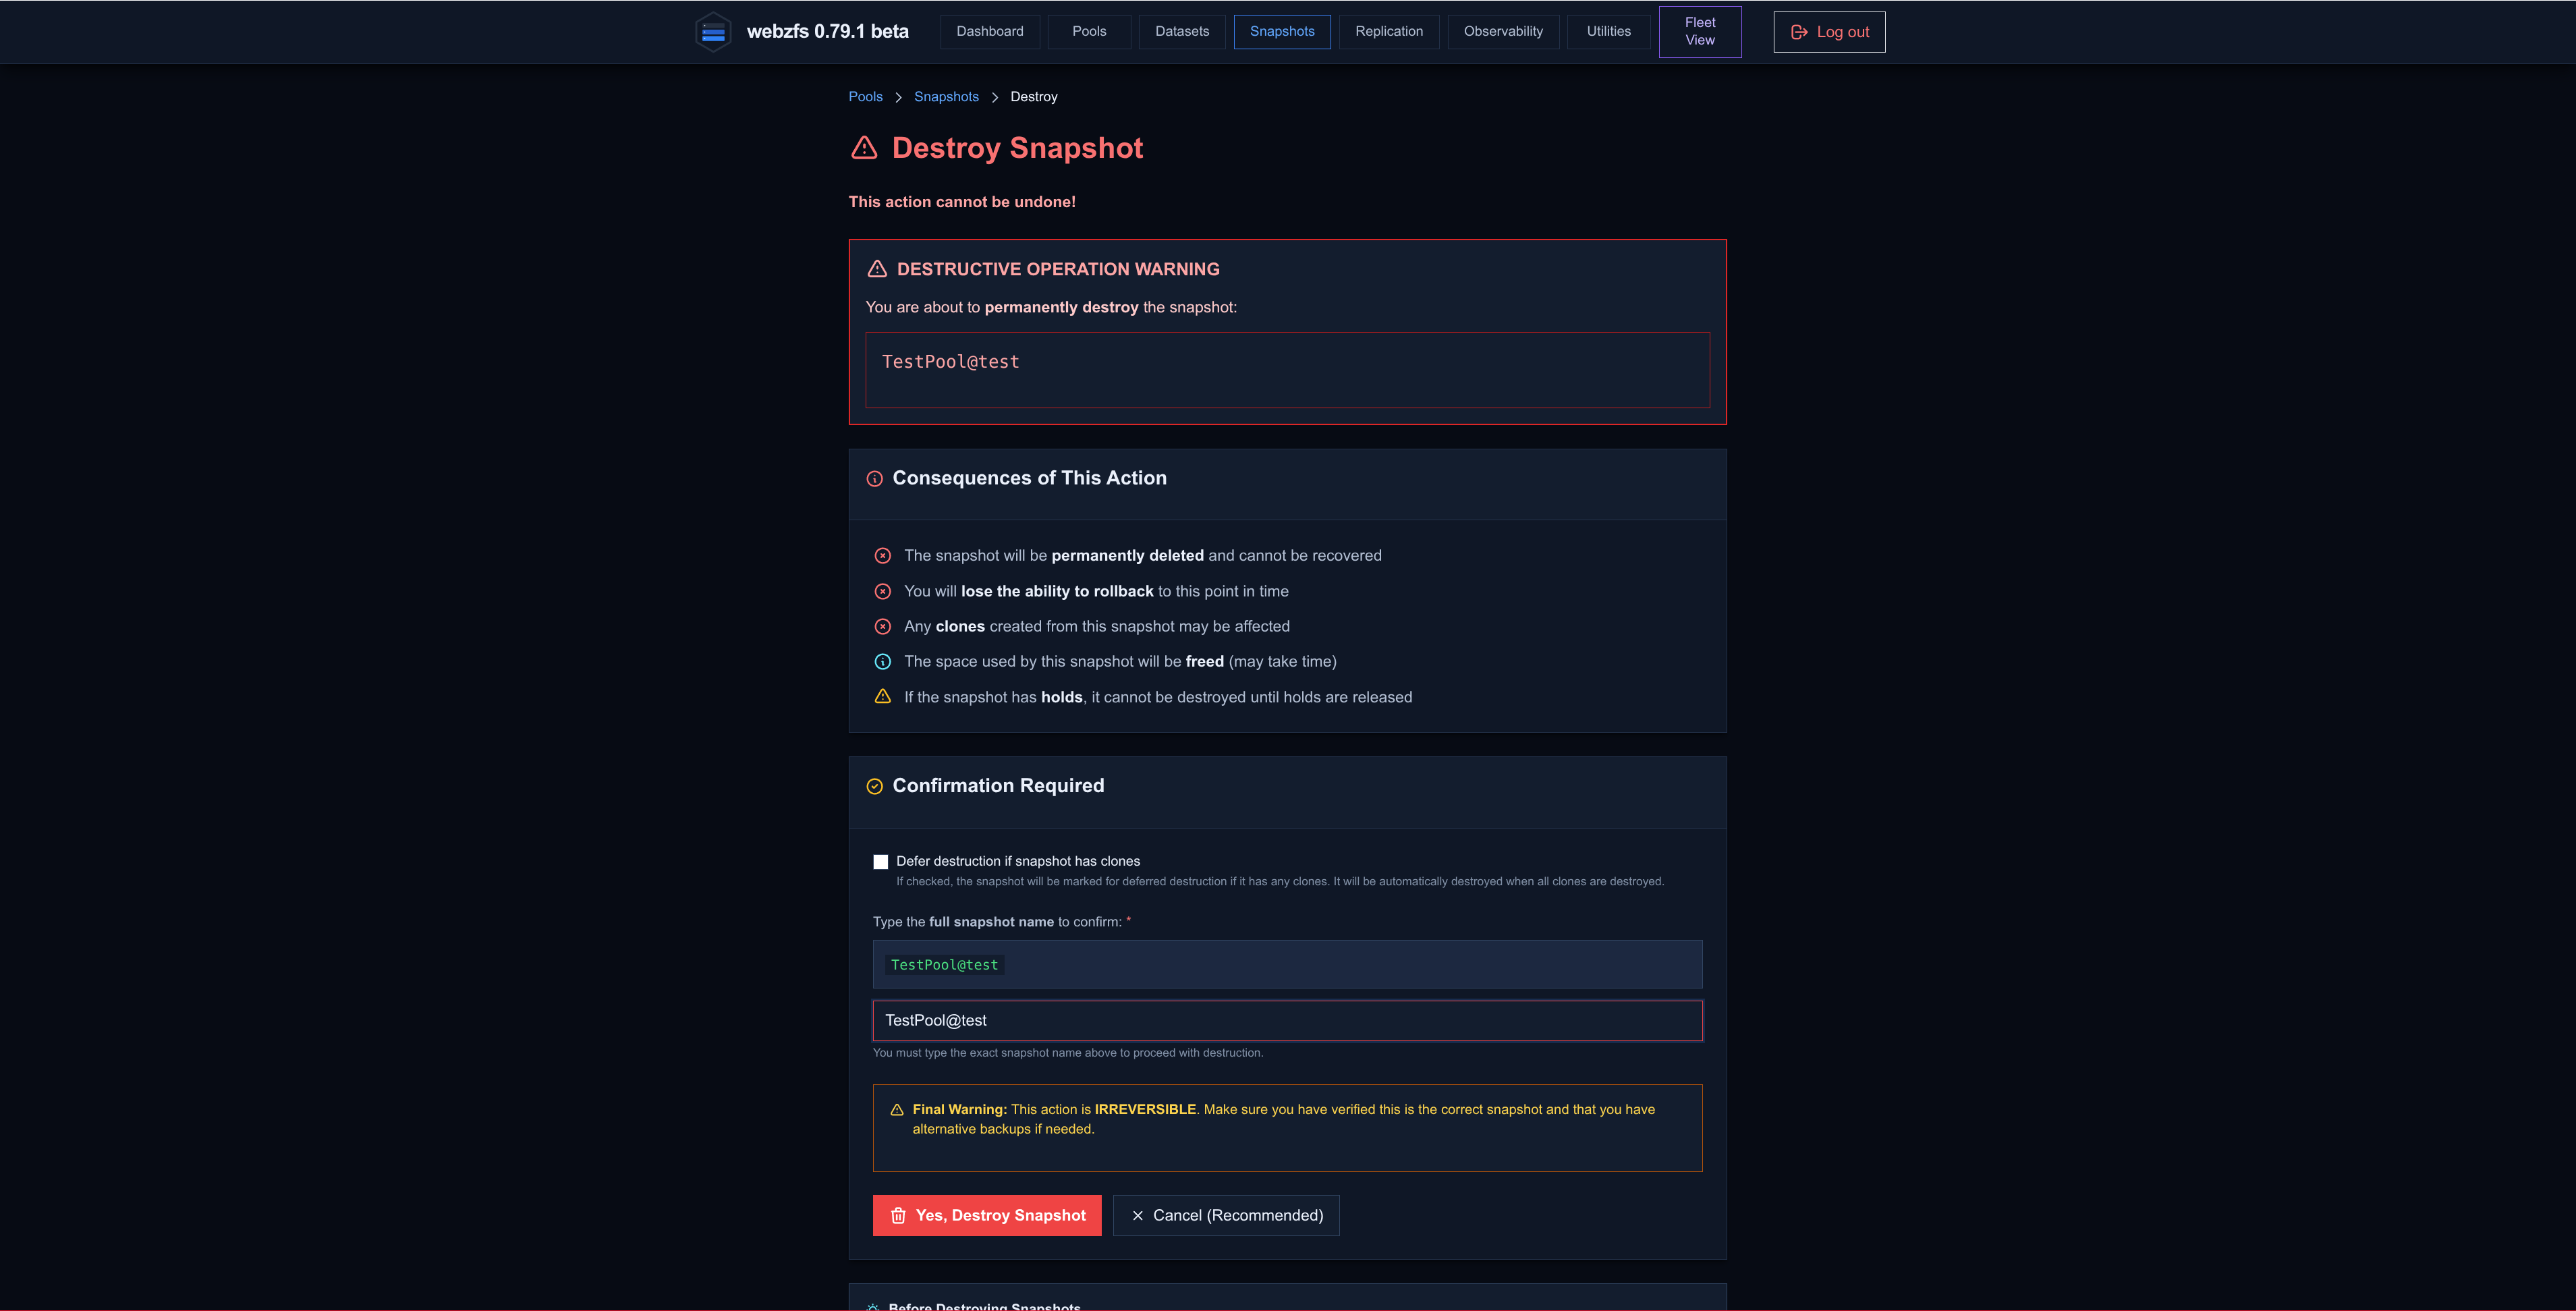
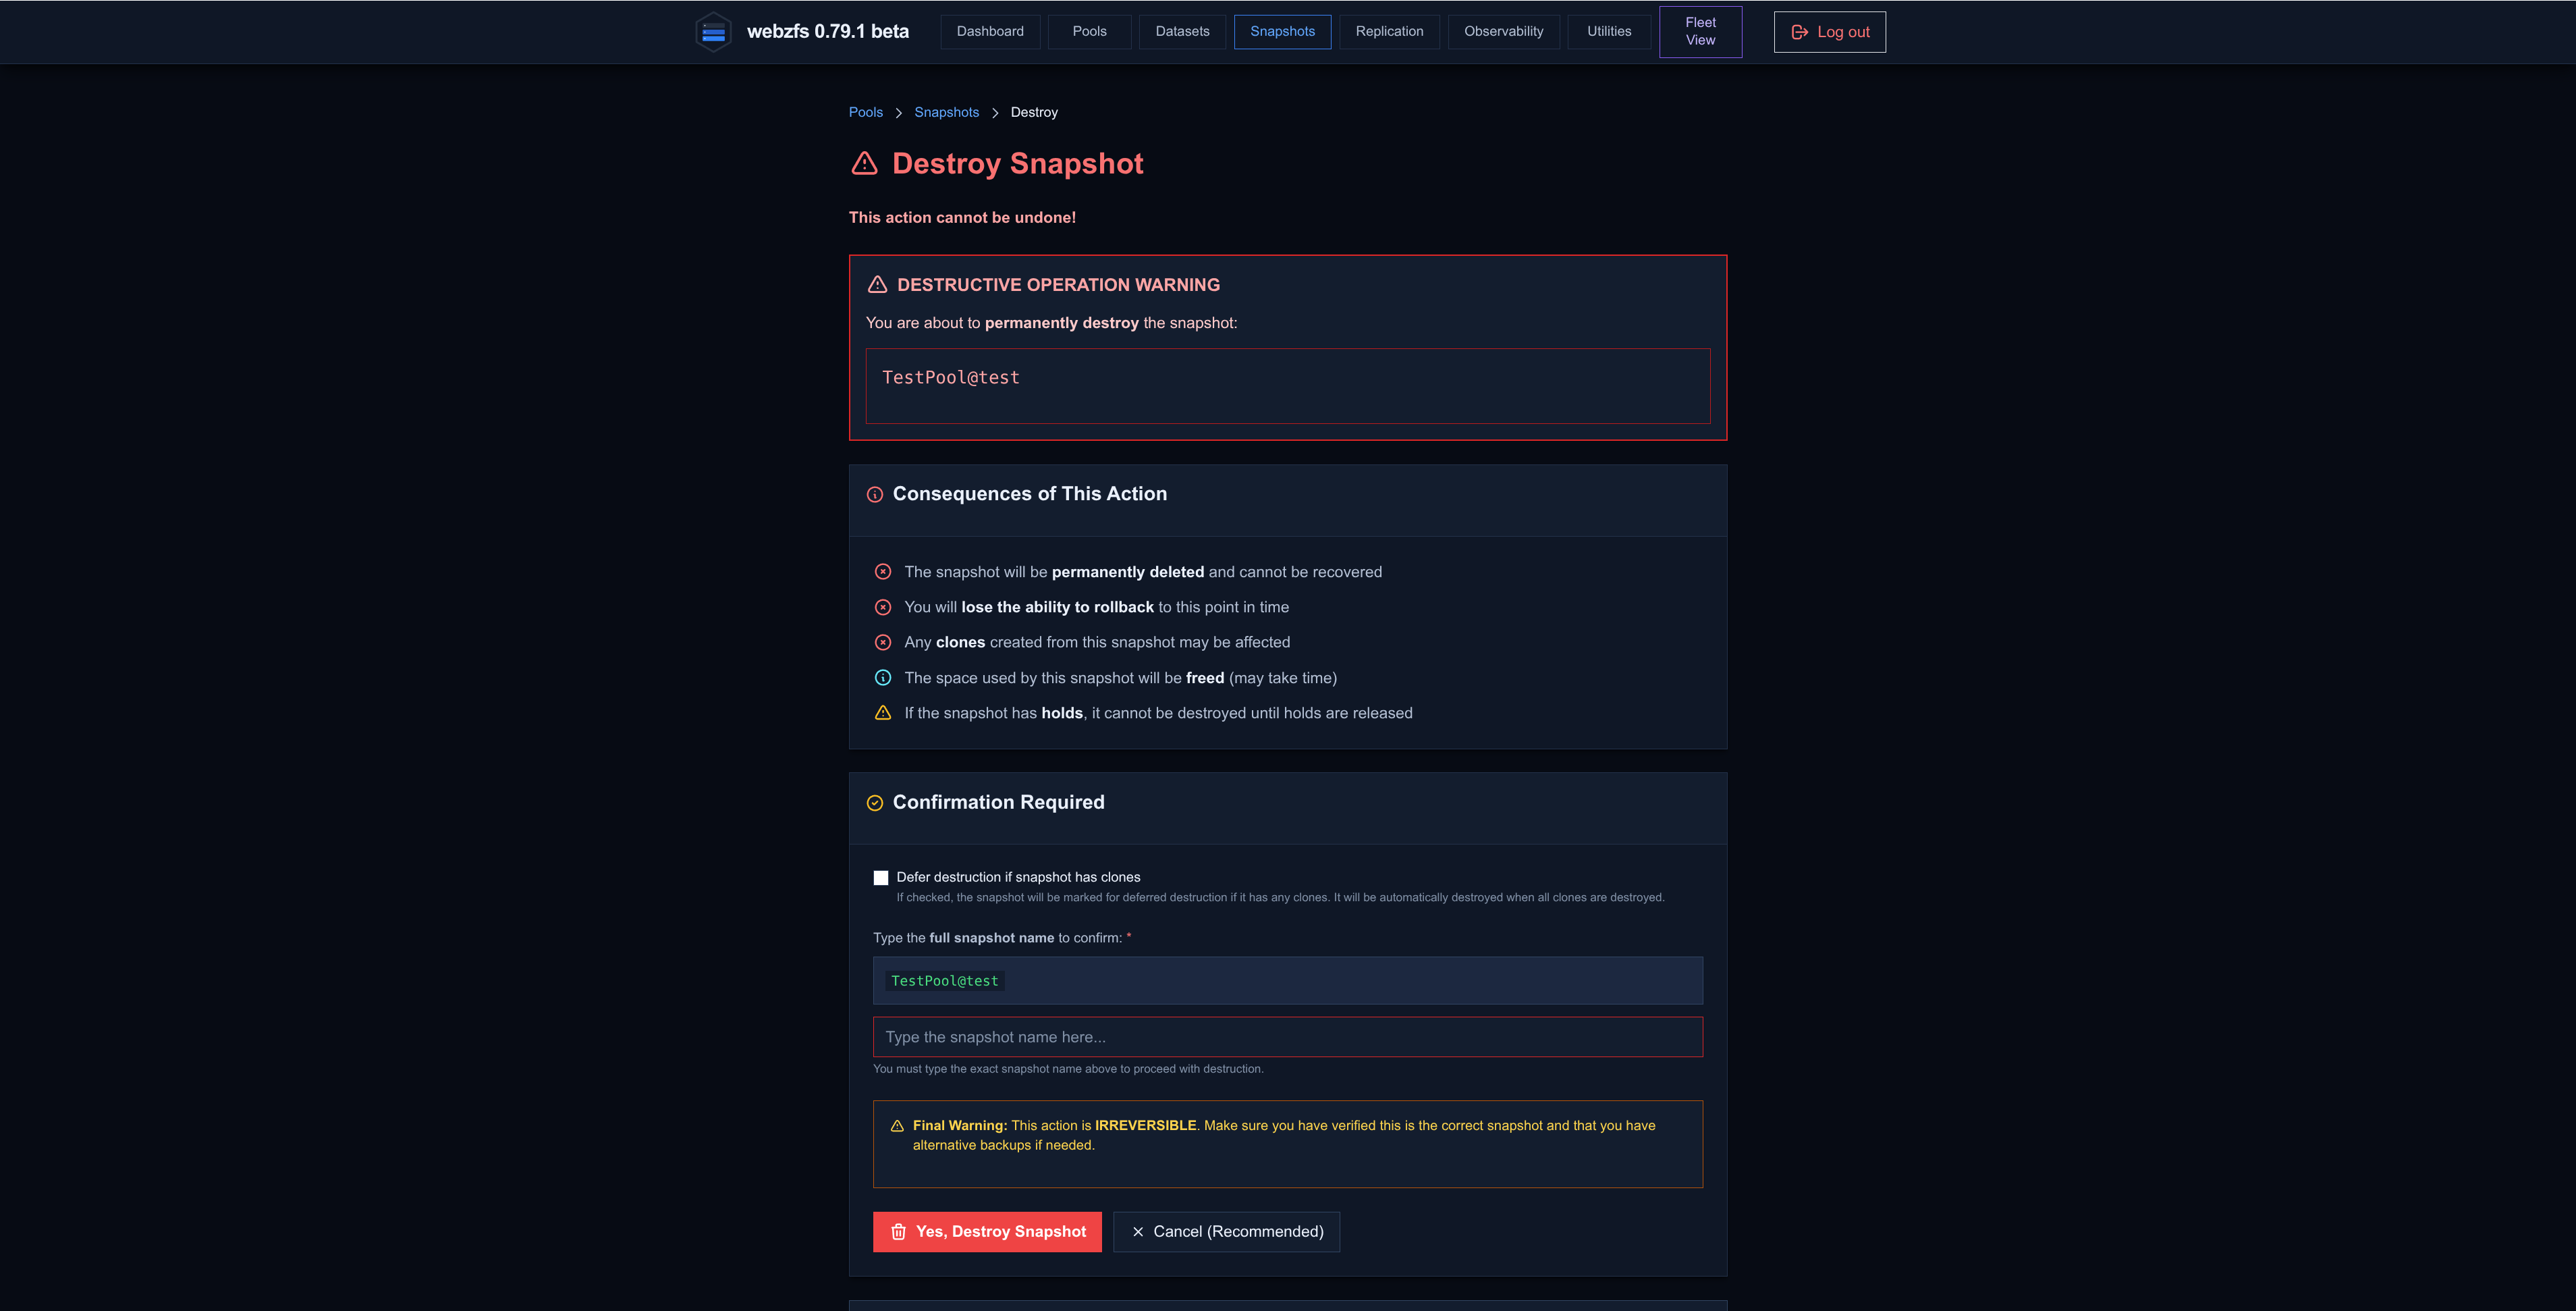
If we try to delete the snapshot while we have a Hold the interface will simply fail silently:
|
|
|
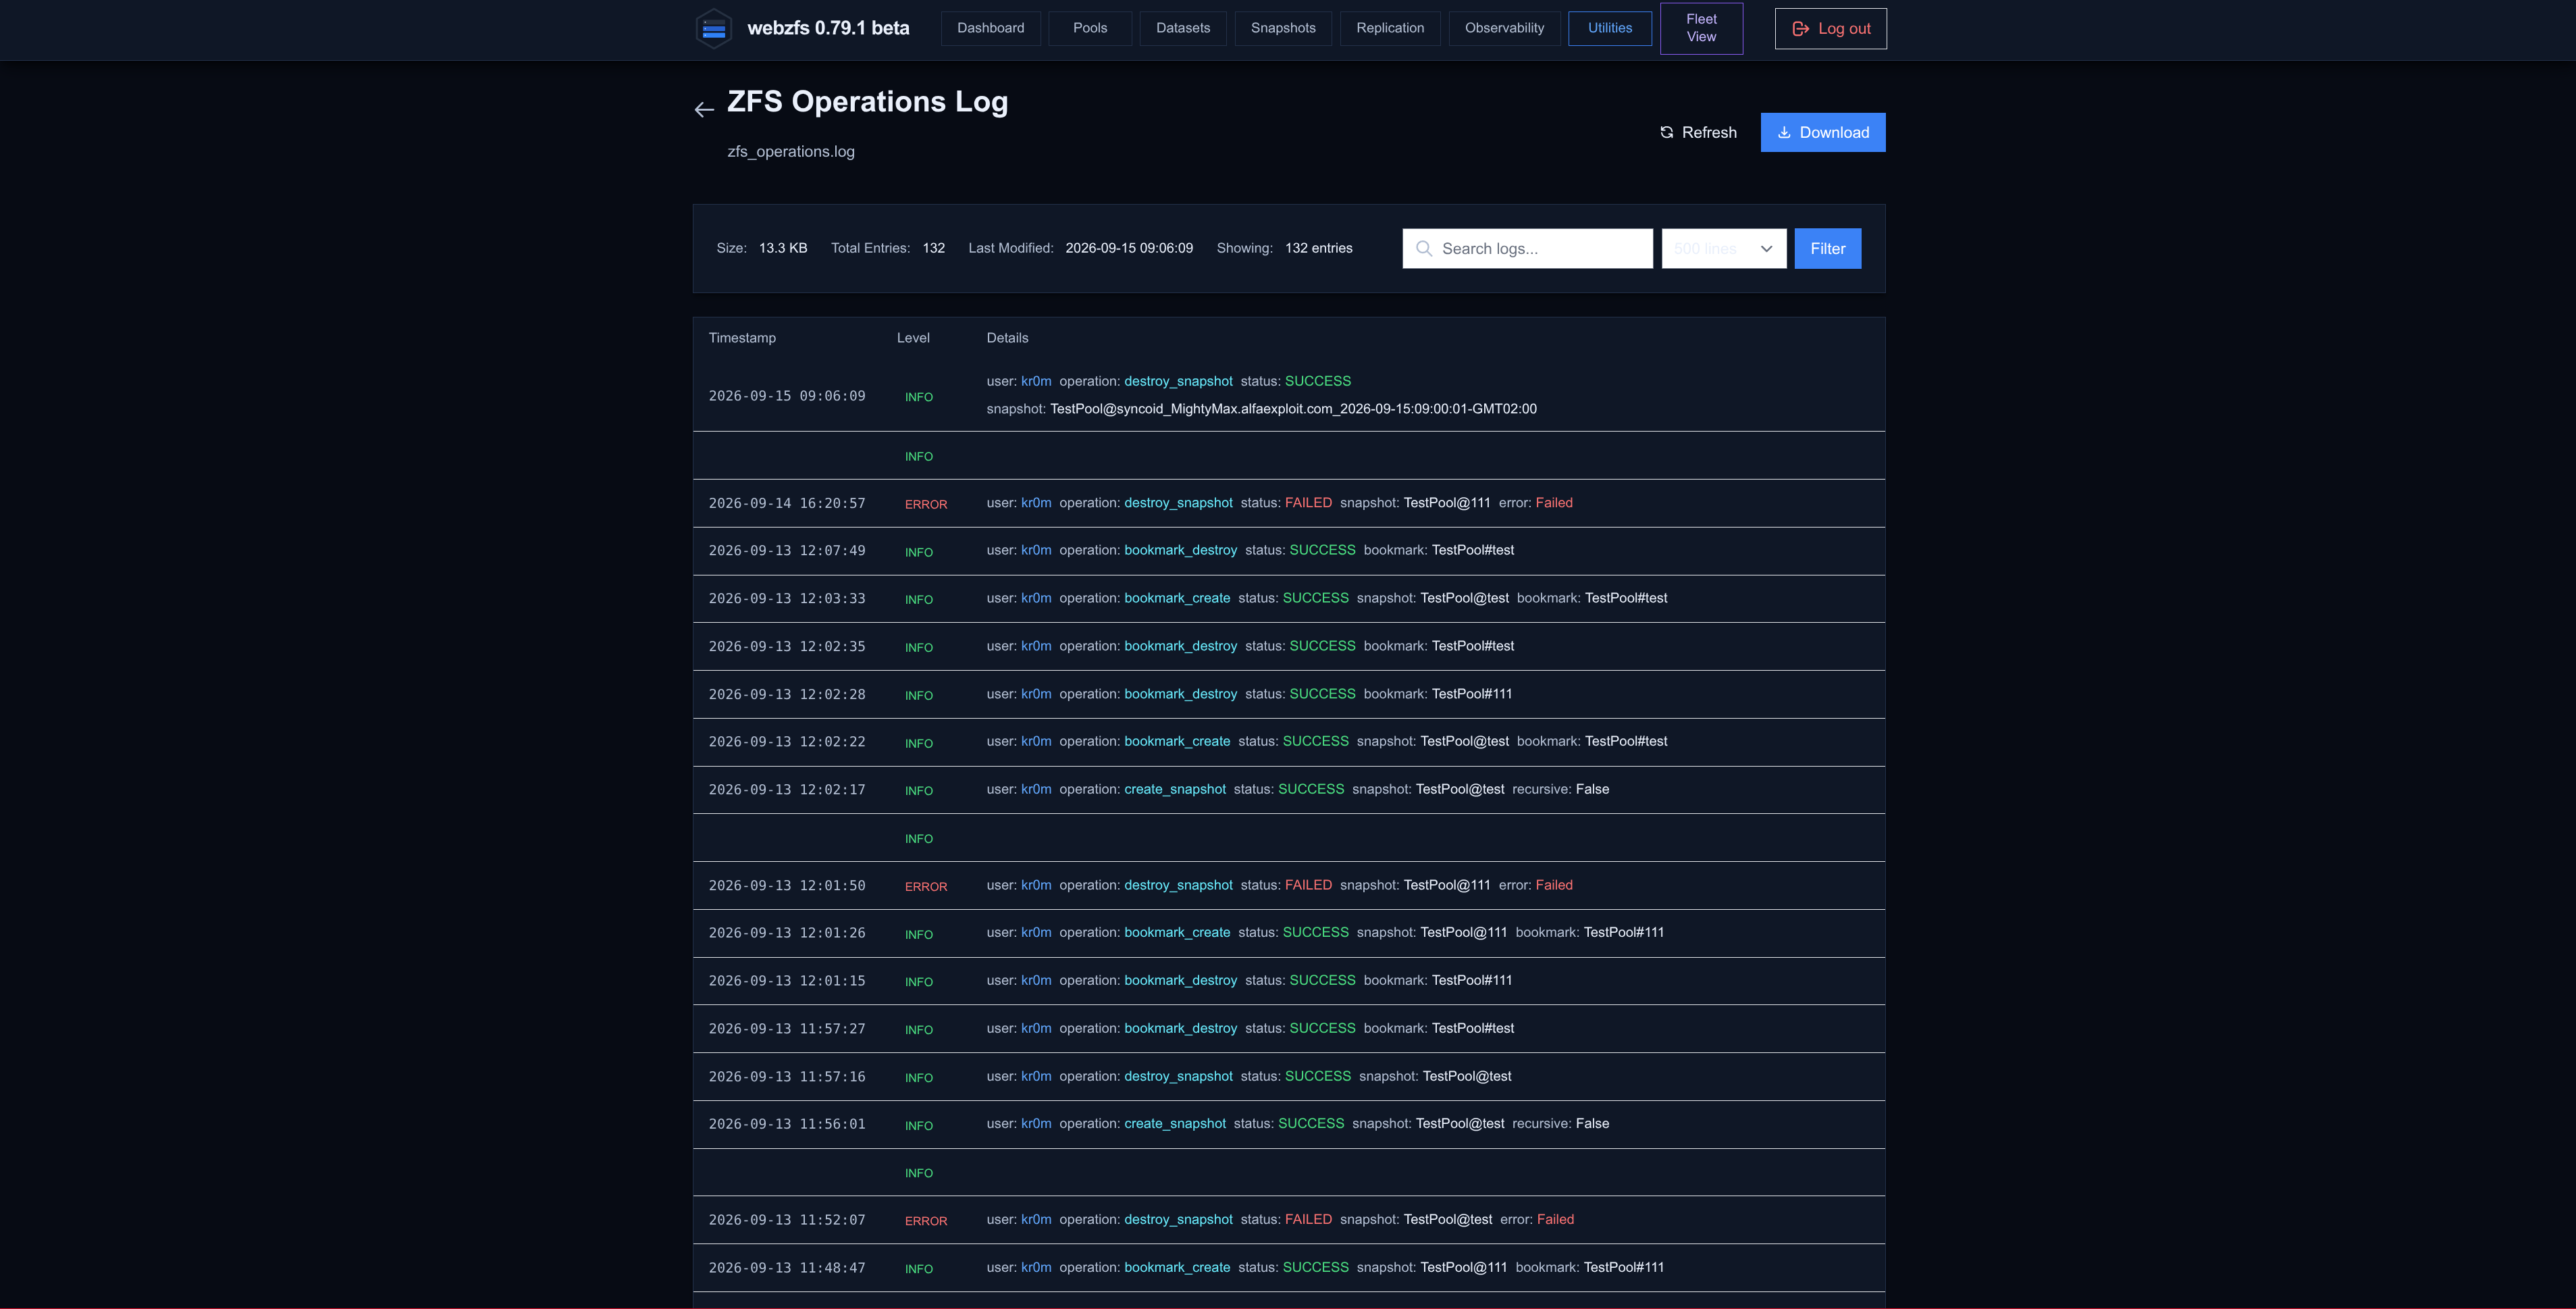
But we can see in the logs:
/opt/webzfs/.config/webzfs/logs/zfs_operations.log

2026-09-13 11:29:23 [ERROR] user=kr0m operation=destroy_snapshot status=FAILED snapshot=TestPool@test error="Failed to destroy snapshot: cannot destroy snapshot TestPool@test: it's being held. Run 'zfs holds -r TestPool@test' to see holders.
NOTE: The Release Hold button is buggy; once held we will not be able to un-hold it.
Among other options offered by the interface we have.
-
Clone to Dataset: This button is exactly the same as the Clone above on this same page.
-
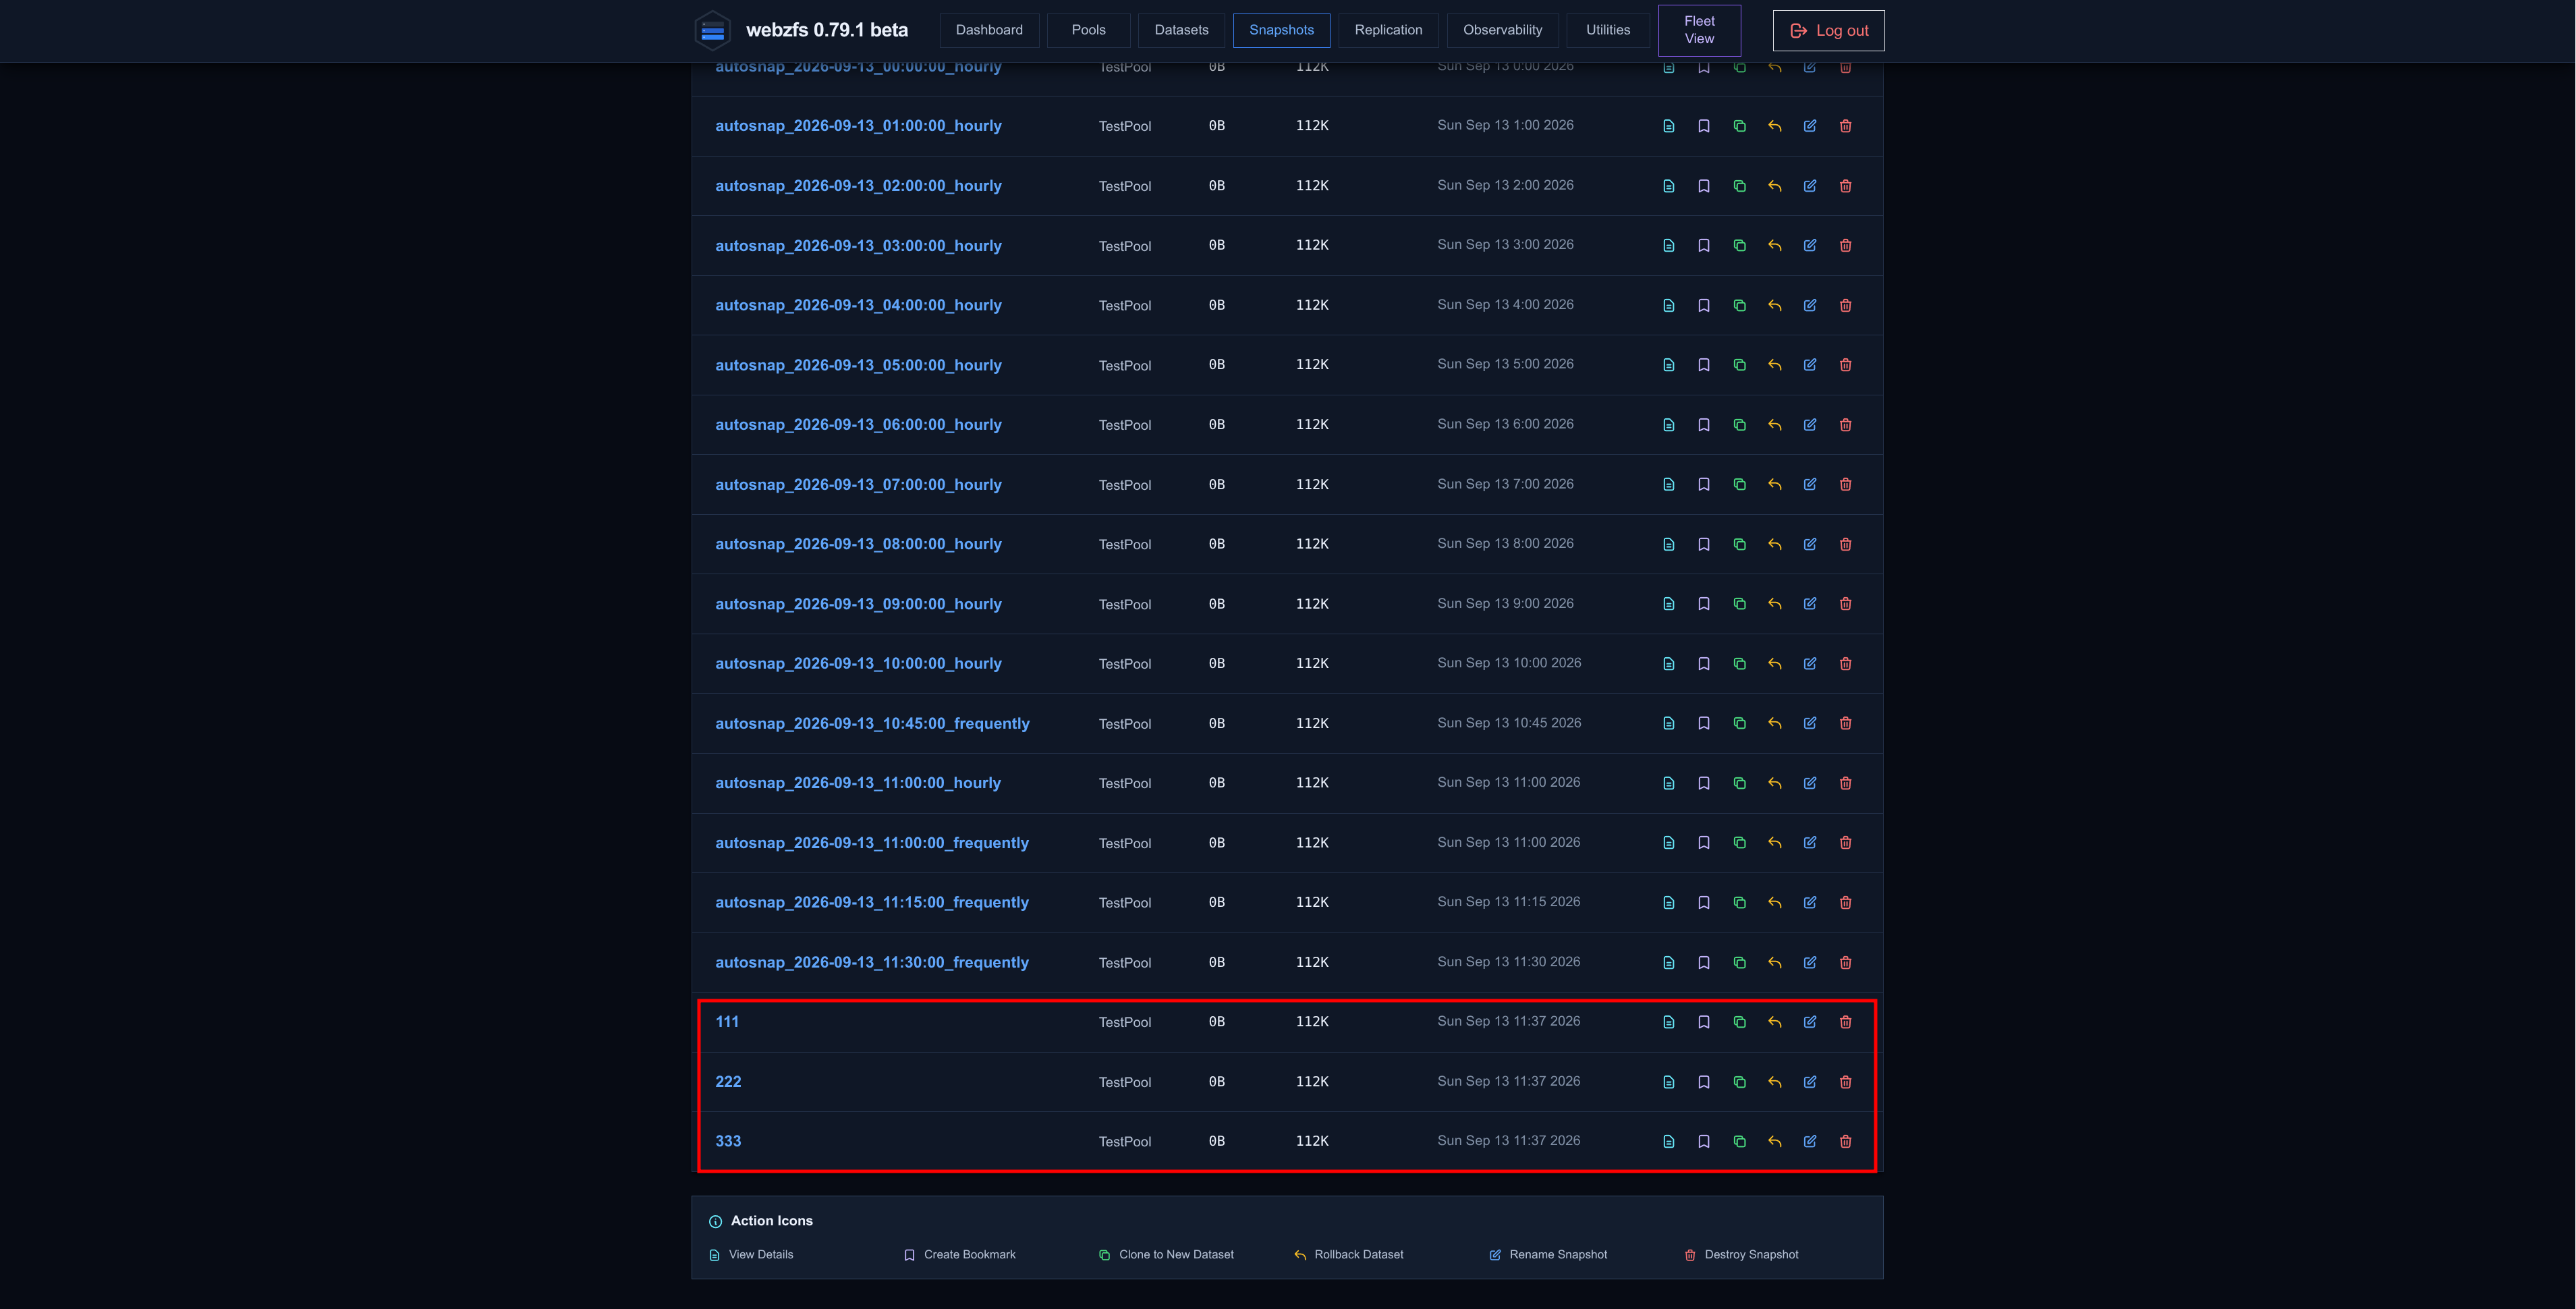
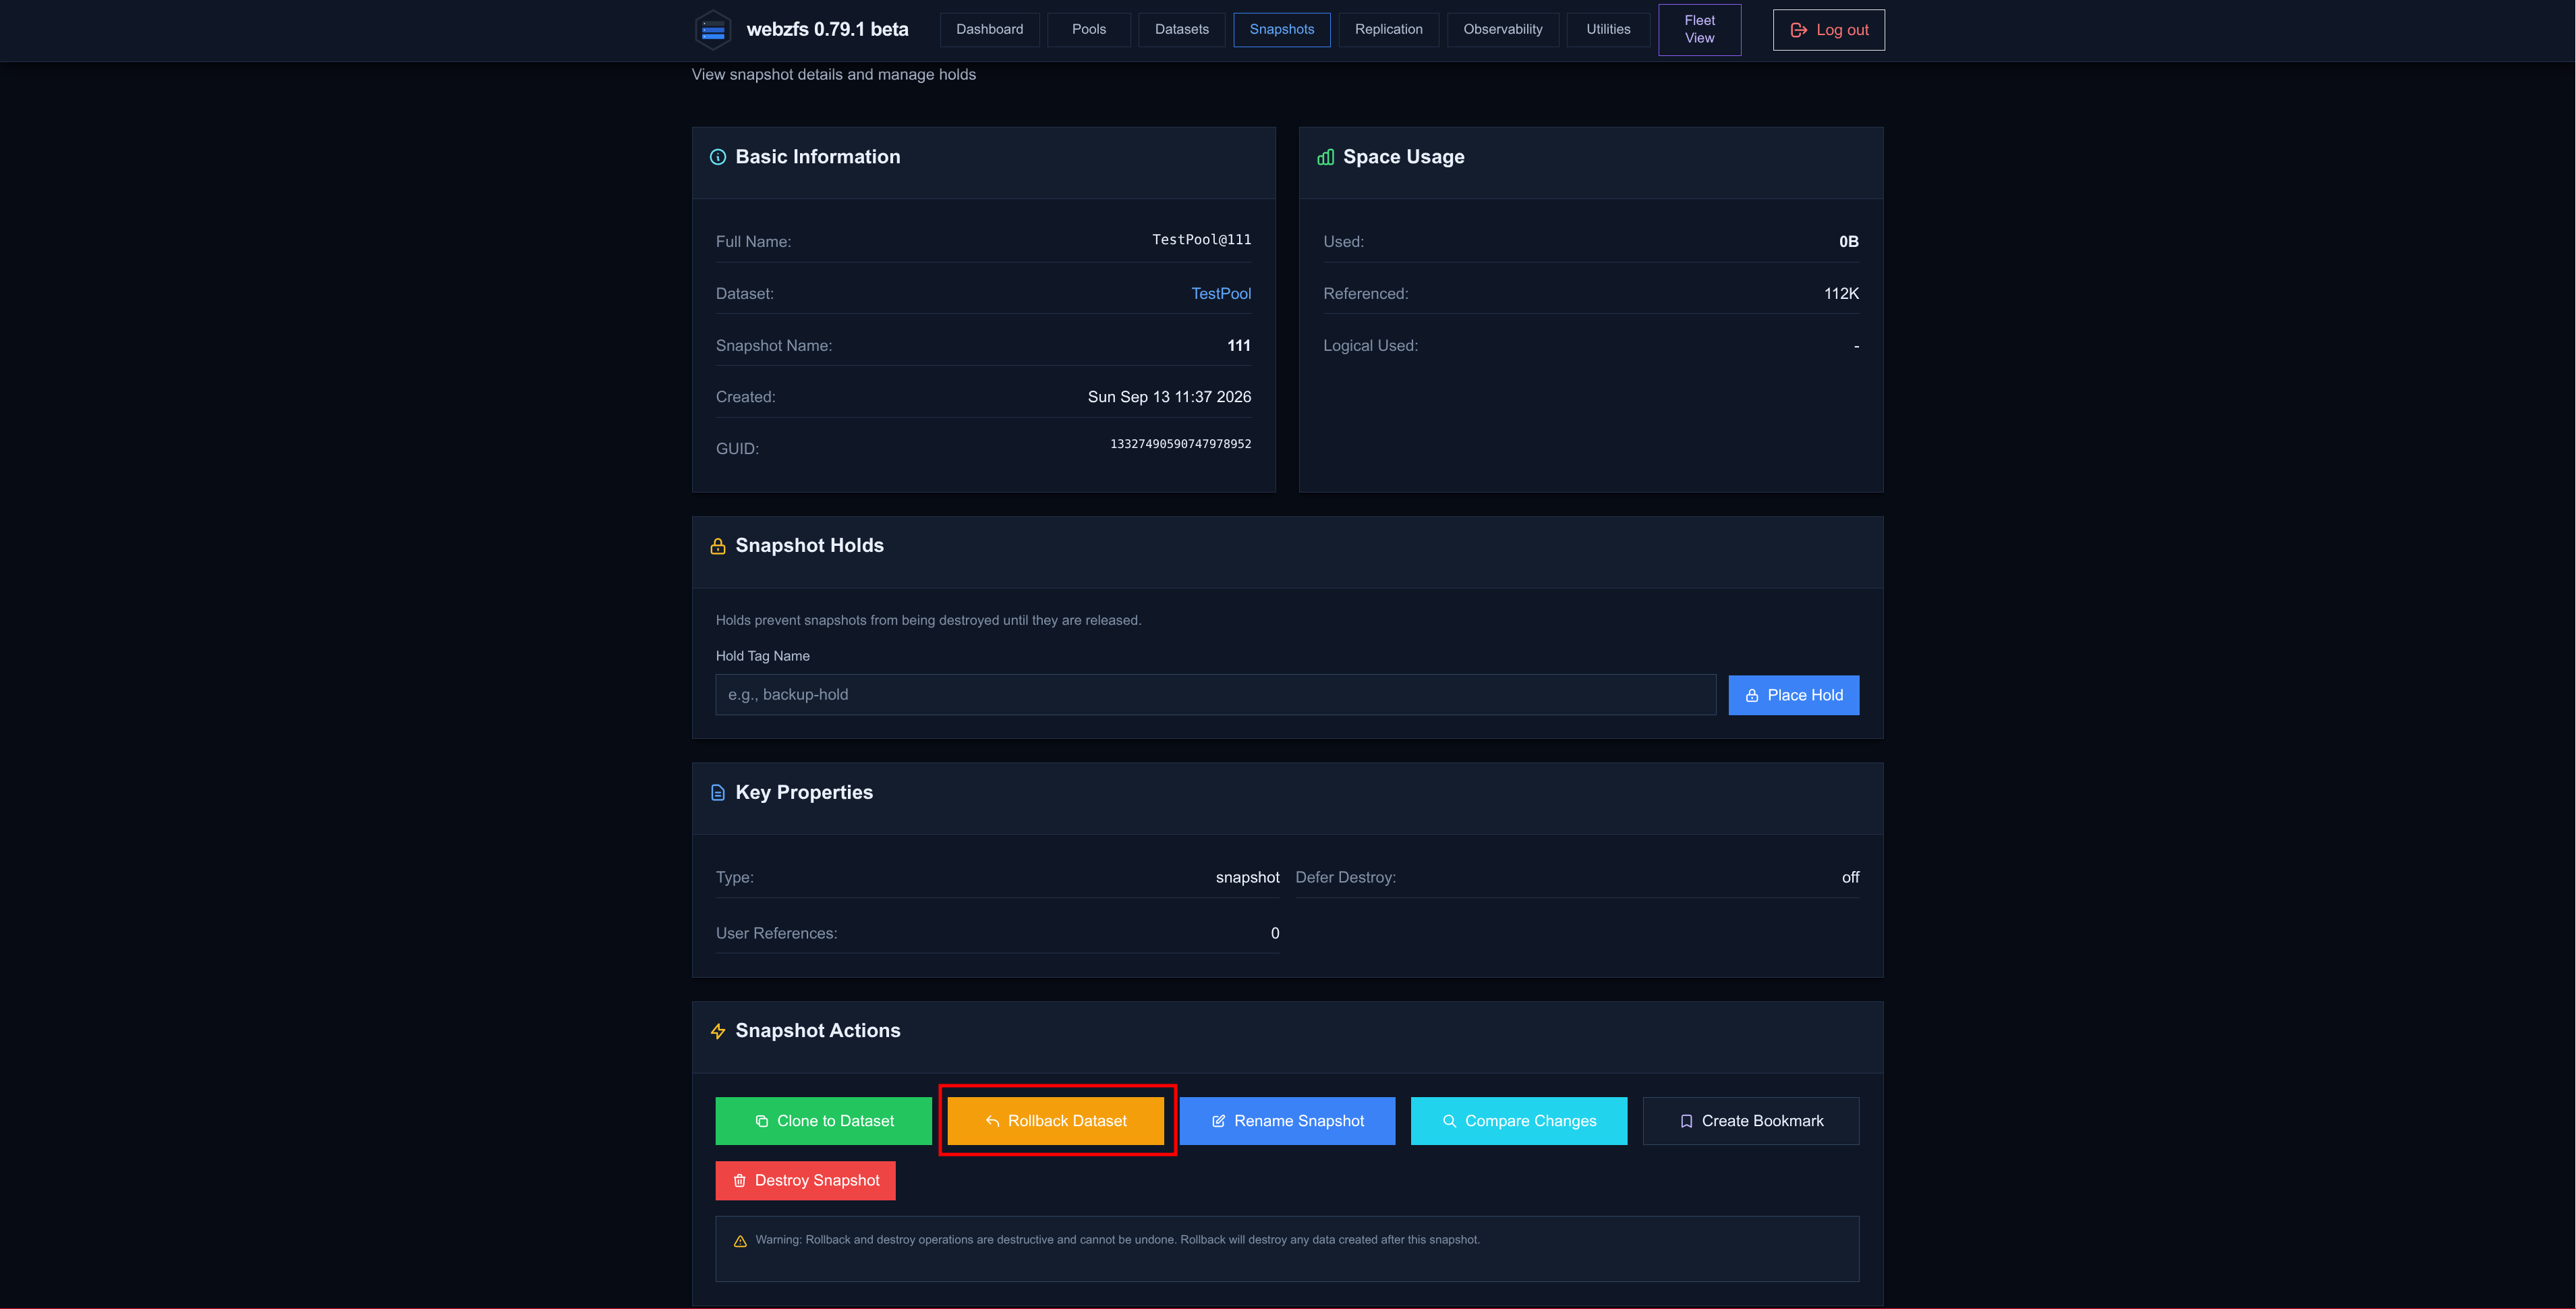
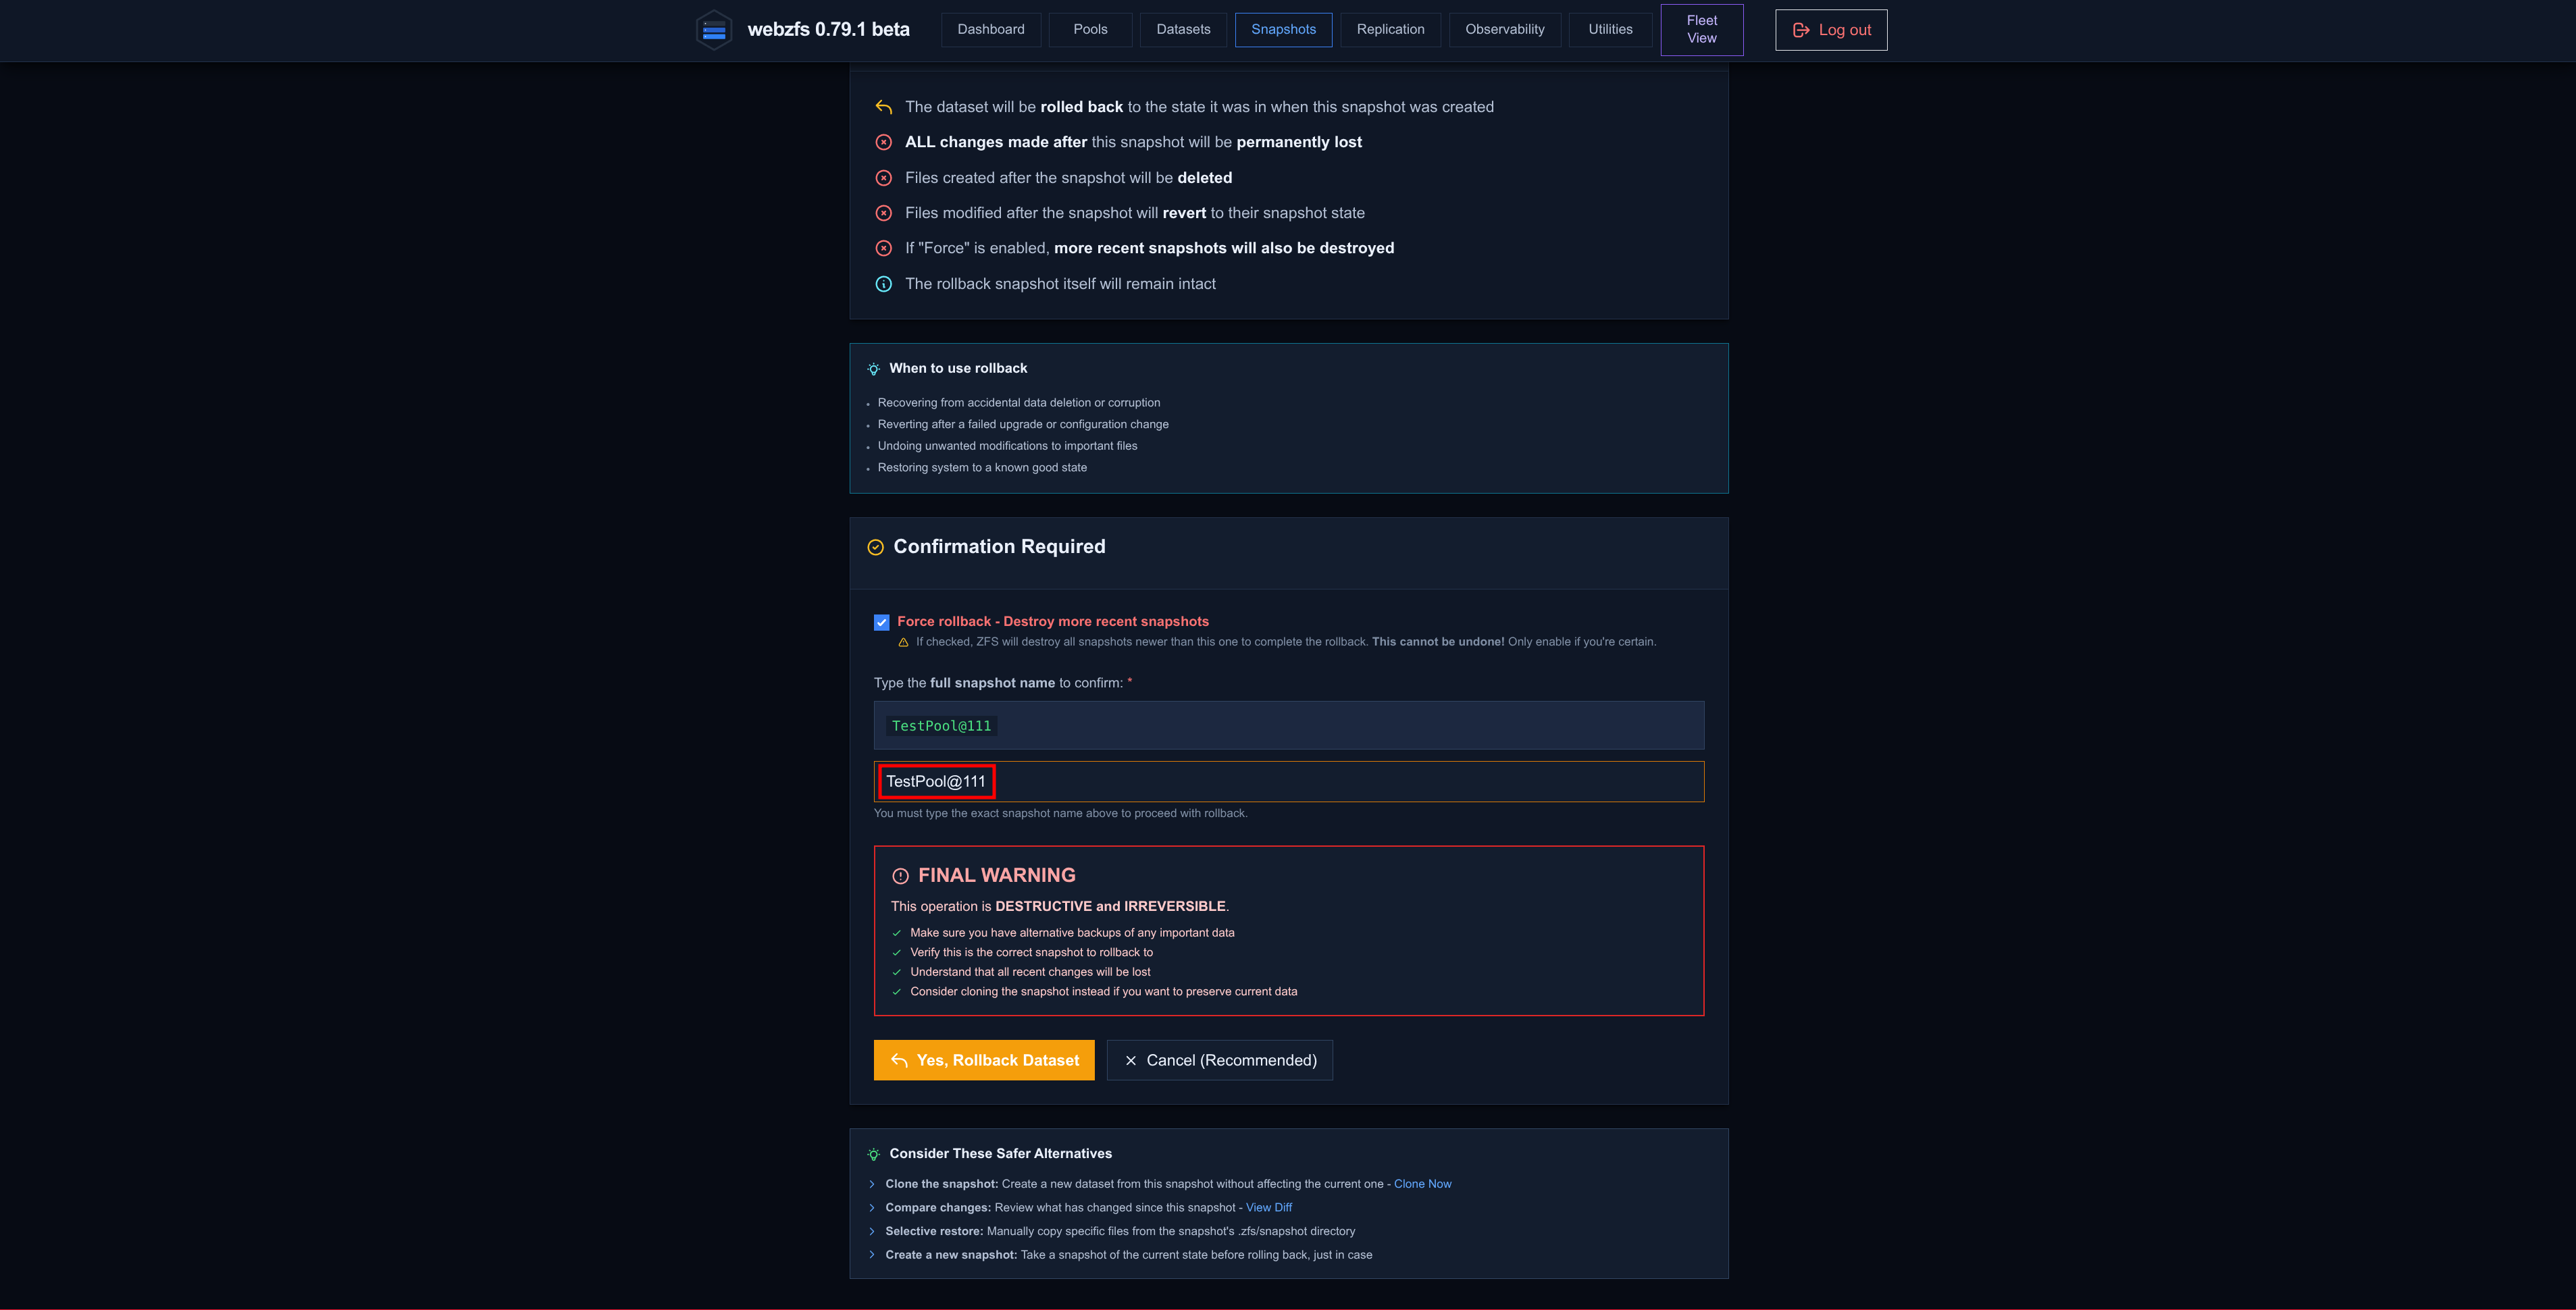
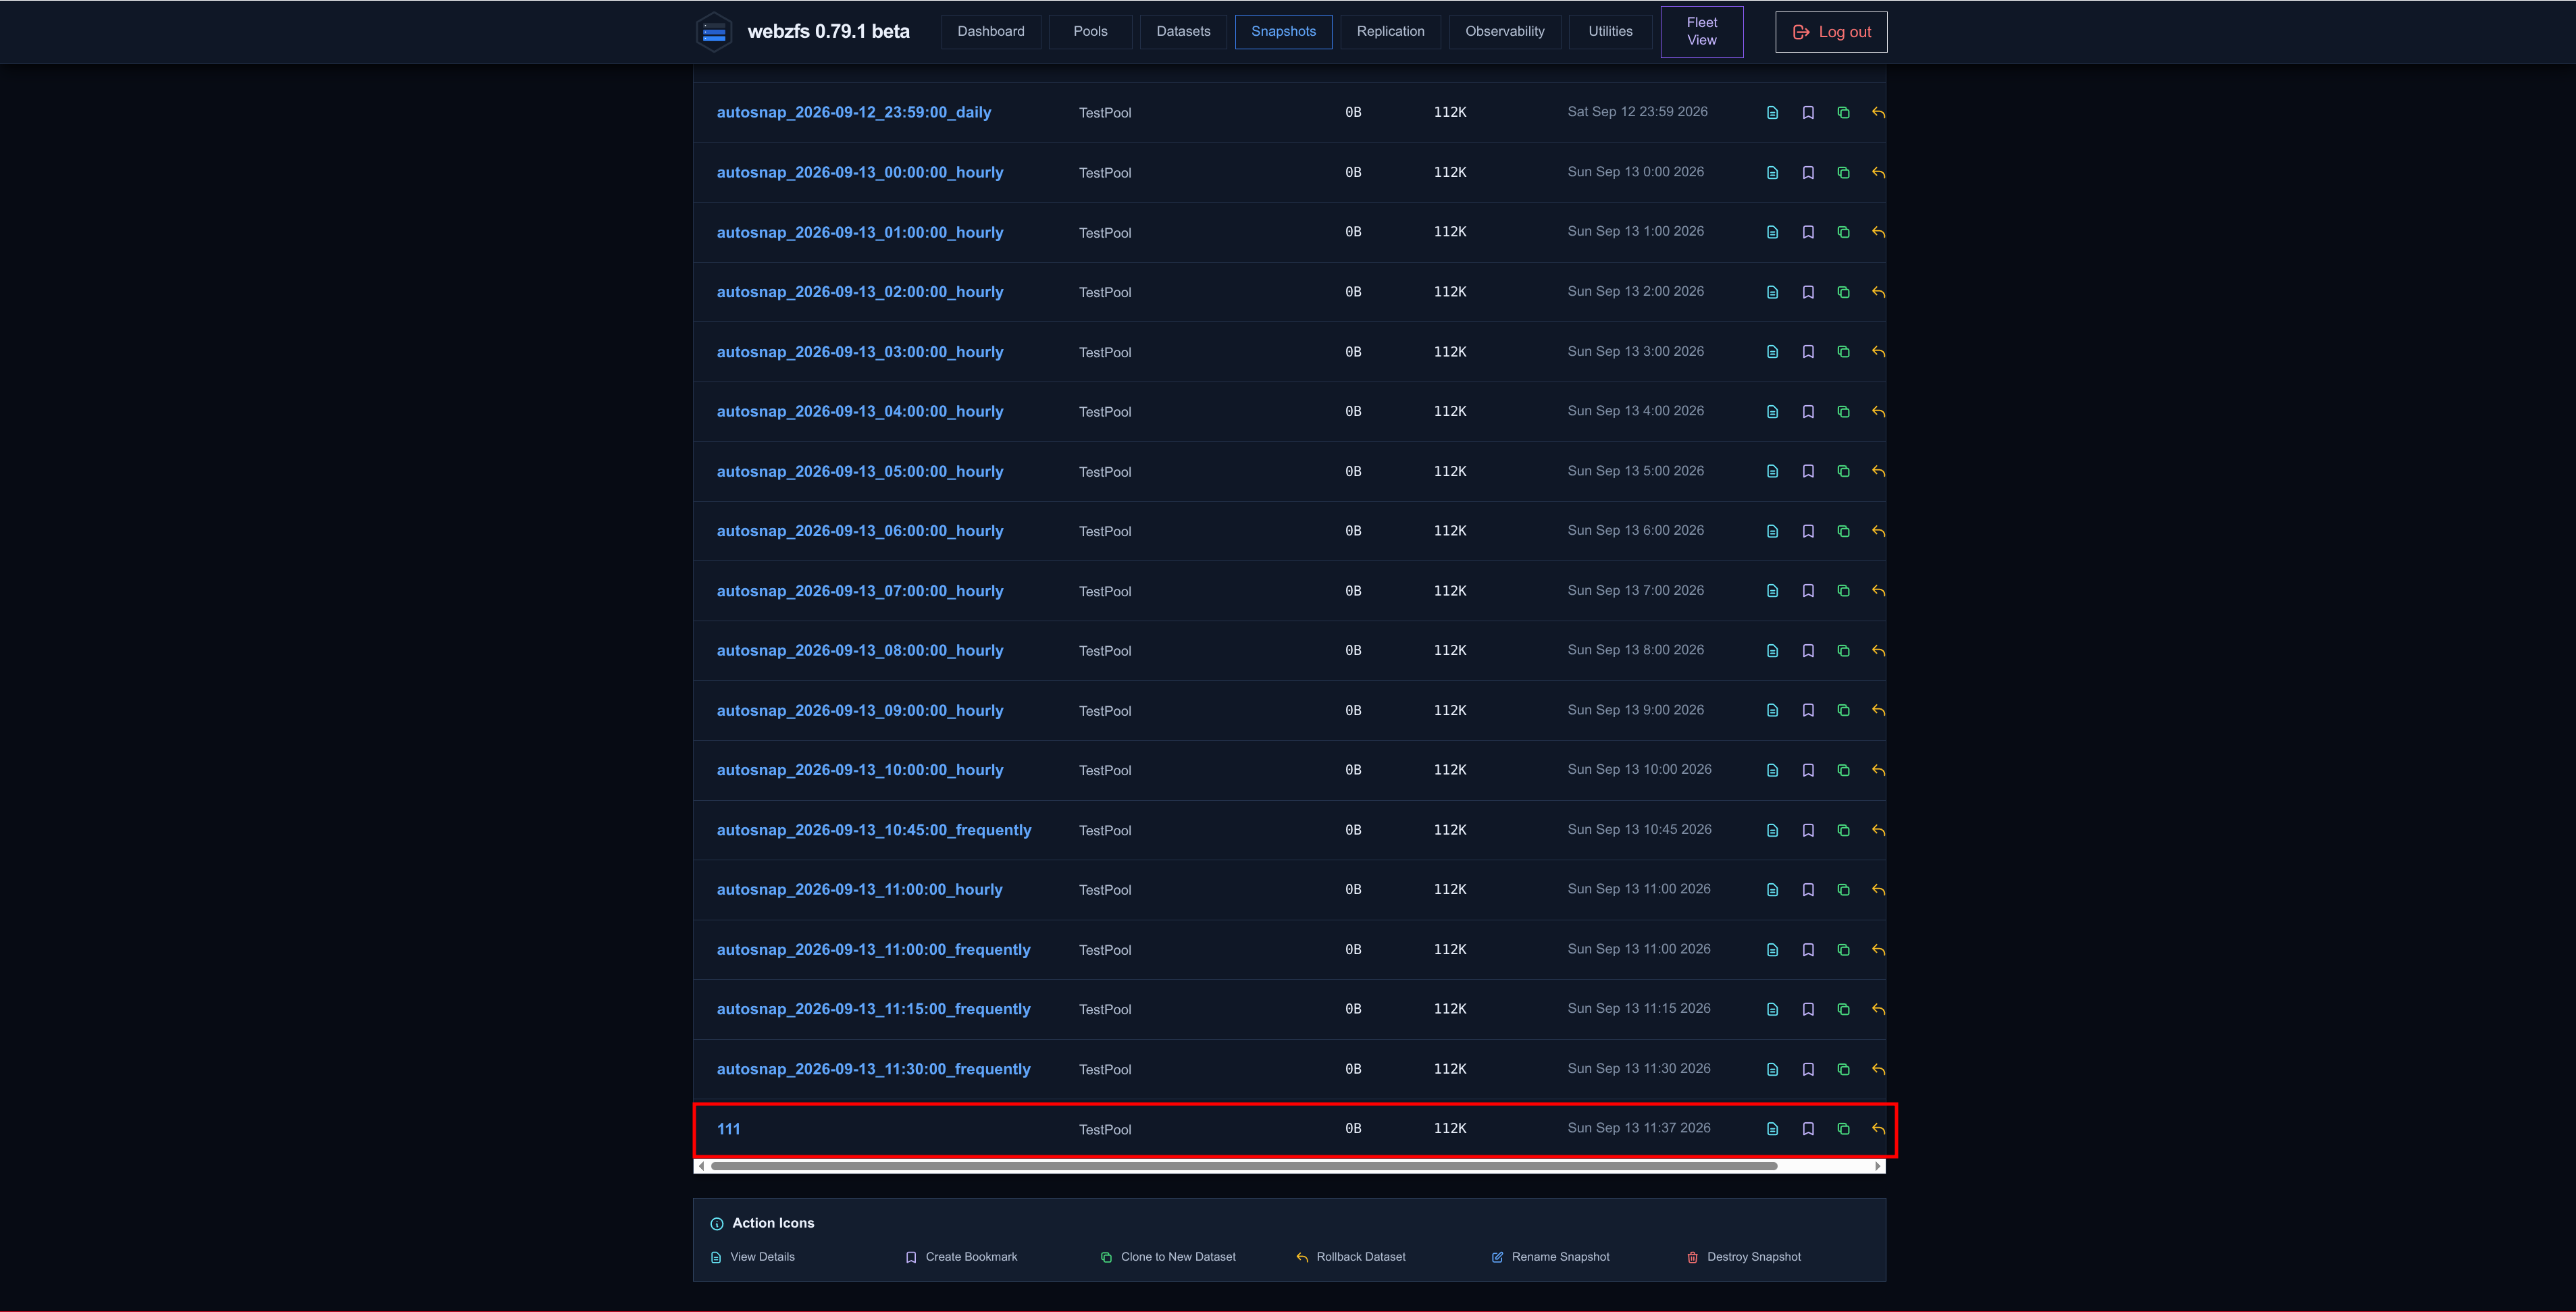
Rollback Dataset: It lets us roll back to the state of a specific snapshot, but we must keep in mind that it is a destructive and irreversible process; if there are intermediate snapshots they will be destroyed too.
TestPool has these three snapshots and we roll back to 111:
|
|
|
|
If we do not enable the Force rollback - Destroy more recent snapshots option the interface will fail silently but in the logs we will see:
/opt/webzfs/.config/webzfs/logs/zfs_operations.log

2026-09-13 11:41:59 [ERROR] user=kr0m operation=rollback_snapshot status=FAILED snapshot=TestPool@111 force=False error="Failed to rollback snapshot: cannot rollback to 'TestPool@111': more recent snapshots or bookmarks exist
-
Rename Snapshot: This button is exactly the same as the
Renameabove on this same page. -
Compare Changes: This button is exactly the same as the
Compare Snapshotsin the Snapshots section but with theFirst Snapshotfield already preselected. -
Create Bookmark:
ZFSbookmarks mainly serve to allow incremental sends (zfs send) without having to keep the full snapshot at the source, saving space.
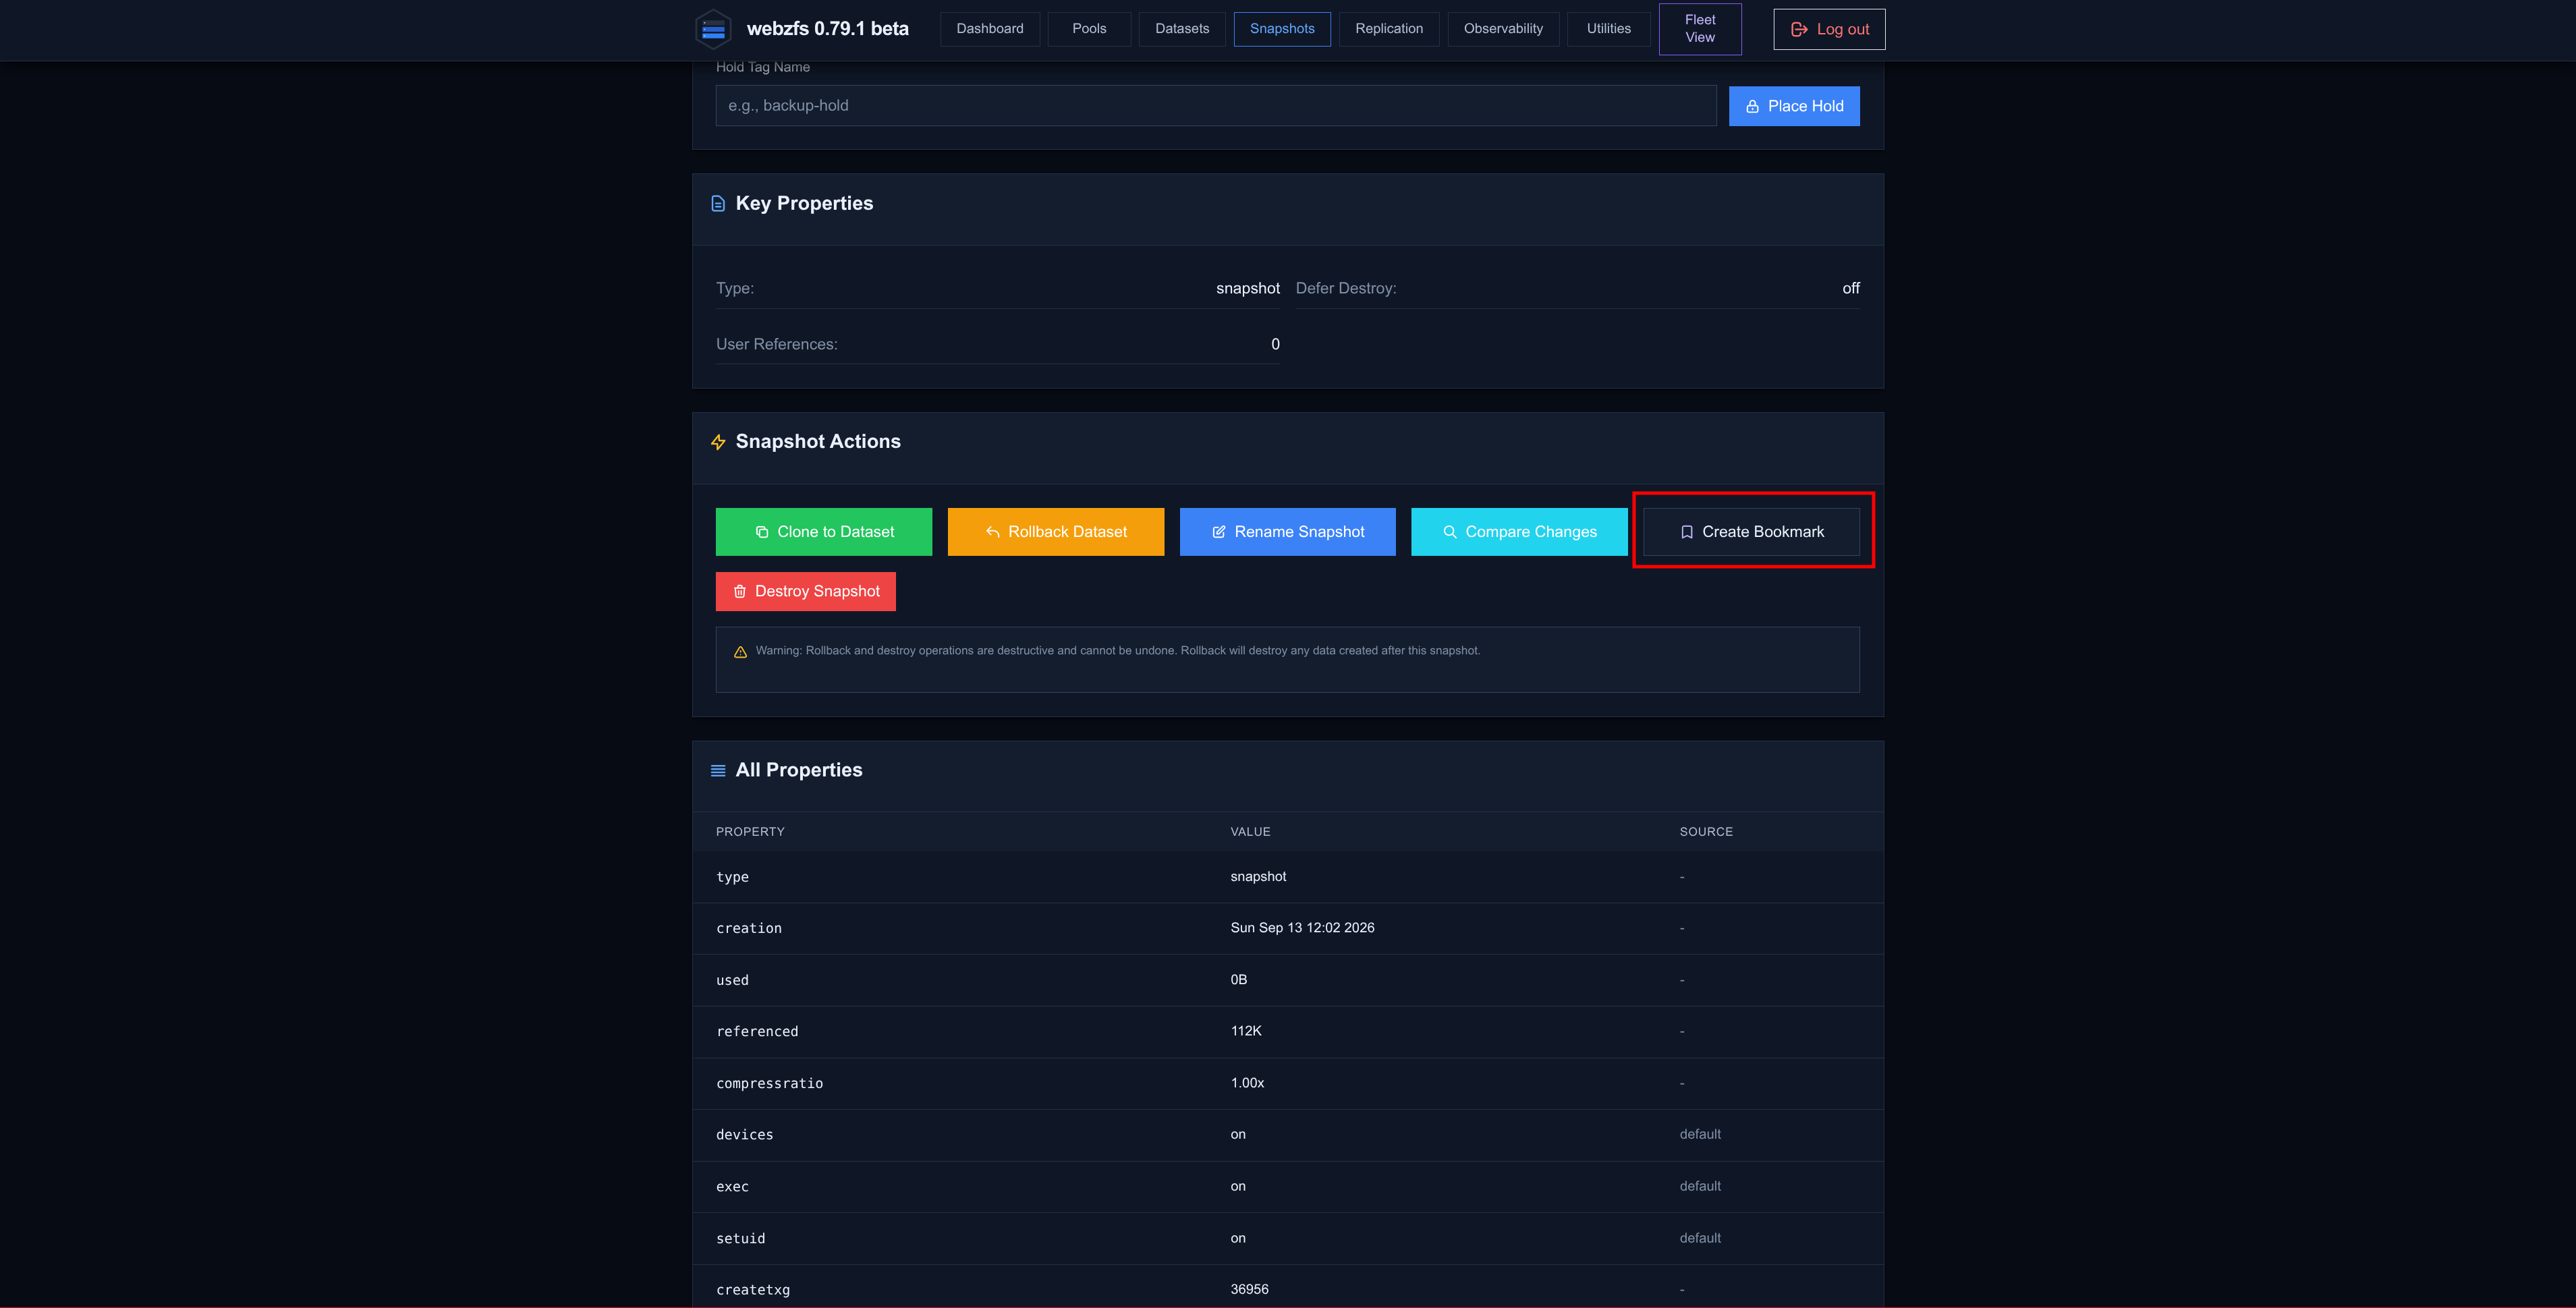
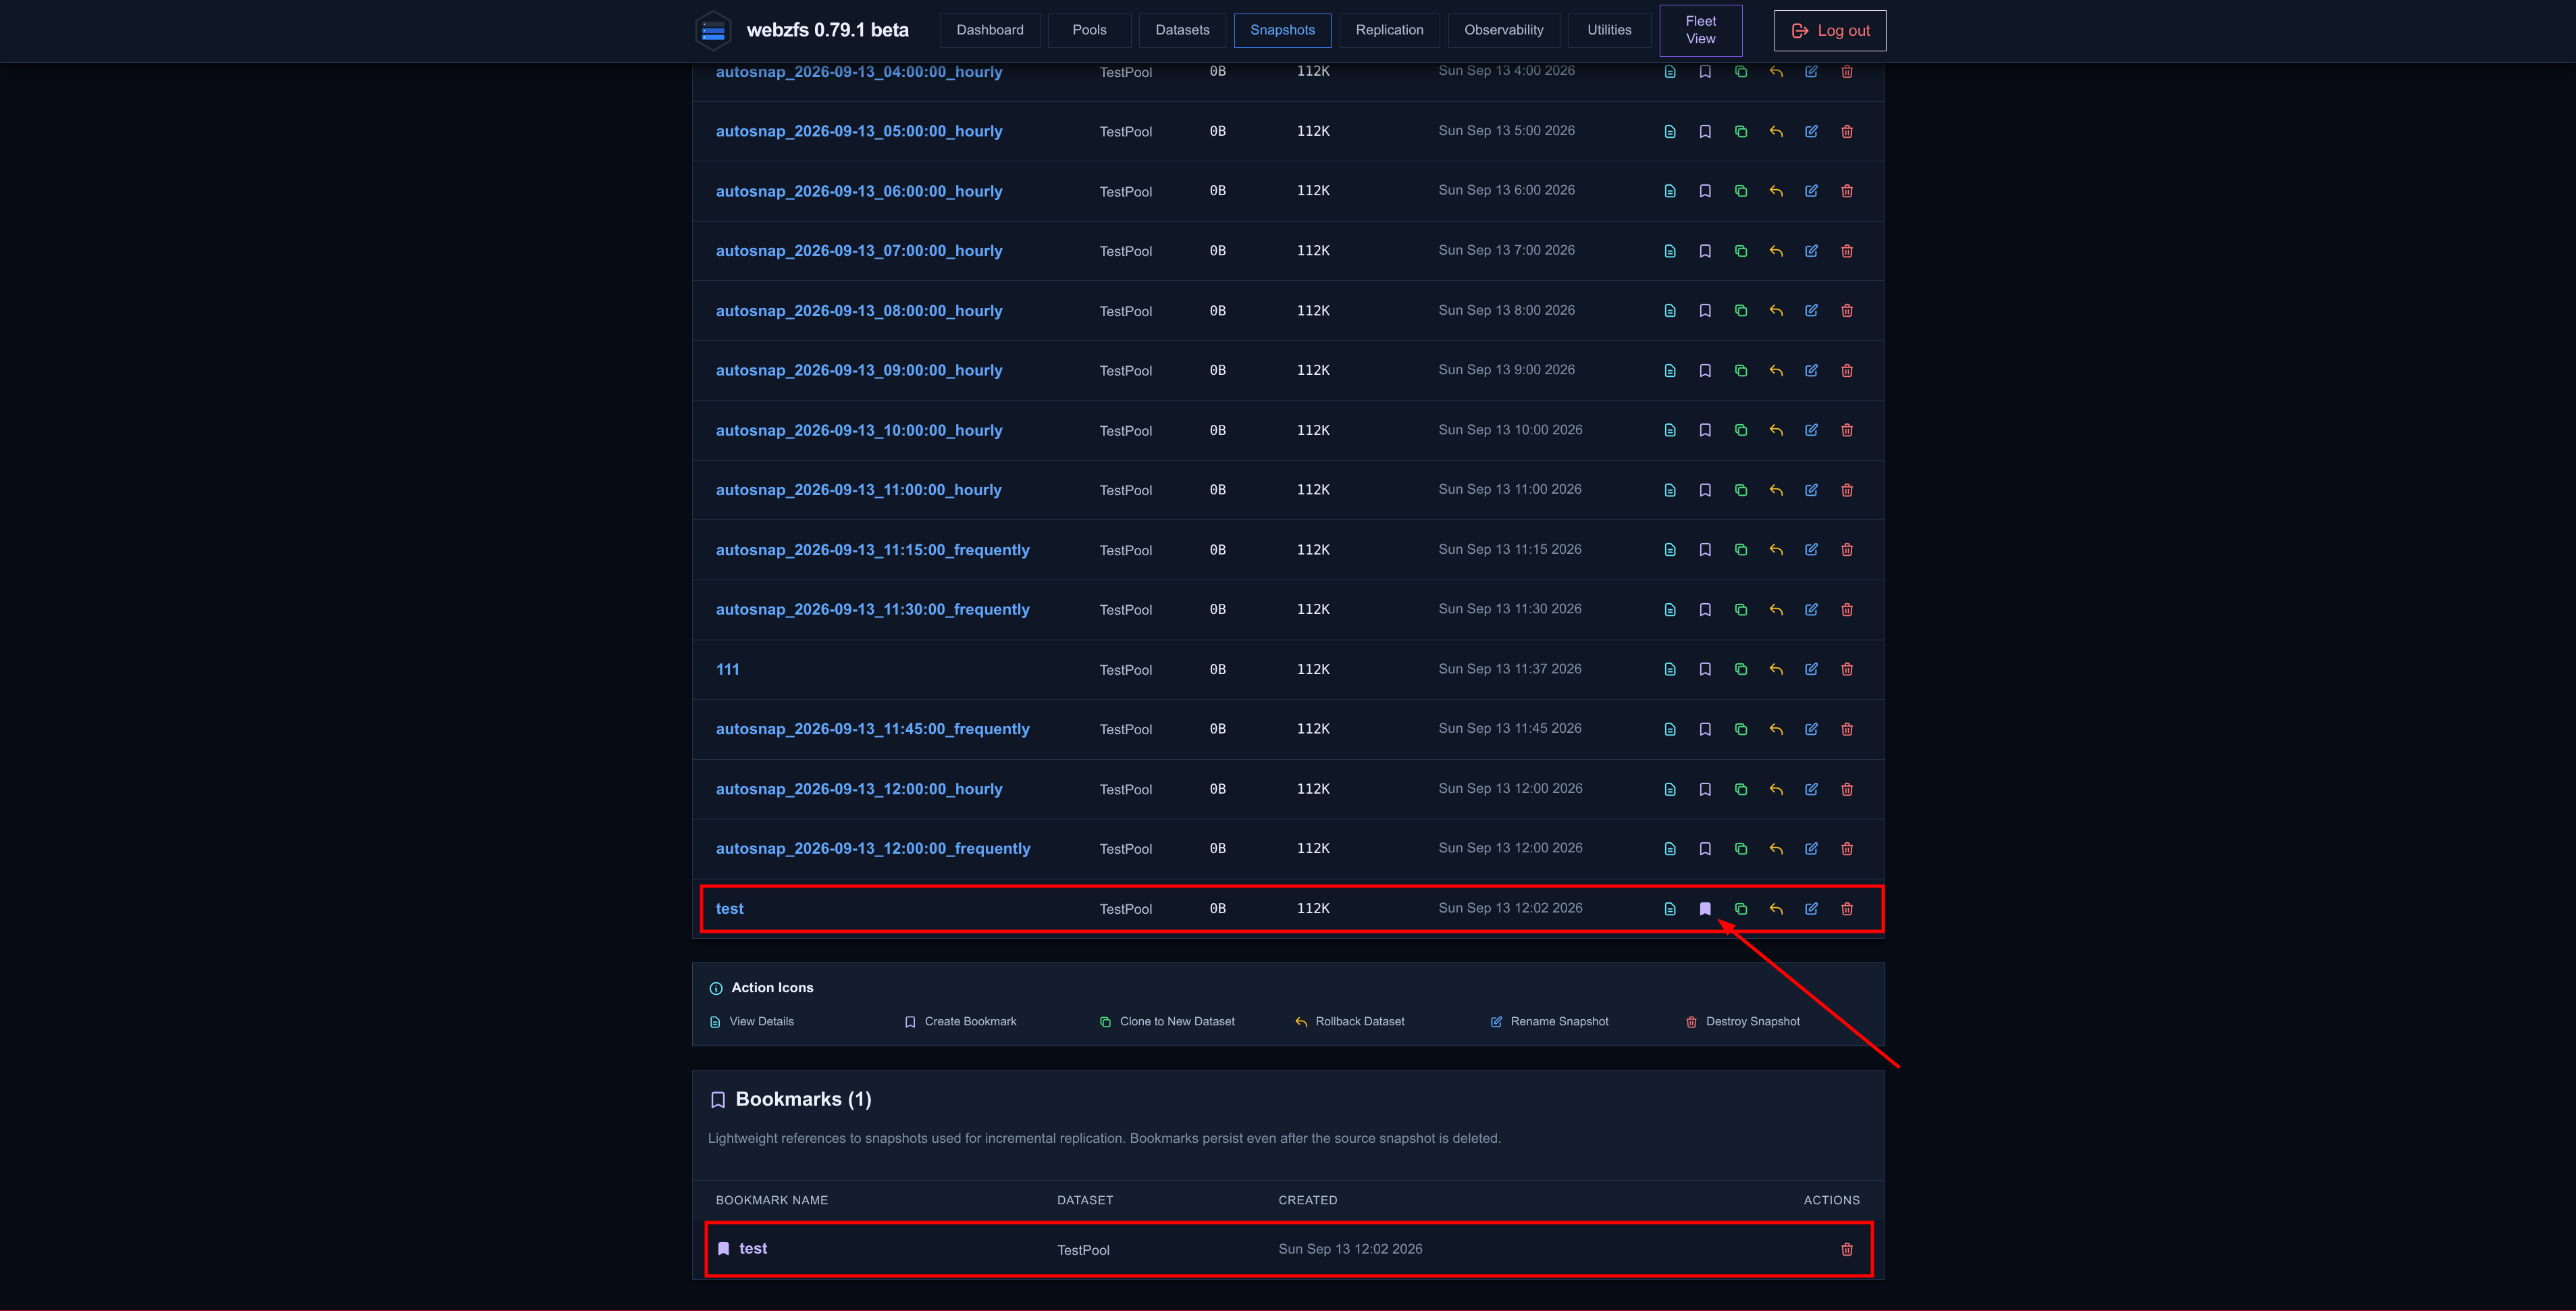
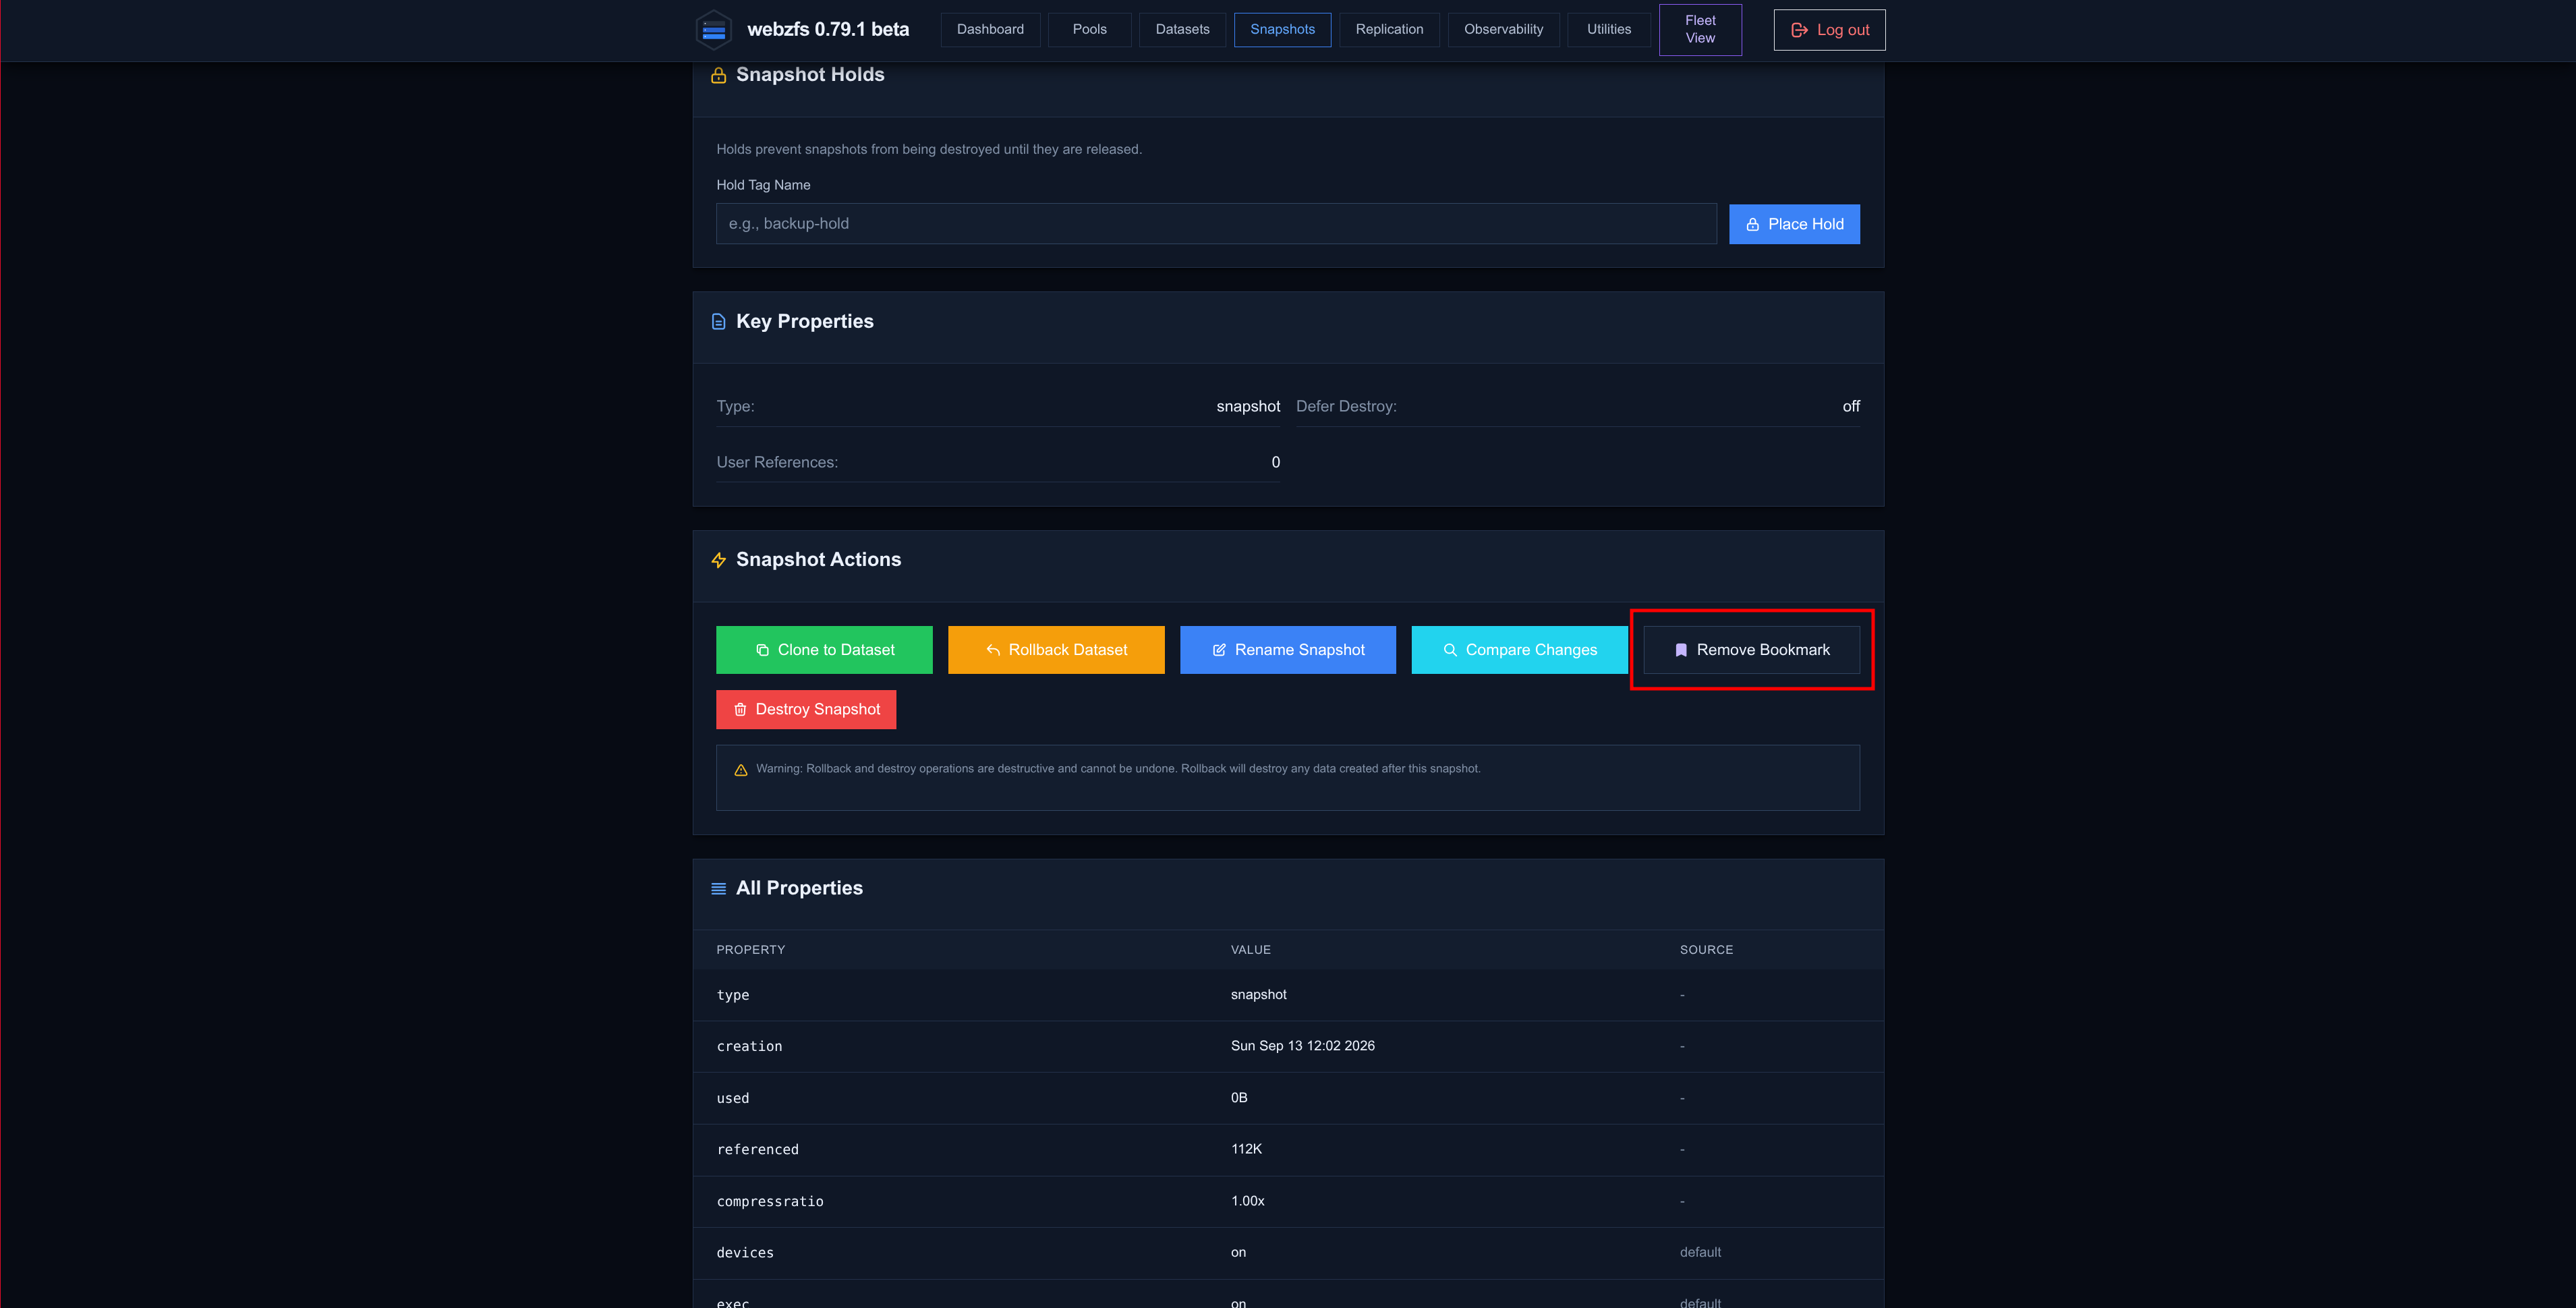
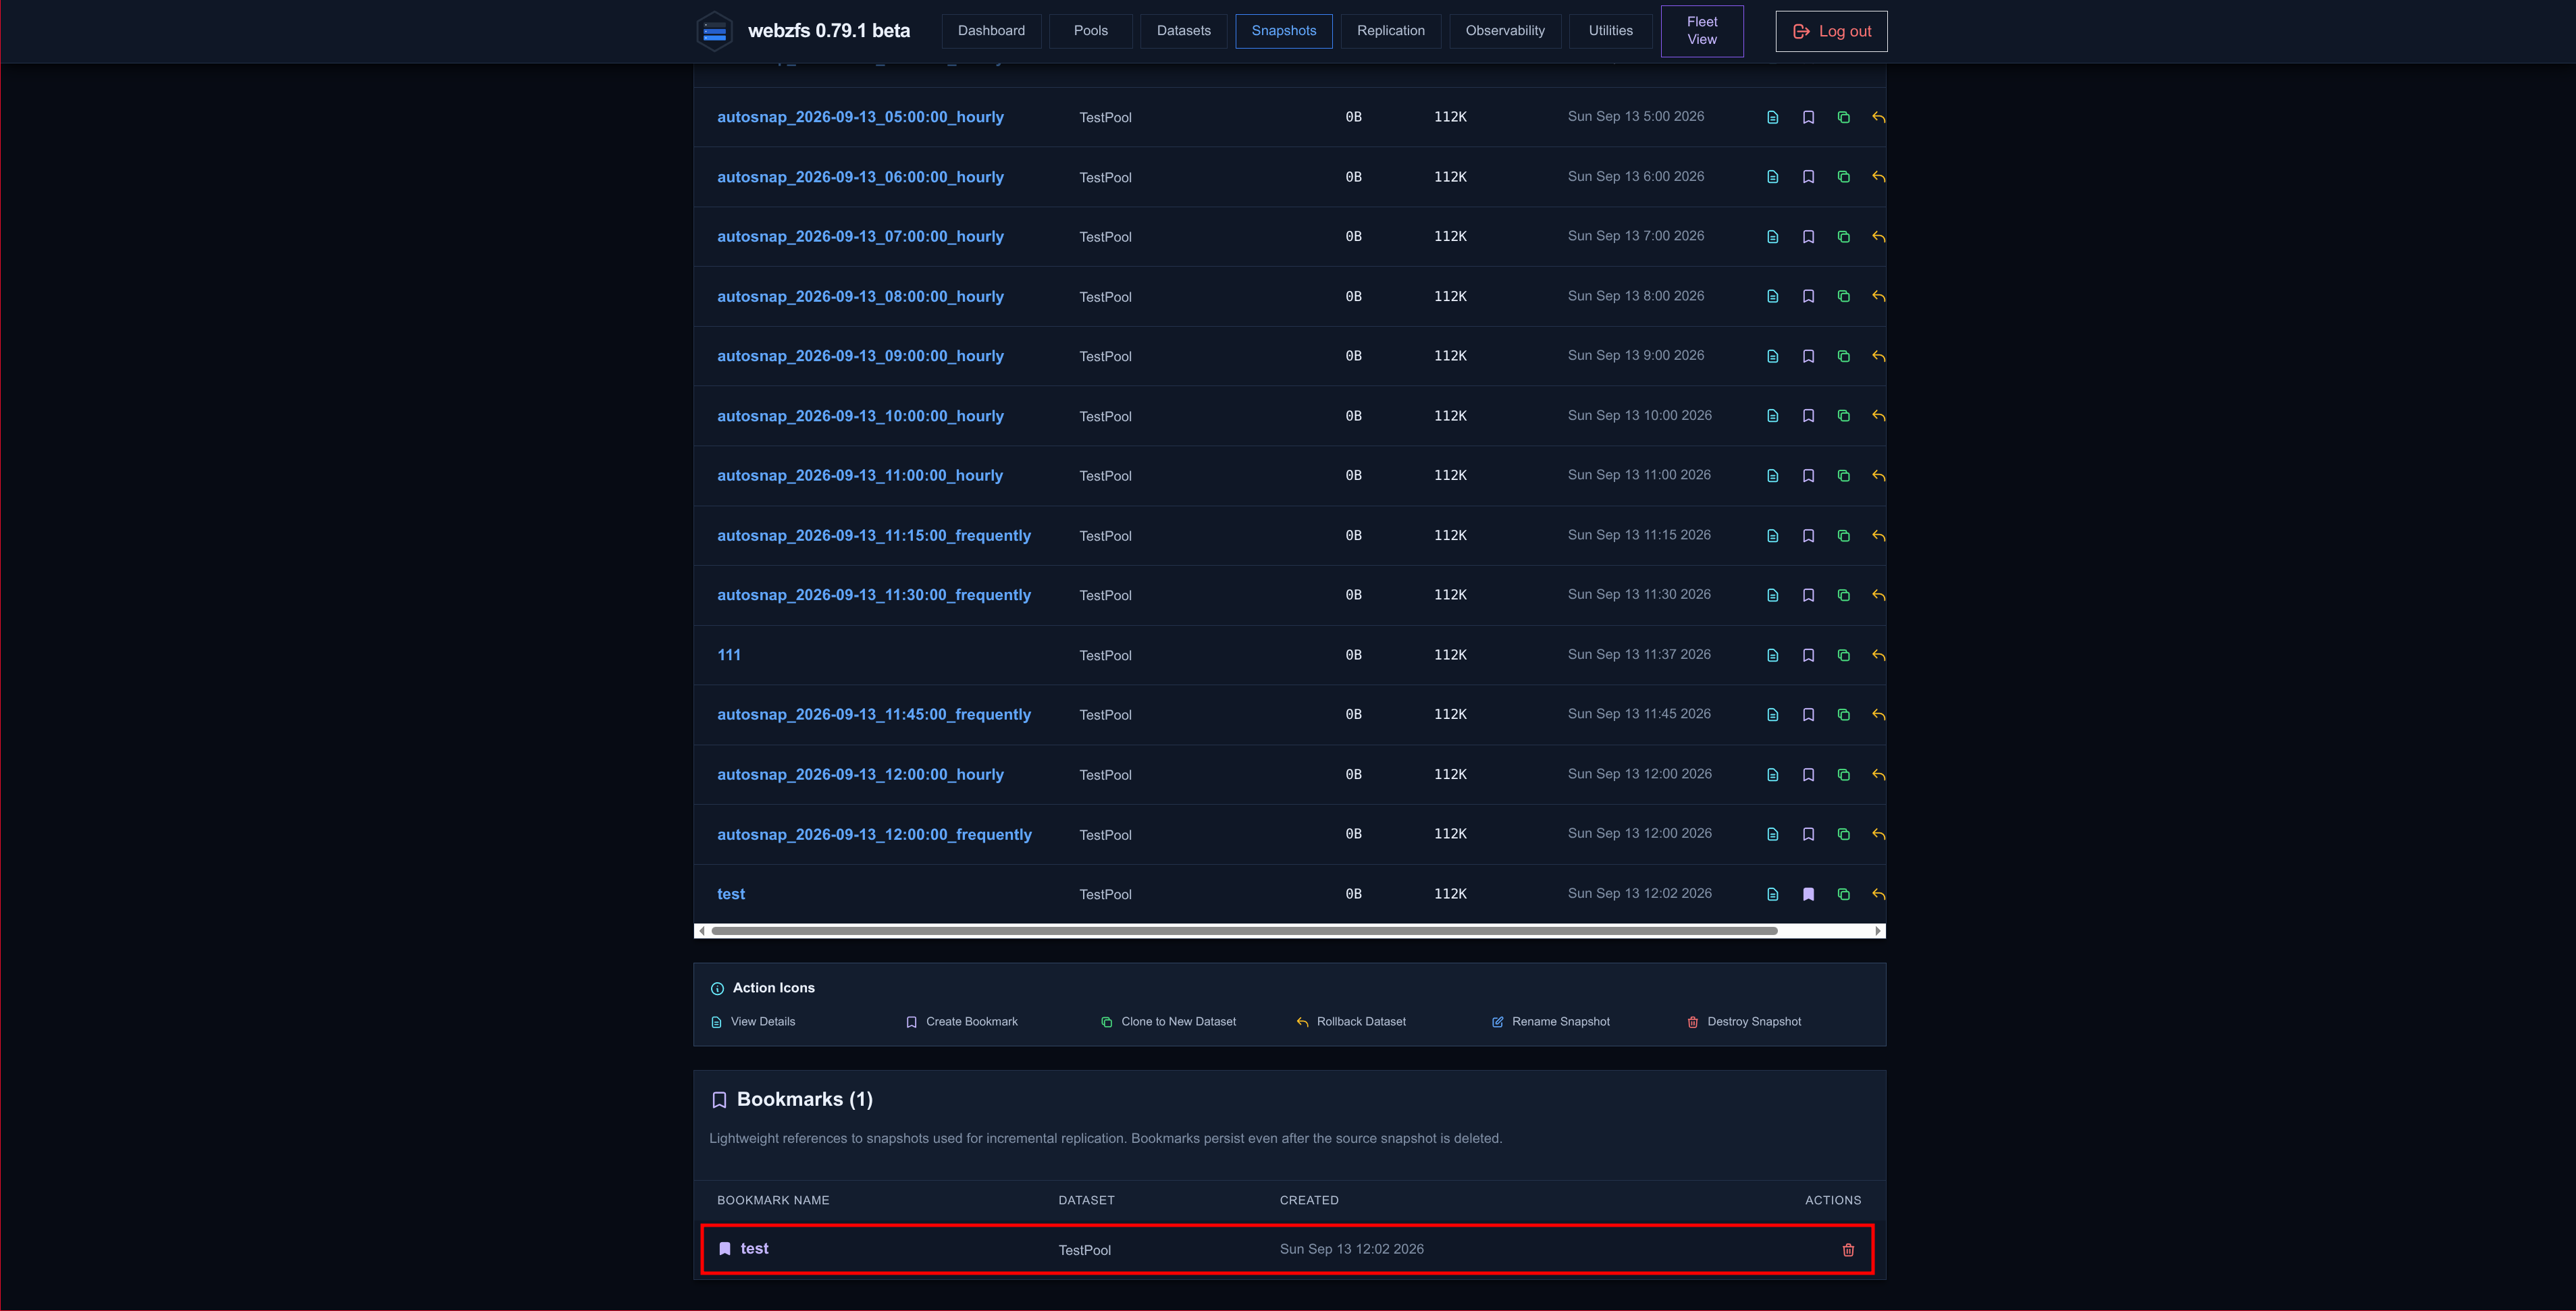
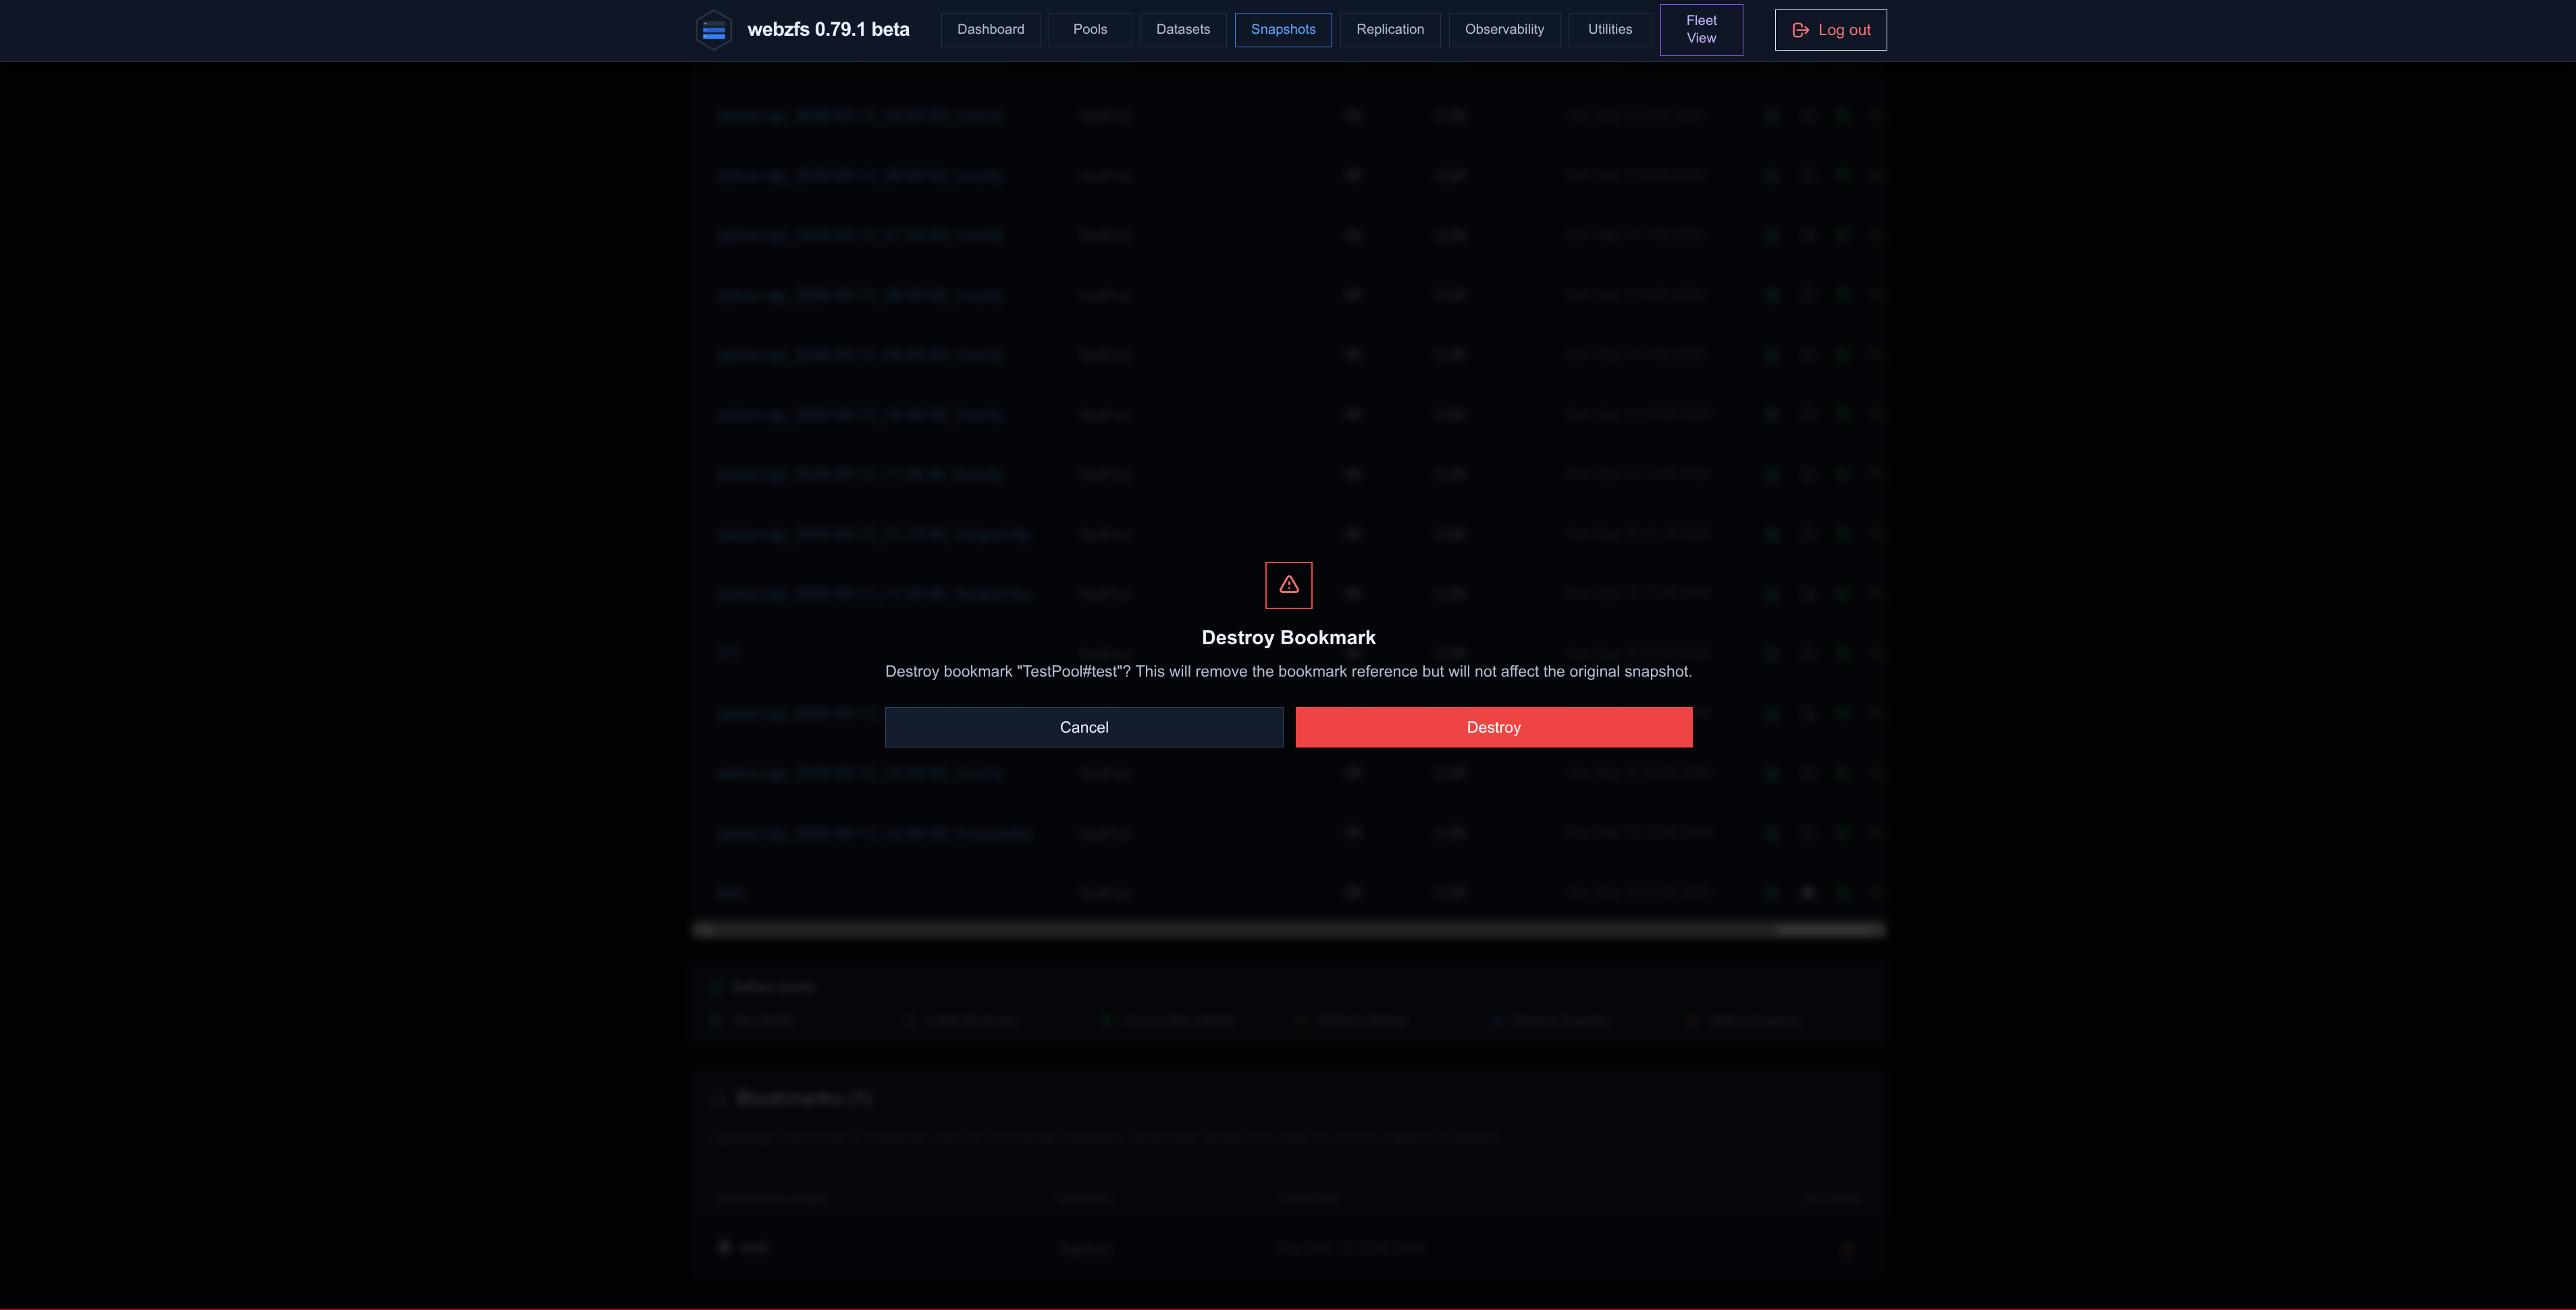
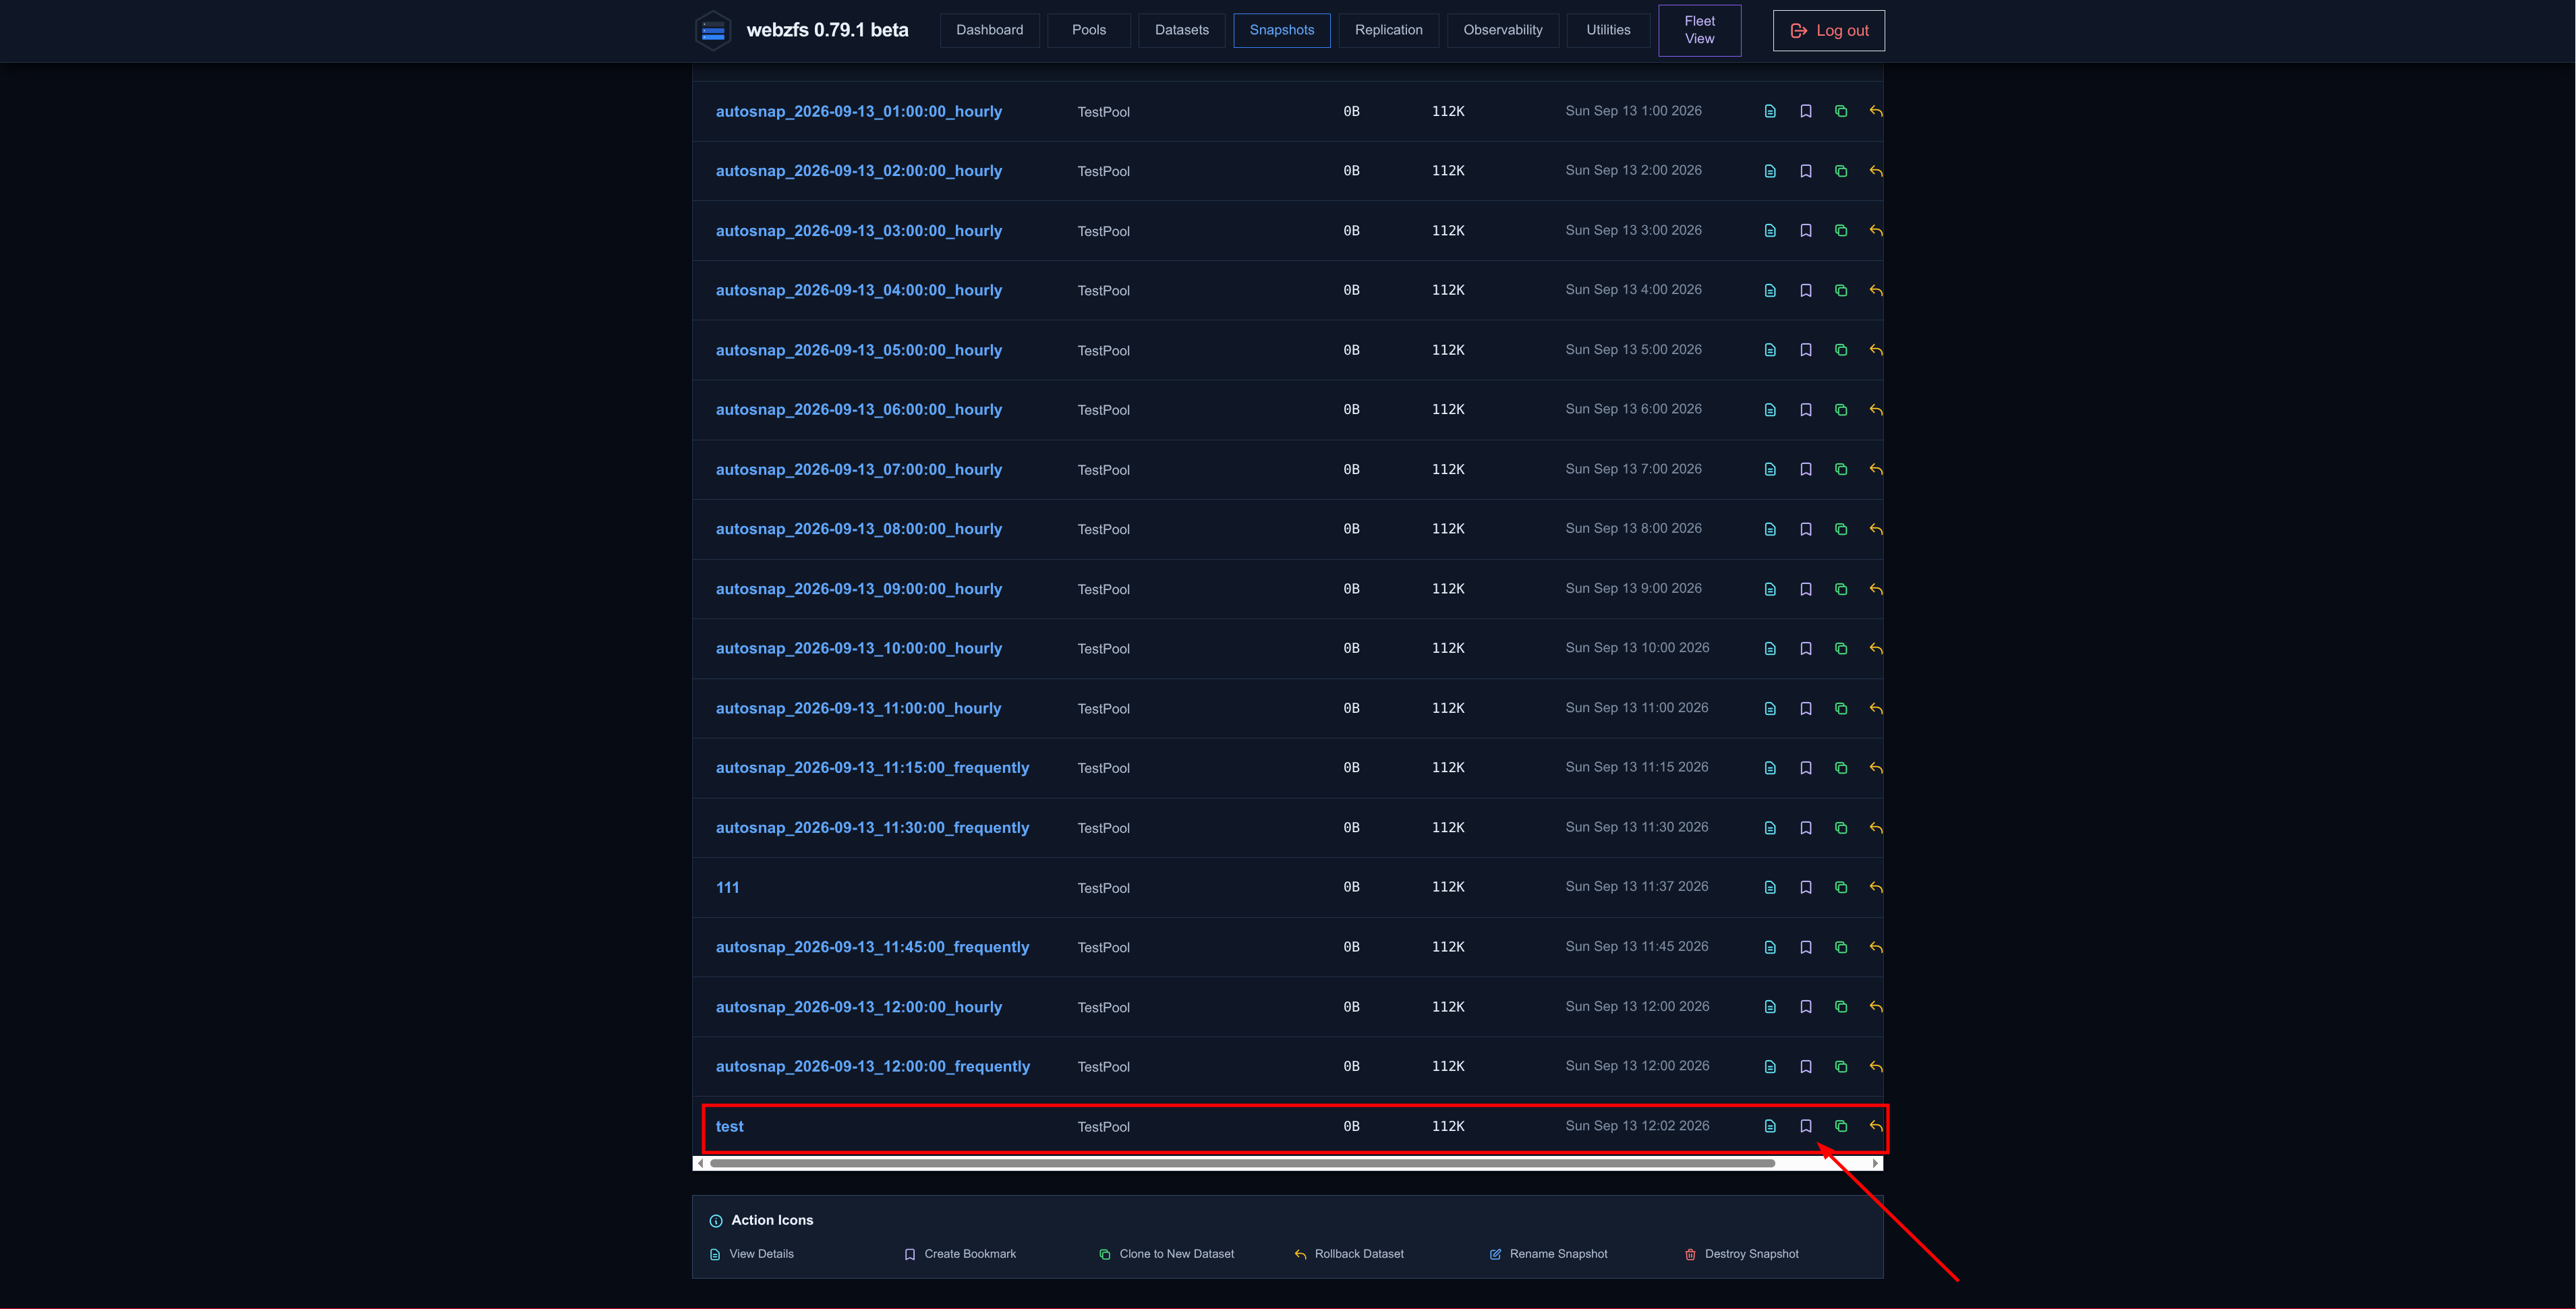
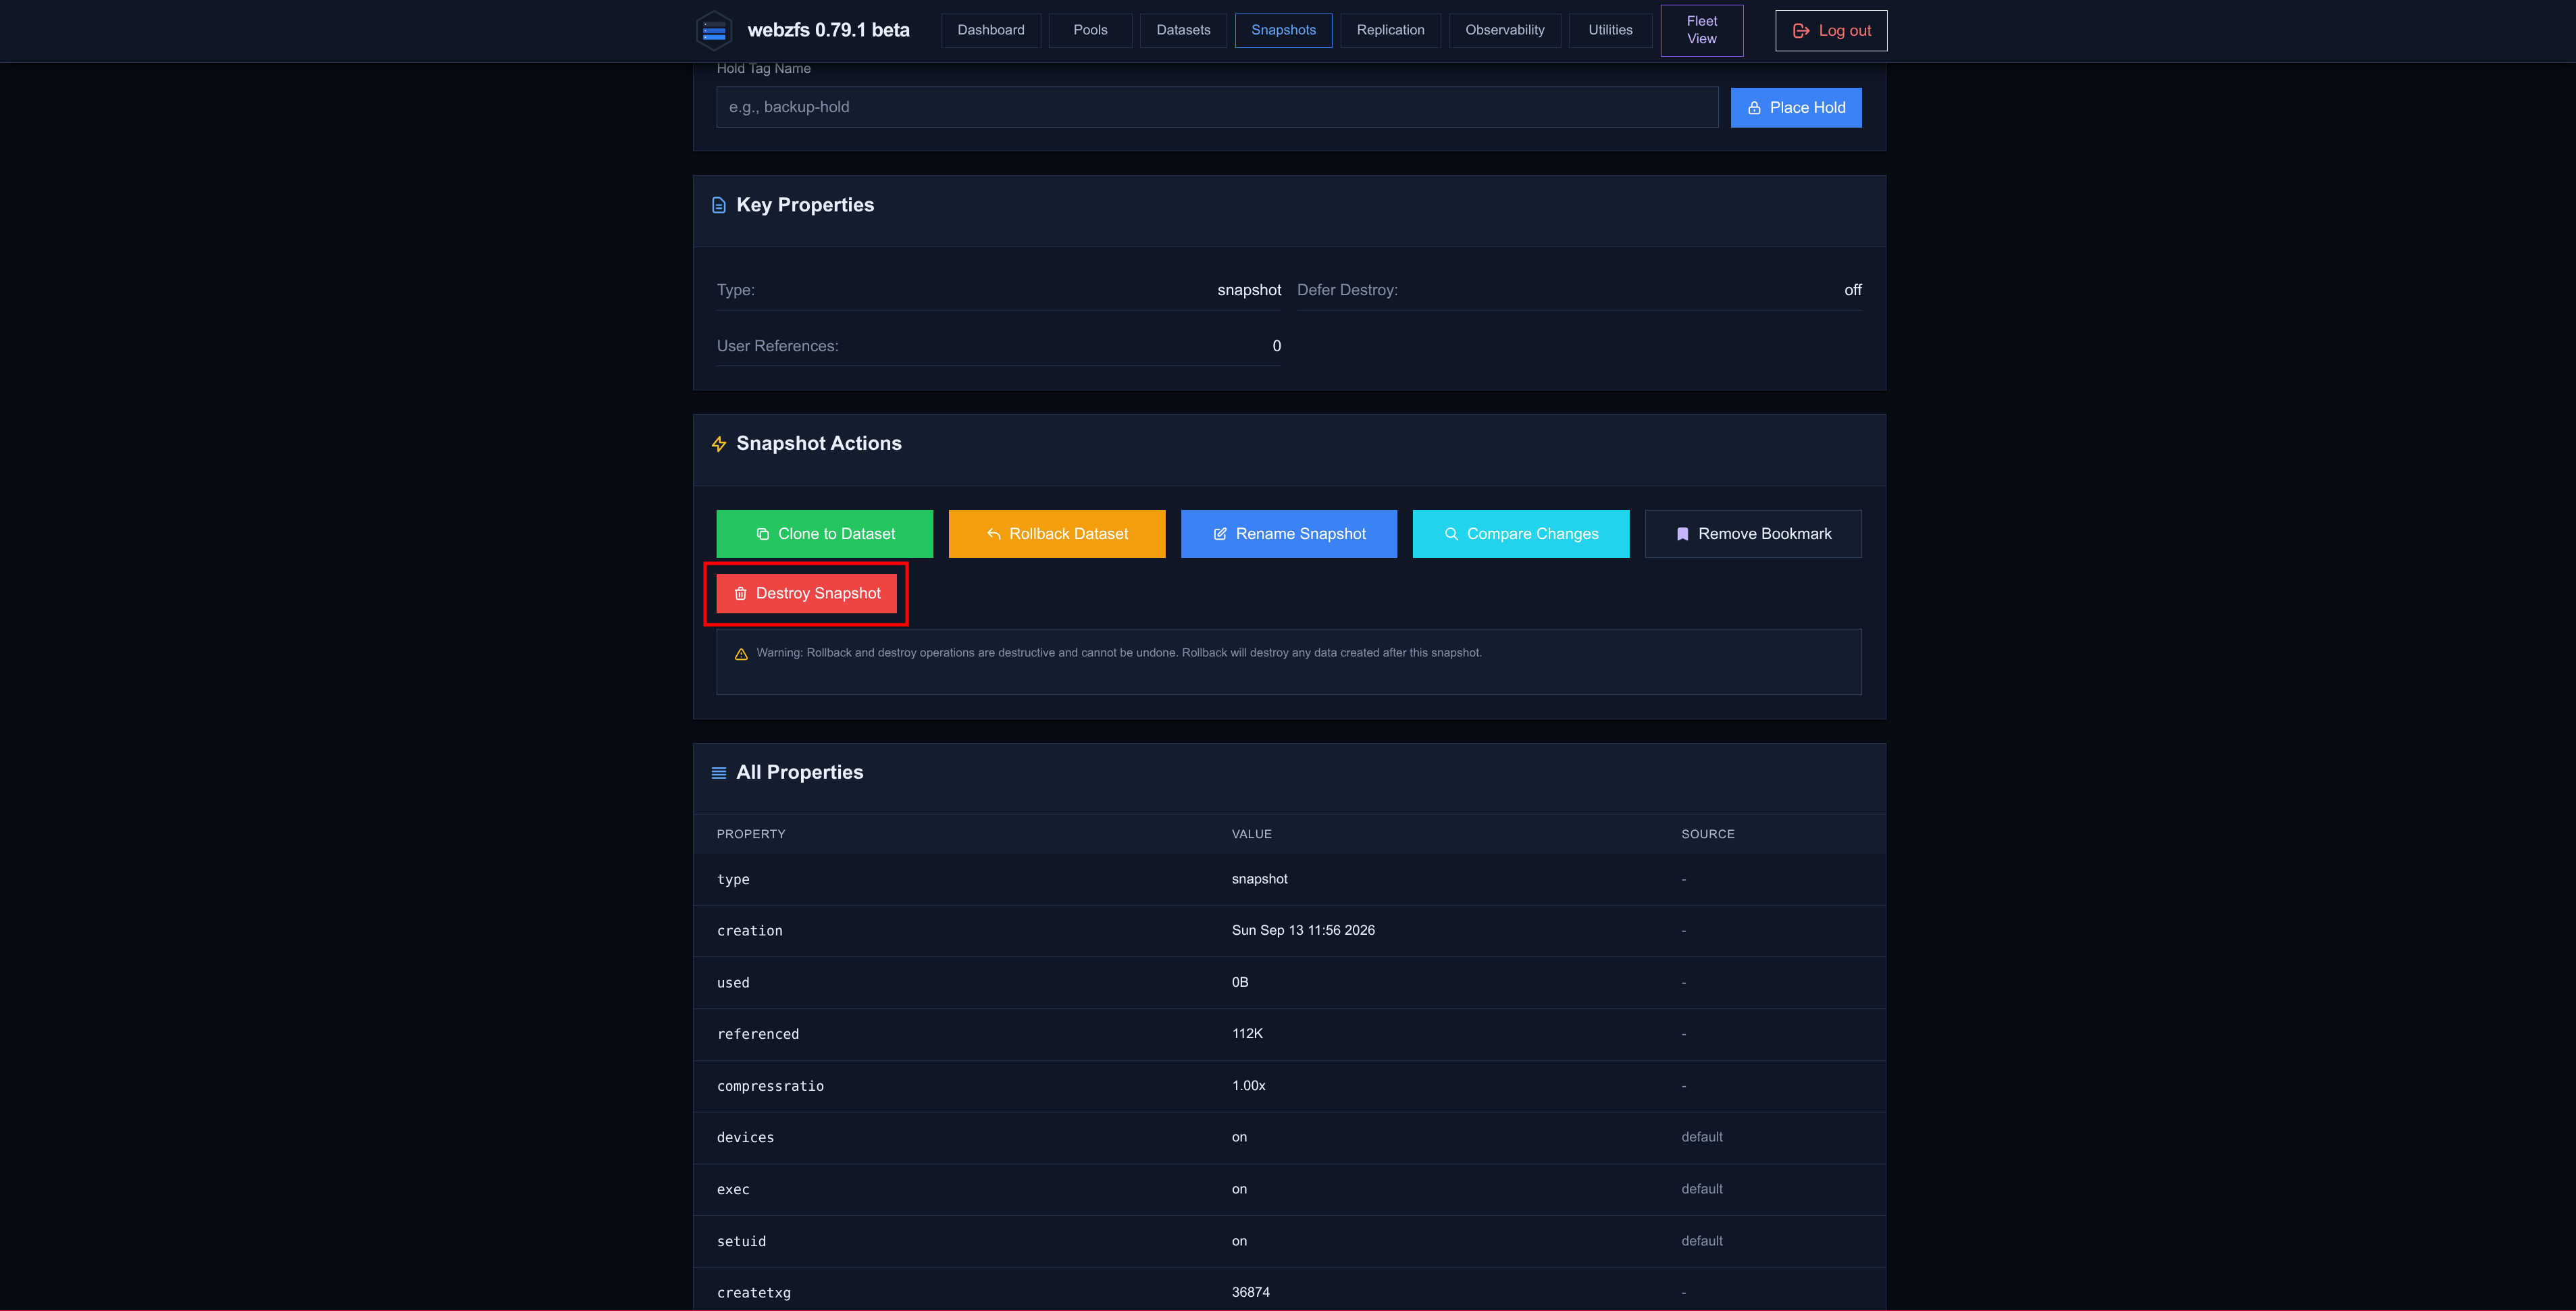
The Remove Bookmark button is buggy; once bookmarked we will not be able to un-bookmark it. We will have to access the main snapshots menu and do it from the list it shows:
| Bugged button | Working button |
|---|---|
|
|
|
|
- Destroy Snapshot: Deletes the snapshot.
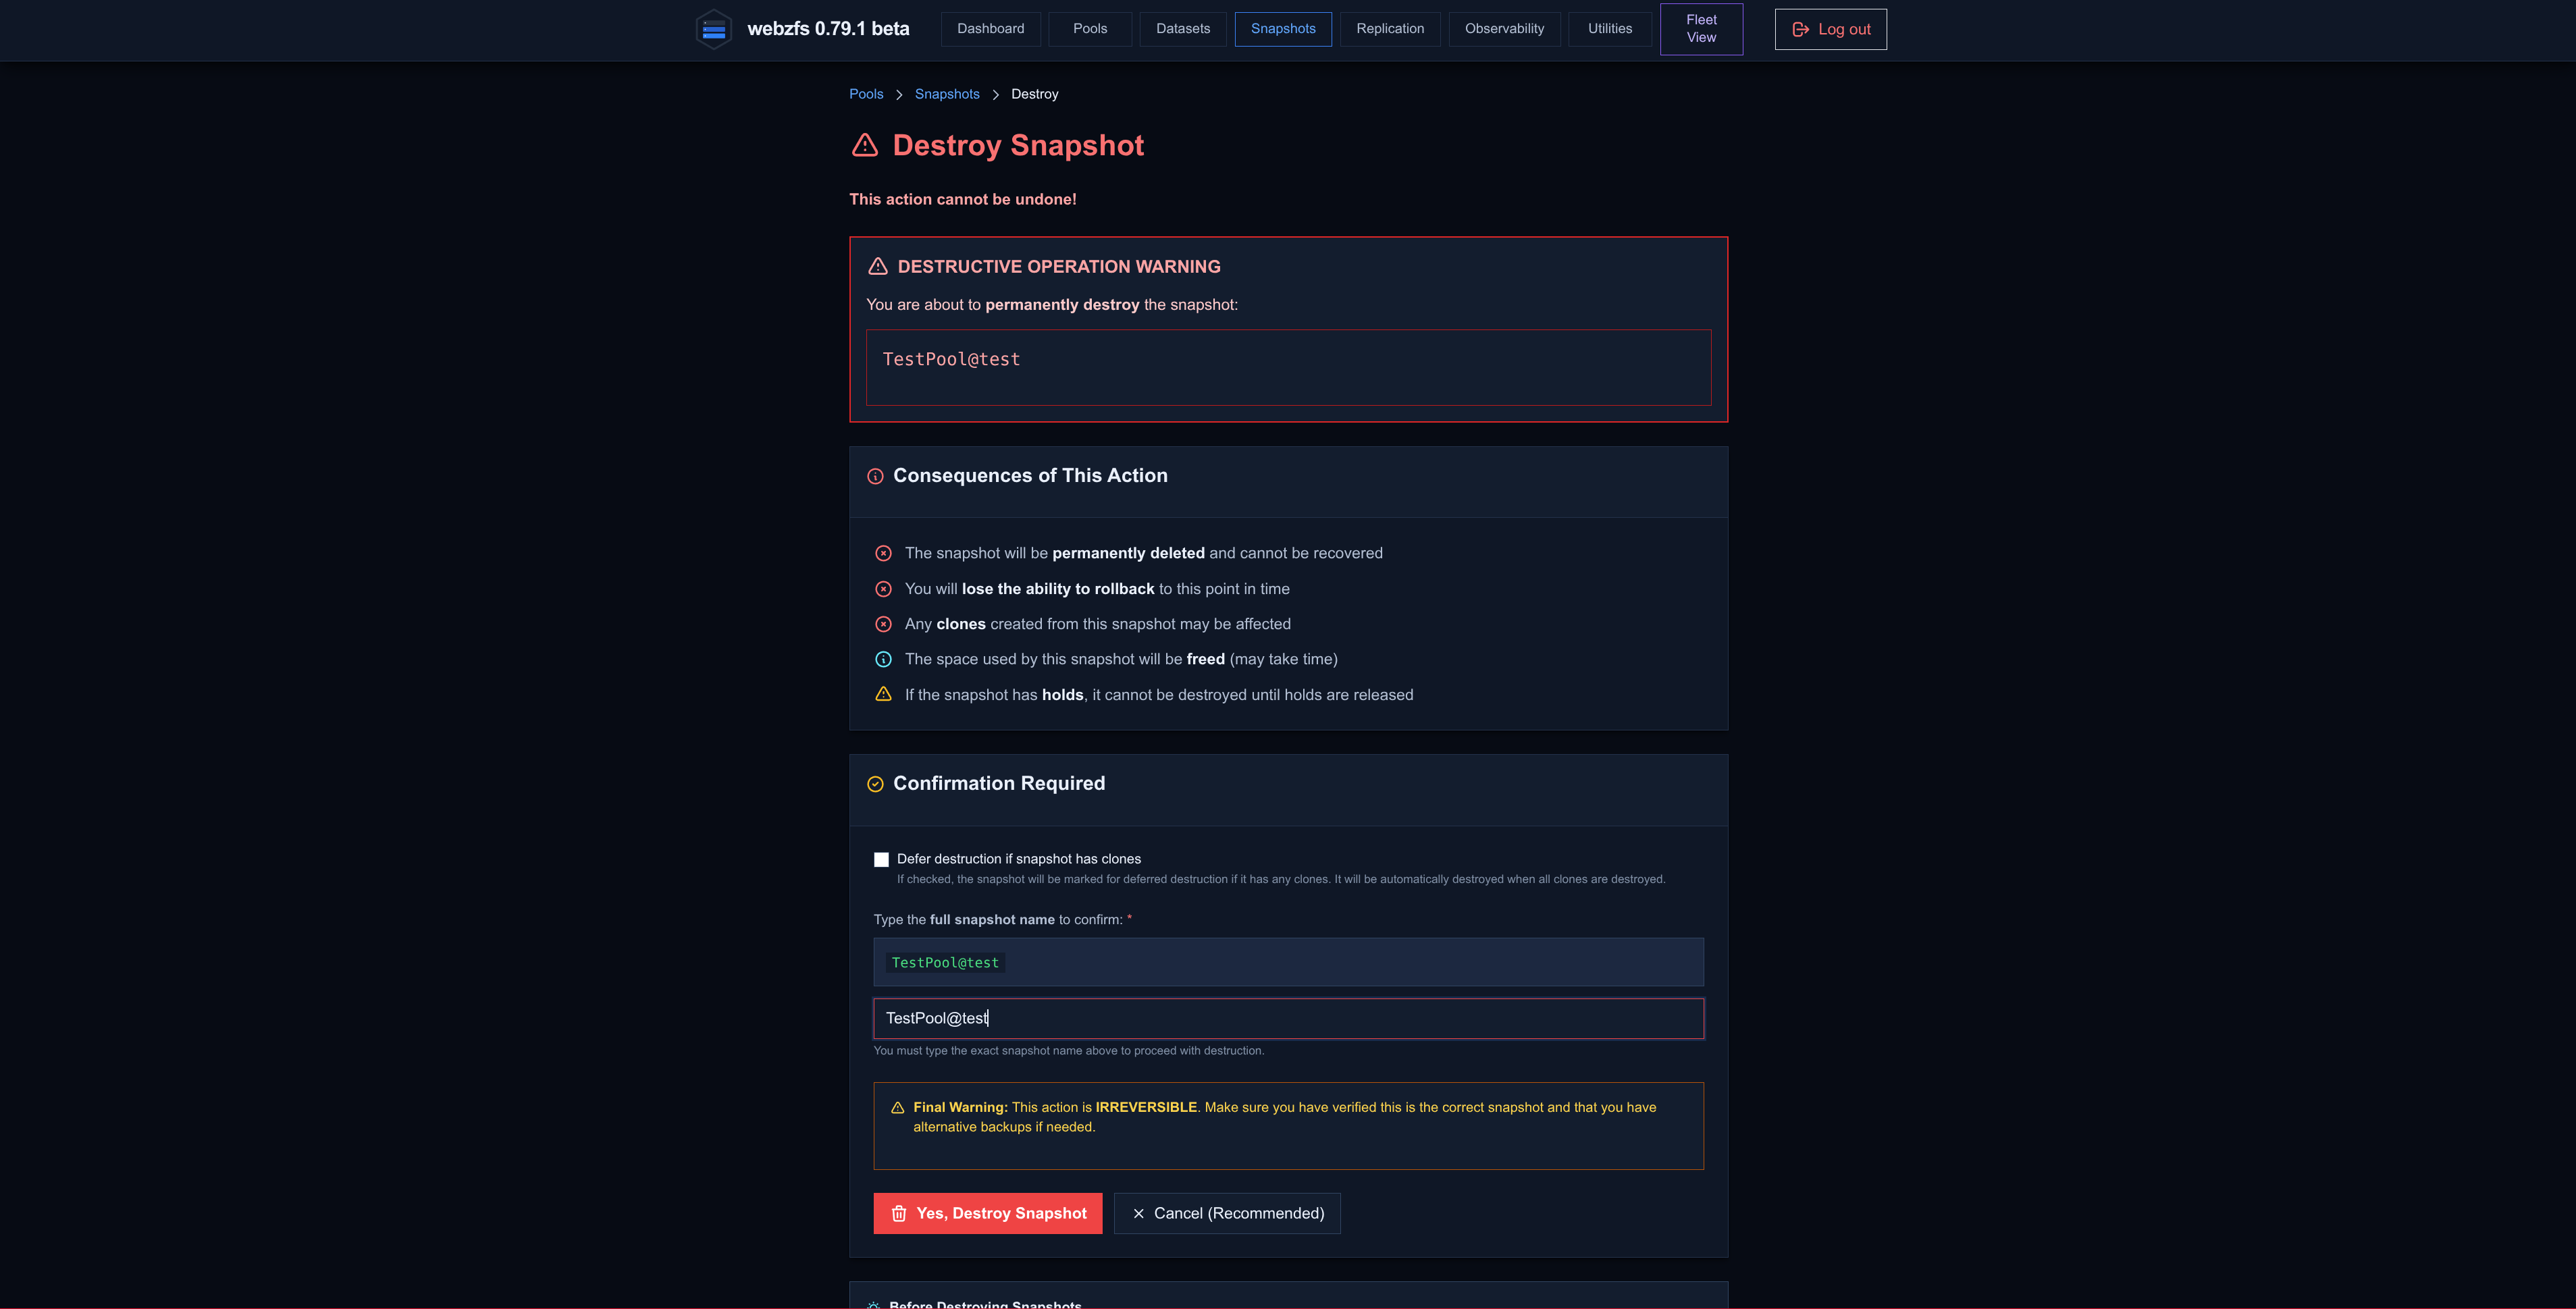
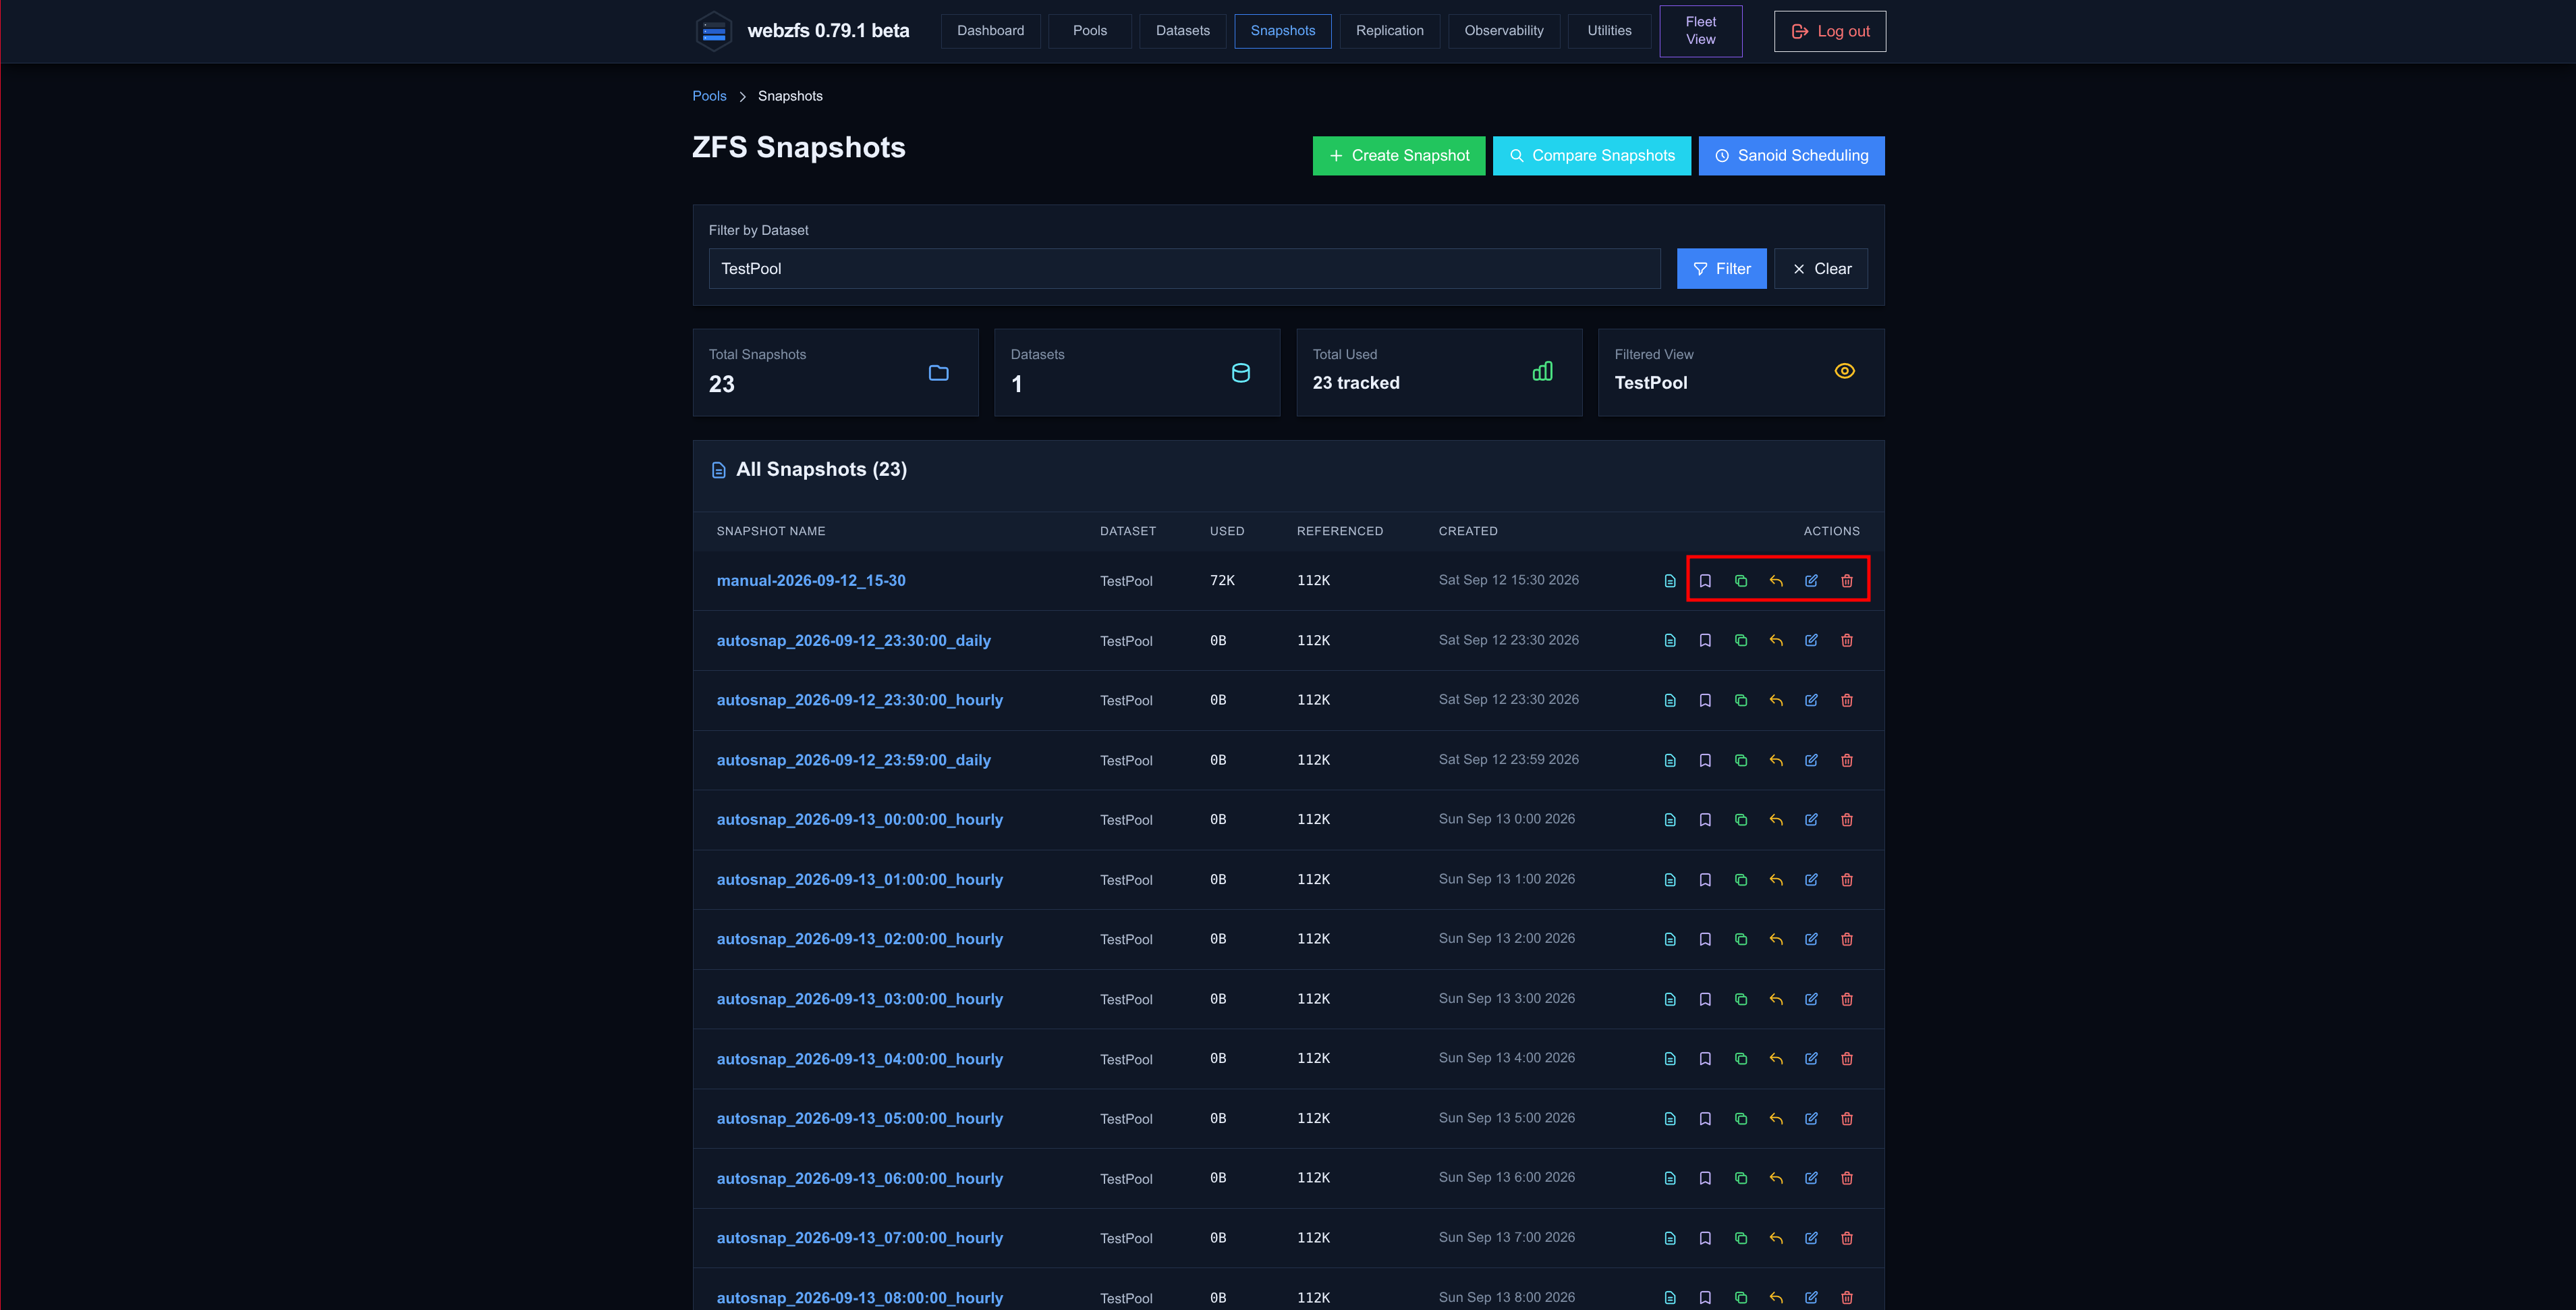
The rest of the options that appear in the snapshot list have exactly the same functions as the buttons inside each snapshot, Create Bookmark, Clone, Rollback, Rename, Destroy:
Replication
Another very interesting section; using
Syncoid
we can synchronize ZFS snapshots to a remote system; once the first snapshot is synchronized, only the differences between them will be synchronized, which will make the synchronization much faster than a traditional Rsync.
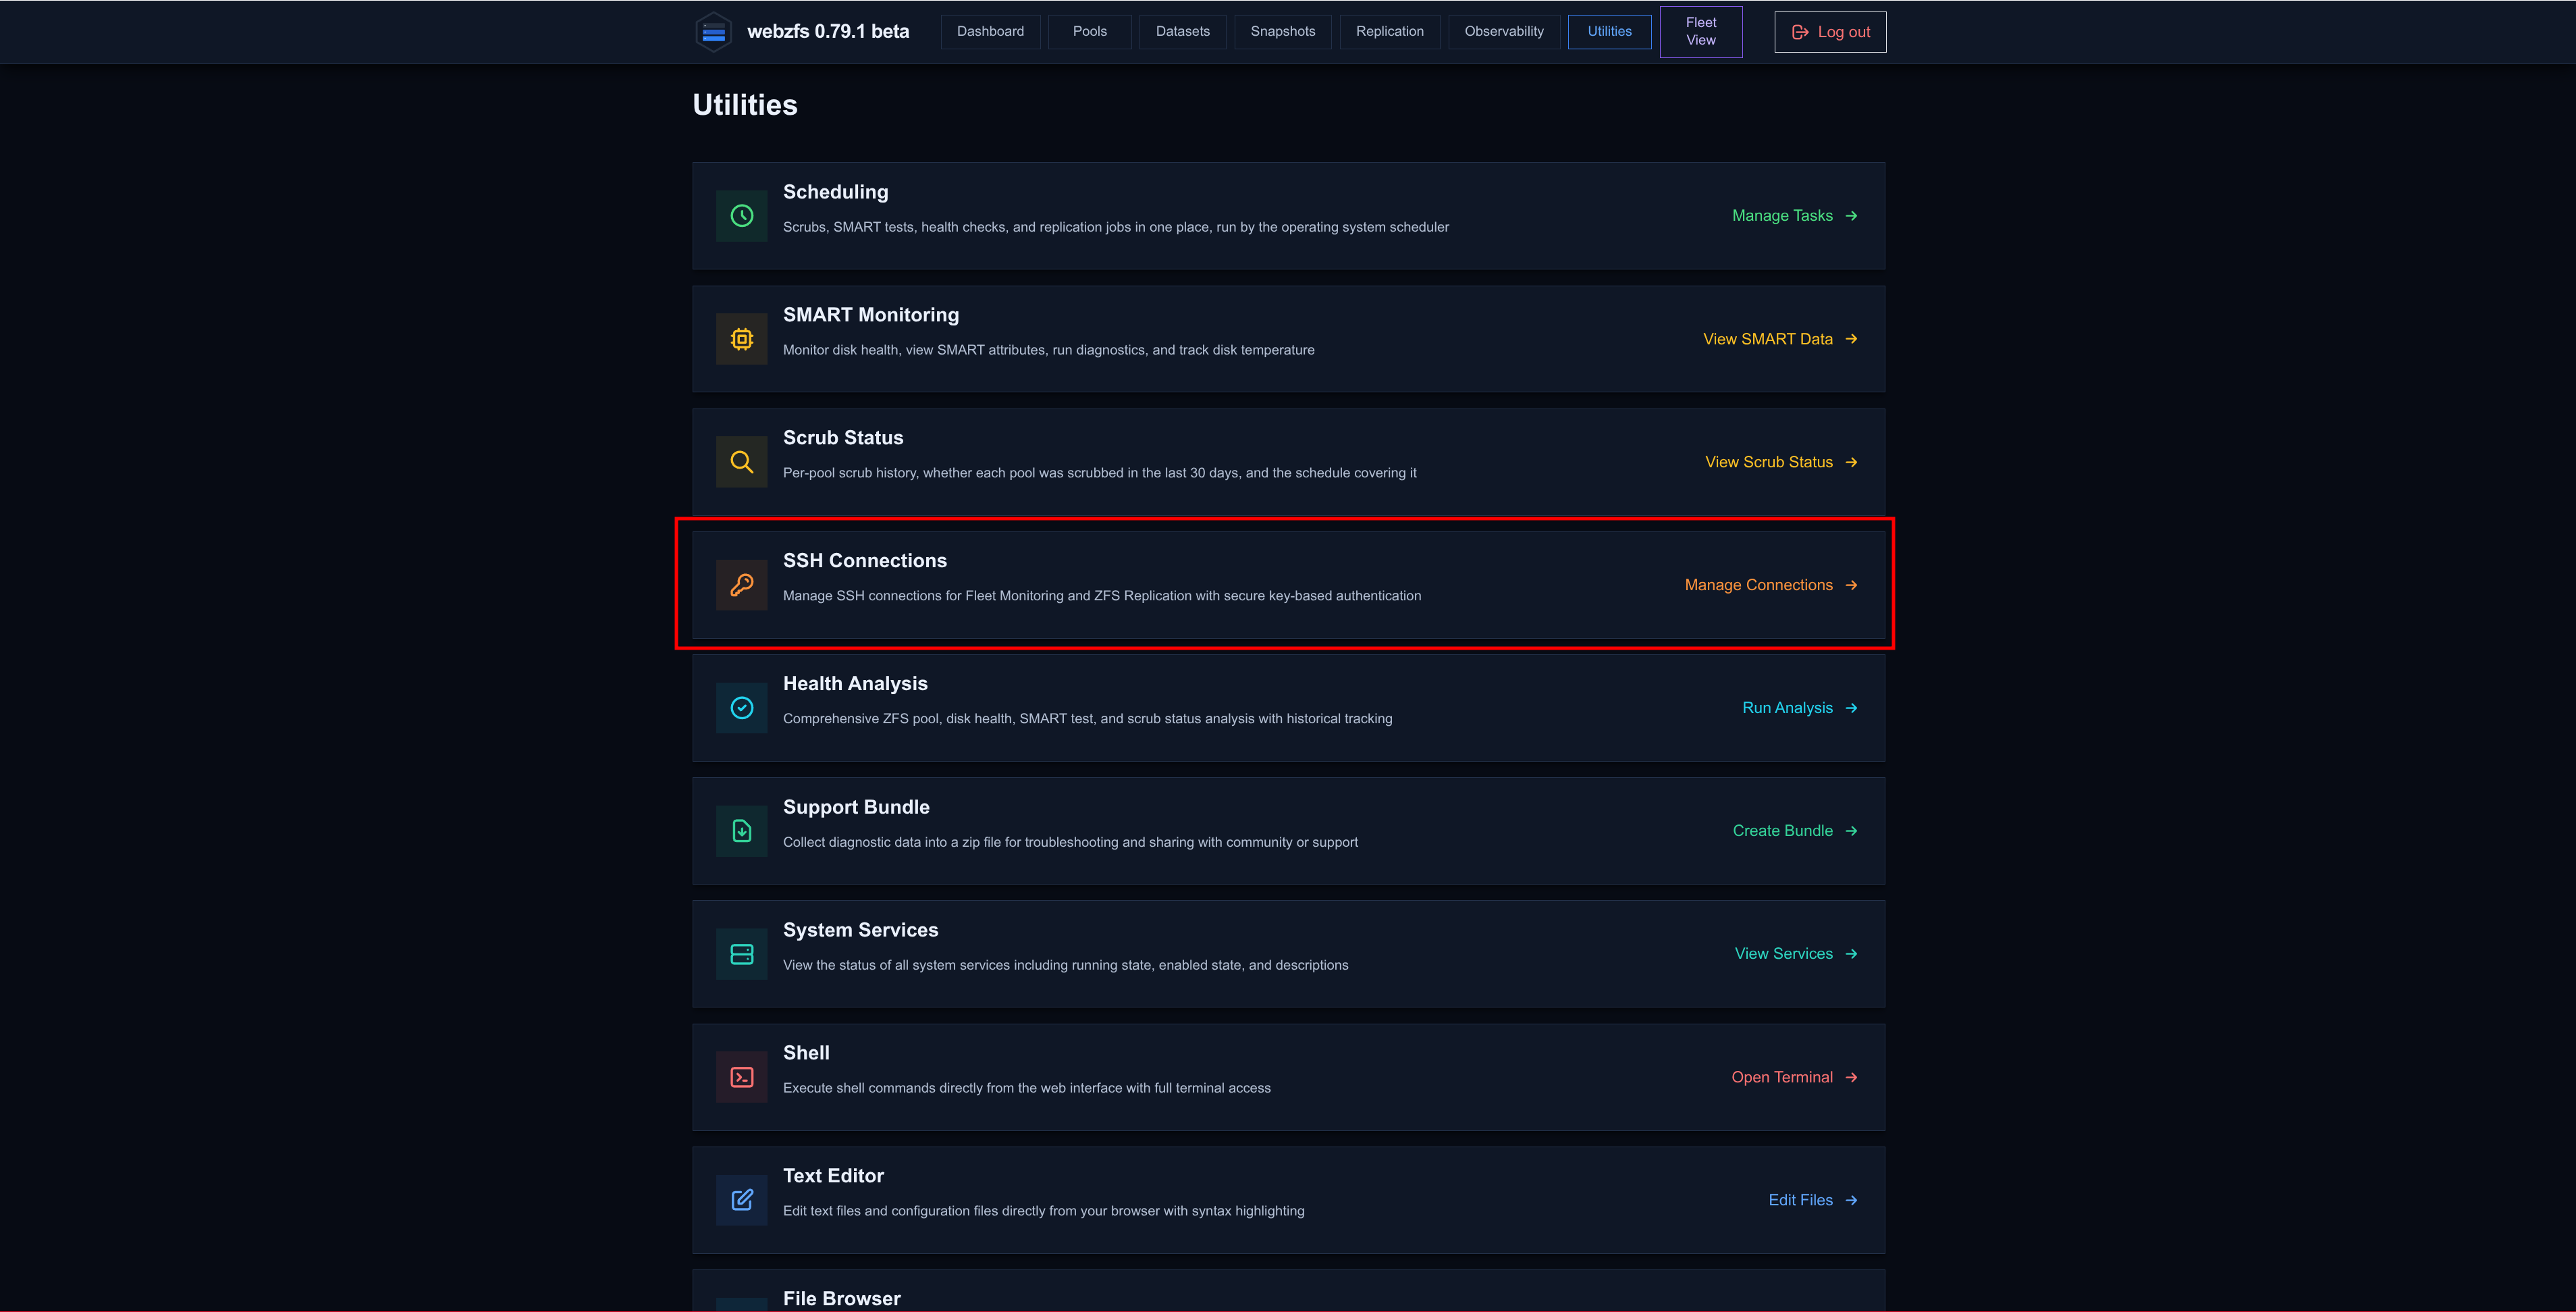
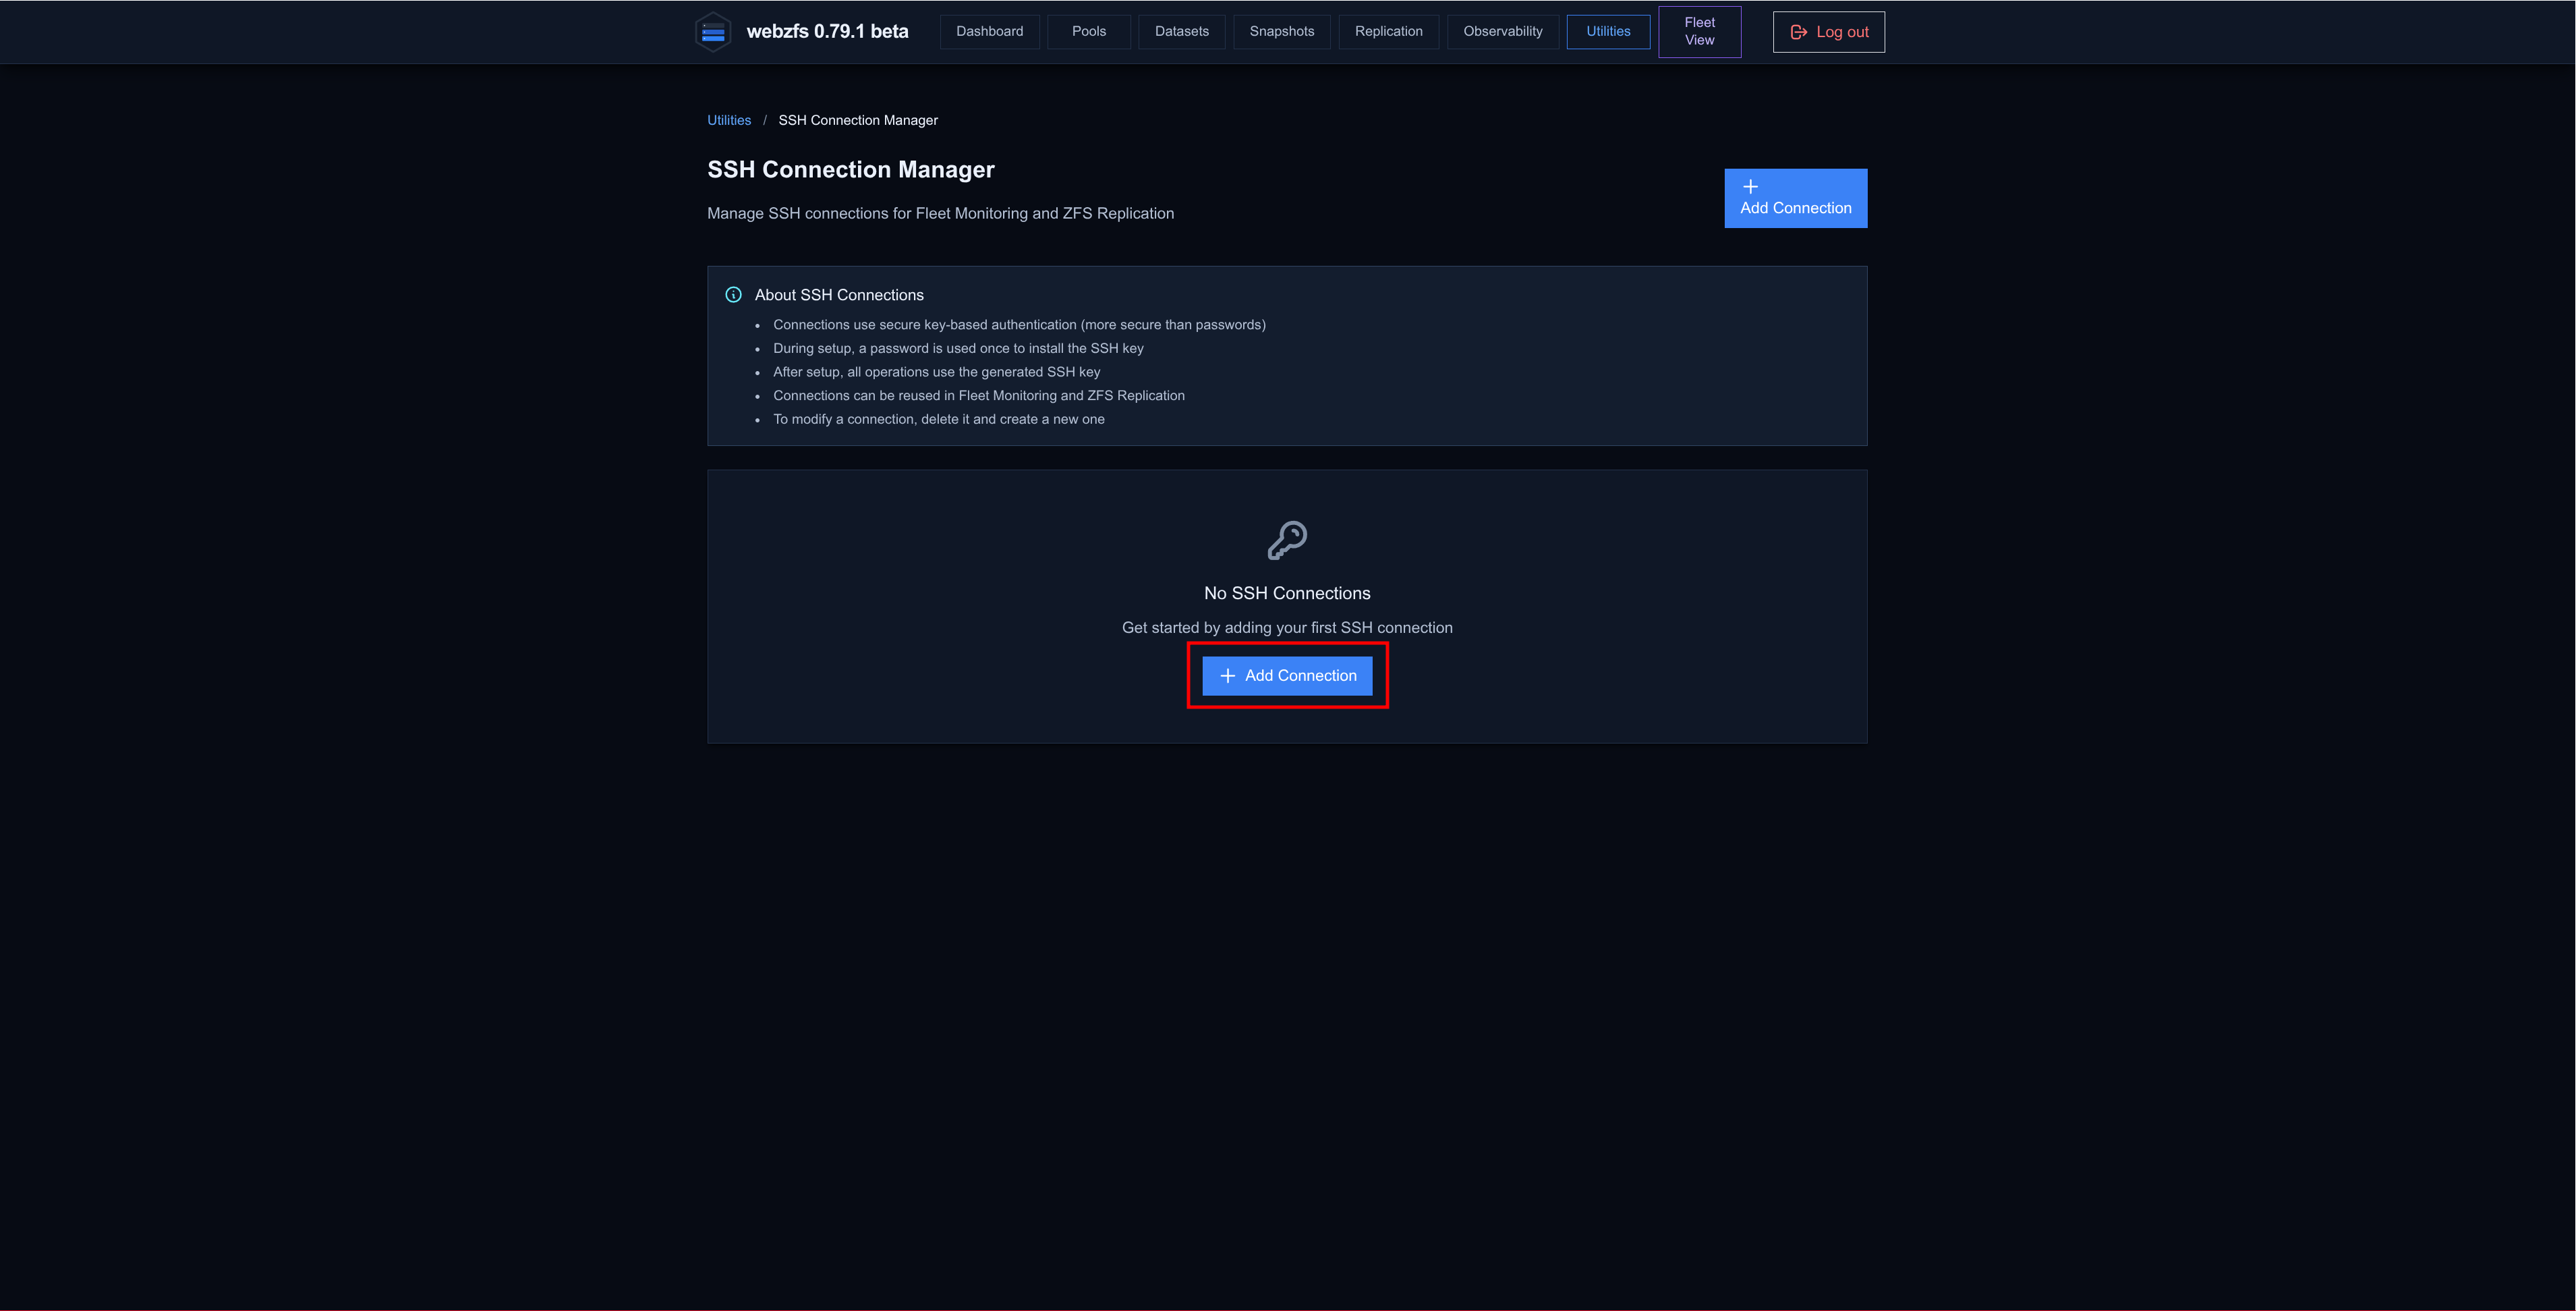
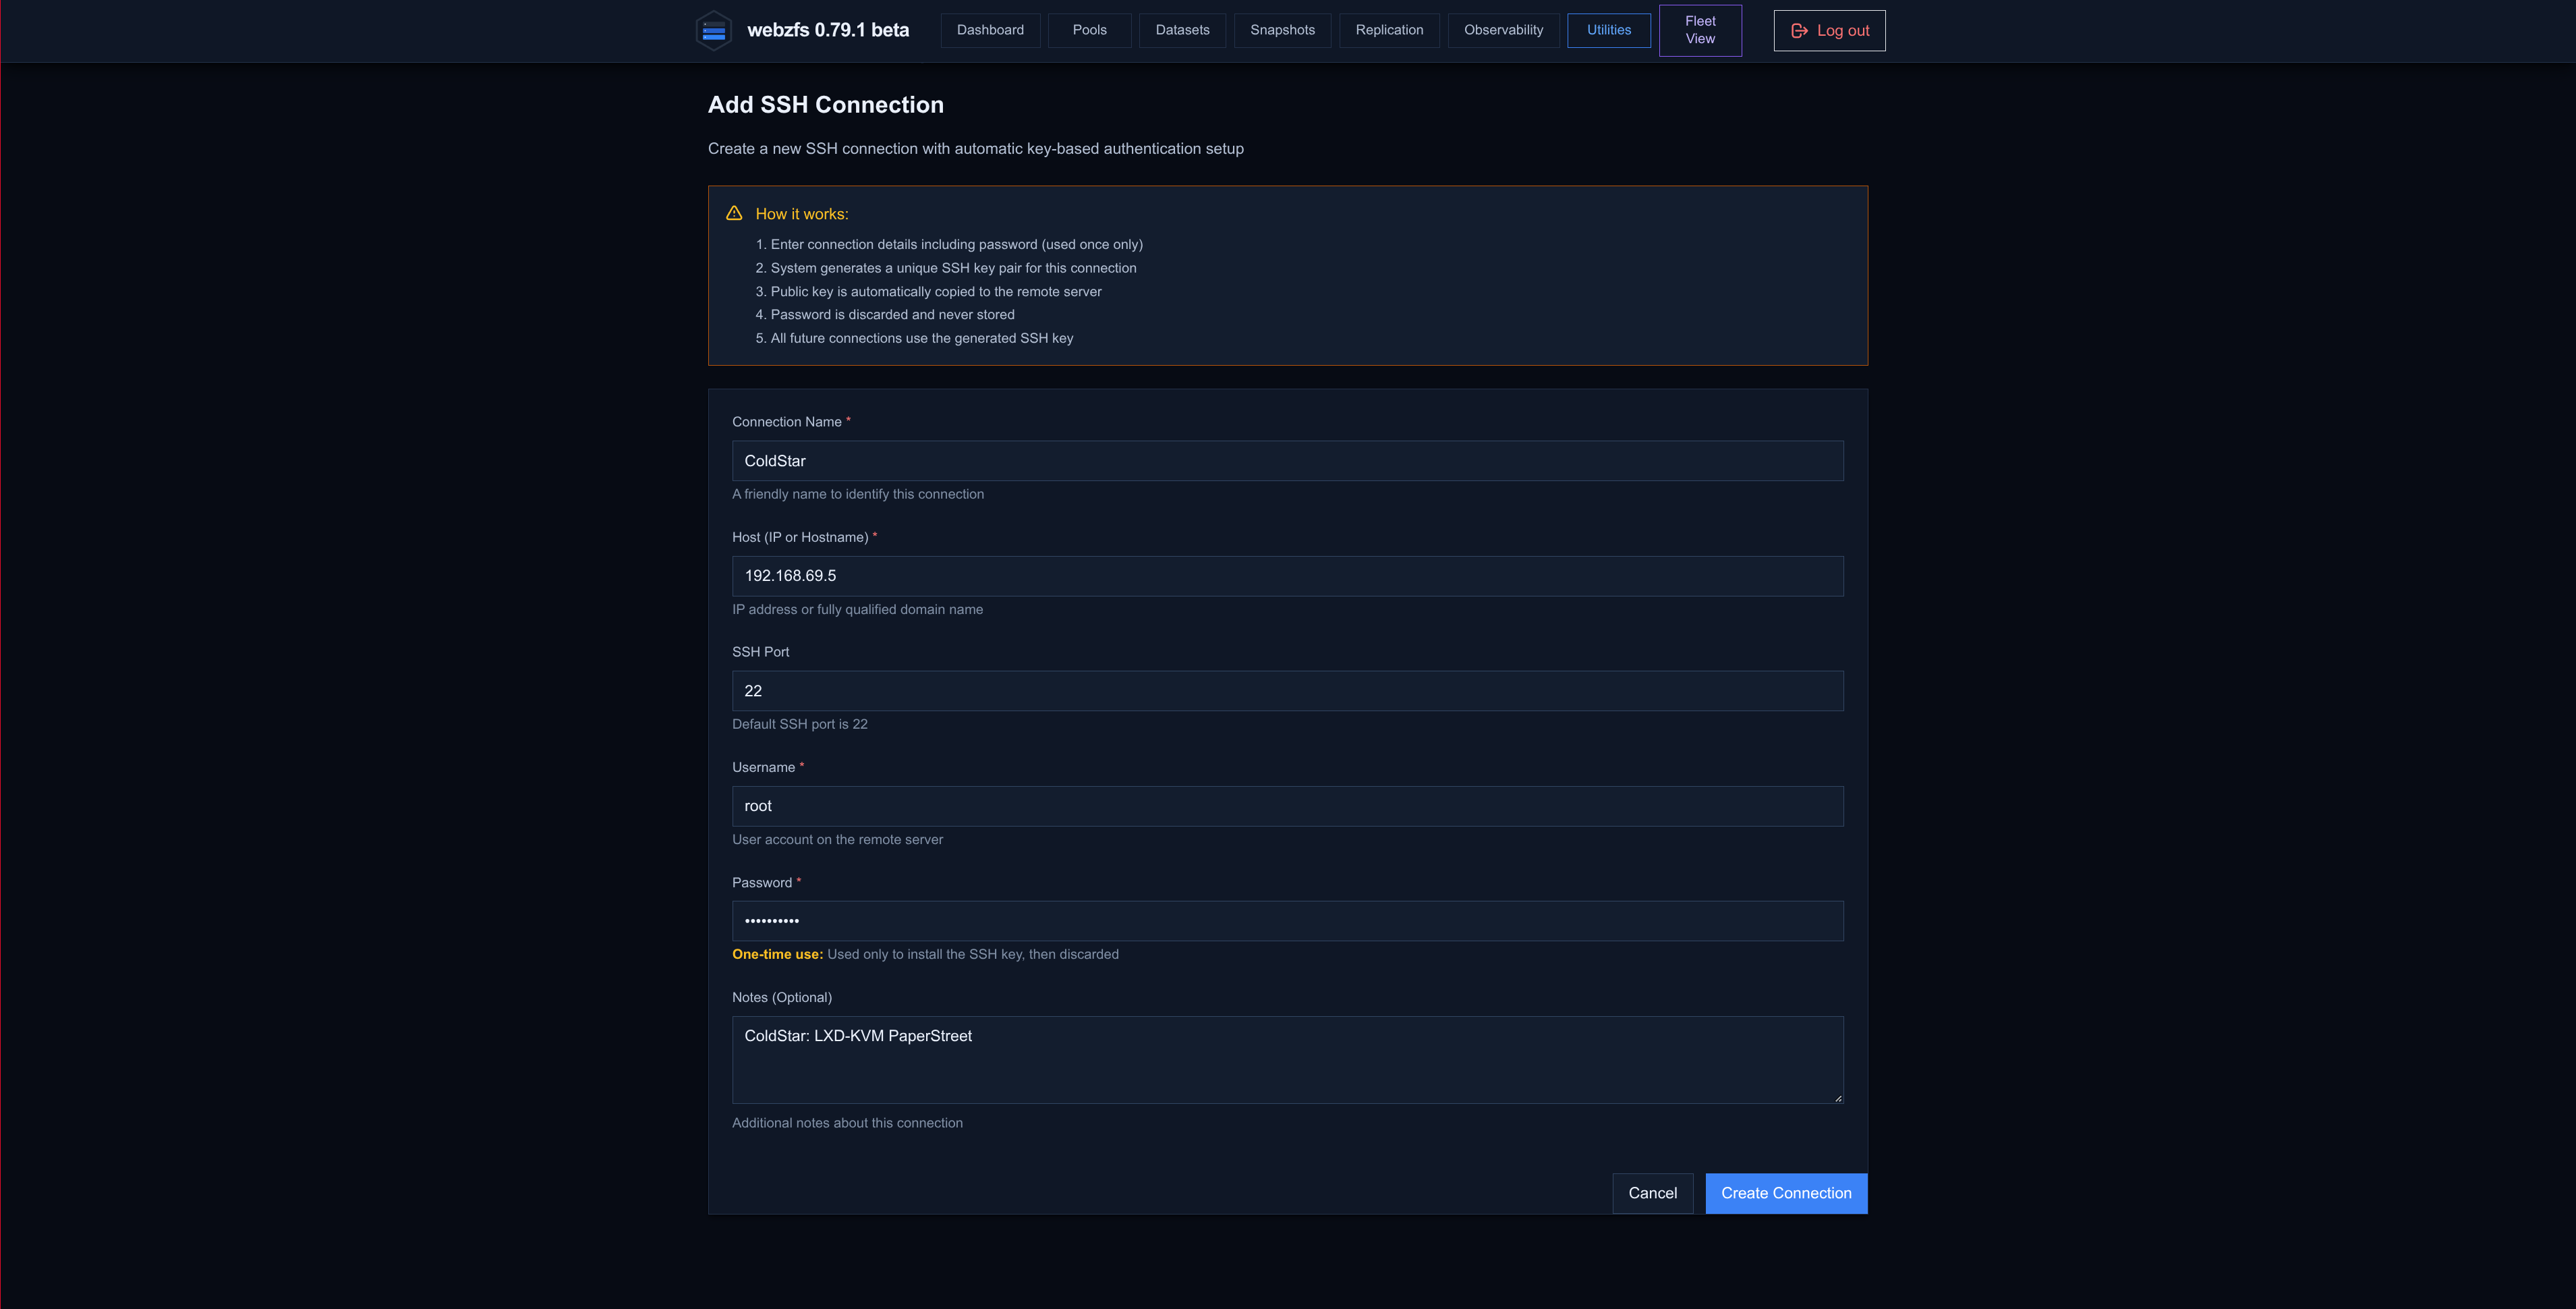
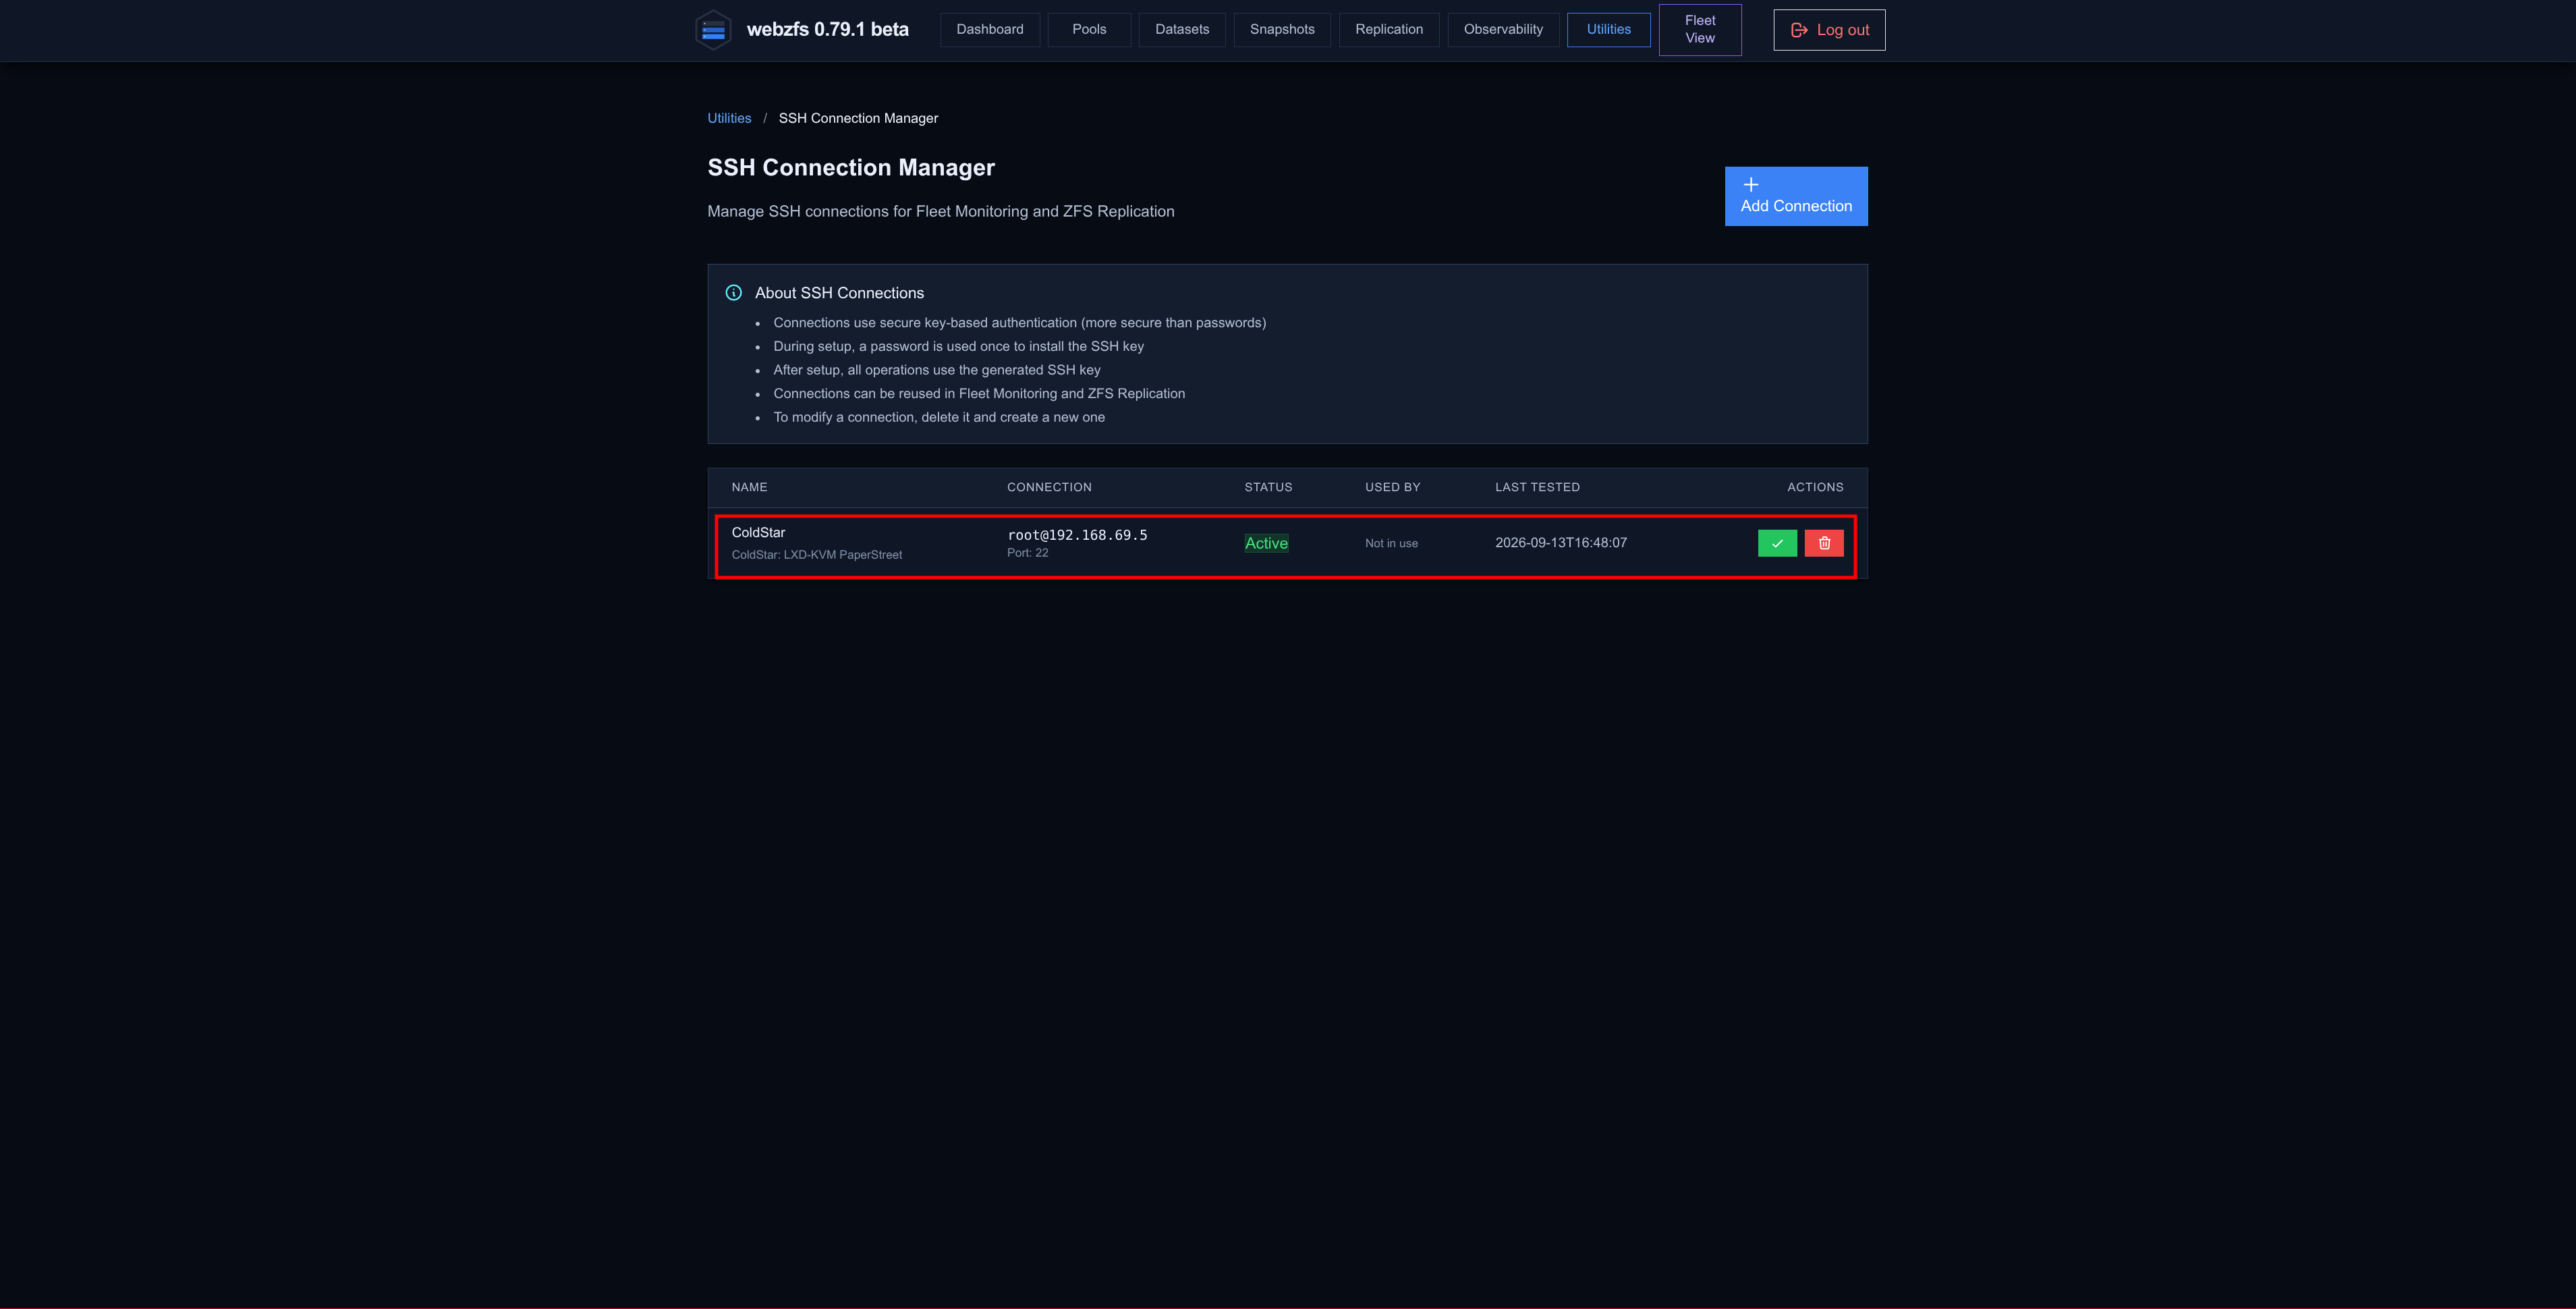
First of all we must register a server (in my case 192.168.69.5) accessible via SSH and provide the root password; this password will only be used once to authorize the SSH key that Syncoid will use later. It is advisable to change the password, perform the configuration and, once the key is authorized, revert the password.
To do so we access the Utilities -> SSH Connections section:
|
|
|
|
On the SSH server, root access has been allowed so that it can manage ZFS without problems:
PermitRootLogin yes
Once this is done we can configure Syncoid.
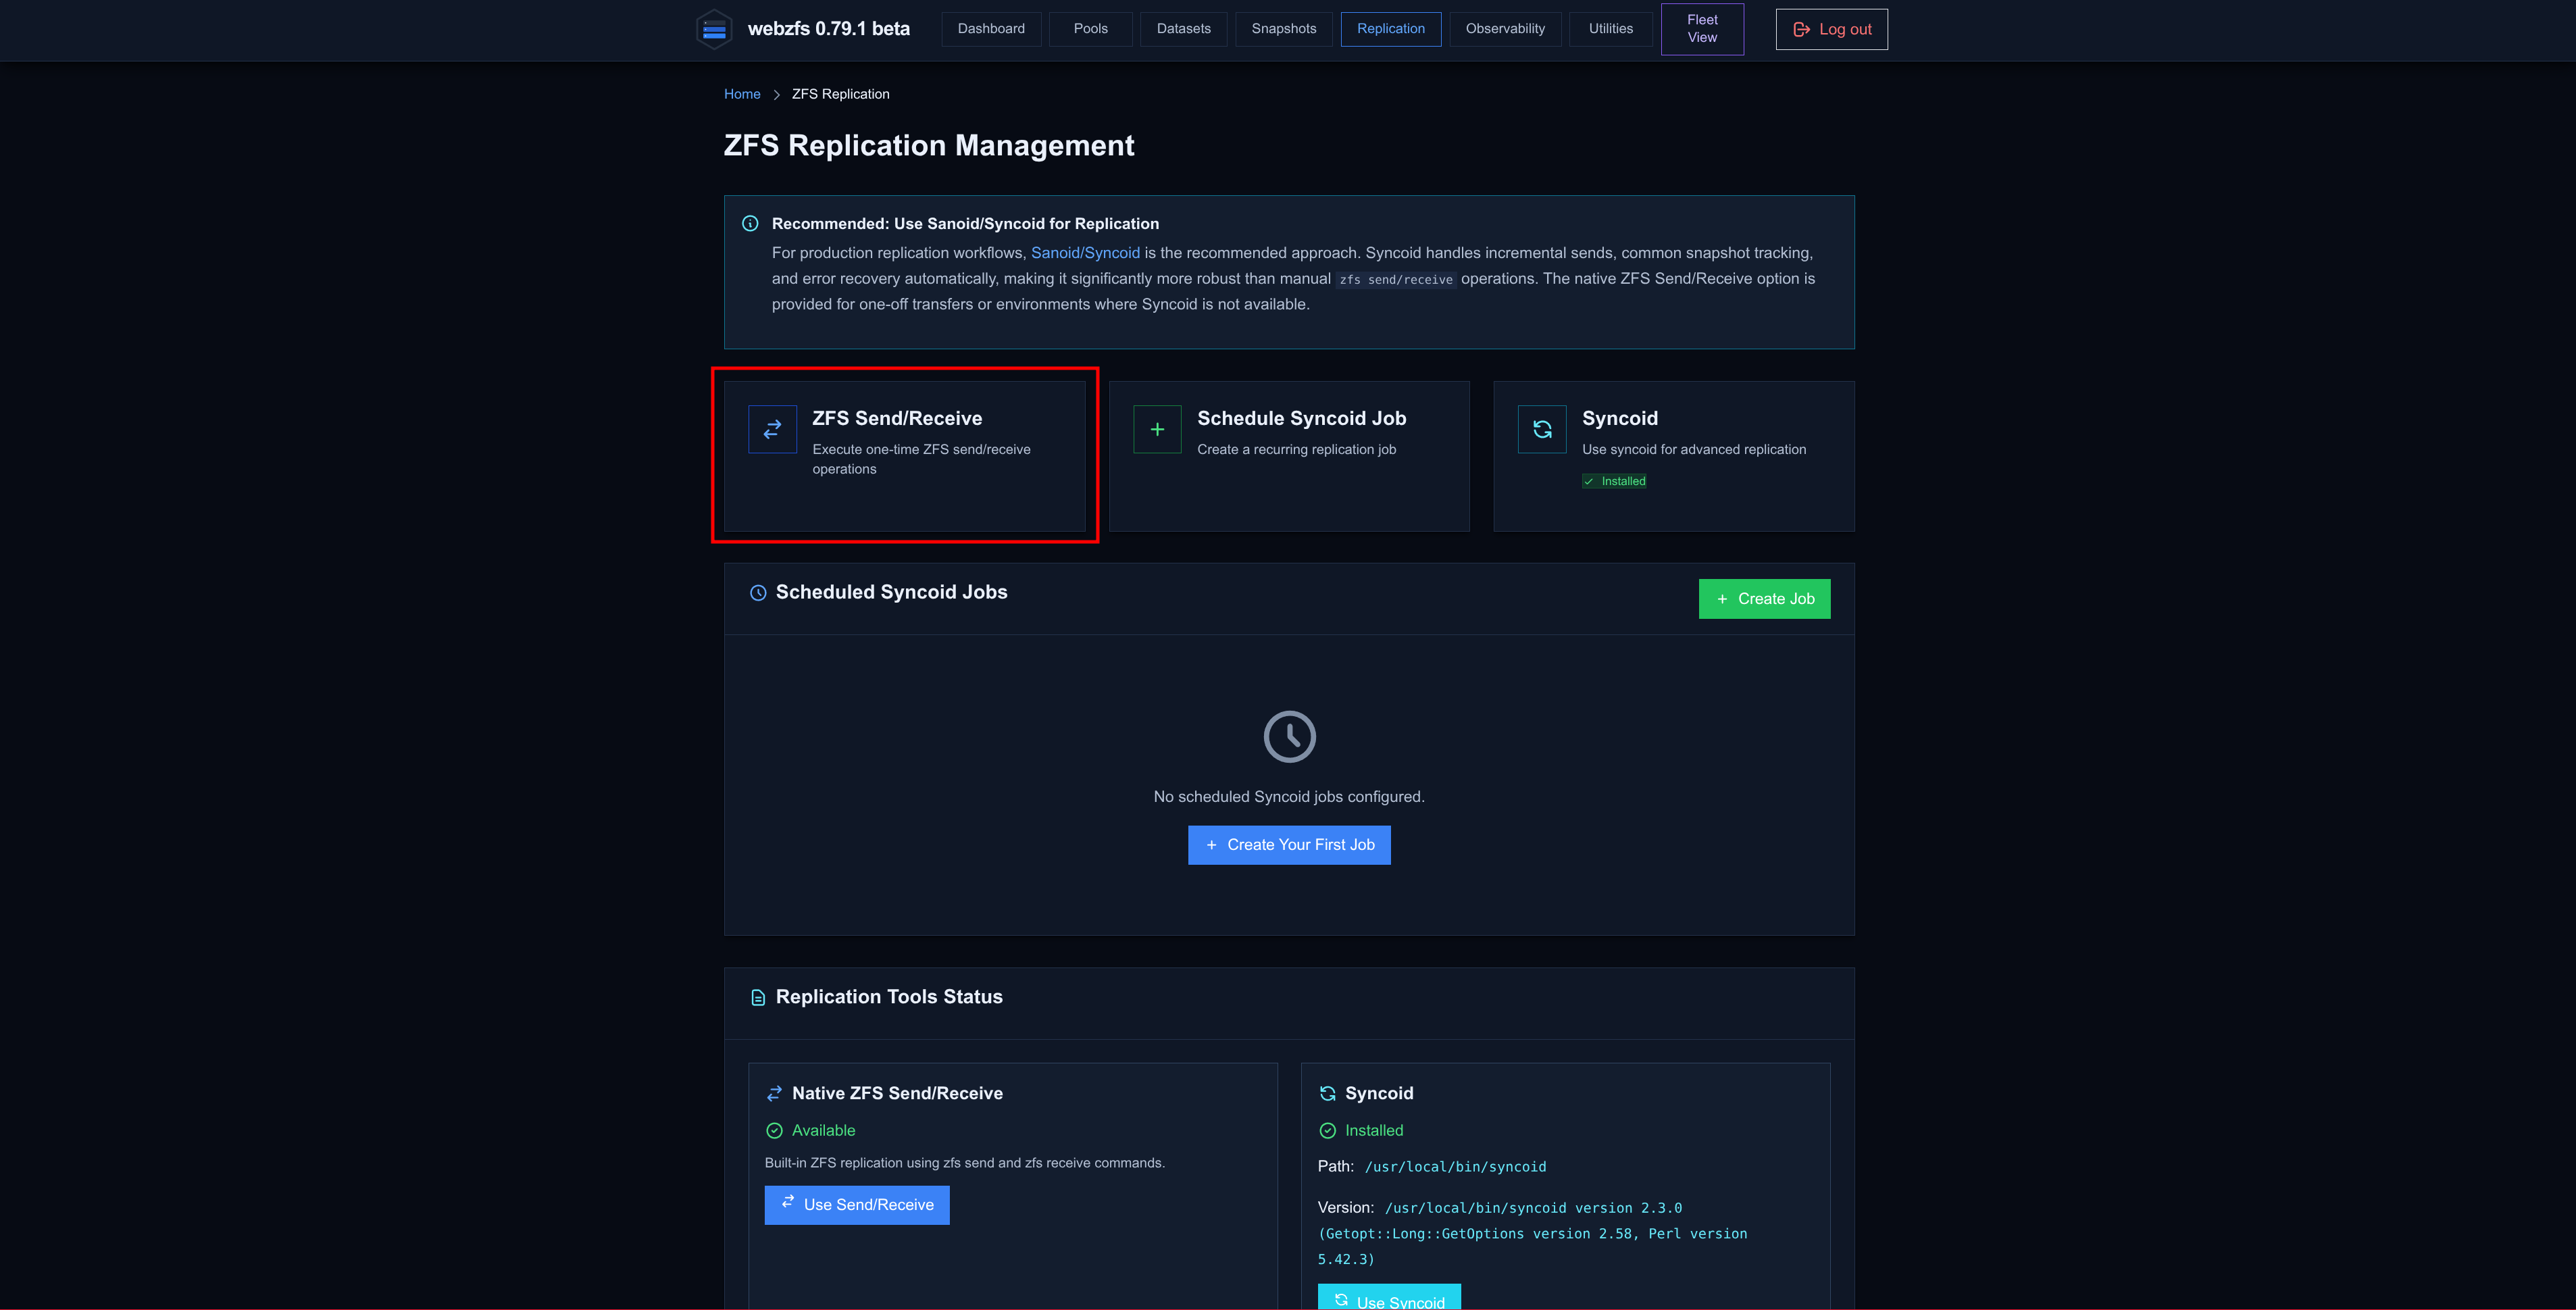
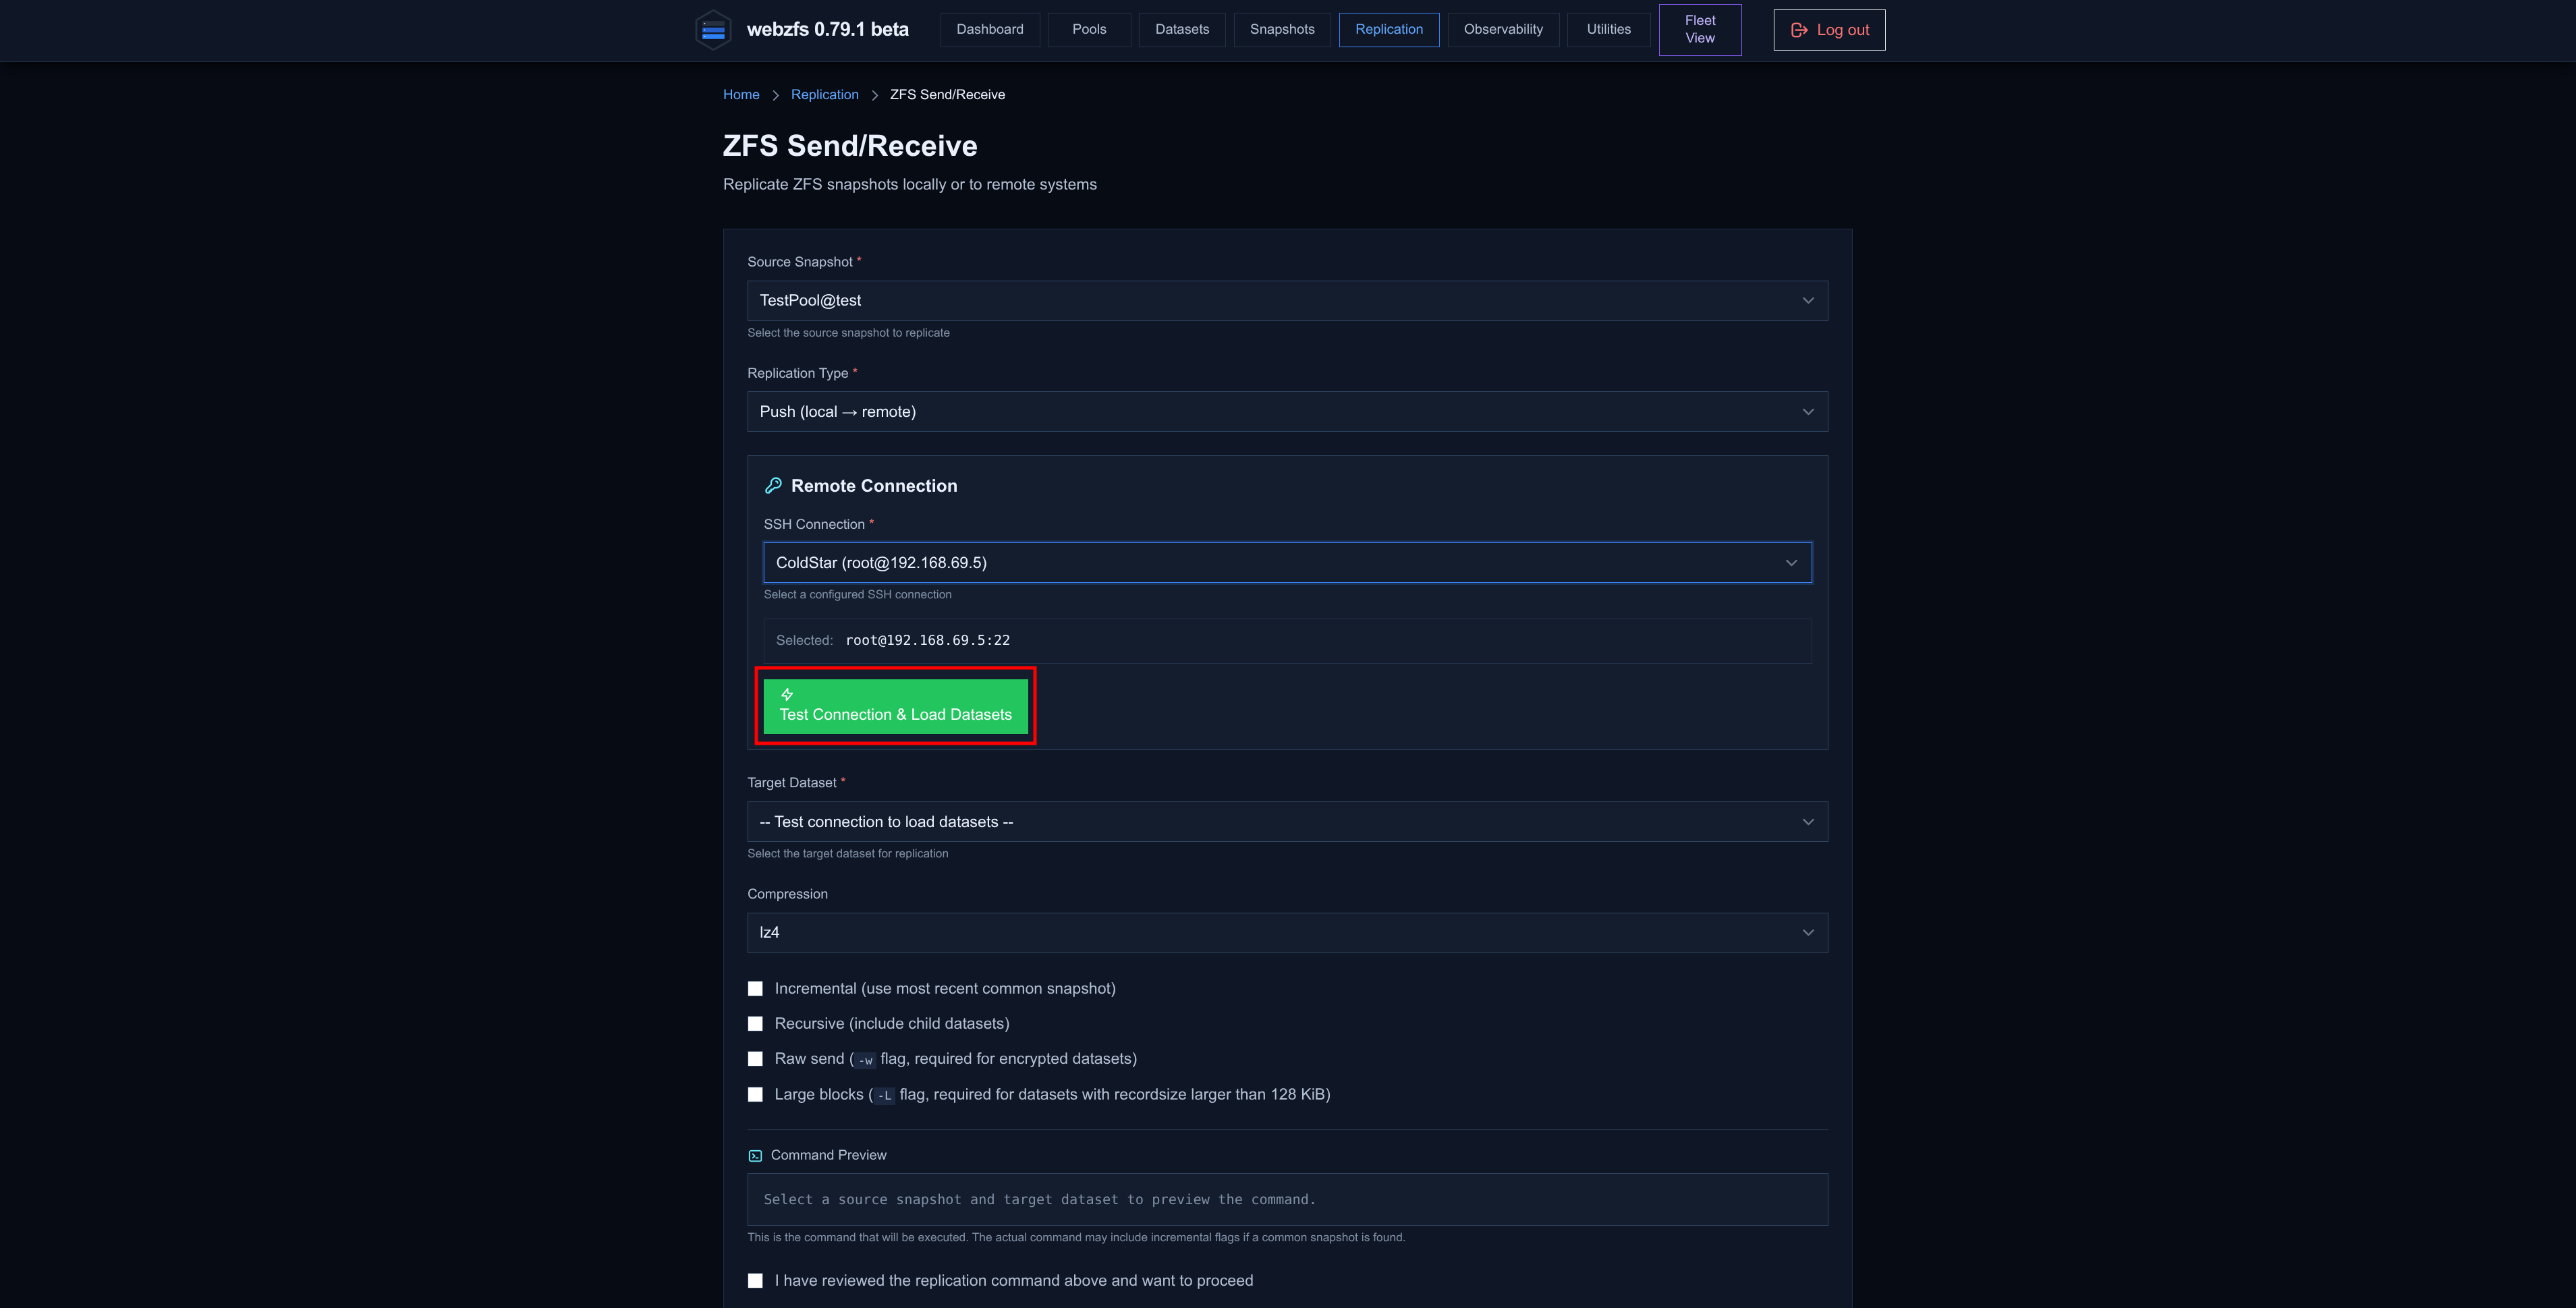
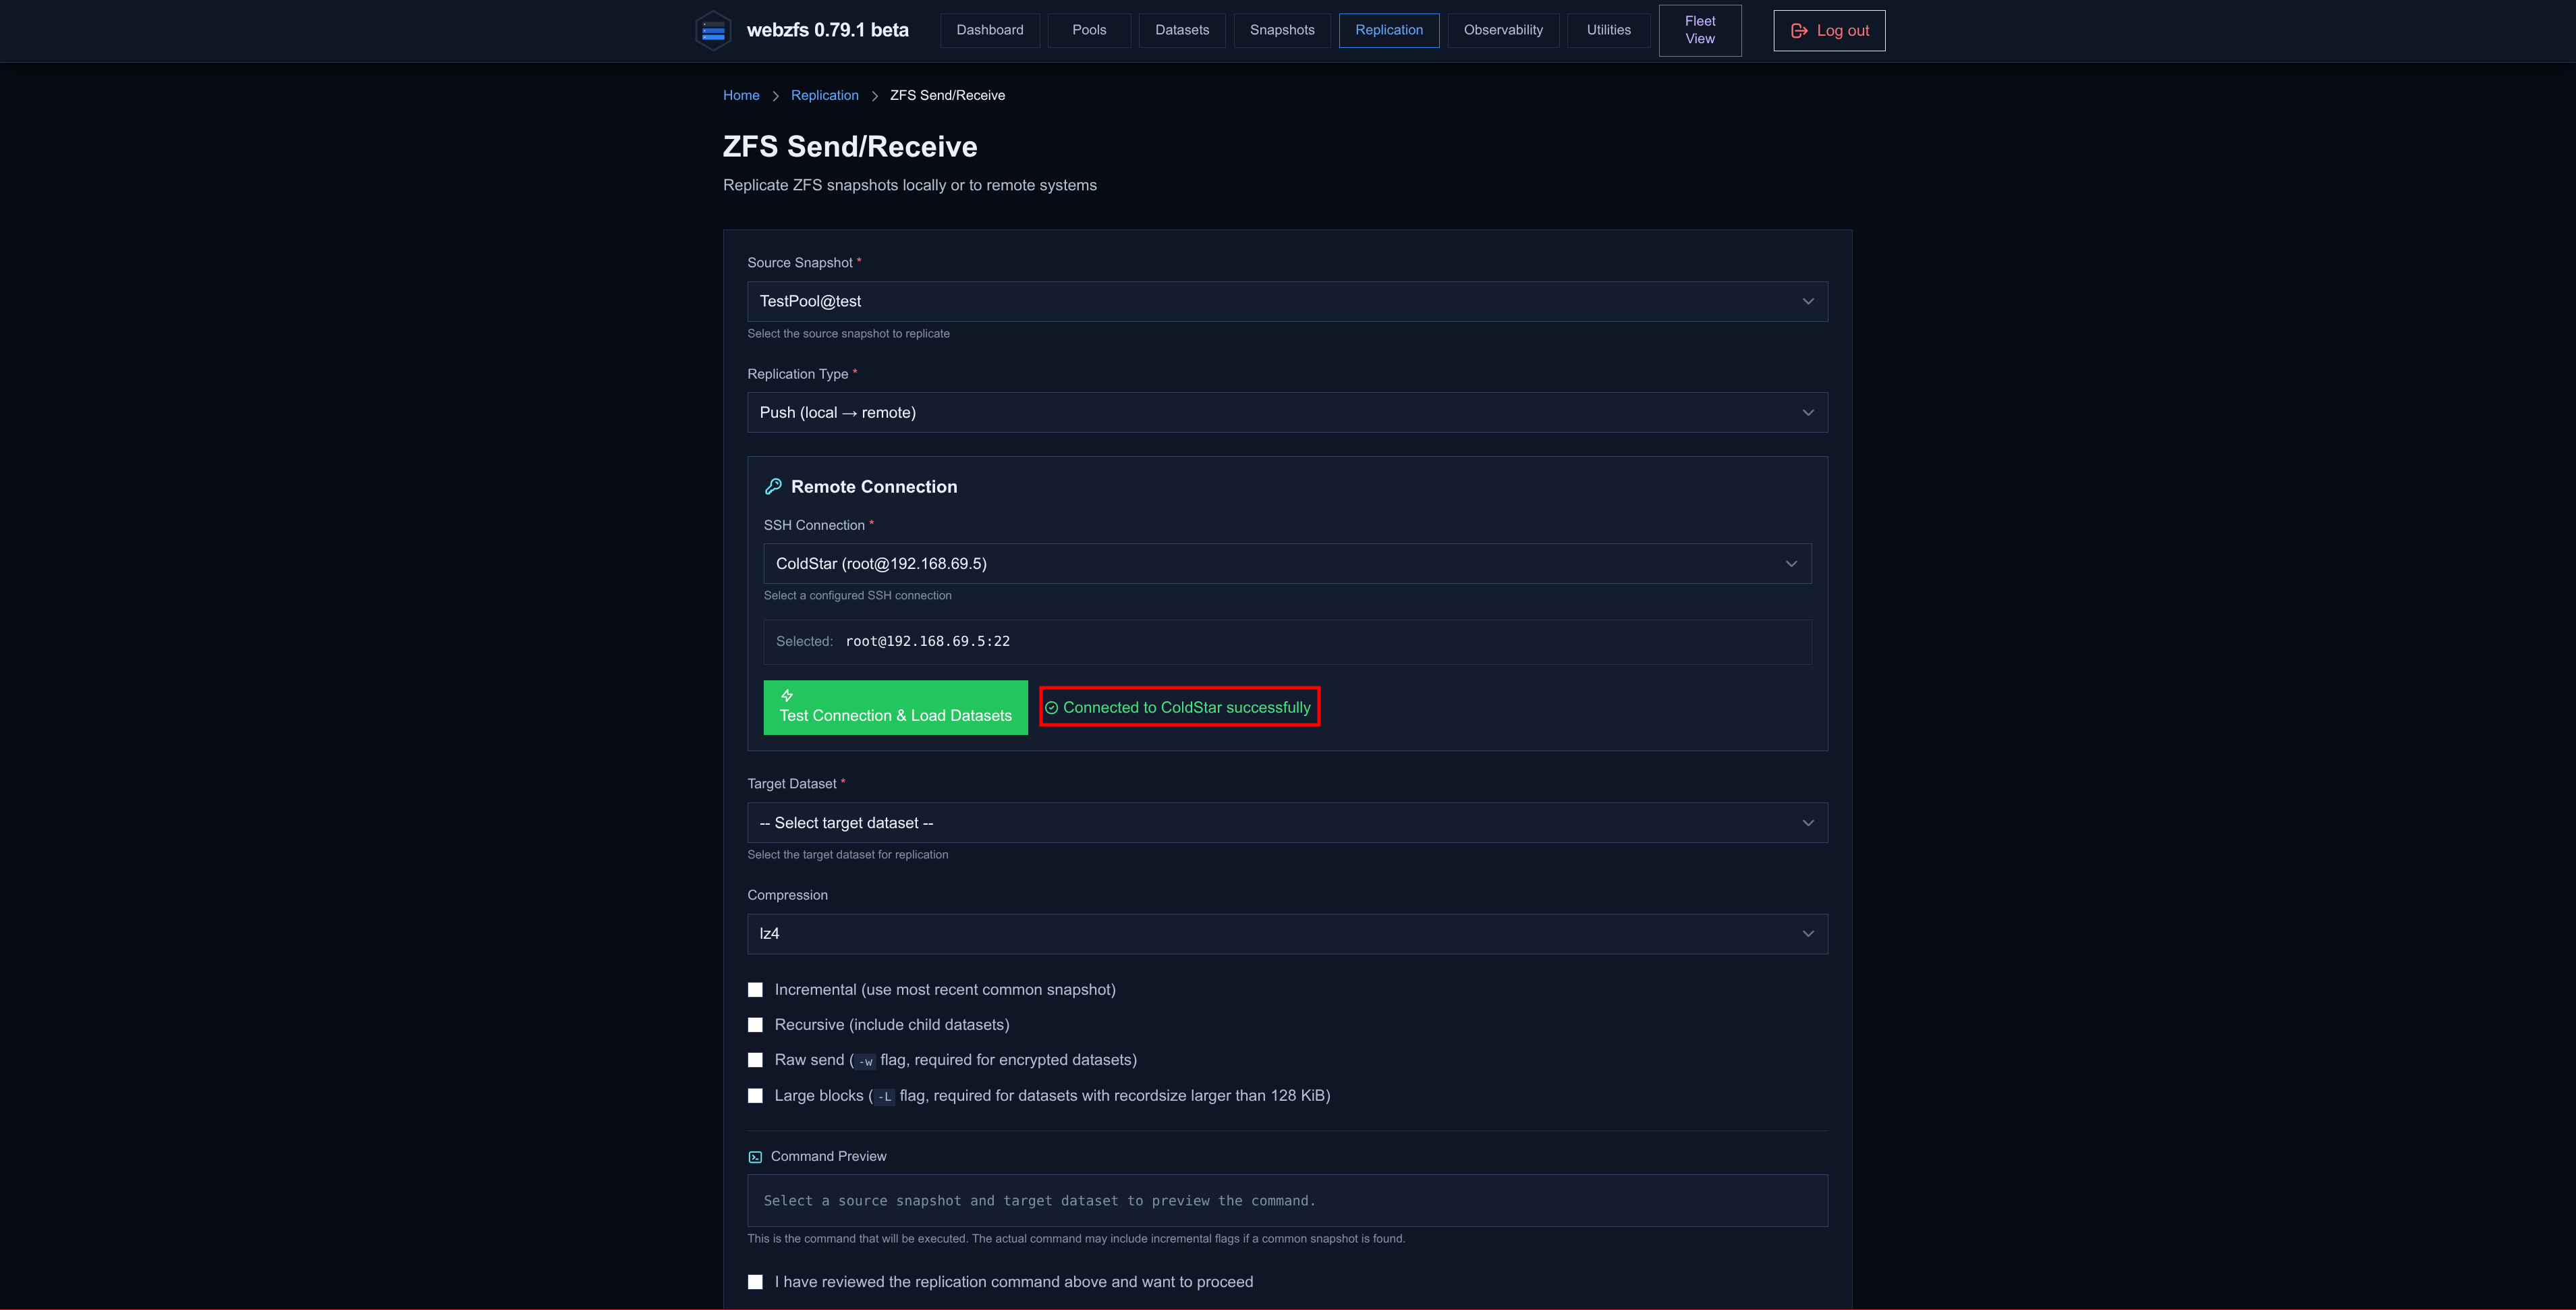
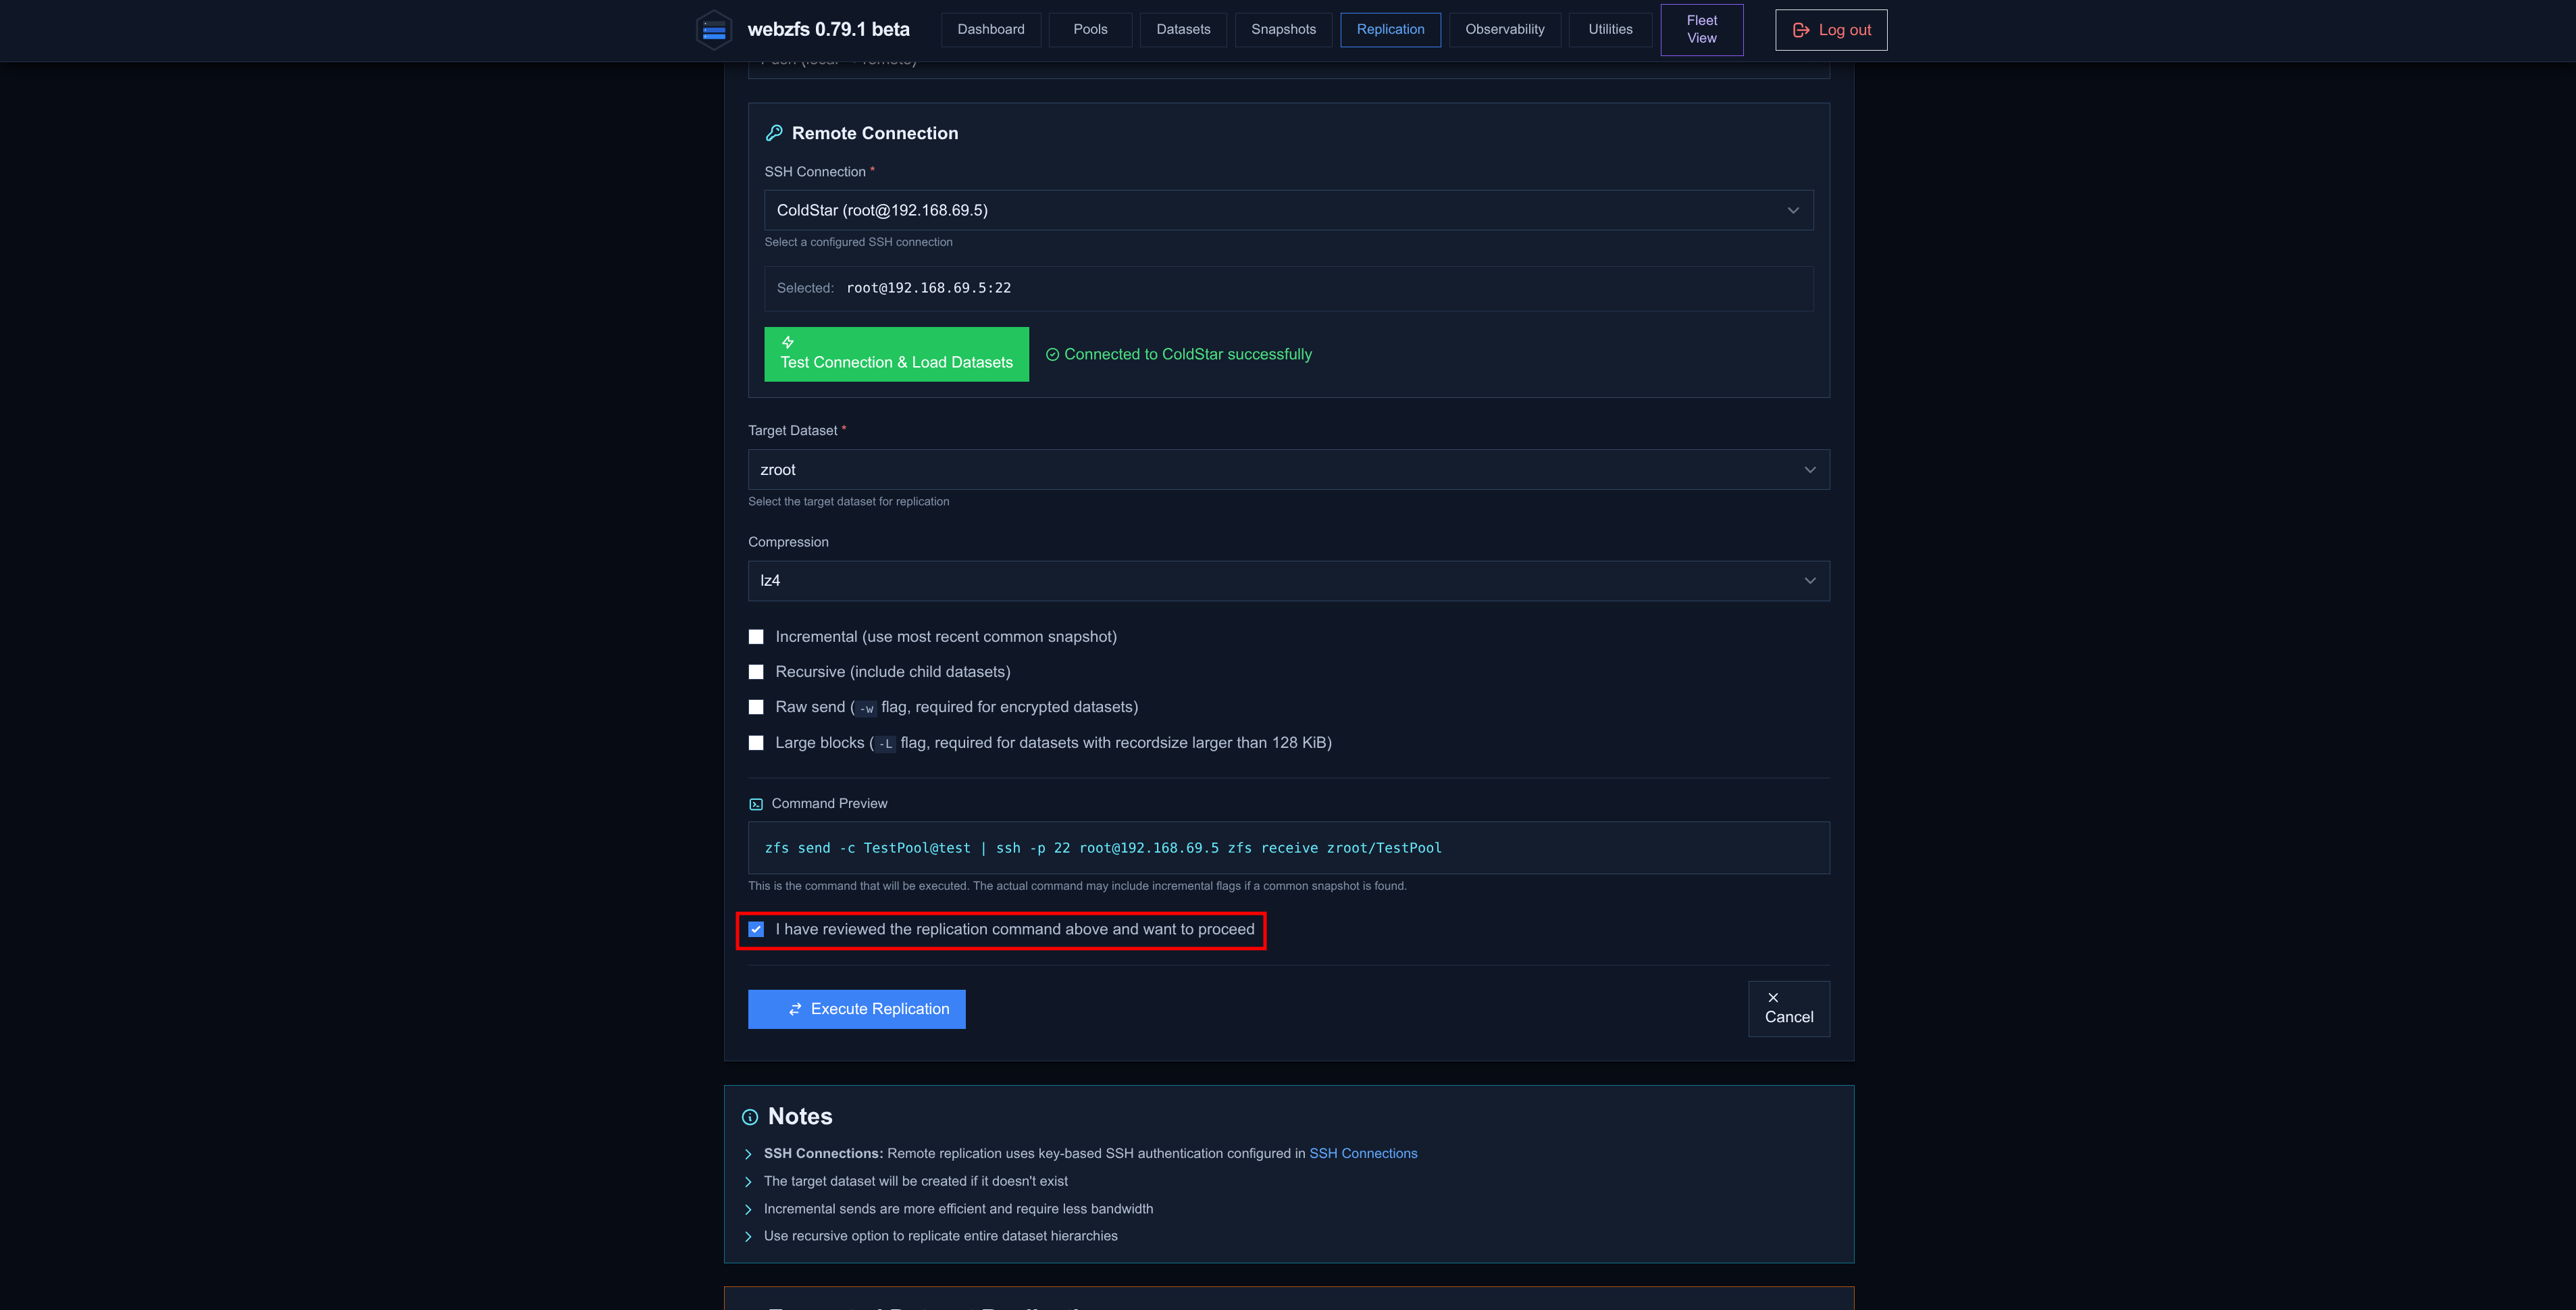
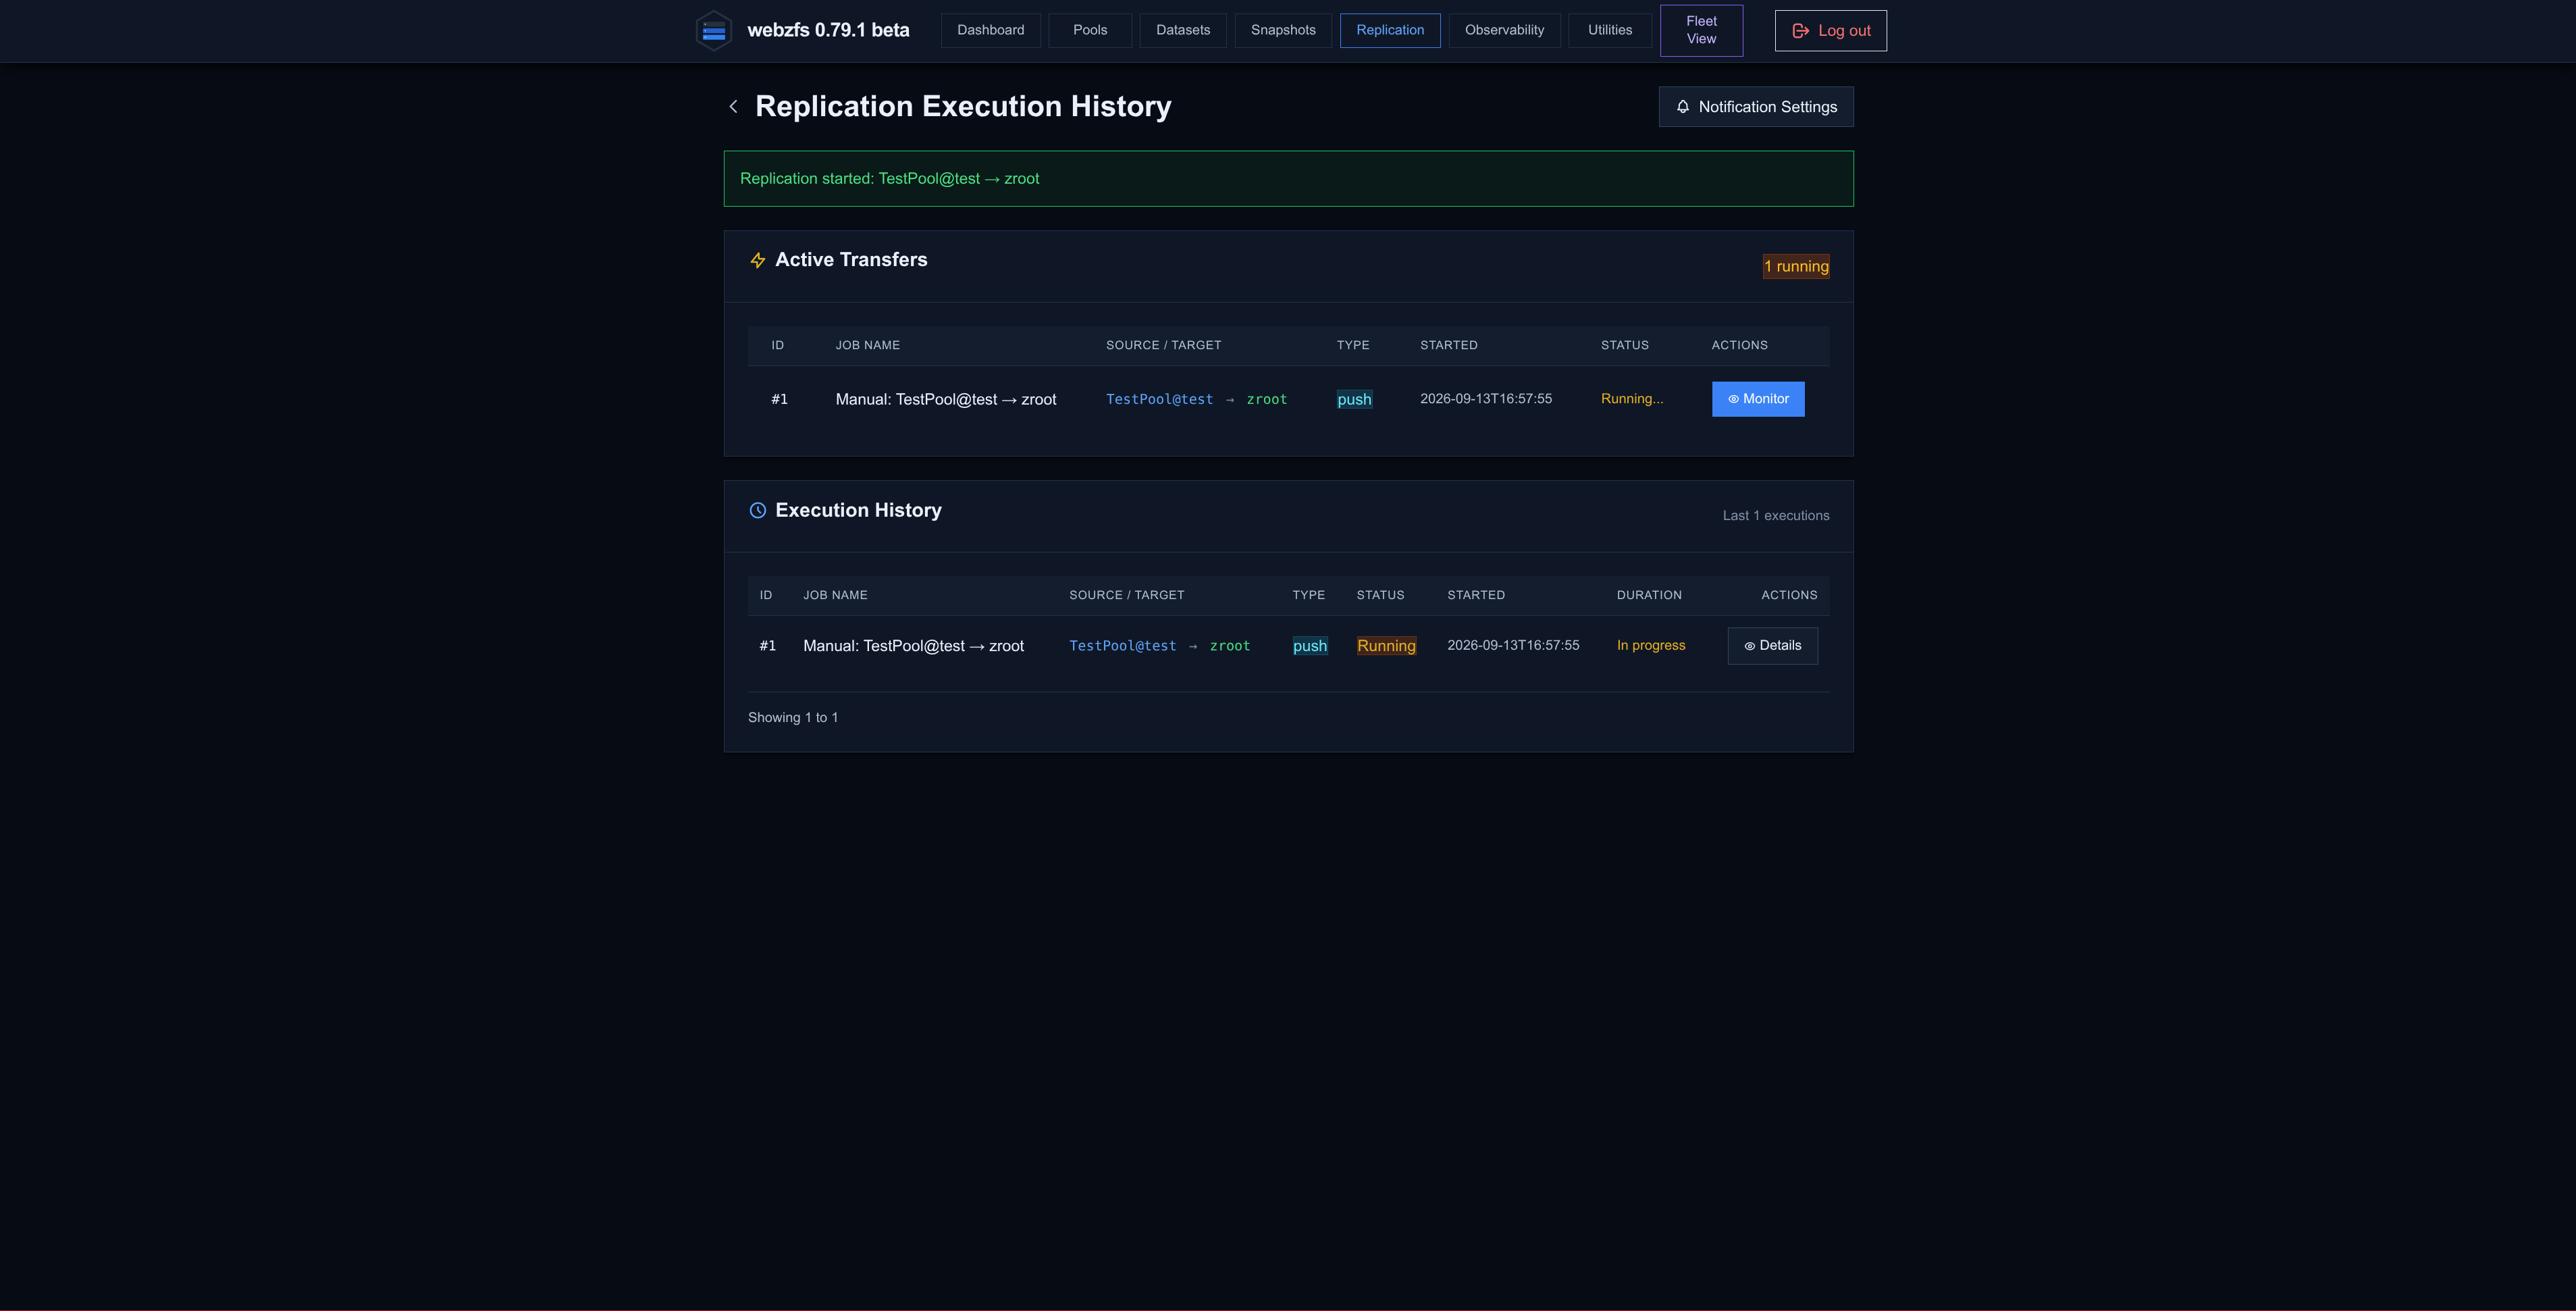
From this section we can run ZFS Send/Receives manually; we just need to check connectivity first and confirm that the command to run is correct:
|
|
|
|
|
On the remote server we can see that the test snapshot has been created under the TestPool dataset:
ColdStar # ~> zfs list zroot/TestPool
NAME             USED  AVAIL  REFER  MOUNTPOINT
zroot/TestPool   112K   382G   112K  /zroot/TestPool

ColdStar # ~> zfs list -t snapshot
NAME                  USED  AVAIL  REFER  MOUNTPOINT
zroot/TestPool@test     0B      -   112K  -
The next option Schedule Syncoid Job lets us schedule Syncoid jobs so that the snapshots are replicated automatically.
We must indicate the source, the destination and how often the synchronization should be performed:
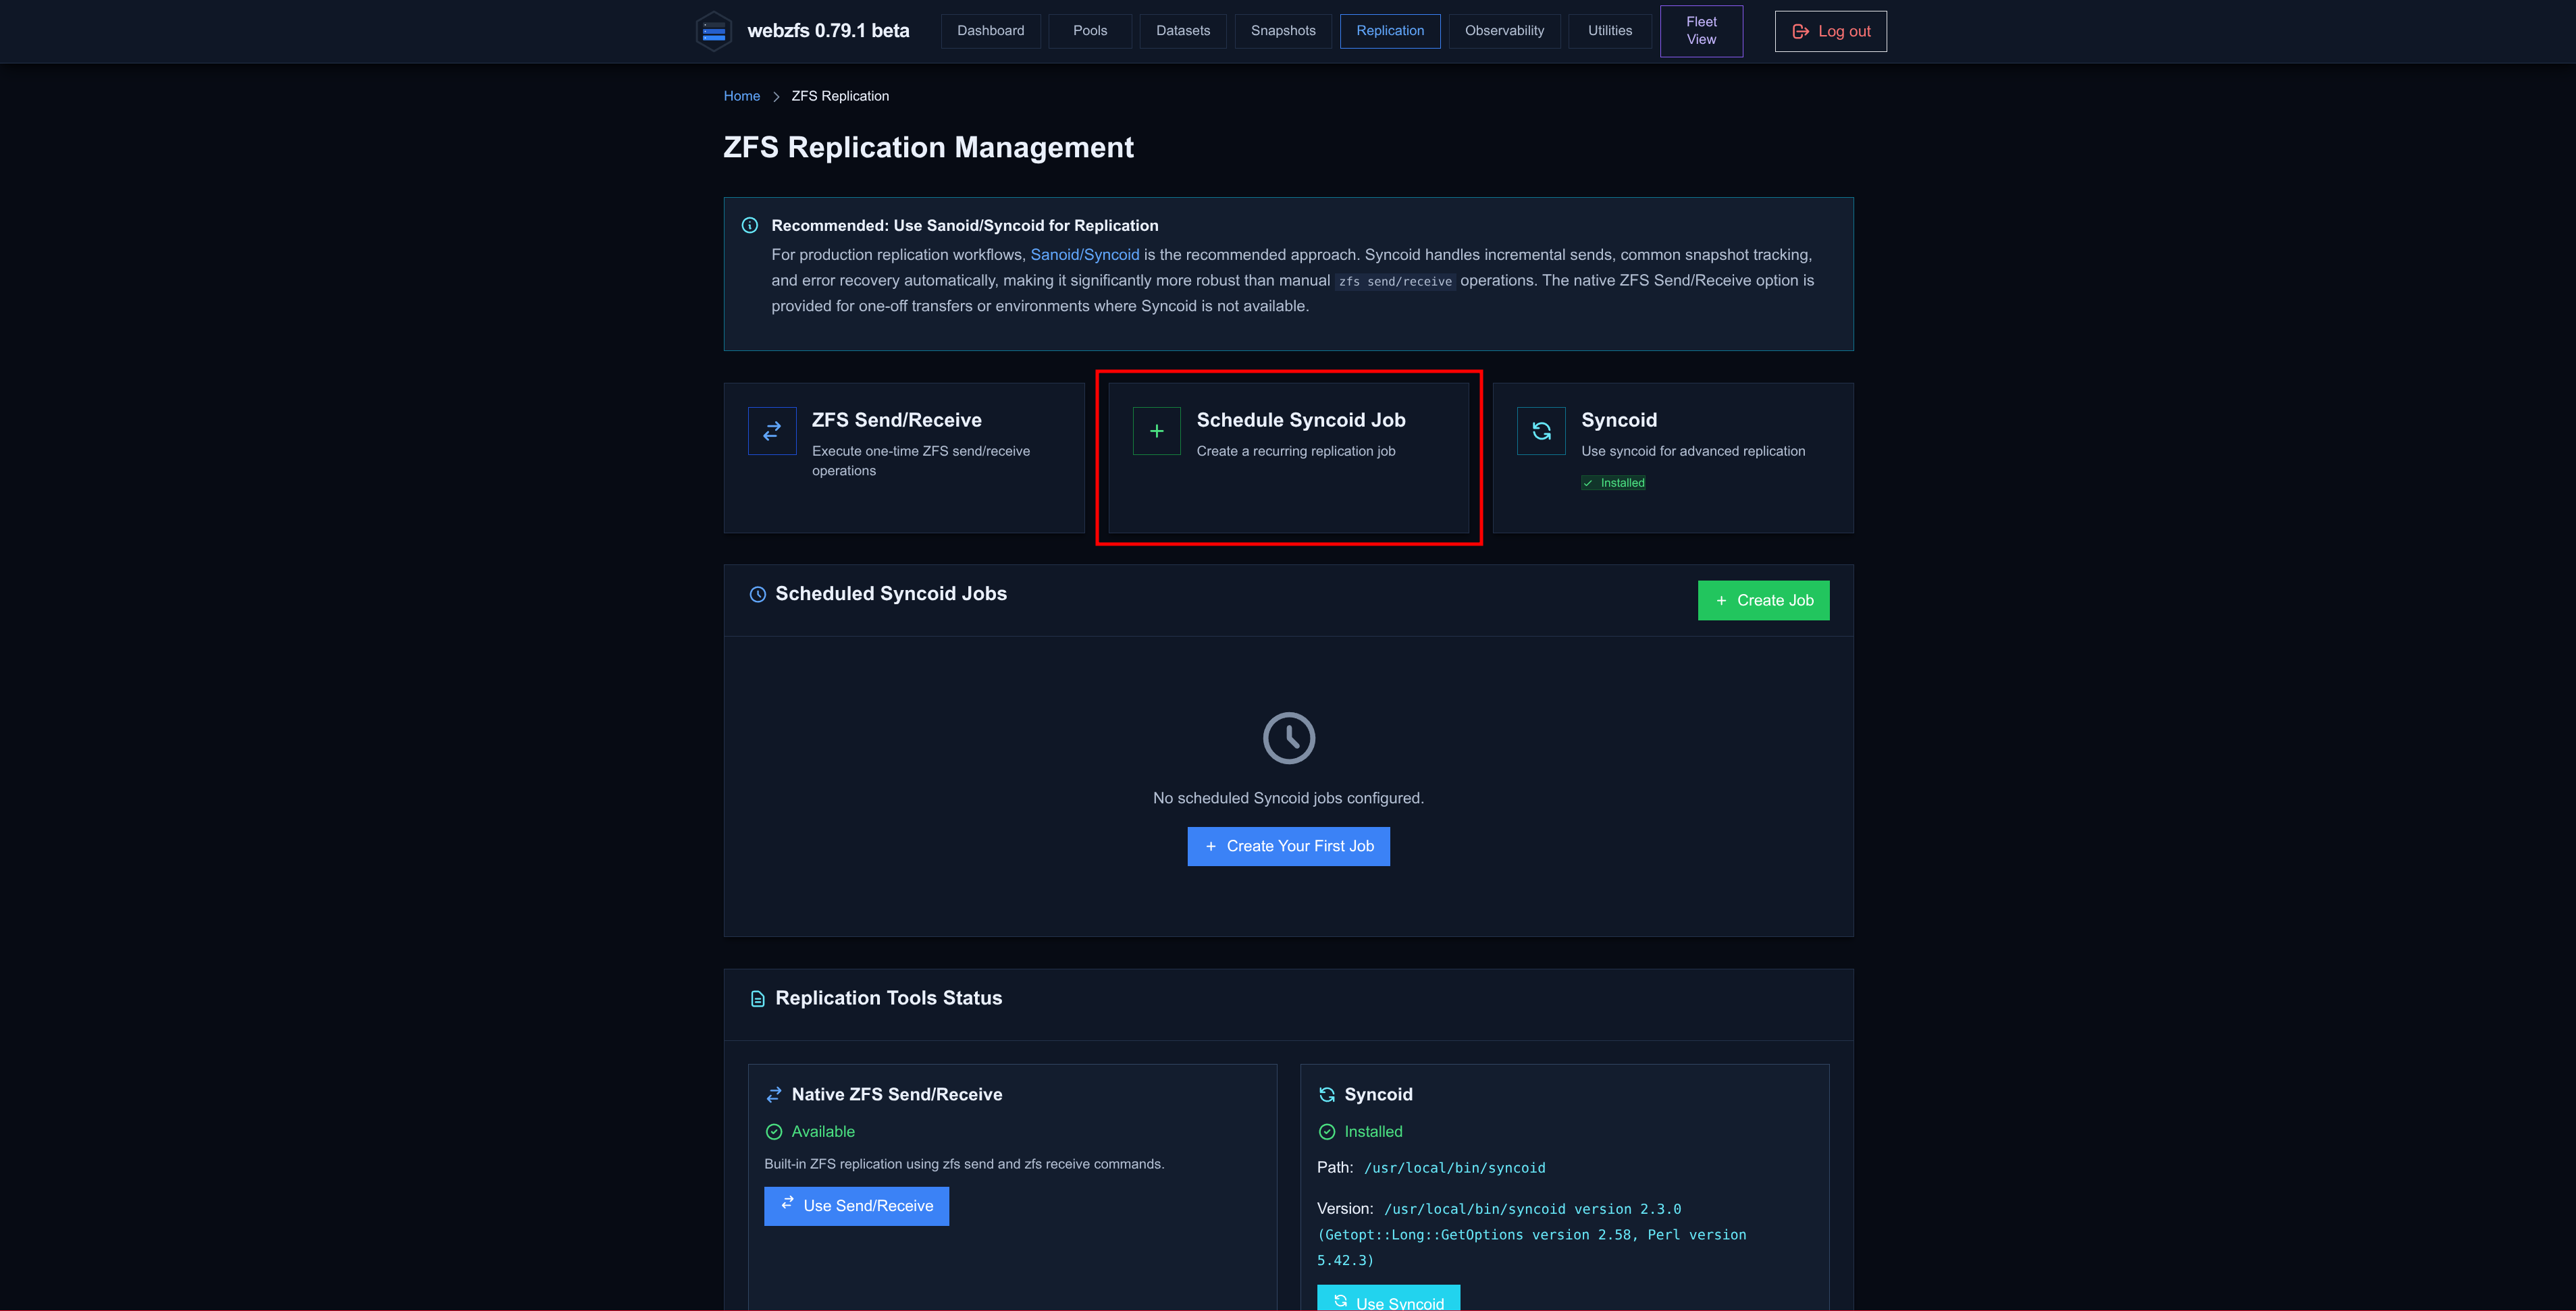
Here we must make a distinction depending on whether we have configured an auto-snapshotting policy via Sanoid or not:
- With auto-snapshotting (I delete the
TestPooldataset at the destination before proceeding): We can letSyncoidgenerate a snapshot each time the job runs. At the source it will create a new snapshot and delete the old one on each run, and at the destination it will receive the new snapshot and delete the old one. This way the last snapshot remains on both sides.
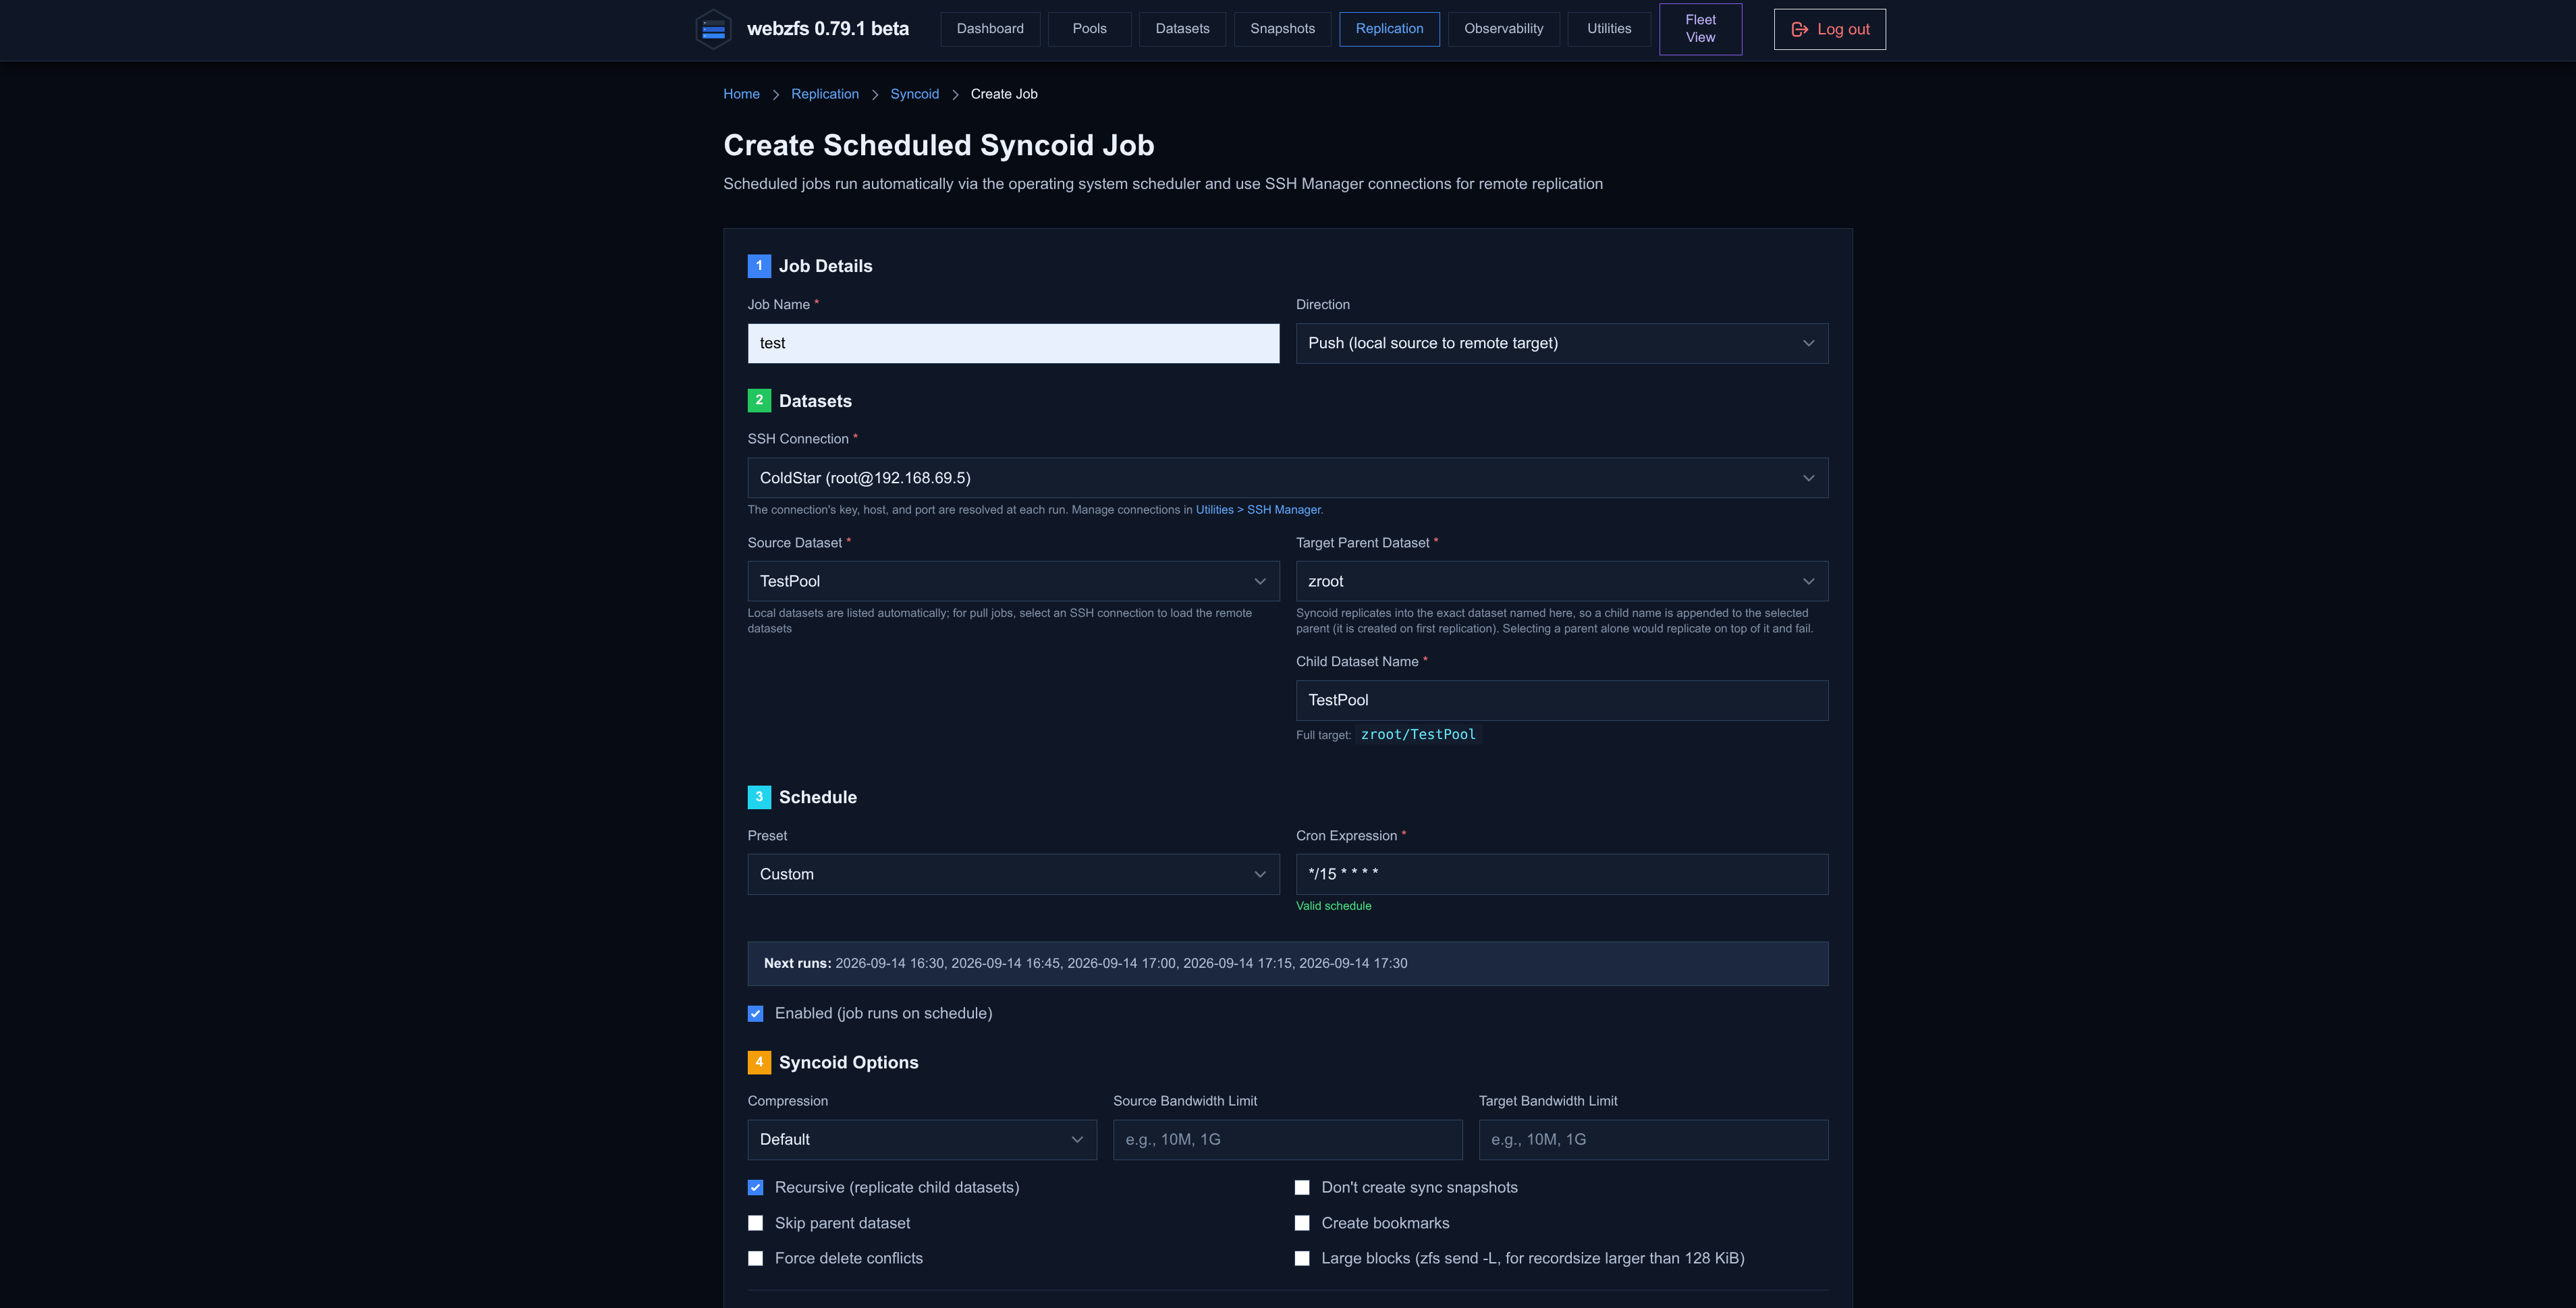
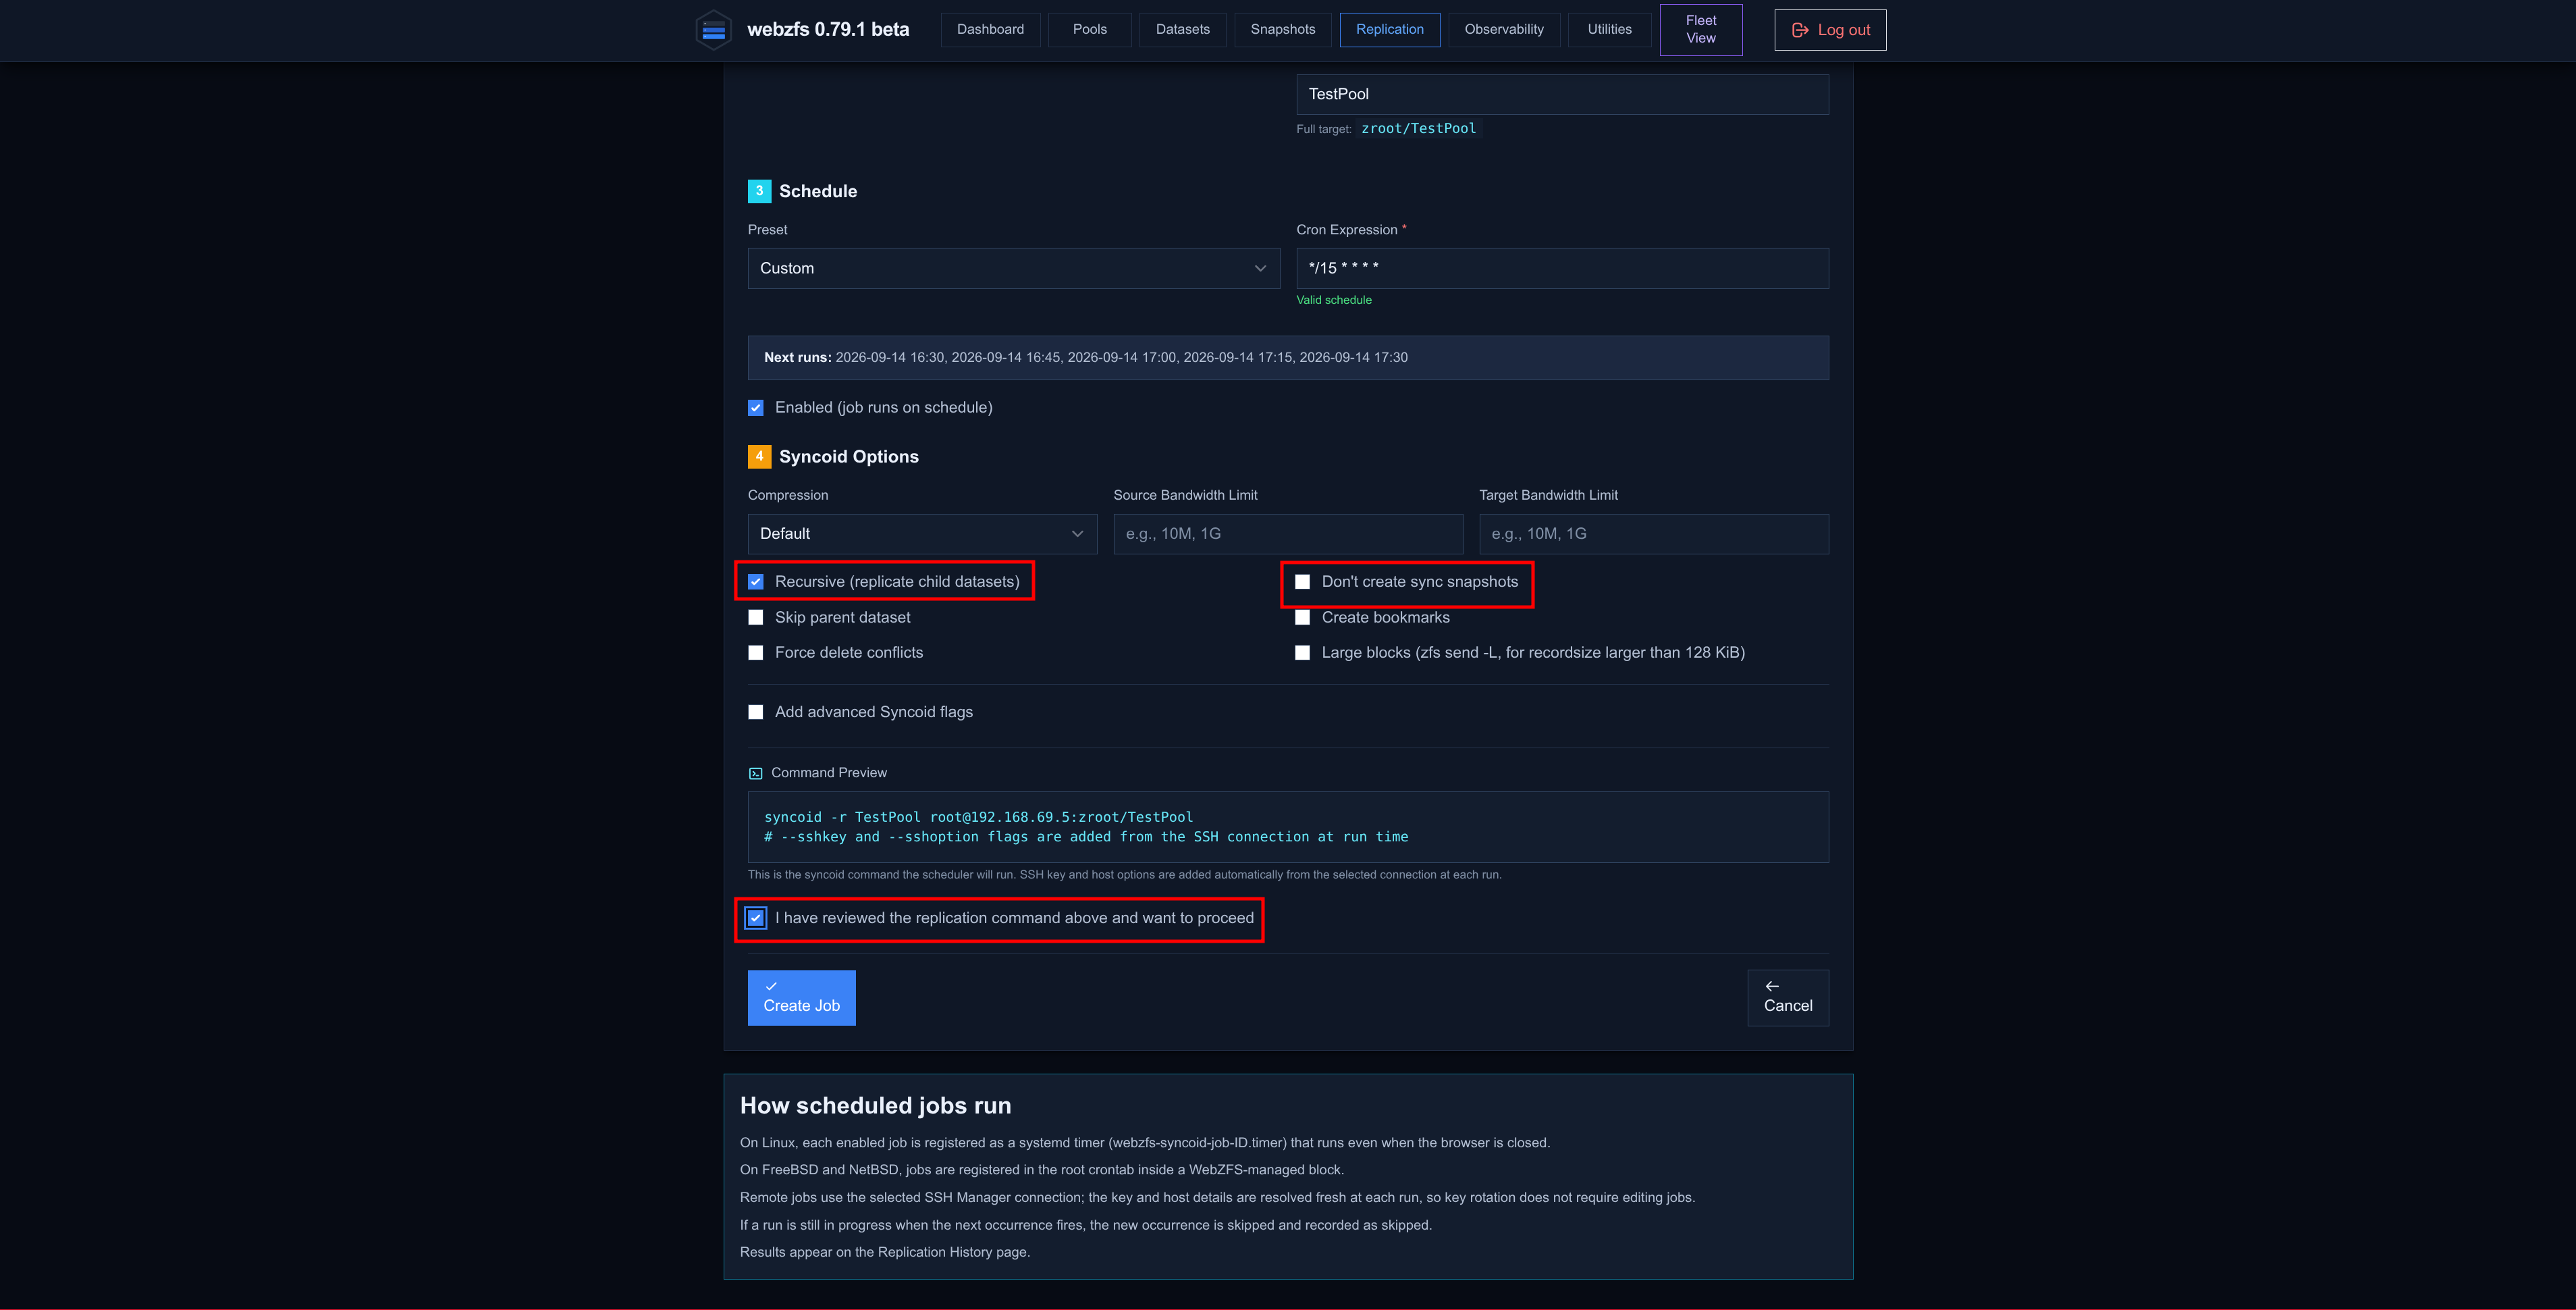
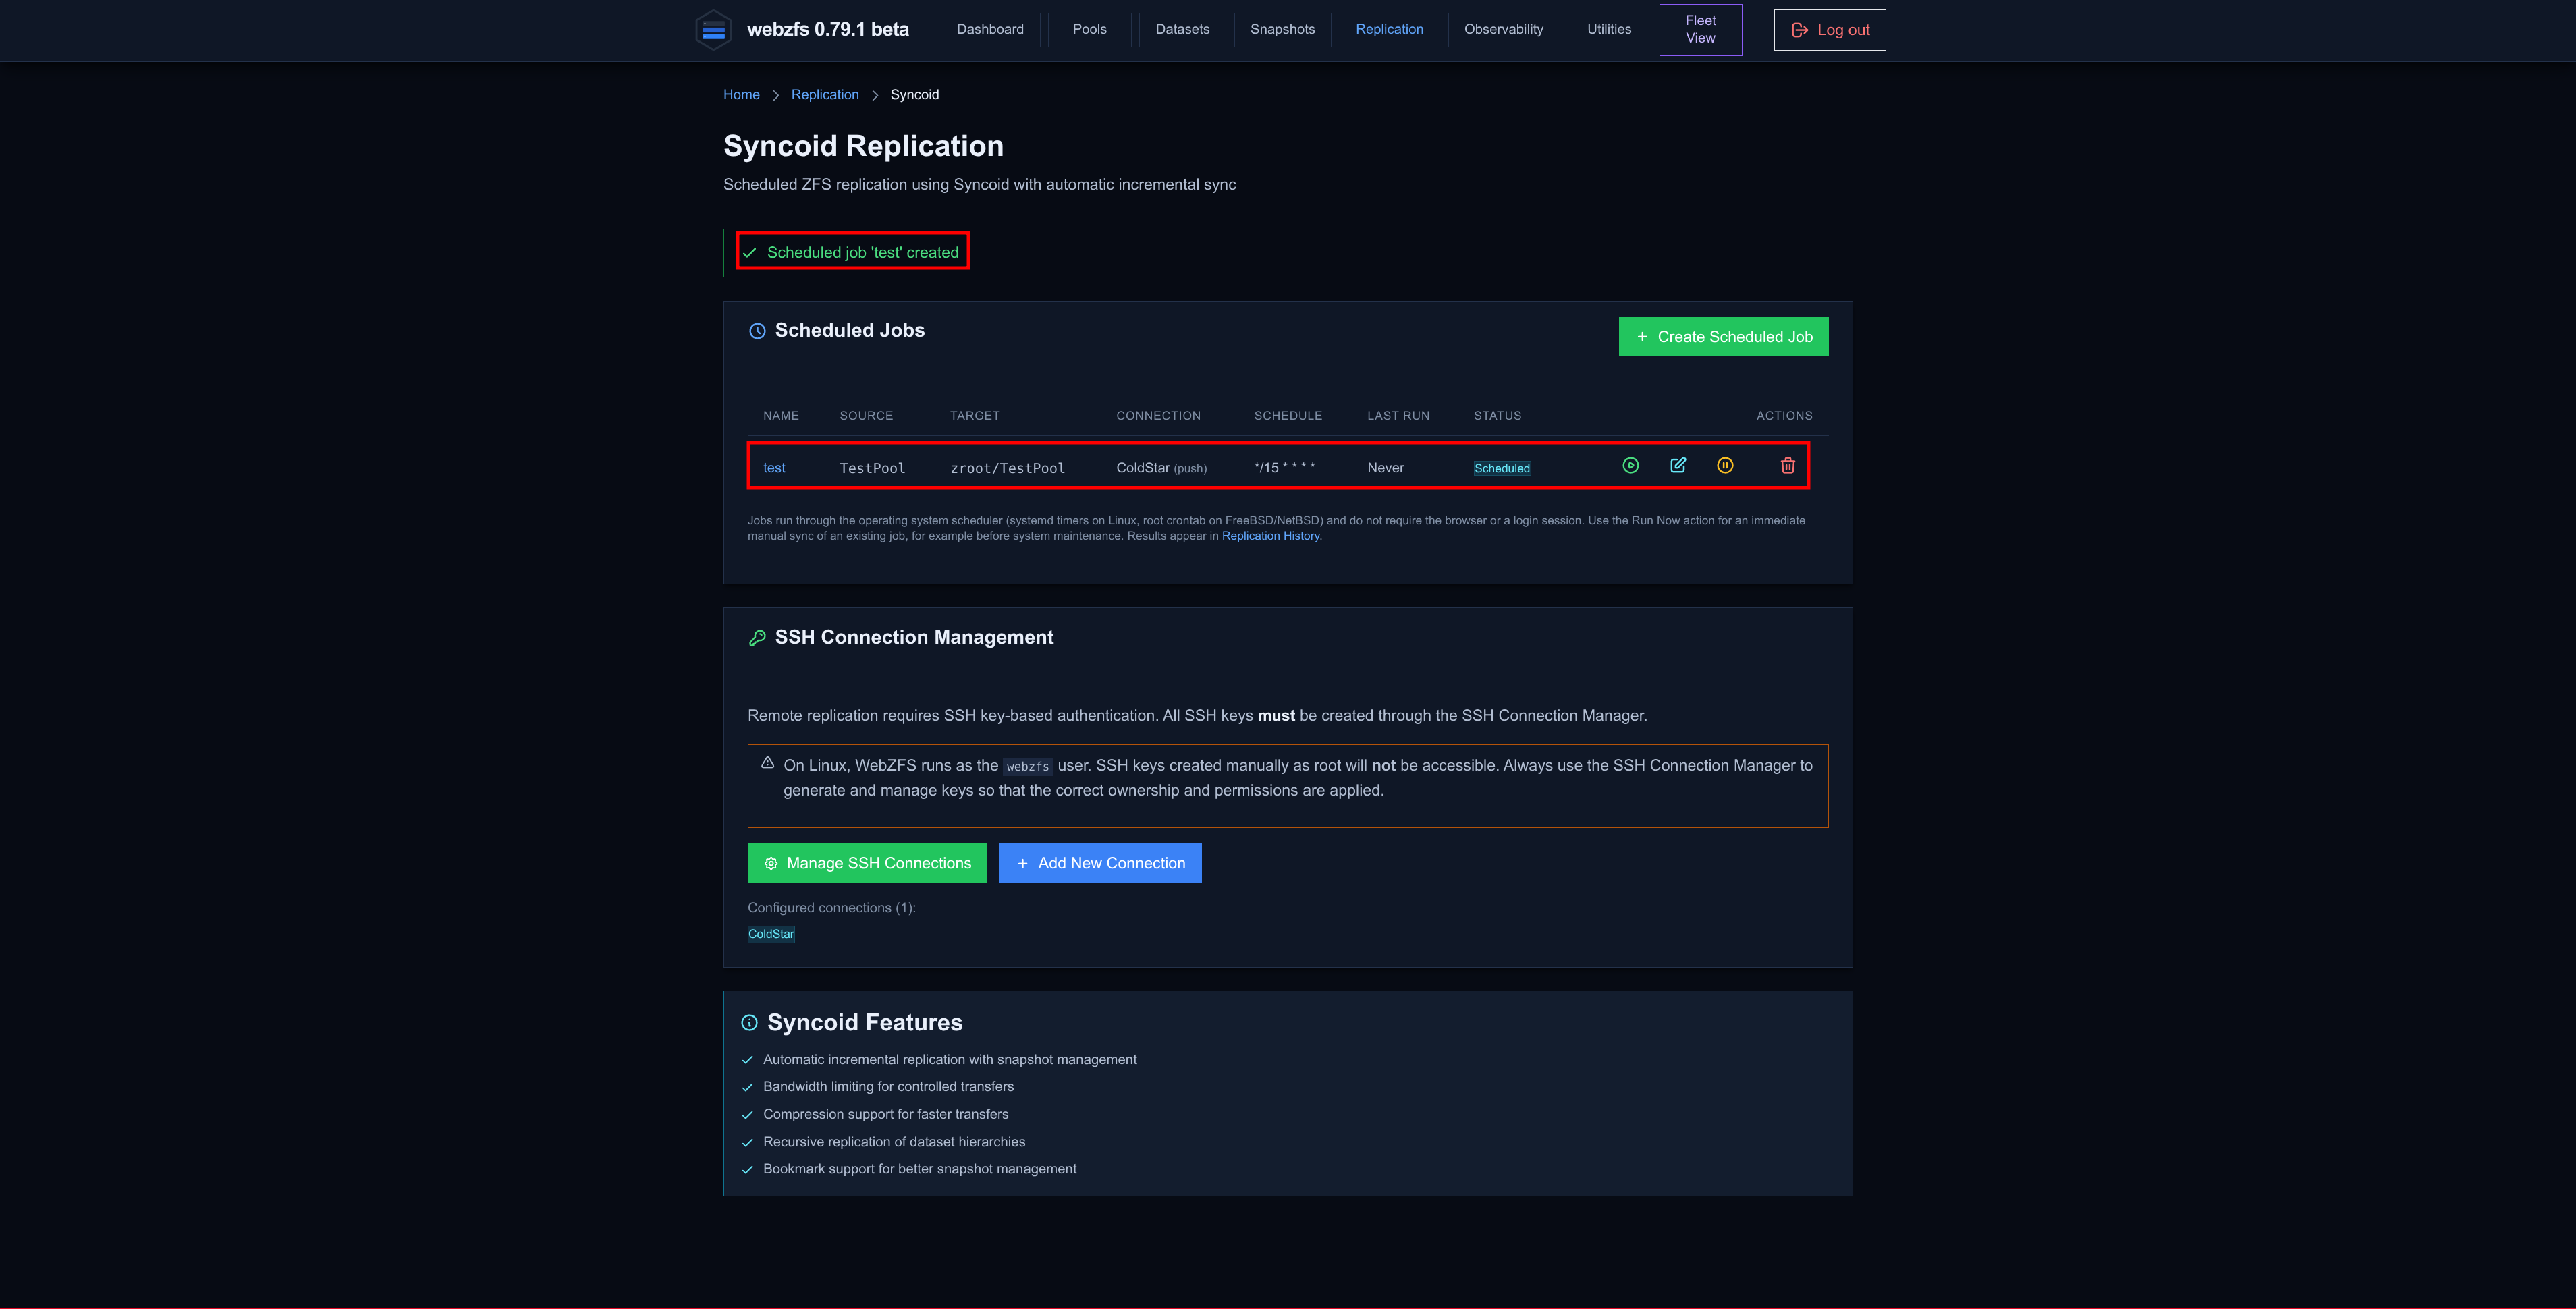
We can see at the source that a snapshot has been generated automatically:
MightyMax # ~> zfs list TestPool -t snapshot
NAME                                                                      USED  AVAIL  REFER  MOUNTPOINT
TestPool@syncoid_MightyMax.alfaexploit.com_2026-09-14:16:30:01-GMT02:00     0B      -   112K  -
And at the destination it is receiving the data:
ColdStar # ~> zfs list zroot/TestPool -t snapshot
NAME                                                                            USED  AVAIL  REFER  MOUNTPOINT
zroot/TestPool@syncoid_MightyMax.alfaexploit.com_2026-09-14:16:30:01-GMT02:00     0B      -   112K  -

ColdStar # ~> zfs list zroot/TestPool
NAME             USED  AVAIL  REFER  MOUNTPOINT
zroot/TestPool   112K   382G   112K  /zroot/TestPool
- Without auto-snapshotting (I delete the
TestPooldataset at the destination before proceeding): On the other hand, it is advisable to configure an auto-snapshotting policy fromSanoidand letSyncoidjust copy the data without generating snapshots; this way we can have a snapshot history on both sides.
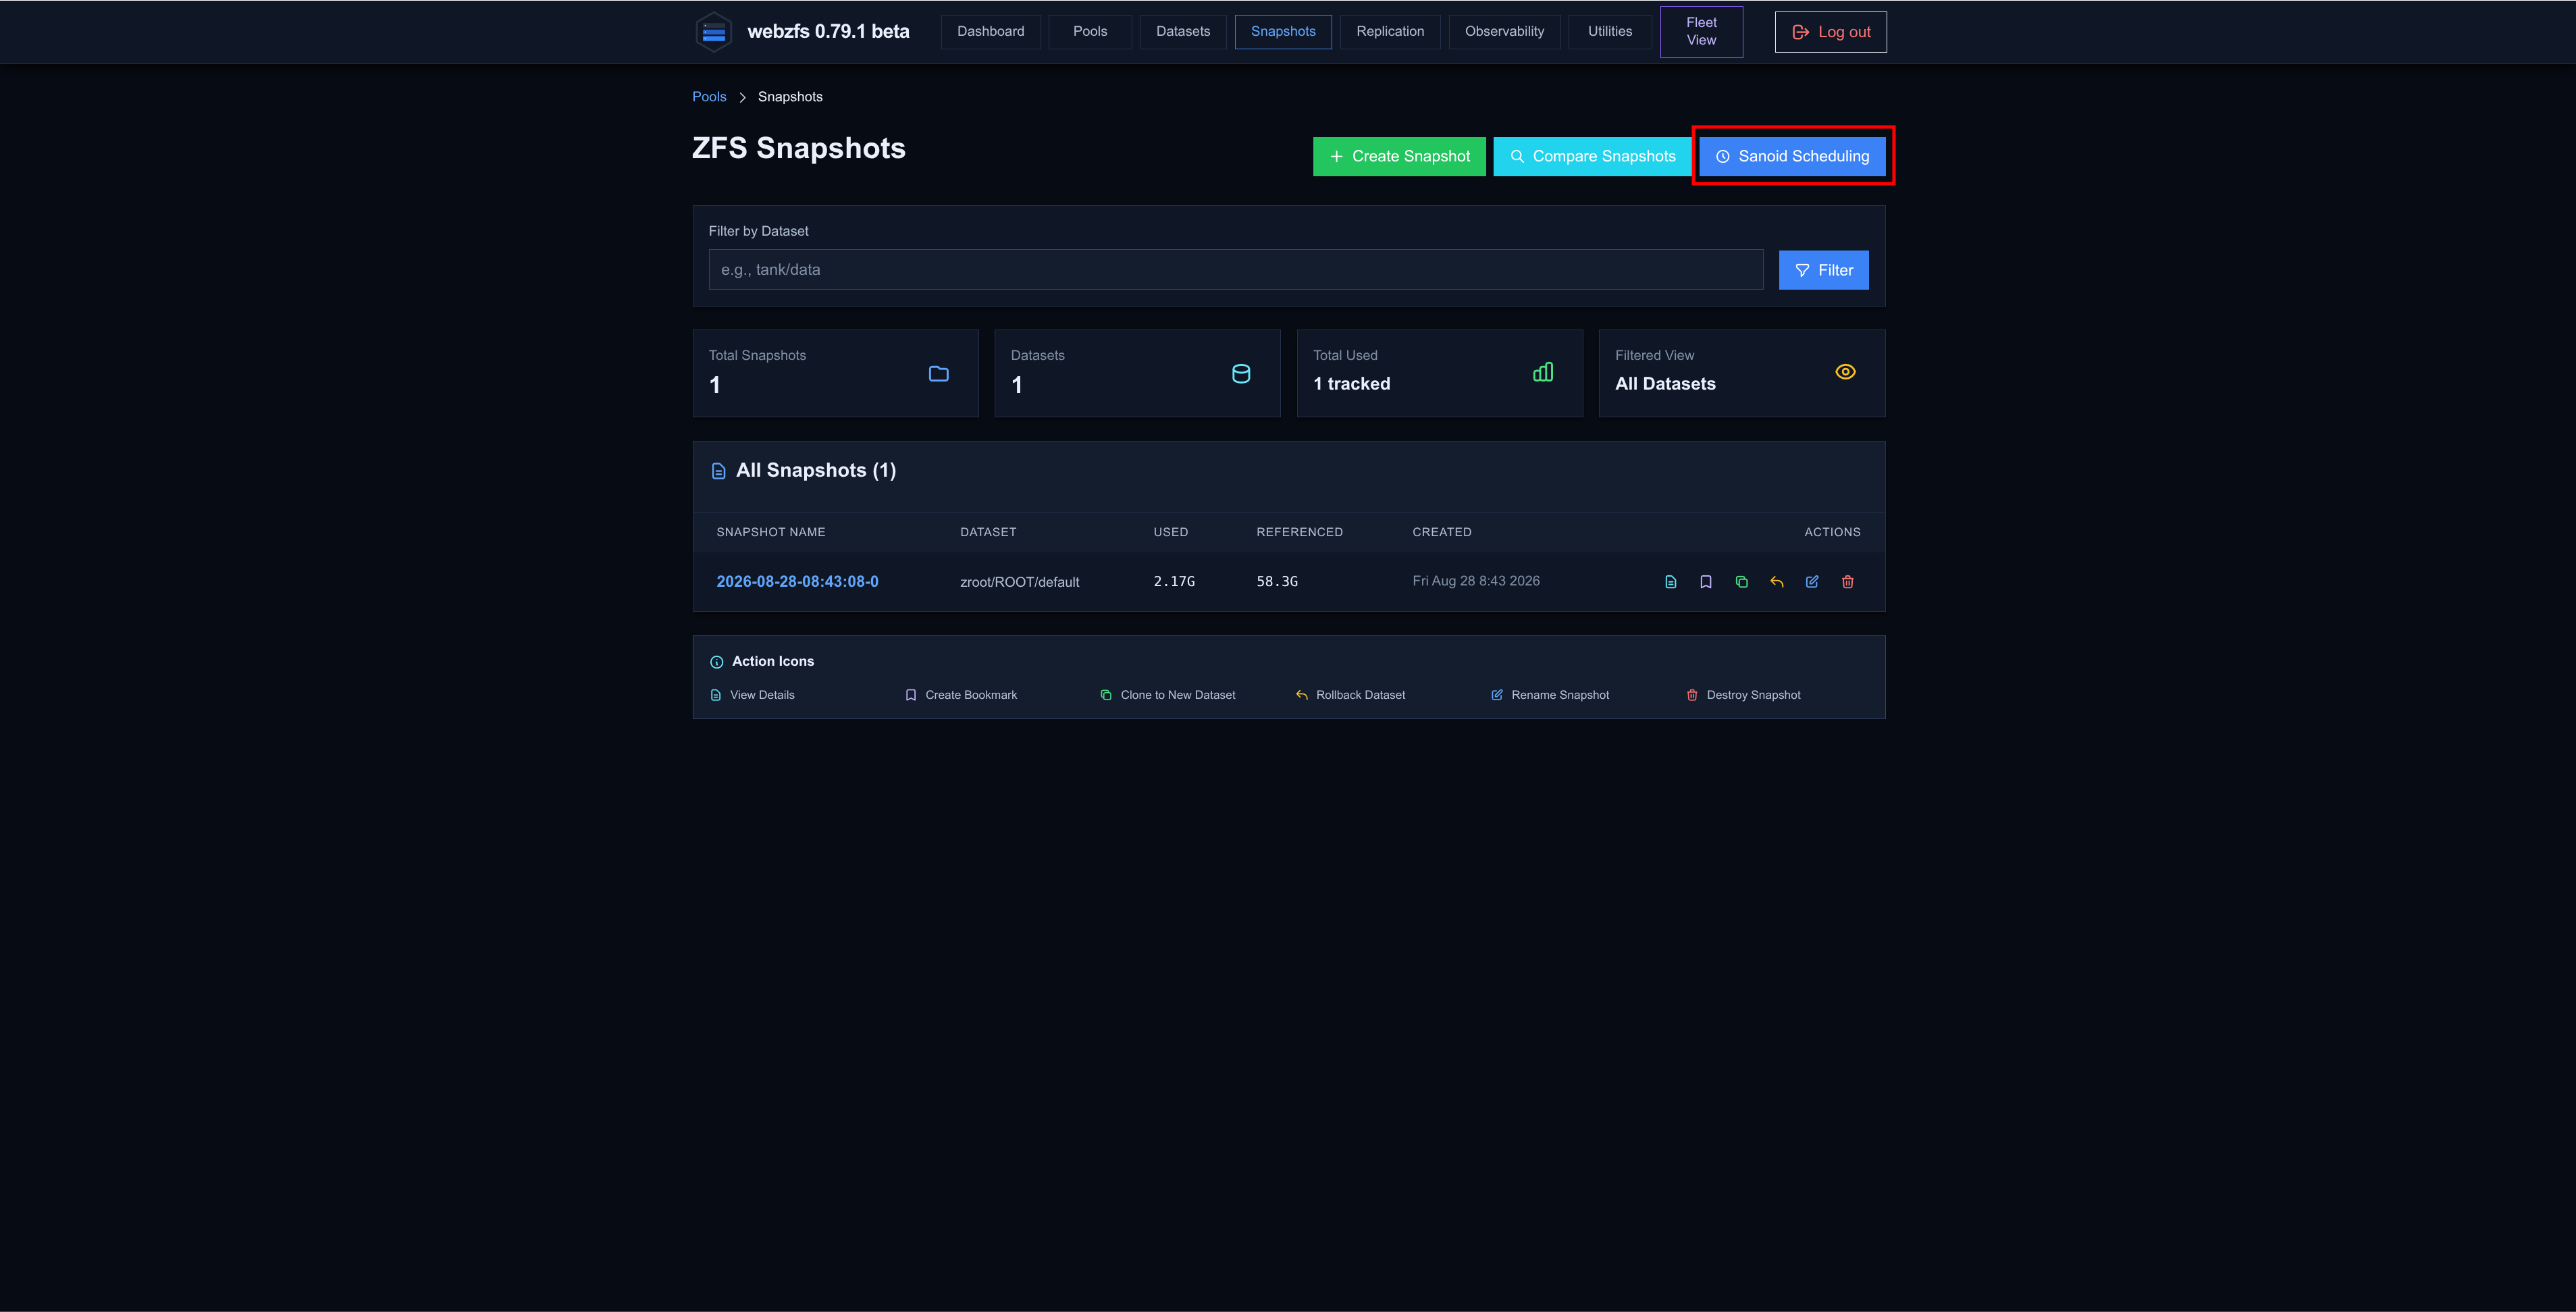
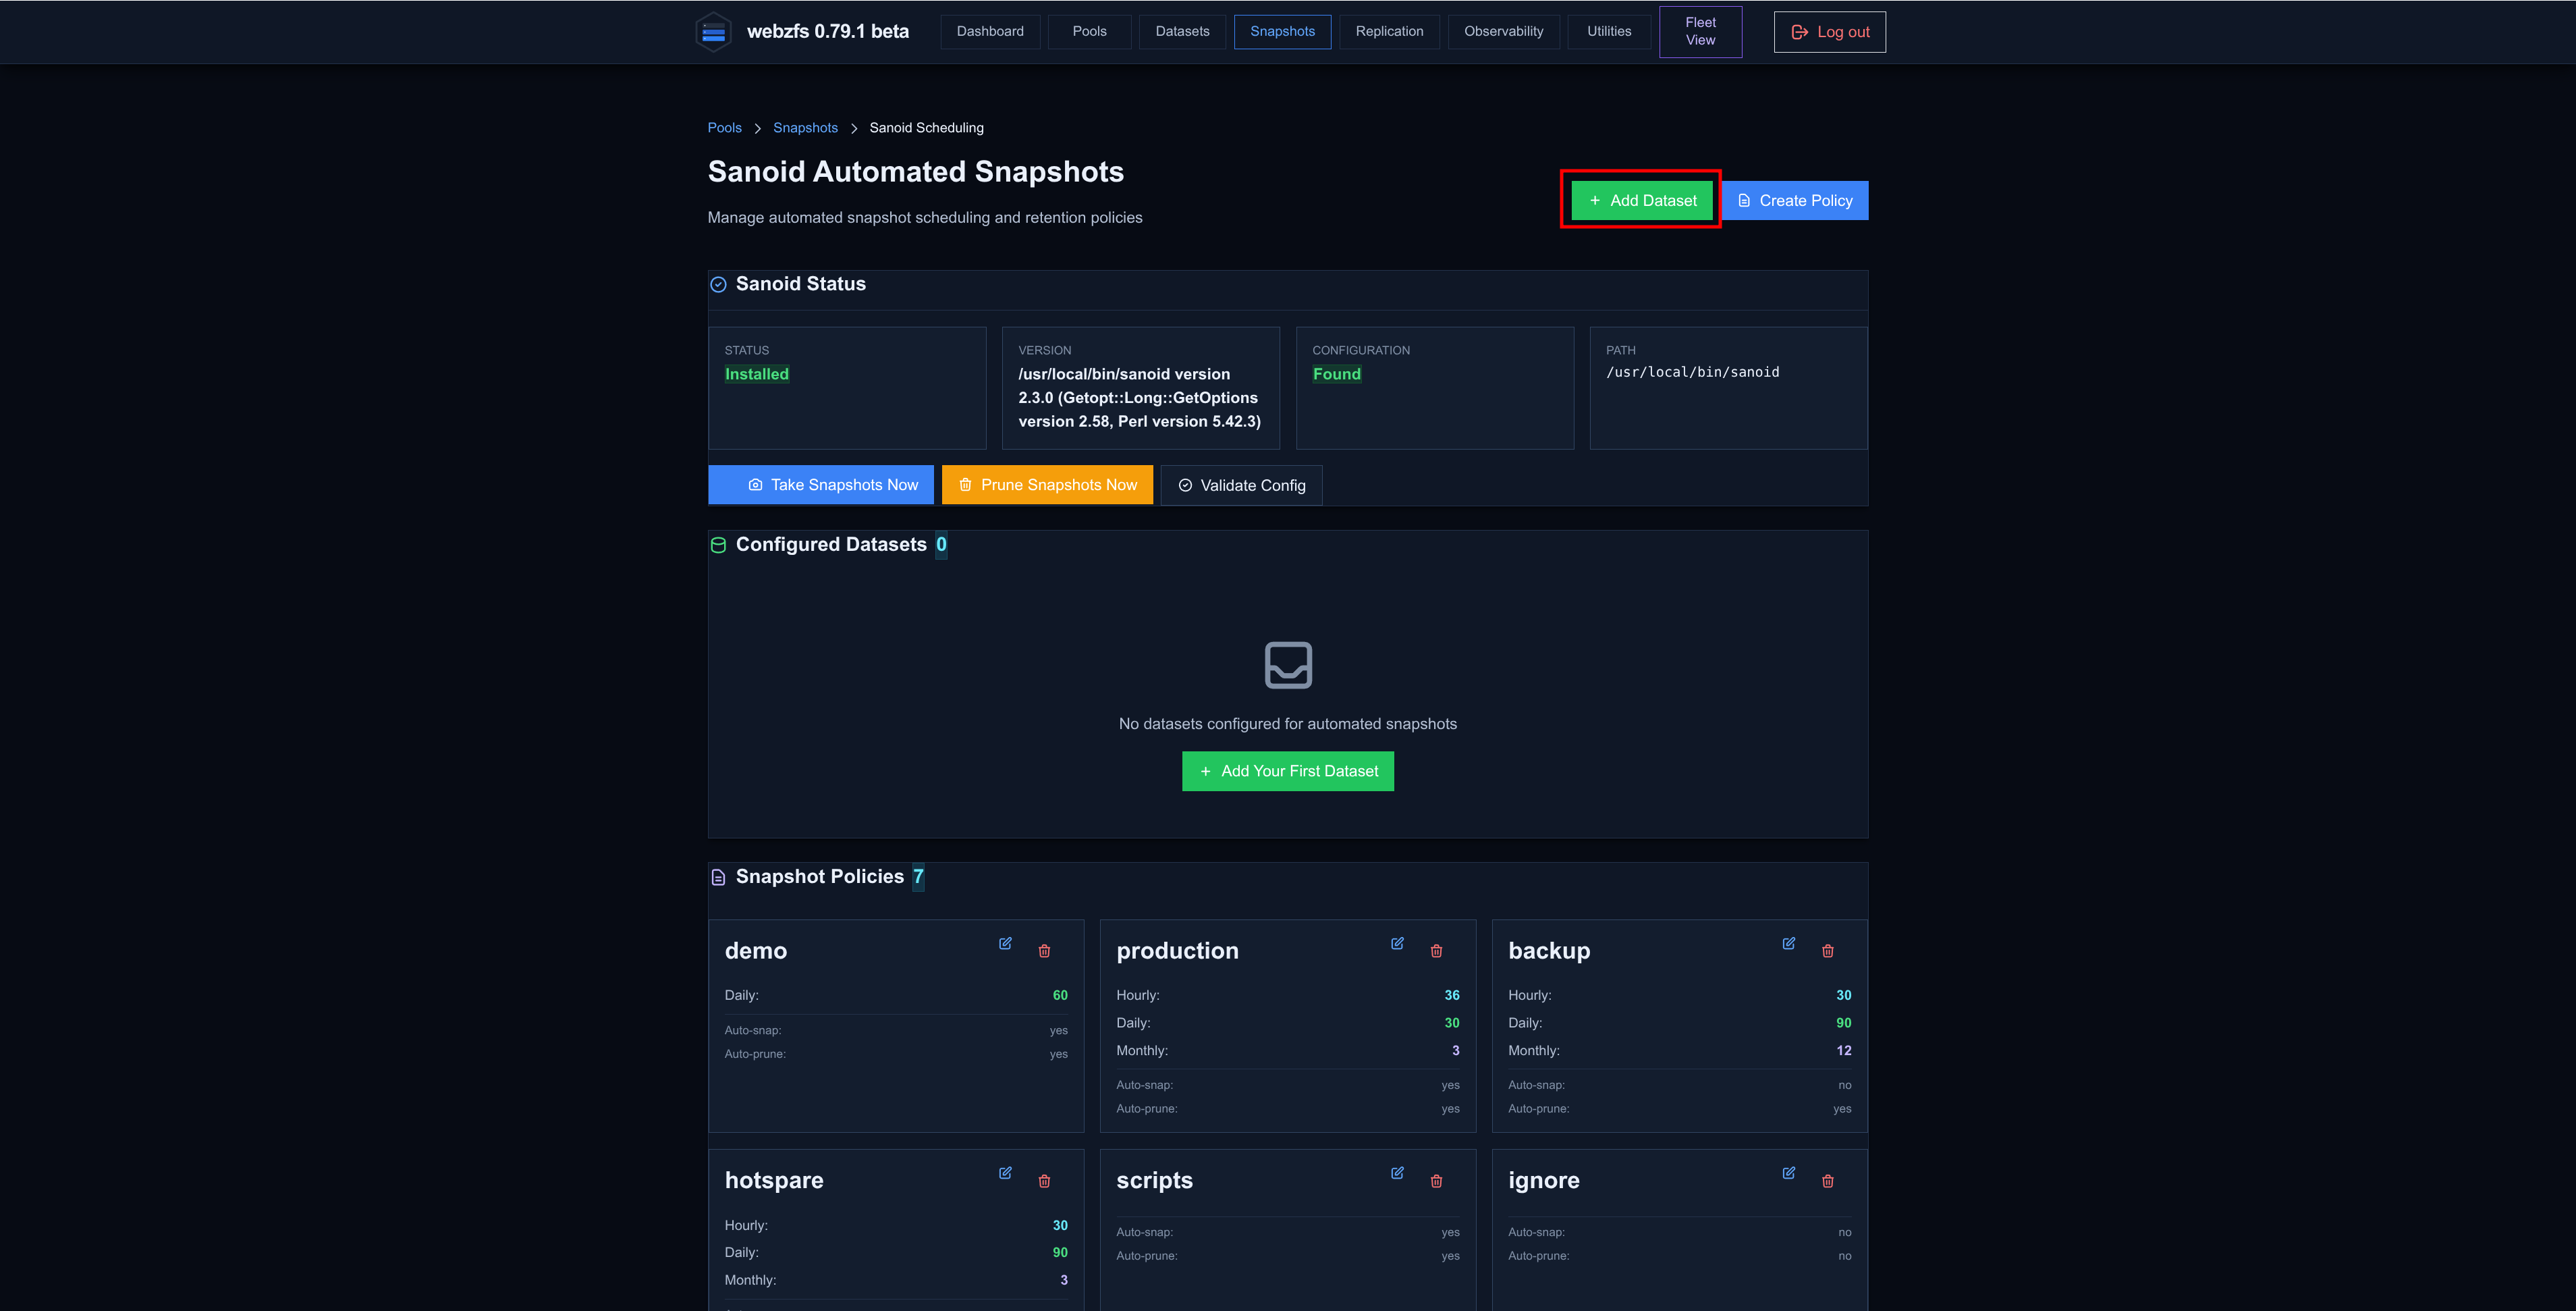
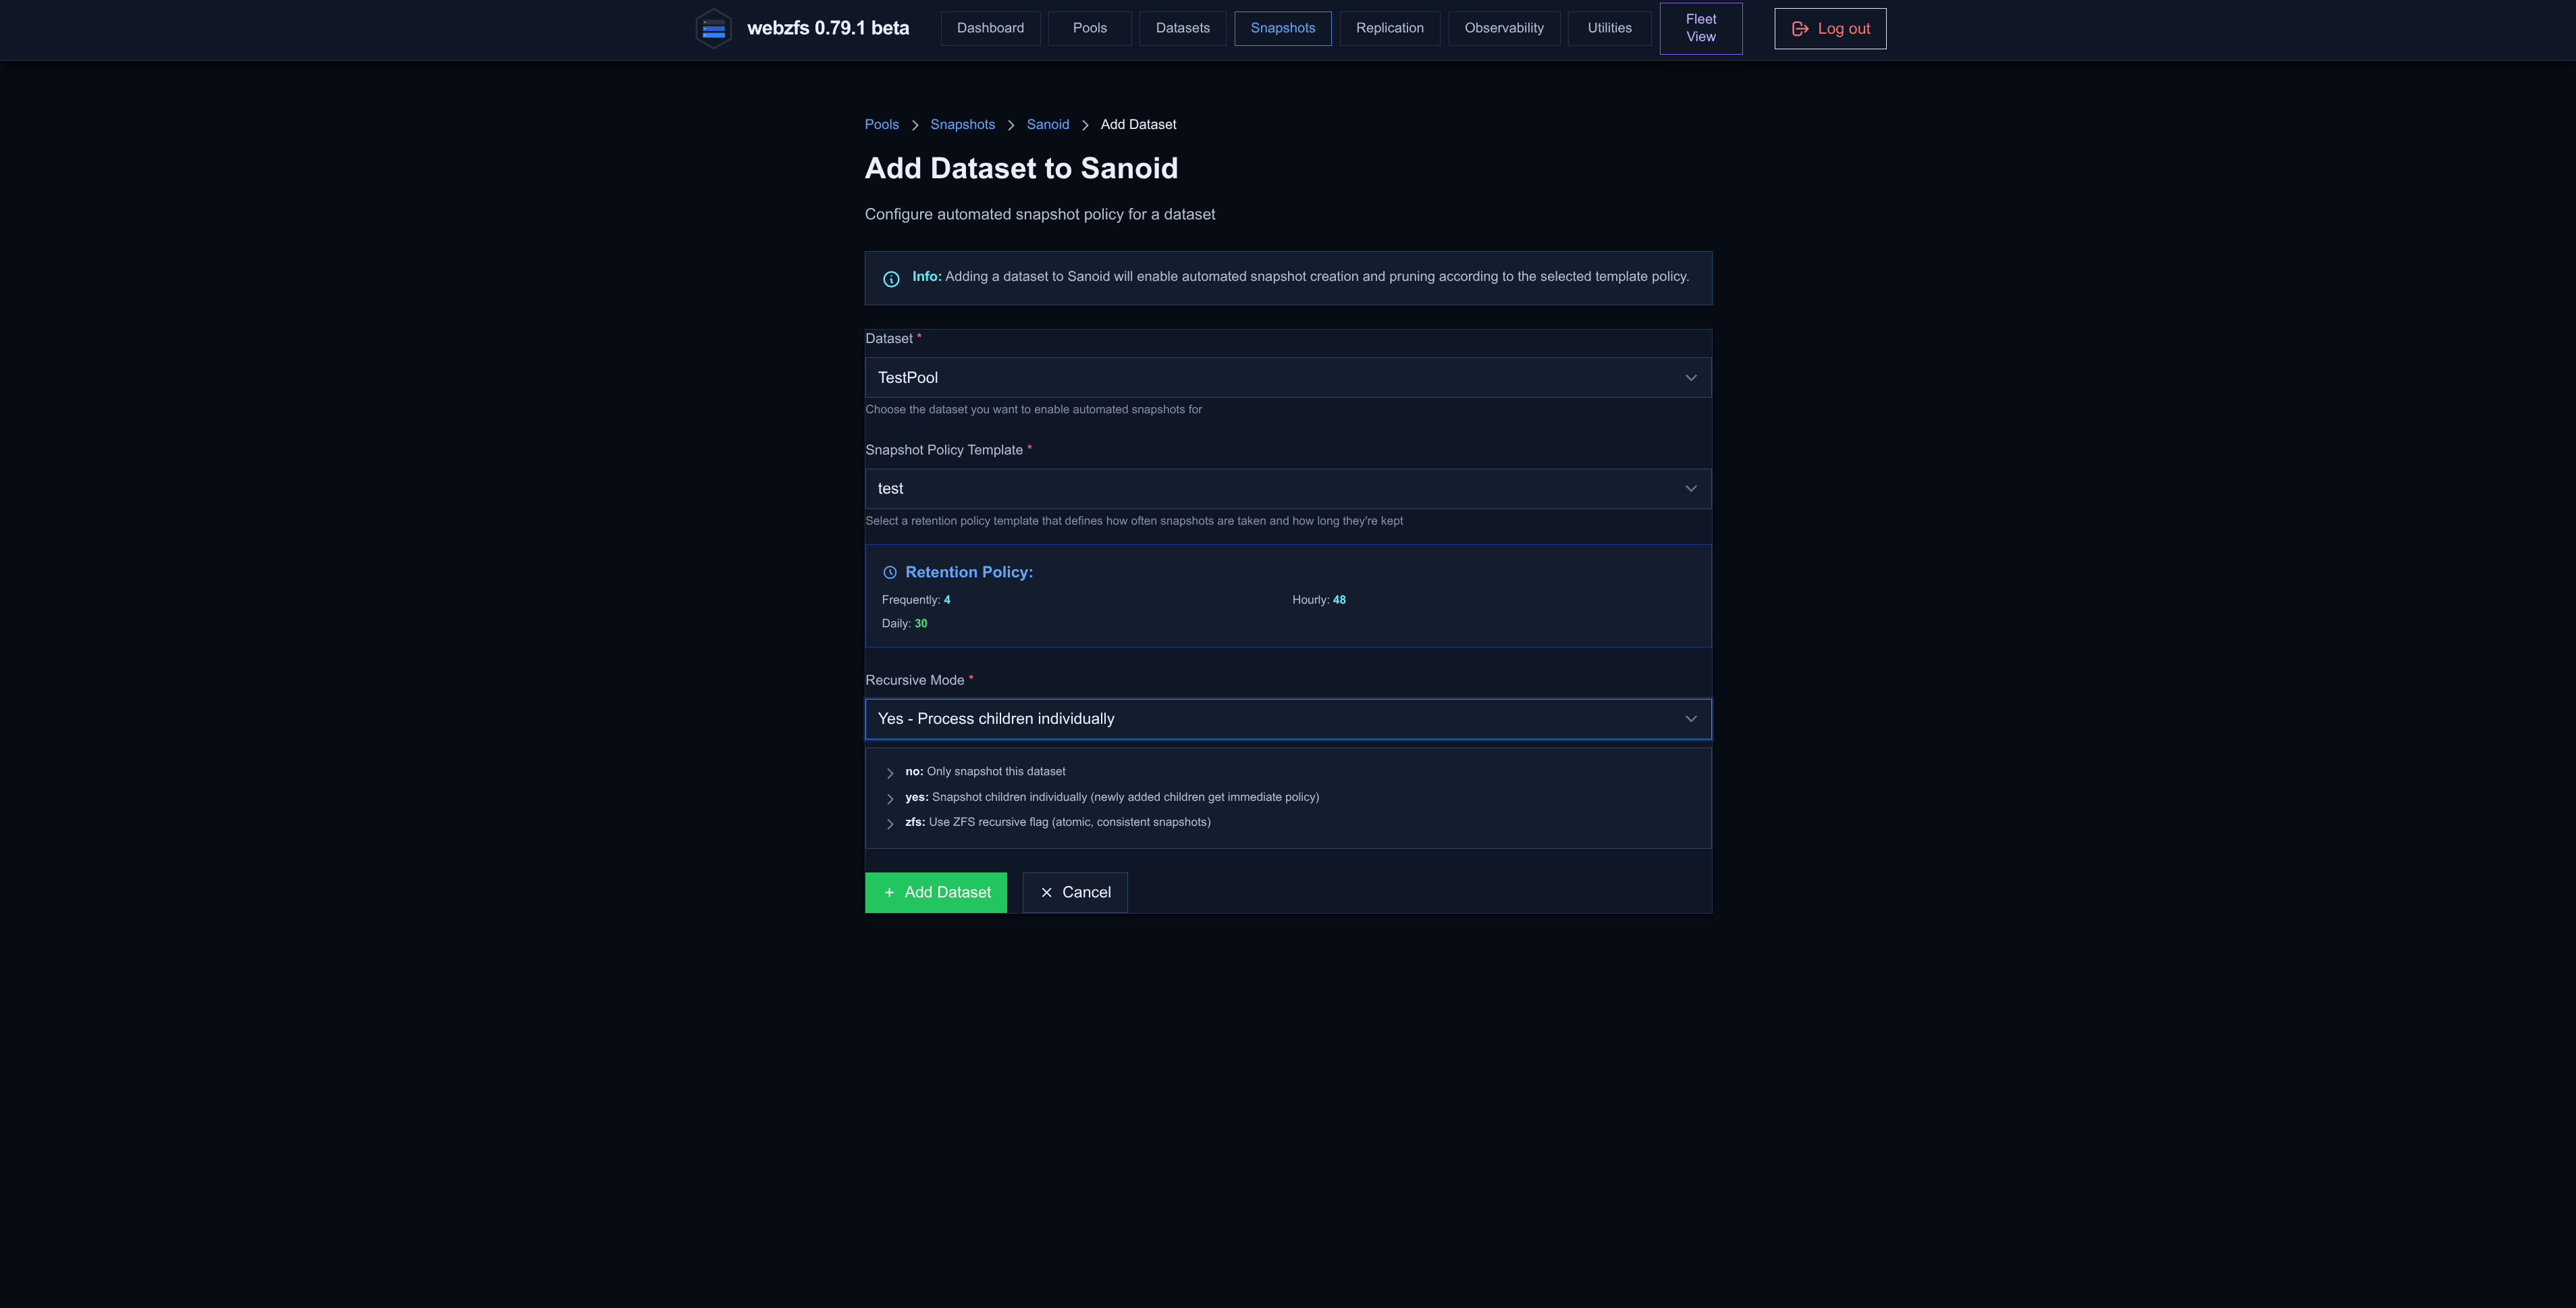
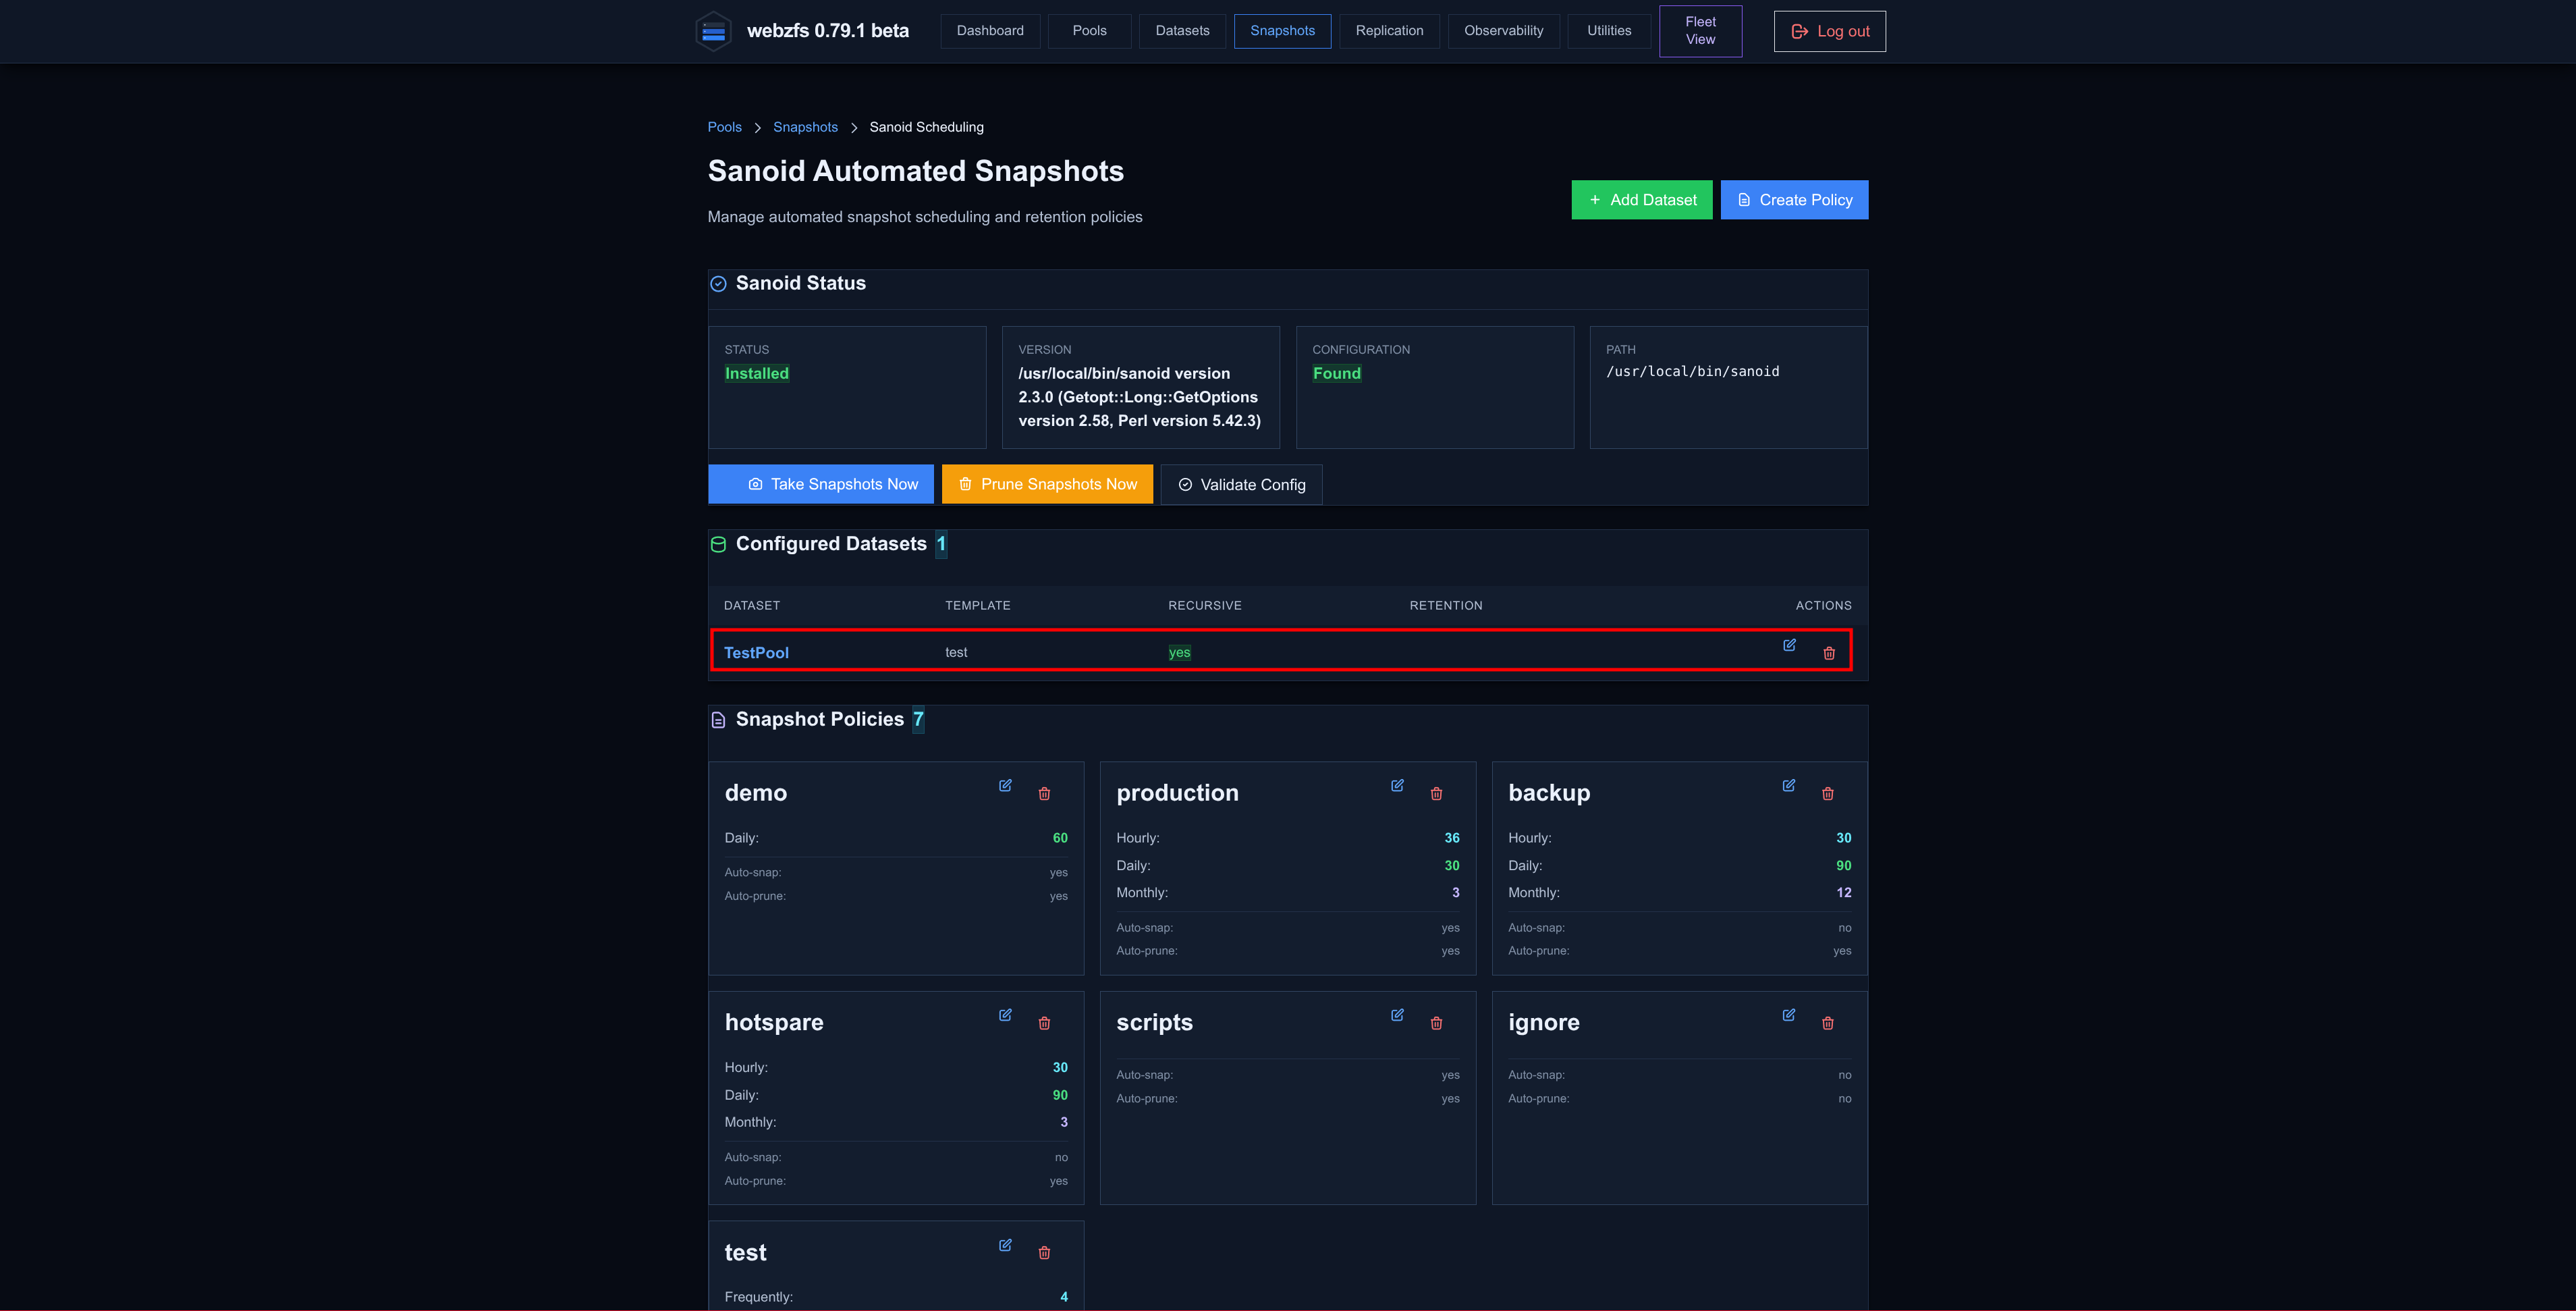
Sanoid snapshotting policy using the test policy generated earlier in the
Snapshots section
:
|
|
|
|
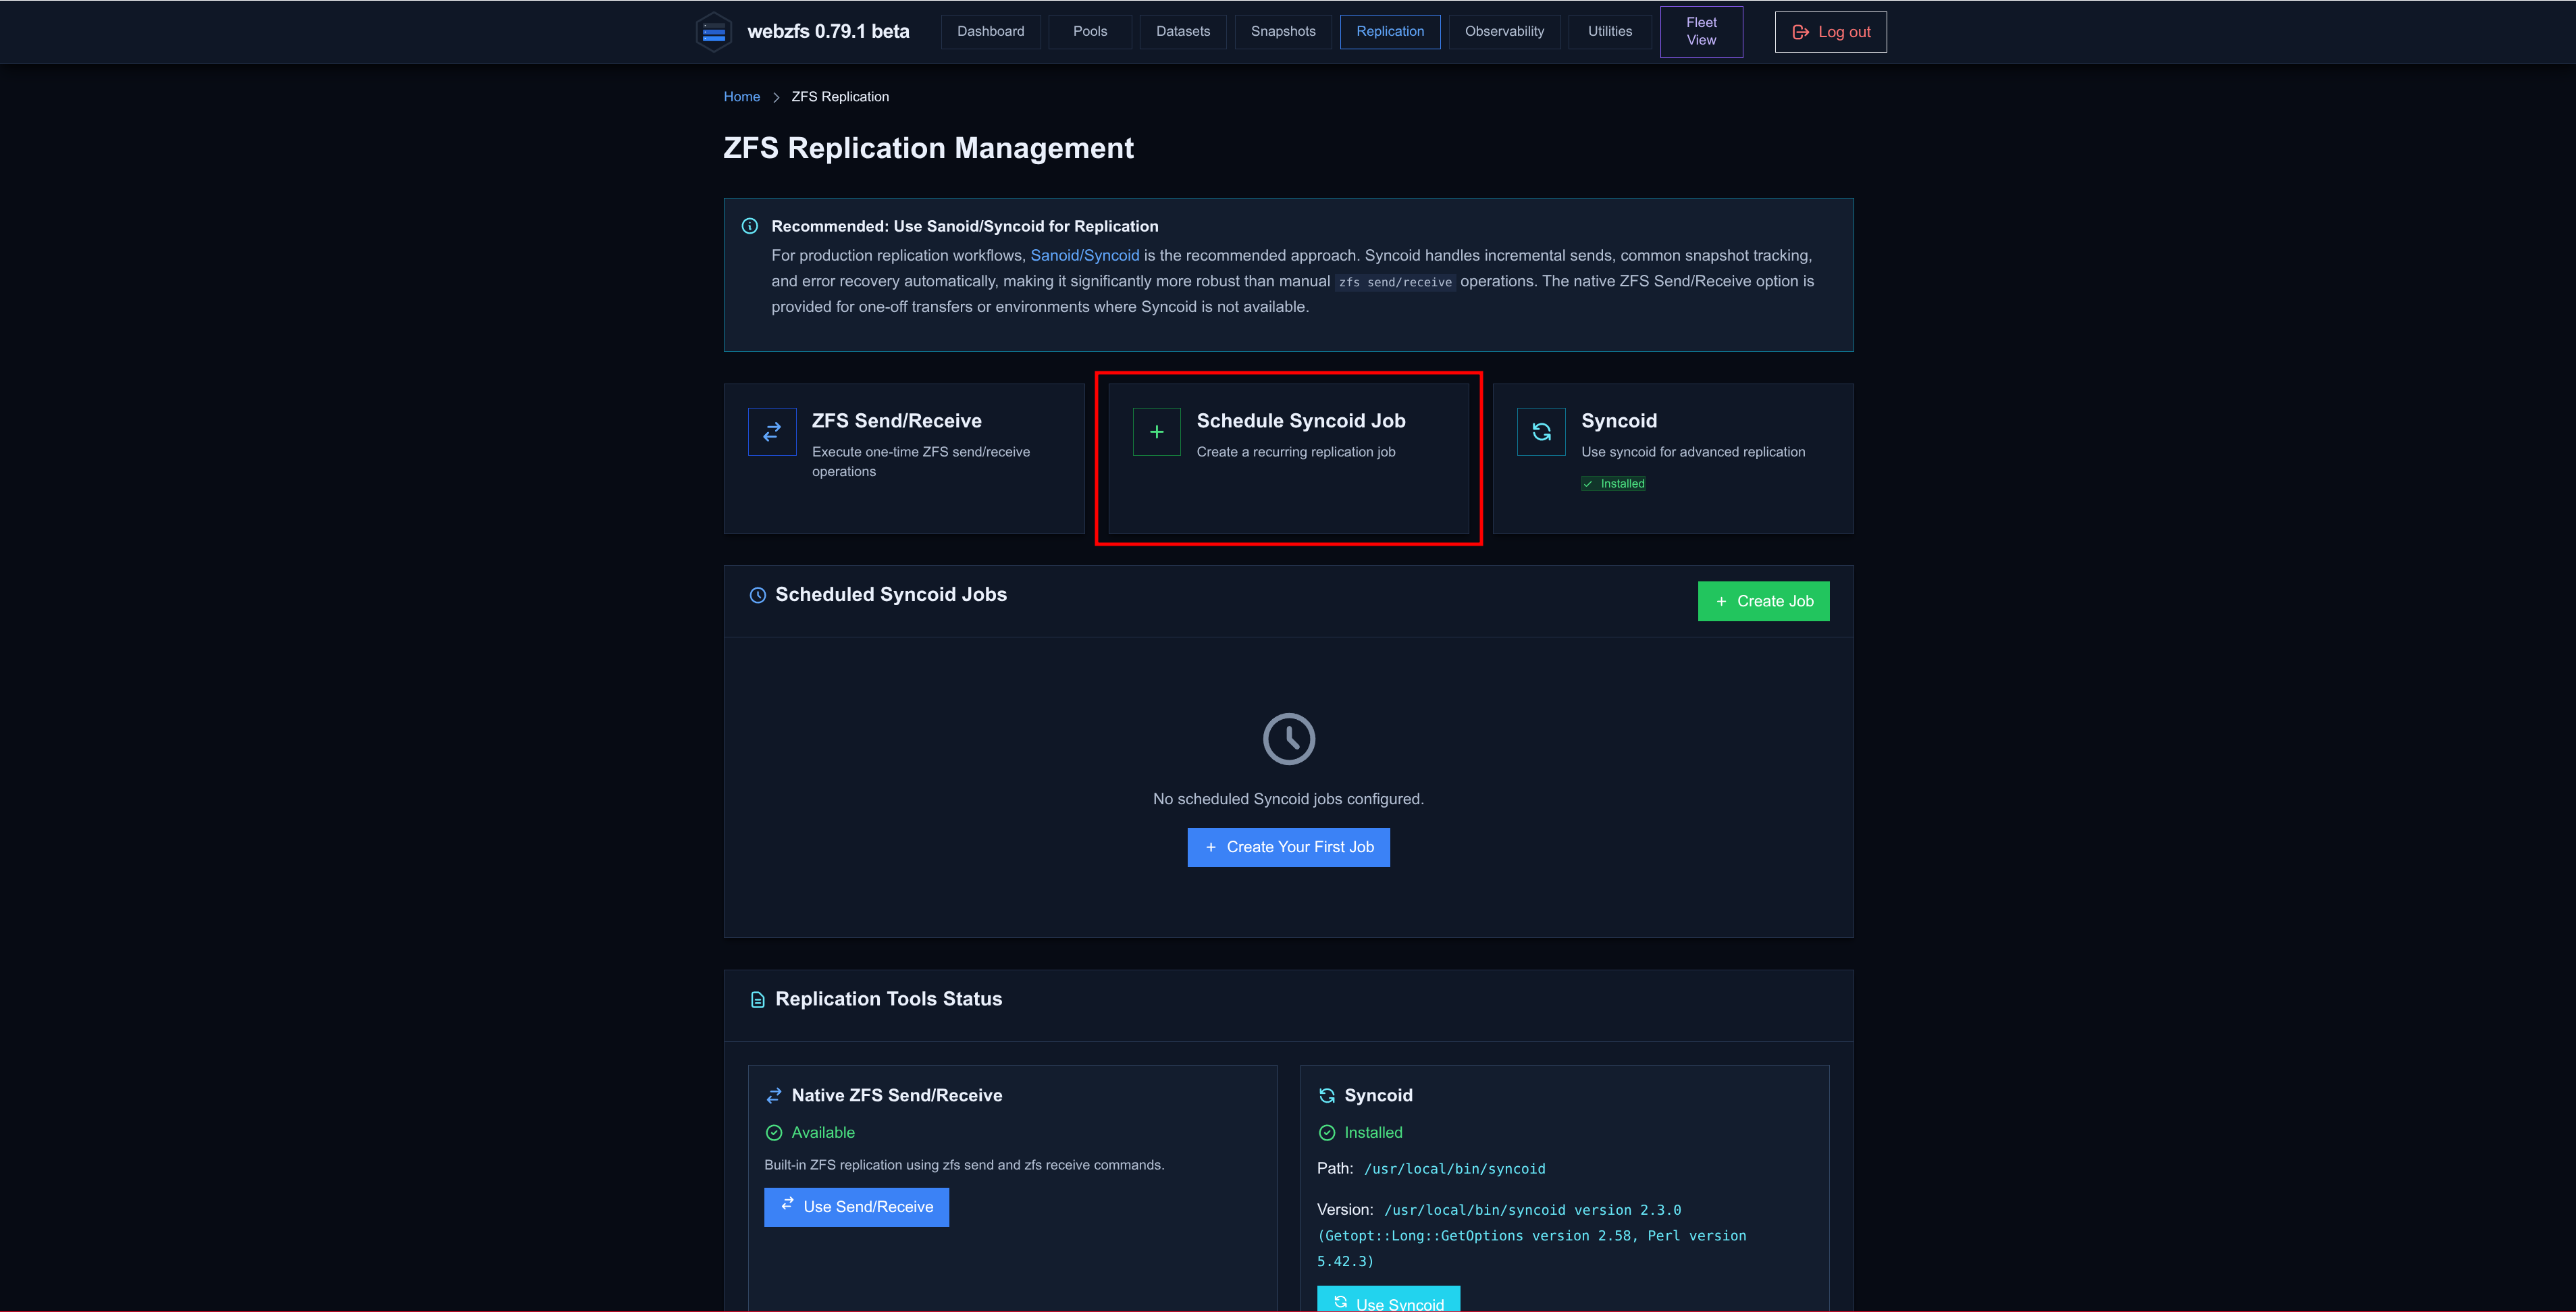
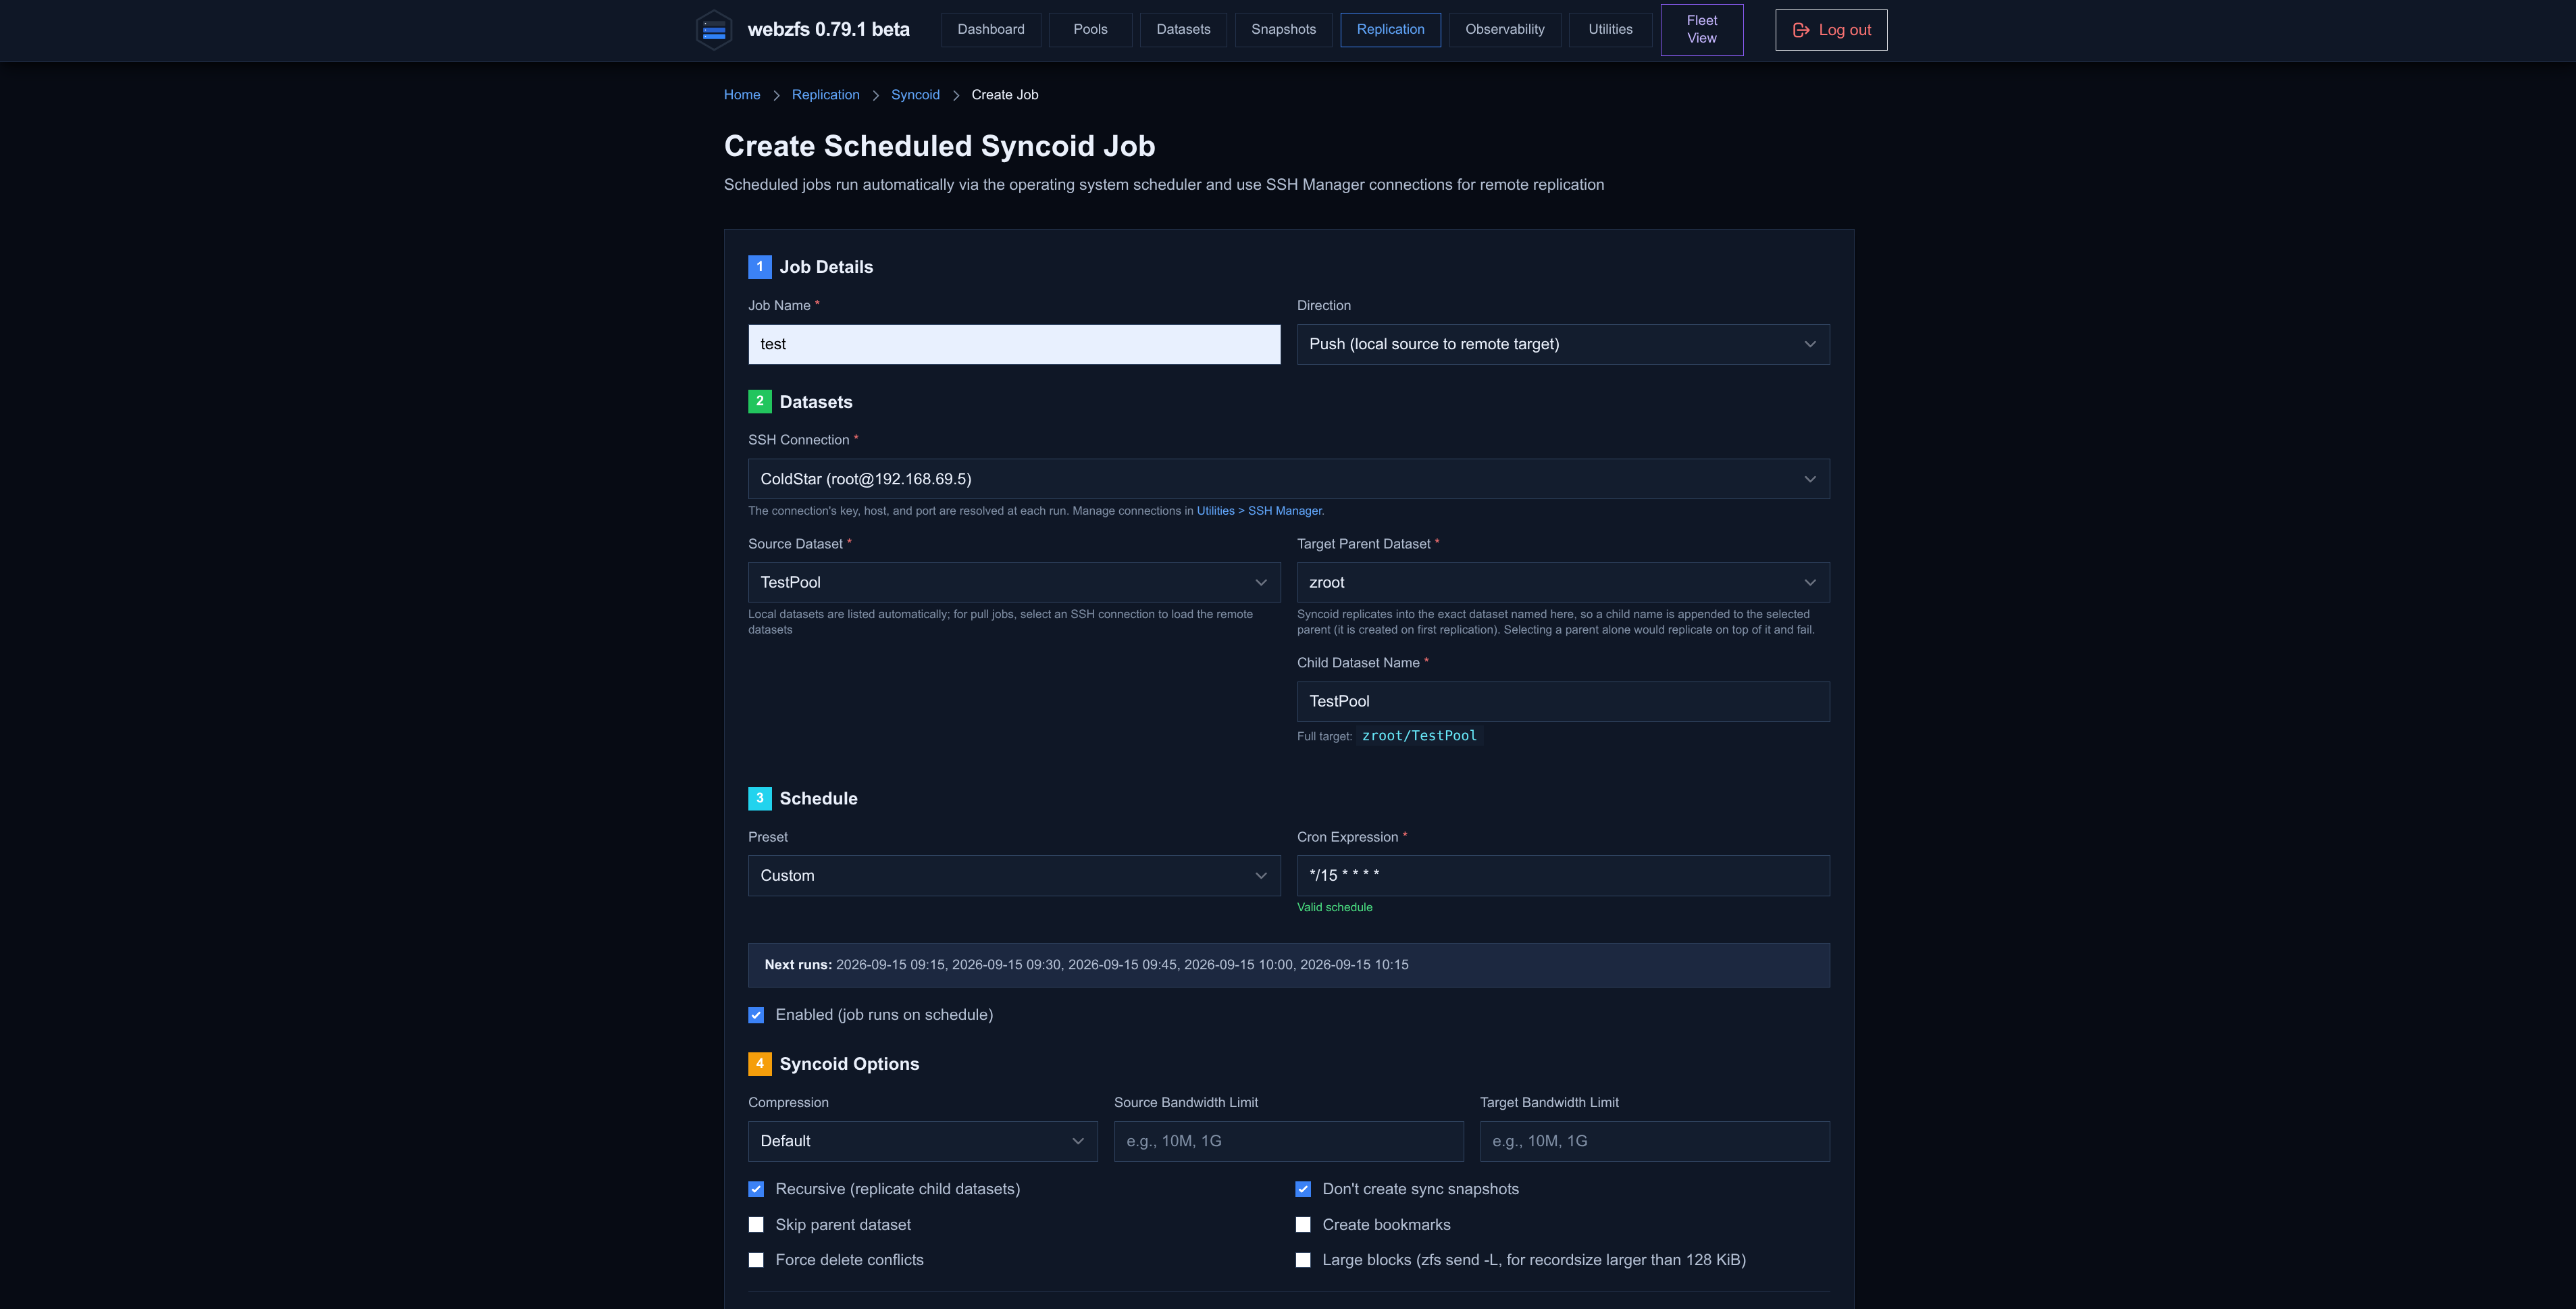
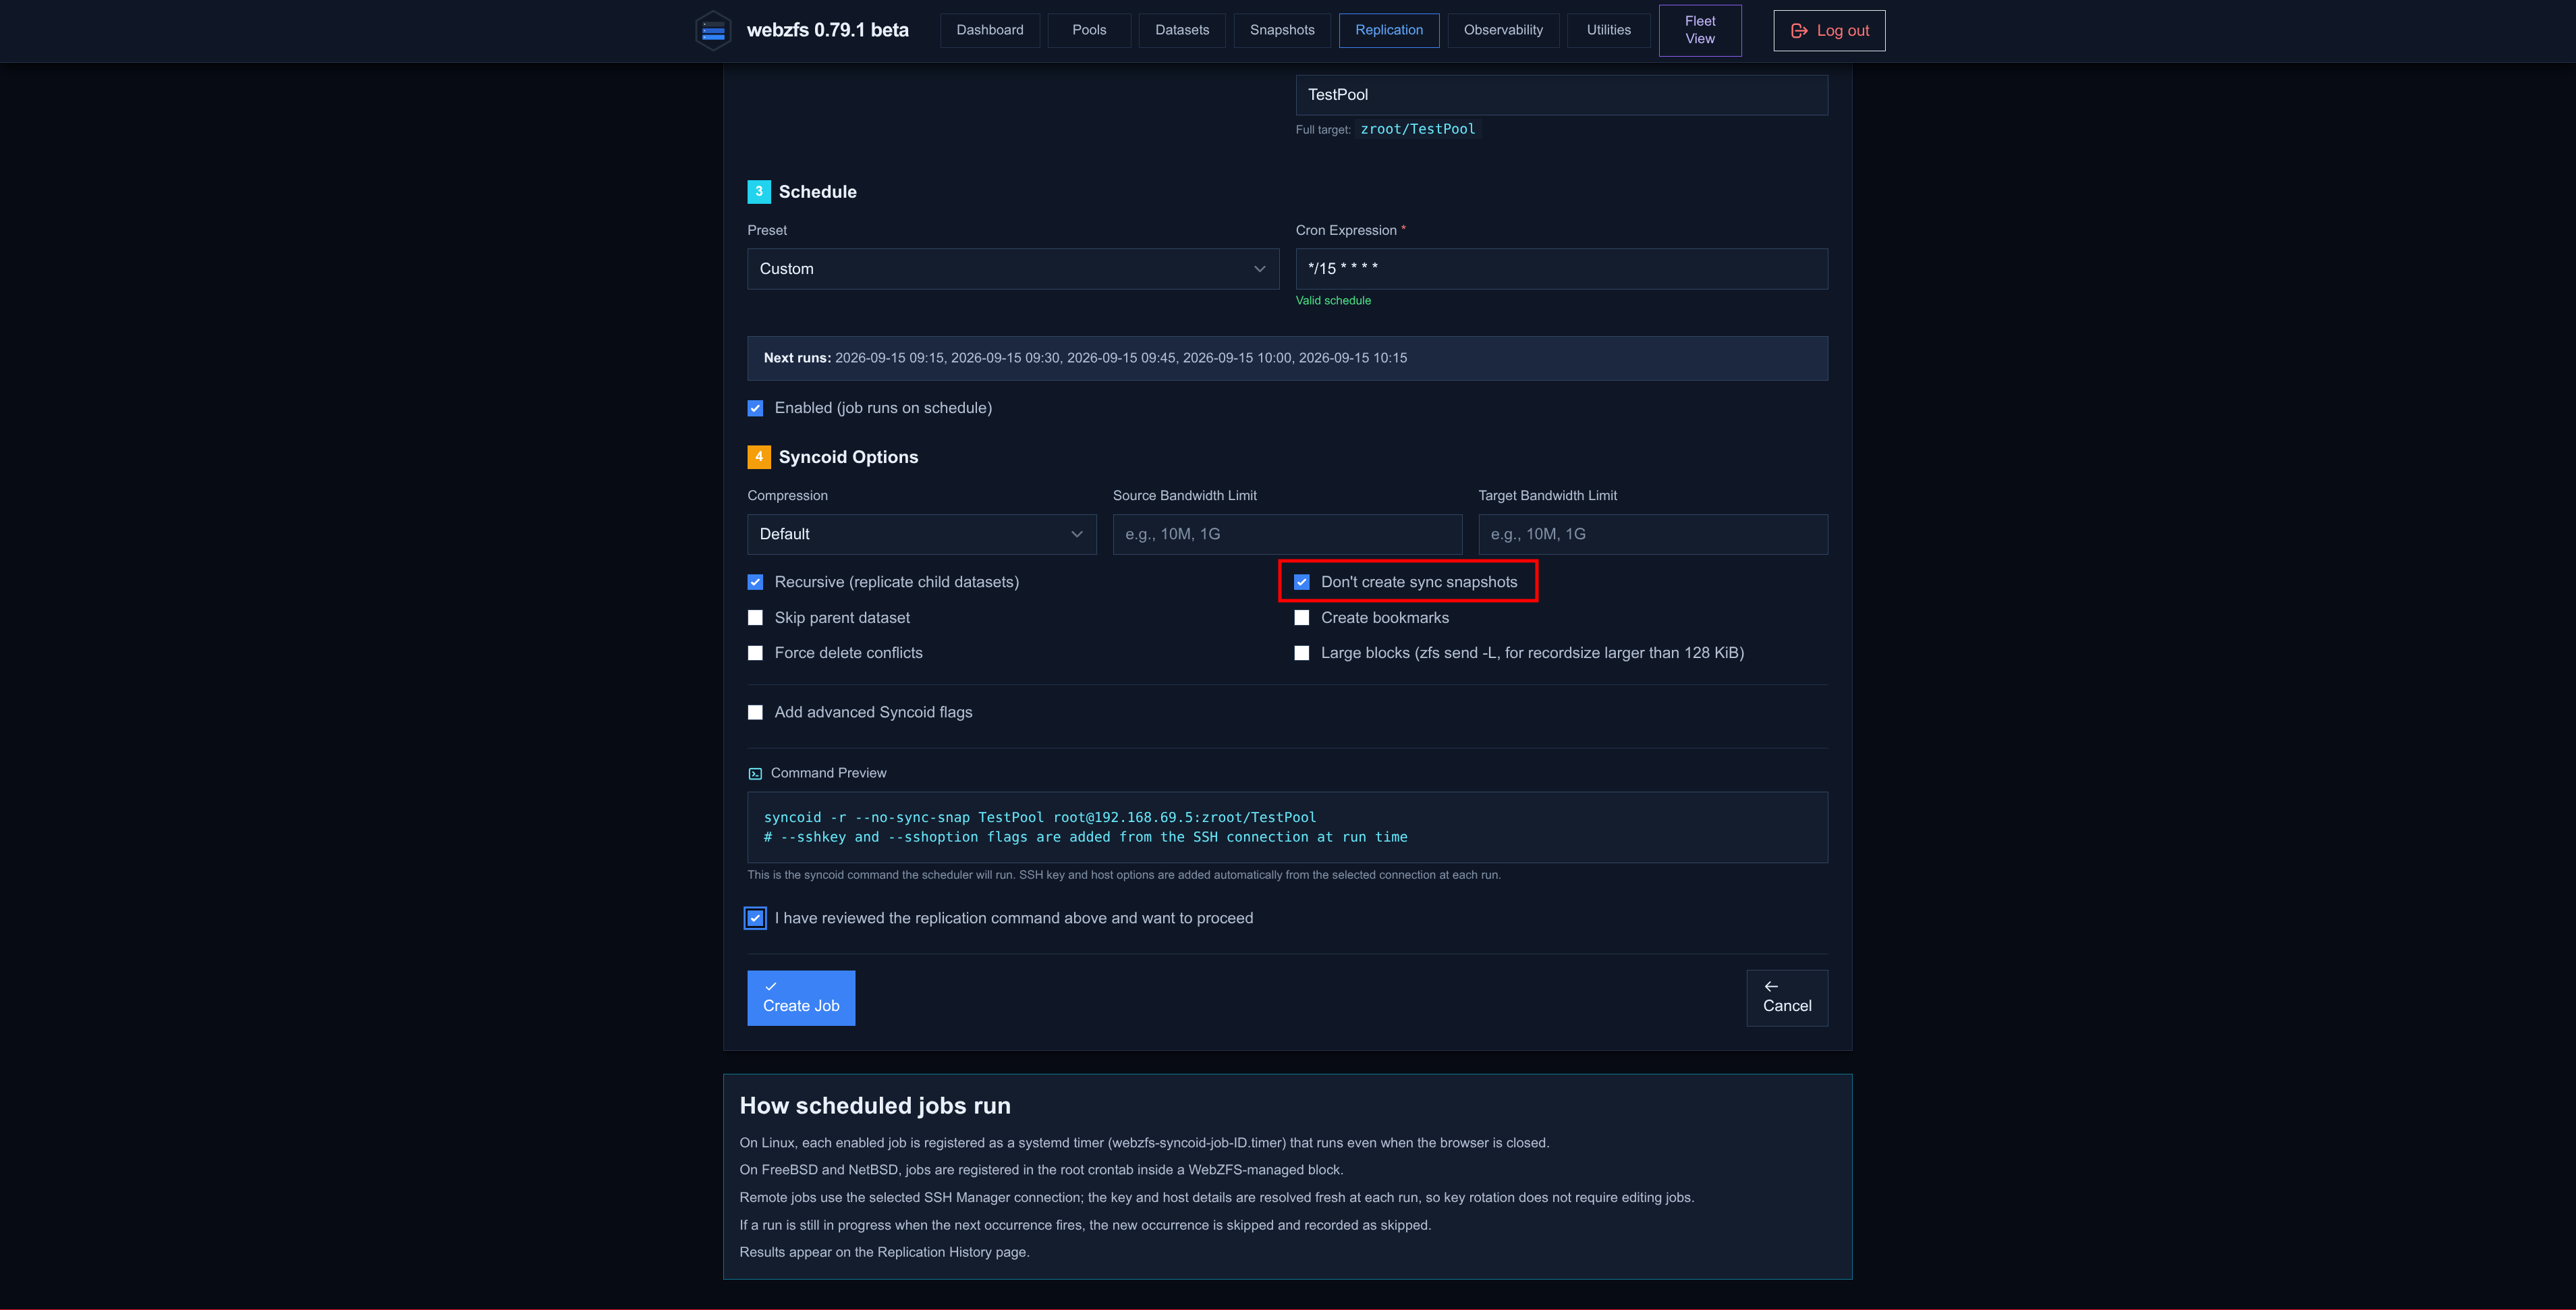
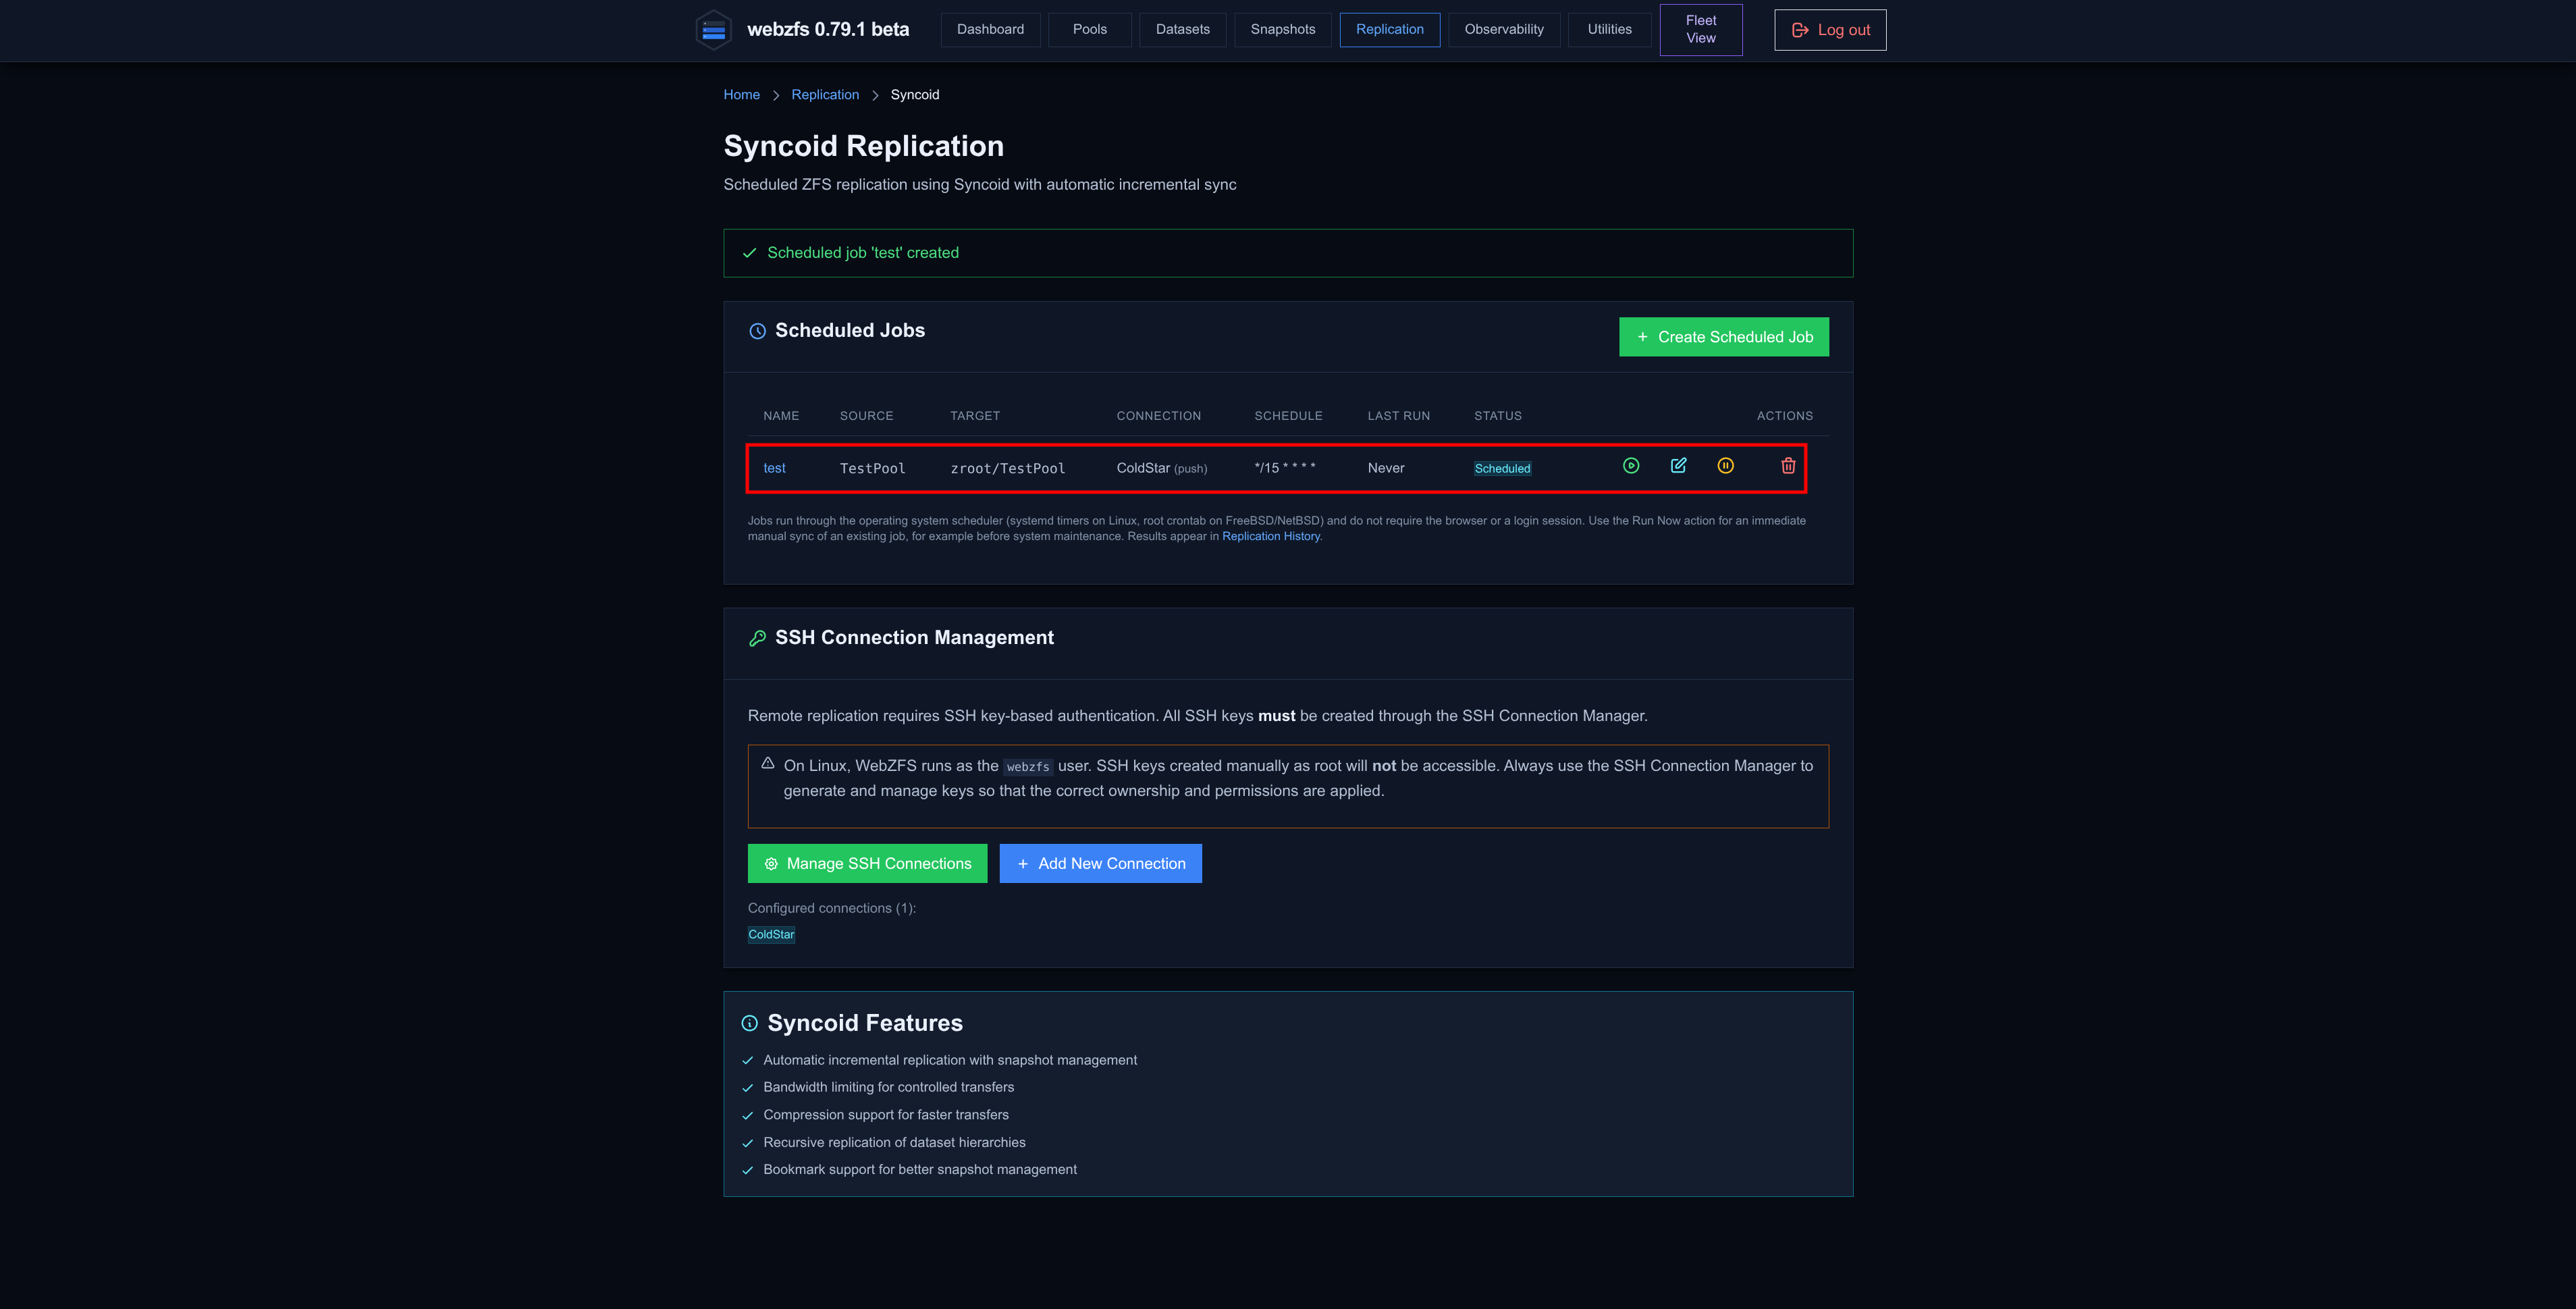
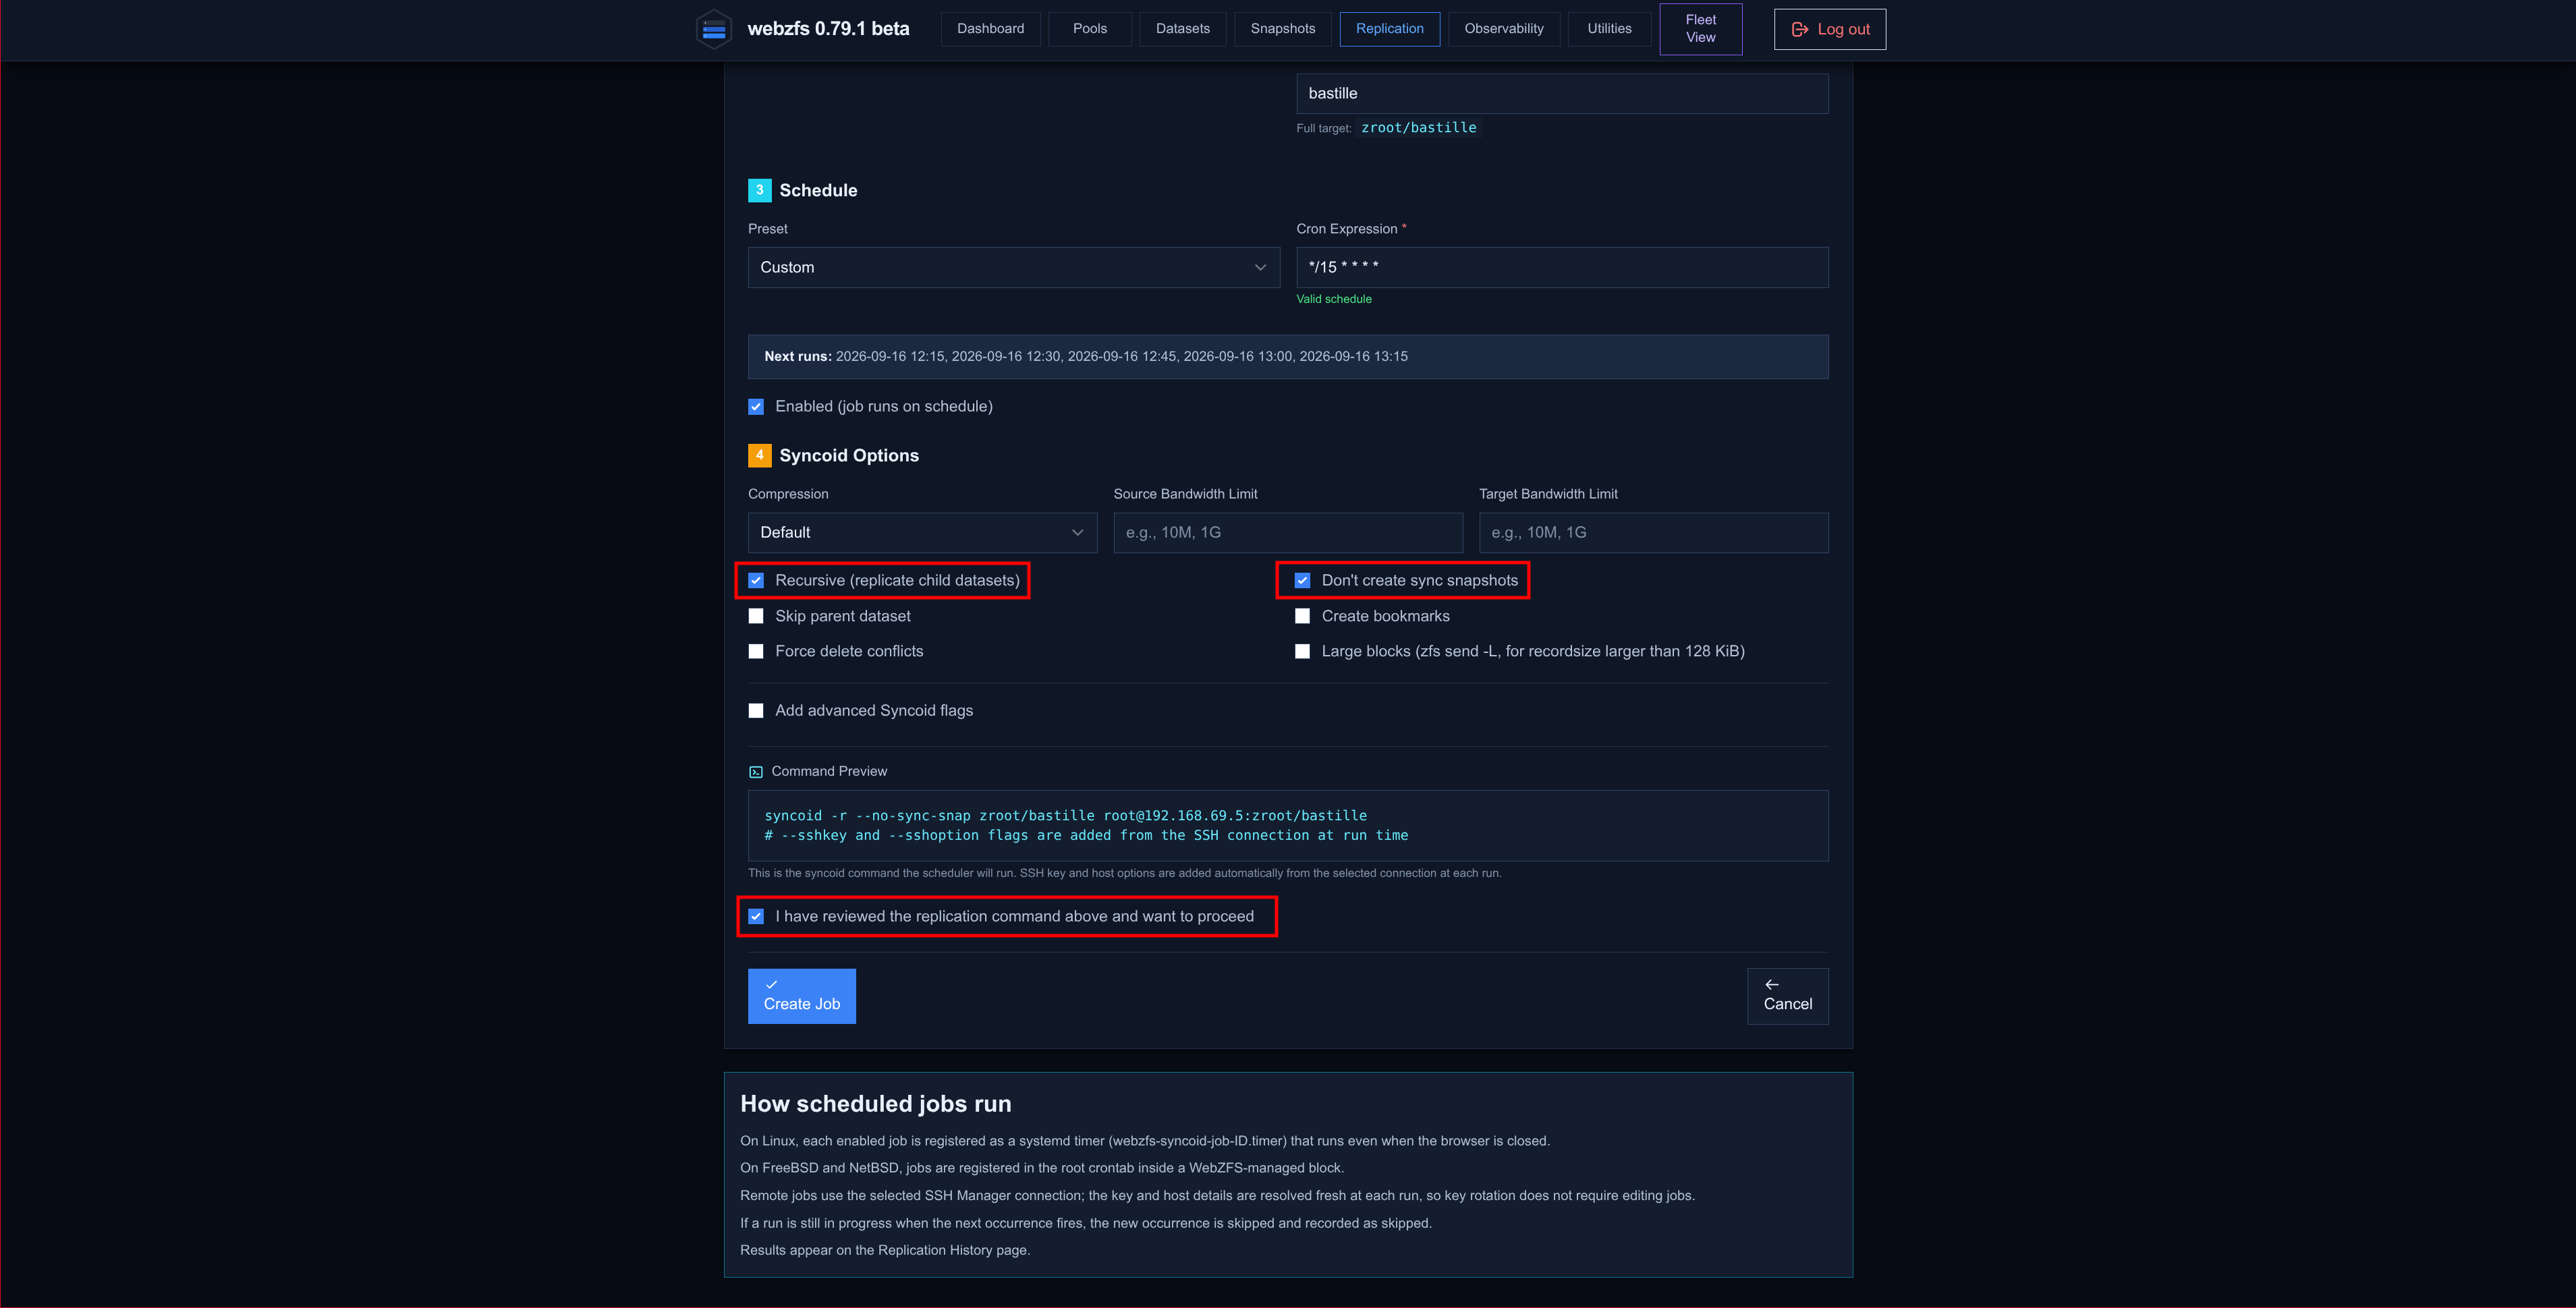
Syncoid replication; on this occasion we disable the sync snapshots since Sanoid is already doing it:
|
|
|
|
We can see at the source that a snapshot has been generated automatically:
MightyMax # ~> zfs list TestPool -t snapshot
NAME                                               USED  AVAIL  REFER  MOUNTPOINT
TestPool@autosnap_2026-09-15_09:10:00_daily          0B      -   112K  -
TestPool@autosnap_2026-09-15_09:10:00_hourly         0B      -   112K  -
TestPool@autosnap_2026-09-15_09:10:00_frequently     0B      -   112K  -
TestPool@autosnap_2026-09-15_09:15:00_frequently     0B      -   112K  -
And at the destination it is receiving the data:
ColdStar # ~> zfs list zroot/TestPool -t snapshot
NAME                                                     USED  AVAIL  REFER  MOUNTPOINT
zroot/TestPool@autosnap_2026-09-15_09:10:00_daily          0B      -   112K  -
zroot/TestPool@autosnap_2026-09-15_09:10:00_hourly         0B      -   112K  -
zroot/TestPool@autosnap_2026-09-15_09:10:00_frequently     0B      -   112K  -
zroot/TestPool@autosnap_2026-09-15_09:15:00_frequently     0B      -   112K  -

ColdStar # ~> zfs list zroot/TestPool
NAME             USED  AVAIL  REFER  MOUNTPOINT
zroot/TestPool   112K   382G   112K  /zroot/TestPool
But this backup strategy has a drawback, which is that there is nothing pruning the snapshots at the destination, so they will keep accumulating and eventually fill all the disk space. At the source this does not happen because Sanoid will only retain the snapshots defined in the policy linked to the job in question.
MightyMax # ~> zfs list TestPool -t snapshot
NAME                                               USED  AVAIL  REFER  MOUNTPOINT
TestPool@autosnap_2026-09-15_09:10:00_daily          0B      -   112K  -
TestPool@autosnap_2026-09-15_09:10:00_hourly         0B      -   112K  -
TestPool@autosnap_2026-09-15_10:00:00_hourly         0B      -   112K  -
TestPool@autosnap_2026-09-15_10:00:00_frequently     0B      -   112K  -
TestPool@autosnap_2026-09-15_10:15:00_frequently     0B      -   112K  -
TestPool@autosnap_2026-09-15_10:30:00_frequently     0B      -   112K  -
TestPool@autosnap_2026-09-15_10:45:00_frequently     0B      -   112K  -
ColdStar # ~> zfs list zroot/TestPool -t snapshot
NAME                                                     USED  AVAIL  REFER  MOUNTPOINT
zroot/TestPool@autosnap_2026-09-15_09:10:00_daily          0B      -   112K  -
zroot/TestPool@autosnap_2026-09-15_09:10:00_hourly         0B      -   112K  -
zroot/TestPool@autosnap_2026-09-15_09:10:00_frequently     0B      -   112K  -
zroot/TestPool@autosnap_2026-09-15_09:15:00_frequently     0B      -   112K  -
zroot/TestPool@autosnap_2026-09-15_09:30:00_frequently     0B      -   112K  -
zroot/TestPool@autosnap_2026-09-15_09:45:00_frequently     0B      -   112K  -
zroot/TestPool@autosnap_2026-09-15_10:00:00_hourly         0B      -   112K  -
zroot/TestPool@autosnap_2026-09-15_10:00:00_frequently     0B      -   112K  -
zroot/TestPool@autosnap_2026-09-15_10:15:00_frequently     0B      -   112K  -
zroot/TestPool@autosnap_2026-09-15_10:30:00_frequently     0B      -   112K  -
zroot/TestPool@autosnap_2026-09-15_10:45:00_frequently     0B      -   112K  -
To avoid this we can install WebZFS at the destination as well and configure a Sanoid job with the same retention as at the source (or a different one as appropriate) but in the policy’s Advanced Options set:
- Auto-Snapshot: No - Manual only
- Auto-Prune: Yes - Automatically prune old snapshots
We delete the pool at the destination to avoid problems and let it resync with the indicated policies:
zfs destroy -r zroot/TestPool
We create the retention policy:
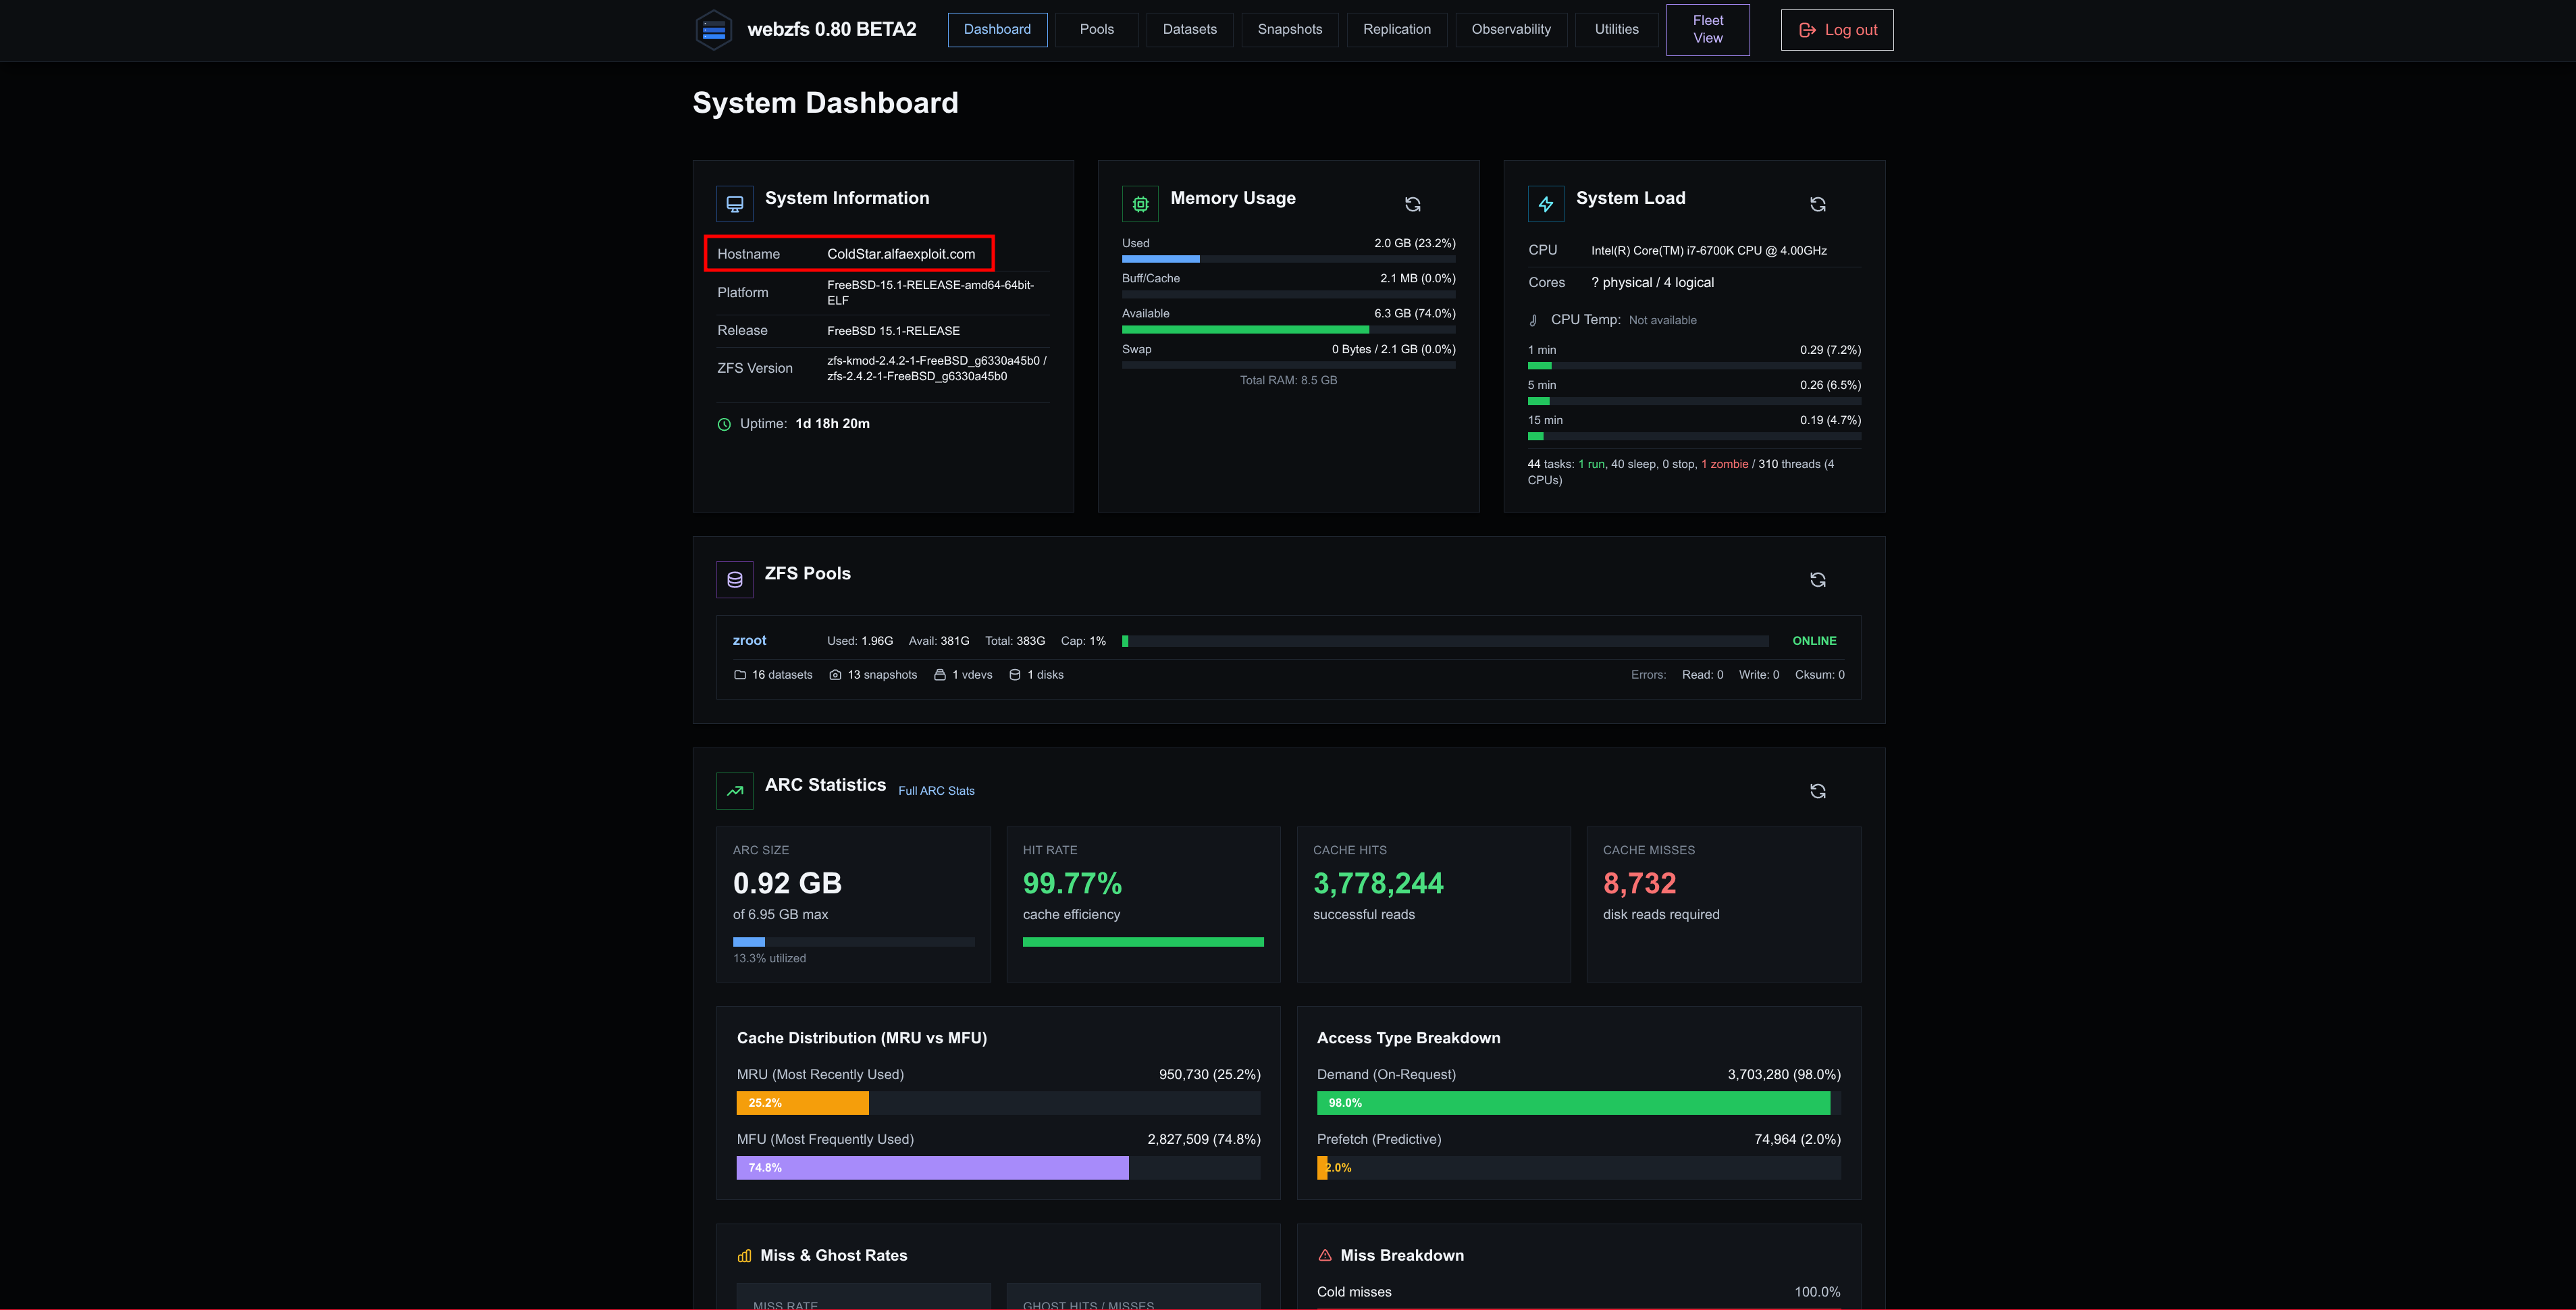
|
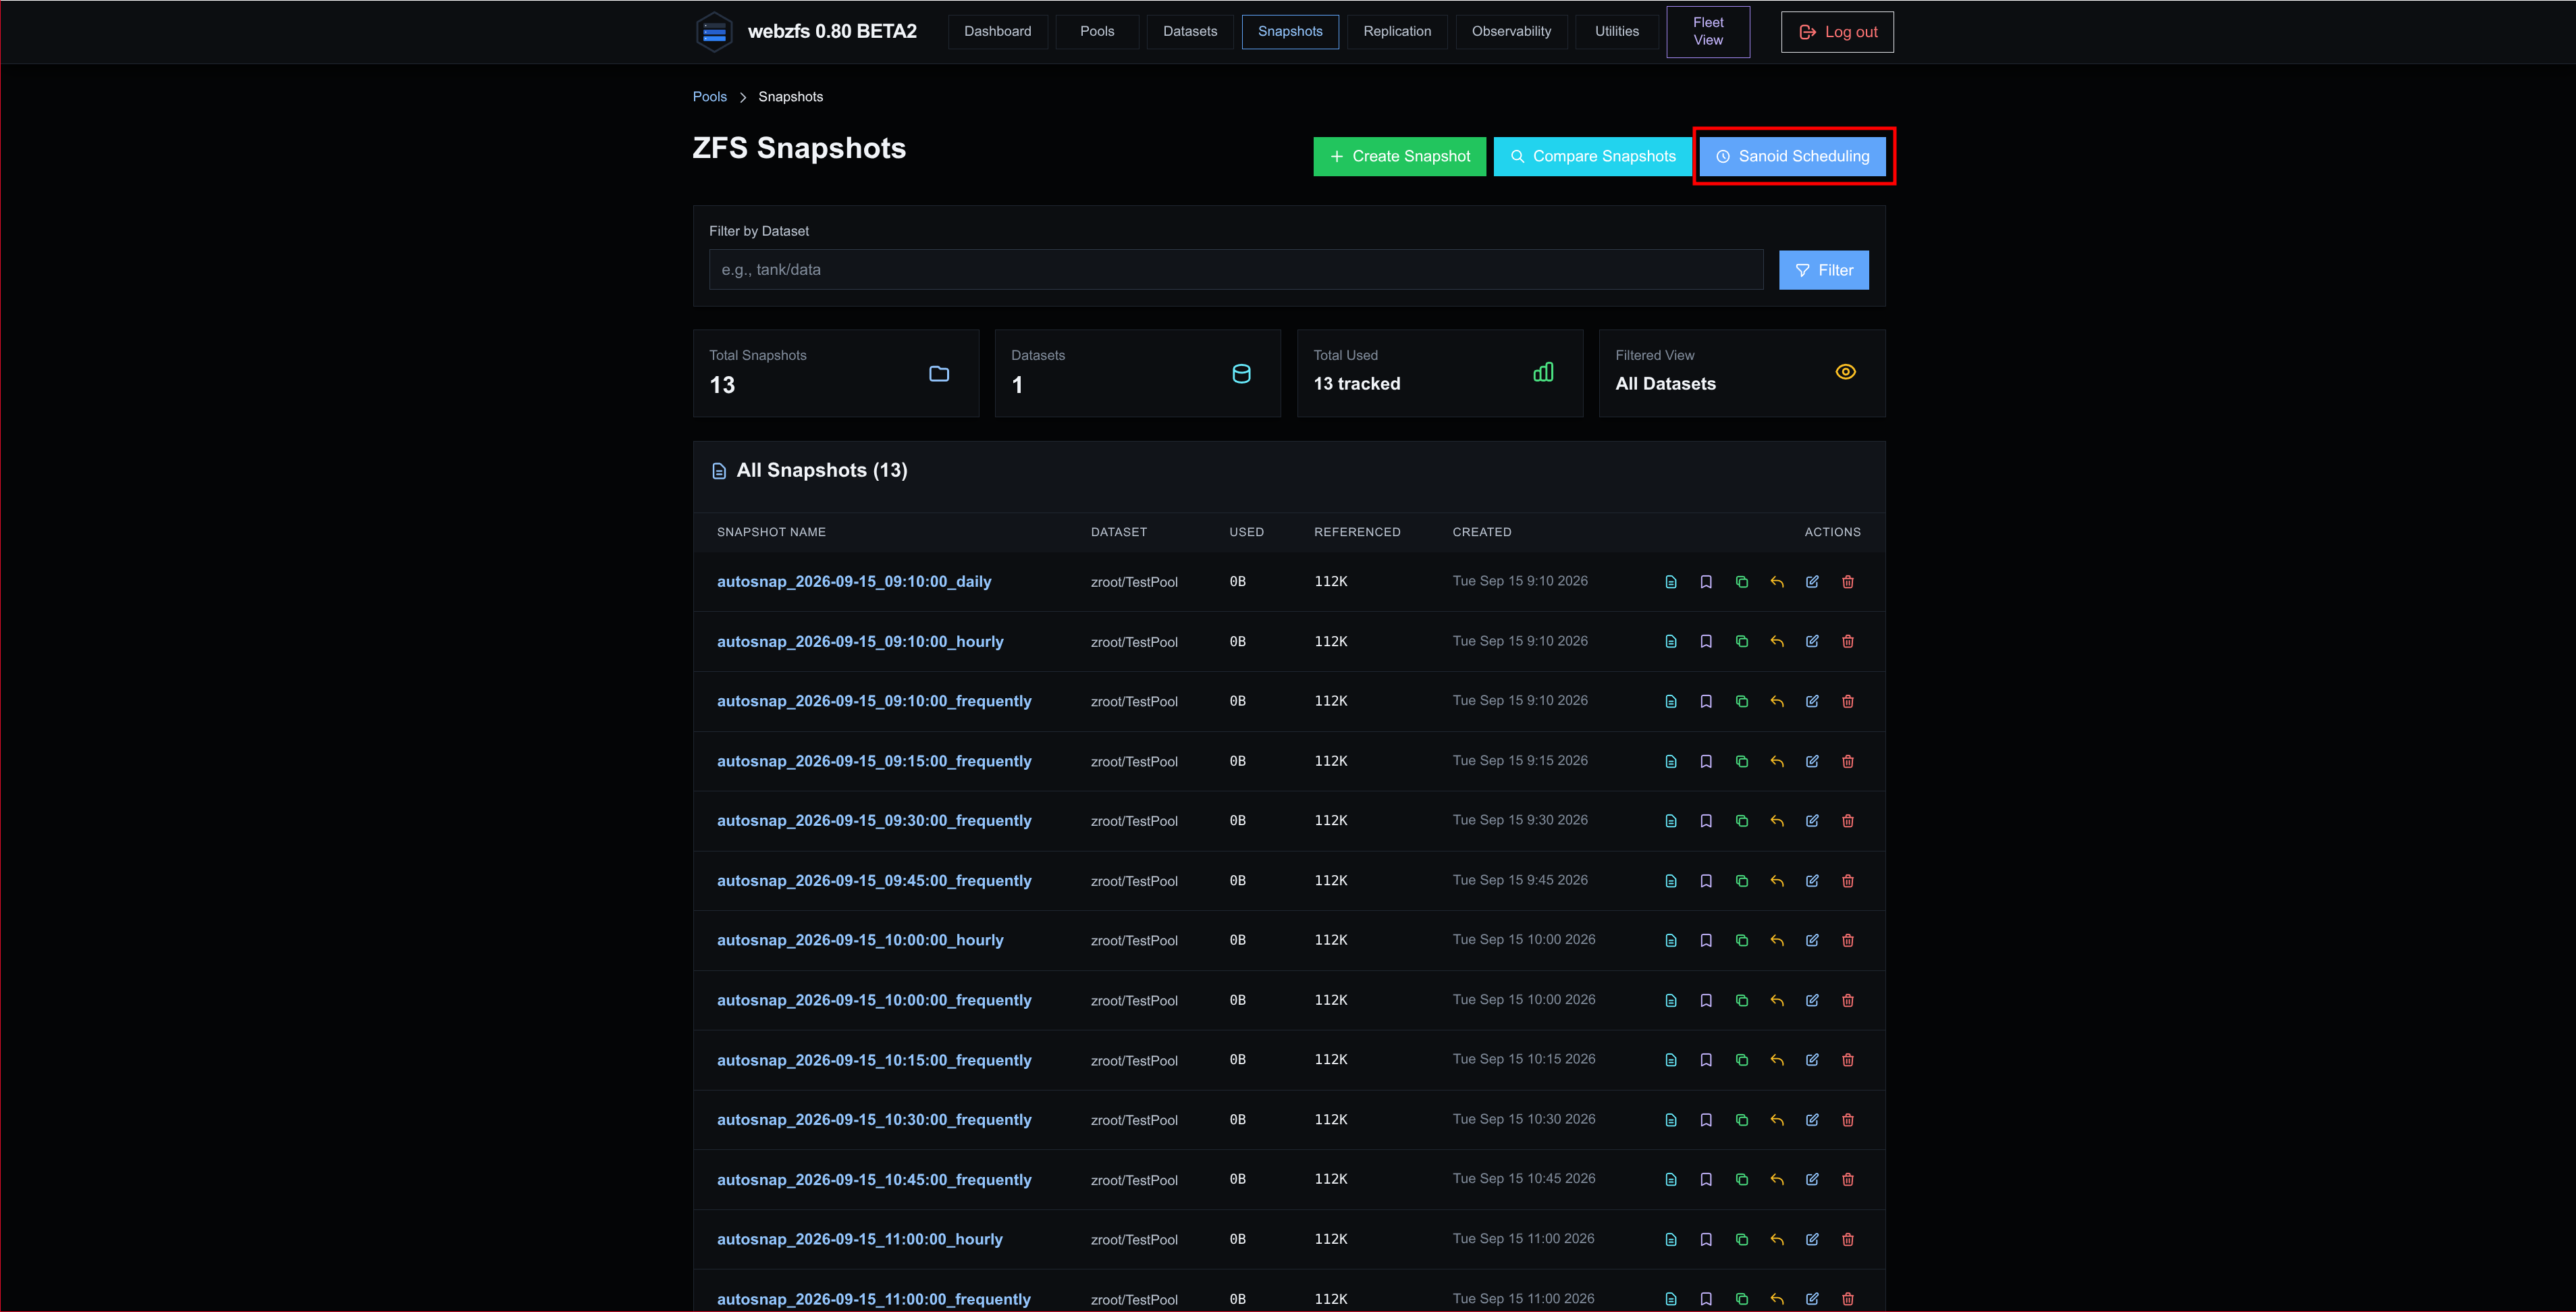
|
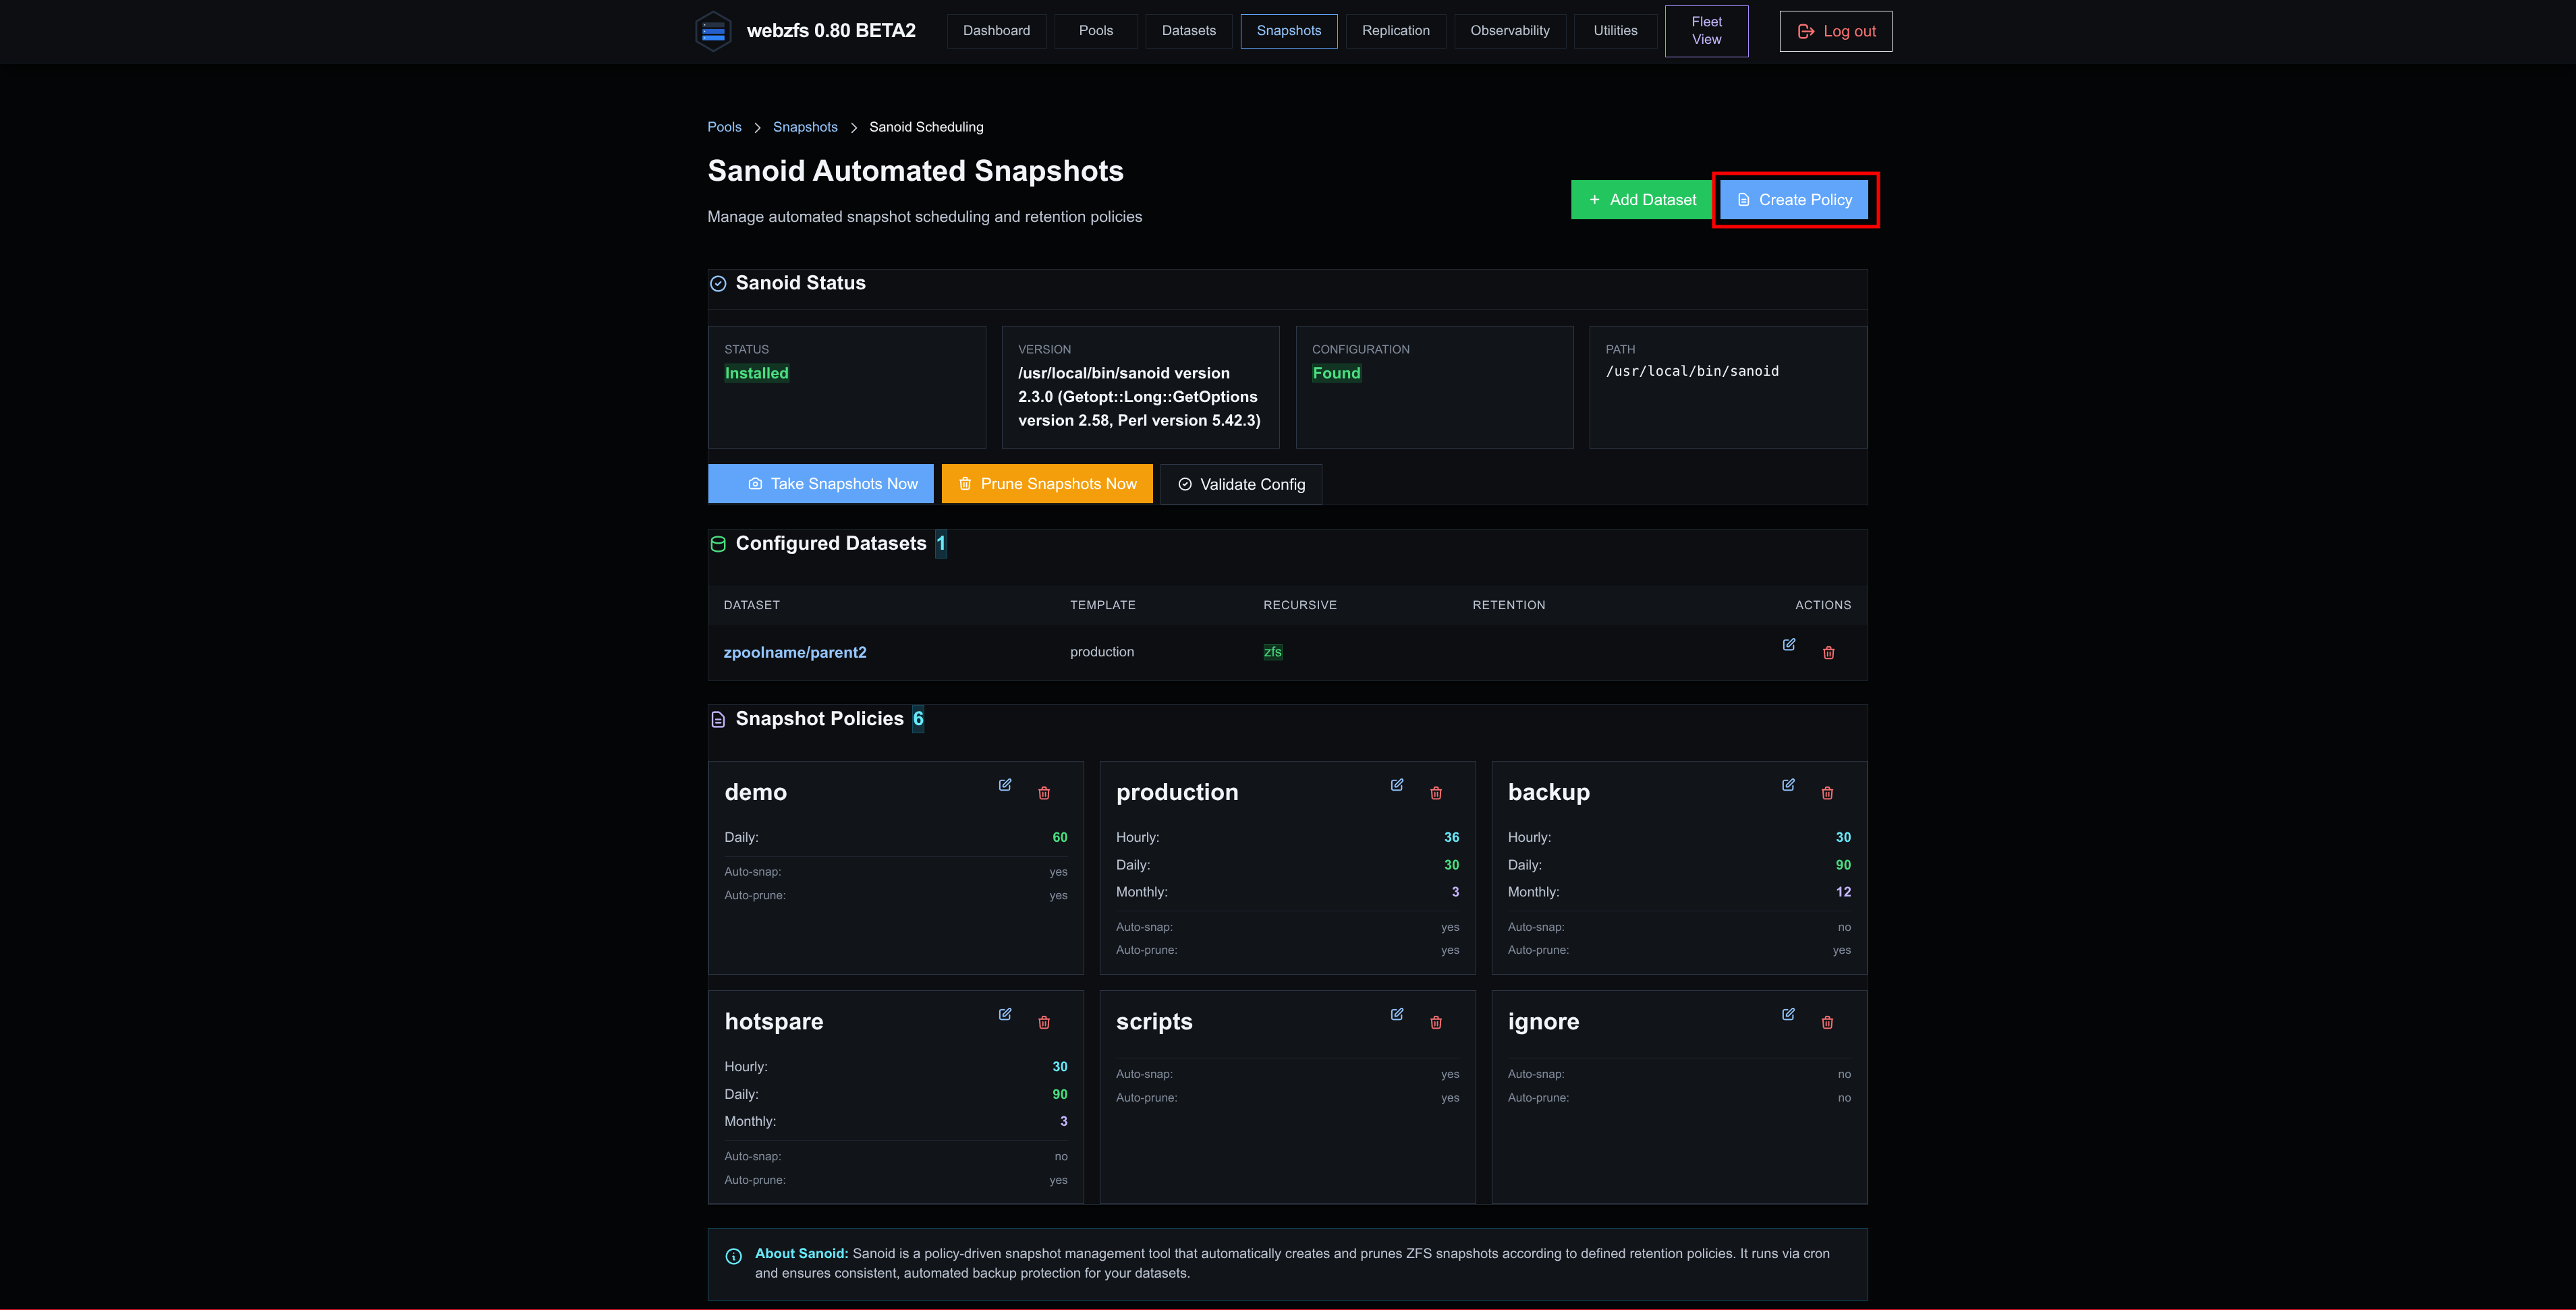
|
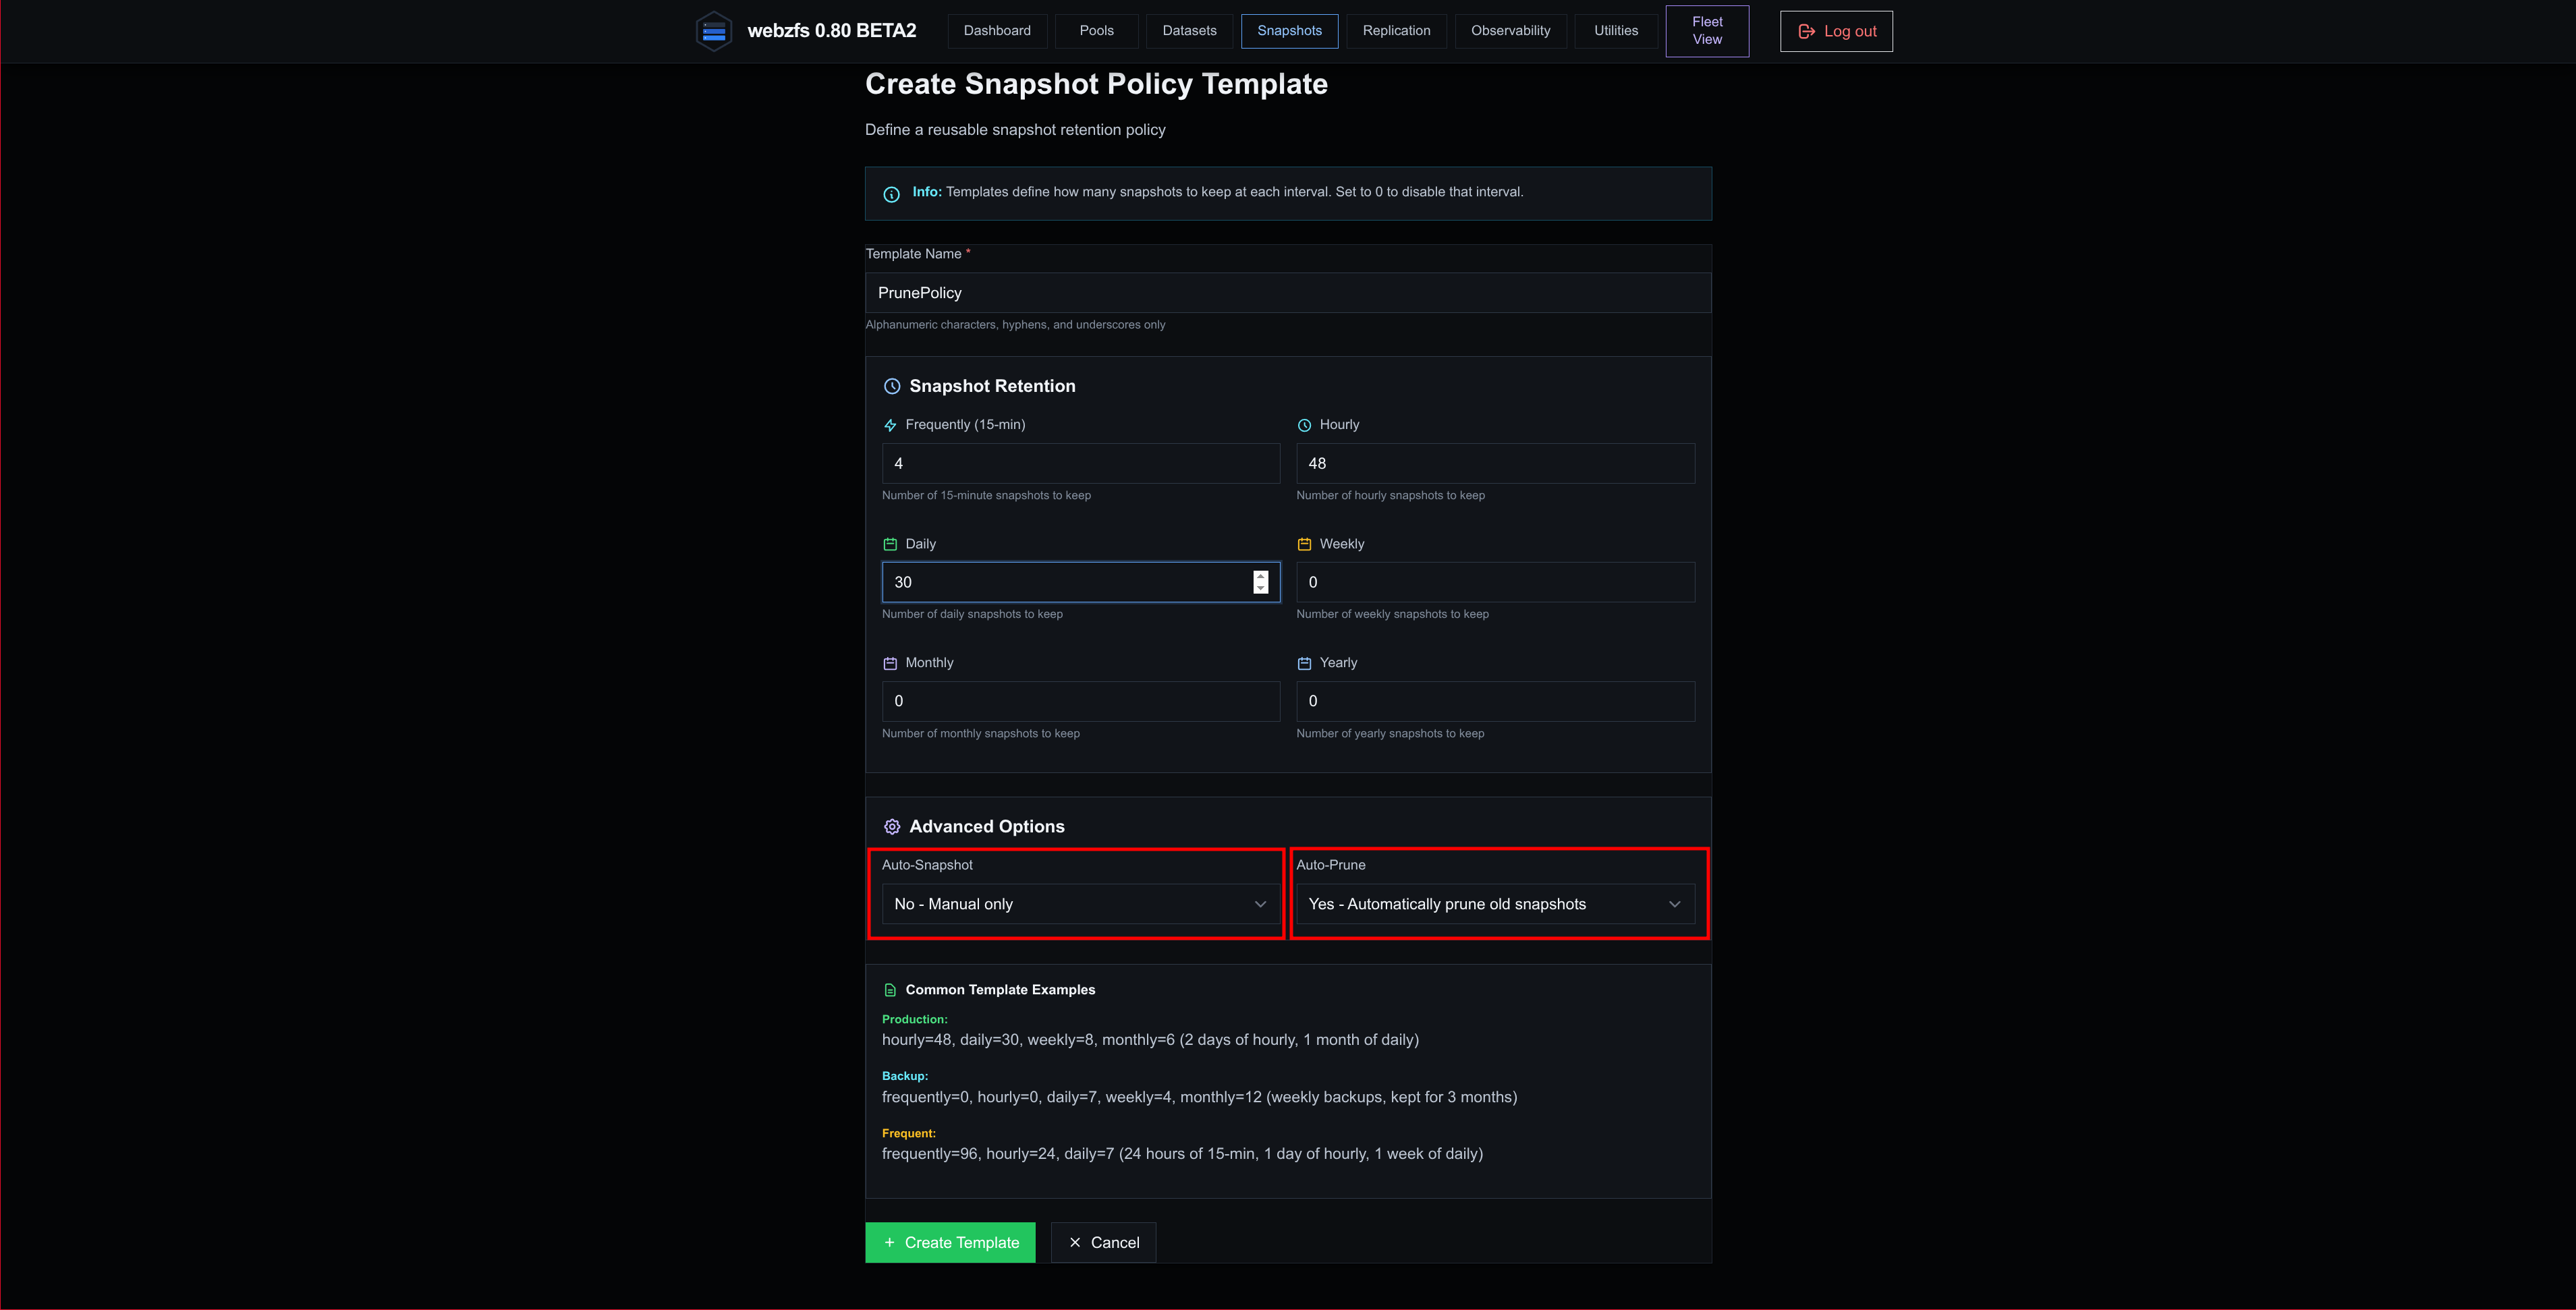
|
And then the job associated with that policy:
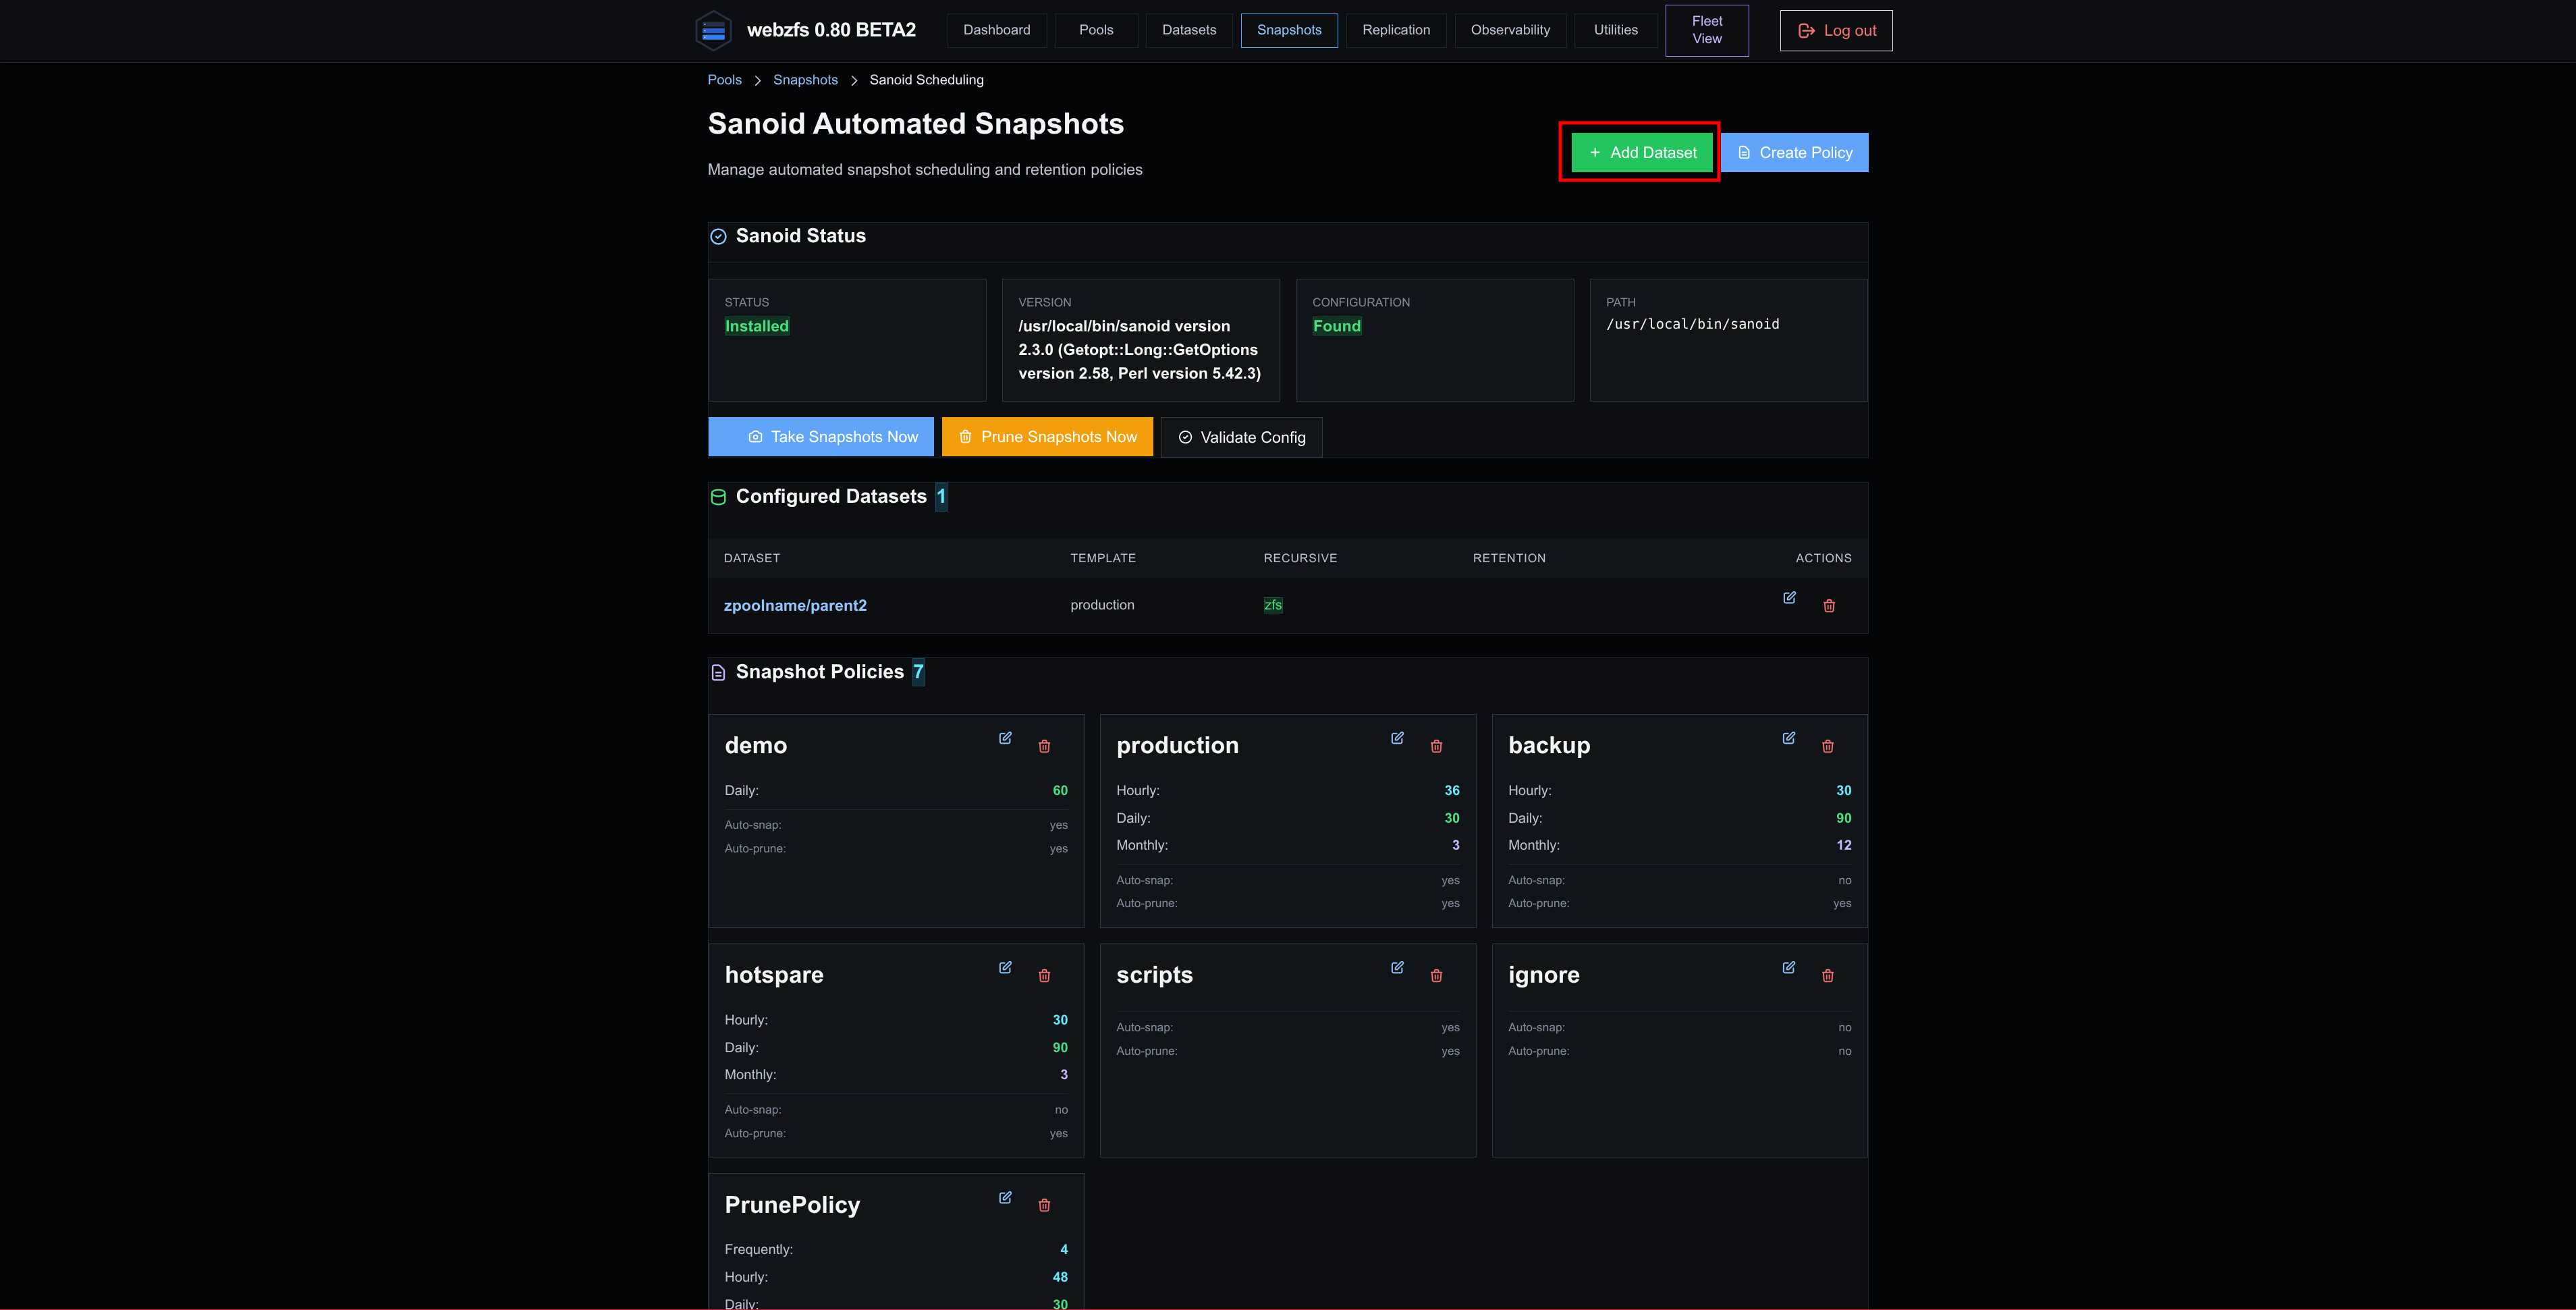
|
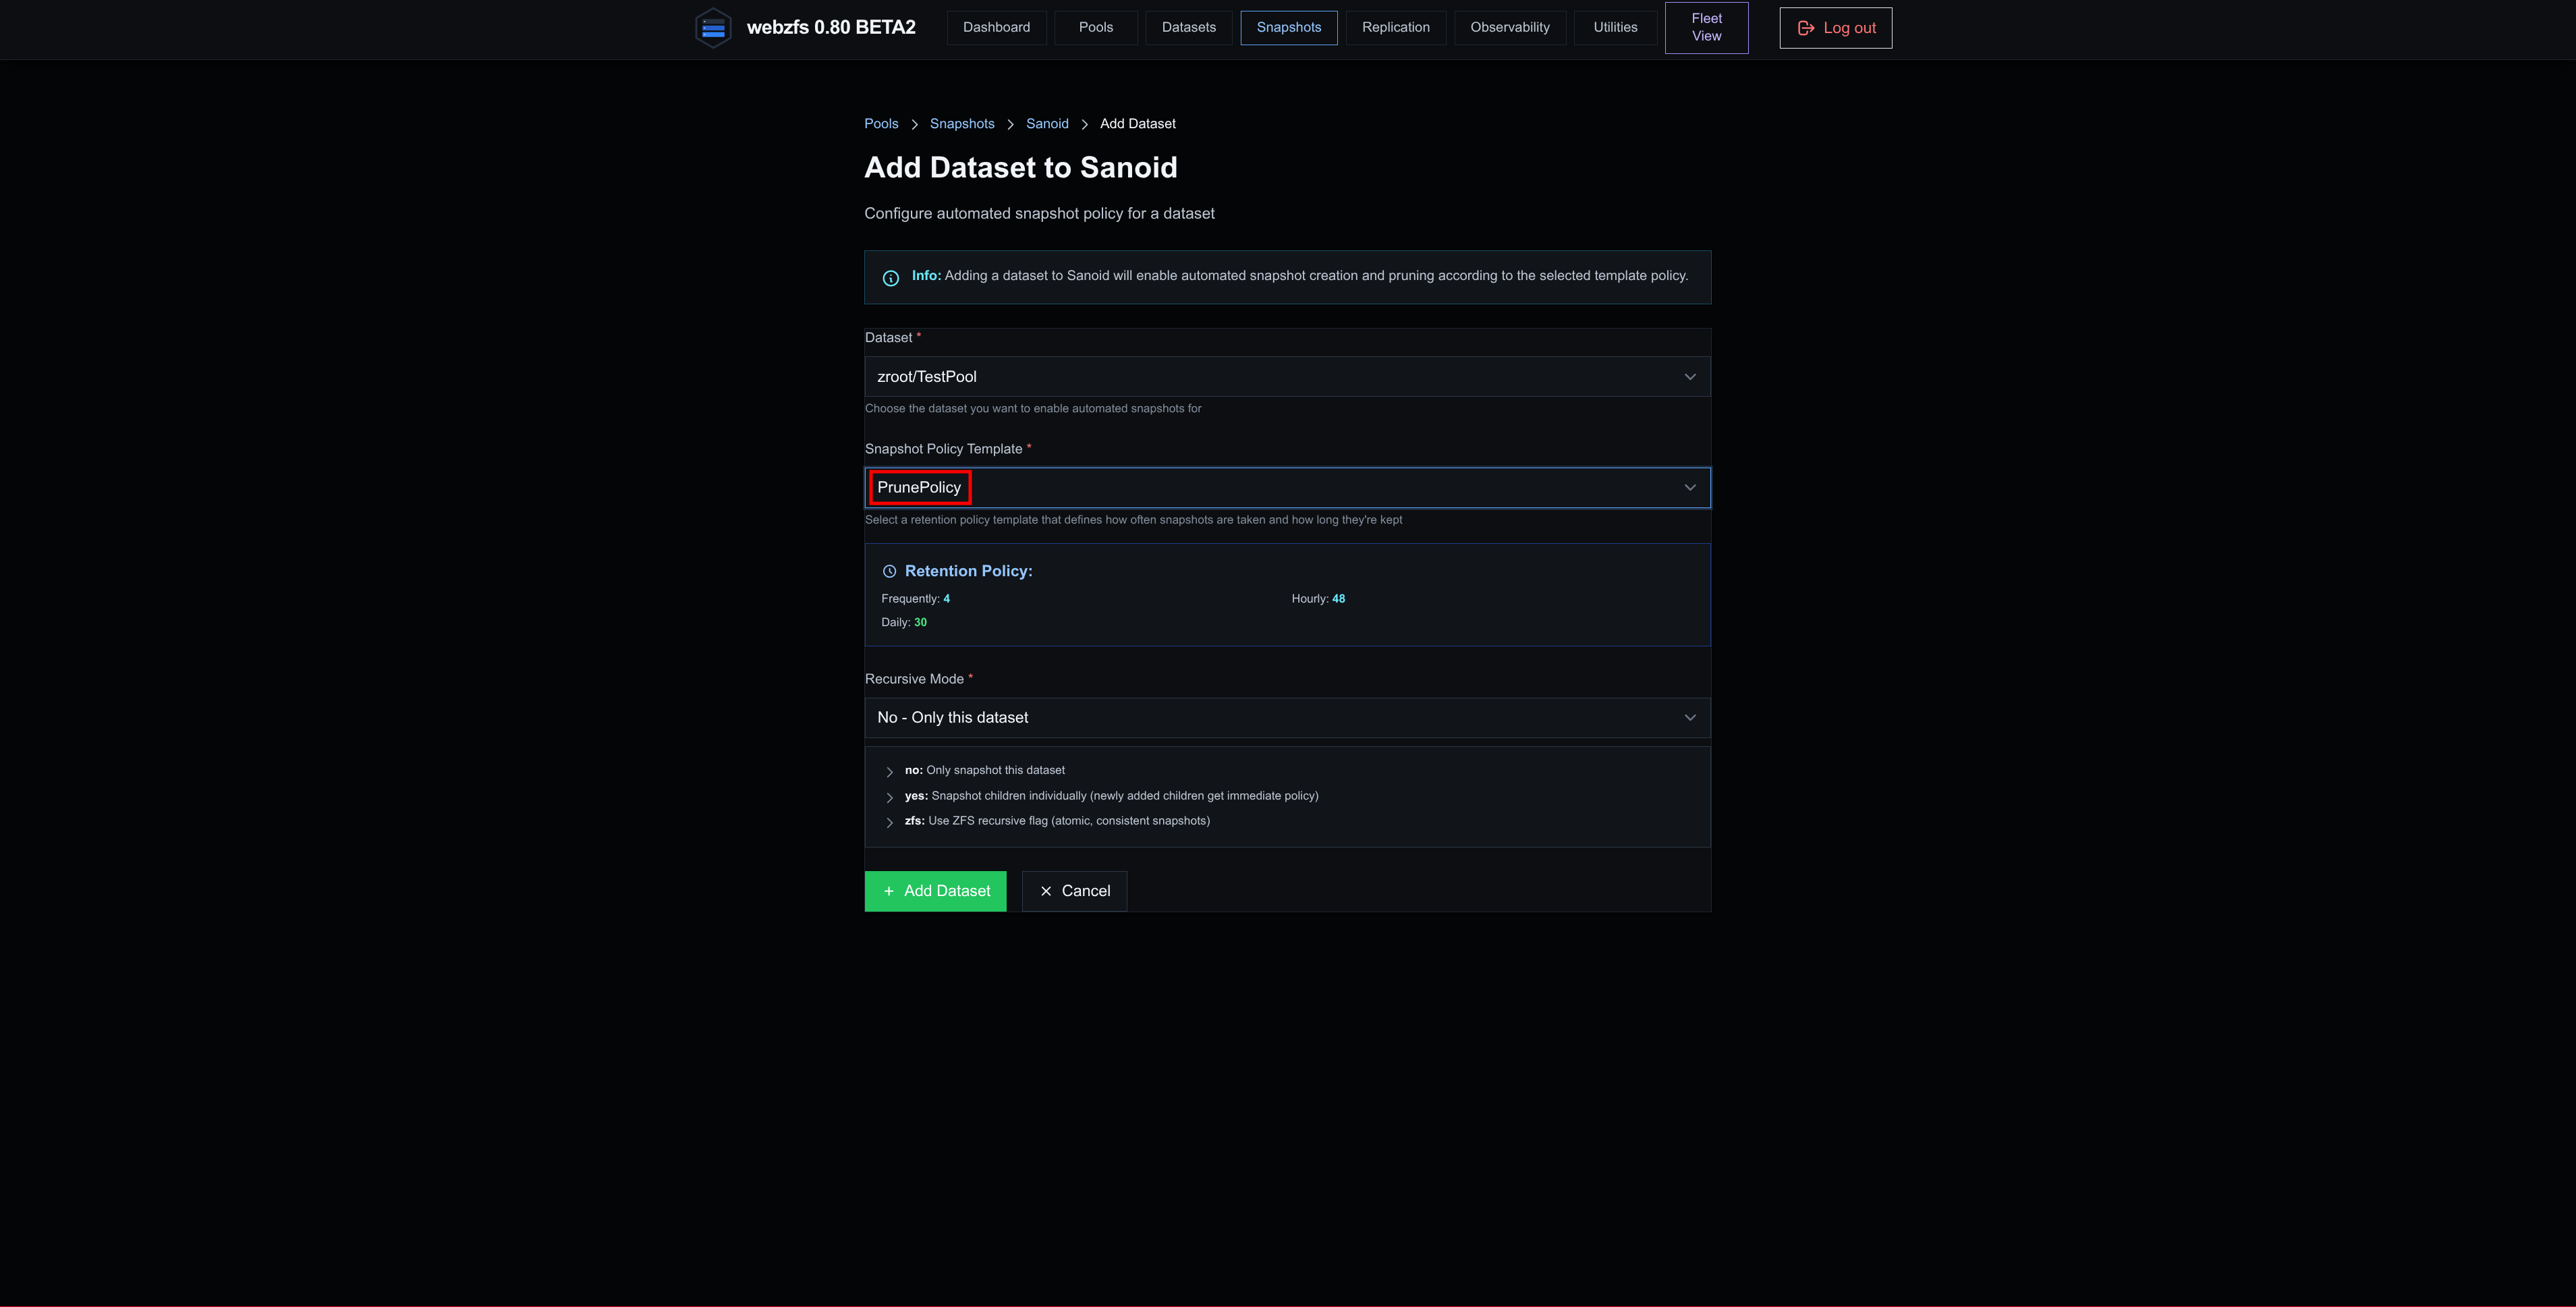
|
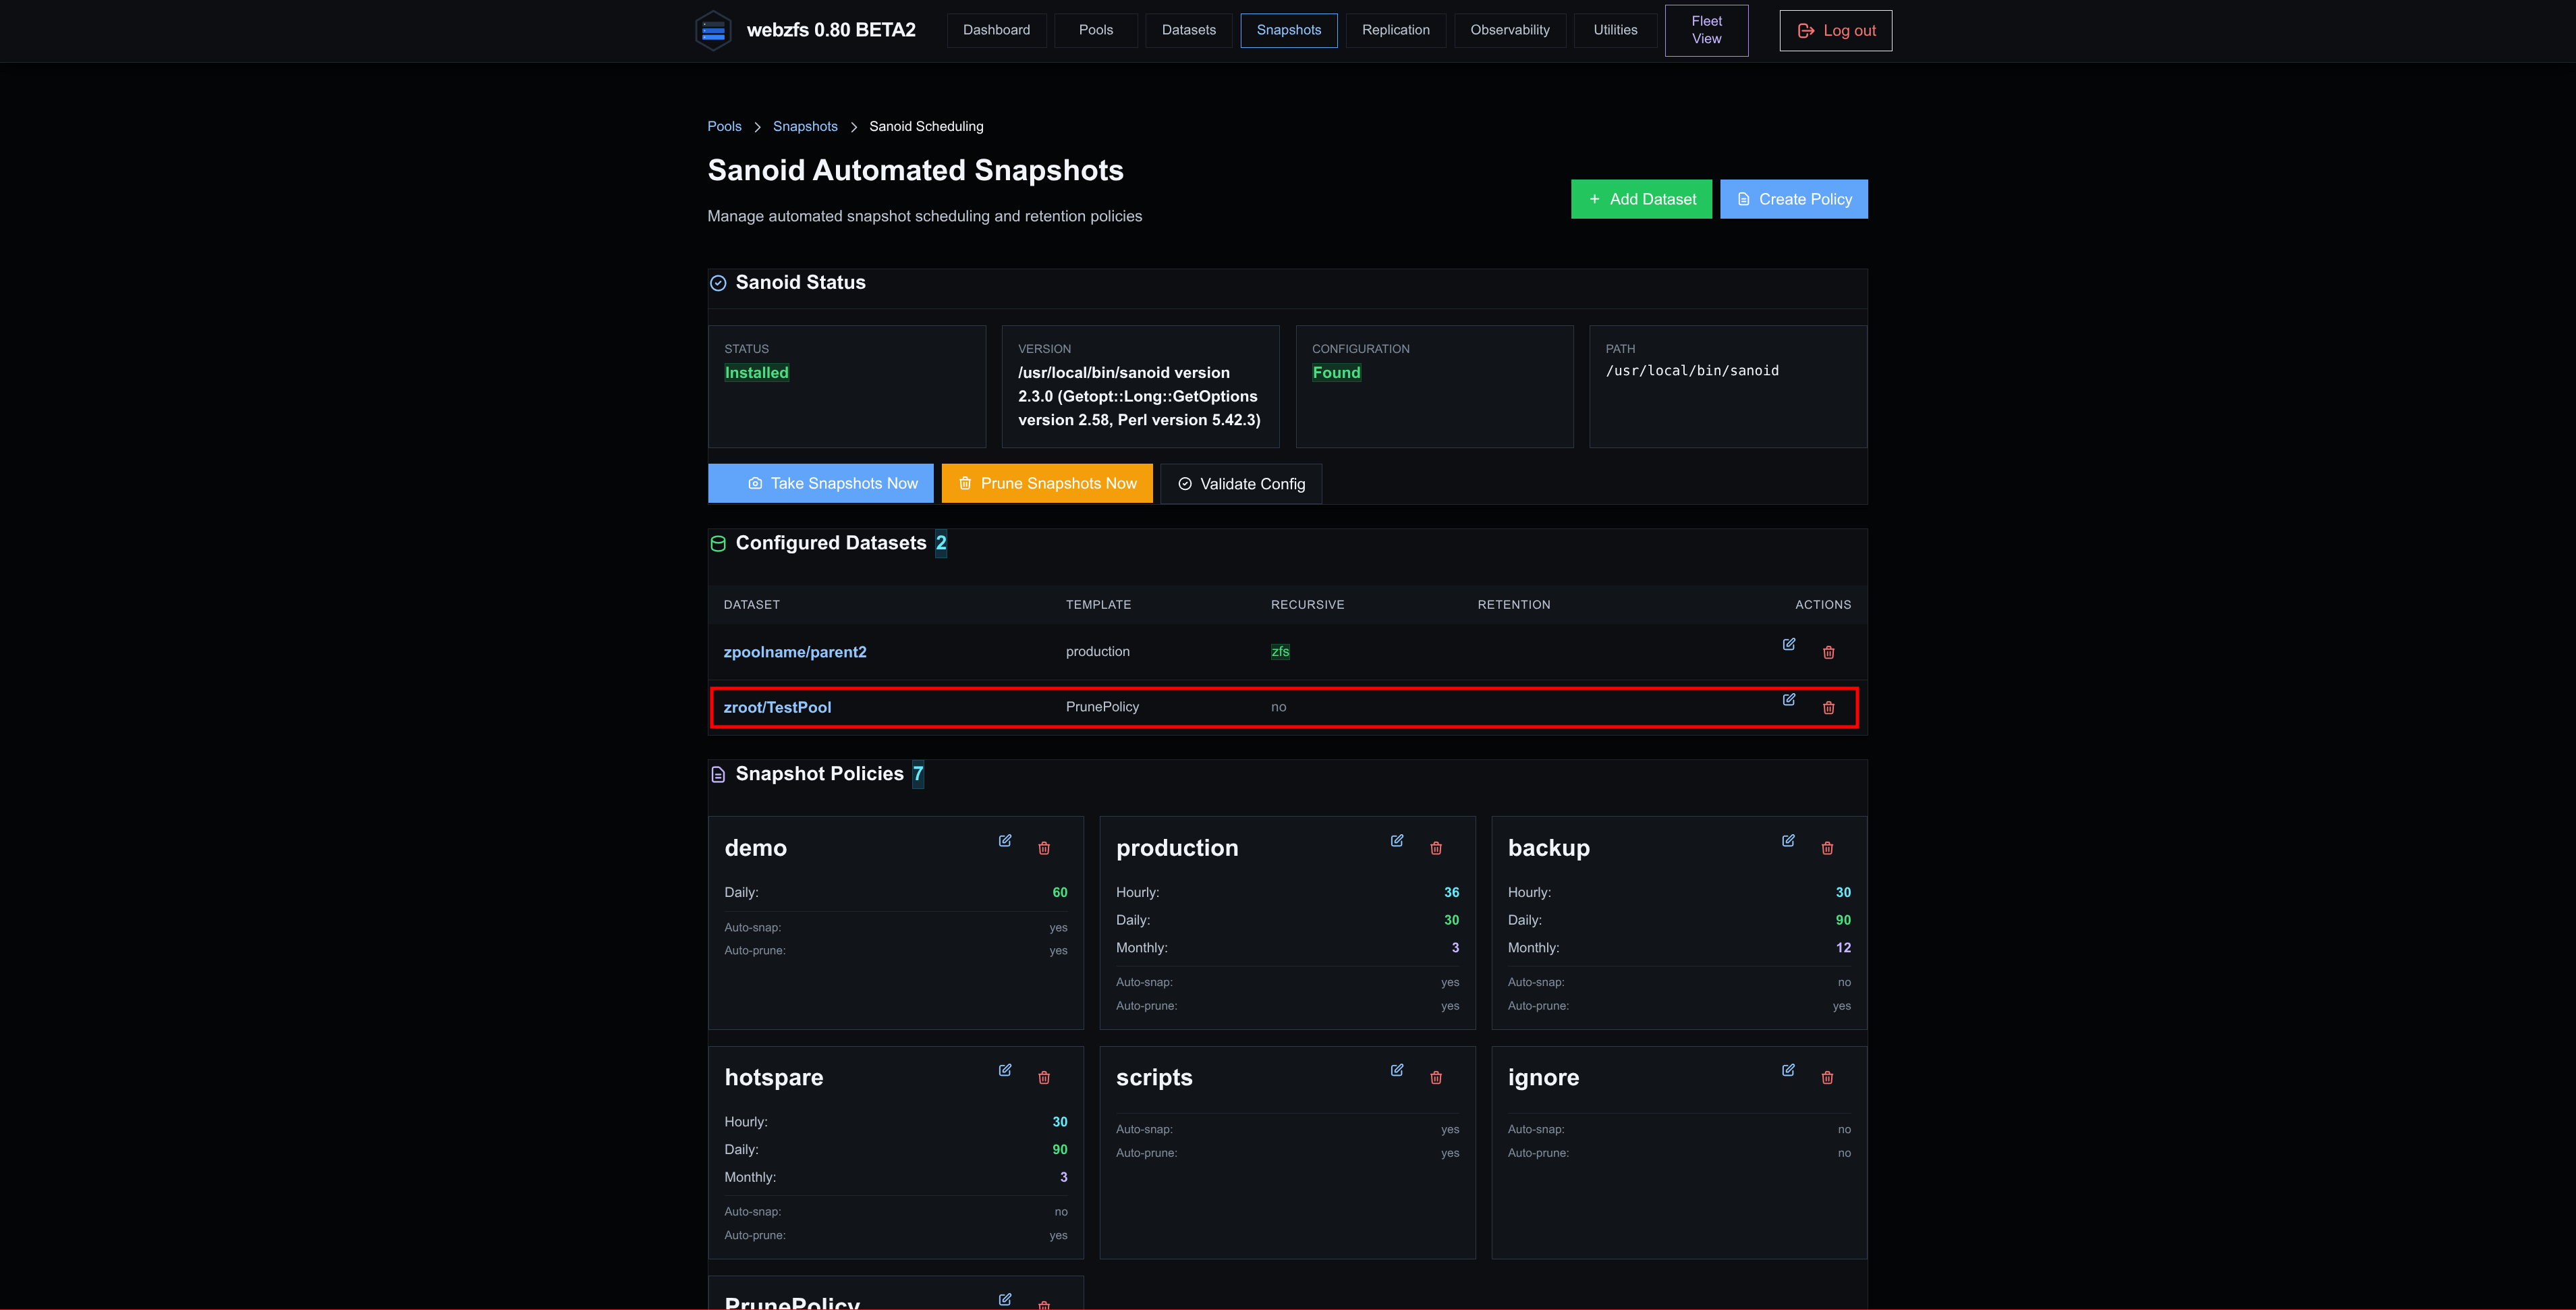
|
As we already mentioned earlier in the
Snapshots section
, the integration of WebZFS with Sanoid must be buggy; it generates the configuration correctly but does not leave the execution scheduled to generate/prune the snapshots.
It has to be crontab’d manually:
crontab -e
* * * * * /usr/local/bin/sanoid --cron >/dev/null 2>&1
As we can see, the same snapshots are now kept at both the source and the destination:
MightyMax # ~> zfs list TestPool -t snapshot
NAME                                               USED  AVAIL  REFER  MOUNTPOINT
TestPool@autosnap_2026-09-15_09:10:00_daily          0B      -   112K  -
TestPool@autosnap_2026-09-15_09:10:00_hourly         0B      -   112K  -
TestPool@autosnap_2026-09-15_10:00:00_hourly         0B      -   112K  -
TestPool@autosnap_2026-09-15_11:00:00_hourly         0B      -   112K  -
TestPool@autosnap_2026-09-15_12:00:00_hourly         0B      -   112K  -
TestPool@autosnap_2026-09-15_13:00:00_hourly         0B      -   112K  -
TestPool@autosnap_2026-09-15_13:30:00_frequently     0B      -   112K  -
TestPool@autosnap_2026-09-15_13:45:00_frequently     0B      -   112K  -
TestPool@autosnap_2026-09-15_14:00:00_hourly         0B      -   112K  -
TestPool@autosnap_2026-09-15_14:00:00_frequently     0B      -   112K  -
TestPool@autosnap_2026-09-15_14:15:00_frequently     0B      -   112K  -
ColdStar # ~> zfs list zroot/TestPool -t snapshot
NAME                                                     USED  AVAIL  REFER  MOUNTPOINT
zroot/TestPool@autosnap_2026-09-15_09:10:00_daily          0B      -   112K  -
zroot/TestPool@autosnap_2026-09-15_09:10:00_hourly         0B      -   112K  -
zroot/TestPool@autosnap_2026-09-15_10:00:00_hourly         0B      -   112K  -
zroot/TestPool@autosnap_2026-09-15_11:00:00_hourly         0B      -   112K  -
zroot/TestPool@autosnap_2026-09-15_12:00:00_hourly         0B      -   112K  -
zroot/TestPool@autosnap_2026-09-15_13:00:00_hourly         0B      -   112K  -
zroot/TestPool@autosnap_2026-09-15_13:30:00_frequently     0B      -   112K  -
zroot/TestPool@autosnap_2026-09-15_13:45:00_frequently     0B      -   112K  -
zroot/TestPool@autosnap_2026-09-15_14:00:00_hourly         0B      -   112K  -
zroot/TestPool@autosnap_2026-09-15_14:00:00_frequently     0B      -   112K  -
zroot/TestPool@autosnap_2026-09-15_14:15:00_frequently     0B      -   112K  -
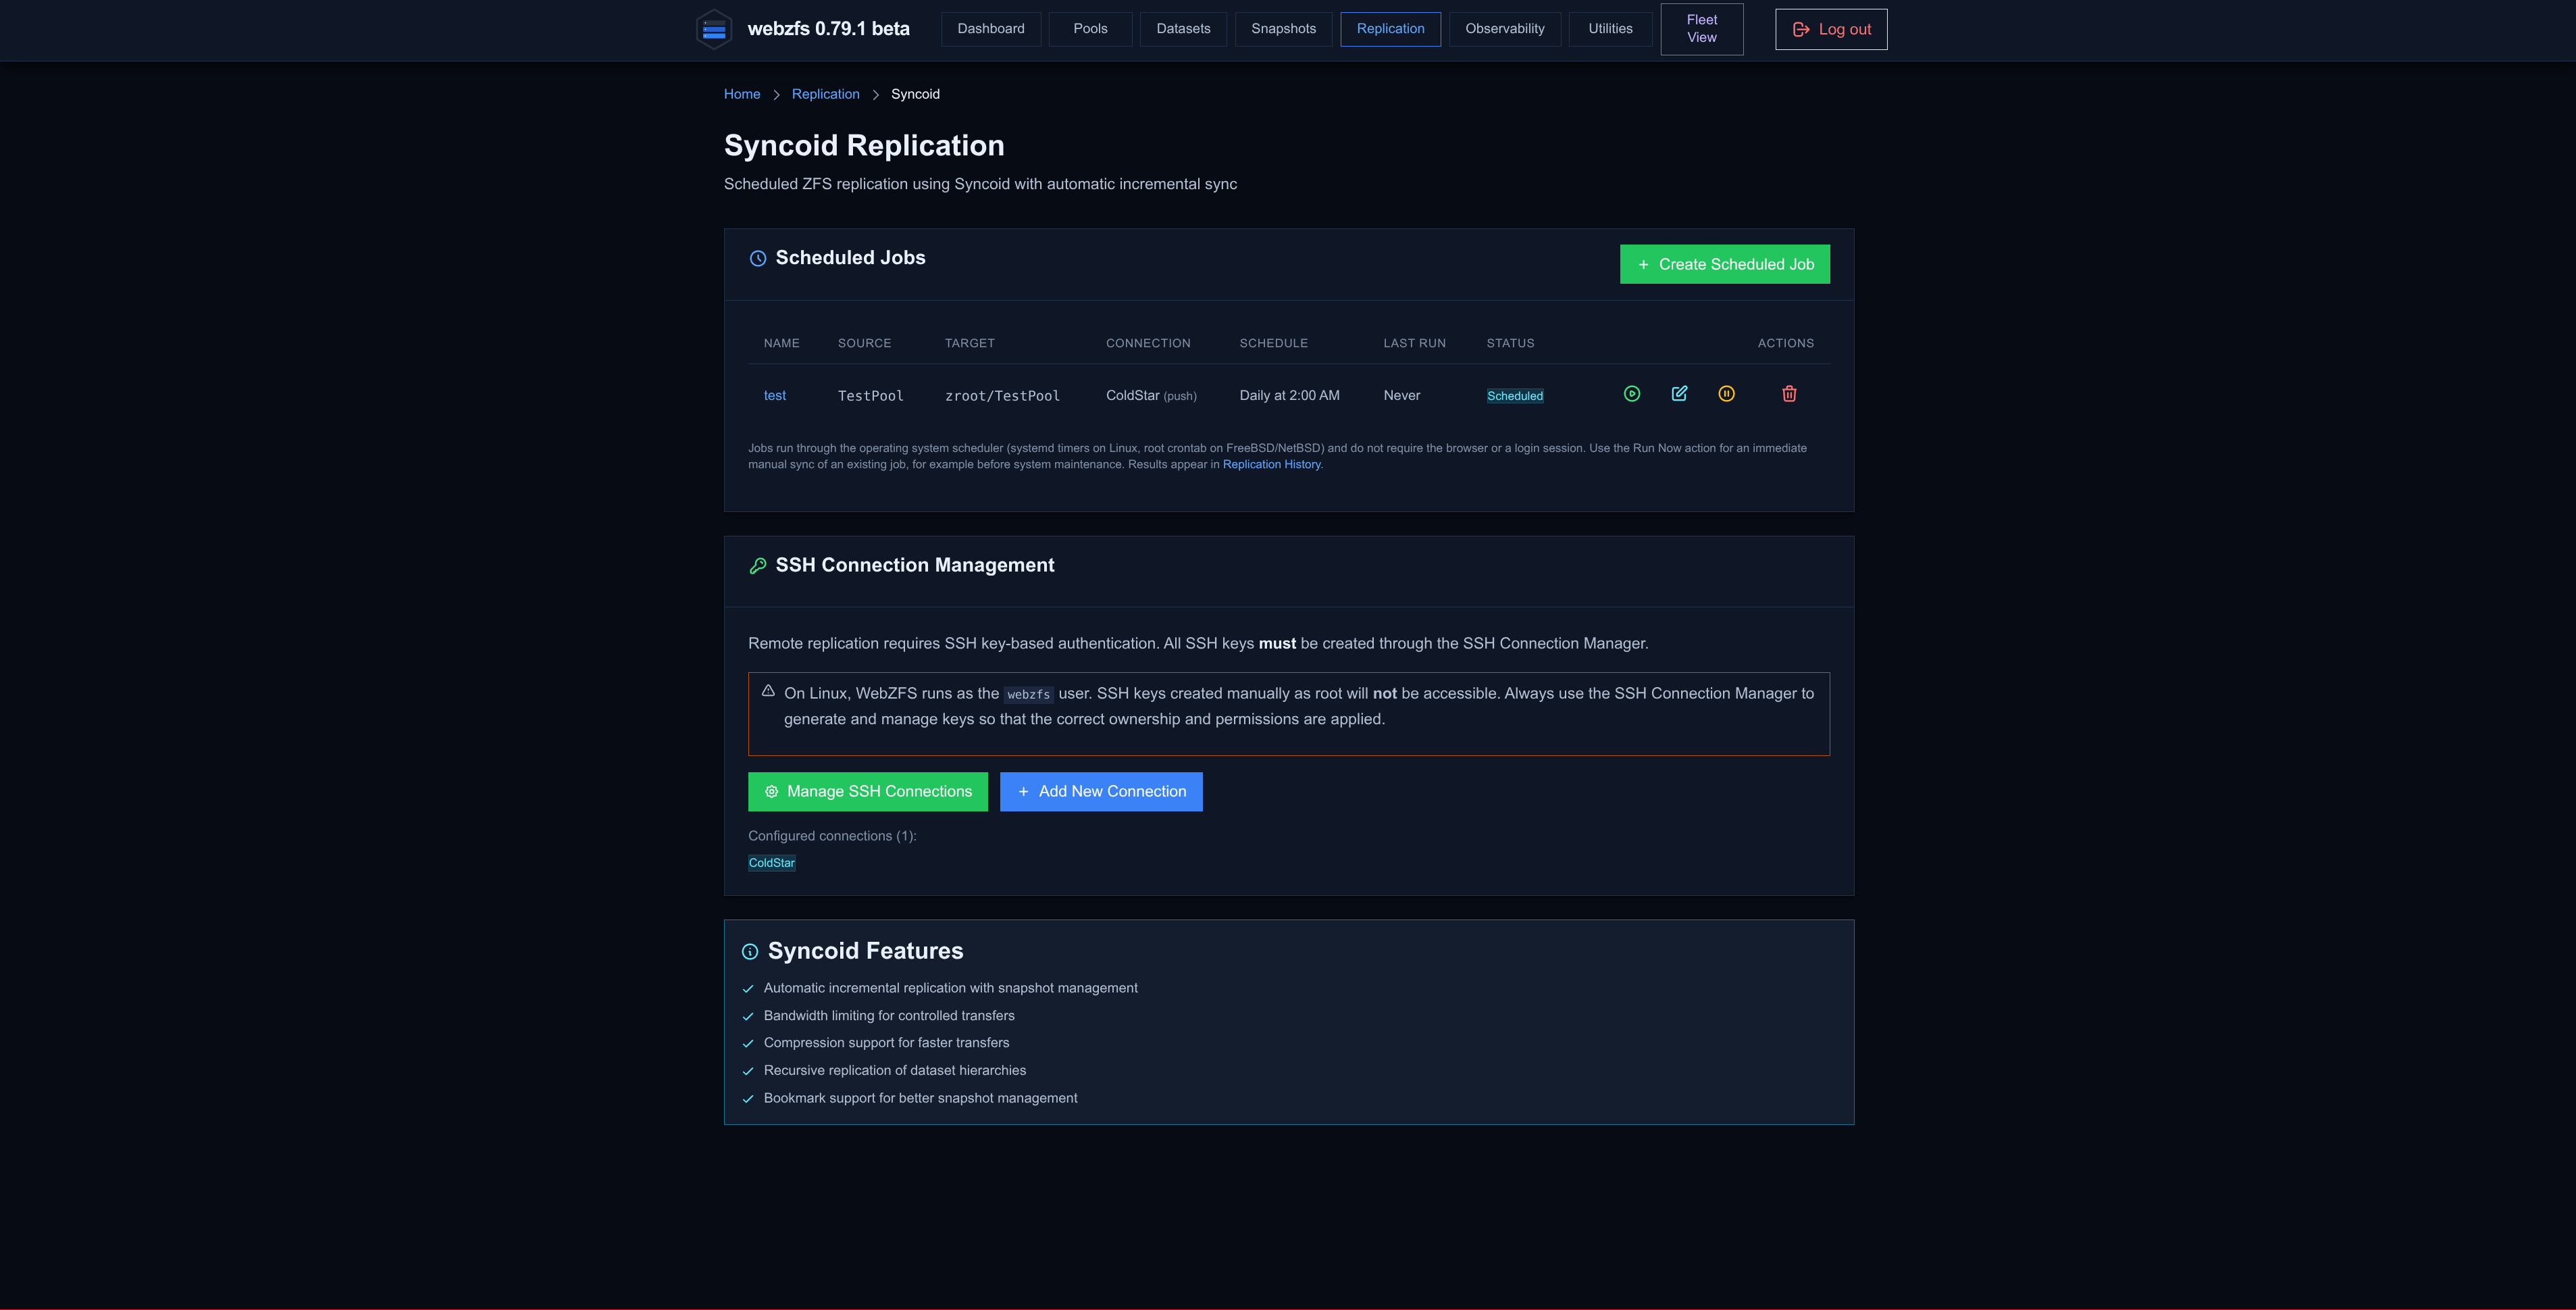
The next option Syncoid simply lets us view the scheduled jobs and manage the SSH connections to remote hosts:
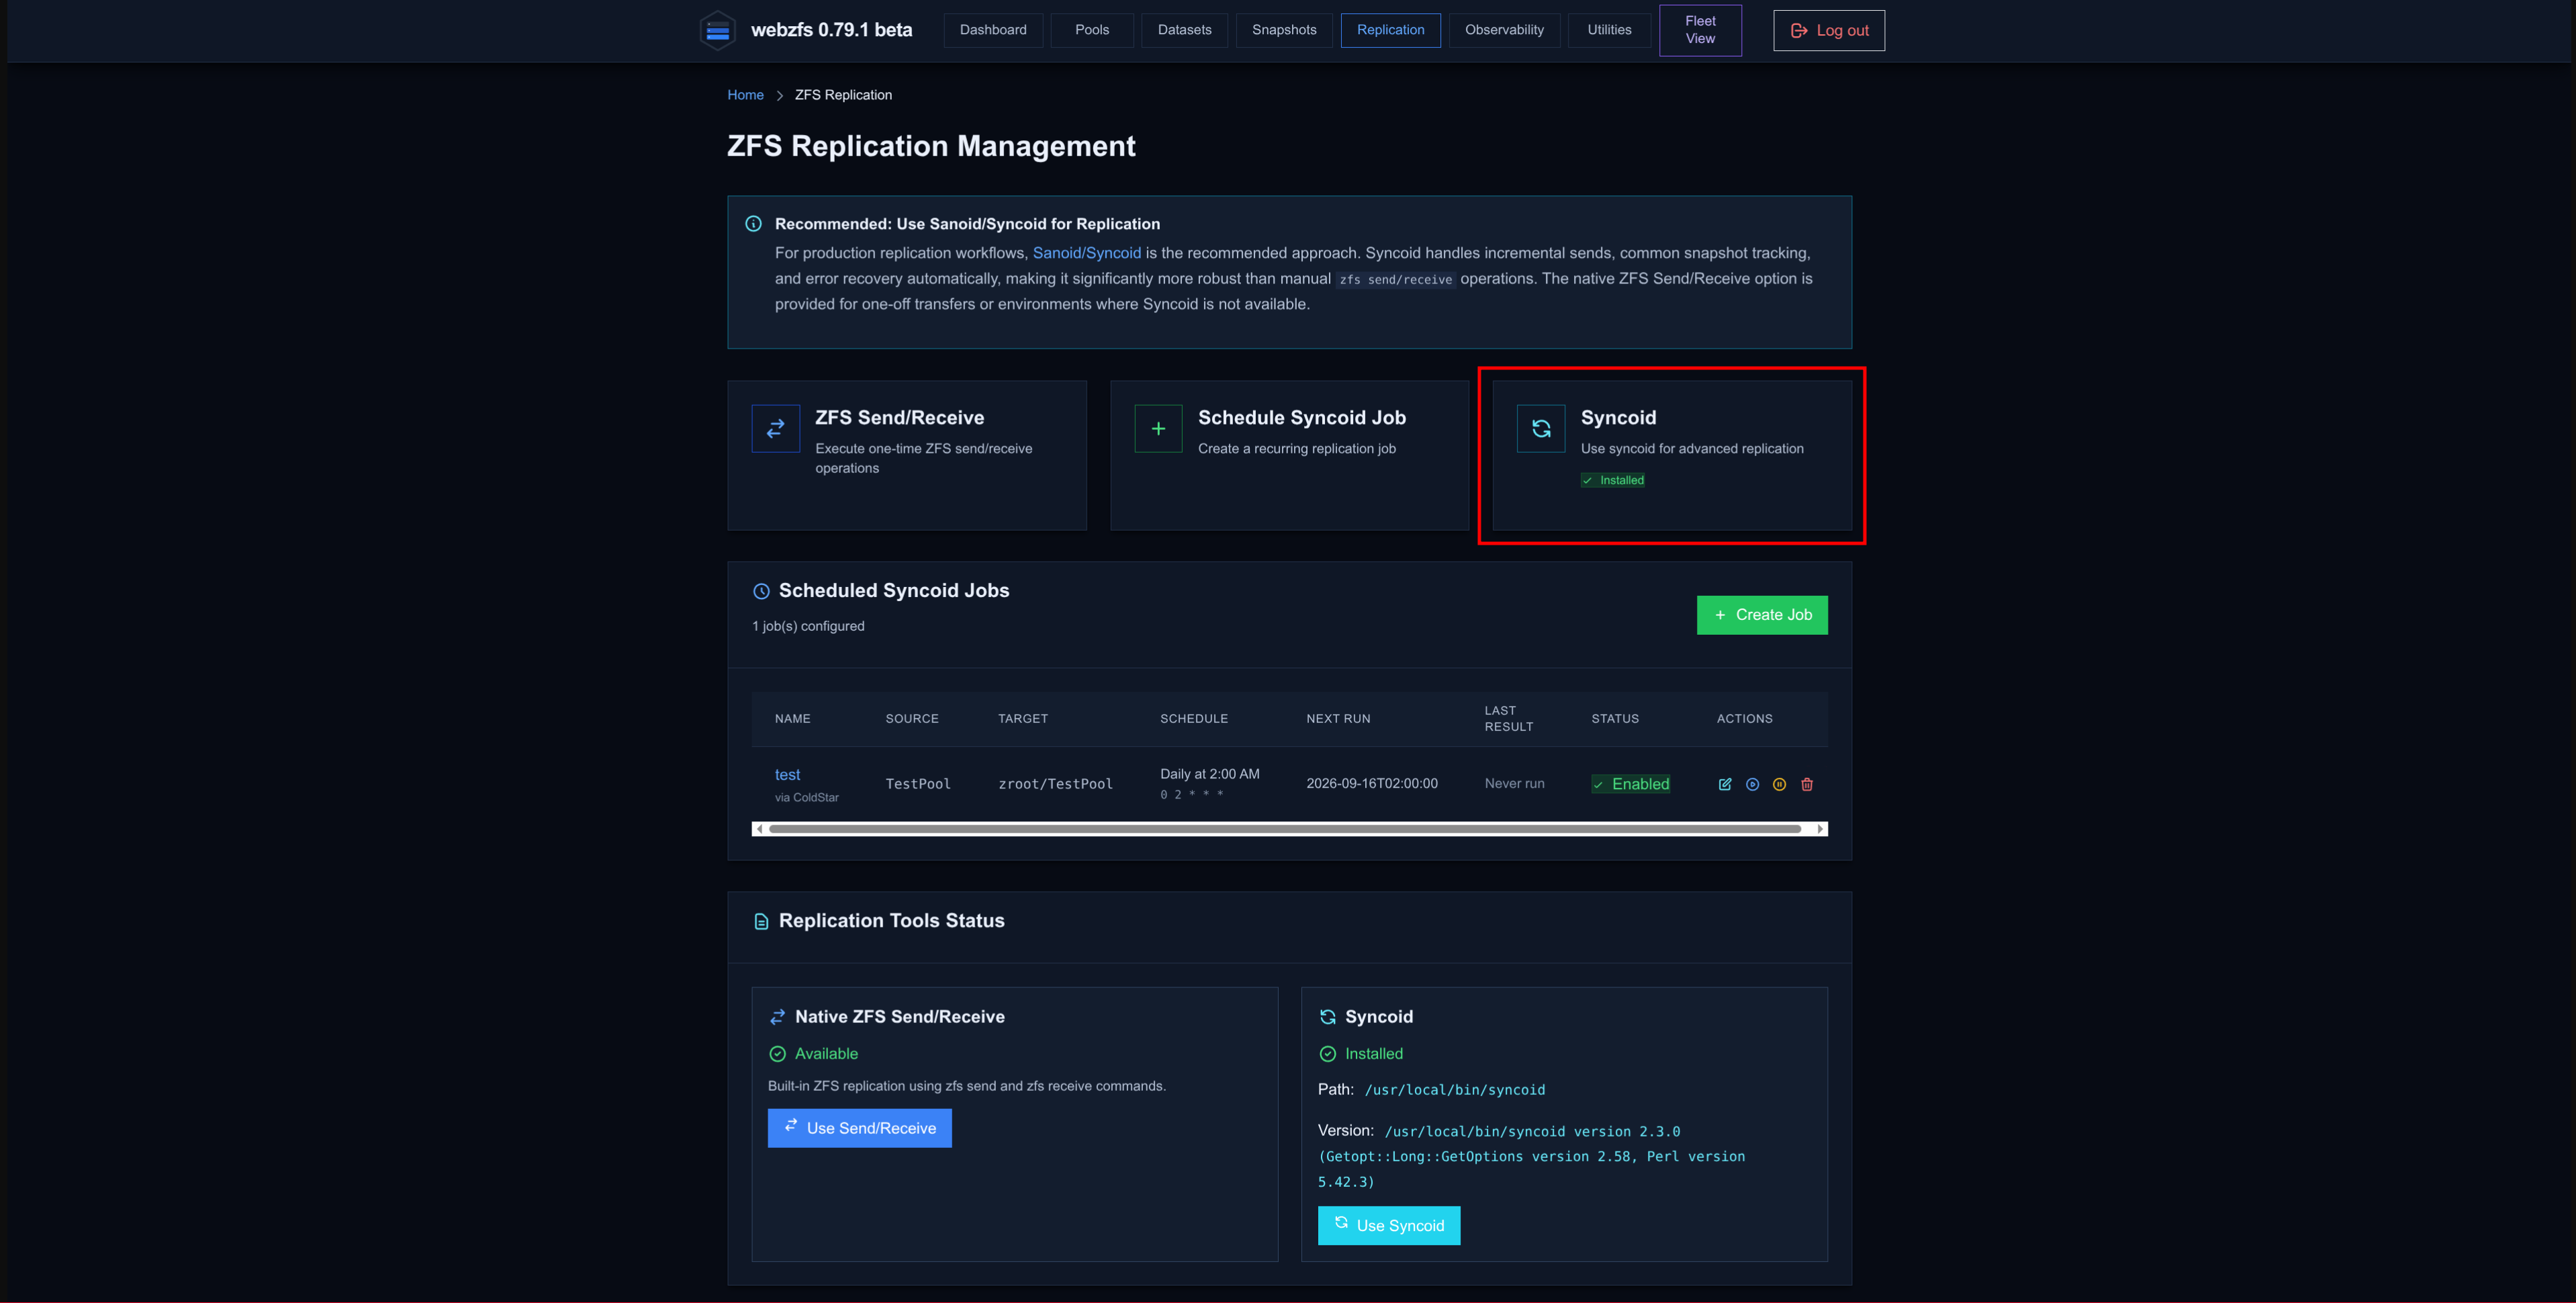
|
|
From the job list we can run them manually, edit, disable or delete them.
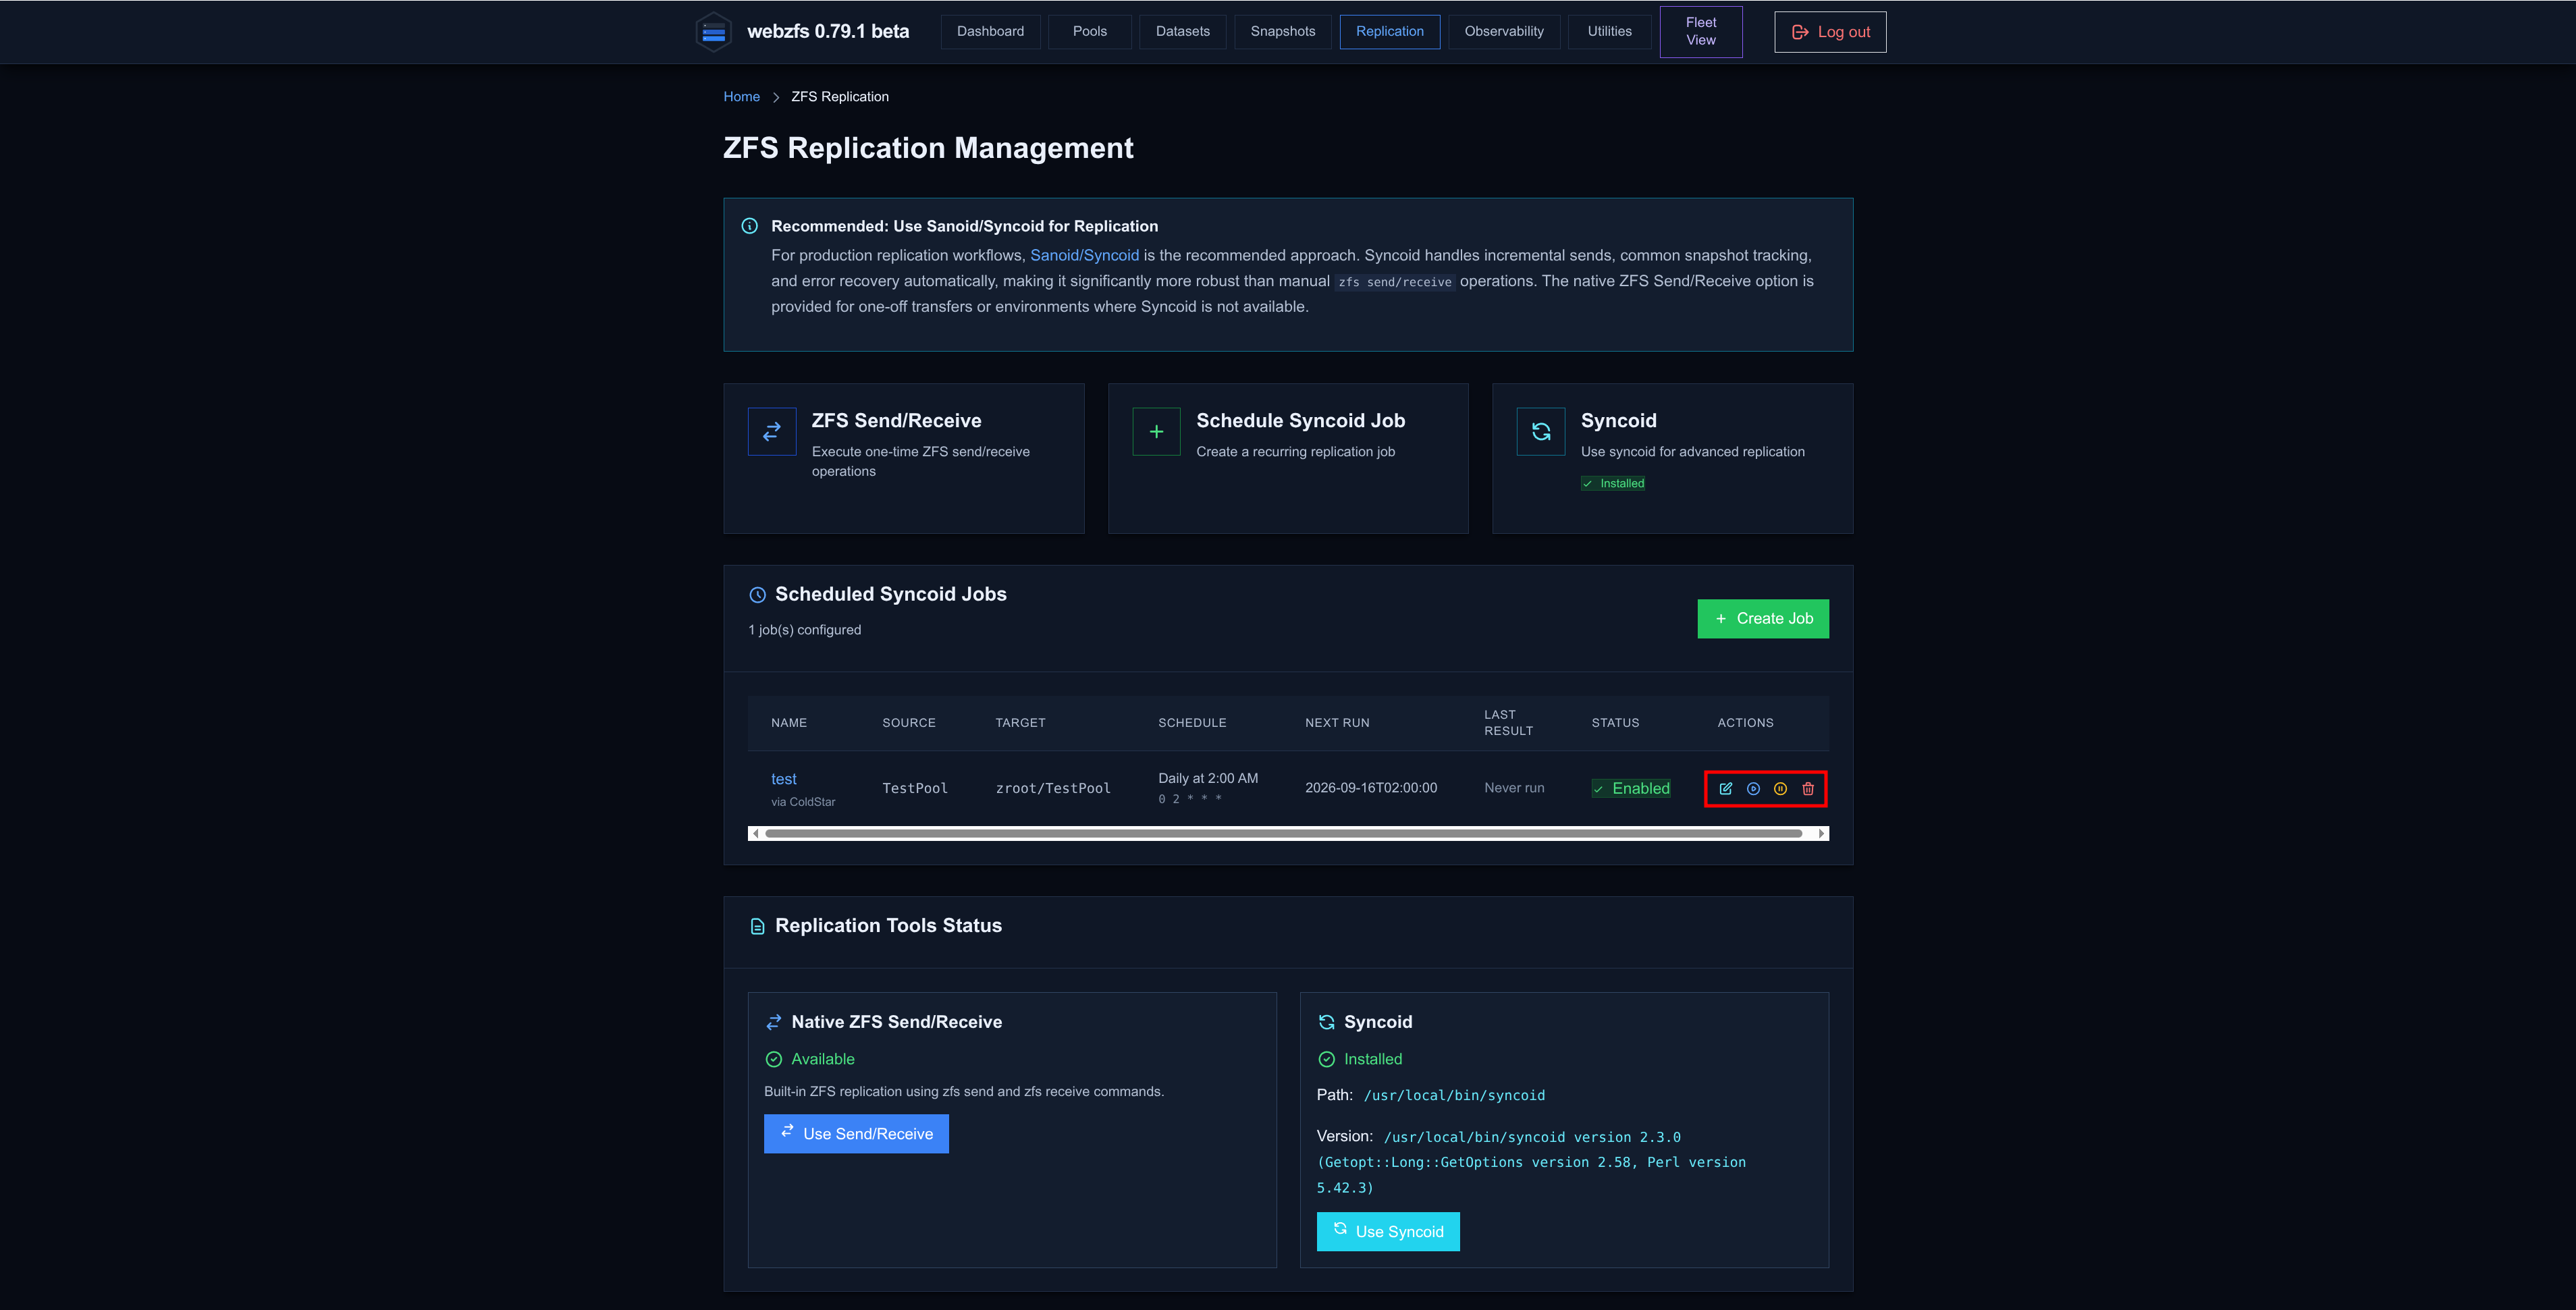
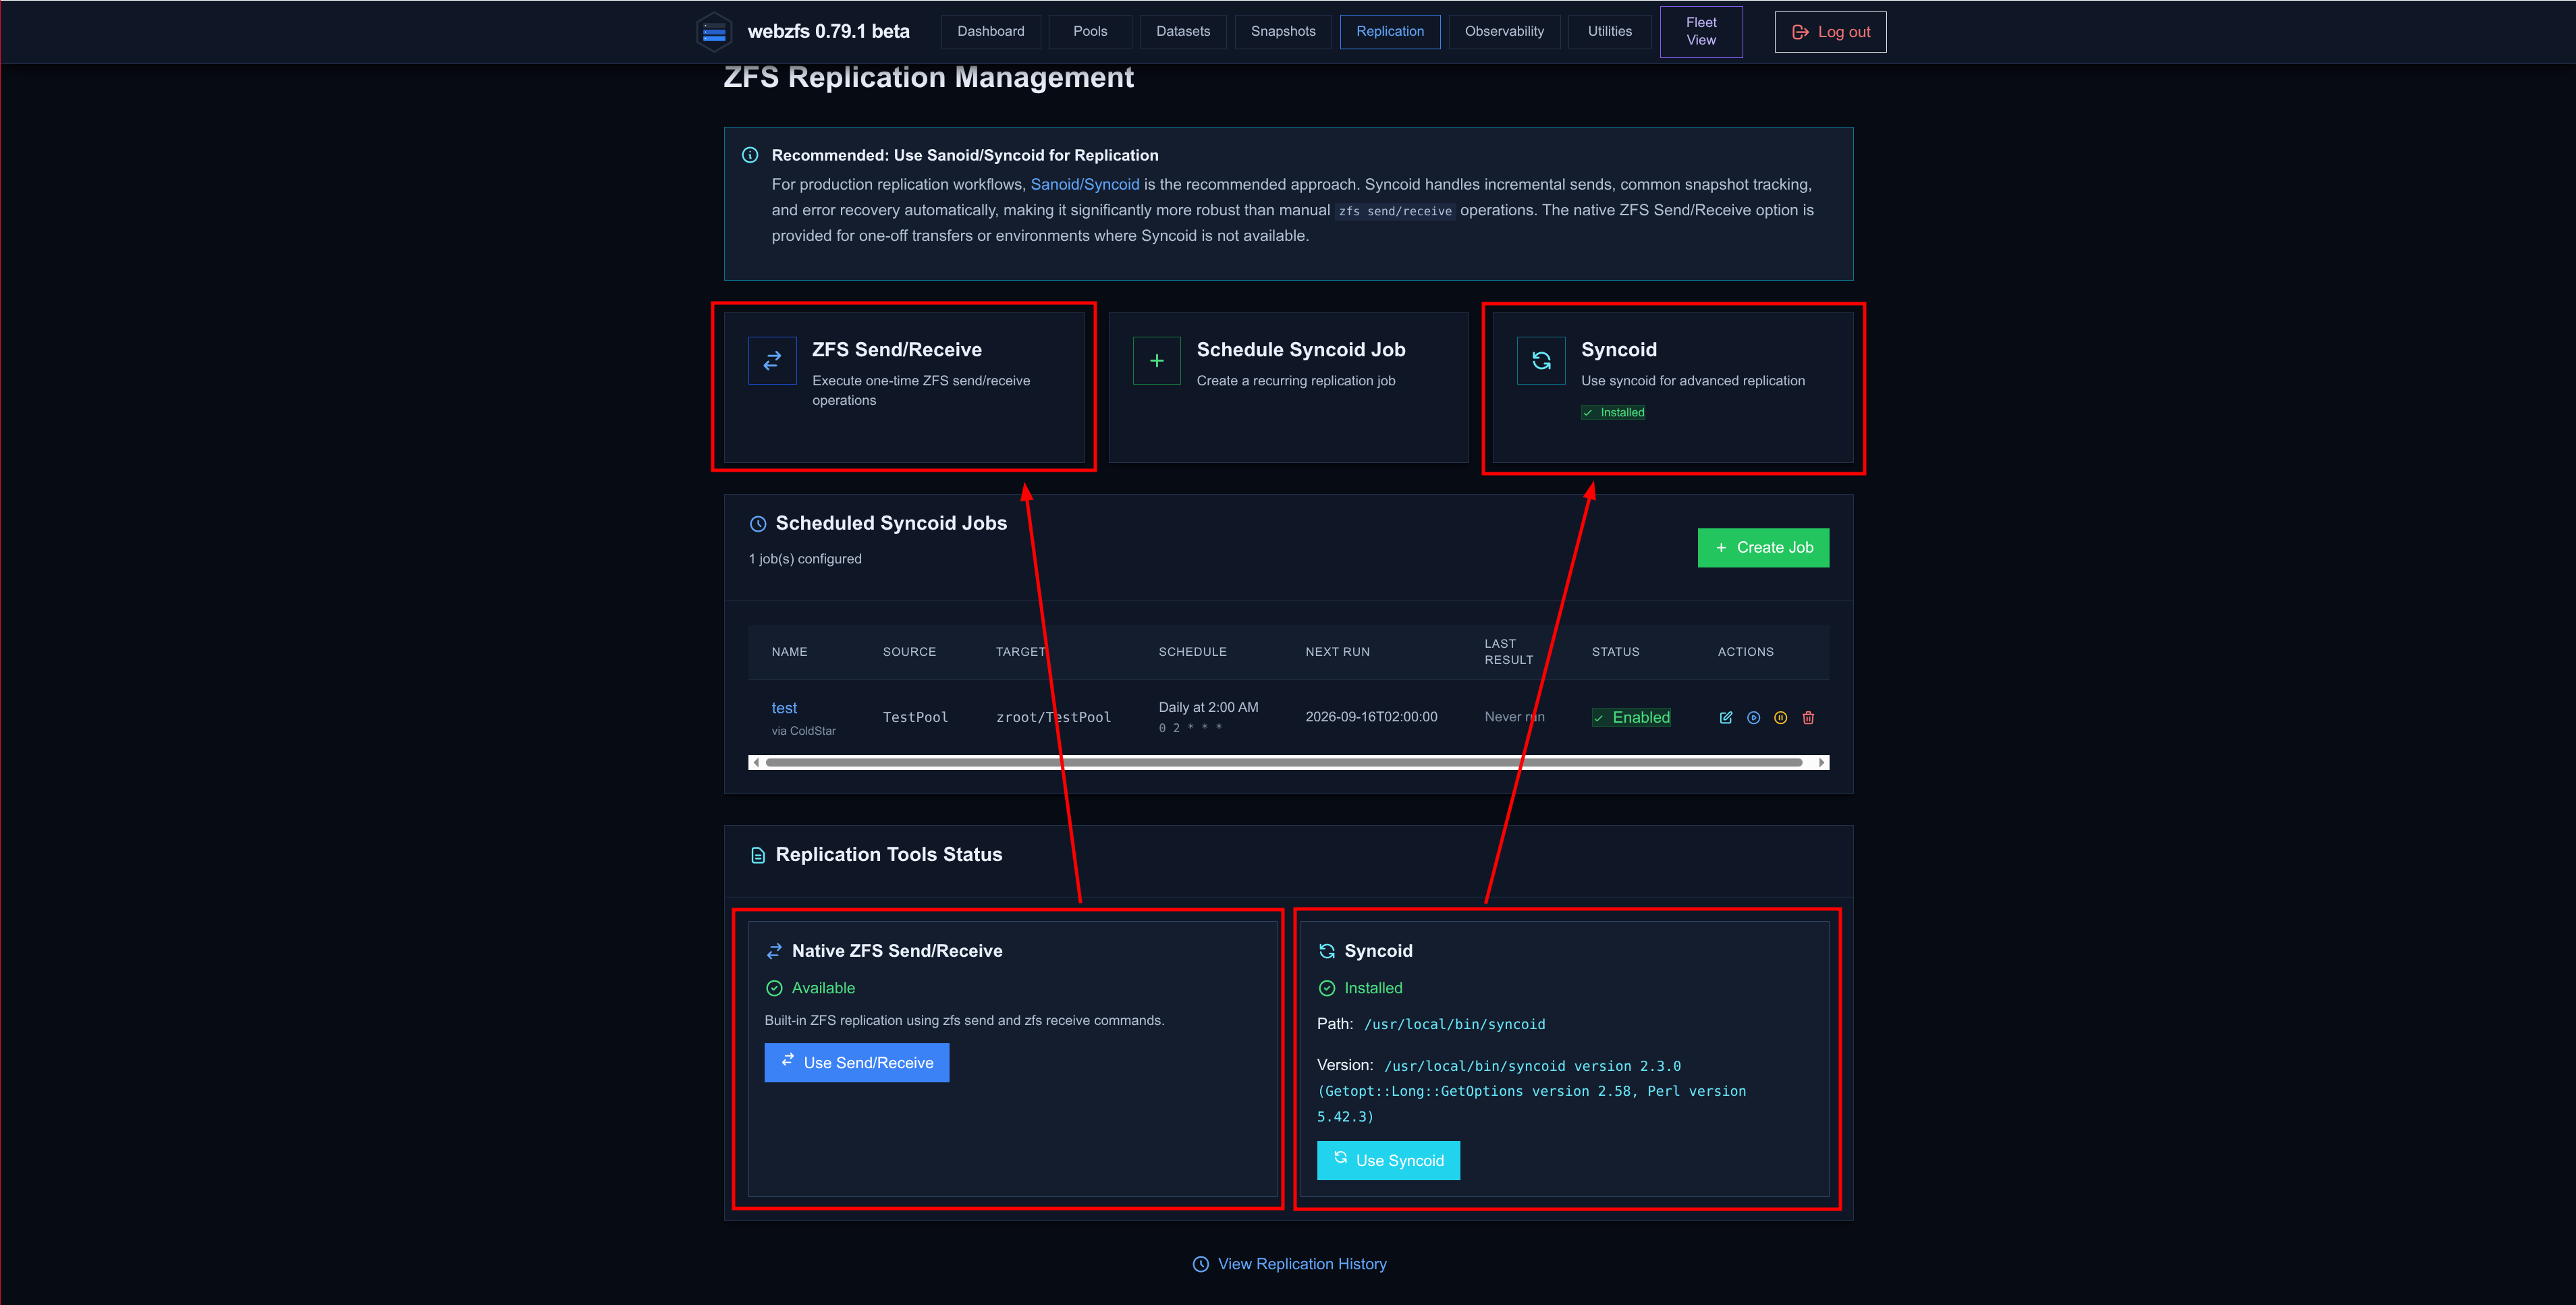
And in the final section we only have two more options, Native ZFS Send/Receive and Syncoid, which do exactly the same as the buttons above on that same page, ZFS Send/Receive and Schedule Syncoid Job.
Observability
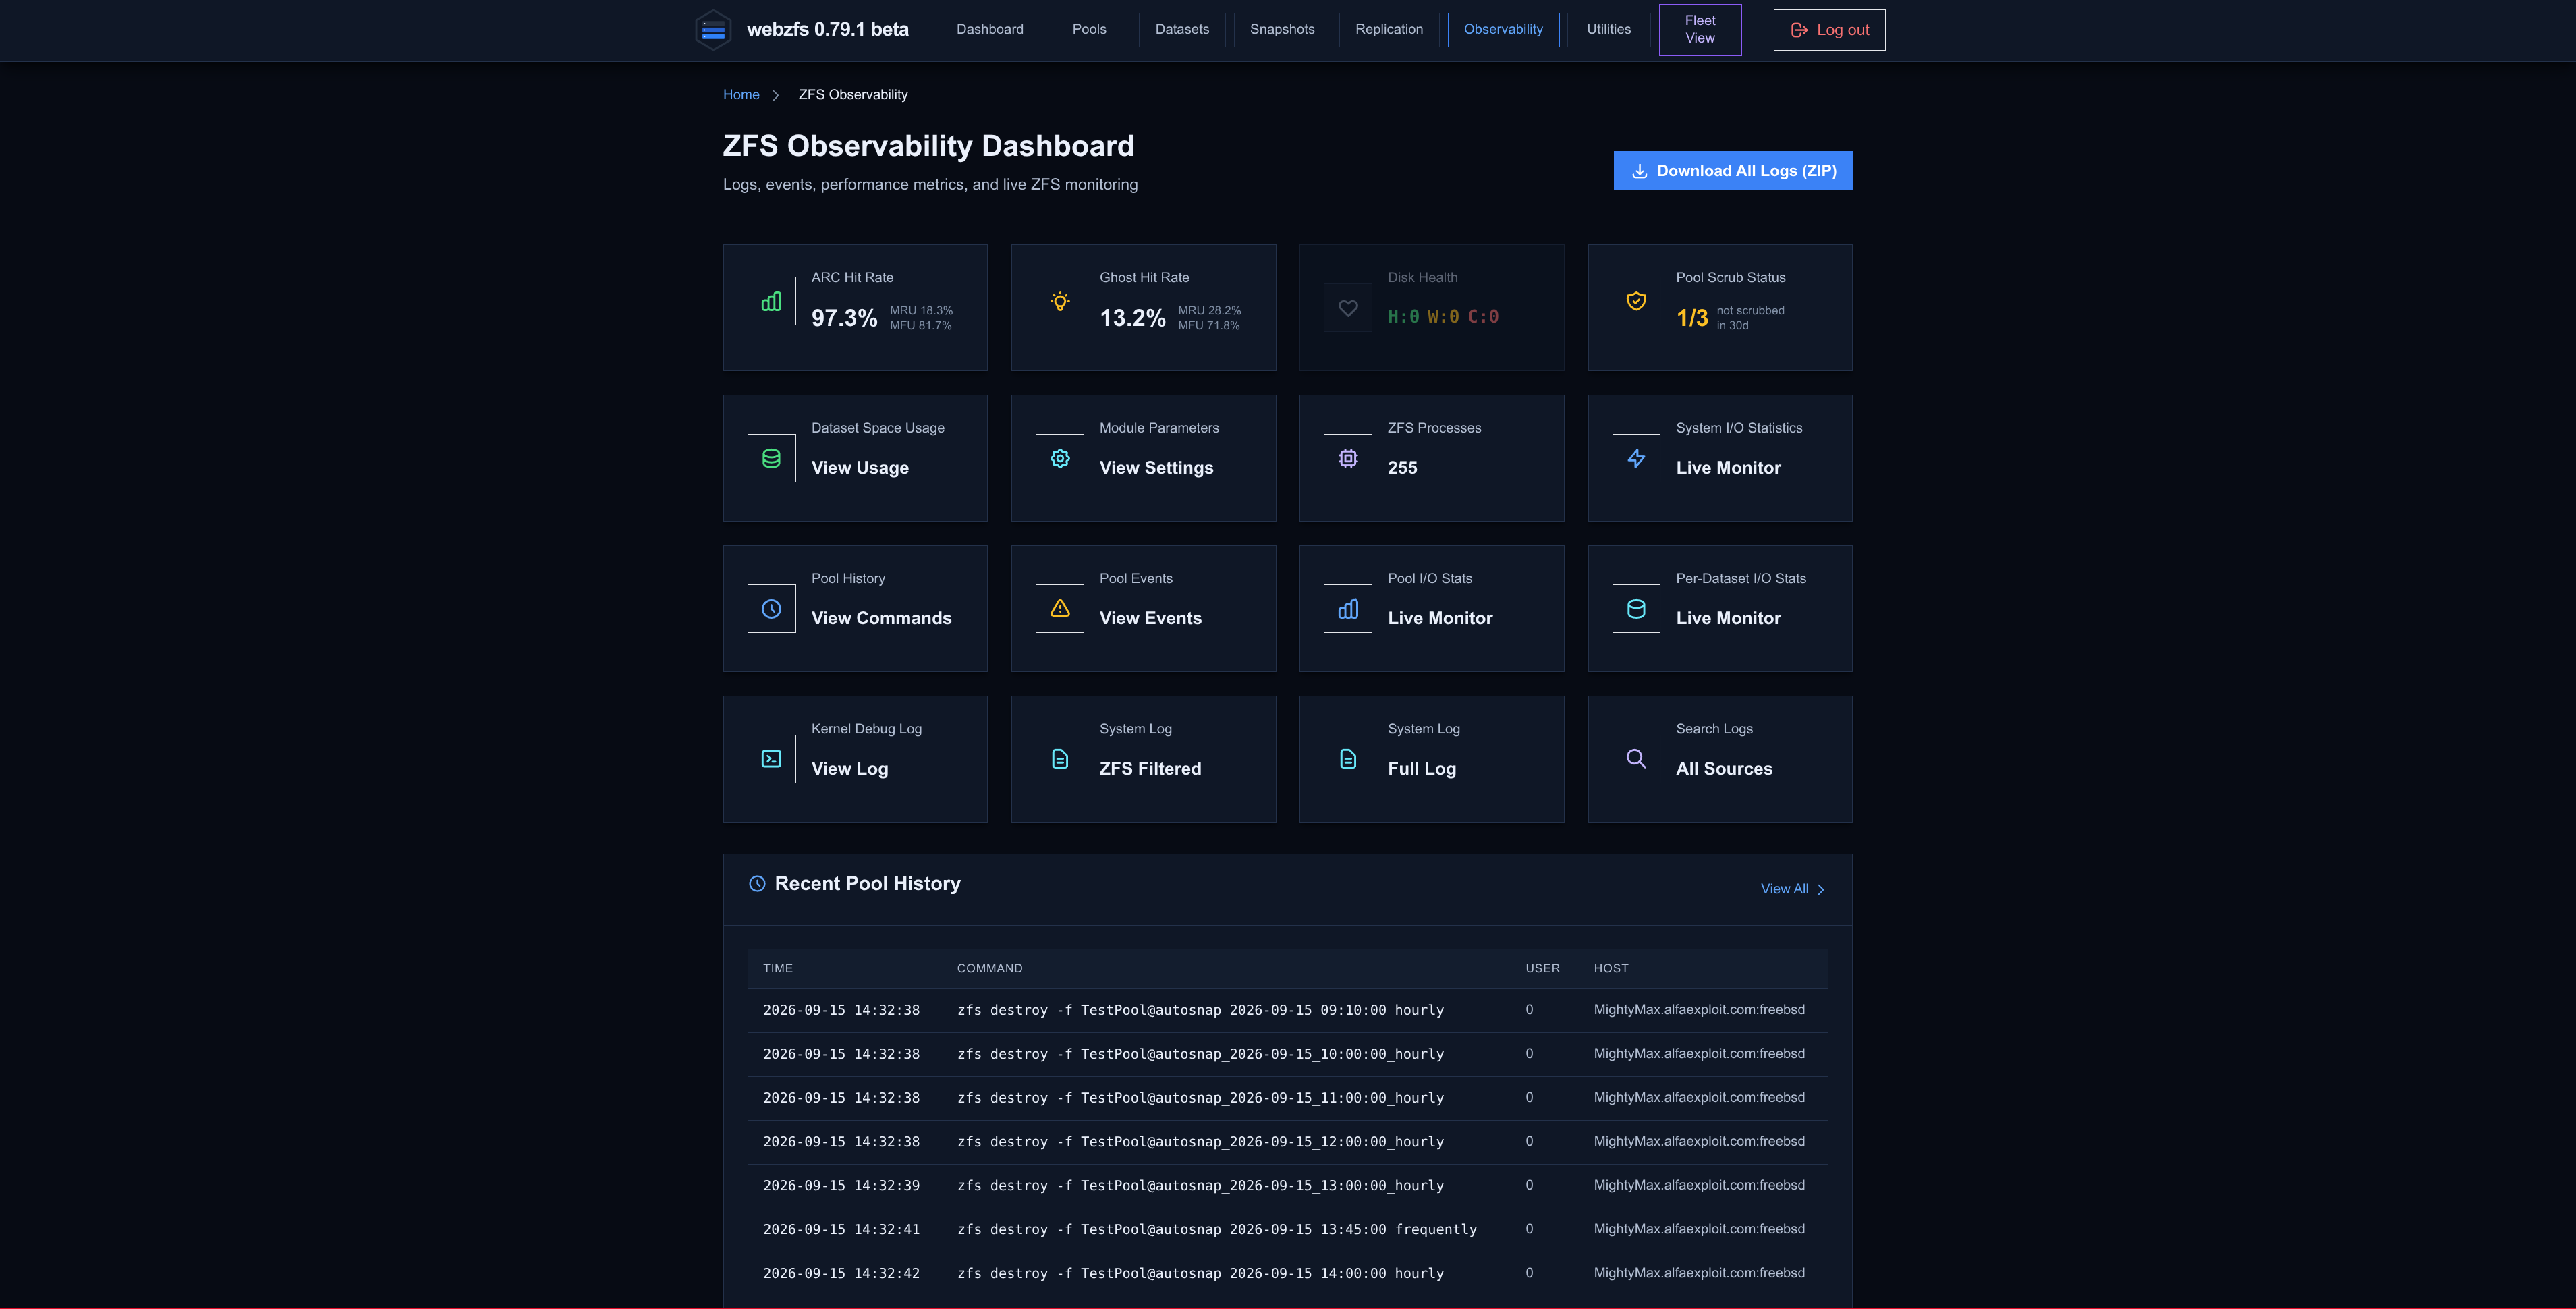
From here we can access different monitoring panels for the status of the ZFS filesystems on the machine; some panels we have already seen earlier in this article since they are the same.
ARC Hit Rate:
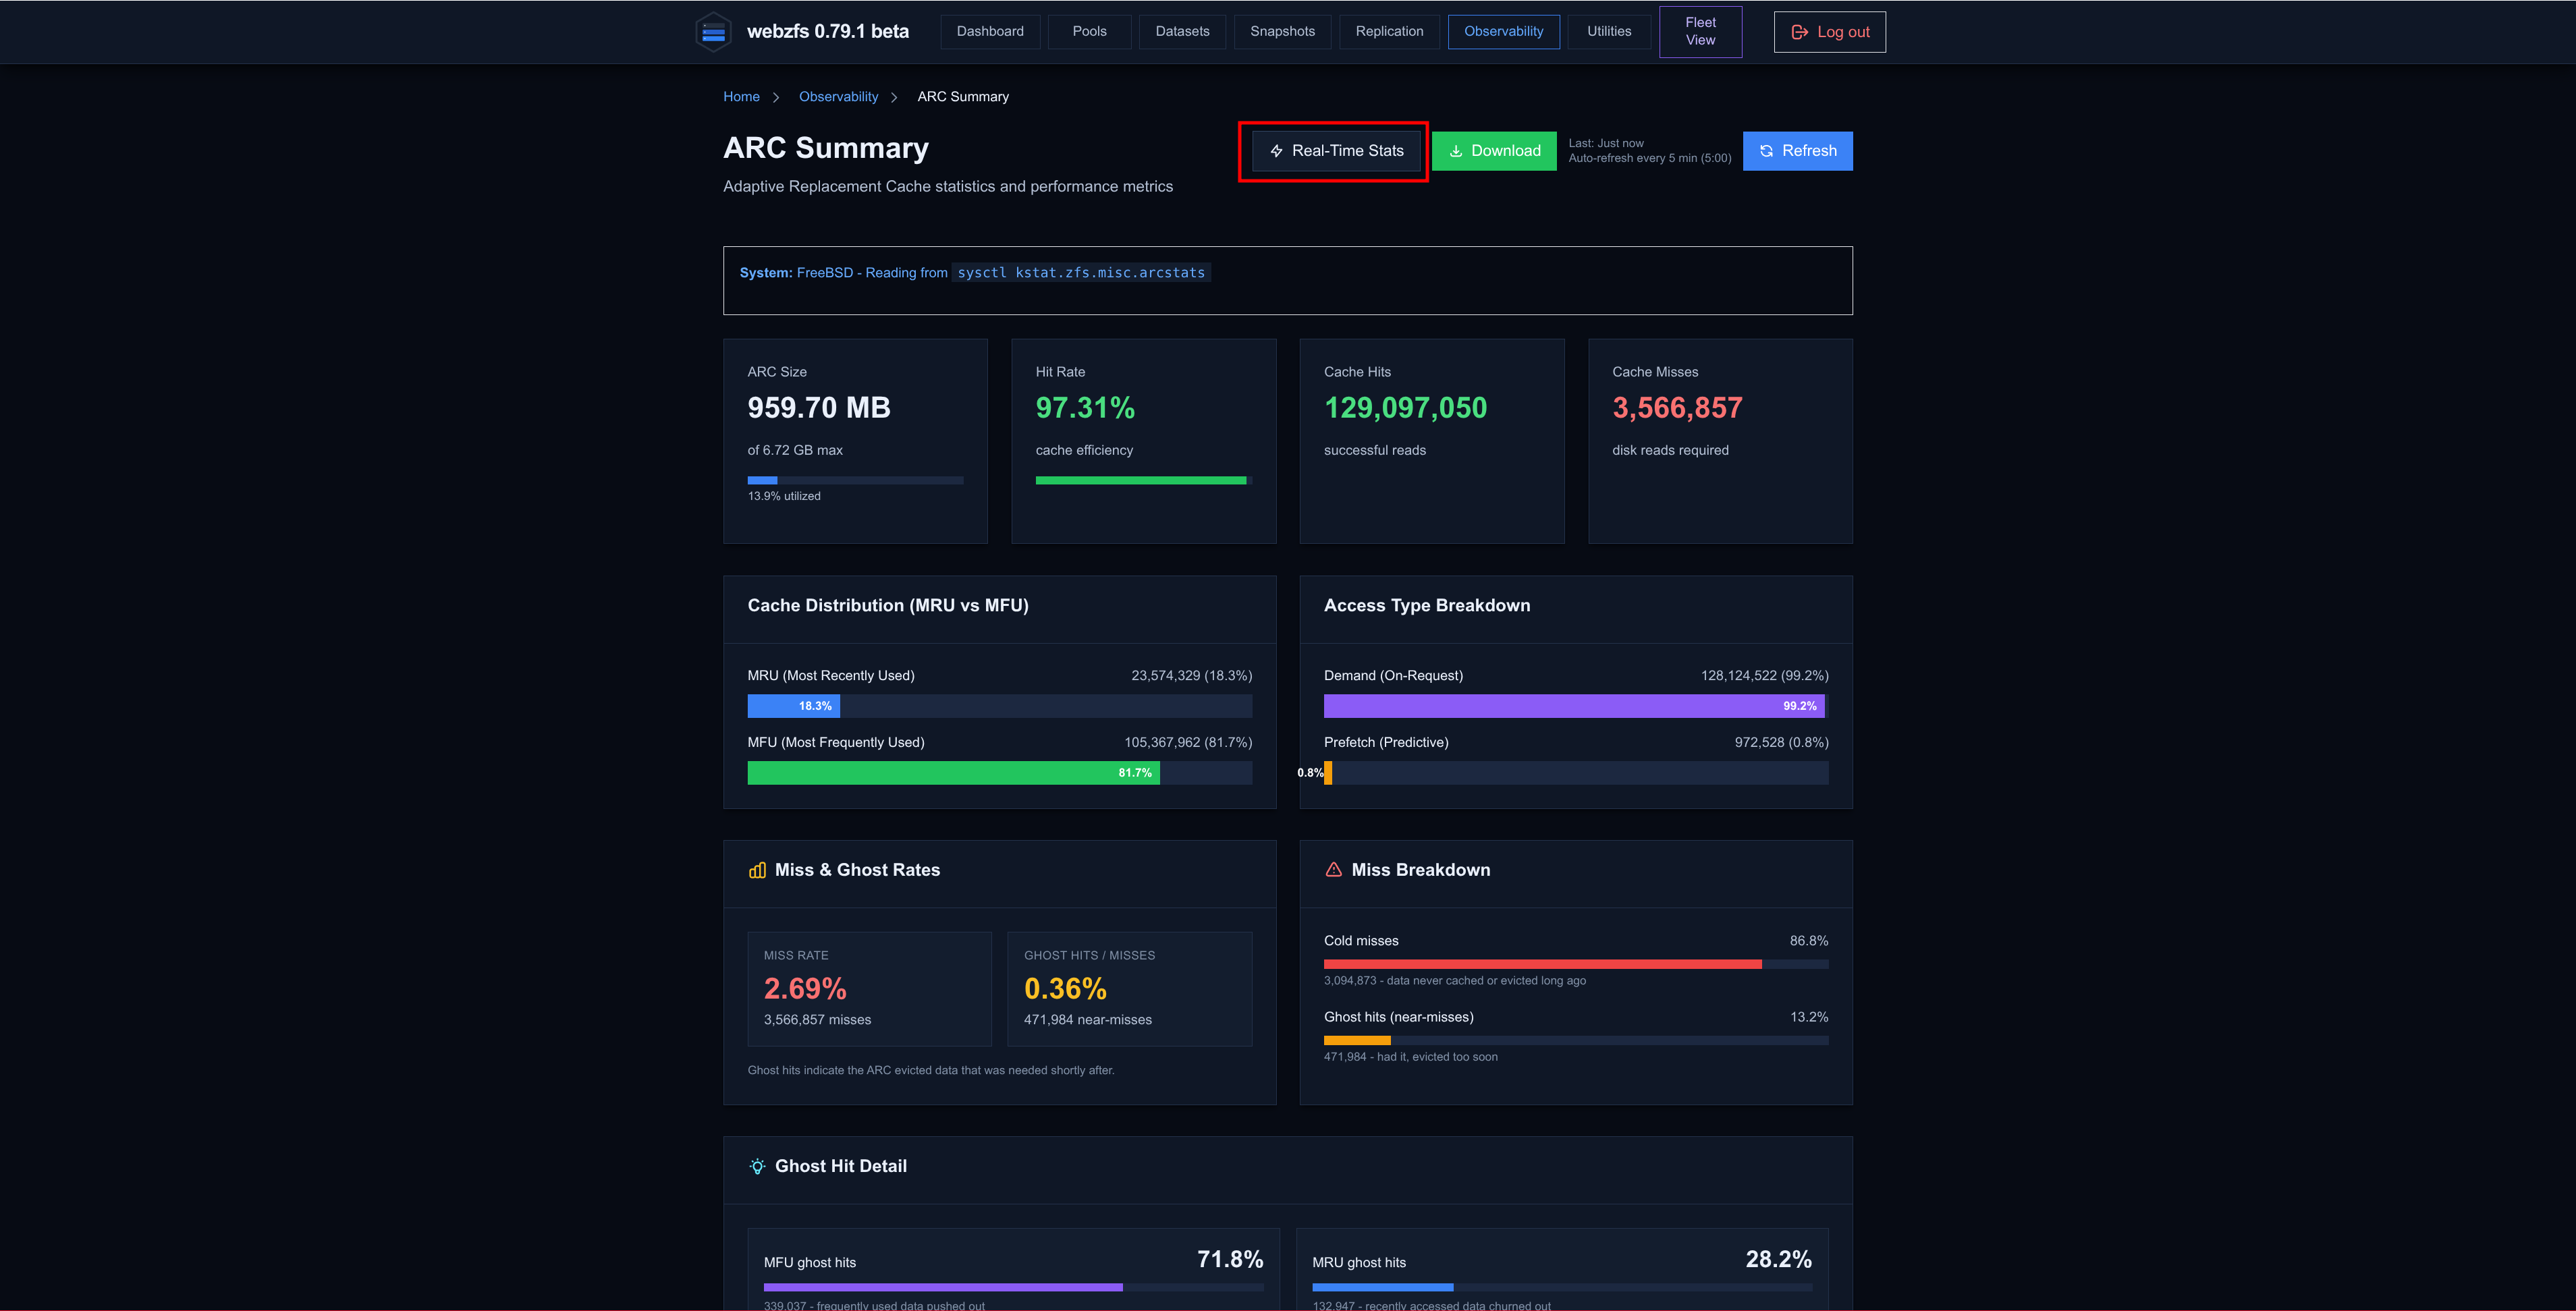
In this panel we can see data related to the ZFS RAM cache, more commonly known as ARC: Adaptive Replacement Cache.
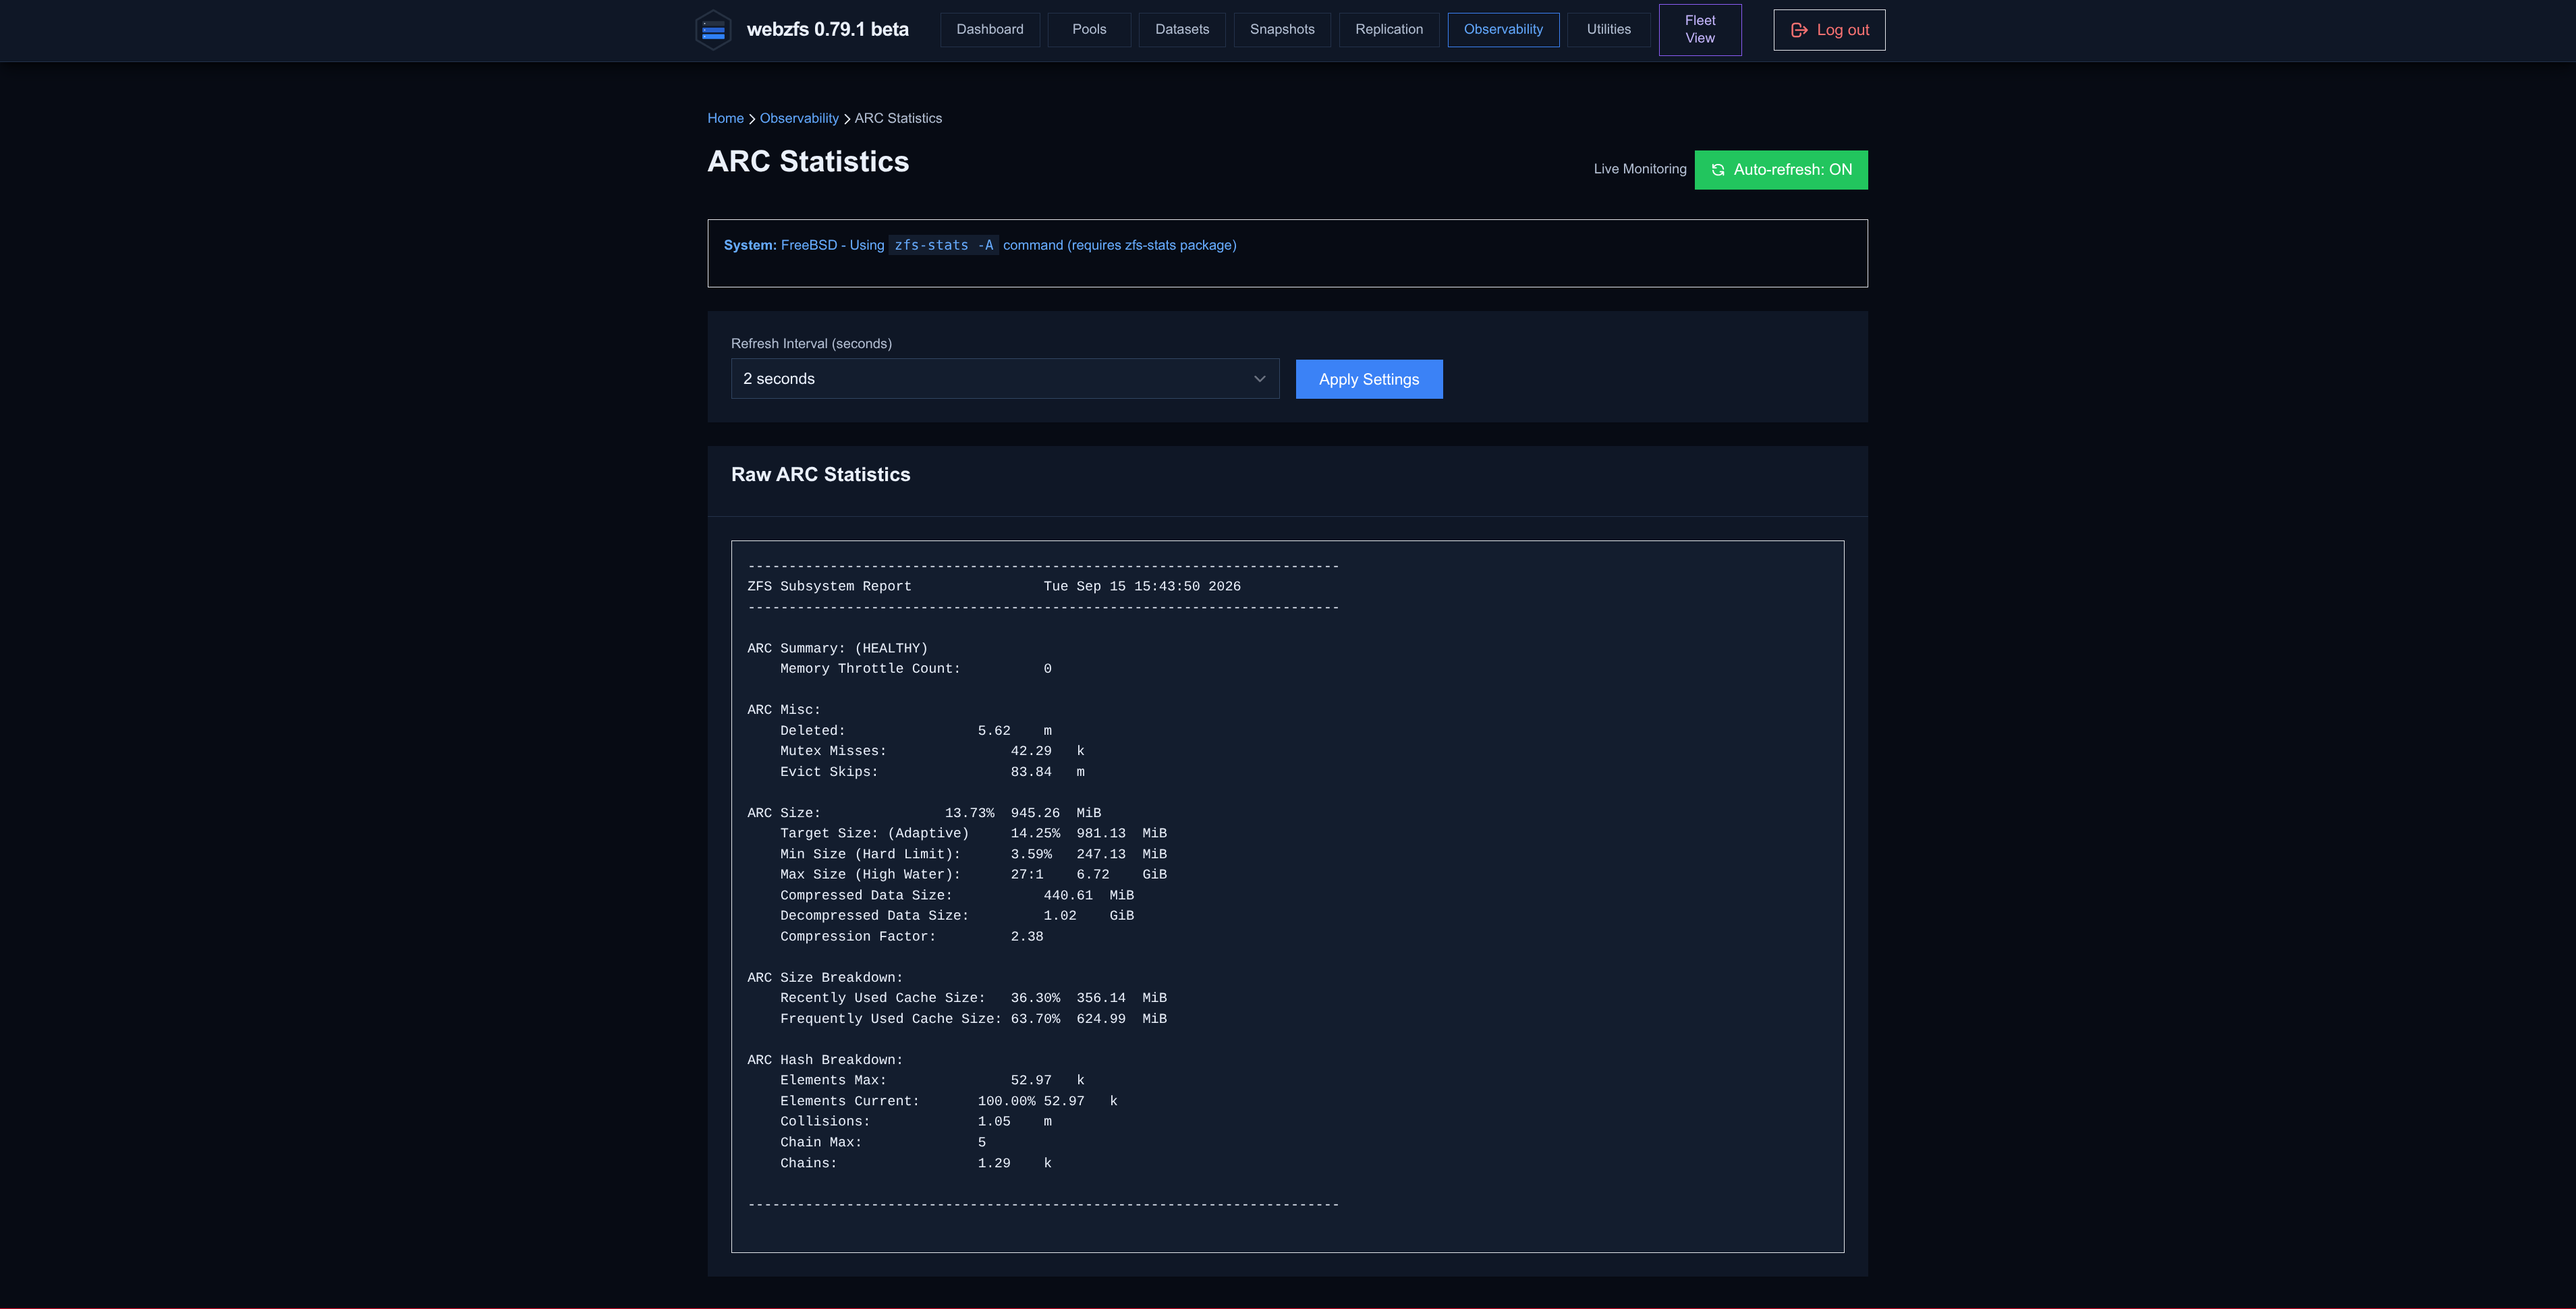
The first button we find is Real-Time Stats, which will show us the ZFS statistics in real time:
|
|
The rest of the panel is information about the ARC:
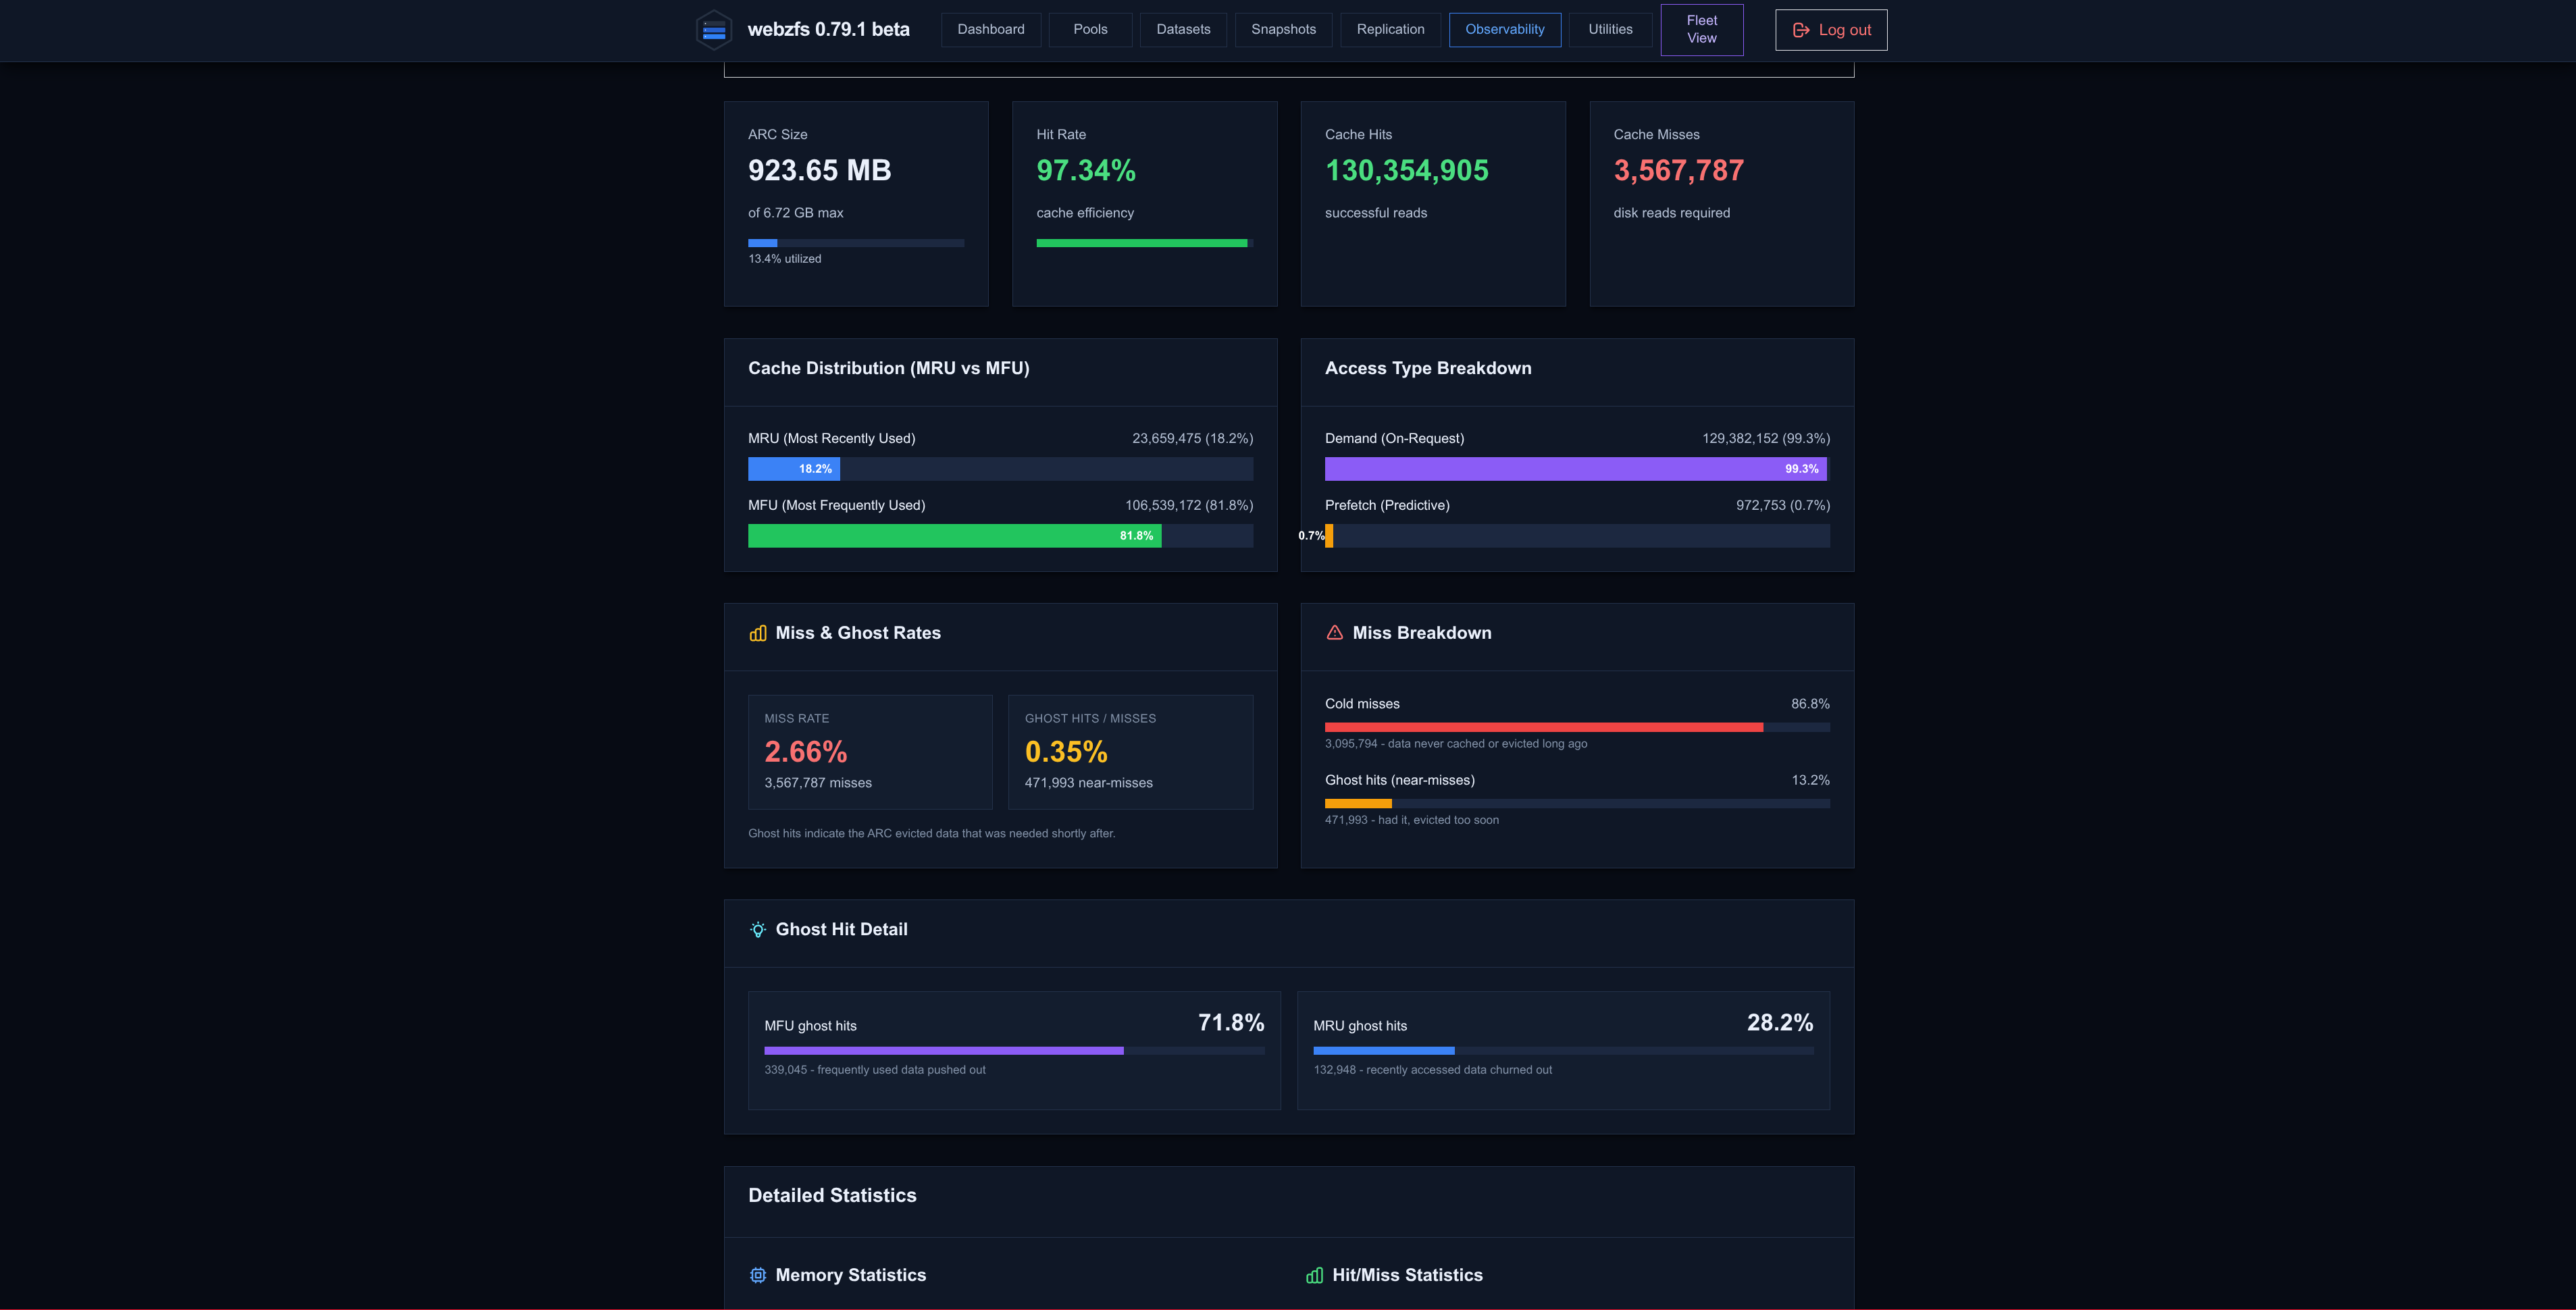
- ARC Size: Amount of RAM that the
ARCis currently using. - Hit Rate: Times when
RAMis accessed instead of the disk. - Cache Hits: Number of times the data was in
RAM. - Cache Misses: Number of times the data was not in
RAMand the disk had to be accessed. - Cache Distribution (MRU vs MFU):
ARCkeeps inRAMthe data that has been used recently and the data that is used most frequently.MRU(Most Recently Used): Number of accesses satisfied from the cache with data belonging to the list of recently used items.MFU(Most Frequently Used): Number of accesses satisfied from the cache with data belonging to the list of most frequently used items.
- Access Type Breakdown: Breakdown by type of access.
- Demand (On-Request): Number of times the data was requested by an action on the system.
- Prefetch (Predictive): Number of times the data was preloaded by the prediction system and served when requested by an action on the system.
- Miss & Ghost Rates:
- MISS RATE: A miss occurs when
ZFSreceives a read request and the data is not available in theARC. - GHOST HITS/MISSES: A ghost hit means that
ZFSremembers that block was previously in theARC, but it had already evicted it when it was requested again.
- MISS RATE: A miss occurs when
- Miss Breakdown: Breakdown by type of miss.
- Cold misses: Number of accesses that were misses.
- Ghost hits (near-misses): Number of accesses that were misses but the data has previously been in
RAM.
- Ghost Hit Detail: Details of the ghost misses.
MFUghost hits: Number of ghost hits accessingMFUdata.MRUghost hits: Number of ghost hits accessingMRUdata.
- Detailed Statistics: Raw data about the
ARCdetails.
Ghost Hit Rate:
It takes us to the ARC Hit Rate section explained at the beginning of this
same section
.
Disk Health:
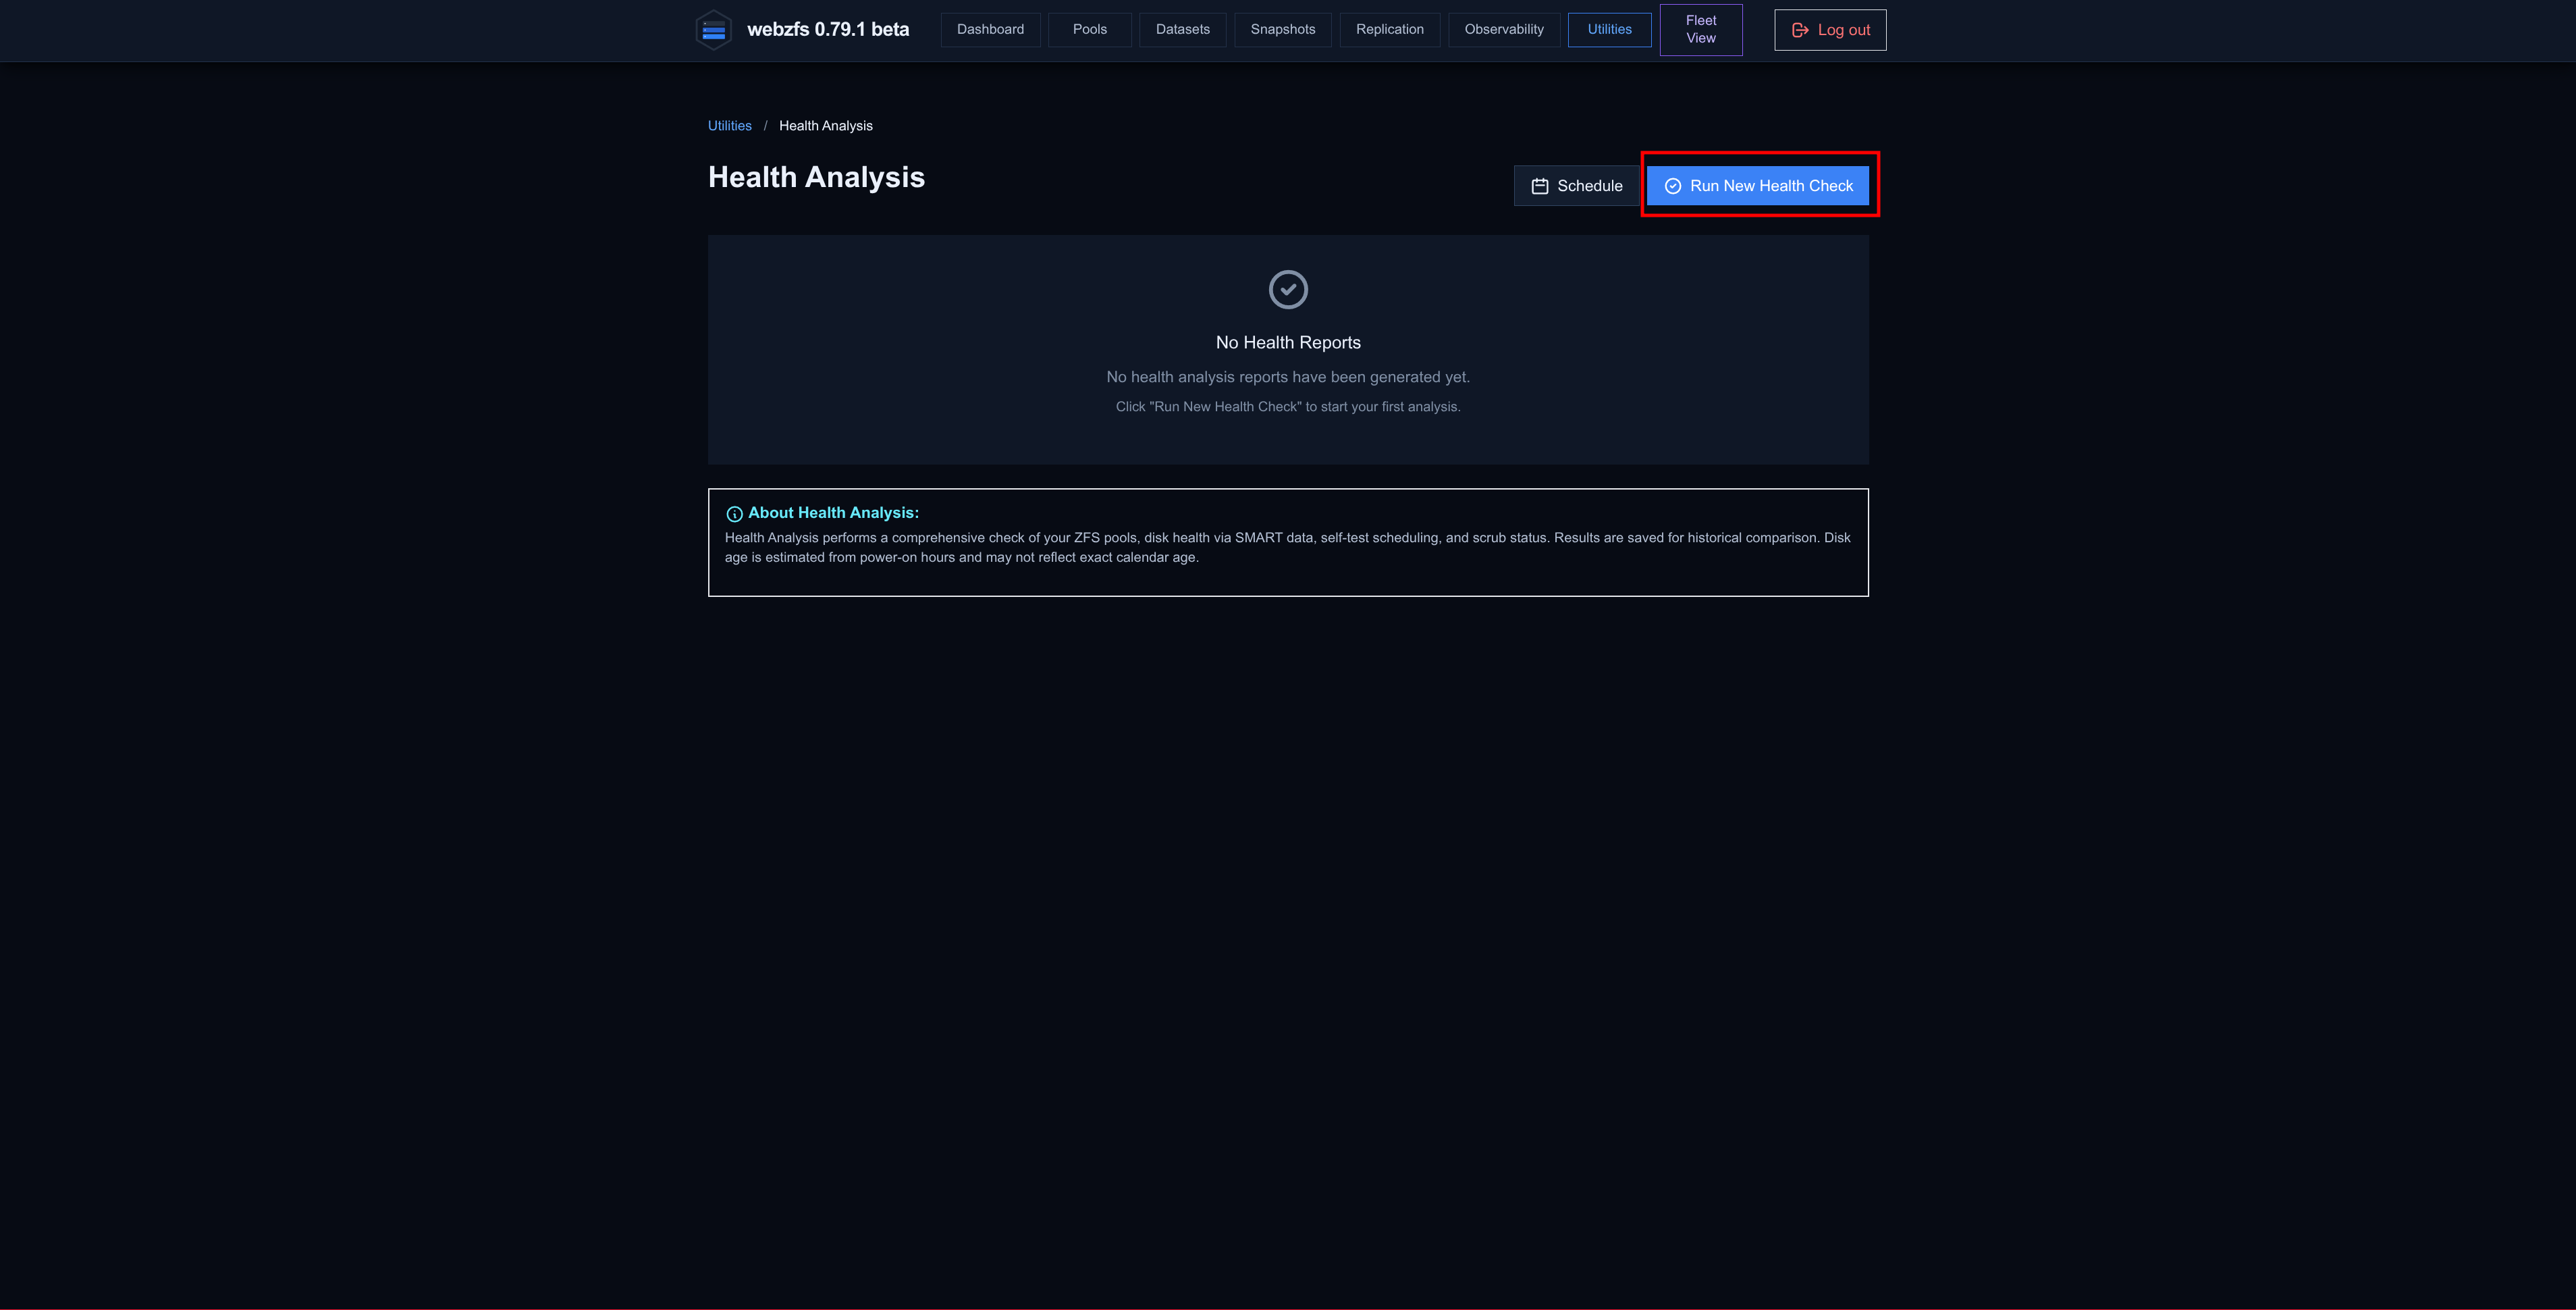
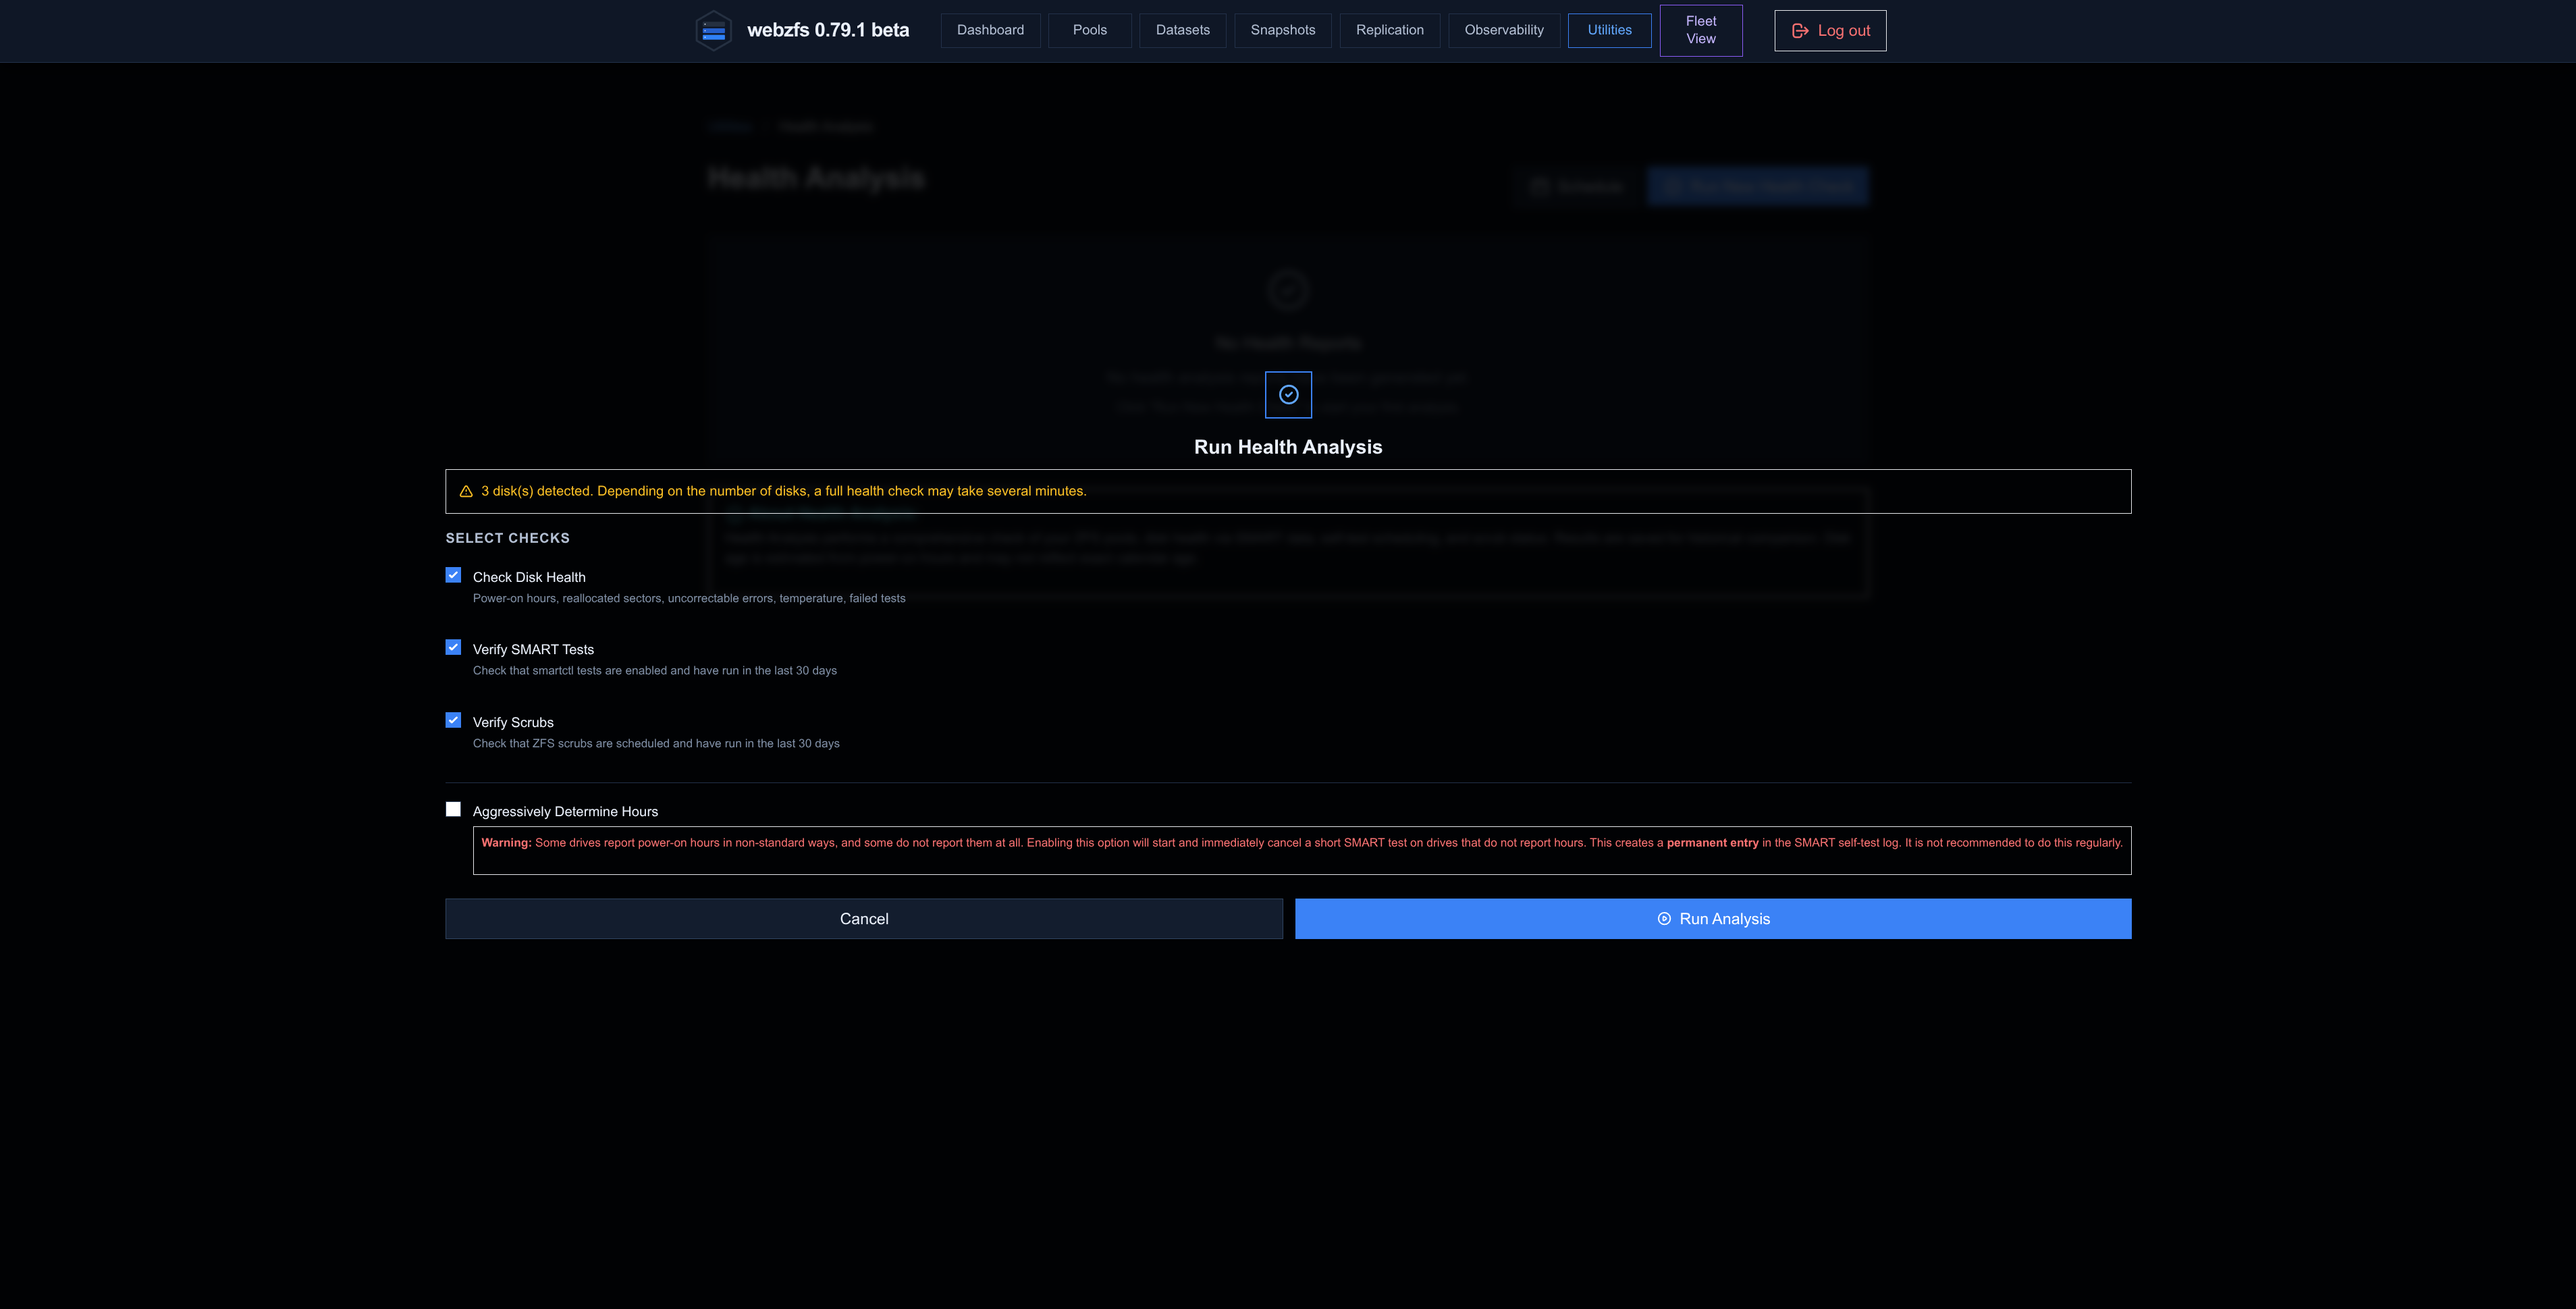
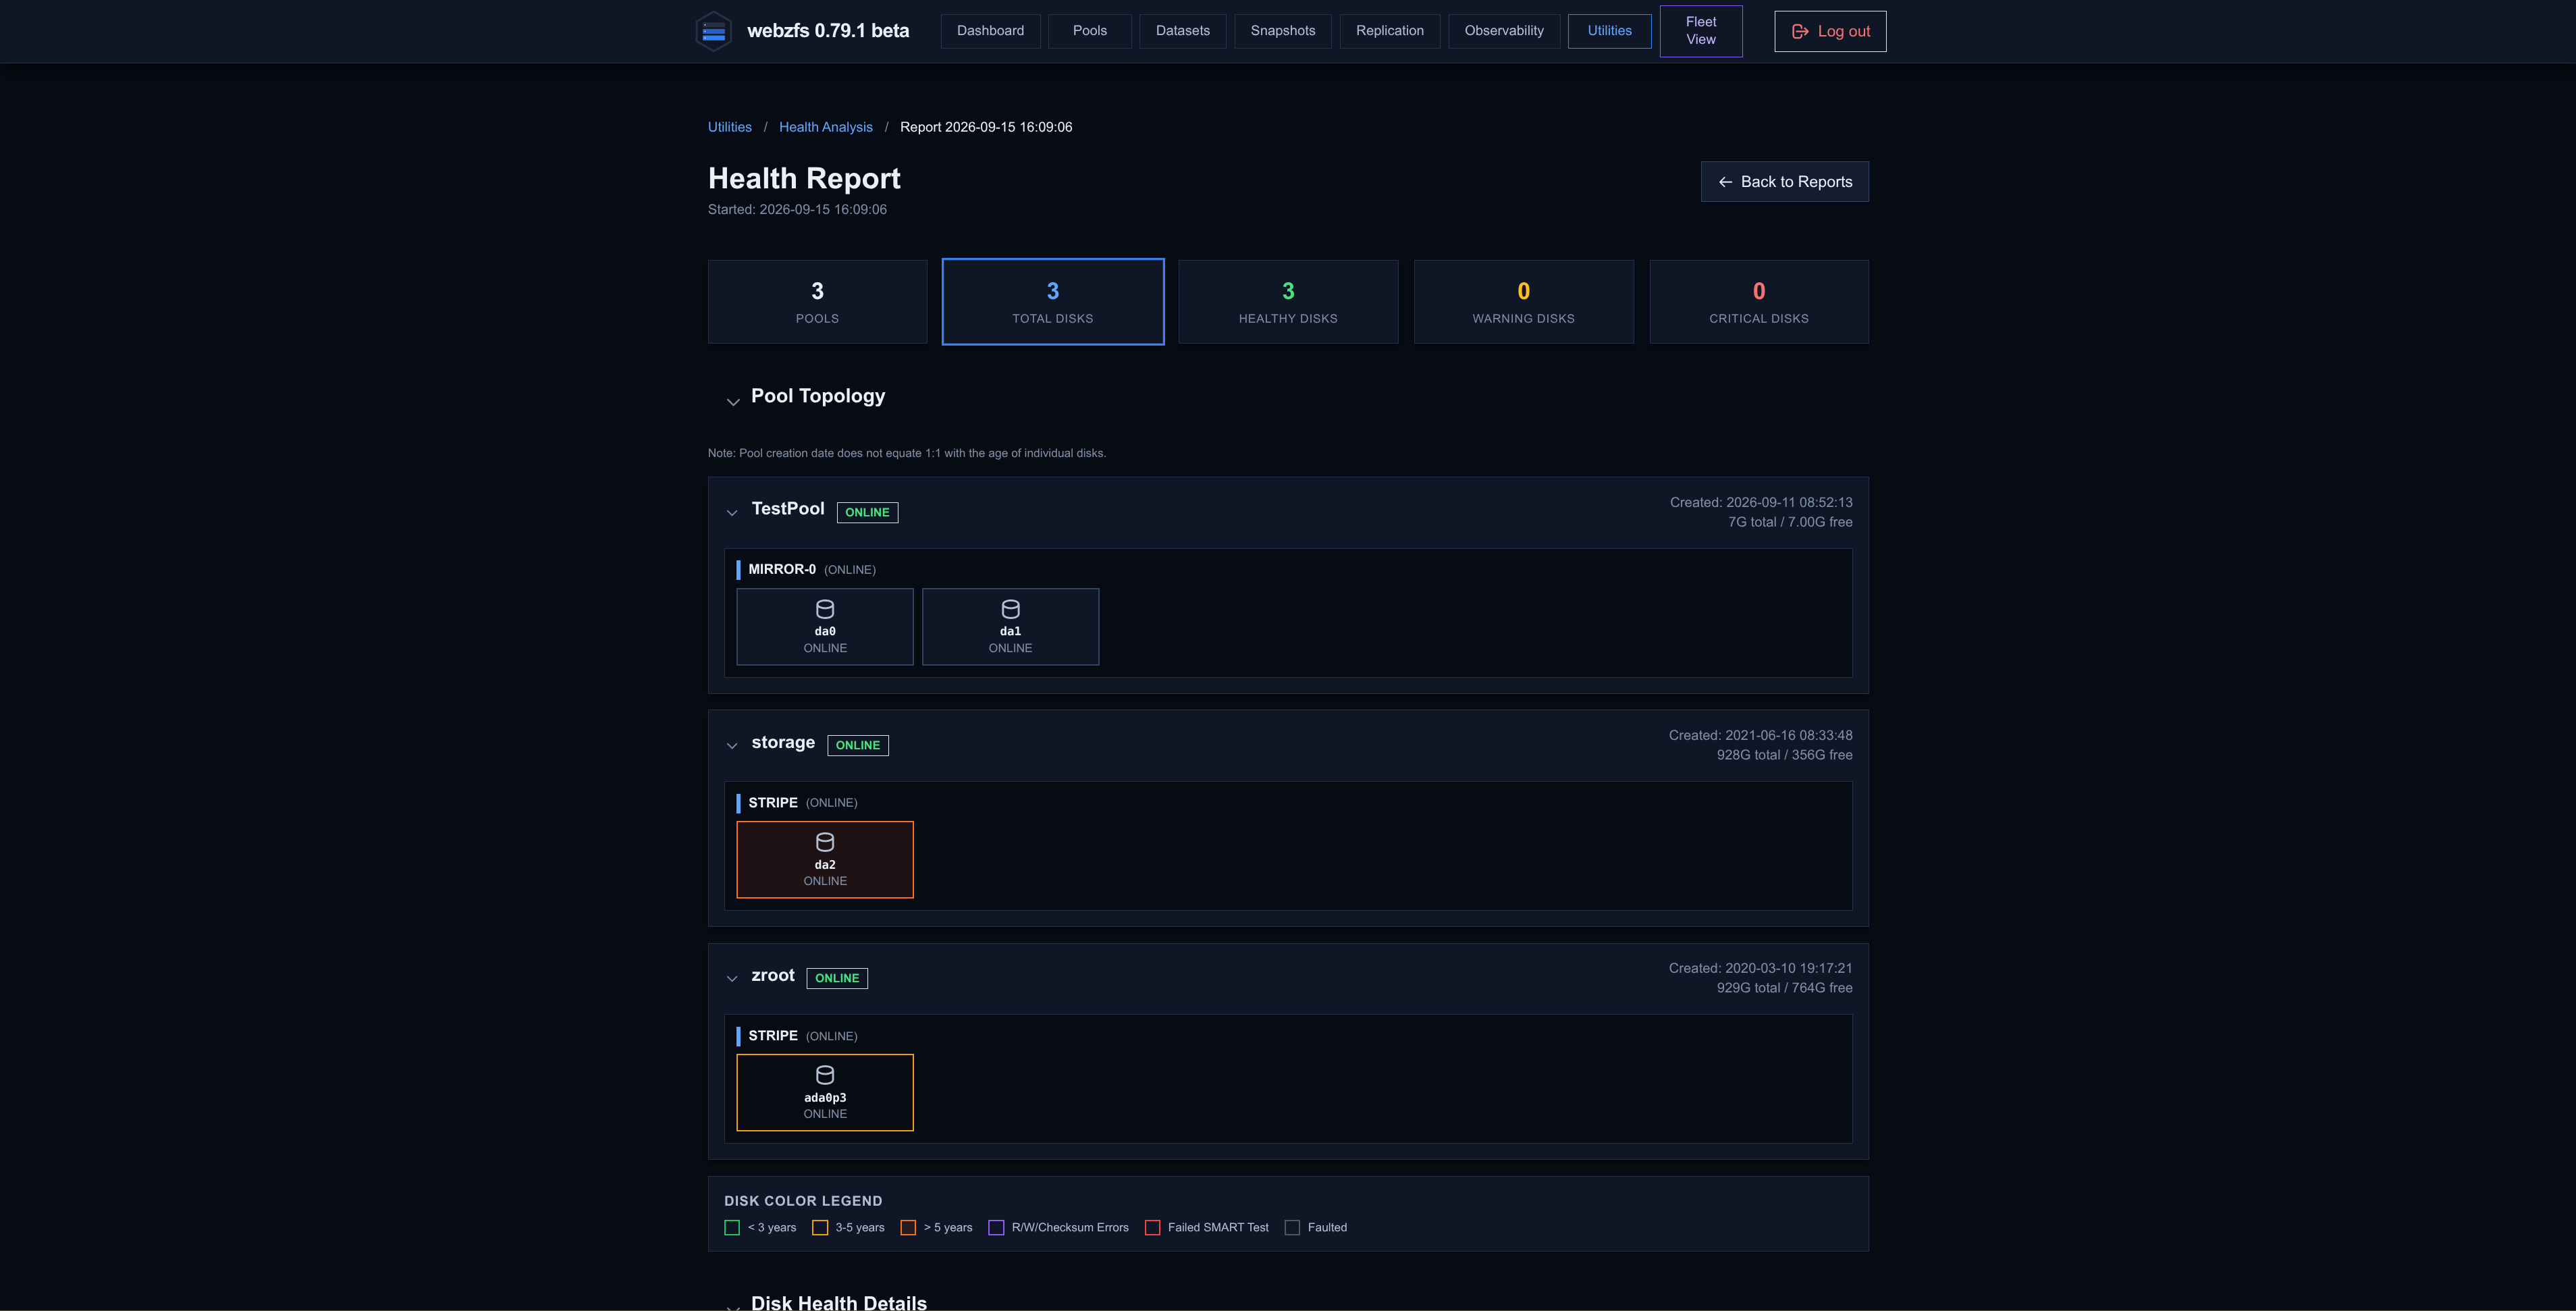
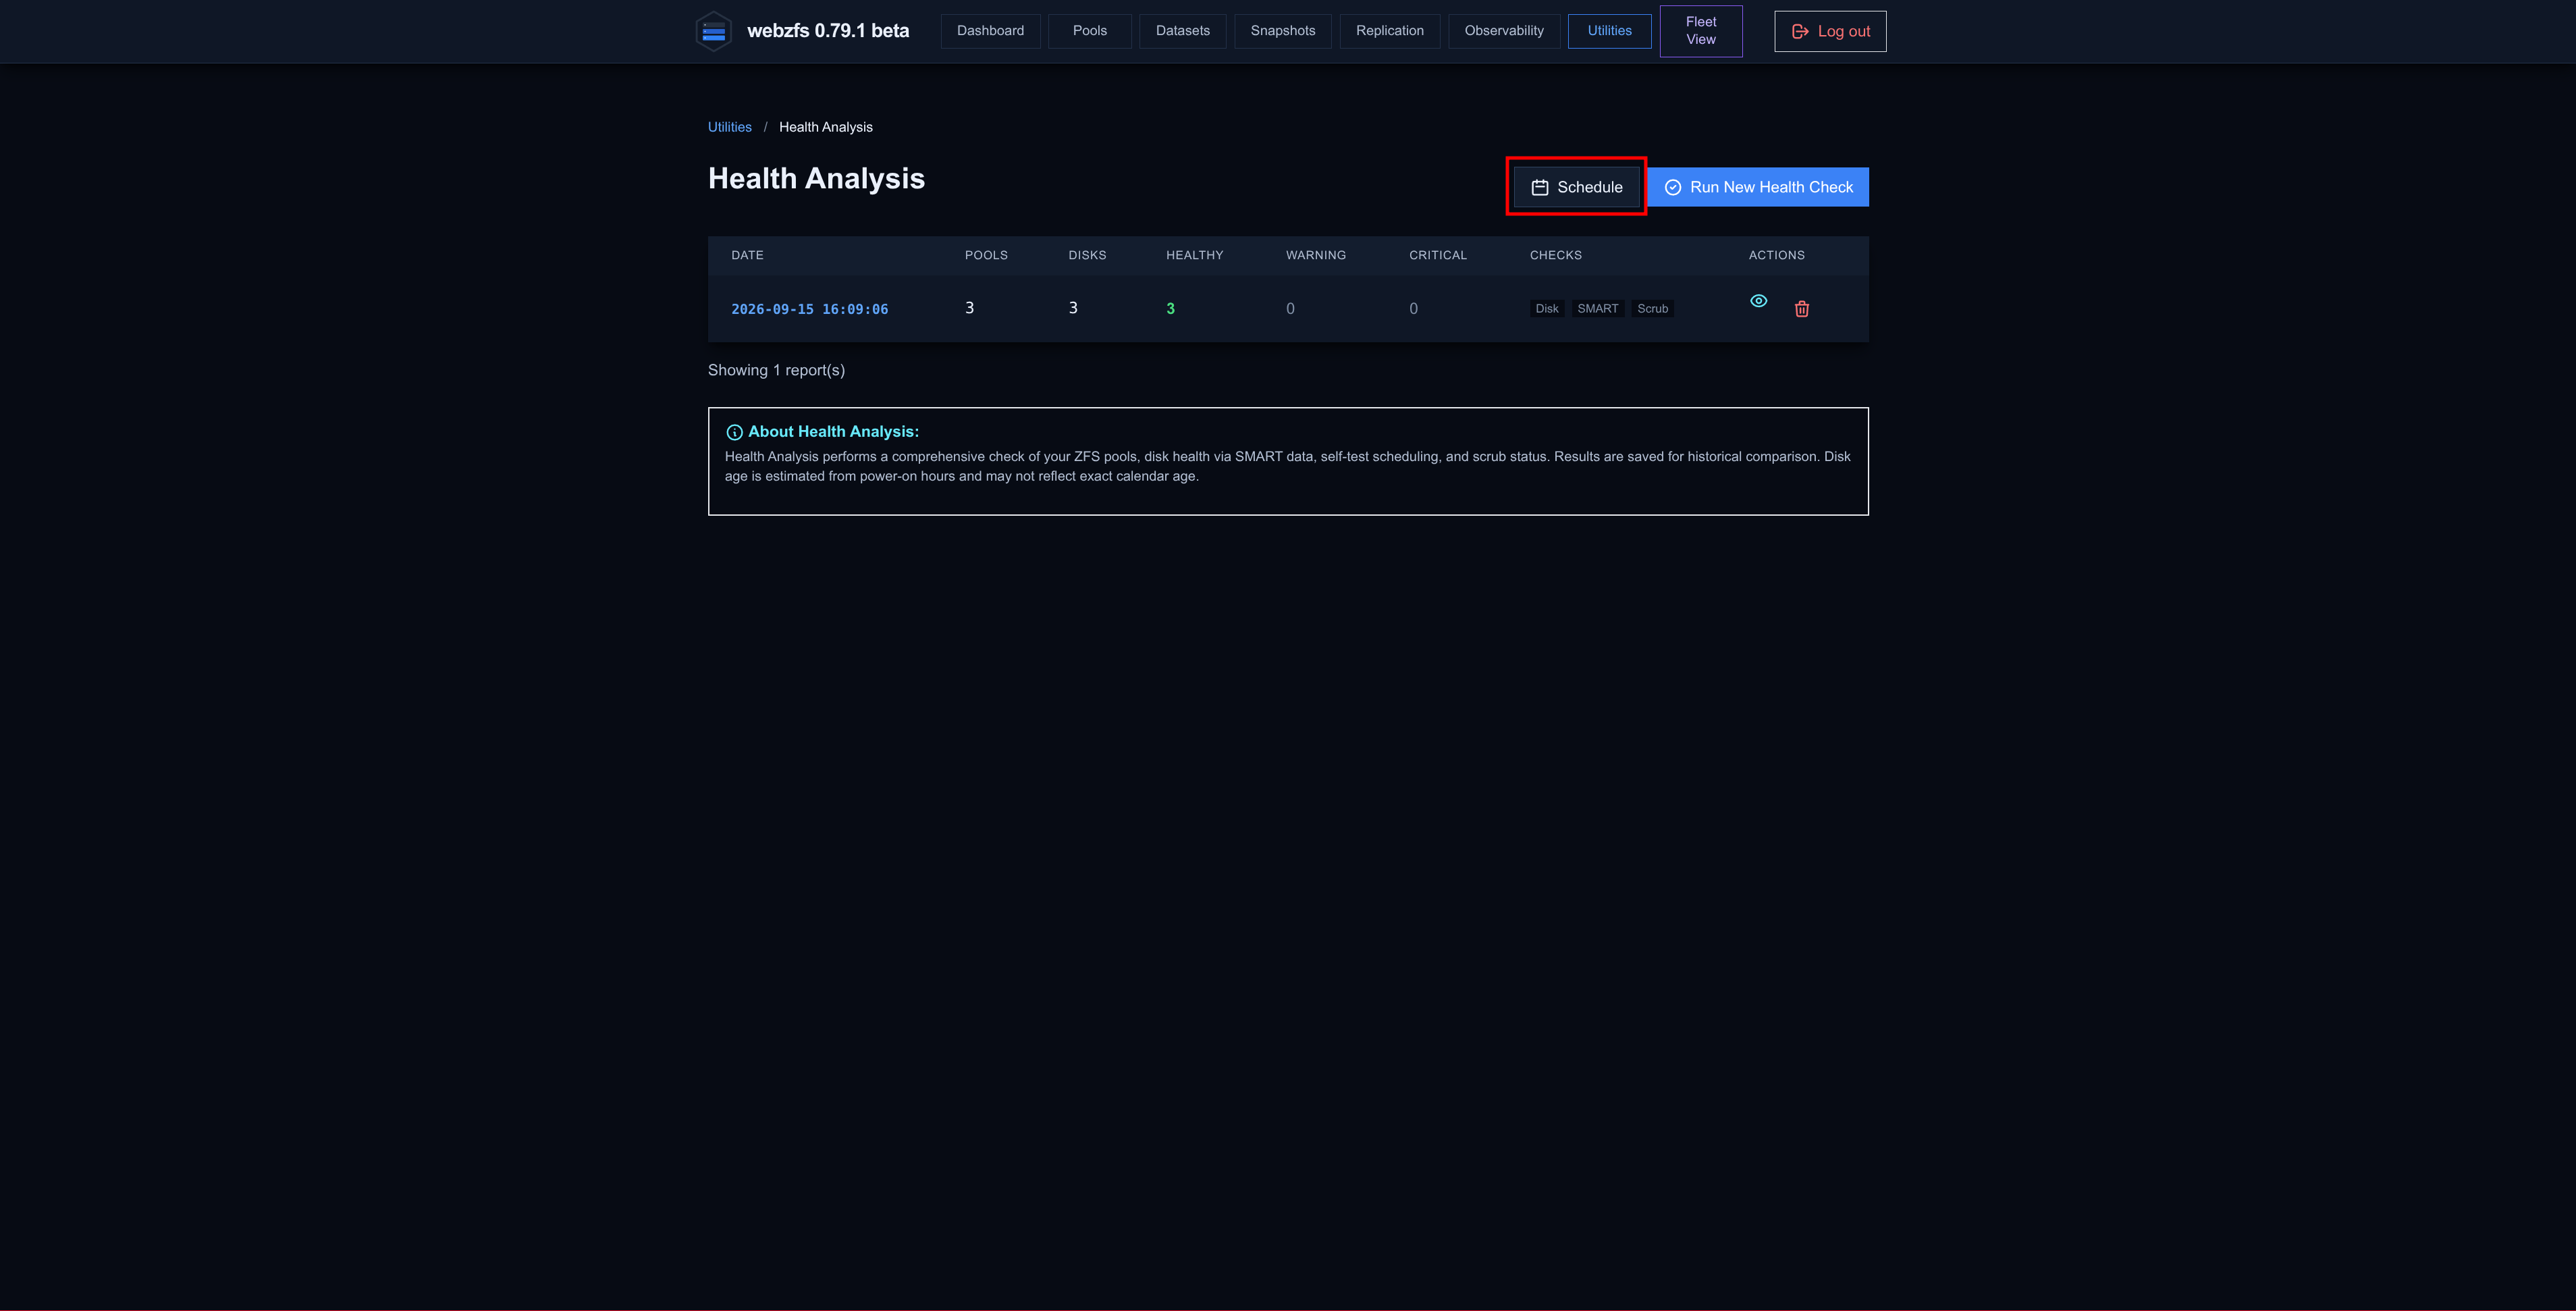
It lets us perform/schedule an analysis of the status of the physical disks of the system:
|
|
|
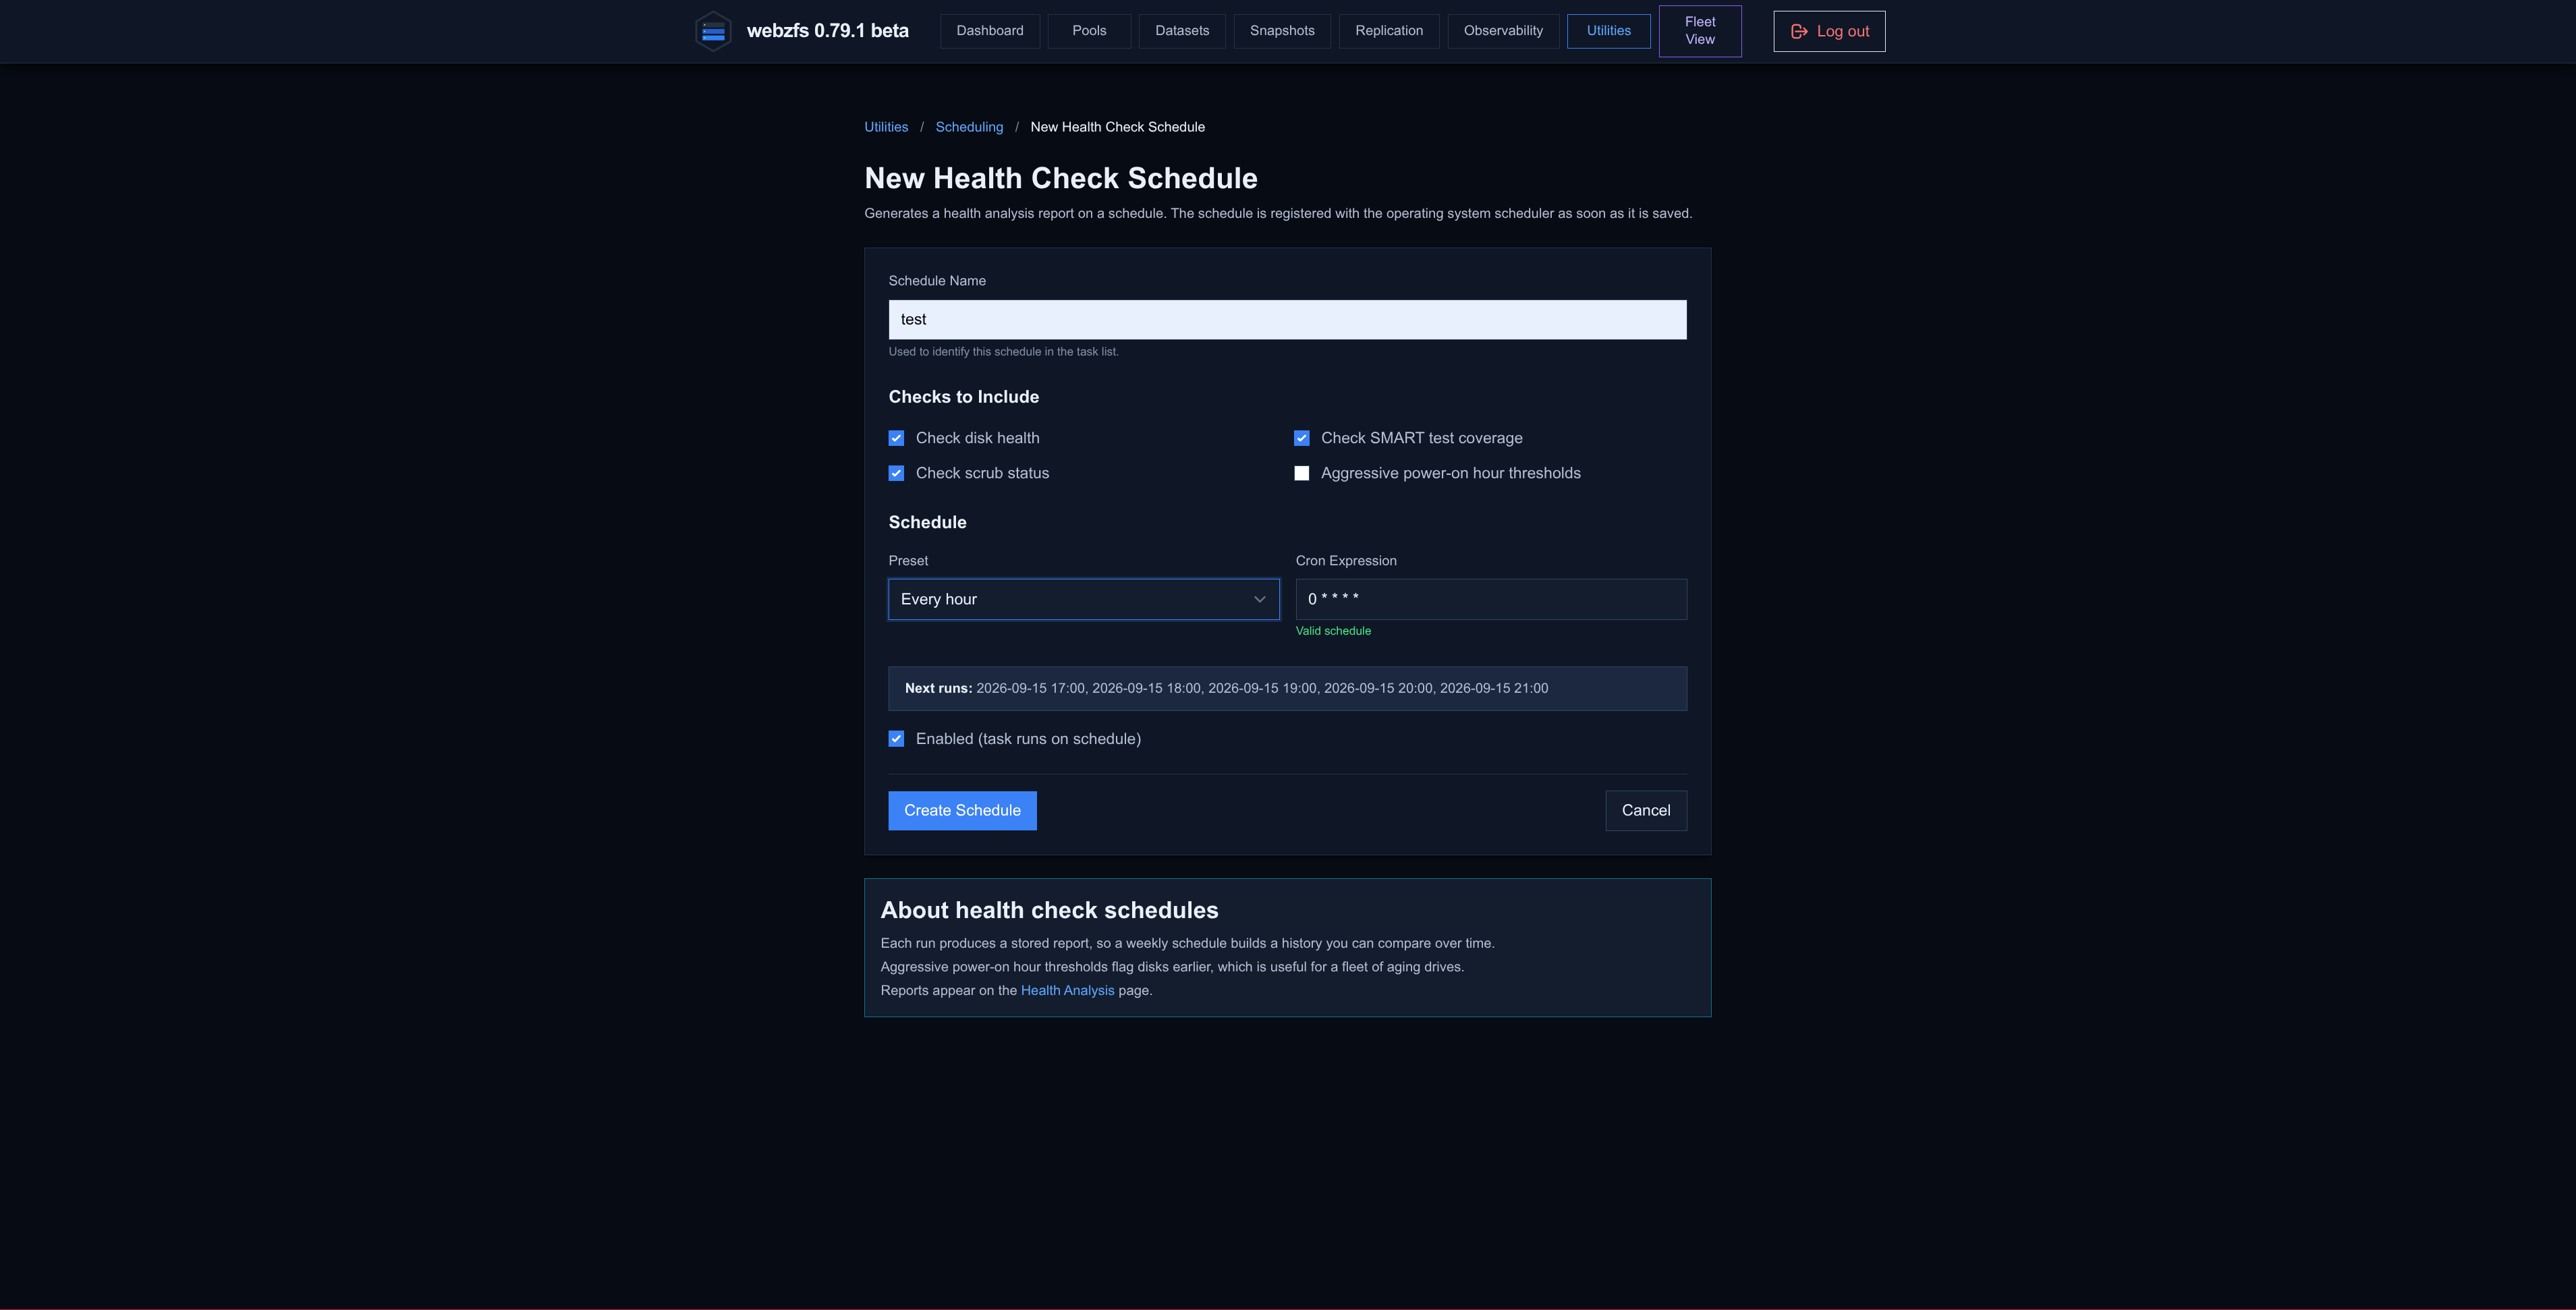
If we schedule it, we will see the following panel:
|
|
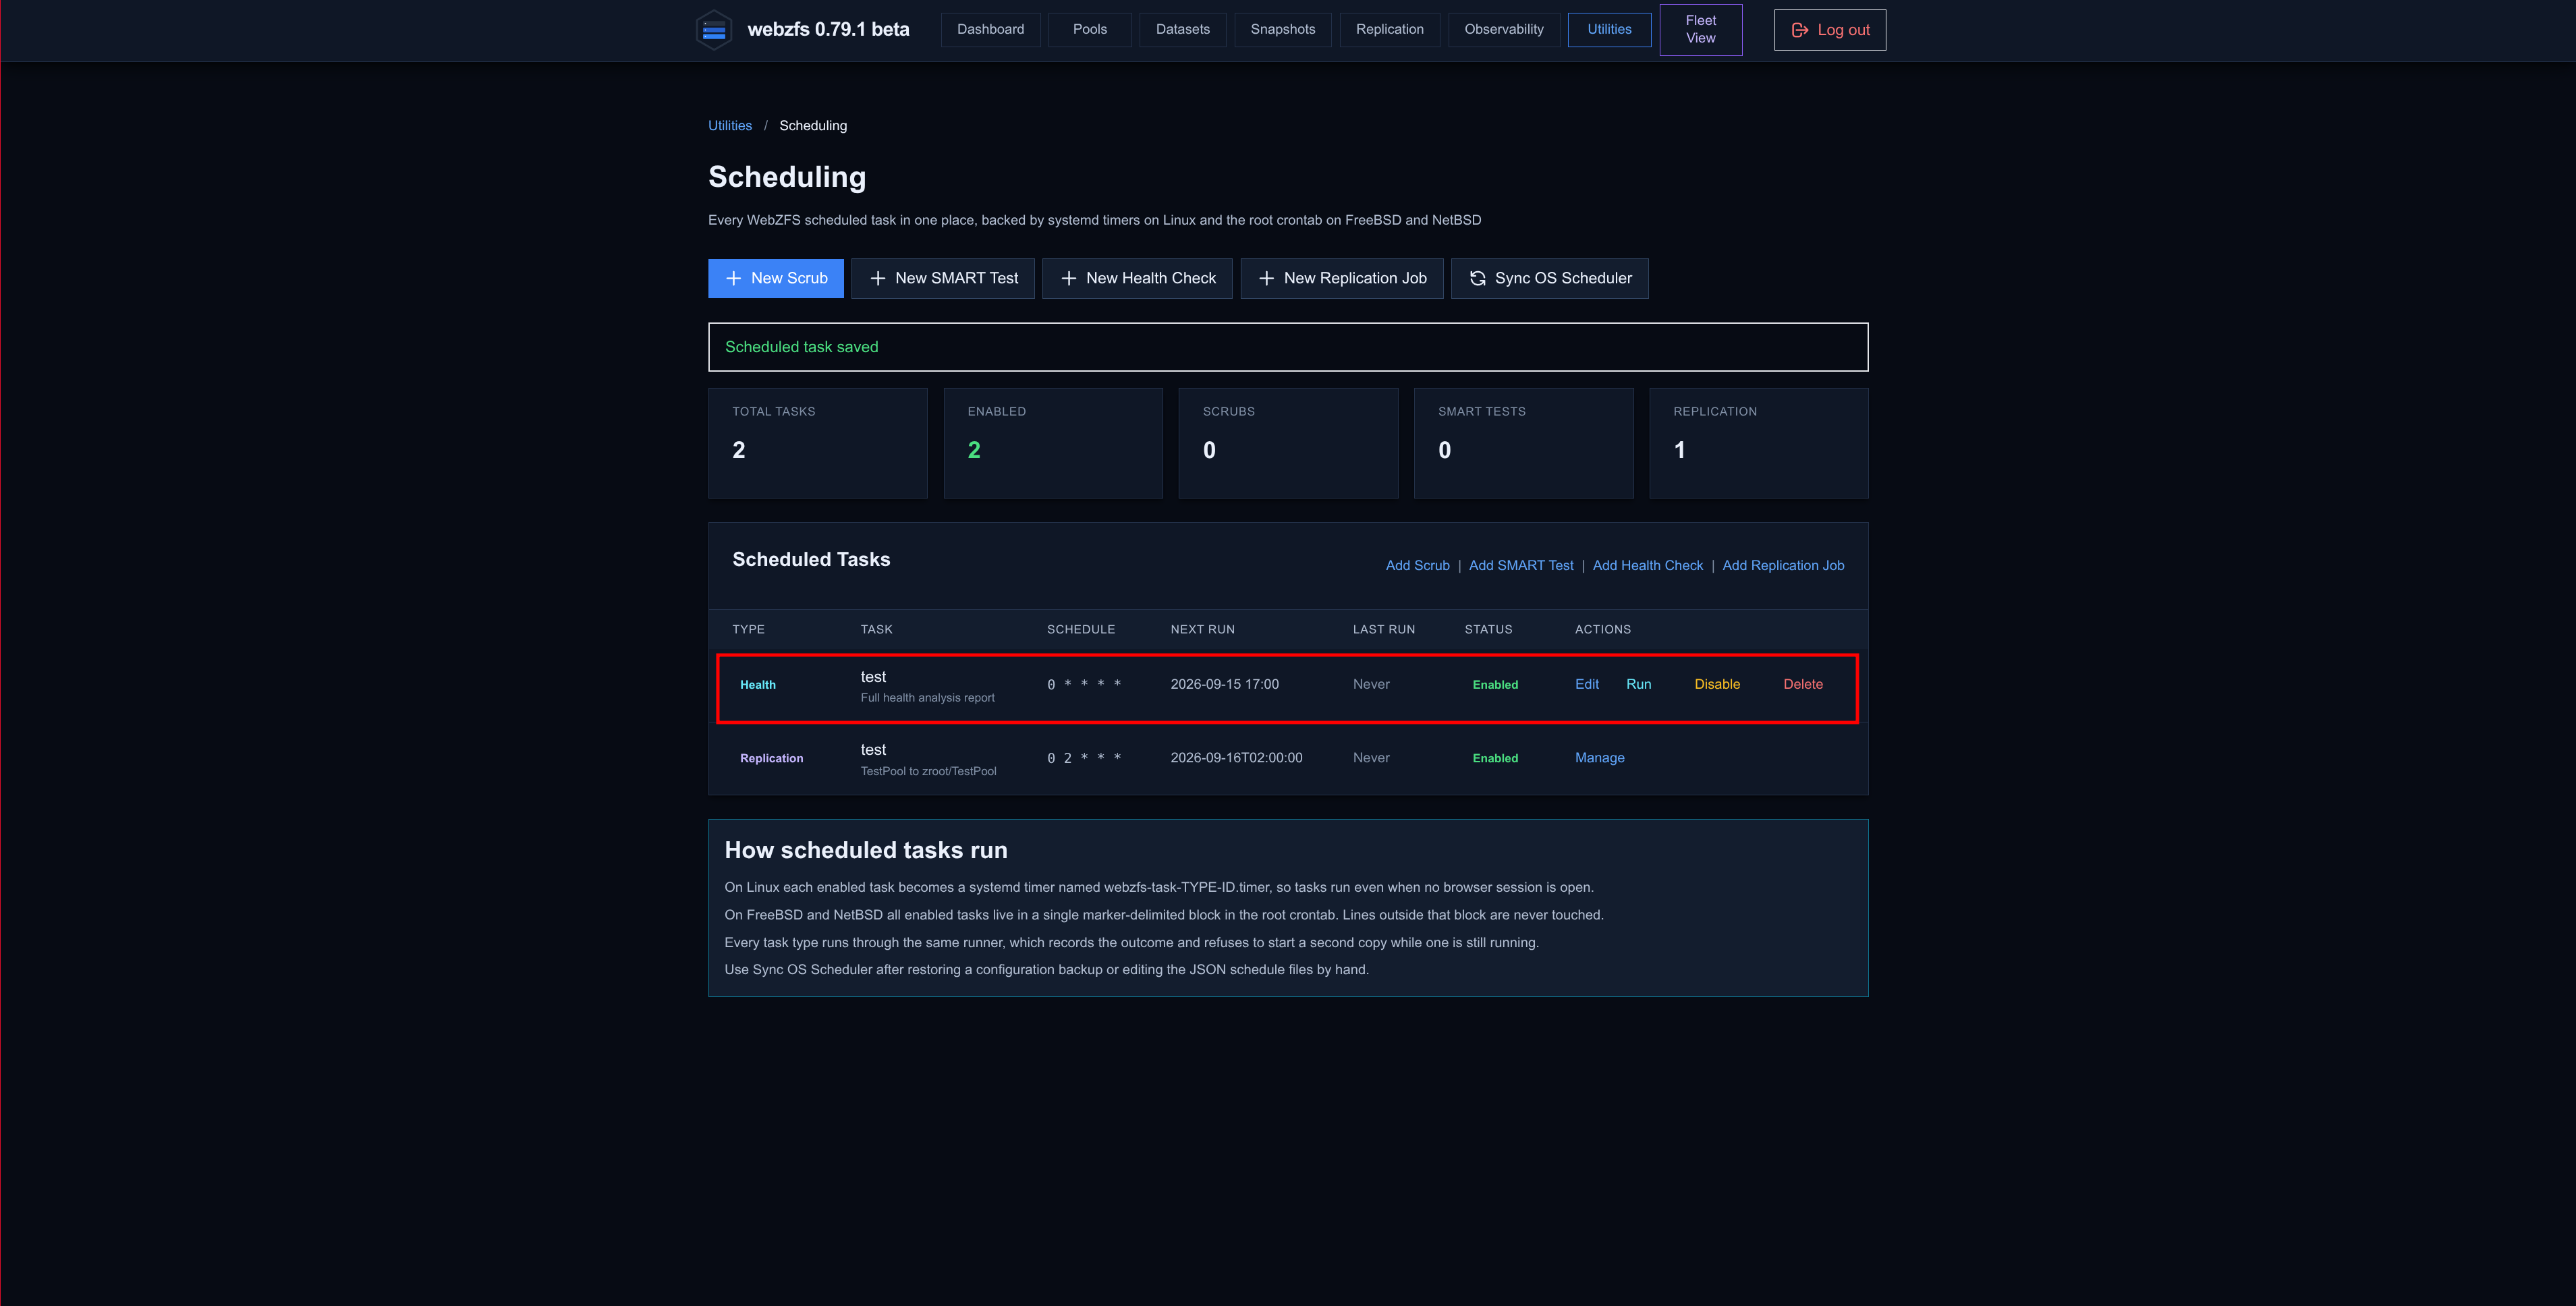
|
Pool Scrub Status:
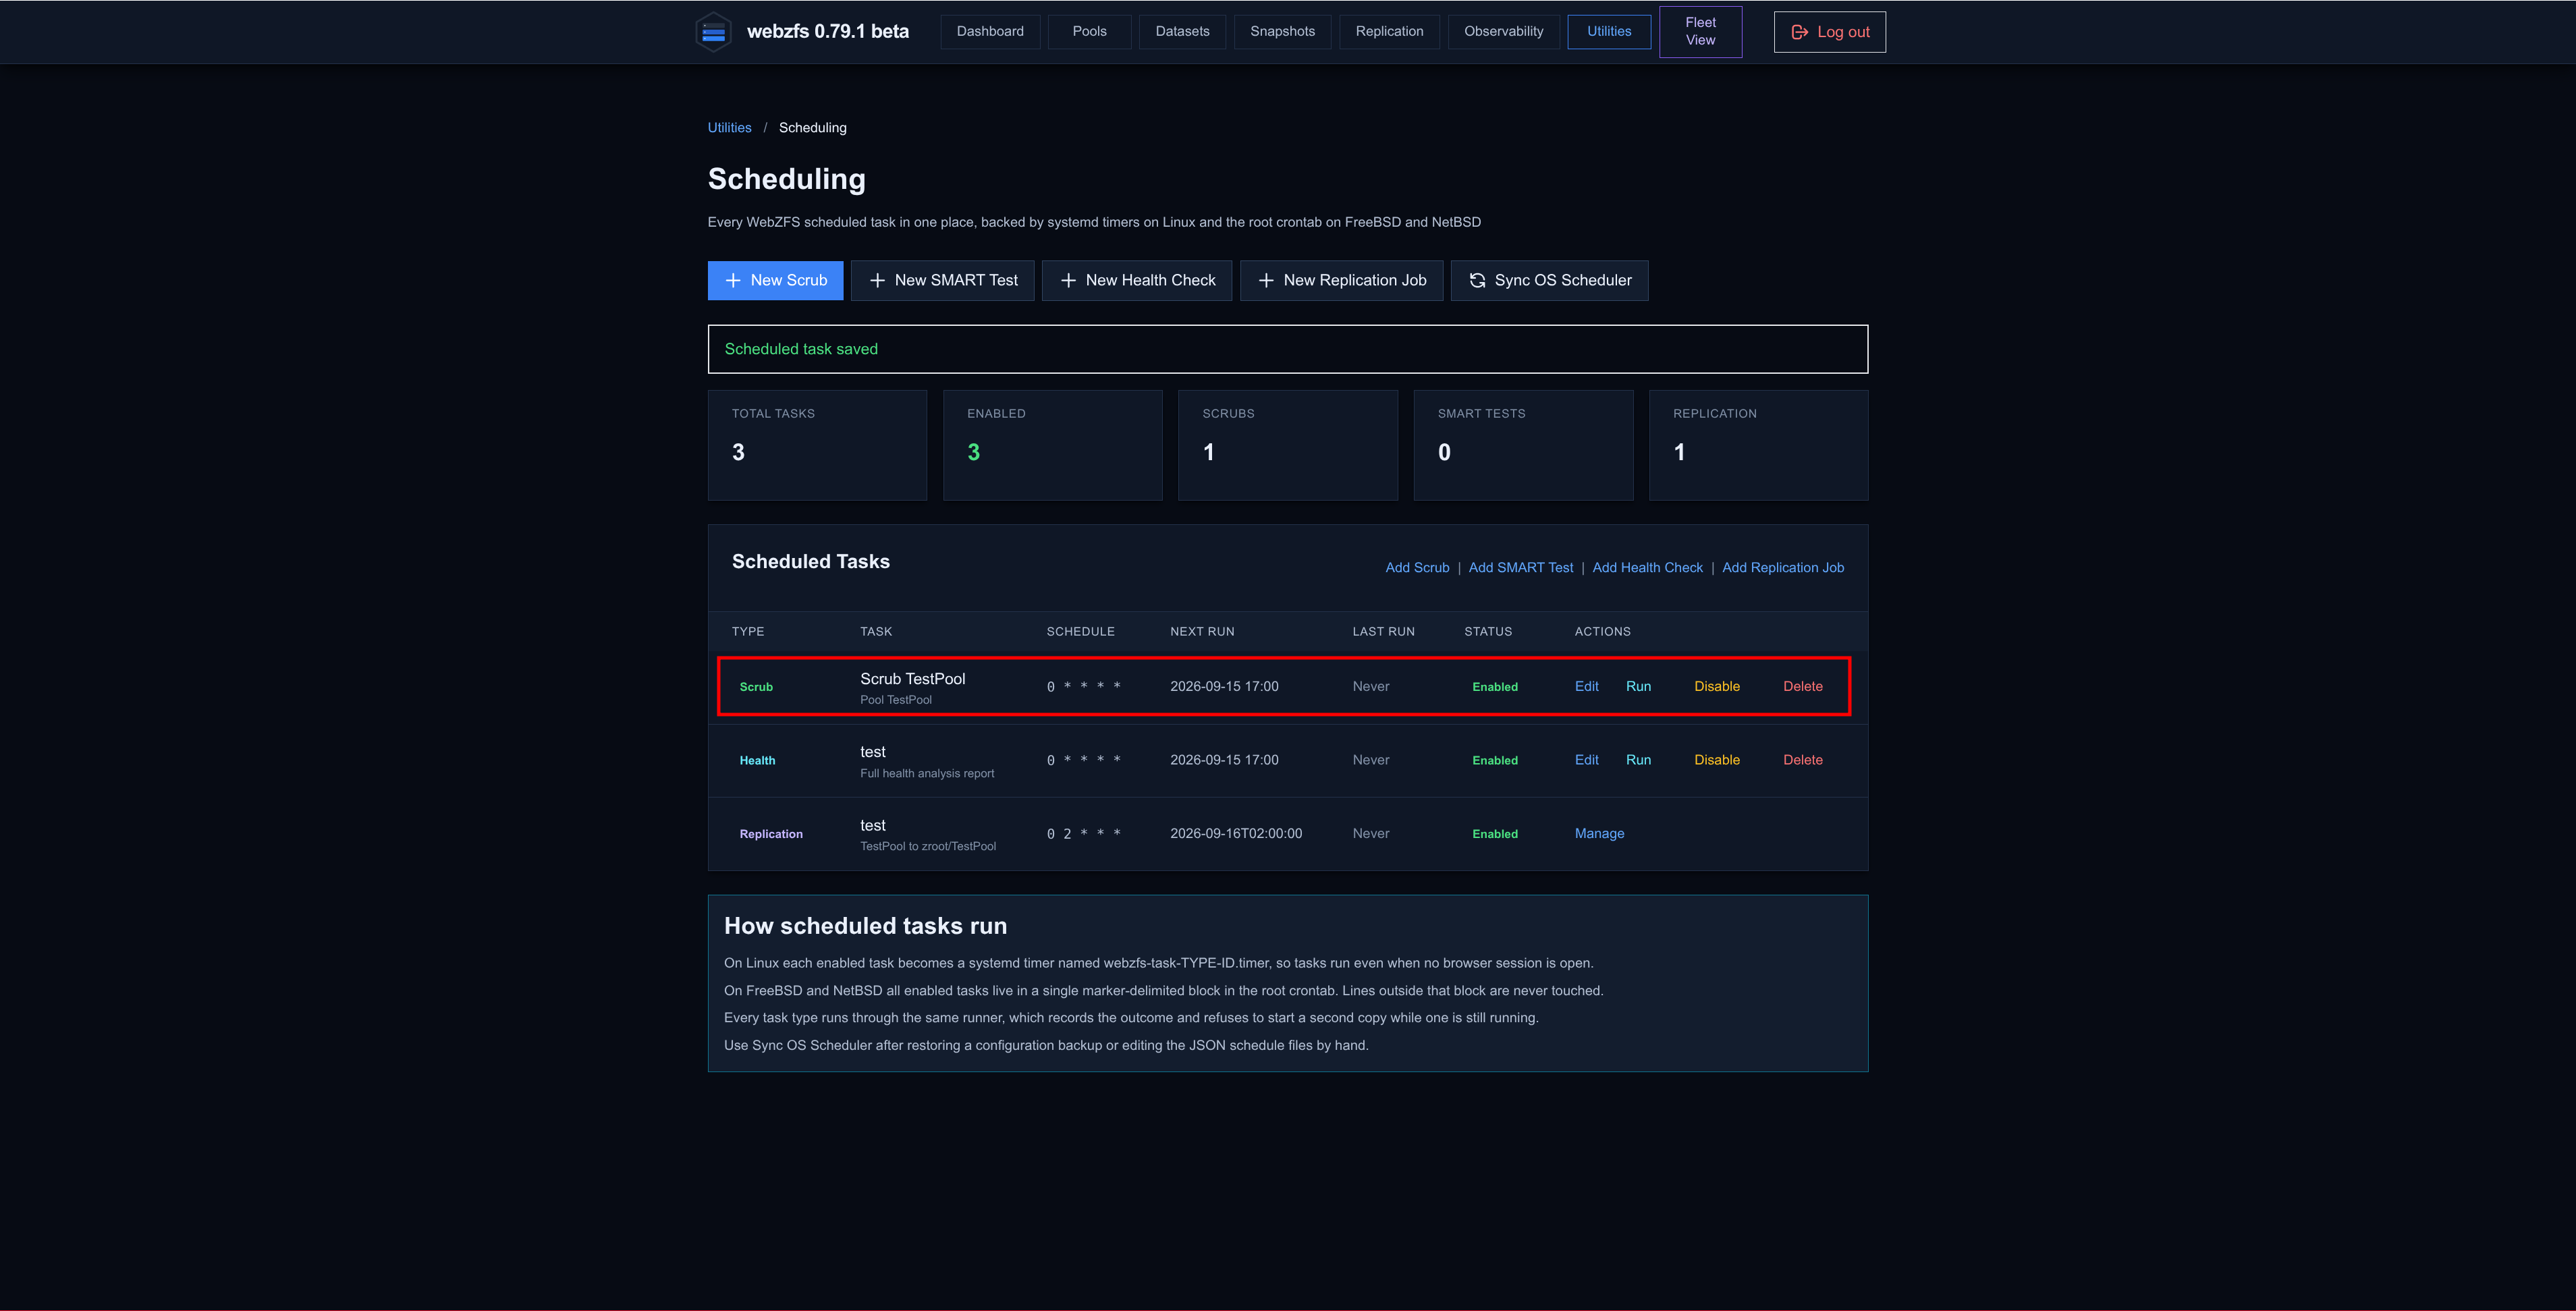
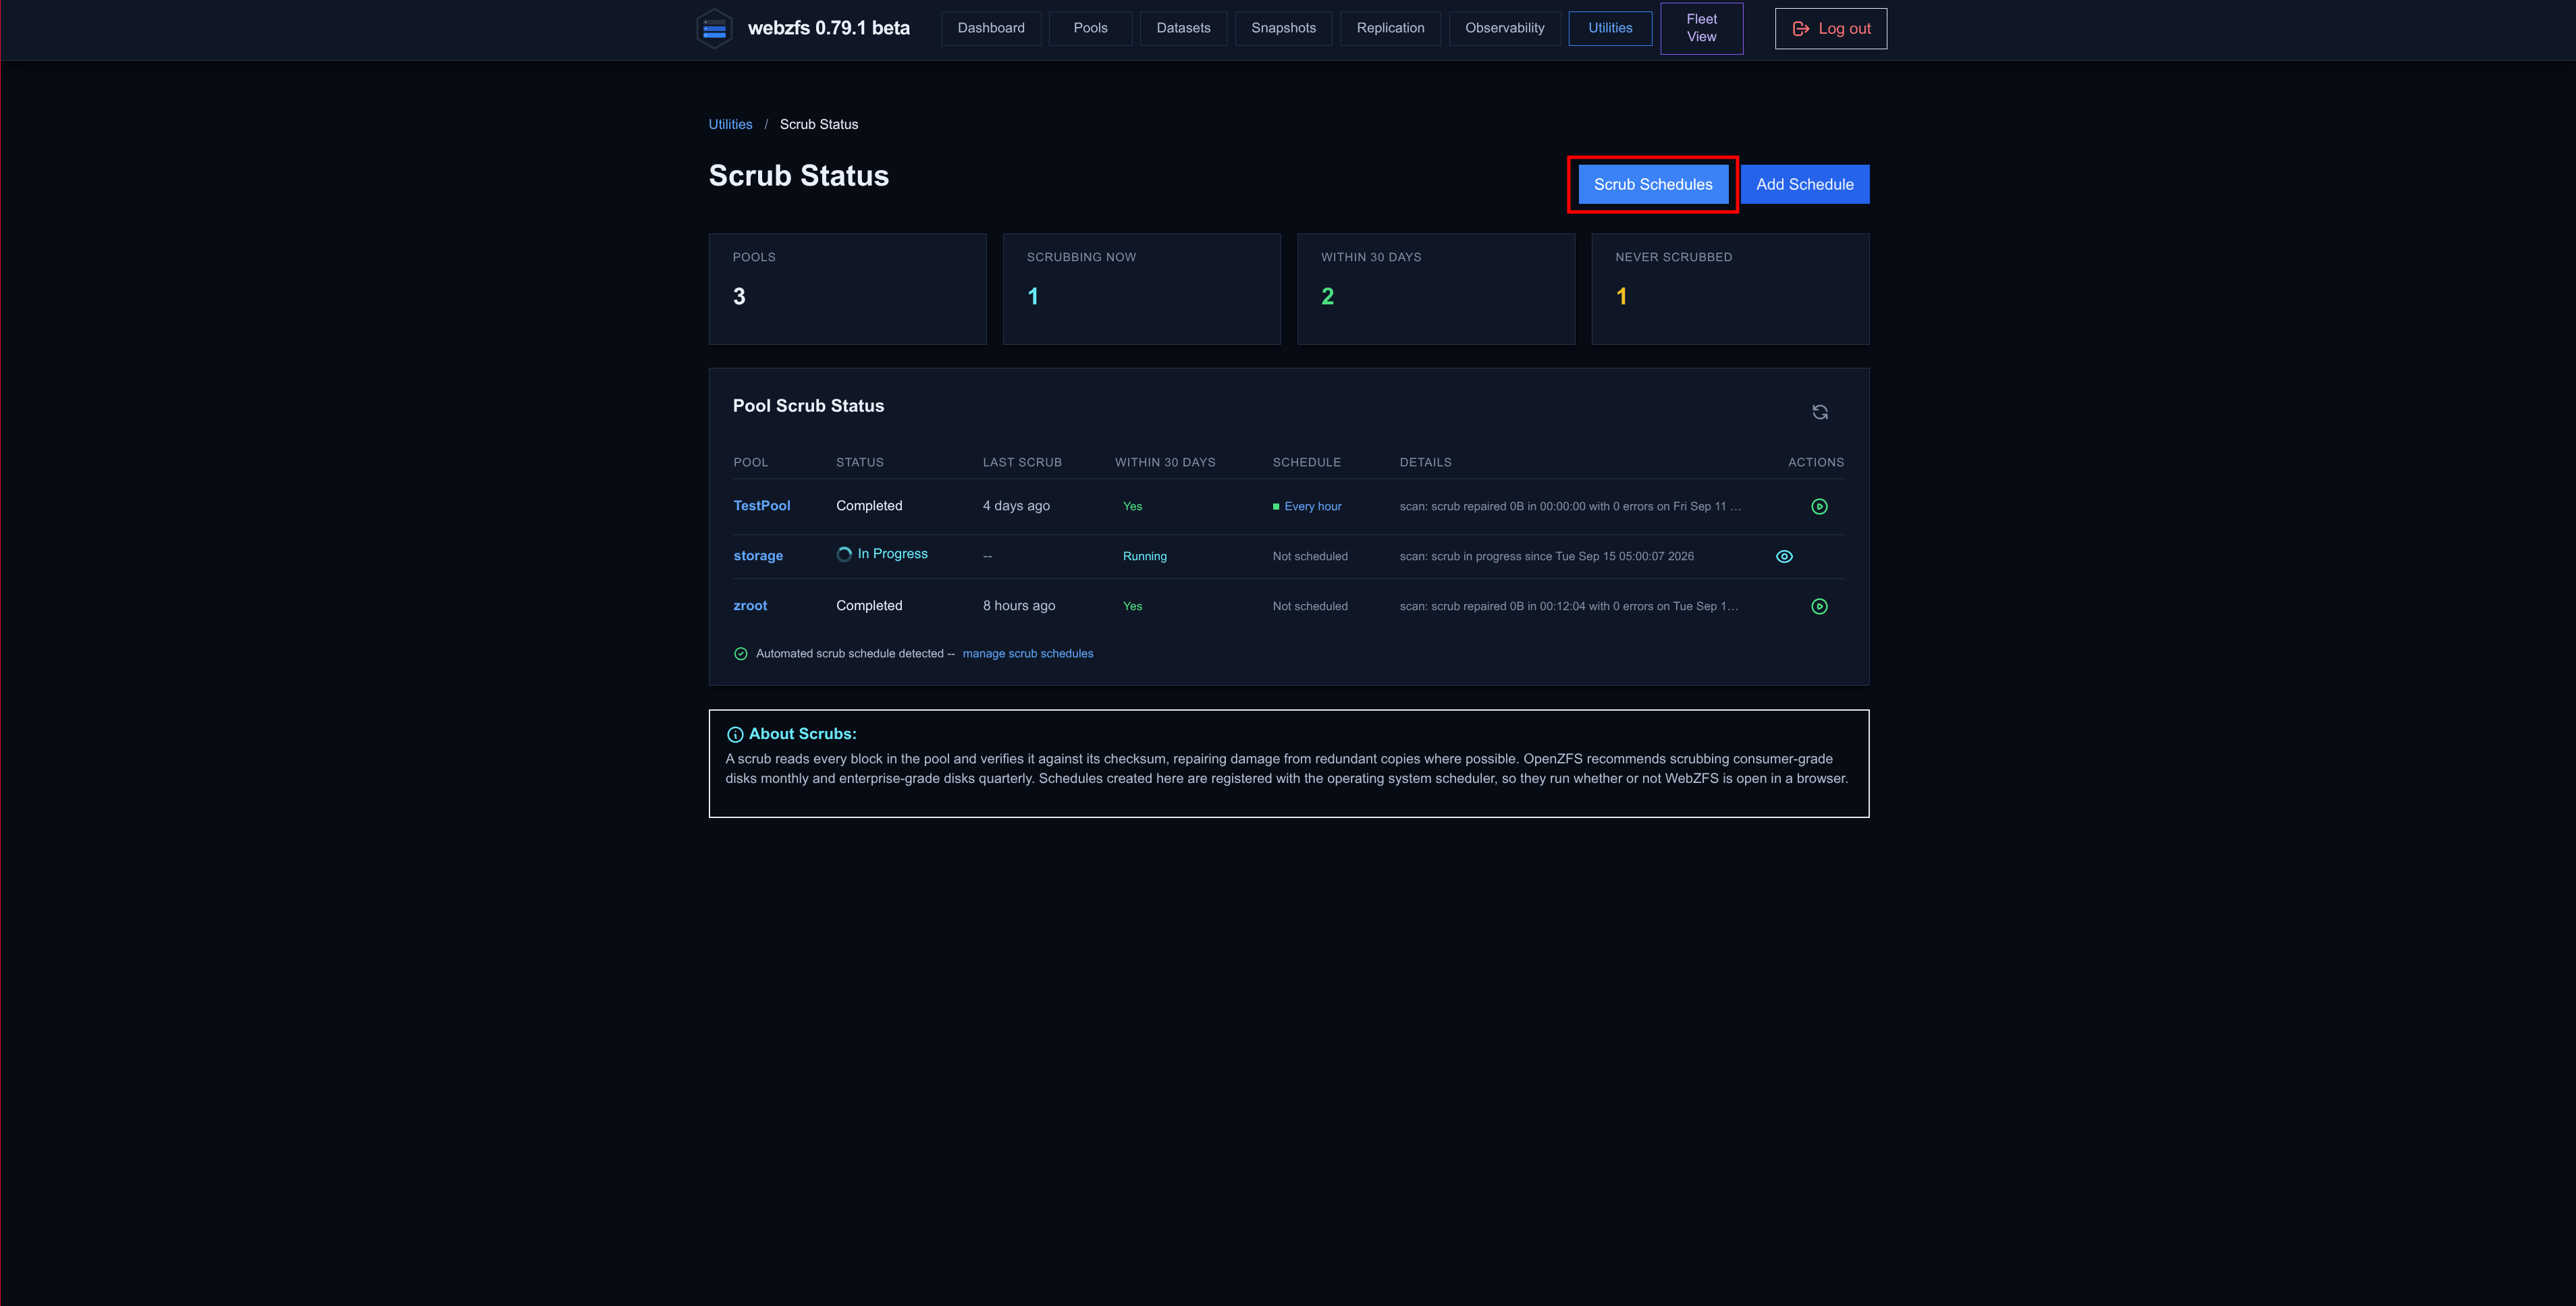
This section will let us schedule Scrubs on the ZFS pools, see the list of scheduled ones, immediately run Scrubs that were previously executed and see the status of the current scrubs.
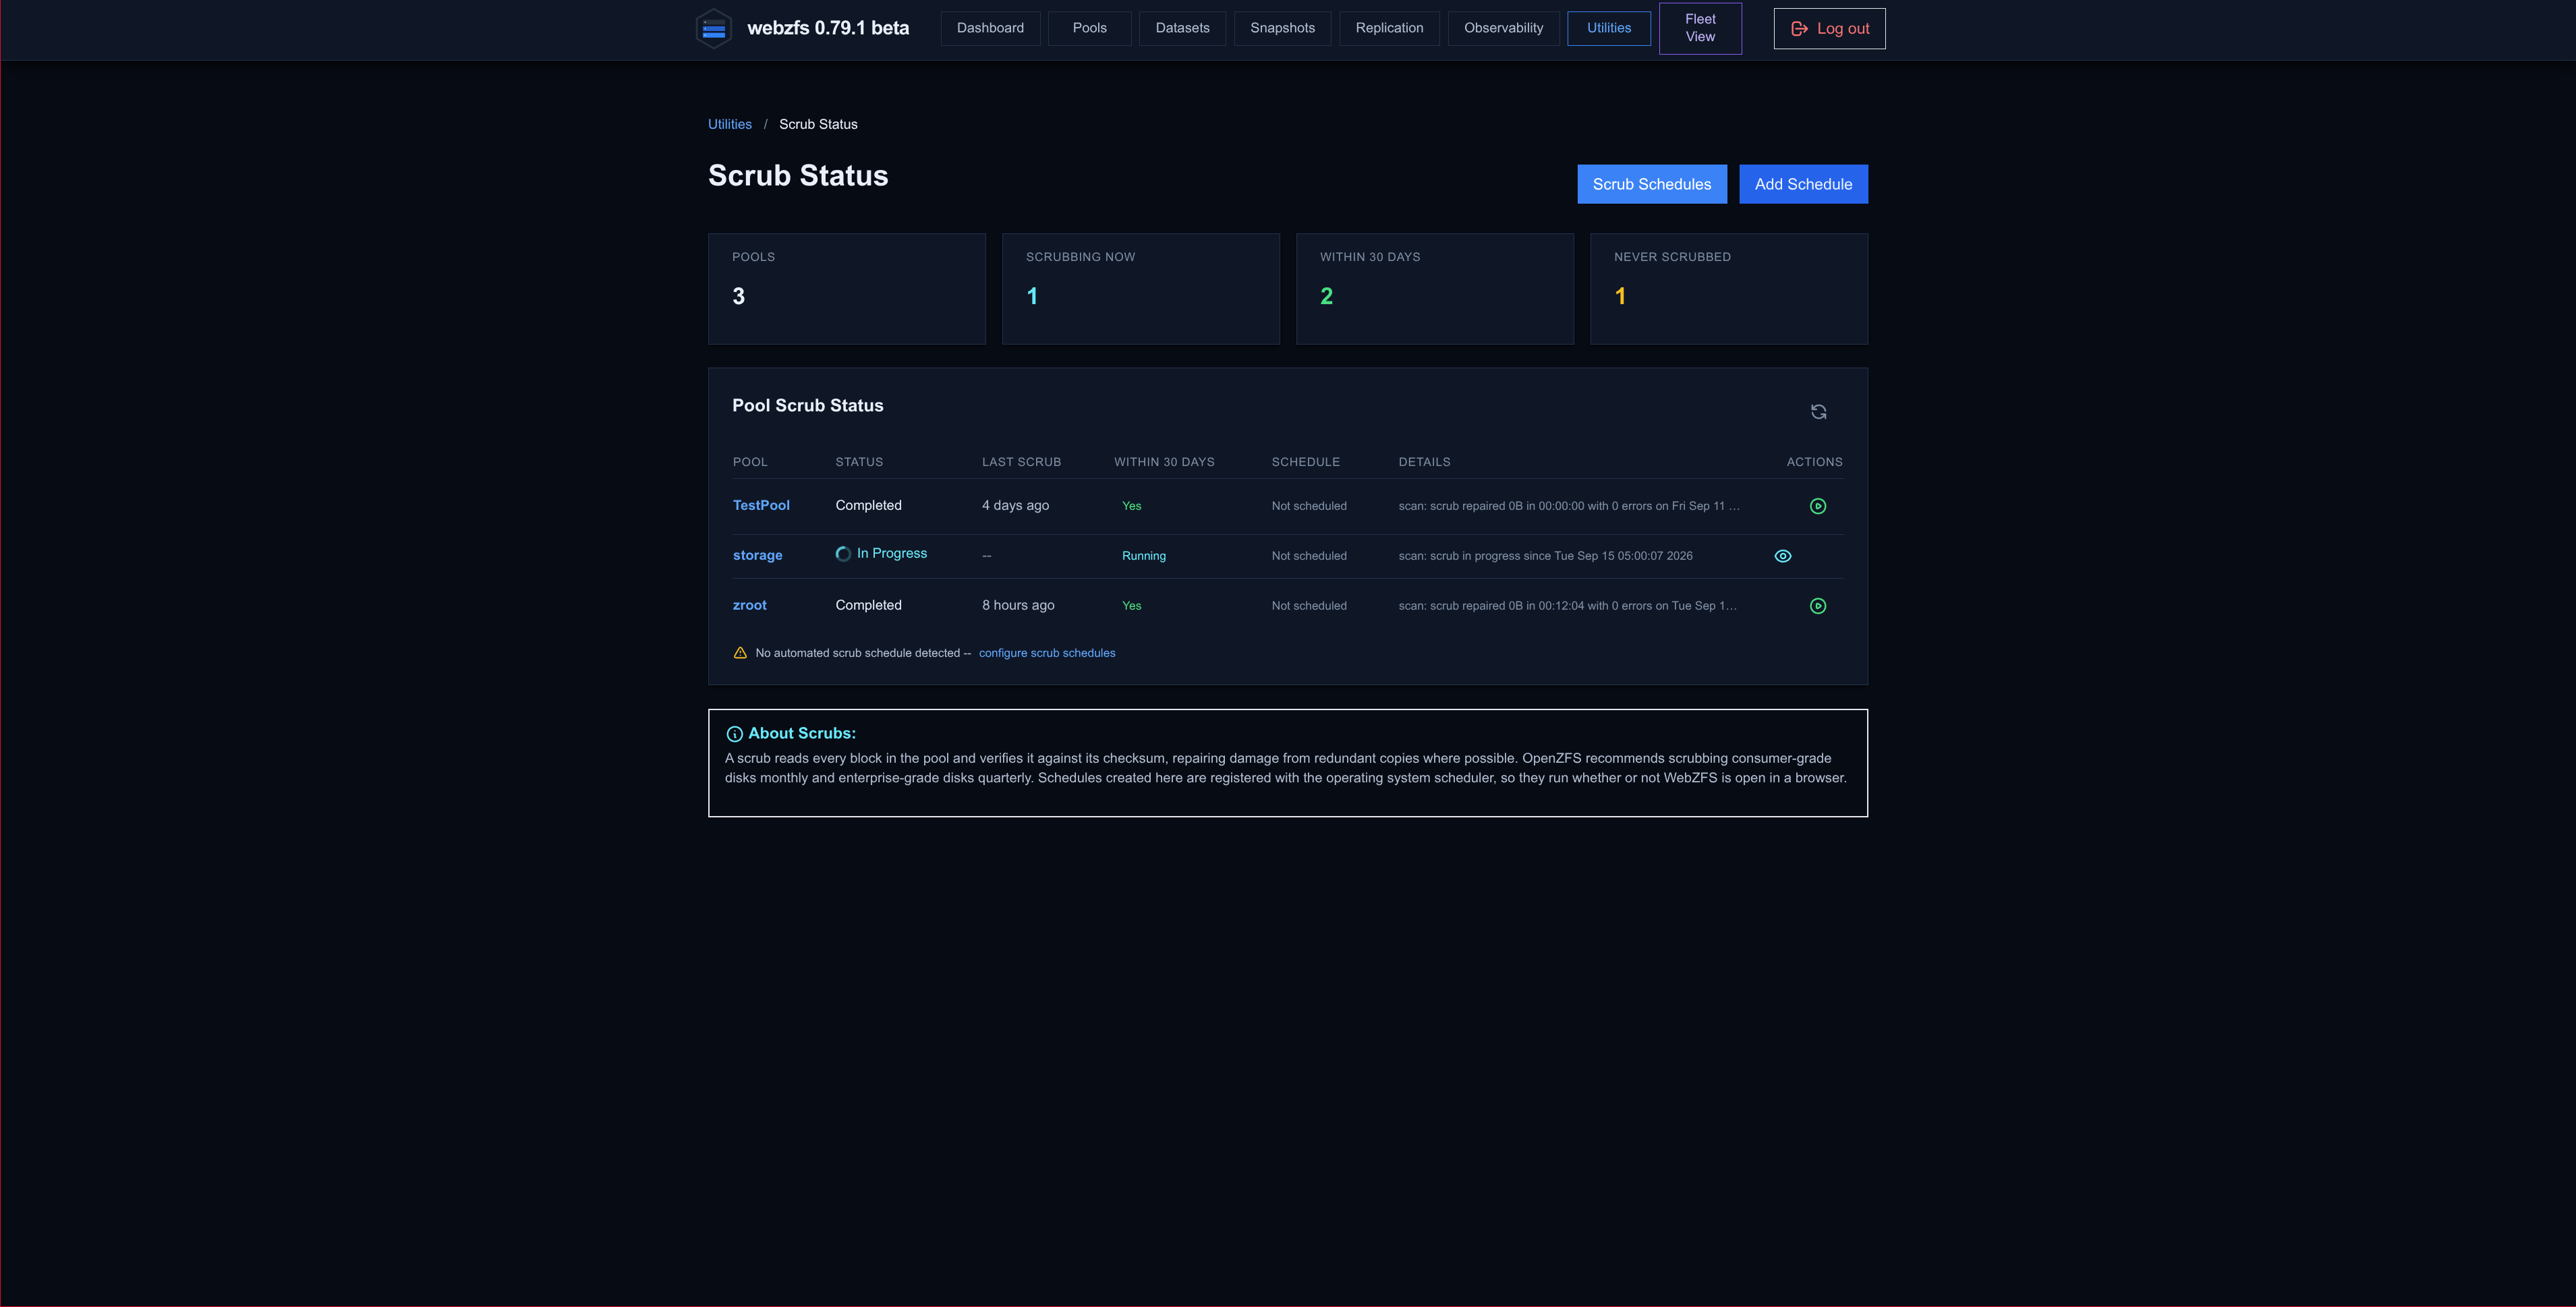
We add a scheduled Scrub:
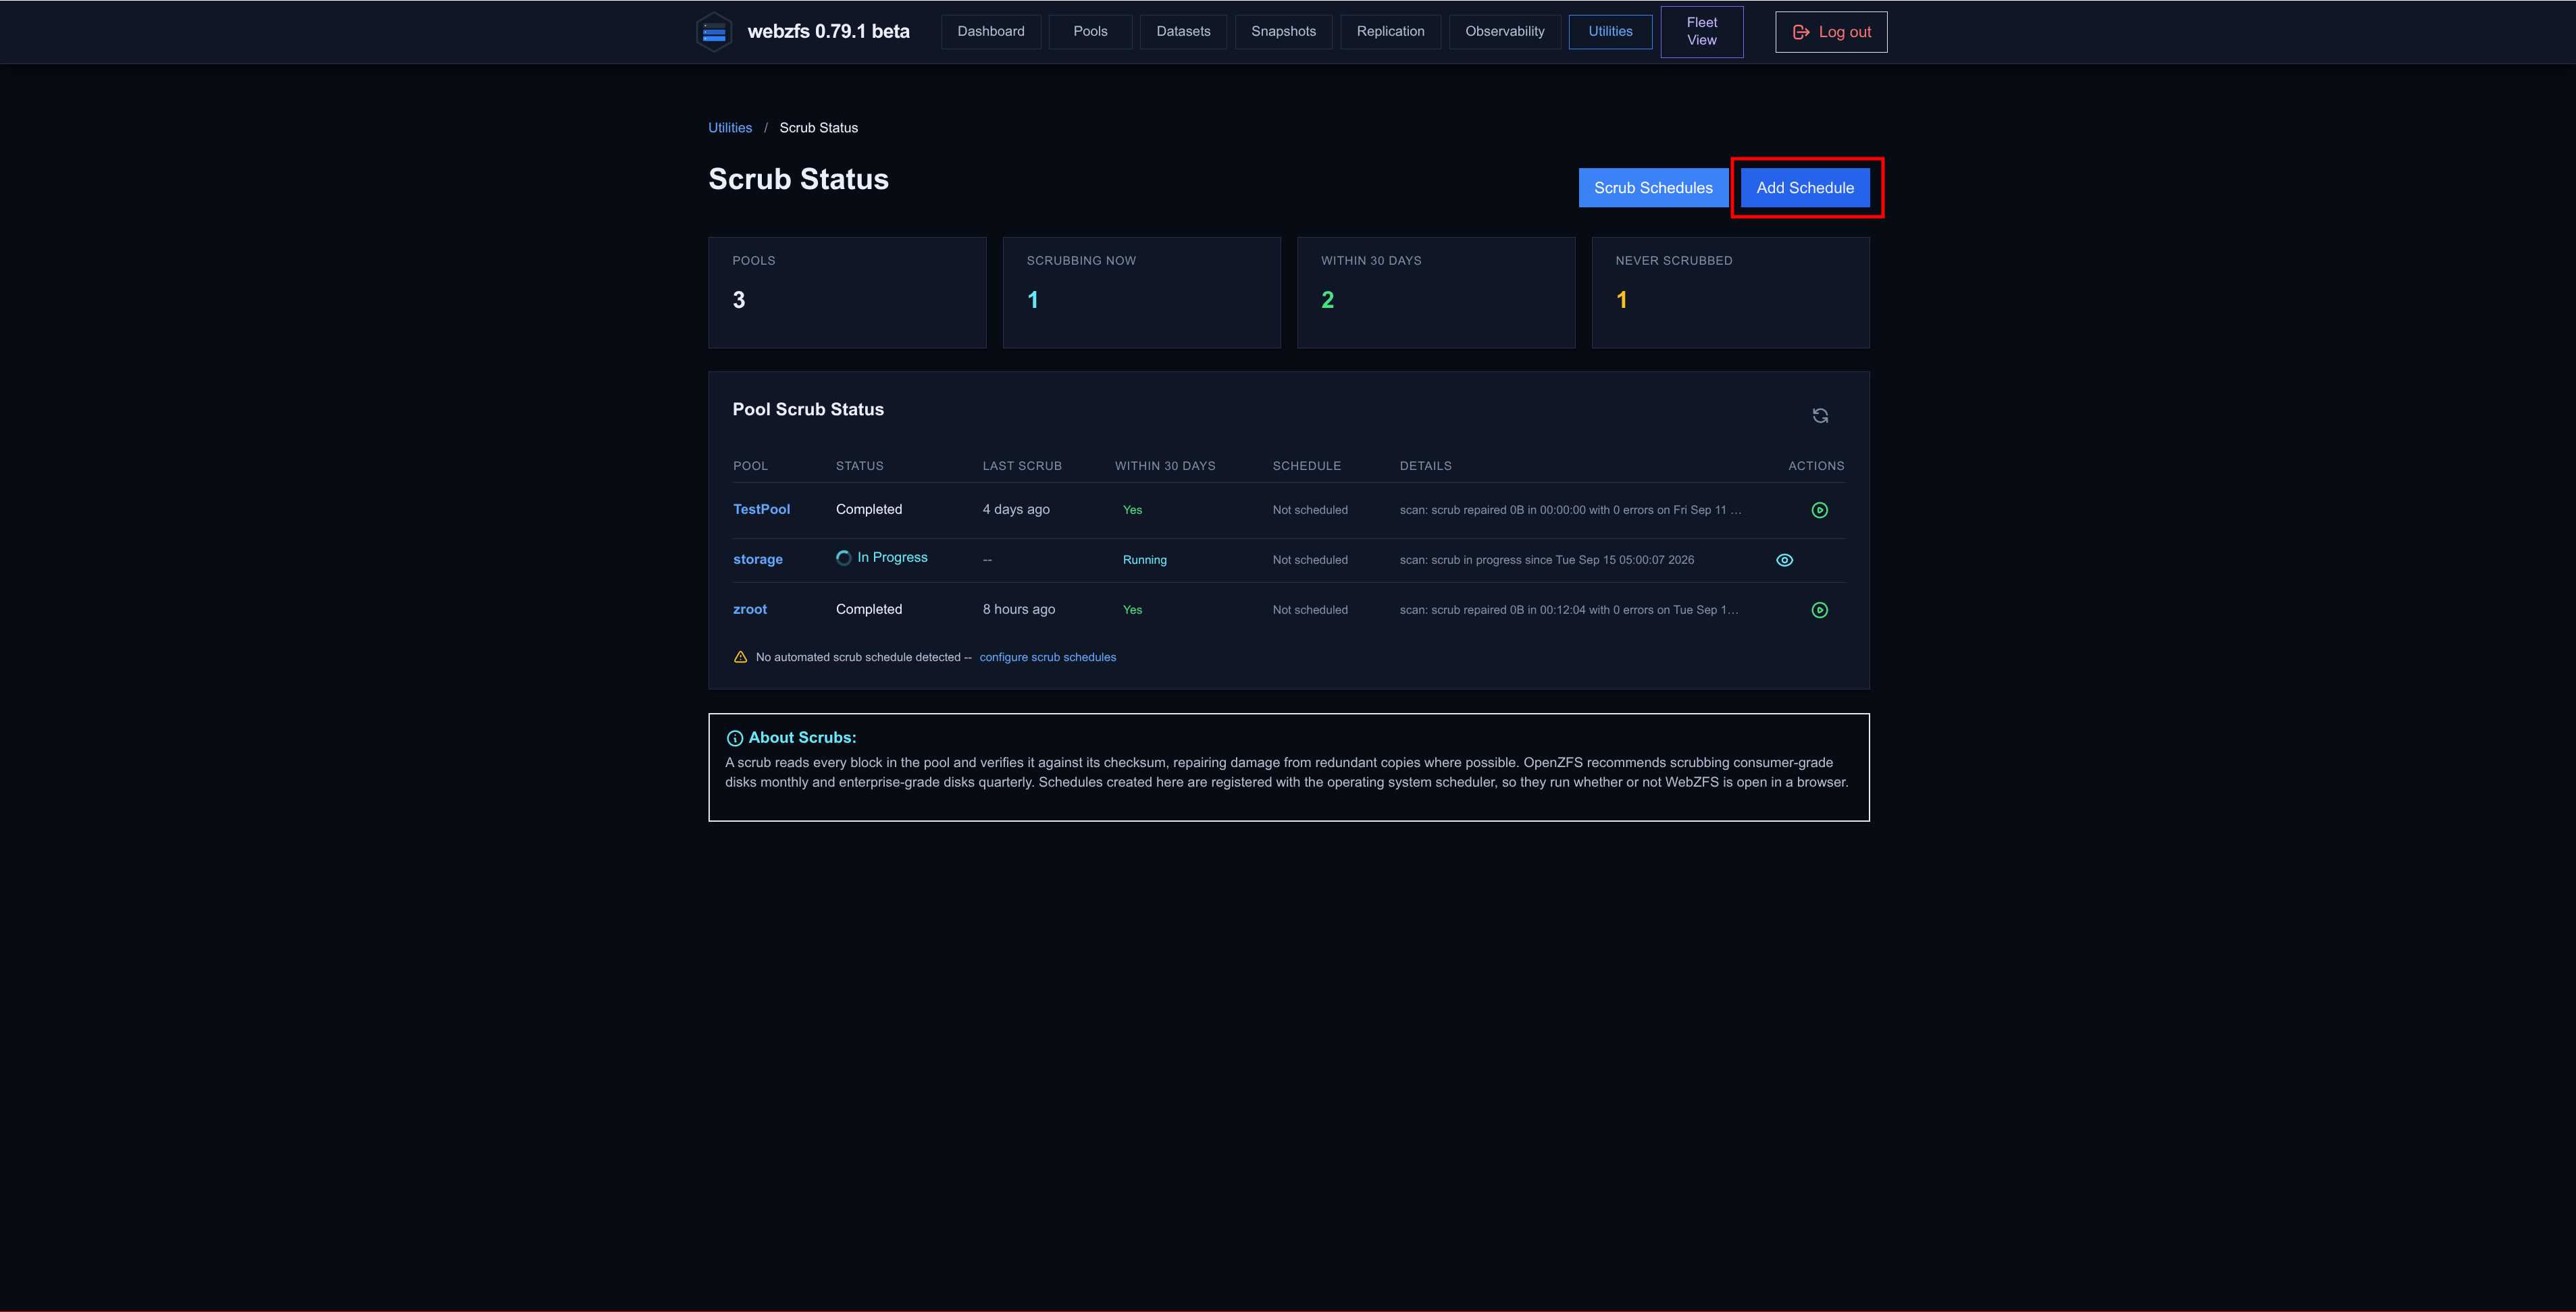
|
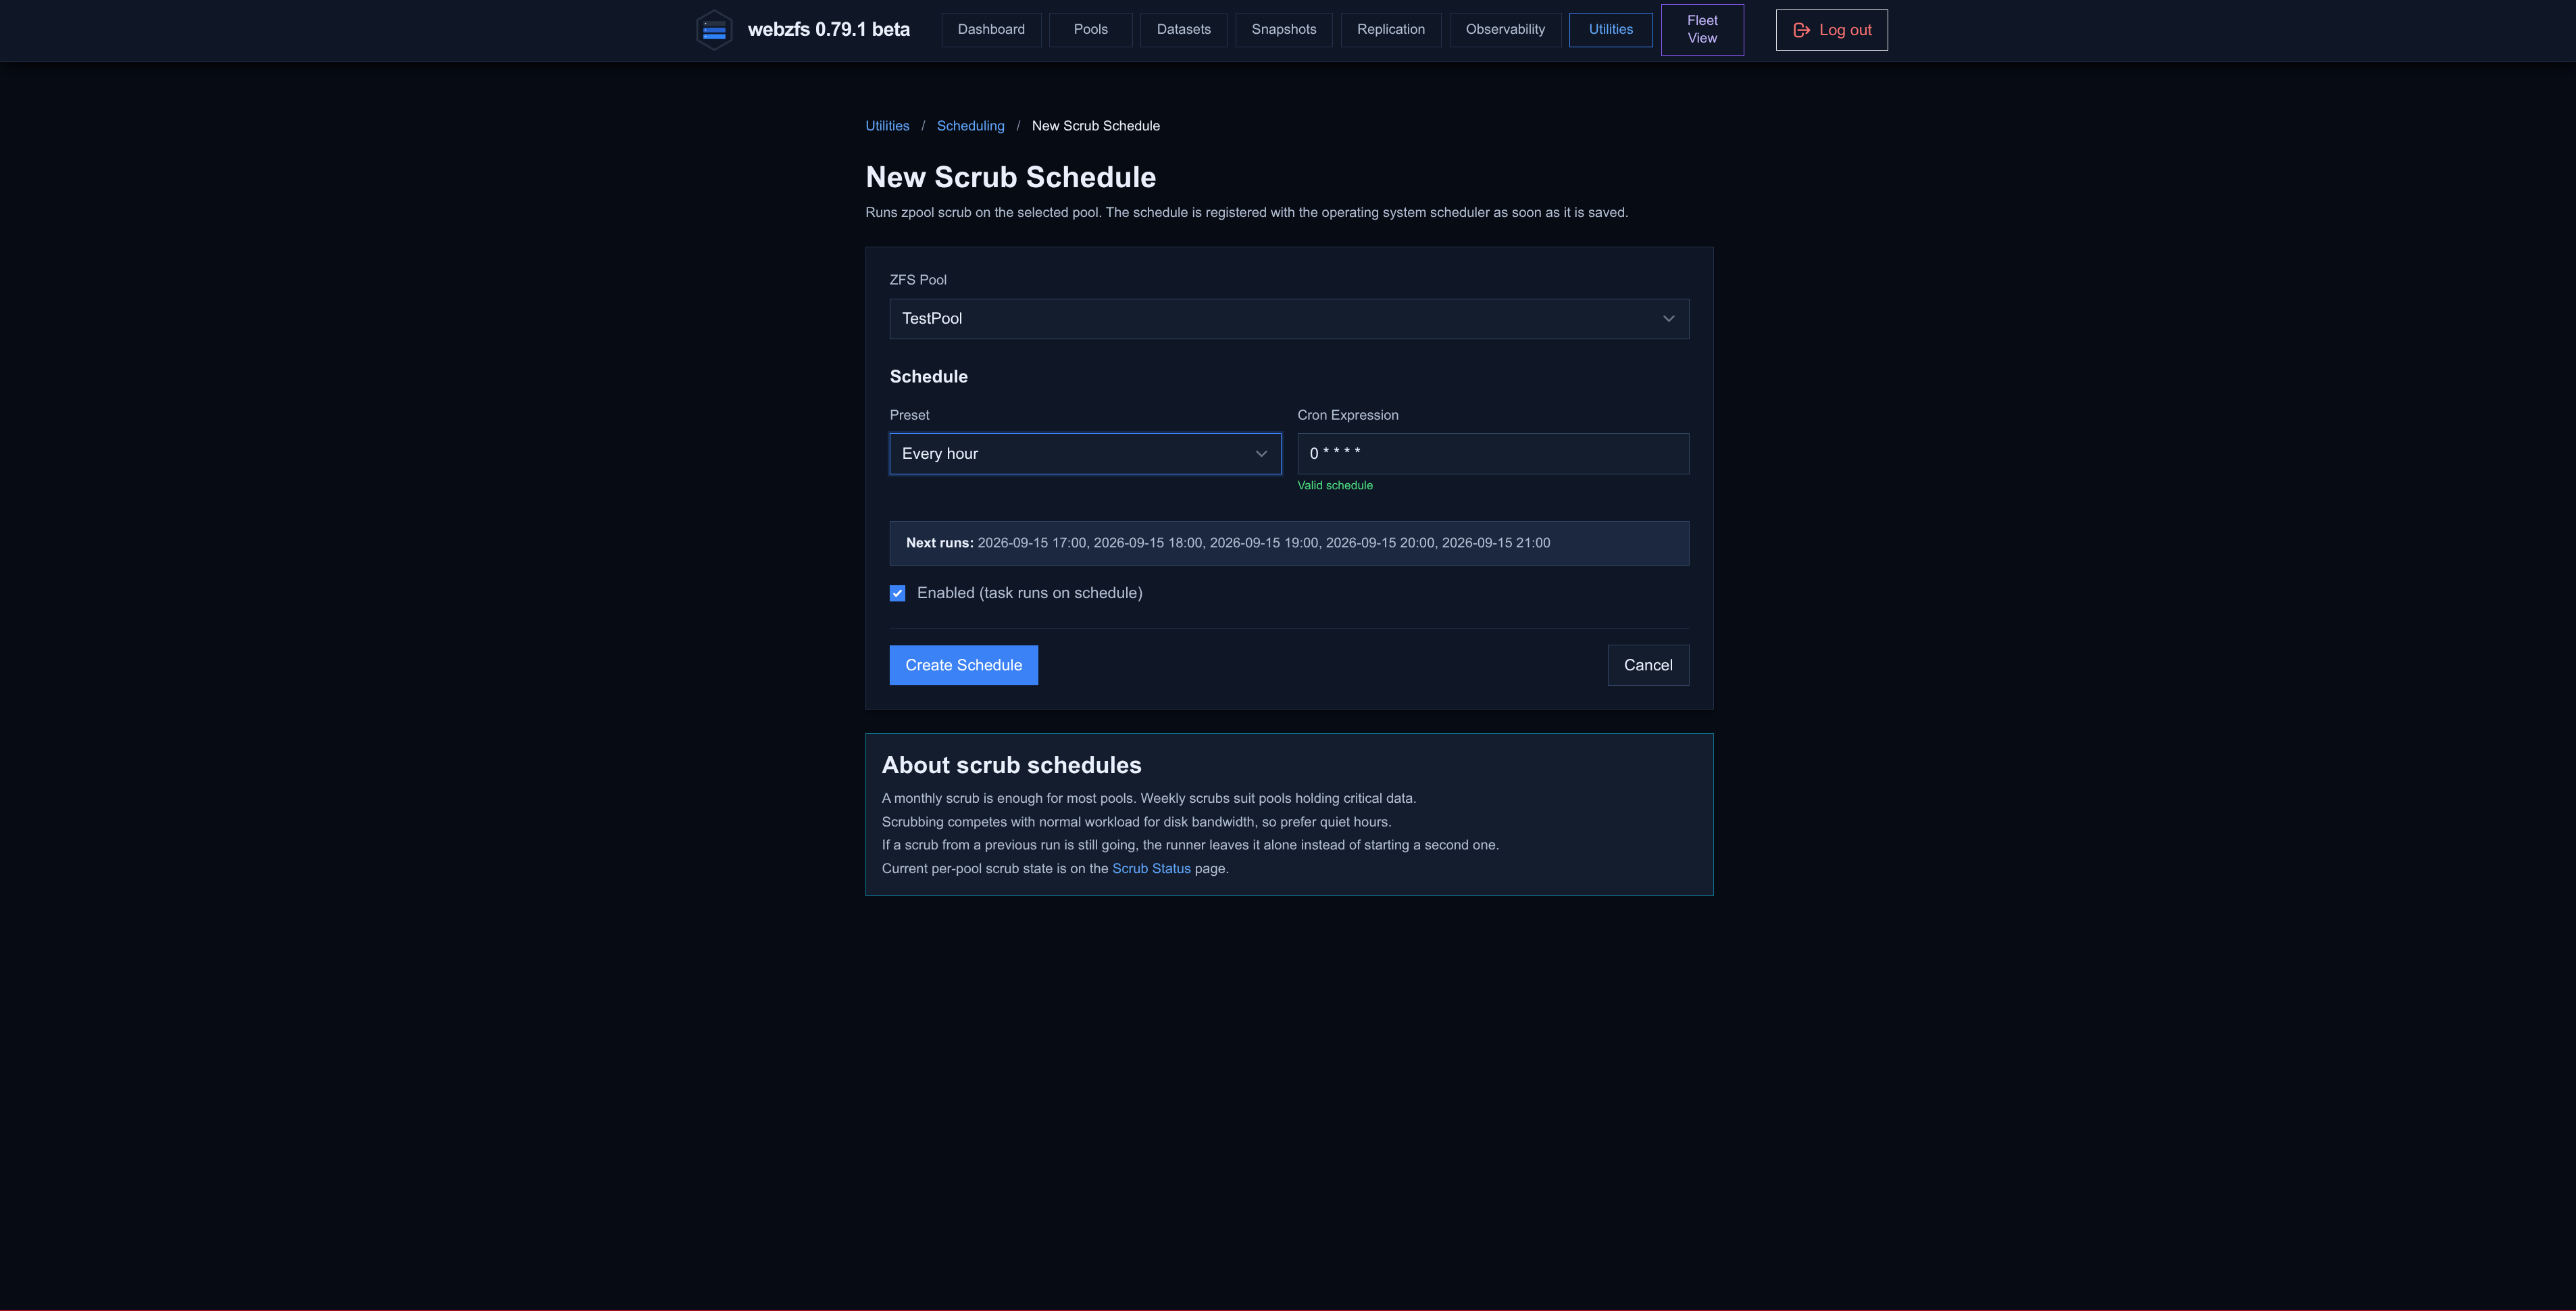
|
|
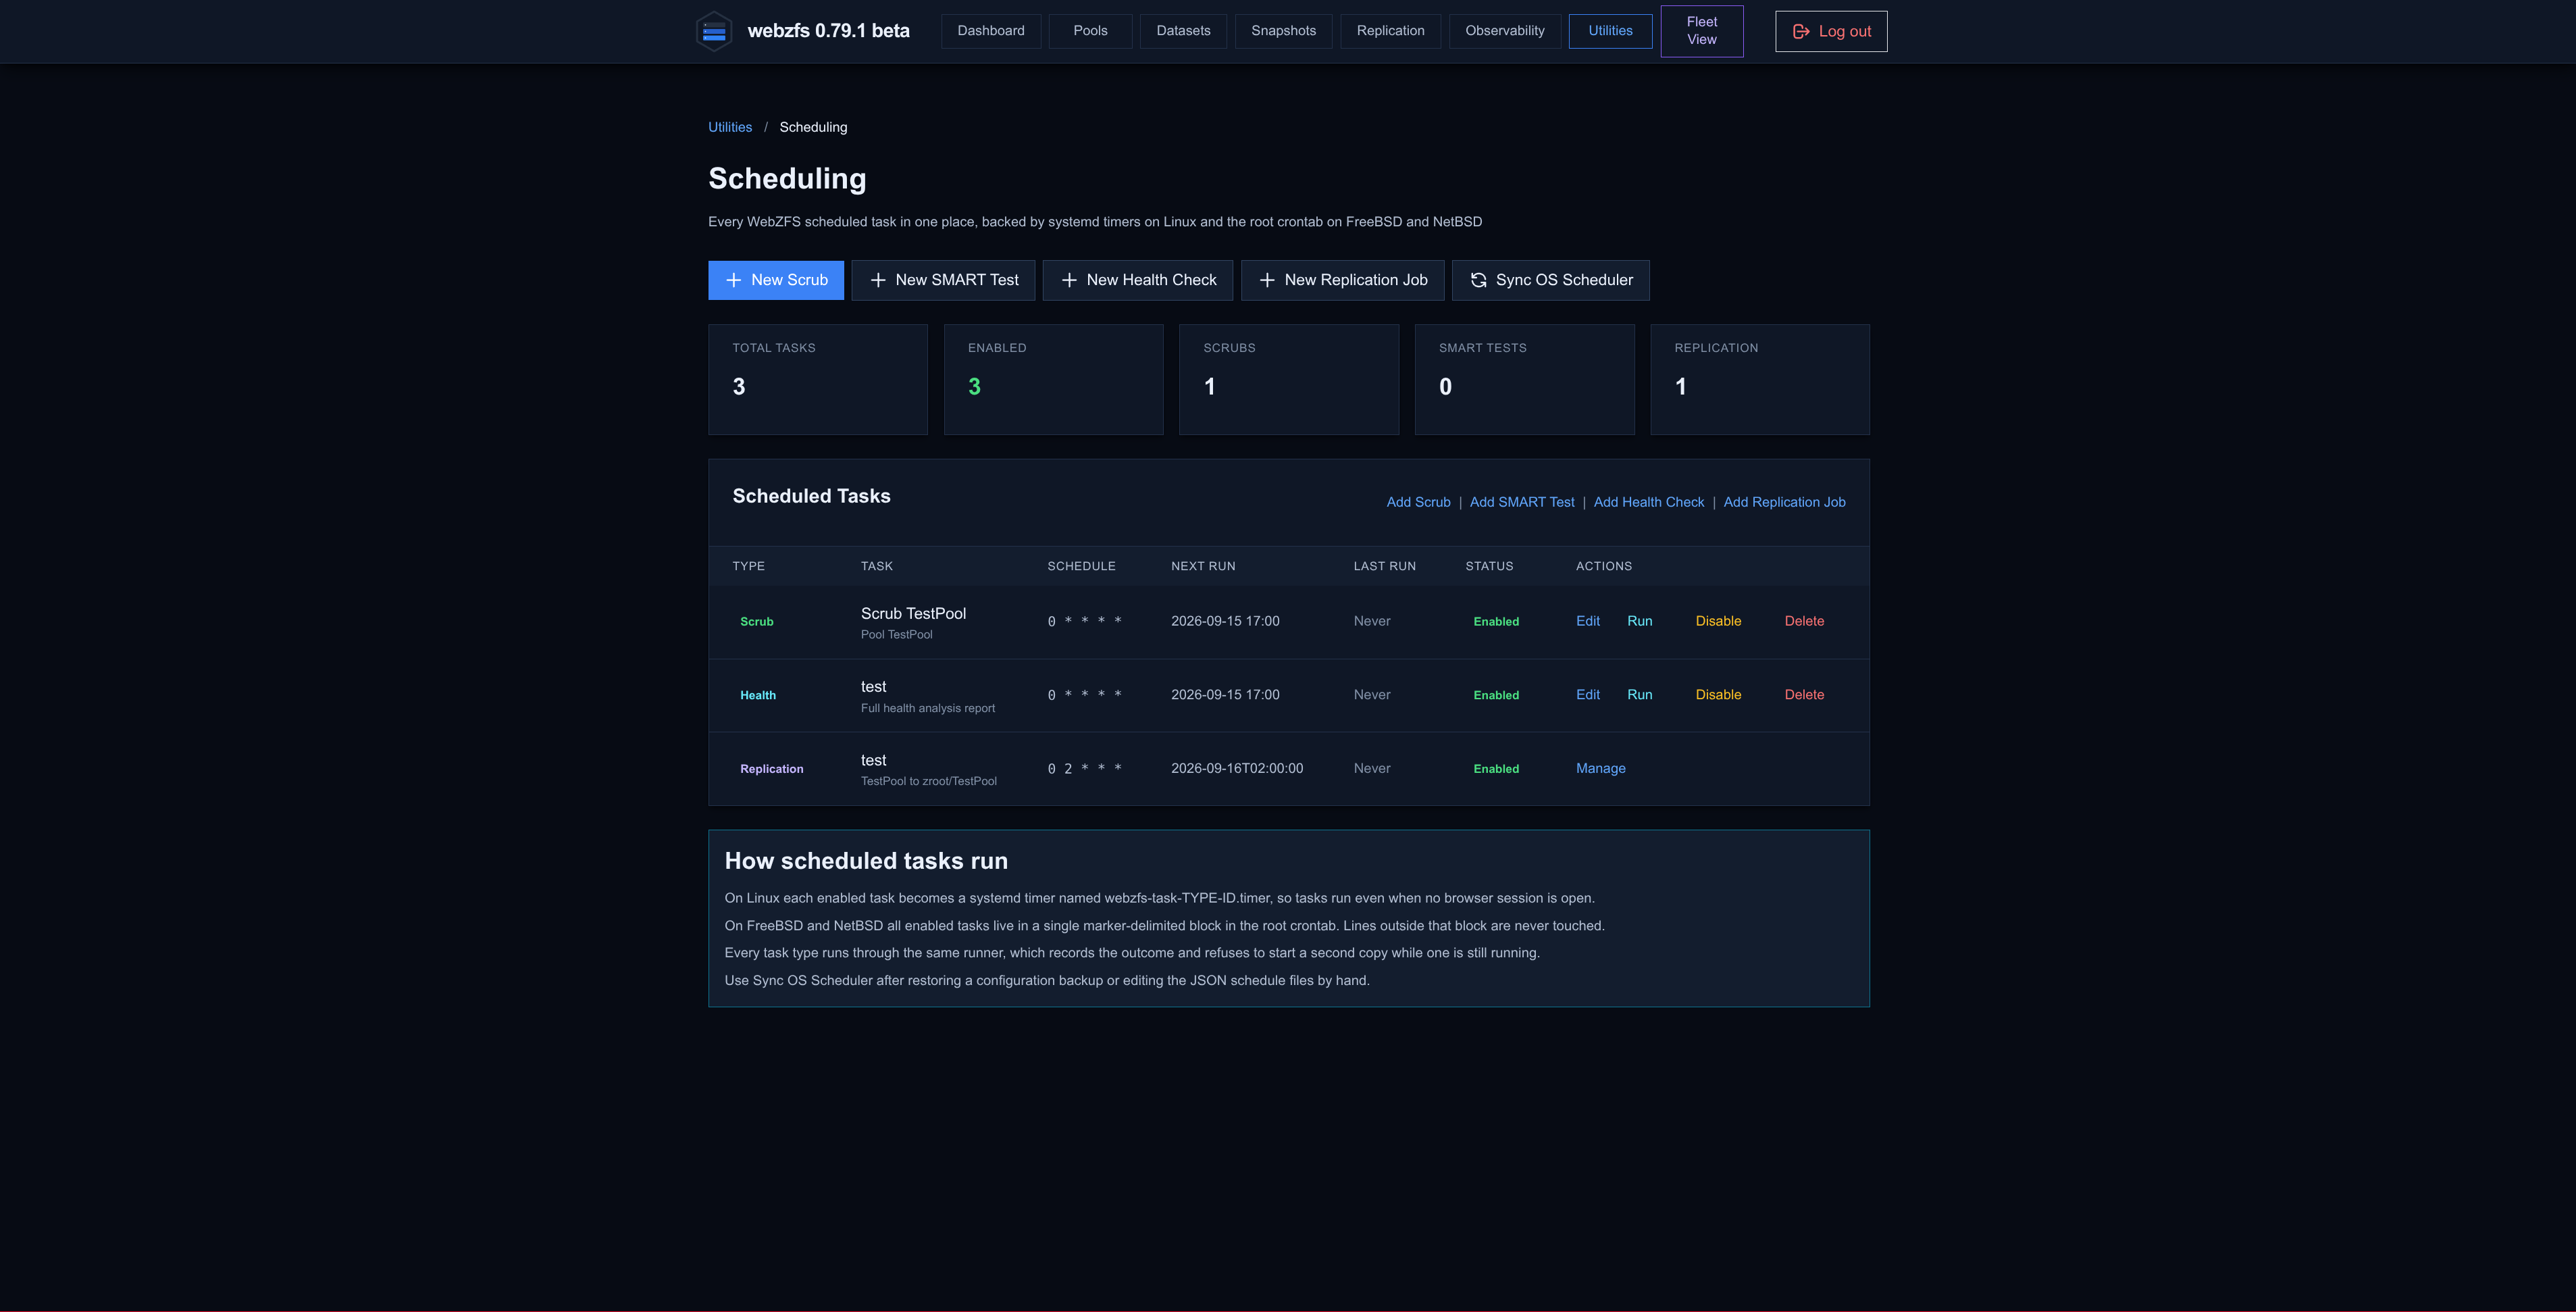
We view the list of scheduled tasks:
|
|
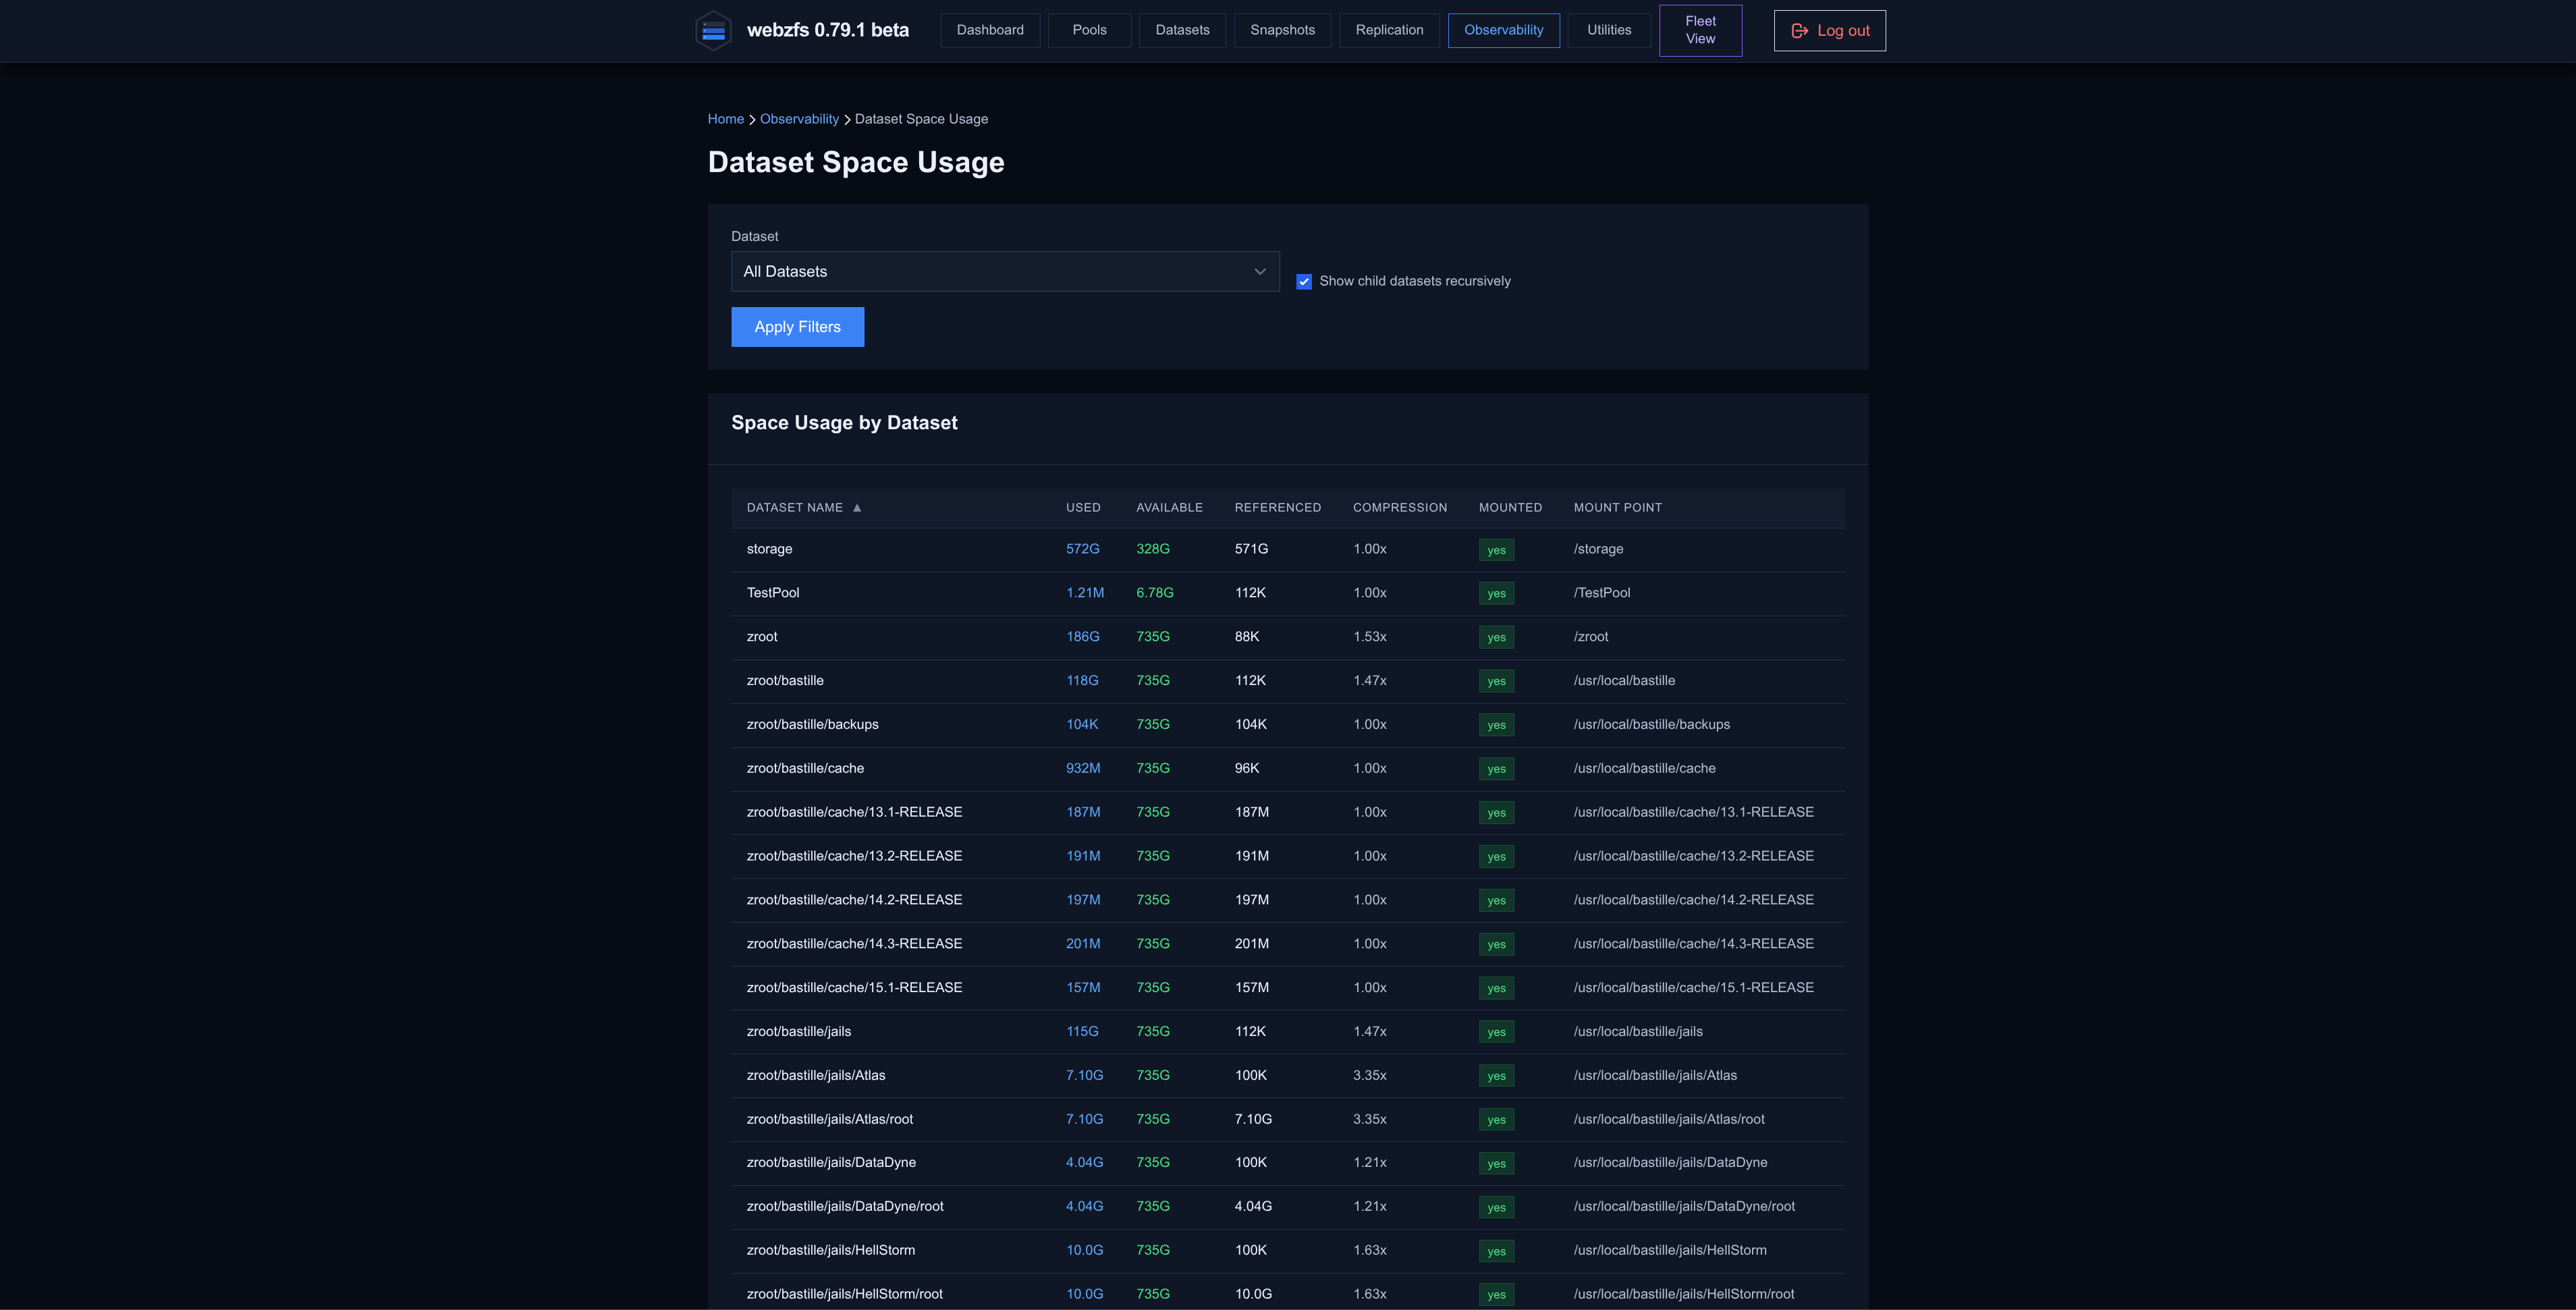
Dataset Space Usage:
From here we can view the space consumed per Dataset.
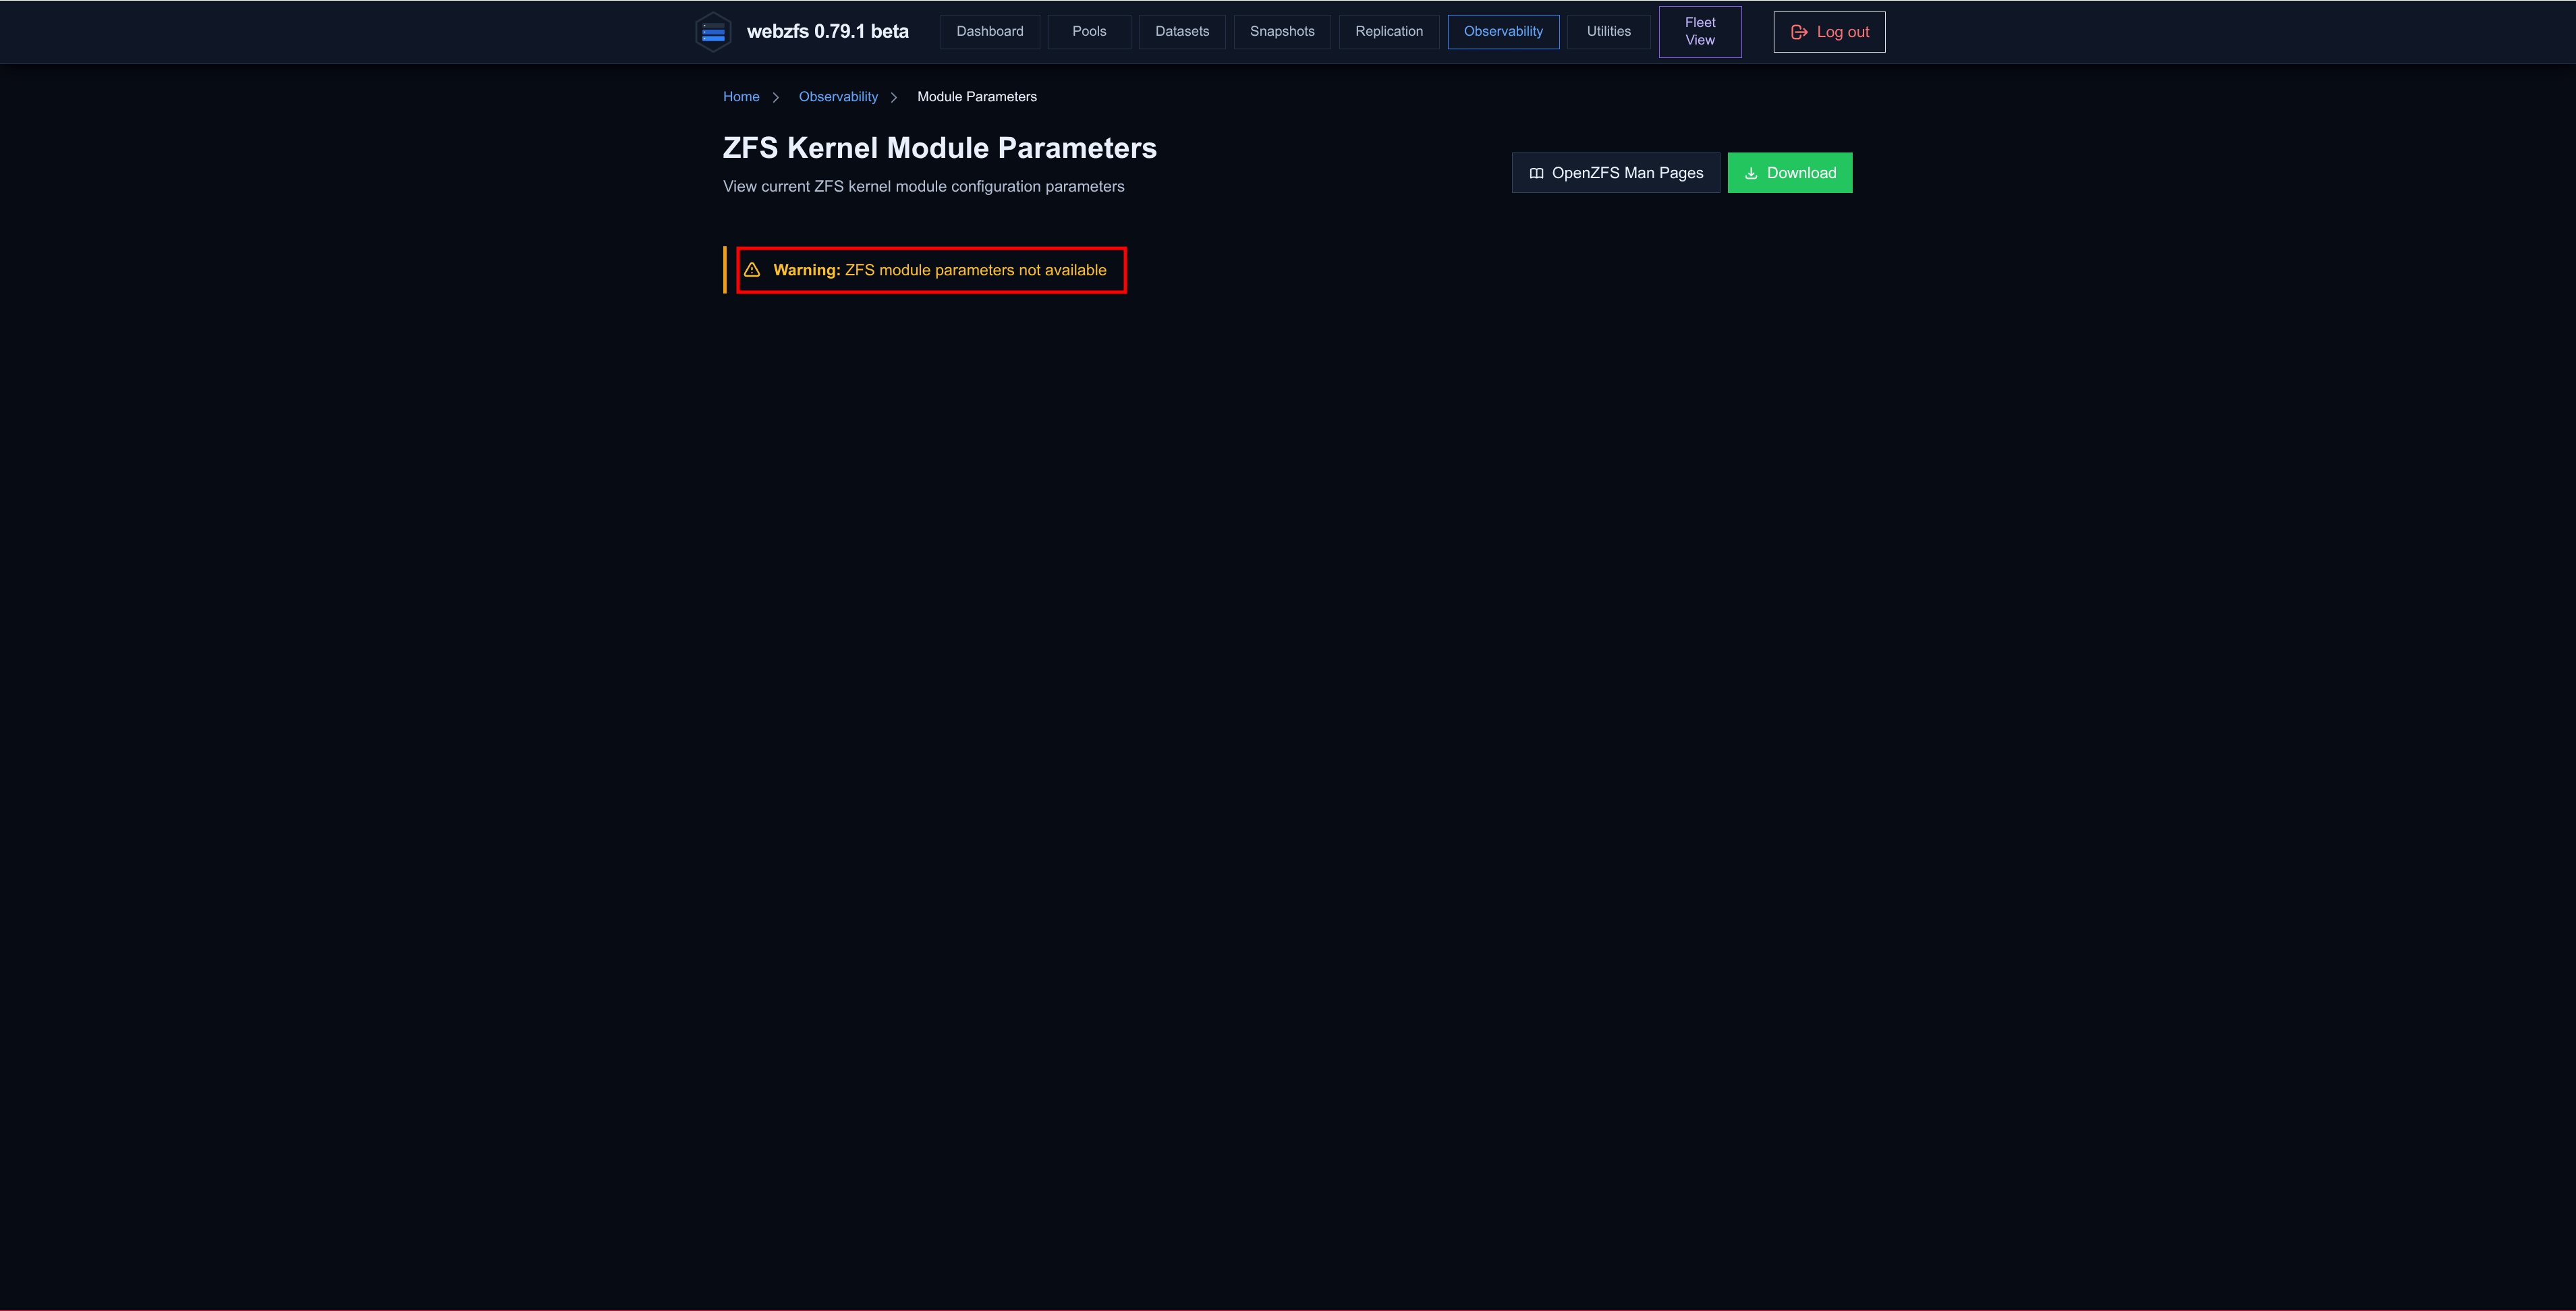
Module Parameters:
We can see the parameters passed to the ZFS module in case of loading it as a module; in my case it is not possible.
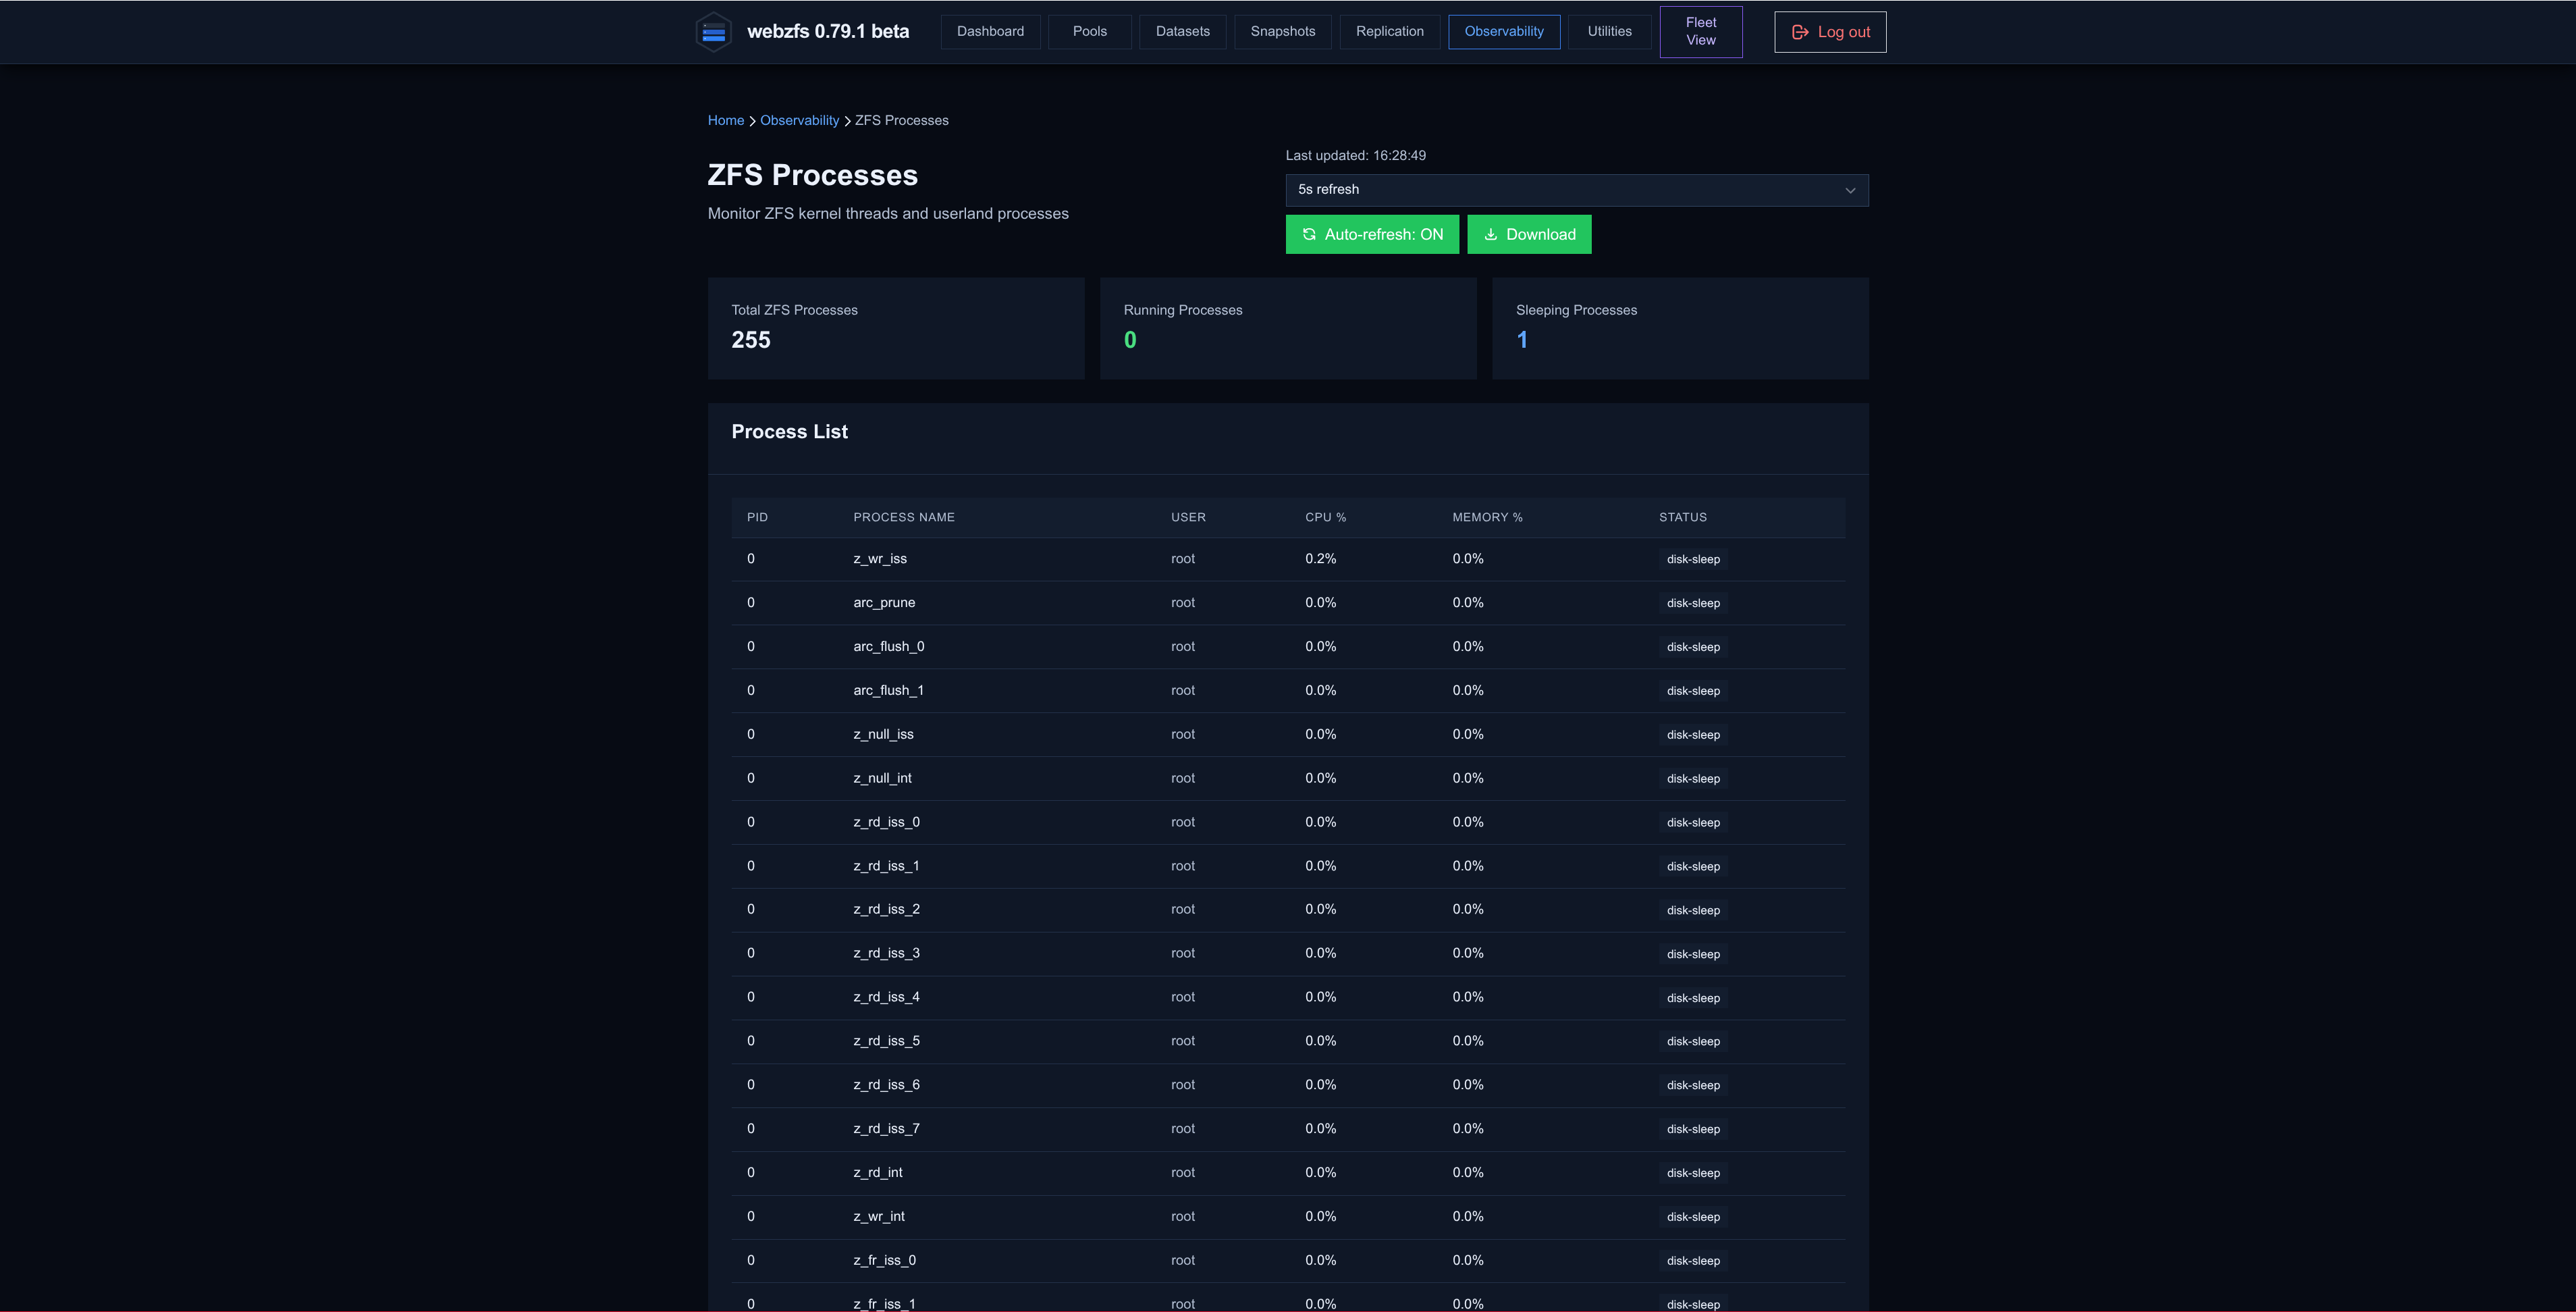
ZFS Processes:
We can view the system processes related to ZFS.
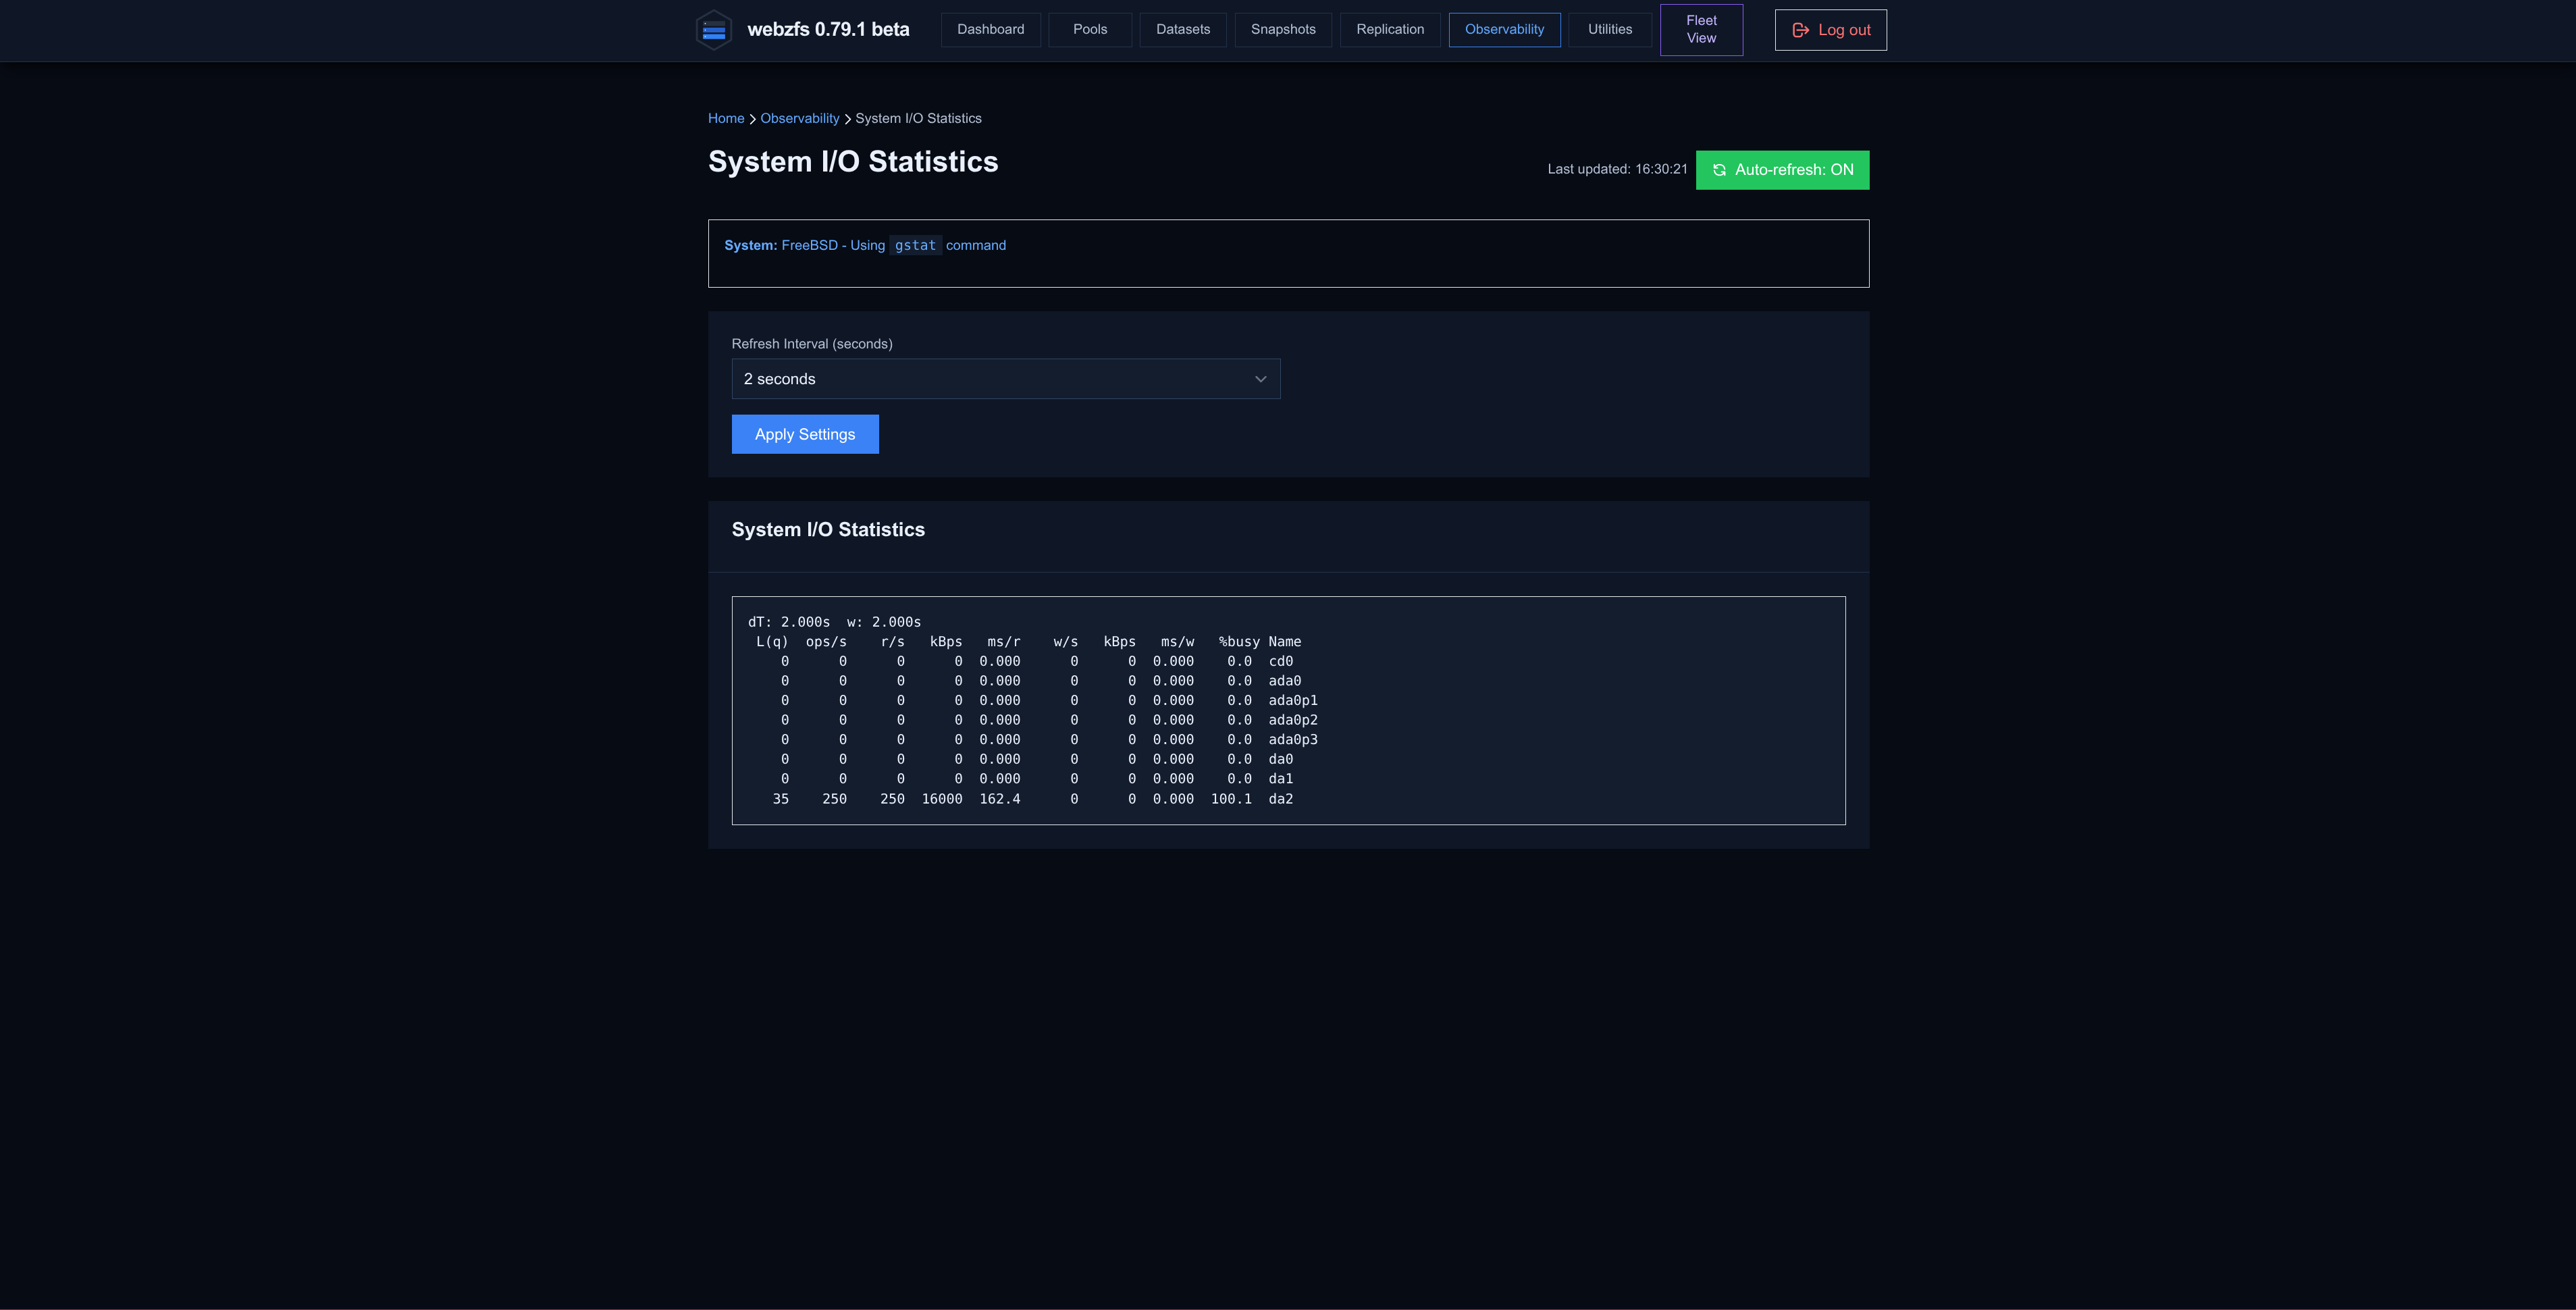
System I/O Statistics:
We can view access statistics per disk.
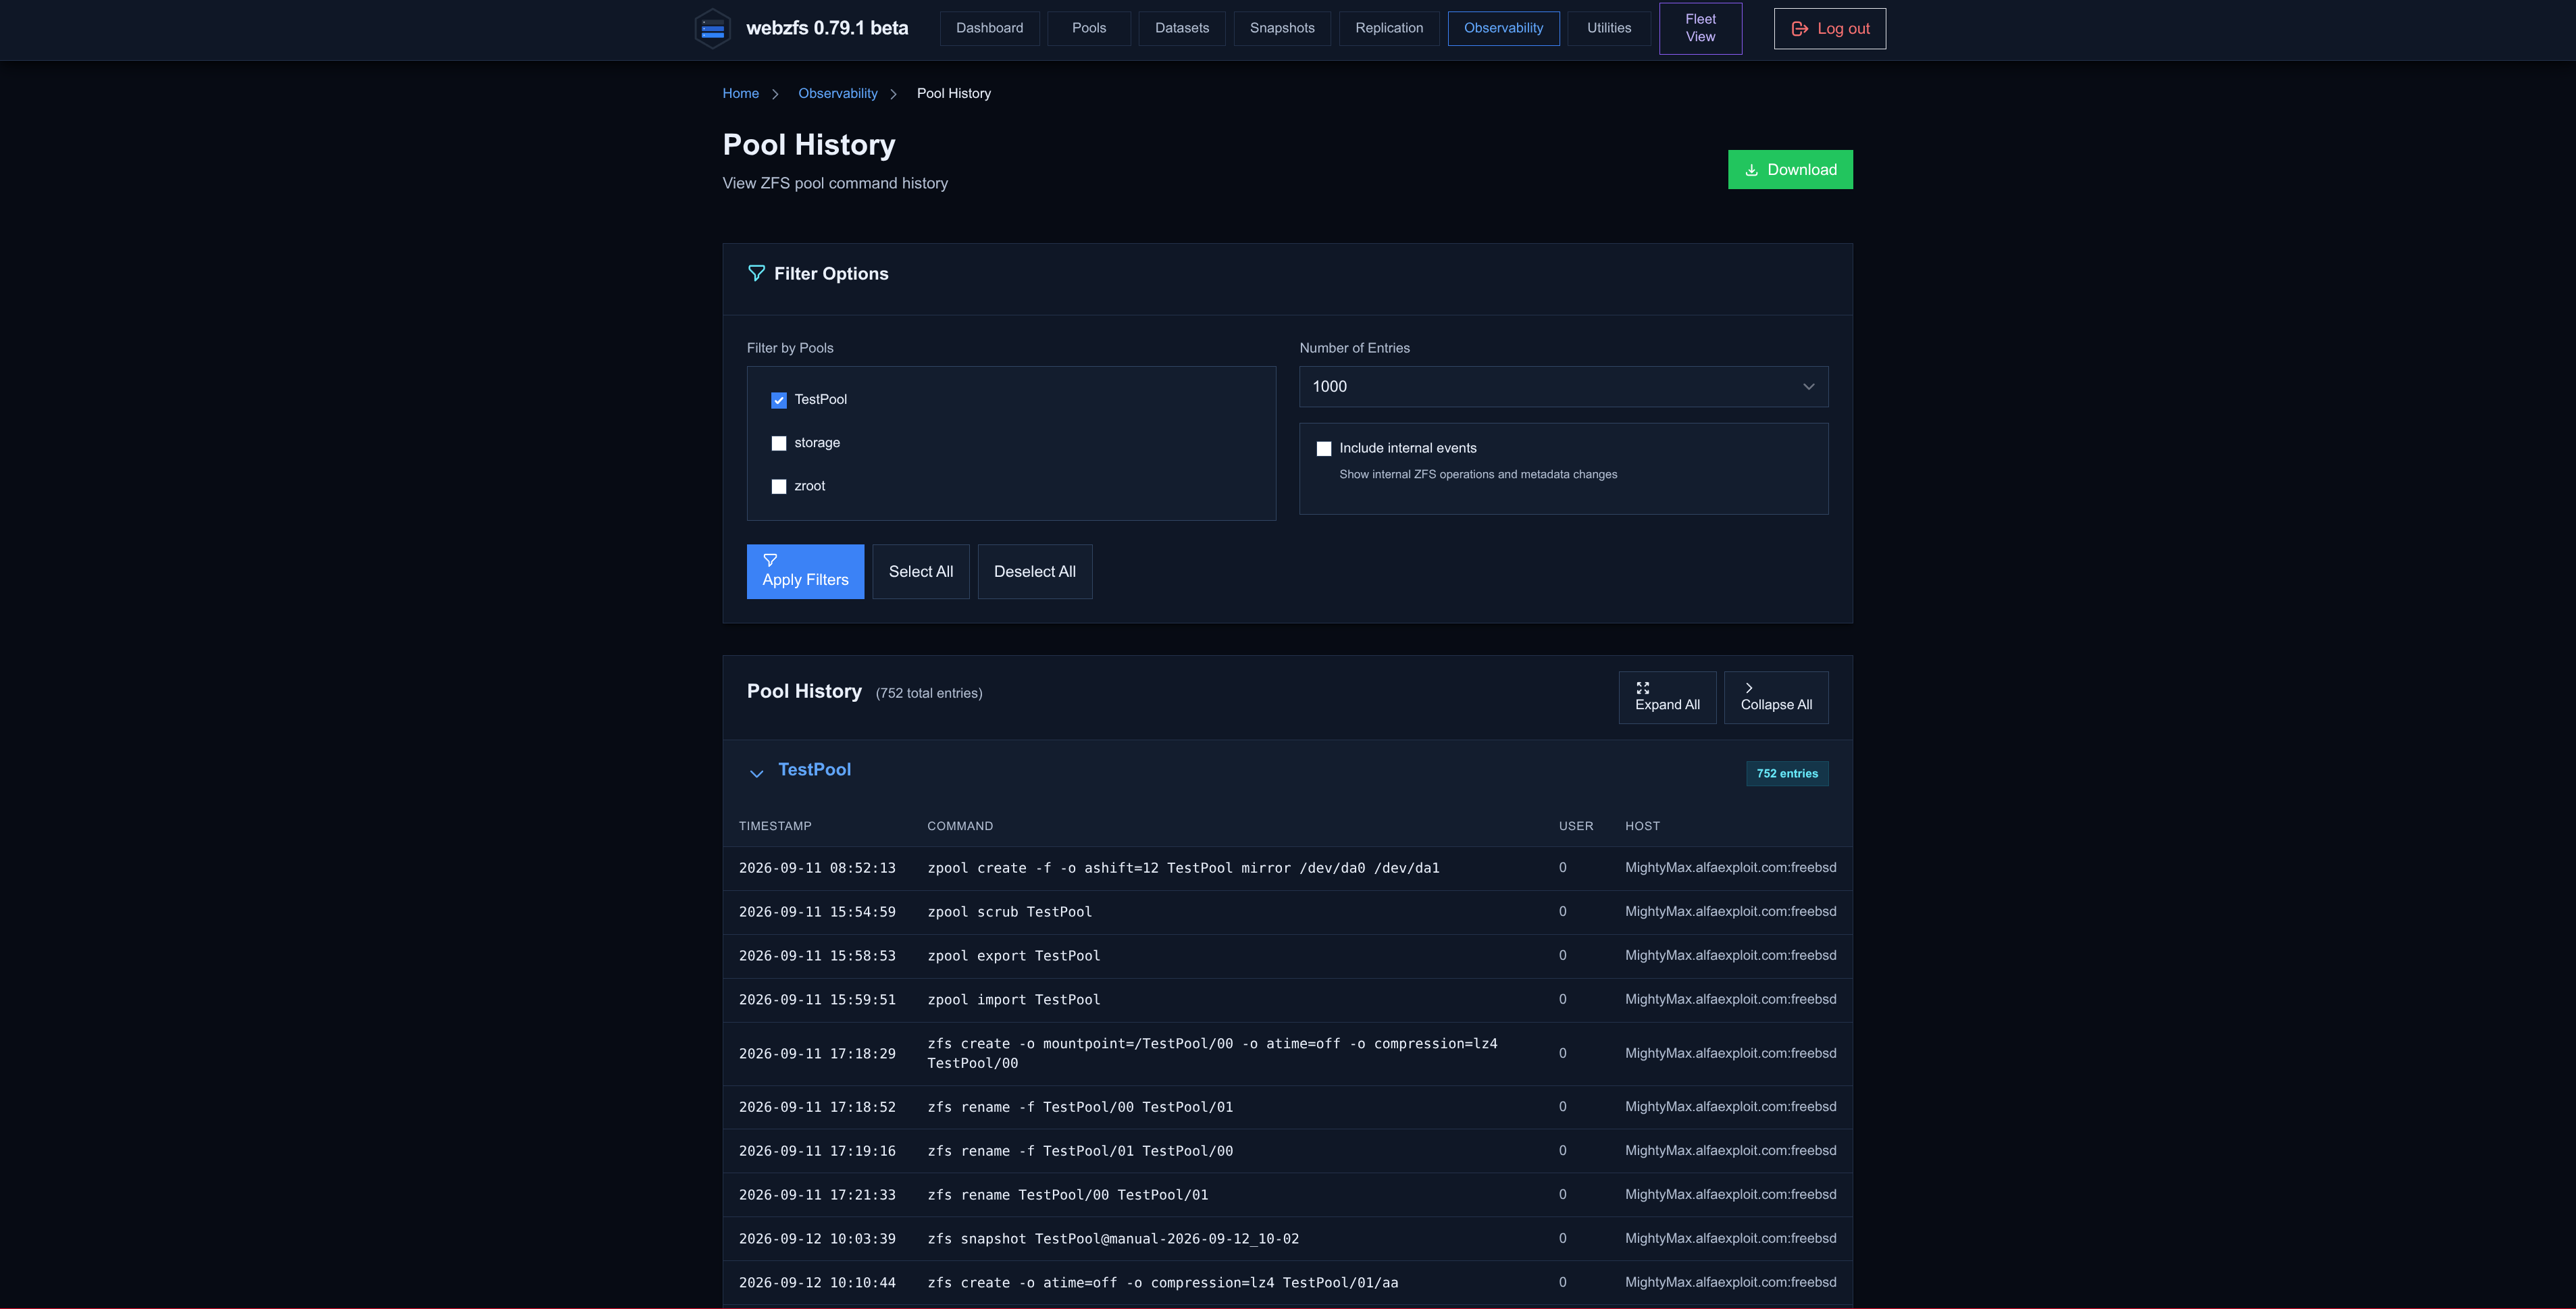
Pool History:
We can view the history of actions performed per pool.
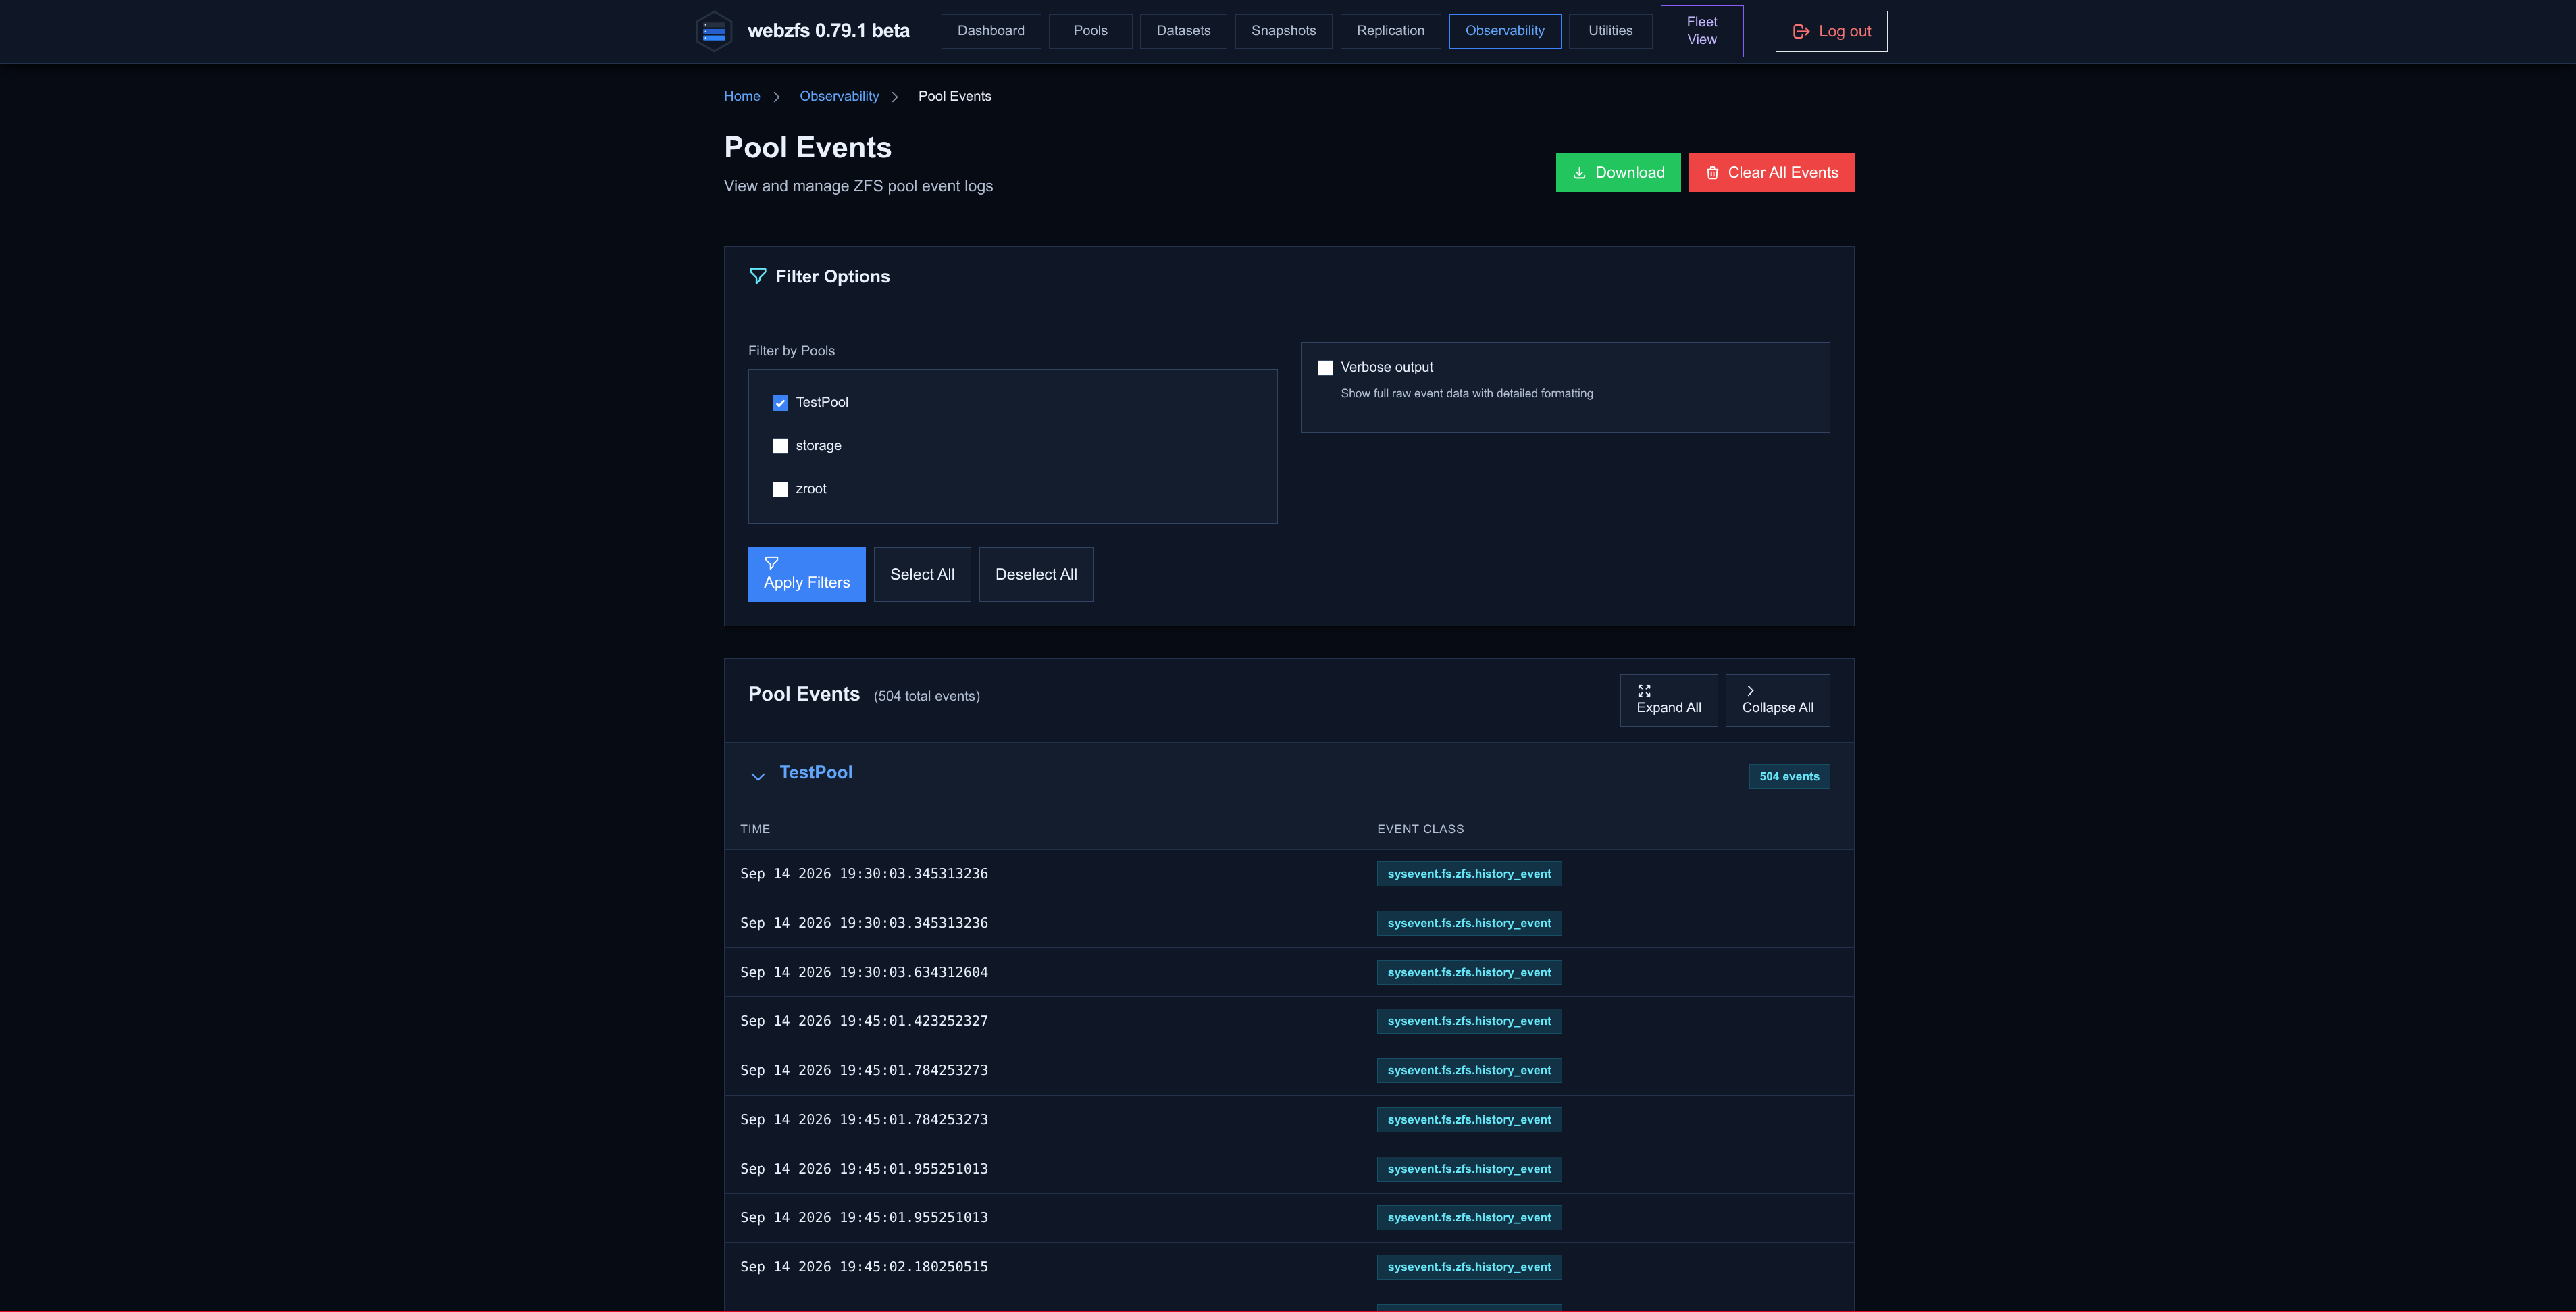
Pool Events:
We can view the event history per pool.
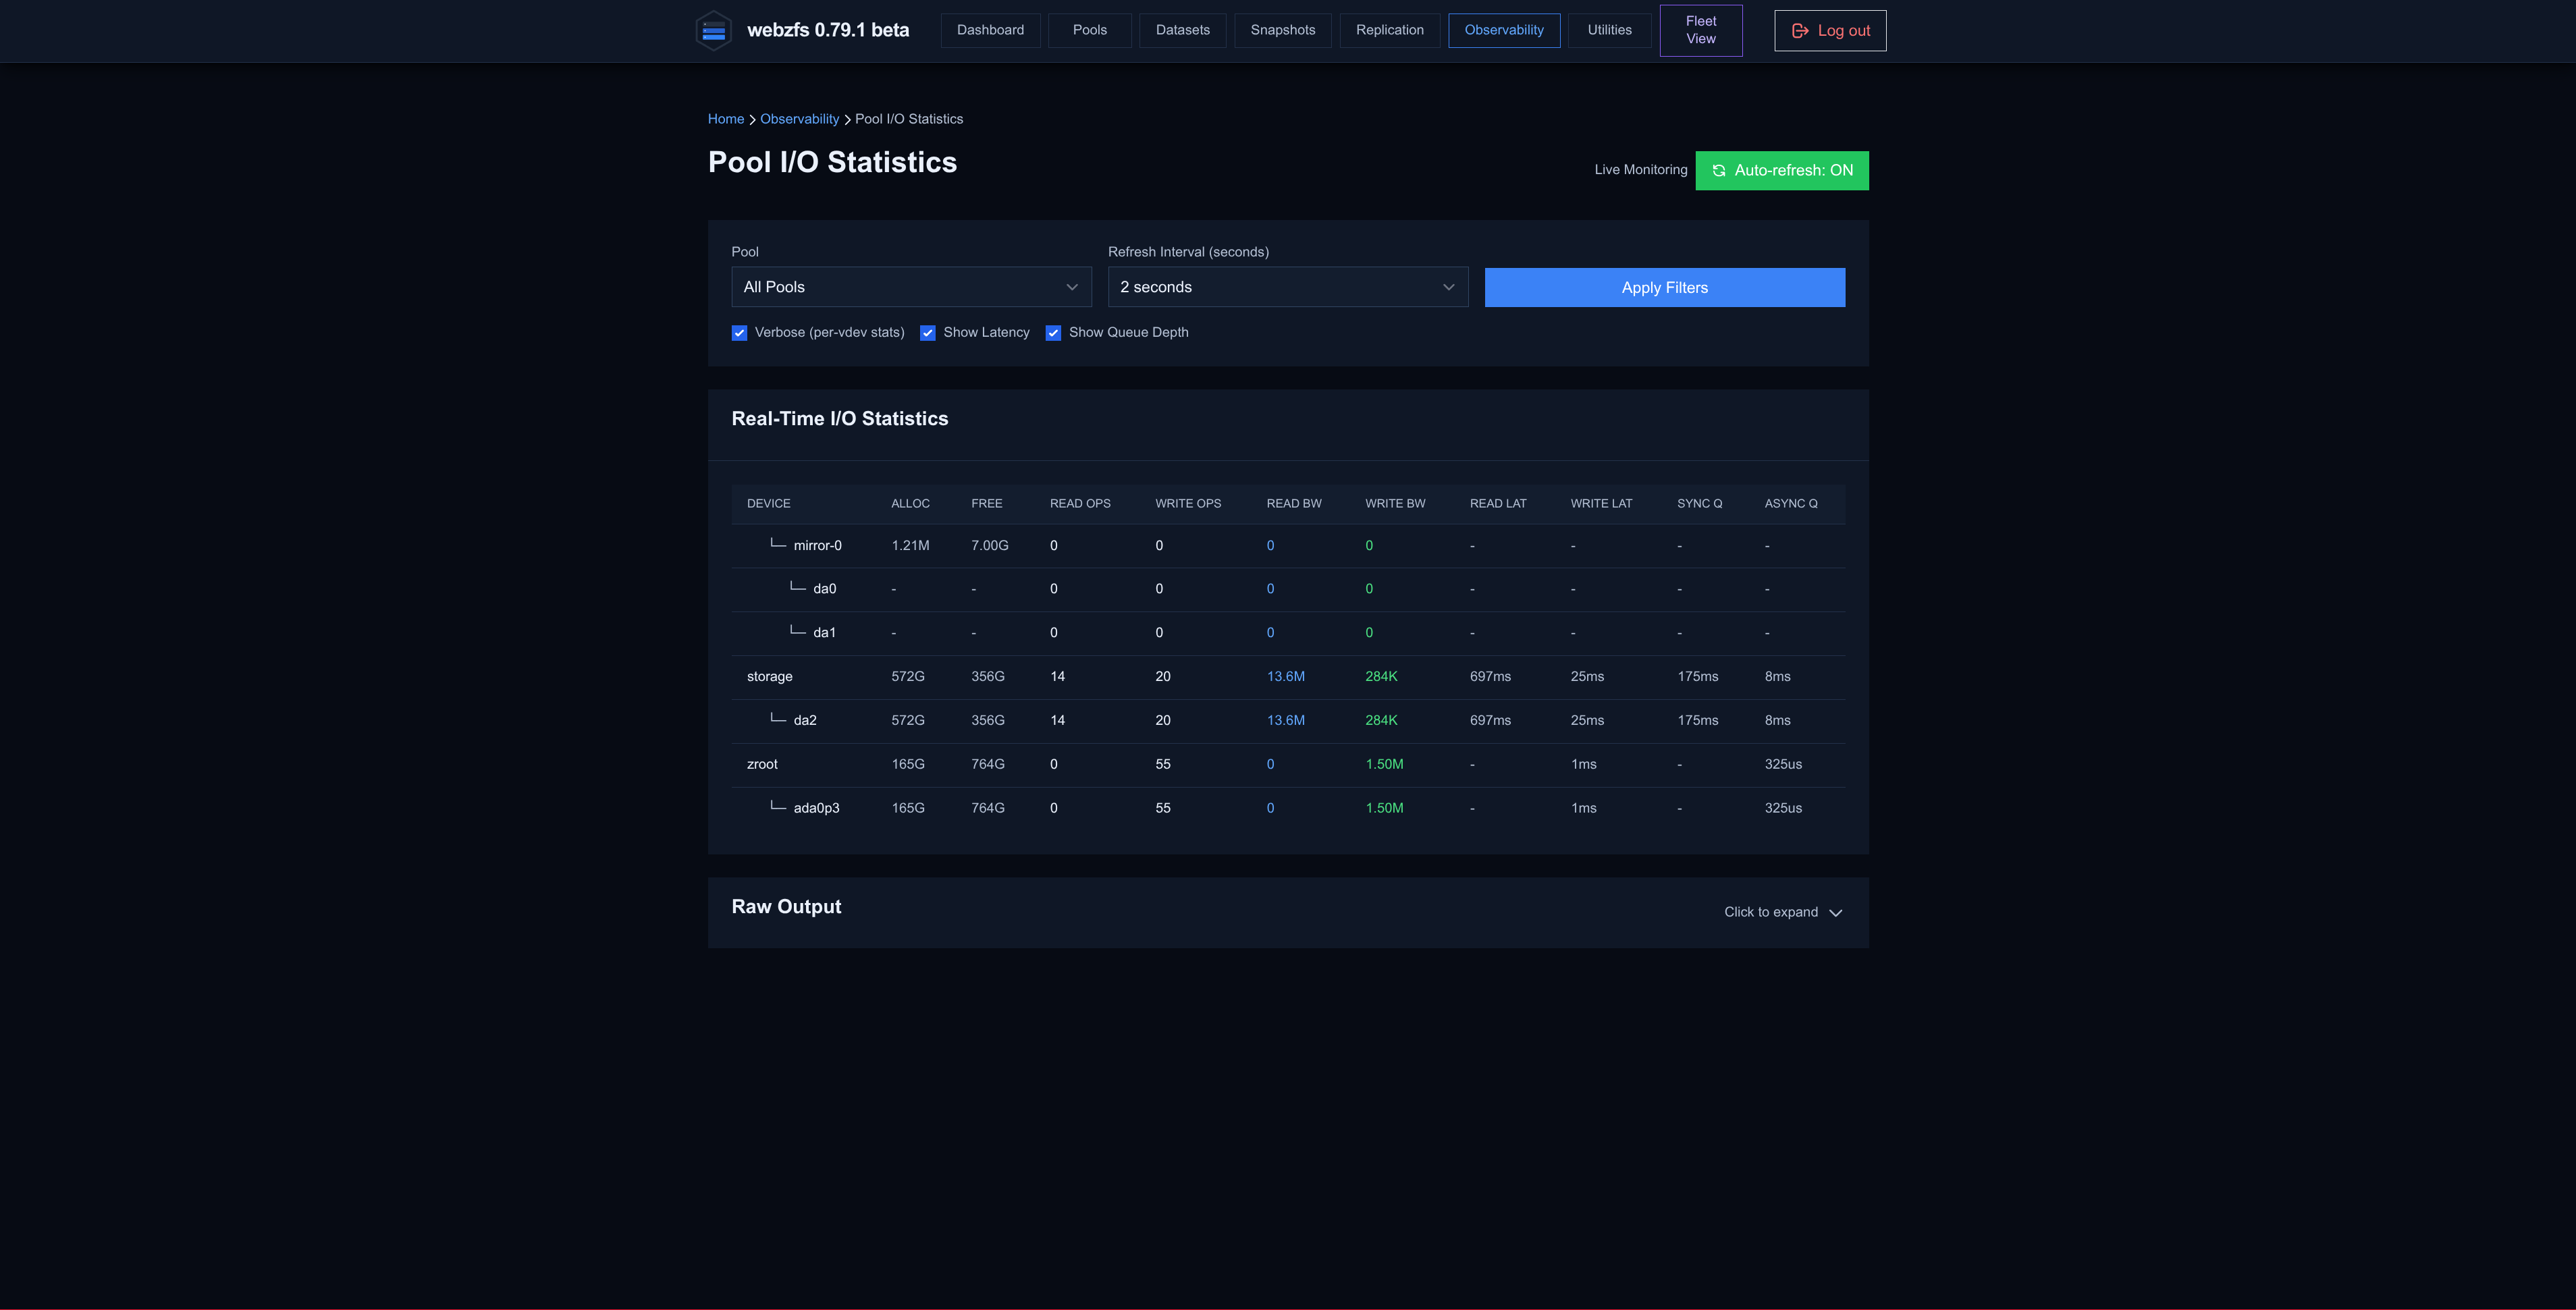
Pool I/O Stats:
We can view access statistics per pool.
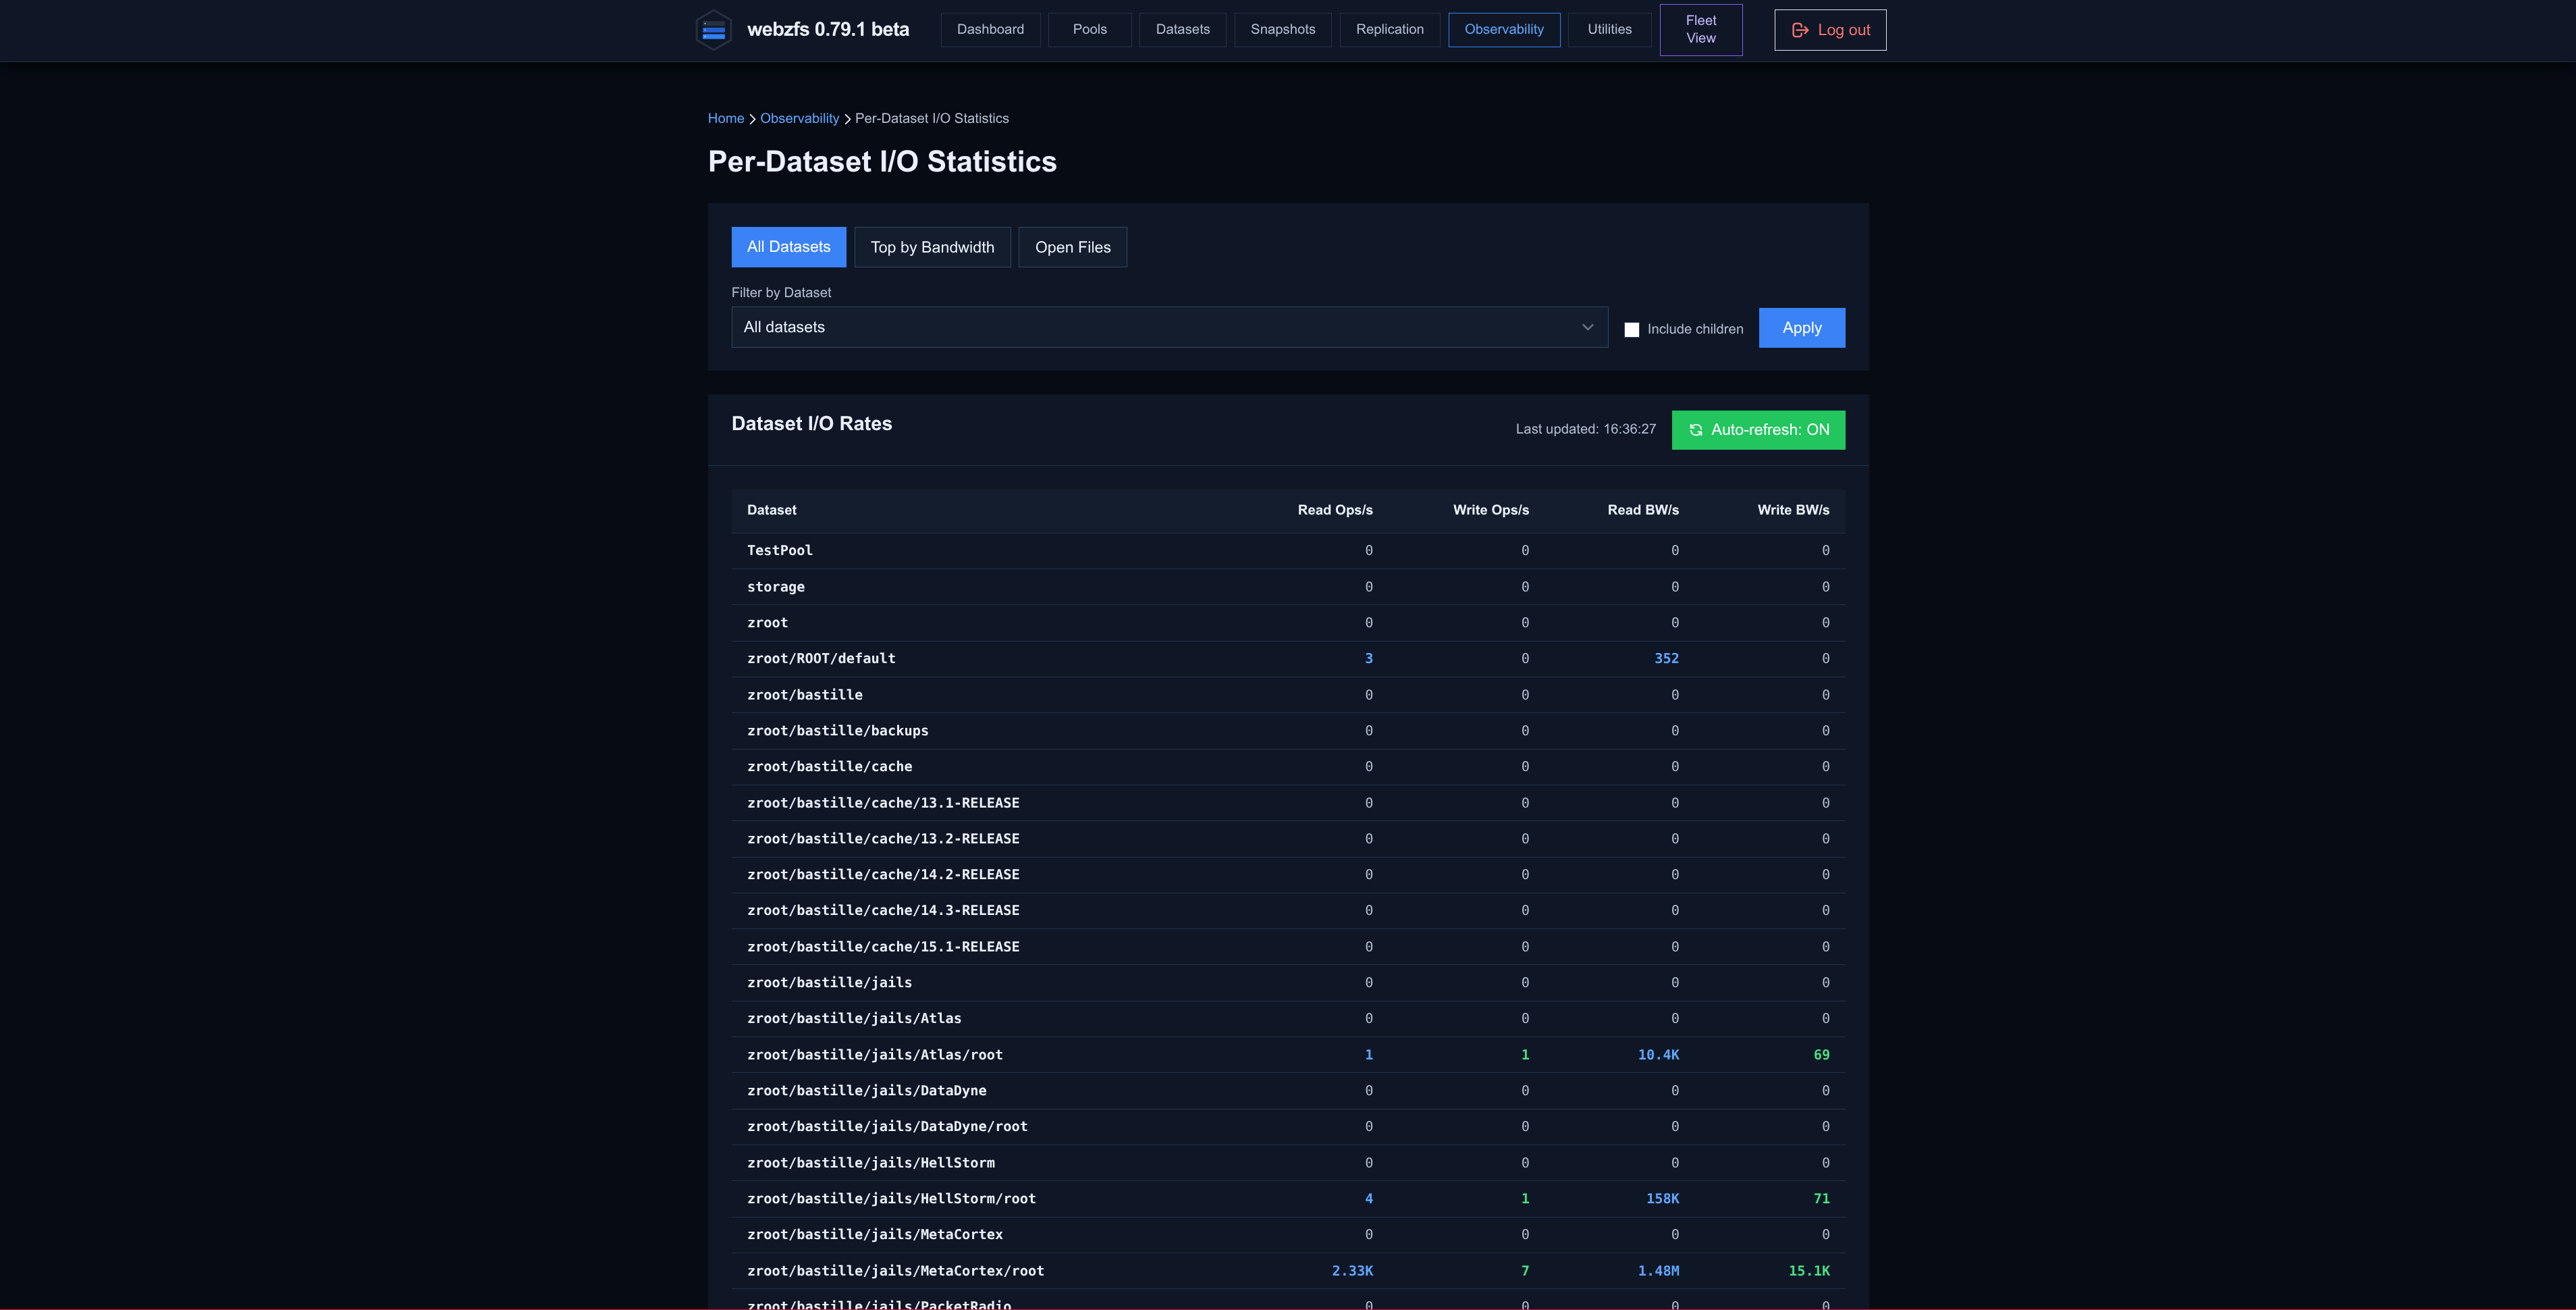
Per-Dataset I/O Stats:
We can view access statistics per dataset.
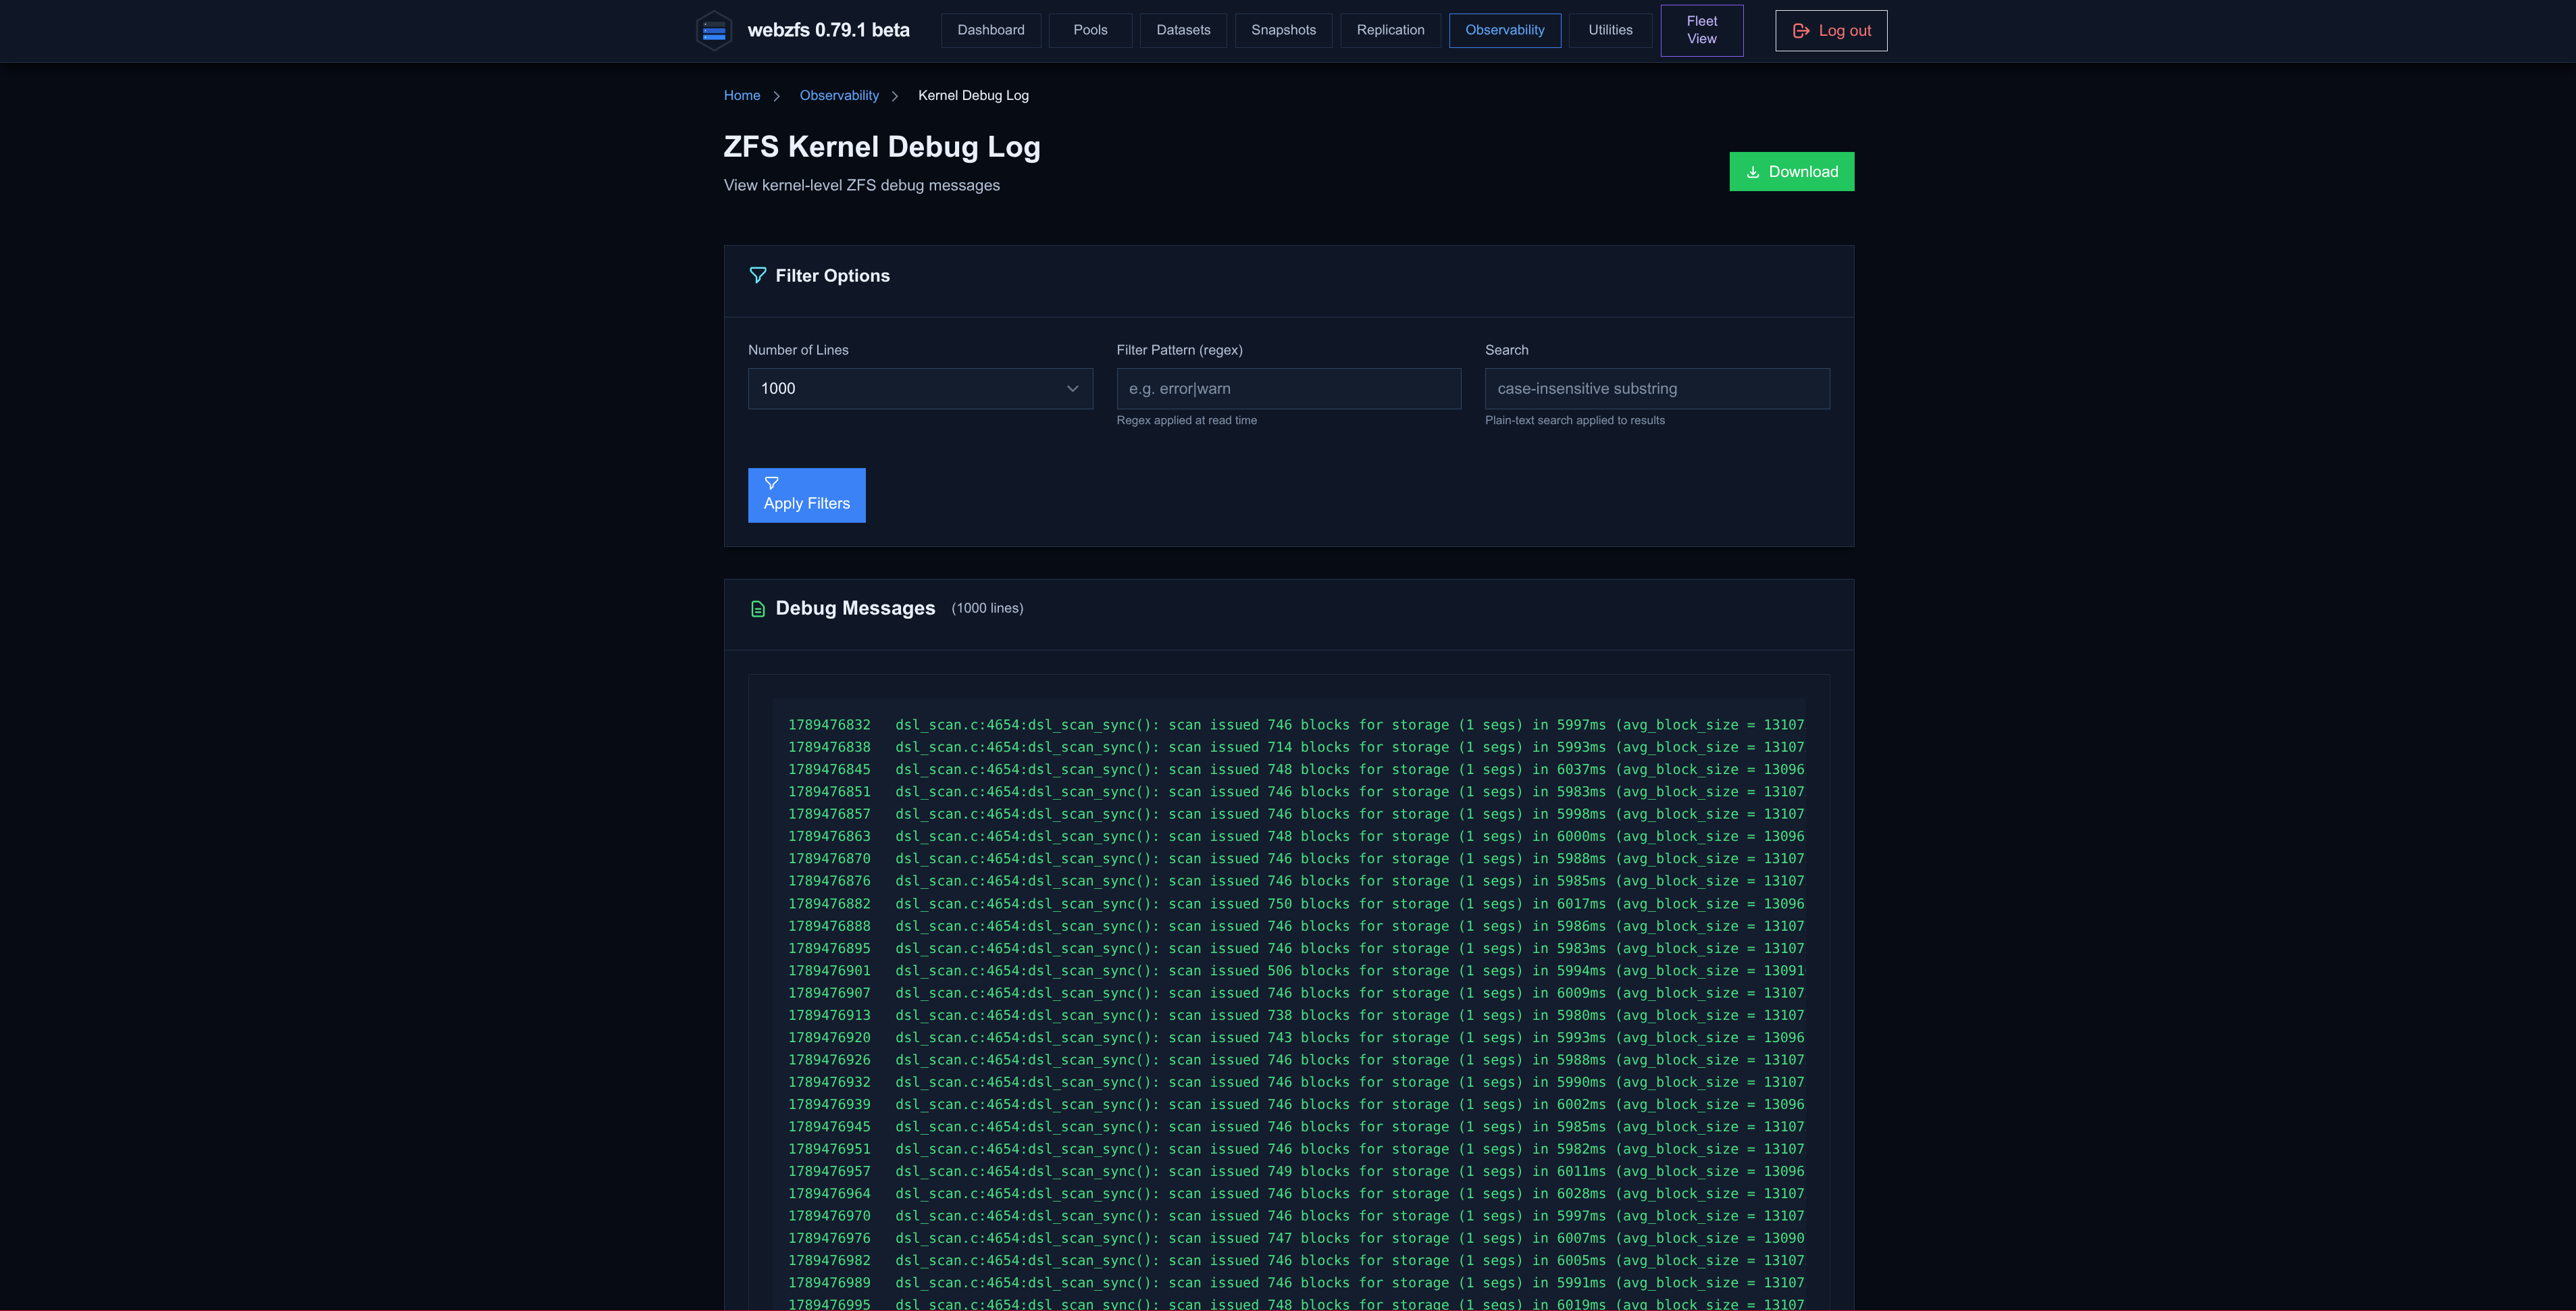
Kernel Debug Log:
It lets you search and filter debug log messages related to ZFS.
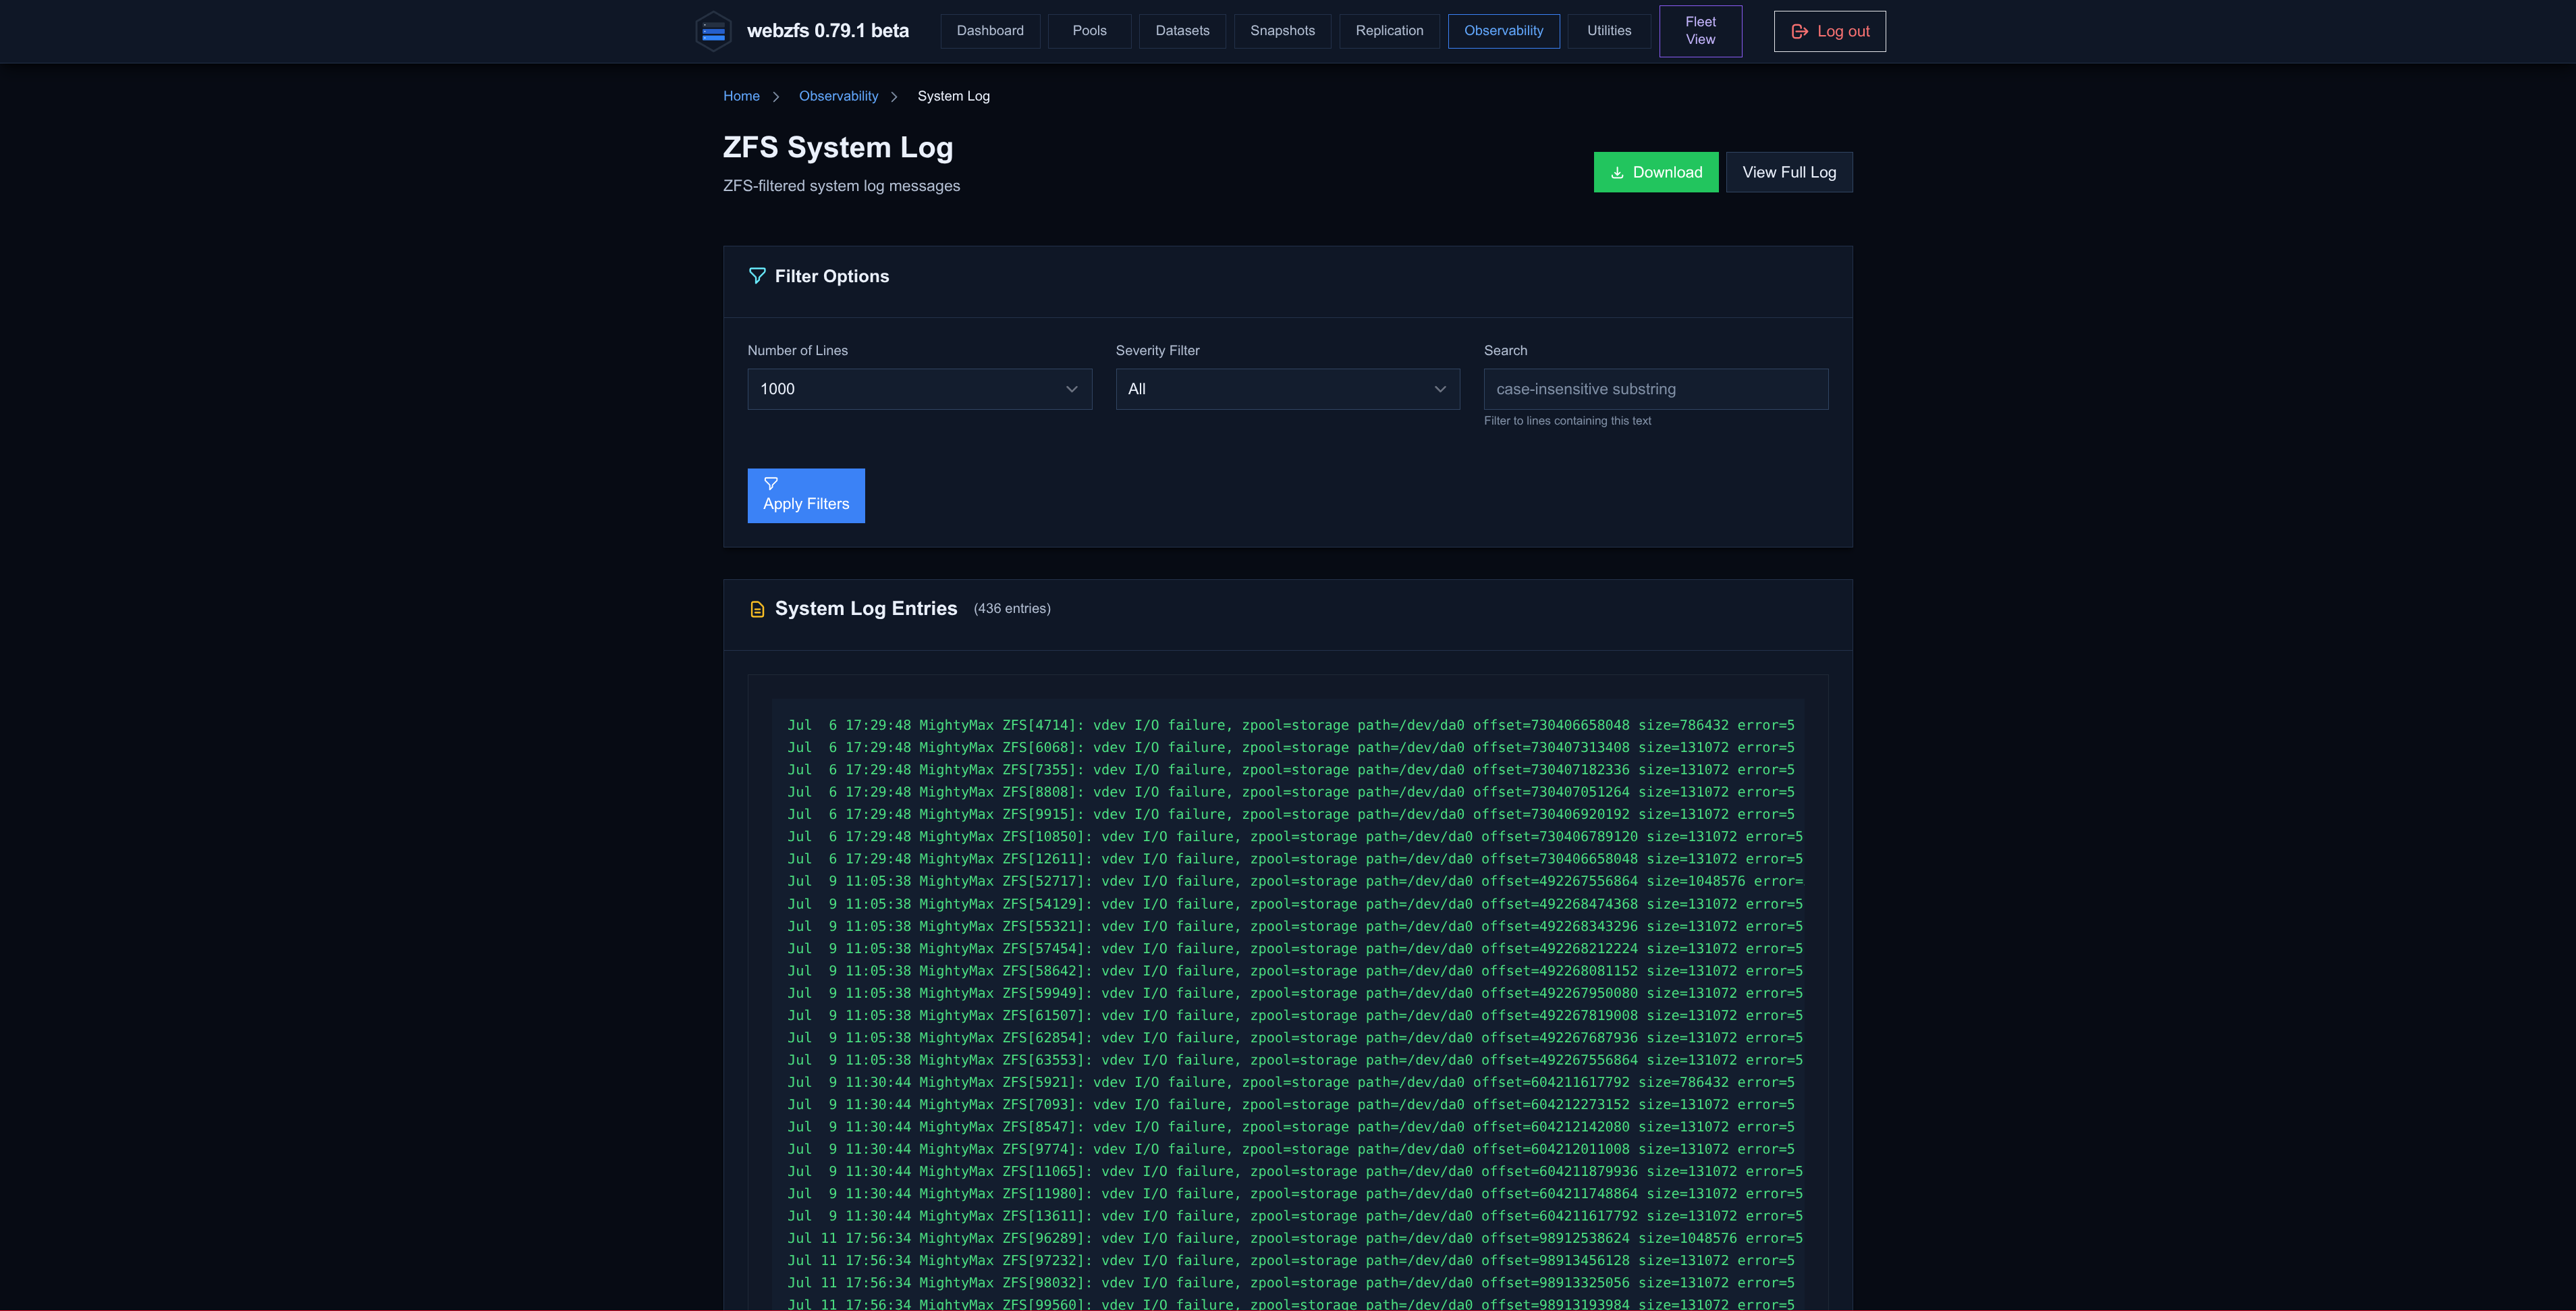
System Log(ZFS Filtered):
It lets you search and filter log messages related to ZFS.
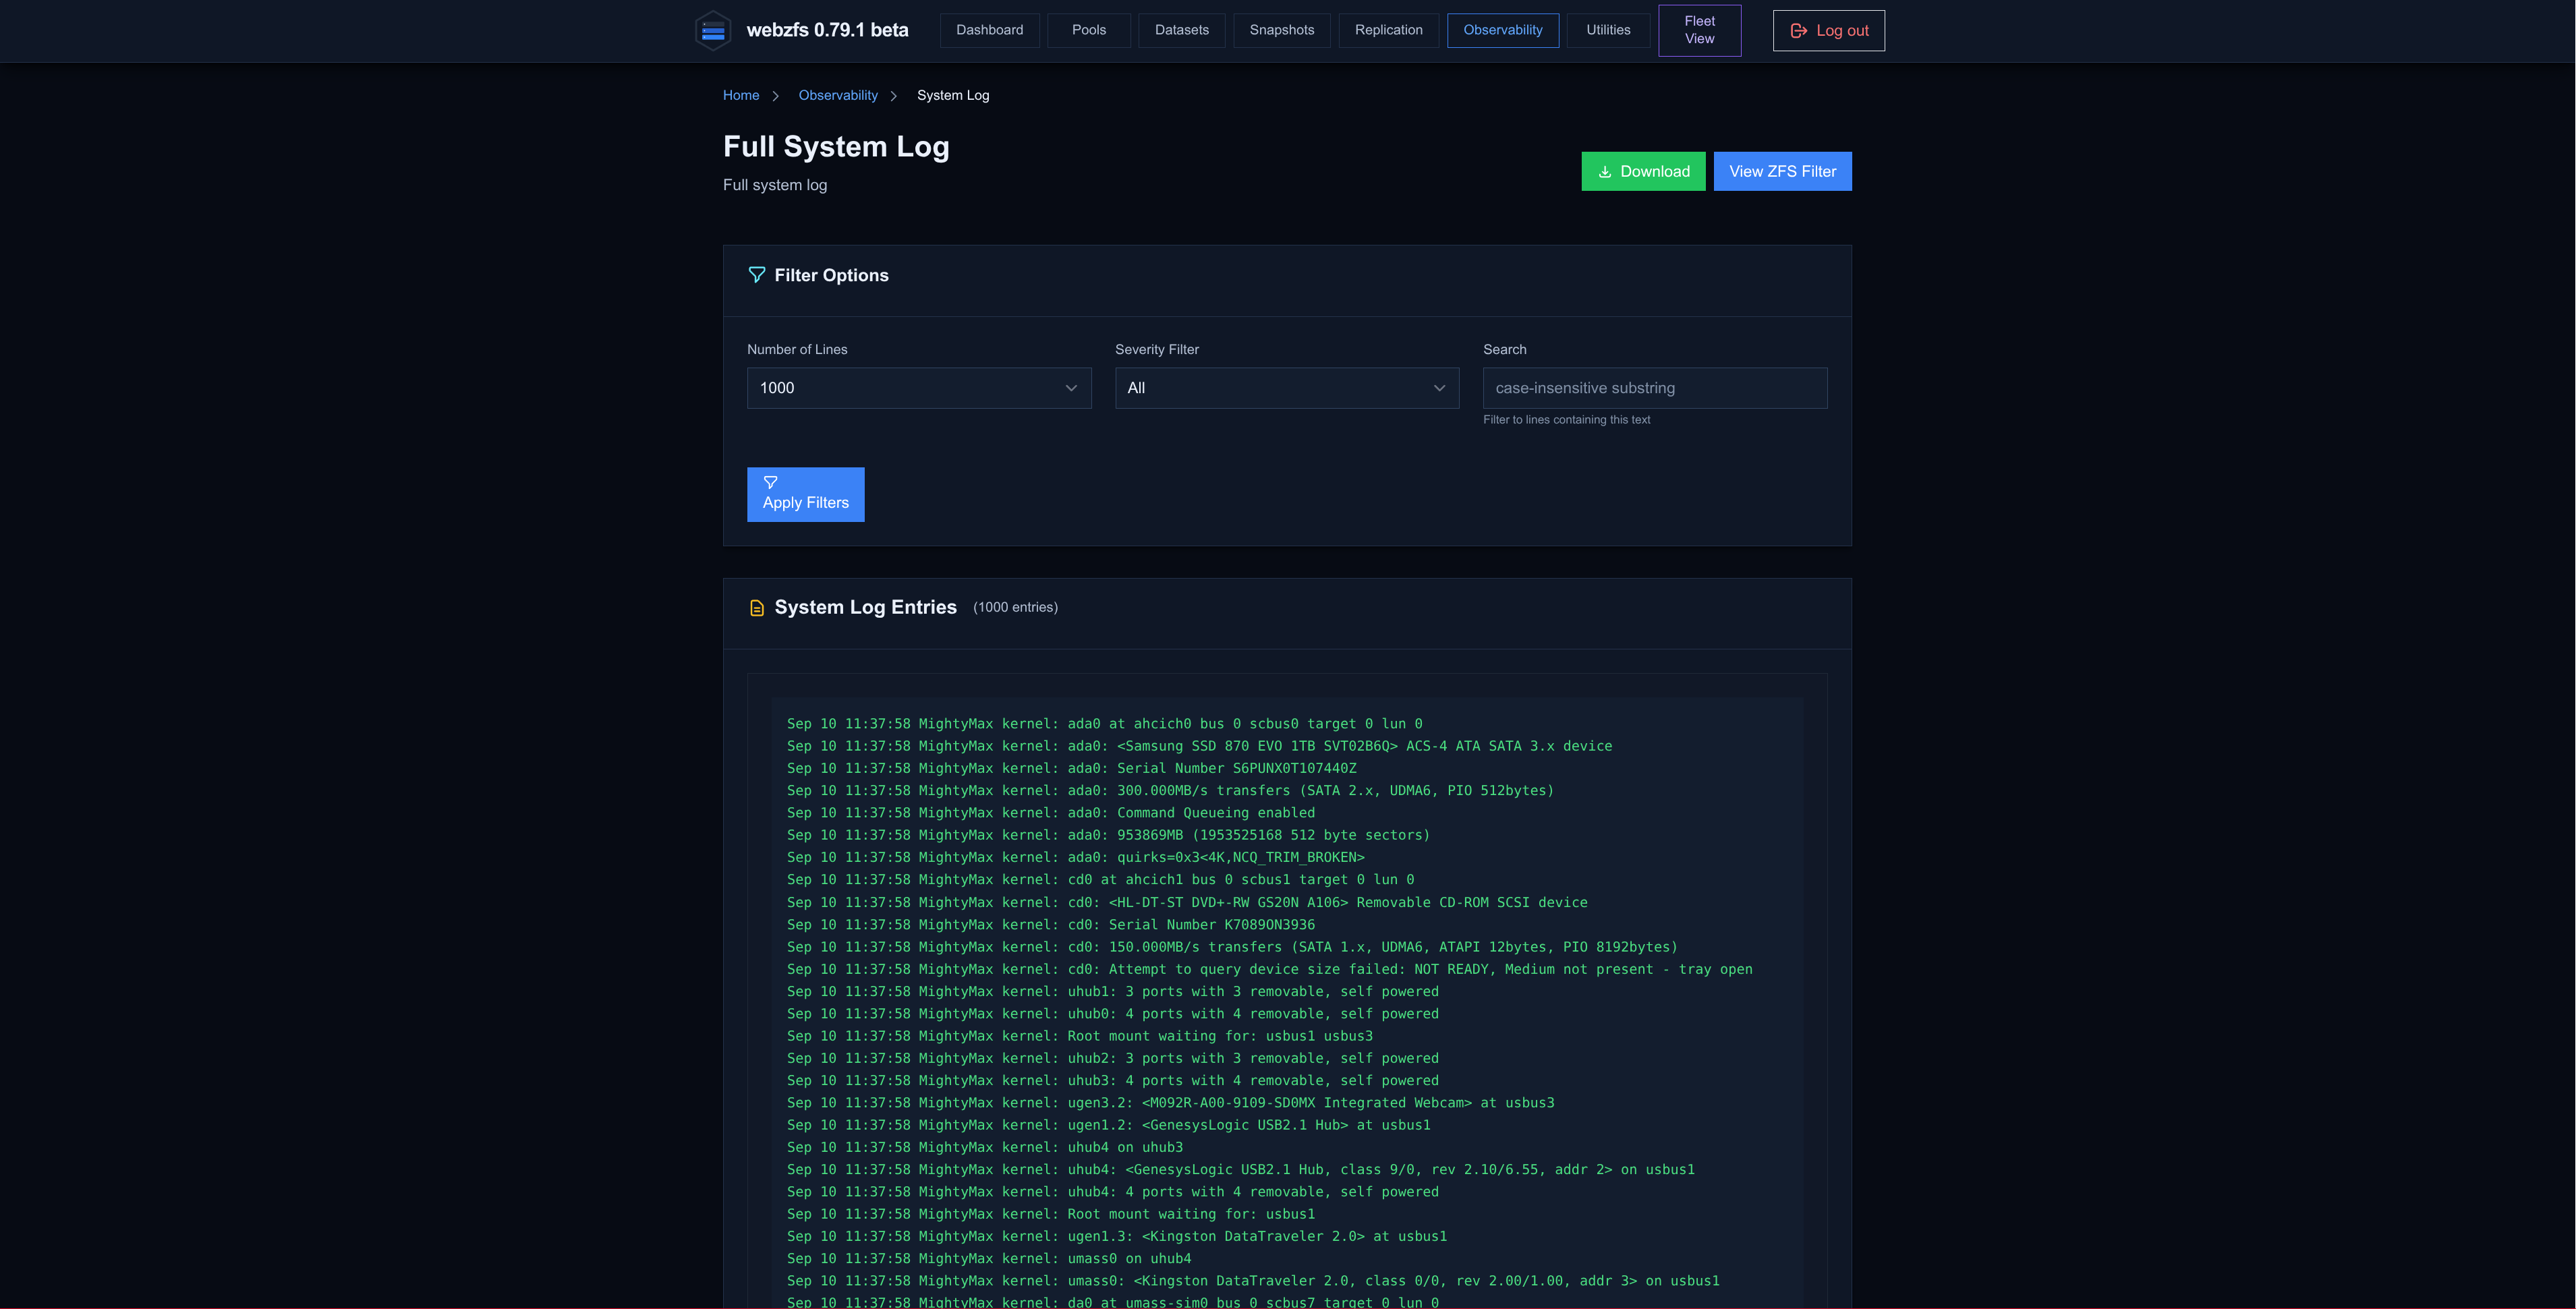
System Log(Full Log):
It lets you search and filter log messages.
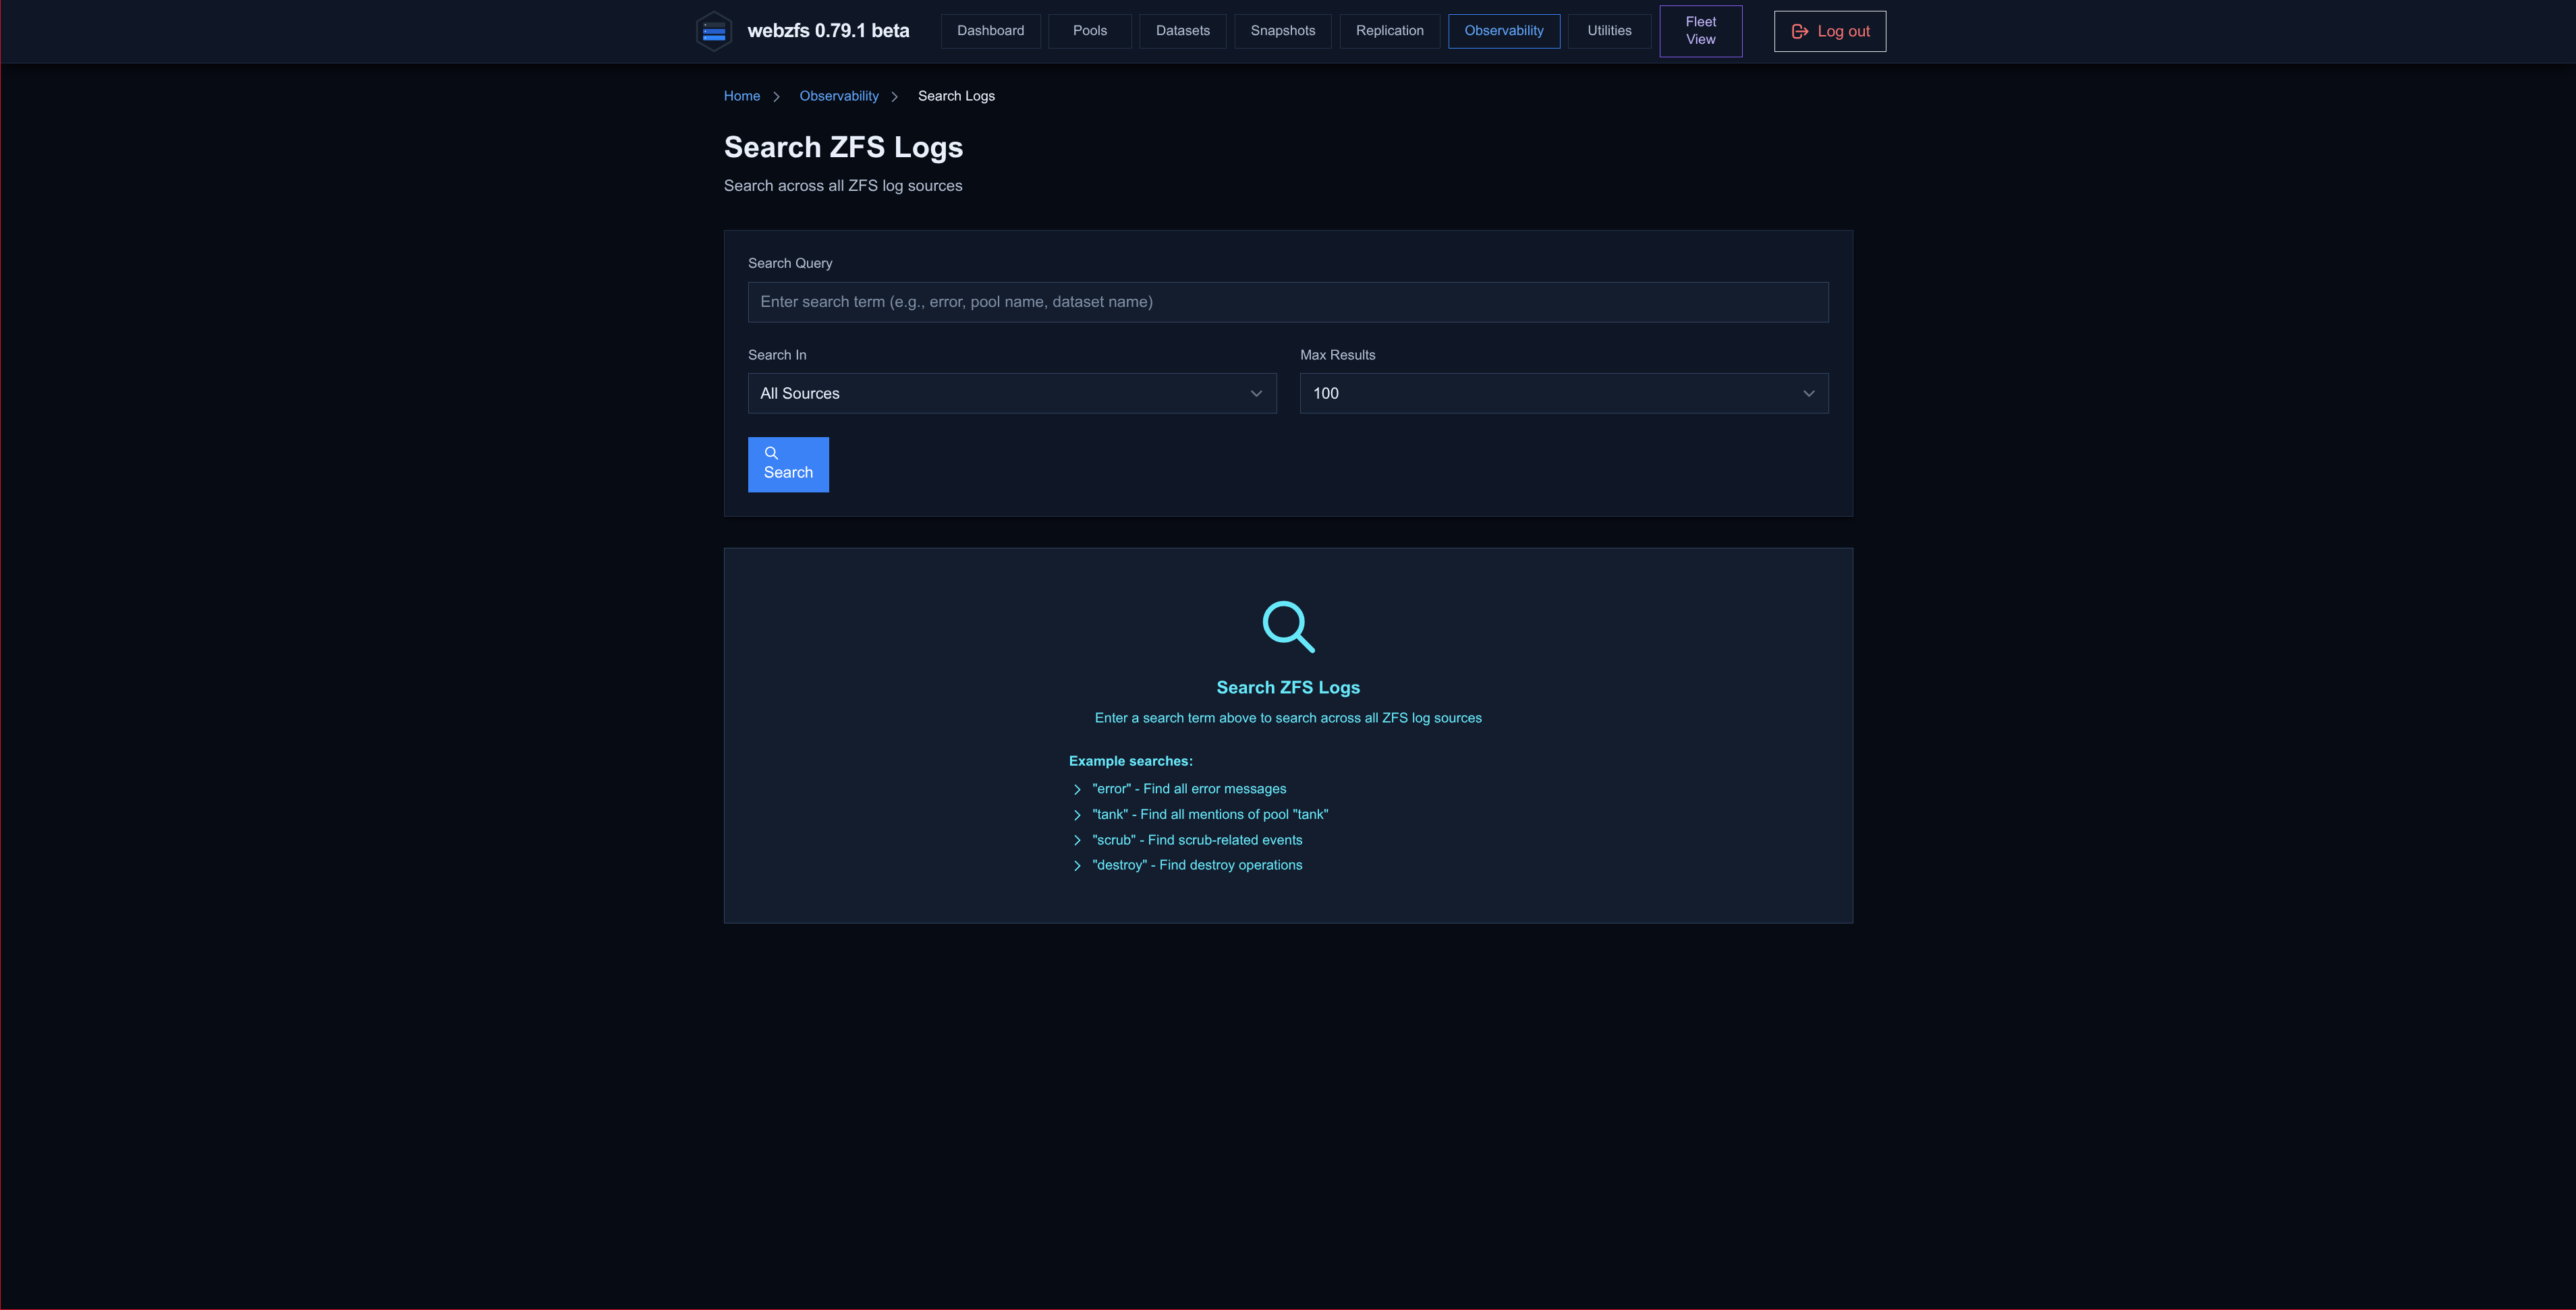
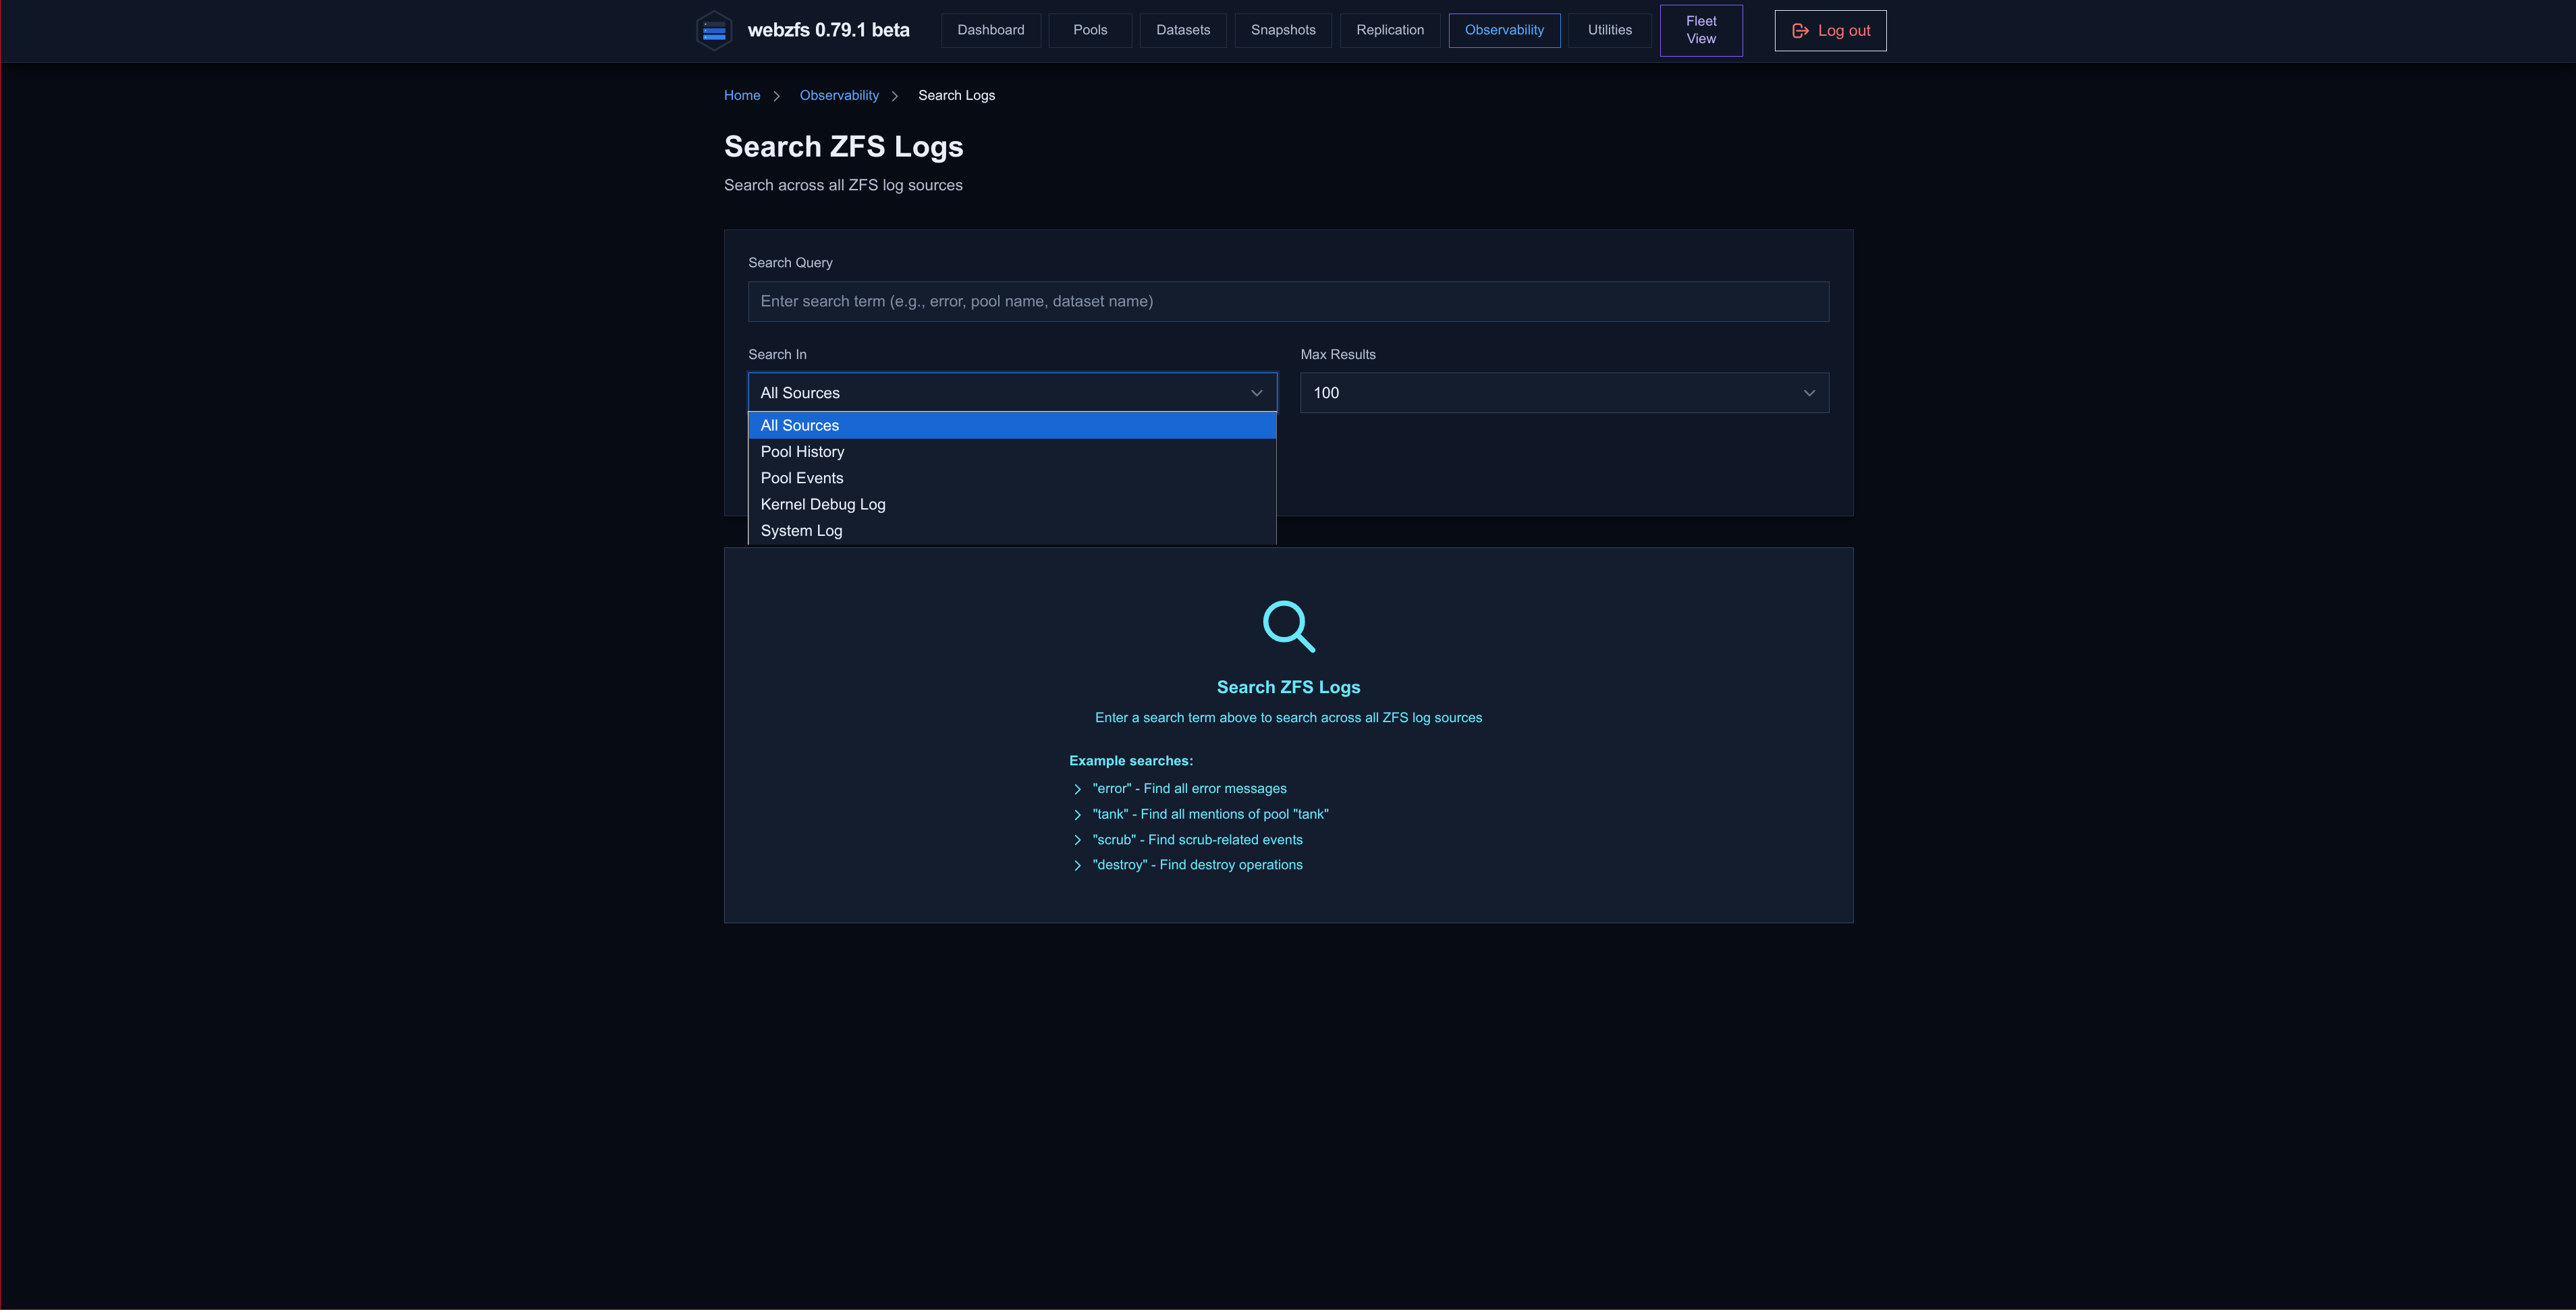
Search Logs:
System log search that searches all available log sources.
|
|
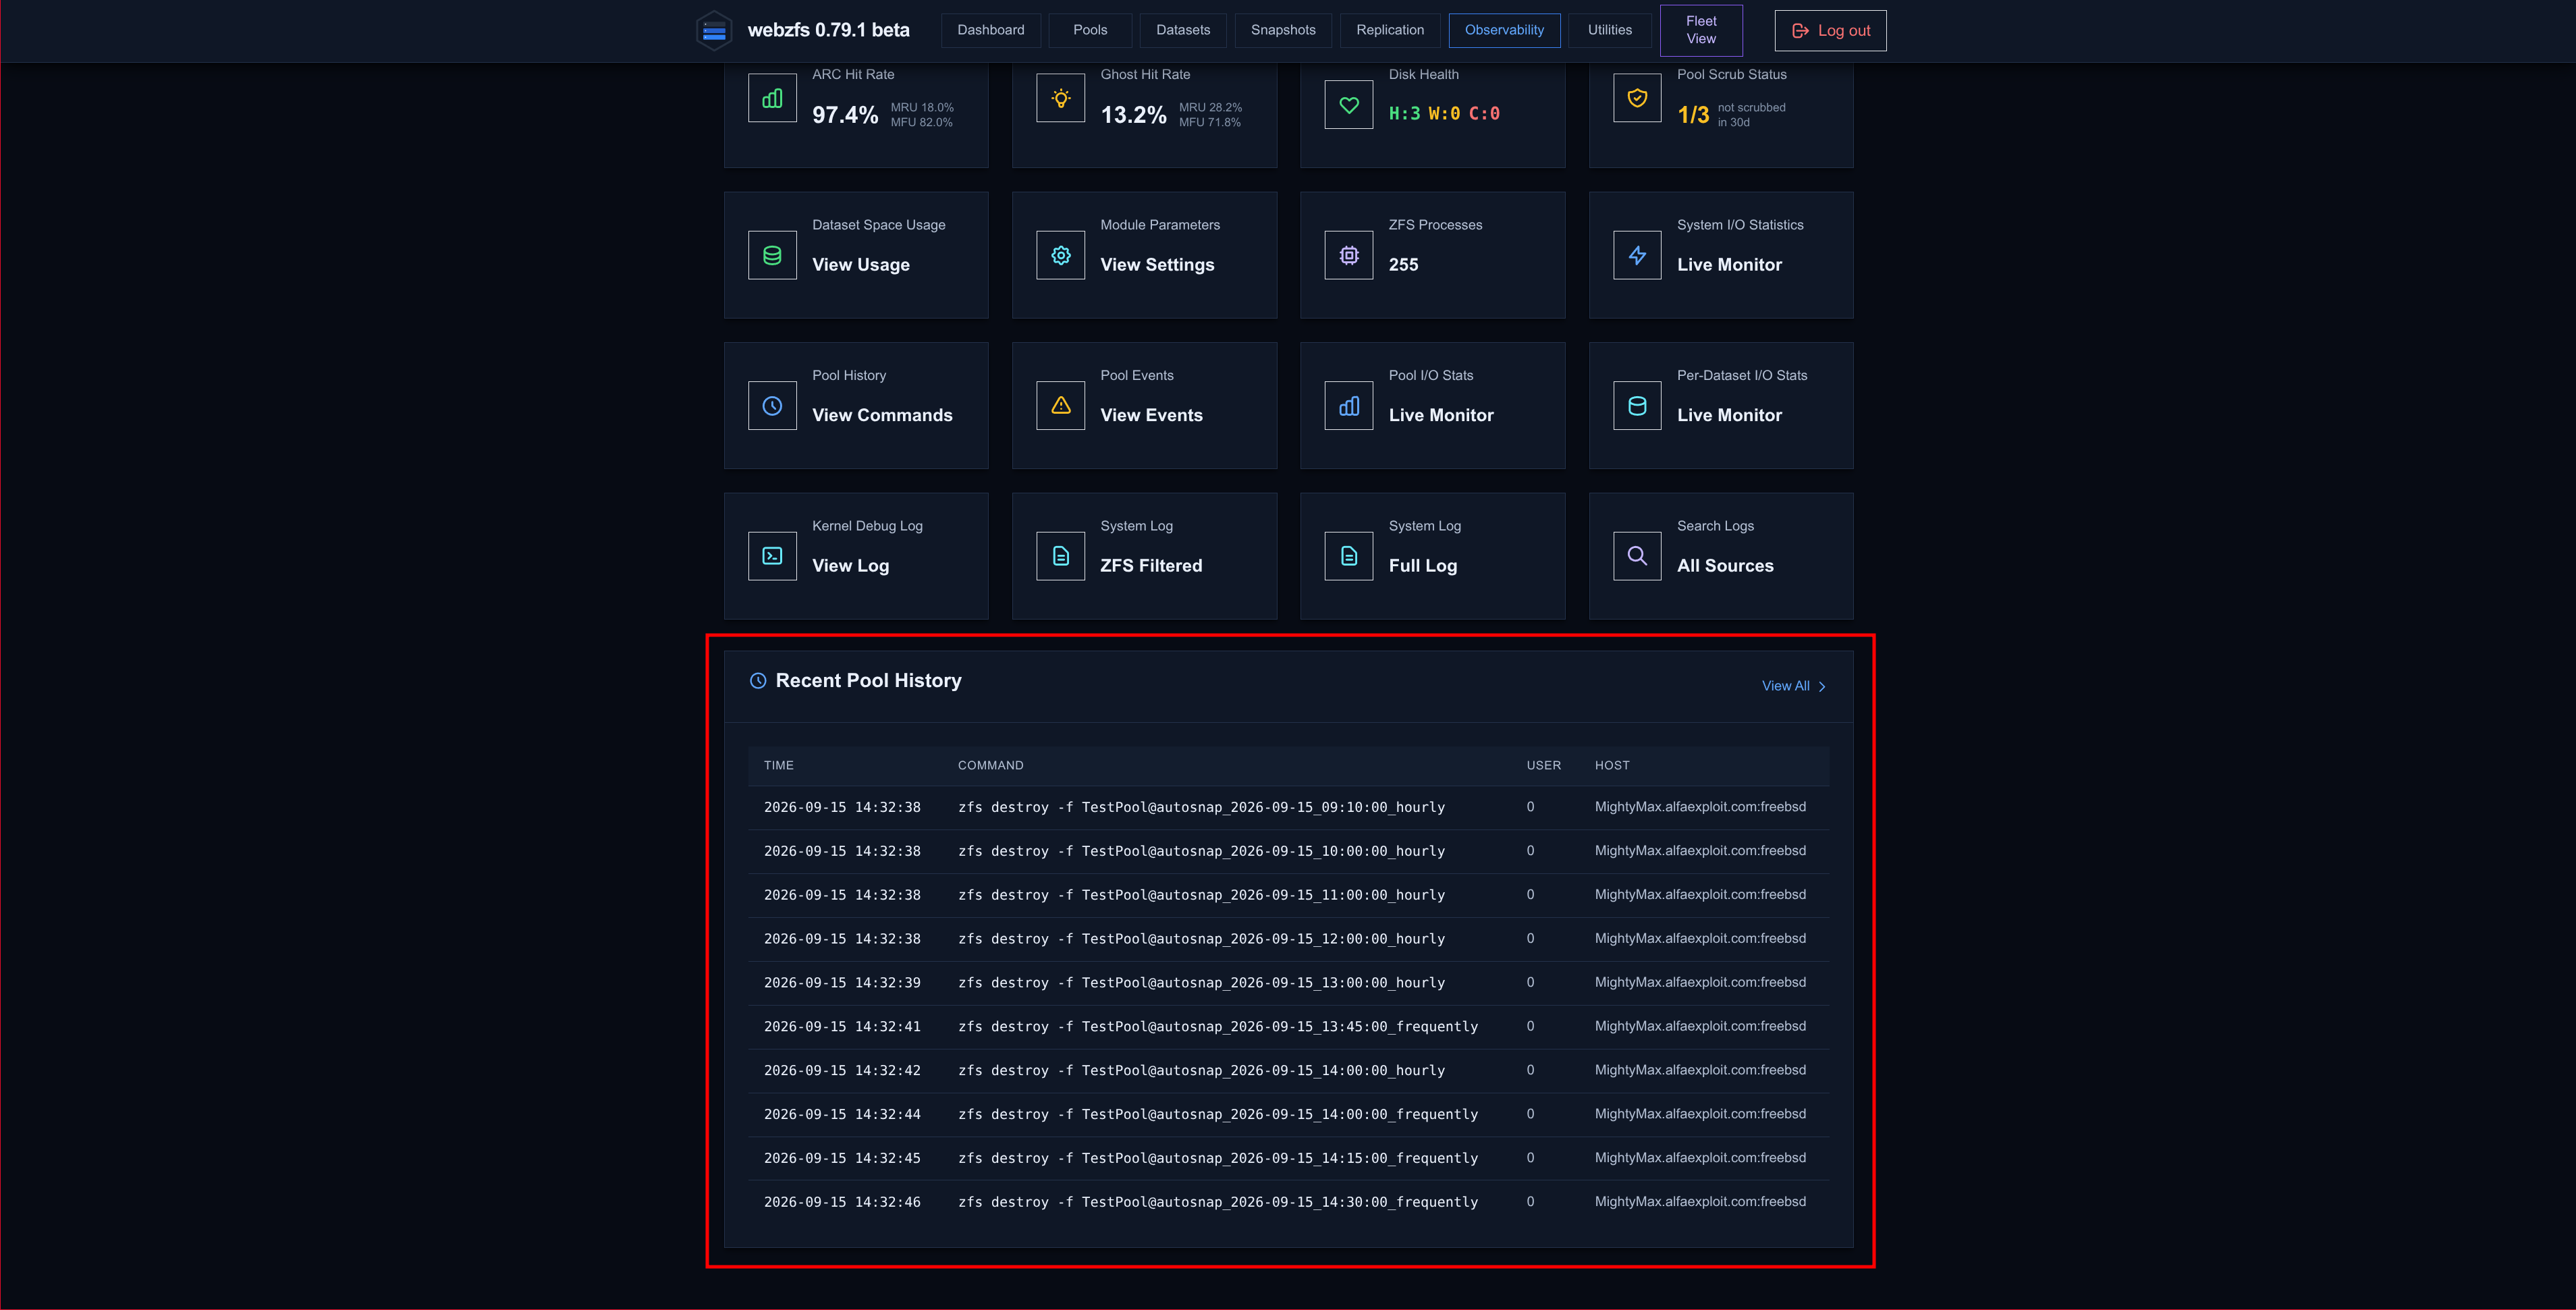
It will also show us at the end of the panel the recent history of the Pools:
Utilities
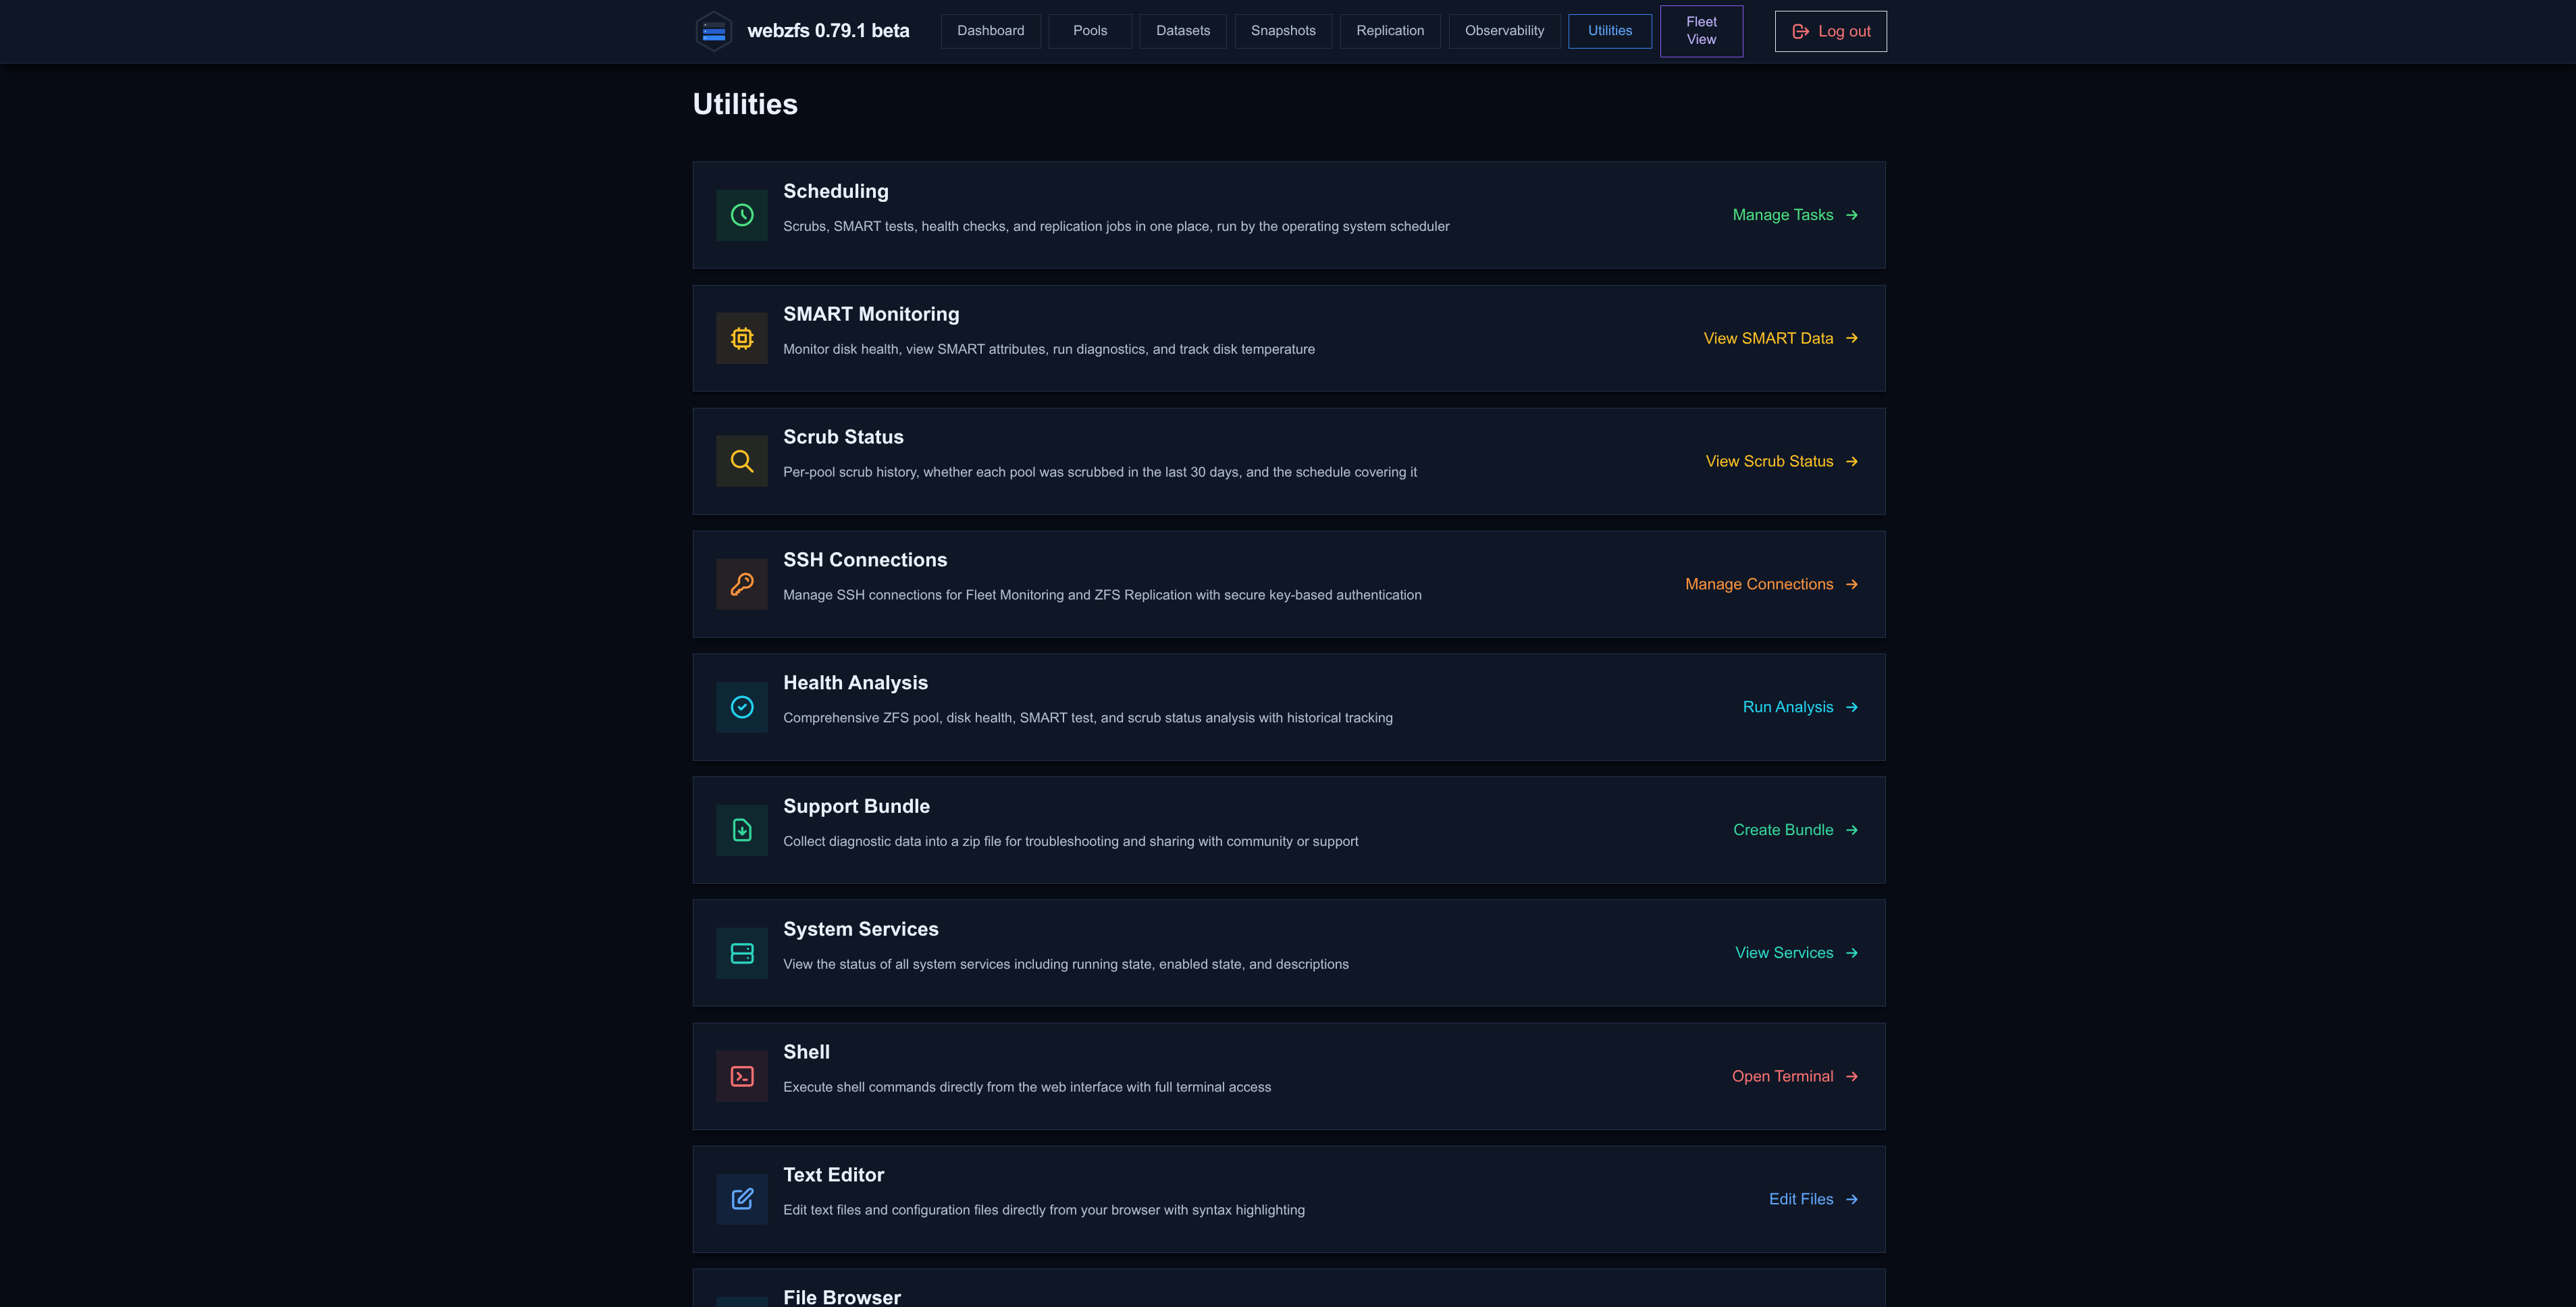
From this section we can access a wide range of panels.
Scheduling:
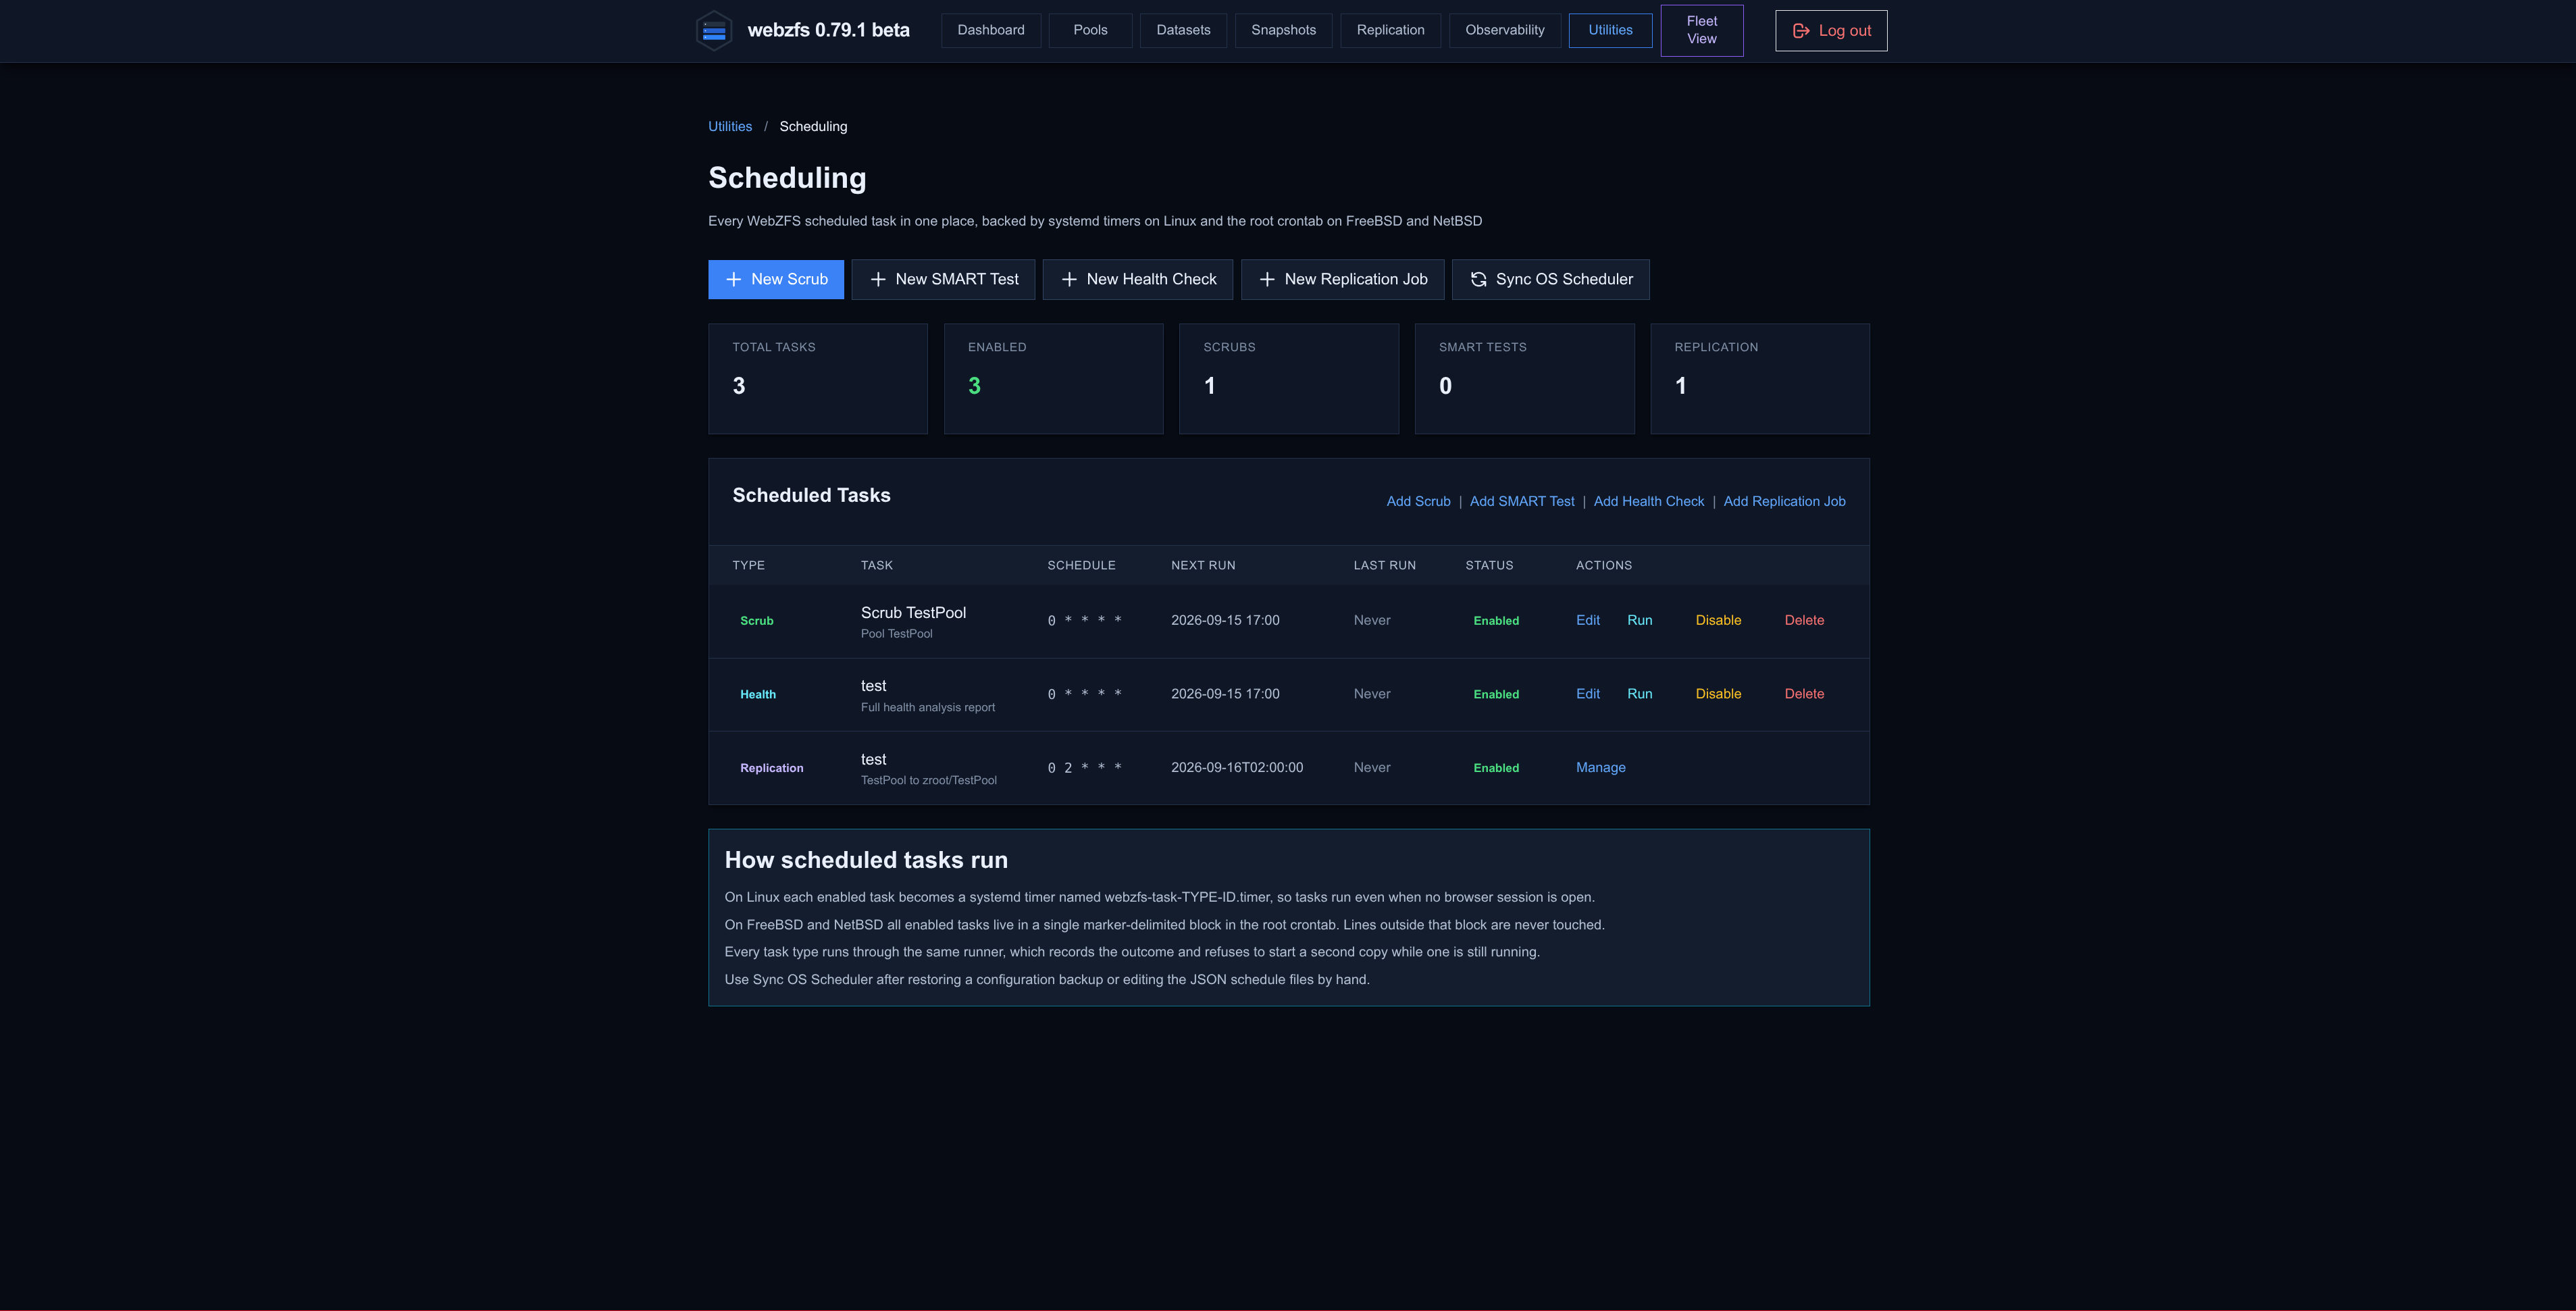
It shows us the scheduled tasks panel, whether Scrubs, SMART Tests, Replication Jobs. But not Sanoid Schedules (Snapshoting policies).
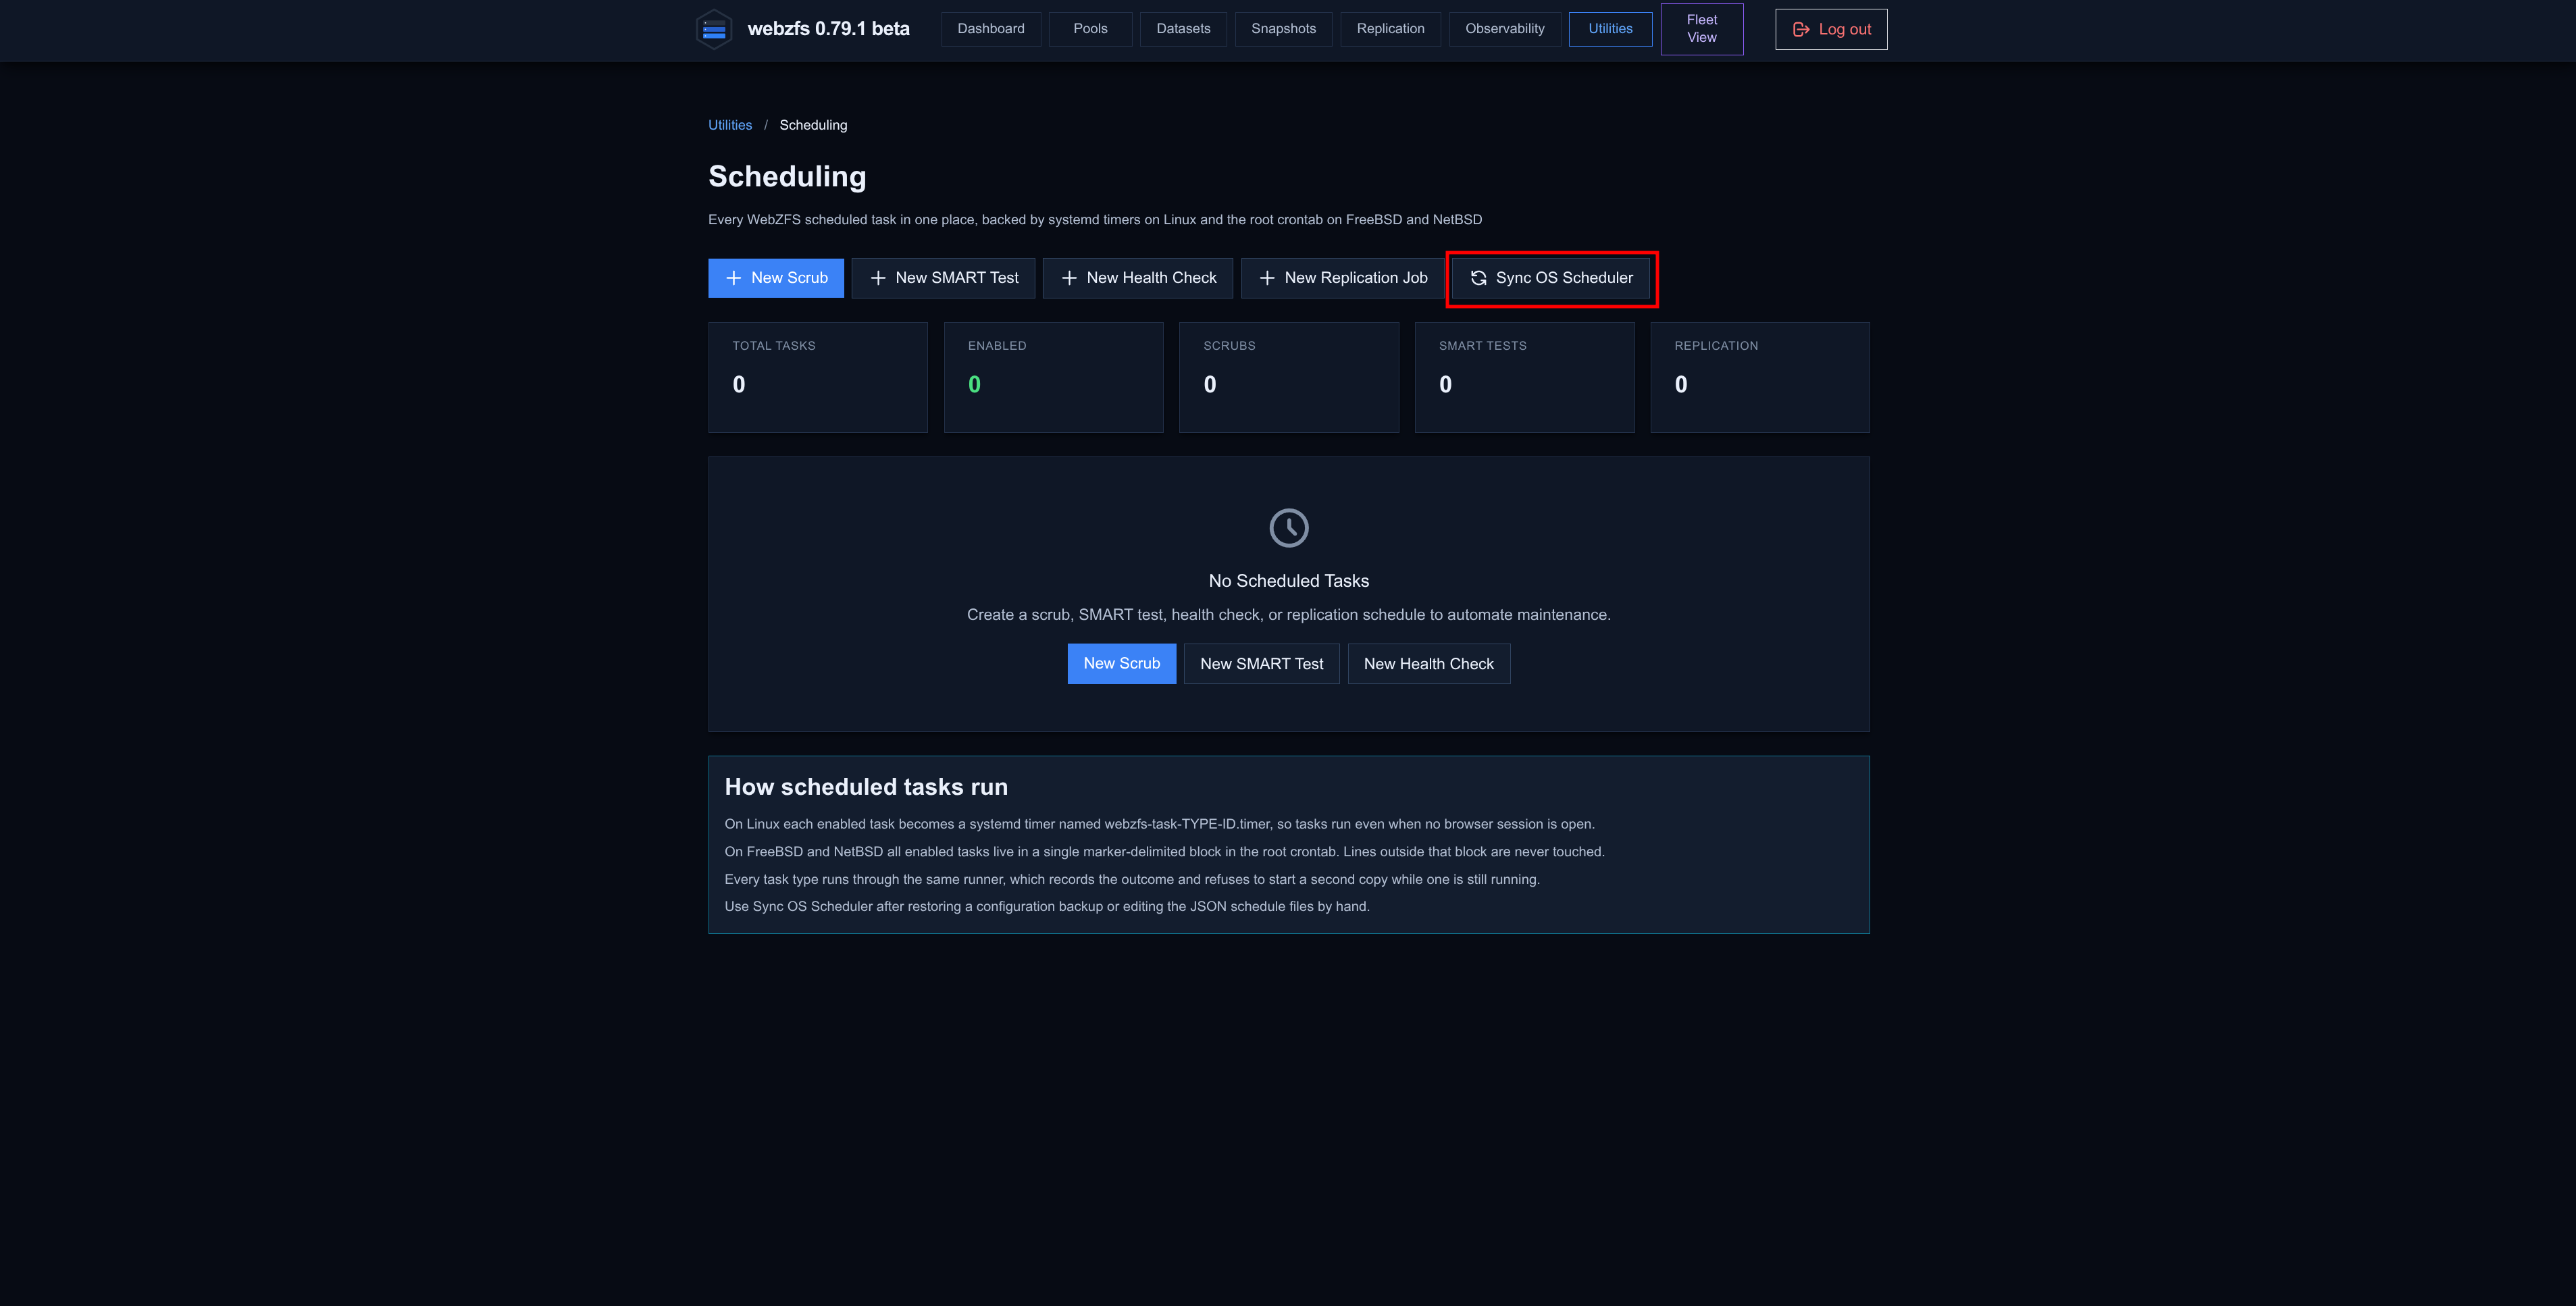
It also has a button that makes sure the tasks are scheduled in the system by the appropriate means, although in my case I have not needed to use it.
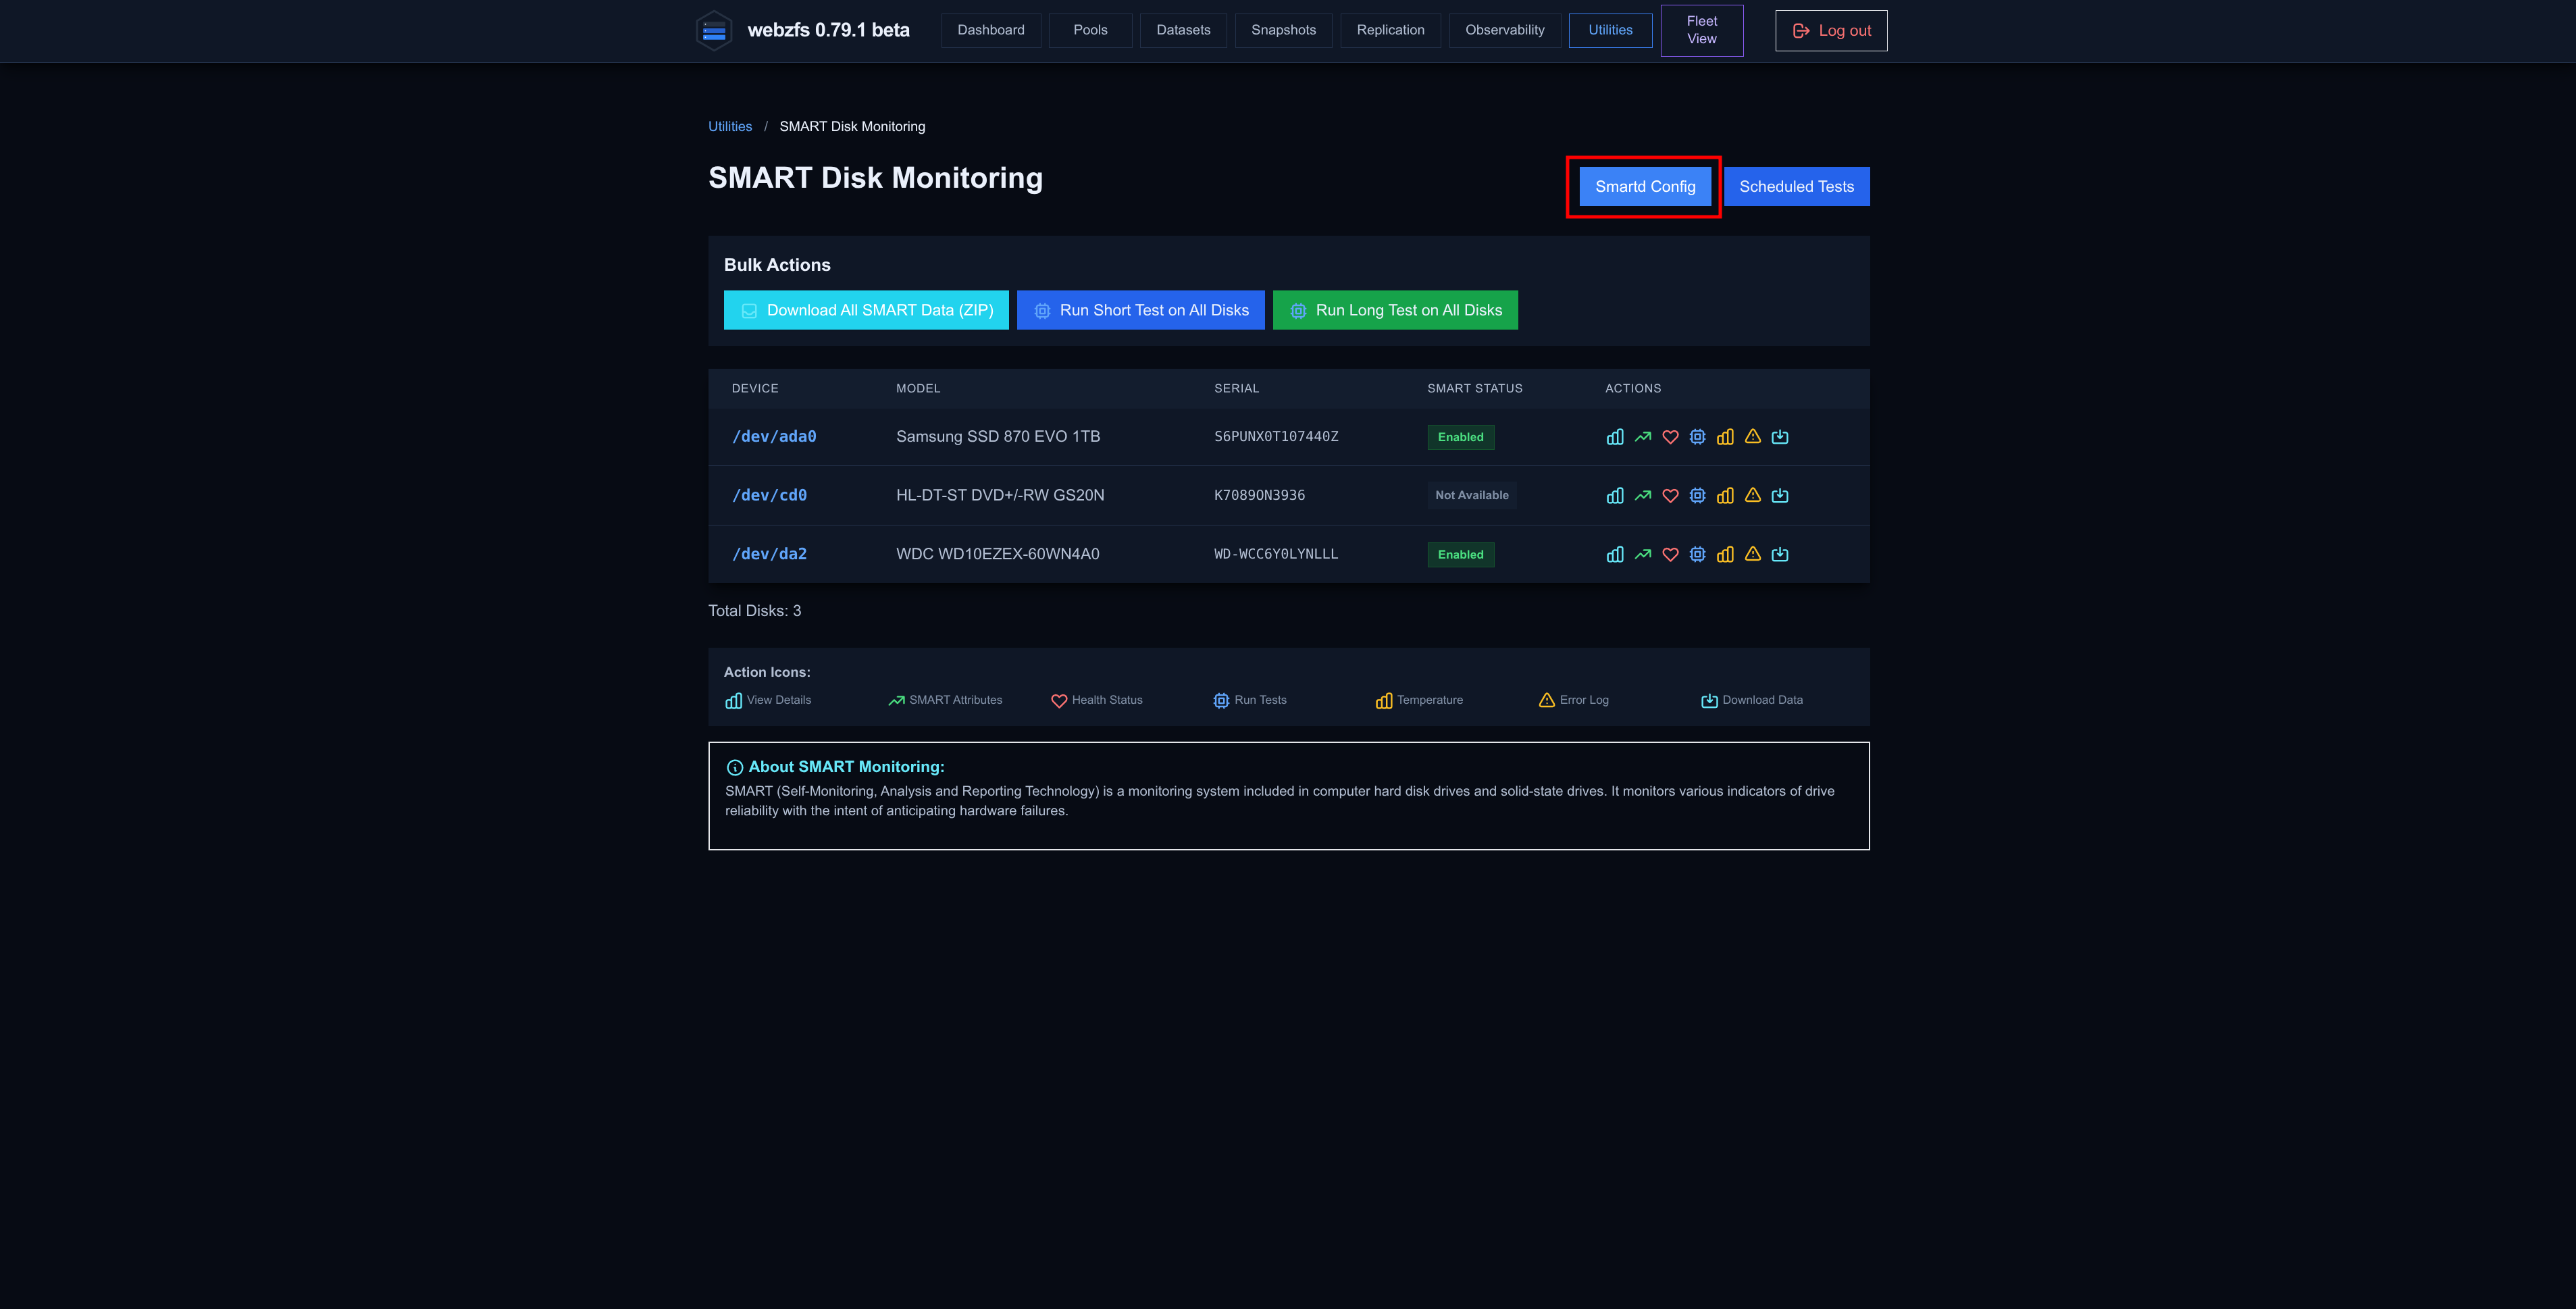
SMART Monitoring:
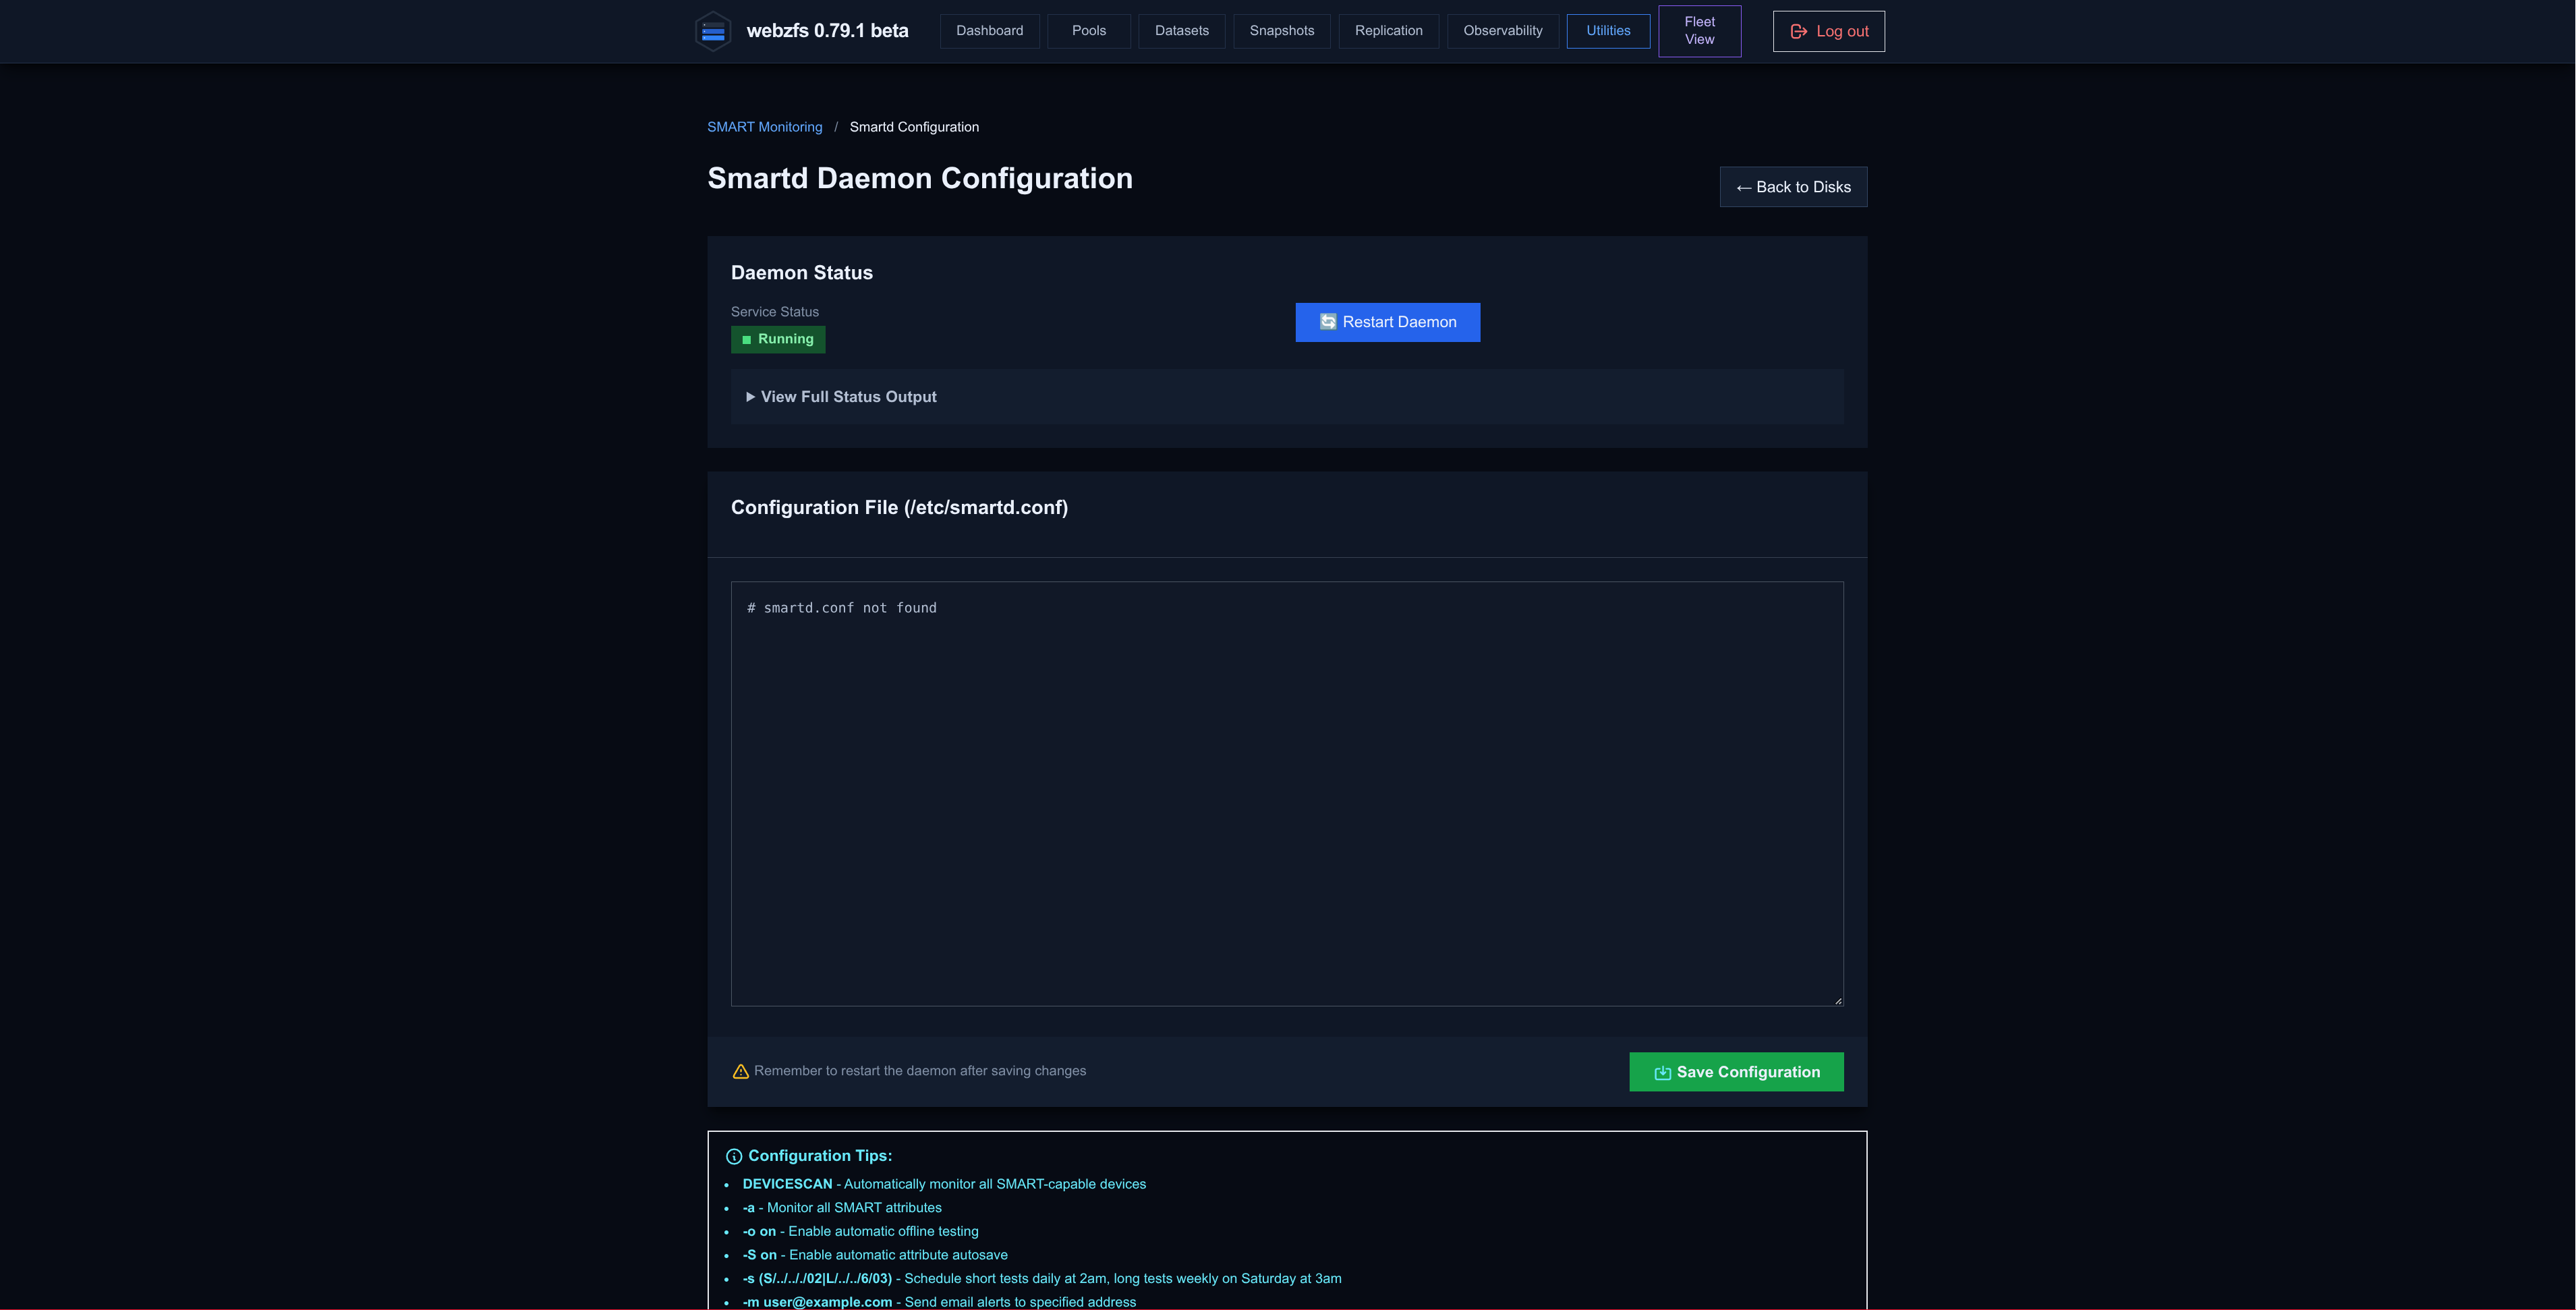
From here we can configure SMART, restart the service and modify configuration parameters (in my case I don’t use SMART since I rely on ZFS native disk monitoring).
|
|
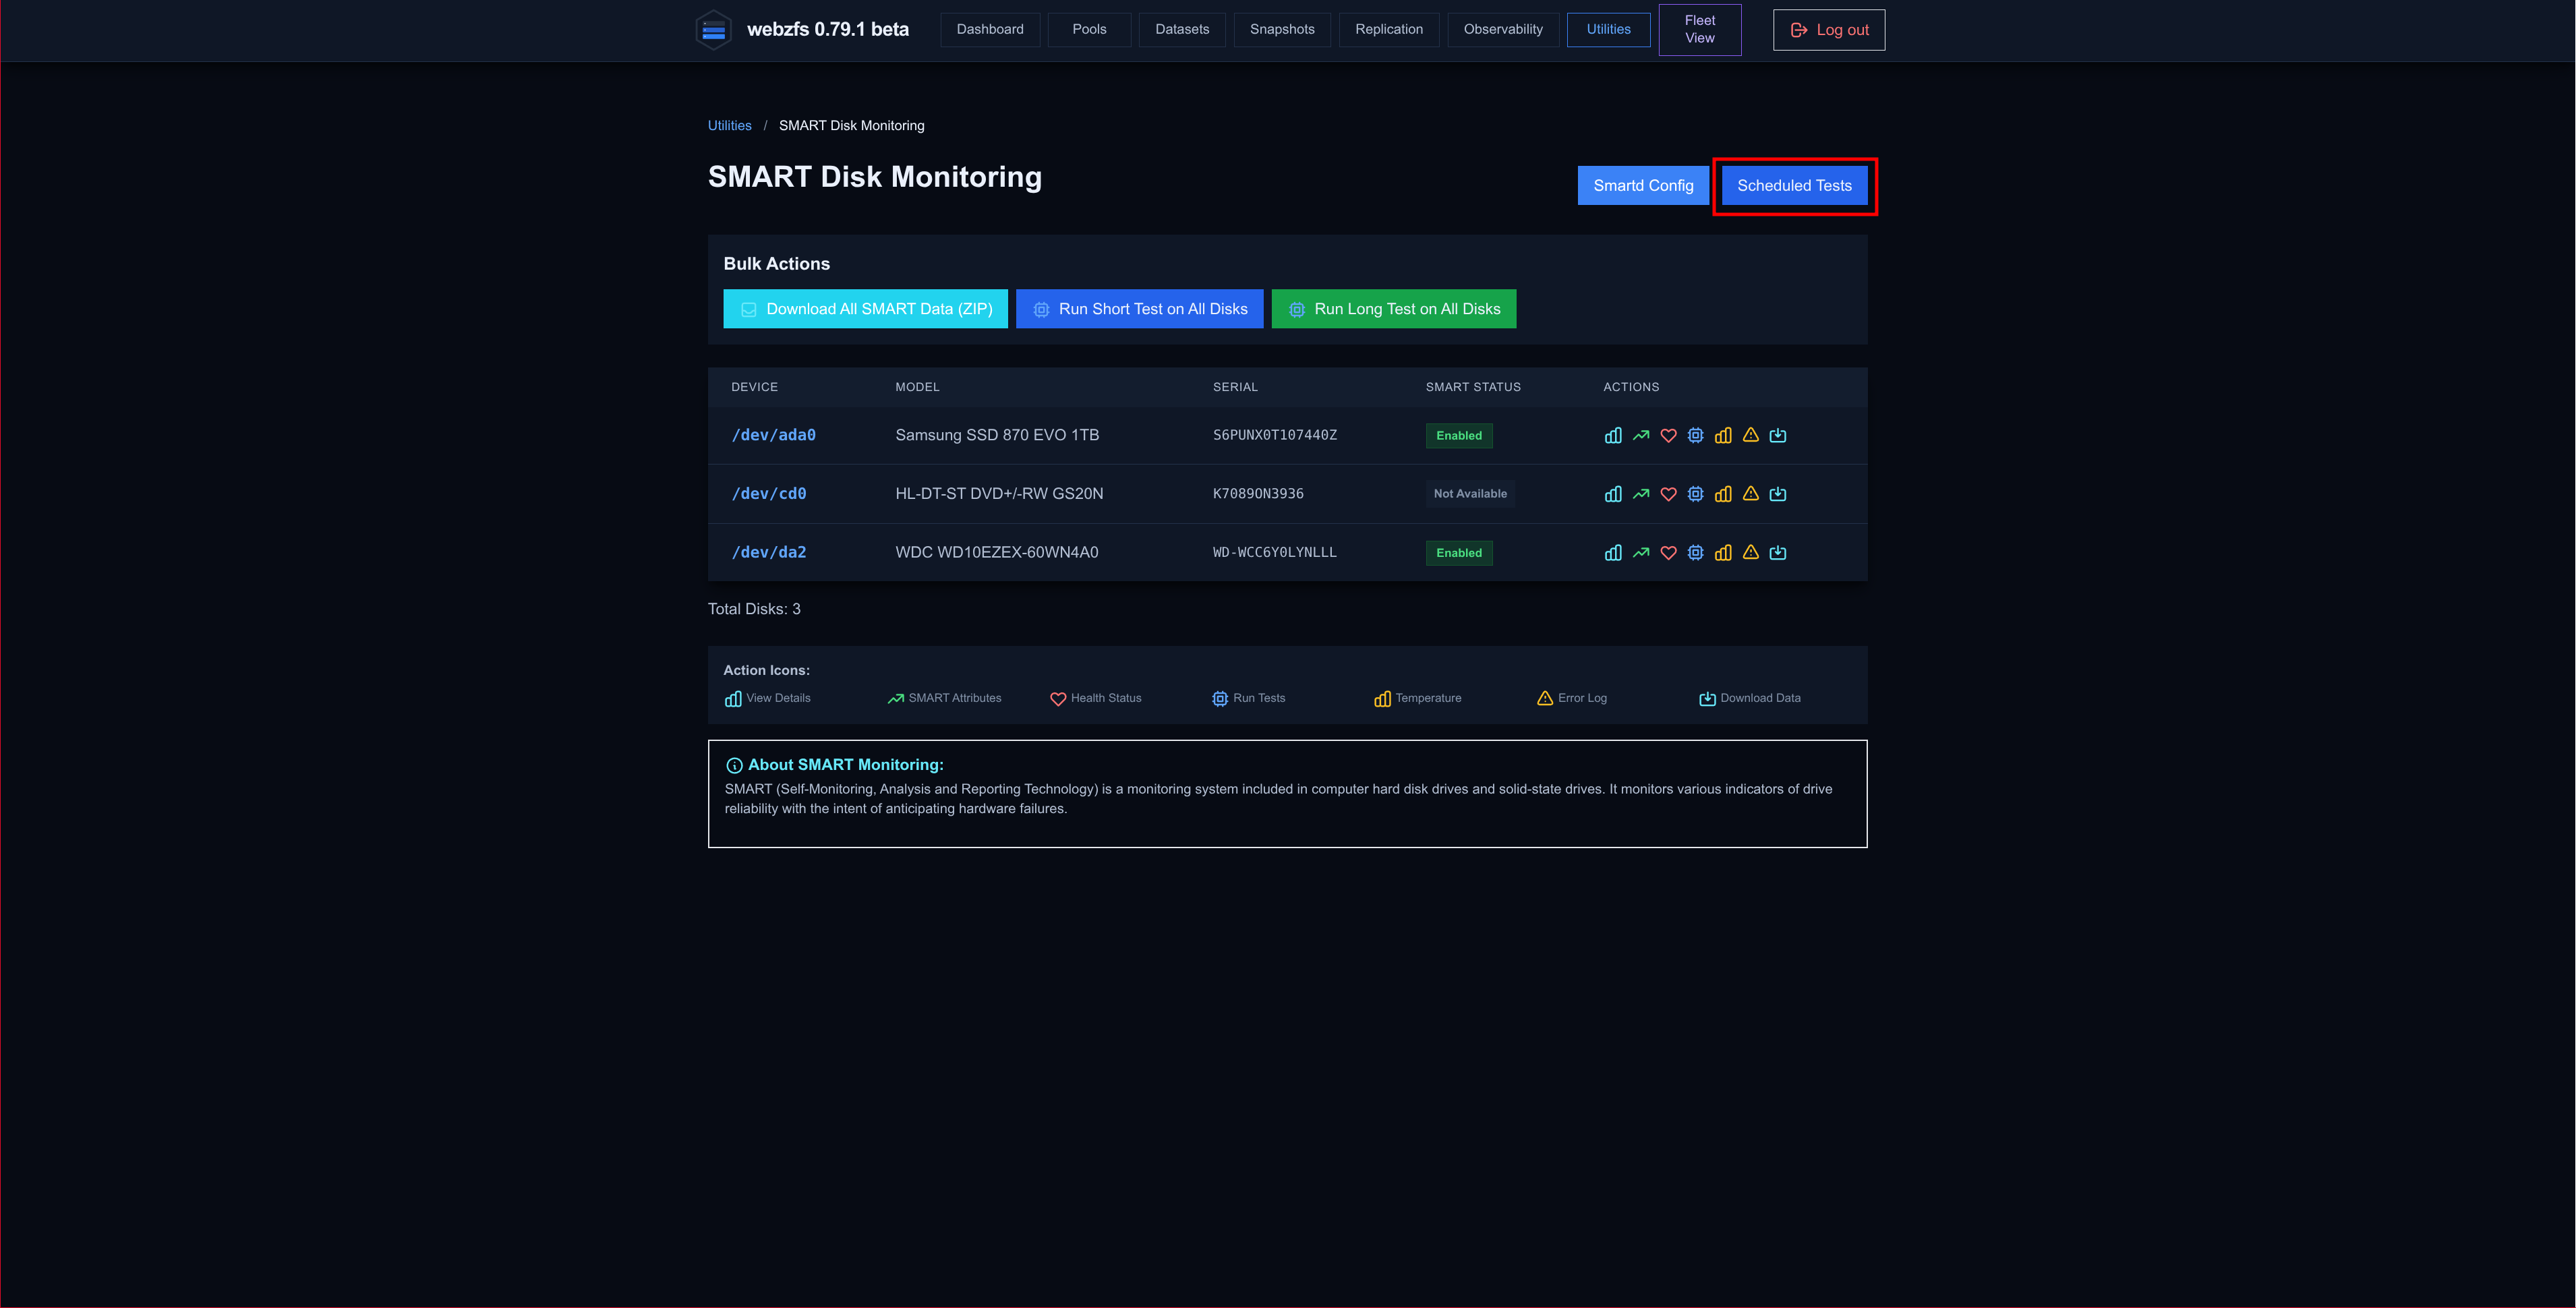
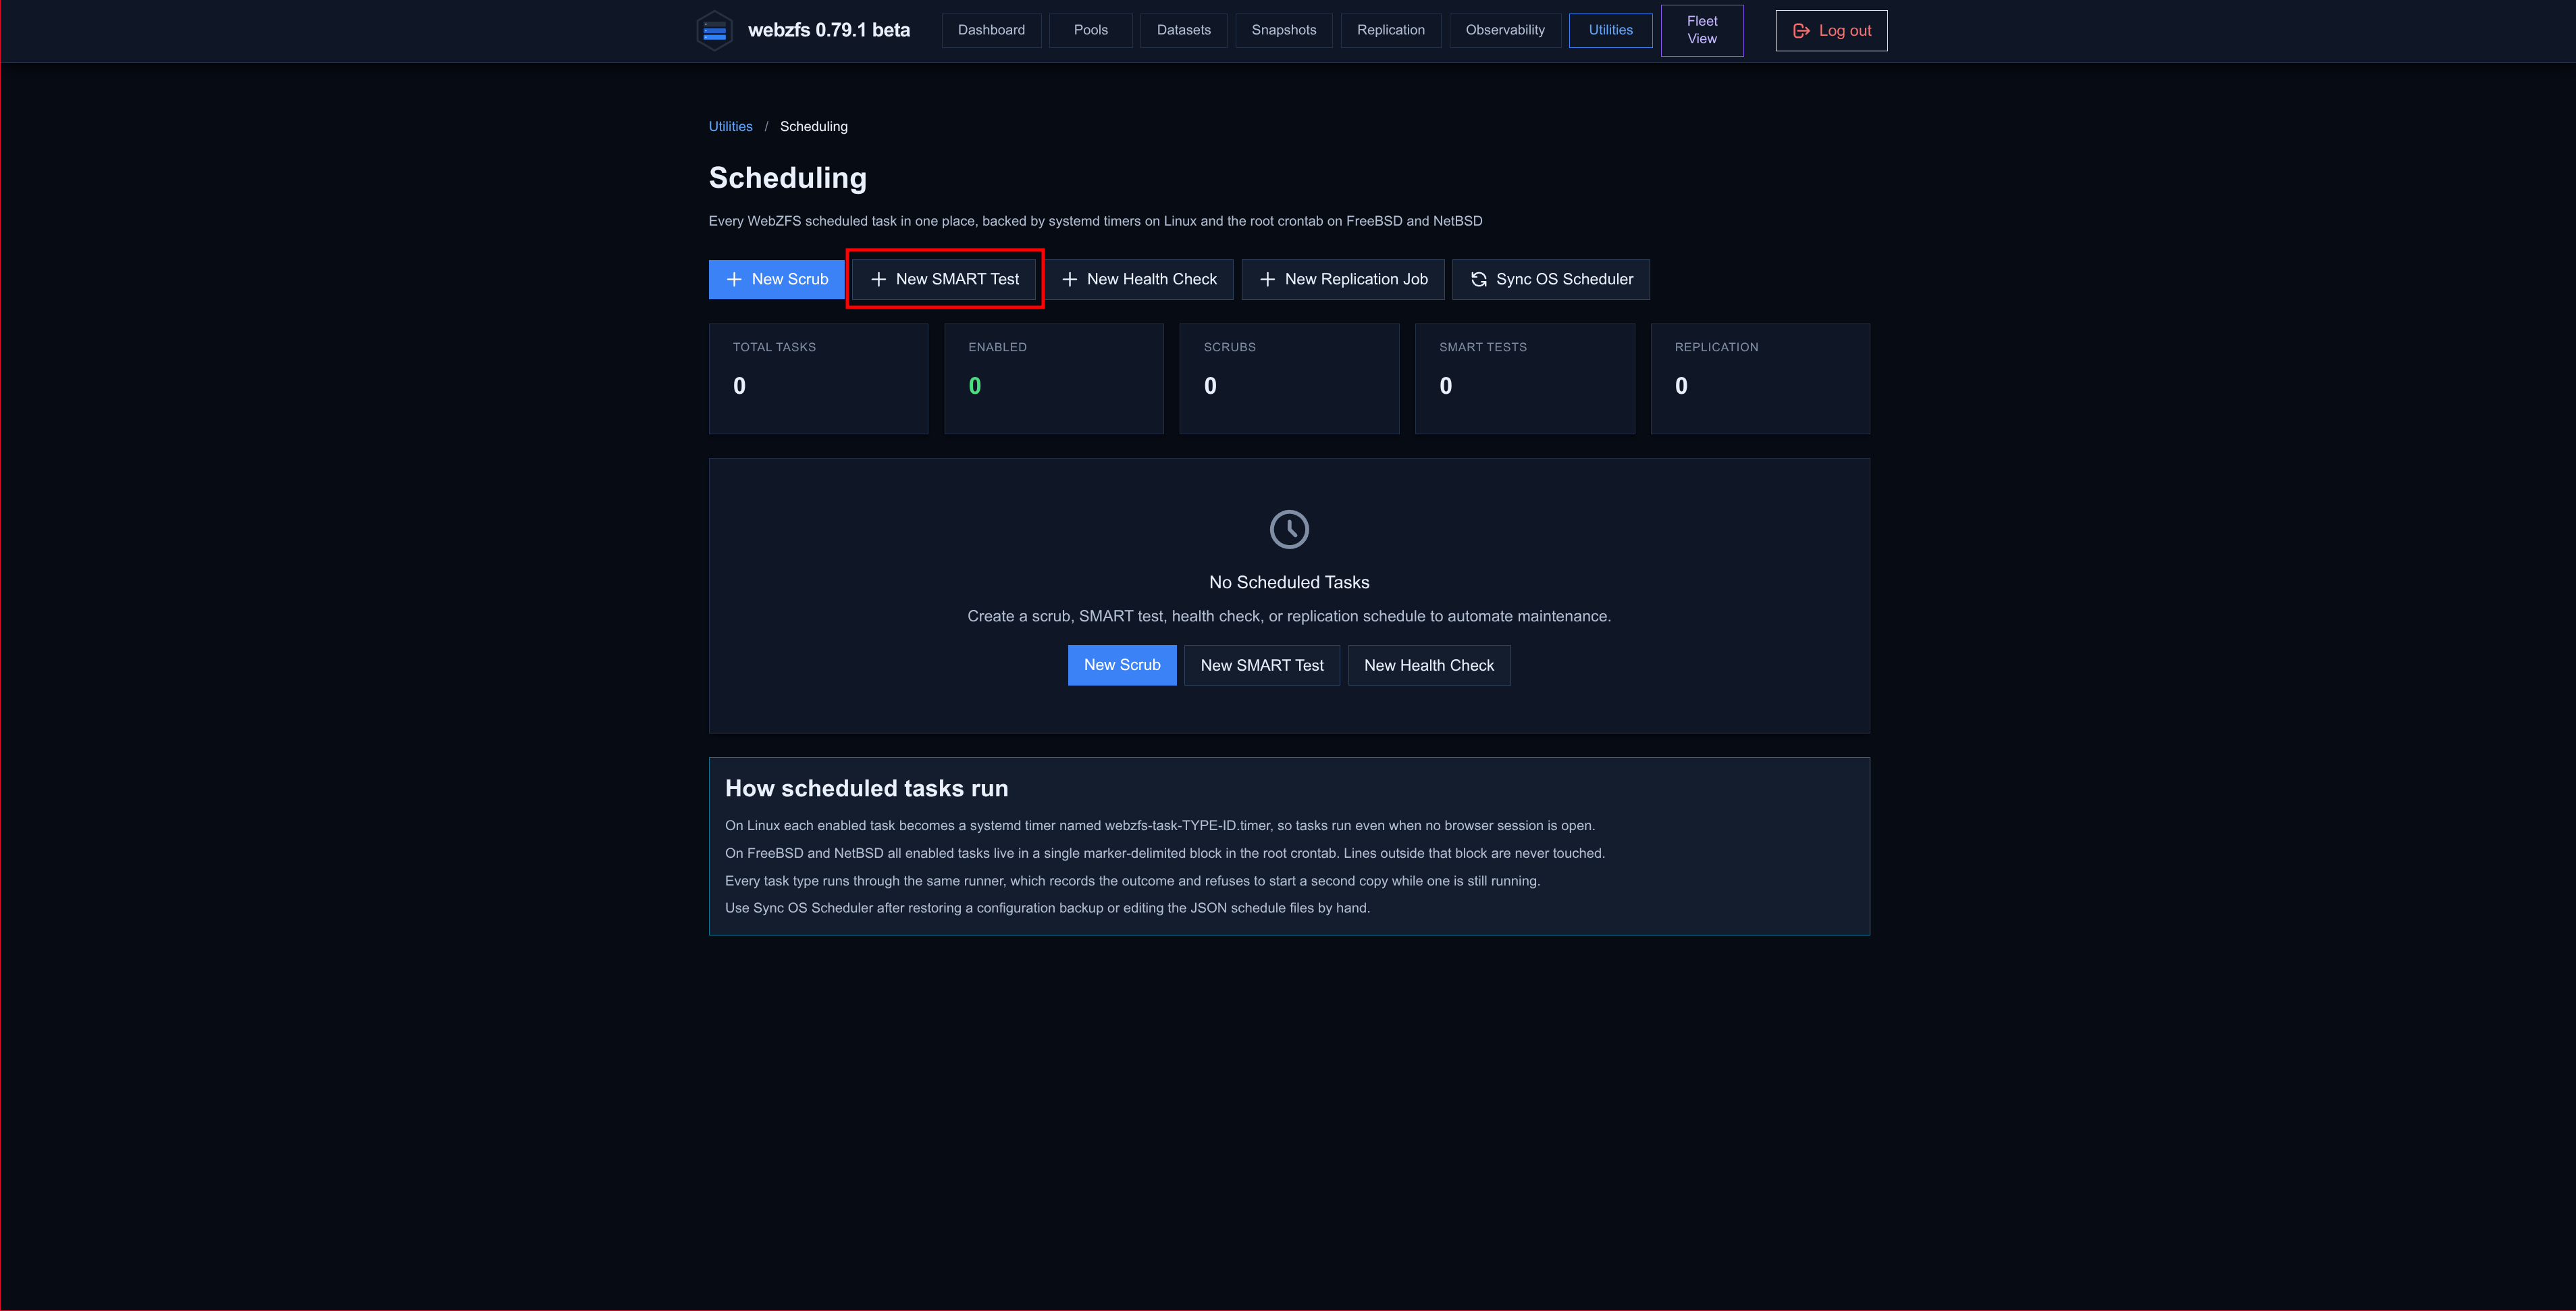
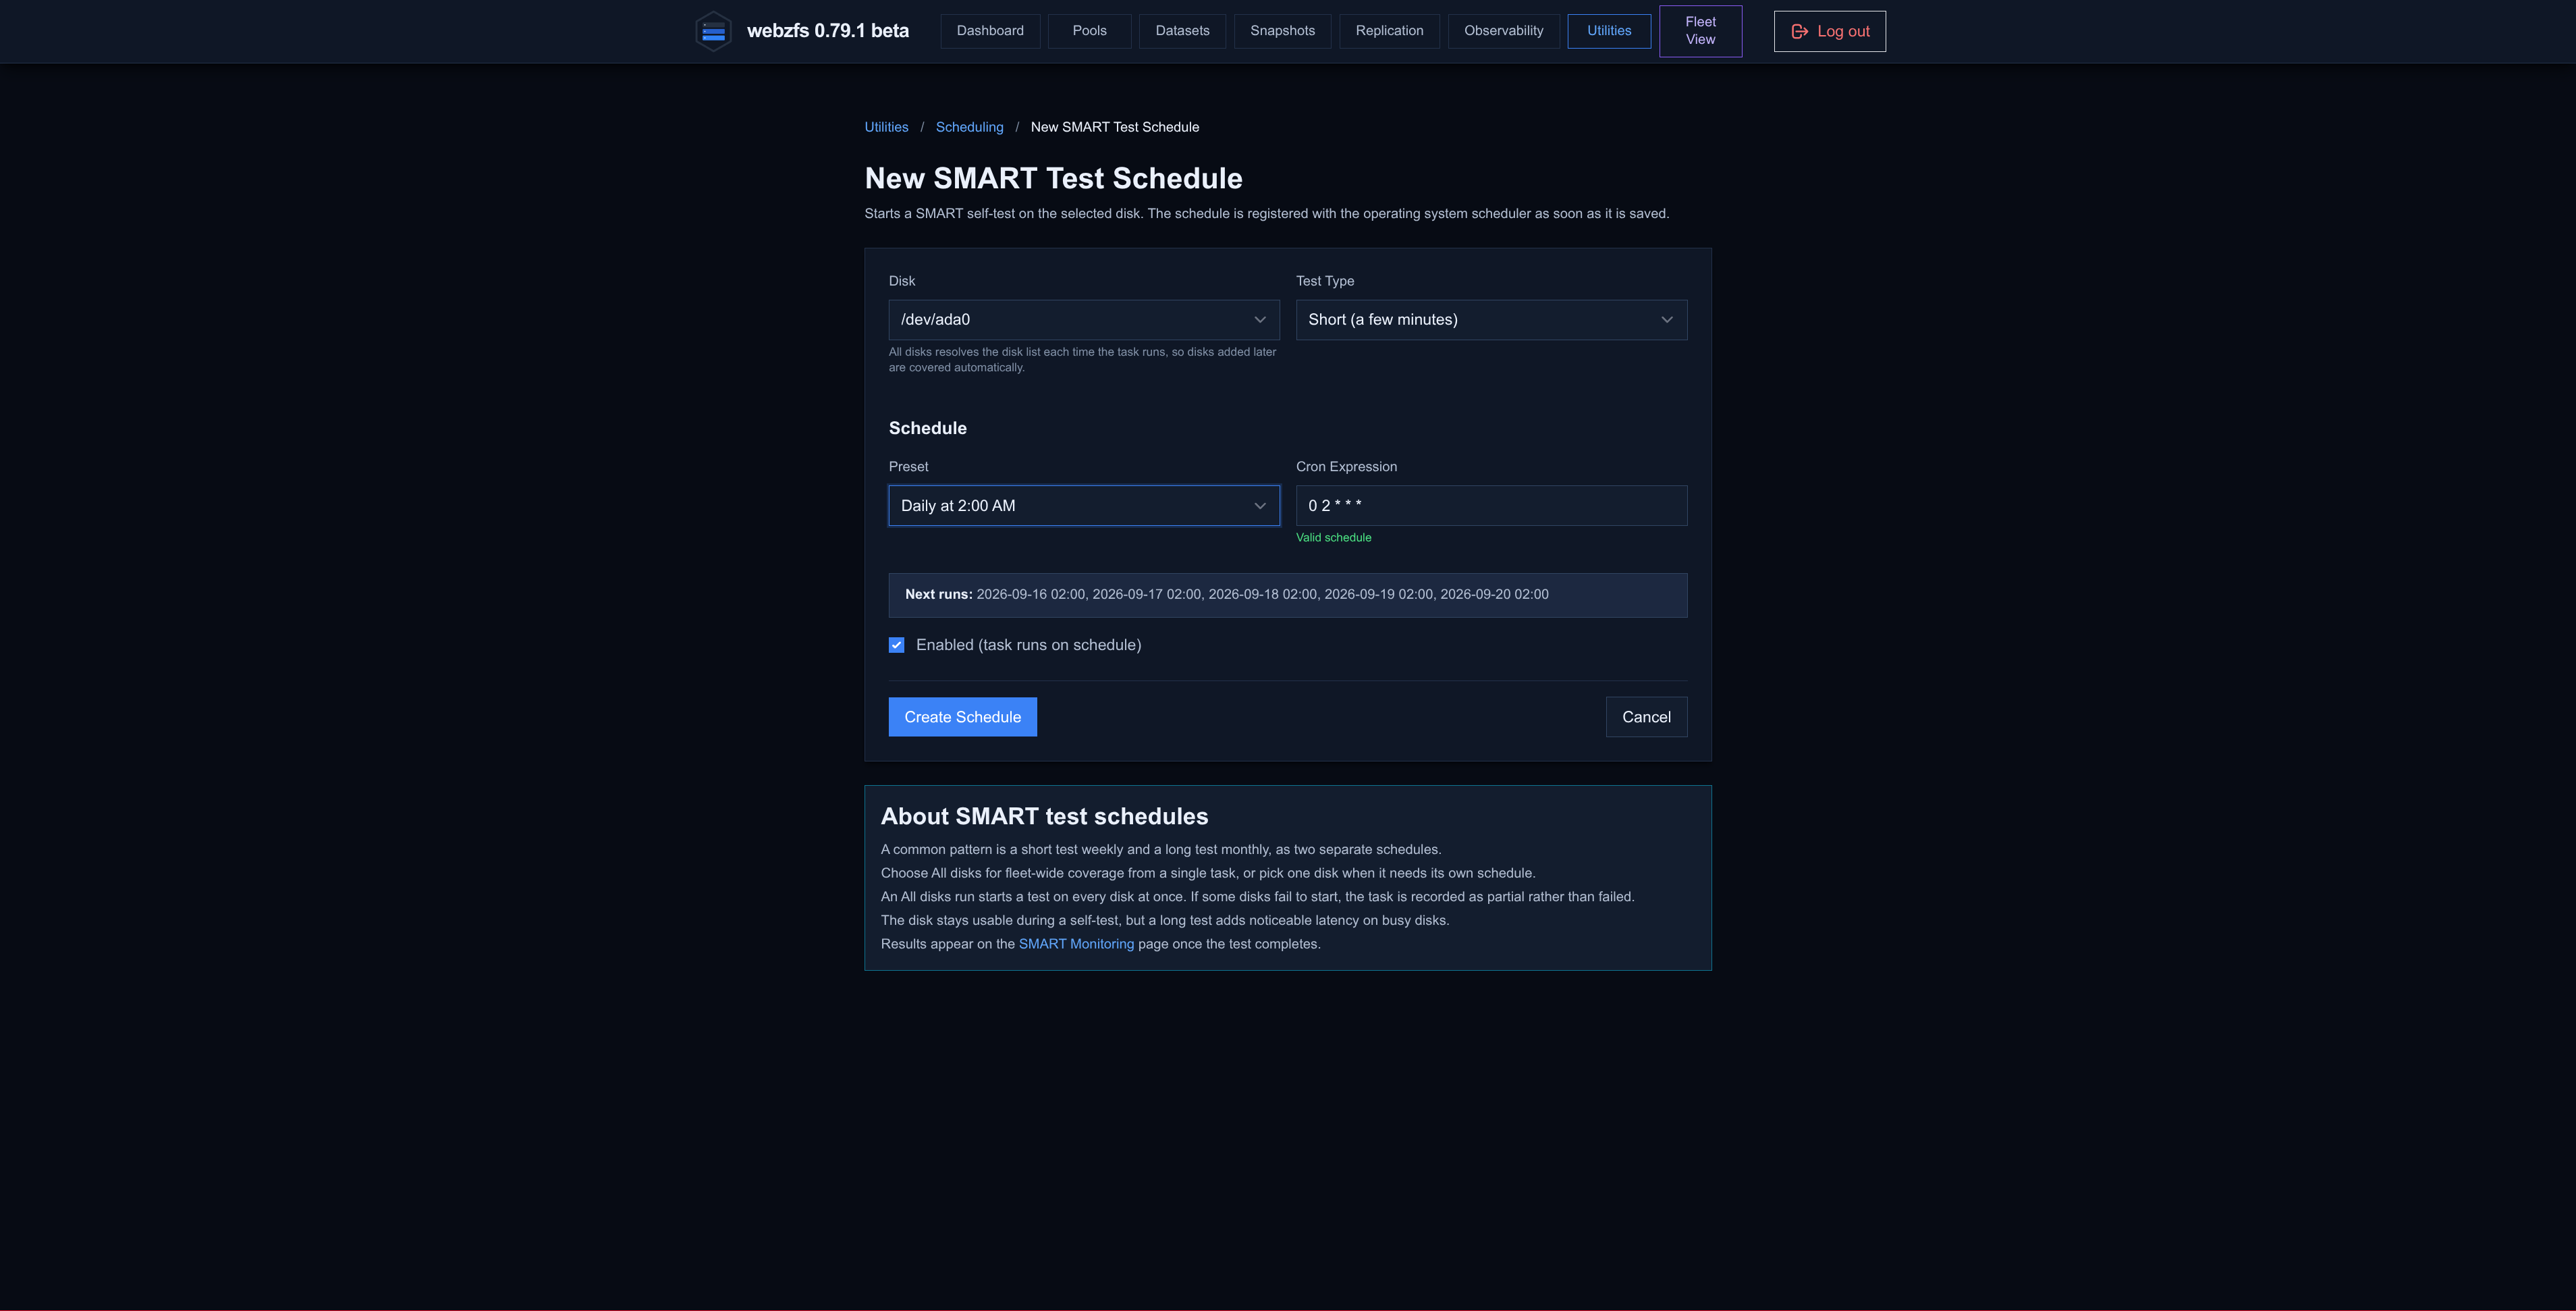
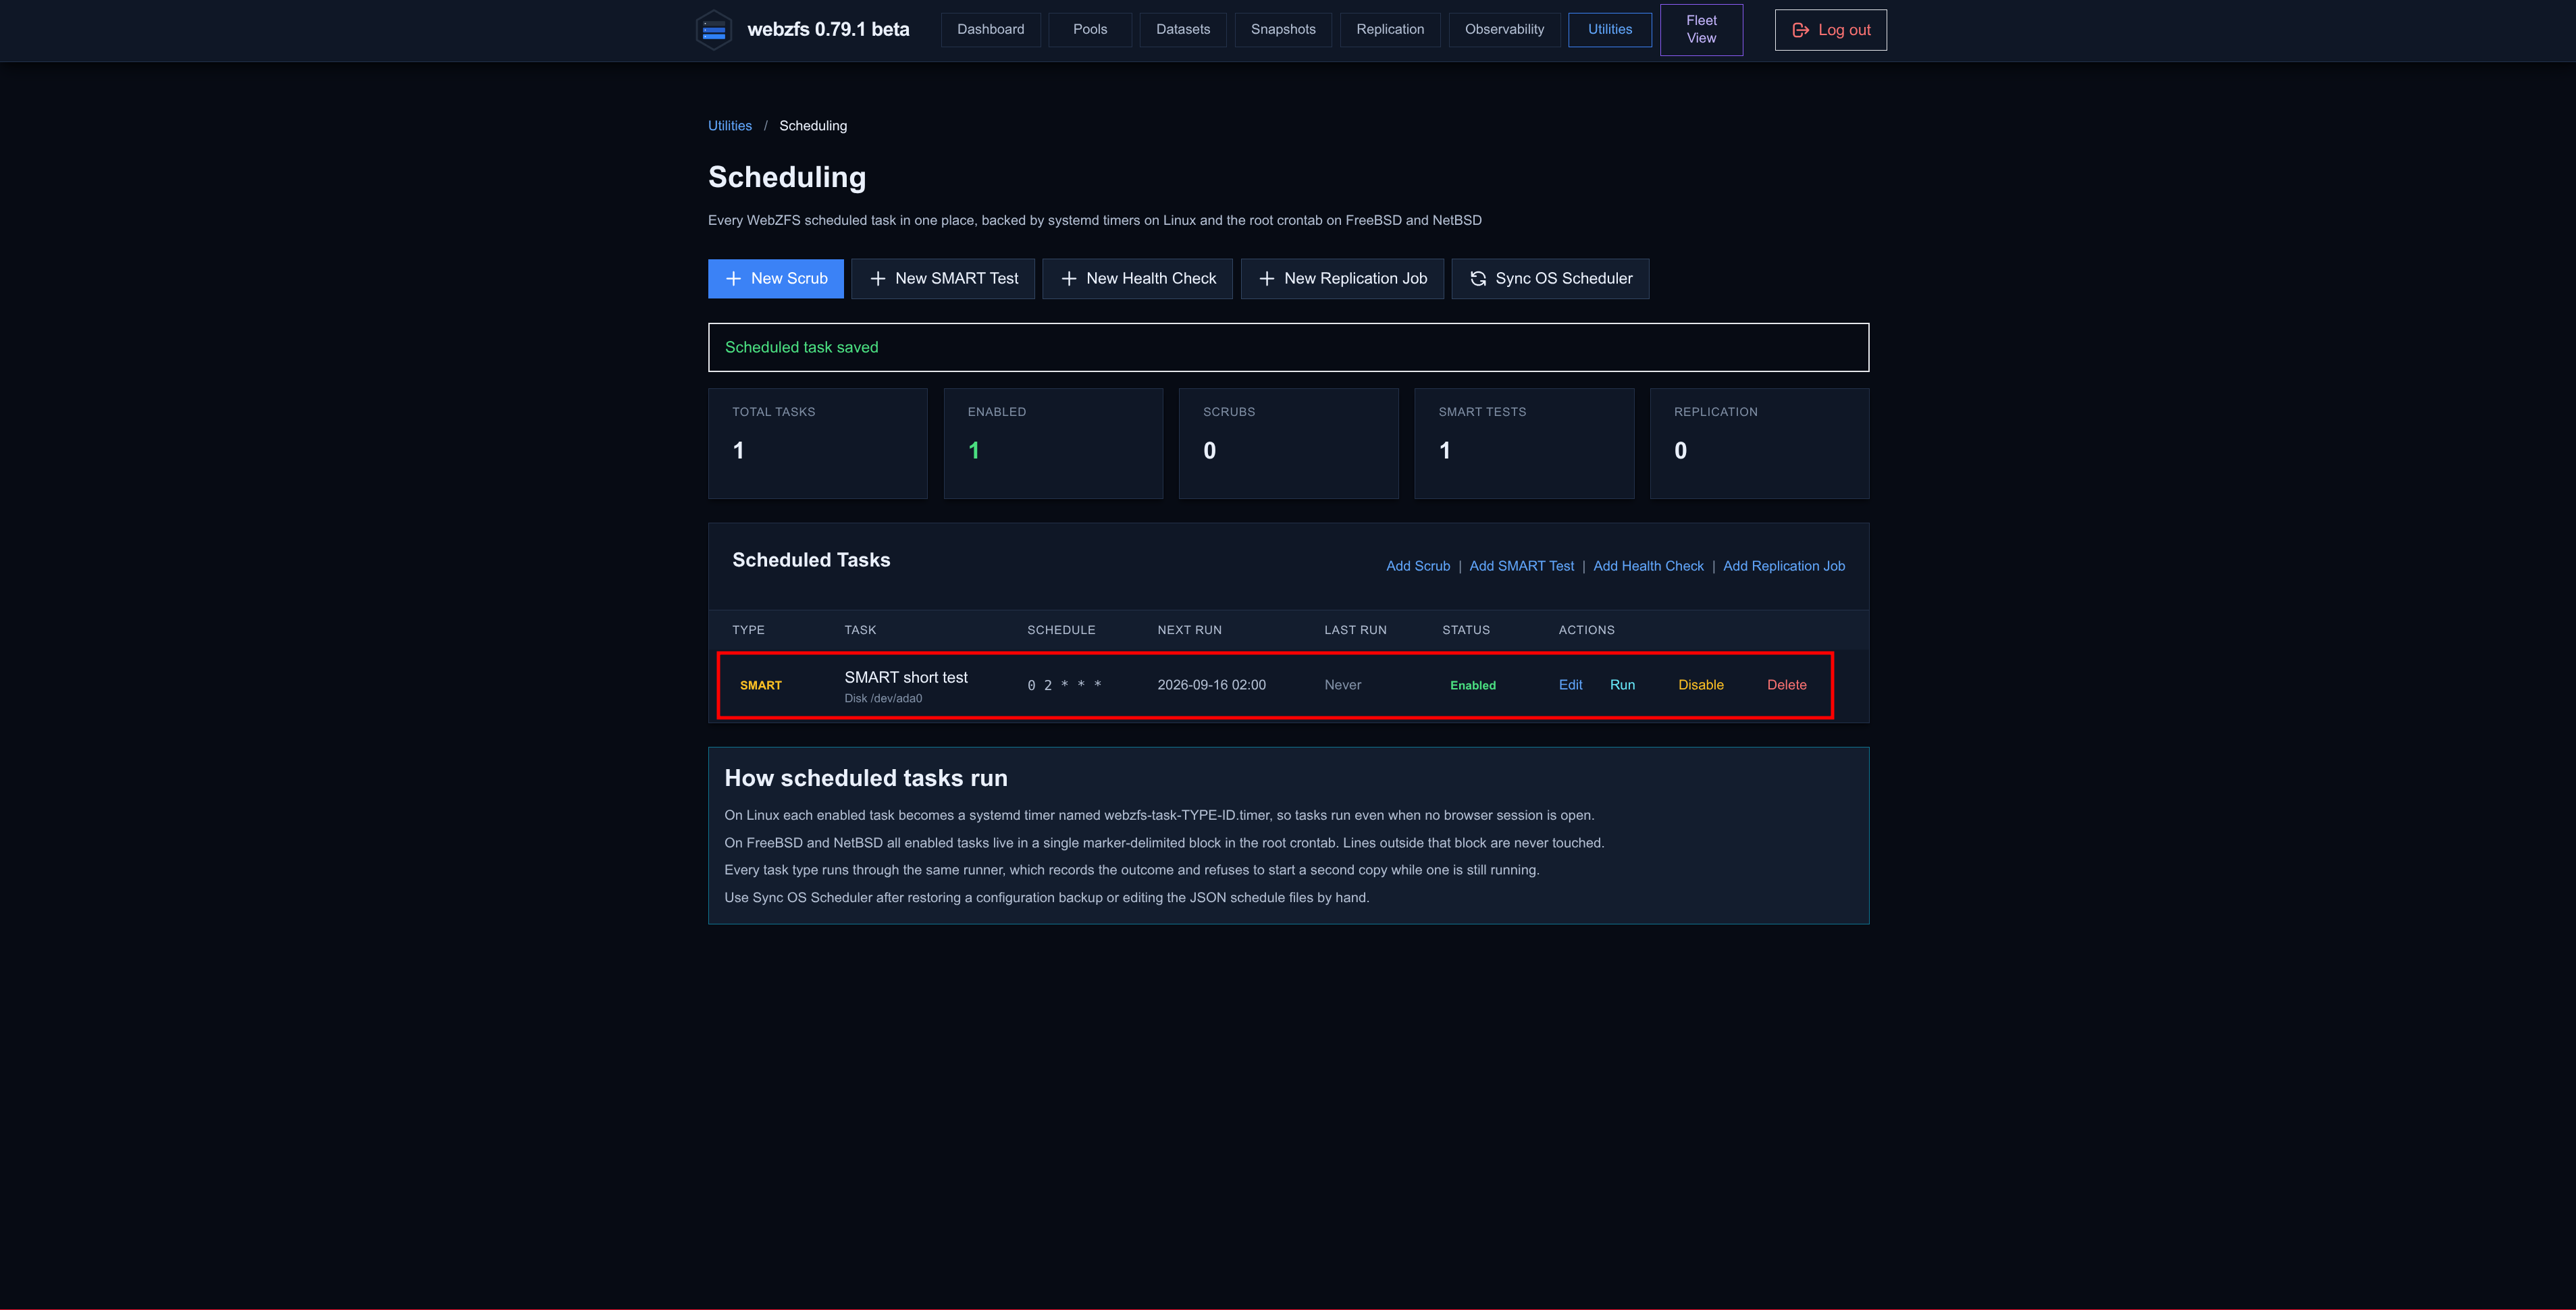
Schedule SMART tests; it actually takes us to the generic Scheduling that we have already seen earlier in this article.
|
|
|
|
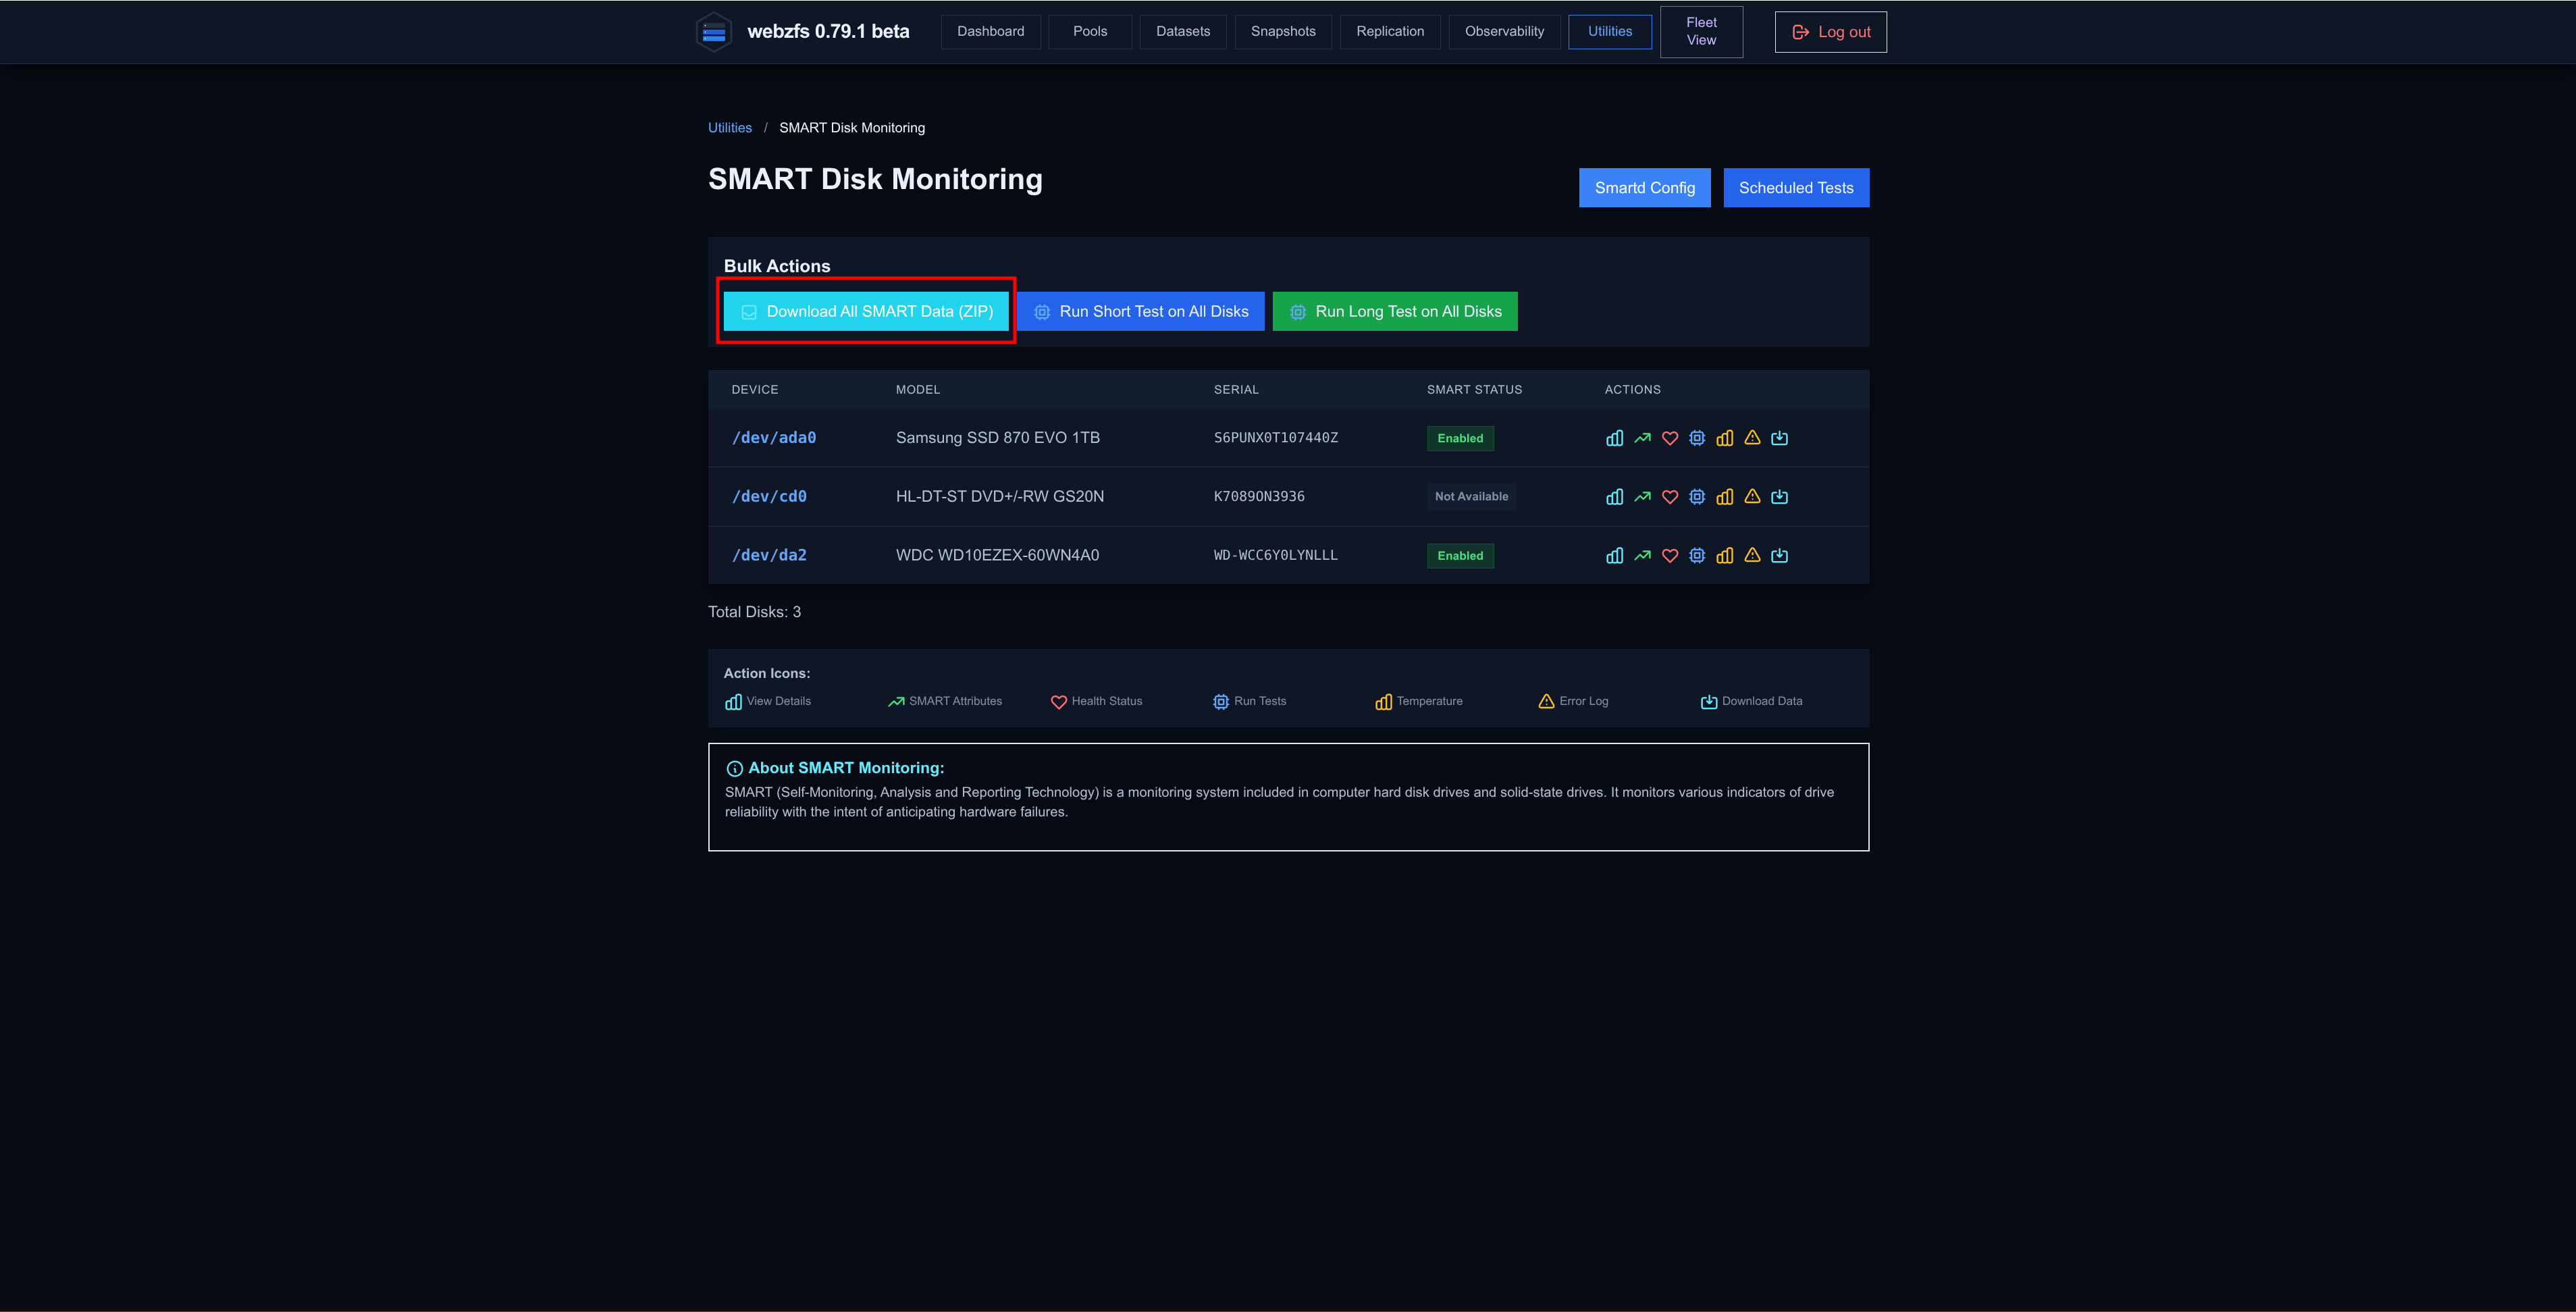
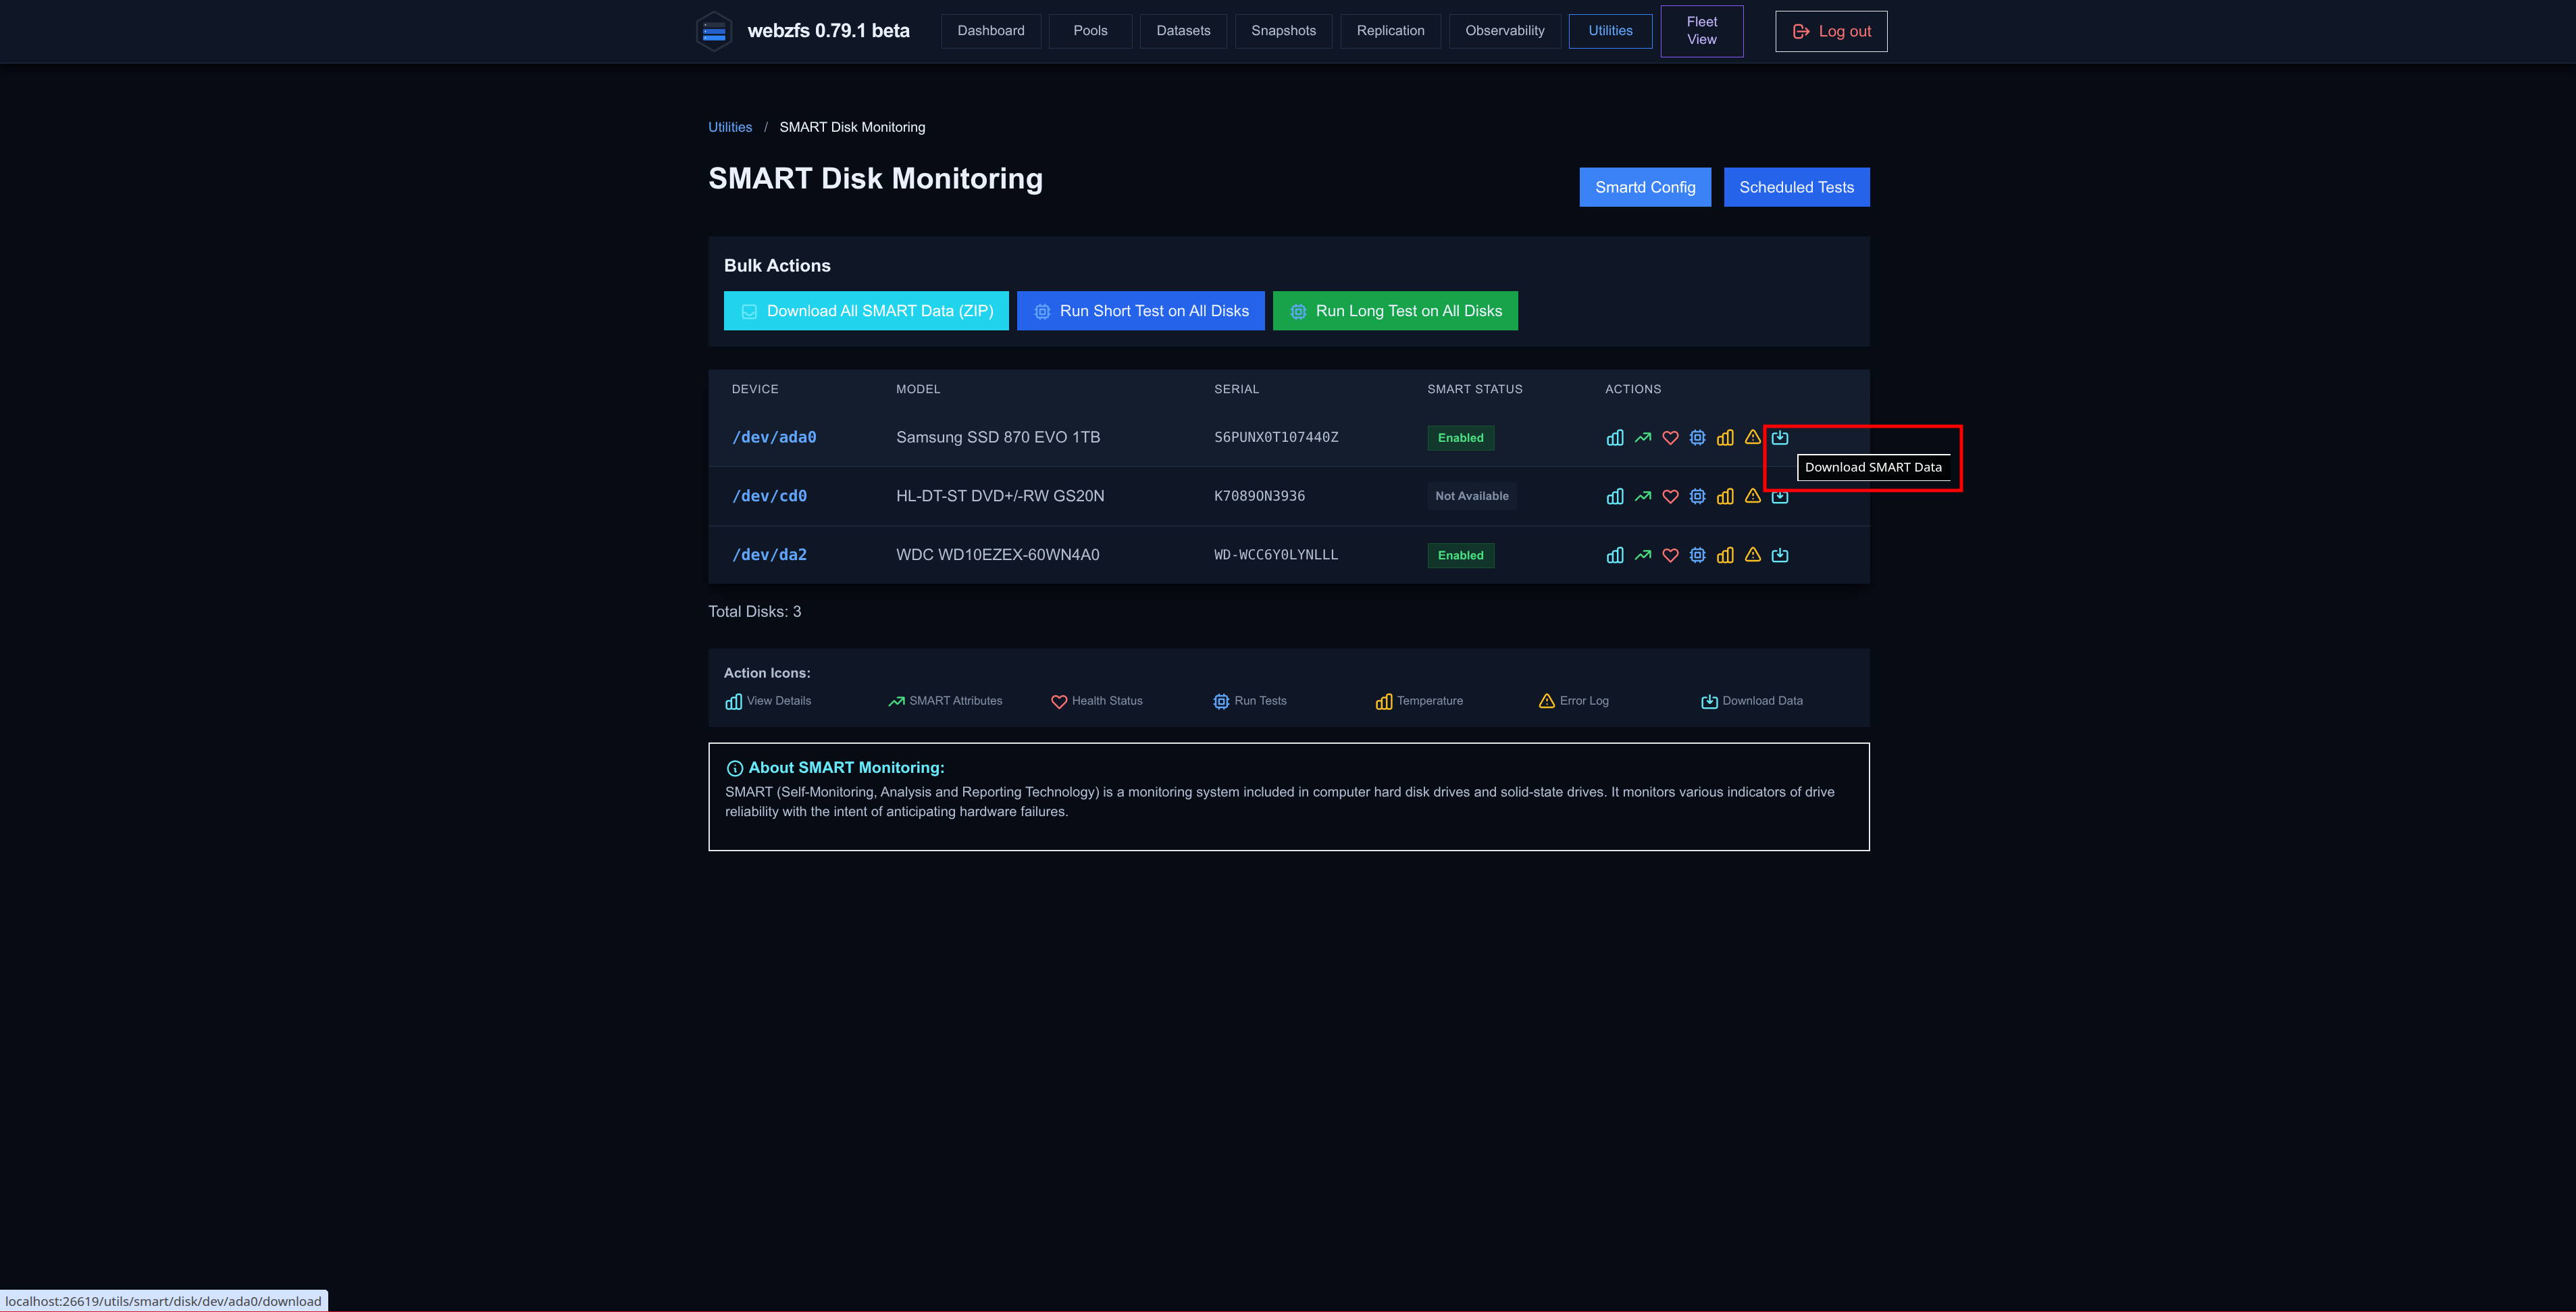
We can also download the SMART info of the disks.
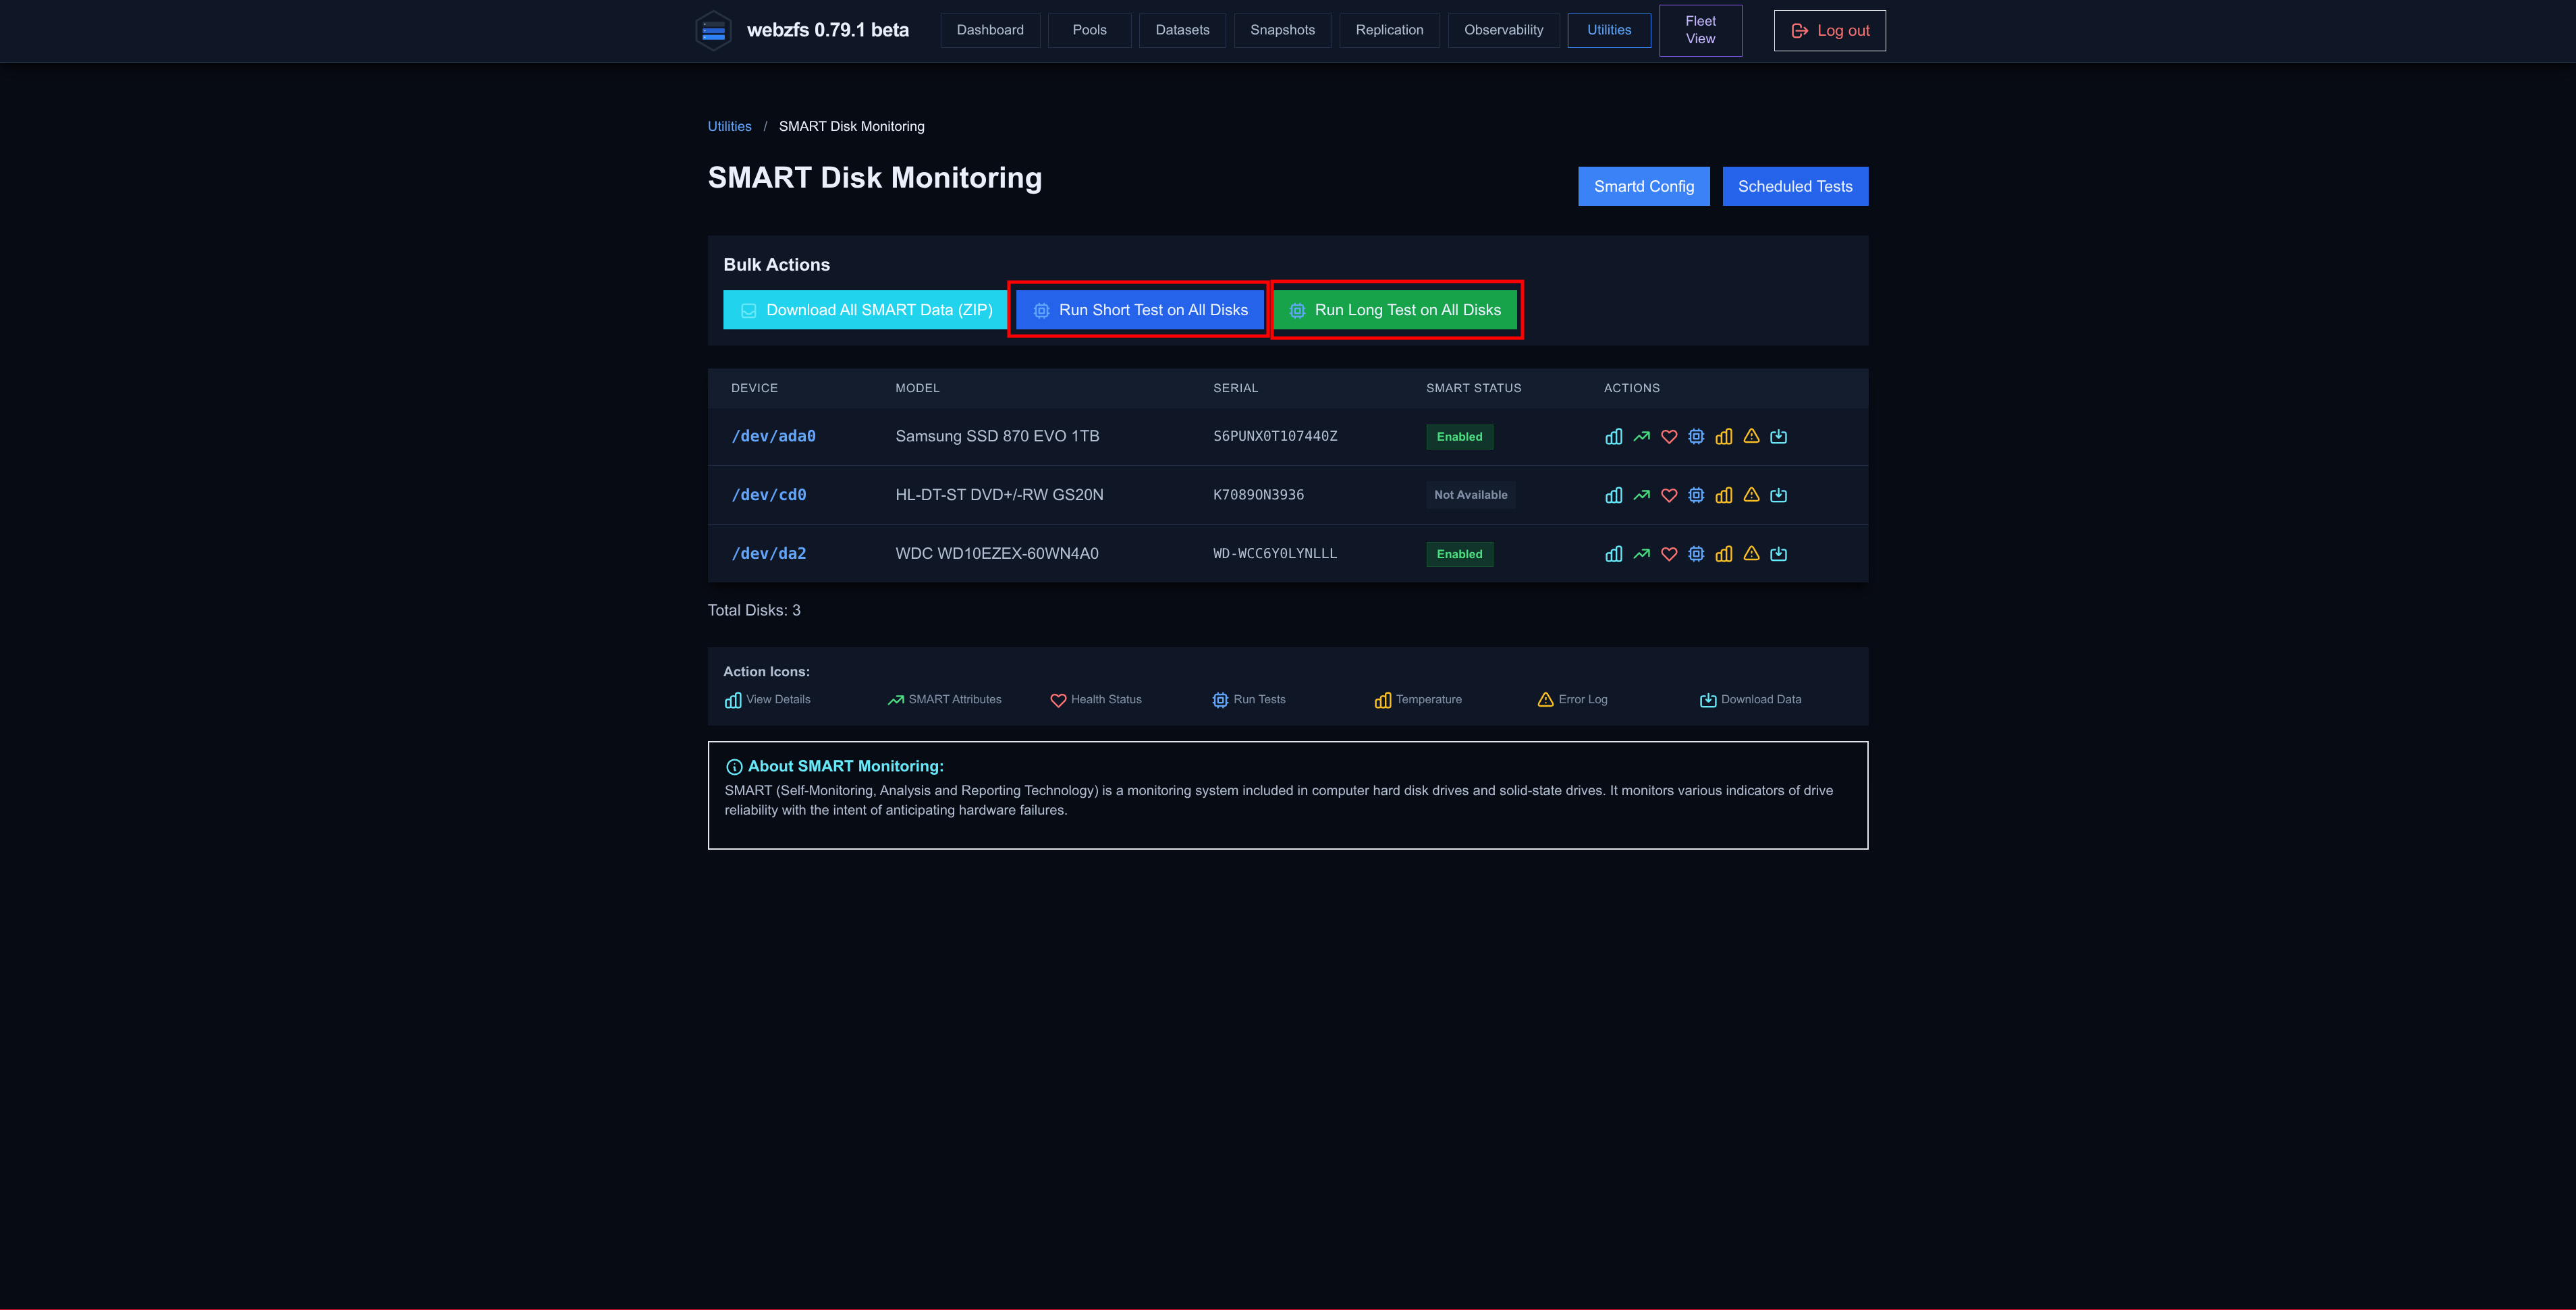
Or run both short and long tests on all disks, but both buttons seem to be buggy; no error appears but no test runs.
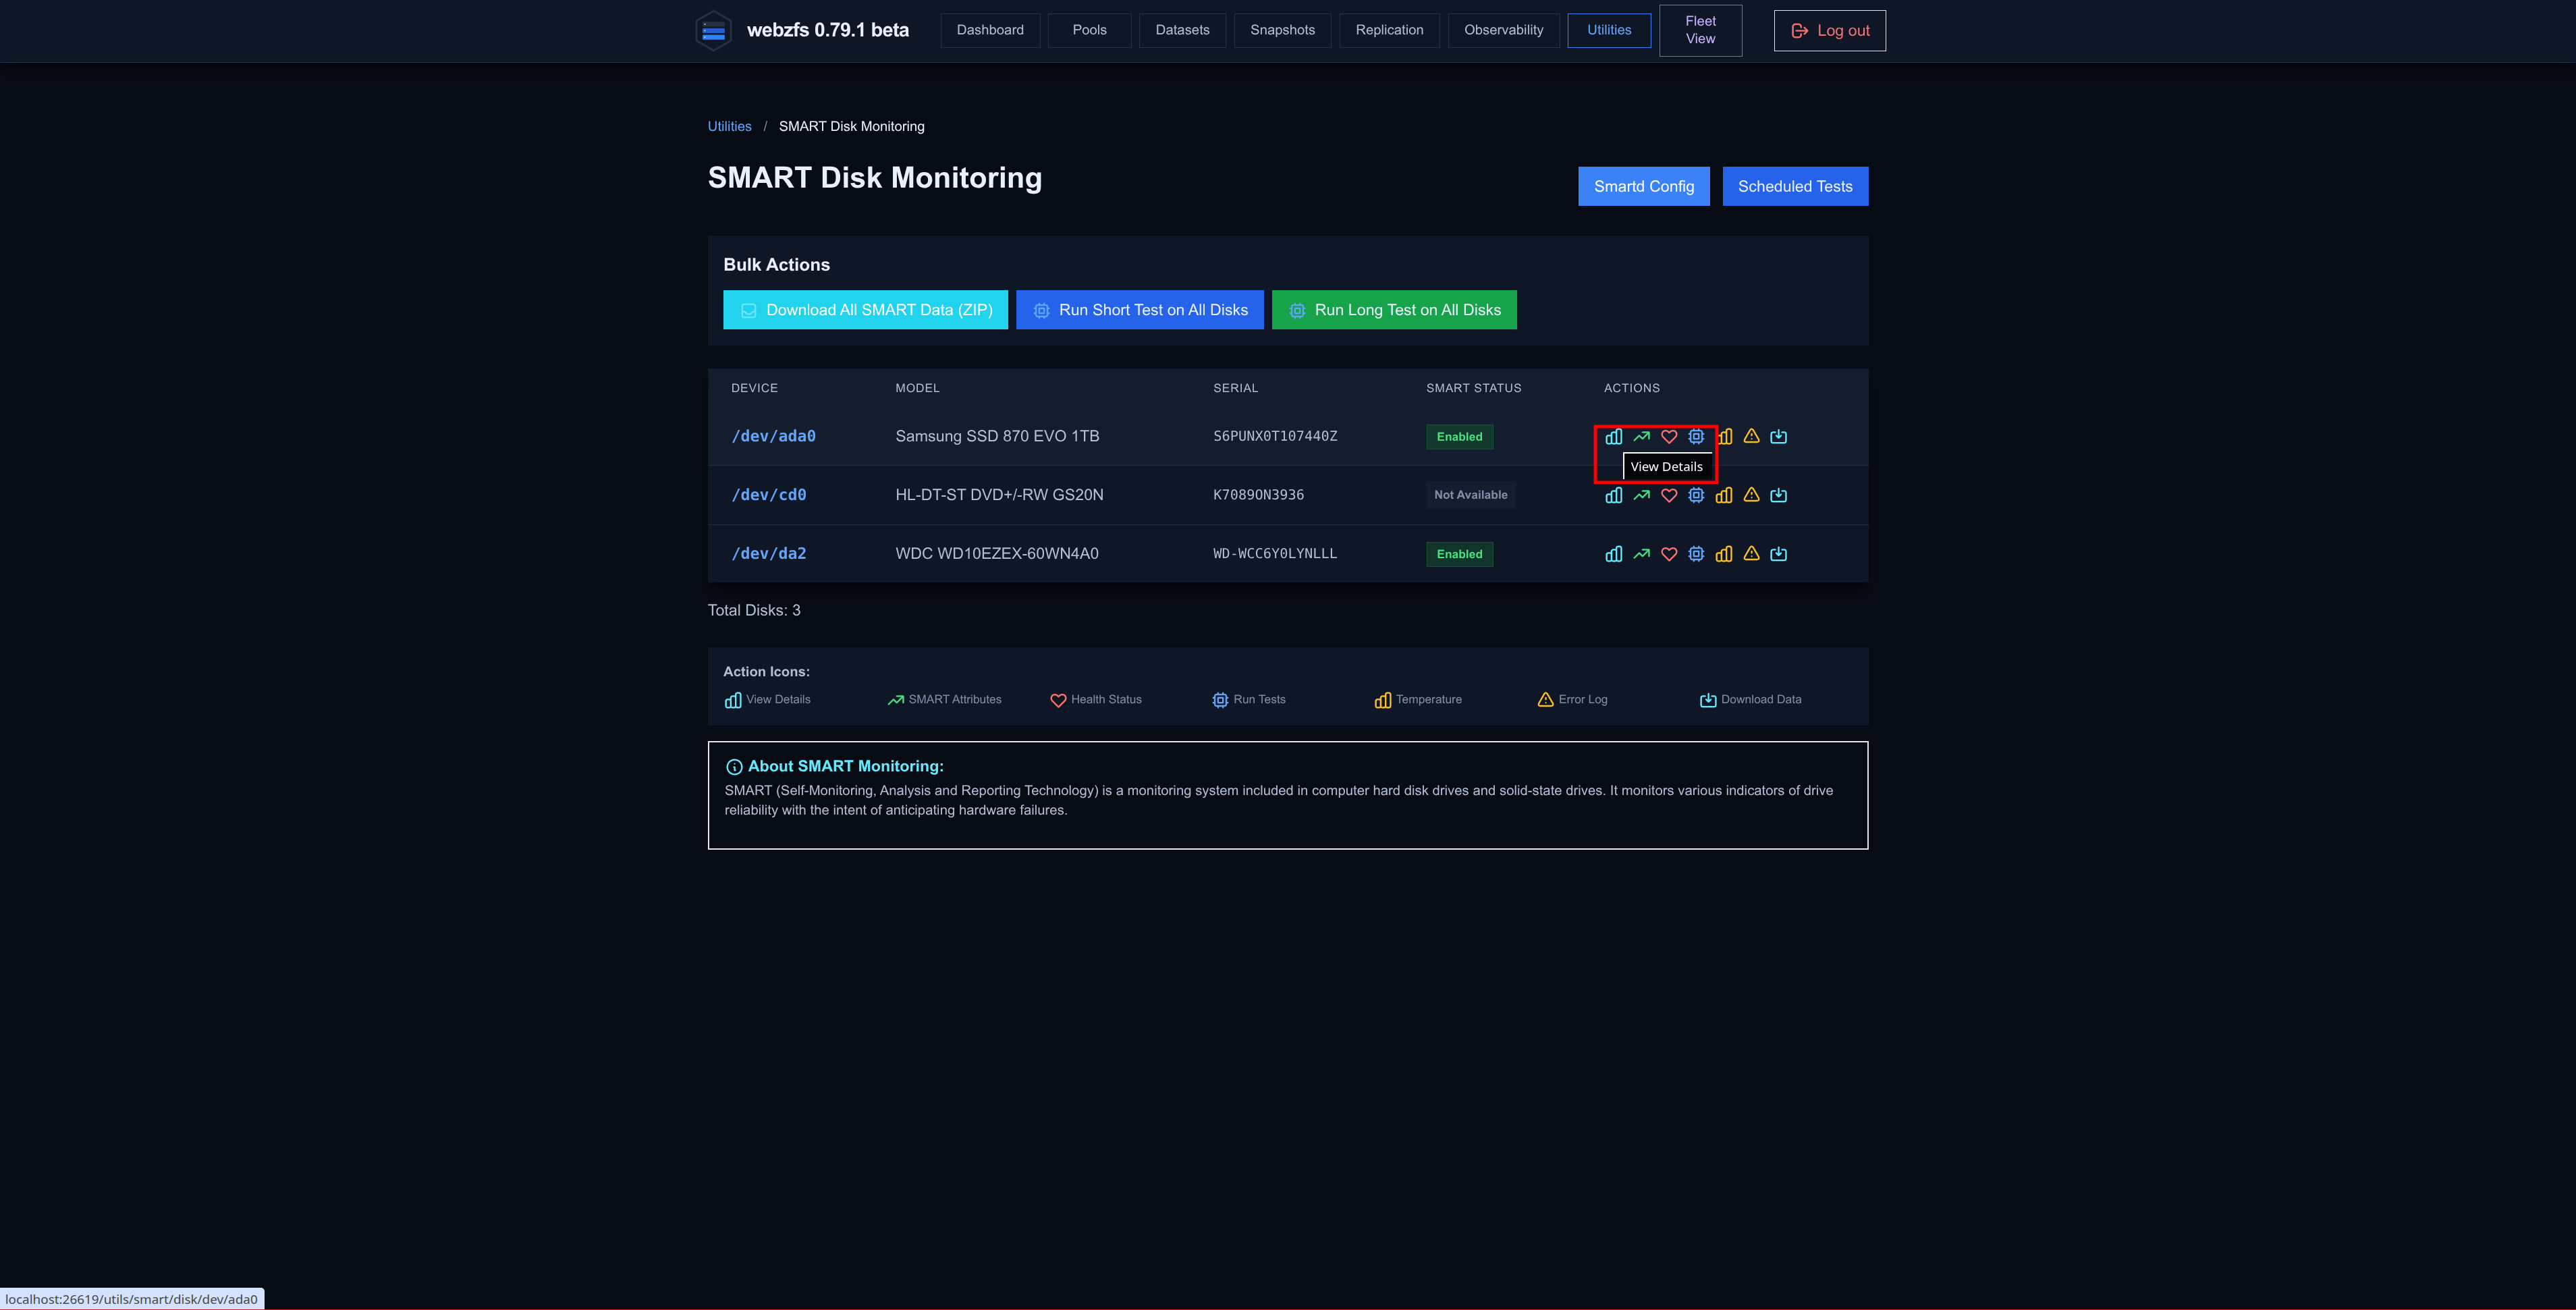
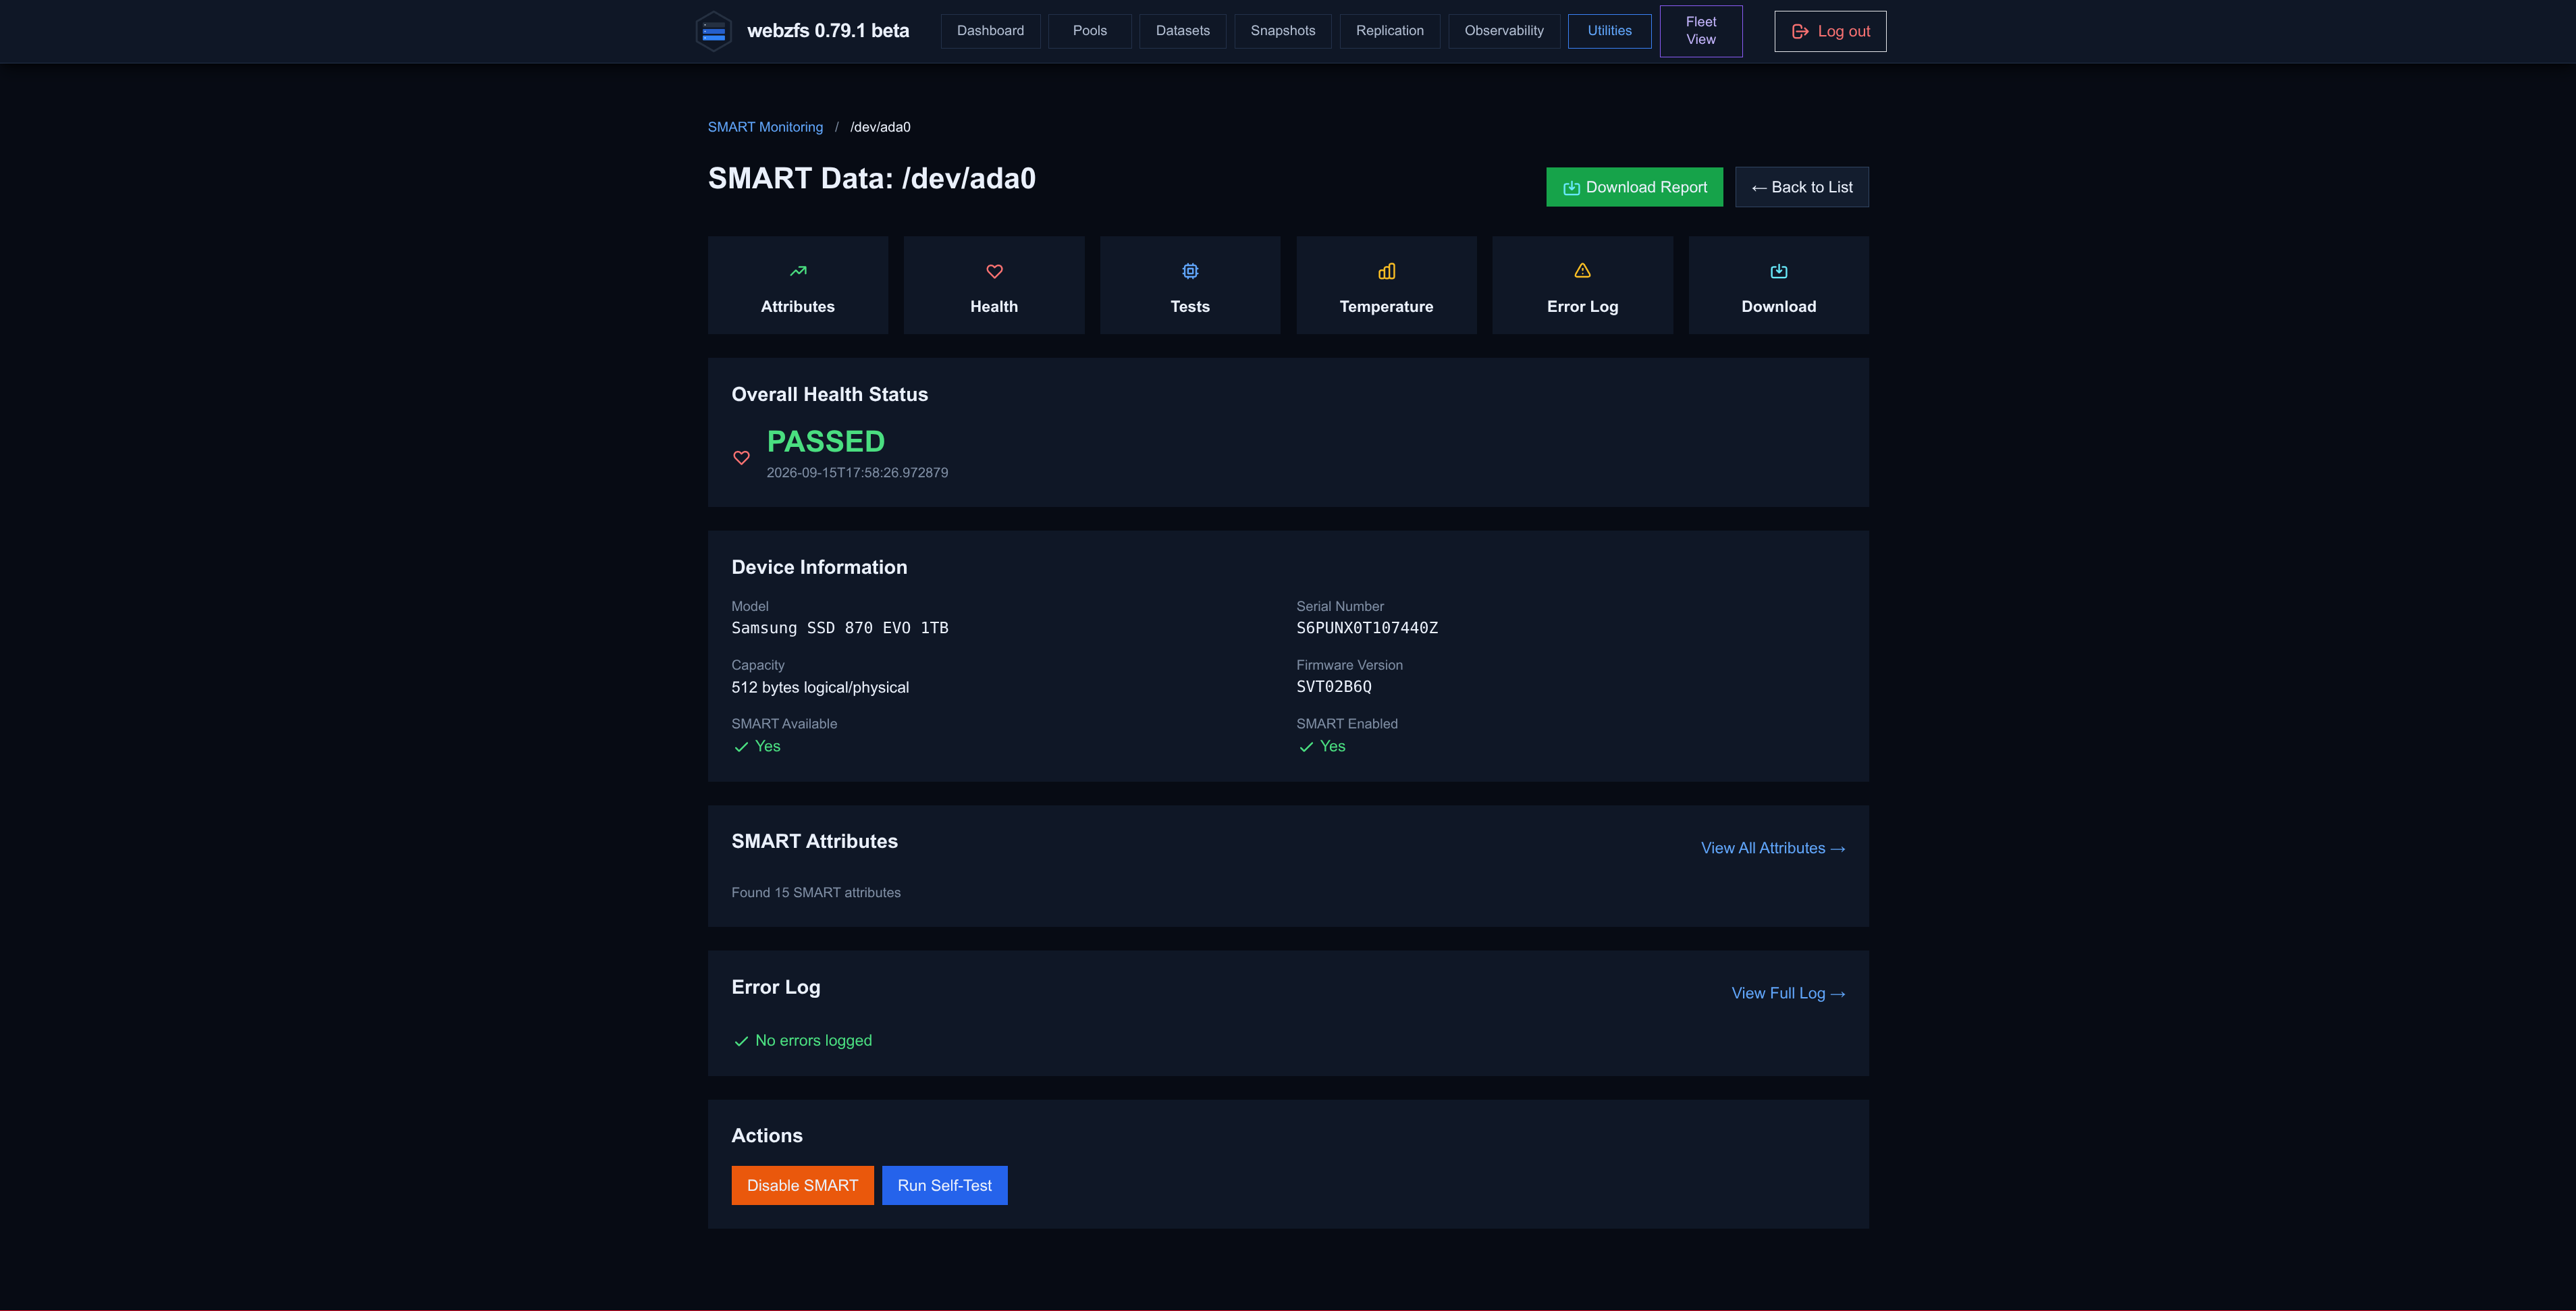
We can also see the disk details.
|
|
All the Attributes, Health, Tests, Temperature, Error Log, Download buttons are the same as those that appear in the disk list, so those sections will be analyzed later.
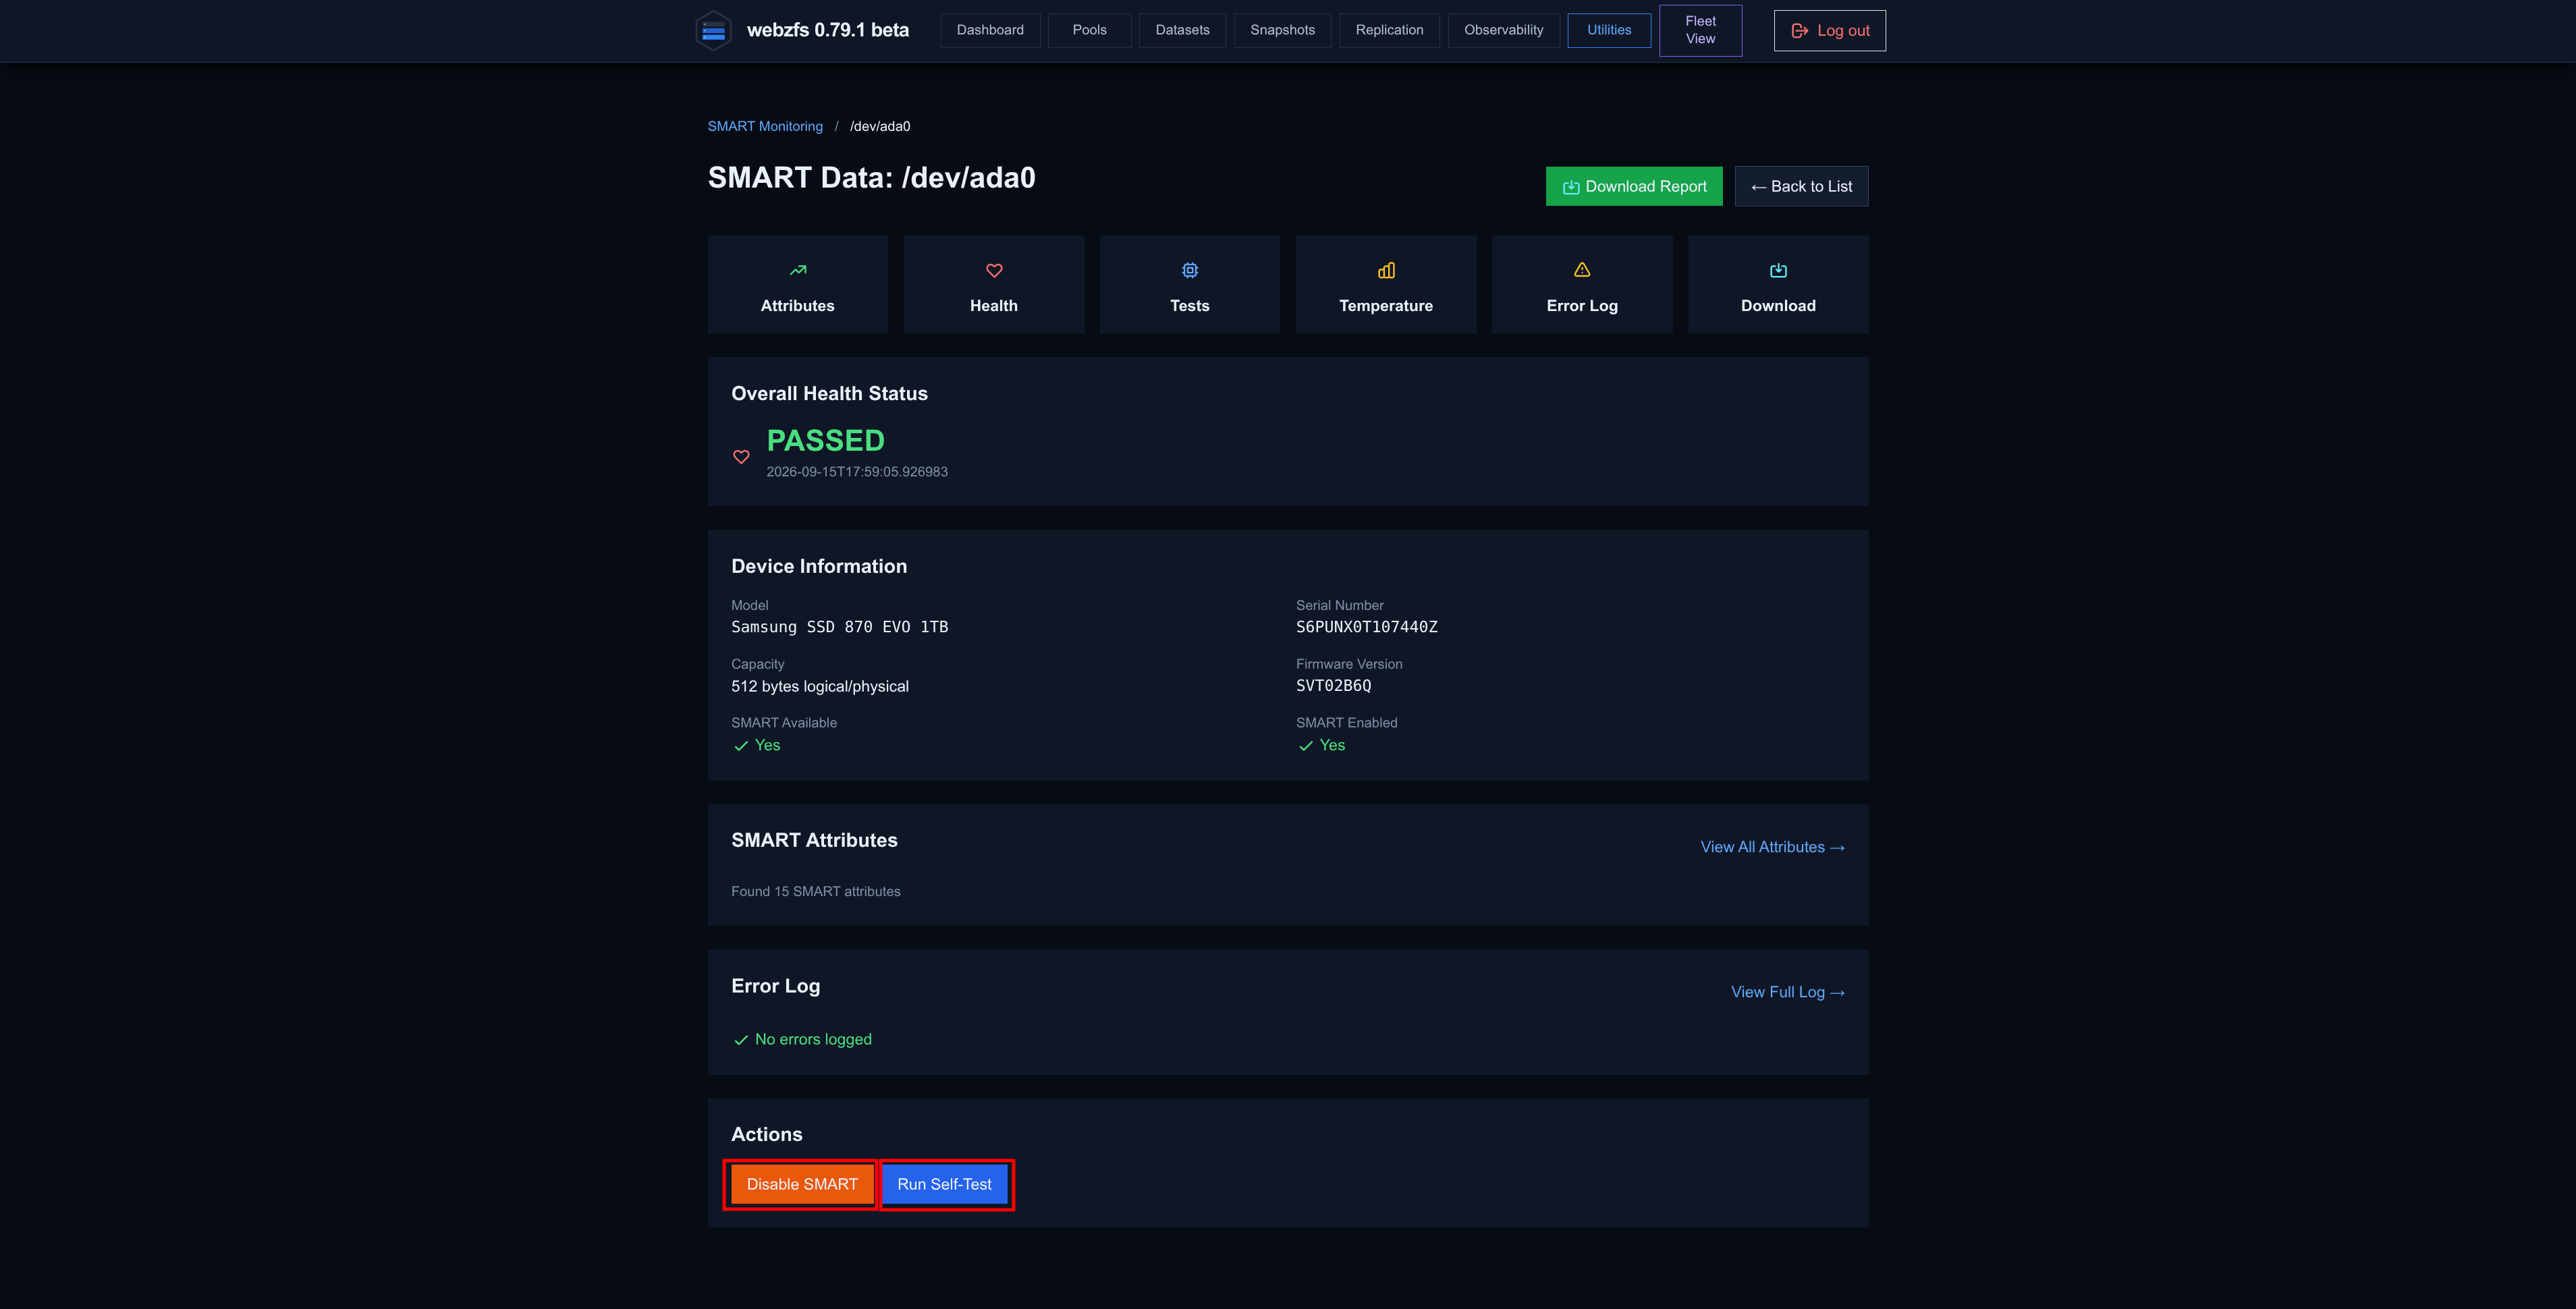
The Disable SMART and Run Self-Test buttons also seem to be buggy; they do nothing.
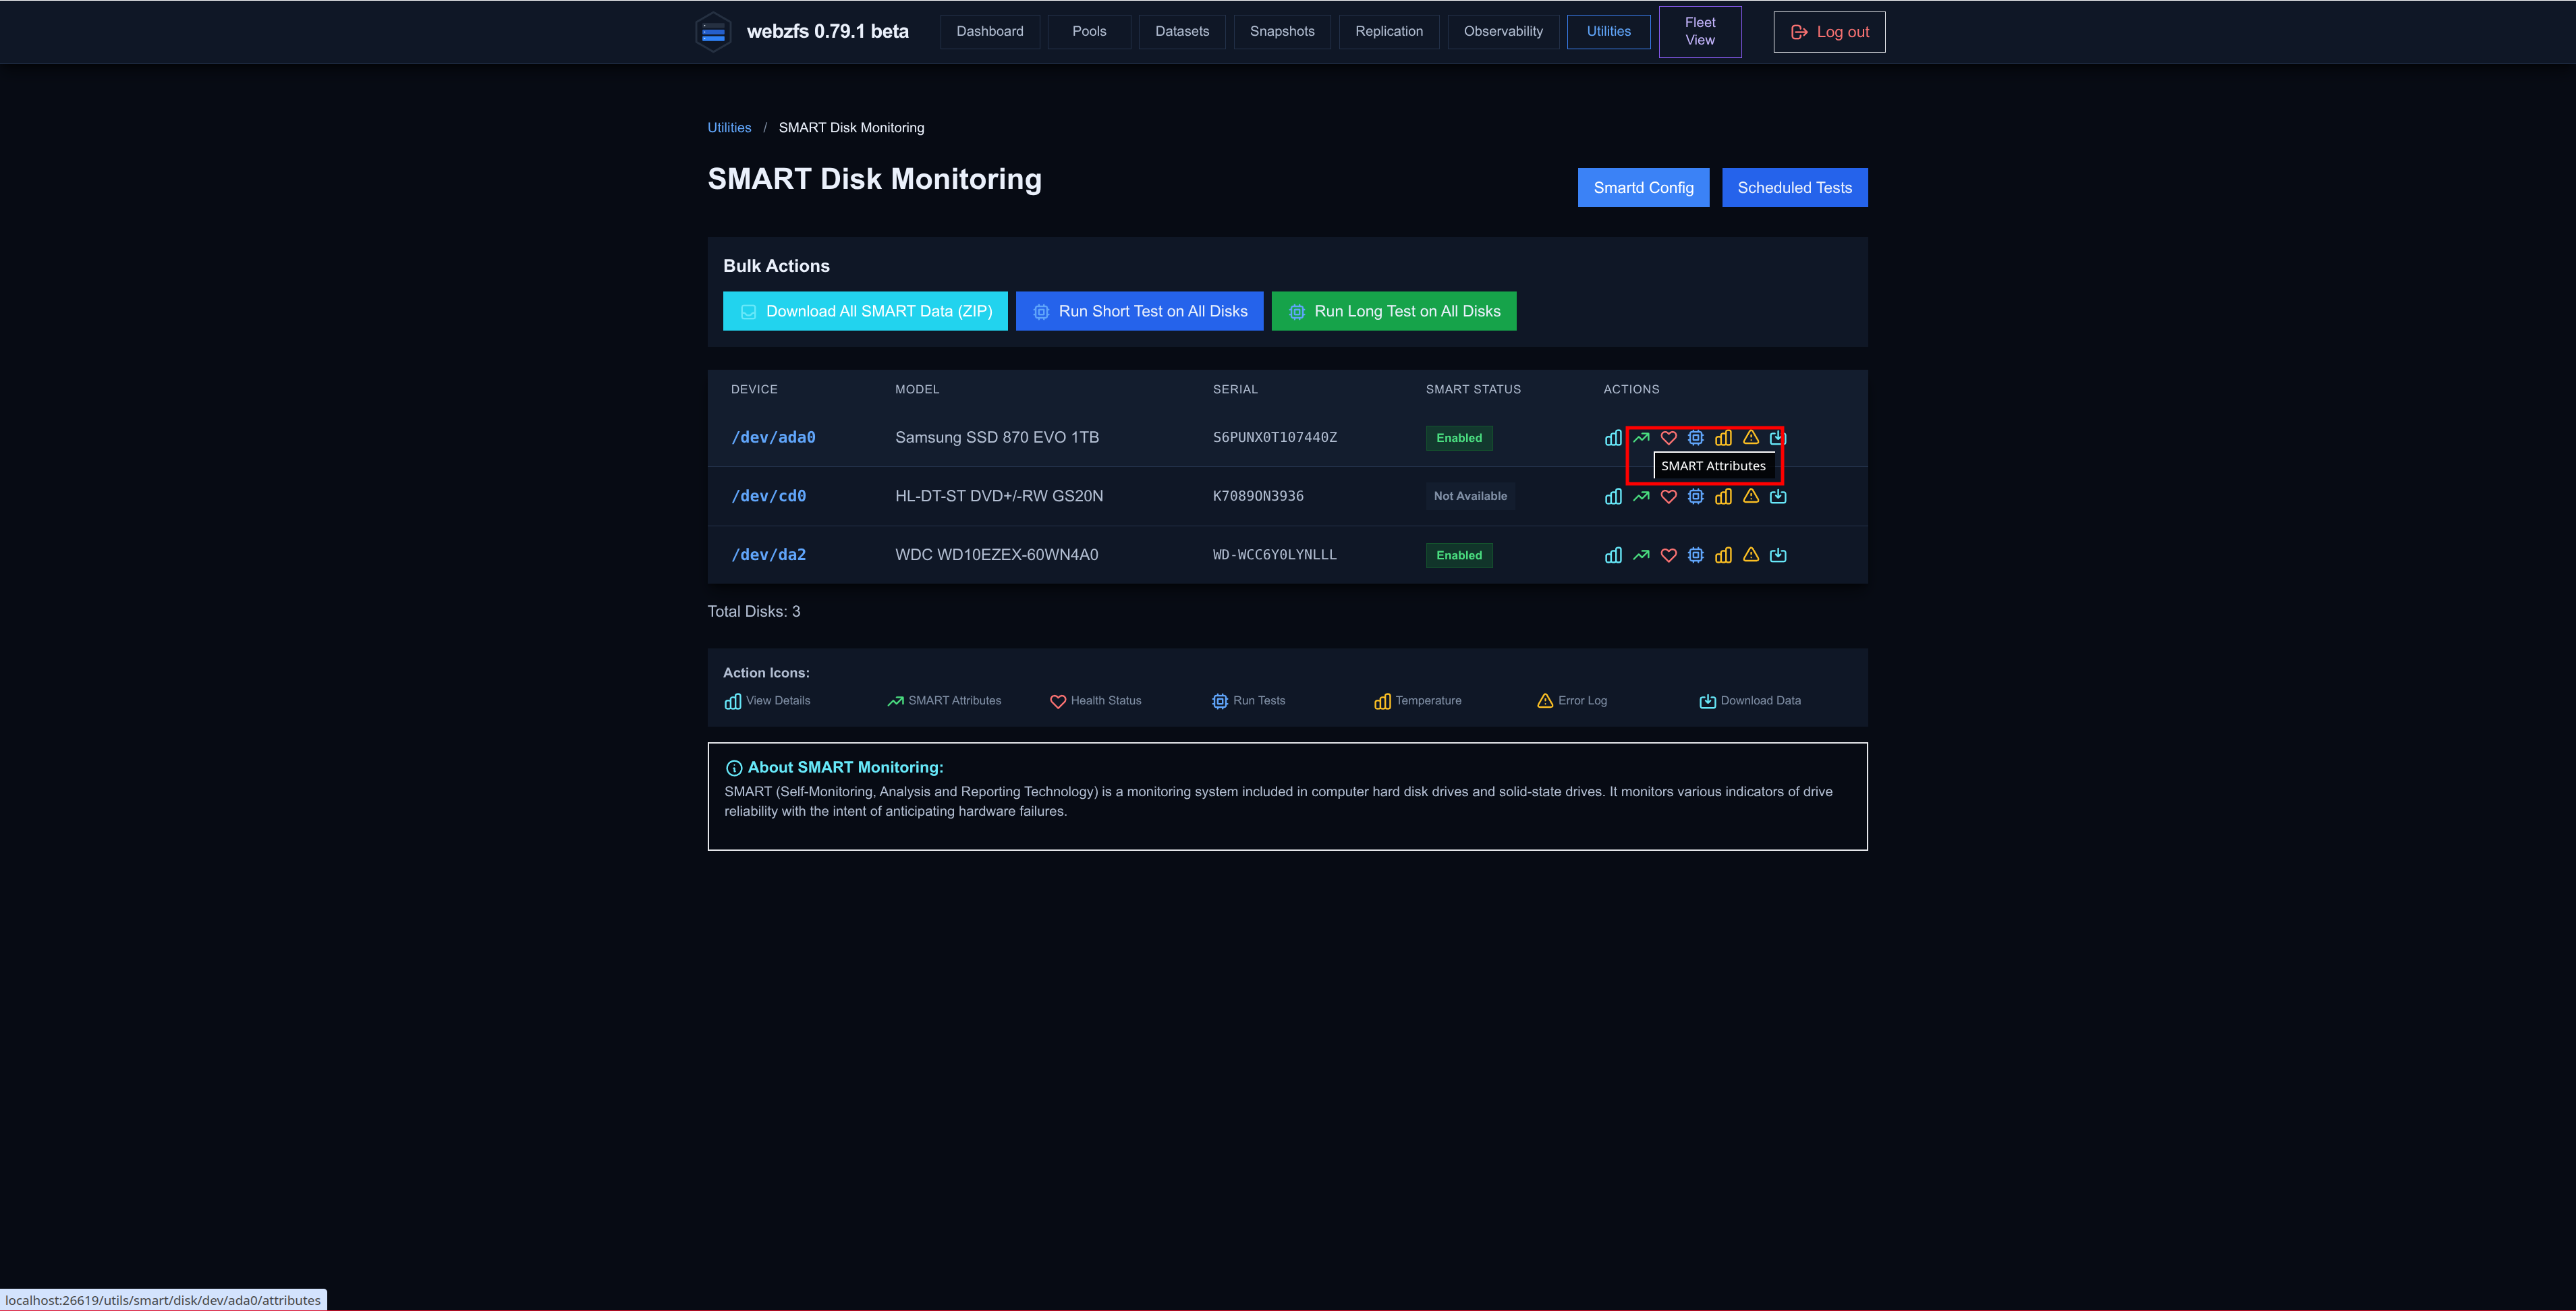
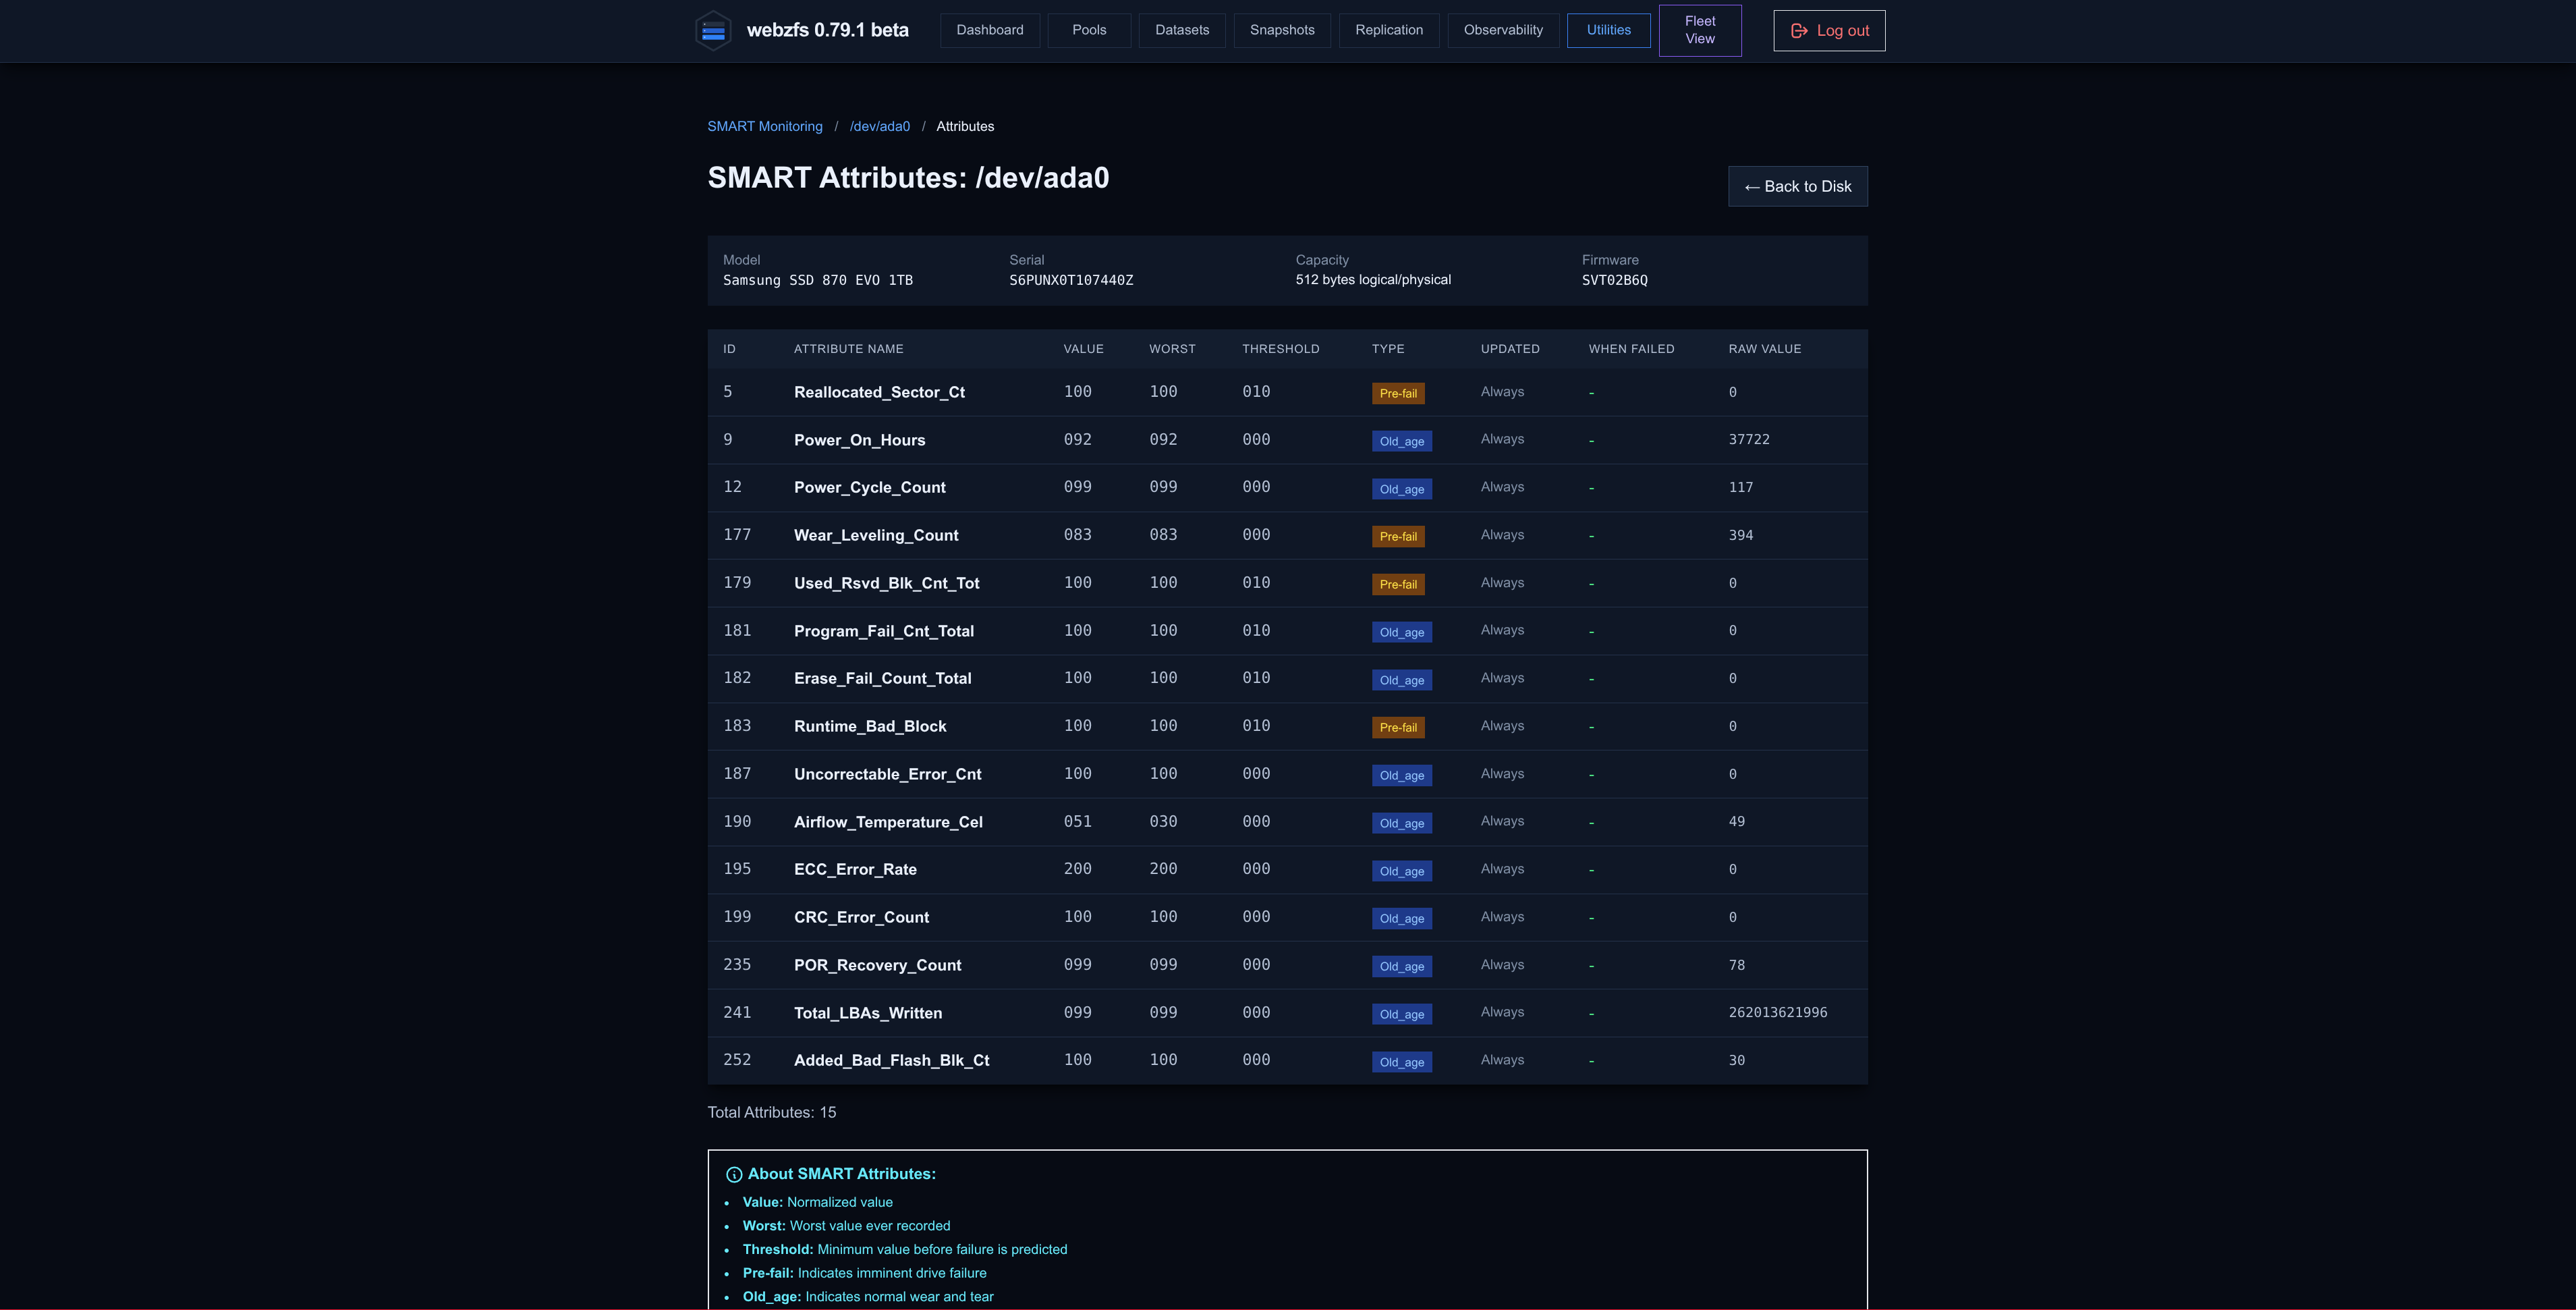
The next option lets us view the SMART attributes.
|
|
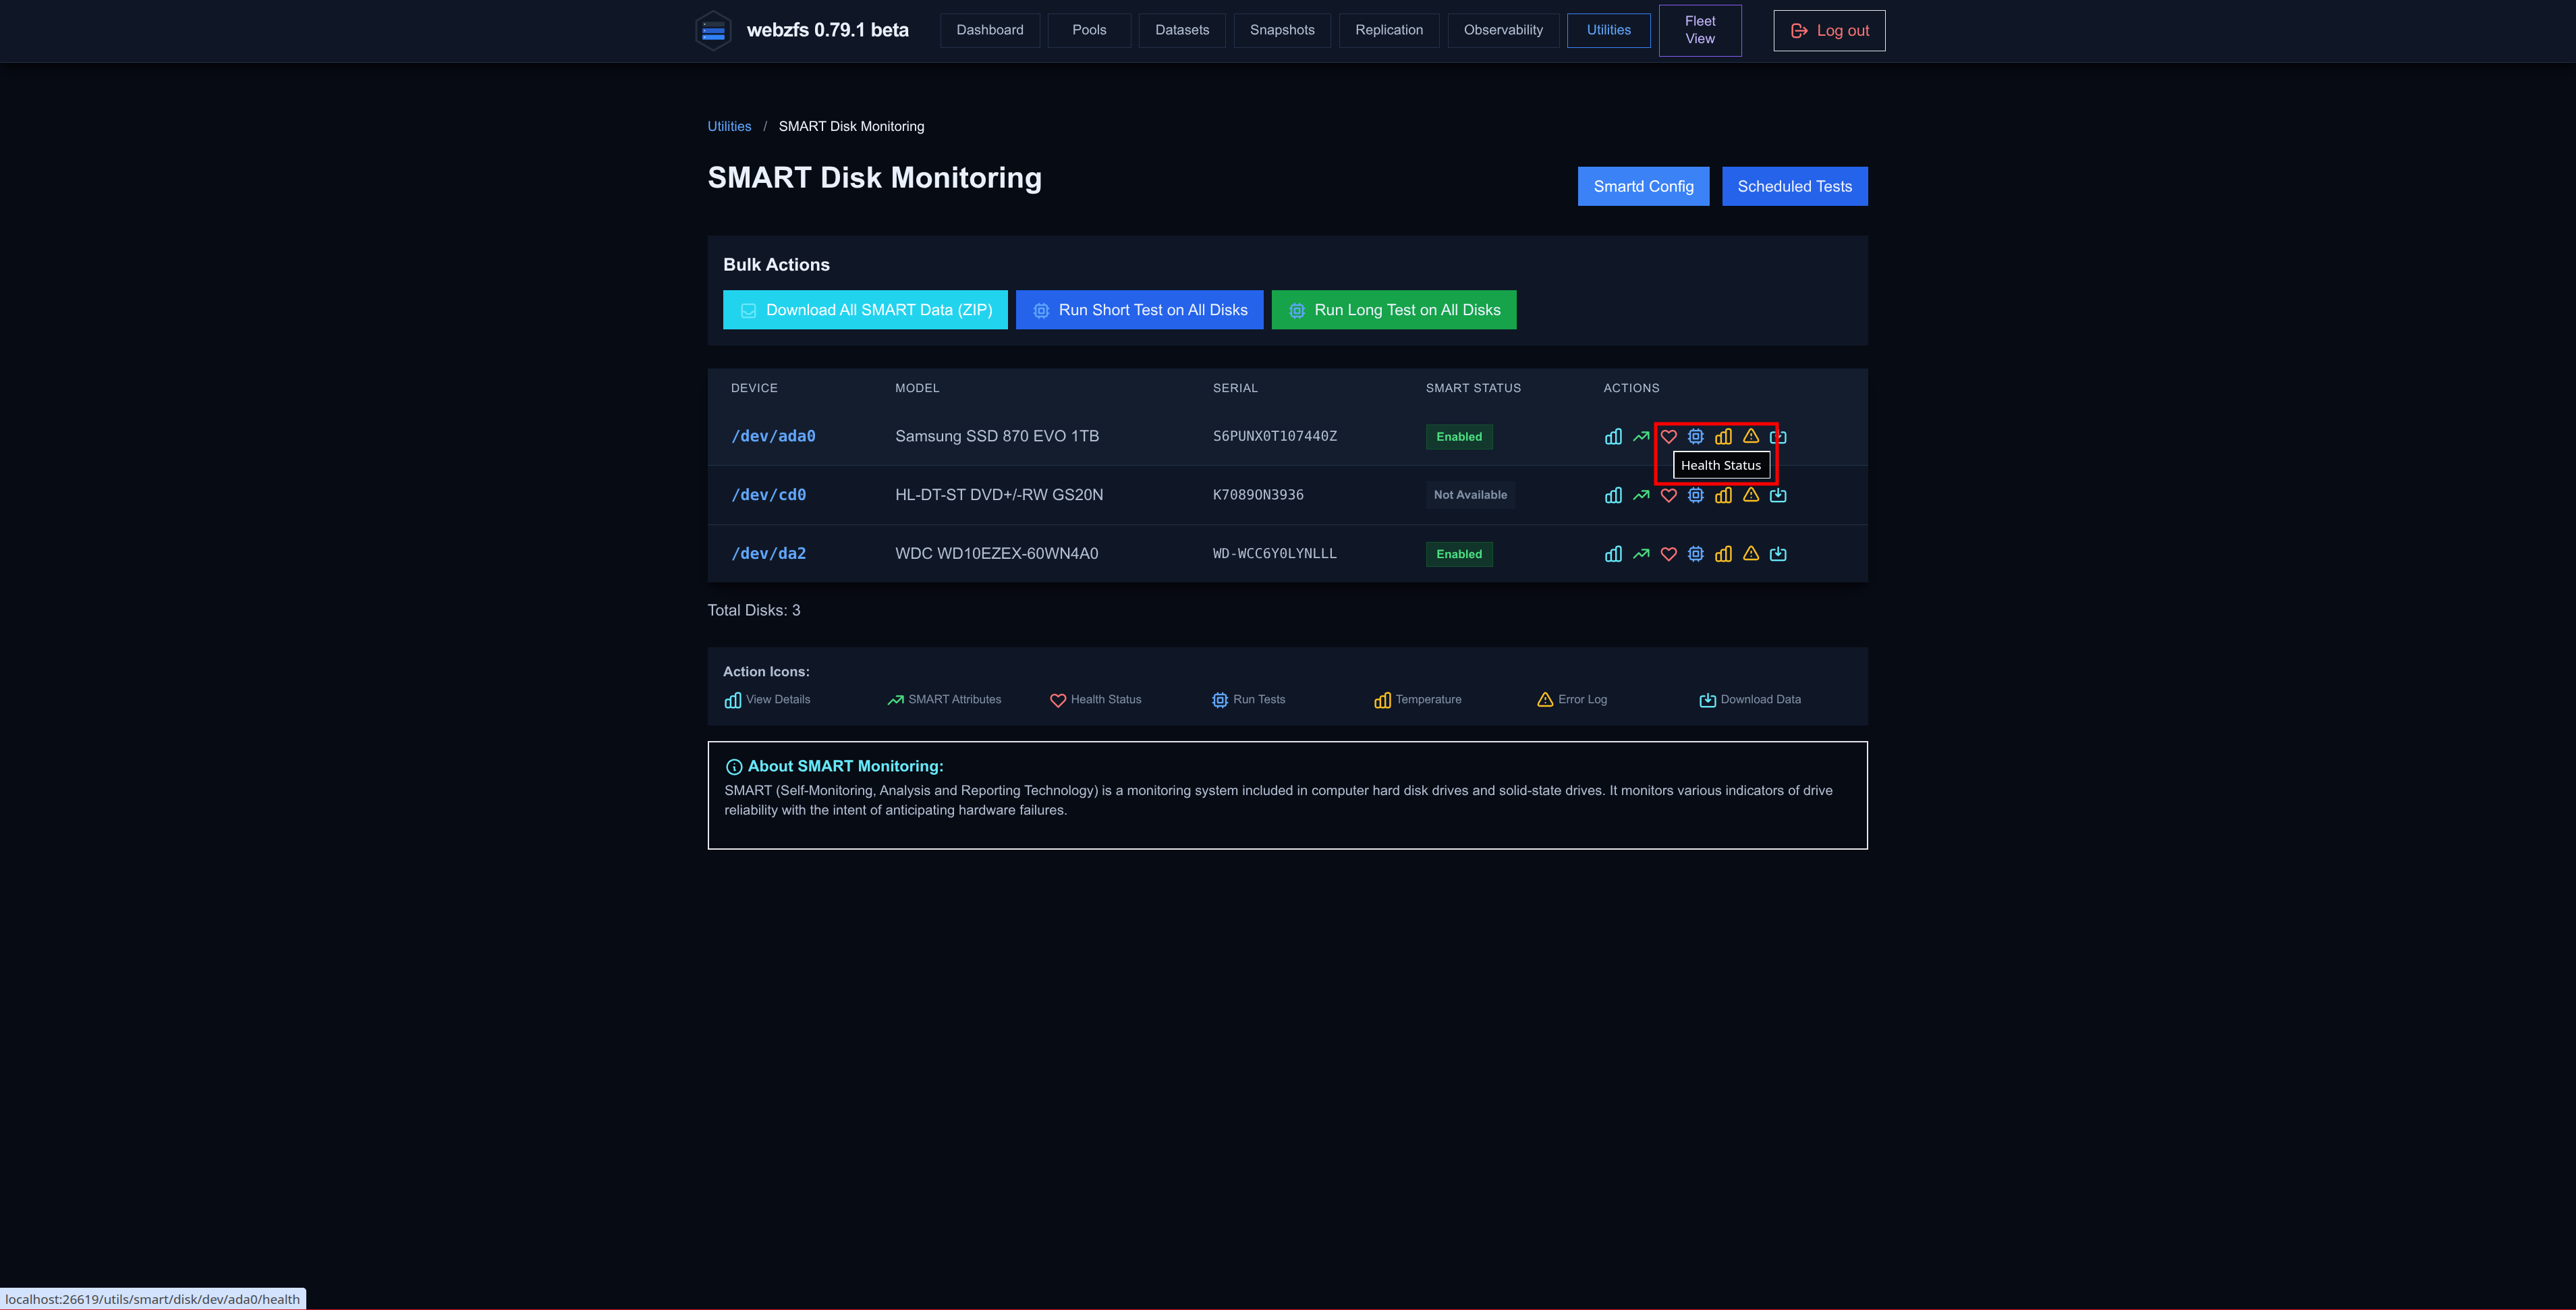
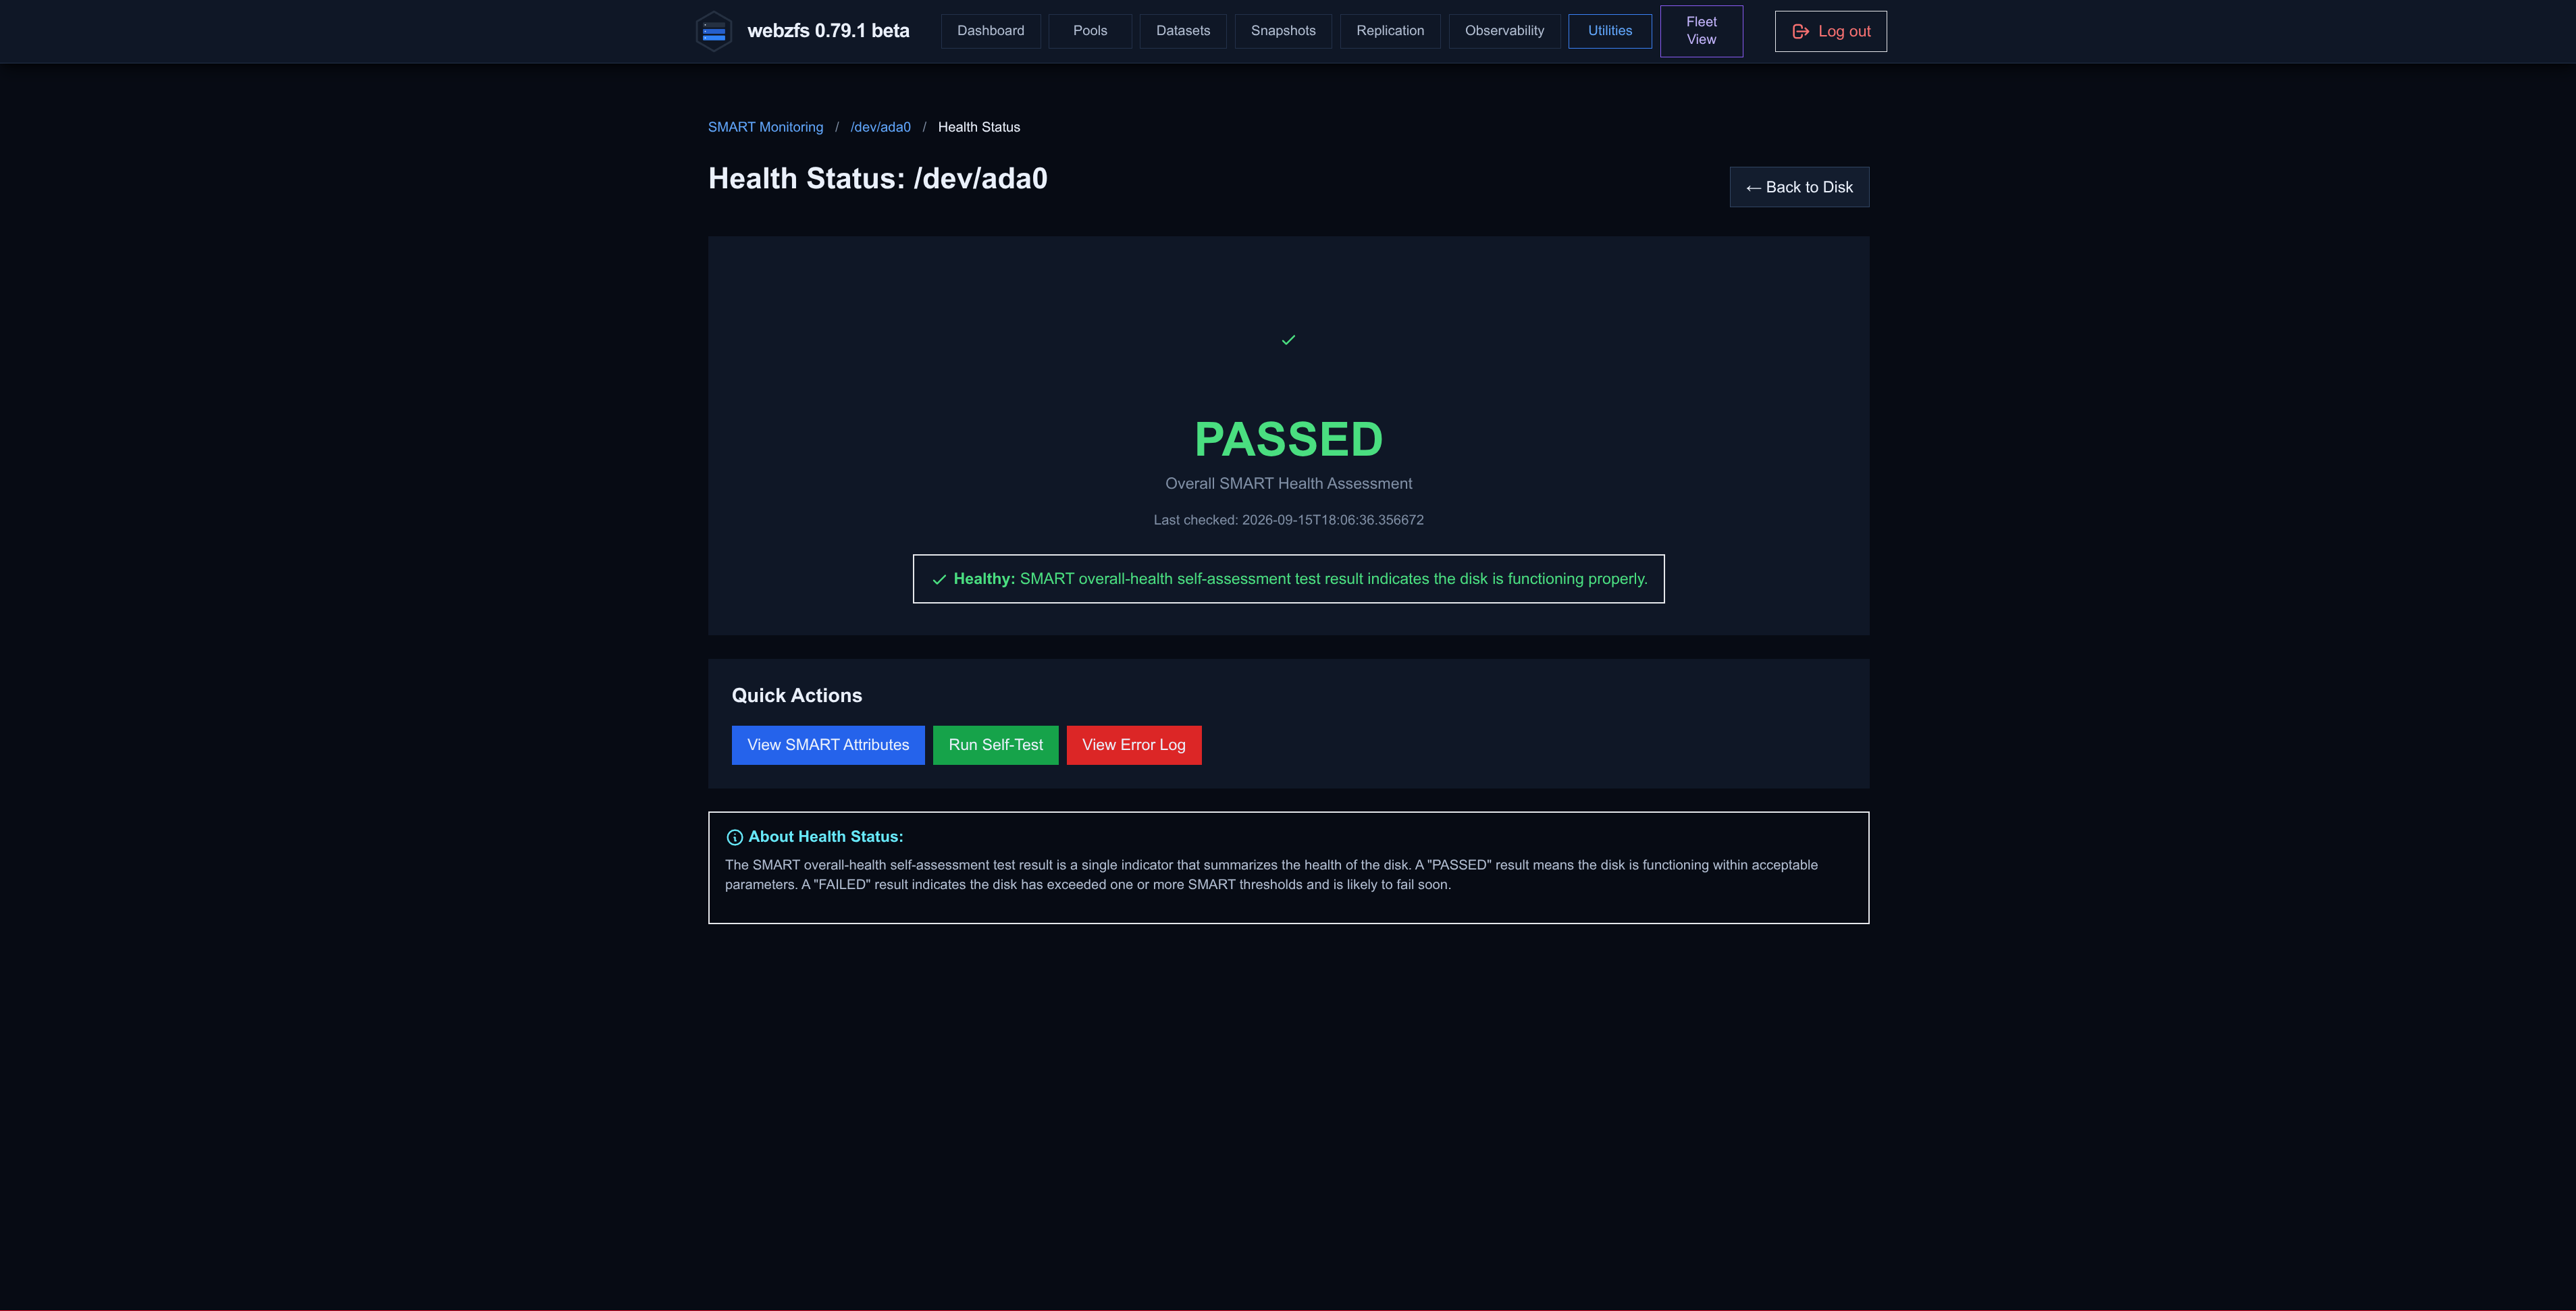
The health status.
|
|
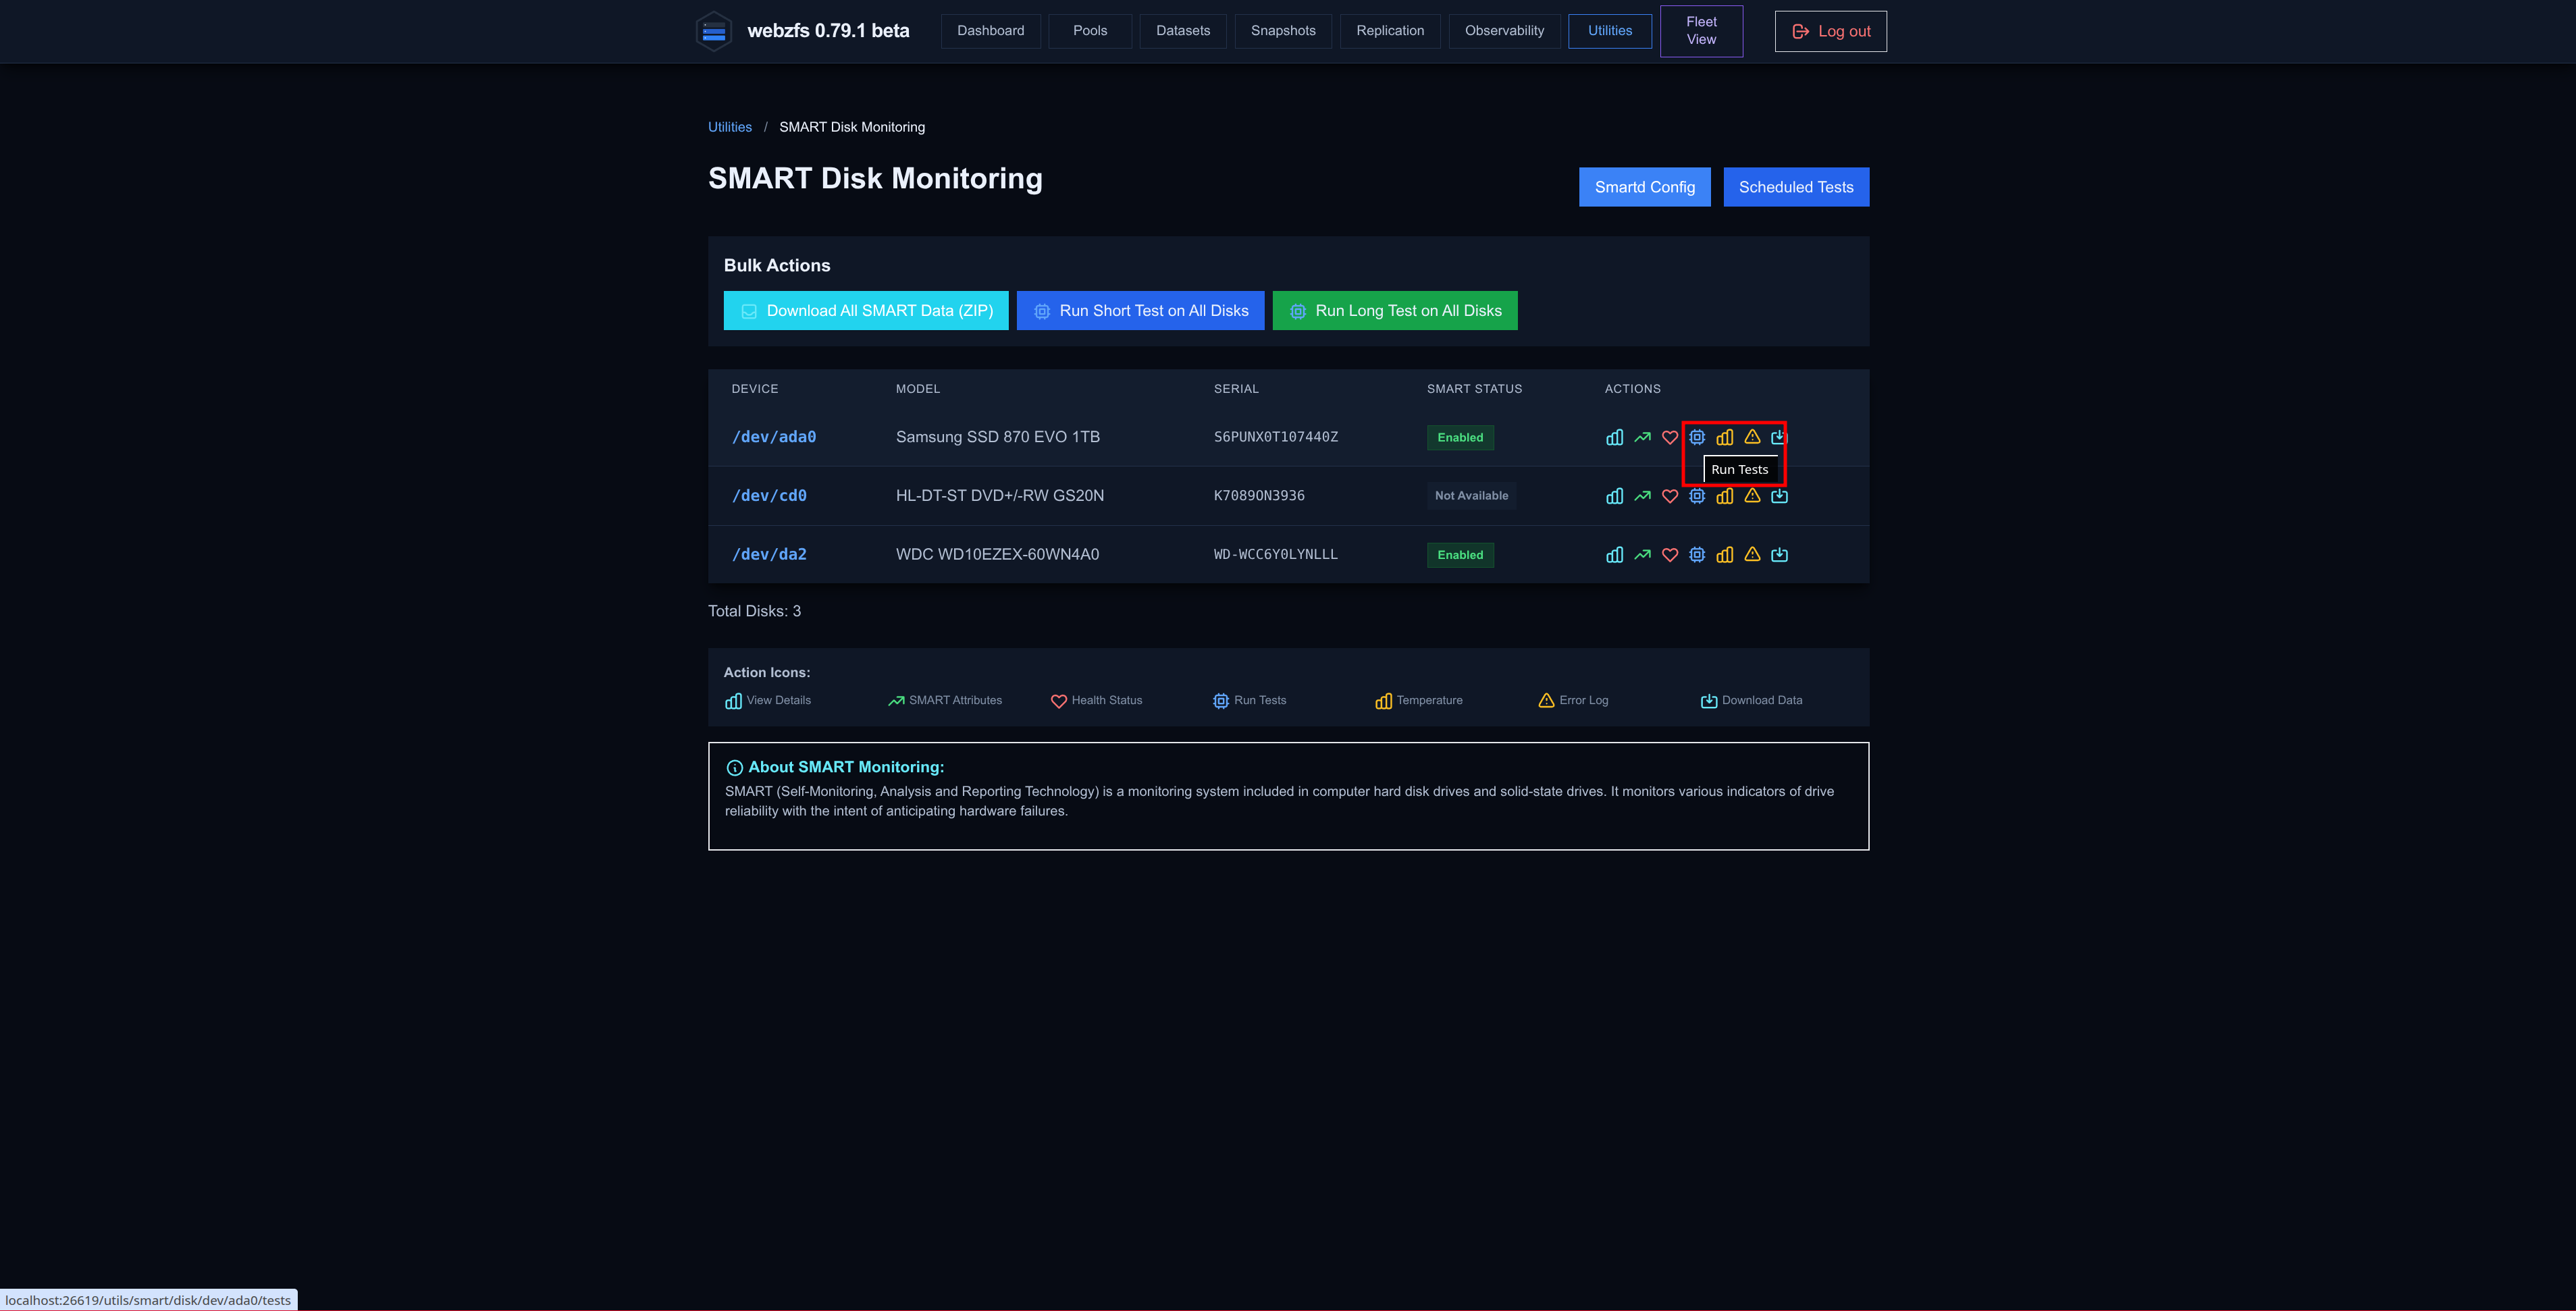
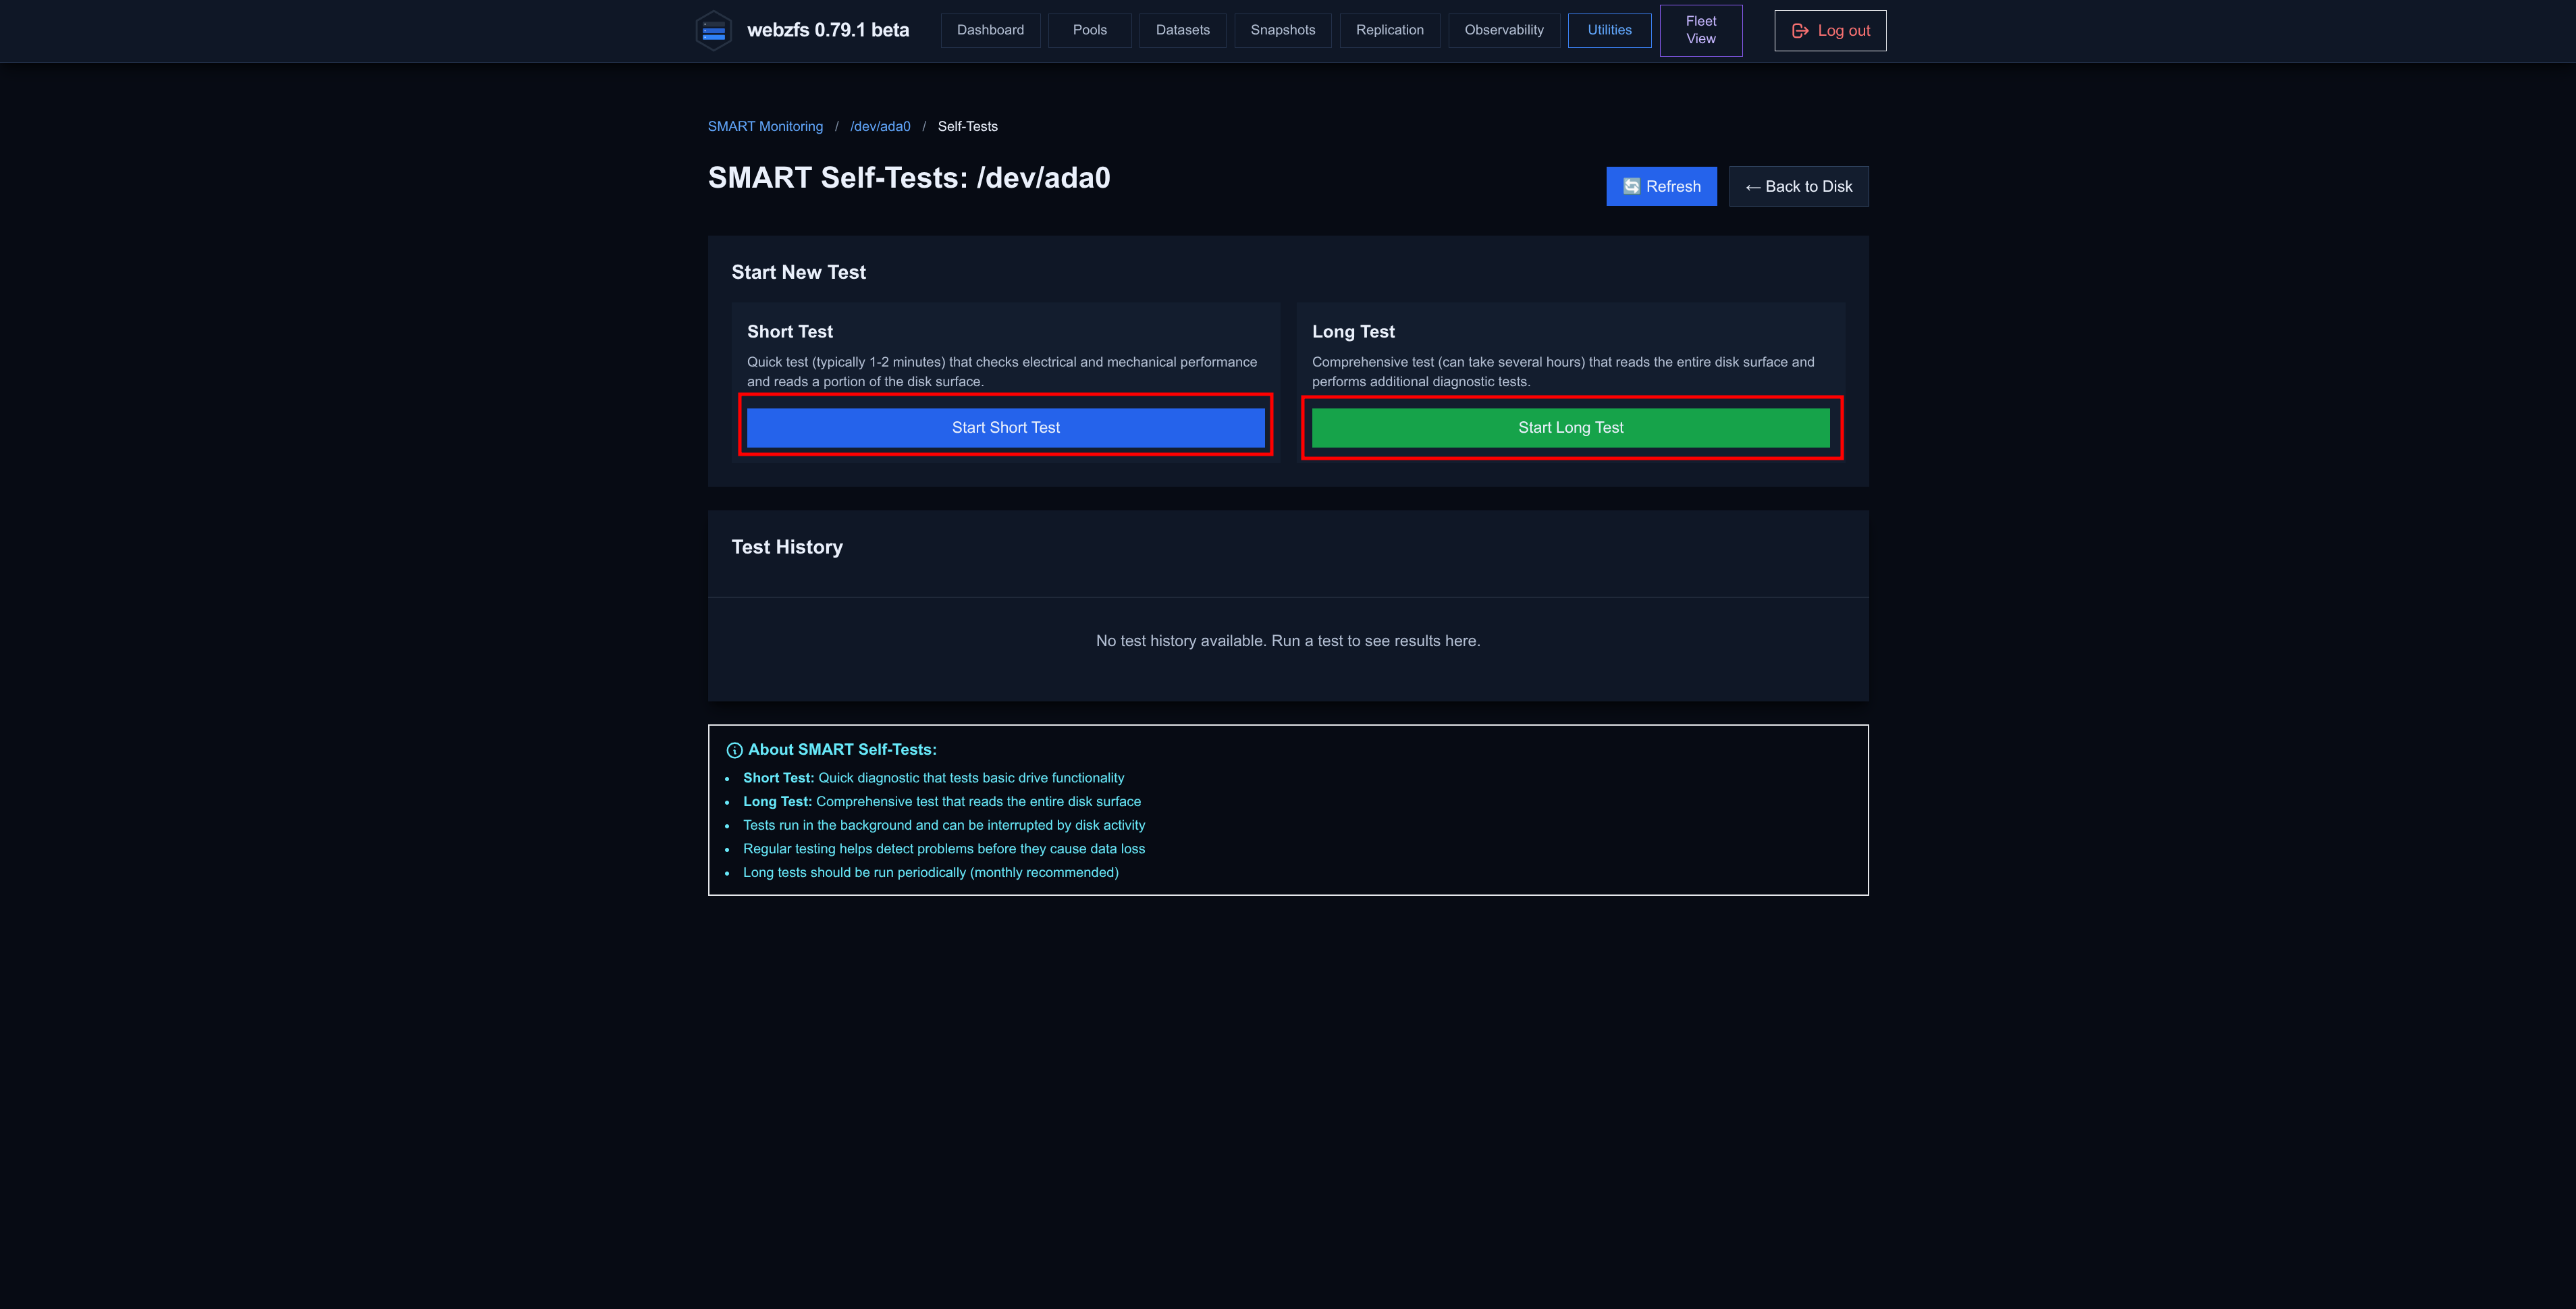
We can also access the menu to run tests.
|
|
NOTE: Both buttons seem to be buggy.
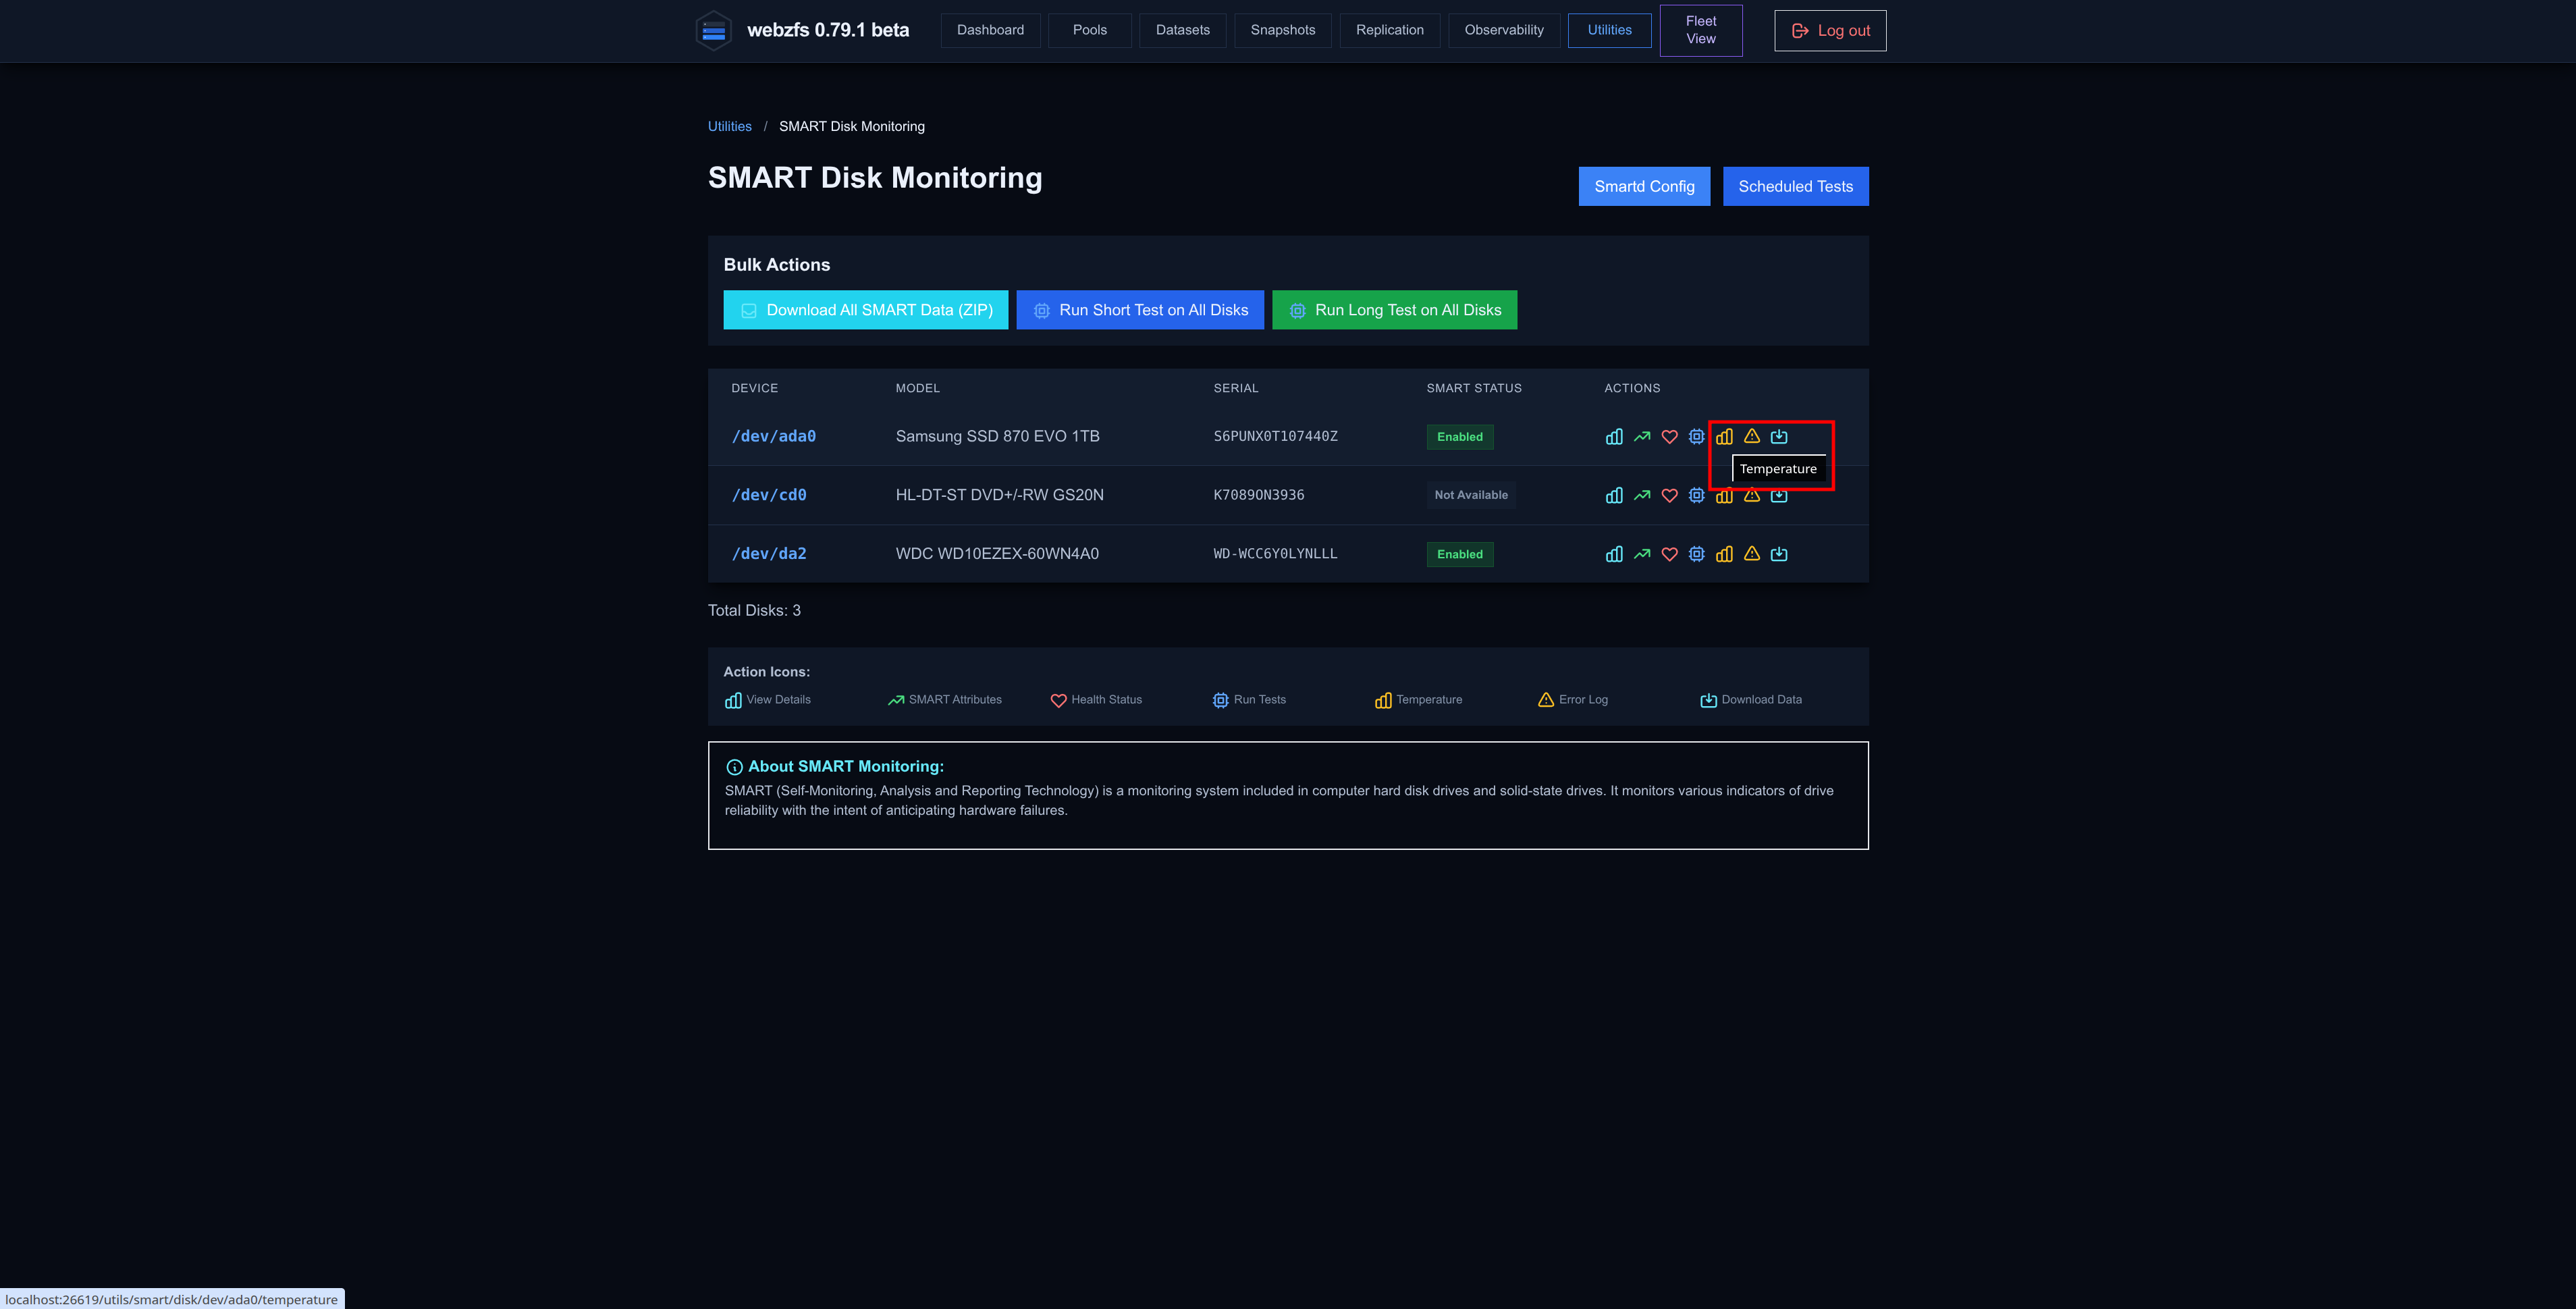
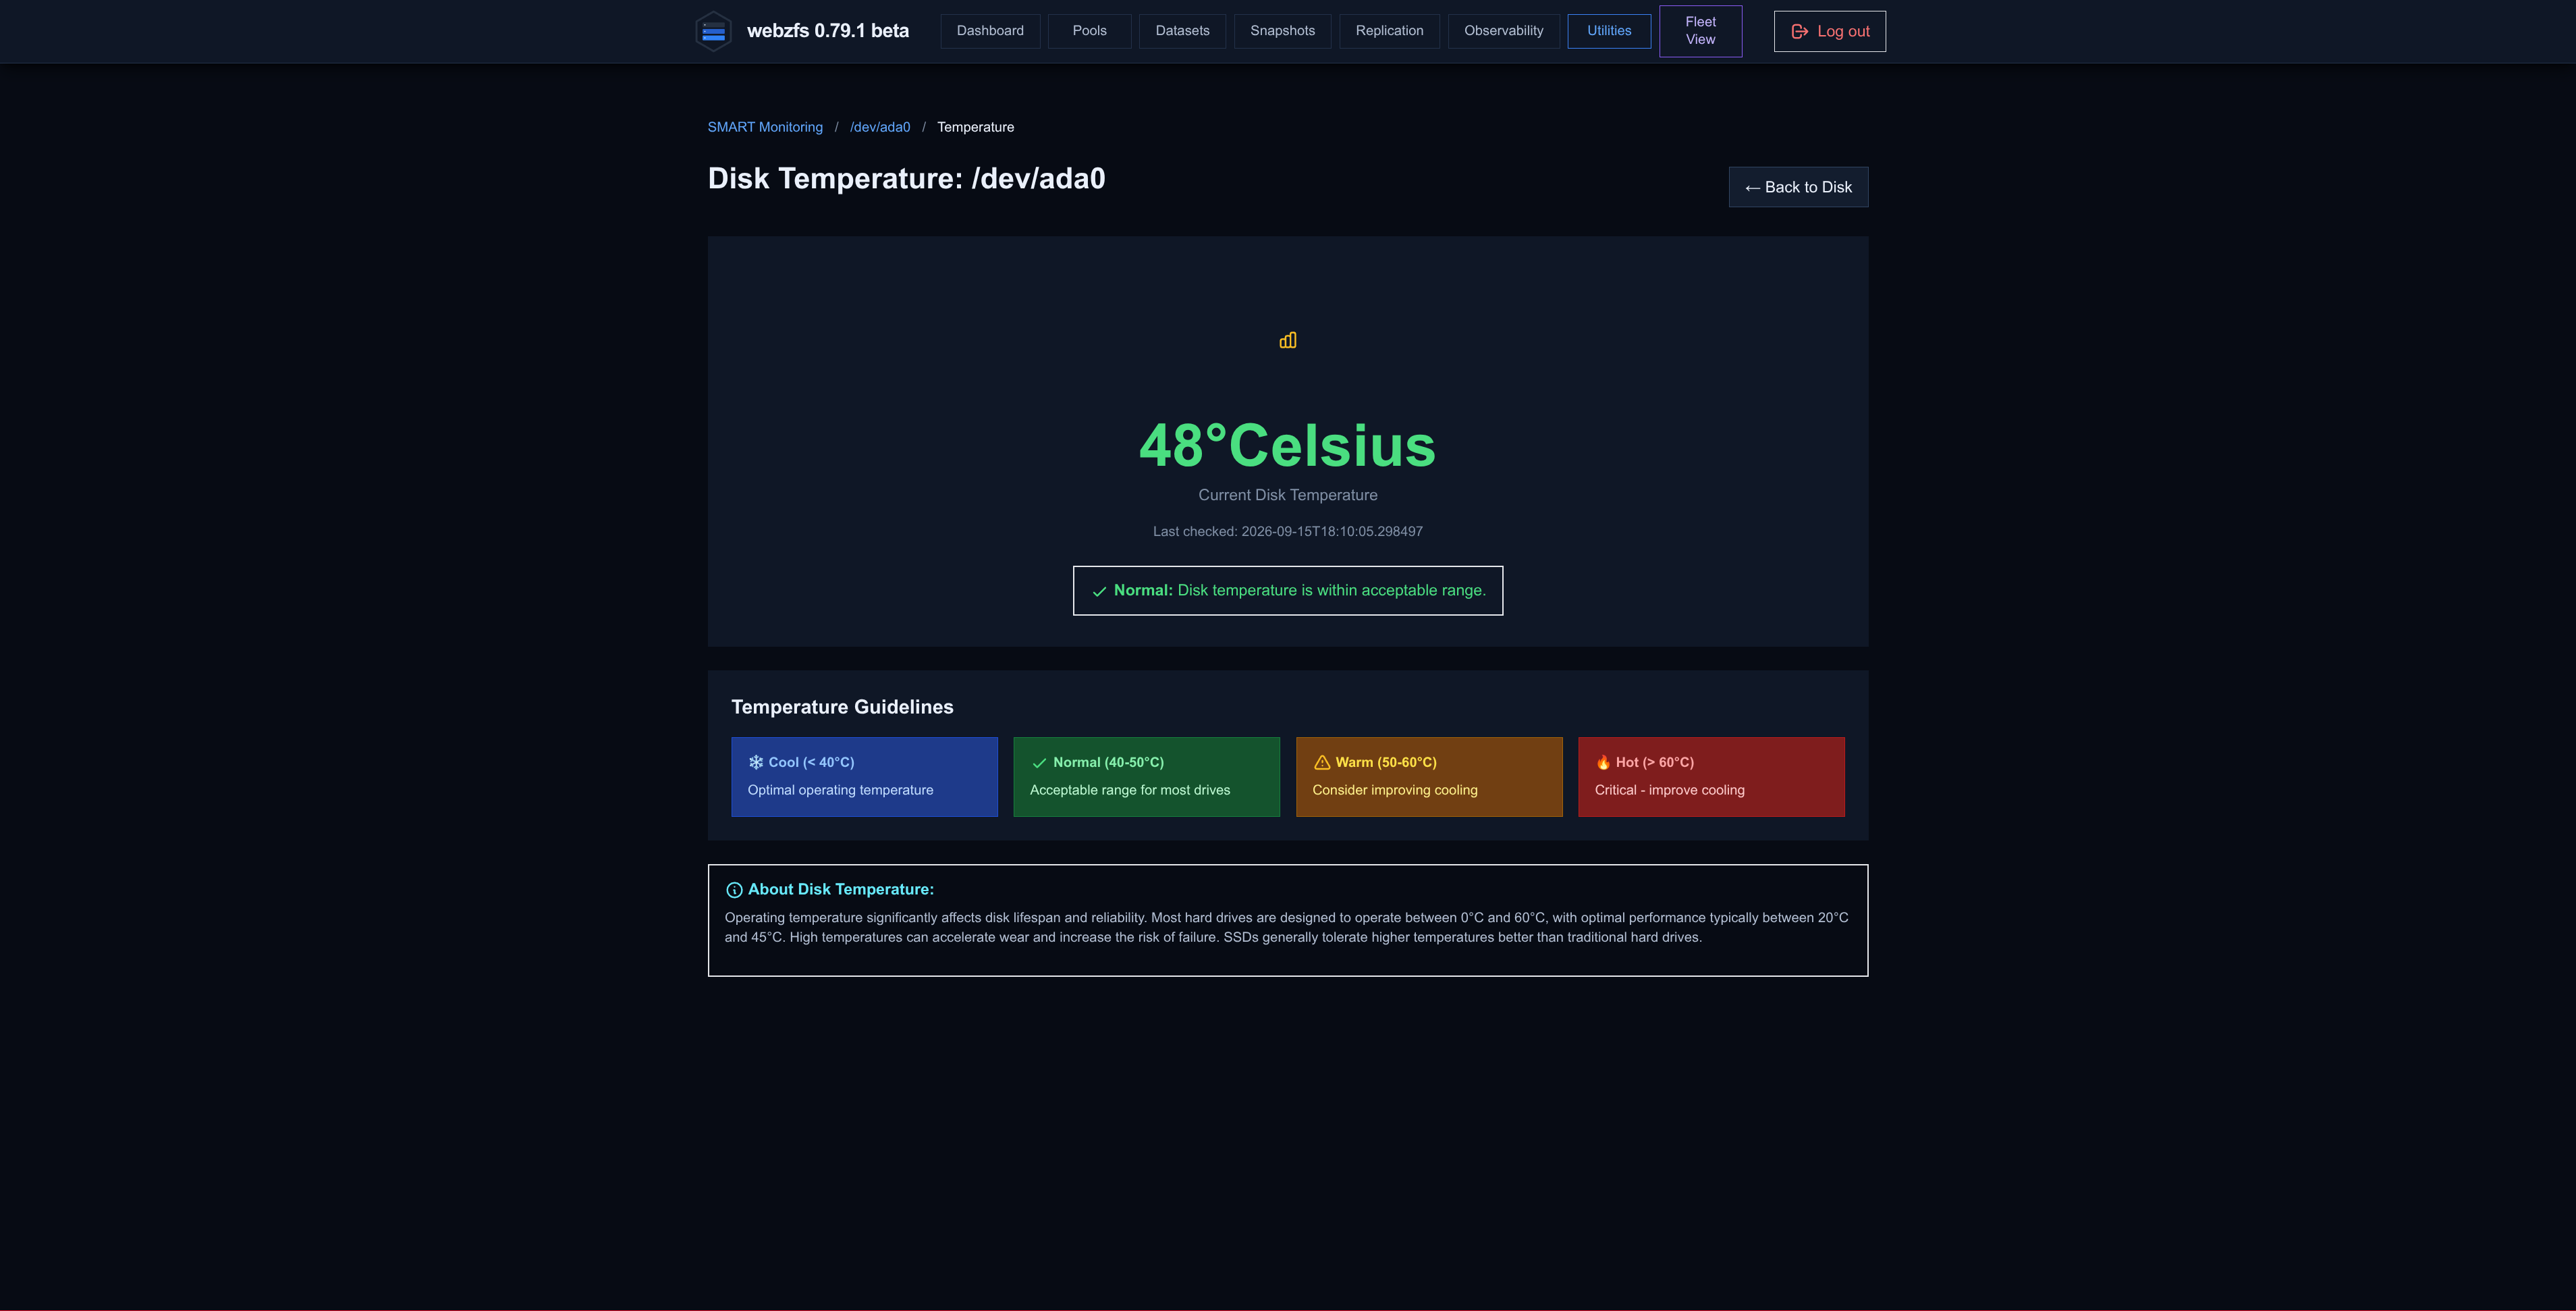
We can also view the disk temperature.
|
|
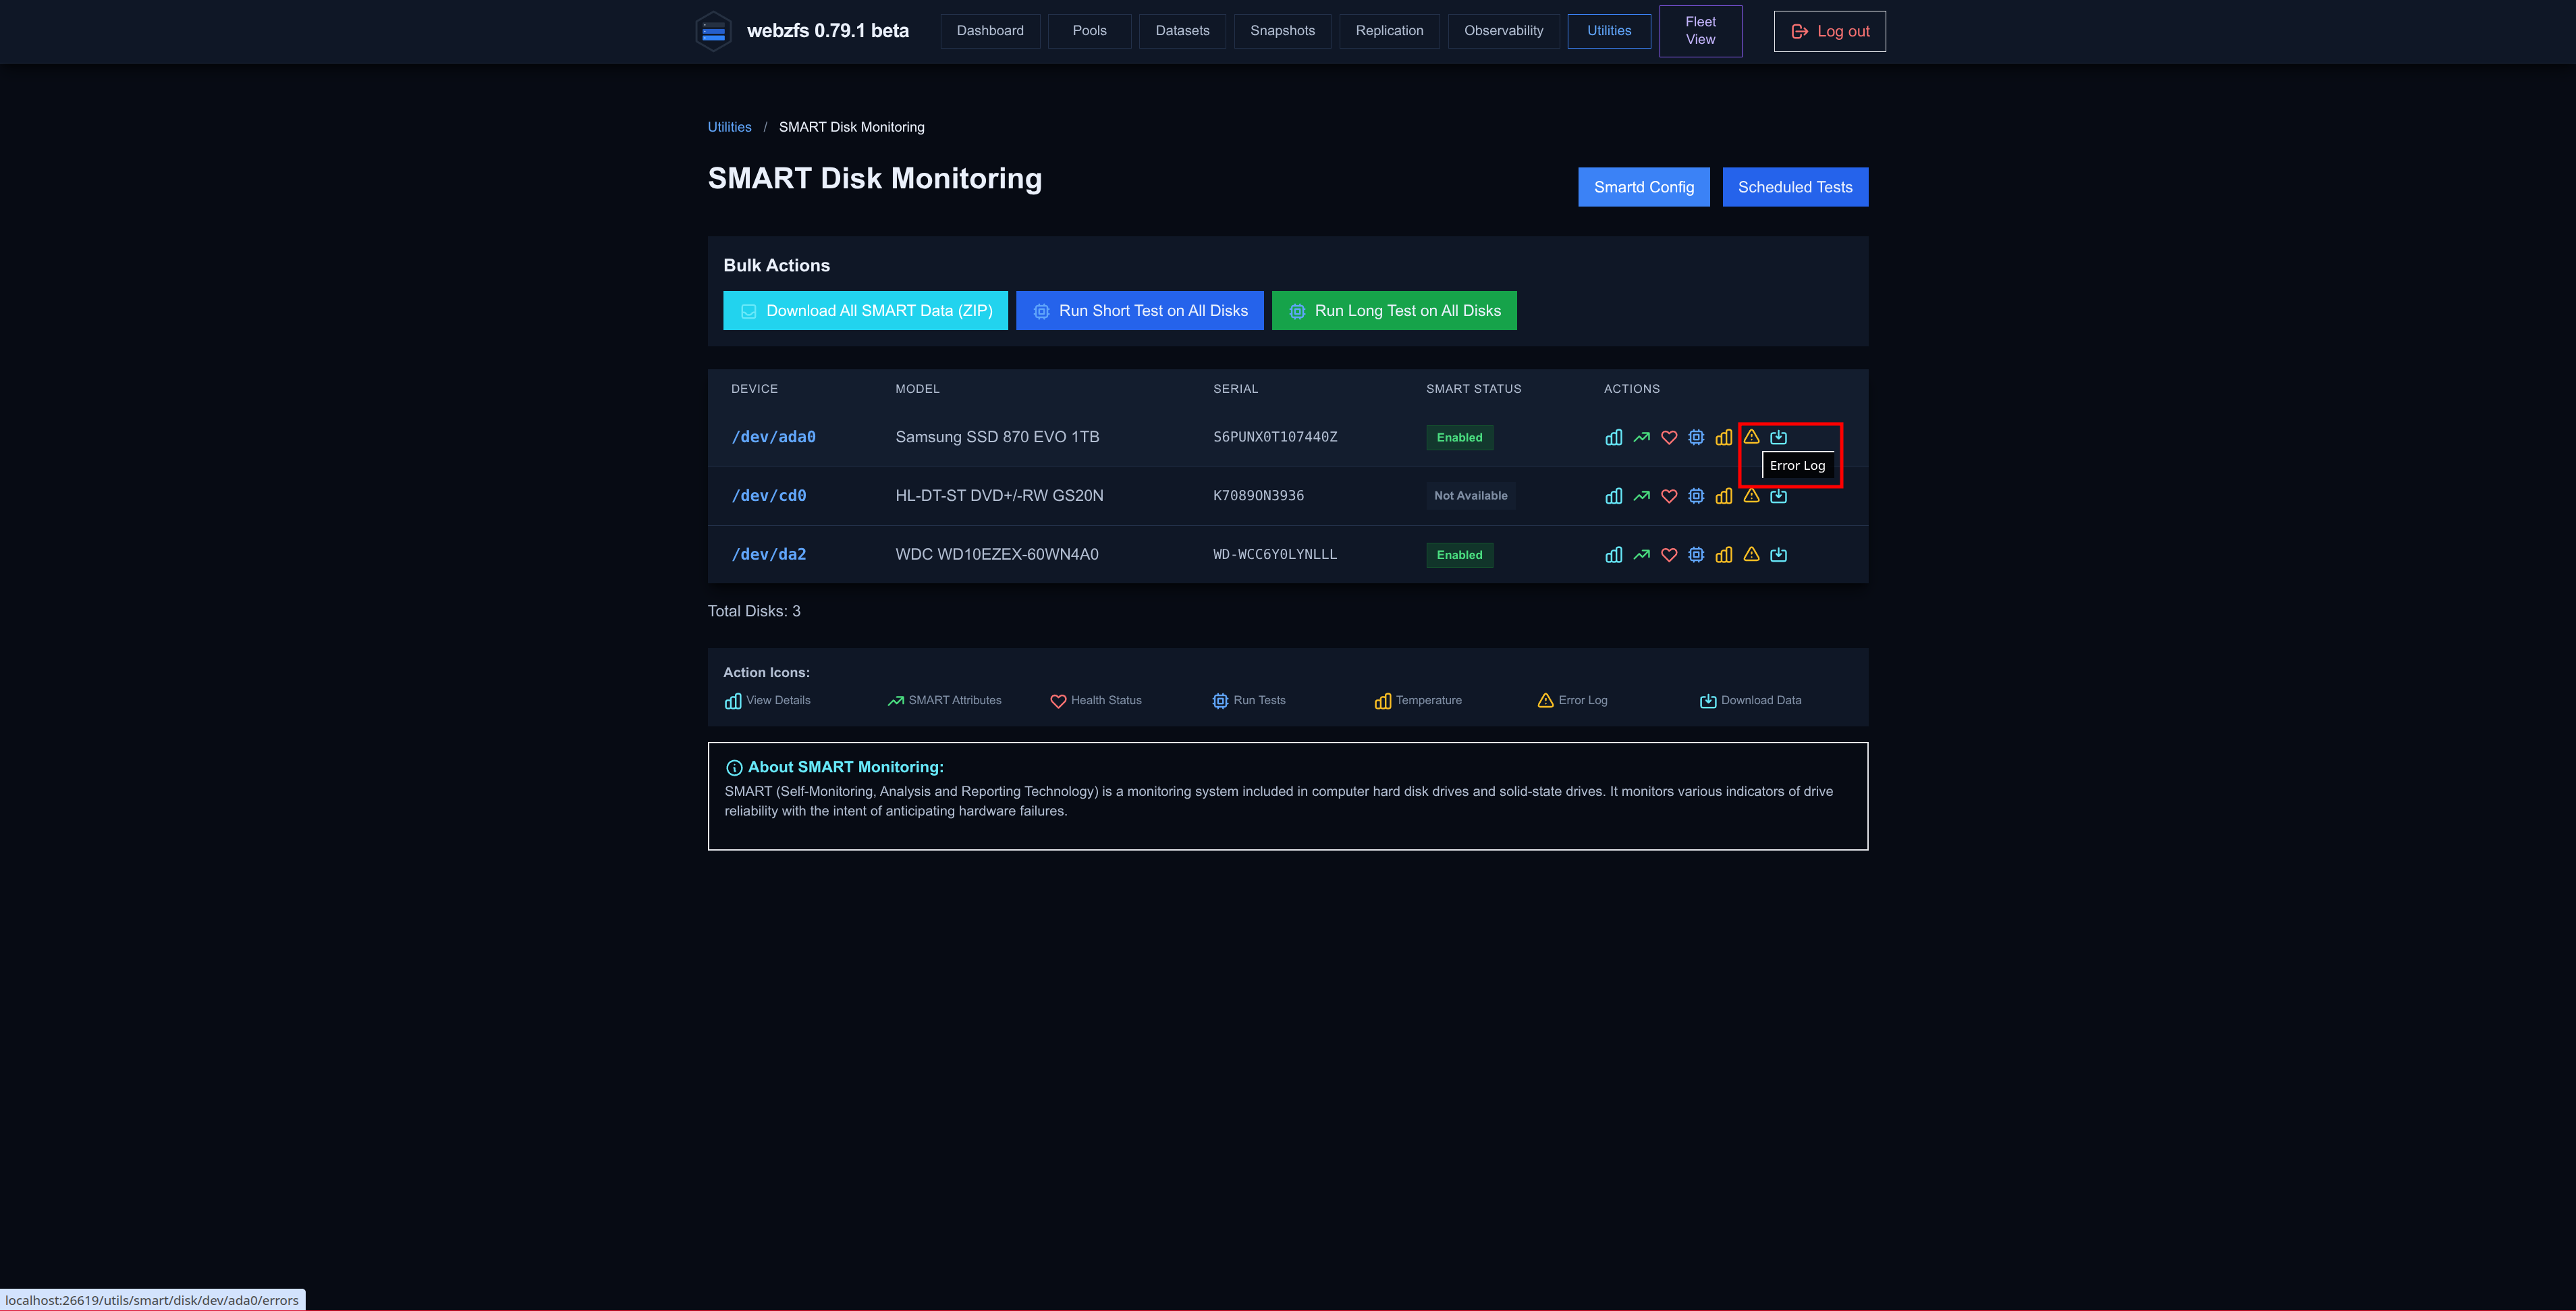
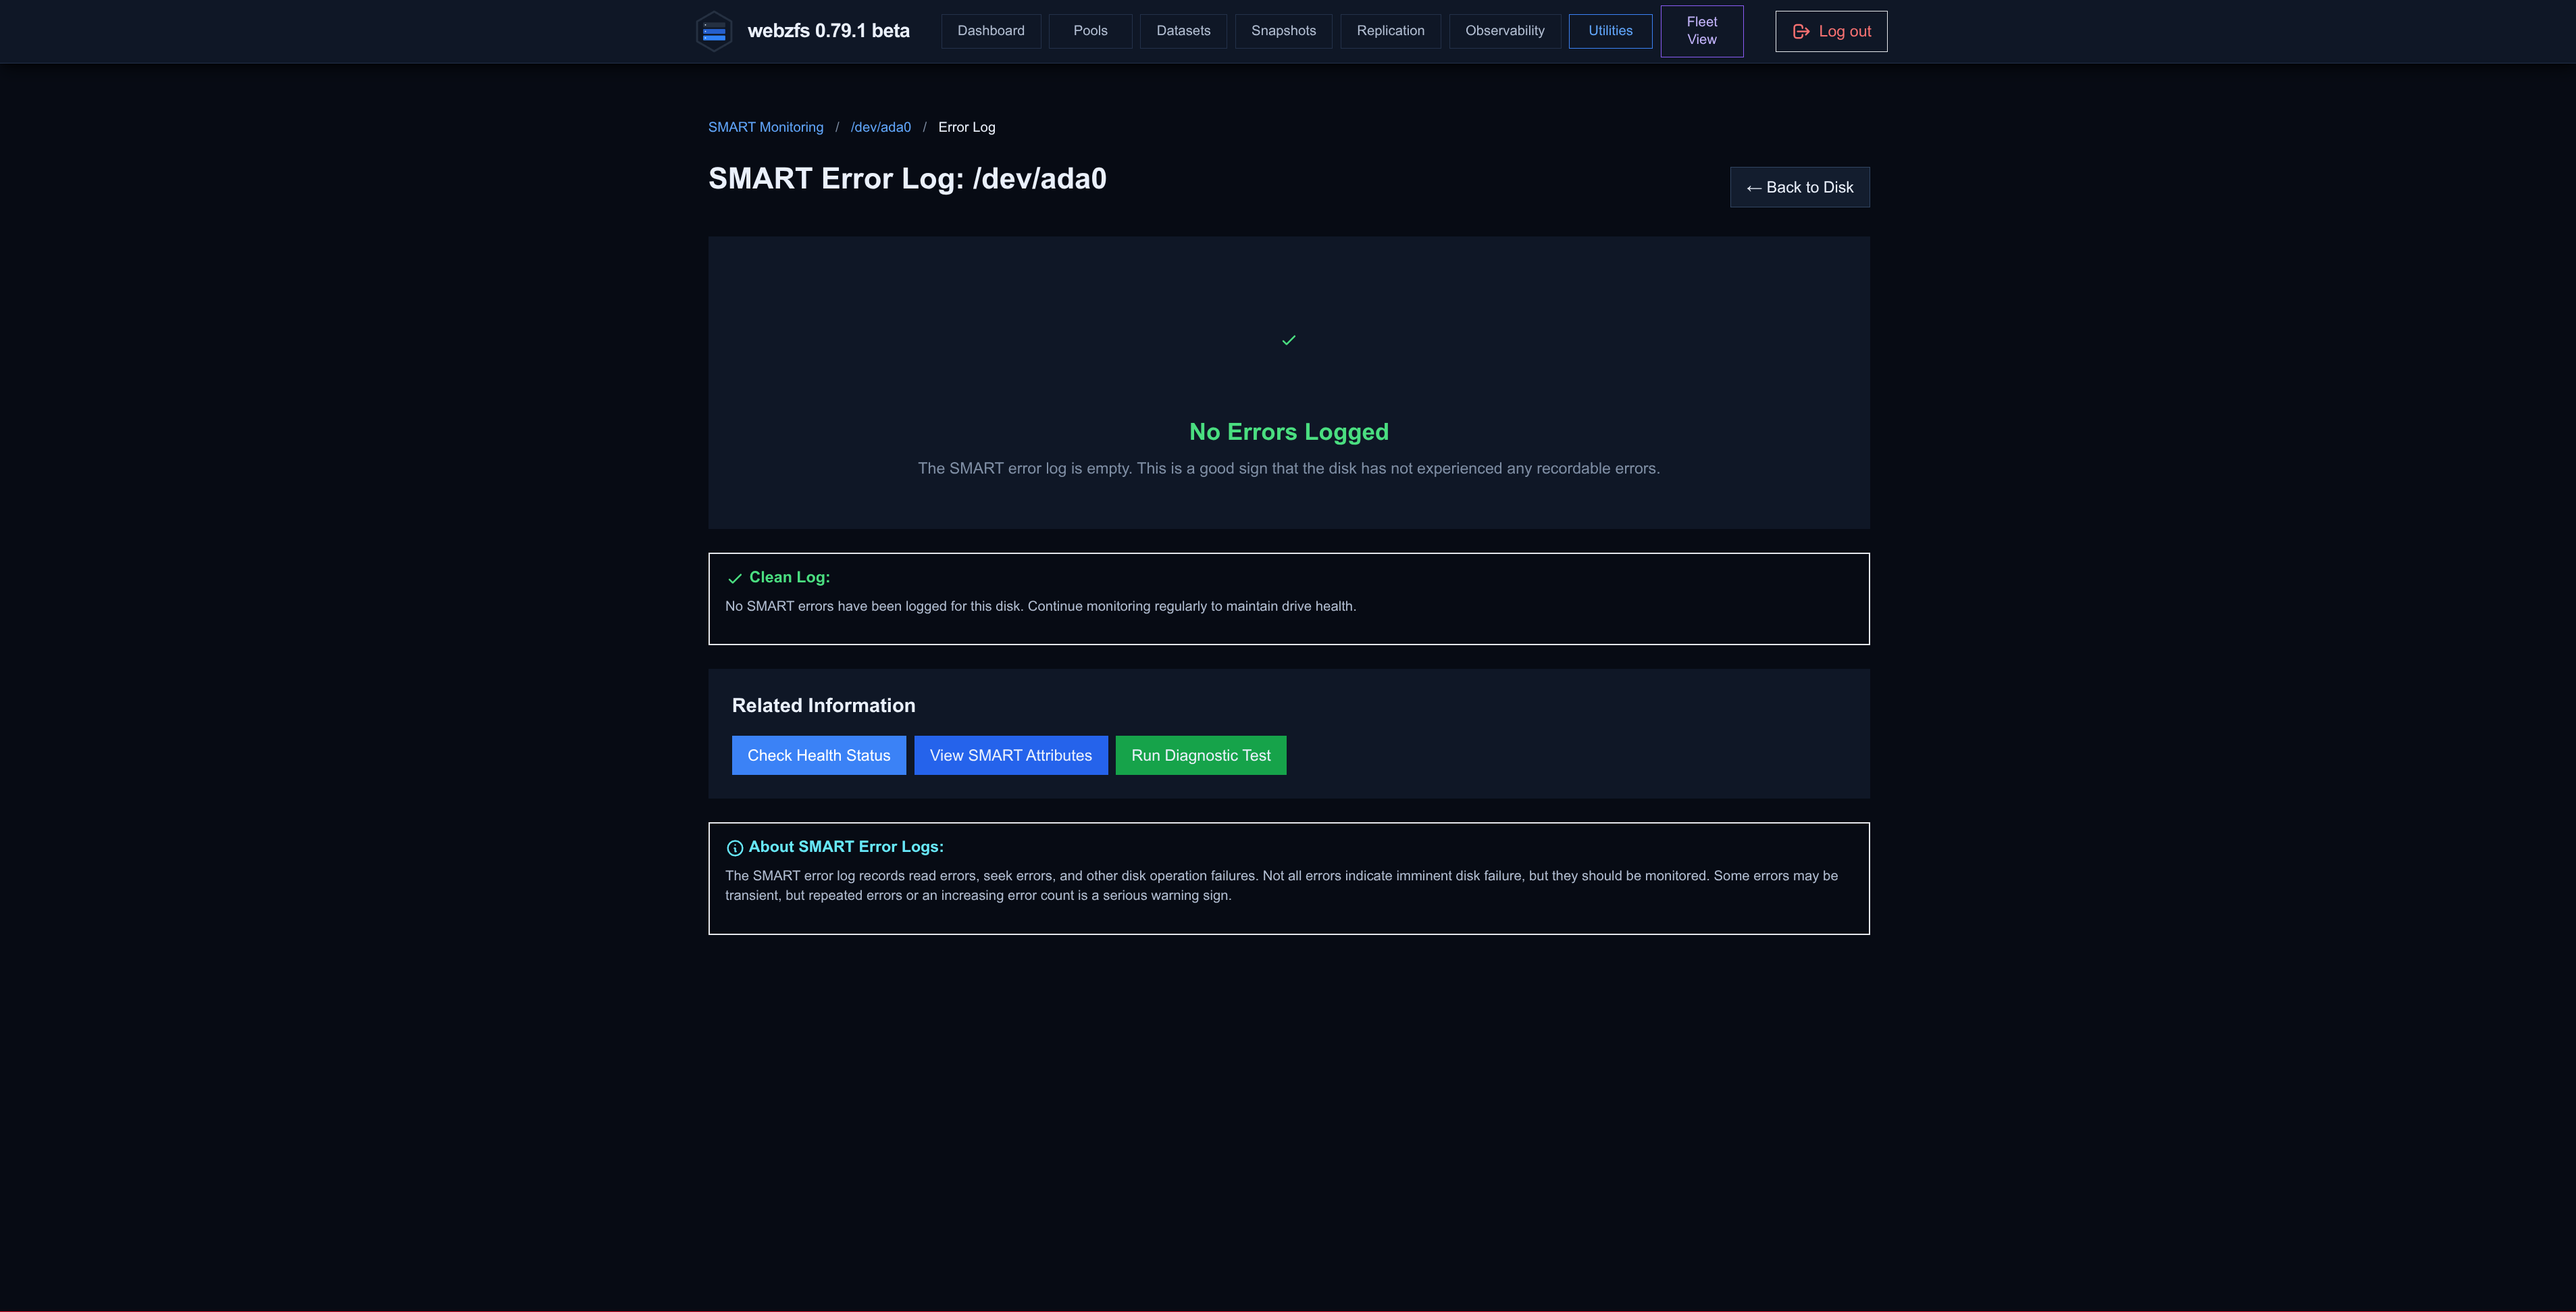
View the error logs.
|
|
Or download SMART data.
Scrub Status:
This section is exactly the same as the one found in
Observability -> Pool Scrub Status
described earlier in this same article.
SSH Connections:
From here we can manage the SSH connections to remote systems. Its operation was already explained in the
Replication section
of this same article.
Health Analysis:
Its operation was already explained in the
Observability -> Disk Health section
of this same article.
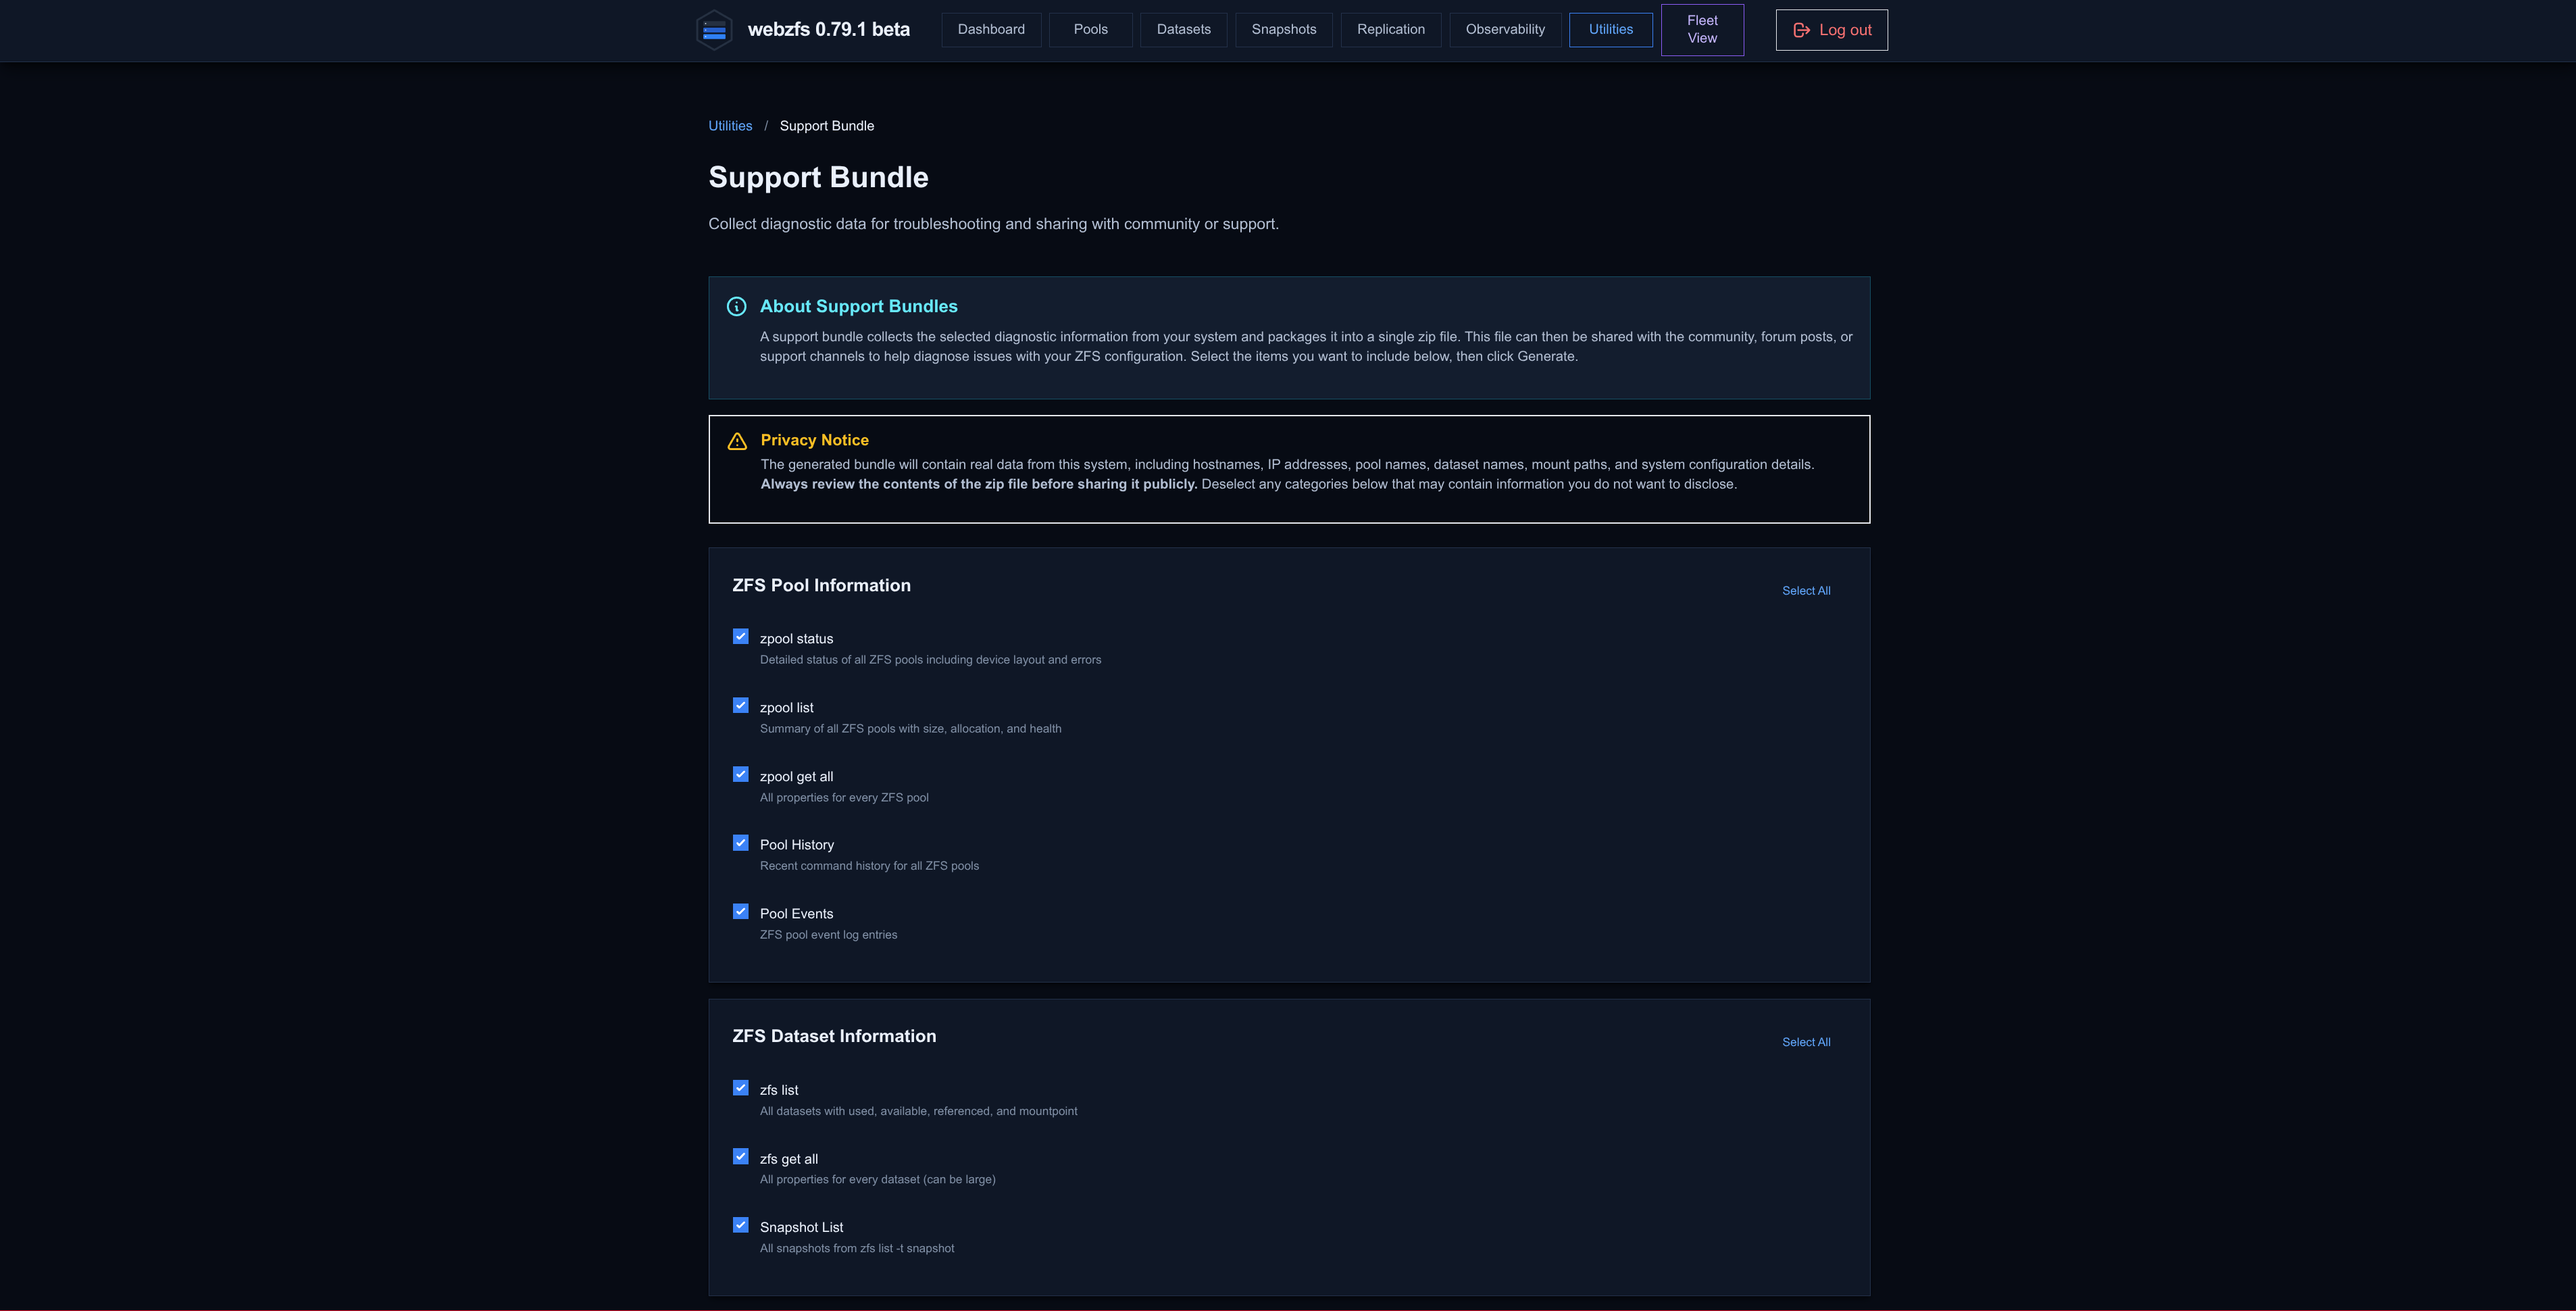
Support Bundle:
This section collects useful diagnostic information about our system in case we need technical support.
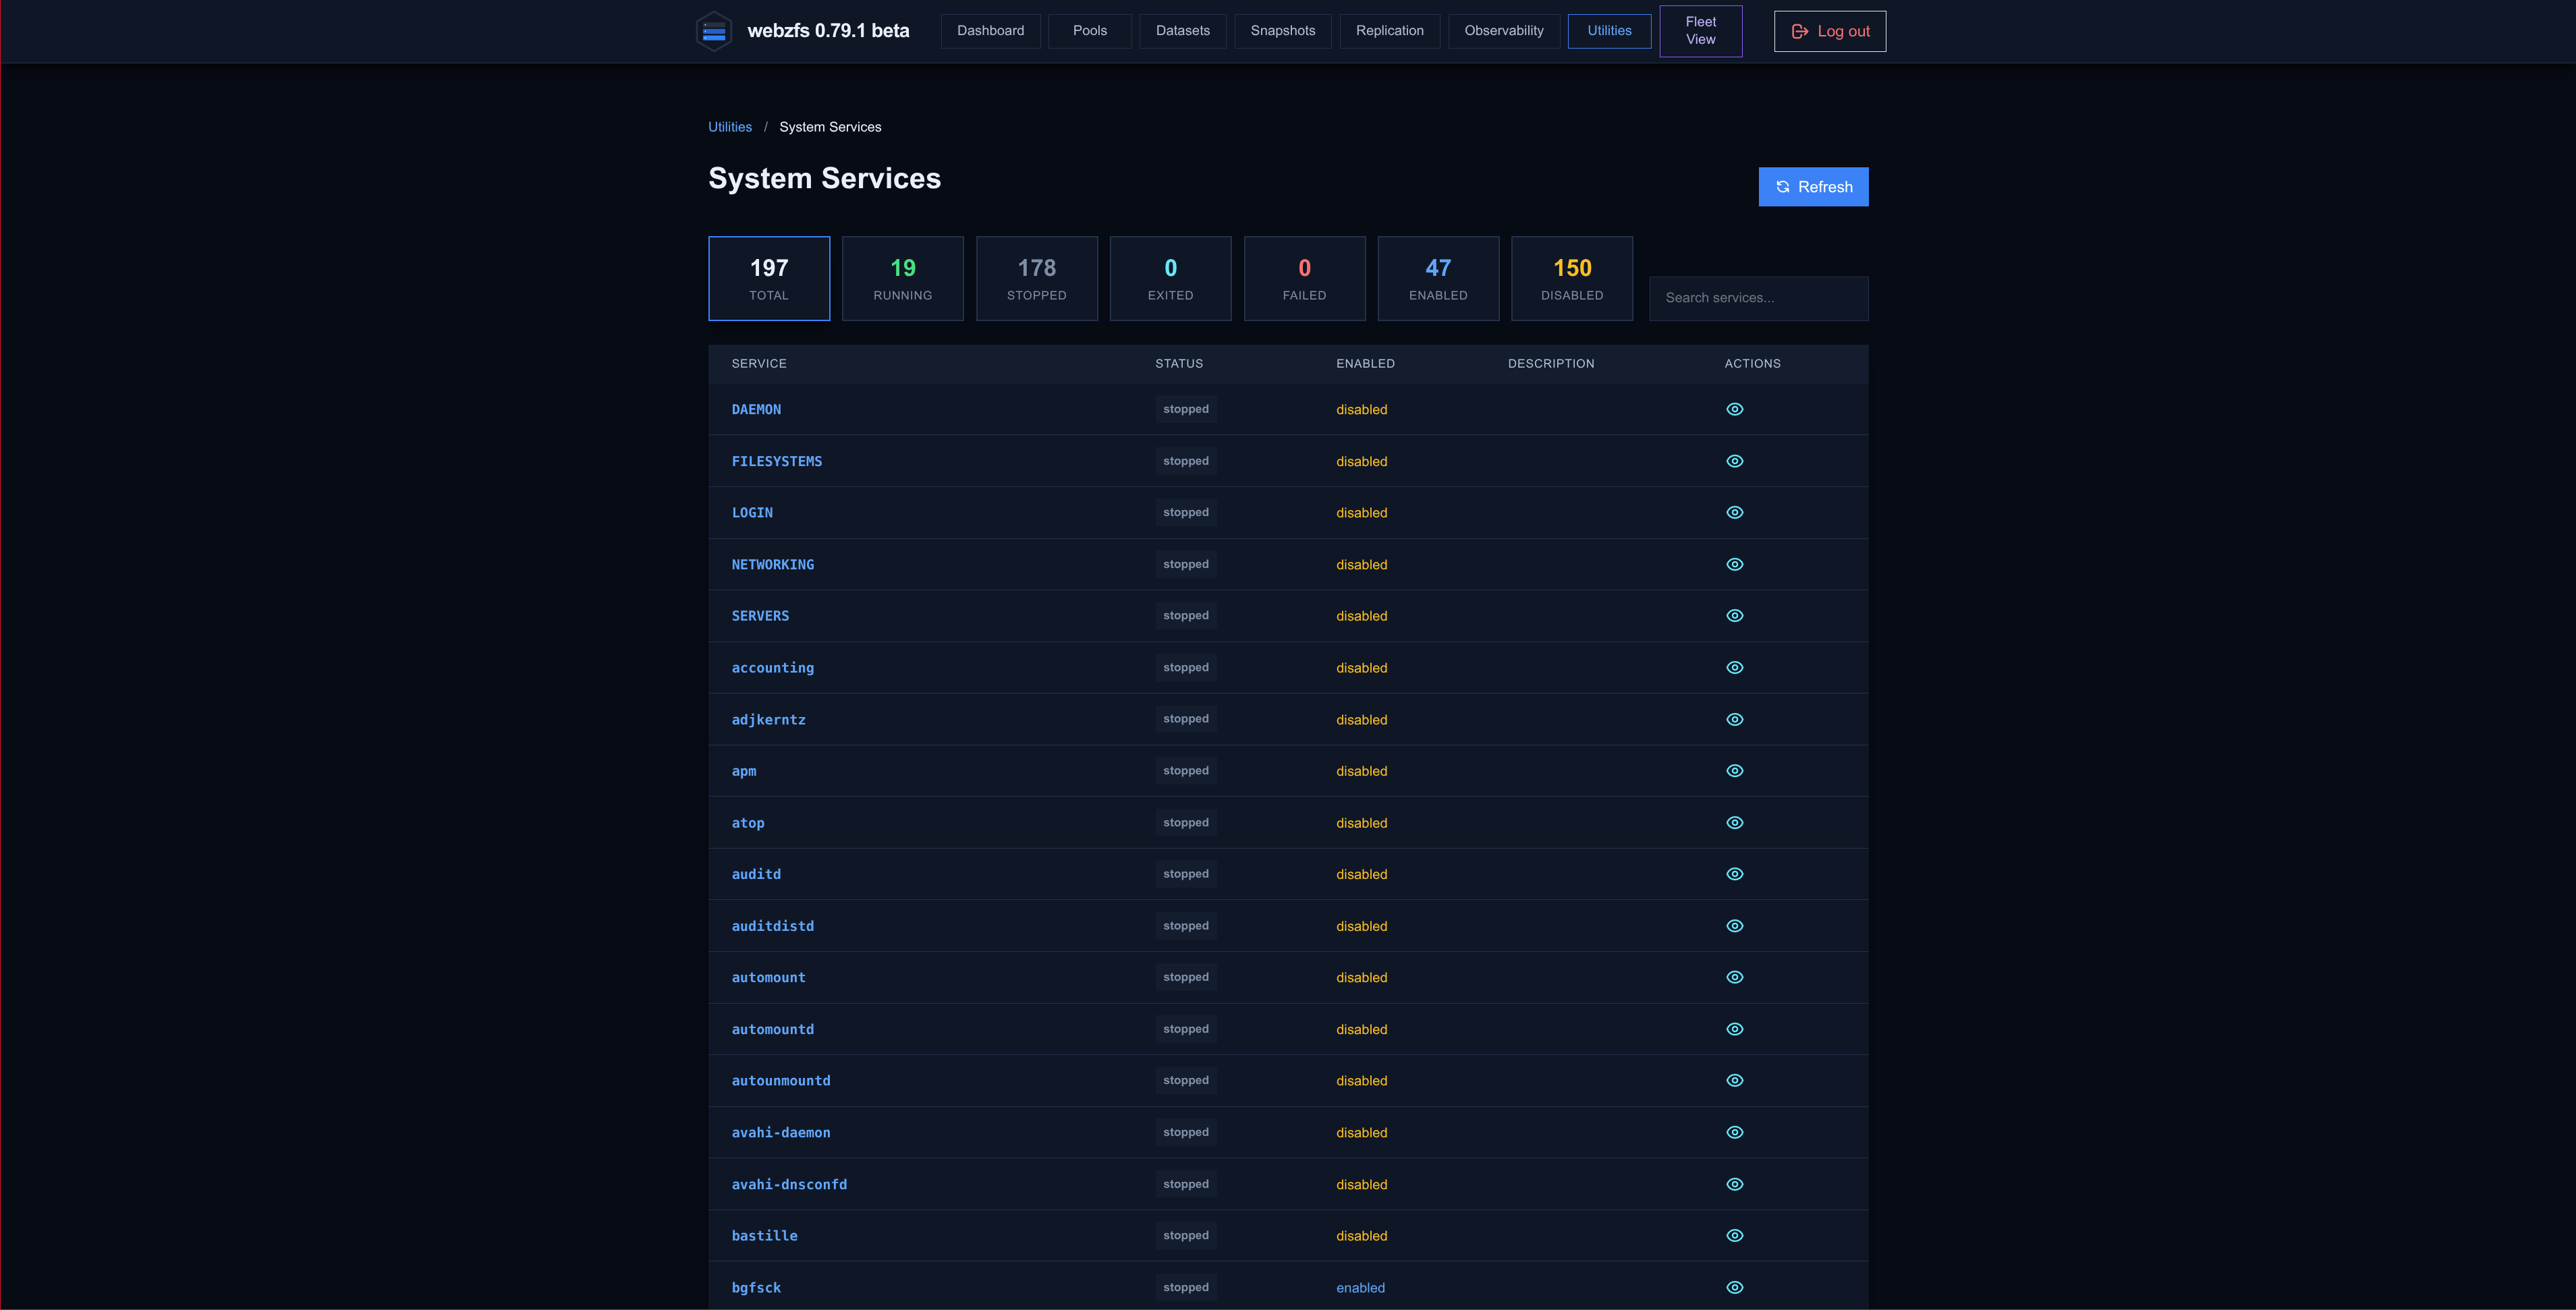
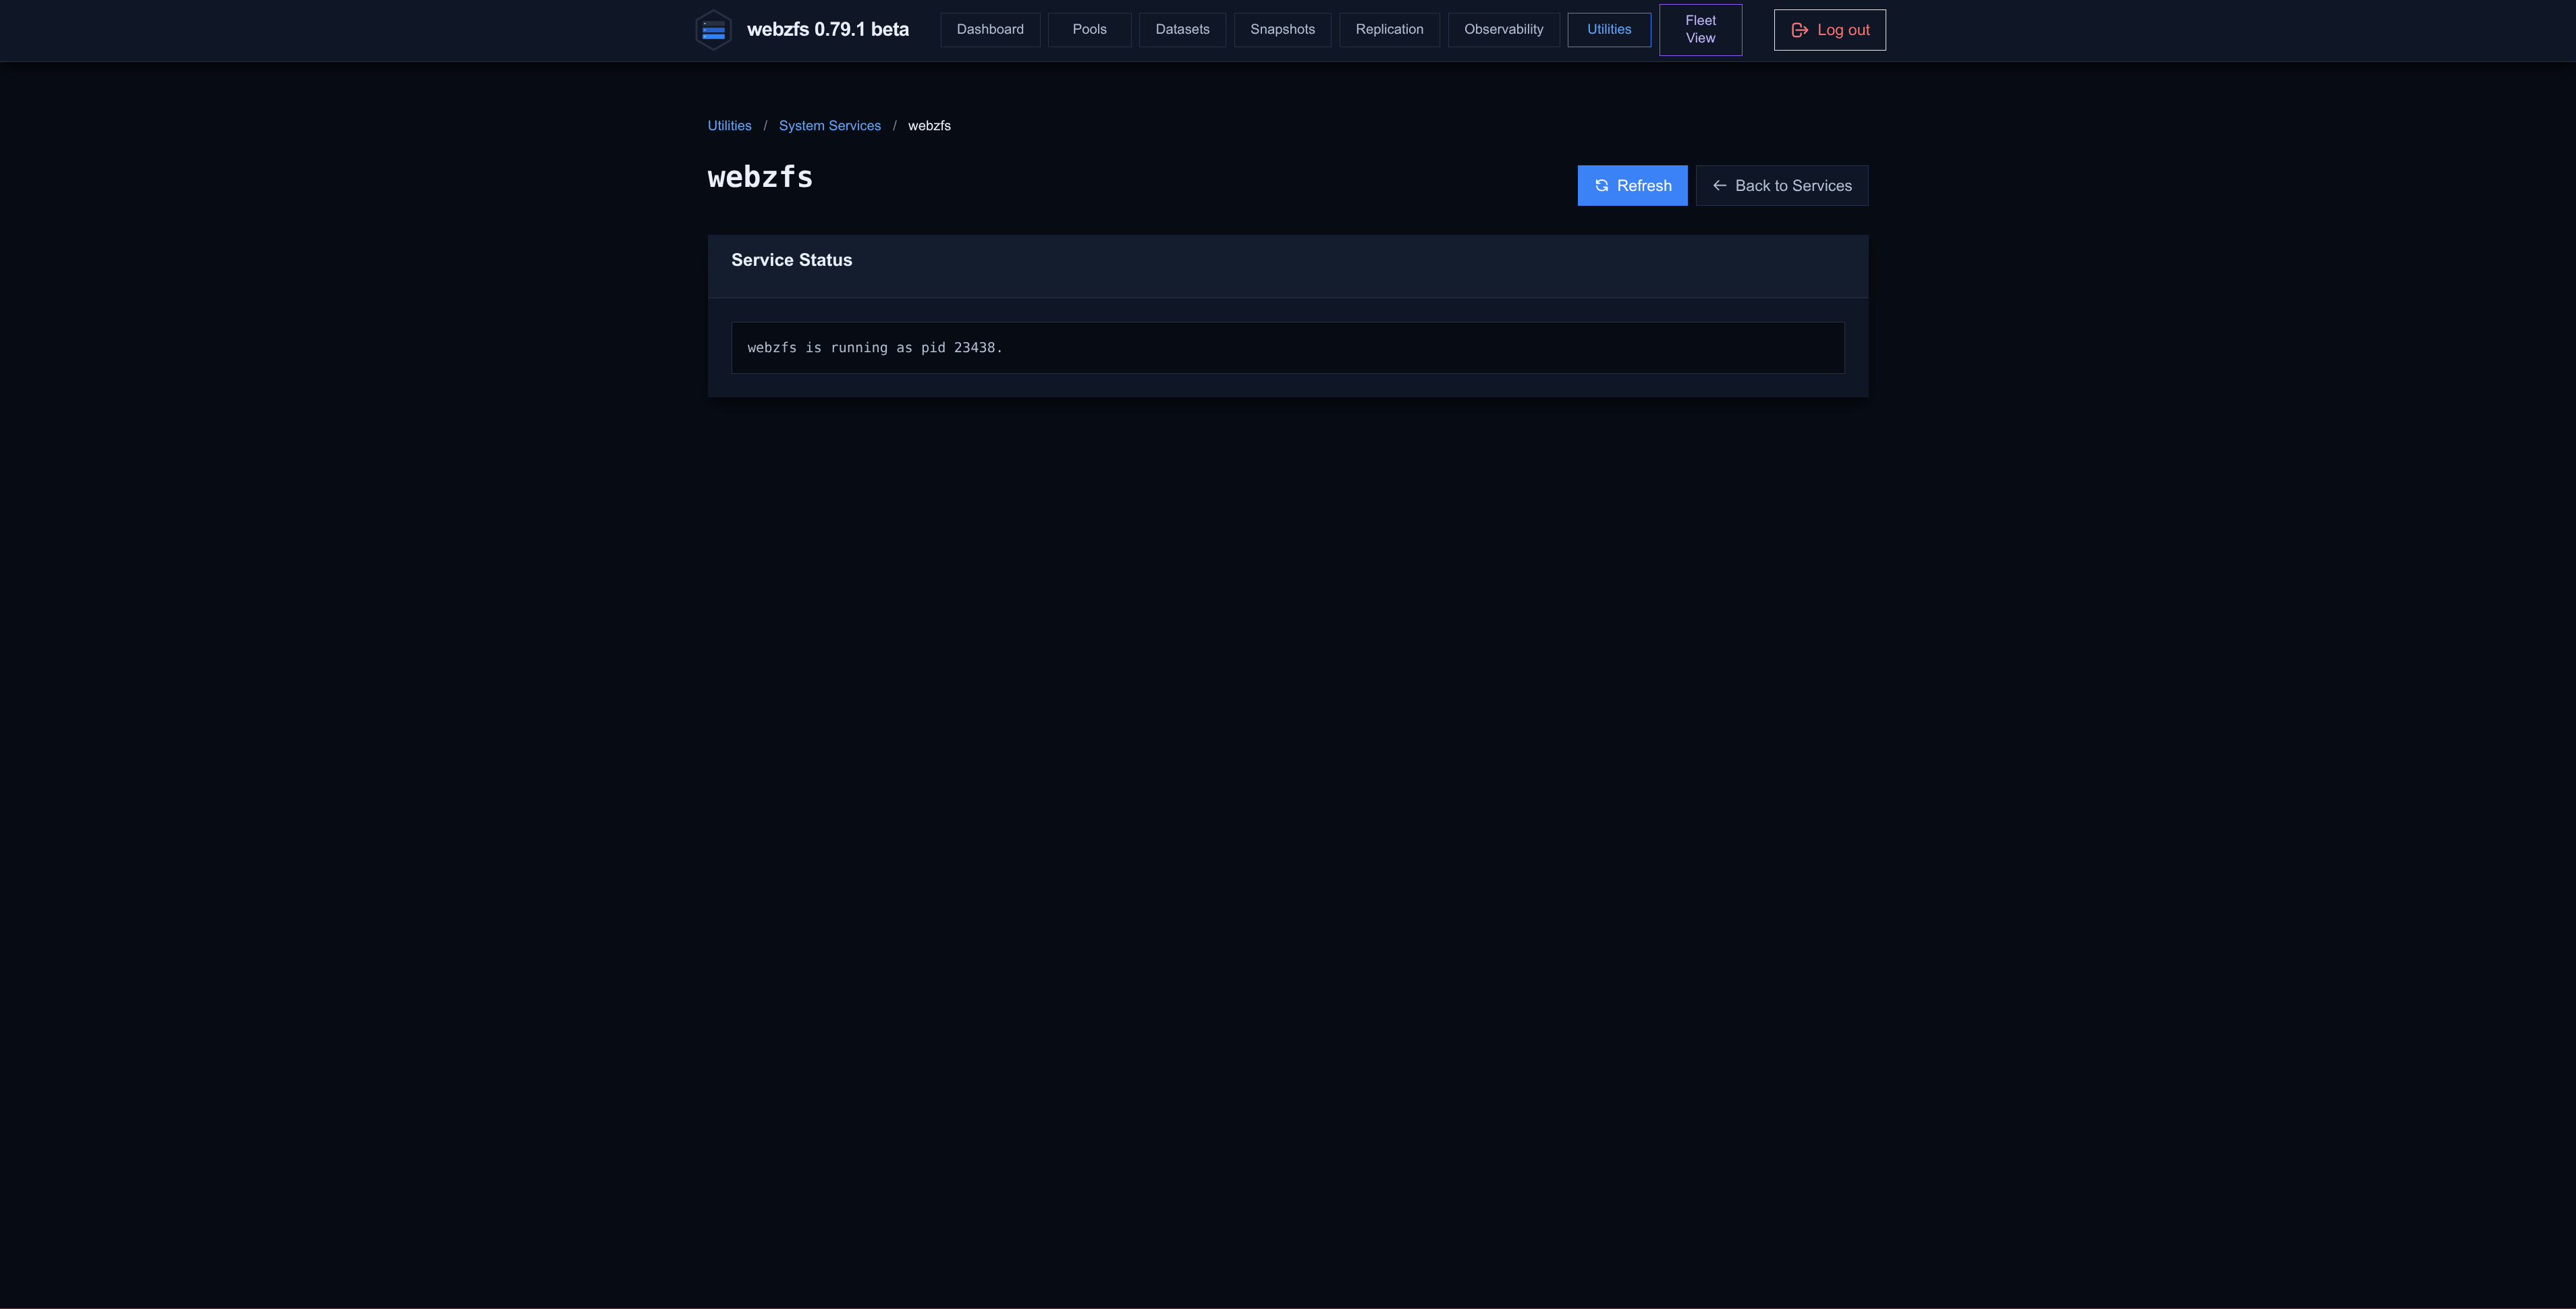
System Services:
It lets us view the system services and see the PID they run with.
|
|
Shell:
It lets us run system commands from the web interface; be very careful with what we run since it will do so as the user the process is running with.
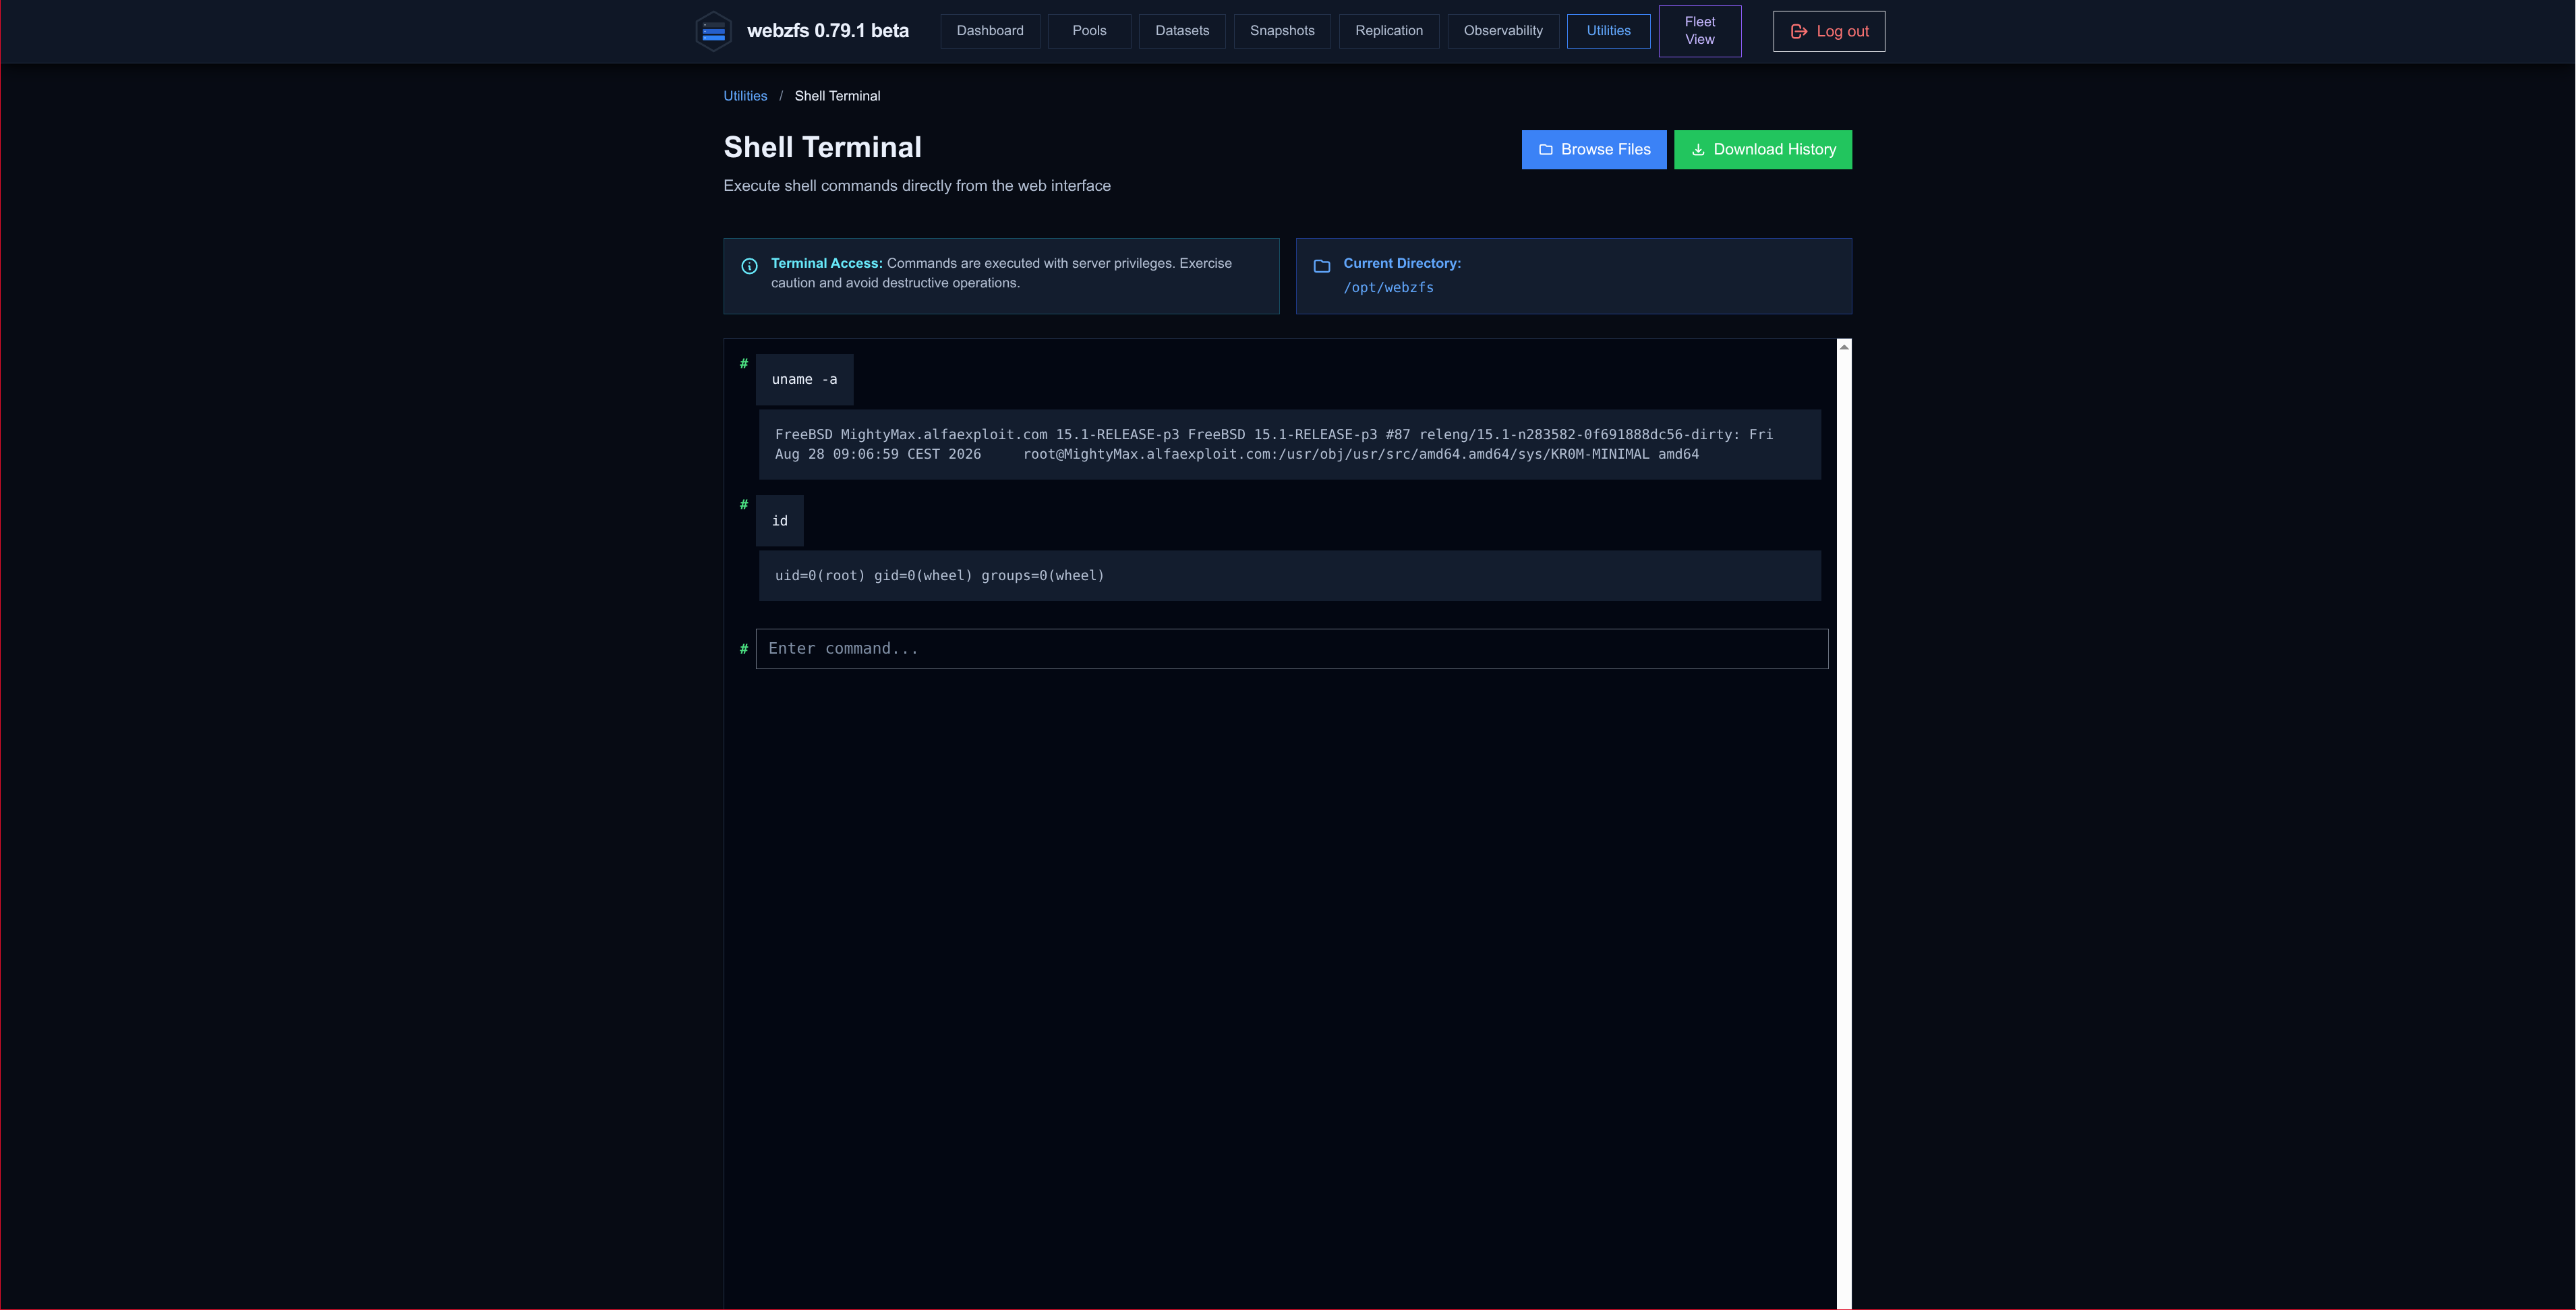
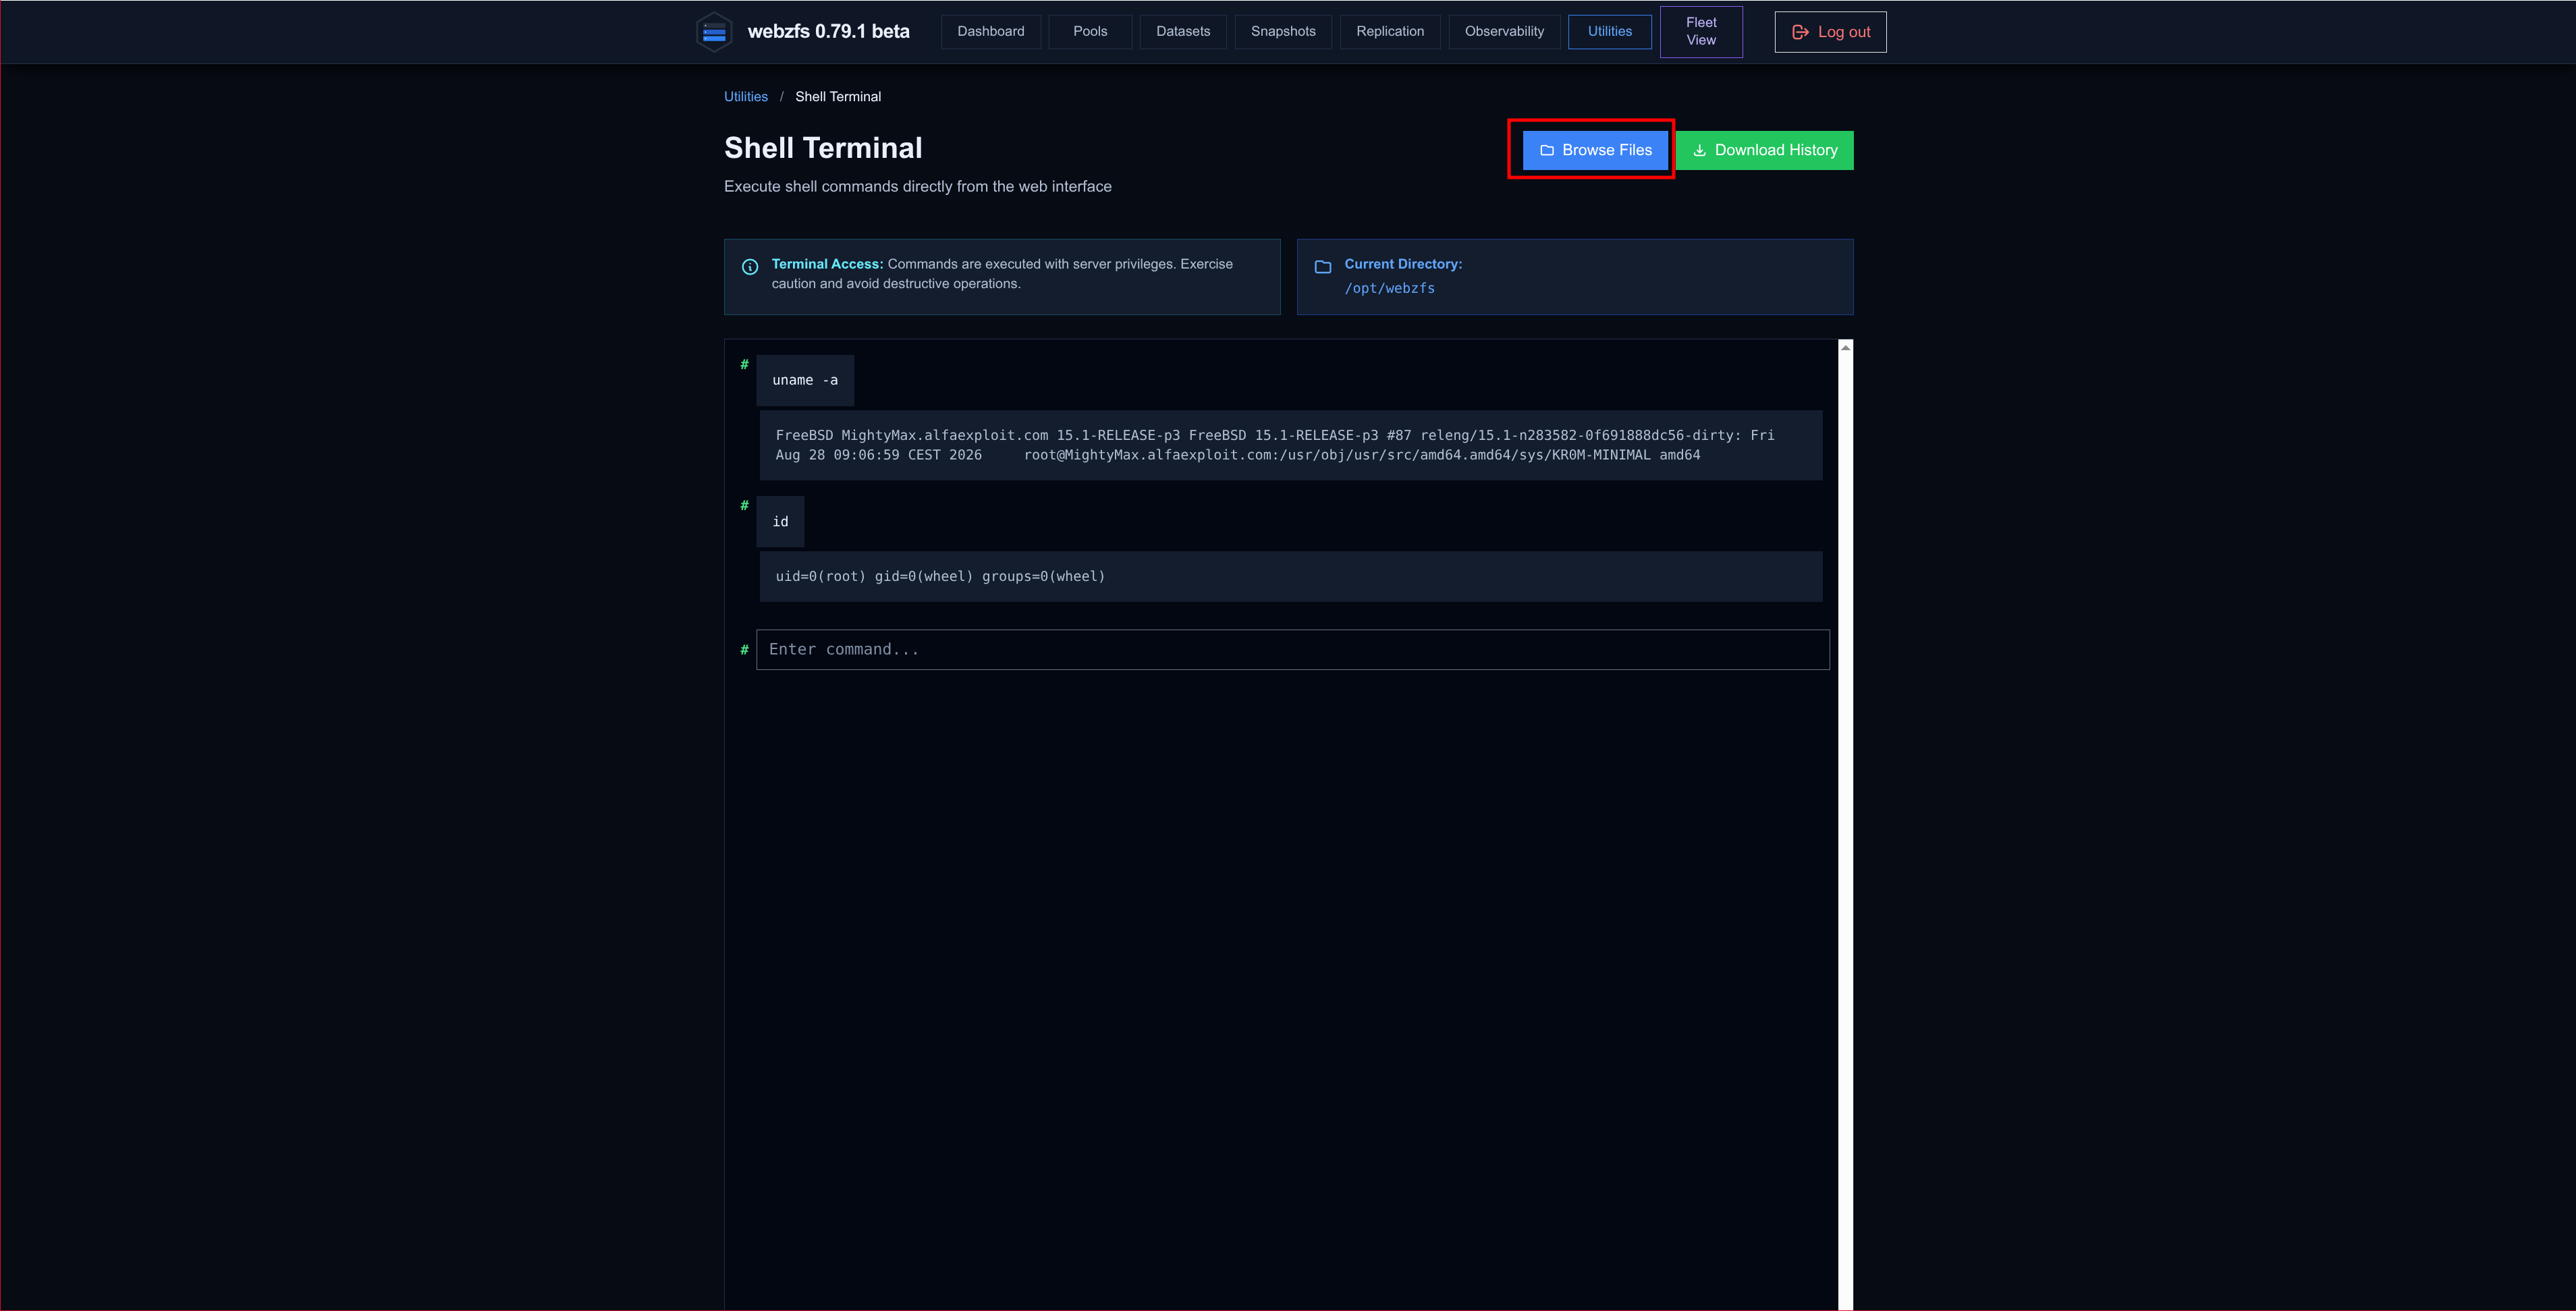
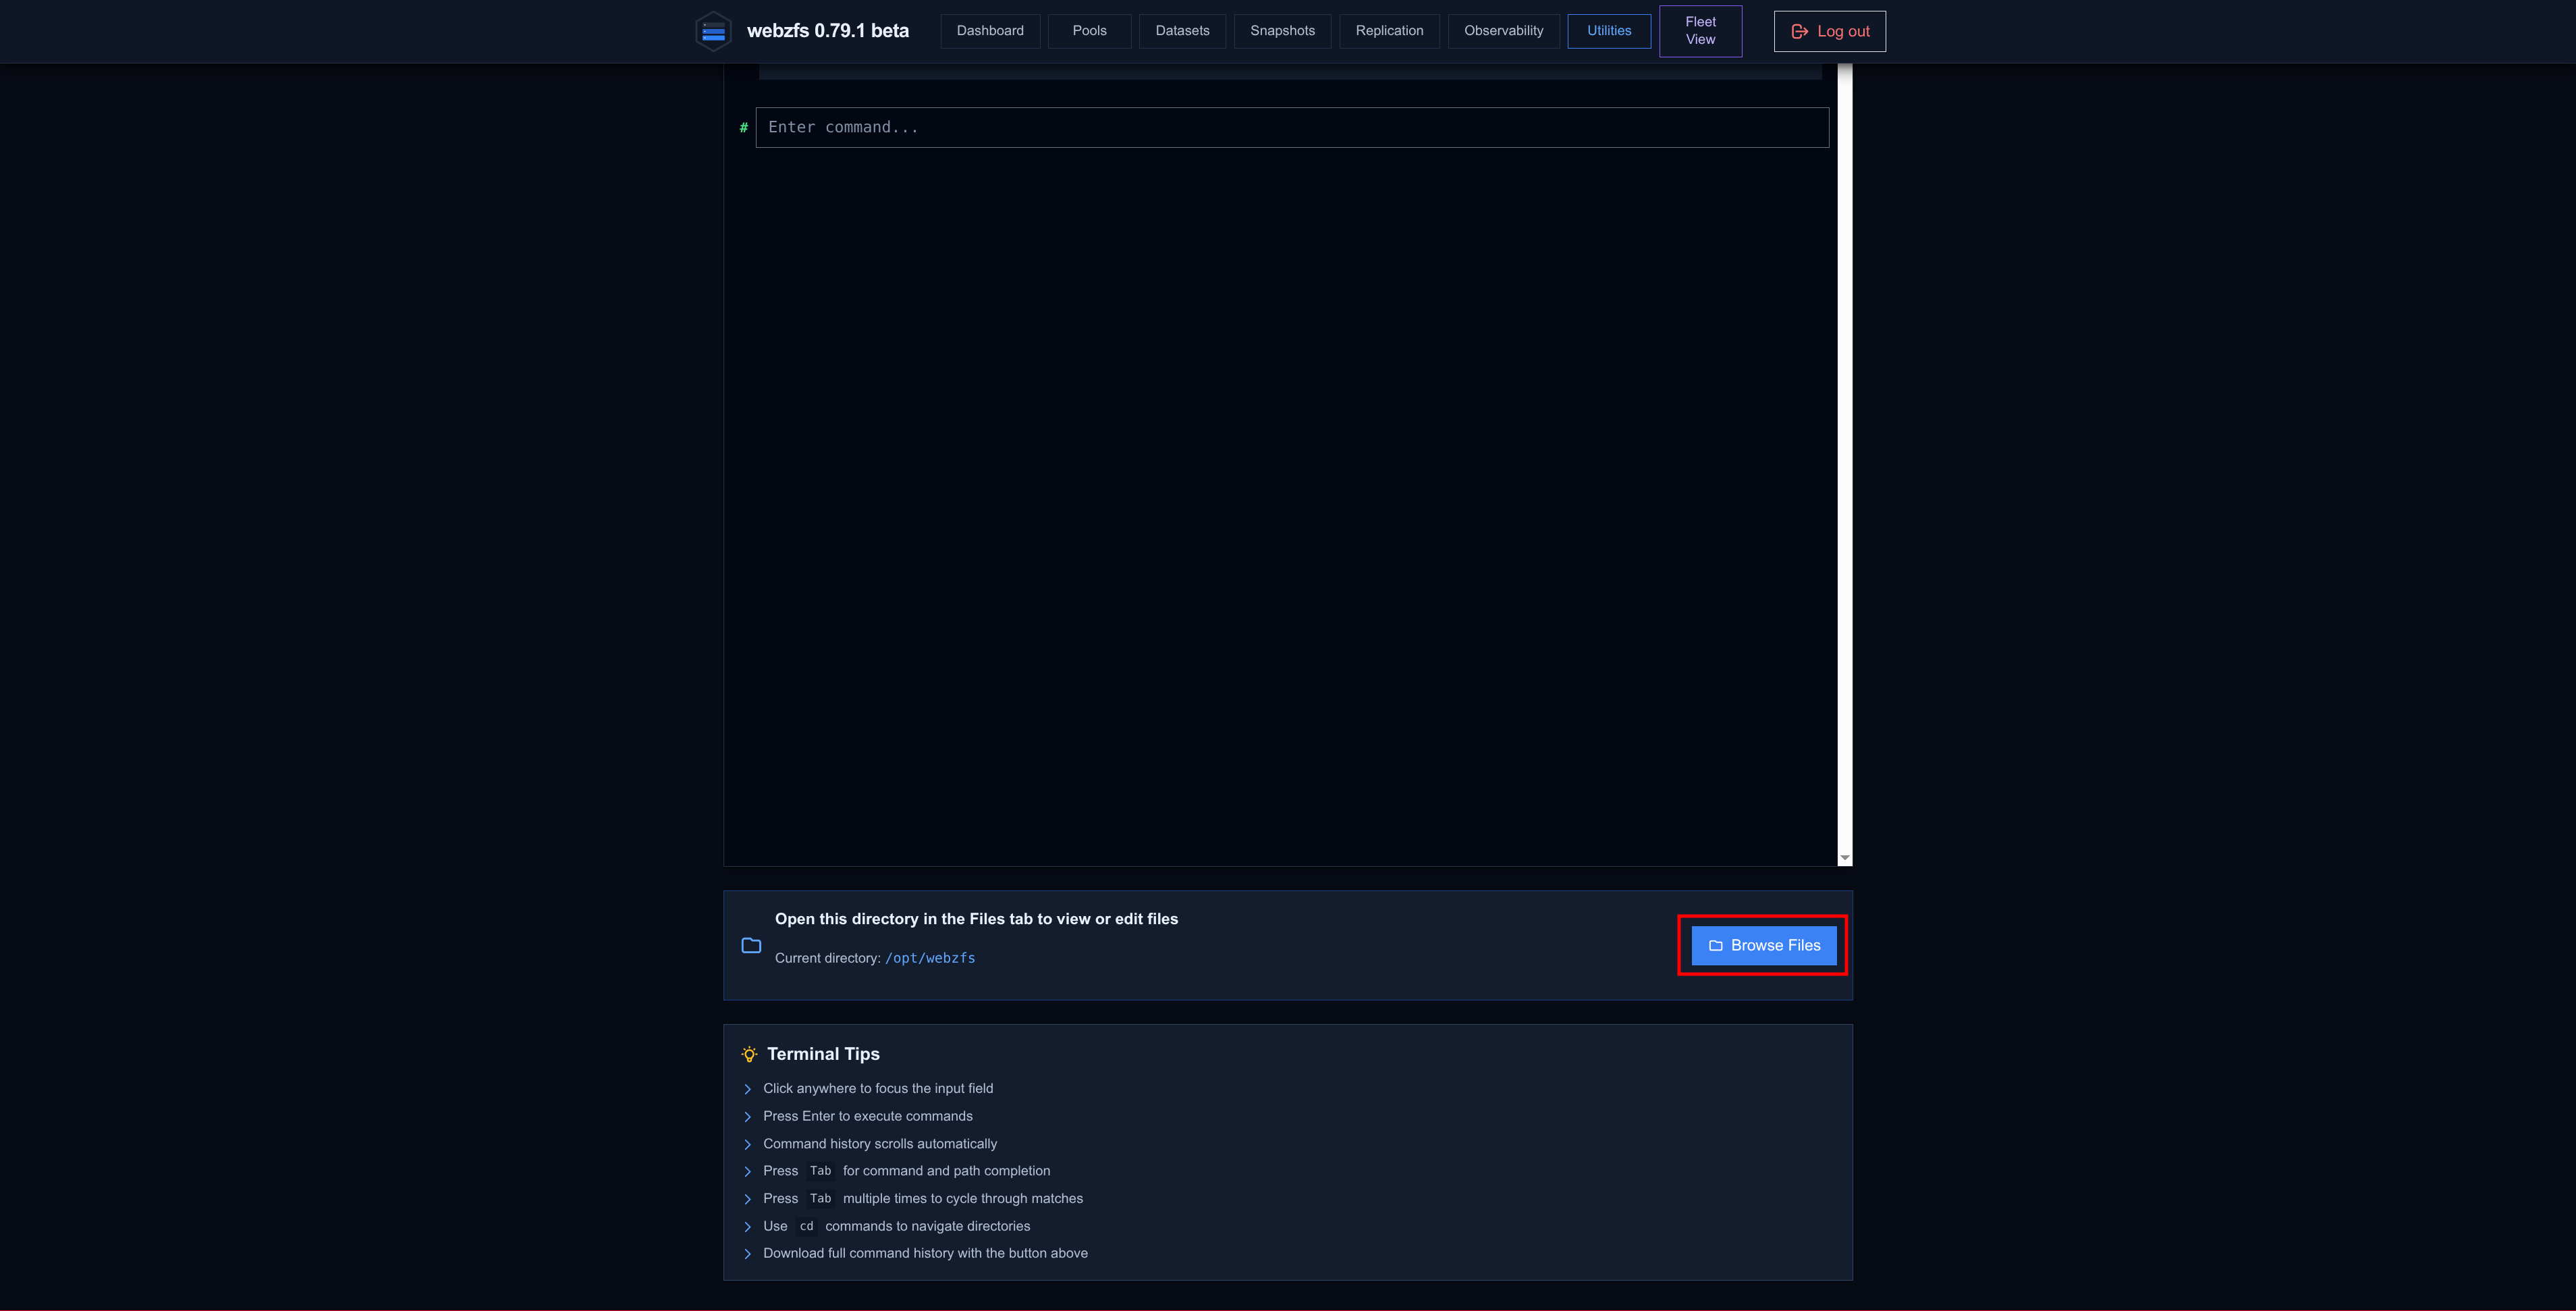
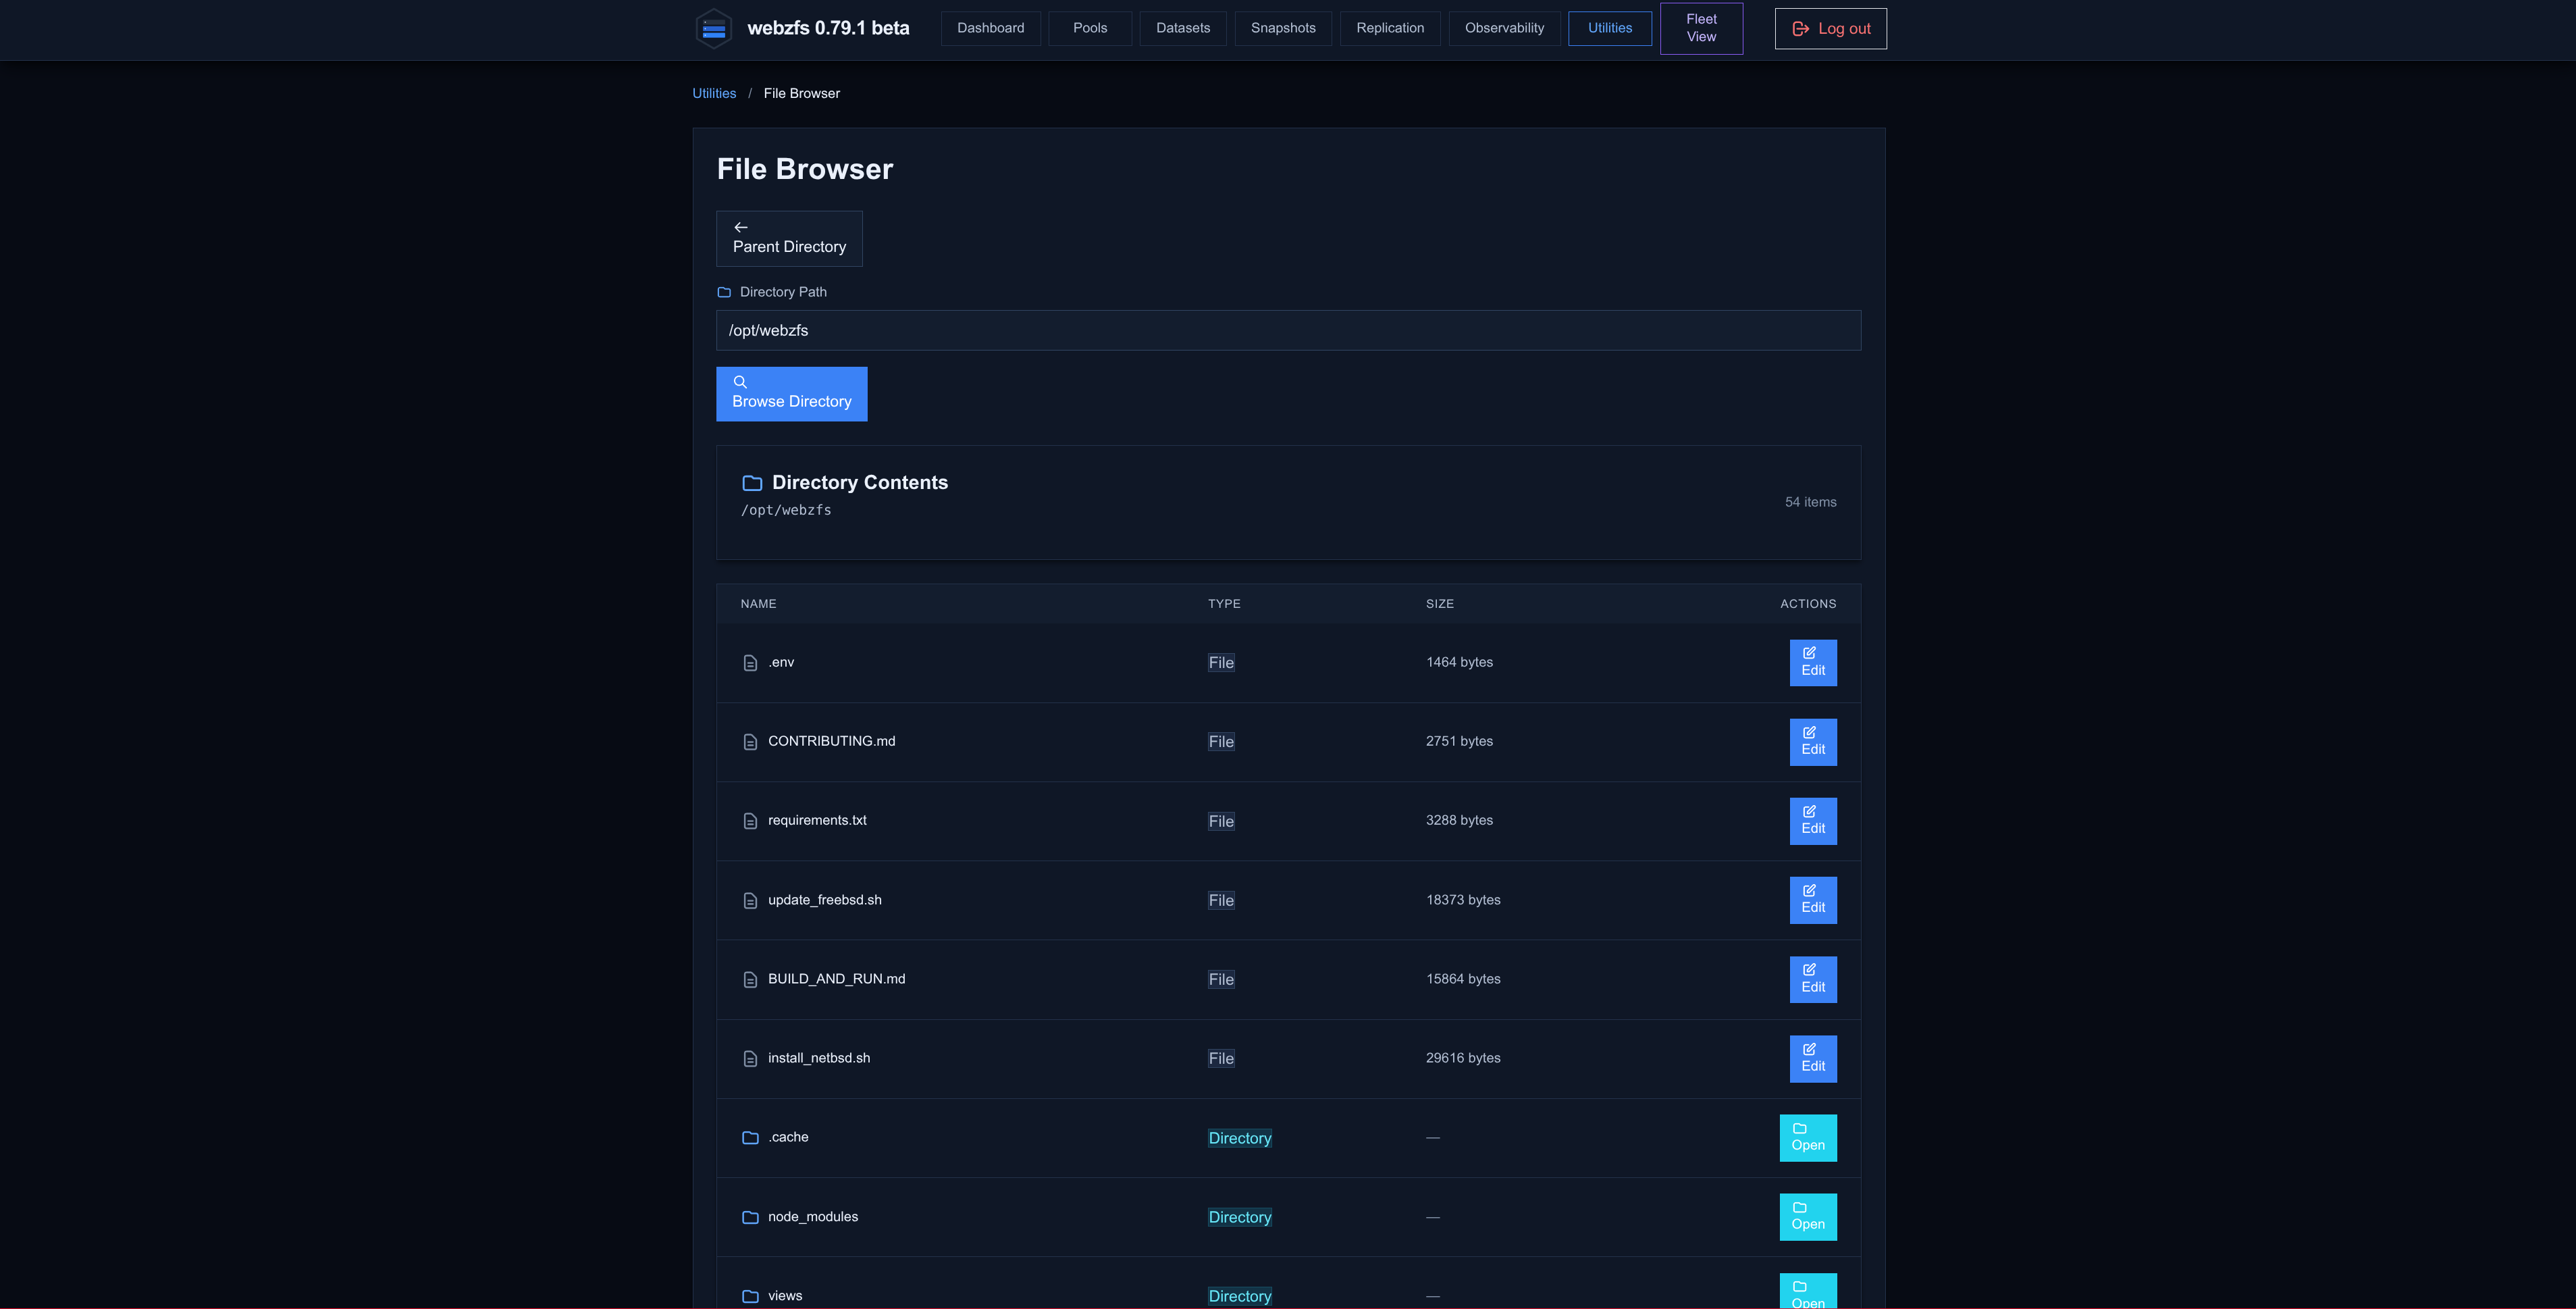
It also lets us browse the filesystem from two buttons that do exactly the same:
|
|
|
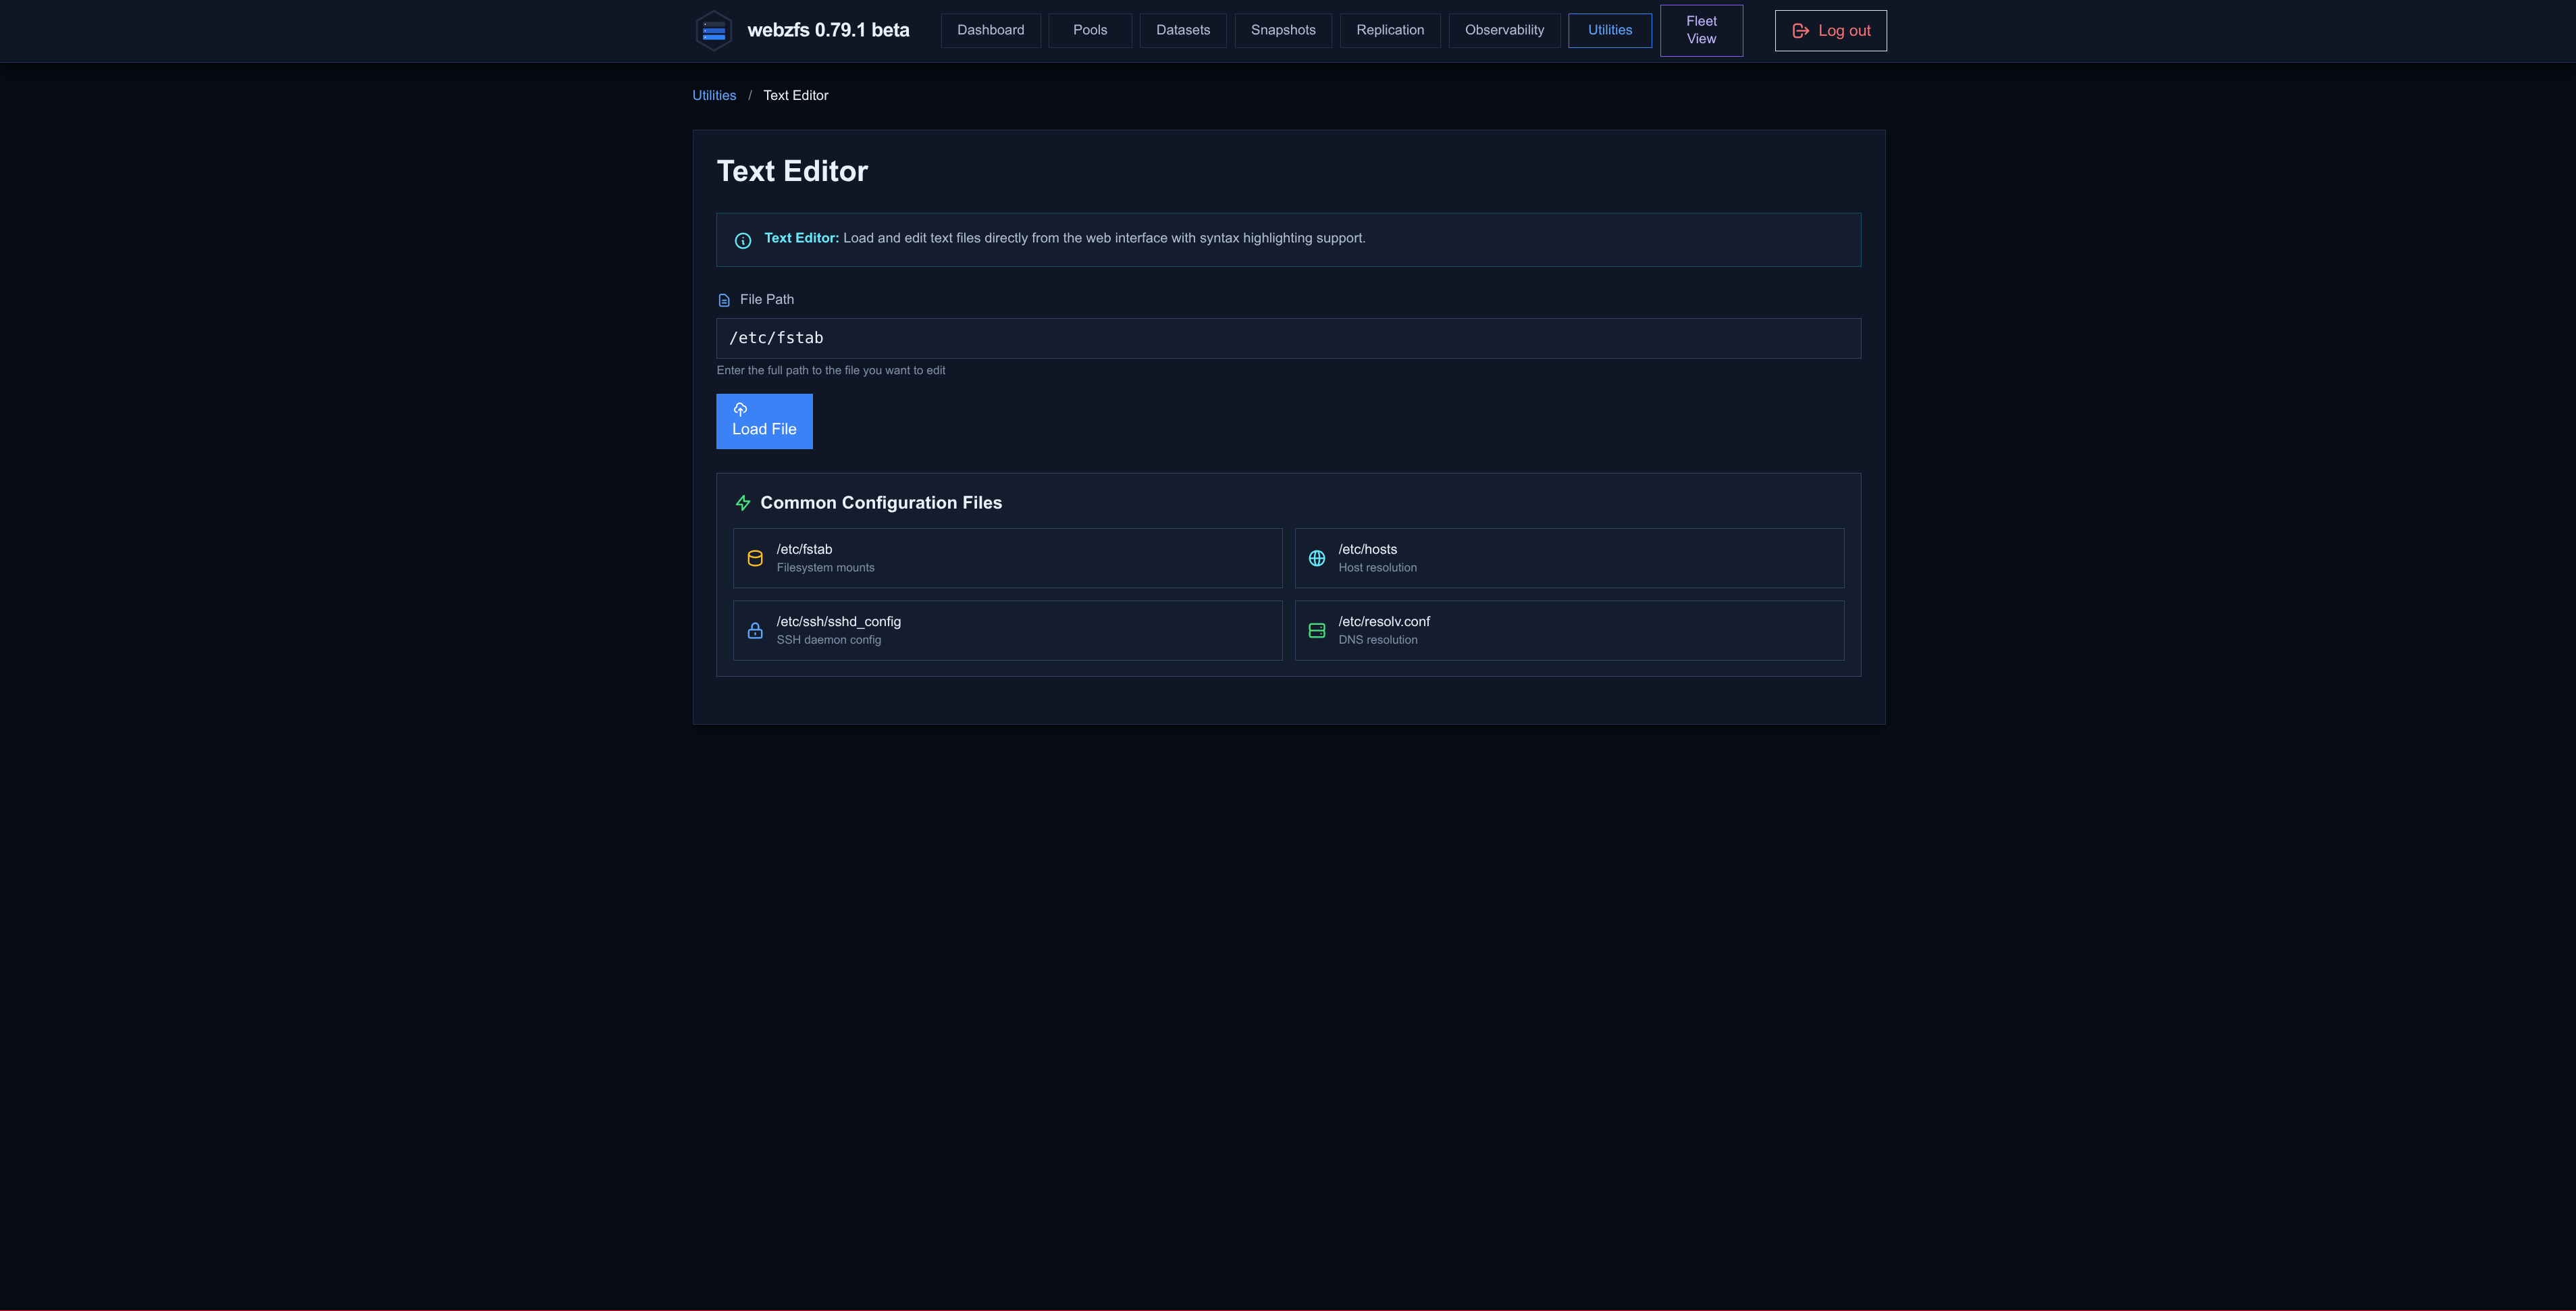
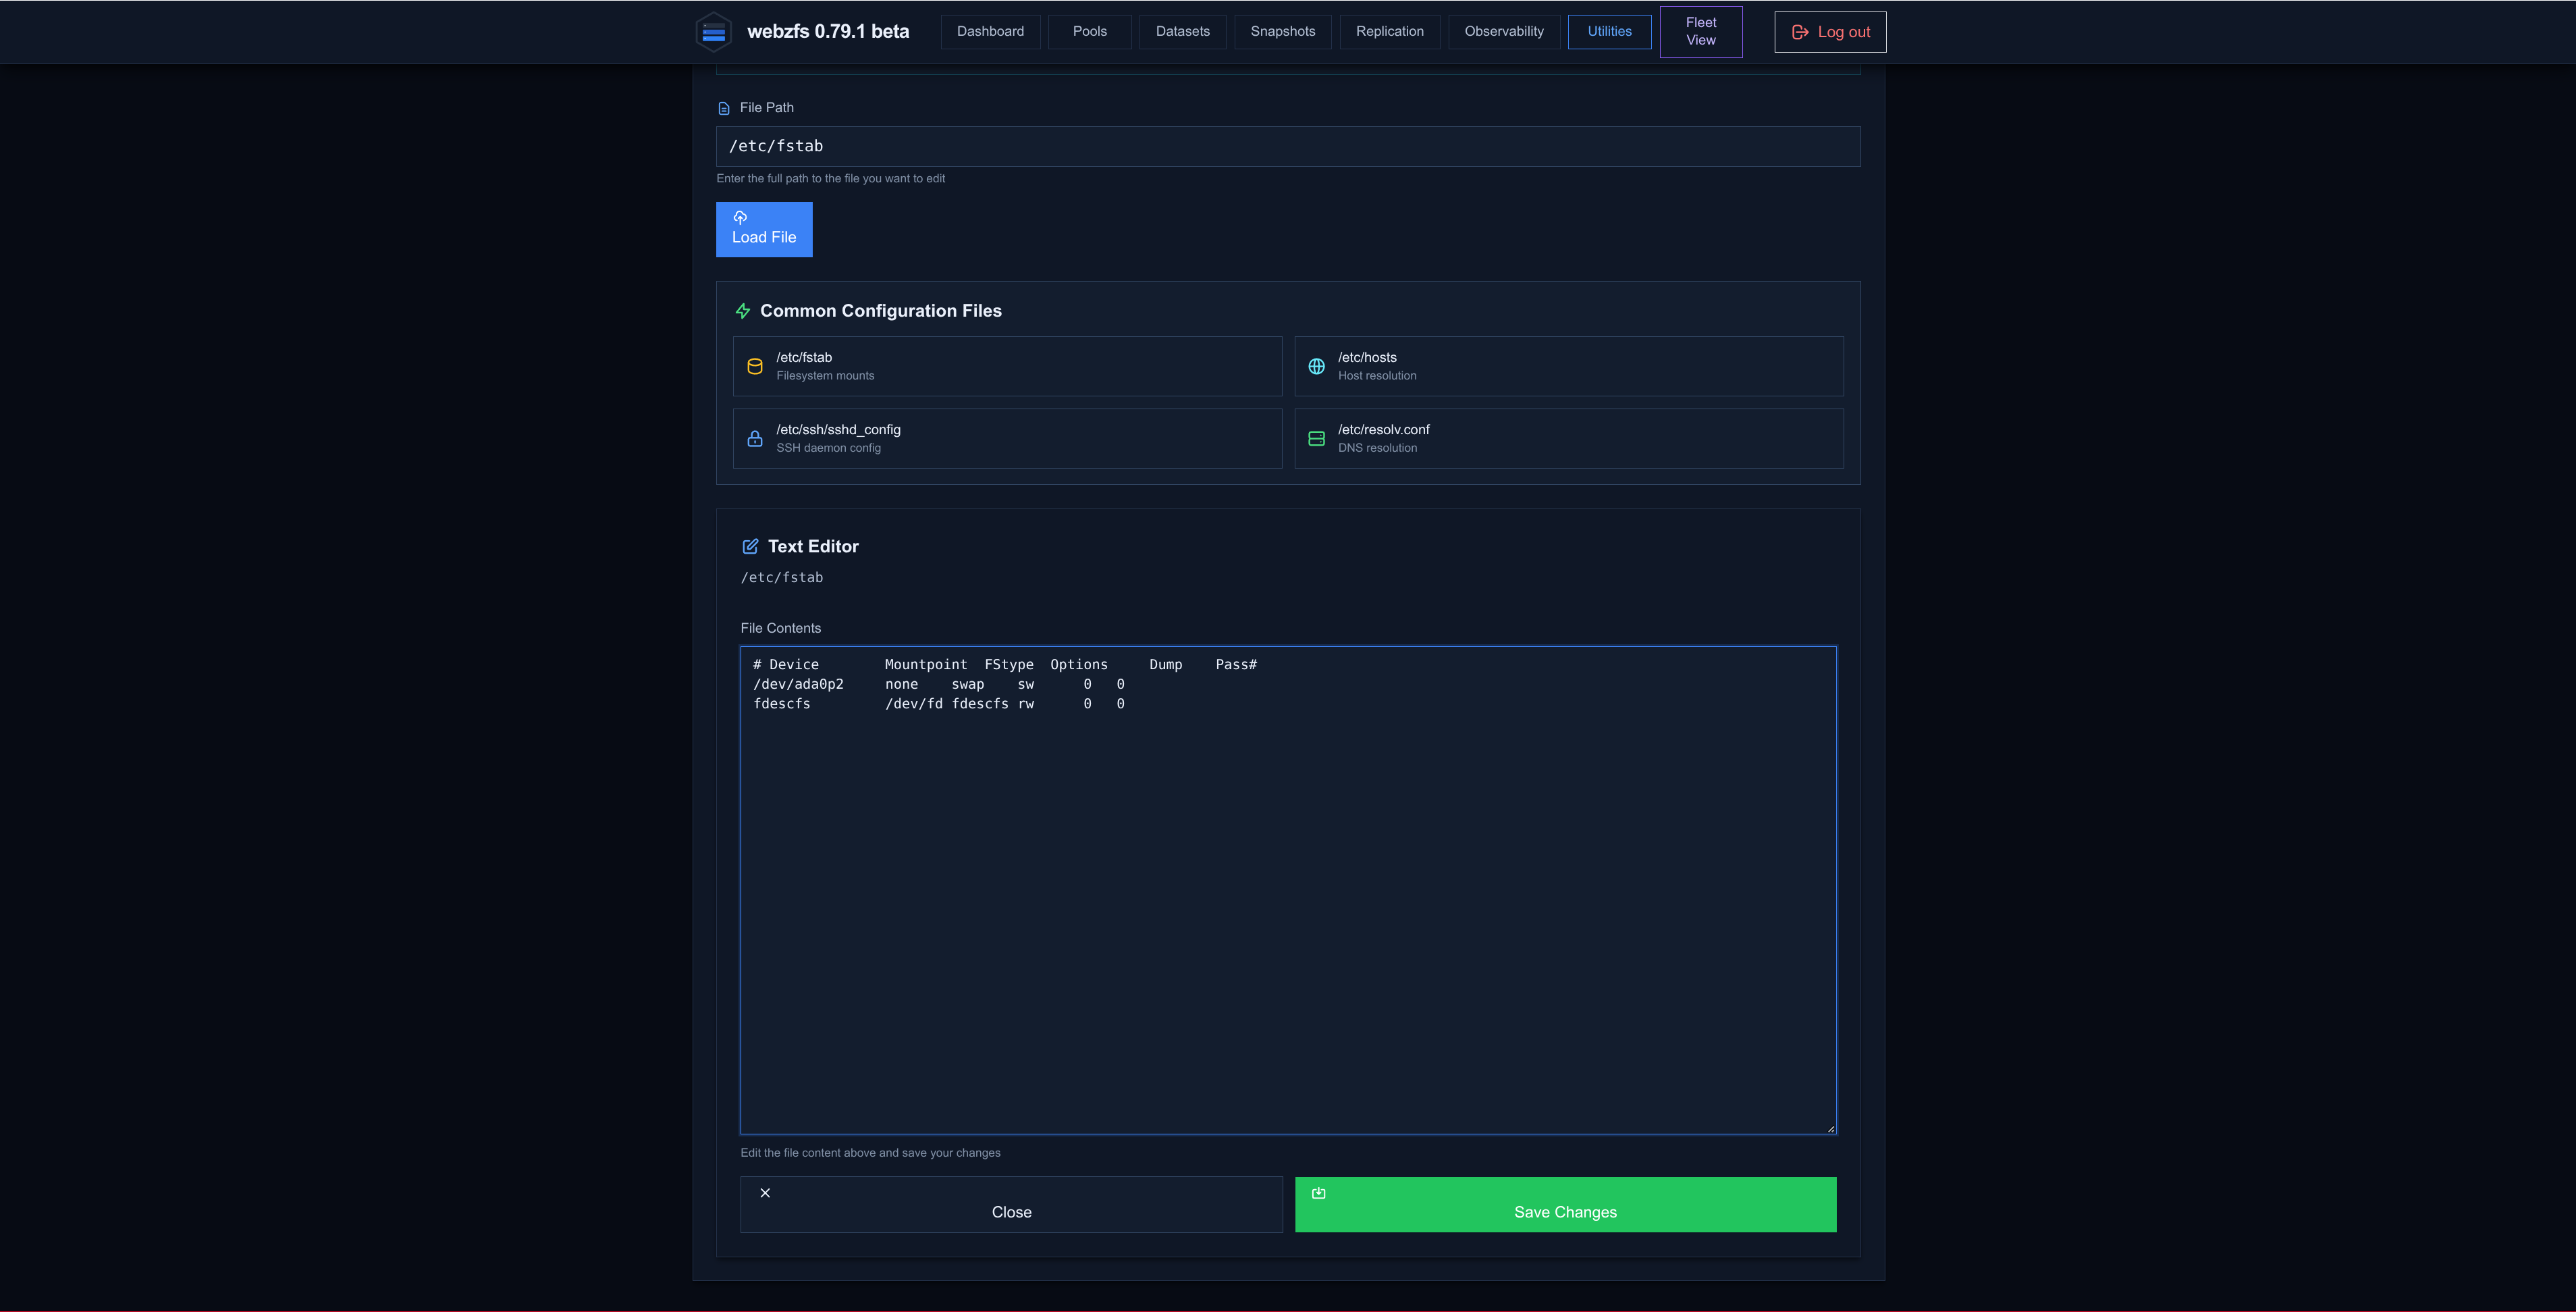
Text Editor:
It lets us edit system files. This editor has a peculiarity, which is that you cannot do two consecutive saves without first clicking Load File between saves.
|
|
File Browser:
This file explorer we have already seen in the Utilities -> Shell section.
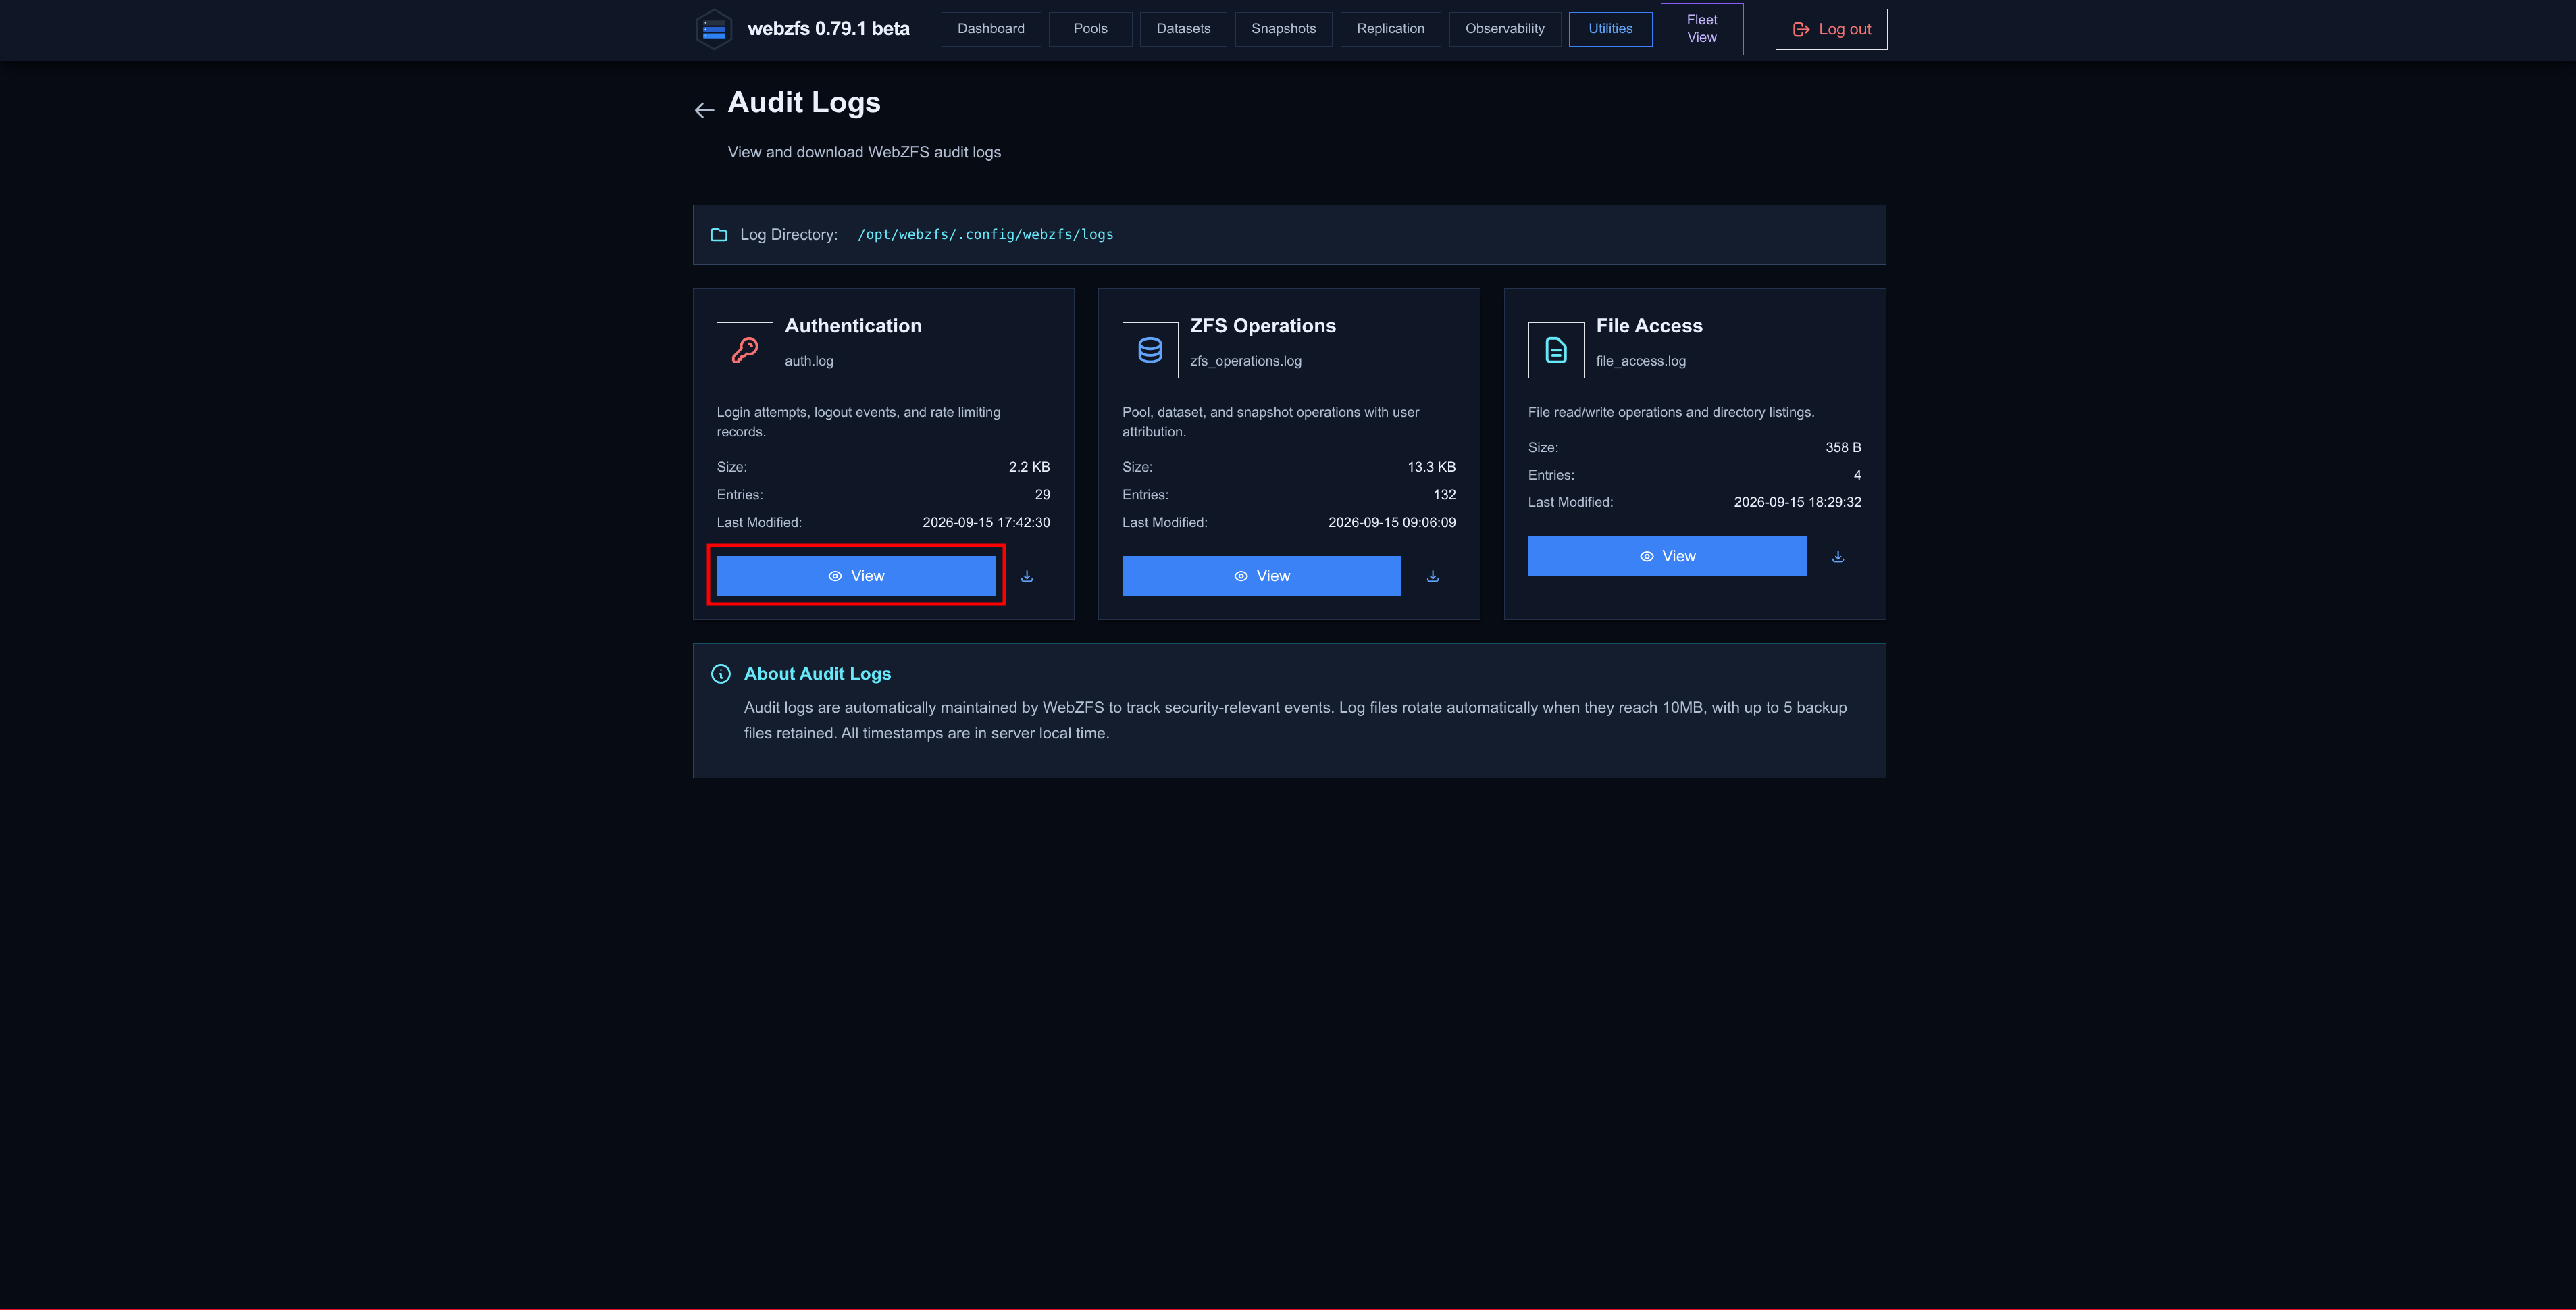
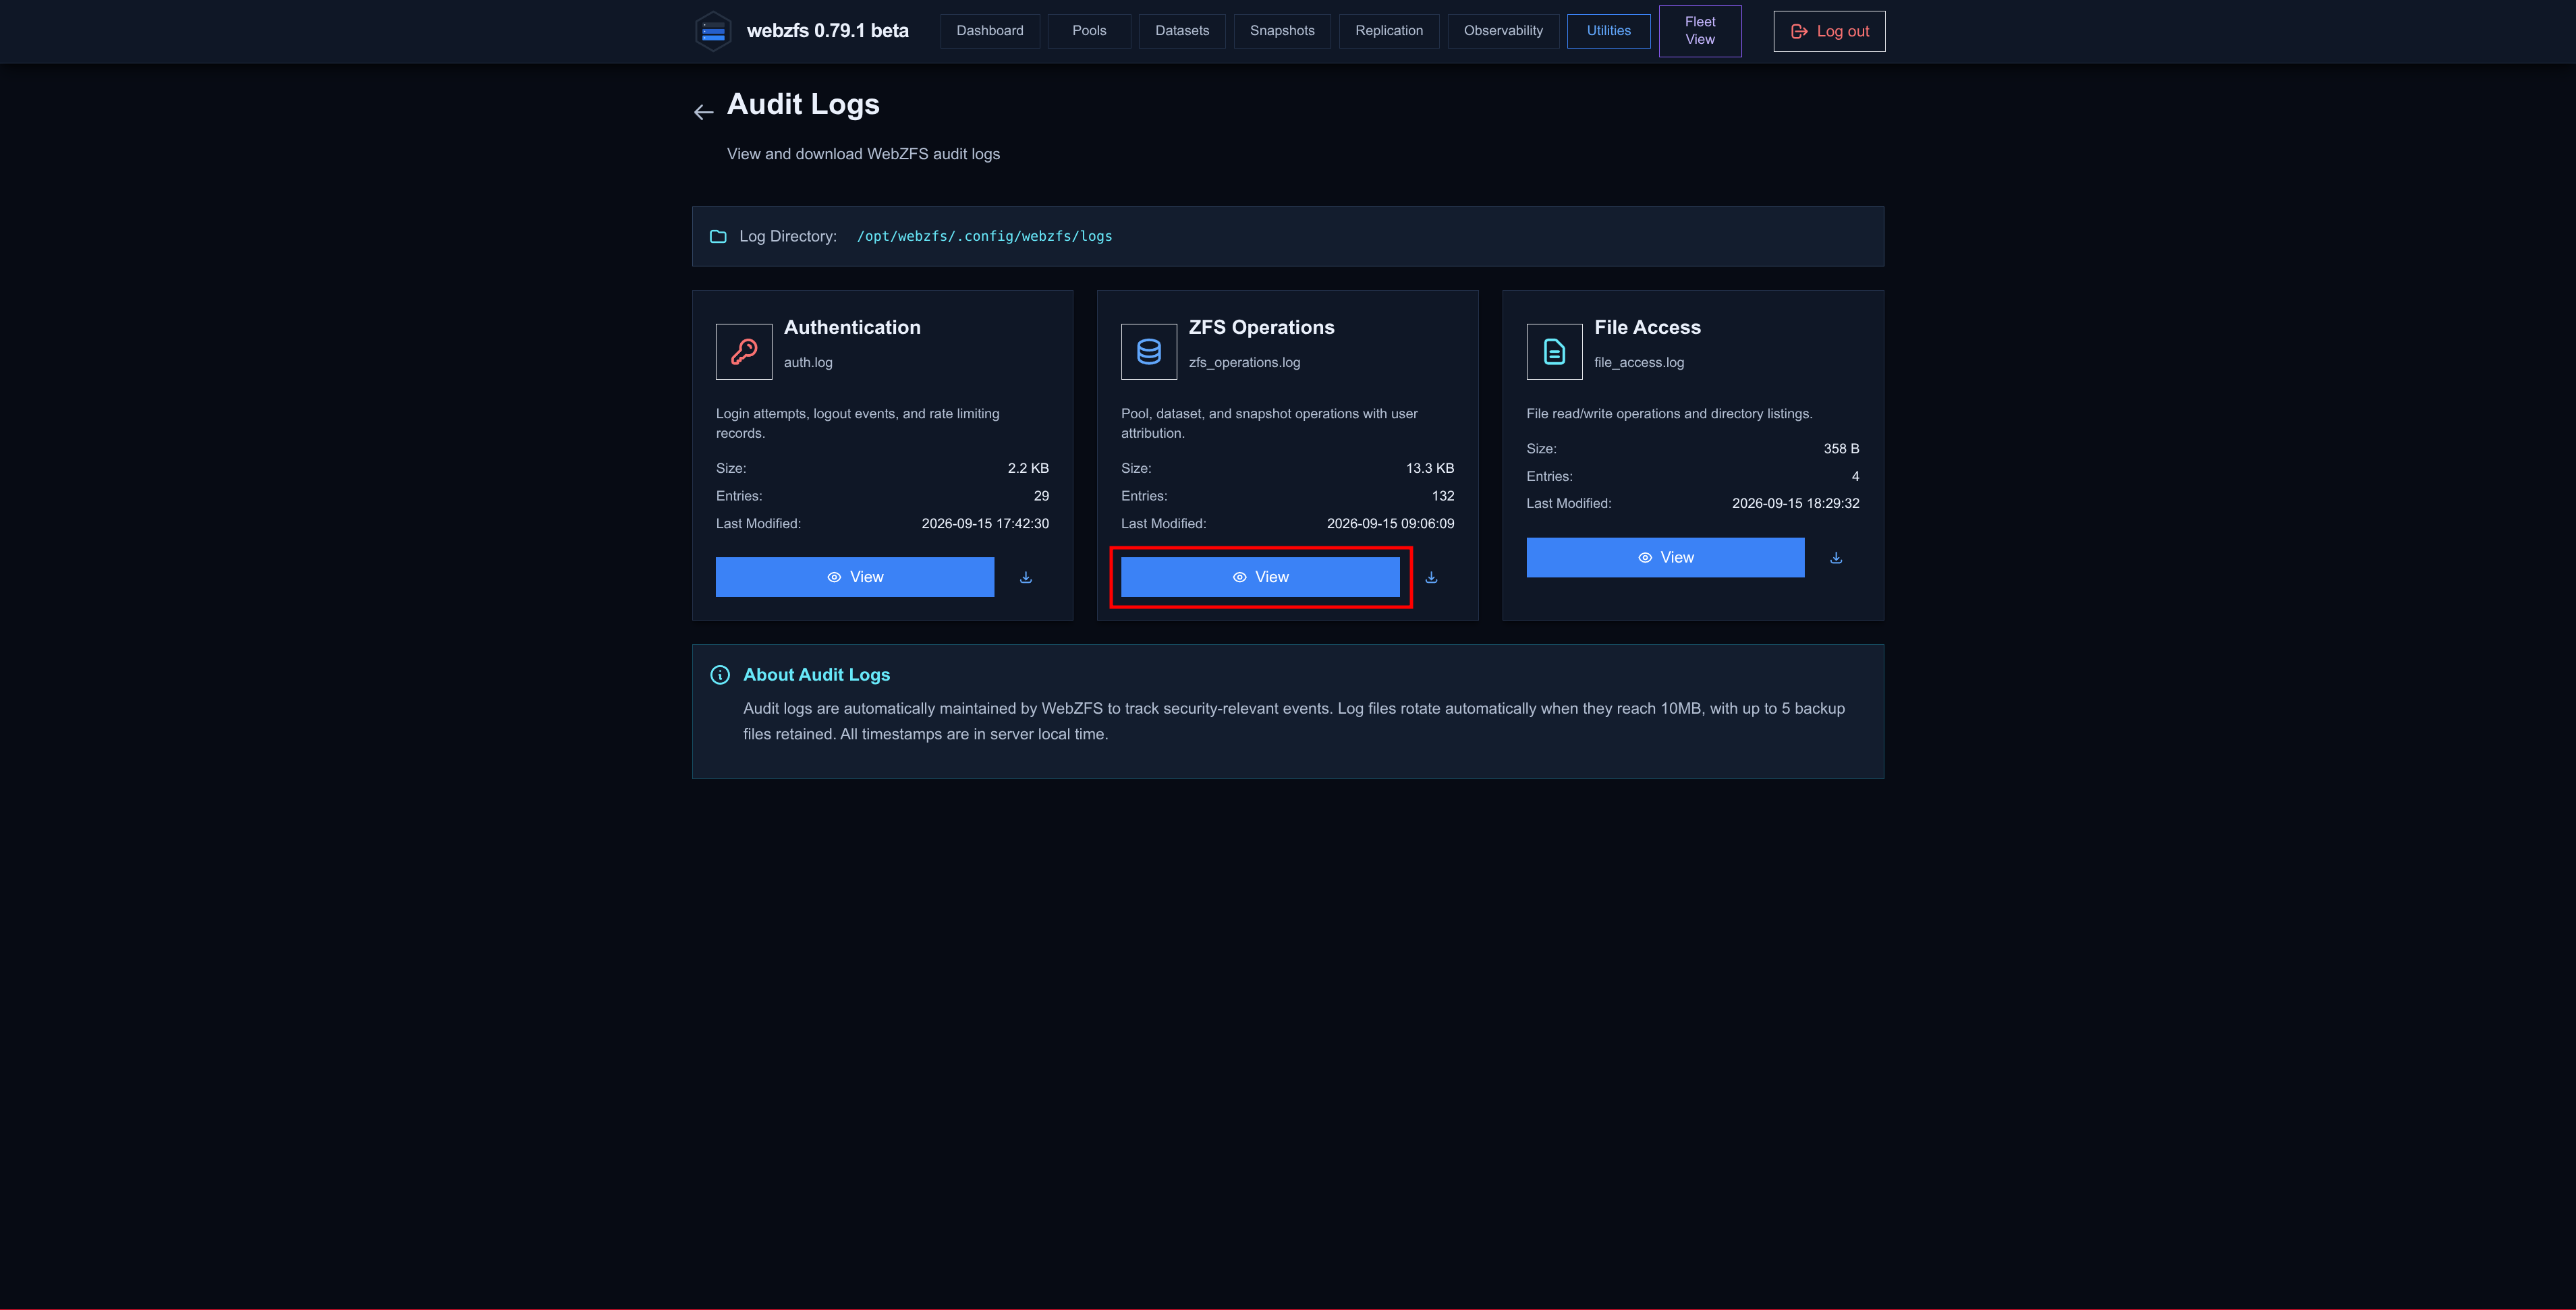
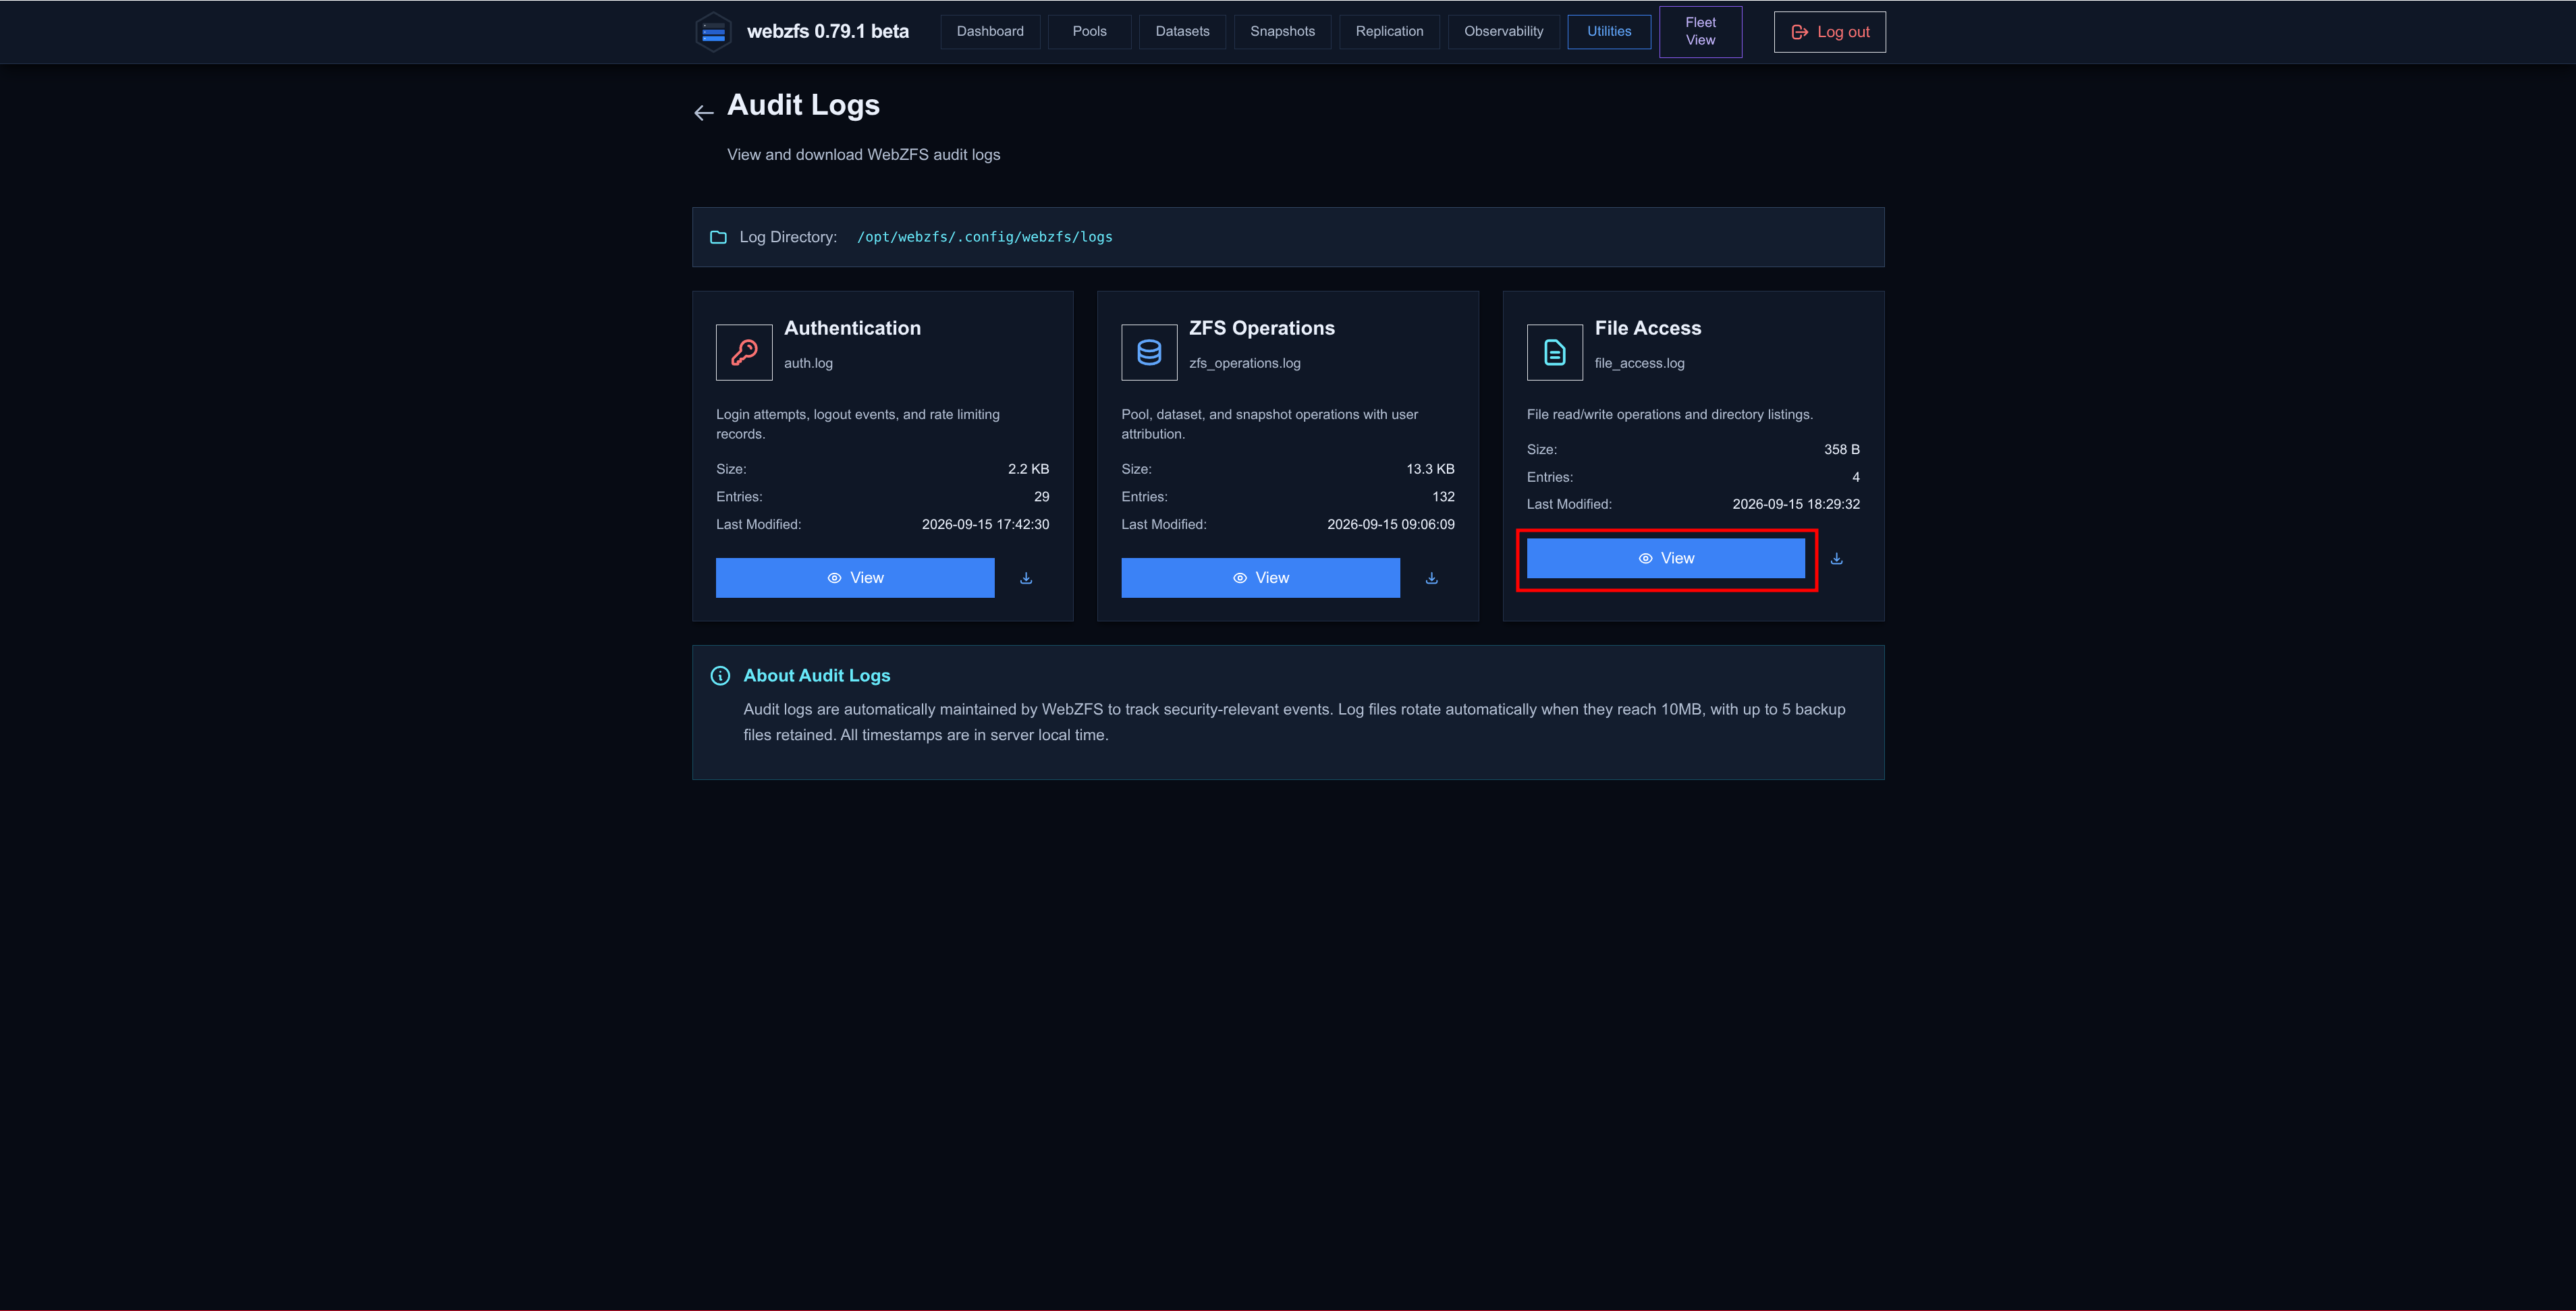
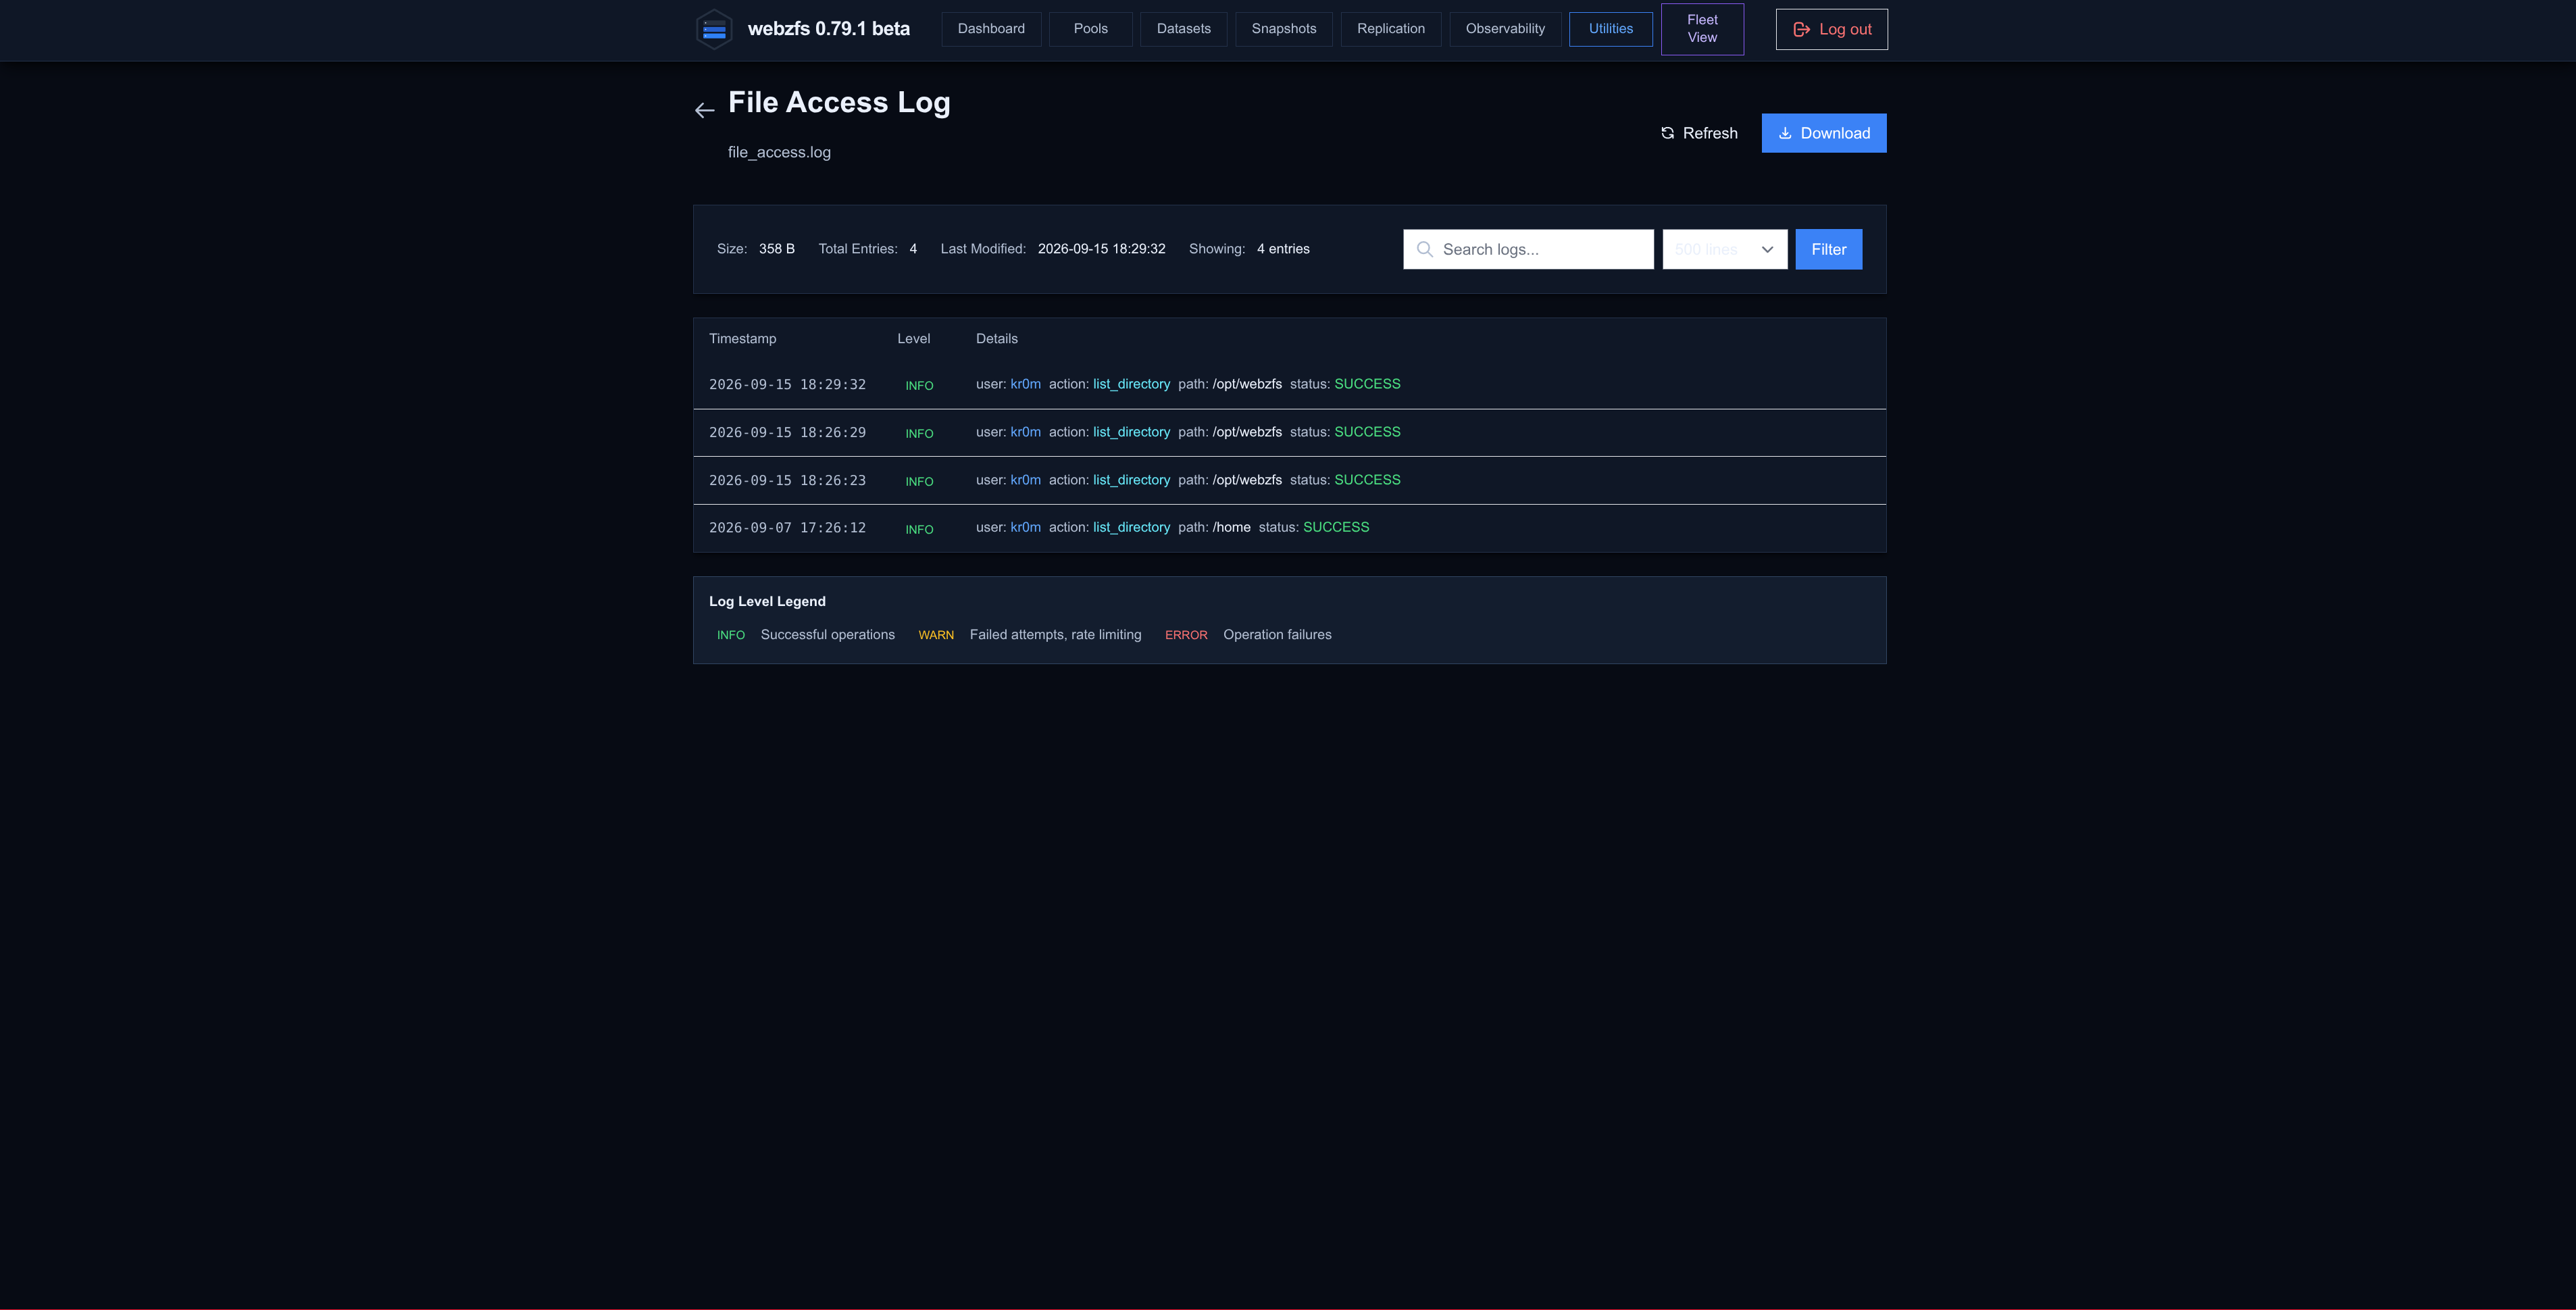
Audit Logs:
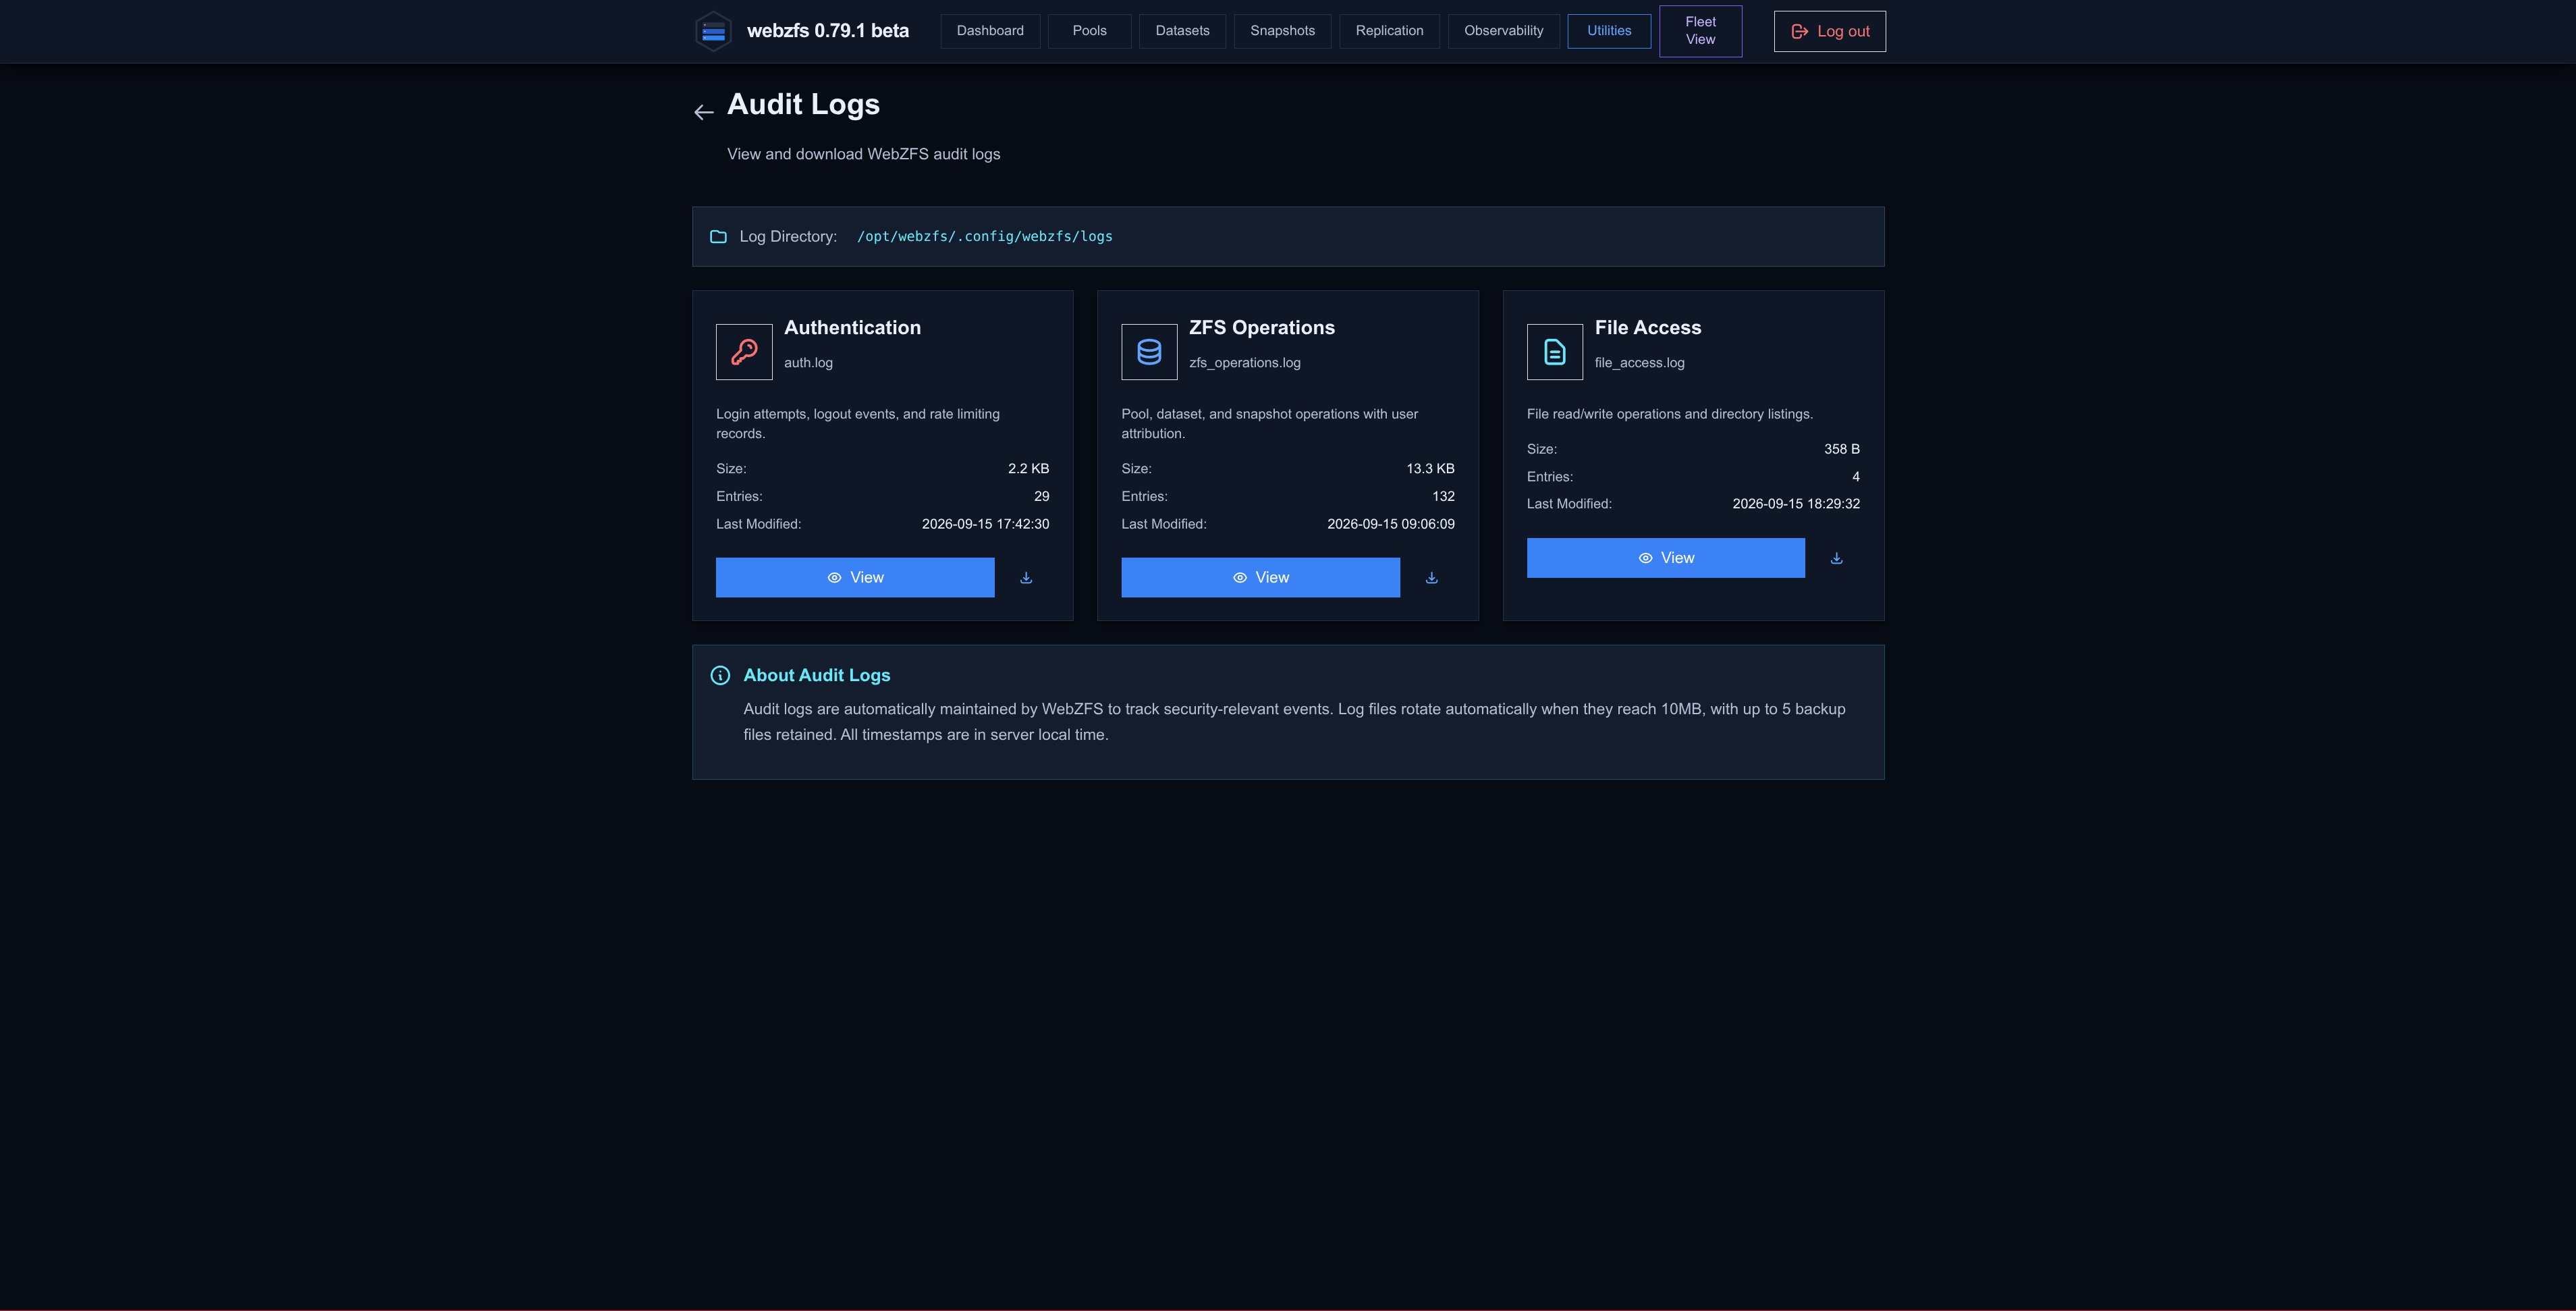
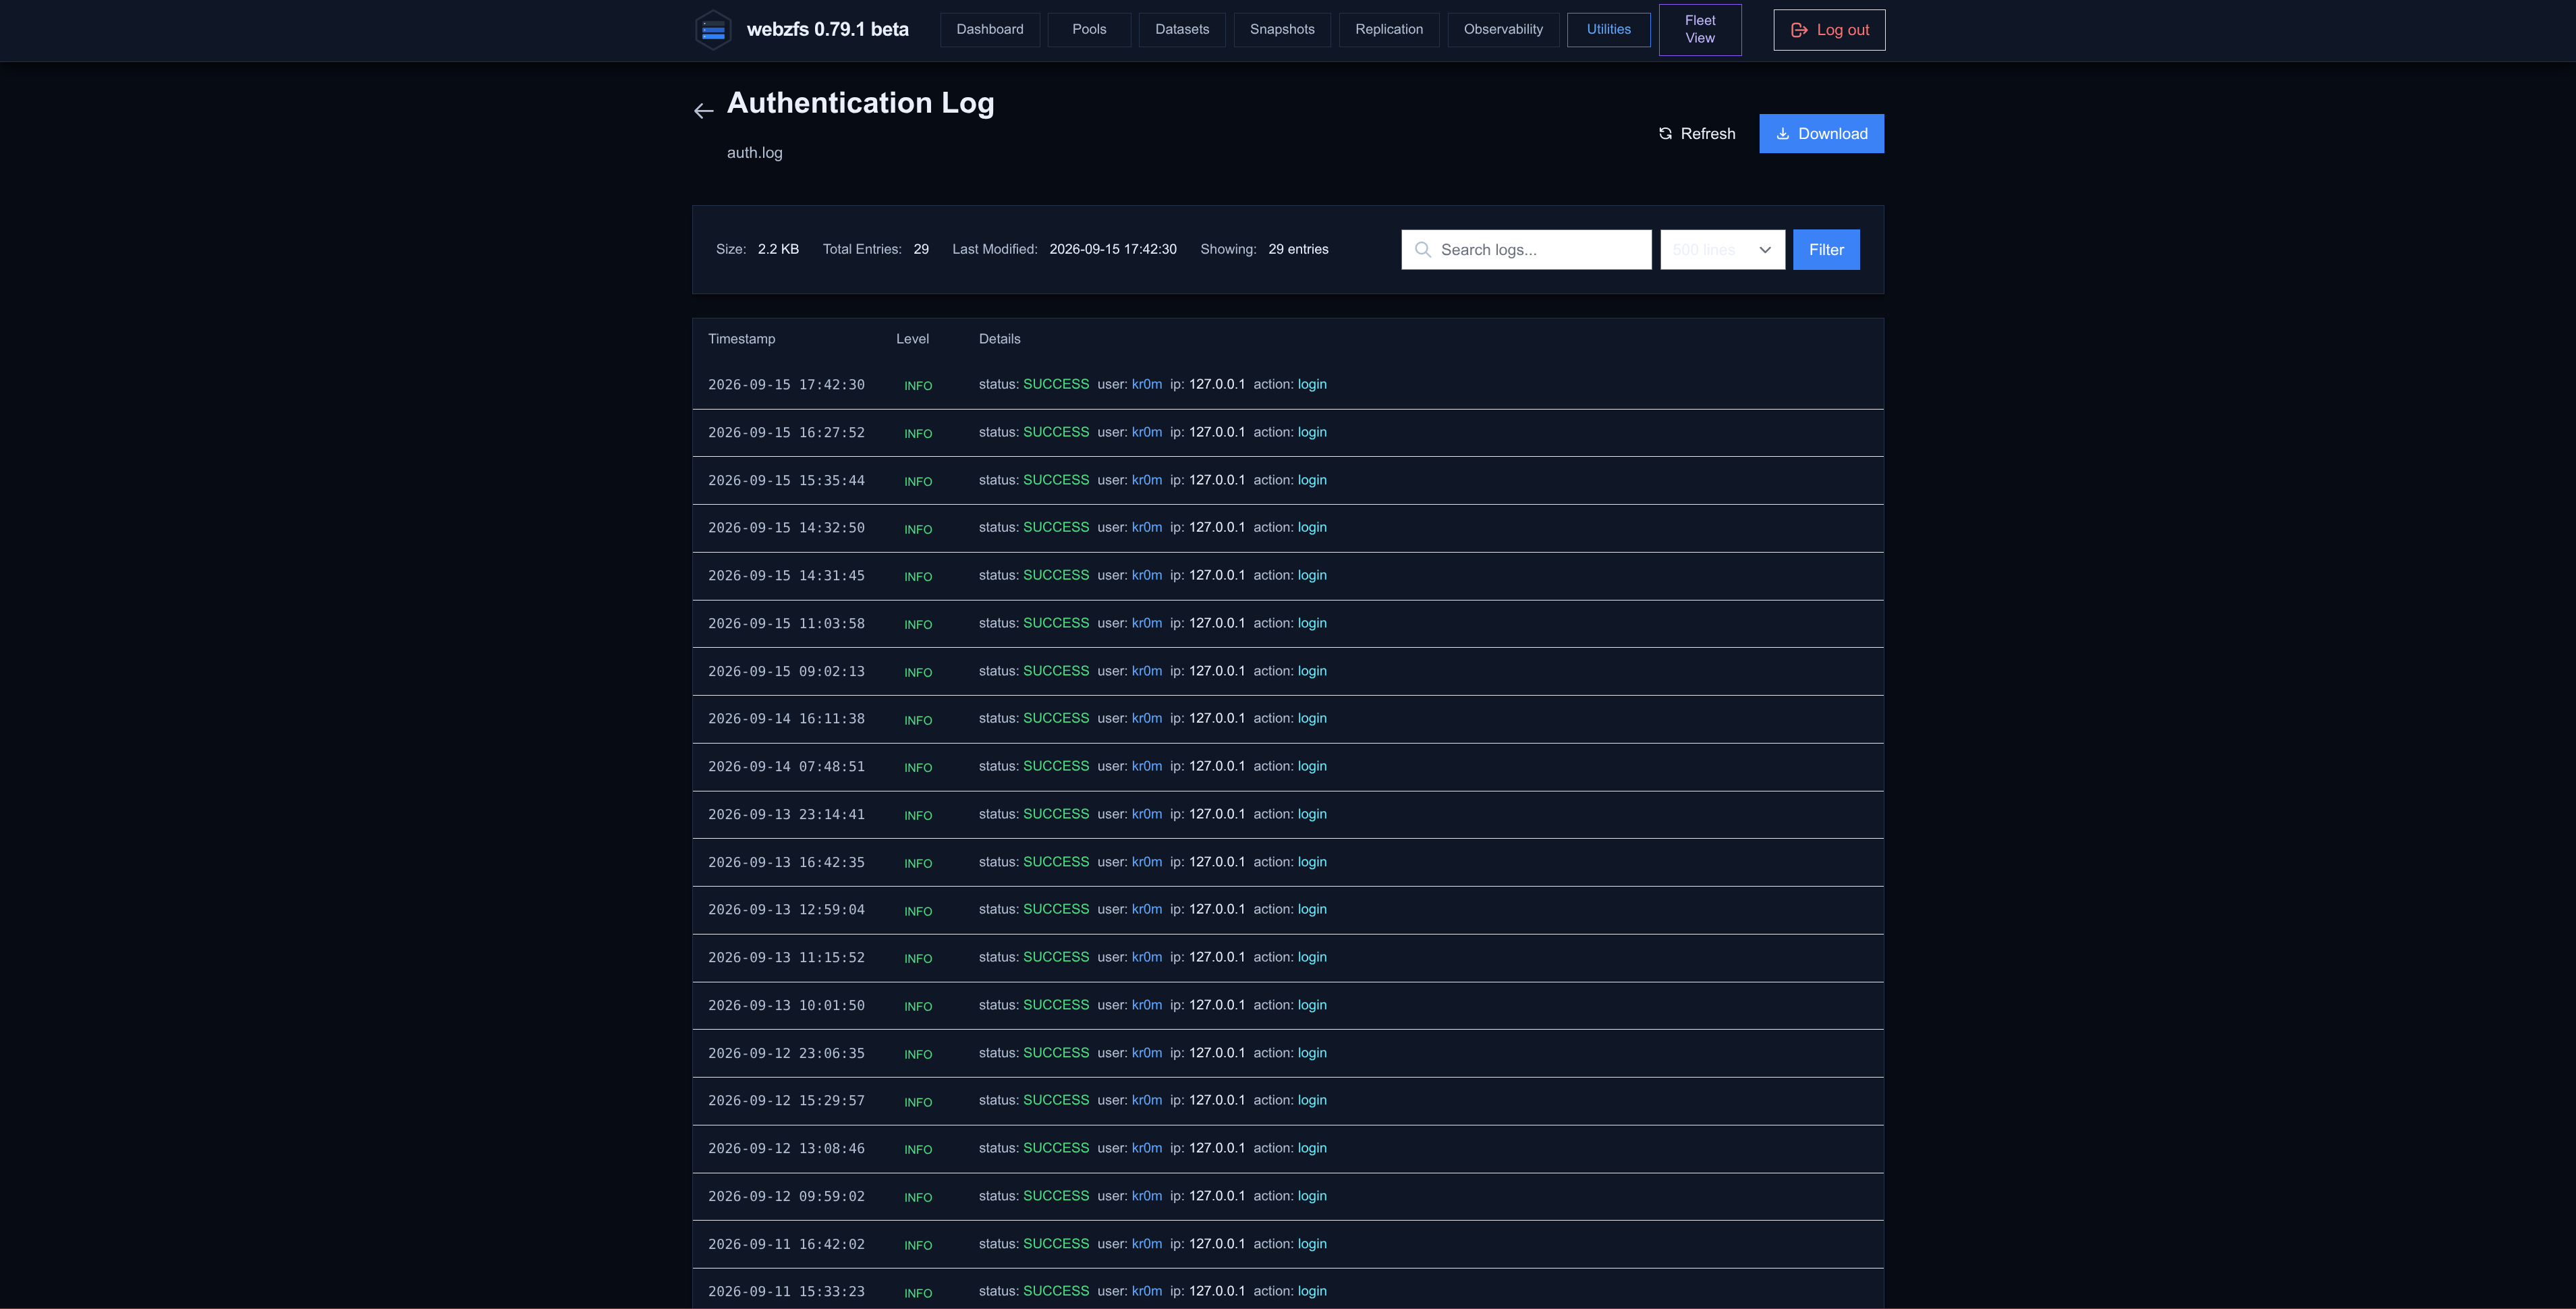
From this section we can see the logs related to authentication, ZFS operations and file accesses from the File Browser.
-
Authentication.
-
ZFS Operations.
-
File Access.
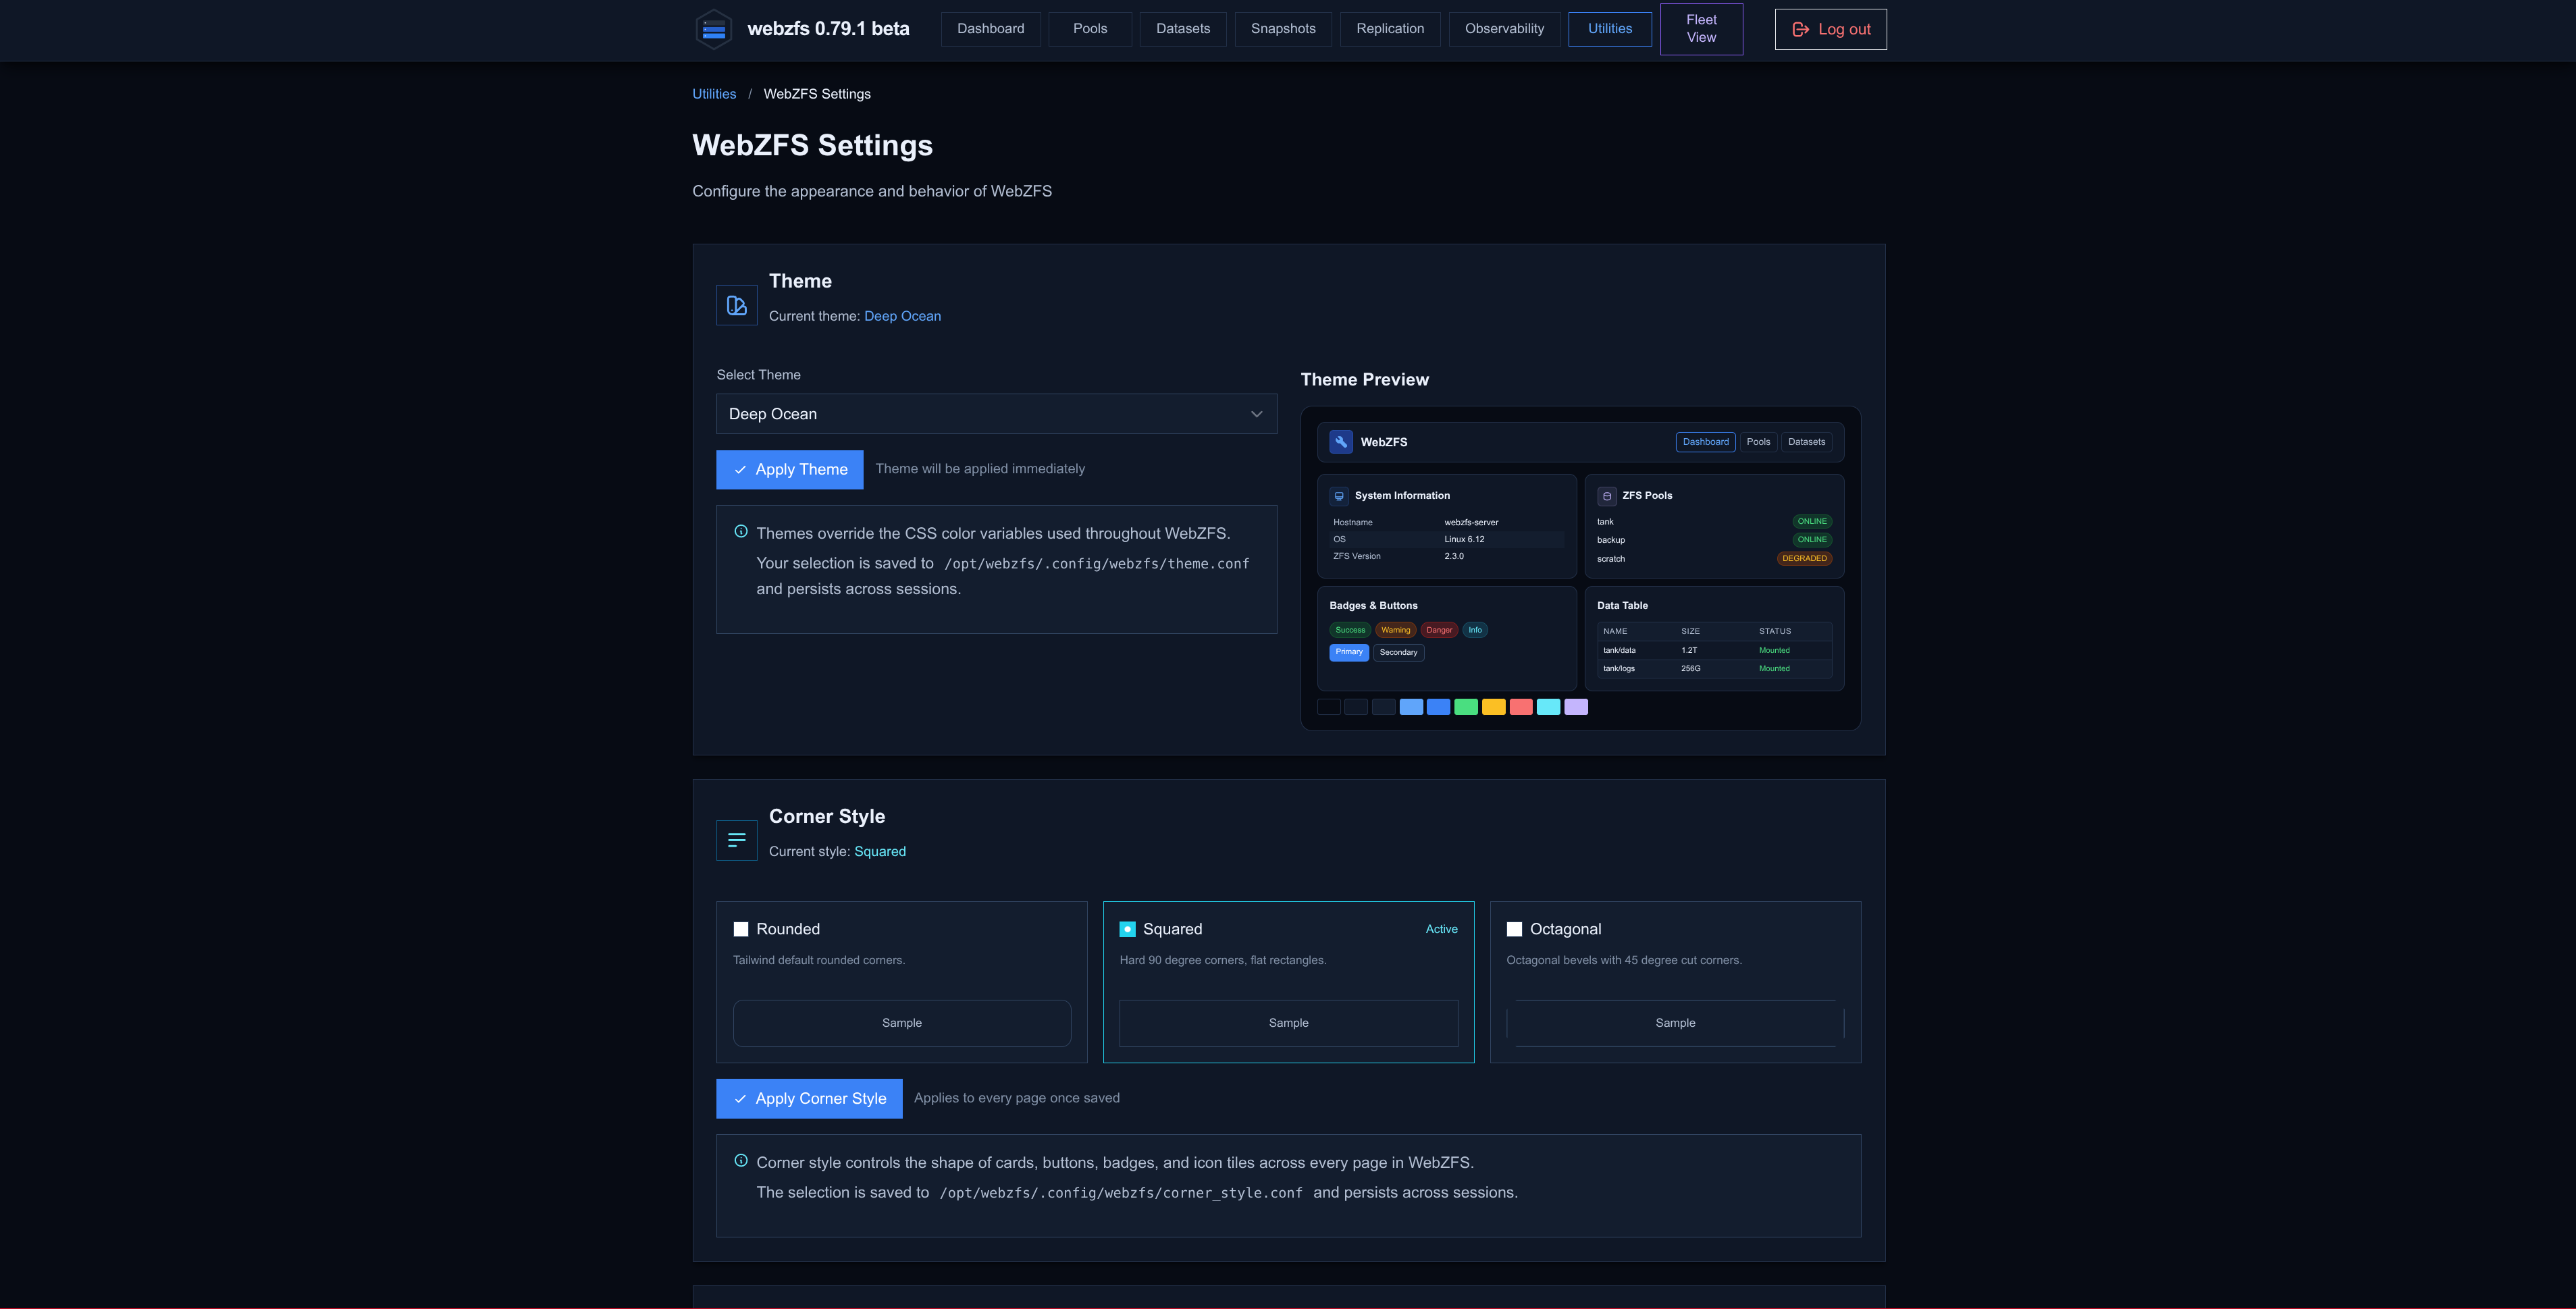
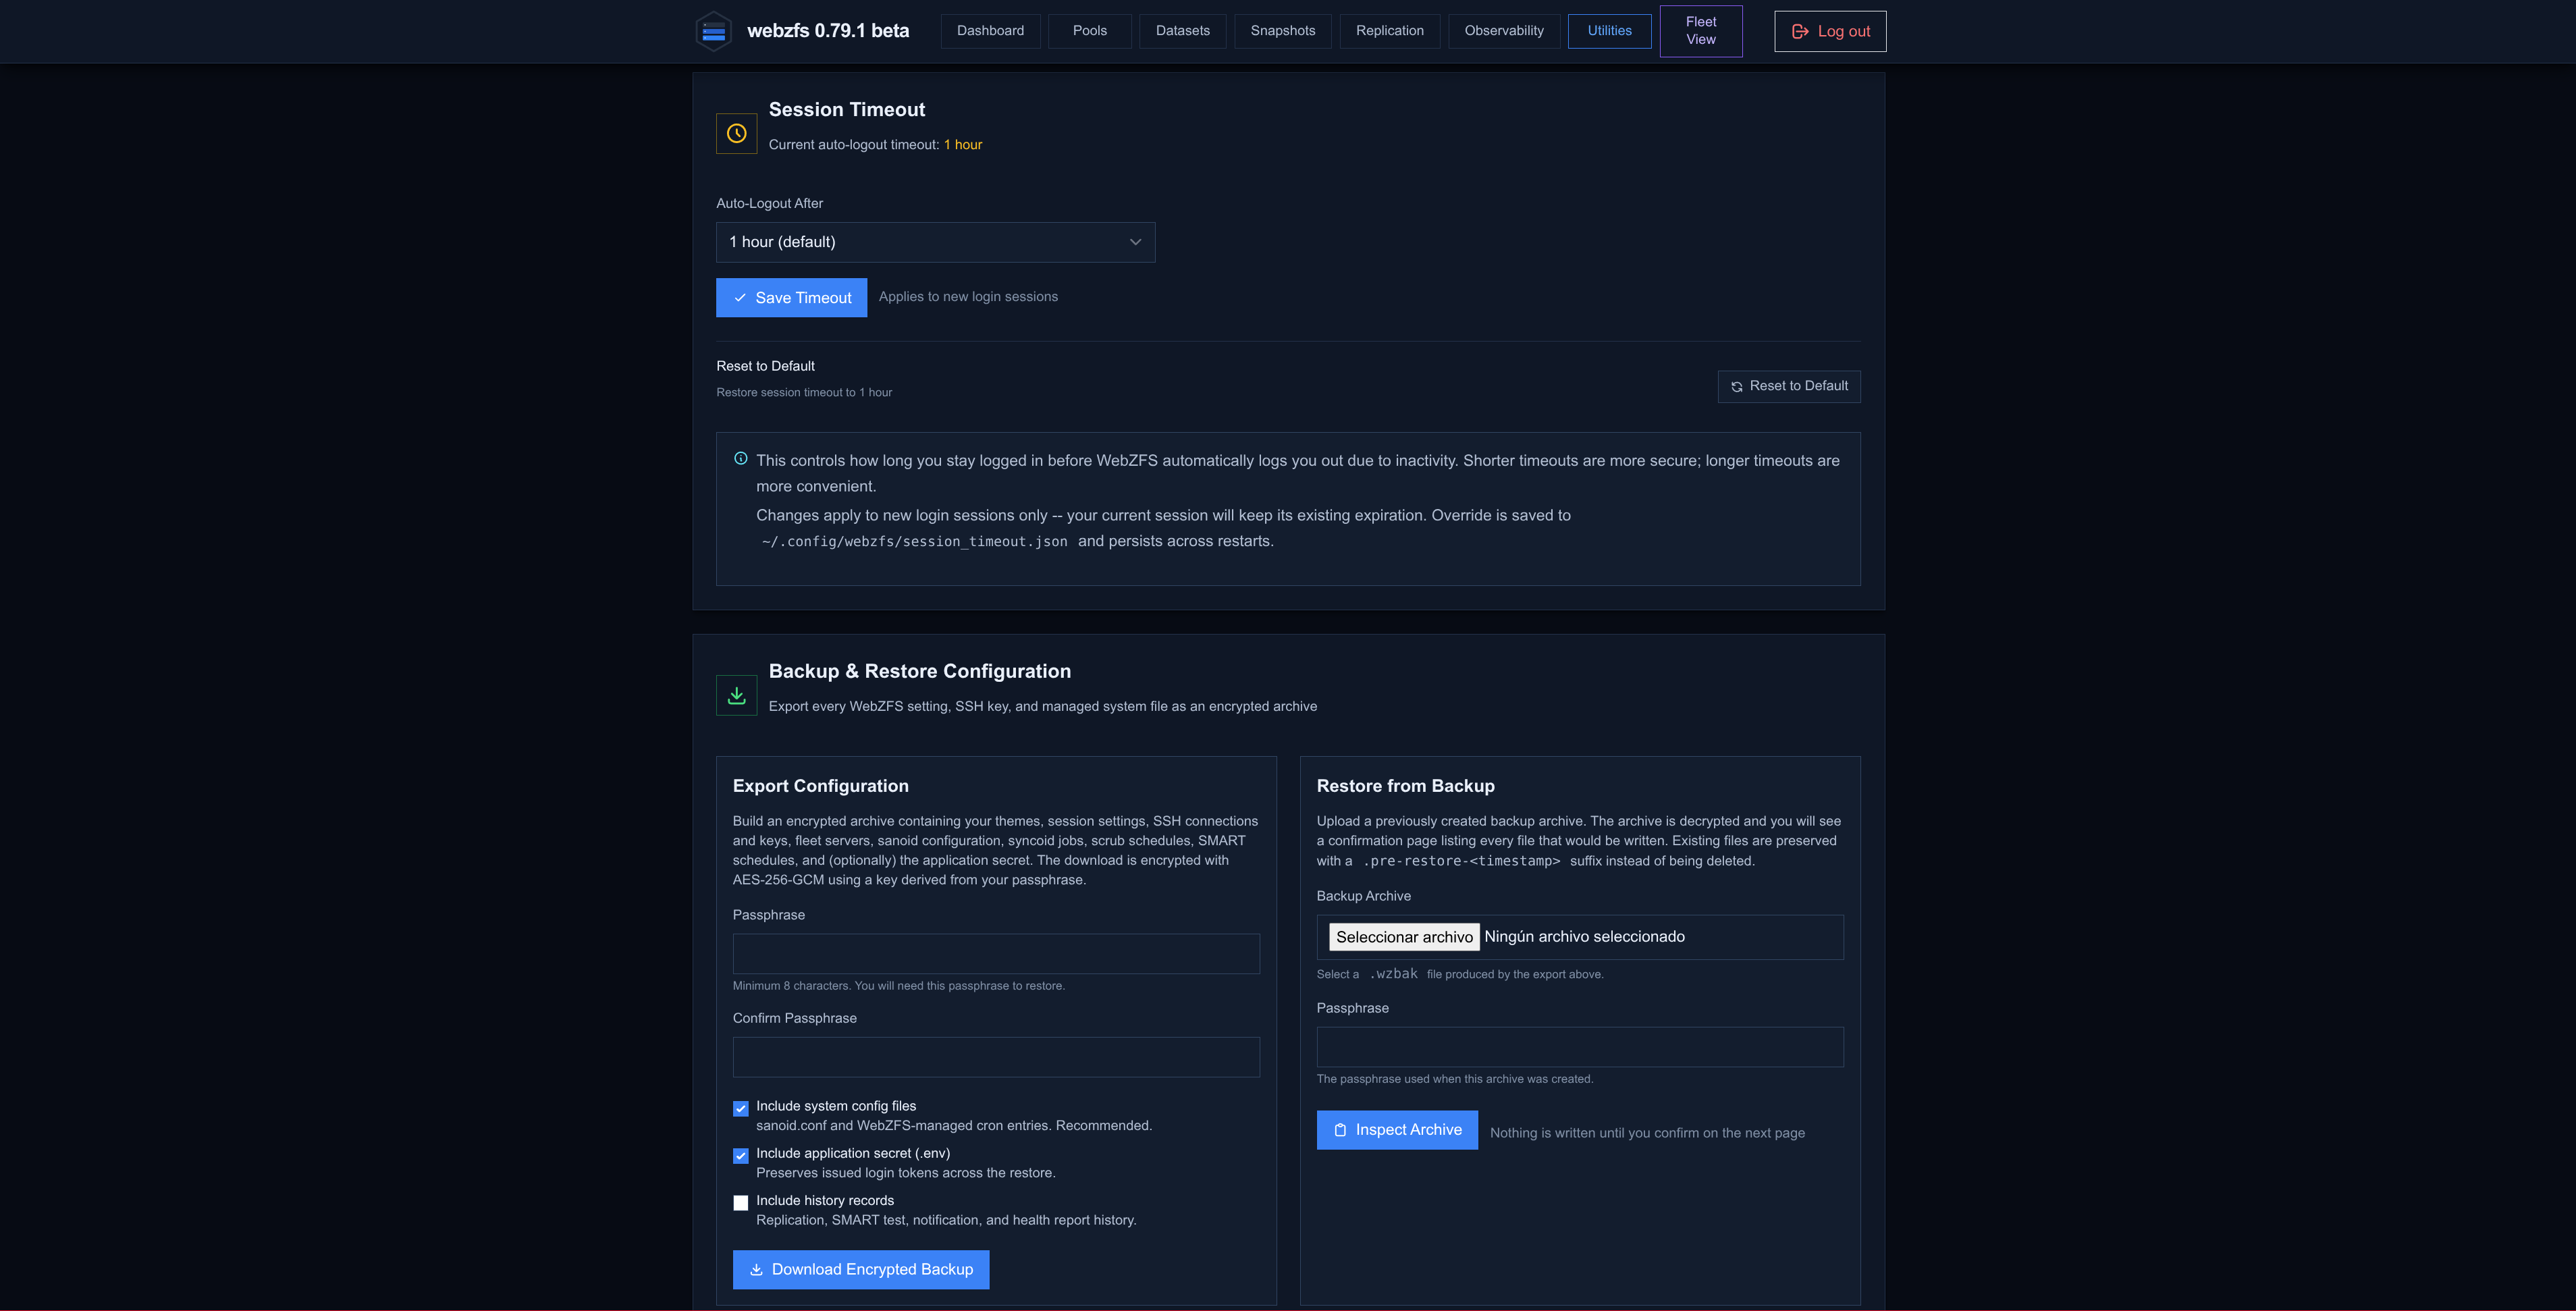
WebZFS Settings:
From this section we can configure aspects such as the theme, the style of the interface boxes or the session timeout. In addition, it will give us access to a backup/restore system for the configuration:
|
|
Fleet View:
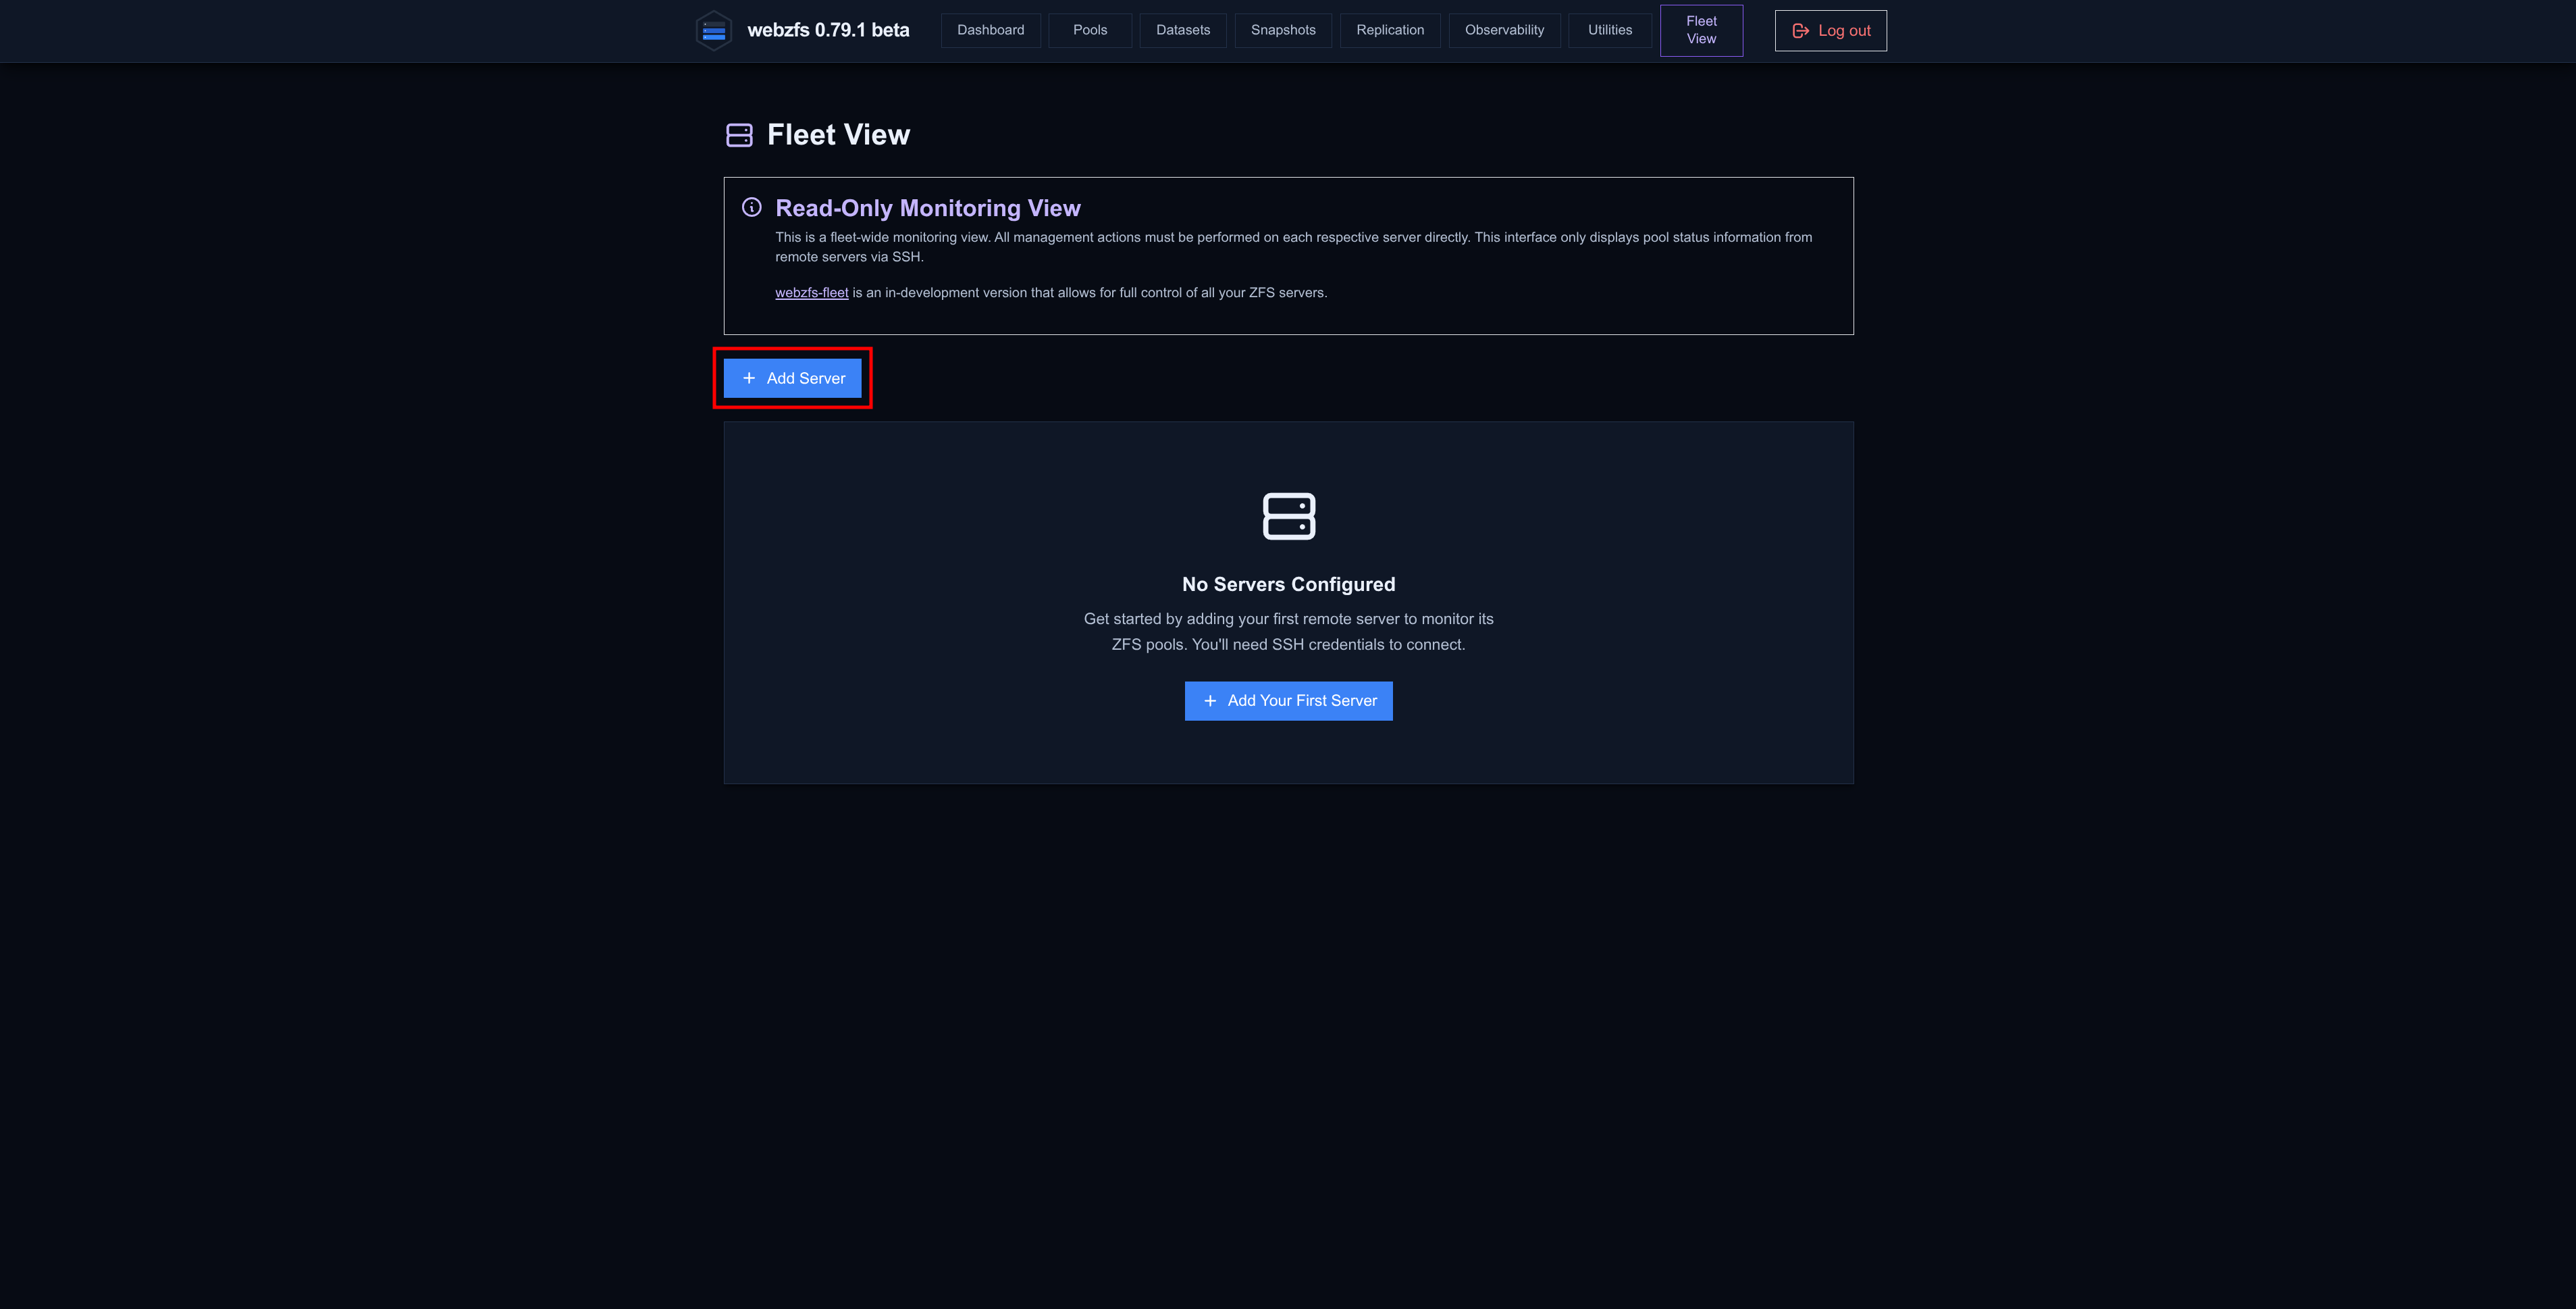
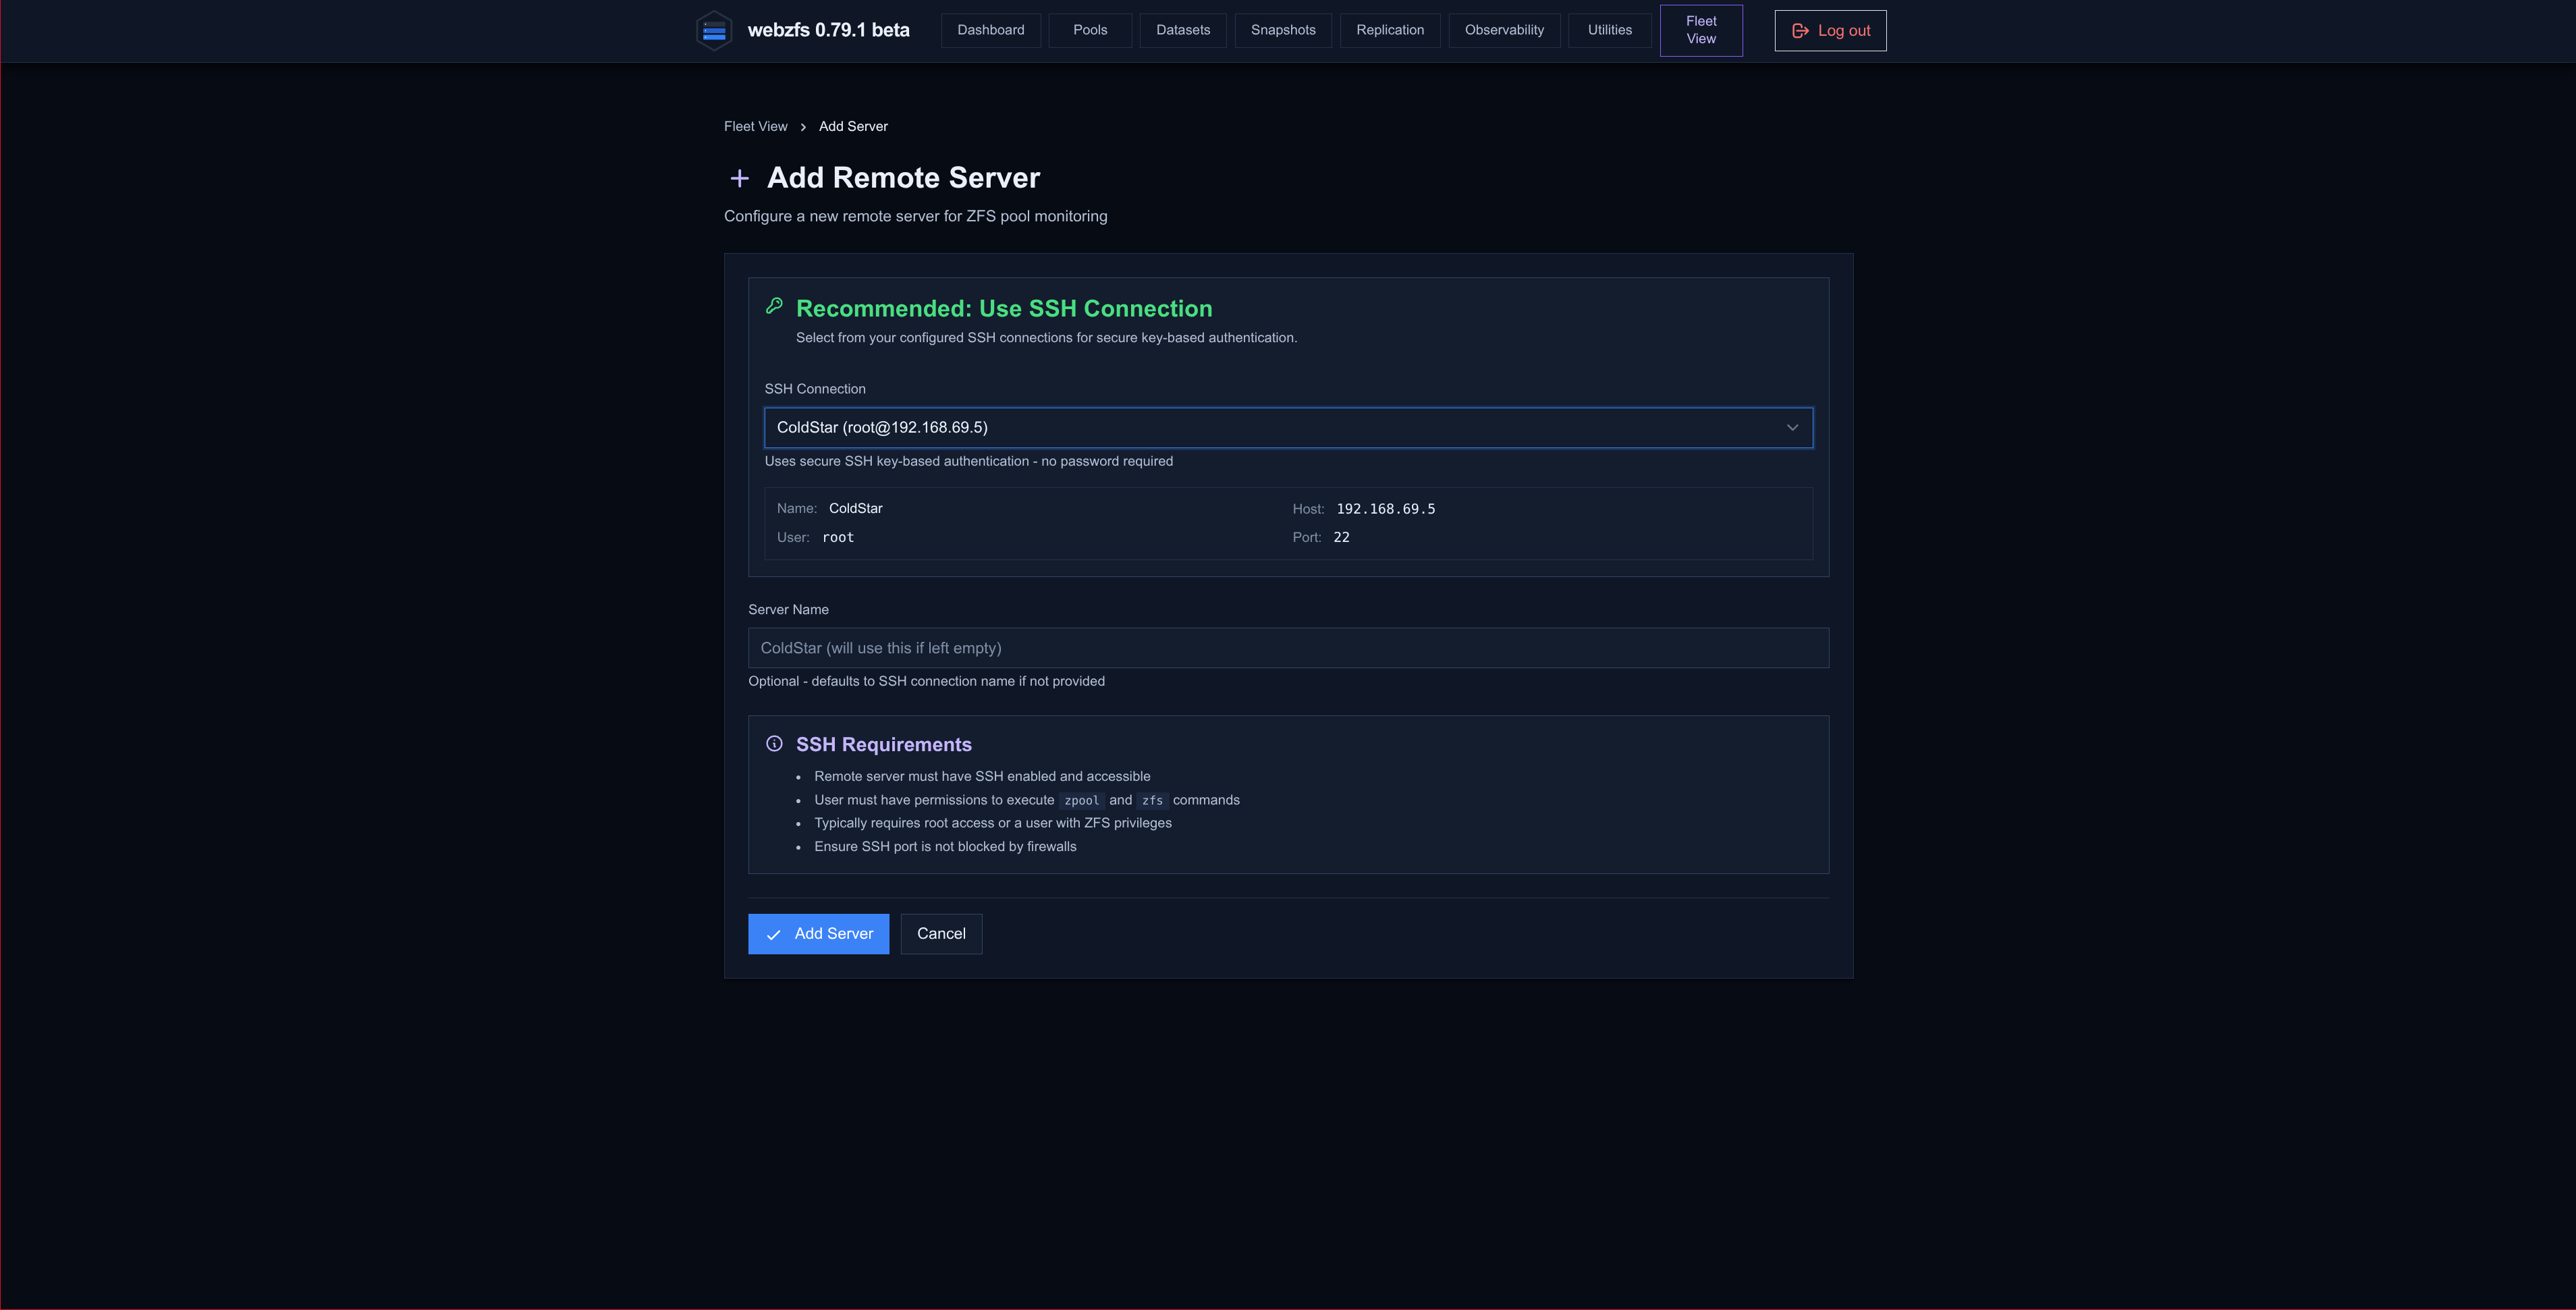
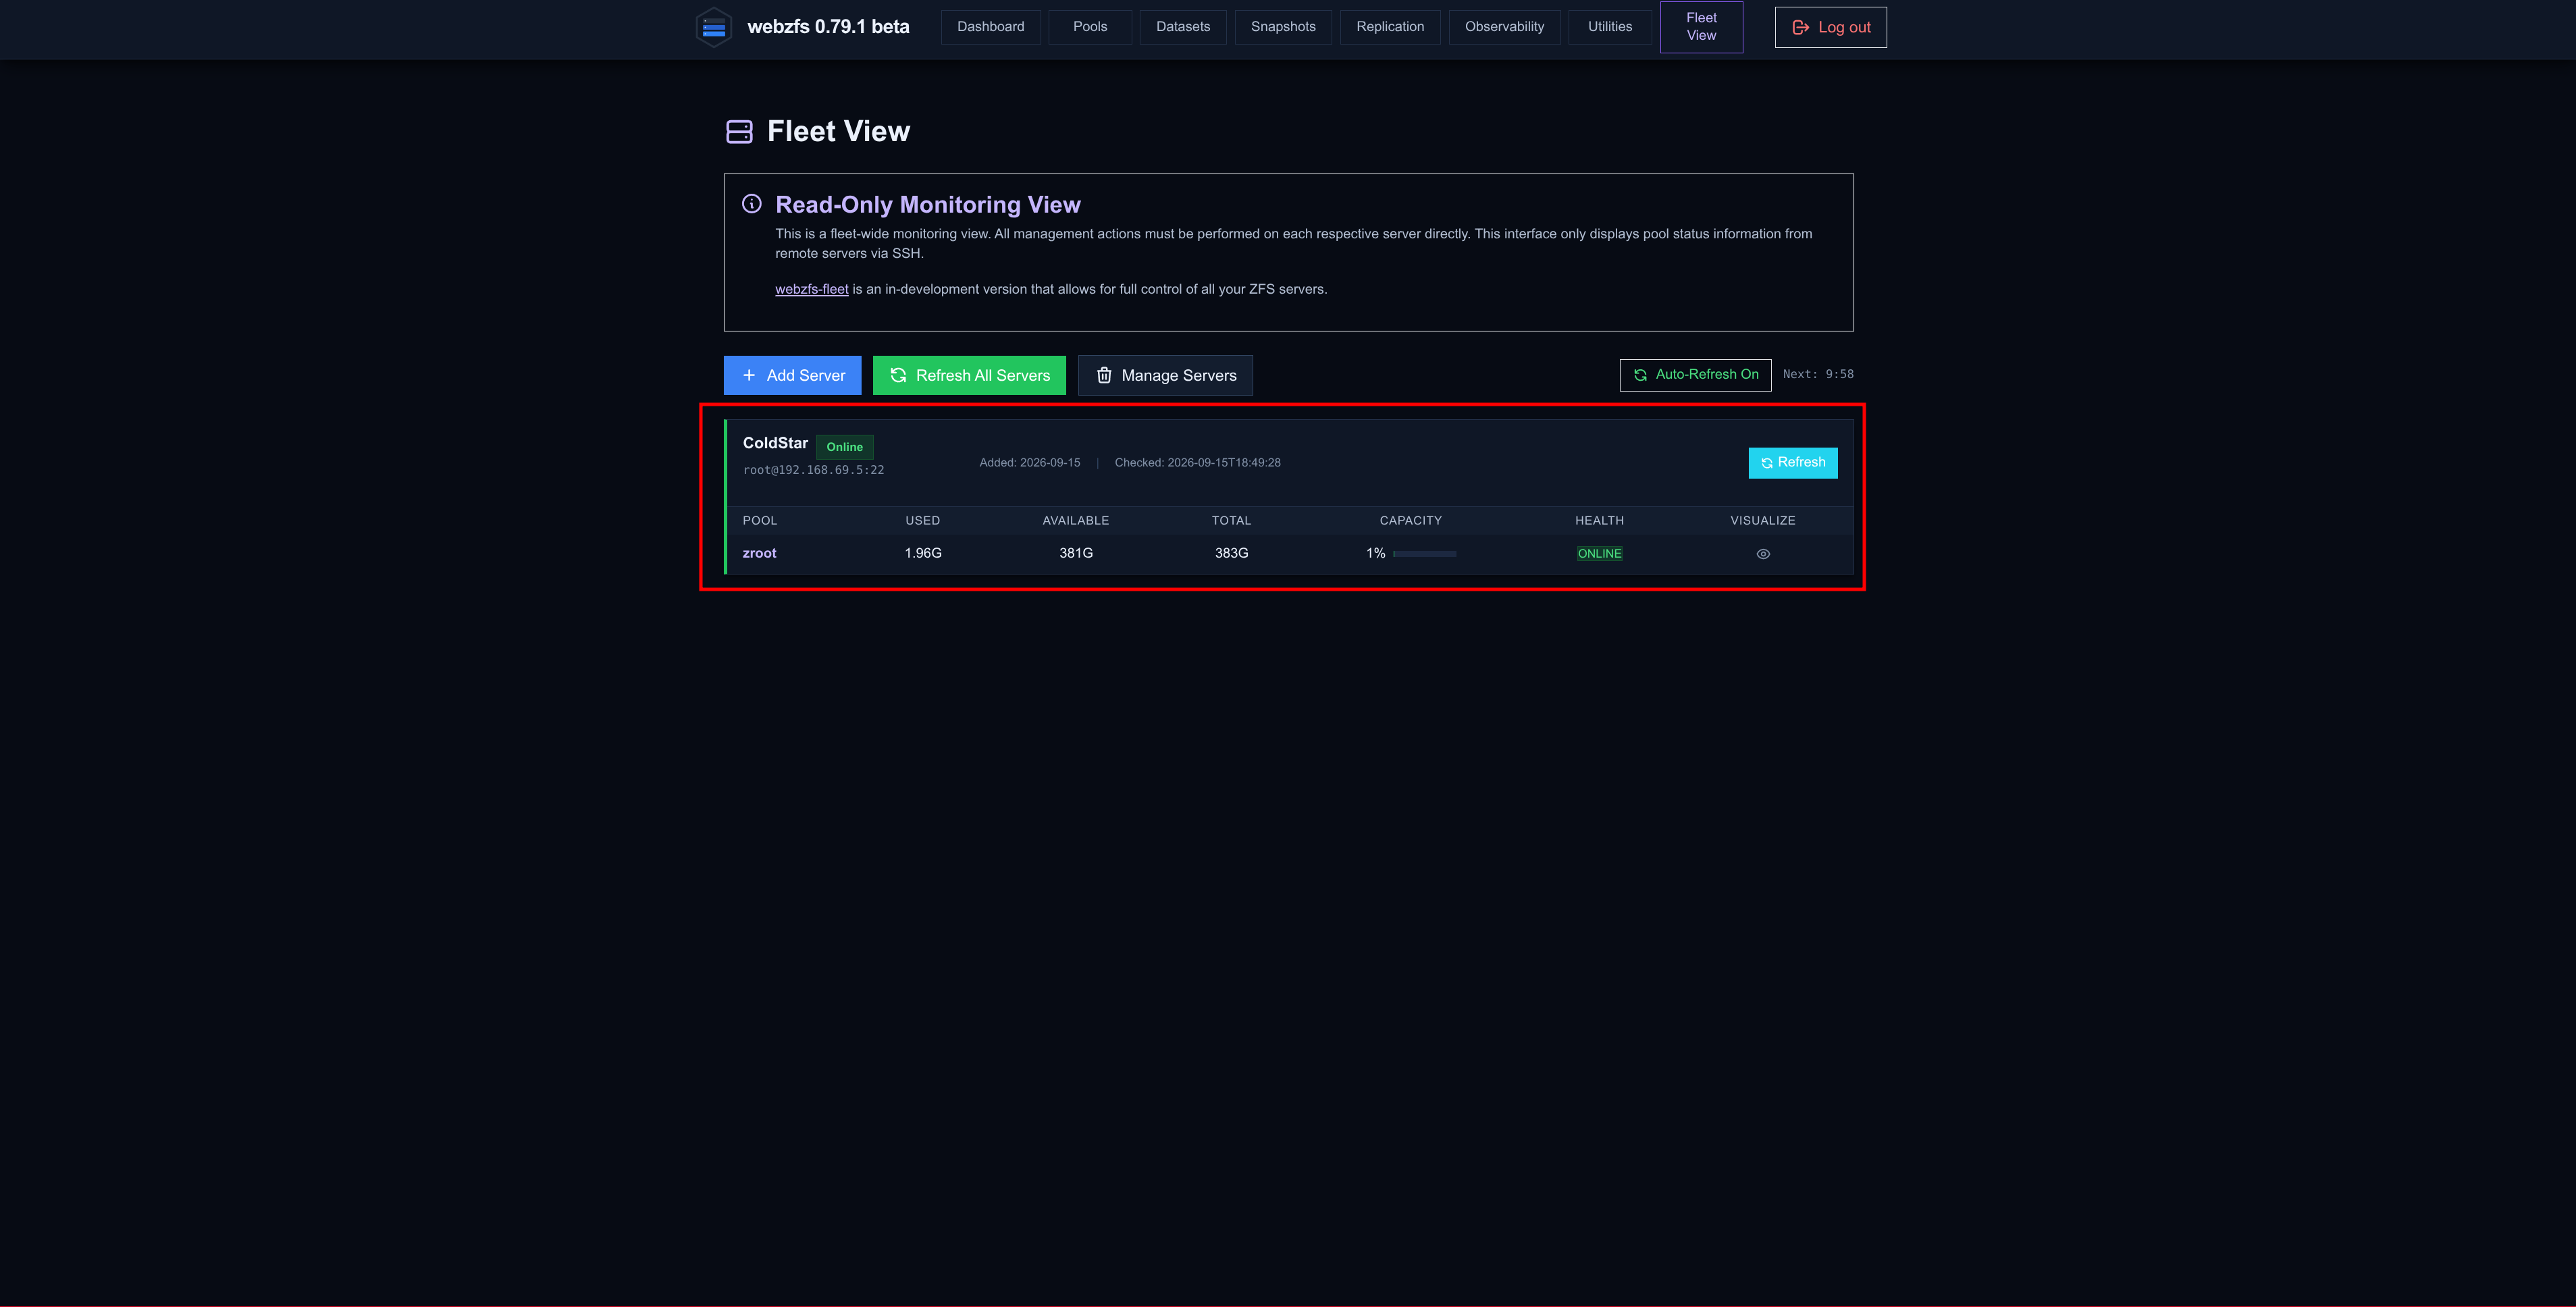
From here we can view the status of the ZFS pools on remote servers; we just need to add one of the servers previously added via Utilities -> SSH Connections.
|
|
|
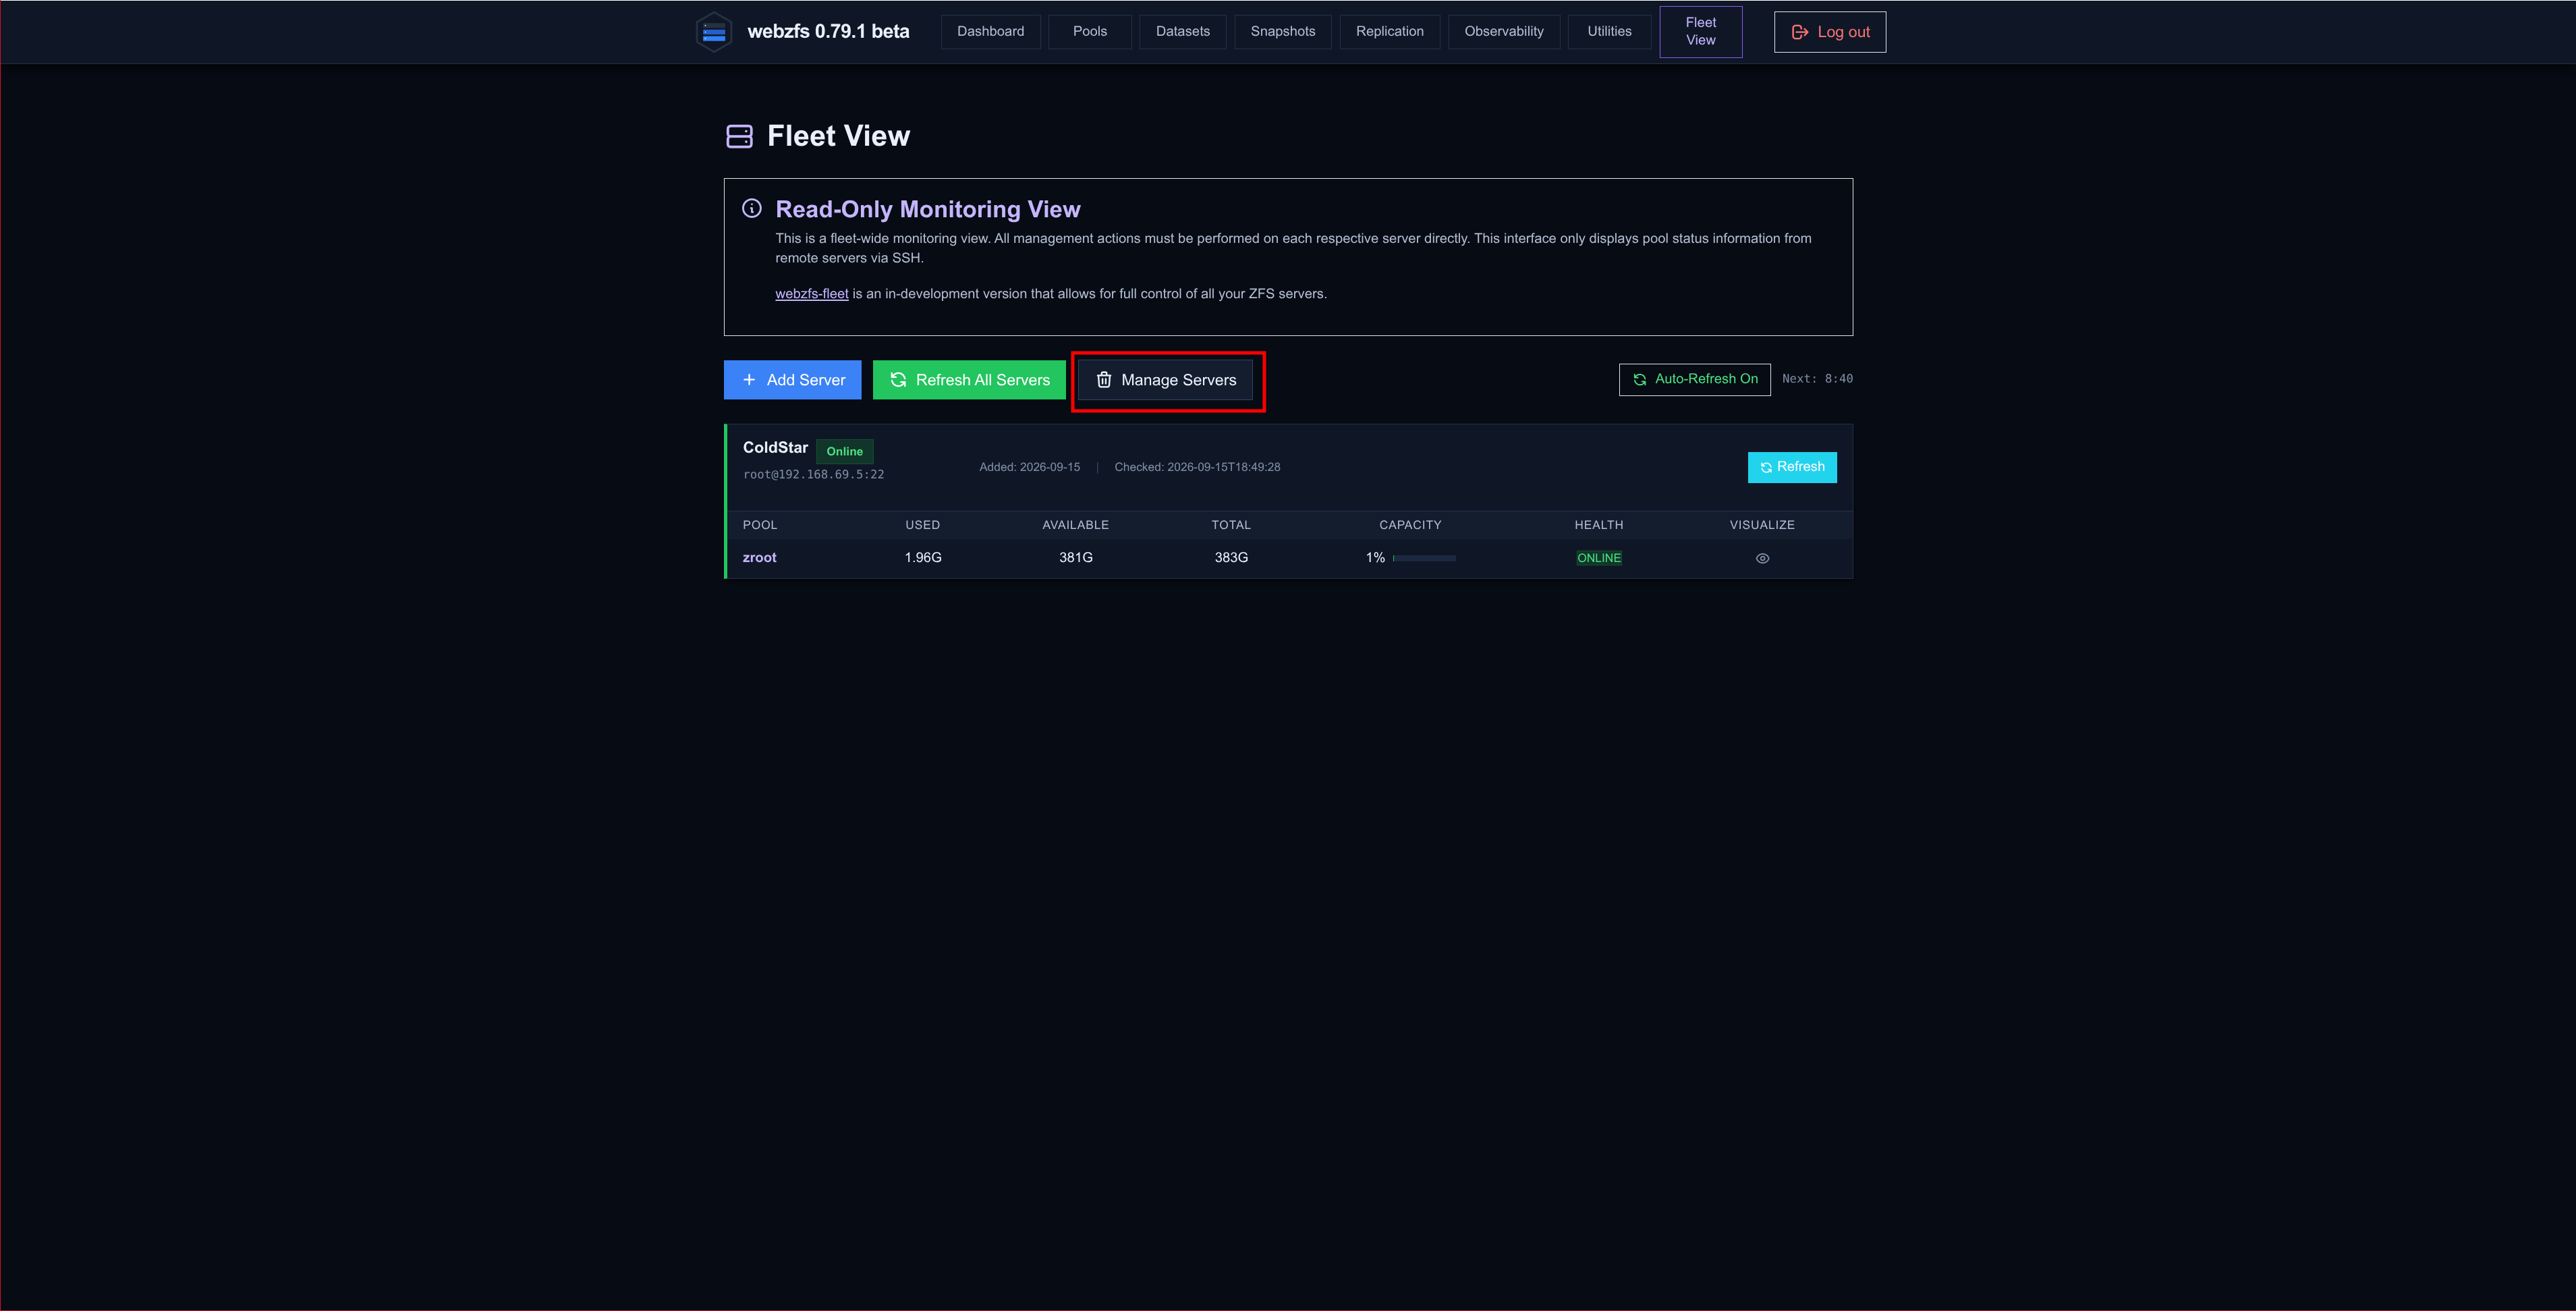
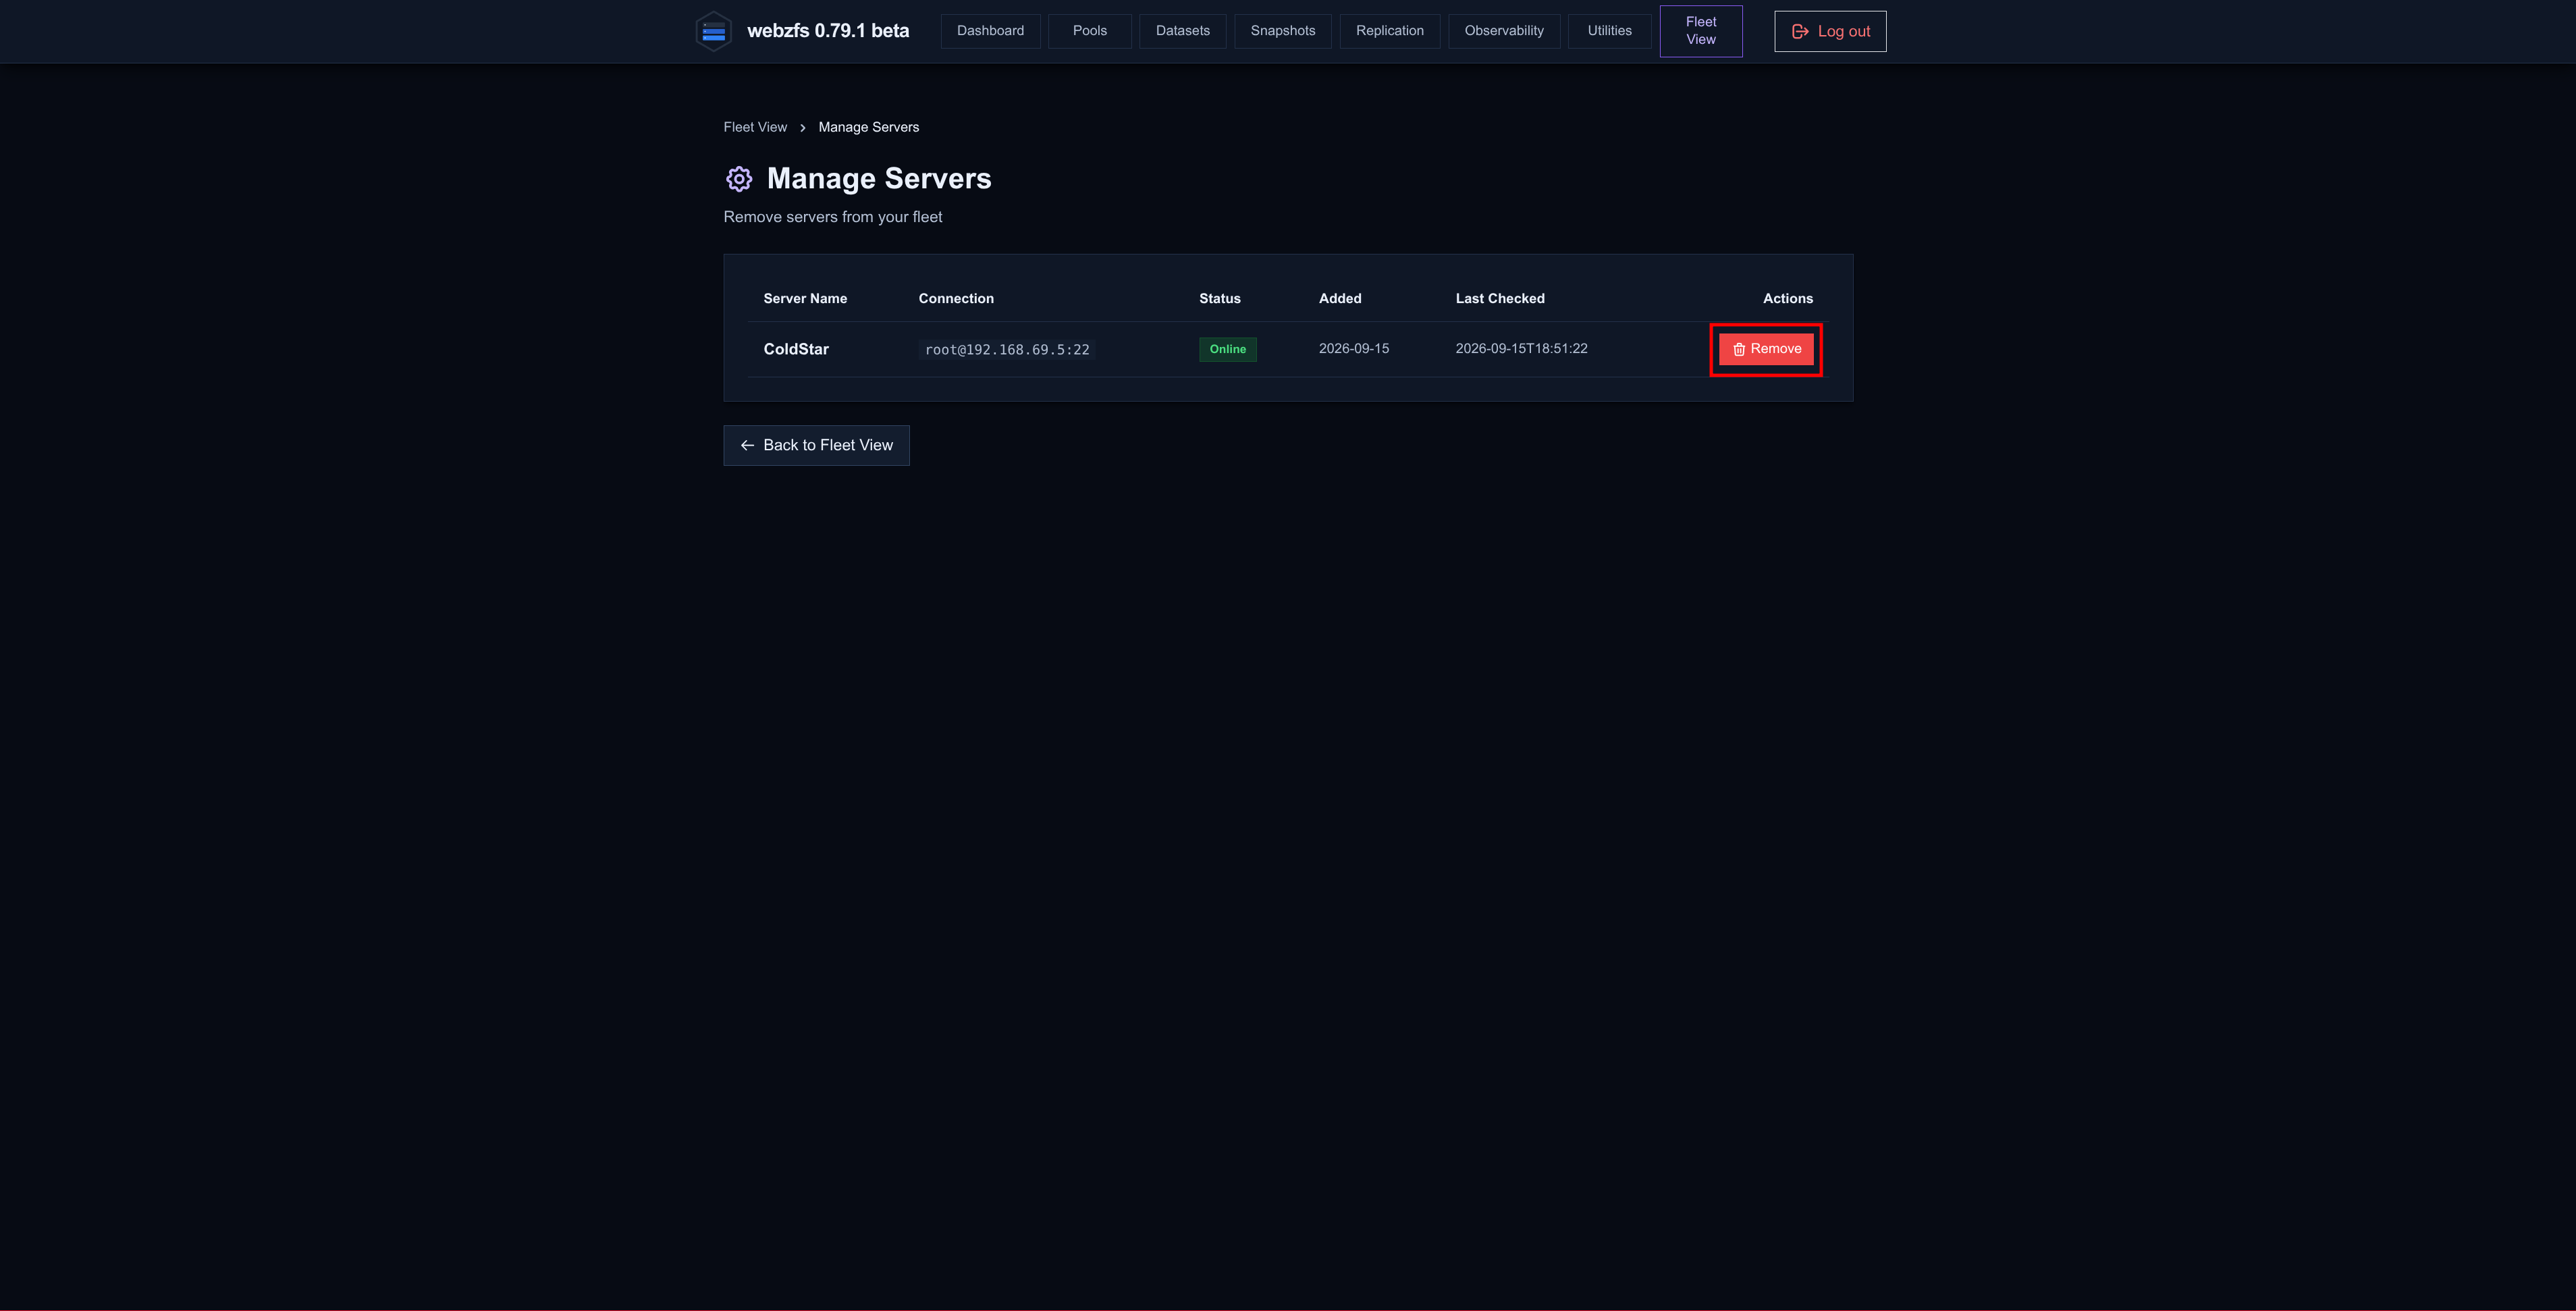
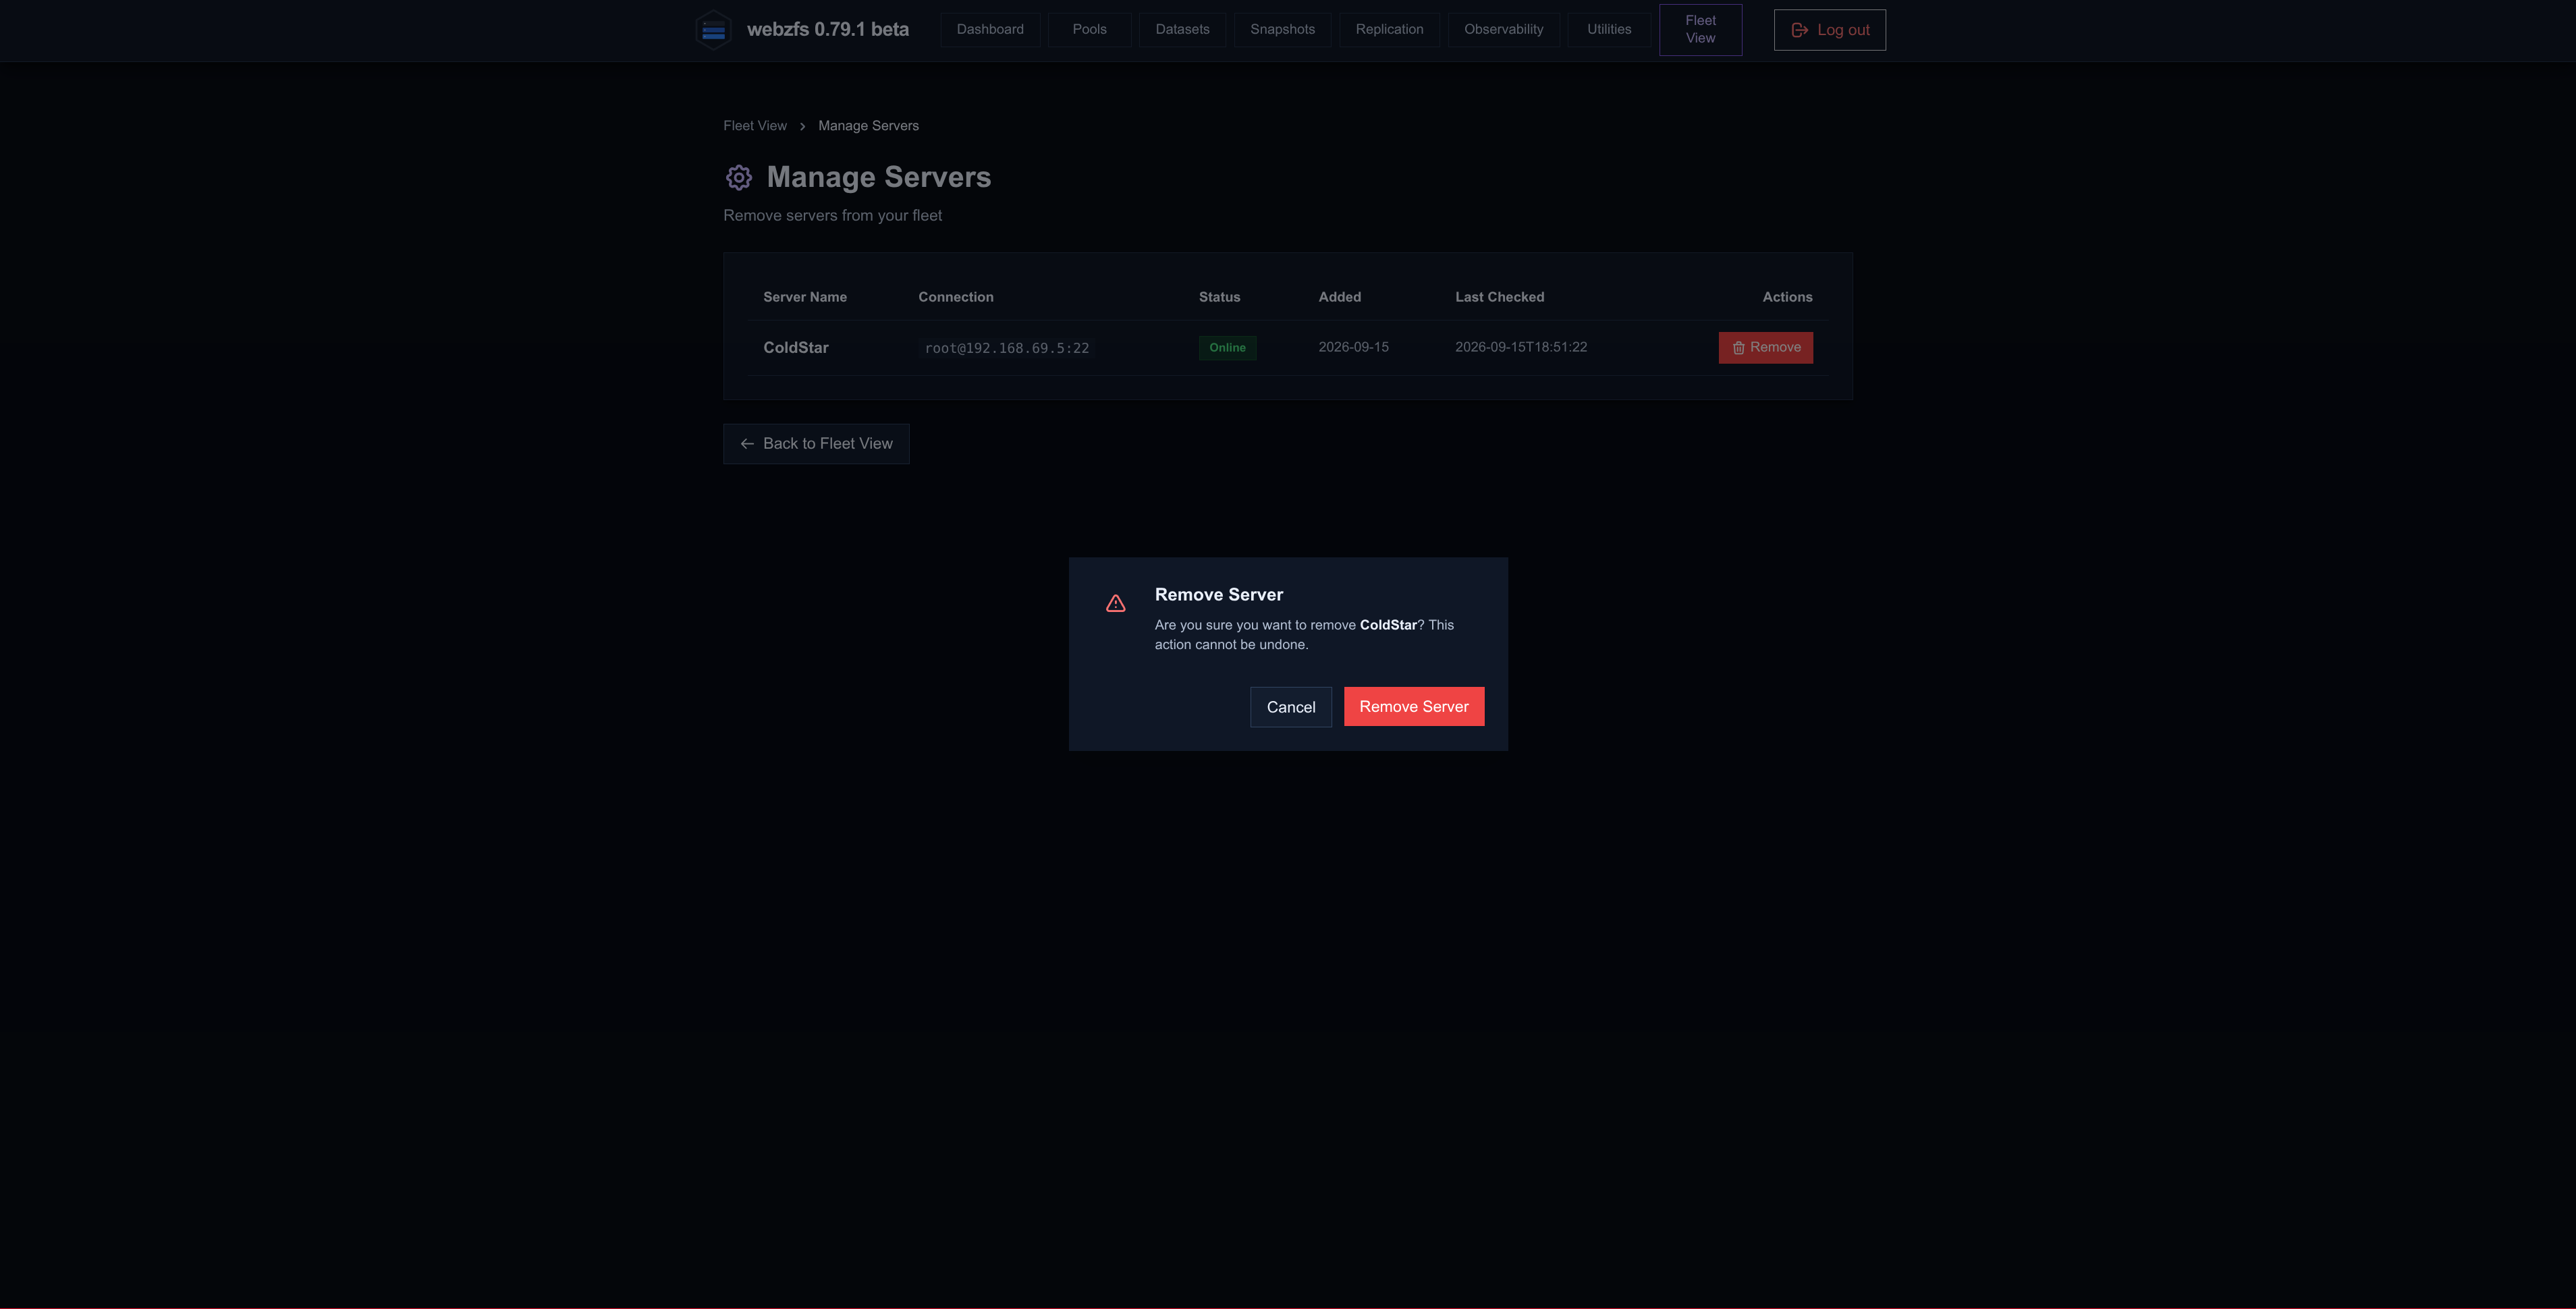
If we want to remove an existing server we just need to click Manage Servers.
|
|
|
Bastille Replication:
In my case I am going to use WebZFS to generate snapshots via Sanoid and I will replicate them on a remote server via Syncoid; these datasets correspond to some
Bastille jails
that make up all the services in AlfaExploit.
This way, in case of a failure on the main server I only need to start the jails on the backup server and all the services will keep working without problems.
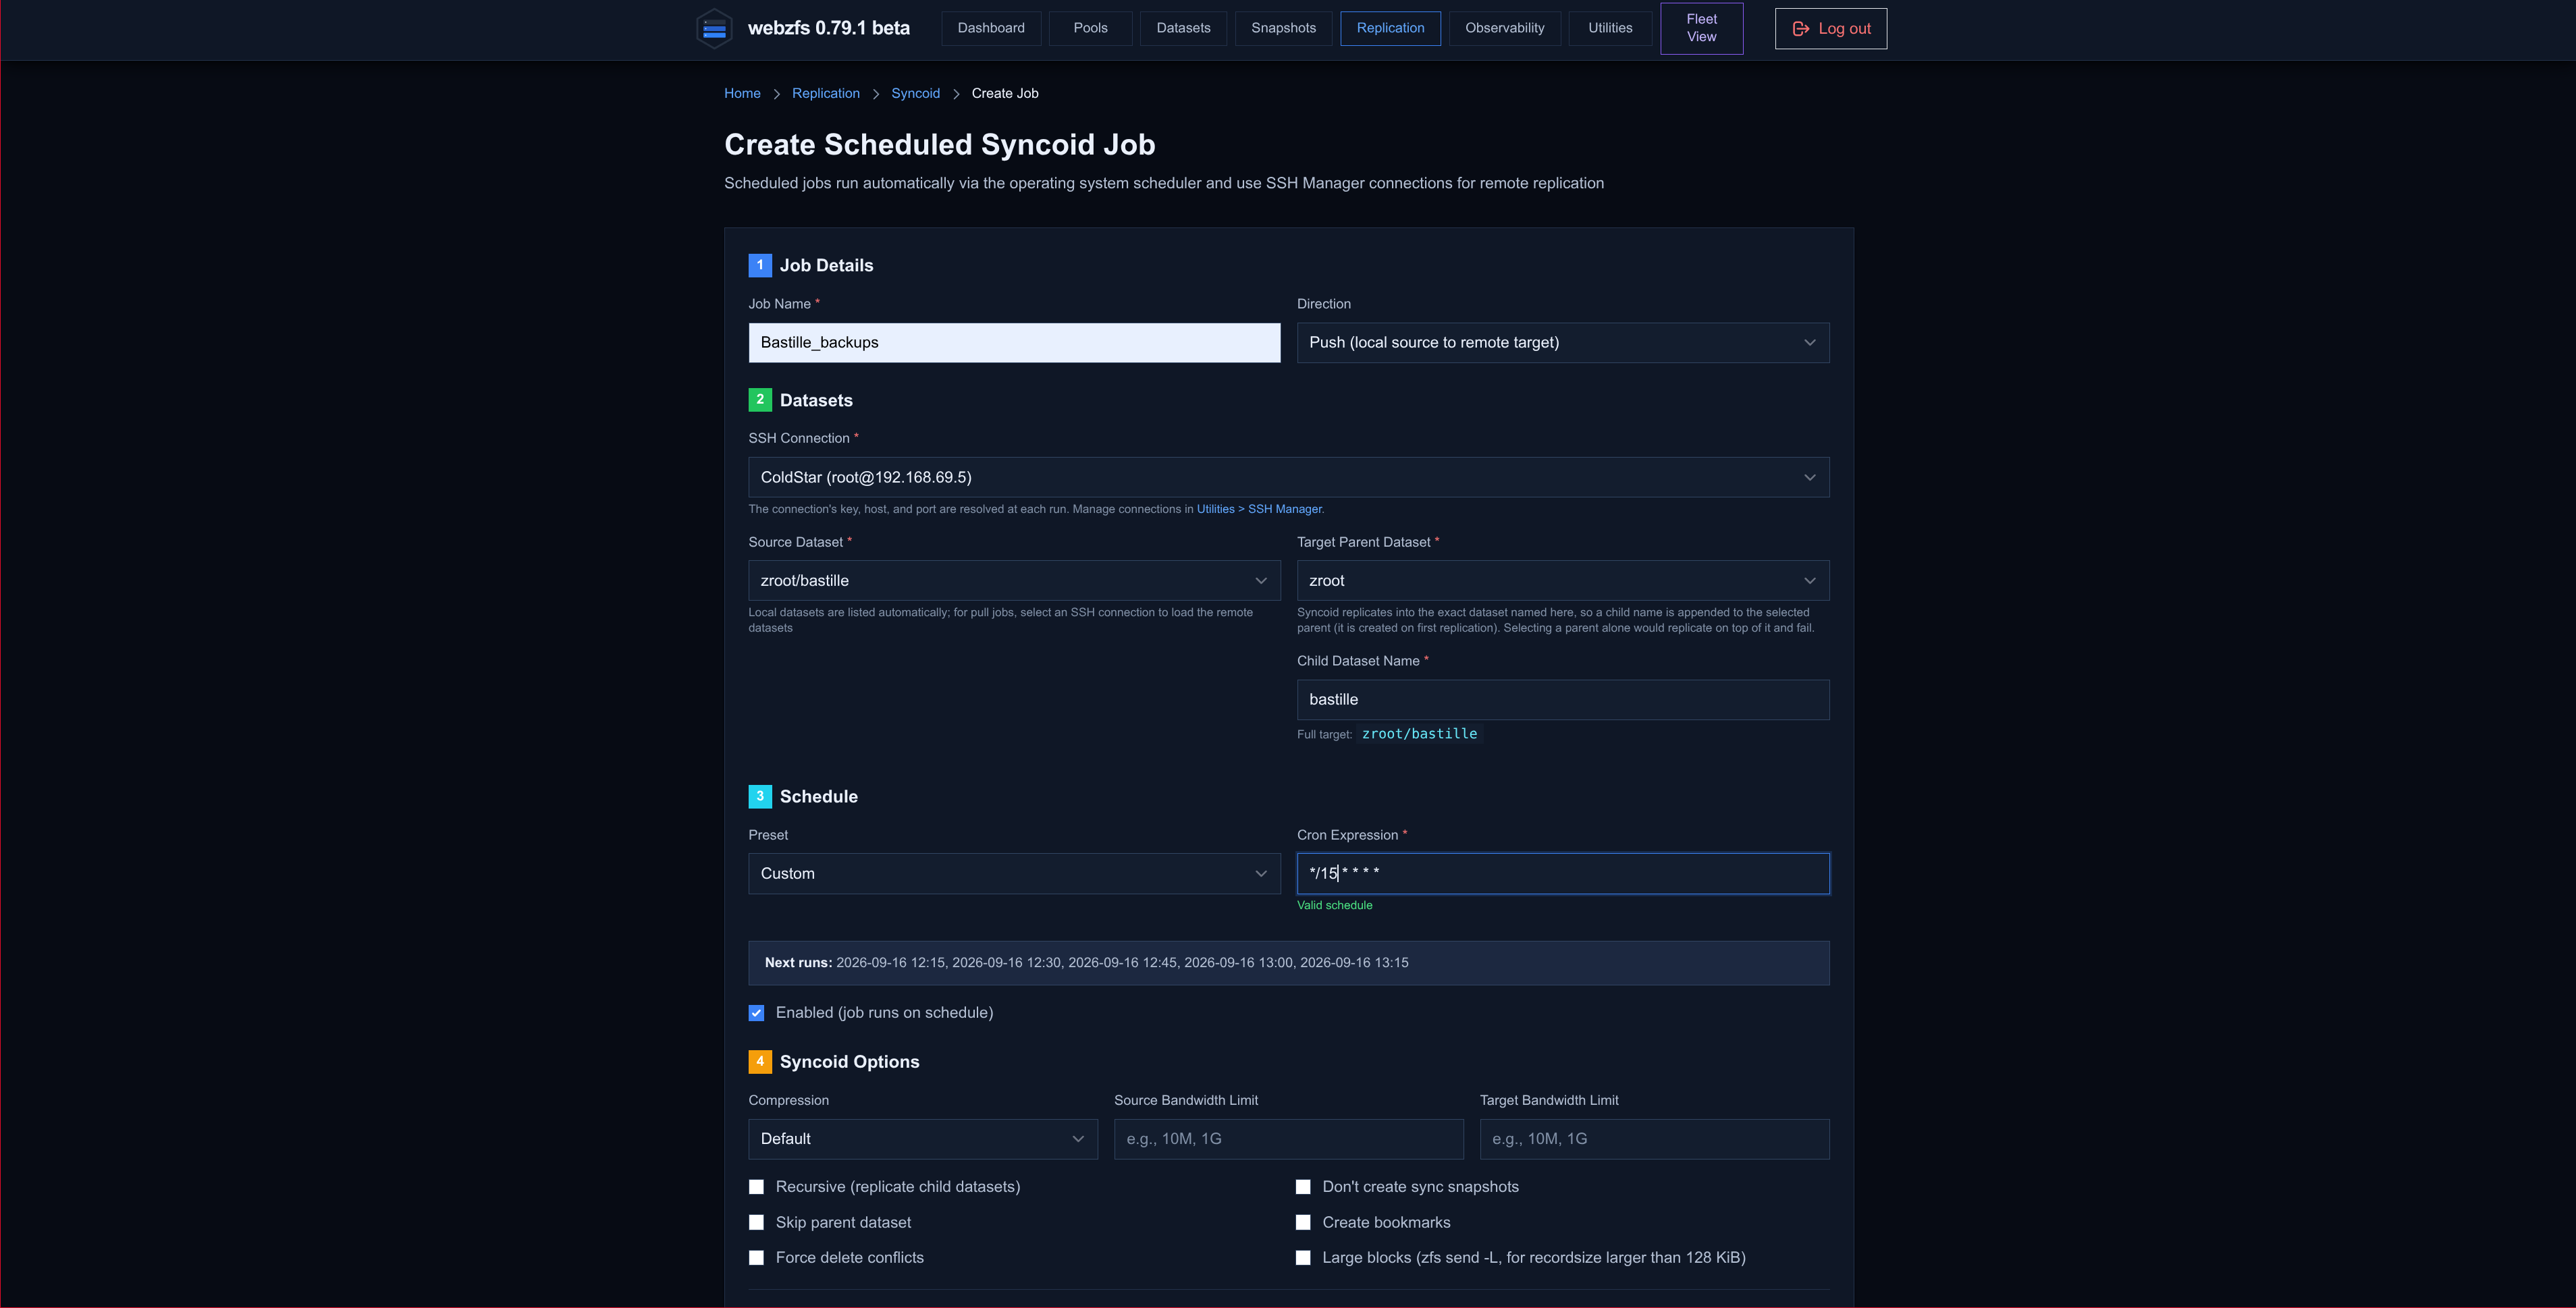
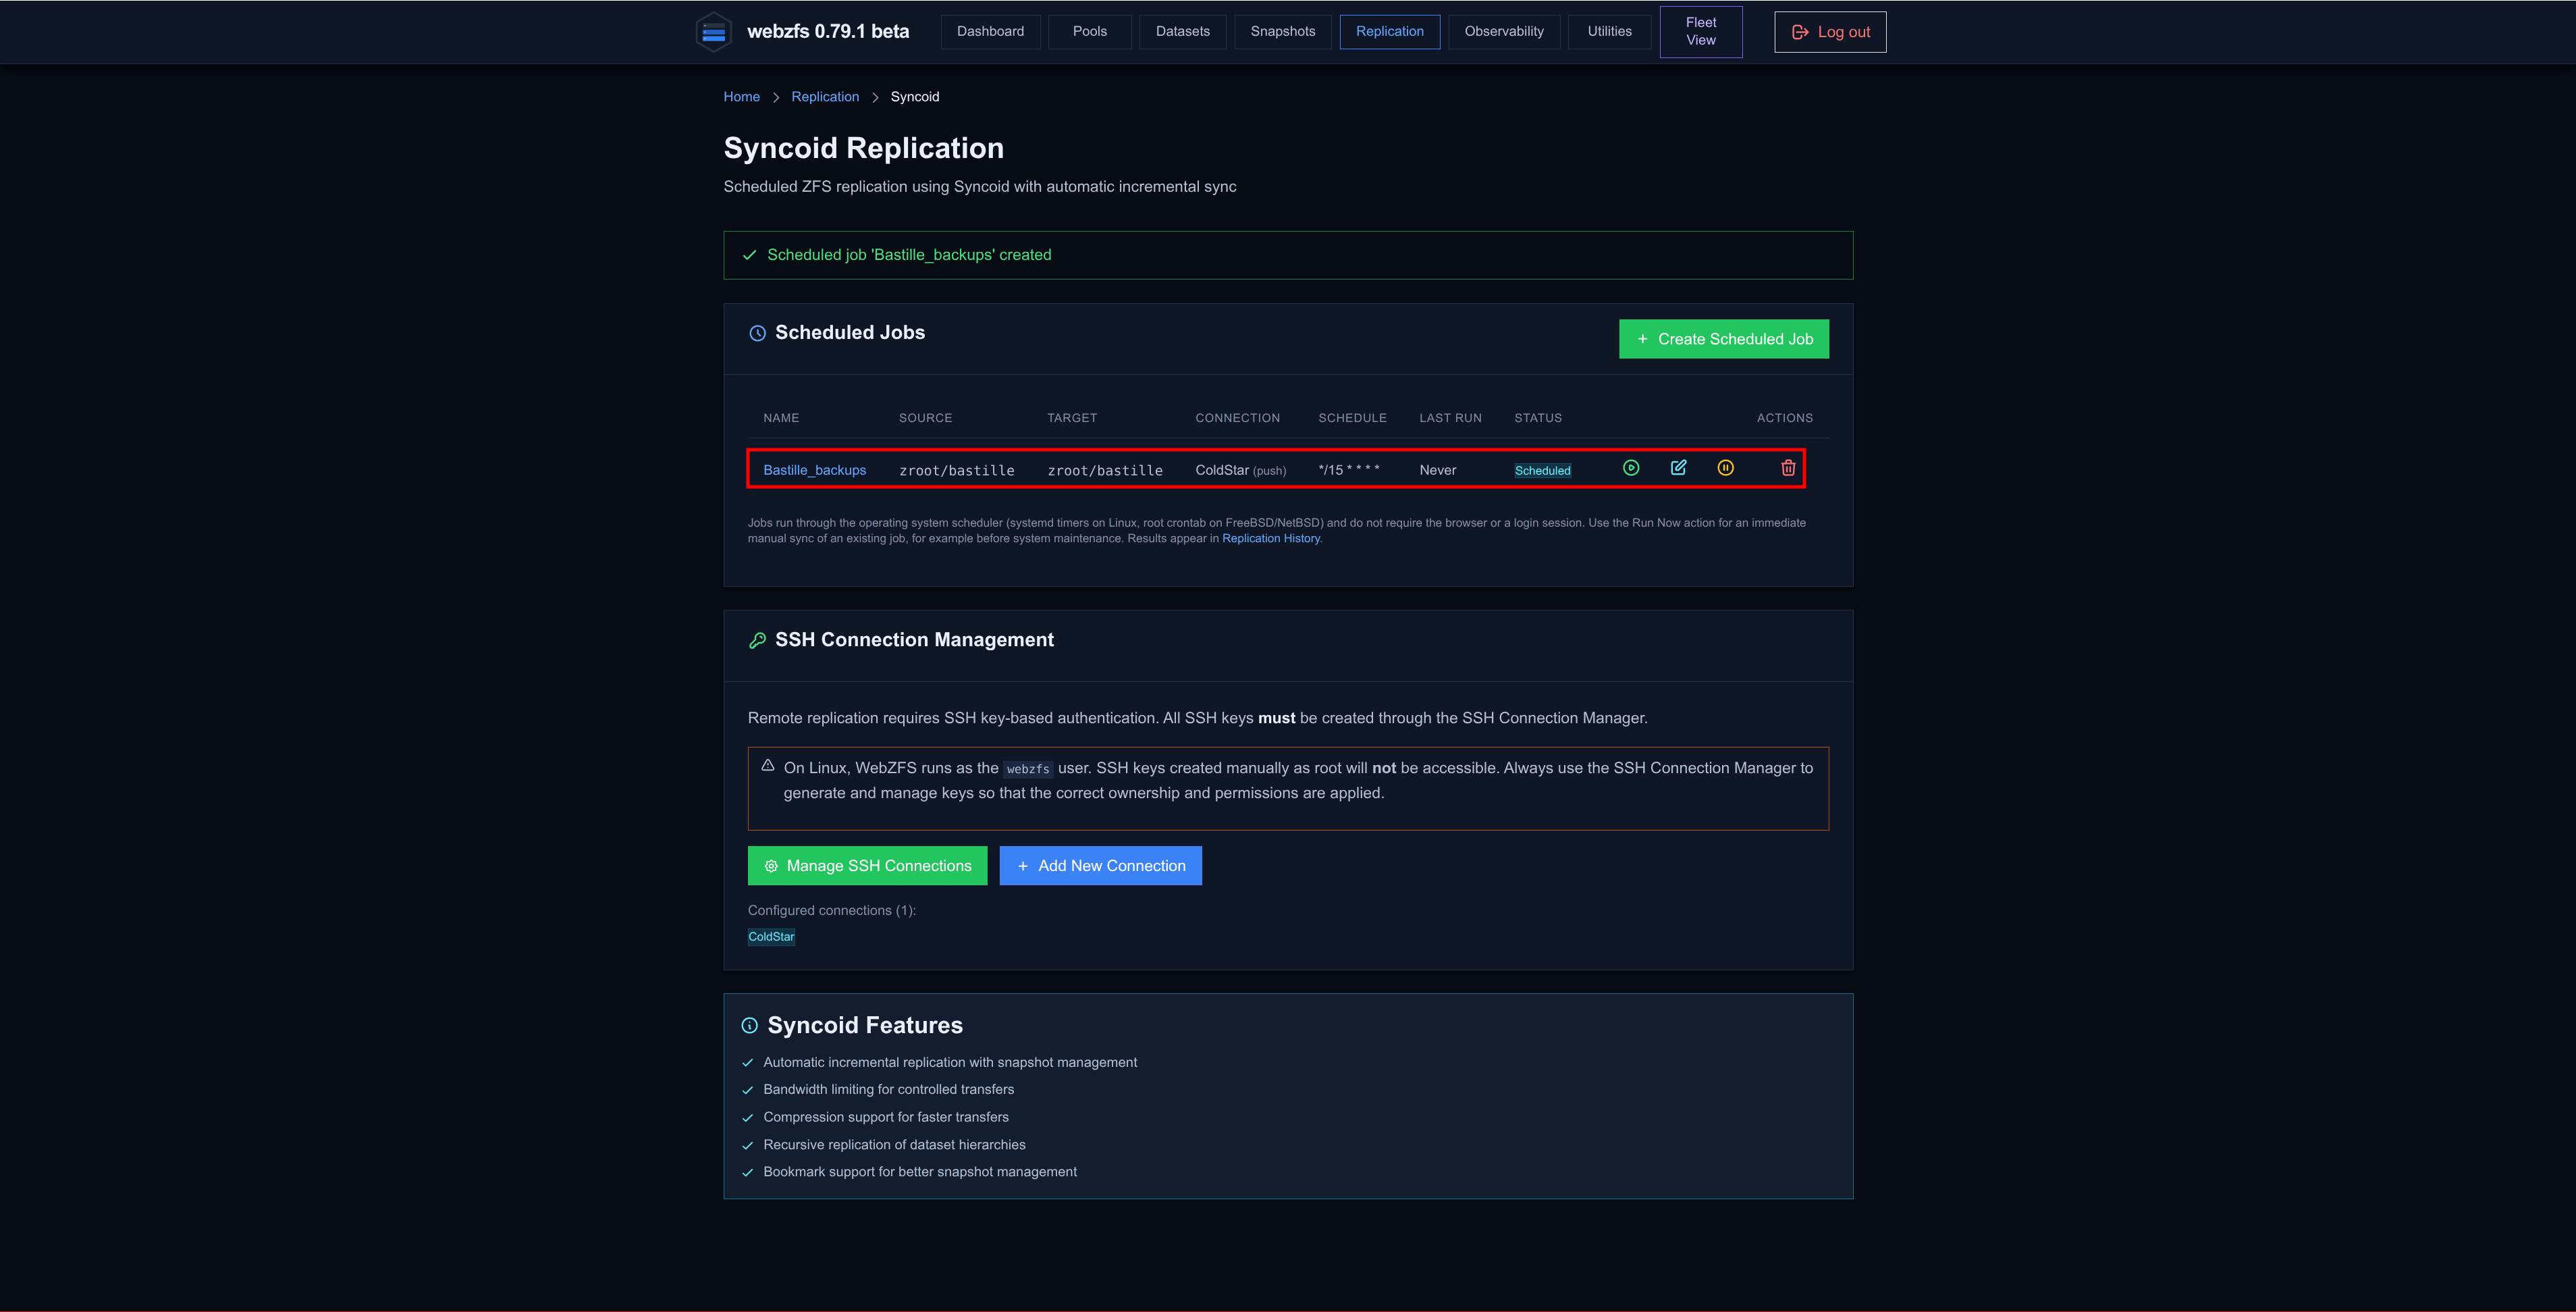
We create a Syncoid job that will take the zroot/bastille dataset to the remote server ColdStar:
|
|
|
The datasets at source/destination will look like this:
MightyMax # ~> zfs list zroot/bastille
NAME             USED  AVAIL  REFER  MOUNTPOINT
zroot/bastille   118G   734G   112K  /usr/local/bastille

ColdStar # ~> zfs list zroot/bastille
NAME             USED  AVAIL  REFER  MOUNTPOINT
zroot/bastille   118G   264G   112K  /zroot/bastille
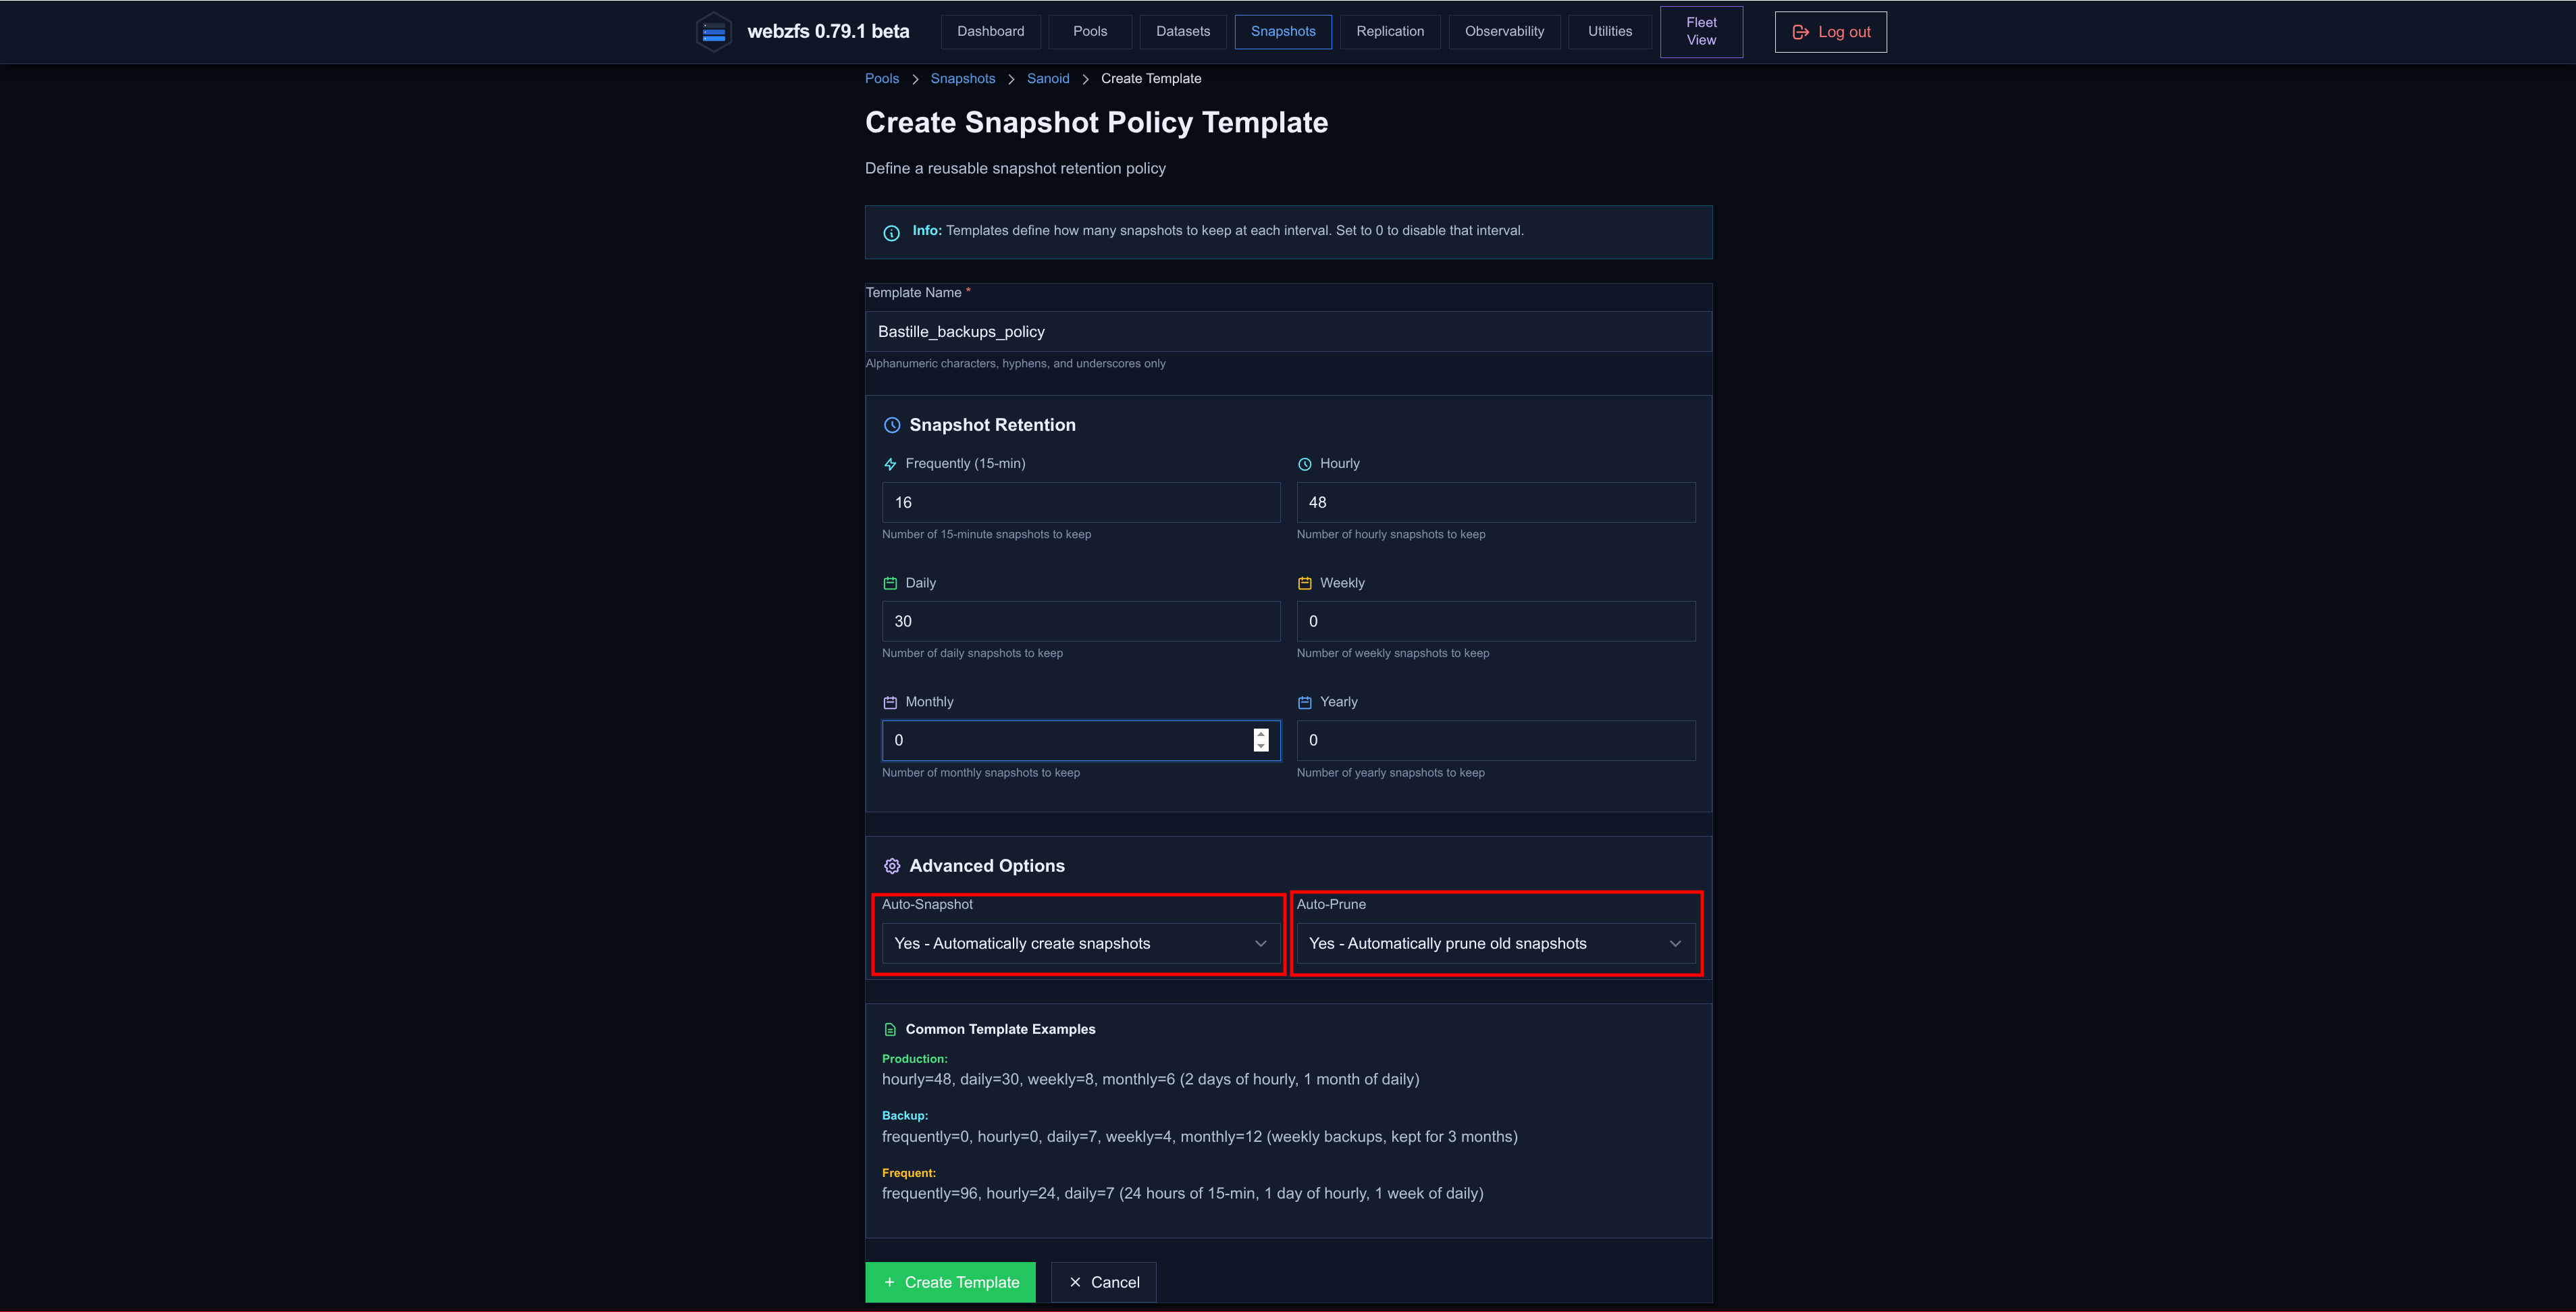
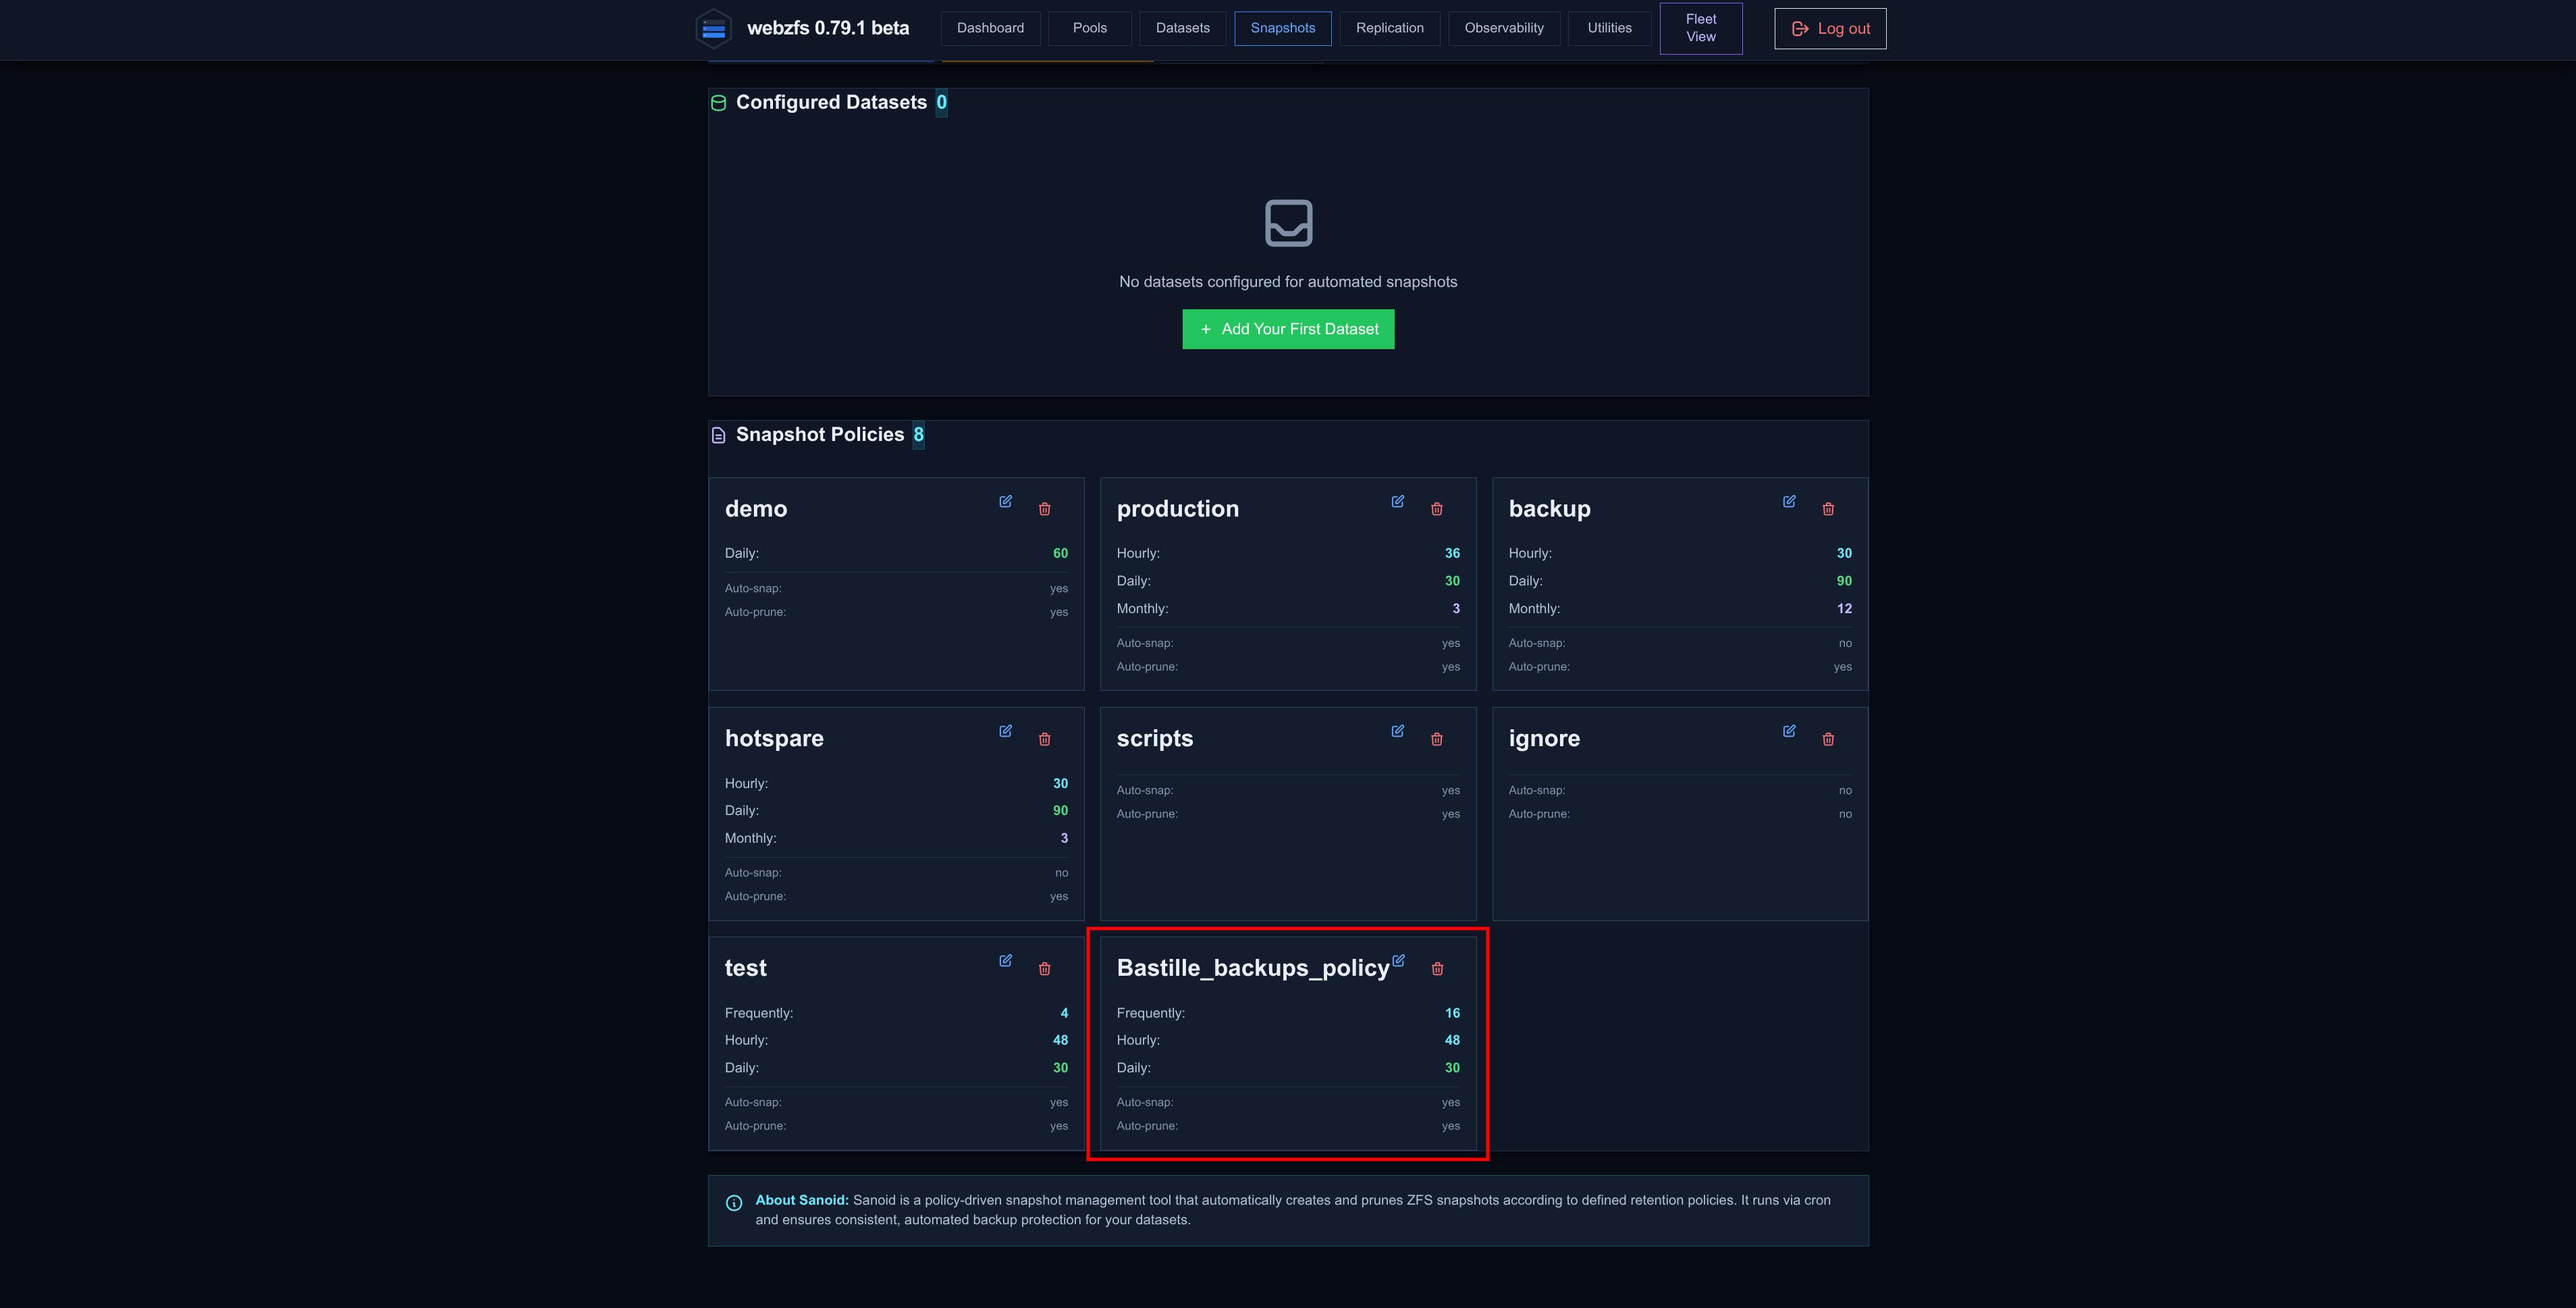
Now we configure Sanoid to follow the snapshot policy we need.
In my case I will keep:
- 4 hours, being able to restore with a granularity of 15m.
- 2 days, being able to restore with a granularity of 1h.
- 1 month with a granularity of 1 day.
Resulting in:
|
|
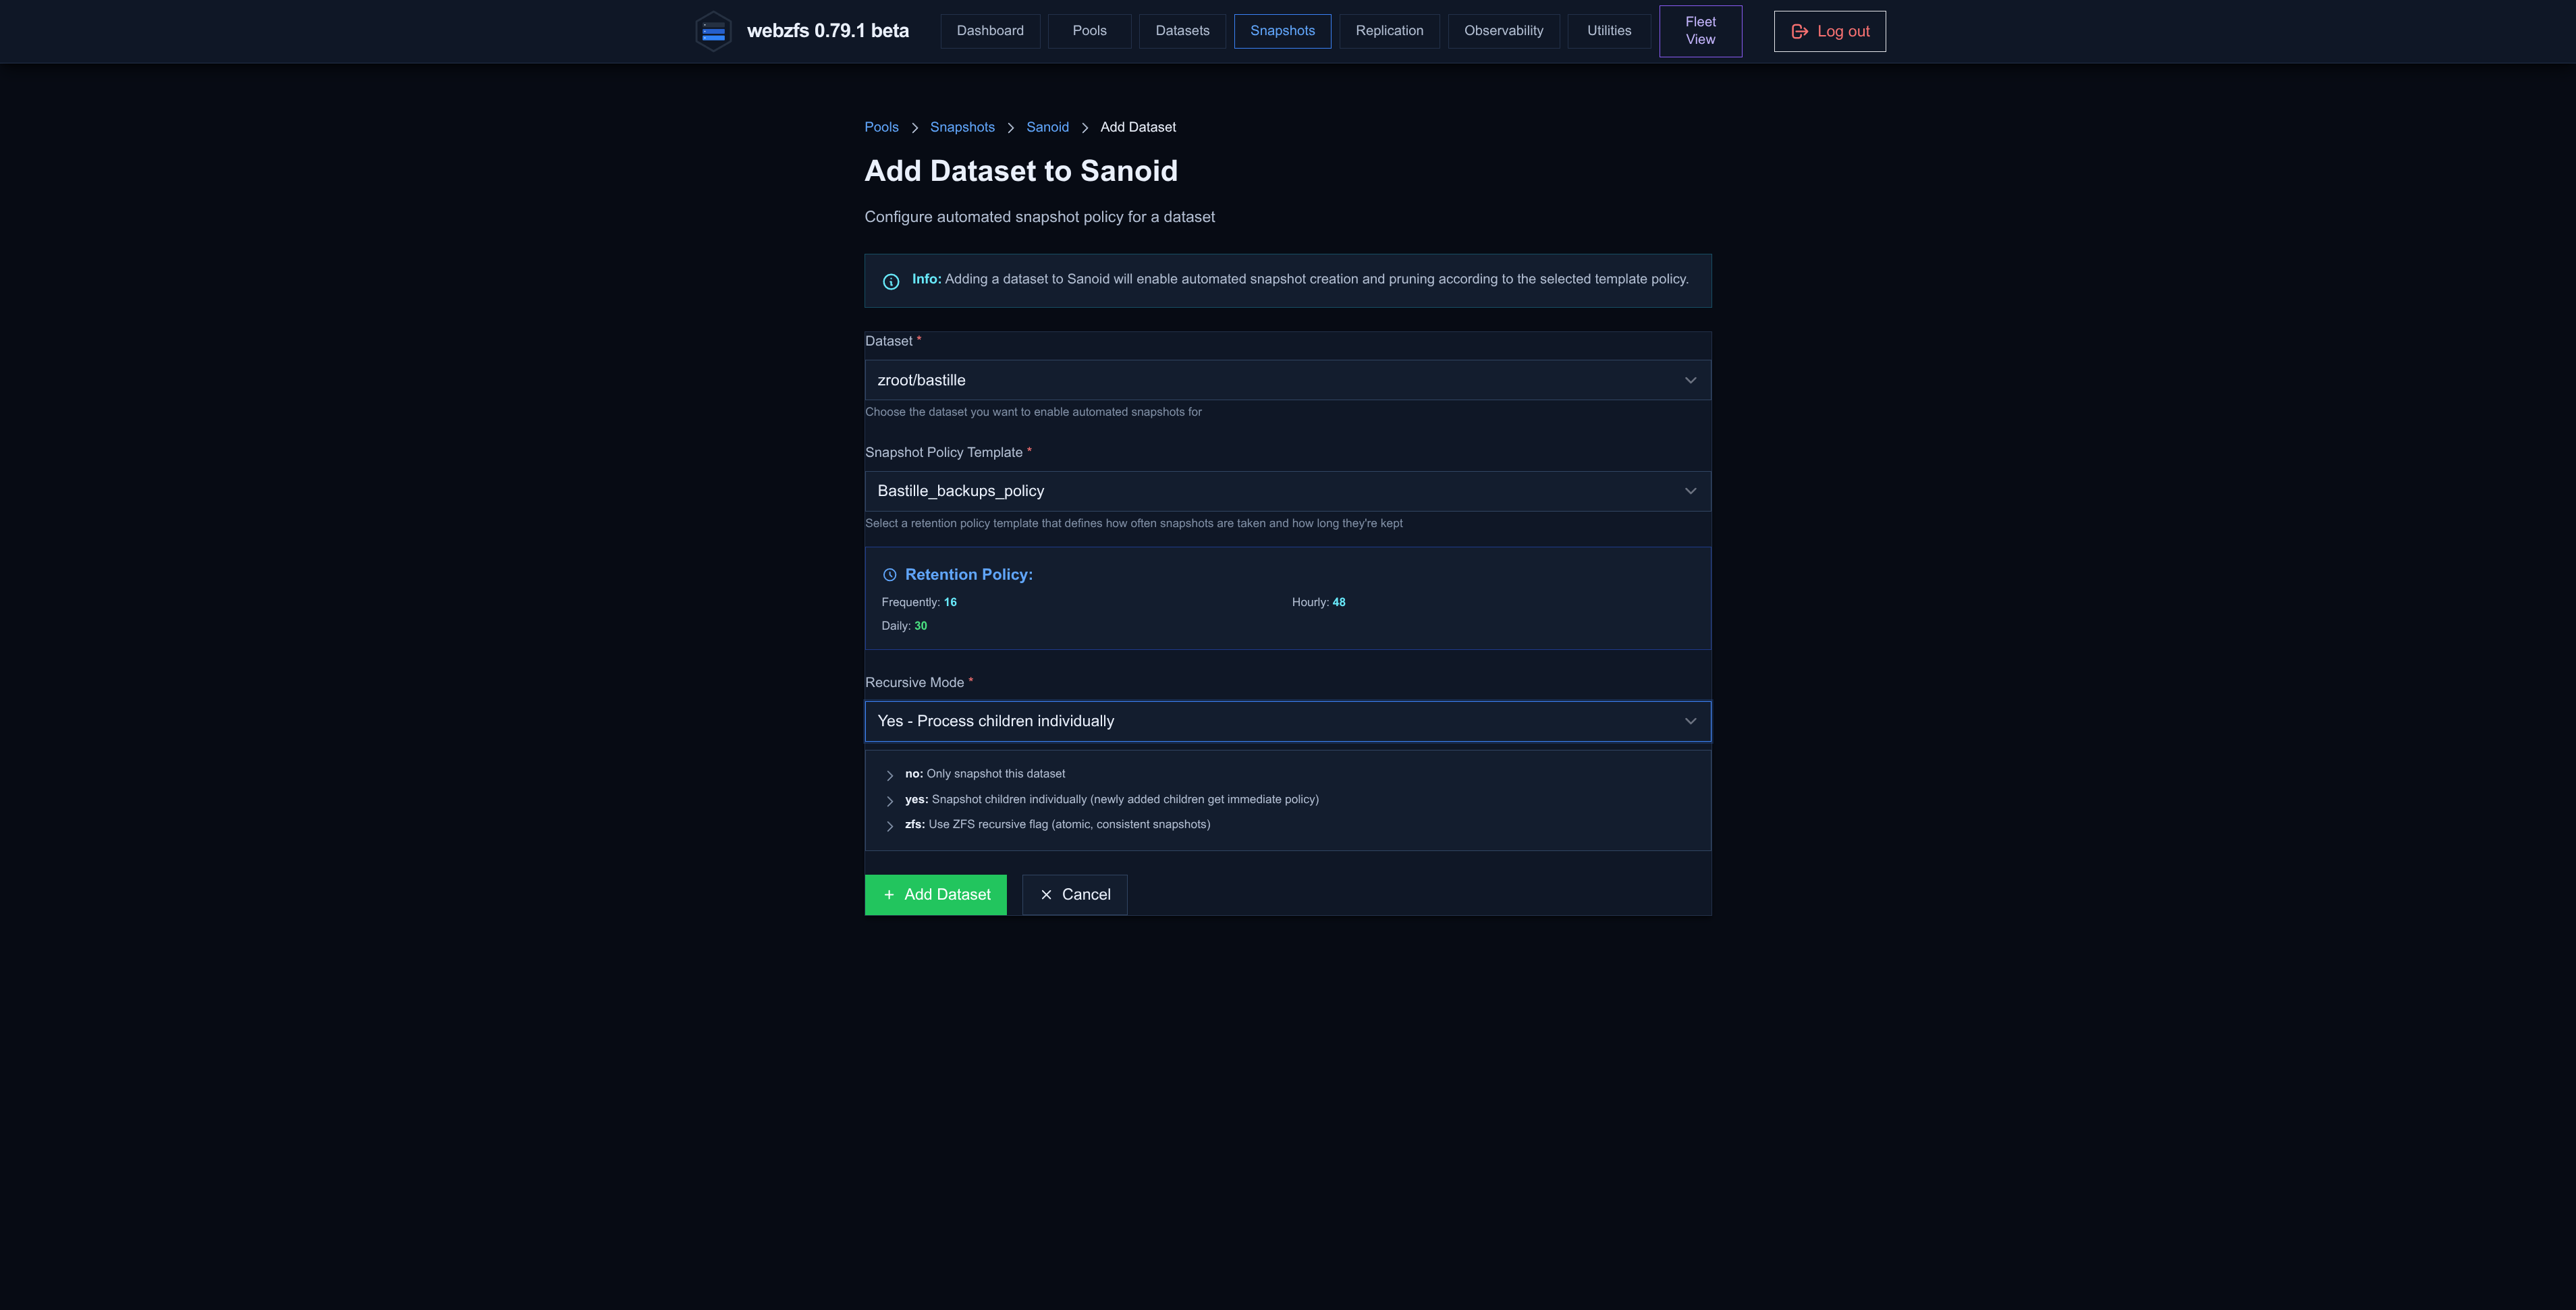
And we add the dataset on which it should take the snapshots:
|
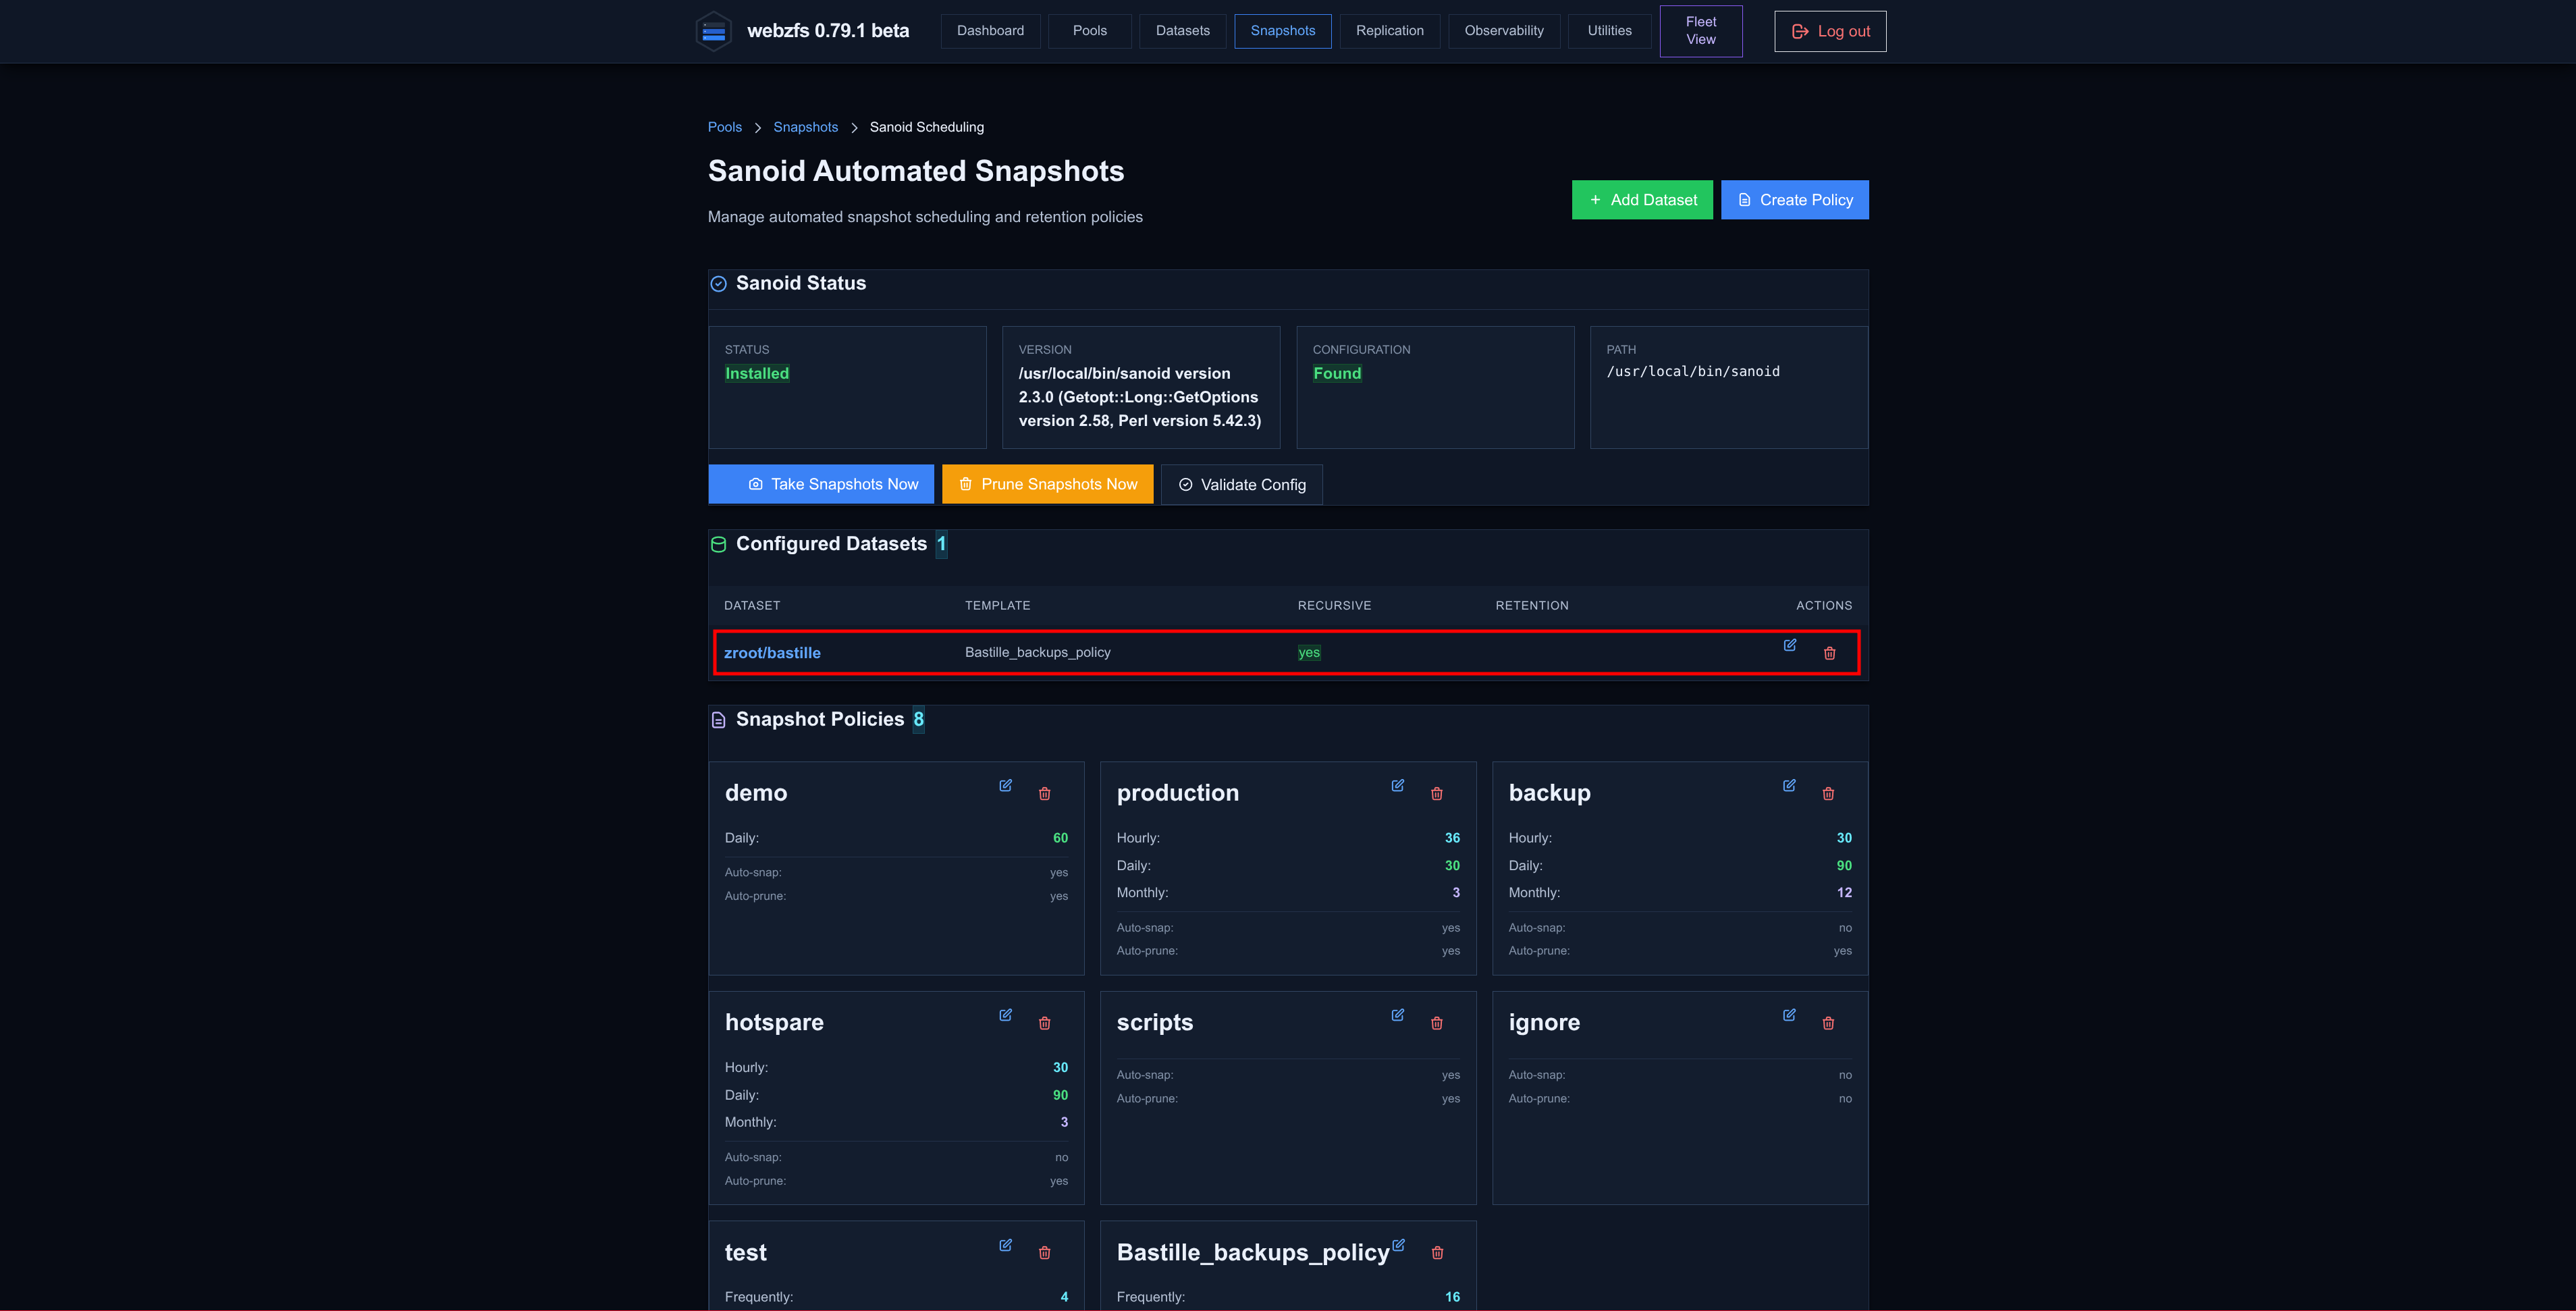
|
As already mentioned earlier in this same article, the integration of WebZFS with Sanoid must be buggy; it generates the configuration correctly but does not leave the execution scheduled to generate/prune the snapshots.
It has to be crontab’d manually:
crontab -e
# SANOID
* * * * * /usr/local/bin/sanoid --cron >/dev/null 2>&1
At the destination we configure Sanoid only to prune the snapshots so they don’t accumulate, as already explained happens in this same article:
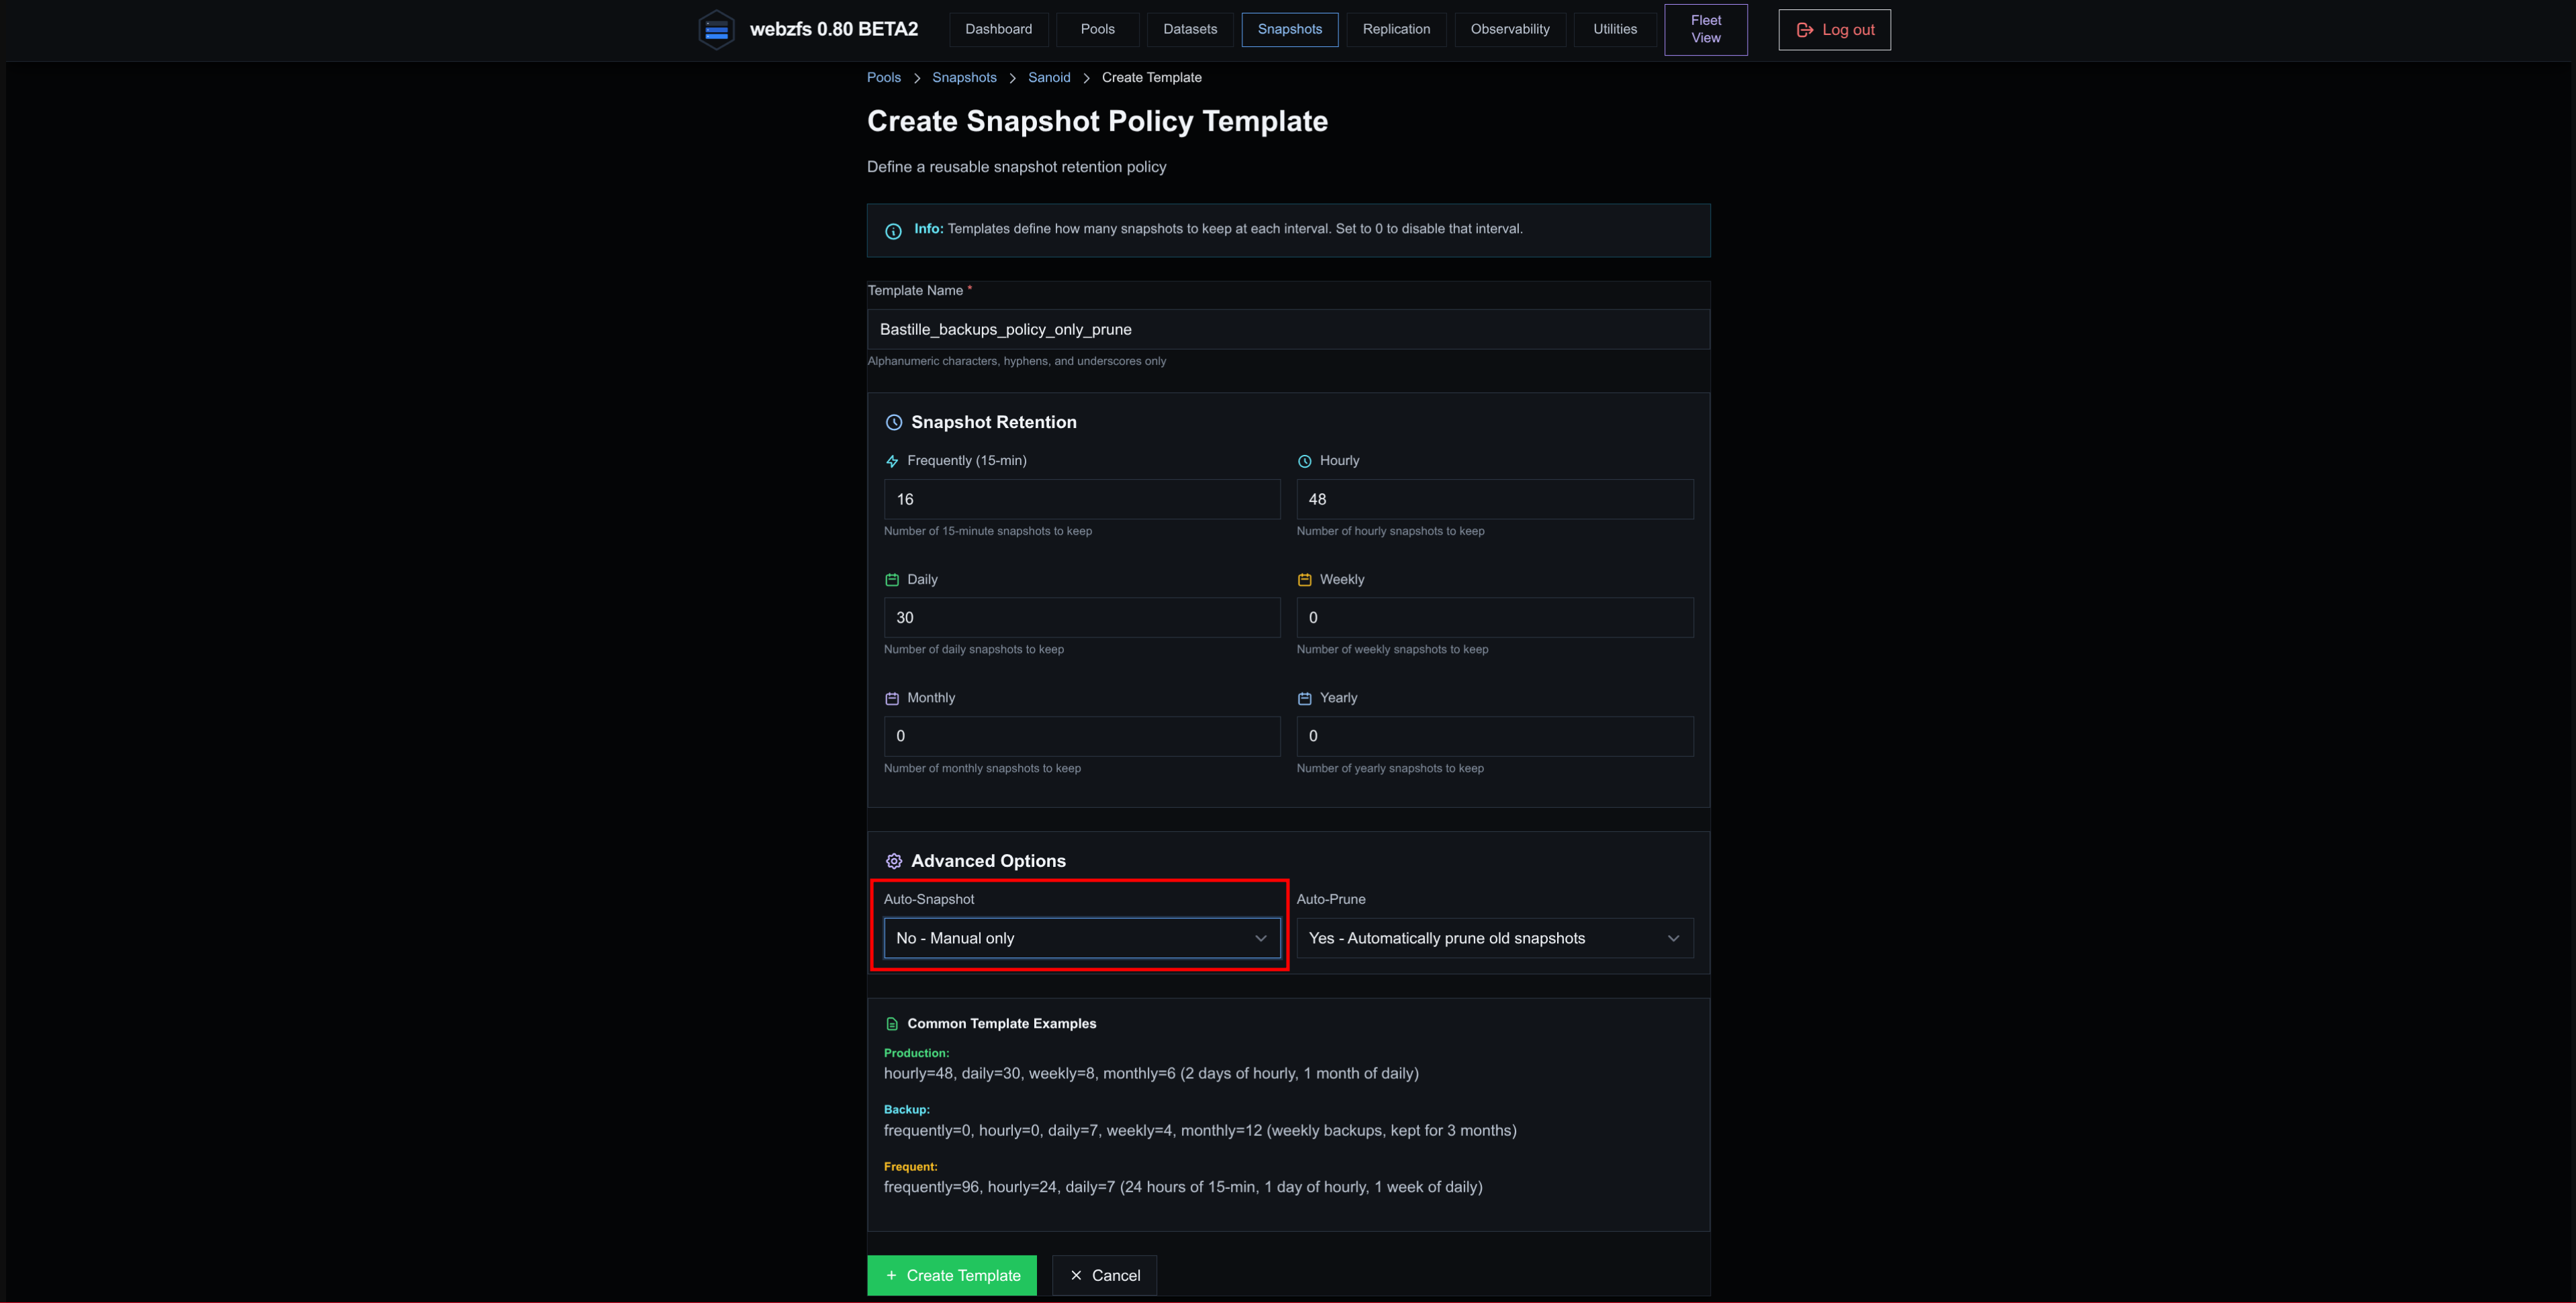
|
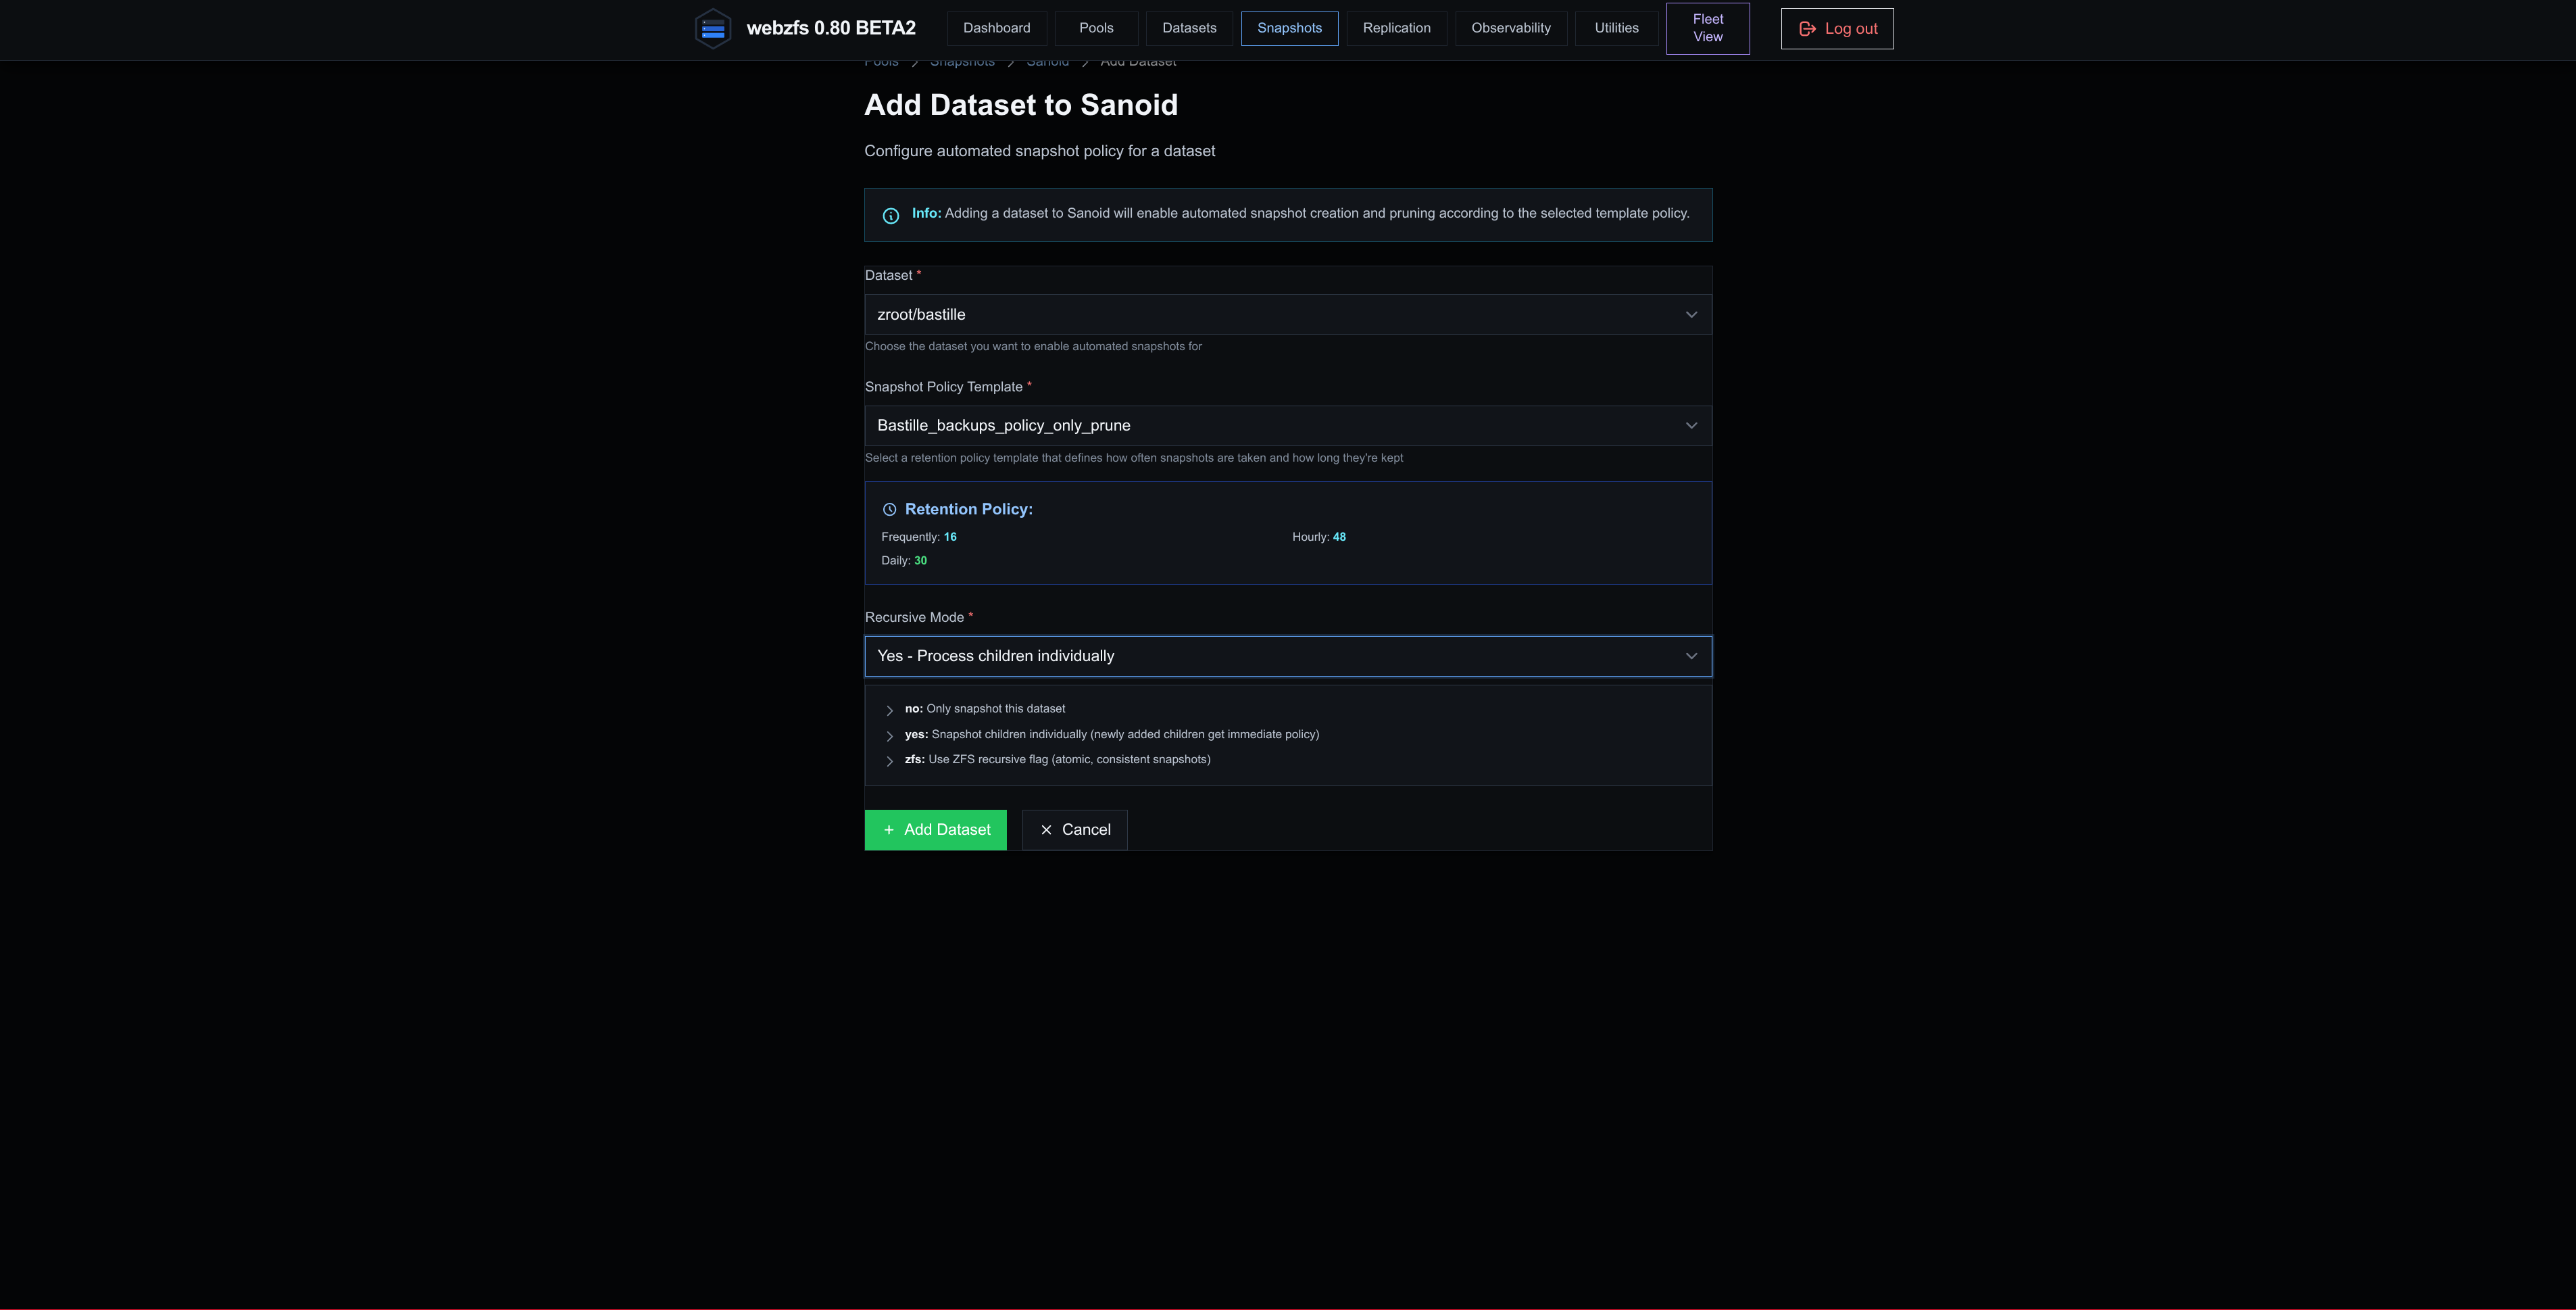
|
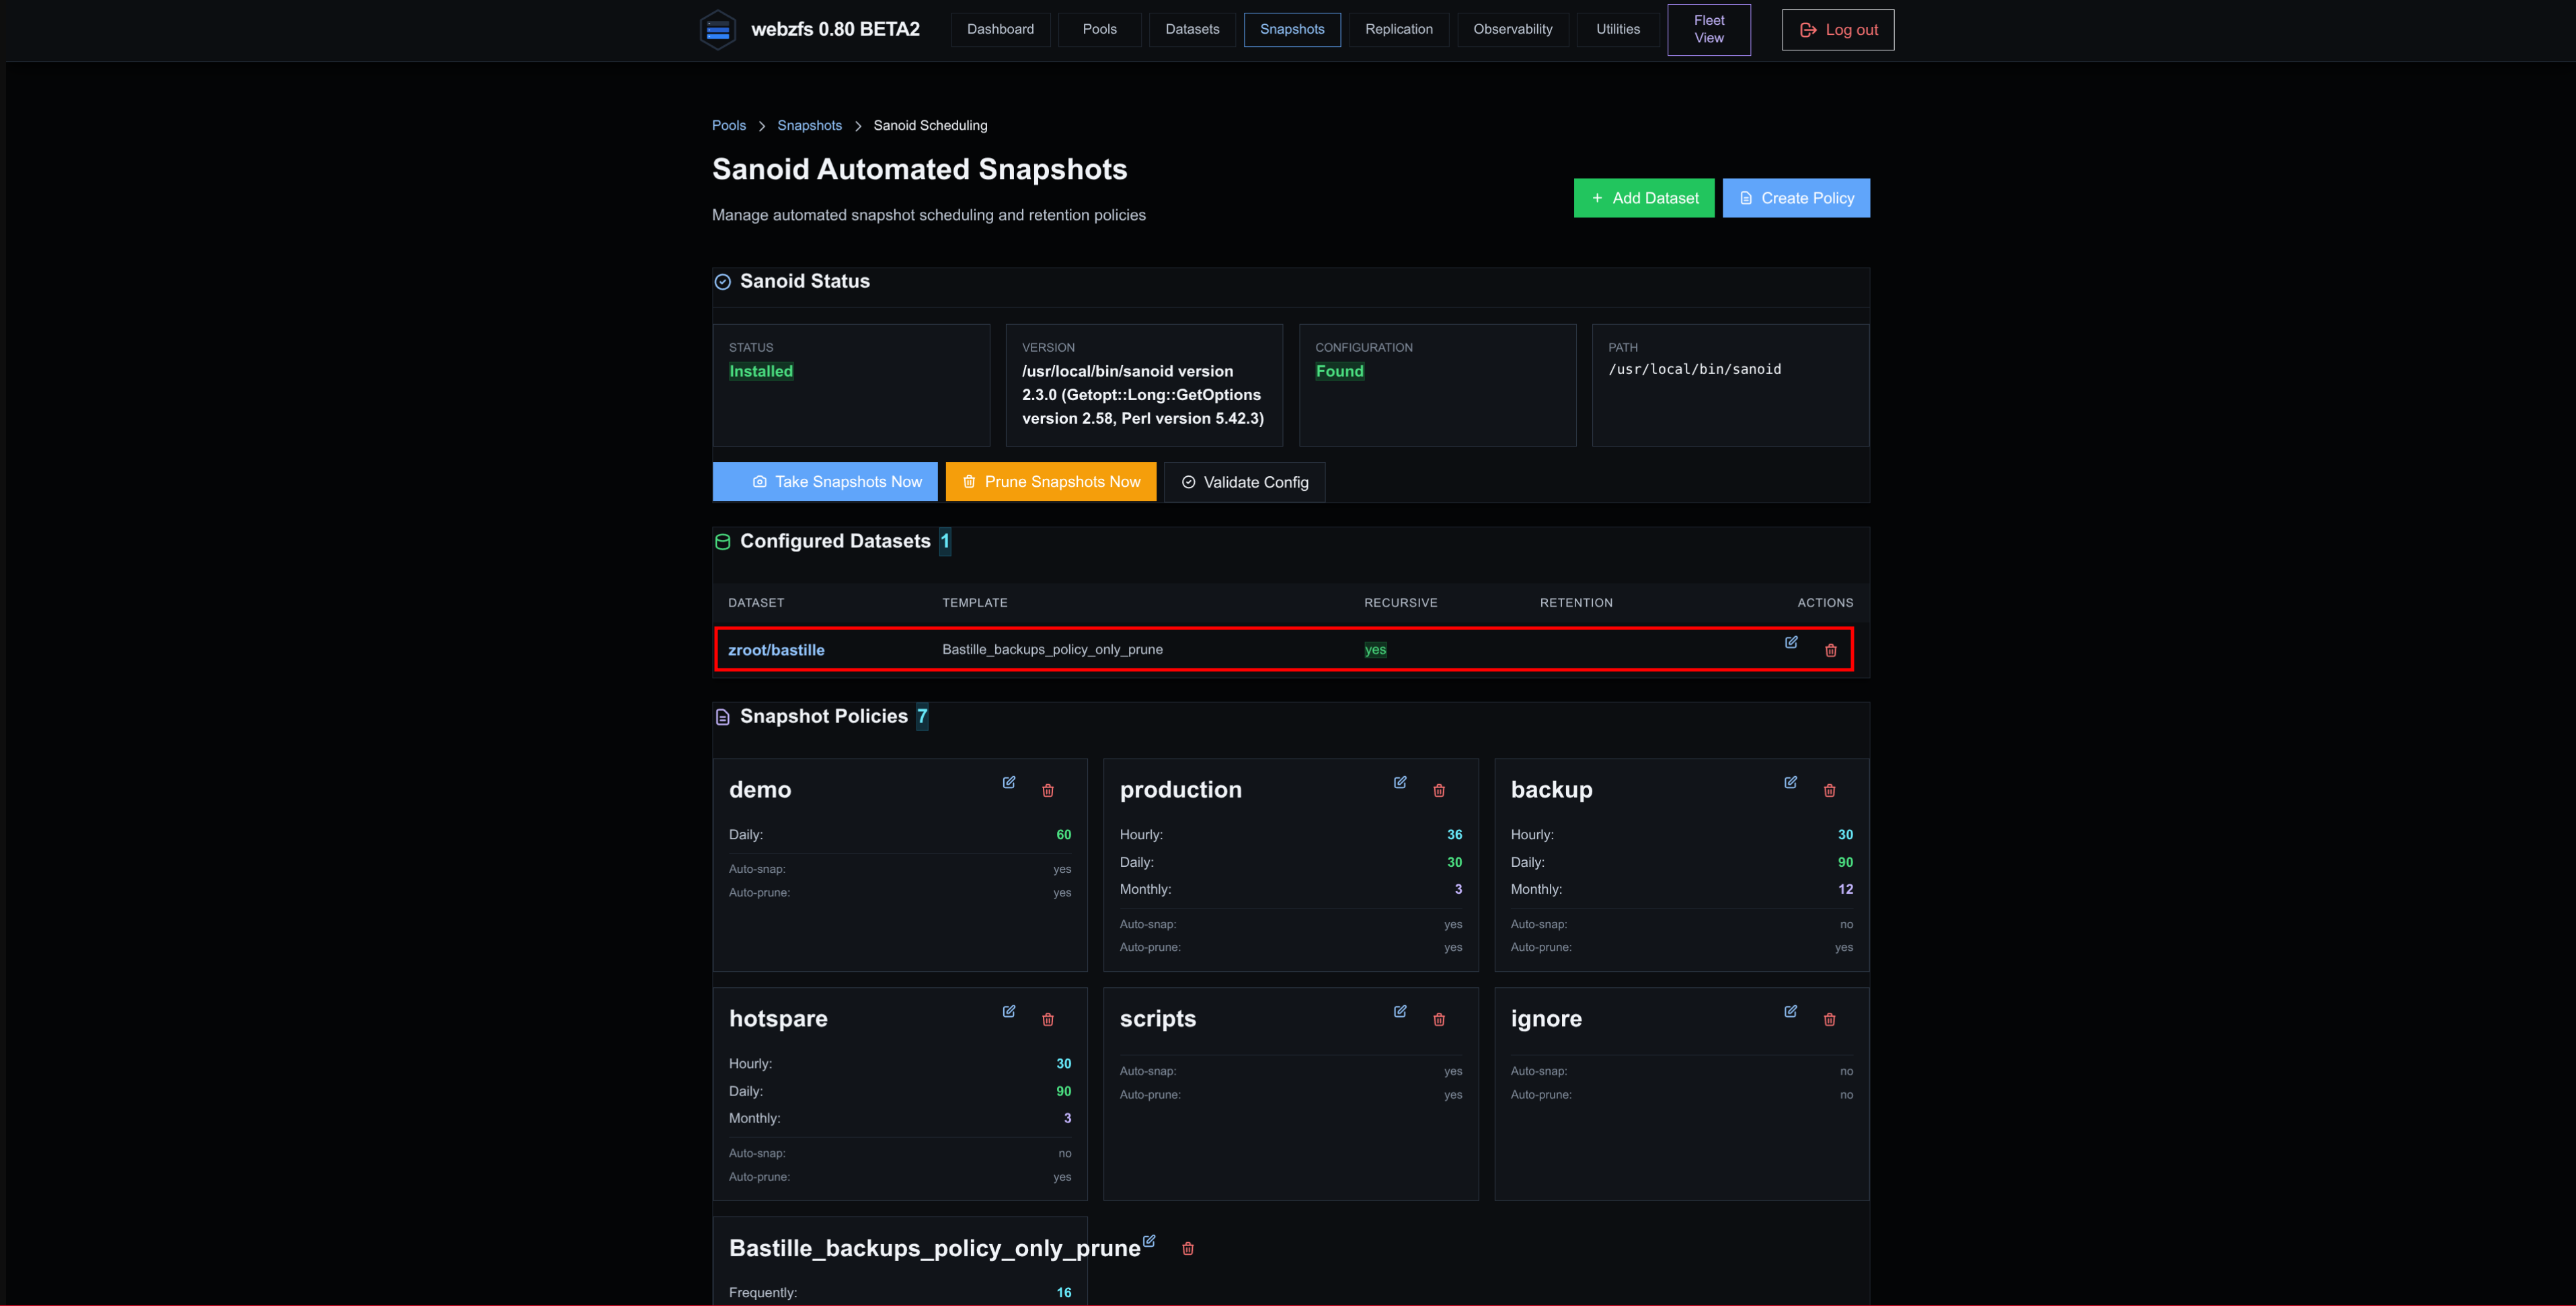
|
As already mentioned earlier in this same article, the integration of WebZFS with Sanoid must be buggy; it generates the configuration correctly but does not leave the execution scheduled to generate/prune the snapshots.
It has to be crontab’d manually:
crontab -e
# SANOID
* * * * * /usr/local/bin/sanoid --cron >/dev/null 2>&1
Finally the synchronization at source/destination will look like this:
MightyMax # ~> zfs list -t snapshot|grep autosnap|wc -l
     891

ColdStar # ~> zfs list -t snapshot|grep autosnap|wc -l
     891
We install Bastille on the backup server as indicated in
this previous article
.
pkg install vim git-lite bash ca_root_nss
pkg install bastille

vi /usr/local/etc/bastille/bastille.conf
## ZFS options
bastille_zfs_enable="YES"    ## default: ""
bastille_zfs_zpool="zroot"   ## default: ""
To move to the backup server we must follow the following steps:
- We stop
WebZFSat the source so thatSyncoidstops running:
service webzfs stop
sysrc webzfs_enable="NO"
- We comment out the
Sanoid/Syncoidcrontabs at the source so that it stops generating snapshots and syncing with the remote server:
crontab -e
# SANOID
#* * * * * /usr/local/bin/sanoid --cron >/dev/null 2>&1
# BEGIN WEBZFS SCHEDULED TASKS - do not edit this block by hand
#*/15 * * * * cd /opt/webzfs && HOME=/opt/webzfs /opt/webzfs/.venv/bin/python -m services.task_runner --task-type syncoid --task-id 11 >> /opt/webzfs/webzfs_tasks.log 2>&1
# END WEBZFS SCHEDULED TASKS
- On the destination server the datasets’ mount points are incorrect (they are the ones
ZFSsets by default):
zfs set mountpoint=/usr/local/bastille zroot/bastille
zfs set mountpoint=/var/log/bastille zroot/bastille/logs
- On the destination server the network interface has a different name so we make the change in the jail configuration:
grep interface /usr/local/bastille/jails/*/jail.conf
sed -i '' 's/nfe0/vtnet0/g' /usr/local/bastille/jails/*/jail.conf
grep interface /usr/local/bastille/jails/*/jail.conf
- We stop
Bastilleat the source:
bastille stop all
- We start
Bastilleat the destination:
bastille start all
If we want to revert and start the jails again on the original system we have two options.
If we have data to preserve while the jails are running on ColdStar.
- Configure all the replication but in reverse:
ColdStar -> MightyMax. - Stop the jails on
ColdStarand start them onMightyMax. - Configure everything again so that it syncs:
MightyMax -> ColdStar.
If we do not have data to preserve while the jails are running on ColdStar.
- Stop the jails on
ColdStarand start them onMightyMax. - Start
WebZFSand re-enable the Crones onMightyMax.
Monitoring:
Sanoid lets you monitor the status of the datasets:
sanoid --monitor-snapshots
OK: all monitored datasets (zroot/bastille, zroot/bastille/backups, zroot/bastille/cache, zroot/bastille/cache/13.1-RELEASE, zroot/bastille/cache/13.2-RELEASE, zroot/bastille/cache/14.2-RELEASE, zroot/bastille/cache/14.3-RELEASE, zroot/bastille/cache/15.1-RELEASE, zroot/bastille/jails, zroot/bastille/jails/Atlas, zroot/bastille/jails/Atlas/root, zroot/bastille/jails/DataDyne, zroot/bastille/jails/DataDyne/root, zroot/bastille/jails/HellStorm, zroot/bastille/jails/HellStorm/root, zroot/bastille/jails/MetaCortex, zroot/bastille/jails/MetaCortex/root, zroot/bastille/jails/PacketRadio, zroot/bastille/jails/PacketRadio/root, zroot/bastille/jails/RECLog, zroot/bastille/jails/RECLog/root, zroot/bastille/jails/RedbullTank, zroot/bastille/jails/RedbullTank/root, zroot/bastille/jails/RosettaStone, zroot/bastille/jails/RosettaStone/root, zroot/bastille/jails/TimeGuard, zroot/bastille/jails/TimeGuard/root, zroot/bastille/logs, zroot/bastille/releases, zroot/bastille/releases/14.2-RELEASE, zroot/bastille/releases/14.3-RELEASE, zroot/bastille/releases/15.1-RELEASE, zroot/bastille/templates) have fresh snapshots
Taking advantage of this we are going to crontab, on both the source and the destination, a script that checks the status and alerts via Telegram in case of failure:
vi /root/.scripts/monitor-sanoid.sh
#!/usr/bin/env bash

#
# monitor-sanoid.sh
#
# Monitor Sanoid snapshots and send Telegram alerts on failure.
#

TELEGRAM_BOT_TOKEN="XXXXX"
TELEGRAM_CHAT_ID="YYYY"

STATE_FILE="/var/run/sanoid-monitor.state"

sendTelegram() {
    curl -fsS -X POST \
        "https://api.telegram.org/bot${TELEGRAM_BOT_TOKEN}/sendMessage" \
        -d "chat_id=${TELEGRAM_CHAT_ID}" \
        --data-urlencode "text=$1" \
        >/dev/null
}

OUTPUT=$(sanoid --monitor-snapshots 2>&1)
RET=$?

if [ "$RET" -ne 0 ]; then

    # Send an alert only on the first failure
    if [ ! -f "$STATE_FILE" ] || [ "$(cat "$STATE_FILE")" != "FAILED" ]; then
        sendTelegram "🚨 SANOID ALERT on $(hostname)

Snapshot monitoring has FAILED.

$OUTPUT"

        echo "FAILED" > "$STATE_FILE"
    fi

else

    # Send a recovery notification after a previous failure
    if [ -f "$STATE_FILE" ] && [ "$(cat "$STATE_FILE")" = "FAILED" ]; then
        sendTelegram "✅ SANOID RECOVERY on $(hostname)

Snapshot monitoring has recovered and is now OK.

$OUTPUT"
    fi

    echo "OK" > "$STATE_FILE"
fi

exit "$RET"
We assign the necessary permissions:
chmod 700 /root/.scripts/monitor-sanoid.sh
We run it manually on both servers:
/root/.scripts/monitor-sanoid.sh
If everything went well, we crontab it:
crontab -e
*/5 * * * * /root/.scripts/monitor-sanoid.sh
Troubleshooting:
There are some logs that can shed light at certain times when WebZFS fails without showing warnings in the web interface:
tail -f /opt/webzfs/.config/webzfs/logs/*.log
tail -f /opt/webzfs/webzfs_tasks.log
tail -f /opt/webzfs/gunicorn.log