Bhyve is the official virtualization hypervisor of FreeBSD starting from version 10.0-RELEASE. In this article, we will use vm-bhyve, a wrapper that will greatly facilitate the management of machines and the network.
- Instalación
- Puerto serie
- VNC
- Cloud image
- Cloud image: Provisioning
- Cloud image: cloud-init/CIDATA
- Cloud image: cloud-init/Local files
- Cloud image: cloud-init/IMDS
- Firewall
- Wifi
- Troubleshooting
Installation
We install everything we need:
We create a ZFS pool where the virtual machines will be stored:
zfs set recordsize=64K zroot/vm
We enable the service and indicate where the virtual machines will be hosted:
sysrc vm_dir="zfs:zroot/vm"
We initialize vm-bhyve:
We copy the example templates:
We create a bridge to connect the virtual machines with the physical network interface:
We add the physical interface to the switch:
We can see the available bridges:
NAME    TYPE      IFACE      ADDRESS  PRIVATE  MTU  VLAN  PORTS
public  standard  vm-public  -        no       -    -     bge0
When we start a virtual machine, the corresponding tap interface will be automatically added to the bridge: vm-public linked to the switch: public.
A physical interface can only be in one bridge, so if any previous software is already using it in a bridge, we will need to reuse the existing bridge. In my case, the existing bridge is called bridge0, so I create a vm-bhyve switch named bridge0:
NAME     TYPE      IFACE      ADDRESS  PRIVATE  MTU  VLAN  PORTS
public   standard  vm-public  -        no       -    -     -
bridge0  manual    bridge0    n/a      no       n/a  n/a   n/a
For the machines to use this switch, we need to modify the template we are going to use:
/zroot/vm/.templates/alpine.conf:network0_switch="public"
/zroot/vm/.templates/arch.conf:network0_switch="public"
/zroot/vm/.templates/centos6.conf:network0_switch="public"
/zroot/vm/.templates/centos7.conf:network0_switch="public"
/zroot/vm/.templates/coreos.conf:network0_switch="public"
/zroot/vm/.templates/debian.conf:network0_switch="public"
/zroot/vm/.templates/default.conf:network0_switch="public"
/zroot/vm/.templates/dragonfly.conf:network0_switch="public"
/zroot/vm/.templates/freebsd-zvol.conf:network0_switch="public"
/zroot/vm/.templates/freepbx.conf:network0_switch="public"
/zroot/vm/.templates/linux-zvol.conf:network0_switch="public"
/zroot/vm/.templates/netbsd.conf:network0_switch="public"
/zroot/vm/.templates/openbsd.conf:network0_switch="public"
/zroot/vm/.templates/resflash.conf:network0_switch="public"
/zroot/vm/.templates/ubuntu.conf:network0_switch="public"
/zroot/vm/.templates/windows.conf:network0_switch="public"
We download the operating system images that we want to install, in my case Kali-linux:
-rw-r--r-- 1 root wheel 2994323456 Feb 7 19:46 /zroot/vm/.iso/kali-linux-2022.1-installer-amd64.iso
A Linux VM can boot with different grub/uefi loaders, depending on which one we use, we will access the VM in one way or another. My advice is to use grub and access the VMs through the serial port since it does not require any additional software. Additionally, if we need to start any graphical application, we can always forward the X.
Serial port
We create the virtual machine:
We install from the ISO:
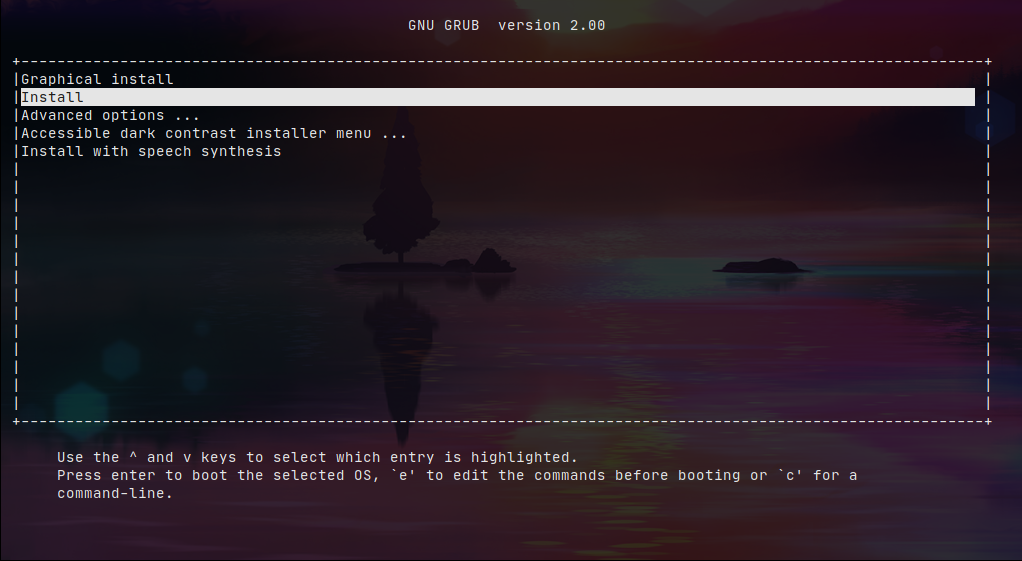
We will see the installer in the console itself:
We can check information about the virtual machine with the following command:
------------------------
Virtual Machine: kali
------------------------
  state: running (99075)
  datastore: default
  loader: grub
  uuid: 05ced6c1-d3a7-11ec-875e-5065f37a62c0
  uefi: default
  cpu: 2
  memory: 2G
  memory-resident: 215412736 (205.433M)

  network-interface
    number: 0
    emulation: virtio-net
    virtual-switch: public
    fixed-mac-address: 58:9c:fc:00:81:dd
    fixed-device: -
    active-device: tap0
    desc: vmnet-kali-0-public
    mtu: 1500
    bridge: vm-public
    bytes-in: 0 (0.000B)
    bytes-out: 0 (0.000B)

  virtual-disk
    number: 0
    device-type: sparse-zvol
    emulation: virtio-blk
    options: -
    system-path: /dev/zvol/zroot/vm/kali/disk0
    bytes-size: 16106127360 (15.000G)
    bytes-used: 57344 (56.000K)
If we list the virtual machines, we will see that it is running:
NAME  DATASTORE  LOADER  CPU  MEMORY  VNC  AUTOSTART  STATE
kali  default    grub    2    2G      -    No         Running (99075)
To exit the console, we must press:
~ + (CtrDerecha + d)
VNC
We create the virtual machine:
We configure it so that the loader is uefi and define the VNC configuration parameters:
loader="grub" -> loader="uefi"
graphics="yes"
xhci_mouse="yes" -> Improves muse experience
graphics_listen="FATHER_HOST_IP"
graphics_port="5900"
graphics_res="1600x900"
graphics_wait="yes" --> Retain VM in pause since VNC connection, awesome. Remember to remove that parameter when initial installation has finished.
We start the installation:
We start the machine:
When we check the virtual machines, we will see that the latter has a VNC socket associated with it:
NAME   DATASTORE  LOADER  CPU  MEMORY  VNC                  AUTOSTART  STATE
kali   default    grub    2    2G      -                    No         Running (42962)
kali2  default    uefi    2    2G      192.168.69.180:5900  No         Locked (odyssey.alfaexploit.com)
We access the installer via VNC:

Cloud image
To test, we download the cloud version of Ubuntu:
We can see the downloaded image:
DATASTORE           FILENAME
default             ubuntu-22.04-server-cloudimg-amd64.img
We create the virtual machine:
We start the image:
The problem with these images is that the vm-bhyve cloud-ini is very limited, it only allows us to enter SSH keys, but not assign a static IP. Therefore, the VM will obtain one via DHCP that we will have to discover:
fixed-mac-address: 58:9c:fc:02:a4:96
MAC=$(vm info ubuntu-cloud|grep 'fixed-mac-address'|tr -d " "|awk -F "fixed-mac-address:" '{print$2}')
arp -a |grep $MAC
? (192.168.69.225) at 58:9c:fc:02:a4:96 on em0 expires in 1110 seconds [ethernet]
We access via SSH since our pubkey must be authorized:
We assign user passwords, i that way we will be able to login via vm-bhyve console:
passwd
passwd ubuntu
Now we can acces via console:
We check the basic information:
Linux ubuntu-cloud 5.15.0-83-generic #92-Ubuntu SMP Mon Aug 14 09:30:42 UTC 2023 x86_64 x86_64 x86_64 GNU/Linux
Cloud image: Provisioning
The cloud-init support in vm-bhyve is very limited; it only allows authorizing SSH keys. To overcome these limitations, we will have to generate the cloud-init files ourselves.
To properly configure cloud-init, we must first understand the configuration process it follows:
- cloud-init discovers the datasource and retrieves the following configuration files:
- meta-data(Ex: pre-network): Information about the instance, machine ID, hostname.
- network-config(Ex: pre-network): Network configuration.
- vendro-data(Ex: post-network): Hardware optimizations, this file is not mandatory, optional.
- user-data(Ex: post-network): Users, SSH keys, custom scripts, integration with systems like Puppet/Chef/Ansible.
- cloud-init sets up the network; if no configuration exists, it will request an IP via DHCP.
- cloud-init configures the instance according to the vendor-data and user-data files.
Cloud-init supports various datasources . In our case, we will use NoCloud which allows us to configure virtual machines through:
- Local filesystem with volume ID: CIDATA.
- Local files: SMBIOS serial number/Kernel command line.
- IMDS server (requires DHCP server): SMBIOS serial number/Kernel command line.
Cloud image: cloud-init/CIDATA
Cloud-init will read these files if the virtual machine has a CD-ROM drive with the volume ID: CIDATA.
We install cdrkit-genisoimage:
We create the virtual machine:
We create the
cloud-init files
:
cd /zroot/vm/ubuntu-cloud2/
cat << EOF > .cloud-init/meta-data
instance-id: Alfaexploit/Ubuntu-CloudImg2
local-hostname: Ubuntu-CloudImg2
EOF
cat << EOF >  .cloud-init/user-data
#cloud-config
users:
# Following entry create user1 and assigns password specified in plain text.
# Please not use of plain text password is not recommended from security best
# practises standpoint
  - name: user1
    groups: sudo
    sudo: ALL=(ALL) NOPASSWD:ALL
    plain_text_passwd: PASSWORD
    lock_passwd: false
# Following entry creates user2 and attaches a hashed passwd to the user. Hashed
# passwords can be generated with:
# python -c 'import crypt,getpass; print(crypt.crypt(getpass.getpass(), crypt.mksalt(crypt.METHOD_SHA512)))'
  - name: user2
    passwd: $PASS_HASH
    lock_passwd: false
# Following entry creates user3, disables password based login and enables an SSH public key
  - name: user3
    ssh_authorized_keys:
      - ssh-rsa AAAAB3NzaC1yc2EAAAADAQABAAABAQCiF8zV98gaV87zVDwhZ8IDxUXs3Xq0NKVT1HY2t3XMjMU6/Sv6WeMeKQtJn/Py5PPXhYkOQ92in5+70WE6fQPt0shH6Hh4ZwY8lKDboLh96XLiCsxZc/IMq0h86QeT2E7FjAXcGo/2gziSYvbnp2Z+JAe5uBm4HtV3419mlEmaRAXGtjQxqcnhoUsLj4gD53ak1H/KUro+GArVDPUoMdSsqxvL0BHGbbcFOIaA3H3GwnGp09bHBNd0fR+Ip6CHRlRIu9oohezOAU+/3ul+FFbZuVlJ8zssaaFOzxjwEhD/2Ghsae3+z6tkrbhEOYN7HvBDejK9WySeI0+bMRqfSaID kr0m@DirtyCow
    lock_passwd: true
# Install some basic software
packages:
  - htop
  - screen
EOF
cat << EOF > .cloud-init/network-config
version: 2
ethernets:
  enp0s5:
    addresses: [192.168.69.30/24]
    routes:
      - to: default
        via: 192.168.69.200
    nameservers:
      addresses: [1.1.1.1,8.8.8.8]
EOF
We generate the seed image with the volume ID: cidata.
We add the CD-ROM image to the virtual machine:
disk1_type="ahci-cd"
disk1_dev="custom"
disk1_name="/zroot/vm/ubuntu-cloud2/seed.iso"
EOF
We start the virtual machine; it will read the seed image and interpret the cloud-init configuration:
vm console ubuntu-cloud2
We will observe how it configures the network:
[   10.606424] cloud-init[649]: Cloud-init v. 23.2.2-0ubuntu0~22.04.1 running 'init' at Wed, 27 Sep 2023 20:13:02 +0000. Up 10.59 seconds.
[   10.615655] cloud-init[649]: ci-info: ++++++++++++++++++++++++++++++++++++++++++++++Net device info++++++++++++++++++++++++++++++++++++++++++++++
[   10.616879] cloud-init[649]: ci-info: +--------+------+--------------------------------------------+---------------+--------+-------------------+
[   10.618050] cloud-init[649]: ci-info: | Device |  Up  |                  Address                   |      Mask     | Scope  |     Hw-Address    |
[   10.619210] cloud-init[649]: ci-info: +--------+------+--------------------------------------------+---------------+--------+-------------------+
[   10.620362] cloud-init[649]: ci-info: | enp0s5 | True |               192.168.69.30                | 255.255.255.0 | global | 58:9c:fc:02:5c:df |
[   10.621520] cloud-init[649]: ci-info: | enp0s5 | True | 2a0c:5a86:d204:ca00:5a9c:fcff:fe02:5cdf/64 |       .       | global | 58:9c:fc:02:5c:df |
[   10.622819] cloud-init[649]: ci-info: | enp0s5 | True |        fe80::5a9c:fcff:fe02:5cdf/64        |       .       |  link  | 58:9c:fc:02:5c:df |
[   10.624148] cloud-init[649]: ci-info: |   lo   | True |                 127.0.0.1                  |   255.0.0.0   |  host  |         .         |
[   10.625316] cloud-init[649]: ci-info: |   lo   | True |                  ::1/128                   |       .       |  host  |         .         |
[   10.626463] cloud-init[649]: ci-info: +--------+------+--------------------------------------------+---------------+--------+-------------------+
We can see that it has created the users as we instructed.
User user1 is local since by default it doesn’t allow SSH login via password, and we haven’t authorized any keys:
Ubuntu-CloudImg2 login: user1
$ id
uid=1000(user1) gid=1000(user1) groups=1000(user1),27(sudo)
User user2 is also local as it doesn’t allow SSH login via password by default, but the password was defined using a hash, unlike user1:
Ubuntu-CloudImg2 login: user2
$ id
uid=1001(user2) gid=1001(user2) groups=1001(user2)
User user3 has SSH access only, without local login:
$ id
uid=1002(user3) gid=1002(user3) groups=1002(user3)
Cloud image: cloud-init/Local files
The steps to use local files are as follows:
- Generate the cloud-init files.
- Copy the files to the deployed operating system image.
- Start the virtual machine specifying the path to the files using the SMBIOS serial parameter : ds=nocloud;s=file://path/to/directory/;h=node-42 or through kernel parameters .
Using SMBIOS Serial Number:
We create the
cloud-init files
:
cd ~/ubuntu-cloud3
For some reason, it’s not possible to leave the network configuration in the
network-config file
as we did with the seed ISO; instead, it needs to be included in the meta-data:
cat << EOF > ~/ubuntu-cloud3/meta-data
instance-id: Alfaexploit/Ubuntu-CloudImg3
local-hostname: Ubuntu-CloudImg3
network-interfaces: |
  iface enp0s5 inet static
  address 192.168.69.30
  network 192.168.69.0
  netmask 255.255.255.0
  broadcast 192.168.69.255
  gateway 192.168.69.200
EOF
cat << EOF > ~/ubuntu-cloud3/user-data
#cloud-config
users:
# Following entry create user1 and assigns password specified in plain text.
# Please not use of plain text password is not recommended from security best
# practises standpoint
  - name: user1
    groups: sudo
    sudo: ALL=(ALL) NOPASSWD:ALL
    plain_text_passwd: PASSWORD
    lock_passwd: false
# Following entry creates user2 and attaches a hashed passwd to the user. Hashed
# passwords can be generated with:
# python -c 'import crypt,getpass; print(crypt.crypt(getpass.getpass(), crypt.mksalt(crypt.METHOD_SHA512)))'
  - name: user2
    passwd: $PASS_HASH
    lock_passwd: false
# Following entry creates user3, disables password based login and enables an SSH public key
  - name: user3
    ssh_authorized_keys:
      - ssh-rsa AAAAB3NzaC1yc2EAAAADAQABAAABAQCiF8zV98gaV87zVDwhZ8IDxUXs3Xq0NKVT1HY2t3XMjMU6/Sv6WeMeKQtJn/Py5PPXhYkOQ92in5+70WE6fQPt0shH6Hh4ZwY8lKDboLh96XLiCsxZc/IMq0h86QeT2E7FjAXcGo/2gziSYvbnp2Z+JAe5uBm4HtV3419mlEmaRAXGtjQxqcnhoUsLj4gD53ak1H/KUro+GArVDPUoMdSsqxvL0BHGbbcFOIaA3H3GwnGp09bHBNd0fR+Ip6CHRlRIu9oohezOAU+/3ul+FFbZuVlJ8zssaaFOzxjwEhD/2Ghsae3+z6tkrbhEOYN7HvBDejK9WySeI0+bMRqfSaID kr0m@DirtyCow
    lock_passwd: true
# Install some basic software
packages:
  - htop
  - screen
EOF
We convert the image to RAW format to be able to mount it:
We generate a memory disk from the image:
We can see the partitions it contains:
=>     34  4612029  md0  GPT  (2.2G)
       34     2014       - free -  (1.0M)
     2048     8192   14  bios-boot  (4.0M)
    10240   217088   15  efi  (106M)
   227328  4384735    1  linux-data  (2.1G)
We mount the / of the Linux system:
We copy the files:
We unmount:
We delete the memory disk:
We create the virtual machine from the modified image:
vm-bhyve allows us to pass arguments directly to Bhyve using the
bhyve_options
parameter. Additionally, Bhyve allows configuring
variables from CLI: -o
.
The variable we need to modify is
system.serial_number
; identifying the correct variable has been a trial and error process.
We add the Bhyve options:
bhyve_options="-o system.serial_number=ds=nocloud;s=file://ubuntu-cloud3/"
EOF
We start the virtual machine:
The users will have been generated according to the configuration files. Additionally, we can see the information injected into SMBIOS:
System Information
	Manufacturer: FreeBSD
	Product Name: BHYVE
	Version: 1.0
	Serial Number: ds=nocloud;s=file://ubuntu-cloud3/
	UUID: b7ff0817-5d72-11ee-b808-3497f636bf45
	Wake-up Type: Power Switch
	SKU Number: None
	Family: Virtual Machine
Using Kernel Parameters:
We create the
cloud-init files
:
cd ~/ubuntu-cloud4
For some reason, it’s not possible to leave the network configuration in the
network-config file
as we did with the seed ISO; instead, it needs to be included in the meta-data:
cat << EOF > ~/ubuntu-cloud4/meta-data
instance-id: Alfaexploit/Ubuntu-CloudImg4
local-hostname: Ubuntu-CloudImg4
network-interfaces: |
  iface enp0s5 inet static
  address 192.168.69.30
  network 192.168.69.0
  netmask 255.255.255.0
  broadcast 192.168.69.255
  gateway 192.168.69.200
EOF
cat << EOF > ~/ubuntu-cloud4/user-data
#cloud-config
users:
# Following entry create user1 and assigns password specified in plain text.
# Please not use of plain text password is not recommended from security best
# practises standpoint
  - name: user1
    groups: sudo
    sudo: ALL=(ALL) NOPASSWD:ALL
    plain_text_passwd: PASSWORD
    lock_passwd: false
# Following entry creates user2 and attaches a hashed passwd to the user. Hashed
# passwords can be generated with:
# python -c 'import crypt,getpass; print(crypt.crypt(getpass.getpass(), crypt.mksalt(crypt.METHOD_SHA512)))'
  - name: user2
    passwd: $PASS_HASH
    lock_passwd: false
# Following entry creates user3, disables password based login and enables an SSH public key
  - name: user3
    ssh_authorized_keys:
      - ssh-rsa AAAAB3NzaC1yc2EAAAADAQABAAABAQCiF8zV98gaV87zVDwhZ8IDxUXs3Xq0NKVT1HY2t3XMjMU6/Sv6WeMeKQtJn/Py5PPXhYkOQ92in5+70WE6fQPt0shH6Hh4ZwY8lKDboLh96XLiCsxZc/IMq0h86QeT2E7FjAXcGo/2gziSYvbnp2Z+JAe5uBm4HtV3419mlEmaRAXGtjQxqcnhoUsLj4gD53ak1H/KUro+GArVDPUoMdSsqxvL0BHGbbcFOIaA3H3GwnGp09bHBNd0fR+Ip6CHRlRIu9oohezOAU+/3ul+FFbZuVlJ8zssaaFOzxjwEhD/2Ghsae3+z6tkrbhEOYN7HvBDejK9WySeI0+bMRqfSaID kr0m@DirtyCow
    lock_passwd: true
# Install some basic software
packages:
  - htop
  - screen
EOF
We convert the image to RAW format to be able to mount it:
We generate a memory disk from the image:
We can see the partitions it contains:
=>     34  4612029  md0  GPT  (2.2G)
       34     2014       - free -  (1.0M)
     2048     8192   14  bios-boot  (4.0M)
    10240   217088   15  efi  (106M)
   227328  4384735    1  linux-data  (2.1G)
We mount the / of the Linux system:
We copy the files:
We unmount:
We delete the memory disk:
We create the virtual machine from the modified image:
We add the Bhyve options:
grub_run_partition="gpt1"
grub_run0="linux /boot/vmlinuz root=/dev/vda1 rw ds='nocloud;s=file://ubuntu-cloud4/'"
grub_run1="initrd /boot/initrd.img"
EOF
We start the virtual machine:
vm console ubuntu-cloud4
We can see that it has generated the users as we instructed. Additionally, we can check the parameters received by the kernel:
[ 0.038996] Kernel command line: console=ttyS0 BOOT_IMAGE=/boot/vmlinuz root=/dev/vda1 rw ds=nocloud;s=file://ubuntu-cloud4/
Cloud image: cloud-init/IMDS
The advantage of using an IMDS(Instance Metadata Service) server is that it centralizes all the configuration files. This is useful for removing a virtual machine from one physical node and redeploying it on another without having to copy or regenerate the files: meta-data/user-data/vendor-data.
However, it also imposes a dependency on DHCP/WebServer servers, which can potentially fail (even when set up in high availability mode). This situation should be avoided at all costs when dealing with production servers. Personally, I recommend using the seed ISO as it can be easily scripted and has no dependencies.
To be able to use an IMDS server, we should proceed as follows:
- Set up a DHCP server configured statically to always assign the same IP address to the MAC address of each virtual machine.
- Set up an IMDS web server that will serve the cloud-init files.
- Start the virtual machine indicating the IP of the IMDS server using the SMBIOS serial parameter : -smbios type=1,serial=ds=‘nocloud;s=http://10.0.2.2:8000/’ or through kernel parameters .
Using SMBIOS serial number:
We create the virtual machine:
We generate the files to be served:
cd ~/IMDS/ubuntu-cloud5
cat << EOF > meta-data
instance-id: Alfaexploit/Ubuntu-CloudImg5
local-hostname: Ubuntu-CloudImg5
EOF
cat << EOF > user-data
#cloud-config
users:
# Following entry create user1 and assigns password specified in plain text.
# Please not use of plain text password is not recommended from security best
# practises standpoint
  - name: user1
    groups: sudo
    sudo: ALL=(ALL) NOPASSWD:ALL
    plain_text_passwd: PASSWORD
    lock_passwd: false
# Following entry creates user2 and attaches a hashed passwd to the user. Hashed
# passwords can be generated with:
# python -c 'import crypt,getpass; print(crypt.crypt(getpass.getpass(), crypt.mksalt(crypt.METHOD_SHA512)))'
  - name: user2
    passwd: $PASS_HASH
    lock_passwd: false
# Following entry creates user3, disables password based login and enables an SSH public key
  - name: user3
    ssh_authorized_keys:
      - ssh-rsa AAAAB3NzaC1yc2EAAAADAQABAAABAQCiF8zV98gaV87zVDwhZ8IDxUXs3Xq0NKVT1HY2t3XMjMU6/Sv6WeMeKQtJn/Py5PPXhYkOQ92in5+70WE6fQPt0shH6Hh4ZwY8lKDboLh96XLiCsxZc/IMq0h86QeT2E7FjAXcGo/2gziSYvbnp2Z+JAe5uBm4HtV3419mlEmaRAXGtjQxqcnhoUsLj4gD53ak1H/KUro+GArVDPUoMdSsqxvL0BHGbbcFOIaA3H3GwnGp09bHBNd0fR+Ip6CHRlRIu9oohezOAU+/3ul+FFbZuVlJ8zssaaFOzxjwEhD/2Ghsae3+z6tkrbhEOYN7HvBDejK9WySeI0+bMRqfSaID kr0m@DirtyCow
    lock_passwd: true
# Install some basic software
packages:
  - htop
  - screen
EOF
We start the web server:
python -m http.server 8000
vm-bhyve allows us to pass arguments directly to Bhyve using the
bhyve_options
parameter. Additionally, Bhyve allows configuring
variables from CLI: -o
.
The variable we need to modify is
system.serial_number
; identifying the correct variable has been a trial and error process.
We add the Bhyve options:
bhyve_options="-o system.serial_number=ds=nocloud;s=http://192.168.69.4:8000/ubuntu-cloud5/"
EOF
We start the virtual machine:
In the console of the web server, we will see the received requests:
Serving HTTP on :: port 8000 (http://[::]:8000/) ...
::ffff:192.168.69.233 - - [27/Sep/2023 22:33:36] "GET /ubuntu-cloud5/meta-data HTTP/1.1" 200 -
::ffff:192.168.69.233 - - [27/Sep/2023 22:33:36] "GET /ubuntu-cloud5/user-data HTTP/1.1" 200 -
::ffff:192.168.69.233 - - [27/Sep/2023 22:33:36] "GET /ubuntu-cloud5/vendor-data HTTP/1.1" 200 -
The users will have been generated as indicated by the configuration files. Additionally, we can see the information injected in SMBIOS:
System Information
	Manufacturer: FreeBSD
	Product Name: BHYVE
	Version: 1.0
	Serial Number: ds=nocloud;s=http://192.168.69.4:8000/ubuntu-cloud5/
	UUID: 9ce6a5f8-5d74-11ee-b808-3497f636bf45
	Wake-up Type: Power Switch
	SKU Number: None
	Family: Virtual Machine
Using kernel parameters:
We create the virtual machine:
We generate the files to be served:
cd ~/IMDS/ubuntu-cloud6
cat << EOF > meta-data
instance-id: Alfaexploit/Ubuntu-CloudImg6
local-hostname: Ubuntu-CloudImg6
EOF
cat << EOF > user-data
#cloud-config
users:
# Following entry create user1 and assigns password specified in plain text.
# Please not use of plain text password is not recommended from security best
# practises standpoint
  - name: user1
    groups: sudo
    sudo: ALL=(ALL) NOPASSWD:ALL
    plain_text_passwd: PASSWORD
    lock_passwd: false
# Following entry creates user2 and attaches a hashed passwd to the user. Hashed
# passwords can be generated with:
# python -c 'import crypt,getpass; print(crypt.crypt(getpass.getpass(), crypt.mksalt(crypt.METHOD_SHA512)))'
  - name: user2
    passwd: $PASS_HASH
    lock_passwd: false
# Following entry creates user3, disables password based login and enables an SSH public key
  - name: user3
    ssh_authorized_keys:
      - ssh-rsa AAAAB3NzaC1yc2EAAAADAQABAAABAQCiF8zV98gaV87zVDwhZ8IDxUXs3Xq0NKVT1HY2t3XMjMU6/Sv6WeMeKQtJn/Py5PPXhYkOQ92in5+70WE6fQPt0shH6Hh4ZwY8lKDboLh96XLiCsxZc/IMq0h86QeT2E7FjAXcGo/2gziSYvbnp2Z+JAe5uBm4HtV3419mlEmaRAXGtjQxqcnhoUsLj4gD53ak1H/KUro+GArVDPUoMdSsqxvL0BHGbbcFOIaA3H3GwnGp09bHBNd0fR+Ip6CHRlRIu9oohezOAU+/3ul+FFbZuVlJ8zssaaFOzxjwEhD/2Ghsae3+z6tkrbhEOYN7HvBDejK9WySeI0+bMRqfSaID kr0m@DirtyCow
    lock_passwd: true
# Install some basic software
packages:
  - htop
  - screen
EOF
We start the web server:
python -m http.server 8000
We add the Bhyve options:
grub_run_partition="gpt1"
grub_run0="linux /boot/vmlinuz root=/dev/vda1 rw ds='nocloud;s=http://192.168.69.4:8000/ubuntu-cloud6/'"
grub_run1="initrd /boot/initrd.img"
EOF
We start the virtual machine:
vm console ubuntu-cloud6
We will see requests arriving in the web server console:
Serving HTTP on :: port 8000 (http://[::]:8000/) ...
::ffff:192.168.69.234 - - [27/Sep/2023 22:36:07] "GET /ubuntu-cloud6/meta-data HTTP/1.1" 200 -
::ffff:192.168.69.234 - - [27/Sep/2023 22:36:07] "GET /ubuntu-cloud6/user-data HTTP/1.1" 200 -
::ffff:192.168.69.234 - - [27/Sep/2023 22:36:07] "GET /ubuntu-cloud6/vendor-data HTTP/1.1" 200 -
We can see that it has generated the users as we instructed. Additionally, we can check the parameters received by the kernel:
[ 0.039752] Kernel command line: console=ttyS0 BOOT_IMAGE=/boot/vmlinuz root=/dev/vda1 rw ds=nocloud;s=http://192.168.69.4:8000/ubuntu-cloud6/
Firewall
The easiest thing is to disable traffic filtering on all bridges of the parent host and filter specifically within each VM:
net.inet.ip.forwarding=1       # Enable IP forwarding between interfaces
net.link.bridge.pfil_onlyip=0  # Only pass IP packets when pfil is enabled
net.link.bridge.pfil_bridge=0  # Packet filter on the bridge interface
net.link.bridge.pfil_member=0  # Packet filter on the member interface
Wifi
If we want to connect the VMs via Wi-Fi, it gets a bit more complicated since we’ll have to NAT an internal VM network.
First, we enable forwarding:
sysctl net.inet6.ip6.forwarding=1
We make sure that it stays enabled after a reboot:
sysrc ipv6_gateway_enable=YES
We define the rules for
PF
/
PF_NAT
:
ext_if = "wlan0"
int_if = "vm-public:"
localnet = "10.0.0.0/8"

set block-policy return
scrub in on $ext_if all fragment reassemble
set skip on lo

nat on $ext_if from {$localnet} to any -> ($ext_if)

antispoof for $ext_if inet

block log all
pass out
pass in
We enable the PF service:
sysrc pf_rules="/etc/pf.conf"
sysrc pflog_enable=YES
sysrc pflog_logfile="/var/log/pflog"
We start PF:
We add the Wi-Fi interface to the bridge:
We configure an IP from the internal network to the bridge, which will act as the gateway for the VMs:
We check that everything is in order:
NAME    TYPE      IFACE      ADDRESS     PRIVATE  MTU  VLAN  PORTS
public  standard  vm-public  10.0.0.1/8  no       -    -     wlan0
We create the VM:
We install the operating system:
We follow the installer steps:
The network configuration will be as follows:
IP: 10.0.0.2
GW: 10.0.0.1
DNS: 8.8.8.8,1.1.1.1
Once the installation is complete, we reboot and access the VM:
GRUB doesn’t boot because /boot wasn’t installed on: hd0, partition 1
https://github-wiki-see.page/m/churchers/vm-bhyve/wiki/Configuring-Grub-Guests
From the Grub interface, we’ll figure out which partition is correct:
(hd0) (hd0,gpt3) (hd0,gpt2) (hd0,gpt1) (host) (lvm/ubuntu--vg-ubuntu--lv)
We can list the contents of the partition:
lost+found/ config-5.15.0-84-generic initrd.img.old vmlinuz.old grub/ System.ma
p-5.15.0-84-generic vmlinuz-5.15.0-84-generic initrd.img vmlinuz initrd.img-5.1
5.0-84-generic
Now that we know the partition where the kernel is located, the root partition, and the location of the initramfs, we proceed with the boot:
initrd (hd0,gpt2)/initrd.img
boot
If it boots correctly, we shut down the operating system to configure it from Bhyve without having to mess with Grub on every startup:
grub_run_partition="gpt2"
grub_run0="linux /vmlinuz root=/dev/mapper/ubuntu--vg-ubuntu--lv rw"
grub_run1="initrd /initrd.img"
Now we can access it without any issues via SSH:
Of course, the VM will be NATed through the Wi-Fi interface.
Troubleshooting
If we are conducting tests and closing the serial port connections incorrectly (by closing the terminal), we will observe an accumulation of ‘cu’ processes. When we reconnect through the serial port, we will see strange characters appearing. To resolve this, we will terminate the orphaned ‘cu’ processes. I usually kill all of them and reconnect to VM.
vm console VM_NAME
If we want to test the cloud-init configuration with Qemu as indicated in the
oficial documentation
, we can try it:
qemu-system-x86_64 -net nic -net user -m 2048 -nographic -hda /zroot/vm/.img/ubuntu-22.04-server-cloudimg-amd64.img -smbios type=1,serial=ds=‘nocloud;s=http://192.168.69.4:8000/ubuntu-cloud3/’
If we encounter any issues with the boot or with the parameters passed to Bhyve, we can check the following log files:
cat /zroot/vm/ubuntu-cloud3/grub.cfg
If we want to debug the boot even further, we enable debugging:
debug="yes"
cat /zroot/vm/ubuntu-cloud3/bhyve.log
If we have any trouble with the semilla ISO we can access it’s content:
cp seed.iso decompressed
cd decompressed
tar xzf seed.iso
We can check that cloud-init was executed successfully:
cloud-init query userdata
cloud-init schema –system
We can also manually re-run cloud-init:
cloud-init -d init
cloud-init -d modules --mode final
Sometimes virtual machines doesn’t stop:
Sometimes virtual machines end up in a “Locked” state:
NAME    DATASTORE  LOADER  CPU  MEMORY  VNC           AUTOSTART  STATE
kali00  default    uefi    1    2048M   0.0.0.0:5900  No         Locked (odyssey.alfaexploit.com)
To solve it, we must first delete the run.lock file:
Now it will appear as “Stopped”:
NAME    DATASTORE  LOADER  CPU  MEMORY  VNC  AUTOSTART  STATE
kali00  default    uefi    1    2048M   -    No         Stopped
If we try to delete it and it causes us problems, we will have to release the resources from bhyvectl:
/usr/local/sbin/vm: WARNING: kali00 appears to be running locally (vmm exists)
We release the resources:
The function of bhyvectl --destroy is:
After the VM has been shutdown, its resources can be reclaimed
Even with the resources released, the ZFS dataset may resist:
NAME    DATASTORE  LOADER  CPU  MEMORY  VNC  AUTOSTART  STATE
kali00  default    uefi    1    2048M   -    No         Stopped
Are you sure you want to completely remove this virtual machine (y/n)? y
/usr/local/sbin/vm: ERROR: failed to destroy ZFS dataset zroot/vm/kali00
In that case, we remove it manually:
Finally, we remove the virtual machine:
Are you sure you want to completely remove this virtual machine (y/n)? y
We check that there is no trace of it:
NAME DATASTORE LOADER CPU MEMORY VNC AUTOSTART STATE