It is recommended to read the previous articles to better understand the current one:
In this article, we will see some features of the GameBoy related to VRAM and the screen, so we can better understand its operation and what can be done with it.
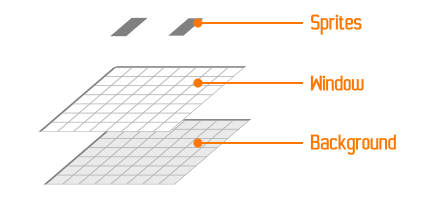
First, let’s clarify that the GameBoy screen is composed of 3 layers:
| - Background: Game levels background. - Sprites: Moving elements such as characters or enemies. - Window: Part where information such as score, lives, and other informative elements are displayed. |
|
NOTE: VRAM is divided into two regions, one for sprites and another shared between the background and the window. For this reason, when debugging with bgb, the VRAM of the background/window appears in a different tab than that of tiles.
The second aspect to consider is the limited amount of VRAM that the GameBoy has. Knowing that the screen has a resolution of 160x144 pixels gives us a total of 23040 pixels. If the GameBoy used a framebuffer system , that is, each point on the screen is mapped to a memory position, it would need 23040 bytes -> 22KB of memory.
So how is it possible to display a screen that requires 22KB of VRAM with only 8KB?
The answer is a clever system of tile reuse. Since levels usually repeat tiles, these are loaded into VRAM to later create sprites/backgrounds/screens indicating the position of the VRAM to use. In this way, several sprites refer to the same VRAM positions, considerably reducing the amount of RAM required.
We had already used this system transparently in previous articles where we loaded the tiles into VRAM using the set_sprite_data function and indicated the VRAM position of the tile to assign to the sprite at that time using the set_sprite_tile function.
GameBoy backgrounds allow scrolling over them, thanks to the fact that the entire background is mapped in VRAM, although the screen is only showing part of it. To understand this, let’s clarify some points:
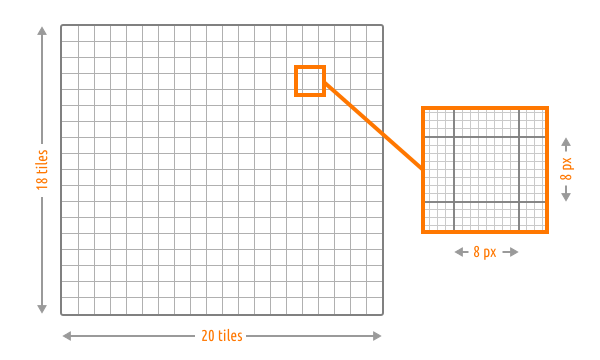
| - Each tile is 8x8 pixels. - The screen is 160x144 pixels -> 20x18 tiles. |
|
| - There are 32x32 tiles in VRAM, allowing us to load a background in one instruction and scroll over it. | 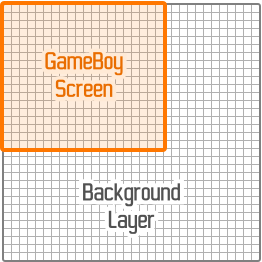
|
With this data, we have more than enough to explain how backgrounds work on the GameBoy, but here are some very interesting videos and links about the hardware and operation of the GameBoy:
- https://www.youtube.com/watch?v=RZUDEaLa5Nw
- https://www.youtube.com/watch?v=t0V-D2YMhrs
- https://www.youtube.com/watch?v=ecTQVa42sJc
- http://hisimon.dk/misc/pandocs/
- https://www.copetti.org/writings/consoles/game-boy/
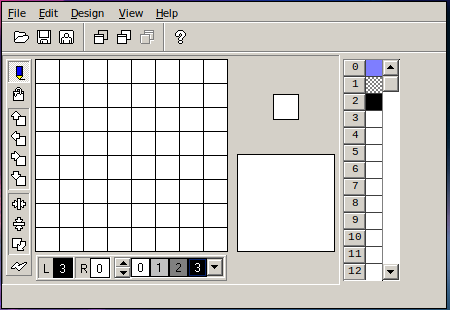
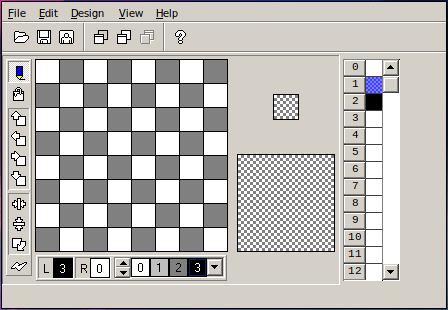
To create our background, we will use the gbtd (GameBoy Tile Designer) tool, where we will create our tiles with which we will make our map:
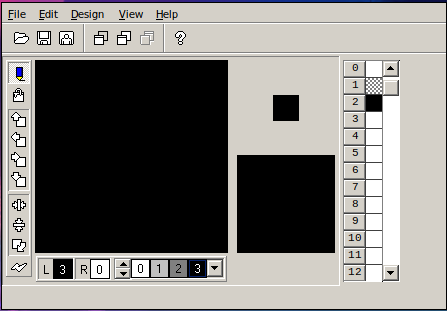
We create some tiles with different patterns, in this case they are very basic as they will only serve as an example.
| Transparent | Ground | Black |
|---|---|---|
|
|
|
We save the tiles pack so that the Map Builder can load them:
File -> Save As: BackgroundTiles.gbr
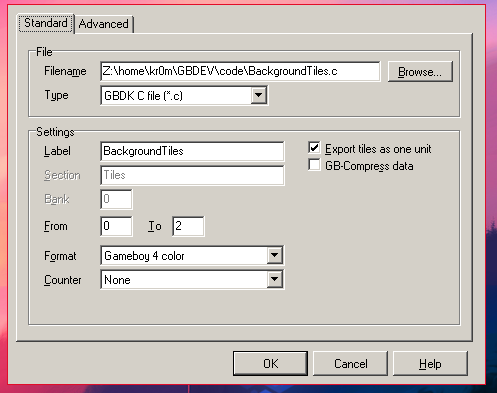
We also export the tiles as we saw in previous articles:
File -> Export to
To design the map, we will load the tiles in gbmb(GameBoy Map Builder):
cd ~/GBDEV/gbmb
wget http://www.devrs.com/gb/hmgd/gbmb18.zip
unzip /gbmb18.zip
wine GBMB.EXE
We create the map and load the tiles:
File -> Map Properties:
Size: Definimos el tamaño del fondo: 32x18 tiles
Browse: Z:\home\kr0m\GBDEV\code\BackgroundTiles.gbr
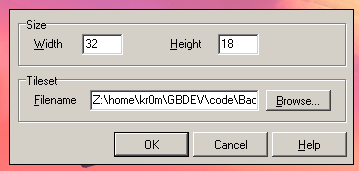
Remember that the GameBoy screen is 160x144 pixels -> 20x18 tiles but since we want to make horizontal scroll, the map must be larger (32x18) with a maximum imposed by the VRAM of 32x32 tiles.
We create our map by selecting the tiles to use and drawing on the map with the right button:
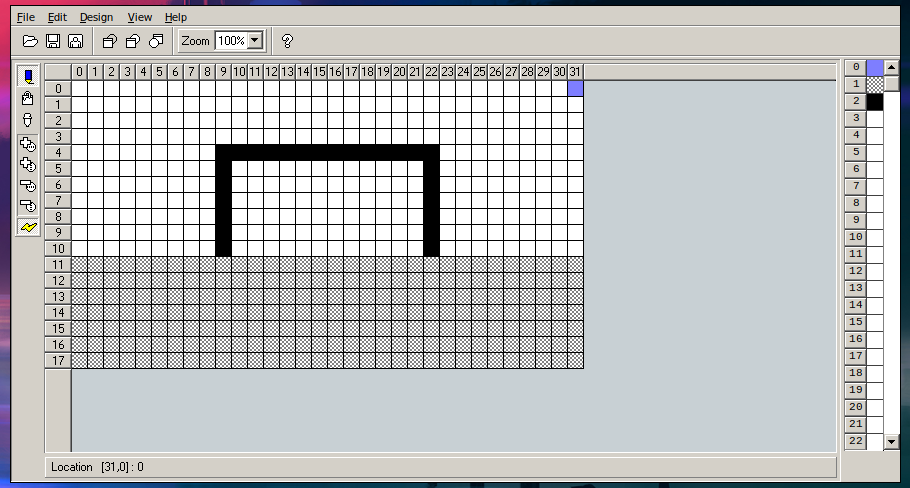
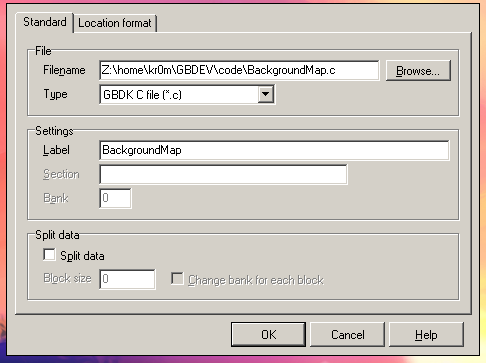
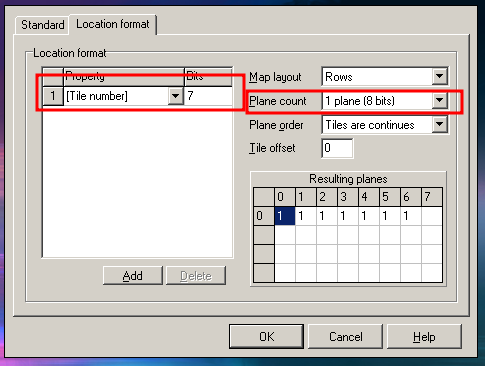
We export the map:
File -> Export
|
|
In the code, we must load the tiles into VRAM, from position 0 up to a total of 3 tiles:
set_bkg_data(0, 3, BackgroundTiles);
And load the background from coordinates 0,0, a size of 32x18 by reading the data from the BackgroundMap array that acts as an index indicating which tile should be loaded in each background position:
set_bkg_tiles(0, 0, 32, 18, BackgroundMap);
The code would be as follows:
#include <gb/gb.h>
#include "BackgroundTiles.c"
#include "BackgroundMap.c"

void main(){
    set_bkg_data(0, 3, BackgroundTiles);
    set_bkg_tiles(0, 0, 32, 18, BackgroundMap);

    SHOW_BKG;
    DISPLAY_ON;

    while(1){
        scroll_bkg(2,0);
        delay(100);
    }
}
We compile:
We load the game in the emulator and we can see how the portview scrolls through the VRAM while displaying the content on the screen:
In this video, we can see how the bgb VRAM viewer has the two tabs commented at the beginning of the article, one to visualize the VRAM part of the background and another for the tiles/screen.