In this article, we will explain how to deploy a Django project so that it is ready for production. We will use HaProxy as a load balancer, Nginx as a web server for static content, and finally ASGI/Daphne as a Python server. In addition, we will follow a series of steps such as disabling debug, defining paths, enabling and forcing SSL, caching database connections, and configuring web error reporting. As a final step, we will configure Git as a version control system and program a deployment script to upload changes.
Before we begin, it is recommended to read the previous articles on Django as they are the previous steps to this article:
- Django: Venv under FreeBSD
- Django: MVT, Apps and URLs
- Django: Database Models
- Django: Administration Interface
- Django: DTL(Django Template Language)
- Django: Debug Toolbar
- Django: User Registration and Authentication
- Django: Webpack
- Django: Bootstrap with WebPack
This article is composed of several parts:
- PostgreSQL Server
- Git Repository
- Python/Daphne Server
- Nginx
- Haproxy
- Final Touches
- Second Programmer
- Deploy Script:
PostgreSQL Server
First of all, let’s install the PostgreSQL server and check the available versions:
postgresql10-server-10.15   PostgreSQL is the most advanced open-source database available anywhere
postgresql11-server-11.10   PostgreSQL is the most advanced open-source database available anywhere
postgresql12-server-12.5    PostgreSQL is the most advanced open-source database available anywhere
postgresql13-server-13.1_1  PostgreSQL is the most advanced open-source database available anywhere
postgresql95-server-9.5.24  PostgreSQL is the most advanced open-source database available anywhere
postgresql96-server-9.6.20  PostgreSQL is the most advanced open-source database available anywhere
Install the desired version:
Configure PostgreSQL to start at system boot:
Initialize the database:
Start the service:
By default, PostgreSQL uses the “peer authentication” authentication scheme for local connections, which basically means that if a SO user’s name matches a PostgreSQL user’s name, this user can access the PostgreSQL cli without authentication.
psql
Create the web application access user:
CREATE USER rxwod_user WITH PASSWORD 'PASSWORD';
ALTER ROLE rxwod_user SET client_encoding TO 'utf8';
ALTER ROLE rxwod_user SET default_transaction_isolation TO 'read committed';
ALTER ROLE rxwod_user SET timezone TO 'UTC+1';
Create the database indicating the owner:
CREATE DATABASE rxwod WITH OWNER rxwod_user;
List the databases:
\l
                              List of databases
   Name    |   Owner    | Encoding | Collate | Ctype |   Access privileges
-----------+------------+----------+---------+-------+-----------------------
 postgres  | postgres   | UTF8     | C       | C     |
 rxwod     | rxwod_user | UTF8     | C       | C     |
 template0 | postgres   | UTF8     | C       | C     | =c/postgres          +
           |            |          |         |       | postgres=CTc/postgres
 template1 | postgres   | UTF8     | C       | C     | =c/postgres          +
           |            |          |         |       | postgres=CTc/postgres
(4 rows)
Assign the necessary permissions and exit:
GRANT ALL PRIVILEGES ON DATABASE rxwod TO rxwod_user;
\q
exit
Check the access:
rxwod=> \conninfo
You are connected to database "rxwod" as user "rxwod_user" via socket in "/tmp" at port "5432".
Dump the database from our PC:
pg_dump rxwod > /tmp/rxwod.psql
Upload the dump to the server:
We load the dump onto the server:
psql rxwod < /tmp/rxwod.psql
We check that it has created the necessary tables:
postgres=# \c rxwod
rxwod=# \dt
                    List of relations
 Schema |            Name            | Type  |   Owner
--------+----------------------------+-------+------------
 public | auth_group                 | table | rxwod_user
 public | auth_group_permissions     | table | rxwod_user
 public | auth_permission            | table | rxwod_user
 public | auth_user                  | table | rxwod_user
 public | auth_user_groups           | table | rxwod_user
 public | auth_user_user_permissions | table | rxwod_user
 public | django_admin_log           | table | rxwod_user
 public | django_content_type        | table | rxwod_user
 public | django_migrations          | table | rxwod_user
 public | django_session             | table | rxwod_user
 public | rxWod_exercise             | table | rxwod_user
 public | rxWod_routine              | table | rxwod_user
(12 rows)

exit
Another way to access the PostgreSQL shell and check that everything is in order is through the dbshell command, which will use the credentials indicated in the project configuration:
rxwod=> select * from "rxWod_routine";
 id |            date            |  exercise_ids   | rounds |     percentages     | user_id
----+----------------------------+-----------------+--------+---------------------+---------
  1 | 2020-12-20 22:00:24.524-01 | 1,2,3,4,5,6,7,8 |      4 | 50,50,0,0,0,0,0,0,0 |       1
  2 | 2020-12-20 22:00:37.701-01 | 1,2,3,4,5,6,7,8 |      2 | 50,50,0,0,0,0,0,0,0 |       1
  3 | 2020-12-20 22:00:46.758-01 | 1,2,3,4,5,6,7,8 |      1 | 50,50,0,0,0,0,0,0,0 |       1
  4 | 2020-12-23 23:36:33.569-01 | 1,2,3,4,5,6,7,8 |      4 | 50,50,0,0,0,0,0,0,0 |      24
(4 rows)
We delete the dump both on the server and on our PC:
Git Repository
The next step is to set up a Git repository, so we can version the code and collaborate with other programmers more easily. When using Git, we must configure the files to exclude to avoid leaks of sensitive information.
We create the repository in Gitolite , which will be called RxWodProject.
We install the Git client on our PC:
We perform the initial configuration:
git config –global user.email kr0m@alfaexploit.com
We externalize the file that will contain the SECRET_KEY of the project so that we can commit the settings.py file but ignore the secret_key file:
vi rxWodProject/settings.py
secret_key_path = str(Path(__file__).resolve().parent) + '/secret_key.txt'
with open(secret_key_path) as f:
    SECRET_KEY = f.read().strip()
SECRET_KEY = 'XXXXXXXXXXXXXXXXXXXXXXXX'
We initialize the repository:
git init
We will see the following message:
hint: Using 'master' as the name for the initial branch. This default branch name
hint: is subject to change. To configure the initial branch name to use in all
hint: of your new repositories, which will suppress this warning, call:
hint:
hint:  git config --global init.defaultBranch <name>
hint:
hint: Names commonly chosen instead of 'master' are 'main', 'trunk' and
hint: 'development'. The just-created branch can be renamed via this command:
hint:
hint:  git branch -m <name>
Initialized empty Git repository in /usr/home/kr0m/rxWod/rxWodProject/.git/
We configure Git:
We configure the files to ignore:
rxWodProject/secret_key.txt
rxWodProject/database_auth.txt
rxWodProject/email_auth.txt
rxWod/migrations
usersAuth/migrations
db.sqlite3
node_modules
yarn-error.log
assets/bundles/*
assets/videos/*
webpack-stats.json
django.mo
djangojs.mo
__pycache__/
*.core
production_enabled
We add the origin of the repository:
git add .
git commit -m “Initial commit”
git push origin master
We configure Git to use the master branch:
[core]
        repositoryformatversion = 0
        filemode = true
        bare = false
        logallrefupdates = true
[remote "origin"]
        url = gitolite@192.168.69.5:RxWodProject
        fetch = +refs/heads/*:refs/remotes/origin/*
[branch "master"]
        remote = origin
        merge = refs/heads/master
We enable forwardagent when accessing the server. Remember that if someone else has access to this host, forwarding the agent can be dangerous. In that case, we should allow the key of the web server itself in the Git repository.
Host RxWod
  HostName 192.168.69.12
  User kr0m
  Port 22
  ForwardAgent yes
We install the Git client on the server:
We install Yarn on the server:
npm install -g yarn
We perform the initial Git configuration on the server (as a regular user):
git config –global user.email kr0m@alfaexploit.com
We create the Django project and clone the repository:
We install its dependencies. There are some that are problematic through pip, so we install them globally:
The rest through pip:
/usr/home/kr0m/rxWod/bin/python3.7 -m pip install –upgrade pip
pip install wheel
pip install -r RxWodProject/requirements.txt
If we notice, the repository is called RxWodProject, but in previous articles it was called rxWodProject. The path was: /home/kr0m/rxWod/rxWodProject, now it is: /home/kr0m/rxWod/RxWodProject.
This discrepancy in the names is due to the fact that to write the article I needed to create a new repository but I don’t want to lose the changes from the original repository since it is where I have the rxwod application practically finished. To avoid confusion and to keep the paths from changing, we rename the directory. Internally, the RxWodProject repository will continue to be used, but all paths will be seen as rxWodProject.
cd rxWodProject
We install the JS dependencies:
We upload the credential files to the server:
scp /home/kr0m/rxWod/rxWodProject/rxWodProject/database_auth.txt RxWod:/home/kr0m/rxWod/rxWodProject/rxWodProject/database_auth.txt
scp /home/kr0m/rxWod/rxWodProject/rxWodProject/email_auth.txt RxWod:/home/kr0m/rxWod/rxWodProject/rxWodProject/email_auth.txt
We create the directory for the bundles:
We execute the possible pending migrations in the database:
python manage.py migrate
We copy the development WebPack configuration file to production:
We change the mode parameter to production:
module.exports = {
    mode: "production",
We compile the WebPack bundles:
We start the server:
We access the server through an Ssh tunnel to check that it works correctly:
We point our browser to:
http://localhost:8000

In the console where we have the server started, we will see:
[15/Mar/2021 22:03:39] "GET / HTTP/1.1" 302 0
[15/Mar/2021 22:03:39] "GET /accounts/login/?next=/ HTTP/1.1" 200 591
[15/Mar/2021 22:03:40] "GET /accounts/login/?next=/ HTTP/1.1" 200 591
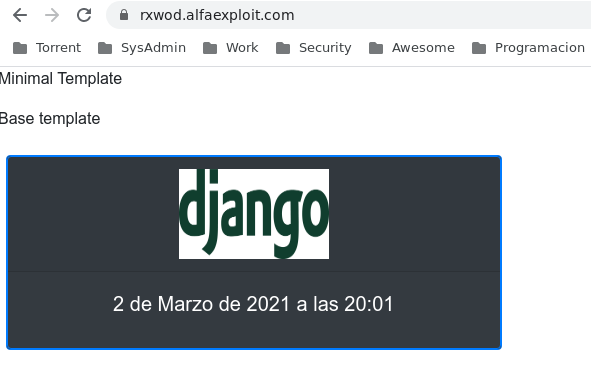
If we log in, we will see the routine:
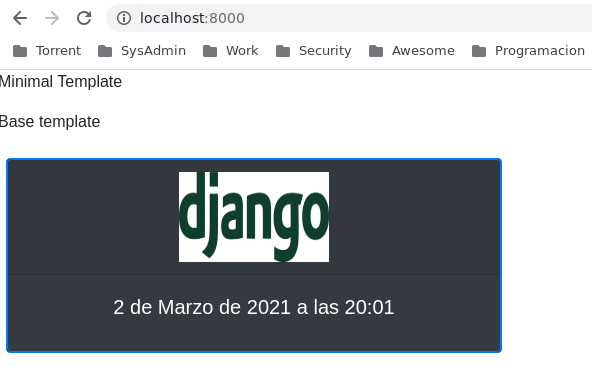
As we can see, the application works correctly on the new server, we stop the development server (Ctrl+c).
Python/Daphne Server
A Django project requires several parts to go into production, the first is a load balancer that will distribute requests among our servers, allowing us to scale horizontally, the second is a web server that will serve static content and forward project requests to the Python server, in our case, Daphne.
The scheme would be as follows:
Django comes with a built-in web server, but we must keep in mind that this server is only for use in the testing phase. On the Django website , they strongly advise against using it as a server in production:
Don’t use this server in anything resembling a production environment. It’s intended only for use while developing. (We’re in the business of making Web frameworks, not Web servers.)
On the Django website , we are warned that having our code in the web server’s document root is a terrible idea since it increases the chances of the app’s source code being viewed by an attacker.
It’s not a good idea to put any of this Python code within your Web server’s document root, because it risks the possibility that people may be able to view your code over the Web. That’s not good for security.
Put your code in some directory outside of the document root, such as /home/mycode.
We can choose from several options for web servers, but the two most popular are Apache and Nginx. These will be responsible for serving static content and sending requests that our code must handle to a WSGI/ASGI server.
Django currently supports two interfaces: WSGI and ASGI.
-
WSGI is the Python standard for communicating web servers with applications, but it only supports synchronous code.
-
ASGI is the new asynchronous standard that allows Django to use Python/Django’s asynchronous features.
WSGI has limitations in terms of concurrency. For example, if our project queries the database and it takes X time to respond, the web server does not attend to new requests until the first one has finished processing.
With ASGI, requests waiting for a response from the database remain on standby and new requests are attended to. When a response is received from the database, the pending request is processed.
ASGI provides a series of additional advantages for applications that require a persistent connection, such as chats. It maintains open bidirectional communication channels (websockets). However, to use these functionalities, it is not enough to use an ASGI server. We also need to program our code with the appropriate libraries.
ASGI servers are capable of managing both traditional WSGI requests and ASGI requests. Therefore, we will set up an ASGI server, and if we decide to use asynchronous functionalities later on, we can do so without any problems.
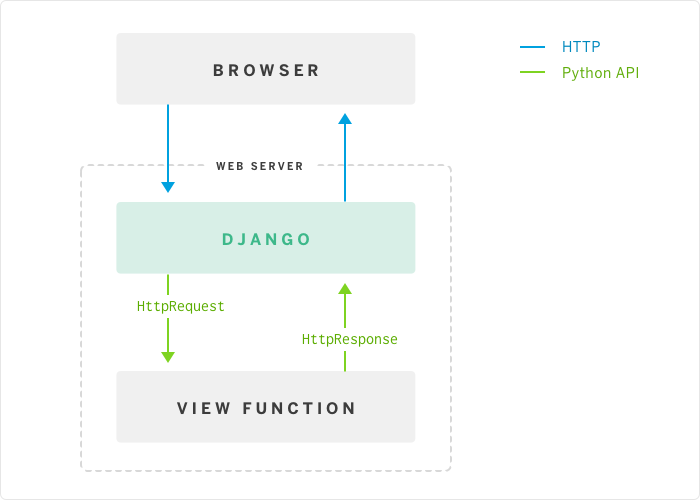
The processing scheme for WSGI requests is as follows:
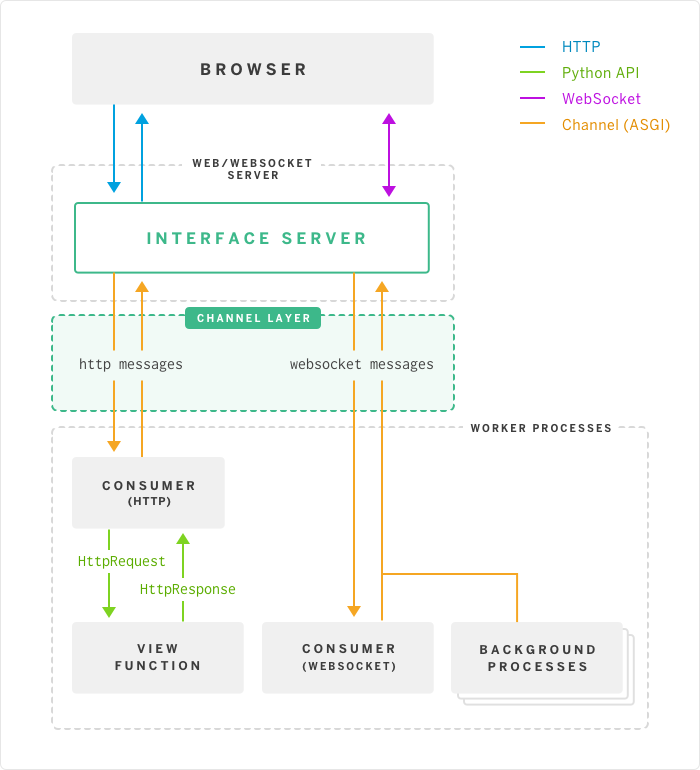
With ASGI, we can see that in addition to WSGI processing, we have the WebSockets and channels part:
In this article, we will use Daphne as it is the standard server.
We install the dependencies:
We install Daphne:
source bin/activate
cd rxWodProject/
pip install daphne
We define the domain to which our application should respond:
ALLOWED_HOSTS = rxwod.alfaexploit.com
We configure the DNS so that rxwod.alfaexploit.com resolves to the server’s IP address.
We manually start Daphne to check that it works correctly:
daphne rxWodProject.asgi:application
2021-03-16 22:18:21,101 INFO     Starting server at tcp:port=8000:interface=127.0.0.1
2021-03-16 22:18:21,102 INFO     HTTP/2 support not enabled (install the http2 and tls Twisted extras)
2021-03-16 22:18:21,102 INFO     Configuring endpoint tcp:port=8000:interface=127.0.0.1
2021-03-16 22:18:21,103 INFO     Listening on TCP address 192.168.69.12:8000
If necessary, we apply the following filtering rules:
$cmd 00806 allow tcp from PC_IP to SERVER_IP 8000 in via $wanif
$cmd 00806 allow tcp from SERVER_IP 8000 to PC_IP out via $wanif
We can try to access to verify that it works:
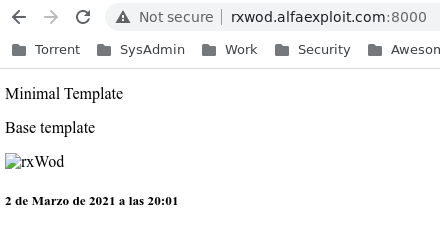
http://rxwod.alfaexploit.com:8000/
As we can see, it works but the static content does not load because it must be served by Nginx:
To demonize Daphne, we will use the FreeBSD RC system:
#! /bin/sh
#
# $FreeBSD$
#

# PROVIDE: daphne
# REQUIRE: DAEMON
# KEYWORD: shutdown

. /etc/rc.subr

name="daphne"
rcvar="${name}_enable"
extra_commands="status"

start_cmd="${name}_start"
stop_cmd="${name}_stop"
status_cmd="${name}_status"

daphne_start(){
    echo "Starting service: ${name}"
    chdir /home/kr0m/rxWod/rxWodProject
    /usr/sbin/daemon -S -p /var/run/${name}.pid -T daphne -u kr0m /home/kr0m/rxWod/bin/daphne rxWodProject.asgi:application --proxy-headers
}

daphne_stop(){
    if [ -f /var/run/${name}.pid ]; then
        echo "Stopping service: ${name}"
        kill -s INT $(cat /var/run/${name}.pid)
        sleep 3
    else
        echo "It appears ${name} is not running."
    fi
}

daphne_status(){
    if [ -f /var/run/${name}.pid ]; then
        echo "${name} running with PID: $(cat /var/run/${name}.pid)"
    else
        echo "It appears ${name} is not running."
    fi
}


load_rc_config ${name}
run_rc_command "$1"
NOTE: In the RC script, we have added the --proxy-headers parameter so that Daphne reads the headers that the Nginx we are going to mount a little later in this article will send it.
We assign permissions and owner:
chown root:wheel /usr/local/etc/rc.d/daphne
We enable the service and start it:
service daphne start
We check that it has started:
kr0m python3.7 726 12 tcp4 192.168.69.12:8000 *:* LISTEN
If any problem arises, we can debug Daphne by starting it manually with verbose: 2
And consulting the generated logs:
Nginx
The next step is to configure Nginx to serve our static content and forward project requests to Daphne.
The static content will be generated using Webpack and with the Django collectstatic command, we will copy said content to the Nginx DocRoot.
In Django, we must define some parameters:
- STATIC_URL: Url from which all our static content will hang, for example, if we want to access an image, we will access http://DOMAIN_NAME/STATIC_URL/file.png
- STATICFILES_DIRS: Directory where the static content generated by WebPack is located, when the collectstatic command is executed, the files in this directory will be read and copied to the path configured in STATIC_ROOT.
- STATIC_ROOT: Directory where all the static content of the project will be copied when the collectstatic command is executed, this content will be available under the Url: http://DOMAIN_NAME/STATIC_URL/, this step is only necessary when we pass our project to production and use some web server like Apache/Nginx. If we are using the development server on our PC, it will not be necessary to execute the collectstatic command since this content will be served directly from the STATICFILES_DIRS directory.
STATIC_URL = '/static/'
STATICFILES_DIRS = (
    os.path.join(BASE_DIR, 'assets/bundles/'),
)
STATIC_ROOT = '/usr/local/www/rxWod/static/'
We install Nginx and start it:
We enable and start the service:
service nginx start
We create the directory where the static content will reside:
chown -R kr0m:kr0m /usr/local/www/rxWod/static/
We copy all the files our project needs:
148 static files copied to '/usr/local/www/rxWod/static'
We check that they have been copied correctly:
total 189
drwxr-xr-x  4 kr0m  kr0m       10 Mar 16 22:37 .
drwxr-xr-x  3 root  wheel       3 Mar 16 22:36 ..
drwxr-xr-x  6 kr0m  kr0m        6 Mar 16 22:37 admin
-rw-r--r--  1 kr0m  kr0m       57 Mar 16 22:37 base-c4b6e89240744702871f.js
drwxr-xr-x  5 kr0m  kr0m        5 Mar 16 22:37 debug_toolbar
-rw-r--r--  1 kr0m  kr0m    16735 Mar 16 22:37 django-logo-positive.png
-rw-r--r--  1 kr0m  kr0m      348 Mar 16 22:37 index-c4b6e89240744702871f.js
-rw-r--r--  1 kr0m  kr0m   161364 Mar 16 22:37 minimal-c4b6e89240744702871f.css
-rw-r--r--  1 kr0m  kr0m   173306 Mar 16 22:37 minimal-c4b6e89240744702871f.js
-rw-r--r--  1 kr0m  kr0m     1976 Mar 16 22:37 minimal-c4b6e89240744702871f.js.LICENSE.txt
Later on, we will set up a HaProxy to balance the traffic, which poses a problem for determining the origin of the request since all IP-level packets come from the balancer. To be able to read the information correctly, we must:
- Add the X-Forwarded-For header if it is HTTP traffic
- Use the Proxy Protocol if it is HTTPS traffic
NOTE: We could also use Proxy Protocol for HTTP, but ProxyProtocol is a binary protocol, so it would be more difficult to debug than plain HTTP.
We leave the main Nginx configuration file practically as it comes by default, but we assign the value of the X-Forwarded-For header to the $proxy_protocol_addr variable and define a new log format called proxyprotocollogformat that will use this variable.
    proxy_set_header X-Forwarded-For $proxy_protocol_addr;
    log_format proxyprotocollogformat
            '$proxy_protocol_addr - $remote_user [$time_local] '
            '"$request" $status $body_bytes_sent '
            '"$http_referer" "$http_user_agent"';
Then we include the configuration file for the vhost itself, in this case rxwod.conf
include rxwod.conf;
And finally, we indicate that we should only trust 192.168.69.11 (HaProxy IP) when we obtain the data from the origin IP of the request, and we will obtain this information by reading the X-Forwarded-For header.
   set_real_ip_from    192.168.69.11;
   real_ip_header      X-Forwarded-For;
The file would be as follows:
worker_processes  1;
events {
    worker_connections  1024;
}
http {
    include       mime.types;
    default_type  application/octet-stream;
    proxy_set_header X-Forwarded-For $proxy_protocol_addr;
    log_format proxyprotocollogformat
            '$proxy_protocol_addr - $remote_user [$time_local] '
            '"$request" $status $body_bytes_sent '
            '"$http_referer" "$http_user_agent"';
    include rxwod.conf;
    sendfile        on;
    keepalive_timeout  65;
    server {
        listen       80;
        server_name  localhost;

        set_real_ip_from    192.168.69.11;
        real_ip_header      X-Forwarded-For;
        location / {
            root   /usr/local/www/nginx;
            index  index.html index.htm;
        }
        error_page   500 502 503 504  /50x.html;
        location = /50x.html {
            root   /usr/local/www/nginx-dist;
        }
    }
}
As we can see, the HTTP configuration is very basic since we will only use it to renew the SSL certificate and our application will only be accessible via HTTPS due to dealing with personal data such as login.
The SSL configuration is a bit more complex. First, we indicate that we should only trust 192.168.69.11 (HaProxy IP) when we obtain the data from the request’s source IP, but this time we will obtain this information through ProxyProtocol.
    set_real_ip_from 192.168.69.11;
    real_ip_header proxy_protocol;
When content is requested under the /static/ path, we will serve the files from the /usr/local/www/rxWod/ directory.
    location /static/ {
        root /usr/local/www/rxWod/;
    }
For the rest of the requests, we will make a proxy_pass to Daphne but first we will assign certain headers:
        proxy_set_header Host $host;
        proxy_set_header X-Real-IP $remote_addr;
        proxy_set_header X-Forwarded-For $proxy_add_x_forwarded_for;
        proxy_set_header X-Forwarded-Host $server_name;
        proxy_set_header X-Forwarded-Proto $scheme;
        proxy_pass http://rxwod.alfaexploit.com:8000;
The final configuration file would be as follows:
server {
    listen 443 ssl default_server proxy_protocol;
    server_name rxwod.alfaexploit.com;
    set_real_ip_from 192.168.69.11;
    real_ip_header proxy_protocol;
    ssl_certificate "/usr/local/etc/ssl/rxwod.alfaexploit.com/fullchain.cer";
    ssl_certificate_key "/usr/local/etc/ssl/rxwod.alfaexploit.com/rxwod.alfaexploit.com.key";
    location = /favicon.ico { access_log off; log_not_found off; }
    location /static/ {
        root /usr/local/www/rxWod/;
    }
    location /{
        proxy_set_header Host $host;
        proxy_set_header X-Real-IP $remote_addr;
        proxy_set_header X-Forwarded-For $proxy_add_x_forwarded_for;
        proxy_set_header X-Forwarded-Host $server_name;
        proxy_set_header X-Forwarded-Proto $scheme;
        proxy_pass http://rxwod.alfaexploit.com:8000;
    }
}
For the proxy_pass to work by domain name as we see in the configuration, we will have to make rxwod.alfaexploit.com resolve to the server’s own IP:
192.168.69.12 rxwod.alfaexploit.com
Before restarting Nginx, we must obtain the SSL certificate:
We configure ACME for the rxwod domain:
cp -r /root/.acme.sh/rxwod.alfaexploit.com /usr/local/etc/ssl/
We restart the service:
Haproxy
The configuration of HaProxy is very similar to the one described in this other article , so I won’t repeat it for the sake of brevity of the article. Basically, it consists of filtering by domain name and sending traffic to the relevant backend. If accessed via HTTP, it will redirect to HTTPS unless it is LetsEncrypt trying to renew the certificate.
When we send traffic from HaProxy to web servers, they will only see the HaProxy’s IP address as the source IP, not the real client’s IP. To avoid this, we will make HaProxy add a header called X-Forwarded-For for HTTP and use ProxyProtocol for HTTPS.
Final Touches
We already have our project working, but there are still some measures we must take before exposing it to the general public. All parameters will be configured in the rxWodProject/settings.py file, but to be able to git the setting.py, we will control the values to be loaded through an external file (production_enabled) that will be ignored.
"""
Django settings for rxWodProject project.

Generated by 'django-admin startproject' using Django 3.1.7.

For more information on this file, see
https://docs.djangoproject.com/en/3.1/topics/settings/

For the full list of settings and their values, see
https://docs.djangoproject.com/en/3.1/ref/settings/
"""

from pathlib import Path
import os

# Build paths inside the project like this: BASE_DIR / 'subdir'.
BASE_DIR = Path(__file__).resolve().parent.parent


# Quick-start development settings - unsuitable for production
# See https://docs.djangoproject.com/en/3.1/howto/deployment/checklist/

# SECURITY WARNING: keep the secret key used in production secret!
secret_key_path = str(Path(__file__).resolve().parent) + '/secret_key.txt'
with open(secret_key_path) as f:
    SECRET_KEY = f.read().strip()

production_enabled = str(Path(__file__).resolve().parent) + '/production_enabled'
f = open(production_enabled, "r")
lines = f.readlines()
f.close()
if lines[0].strip().split(' ')[0] == '1':
    PRODUCTION_ENABLED = True
else:
    PRODUCTION_ENABLED = False

if PRODUCTION_ENABLED:
    ALLOWED_HOSTS = ['rxwod.alfaexploit.com']
    DEBUG = False
    SECURE_SSL_REDIRECT = True
    SECURE_HSTS_SECONDS = 3600
    SECURE_HSTS_INCLUDE_SUBDOMAINS = True
    SECURE_HSTS_PRELOAD = True
    CSRF_COOKIE_SECURE = True
    SESSION_COOKIE_SECURE = True
    CONN_MAX_AGE = 1
    ADMINS = [('kr0m', 'kr0m@alfaexploit.com')]
else:
    # SECURITY WARNING: don't run with debug turned on in production!
    DEBUG = True
    ALLOWED_HOSTS = []


INTERNAL_IPS = [
    '127.0.0.1',
]

# Application definition

INSTALLED_APPS = [
    'rxWod.apps.RxwodConfig',
    'usersAuth.apps.UsersauthConfig',
    'django.contrib.admin',
    'django.contrib.auth',
    'django.contrib.contenttypes',
    'django.contrib.sessions',
    'django.contrib.messages',
    'django.contrib.staticfiles',
    'debug_toolbar',
    'webpack_loader',
]

if PRODUCTION_ENABLED:
    MIDDLEWARE = [
        'django.middleware.common.BrokenLinkEmailsMiddleware',
        'django.middleware.security.SecurityMiddleware',
        'django.contrib.sessions.middleware.SessionMiddleware',
        'django.middleware.common.CommonMiddleware',
        'django.middleware.csrf.CsrfViewMiddleware',
        'django.contrib.auth.middleware.AuthenticationMiddleware',
        'debug_toolbar.middleware.DebugToolbarMiddleware',
        'django.contrib.messages.middleware.MessageMiddleware',
        'django.middleware.clickjacking.XFrameOptionsMiddleware',
    ]
    MANAGERS = [('kr0m', 'kr0m@alfaexploit.com')]

    import re
    IGNORABLE_404_URLS = [
        re.compile(r'\.(php|cgi)$'),
        re.compile(r'^/phpmyadmin/'),
    ]
else:
    MIDDLEWARE = [
        'django.middleware.security.SecurityMiddleware',
        'django.contrib.sessions.middleware.SessionMiddleware',
        'django.middleware.common.CommonMiddleware',
        'django.middleware.csrf.CsrfViewMiddleware',
        'django.contrib.auth.middleware.AuthenticationMiddleware',
        'debug_toolbar.middleware.DebugToolbarMiddleware',
        'django.contrib.messages.middleware.MessageMiddleware',
        'django.middleware.clickjacking.XFrameOptionsMiddleware',
    ]

ROOT_URLCONF = 'rxWodProject.urls'

TEMPLATES = [
    {
        'BACKEND': 'django.template.backends.django.DjangoTemplates',
        'DIRS': [],
        'APP_DIRS': True,
        'OPTIONS': {
            'context_processors': [
                'django.template.context_processors.debug',
                'django.template.context_processors.request',
                'django.contrib.auth.context_processors.auth',
                'django.contrib.messages.context_processors.messages',
            ],
        },
    },
]

WSGI_APPLICATION = 'rxWodProject.wsgi.application'


# Database
# https://docs.djangoproject.com/en/3.1/ref/settings/#databases

#DATABASES = {
#    'default': {
#        'ENGINE': 'django.db.backends.sqlite3',
#        'NAME': BASE_DIR / 'db.sqlite3',
#    }
#}

database_auth_path = str(Path(__file__).resolve().parent) + '/database_auth.txt'
f = open(database_auth_path, "r")
lines = f.readlines()
f.close()
DB_USERNAME = lines[0].strip().split(' ')[0]
DB_PASSWORD = lines[1].strip().split(' ')[0]

DATABASES = {
    'default': {
        'ENGINE': 'django.db.backends.postgresql_psycopg2',
        'NAME': 'rxwod',
        'USER': DB_USERNAME,
        'PASSWORD': DB_PASSWORD,
    }
}


# Password validation
# https://docs.djangoproject.com/en/3.1/ref/settings/#auth-password-validators

AUTH_PASSWORD_VALIDATORS = [
    {
        'NAME': 'django.contrib.auth.password_validation.UserAttributeSimilarityValidator',
    },
    {
        'NAME': 'django.contrib.auth.password_validation.MinimumLengthValidator',
    },
    {
        'NAME': 'django.contrib.auth.password_validation.CommonPasswordValidator',
    },
    {
        'NAME': 'django.contrib.auth.password_validation.NumericPasswordValidator',
    },
]


# Internationalization
# https://docs.djangoproject.com/en/3.1/topics/i18n/

LANGUAGE_CODE = 'es-es'

TIME_ZONE = 'Europe/Madrid'

USE_I18N = True

USE_L10N = True

USE_TZ = True


# Static files (CSS, JavaScript, Images)
# https://docs.djangoproject.com/en/3.1/howto/static-files/

STATIC_URL = '/static/'

STATICFILES_DIRS = (
    os.path.join(BASE_DIR, 'assets/bundles/'),
)

STATIC_ROOT = '/usr/local/www/rxWod/static/'

WEBPACK_LOADER = {
    'DEFAULT': {
        'BUNDLE_DIR_NAME': '',
        'LOADER_CLASS': 'fixes.webpack.CustomWebpackLoader',
        'STATS_FILE': os.path.join(BASE_DIR, 'webpack-stats.json'),
    }
}

# Email configuration
EMAIL_BACKEND = 'django.core.mail.backends.smtp.EmailBackend'

email_auth_path = str(Path(__file__).resolve().parent) + '/email_auth.txt'
f = open(email_auth_path, "r")
lines = f.readlines()
f.close()

EMAIL_HOST = lines[0].strip().split(' ')[0]
EMAIL_USE_TLS = lines[1].strip().split(' ')[0]
EMAIL_PORT = lines[2].strip().split(' ')[0]
EMAIL_HOST_USER = lines[3].strip().split(' ')[0]
EMAIL_HOST_PASSWORD = lines[4].strip().split(' ')[0]

LOGIN_URL='/accounts/login'
LOGIN_REDIRECT_URL='/'
We ignore the control file:
rxWodProject/secret_key.txt
rxWodProject/database_auth.txt
rxWodProject/email_auth.txt
rxWod/migrations
usersAuth/migrations
db.sqlite3
node_modules
yarn-error.log
assets/bundles/*
assets/videos/*
webpack-stats.json
django.mo
djangojs.mo
__pycache__/
*.core
rxWodProject/production_enabled
Depending on the environment we are in, we will assign one value or another to the file:
Production:
Development:
Next, I explain each of the parameters in detail.
We disable Debug mode, which is very useful when developing but can leak information if kept in production, as well as obtaining lower performance, so we disable it:
DEBUG = False
The MEDIA_URL/MEDIA_ROOT parameters refer to files uploaded by the user. In my case, it will not be necessary to configure them since it is not allowed to upload files in any case, but I leave them documented as a reference:
MEDIA_URL: URL from which media files will be served.
MEDIA_ROOT: Path where the media content is located.
NOTE: These files are not trustworthy since they have been uploaded by the user. Therefore, we must take measures at the web server level to not interpret or execute them.
Regarding SSL access, we will only allow web access through HTTPS since the data is personal and there is a login on it. We do not want anyone to obtain the credentials of one of our users or alter the content of their routines through MITM attacks, for example. By configuring HaProxy, we only allow access through HTTPS unless it is LetsEncrypt trying to renew the certificate.
Another aspect to consider is that our Nginx will send requests to Daphne in plain text. For Daphne to be aware of whether they arrived through HTTP or HTTPS, Nginx must insert a header (X-Forwarded-Proto). This way, we can force SSL ( SECURE_SSL_REDIRECT ) in the Django project.
If we do not insert the header and force SSL (SECURE_SSL_REDIRECT), the Django project will identify the requests as HTTP, and we will enter a loop of redirects since it will always detect the access as insecure:
ERR_TOO_MANY_REDIRECTS
We force access through SSL:
SECURE_SSL_REDIRECT = True
SECURE_HSTS_SECONDS = 3600
SECURE_HSTS_INCLUDE_SUBDOMAINS = True
SECURE_HSTS_PRELOAD = True
Now that we have SSL working, we must configure the CSRF_COOKIE_SECURE parameter to True to mark the CSRF cookies as secure. This way, the browser will only allow the use of cookies through HTTPS.
CSRF_COOKIE_SECURE = True
This parameter is identical to the previous one but for session cookies.
SESSION_COOKIE_SECURE = True
Every time a data is queried in the database, a connection is opened and closed. This is very inefficient, especially in applications that make intensive use of it. To avoid this behavior, we can enable persistent connections. This way, the connections will remain open for X seconds, increasing performance.
The allowed values are:
- 0: By default, the connection is opened and closed on each request.
- X: Value expressed in seconds indicating how long the connection should remain open.
- None: Never close the connection.
CONN_MAX_AGE = 1
When we configure a project to go into production, we must disable the DEBUG mode to make it run much faster and prevent malicious users from obtaining details of the application.
On the other hand, by disabling DEBUG, we will no longer see errors when they occur, which is a problem because the application could be failing without us being aware of it. For these cases, we will use the Django error reporting system .
The error reporting system will behave in one way or another depending on the type of error:
- 500 internal server error: It will send an email to all users defined in the ADMINS parameter. They will receive a description of the error, a complete Python error trace, and details of the HTTP request. If you have followed the complete guide, all the necessary parameters to be able to send emails should be configured.
ADMINS = [('kr0m', 'kr0m@alfaexploit.com')]
- 404 page not found error: To enable the sending of these reports, in addition to disabling DEBUG, we must add django.middleware.common.BrokenLinkEmailsMiddleware in the MIDDLEWARE section of the settings.py file. The errors will only be reported if they were produced by a request with a referer and this referer is not the URL of our website. The users to be notified are indicated with the MANAGERS parameter.
MIDDLEWARE = [
    'django.middleware.common.BrokenLinkEmailsMiddleware',
    ...
]
MANAGERS = [('kr0m', 'kr0m@alfaexploit.com')]
We can configure regular expressions so that we are not informed about certain requests, for example, not to inform us if they try to access .php, .cgi files, or any URL that hangs from /phpmyadmin/.
import re
IGNORABLE_404_URLS = [
    re.compile(r'\.(php|cgi)$'),
    re.compile(r'^/phpmyadmin/'),
]
We must bear in mind that the reports contain sensitive information, and we should only report them to trusted personnel through secure channels. Even when the personnel is trustworthy, there are certain data that we may not want to be sent, such as credit card numbers, for example. Django allows us to obfuscate such data:
- https://docs.djangoproject.com/en/3.1/howto/error-reporting/#django.views.decorators.debug.sensitive_variables
- https://docs.djangoproject.com/en/3.1/howto/error-reporting/#django.views.decorators.debug.sensitive_post_parameters
If we need to generate custom reports, we can also do it:
https://docs.djangoproject.com/en/3.1/howto/error-reporting/#custom-error-reports
We can check that most of the parameters are correctly configured using the command:
python manage.py check --deploy
System check identified no issues (0 silenced).
Some additional considerations before going into production are:
- Use caching for sessions
- Cache templates
Finally, we configure our DNS so that the domain points to the IP address of our HaProxy and access our website to check its correct operation:
Second programmer
If we expand our team of programmers, the new addition will only have to follow the following steps:
We install the Git client:
We install Yarn:
npm install -g yarn
We perform the initial Git configuration (as a regular user):
git config --global user.email coder2@alfaexploit.com
We create the Django project and clone the repository:
We install its dependencies, some of which are problematic using pip, so we install them globally:
The rest using pip:
/usr/home/kr0m/rxWod/bin/python3.7 -m pip install --upgrade pip
pip install wheel
pip install -r RxWodProject/requirements.txt
mv RxWodProject rxWodProject
cd rxWodProject
We install the JS dependencies:
We fill in the credential and sensitive information files:
vi rxWodProject/database_auth.txt
vi rxWodProject/email_auth.txt
We create the directory for the bundles:
We execute the possible pending migrations in the database:
python manage.py migrate
We compile the WebPack bundles and start the test server:
Deploy script:
Every time we upload any changes to the repository, we must deploy them on the production server. Below is a script to deploy changes more efficiently.
One of the steps requires restarting the Daphne server, so we will configure sudo.
vi /usr/local/etc/sudoers.d/kr0m
kr0m ALL=(ALL) NOPASSWD: /usr/sbin/service daphne restart
As a regular user:
vi .scripts/deploy.sh
#!/usr/local/bin/bash
cd /home/kr0m/rxWod/rxWodProject
git pull
cd ..
source bin/activate
pip install -r rxWodProject/requirements.txt
cd rxWodProject
python manage.py makemigrations
python manage.py migrate
yarn install
yarn prod-build
python manage.py collectstatic --noinput
sudo /usr/sbin/service daphne restart
This article has turned out to be much longer than expected, but I think we have explained the whole process in the simplest possible way without leaving any loose ends. However, if you have any questions, you can always contact me via Telegram and ask any necessary questions.