Clonezilla is a disk image-based system cloning software. It can be booted from a CDROM/USB/HD, allowing backup operations to be performed from a system that is independent of the PC’s contents.
Clonezilla can be installed on the boot drive in two different ways:
ISO: A system only compatible withCDROMs. Obviously, since it is aCDROM, we cannot store backups on the same drive.ZIP: Can be written to aUSBorHD. This is the most flexible method, as it allows backups to be stored on the same disk where it is installed. This method has two sub-variants depending on the PC’s boot system:BIOS/EFI.
Regardless of the installation method, all steps are exactly the same—the only difference is how it is installed.
Here is an index for easier navigation of the article:
- Basic Concepts
- Operation Modes
- Repository Types
- ISO Installation
- ZIP-EFI Installation
- ZIP-BIOS Installation
- ZIP-EFI/BIOS Installation
- Backup: Linux-EFI+Encryption (unlocked)
- Restore: Linux-EFI+Encryption (unlocked)
- Backup: Linux-EFI+Encryption (locked)
- Restore: Linux-EFI+Encryption (locked)
- Backup: FreeBSD-BIOS
- Restore: FreeBSD-BIOS
- Backup: Windows-EFI
- Restore: Windows-EFI
- Compression Algorithms
- Automation
- Customization
- HD vs SSD
- Troubleshooting
Basic Concepts:
Encryption:
Clonezilla allows encrypted backups so that data cannot be read or restored without the password. However, this can be a double-edged sword if you forget the password for an old backup. I do not recommend encryption—instead, store the disk in a secure place.
Do not confuse this encryption with that applied by other tools such as LUKS. Another important point is that if you back up a disk encrypted with a tool like LUKS and provide the password, the backup will be stored in plain text.
Repository:
A repository is the location used to read/write data depending on whether you’re performing a backup or restore. If you’re backing up, data will be written to it; if you’re restoring, data will be read from it.
Available Tools:
Clonezilla uses several backup tools depending on the file system. In all cases, only the actual data used will be copied, not the entire partition (except for dd):
partimage: Ext2, Ext3, FAT16, FAT32, NTFS (read-only), ReiserFS, HFS (read-only), XFS (experimental read-only), UFS/FFS.partclone: Ext2, Ext3, Ext4, FAT12, FAT16, FAT32, NTFS, HFS+, ReiserFS, XFS, JFS, Btrfs, F2FS, UFS/FFS.dd: Universal support.partclone.dd: Universal support, same asddbut with compression support.ntfsclone: Used onWindowssystems, supports onlyNTFS.
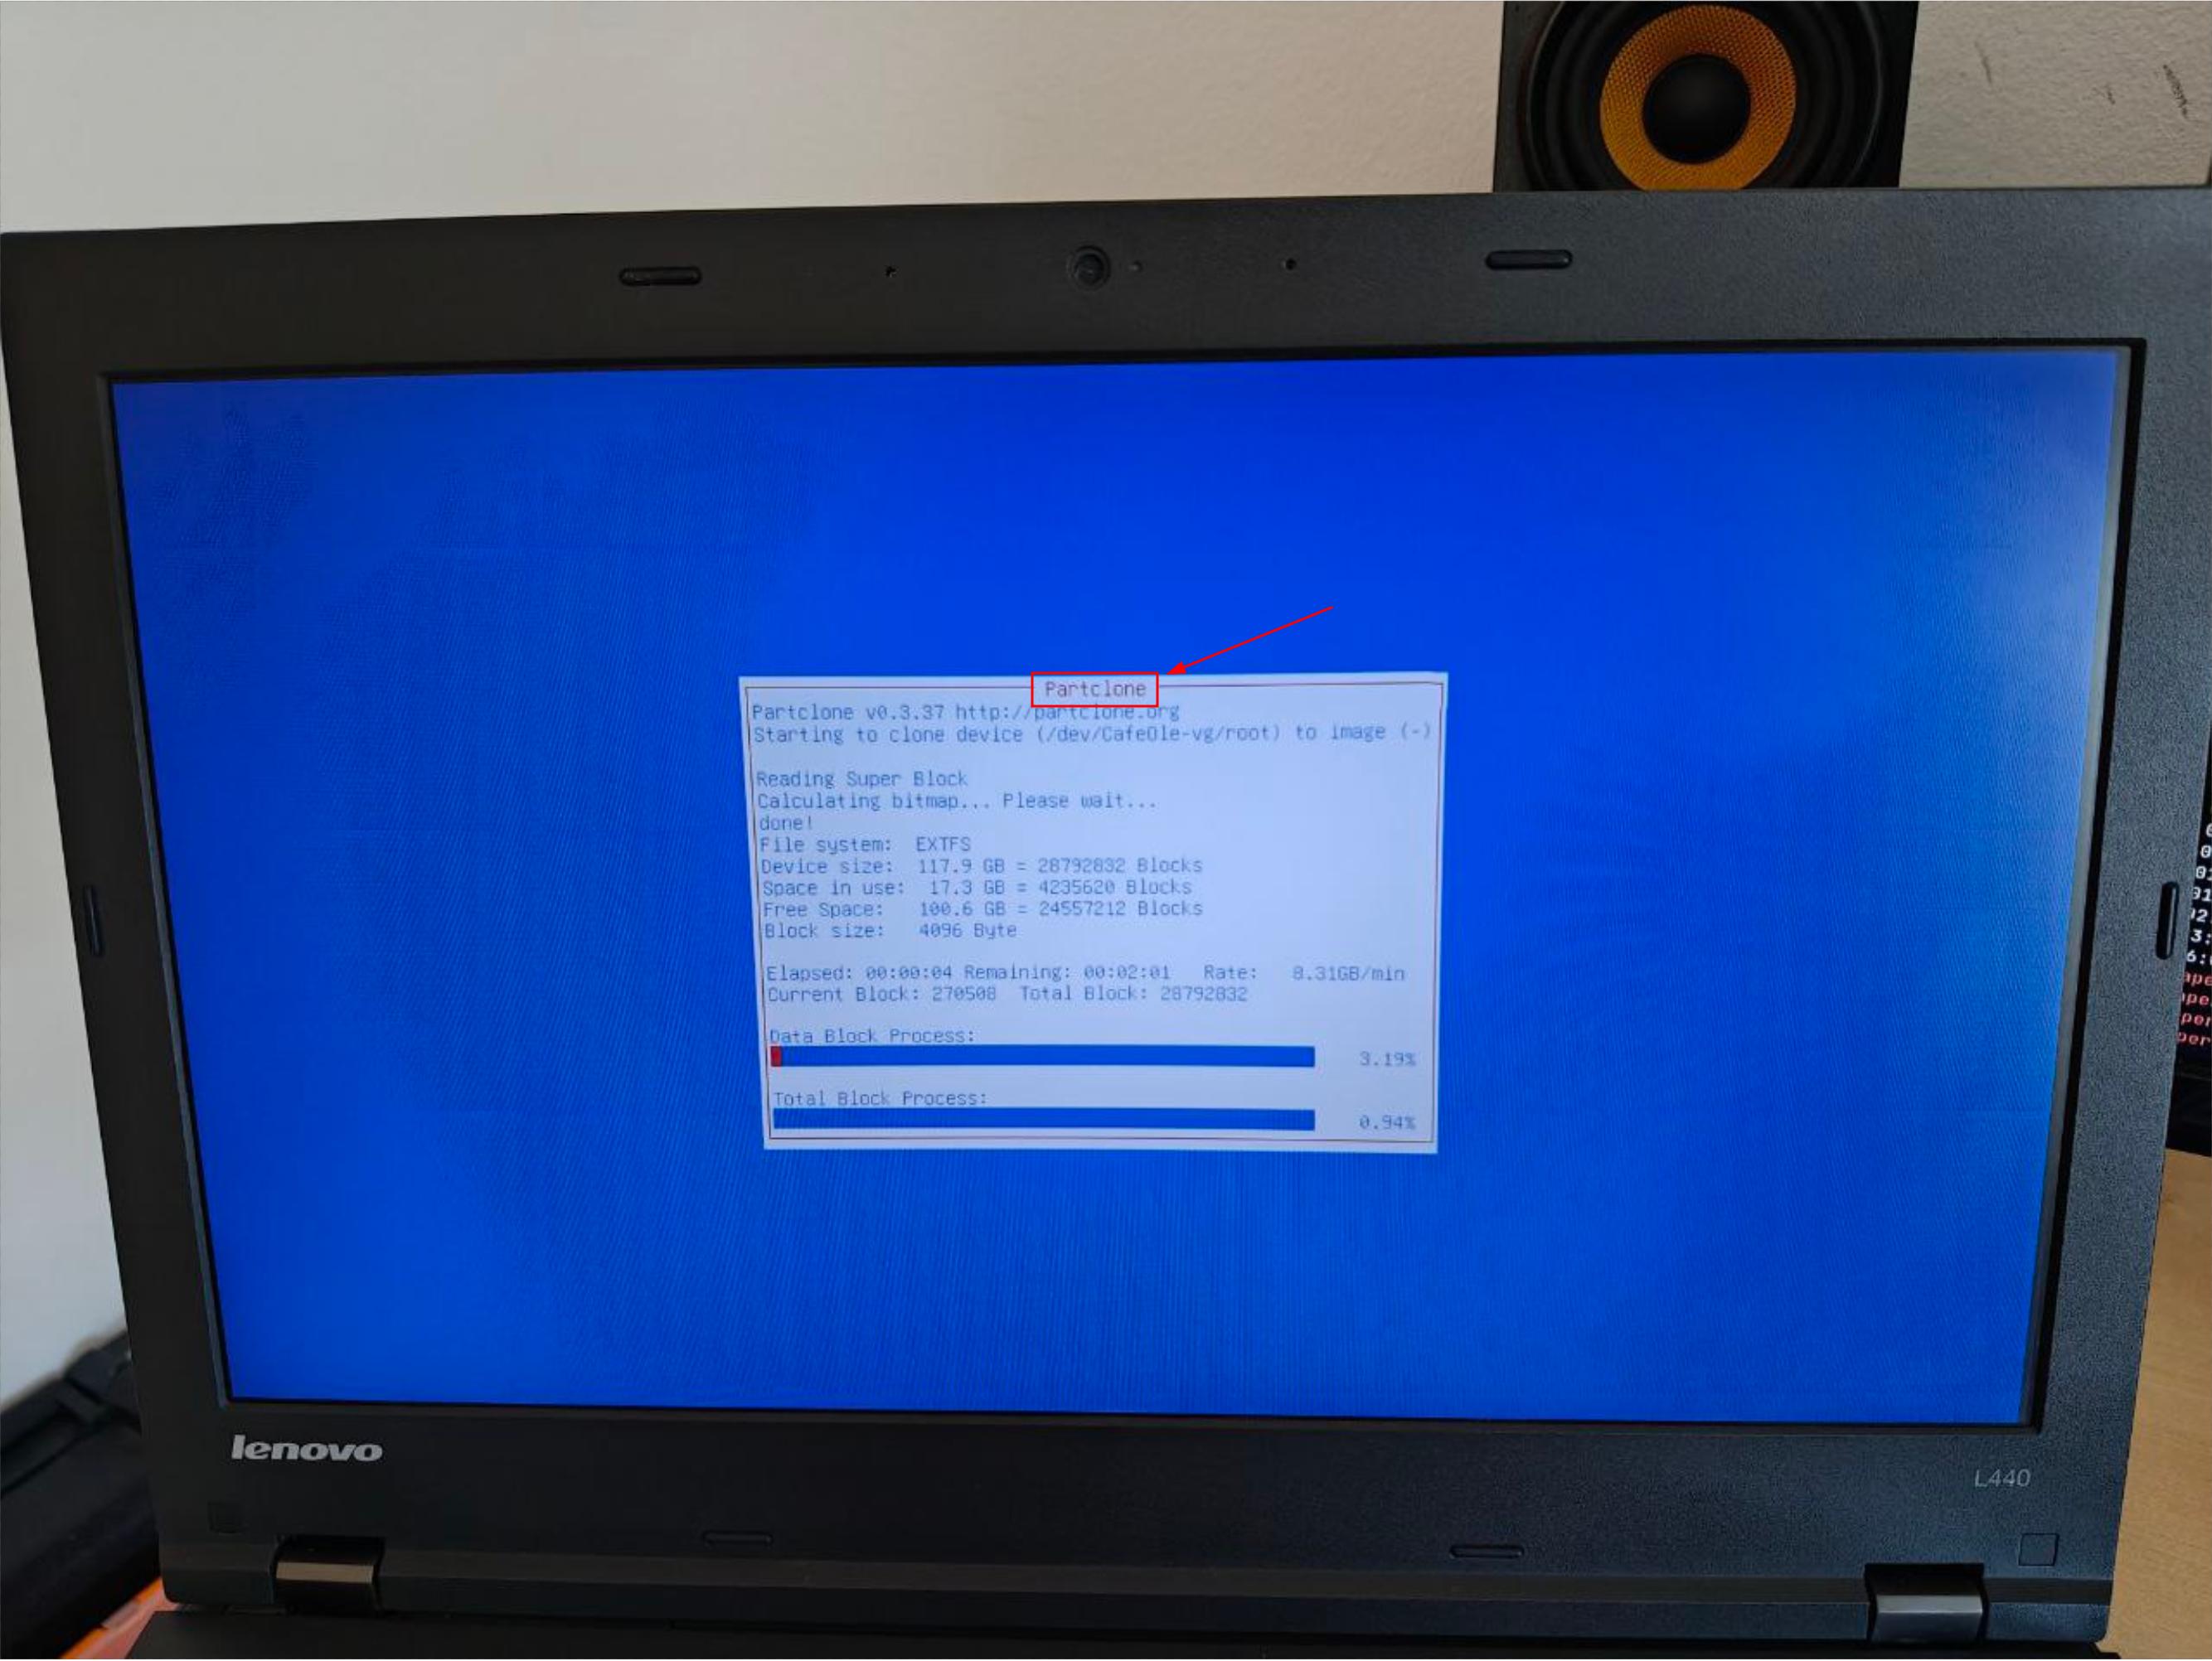
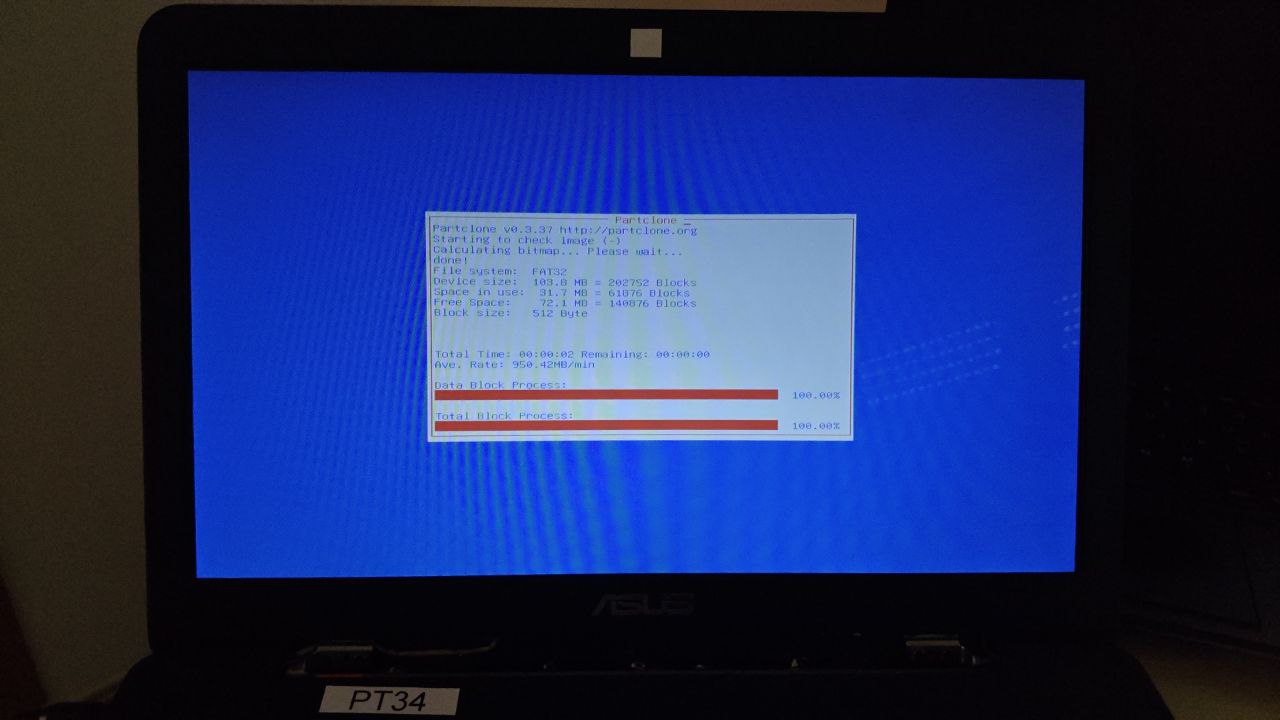
Here are some examples showing which tool is being used in the screenshots:
| Partclone.dd | Partclone |
|---|---|

|
|
If we automate the backup/restore process , we can change tool usage priorities using the following parameters:
-q:  Priority: ntfsclone, partimage, dd
-q1: Only dd
-q2: Priority: partclone, partimage, dd
The default option is: partimage, dd.
Operation Modes:
Clonezilla can operate in several modes:
- device-image: Creates images from entire disks or individual partitions.
- device-device: Clones an entire disk to another disk.
It also provides network functionalities. These two options are for specific cases where a disk needs to be sent or received over the network between two machines:
- remote-source: Sends its disk to another machine running in remote-dest mode.
- remote-dest: Receives the disk from another machine running in remote-source mode.
Additionally, there’s the option to have a central server that performs two functions: serving images to clients or receiving images from clients:
- lite-server: A central server that serves/receives images to/from many clients over the network.
- lite-client: Connects to a central server (lite-server) to download or upload disk images.
Repository Types:
Clonezilla supports the use of repositories both on local devices and on network file systems:
- local_dev: Local devices.
- ssh_server:
SSHserver. - samba_server:
SAMBAserver. - nfs_server:
NFSserver. - webdav_server:
WebDAVserver. - s3_server:
S3server. - enter_shell: Opens a shell for performing any operations needed to set up a repository .
- ram_disk: Uses system RAM to temporarily store the image; useful in cases where cloning occurs within the same machine.
- skip: Uses the
/home/partimagdirectory, which is currently inRAM.
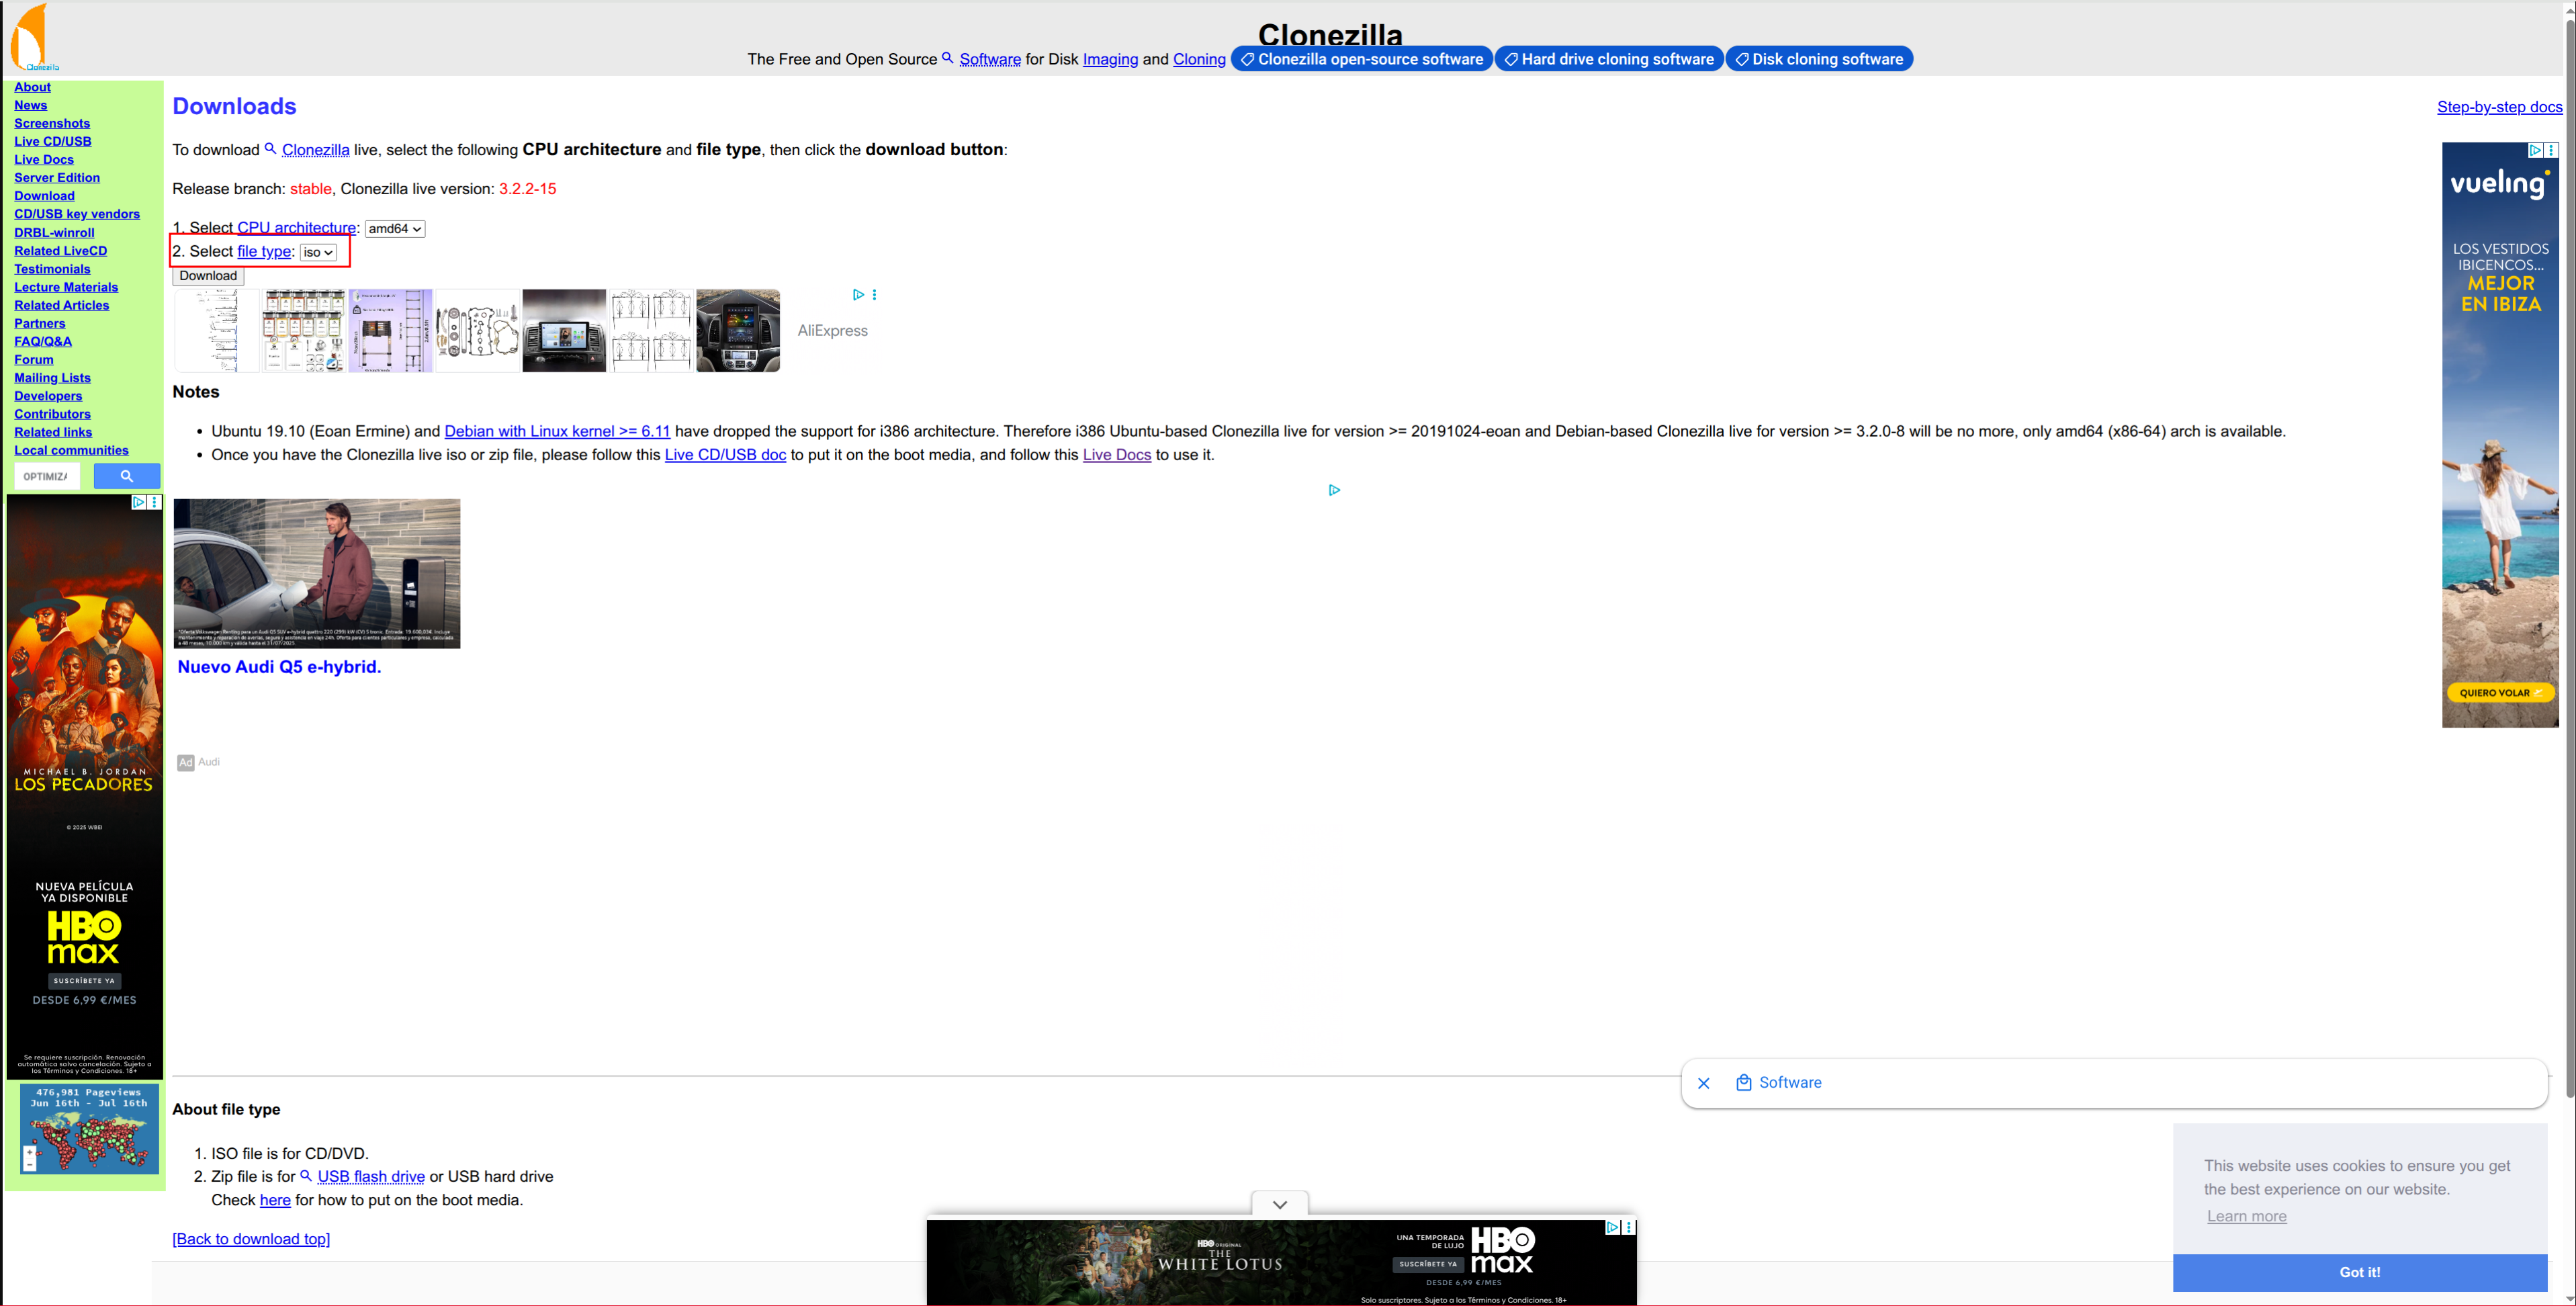
ISO Installation:
Download the ISO file from the
Clonezilla website
:
Install cdrecord:
apt install cdrecord
Burn the ISO to the CDROM:
cdrecord dev=/dev/cdrom blank=disc
cdrecord dev=/dev/cdrom -dao /home/kr0m/Descargas/clonezilla-live-3.2.2-15-amd64.iso
You can see the boot process using the ISO in the following video:
ZIP-EFI Installation:
Download the ZIP file from the
Clonezilla website
:

Create two partitions on the hard drive, one for Clonezilla and another where we will store our backups (
repository
):
fdisk /dev/sdX
Create a new GPT partition table:
Command (m for help): g
Created a new GPT disklabel (GUID: B3128585-1D62-4141-B54E-D065C1662A8B).
Create a 500M partition to install Clonezilla:
Command (m for help): n
Partition number (1-128, default 1):
First sector (2048-1894920014, default 2048):
Last sector, +/-sectors or +/-size{K,M,G,T,P} (2048-1894920014, default 1894918143): +500M
Now the partition where we will store the backups:
Command (m for help): n
Partition number (2-128, default 2):
First sector (1026048-1894920014, default 1026048):
Last sector, +/-sectors or +/-size{K,M,G,T,P} (1026048-1894920014, default 1894918143):
Check the current state of the disk:
Command (m for help): p
Disk /dev/sde: 903.57 GiB, 970199064576 bytes, 1894920048 sectors
Disk model: EXT
Units: sectors of 1 * 512 = 512 bytes
Sector size (logical/physical): 512 bytes / 4096 bytes
I/O size (minimum/optimal): 4096 bytes / 4096 bytes
Disklabel type: gpt
Disk identifier: BE811FD9-BDAE-8644-9D21-37DCAFCA0861

Device       Start        End    Sectors   Size Type
/dev/sde1     2048    1026047    1024000   500M Linux filesystem
/dev/sde2  1026048 1894918143 1893892096 903.1G Linux filesystem
Save the changes:
Command (m for help): w
The partition table has been altered.
Calling ioctl() to re-read partition table.
Syncing disks.
Format the first partition as VFAT:
mkfs.vfat -F 32 /dev/sdX1
And the second one as Ext4:
mkfs.ext4 -L "Backups" /dev/sdX2
Extract clonezilla-live-3.2.2-15-amd64.zip to /dev/sdX1:
mount /dev/sdX1 /mnt/aux
unzip /home/kr0m/clonezilla-live-3.2.2-15-amd64.zip -d /mnt/aux
Unmount the disk:
cd
umount /mnt/aux
You can see the EFI boot in the following video:
ZIP-BIOS Installation:
Download the ZIP file from the
Clonezilla website
:

Create two partitions on the hard drive, one for Clonezilla and another where we will store our backups (
repository
):
fdisk /dev/sdX
Create a new MBR partition table:
Command (m for help): o
Created a new DOS (MBR) disklabel with disk identifier 0x397f9ef2.
Create a 500M partition to install Clonezilla:
Command (m for help): n
Partition type
   p   primary (0 primary, 0 extended, 4 free)
   e   extended (container for logical partitions)
Select (default p):

Using default response p.
Partition number (1-4, default 1):
First sector (2048-1894920047, default 2048):
Last sector, +/-sectors or +/-size{K,M,G,T,P} (2048-1894920047, default 1894920047): +500M
Now the partition where we will store the backups:
Command (m for help): n
Partition type
   p   primary (1 primary, 0 extended, 3 free)
   e   extended (container for logical partitions)
Select (default p):

Using default response p.
Partition number (2-4, default 2):
First sector (1026048-1894920047, default 1026048):
Last sector, +/-sectors or +/-size{K,M,G,T,P} (1026048-1894920047, default 1894920047):
Check the current state of the disk:
Command (m for help): p
Disk /dev/sde: 903.57 GiB, 970199064576 bytes, 1894920048 sectors
Disk model: EXT
Units: sectors of 1 * 512 = 512 bytes
Sector size (logical/physical): 512 bytes / 4096 bytes
I/O size (minimum/optimal): 4096 bytes / 4096 bytes
Disklabel type: dos
Disk identifier: 0x397f9ef2

Device     Boot   Start        End    Sectors   Size Id Type
/dev/sde1          2048    1026047    1024000   500M 83 Linux
/dev/sde2       1026048 1894920047 1893894000 903.1G 83 Linux
Save the changes:
Command (m for help): w
The partition table has been altered.
Calling ioctl() to re-read partition table.
Syncing disks.
Format the first partition as VFAT:
mkfs.vfat -F 32 /dev/sdX1
And the second one as Ext4:
mkfs.ext4 -L "Backups" /dev/sdX2
Extract clonezilla-live-3.2.2-15-amd64.zip to /dev/sdX1:
mount /dev/sdX1 /mnt/aux
unzip /home/kr0m/clonezilla-live-3.2.2-15-amd64.zip -d /mnt/aux
Make the disk bootable, answer y to everything:
cd /mnt/aux/utils/linux
bash makeboot.sh /dev/sdX1
This command will install MBR and syslinux/extlinux bootloader on /dev/sde
Clonezilla files are assumed to be on /dev/sde1
--------------------------------------------
Machine: System Product Name:
Model: sobetter EXT (scsi)
Disk /dev/sde: 970GB
Sector size (logical/physical): 512B/4096B
Partition Table: msdos
Disk Flags:

Number  Start   End    Size   Type     File system  Flags
 1      1049kB  525MB  524MB  primary  fat32
 2      525MB   970GB  970GB  primary  ext4

--------------------------------------------
Are you sure you want to continue?
[y/n] y
OK! Let's do it!
--------------------------------------------
File system of /dev/sde1: vfat
--------------------------------------------
sde1 is not marked as bootable! The partition table of /dev/sde:
--------------------------------------------
System Product Name:
Model: sobetter EXT (scsi)
Disk /dev/sde: 970GB
Sector size (logical/physical): 512B/4096B
Partition Table: msdos
Disk Flags:

Number  Start   End    Size   Type     File system  Flags
 1      1049kB  525MB  524MB  primary  fat32
 2      525MB   970GB  970GB  primary  ext4

--------------------------------------------
Do you want to mark it as bootable ?
[y/n] y
OK! Let's do it!
Running: parted -s /dev/sde set 1 boot on
--------------------------------------------
Do you want to install MBR on /dev/sde on this machine "System Product Name" ?
[y/n] y
OK! Let's do it!
Running: cat "/mnt/aux/utils/mbr/mbr.bin" > /dev/sde
--------------------------------------------
Do you want to install the syslinux boot files on /dev/sde1 on this machine "System Product Name" ?
[y/n] y
OK! Let's do it!
A filesystem supporting Unix file mode for syslinux is required. Copying syslinux to /tmp/linux_tmp.3IsDu2
'/mnt/aux/utils/linux/x64/syslinux' -> '/tmp/linux_tmp.3IsDu2/syslinux'
Running: "/tmp/linux_tmp.3IsDu2/syslinux" -d syslinux -f -i "/dev/sde1"
Hidden (2048) does not match sectors (63)
Hidden (2048) does not match sectors (63)
Hidden (2048) does not match sectors (63)
Hidden (2048) does not match sectors (63)
Hidden (2048) does not match sectors (63)
Hidden (2048) does not match sectors (63)
//NOTE// If your USB flash drive fails to boot (maybe buggy BIOS), try to use "syslinux -d syslinux -fs /dev/sde1", i.e. running with "-fs".
syslinux ran successfully in installation mode.
Done!
Unmount the disk:
cd
umount /mnt/aux
You can see the BIOS boot in the following video:
ZIP-EFI/BIOS Installation:
Most EFI systems support legacy boot through BIOS, so if we create a bootable disk for BIOS, it will likely work for all types of systems.
Backup: Linux + encryption (unlocked)
In this mode, keep in mind that the data stored in the backup will be in plain text, making it vulnerable to prying eyes with access to the backup disk.
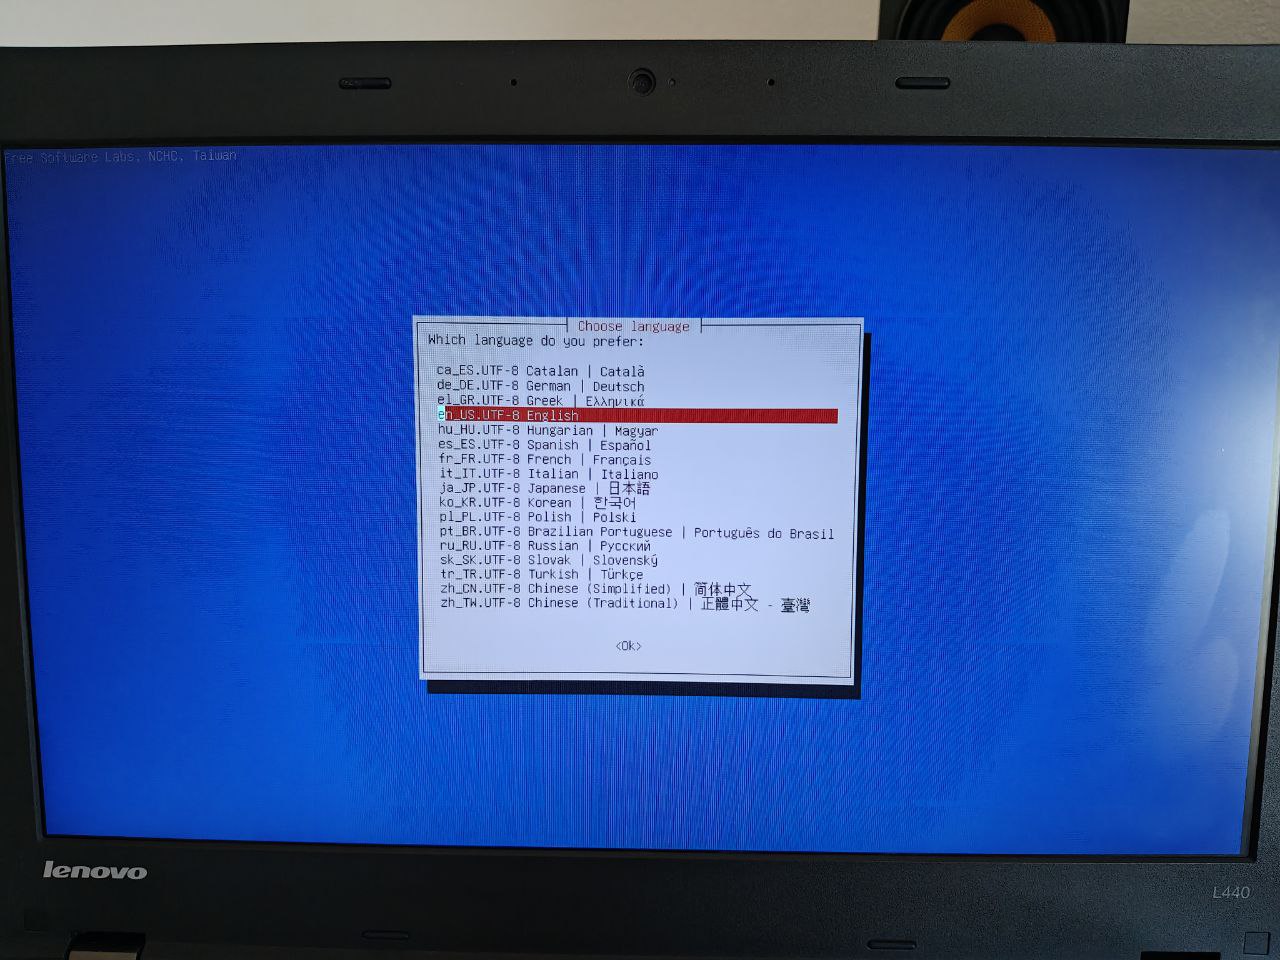
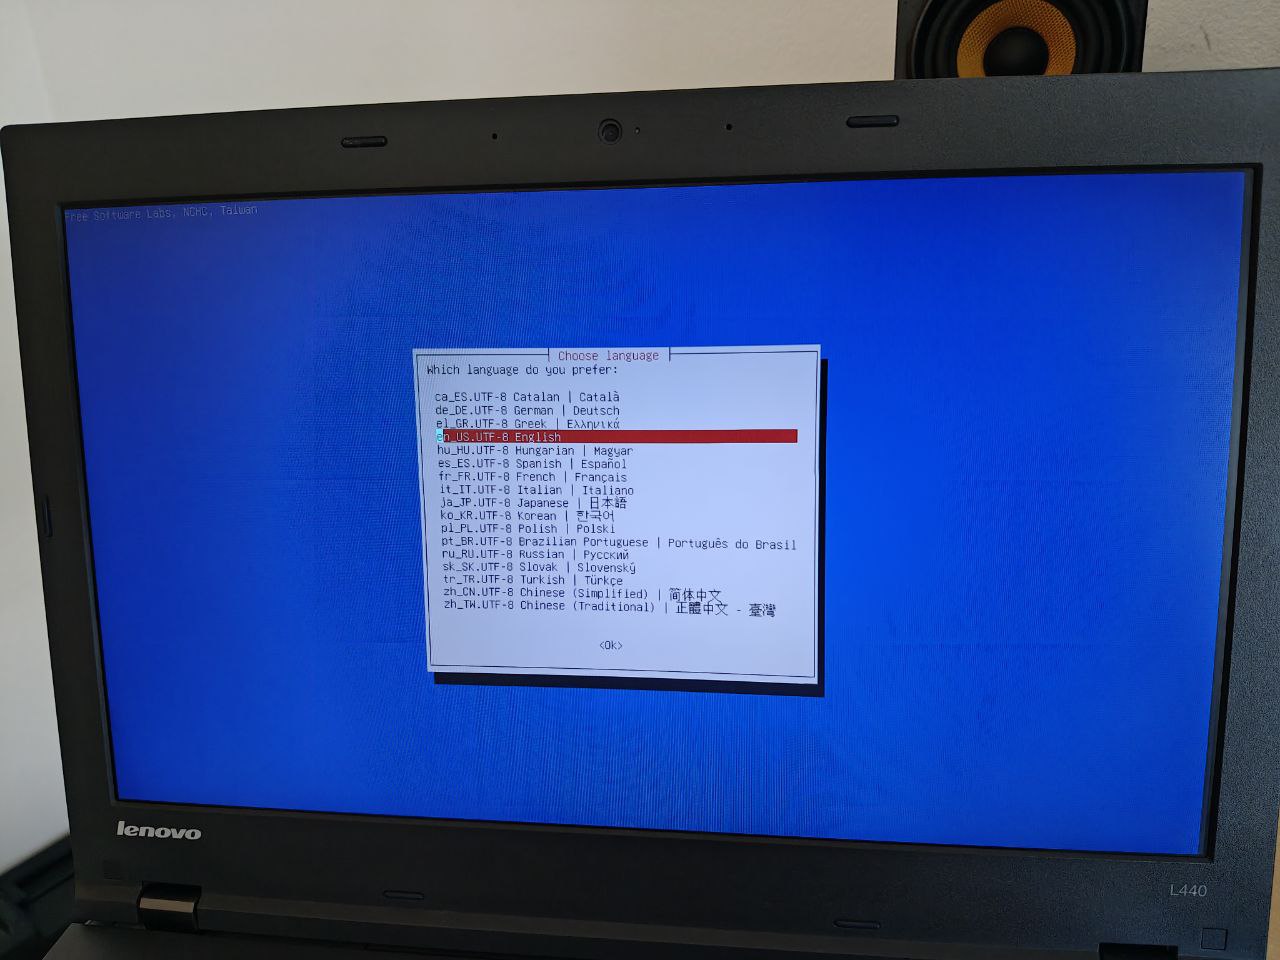
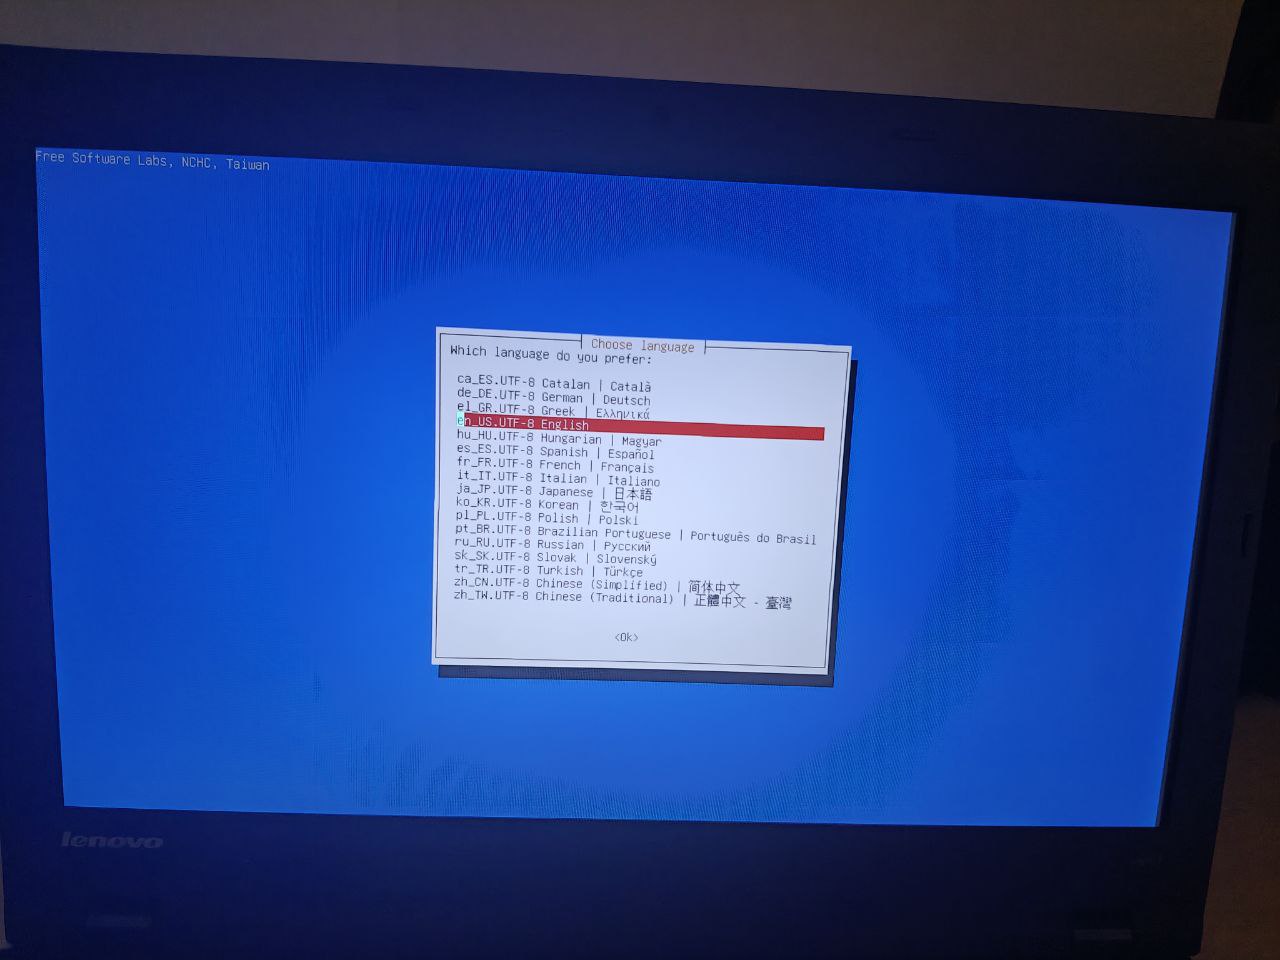
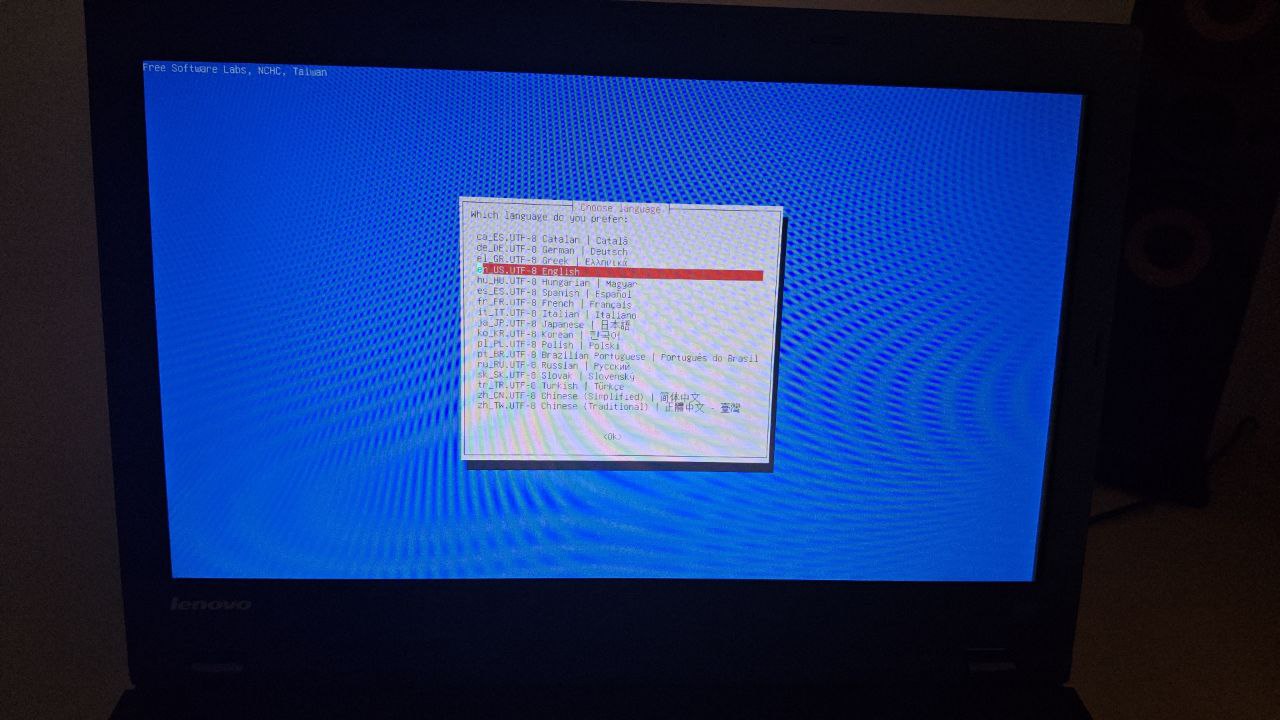
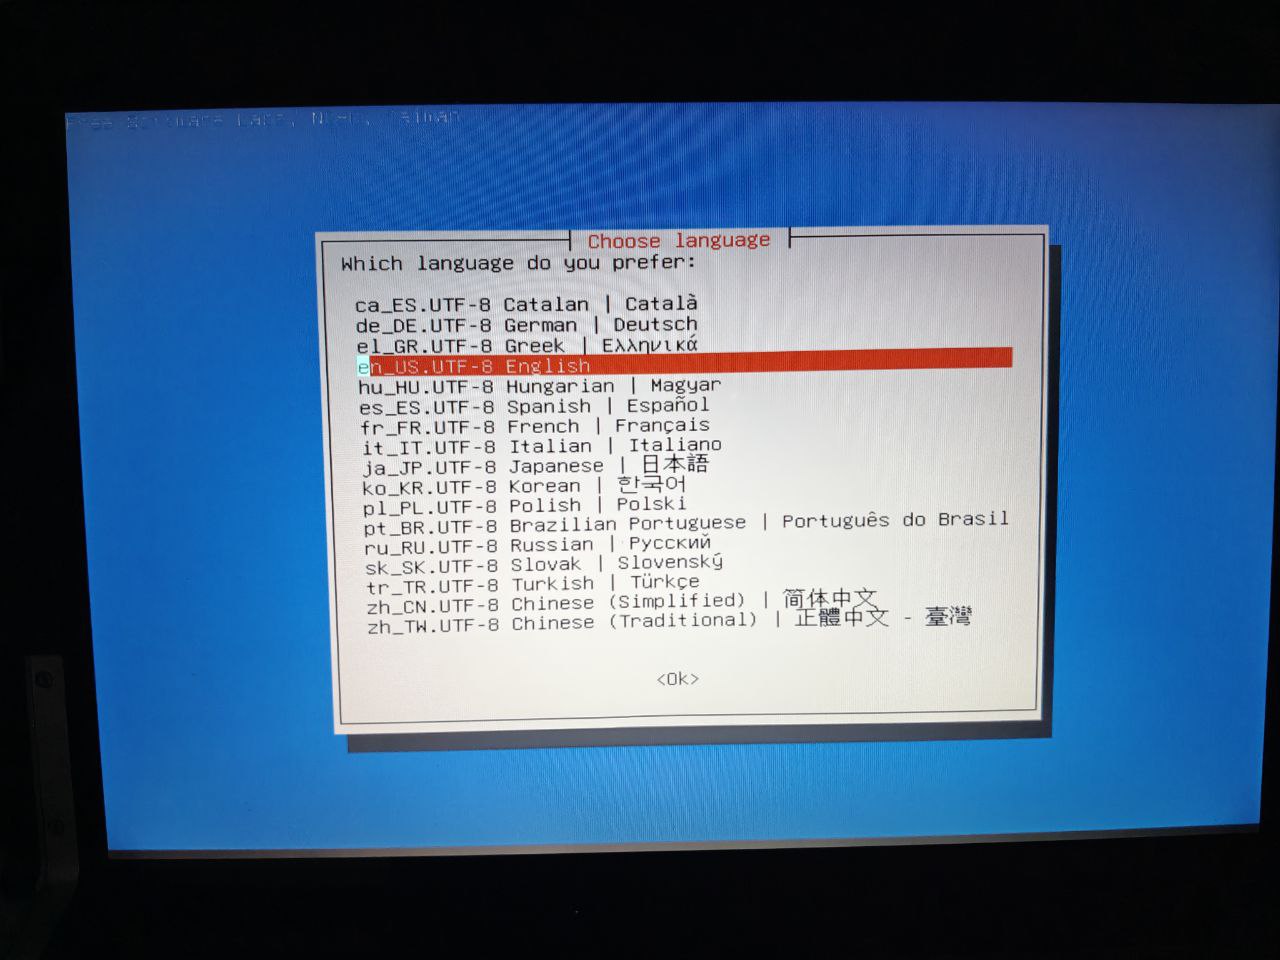
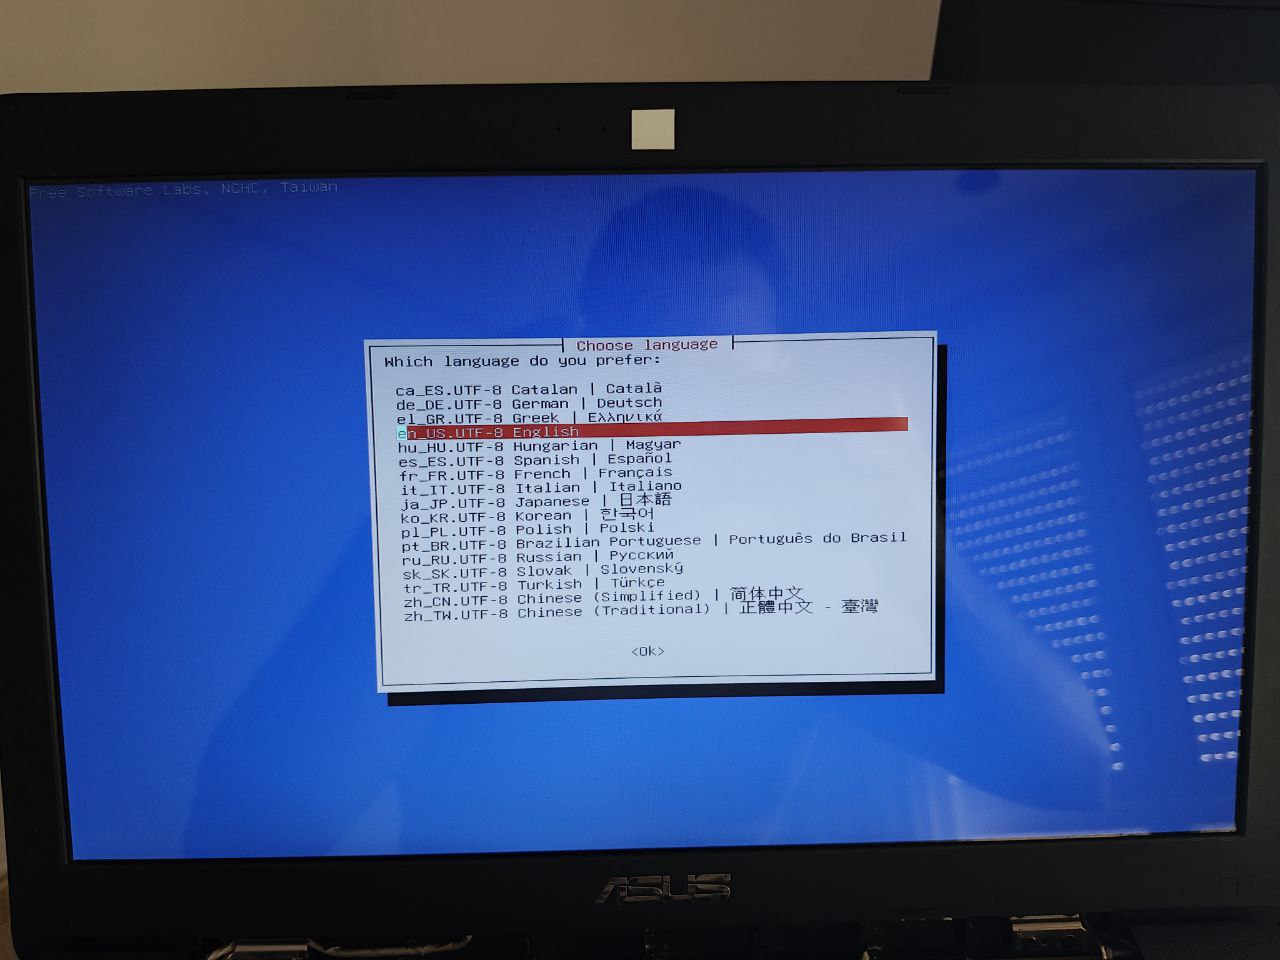
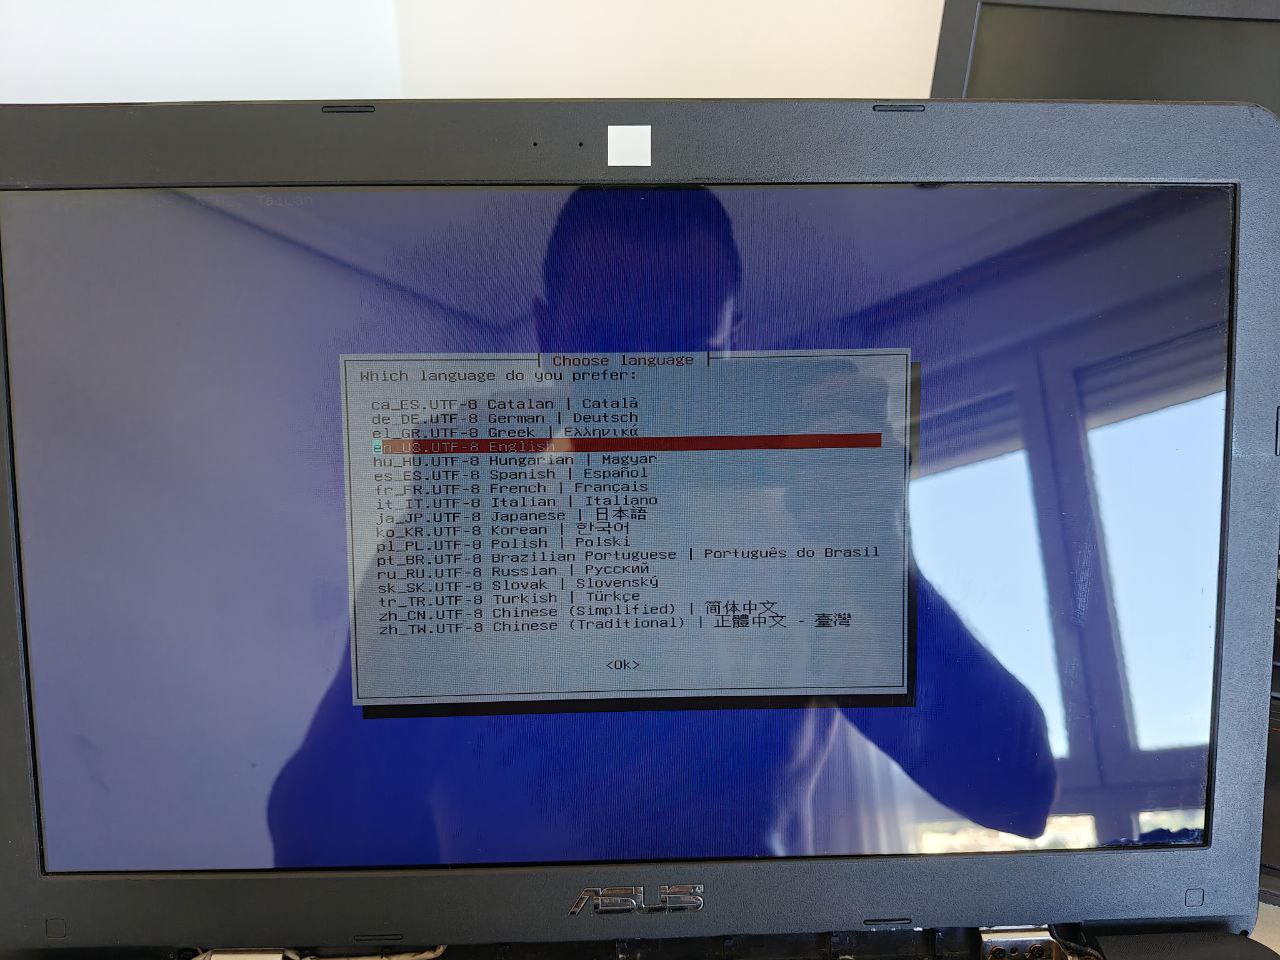
Configure the language:
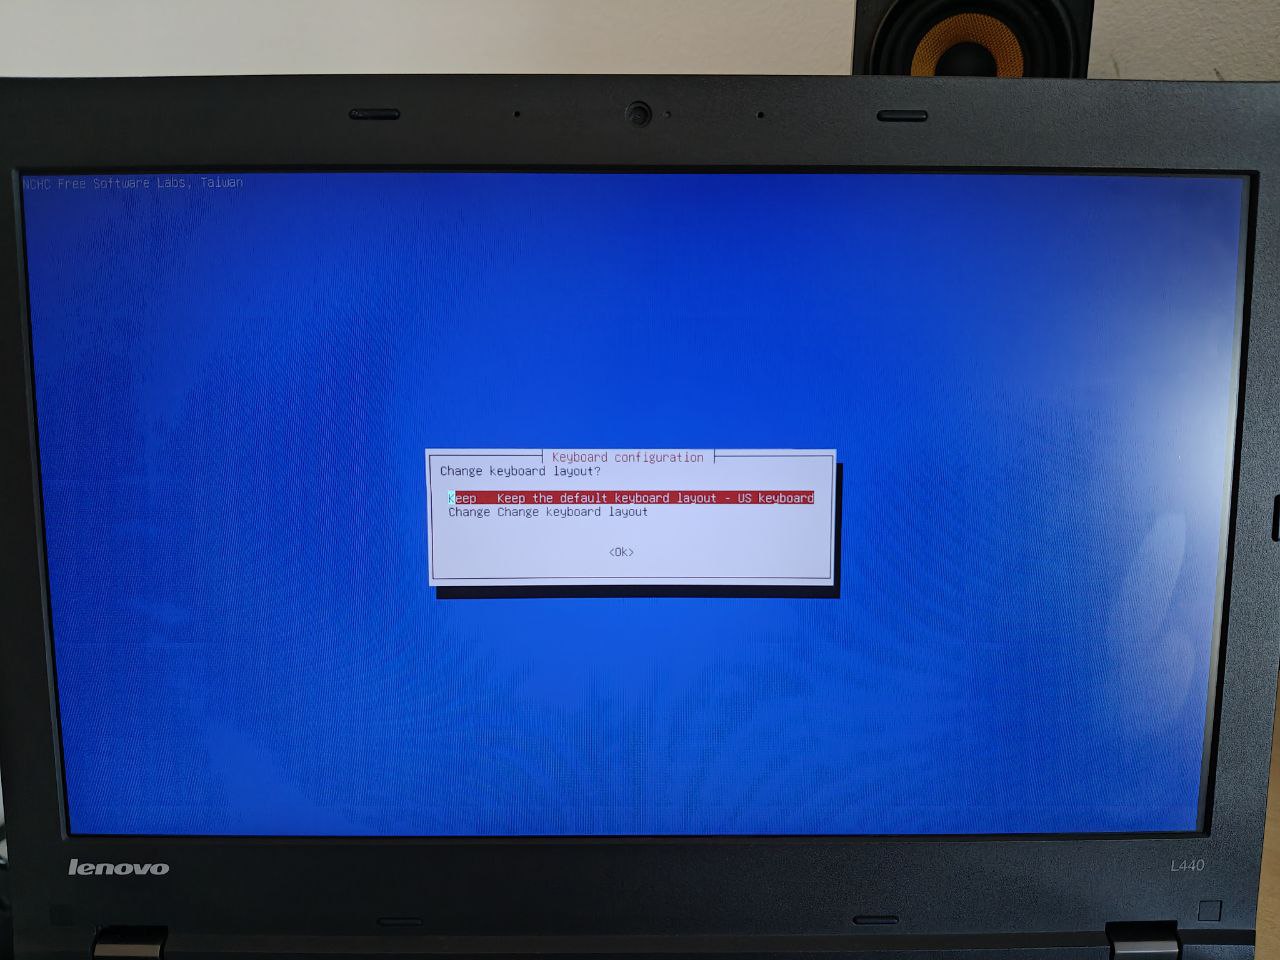
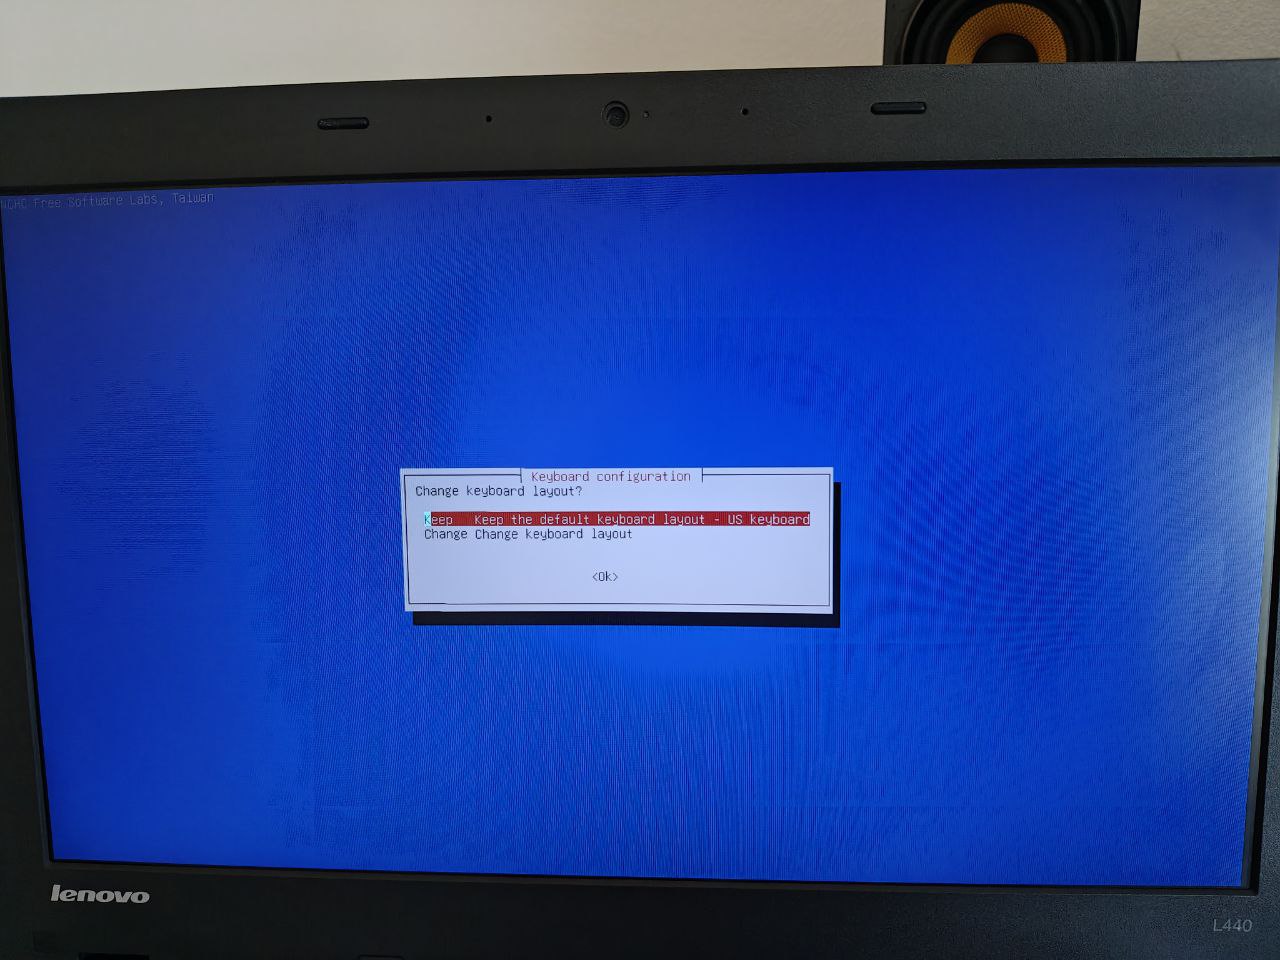
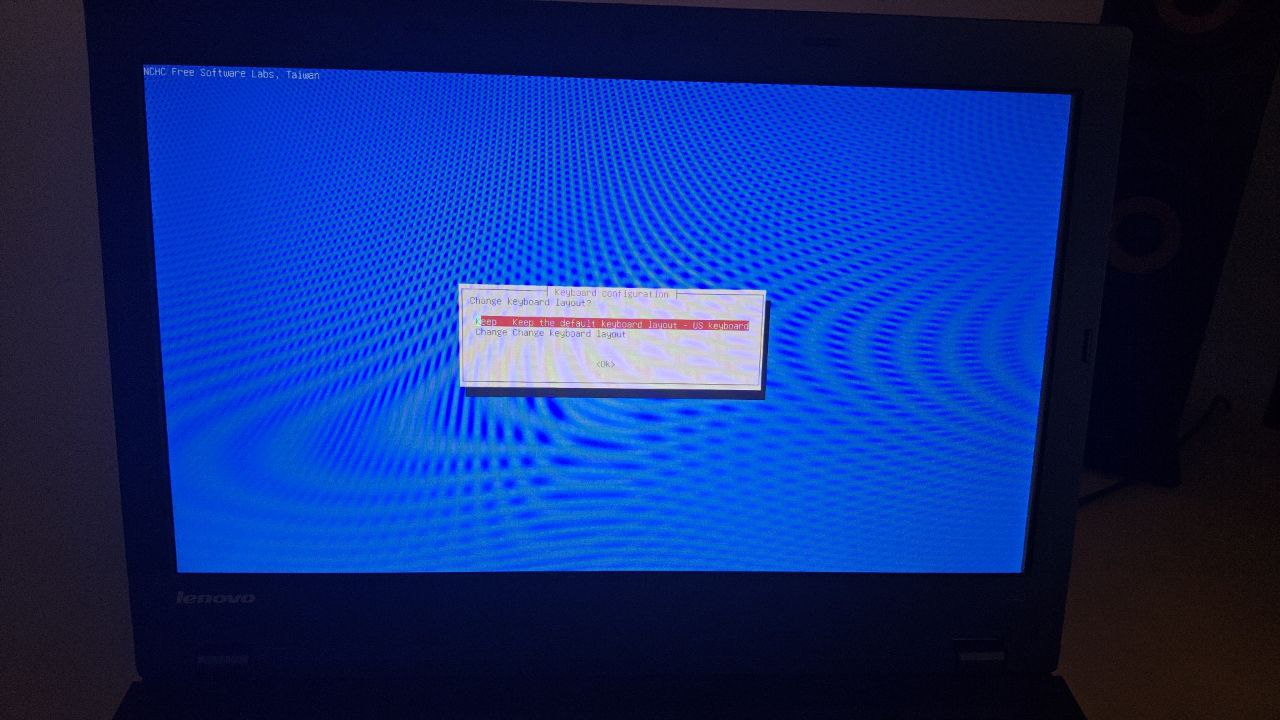
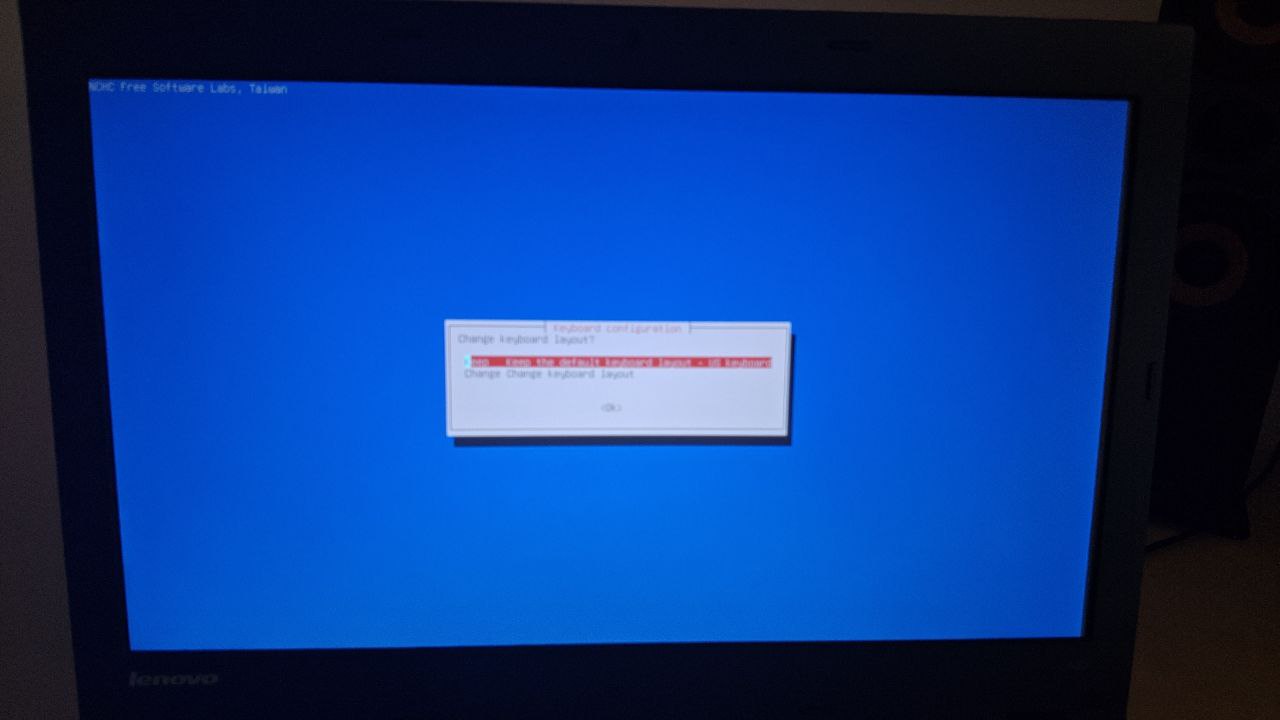
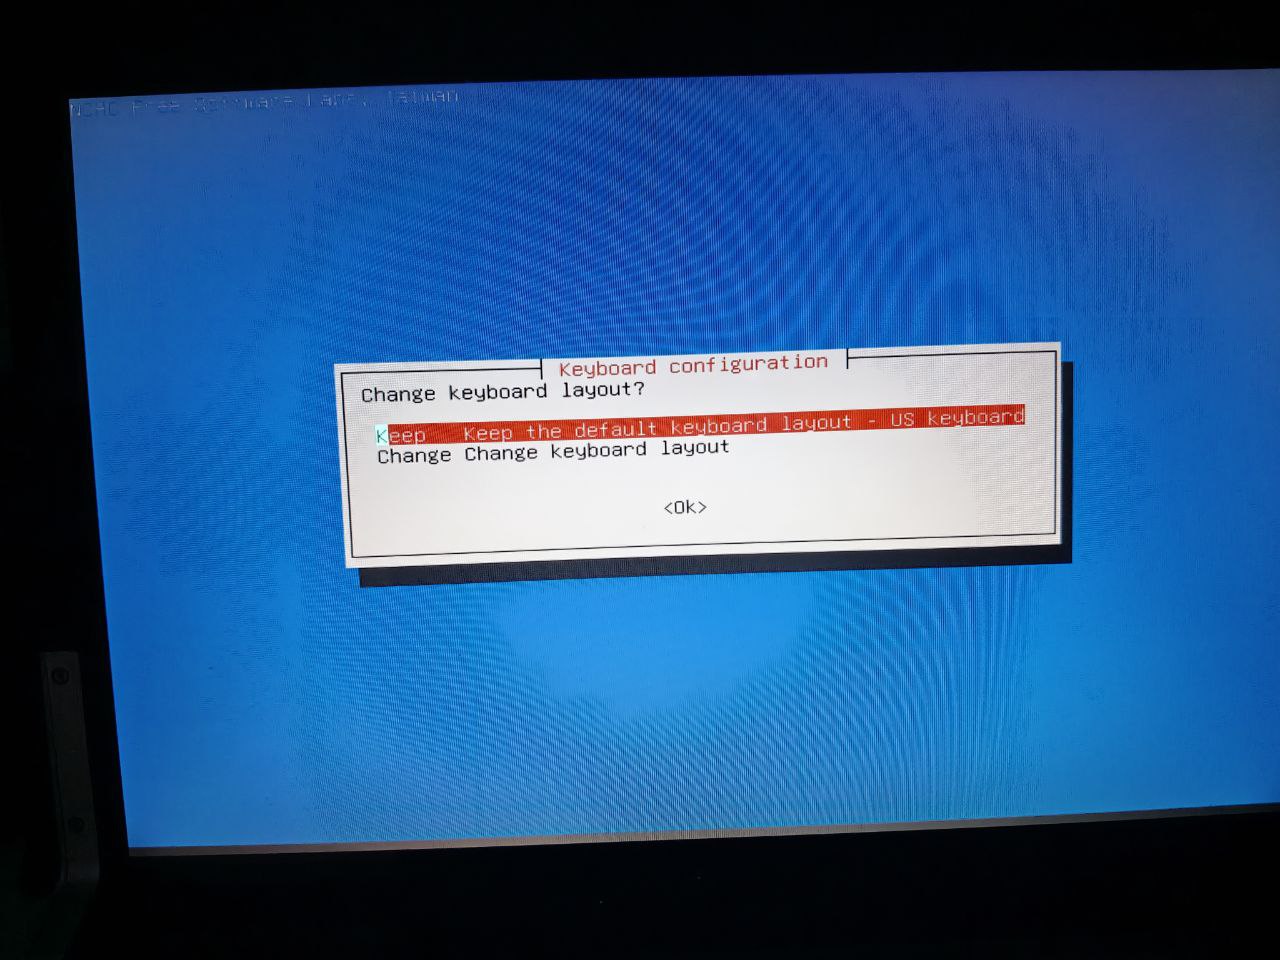
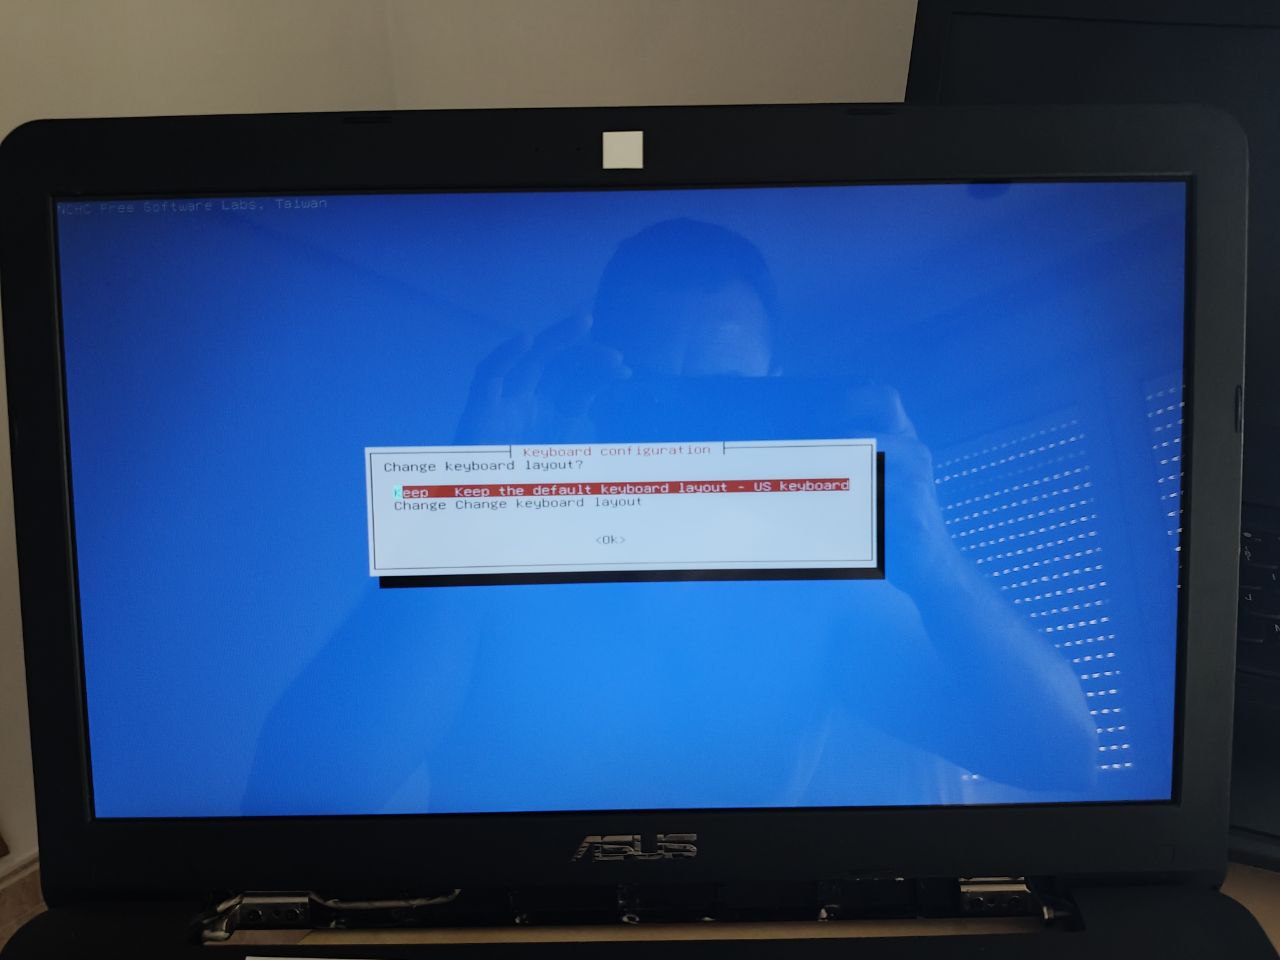
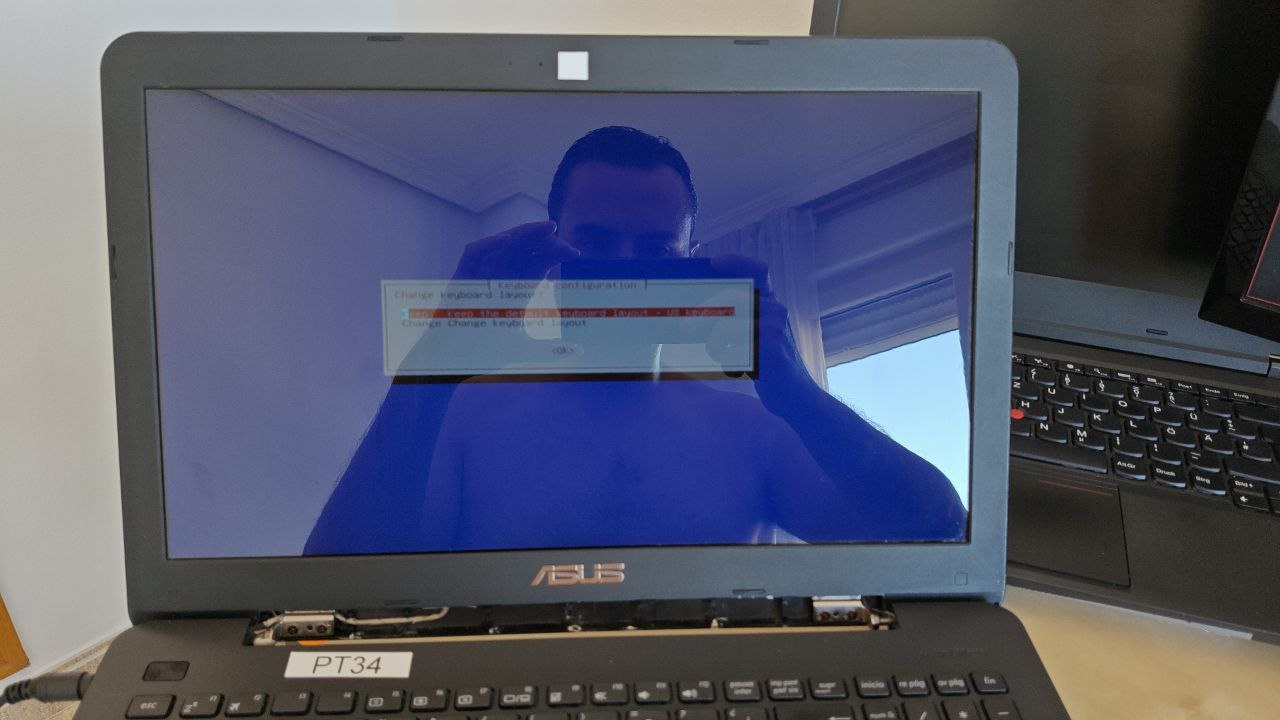
Configure the keyboard layout:
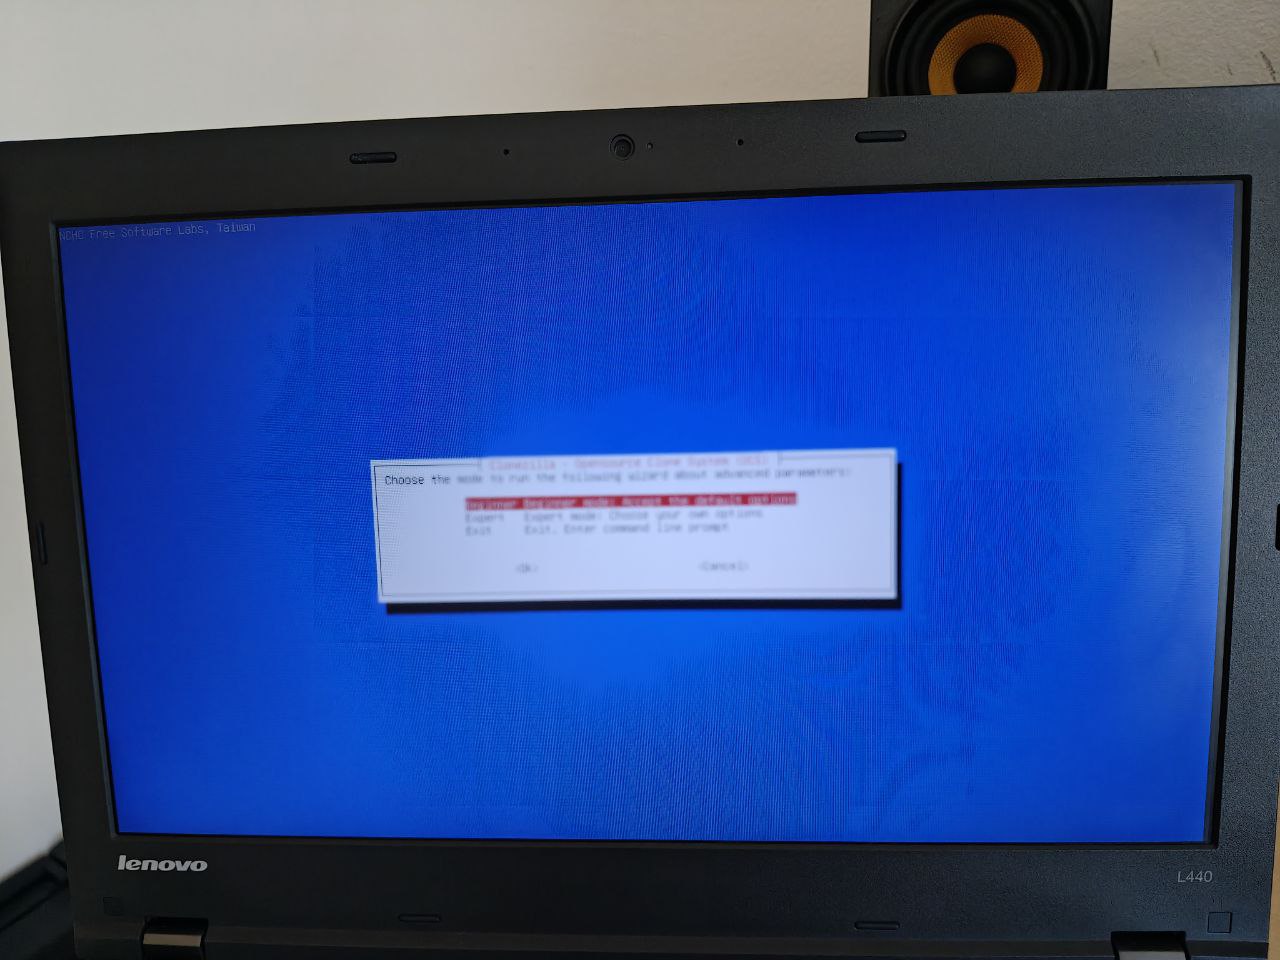
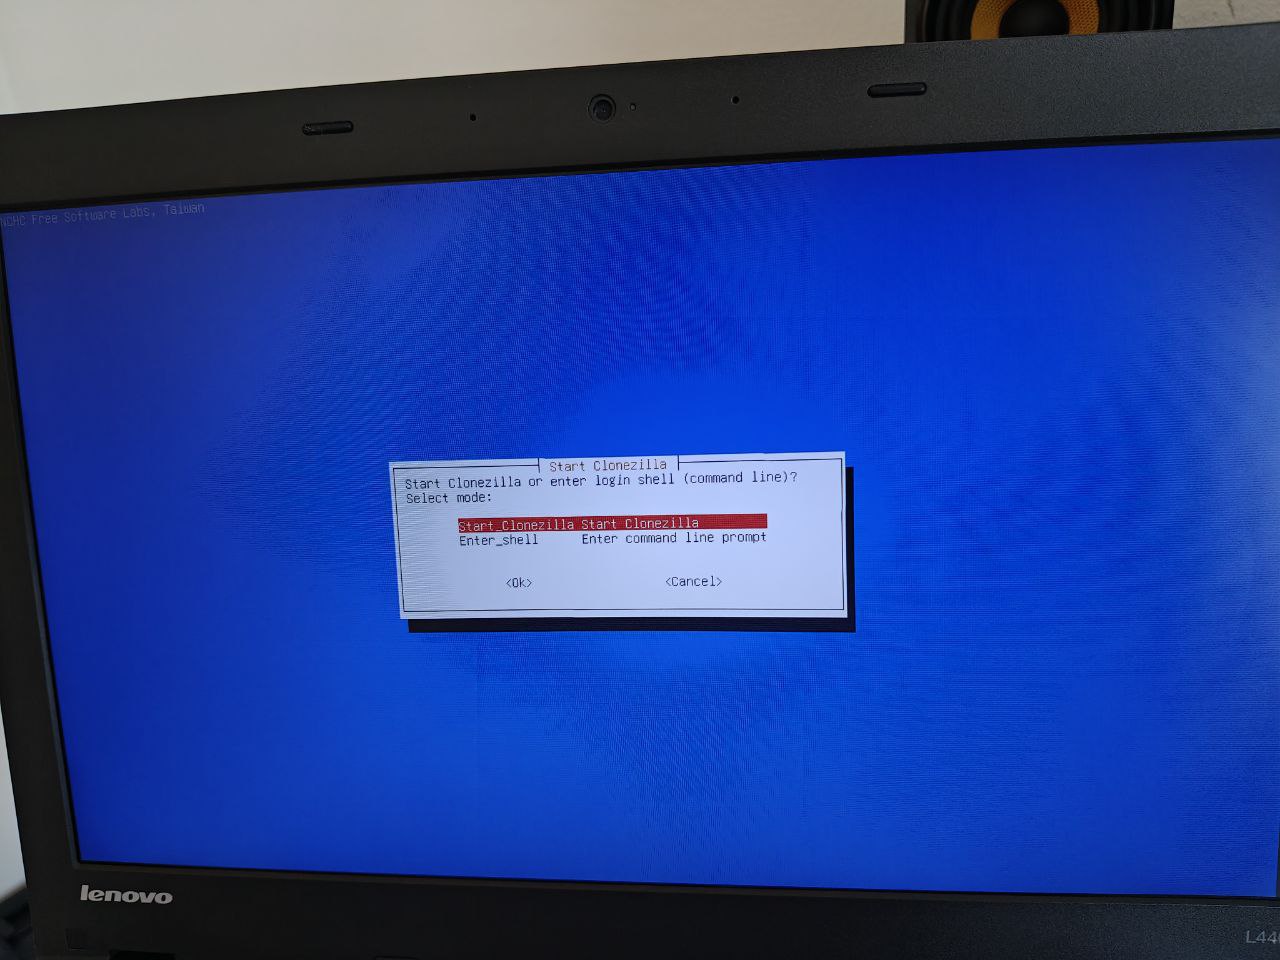
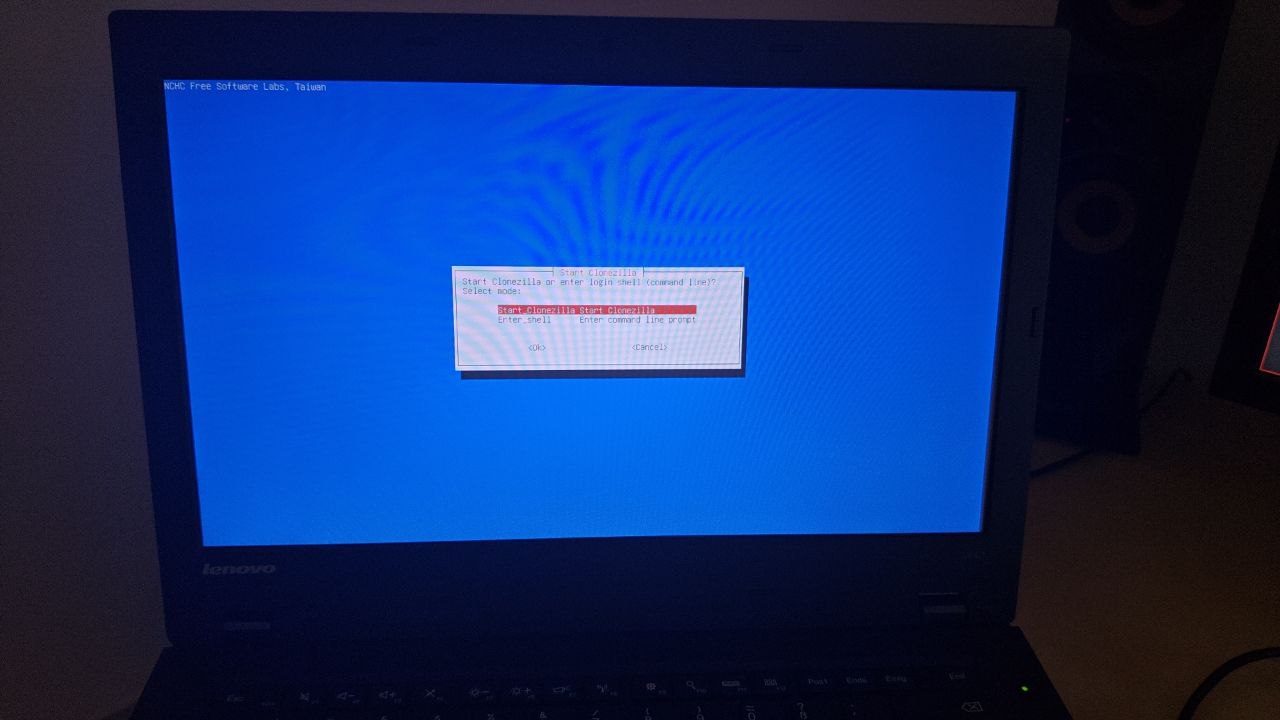
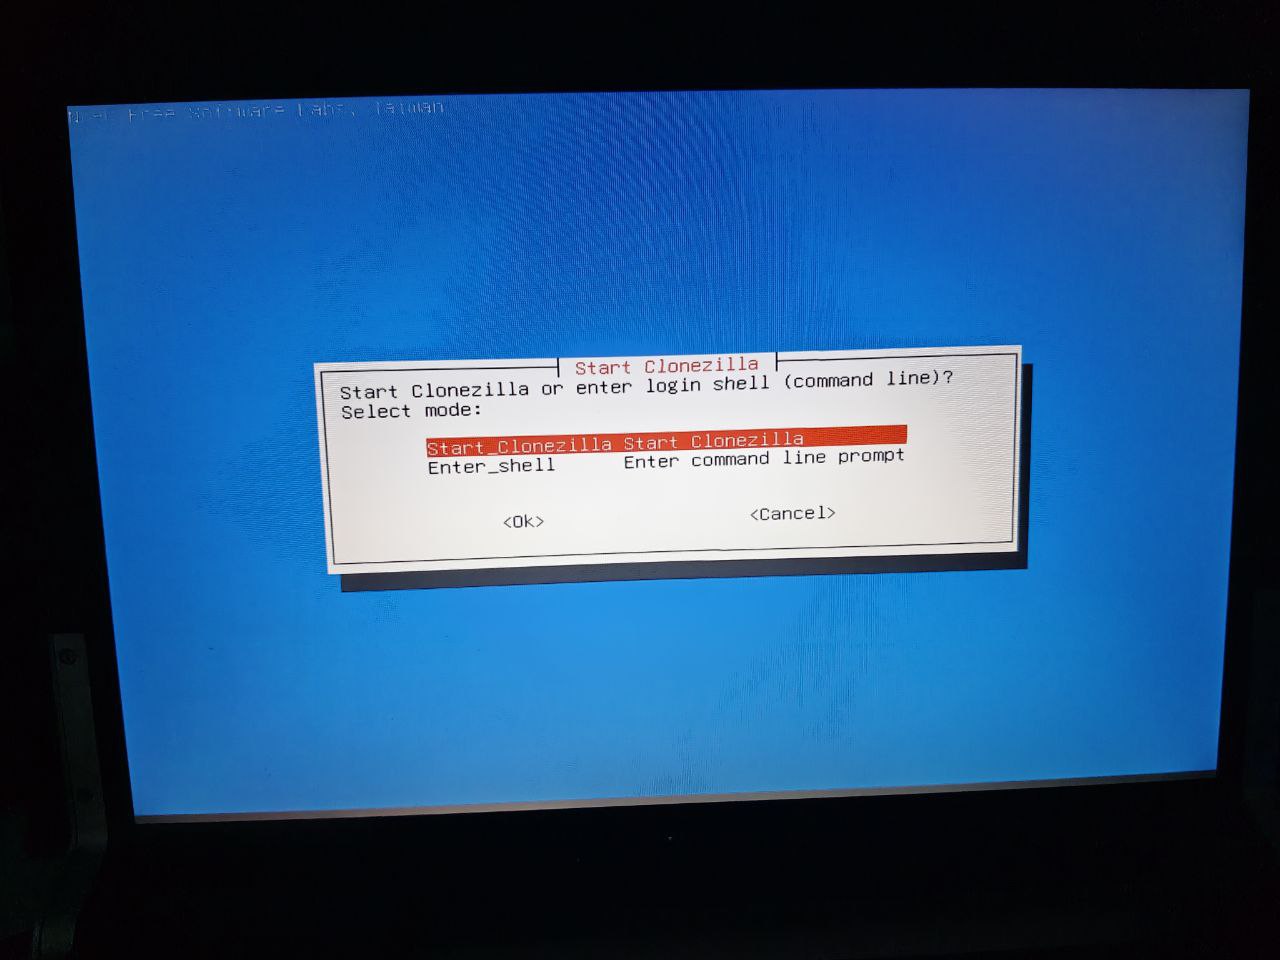
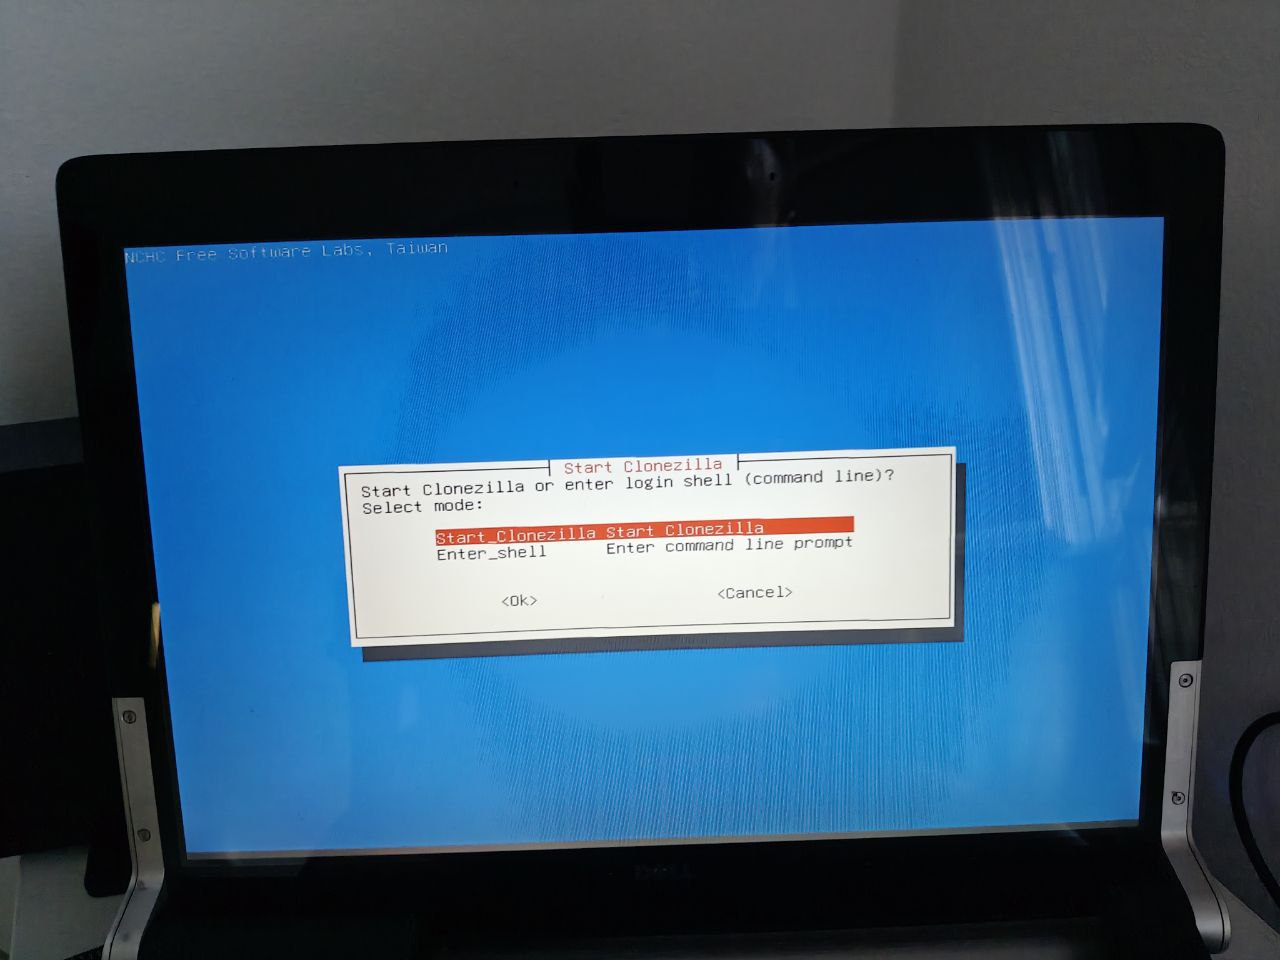
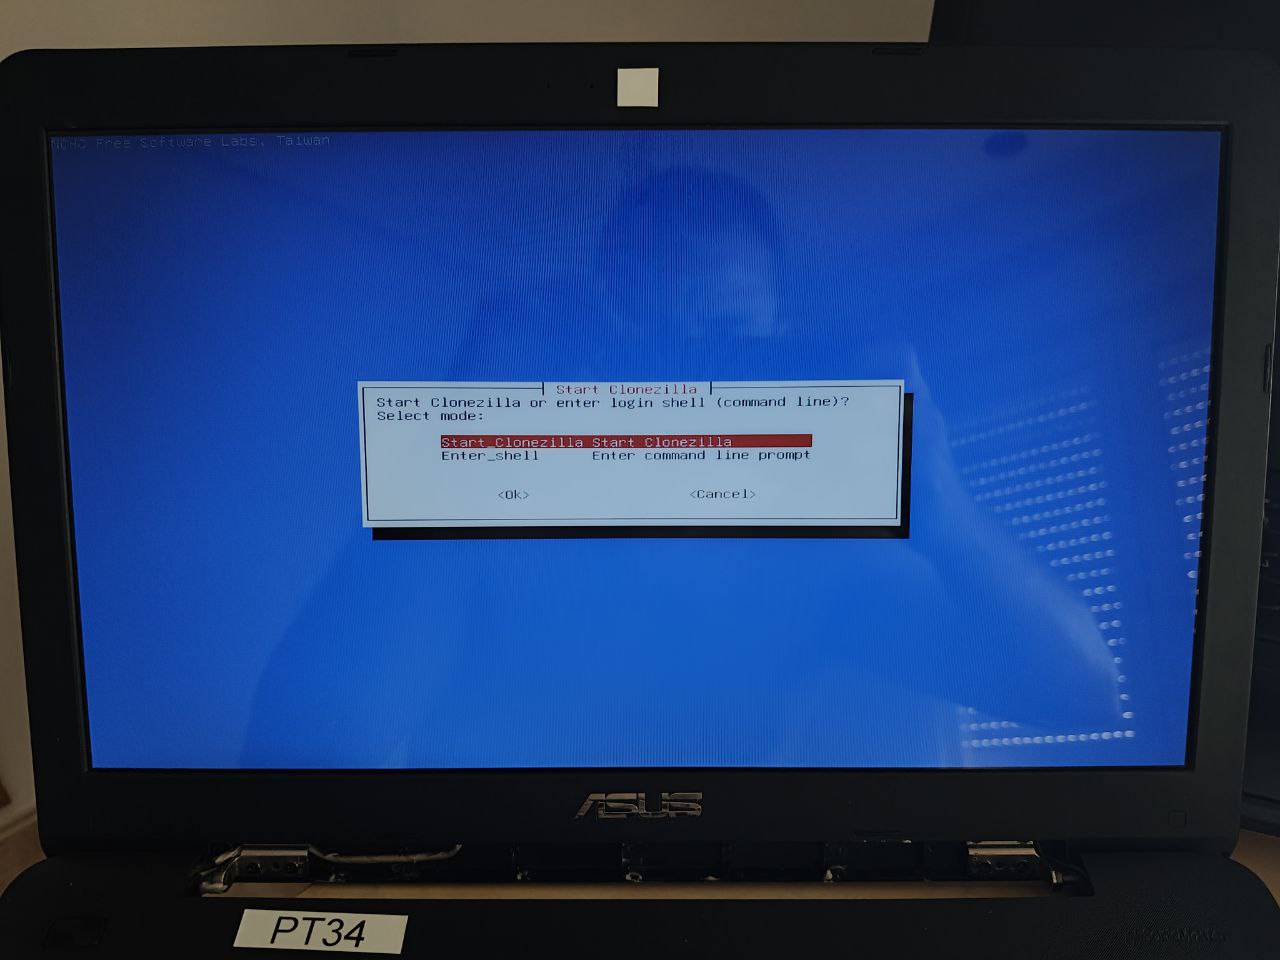
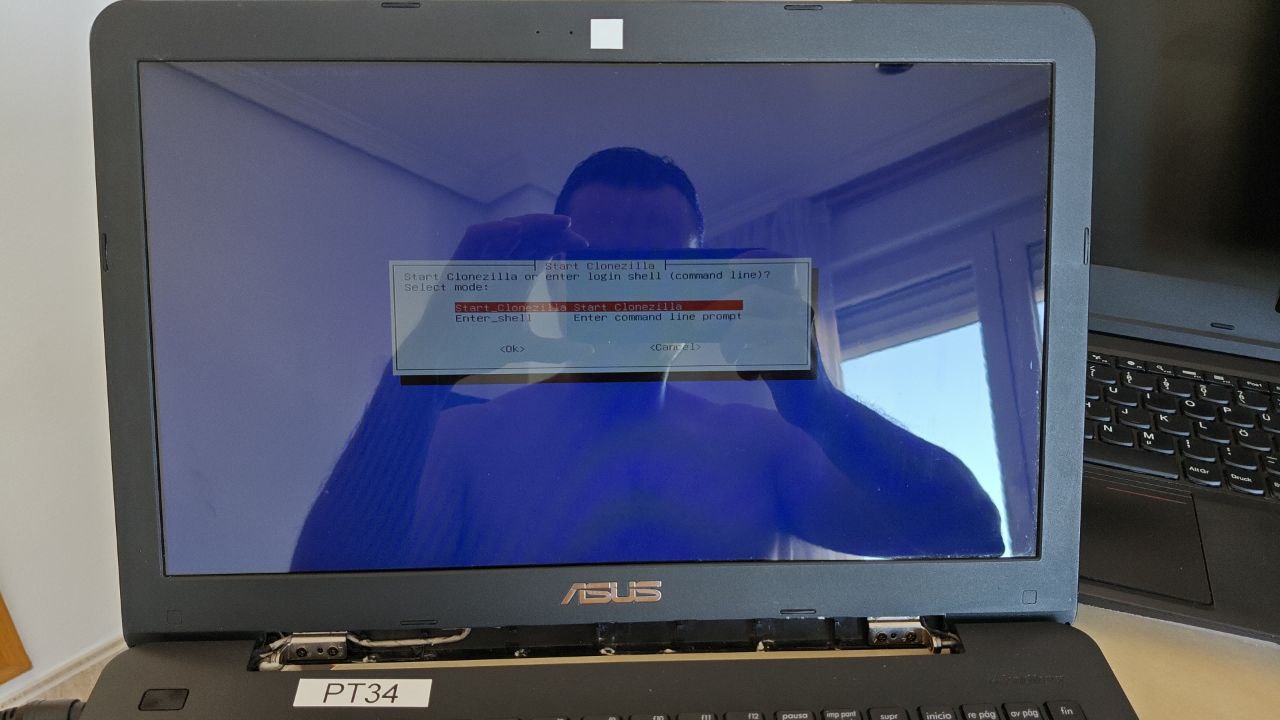
You’re asked to choose between booting Clonezilla or opening a Linux shell. Boot Clonezilla:

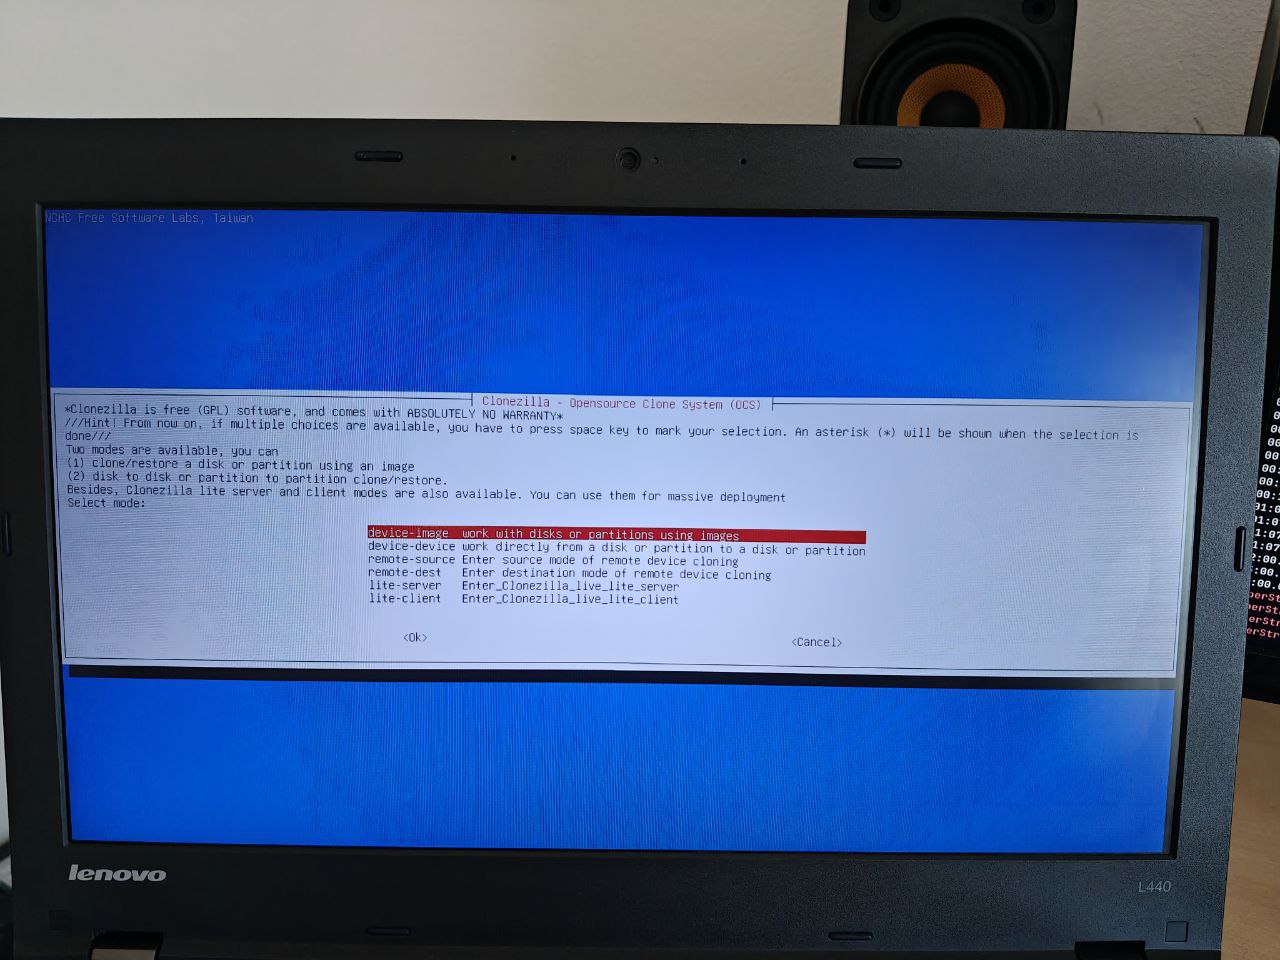
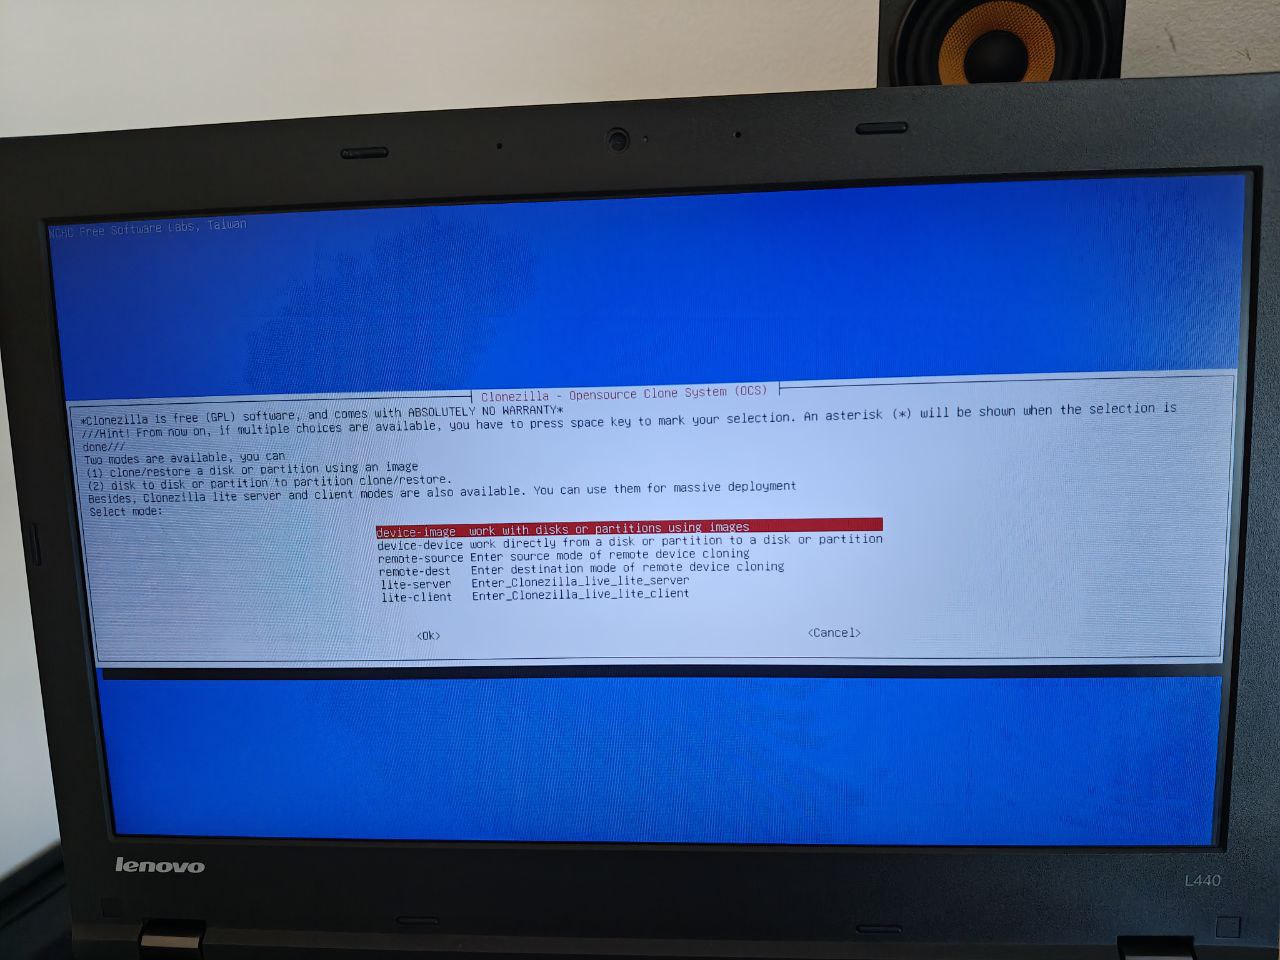
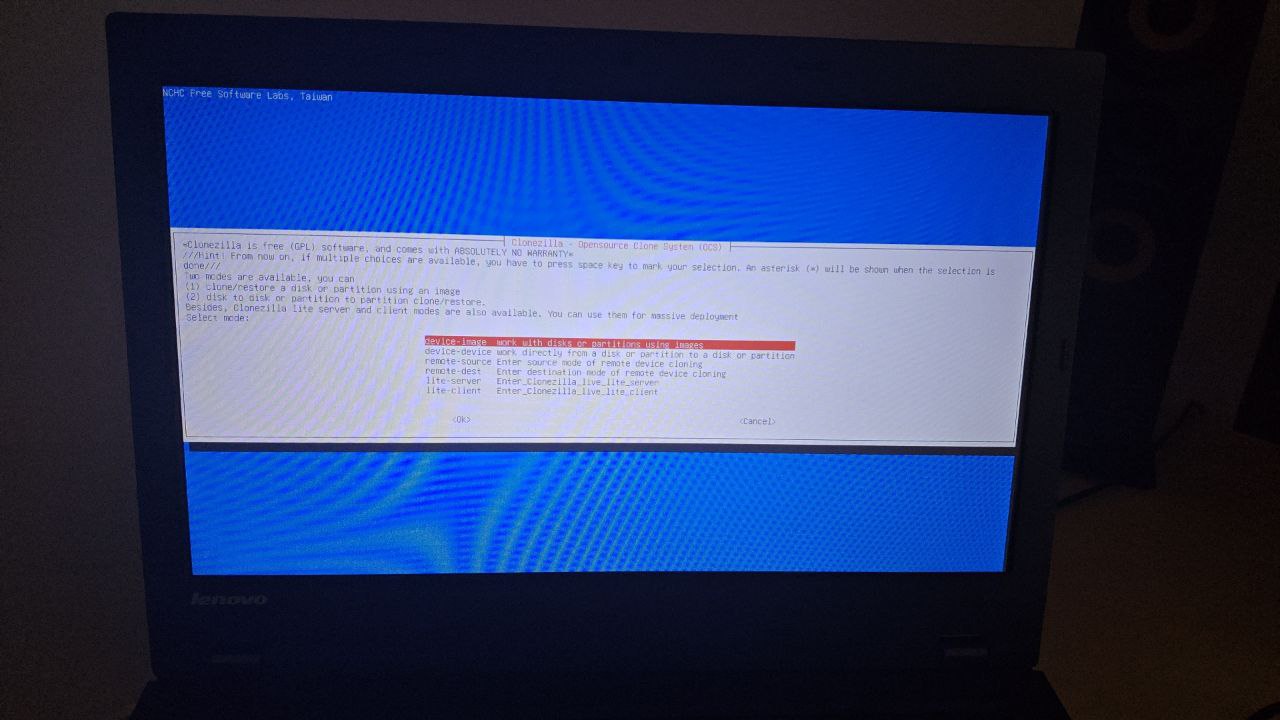
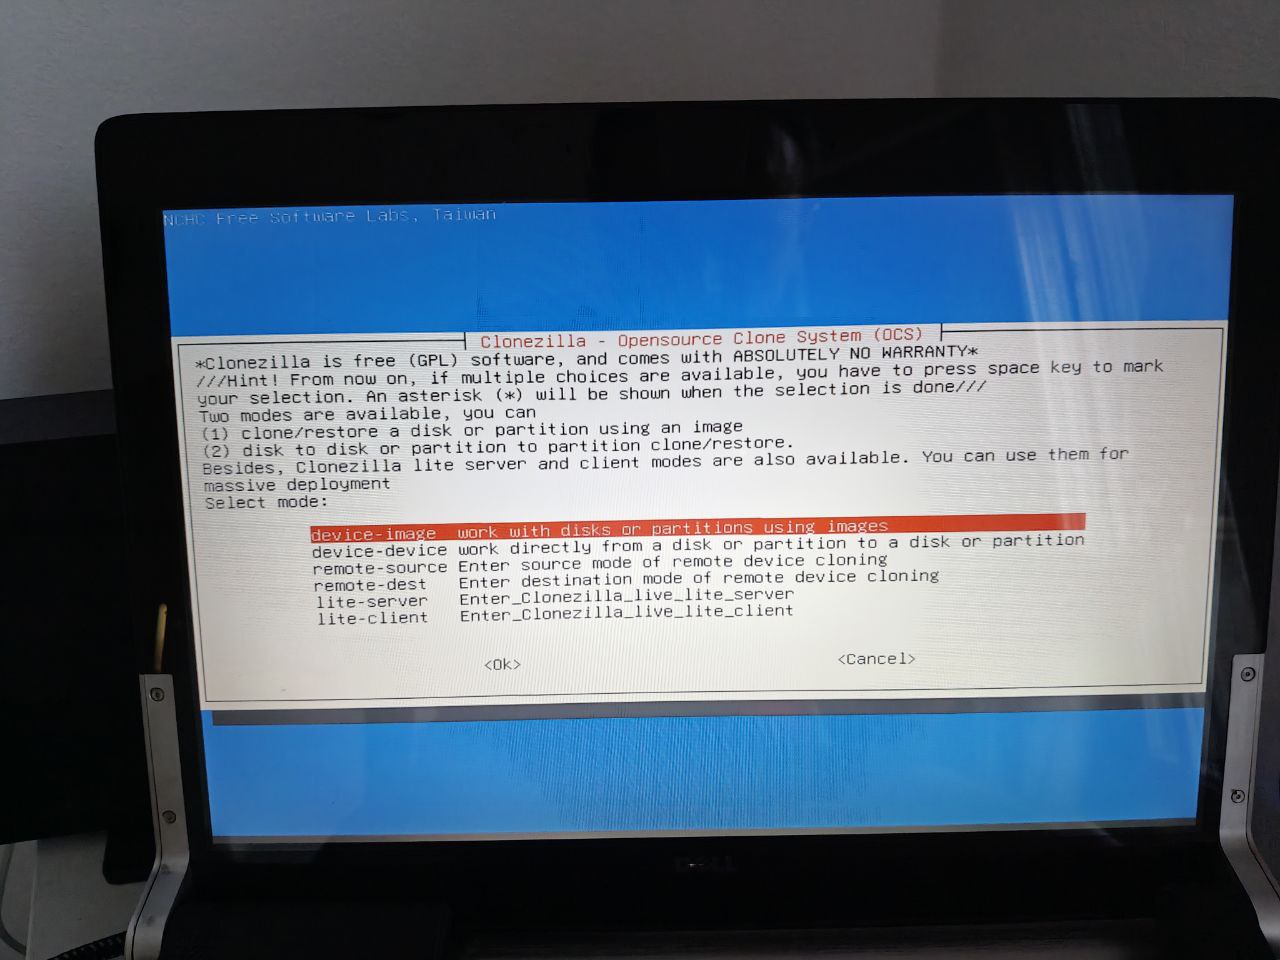
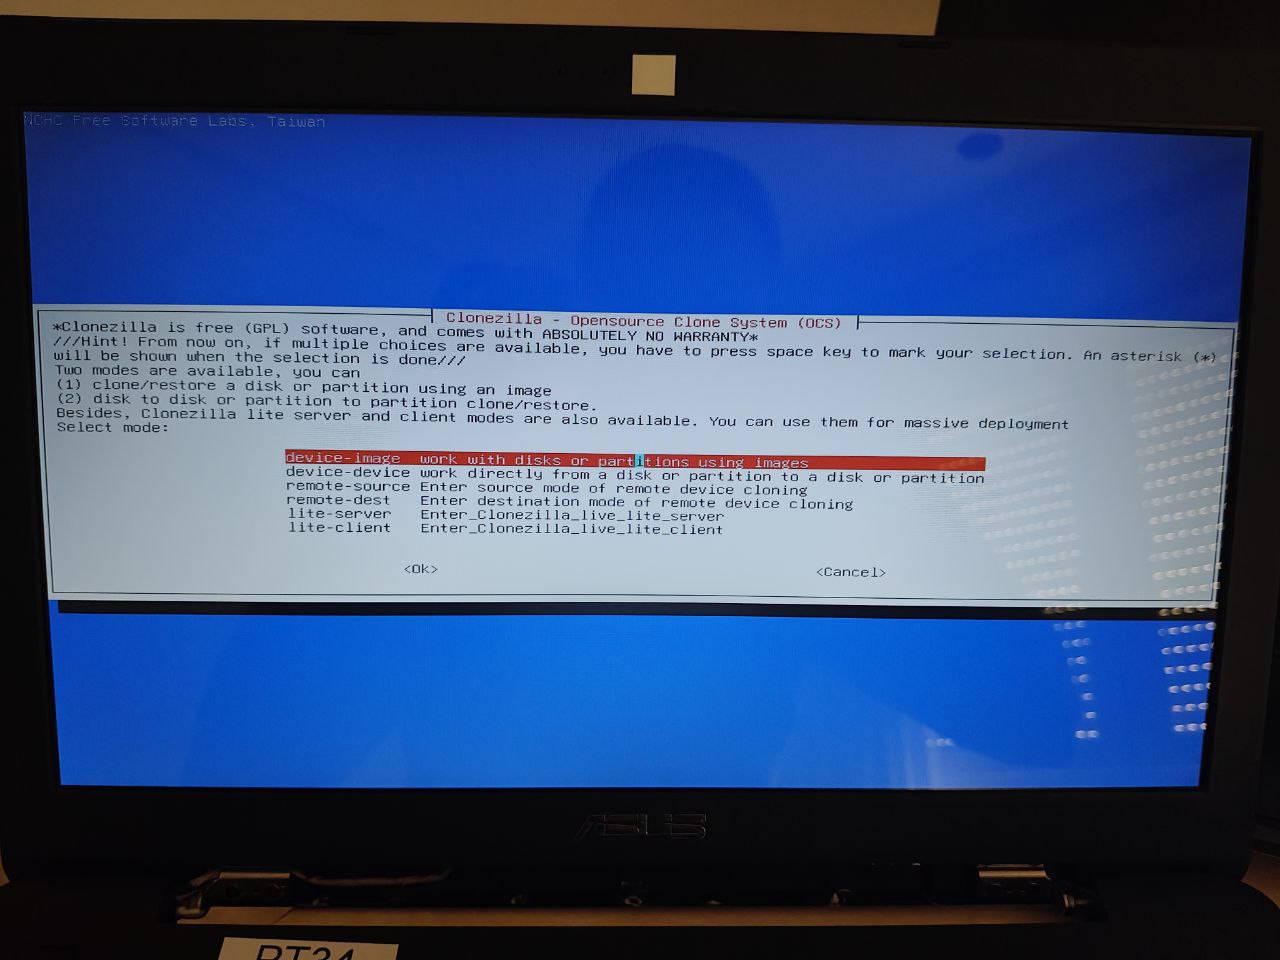
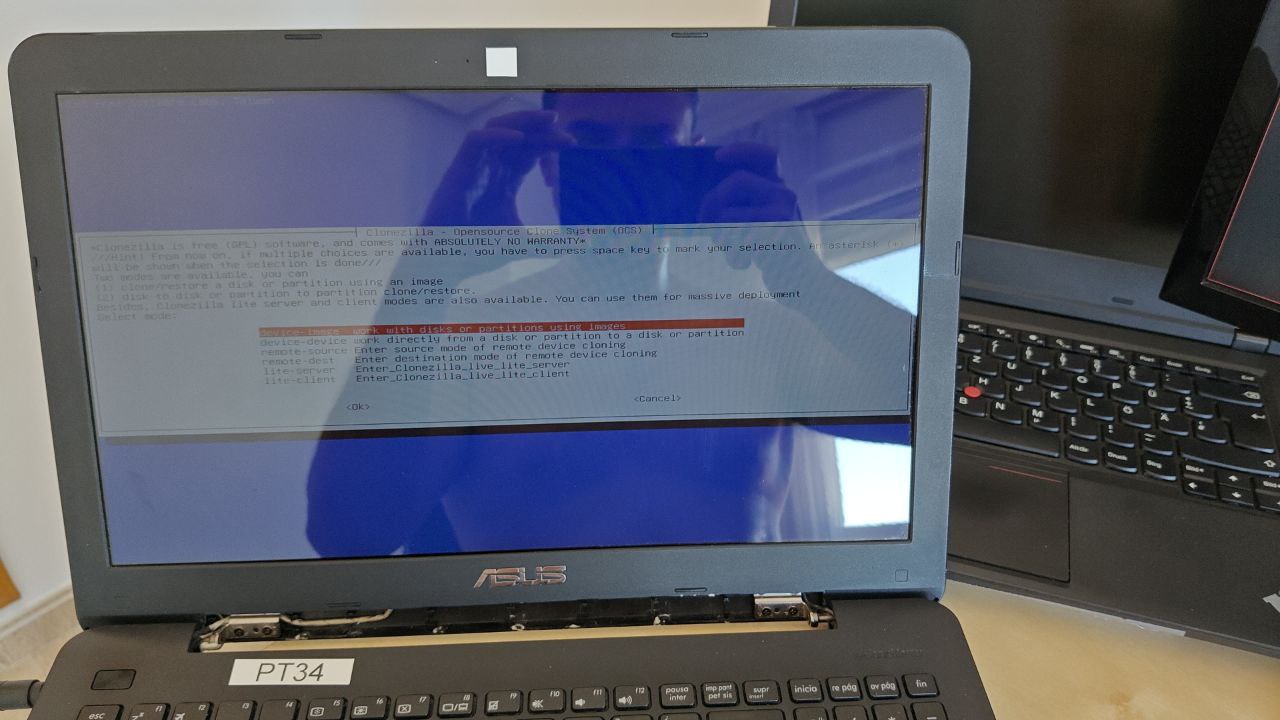
Clonezilla allows you to operate in
various ways
; in our case, we want to store the entire disk as an image, so we choose device-image:
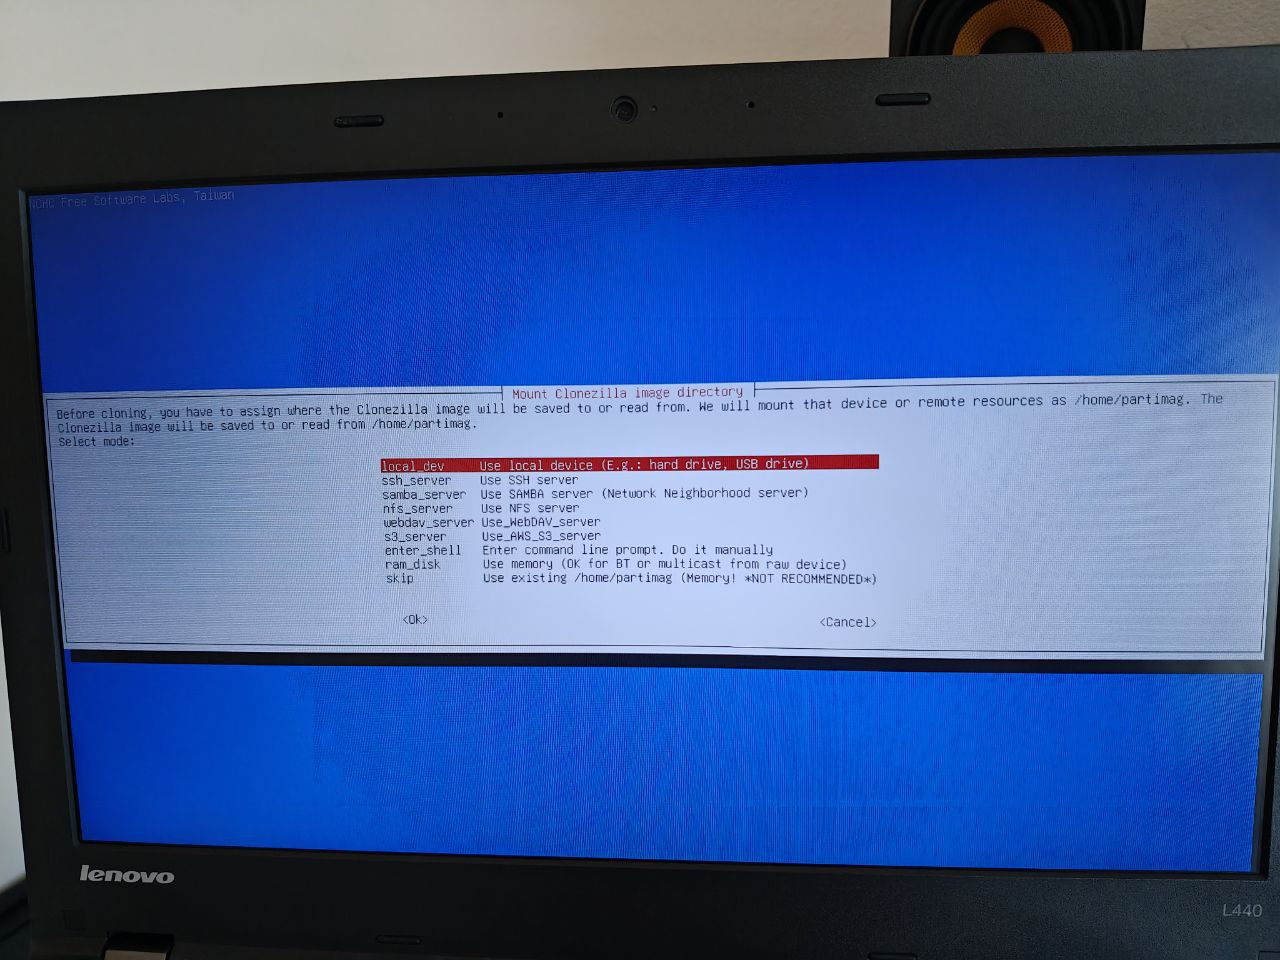
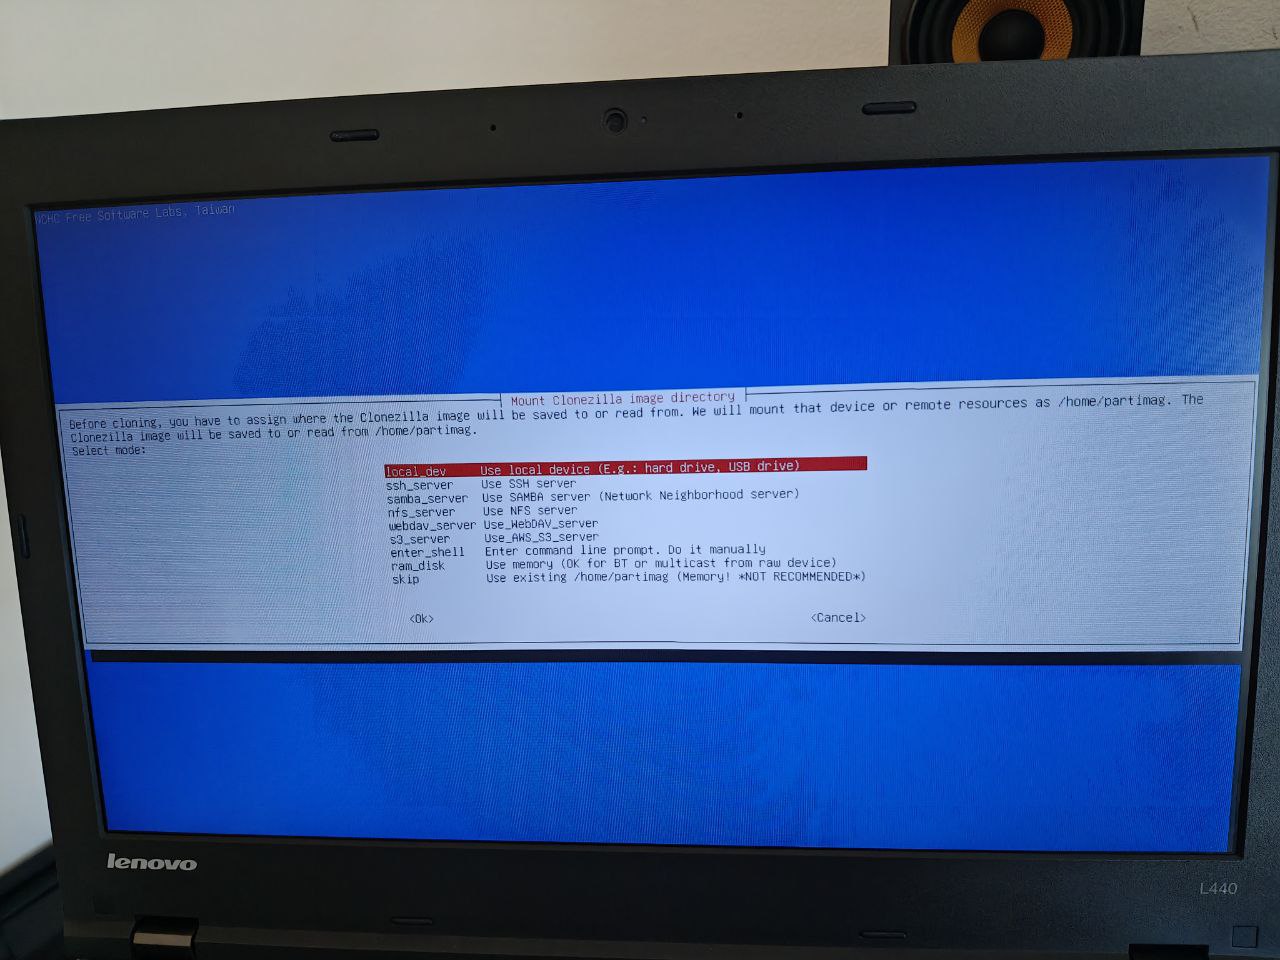
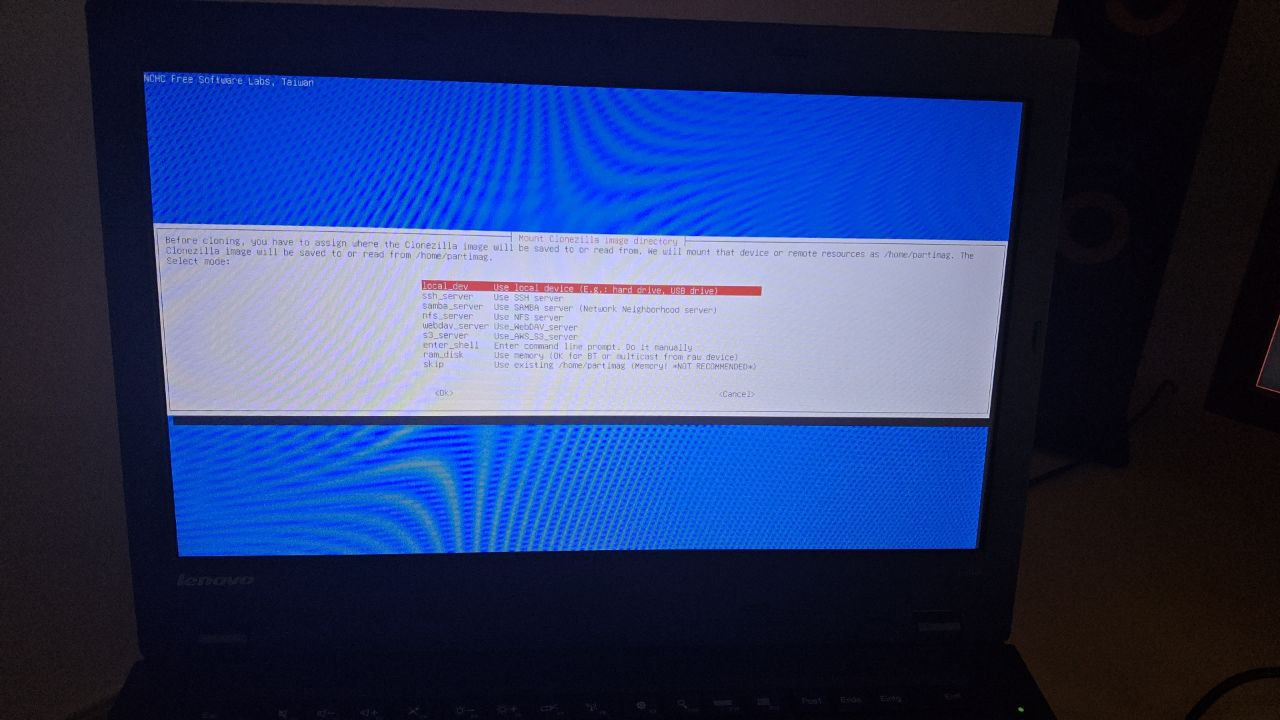
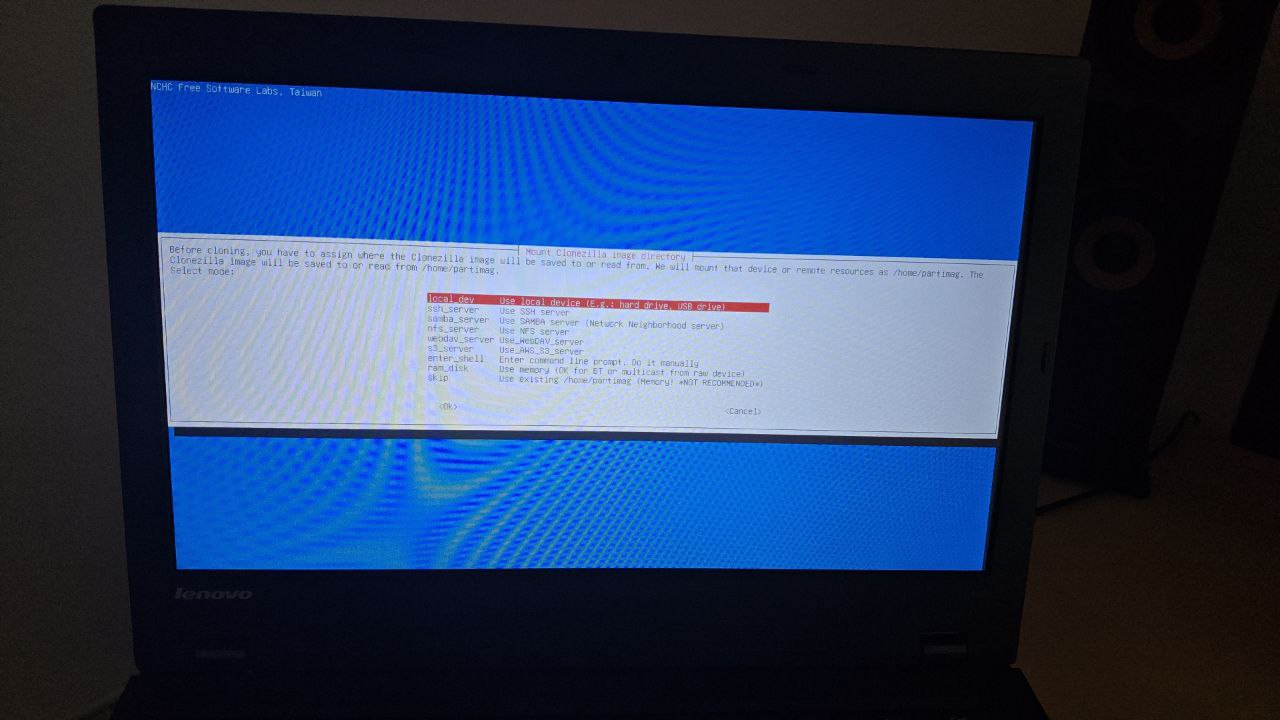
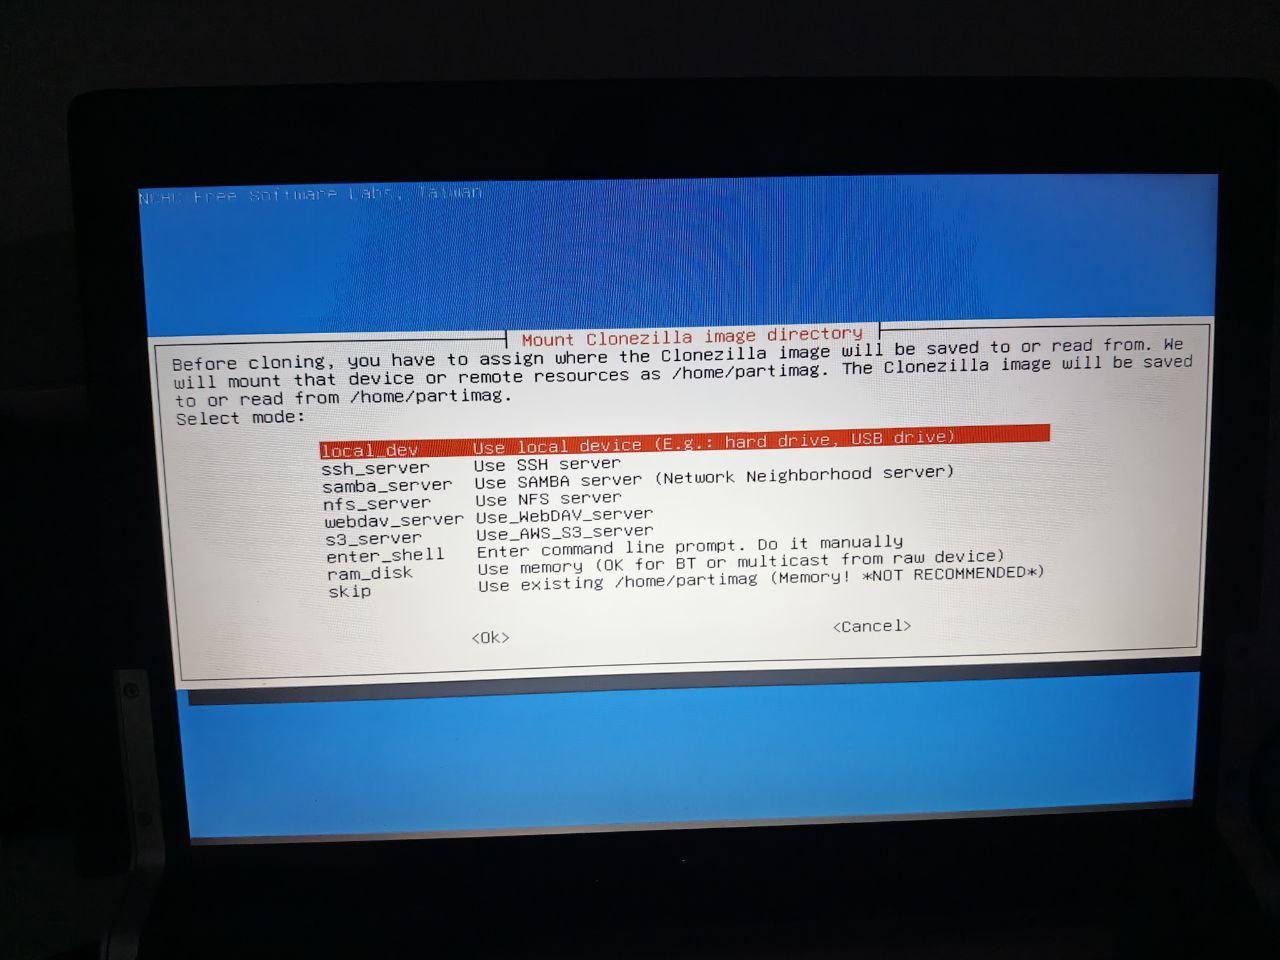
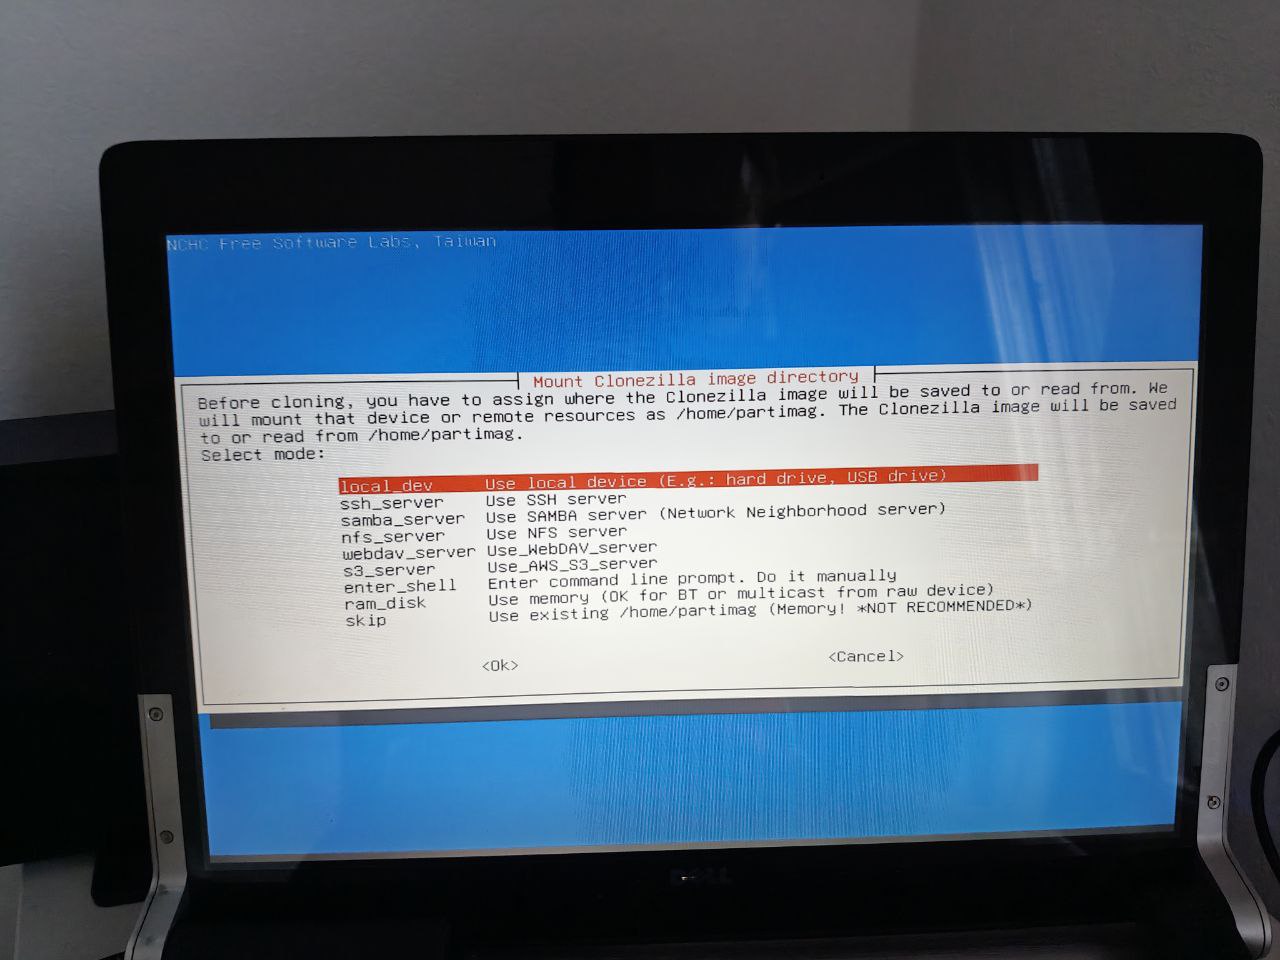
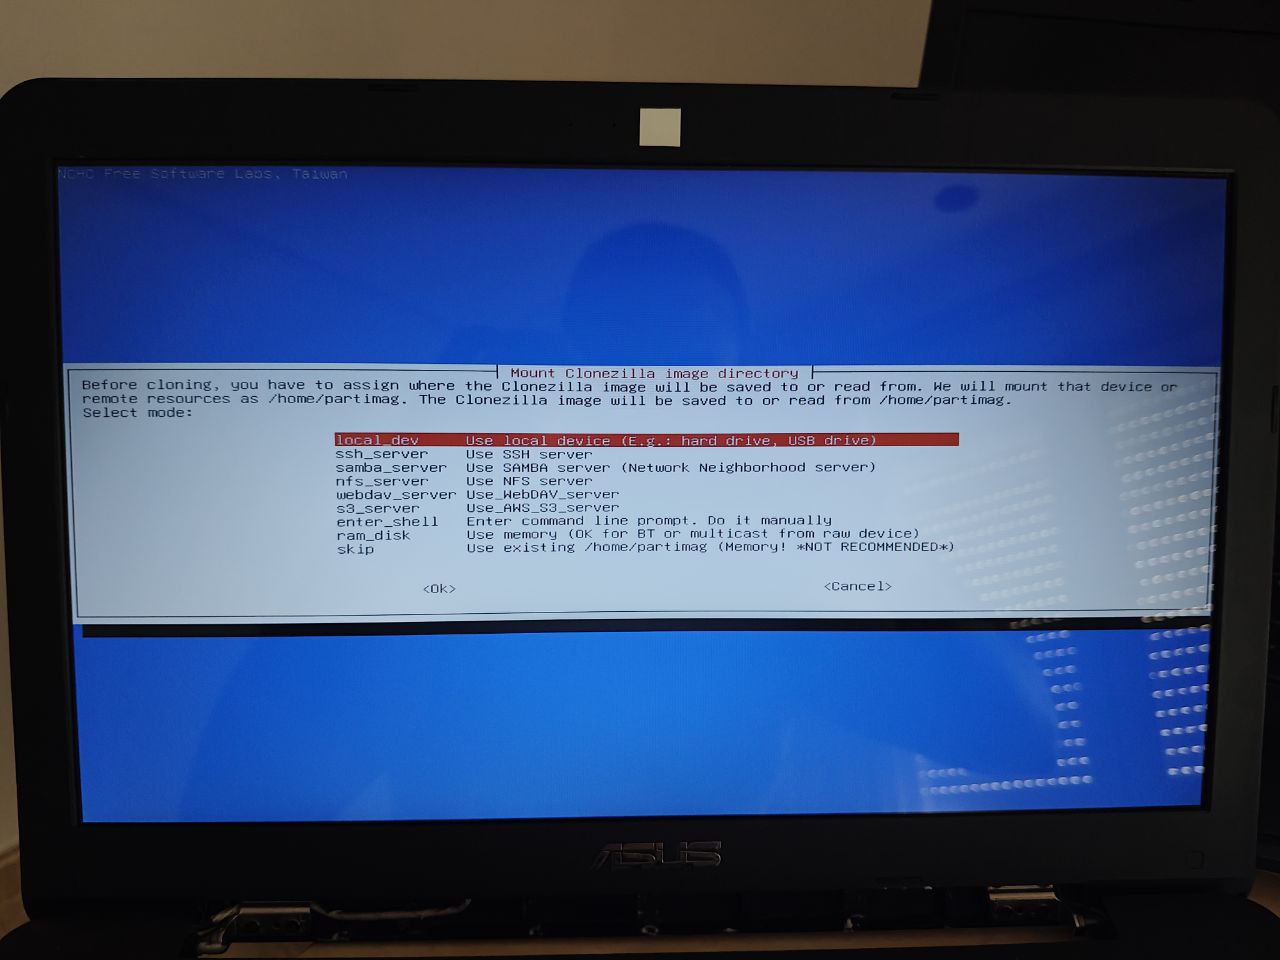
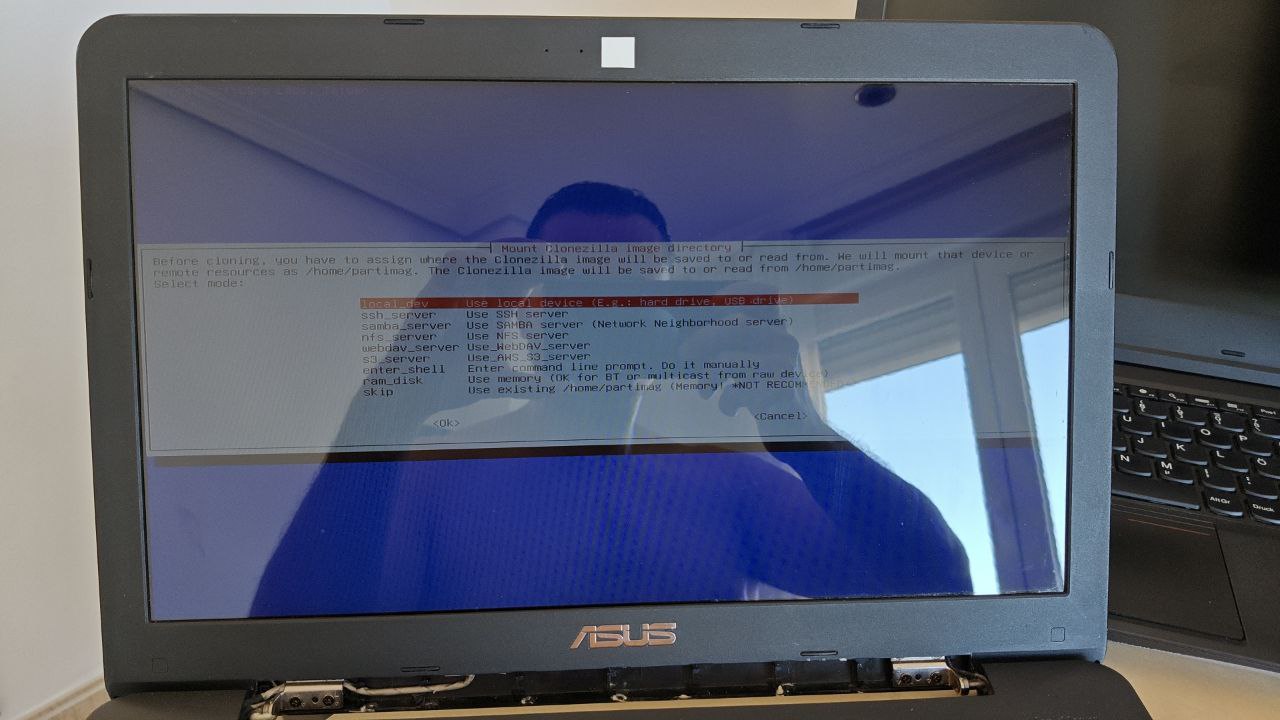
Clonezilla supports the use of
repositories
of
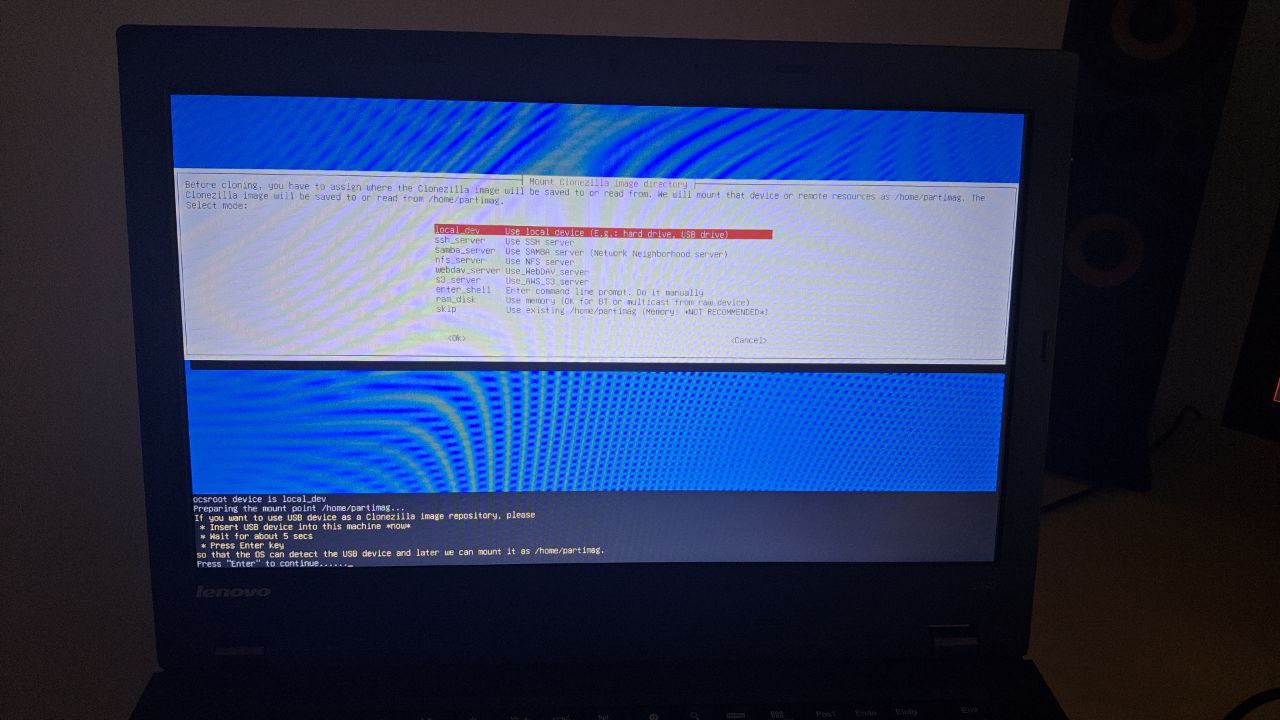
different types
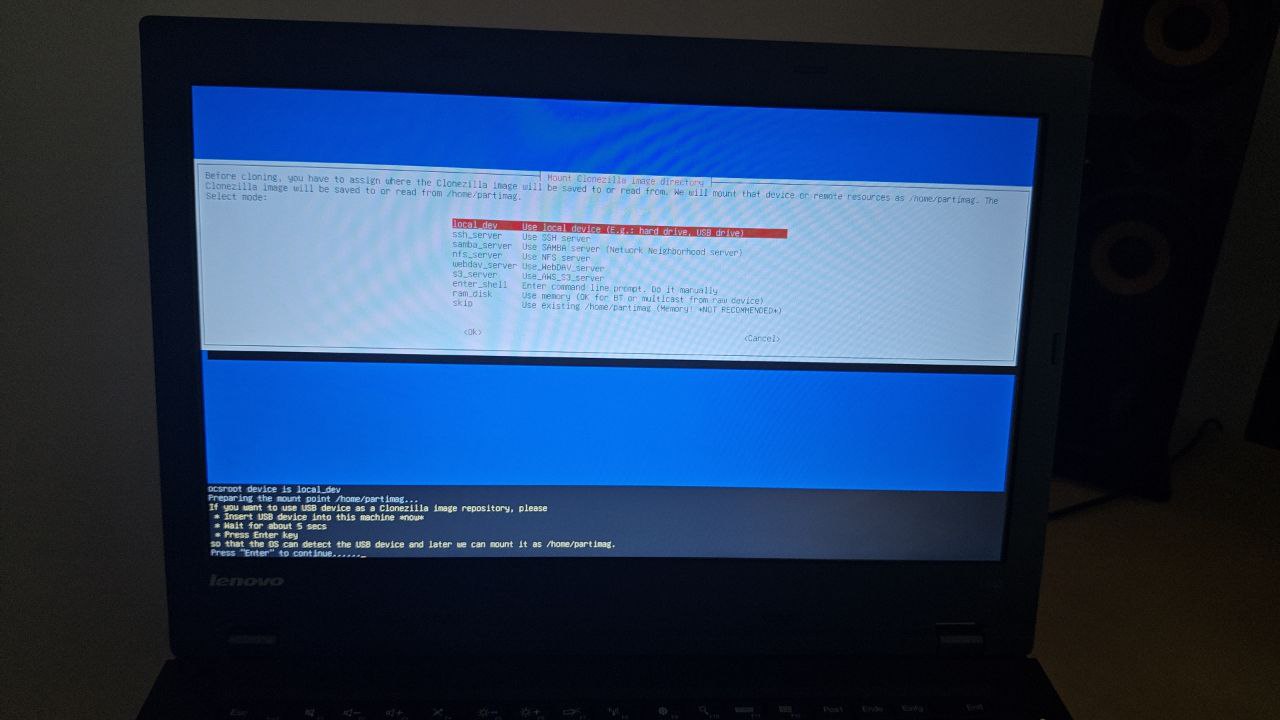
; we choose local_dev since our
repository
is local:
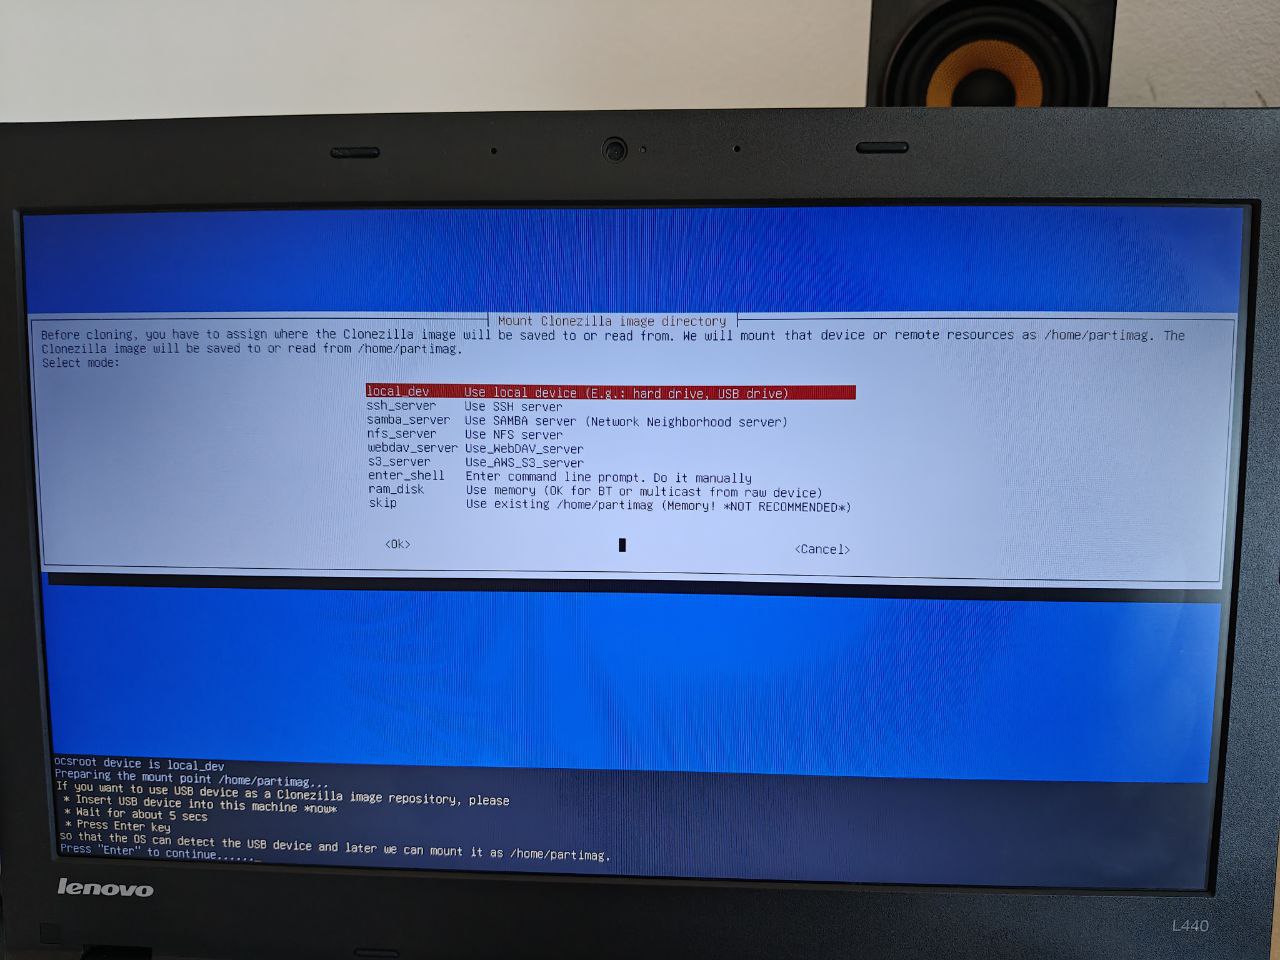
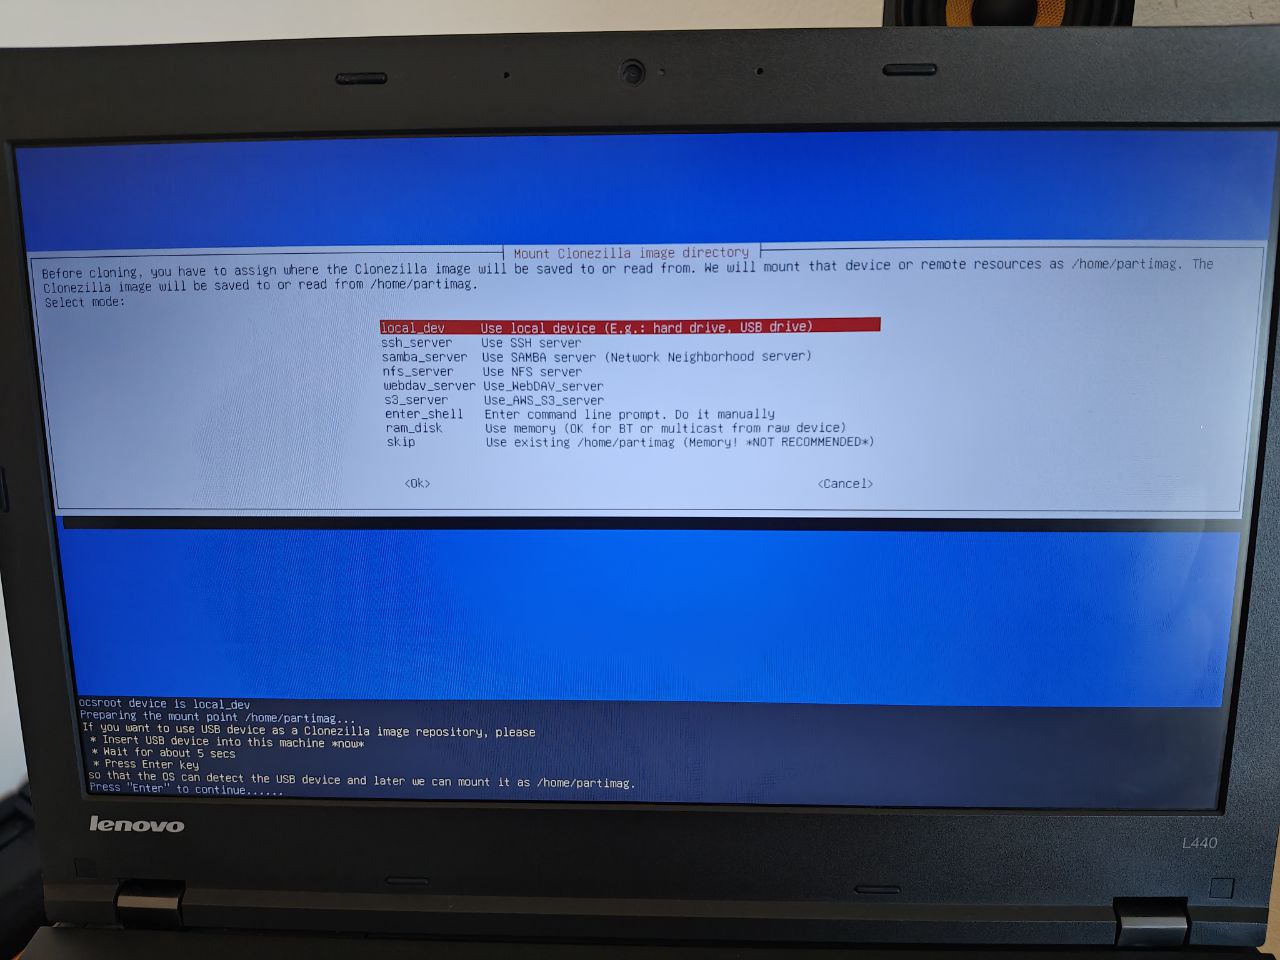
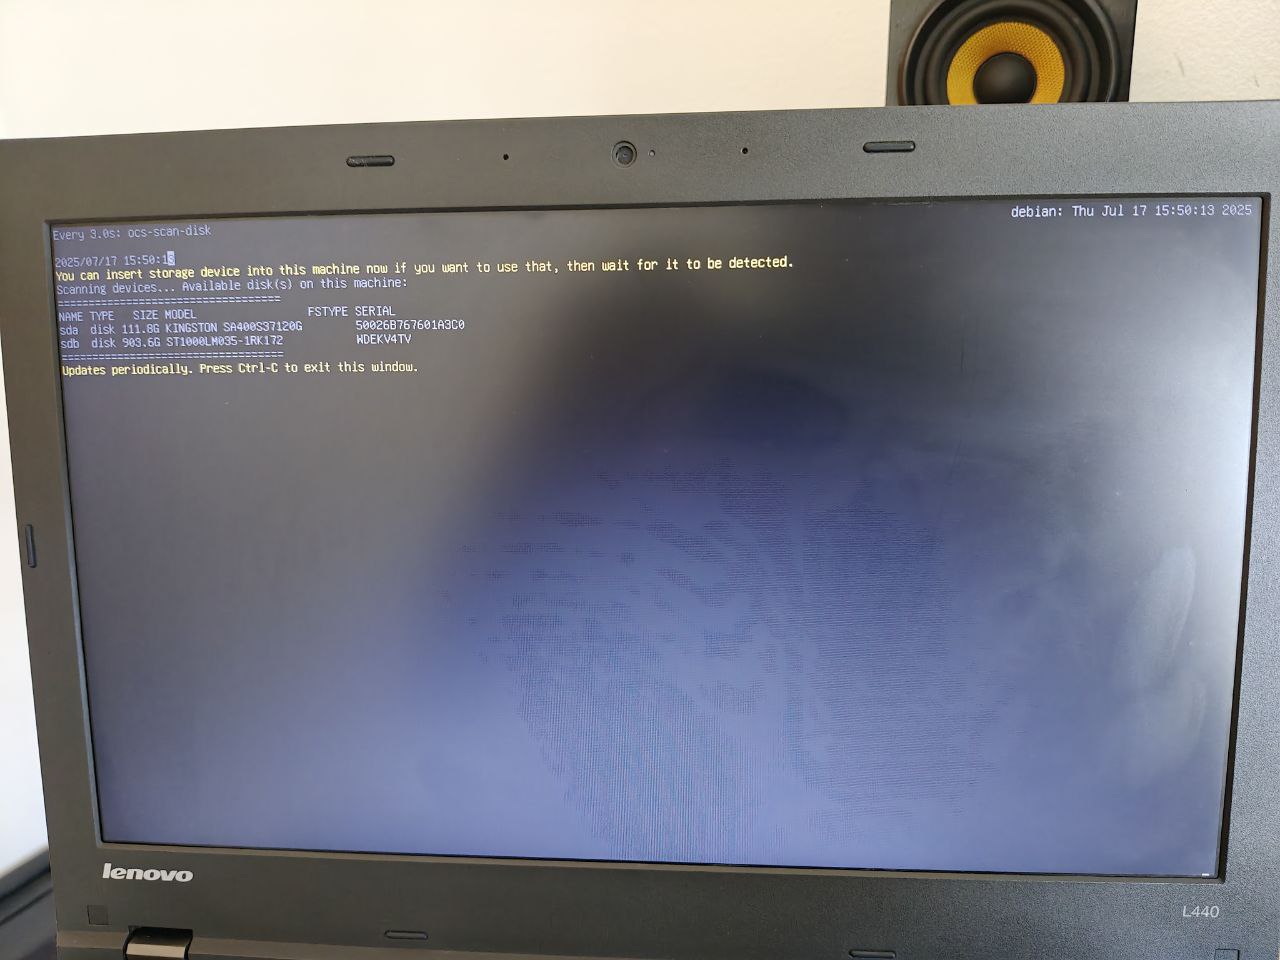
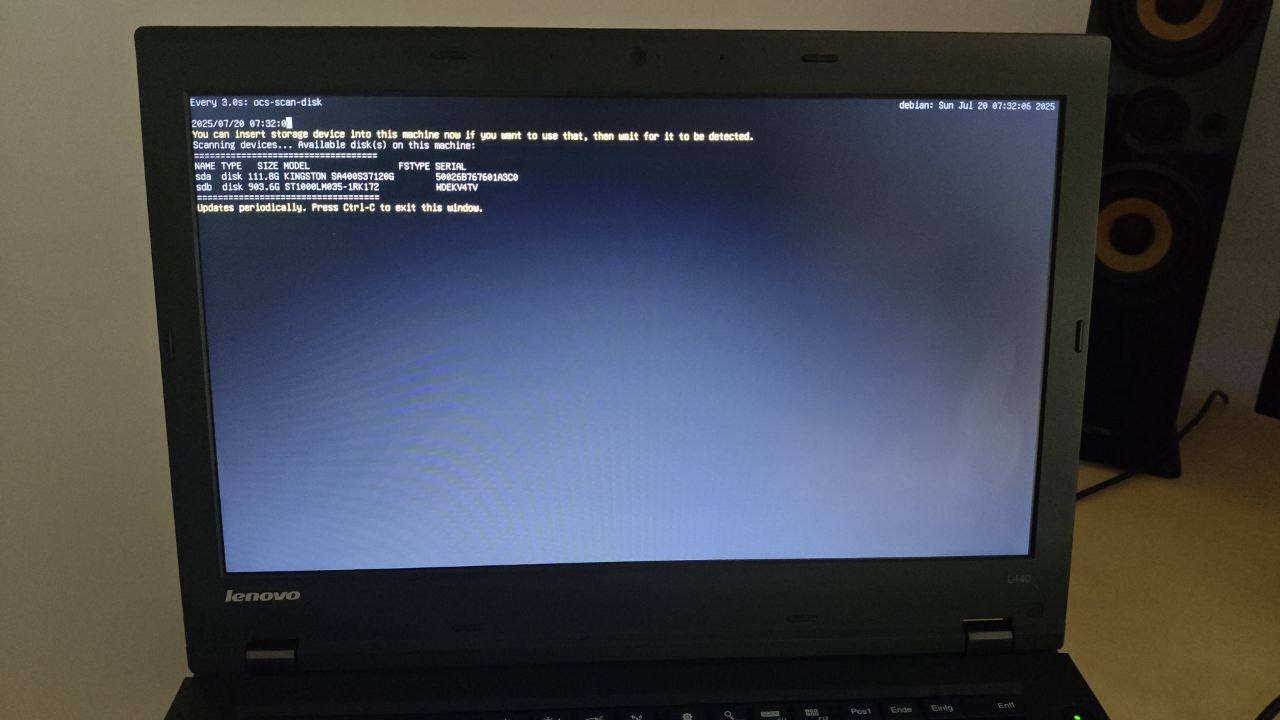
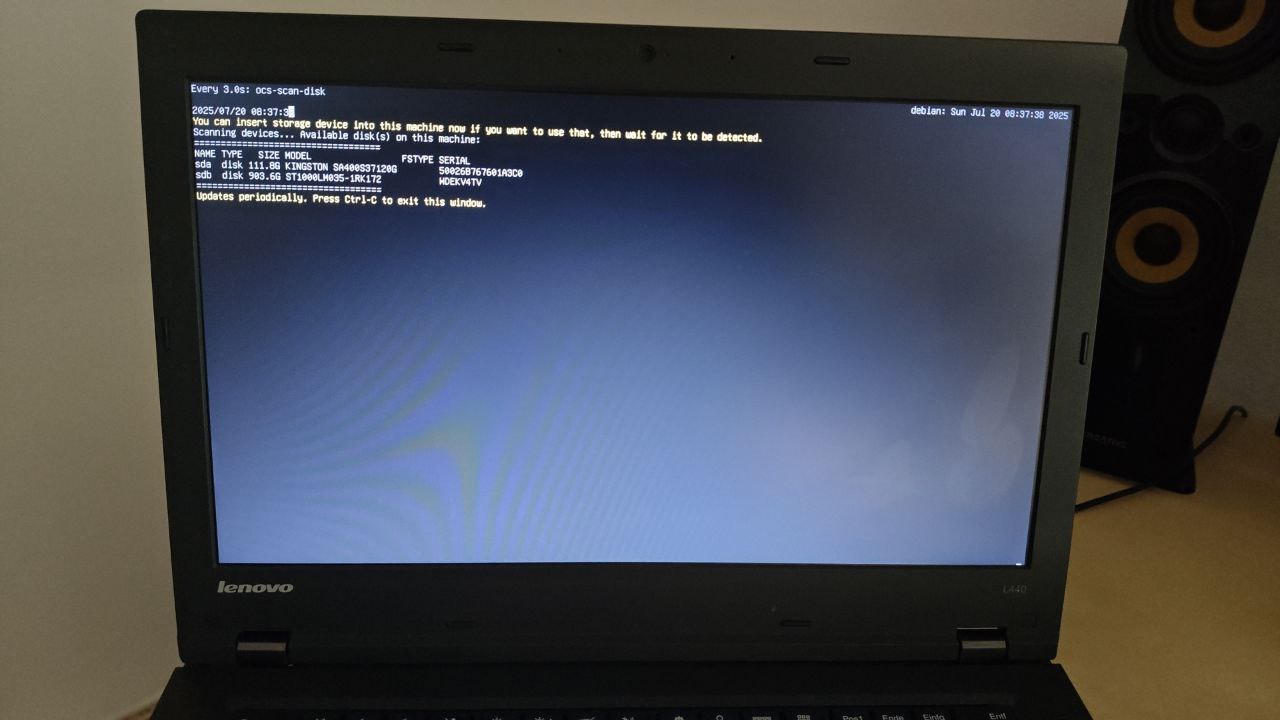
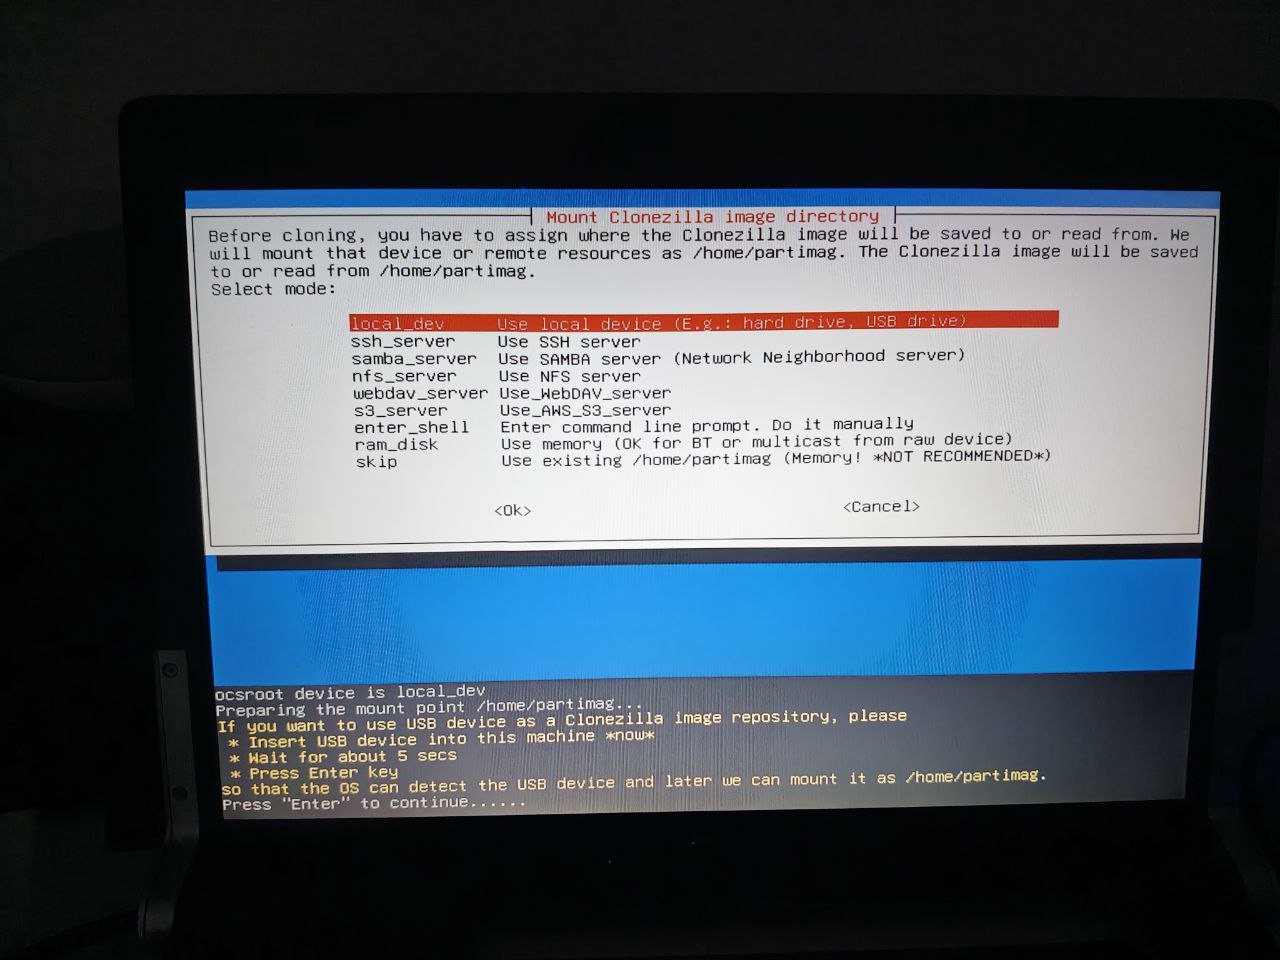
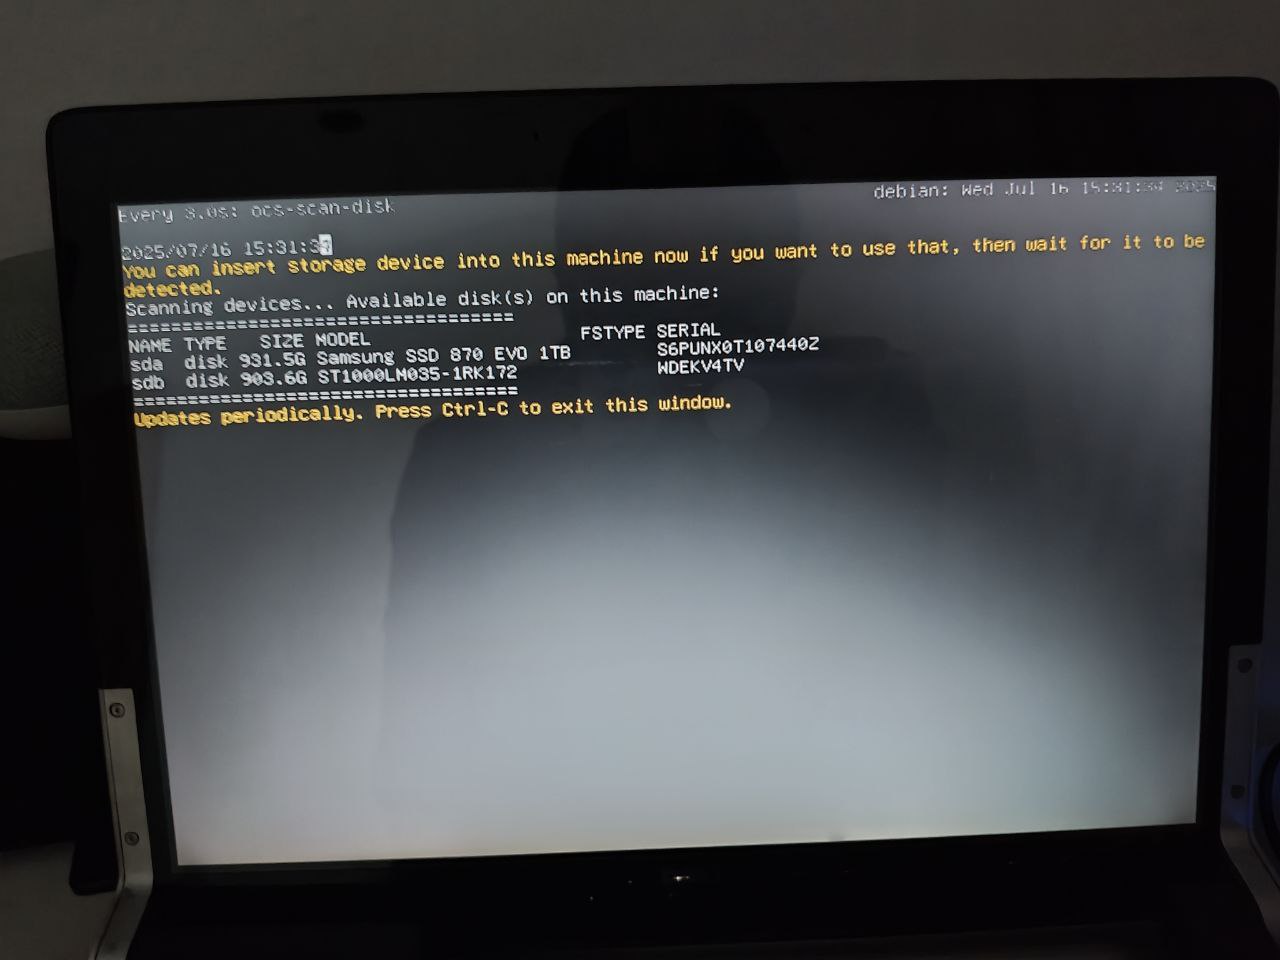
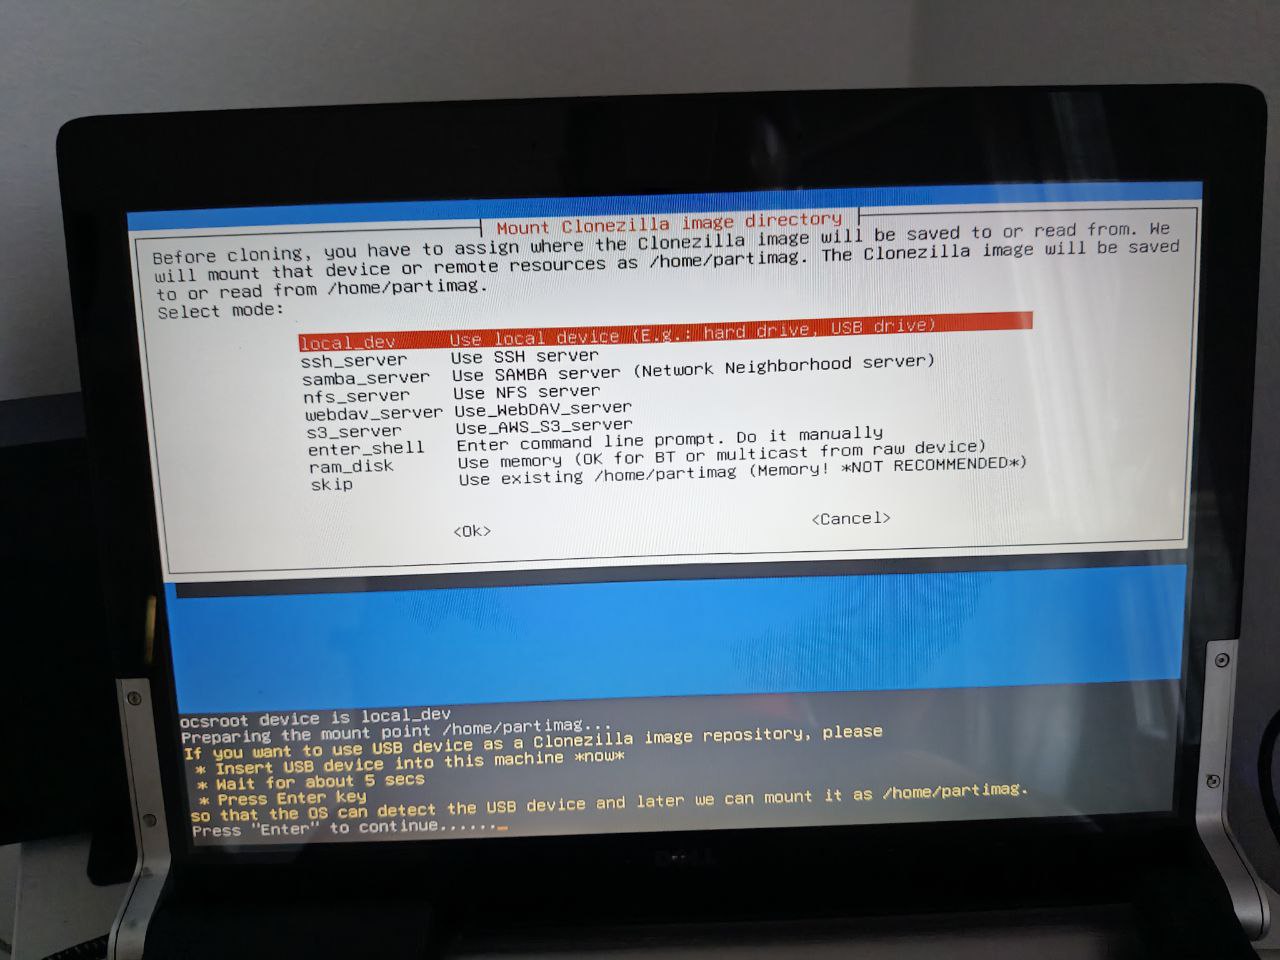
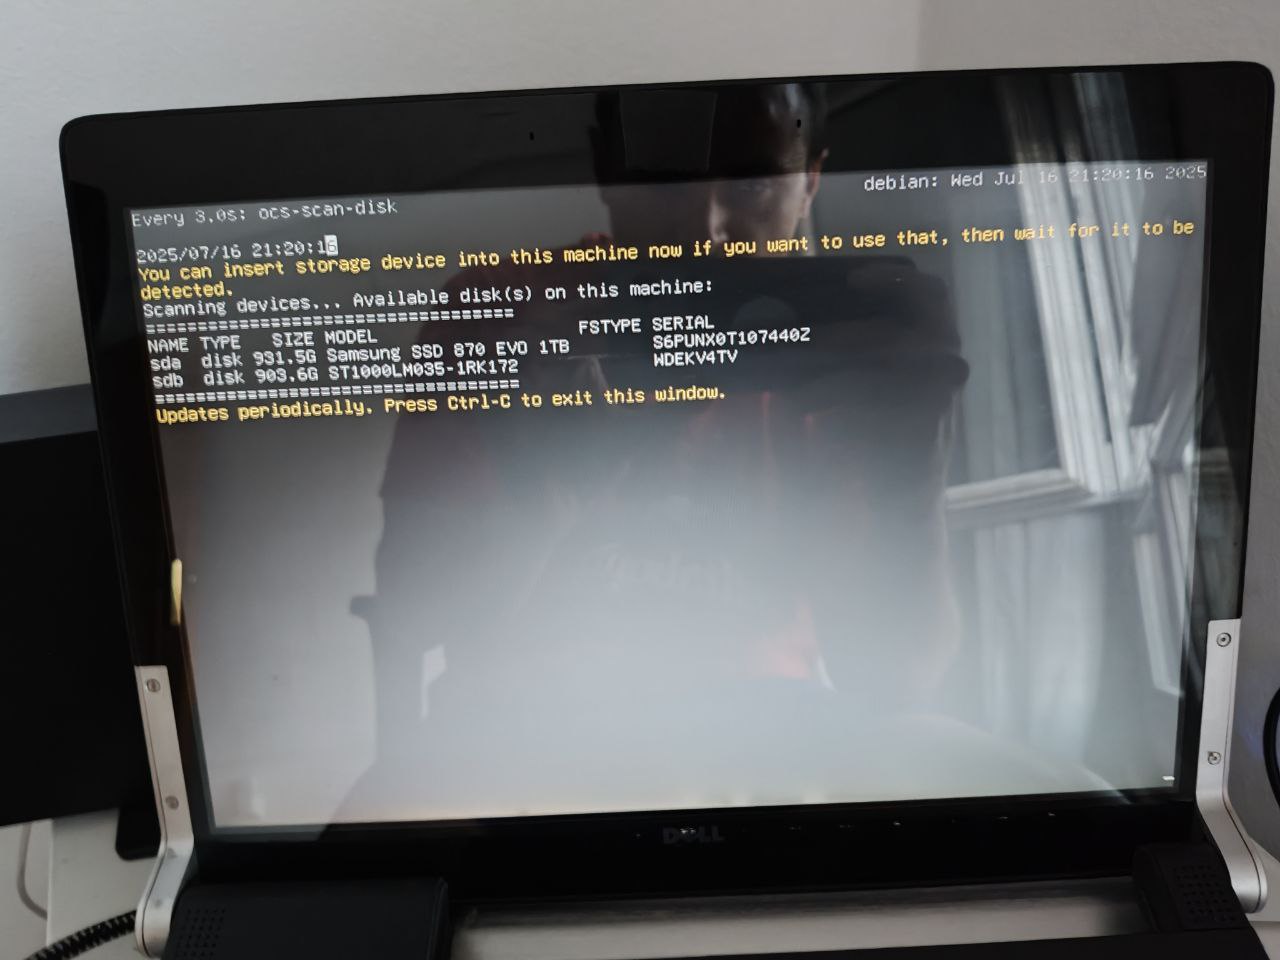
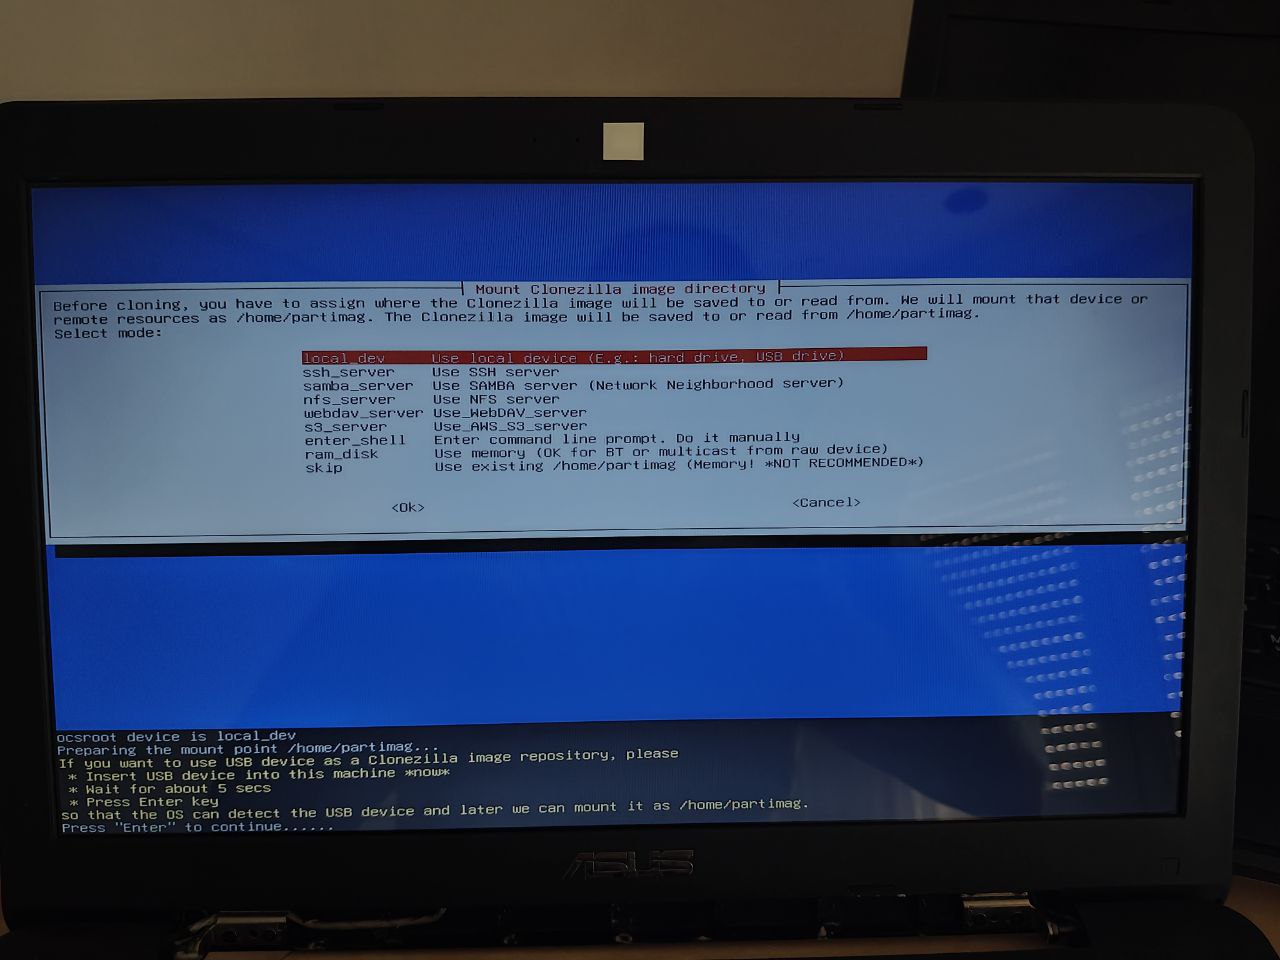
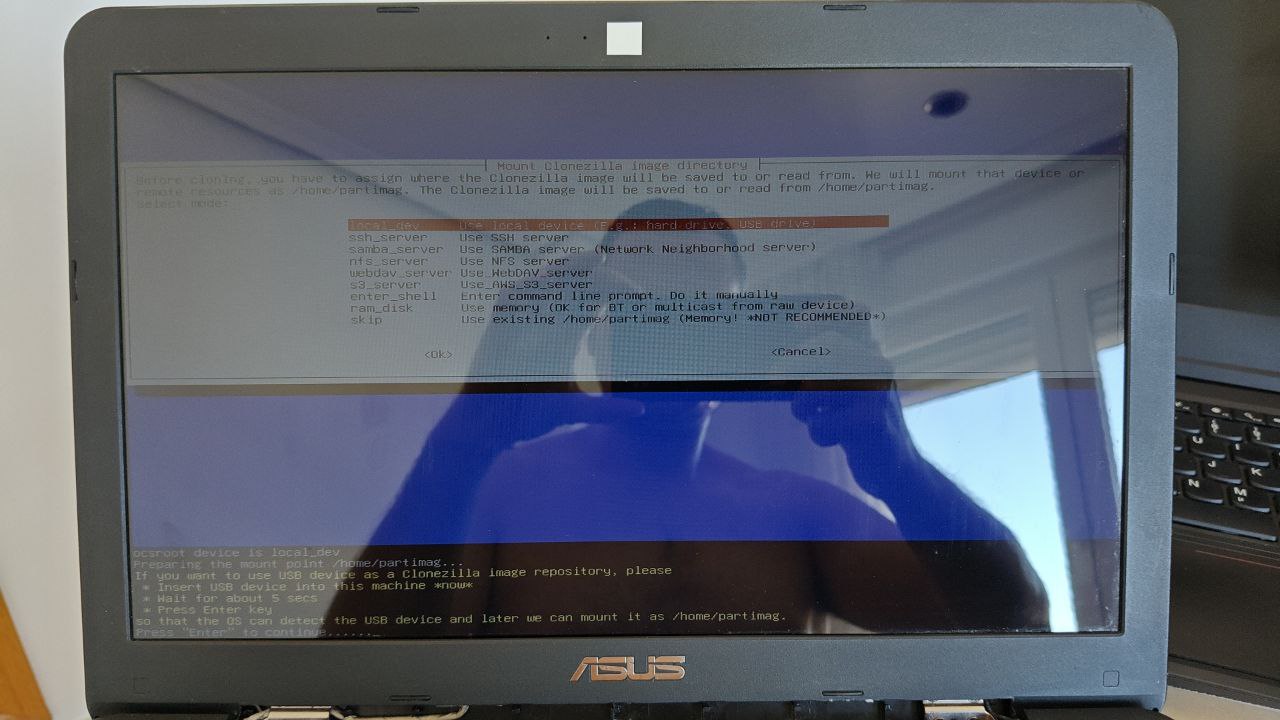
We’re informed that if we want to use a disk not yet connected, now is the time:
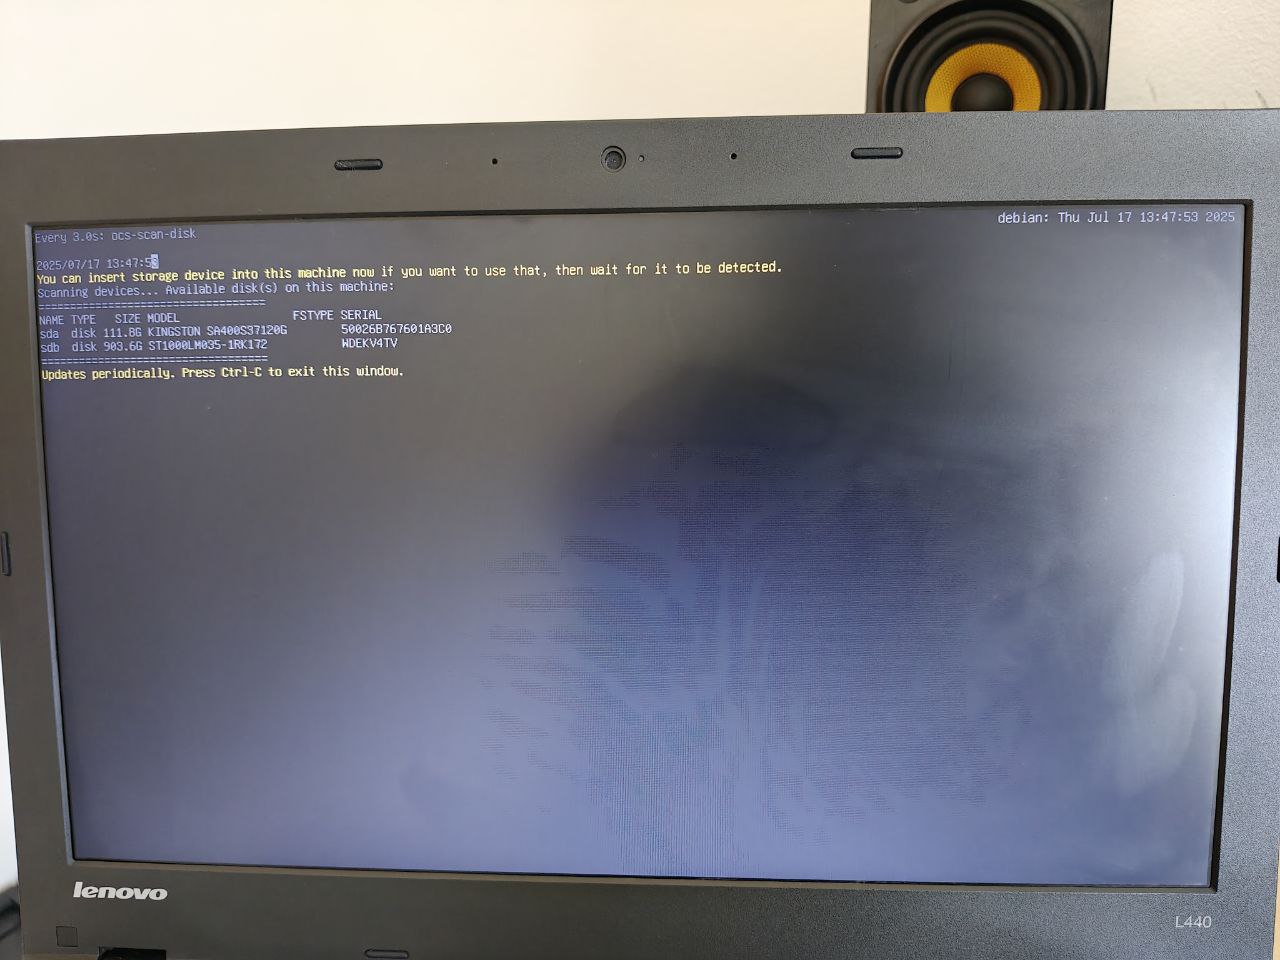
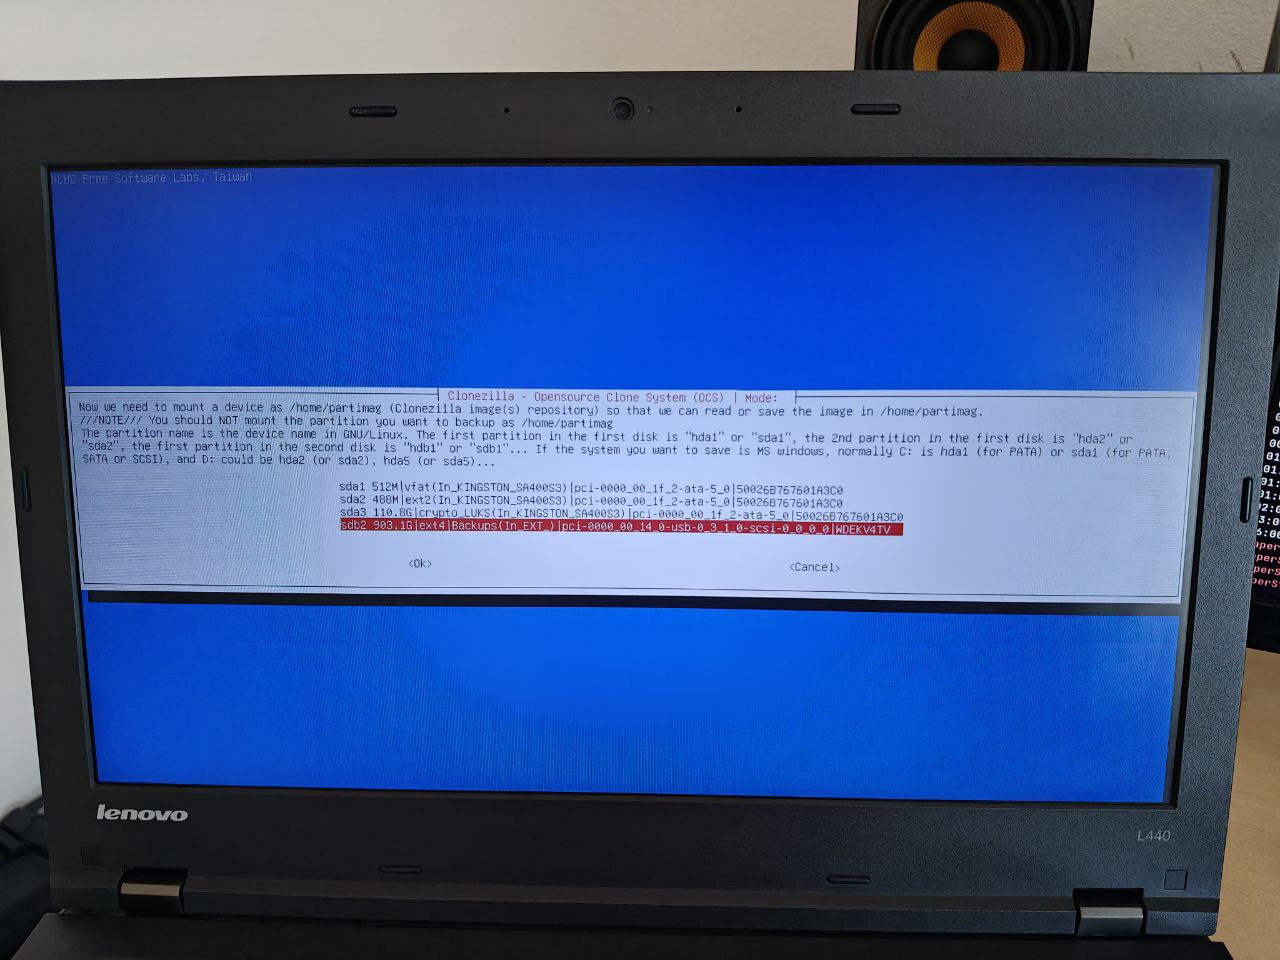
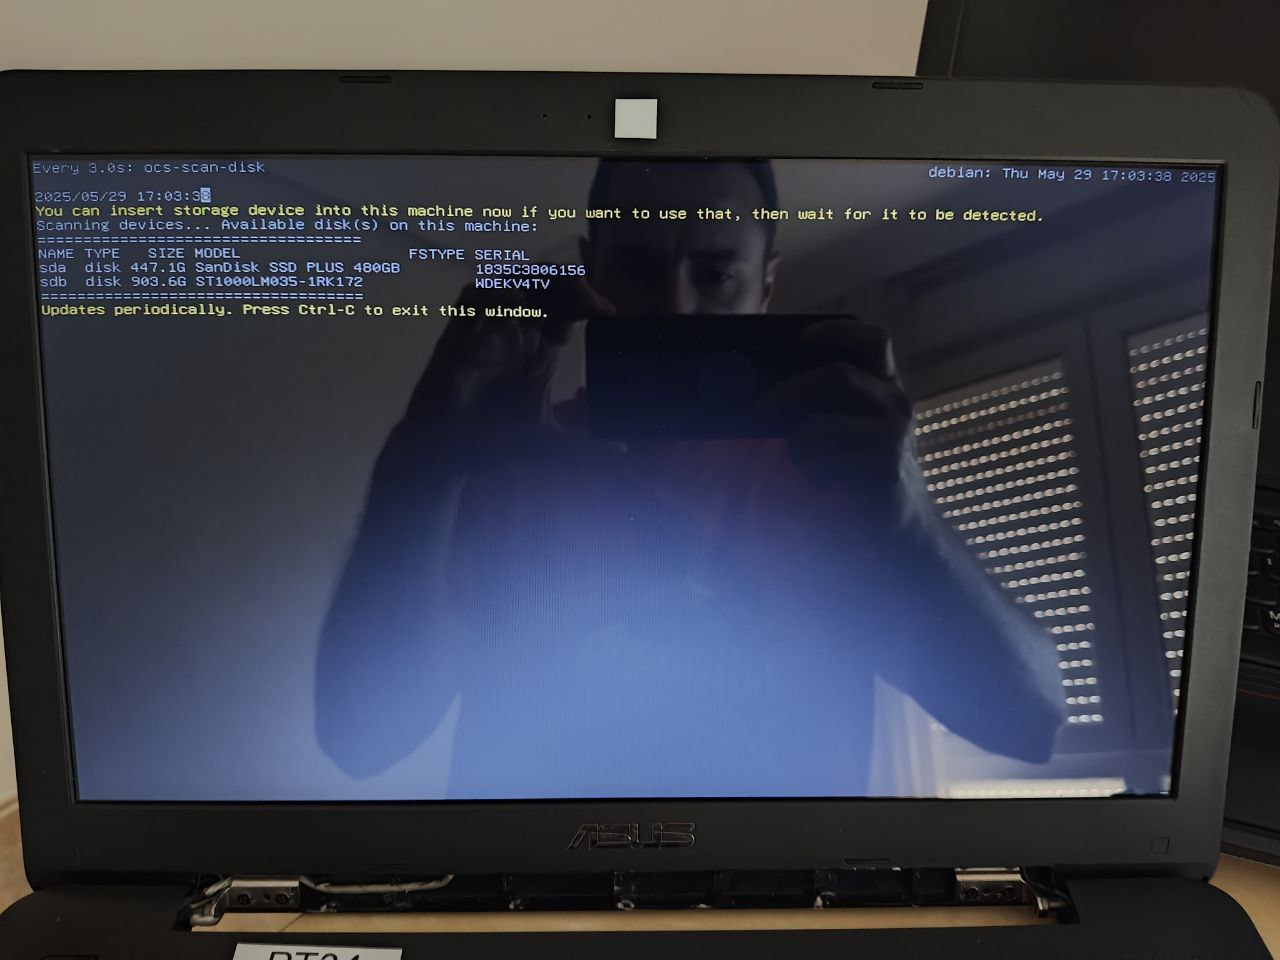
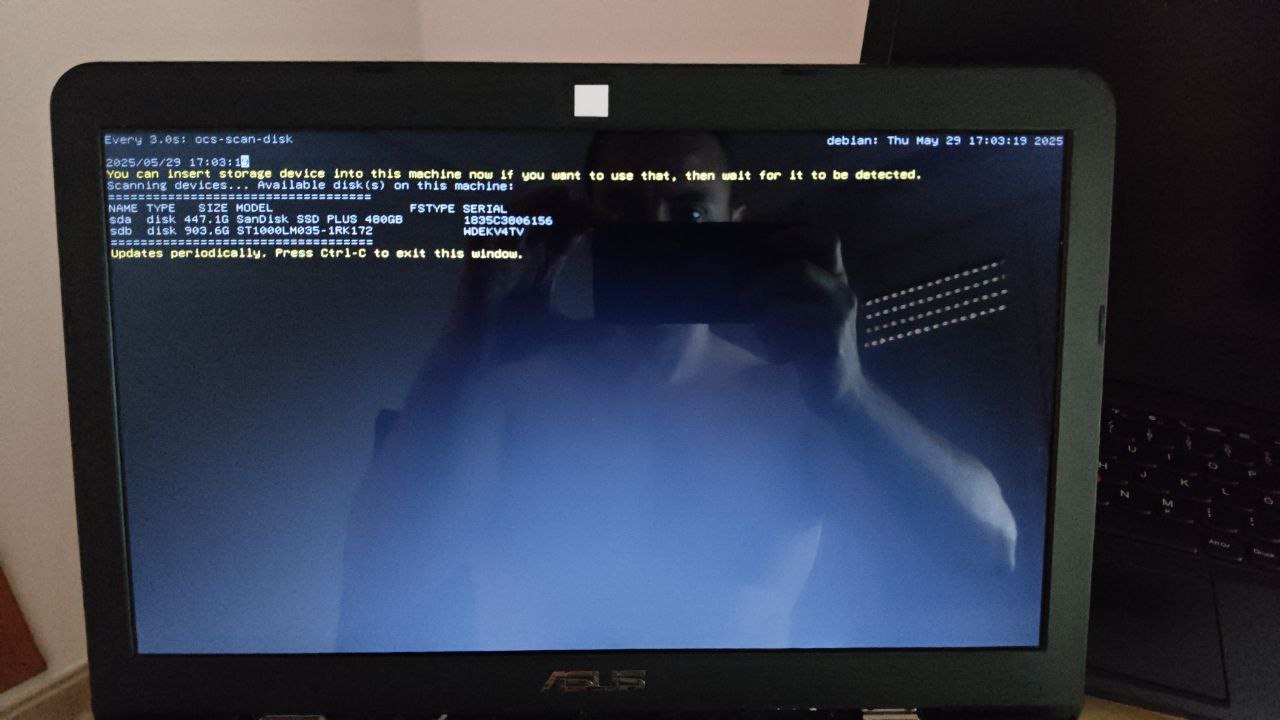
It shows the system disks in real time:
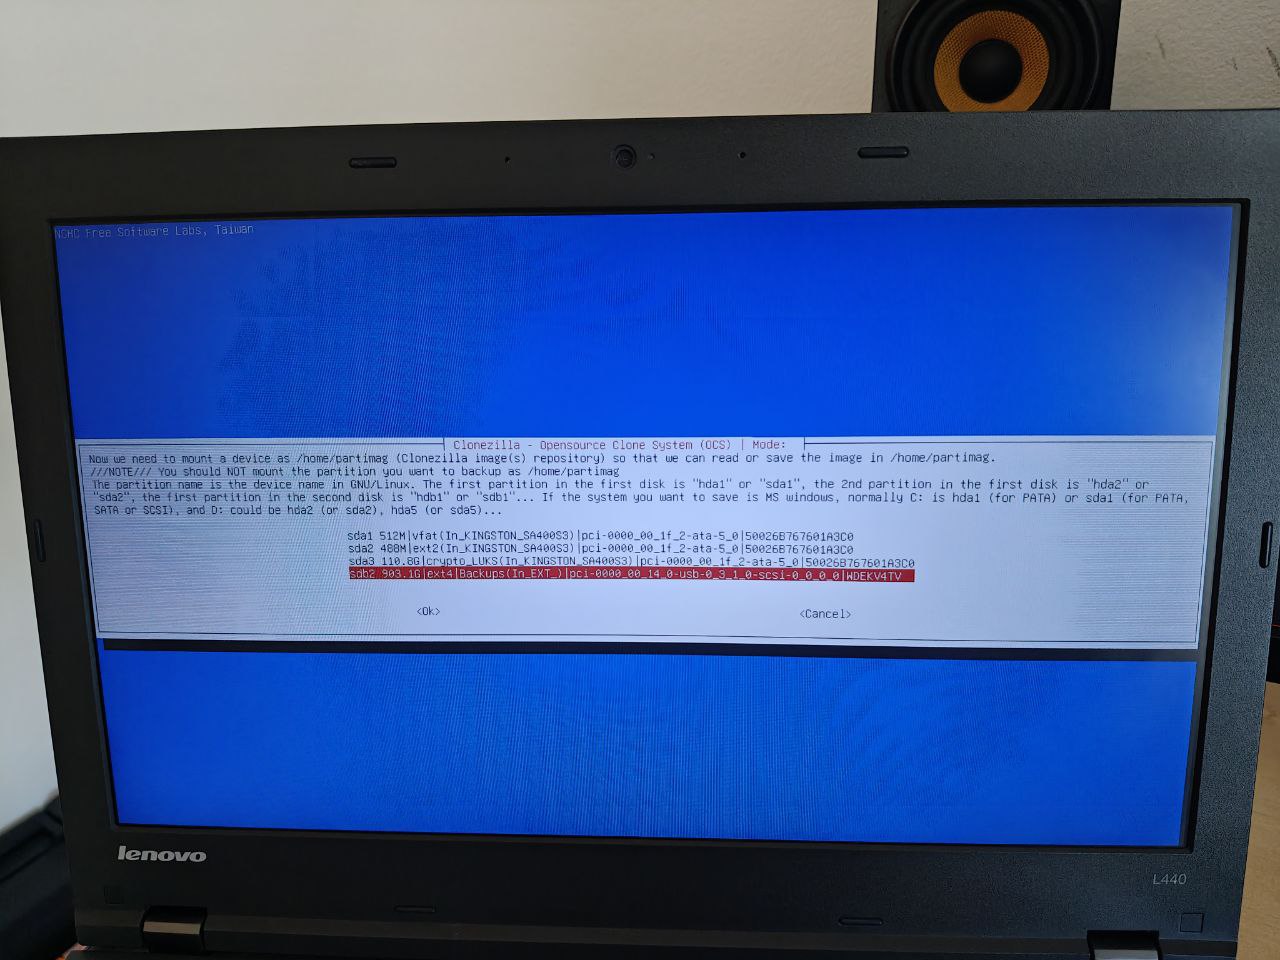
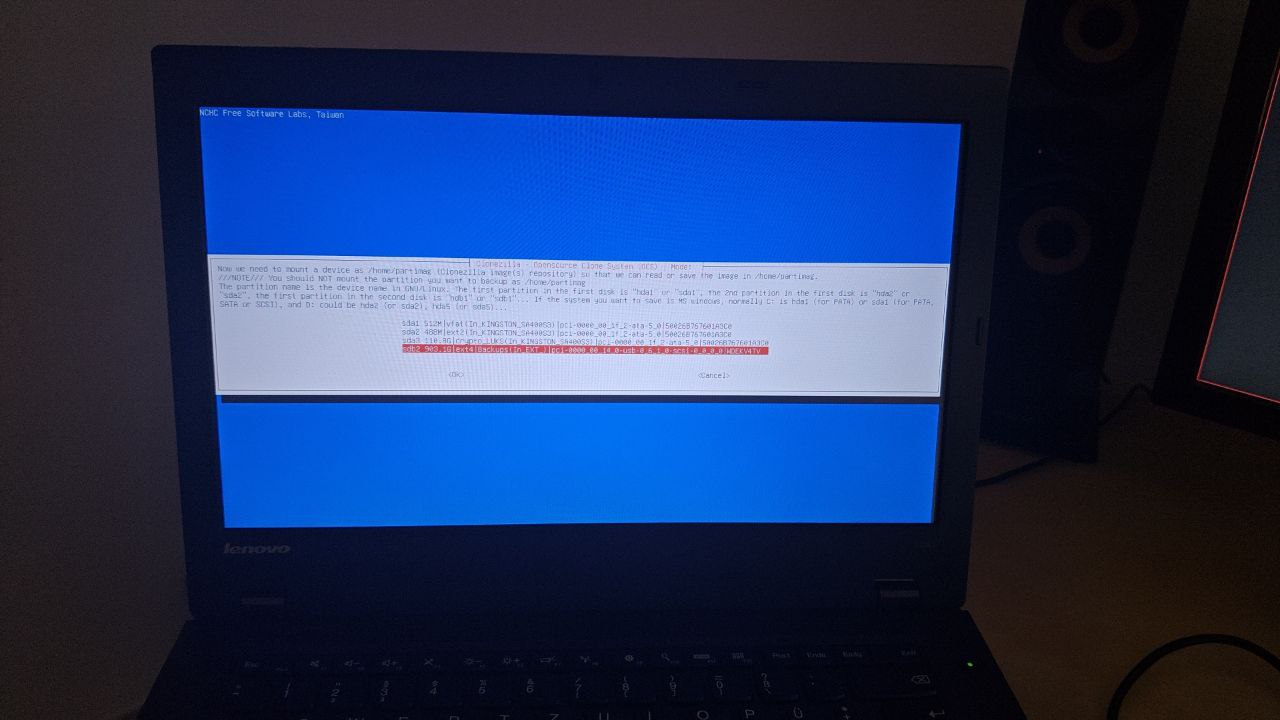
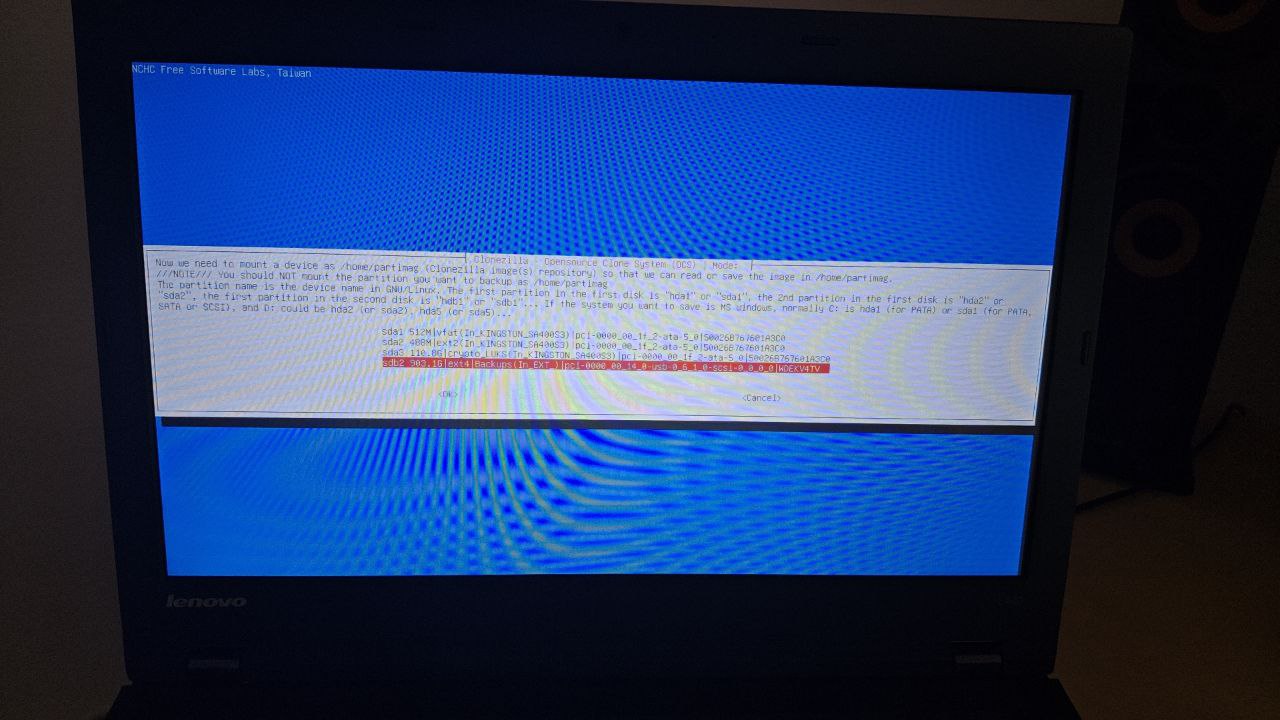
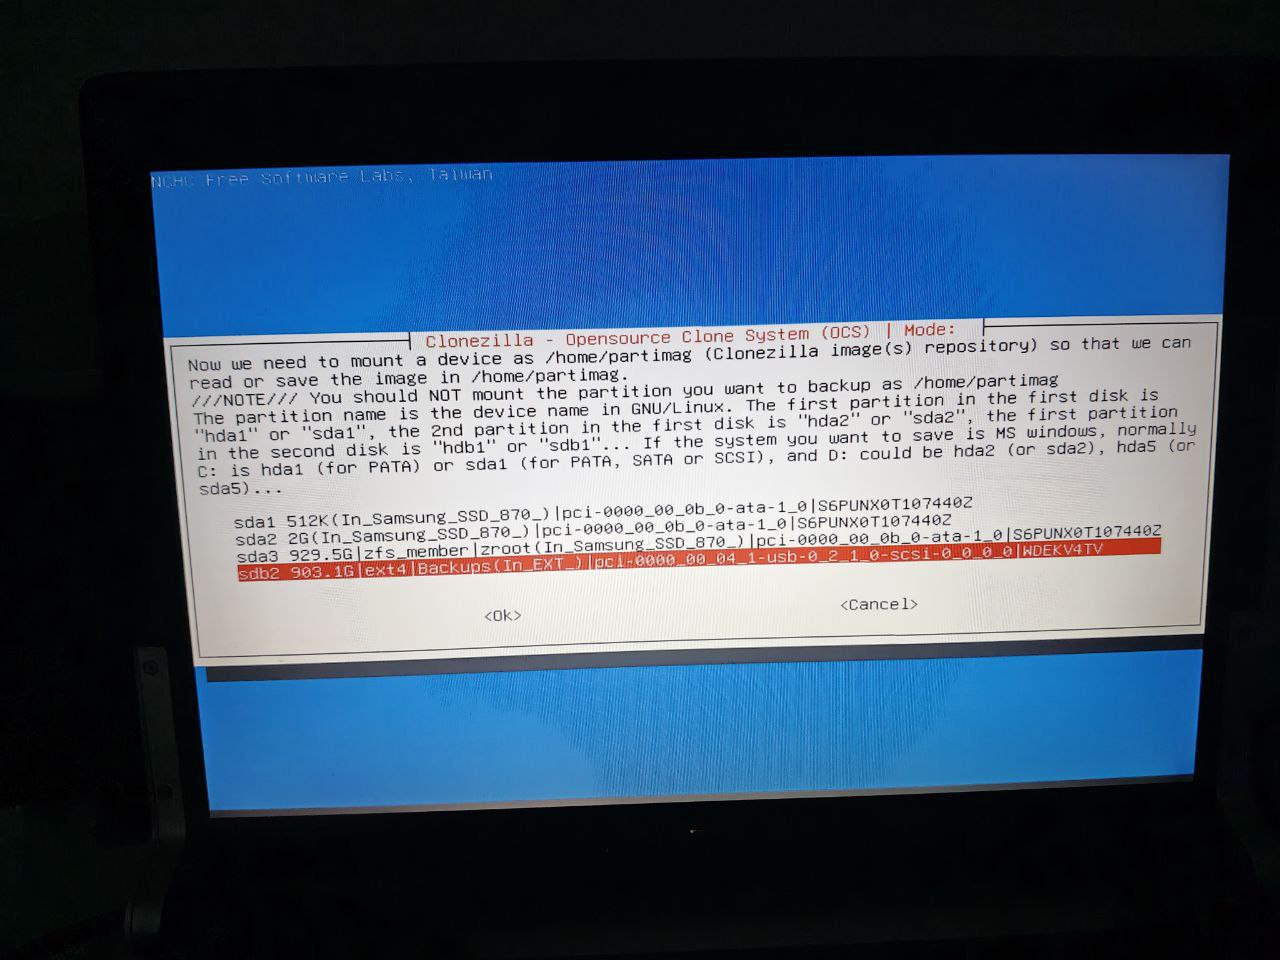
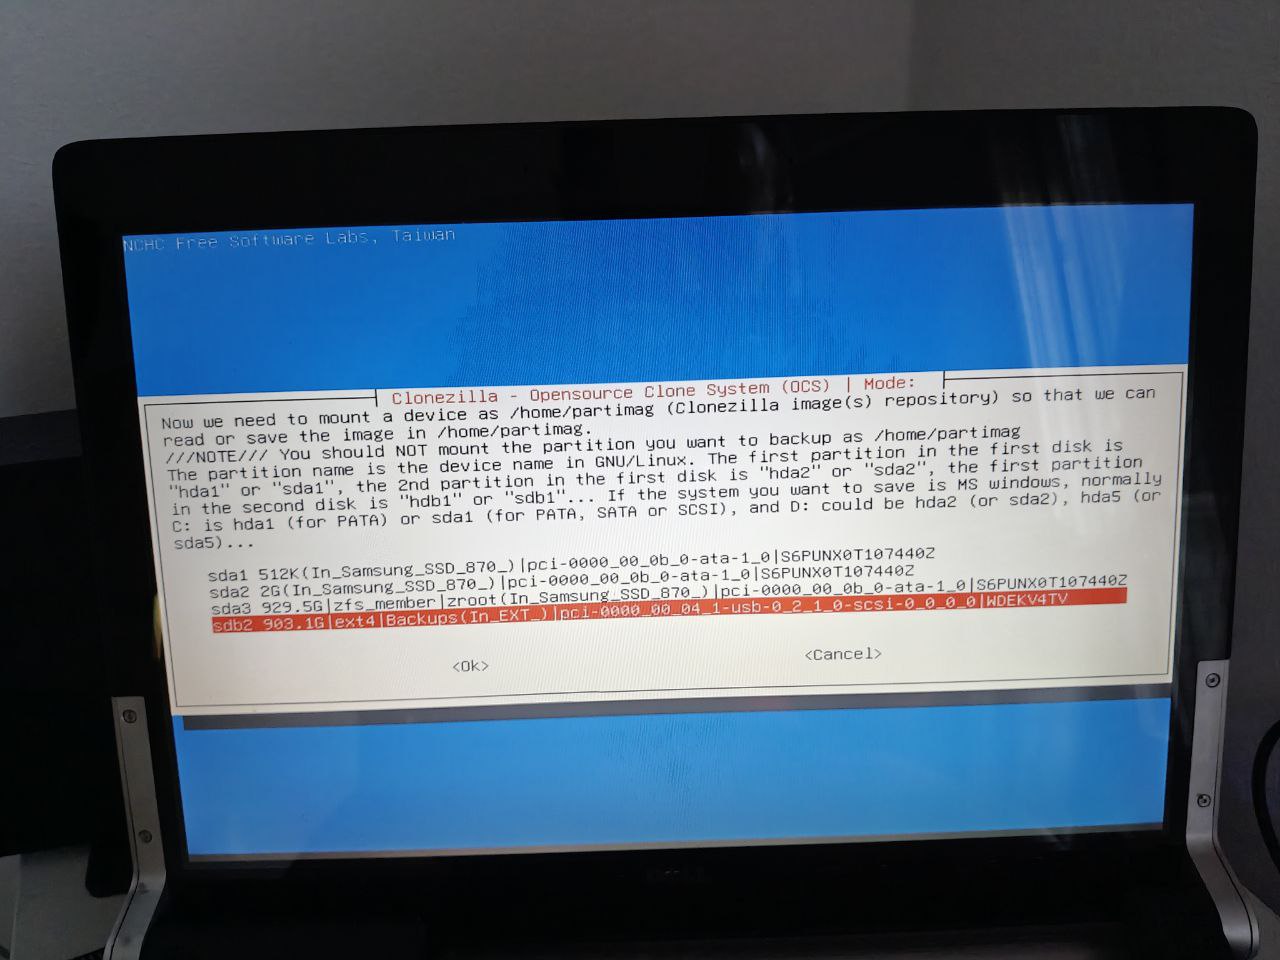
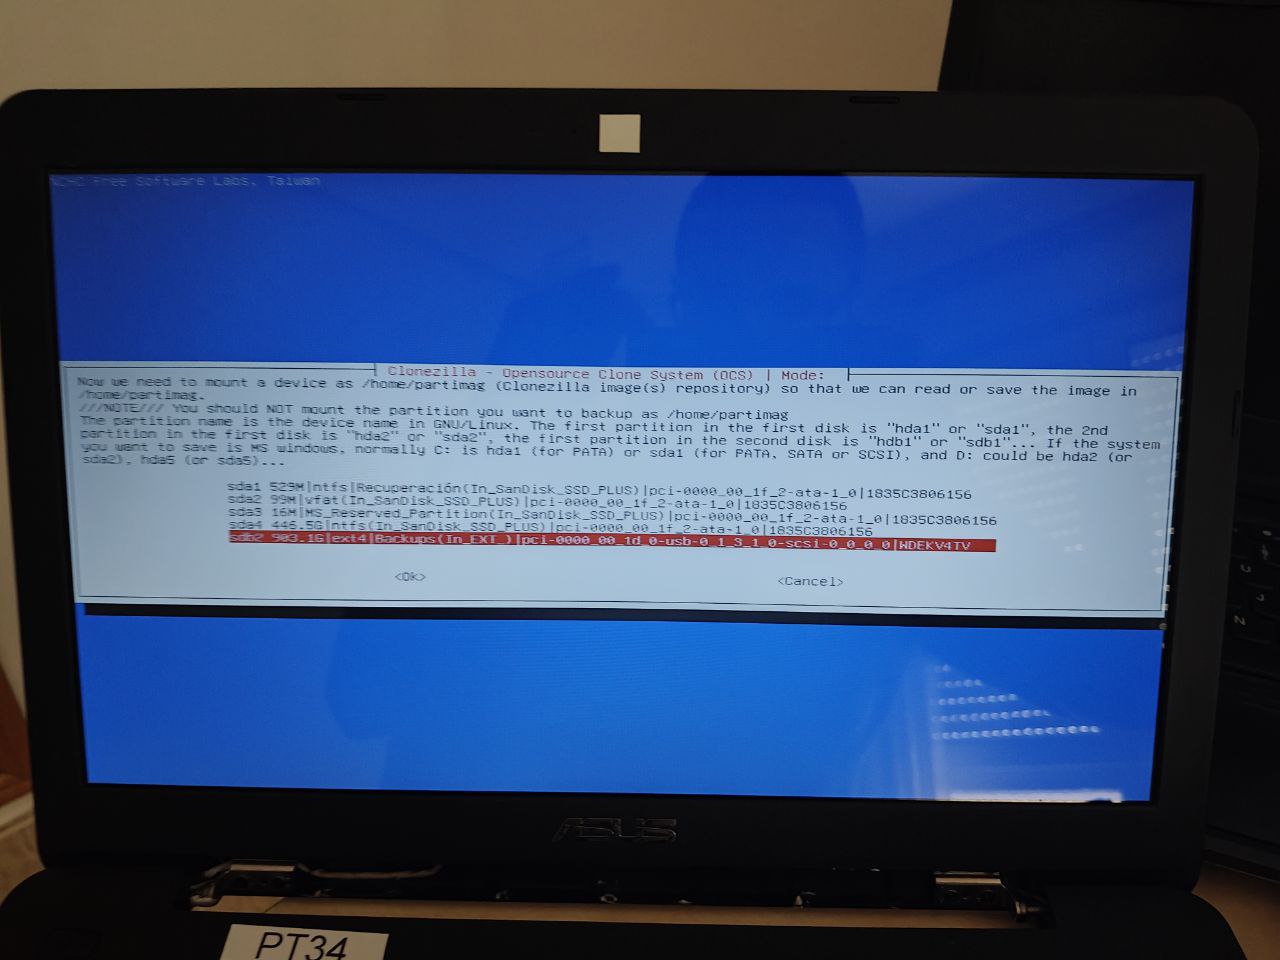
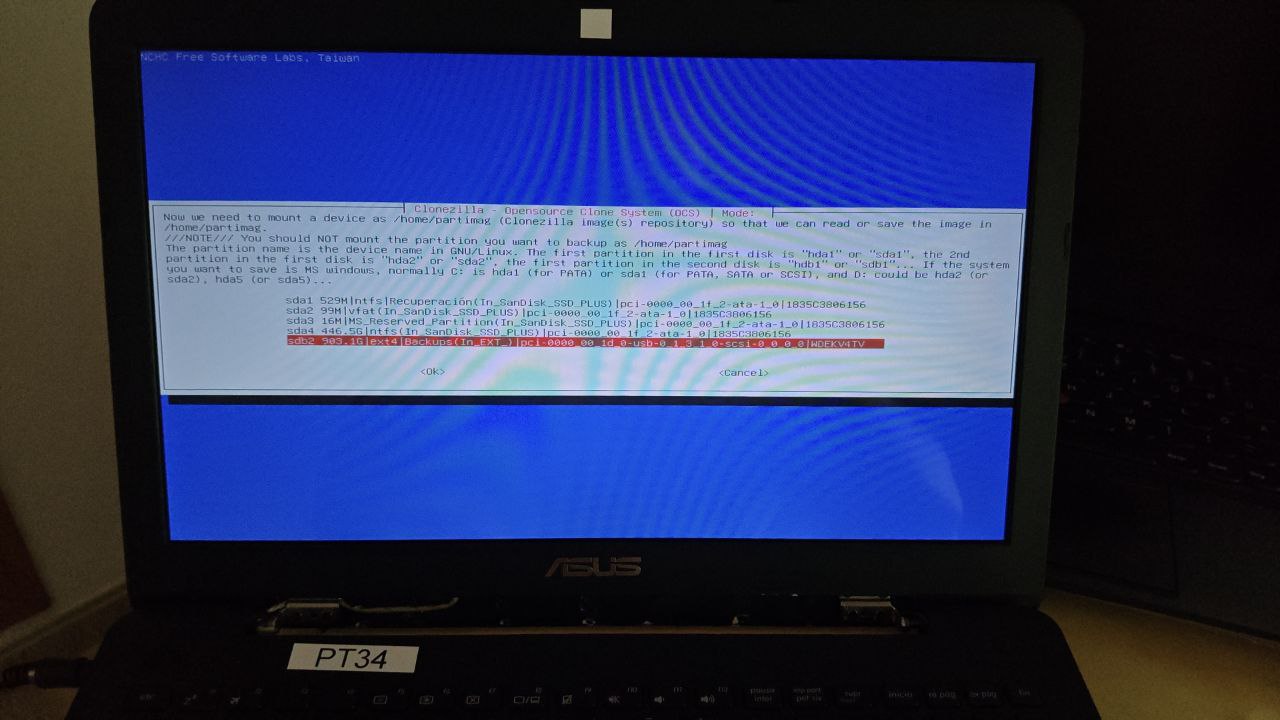
Select the partition where the
repository
resides:
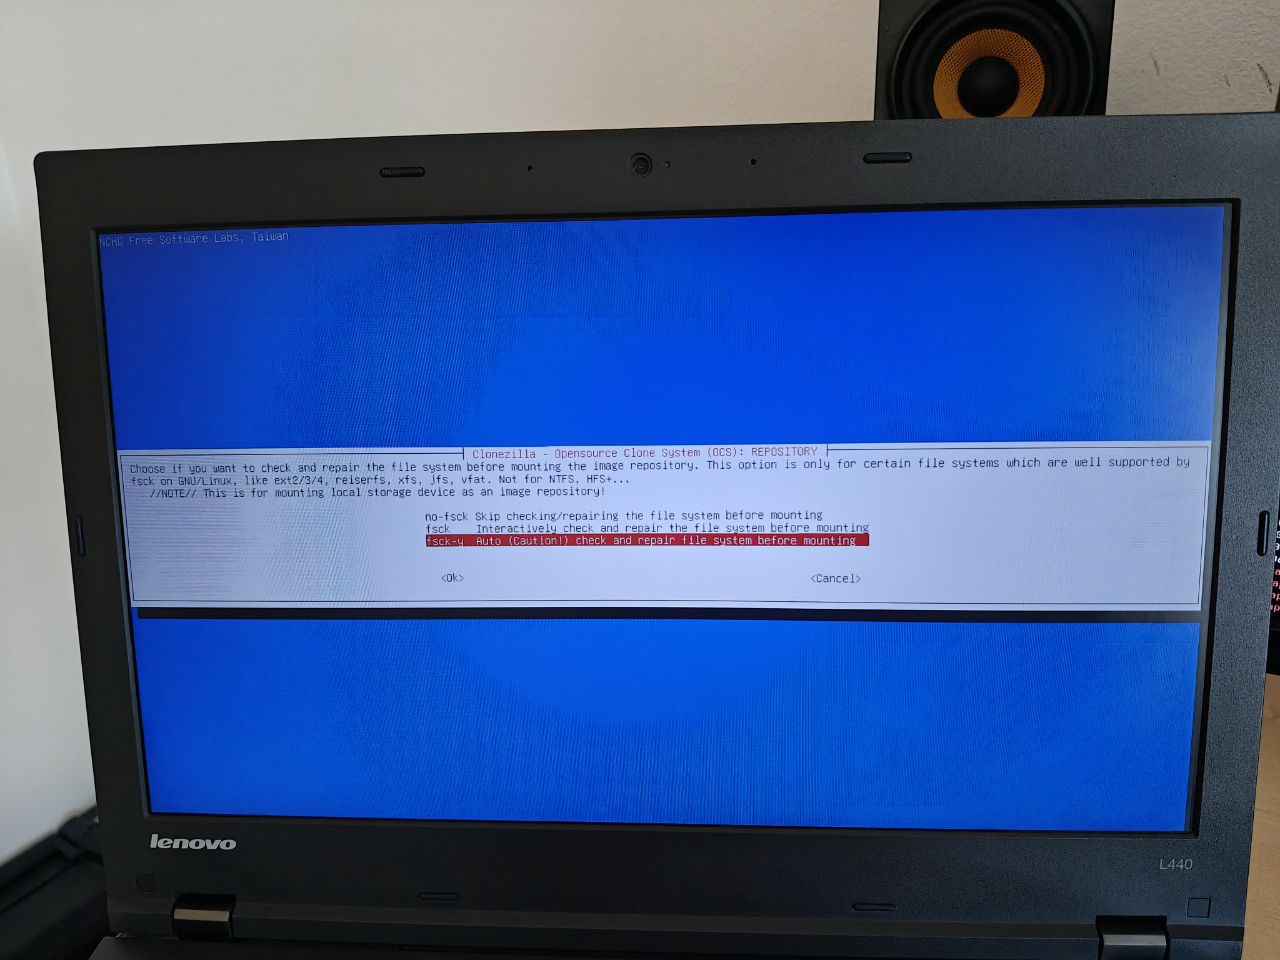
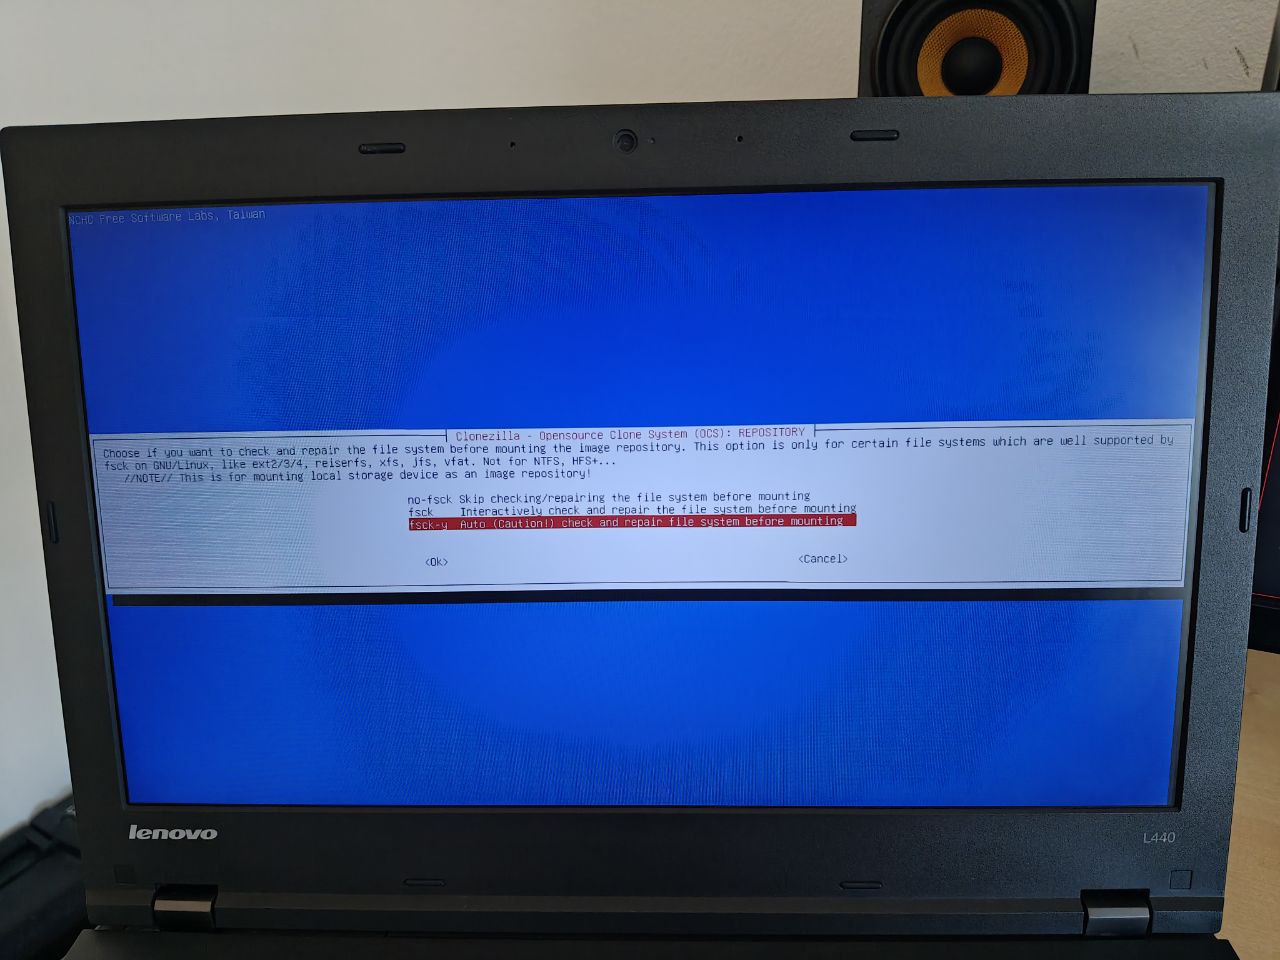
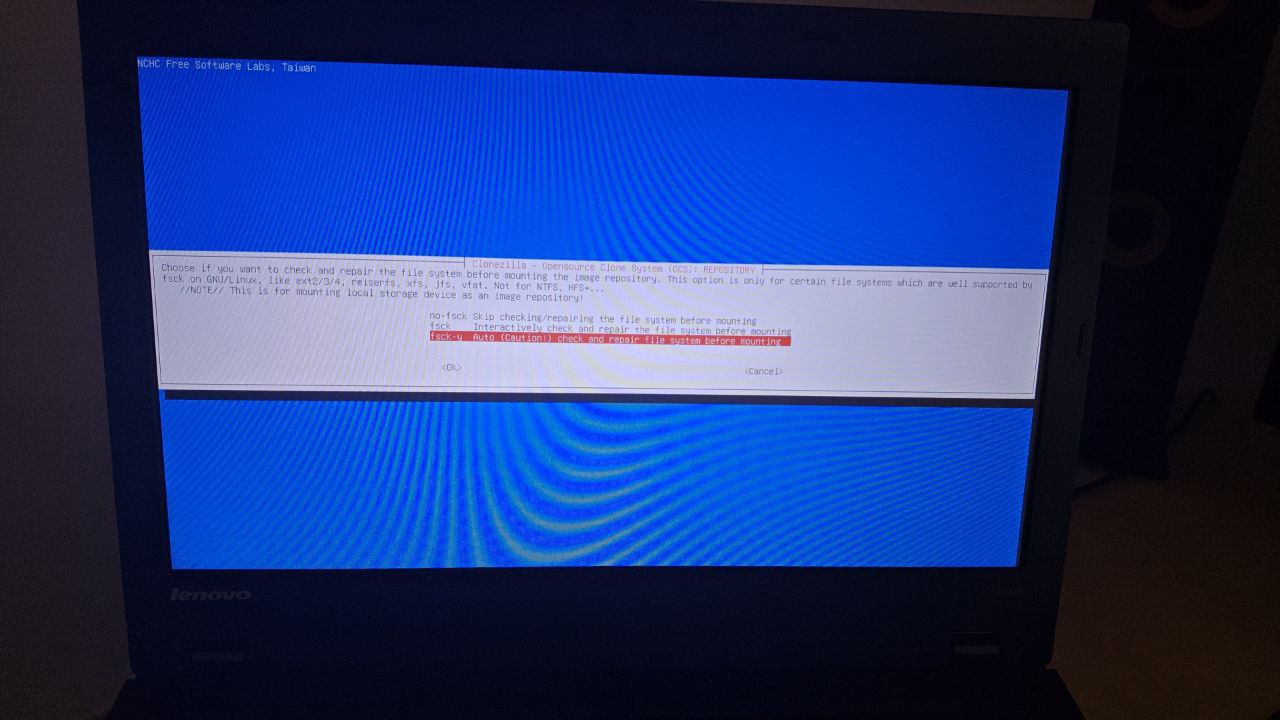
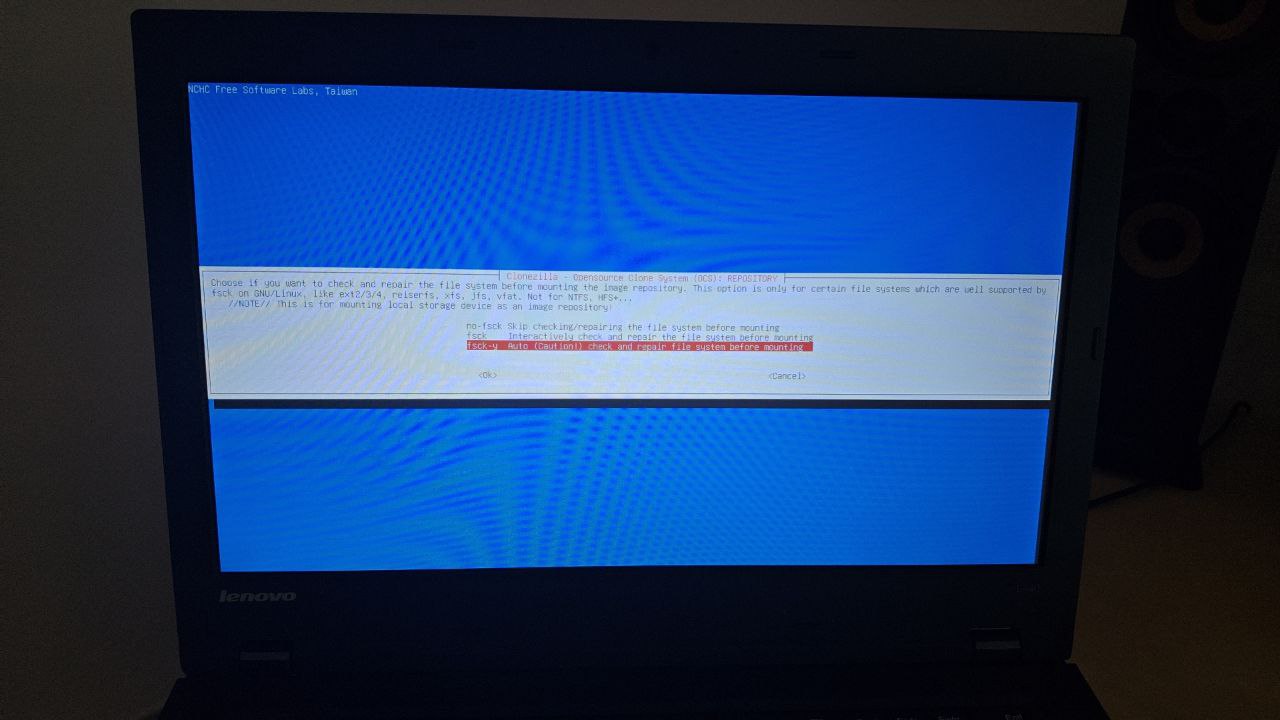
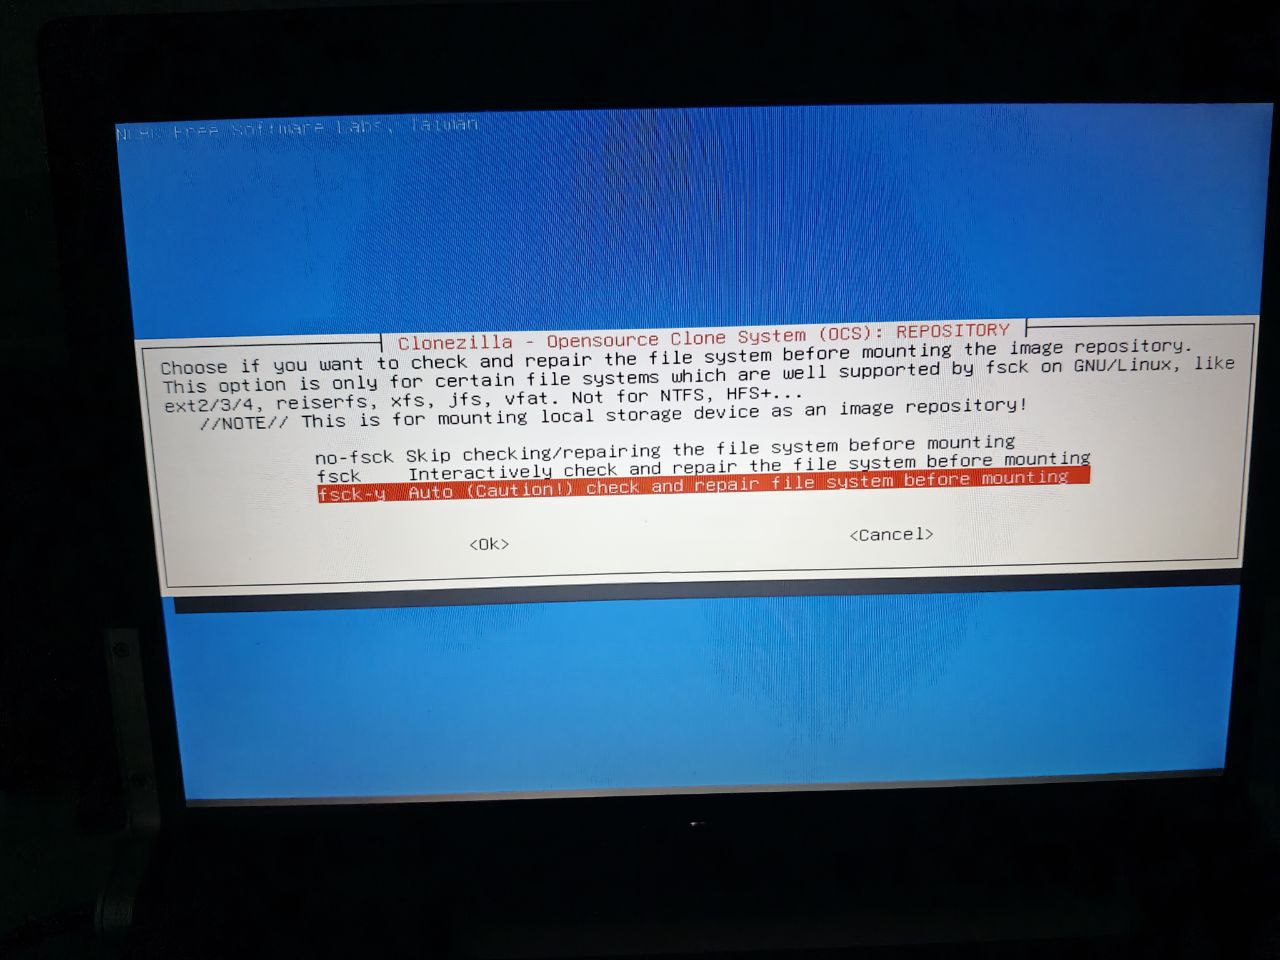
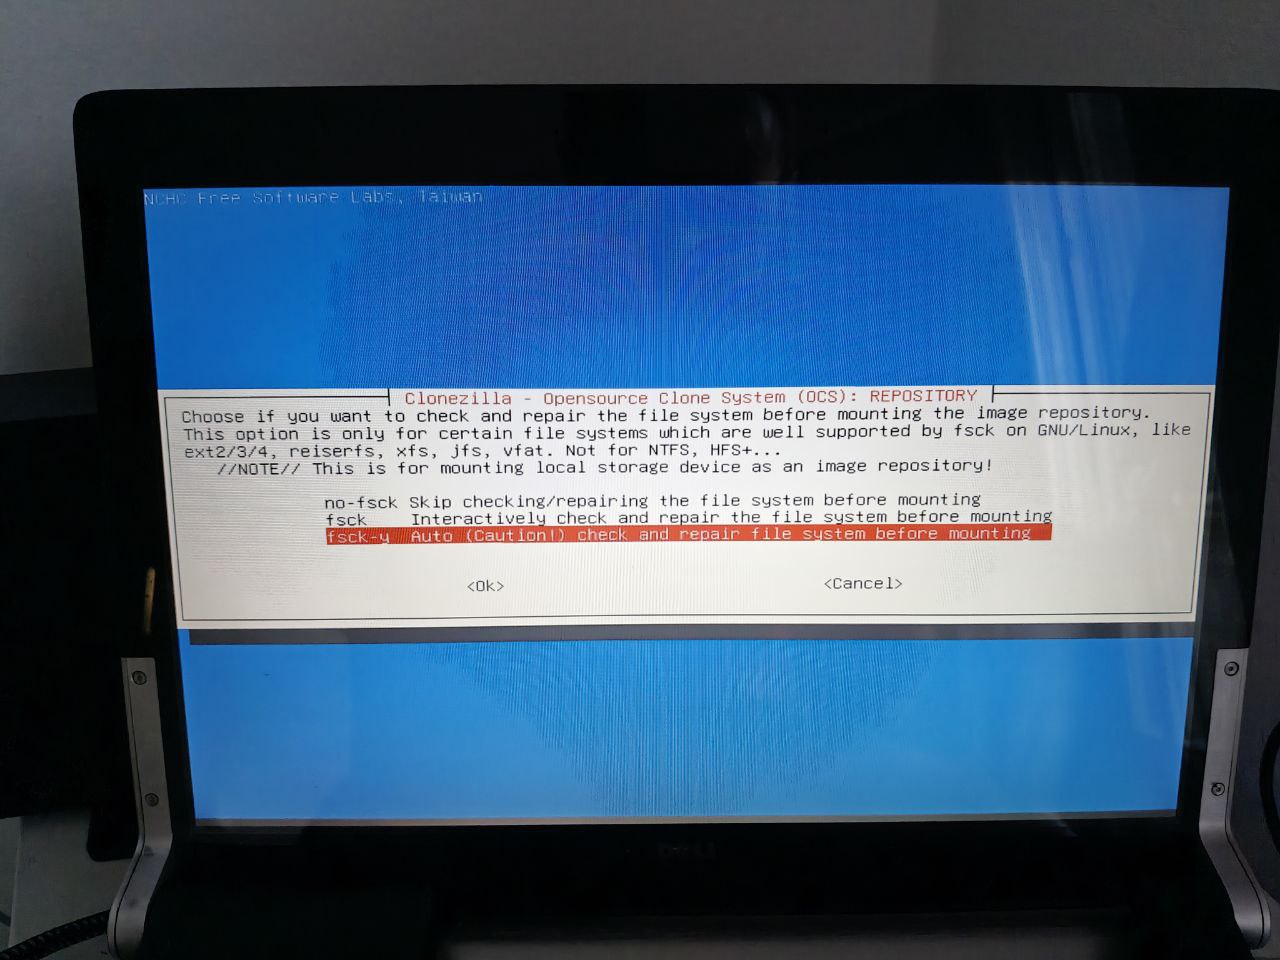
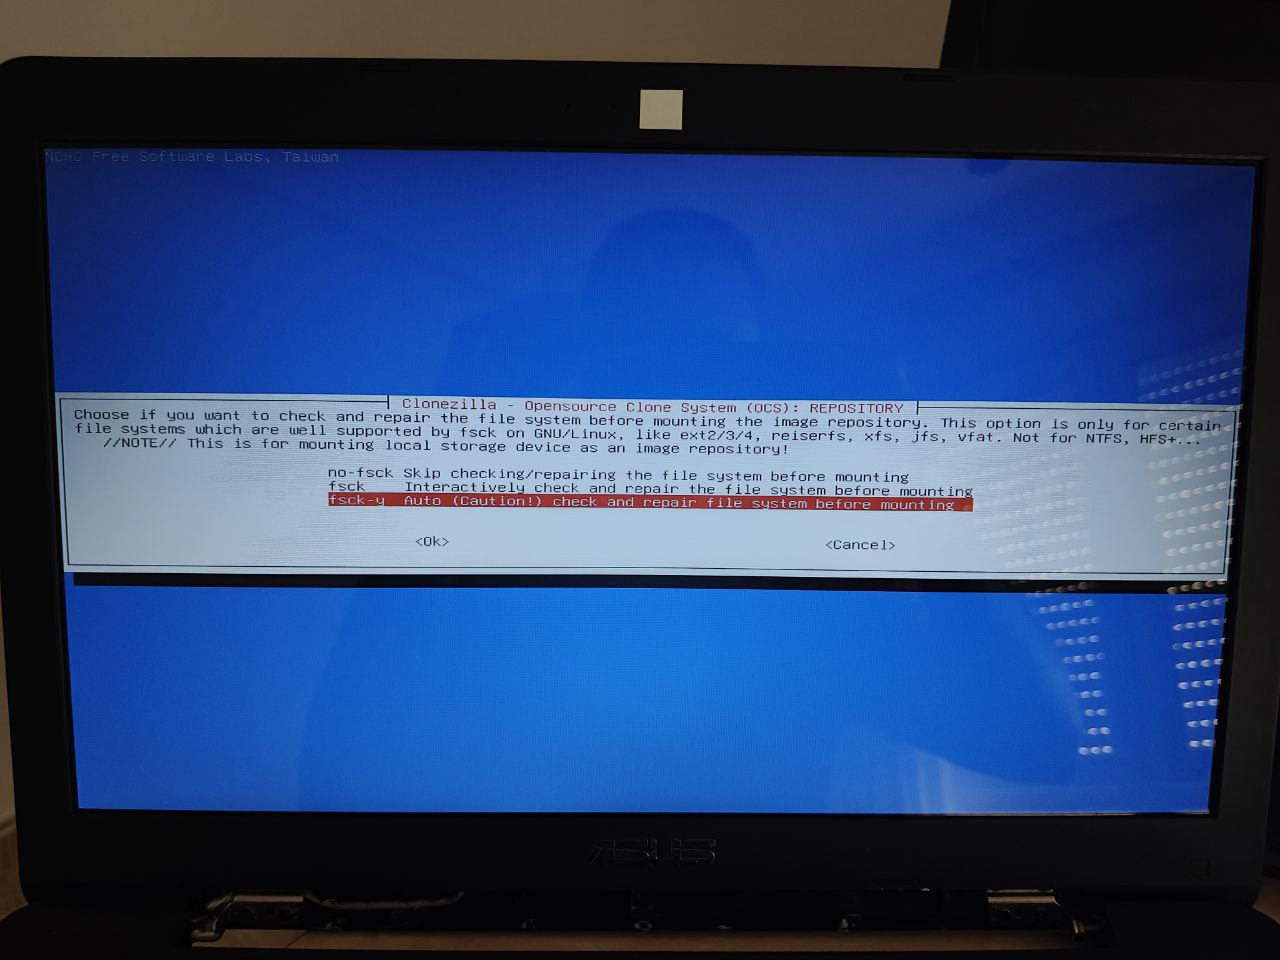
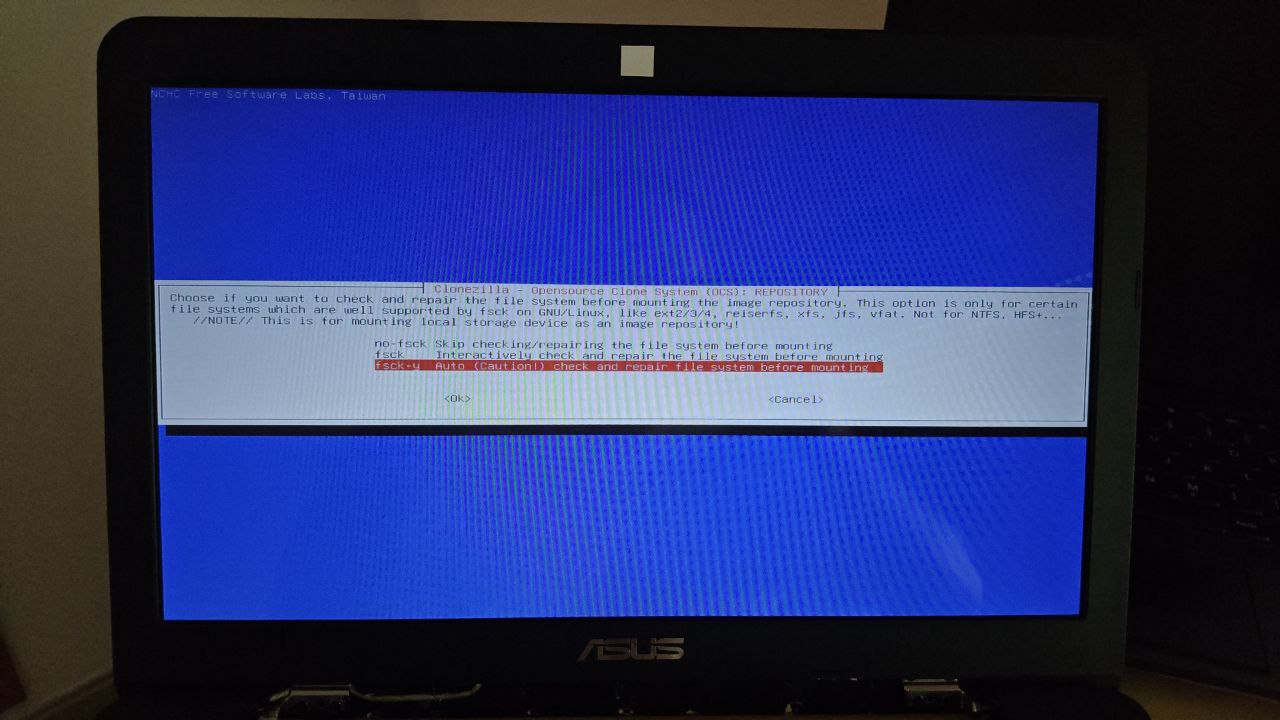
You’re asked whether to perform a fsck on the repository’s file system. In my case it’s Ext4, and an extra check never hurts:
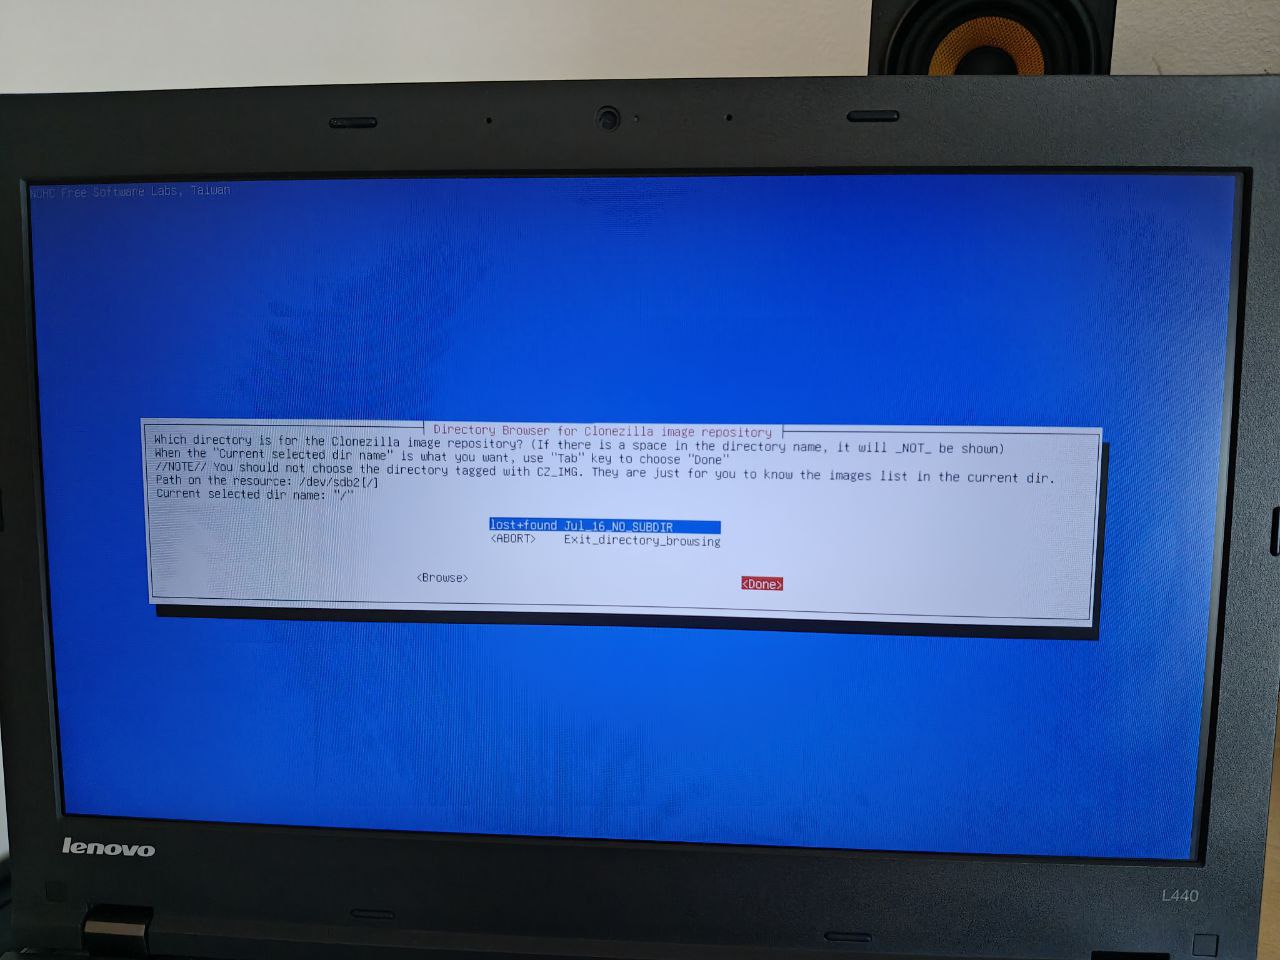
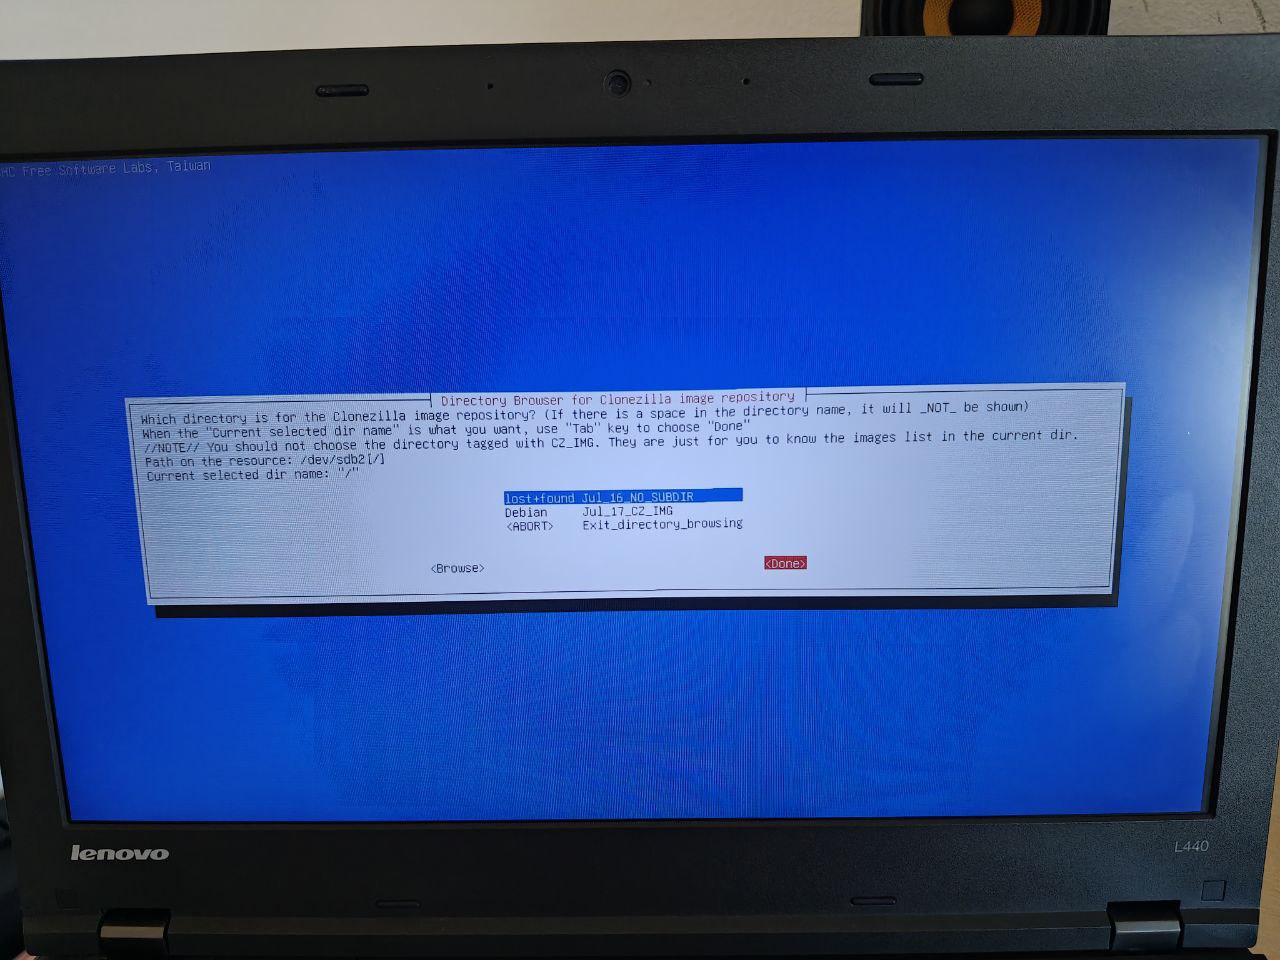
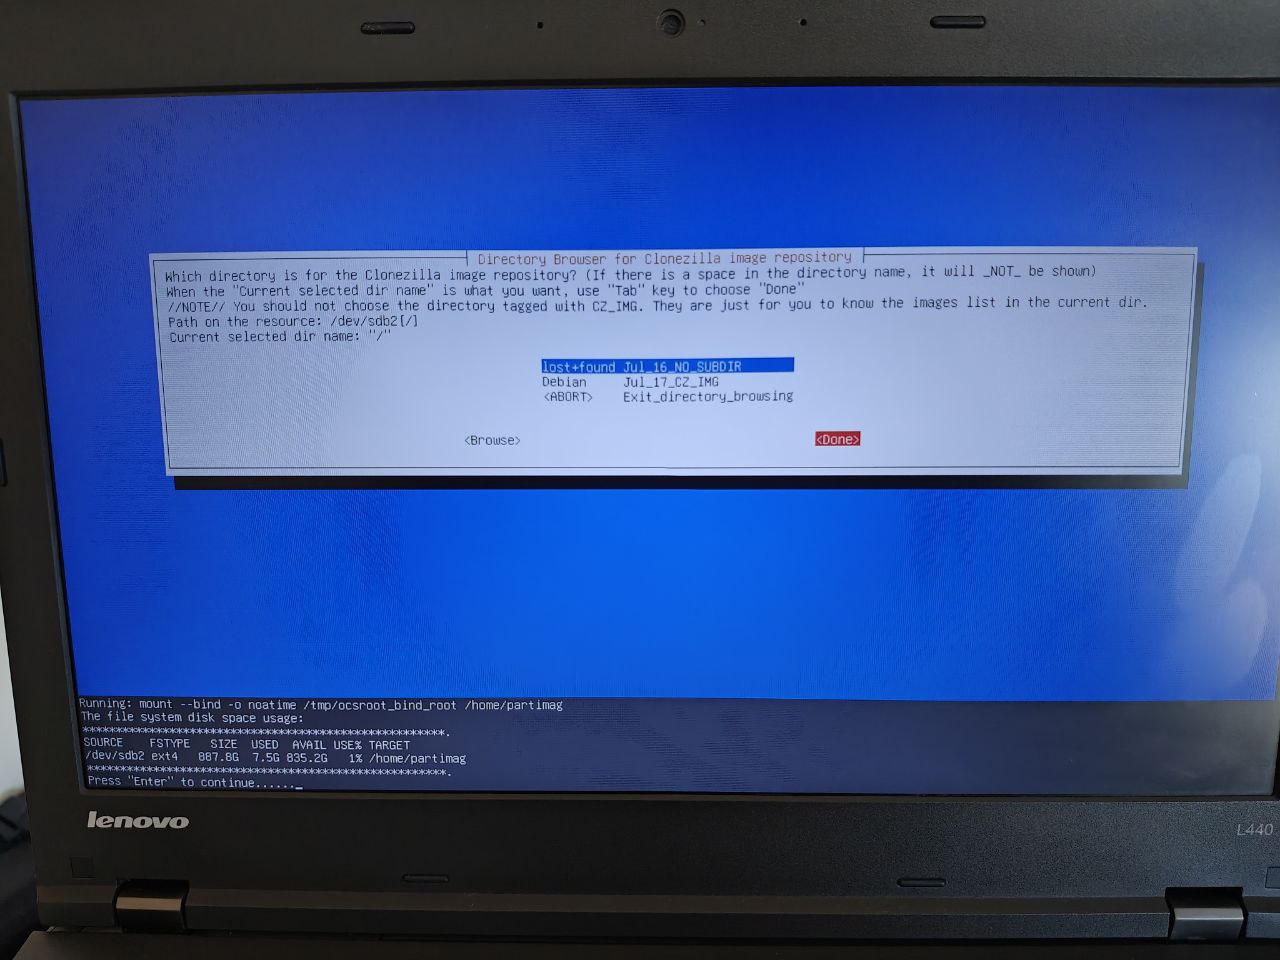
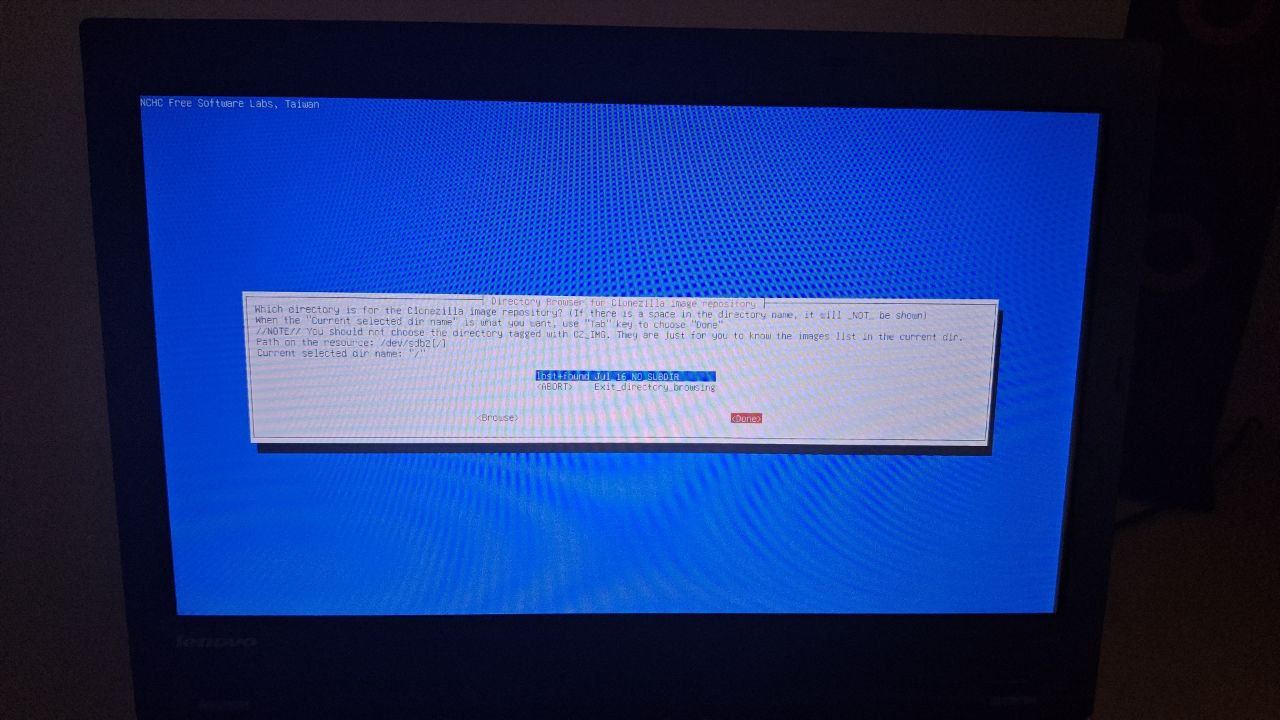
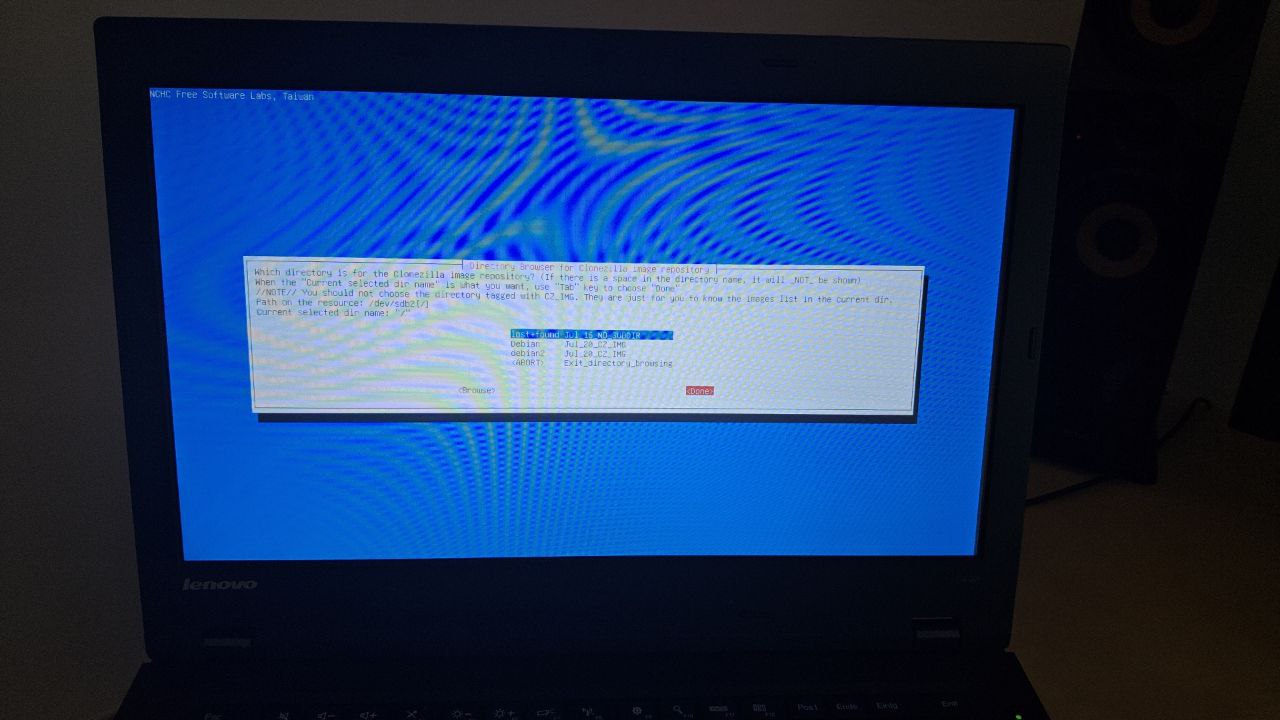
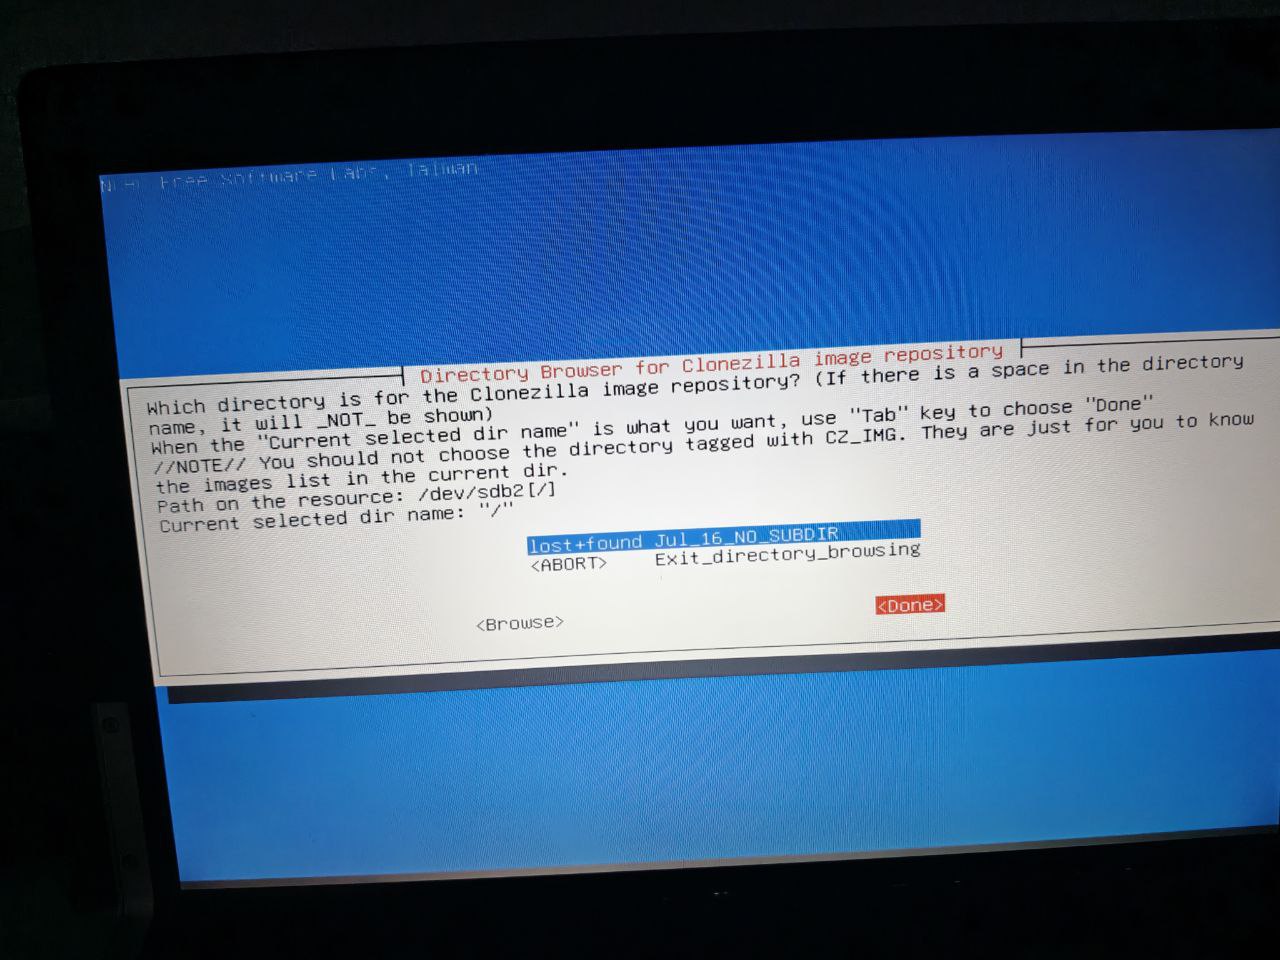
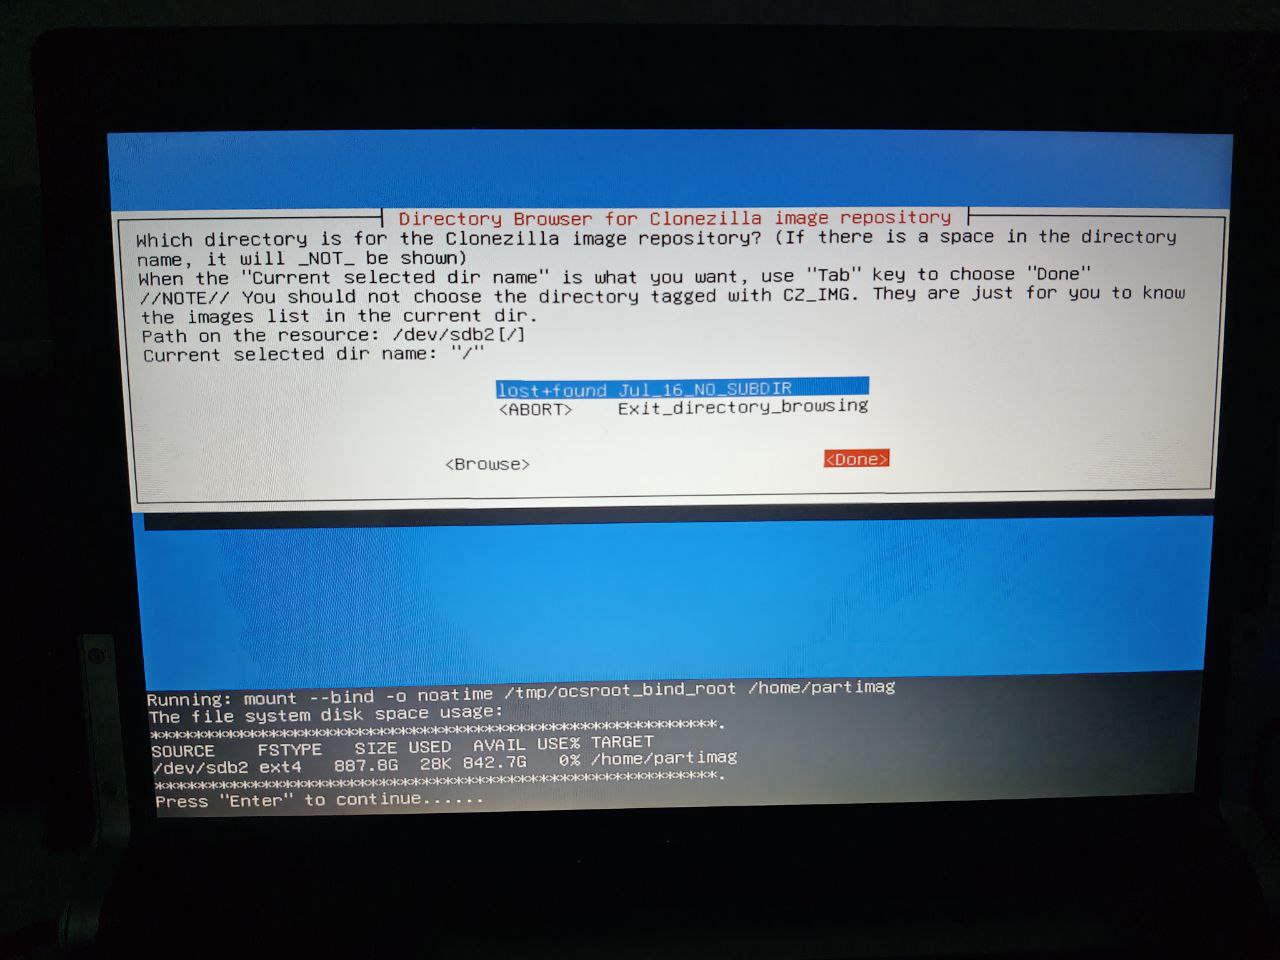
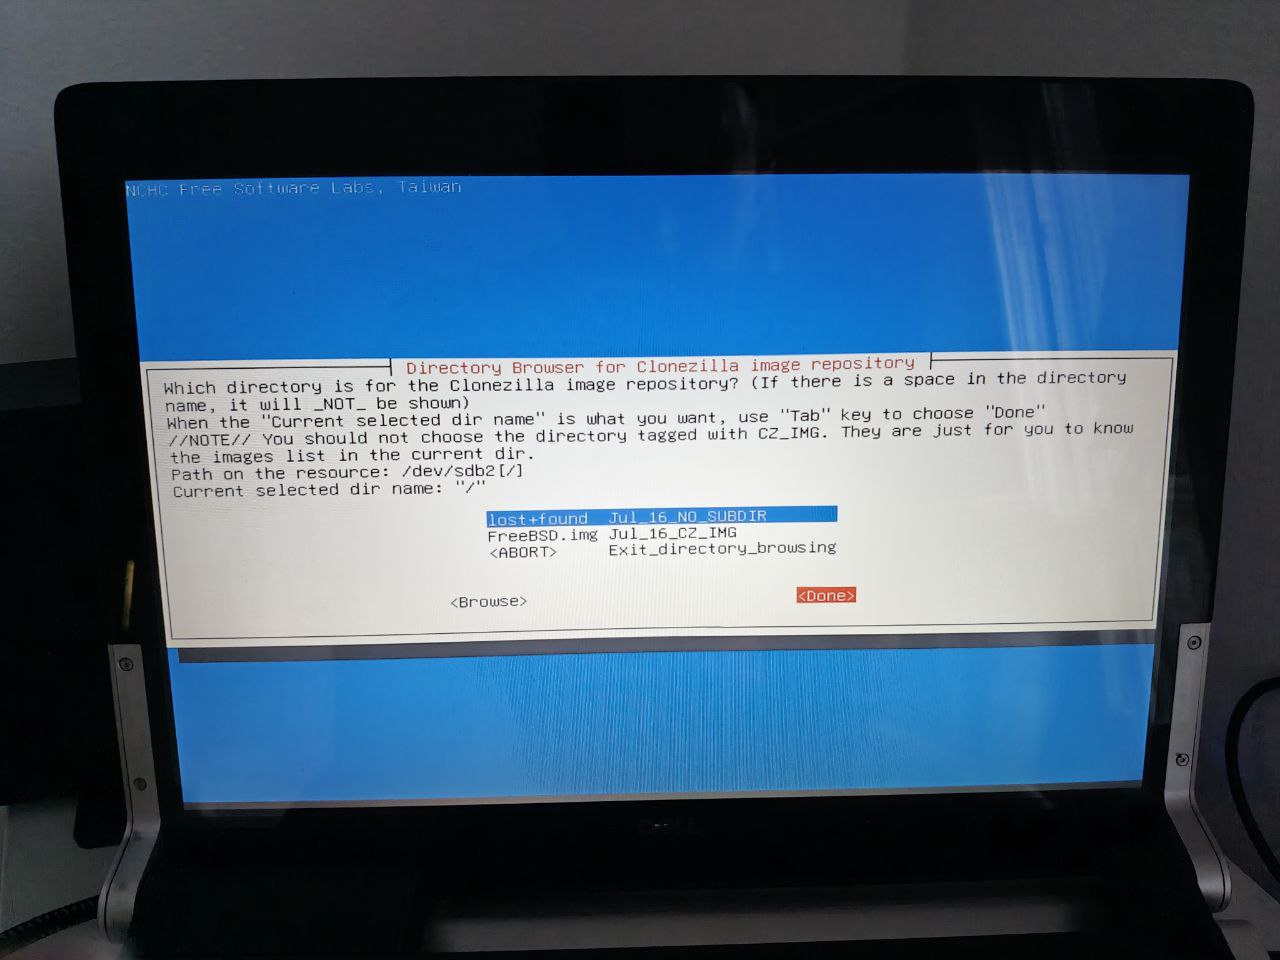
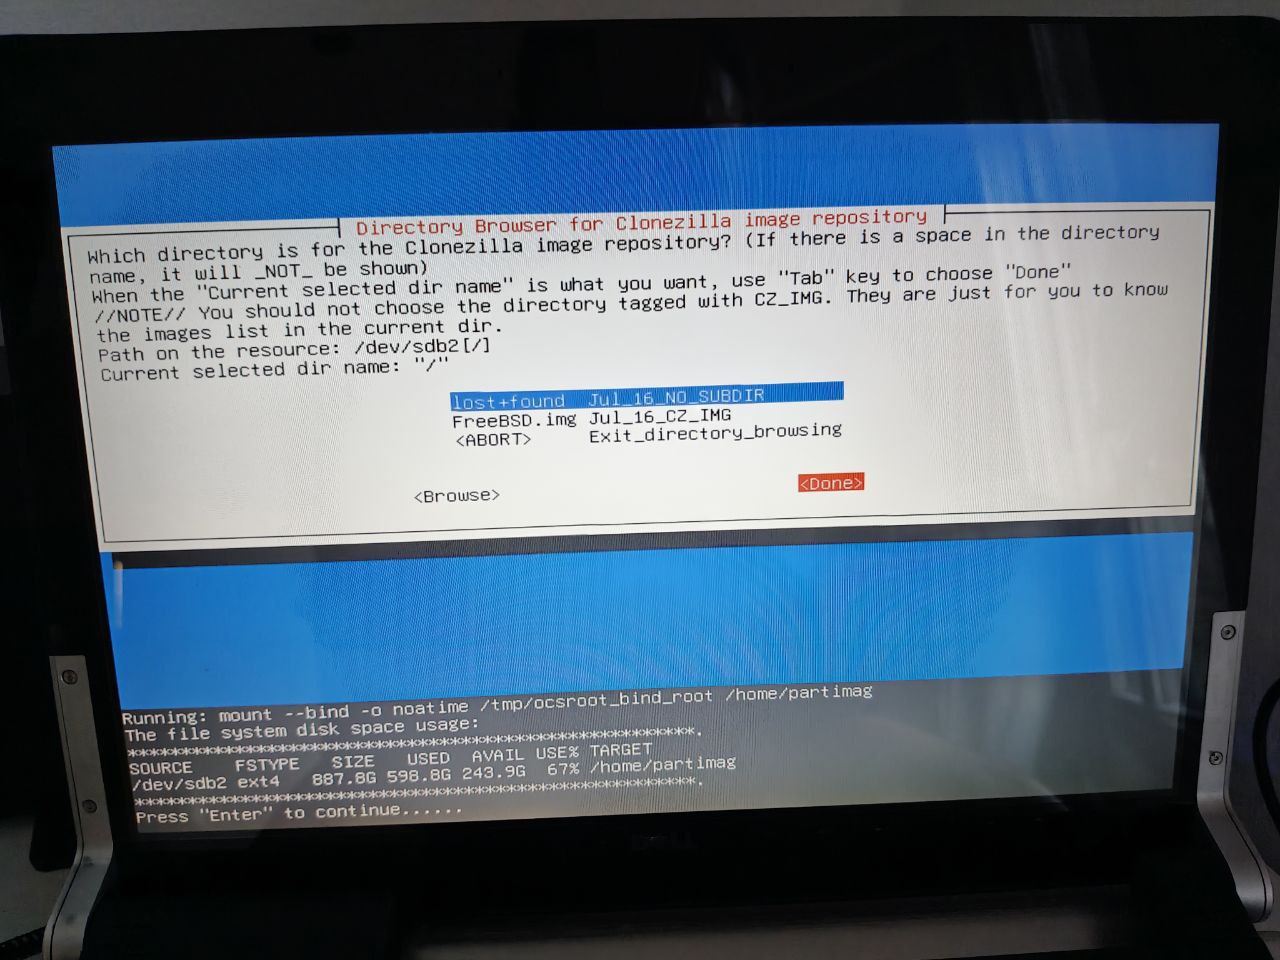
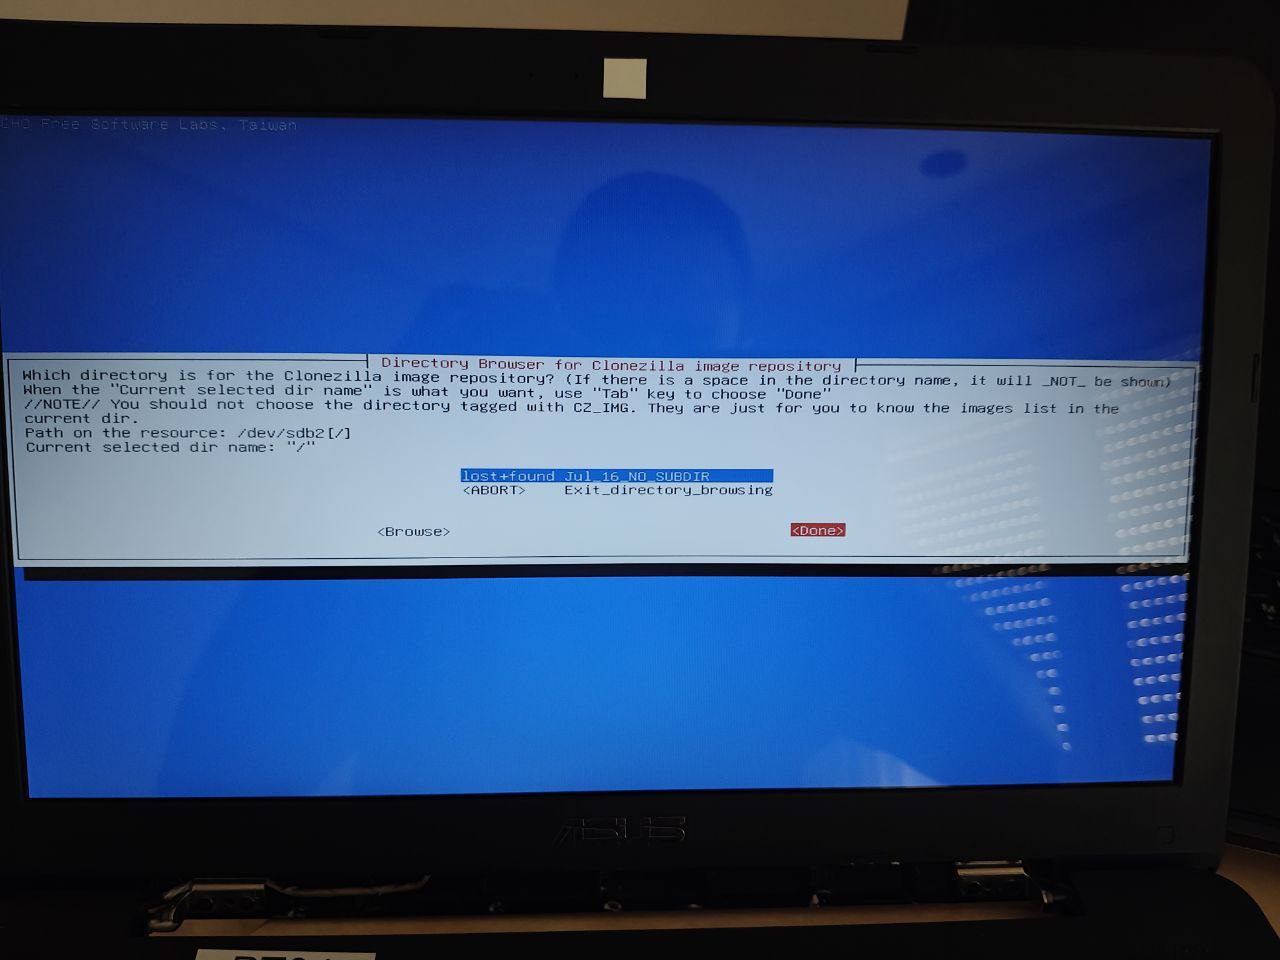
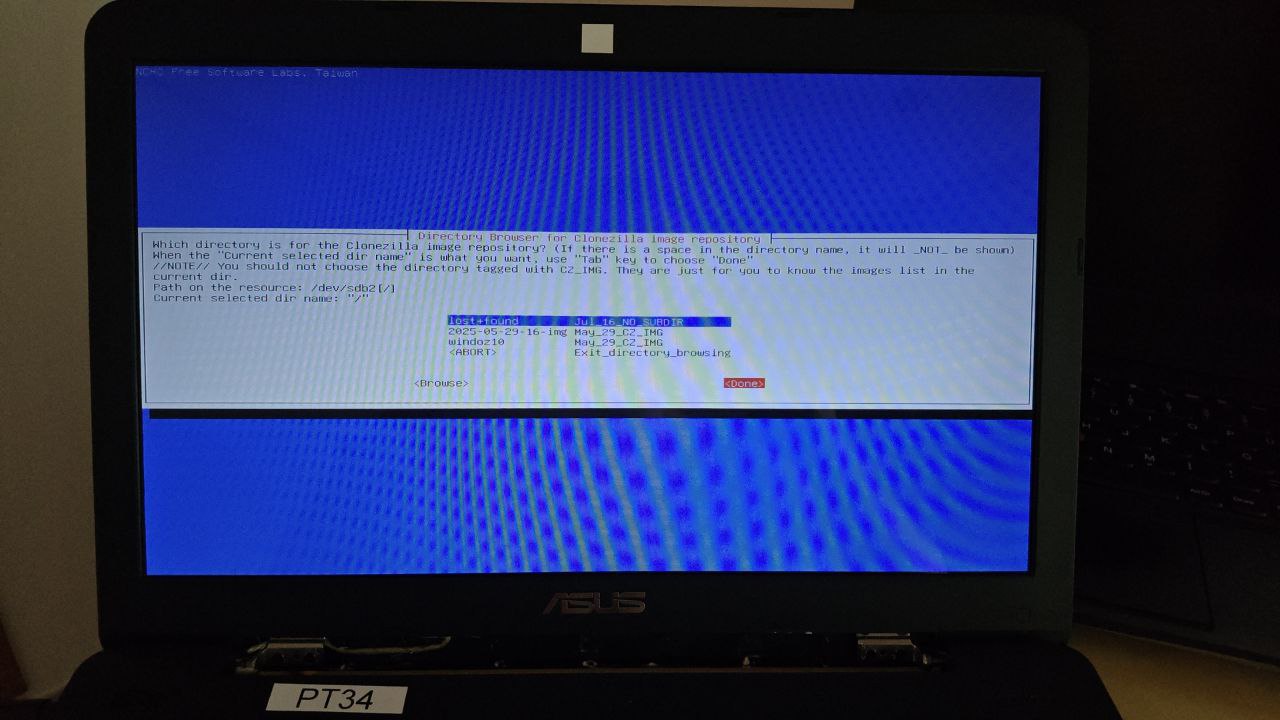
If the repository is in a subdirectory, specify it here:
Path on the resource: /dev/sdb2[/] --> Displays Device+[Directory]: The device can't be changed since it was selected earlier, only the directory path can change.
Current selected dir name: "/" --> Directory path.
My
repository
is in the root, so the path is /. Click Done:
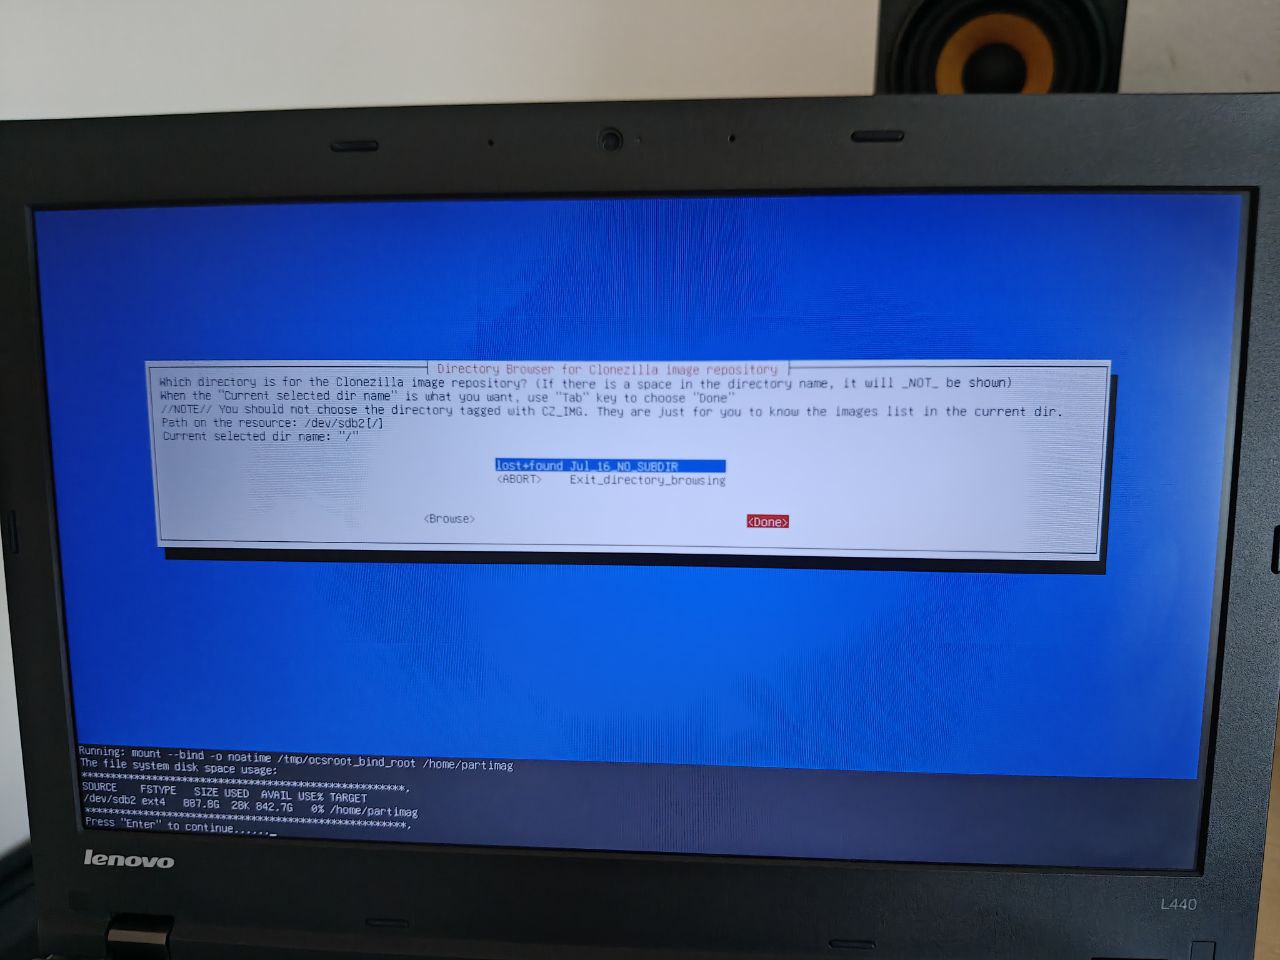
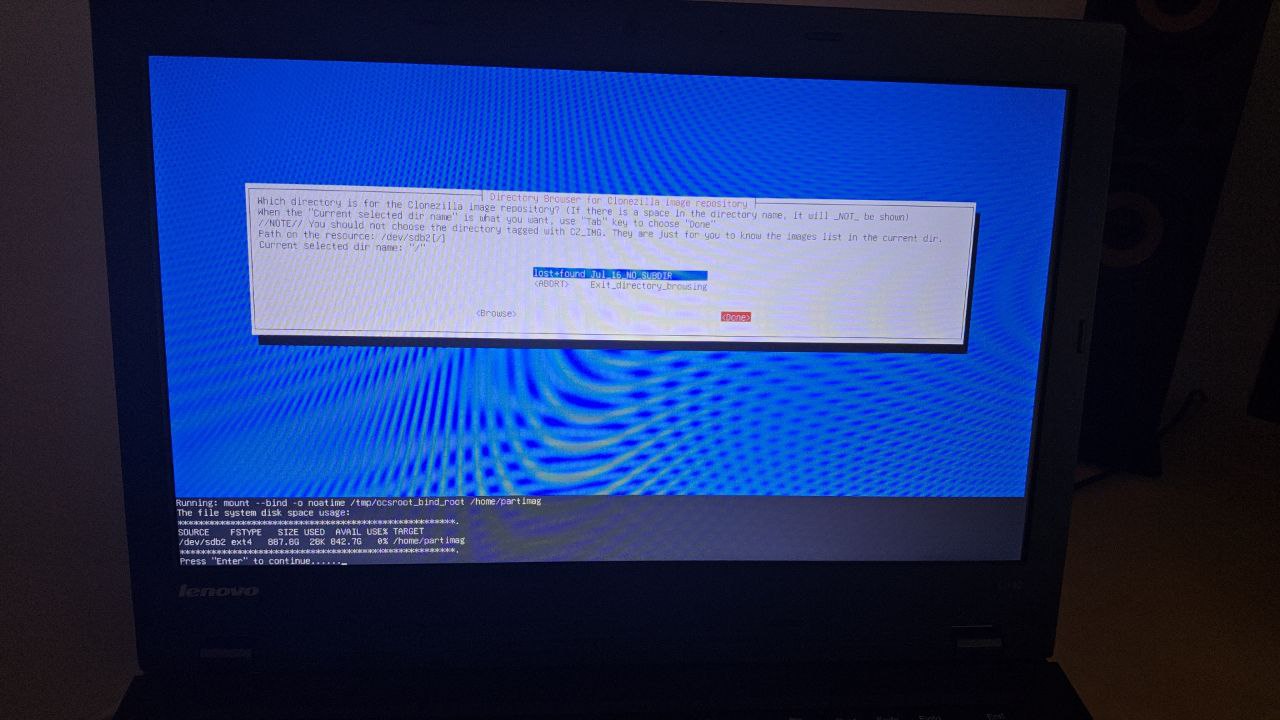
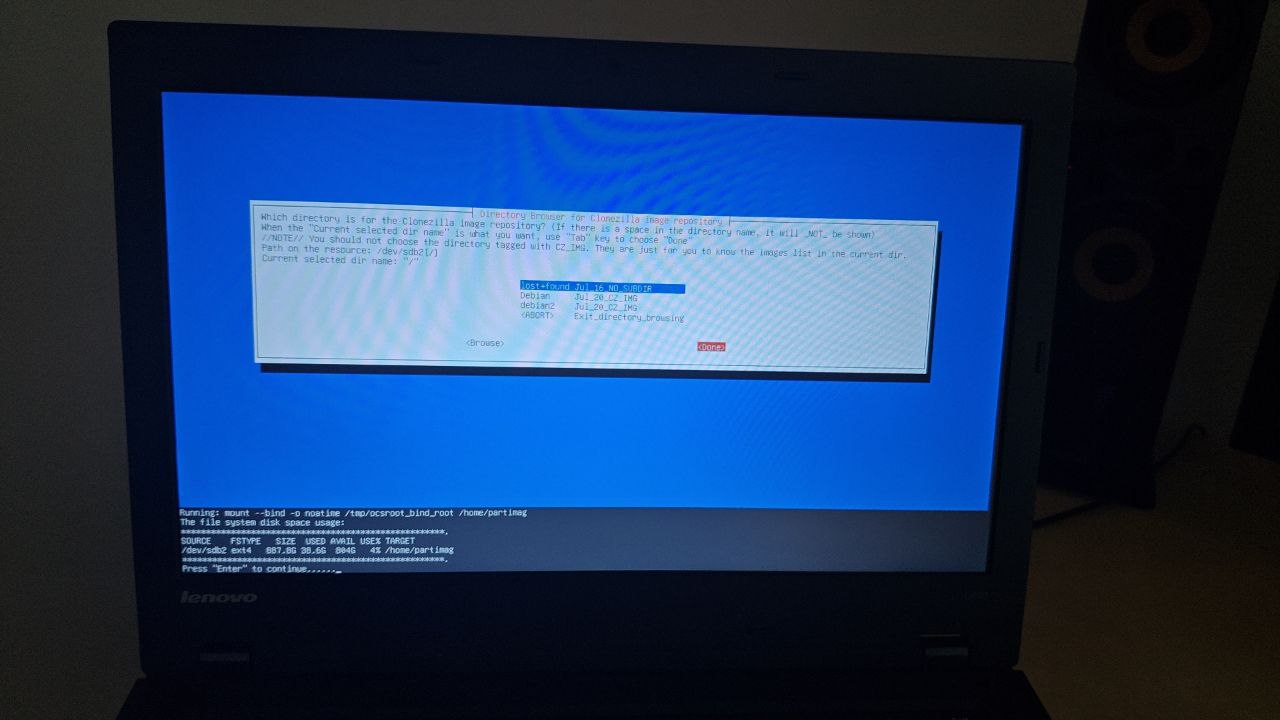
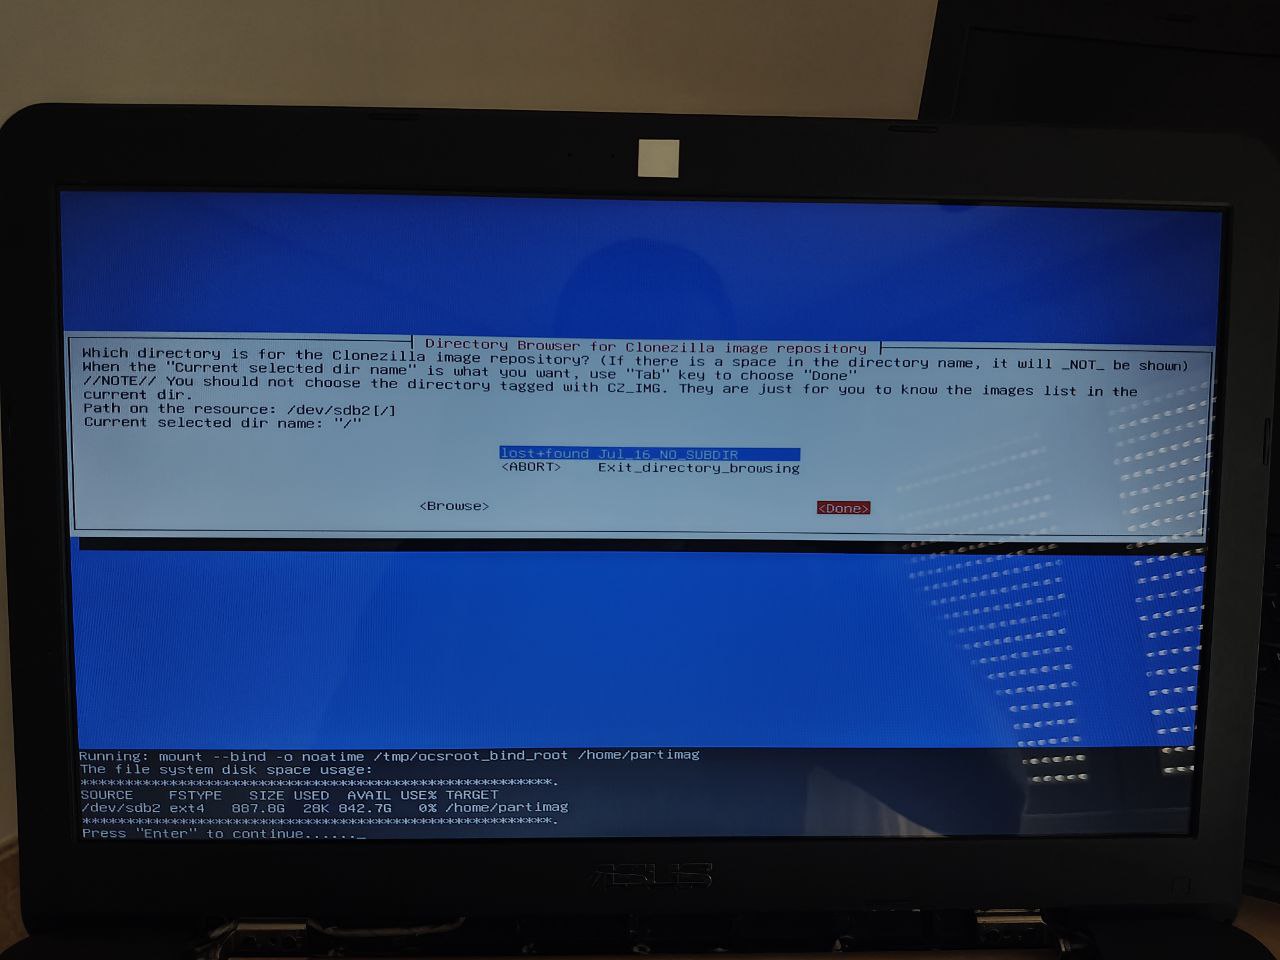
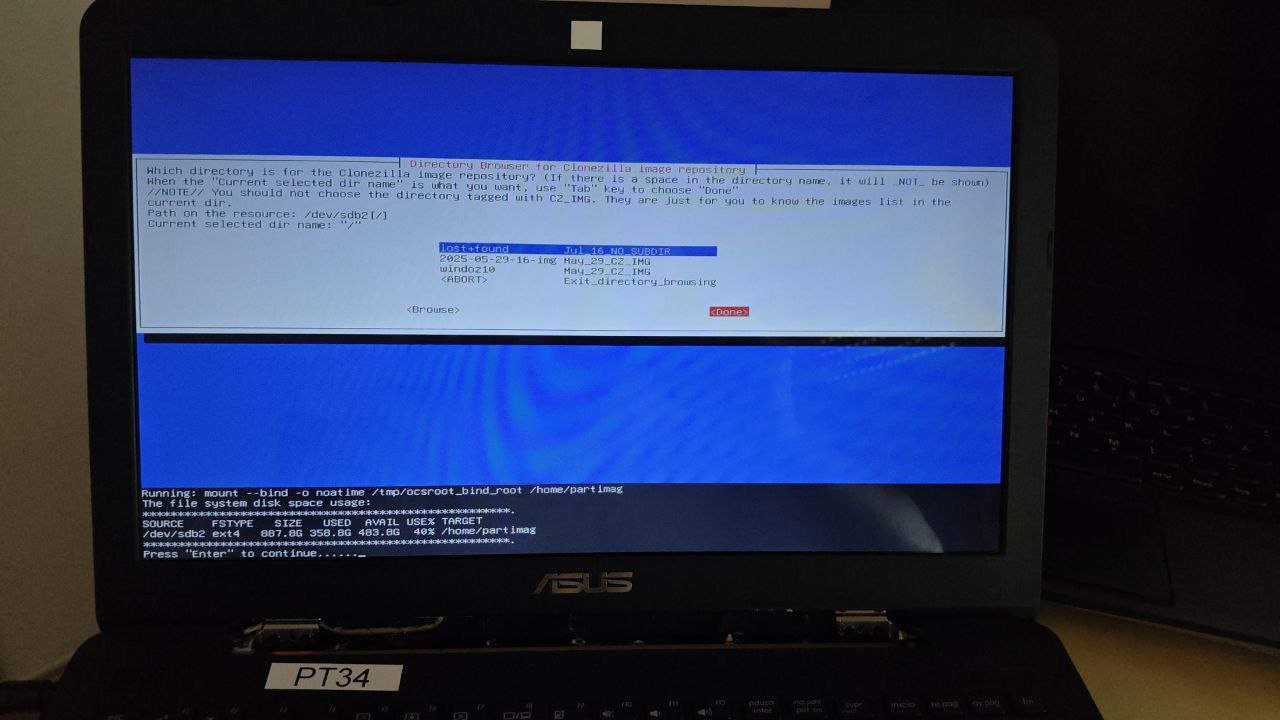
We’re informed that /tmp/ocsroot_bind_root has been mounted to /home/partimag using --bind (as shown at the bottom of the image):
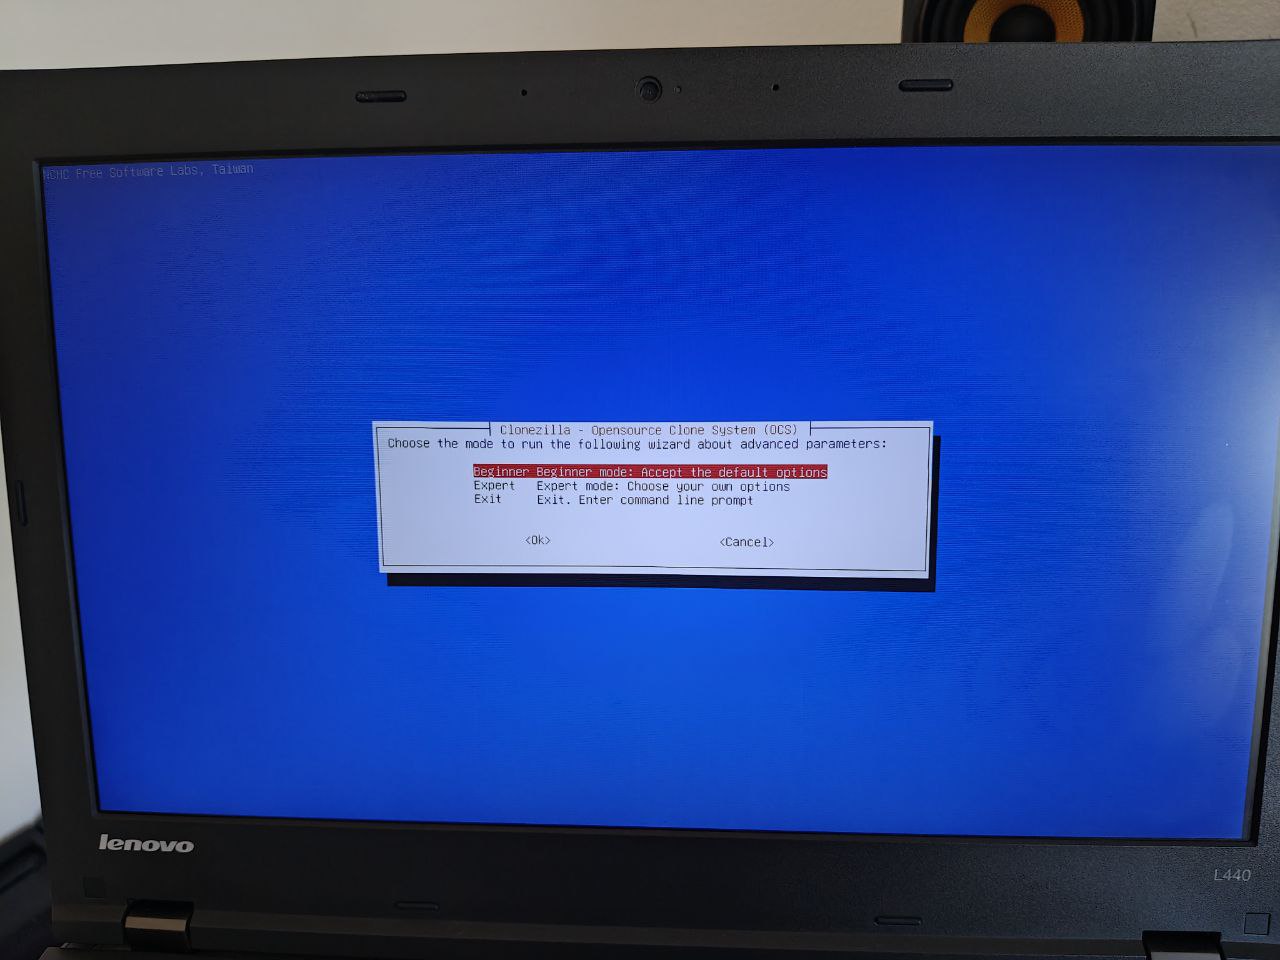
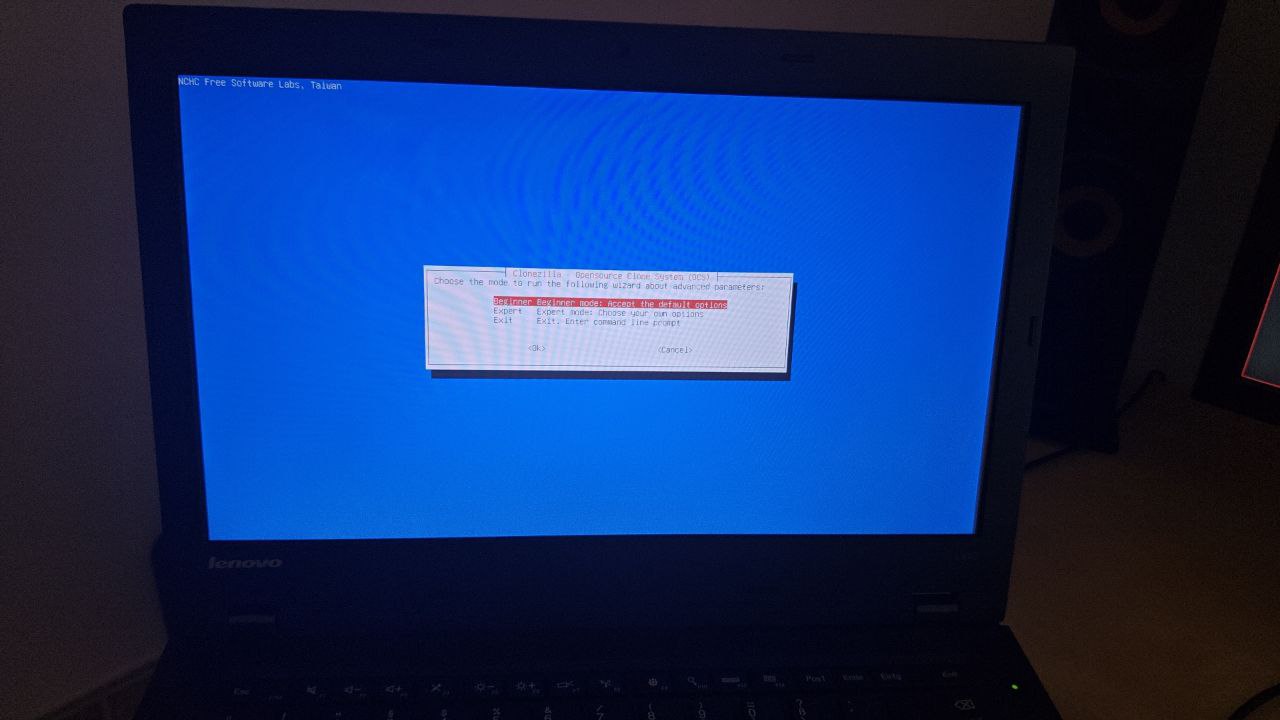
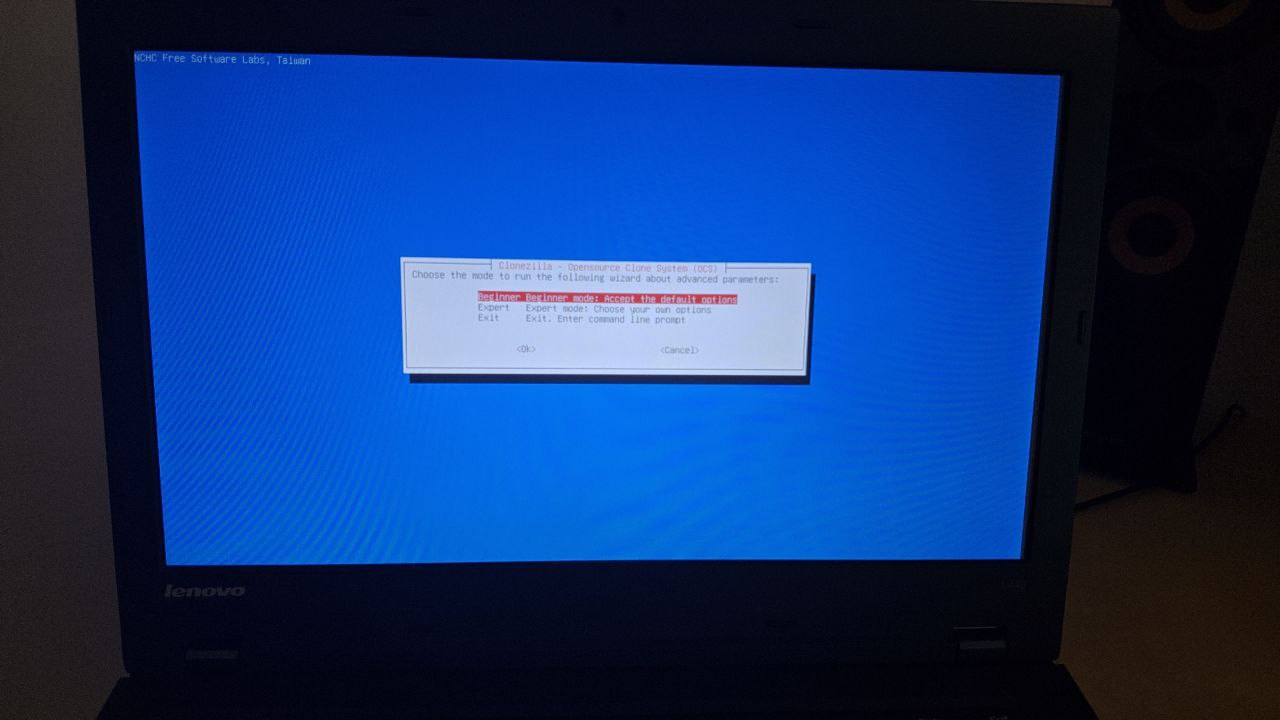
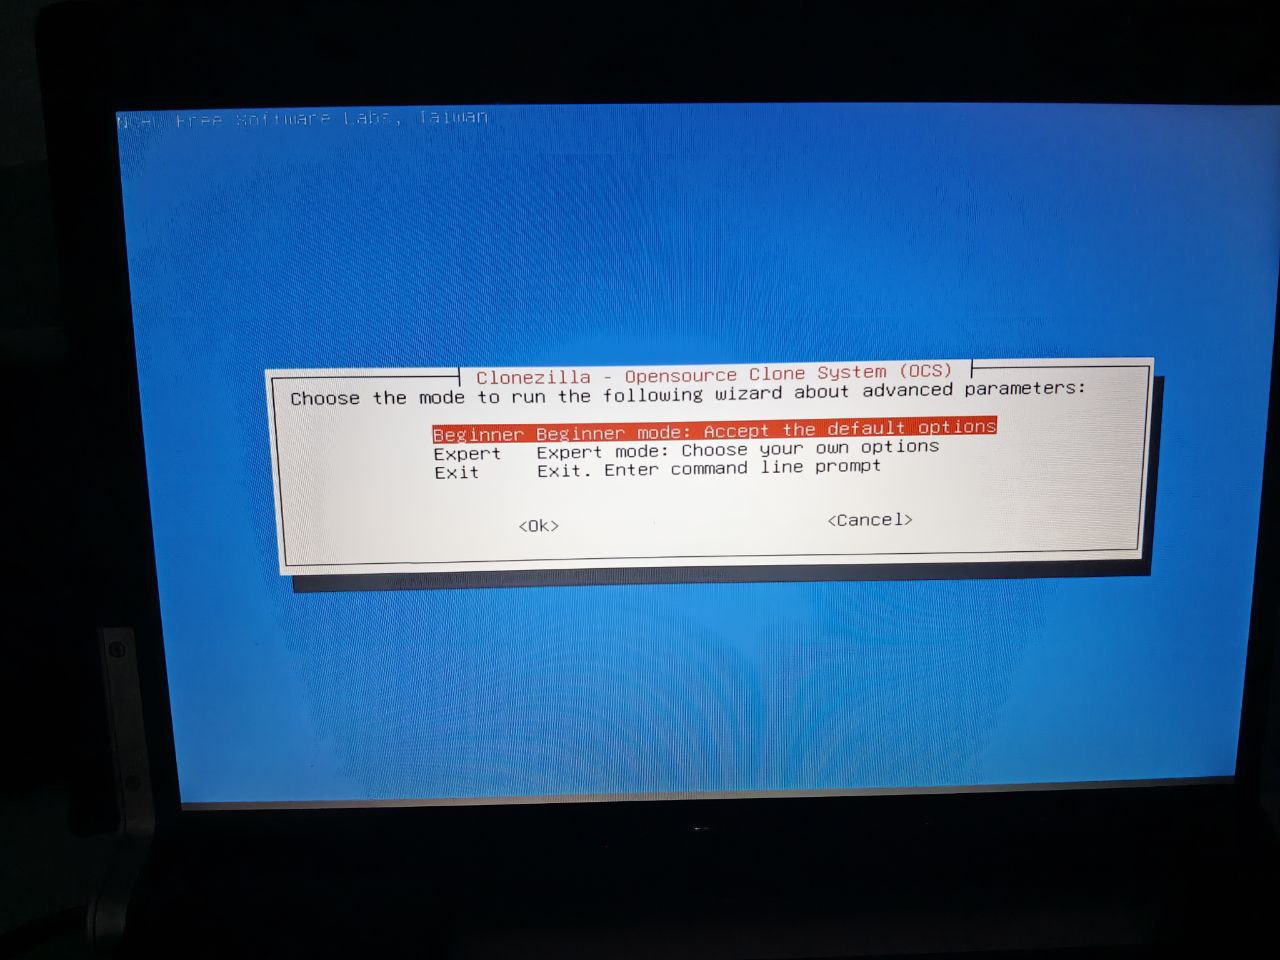
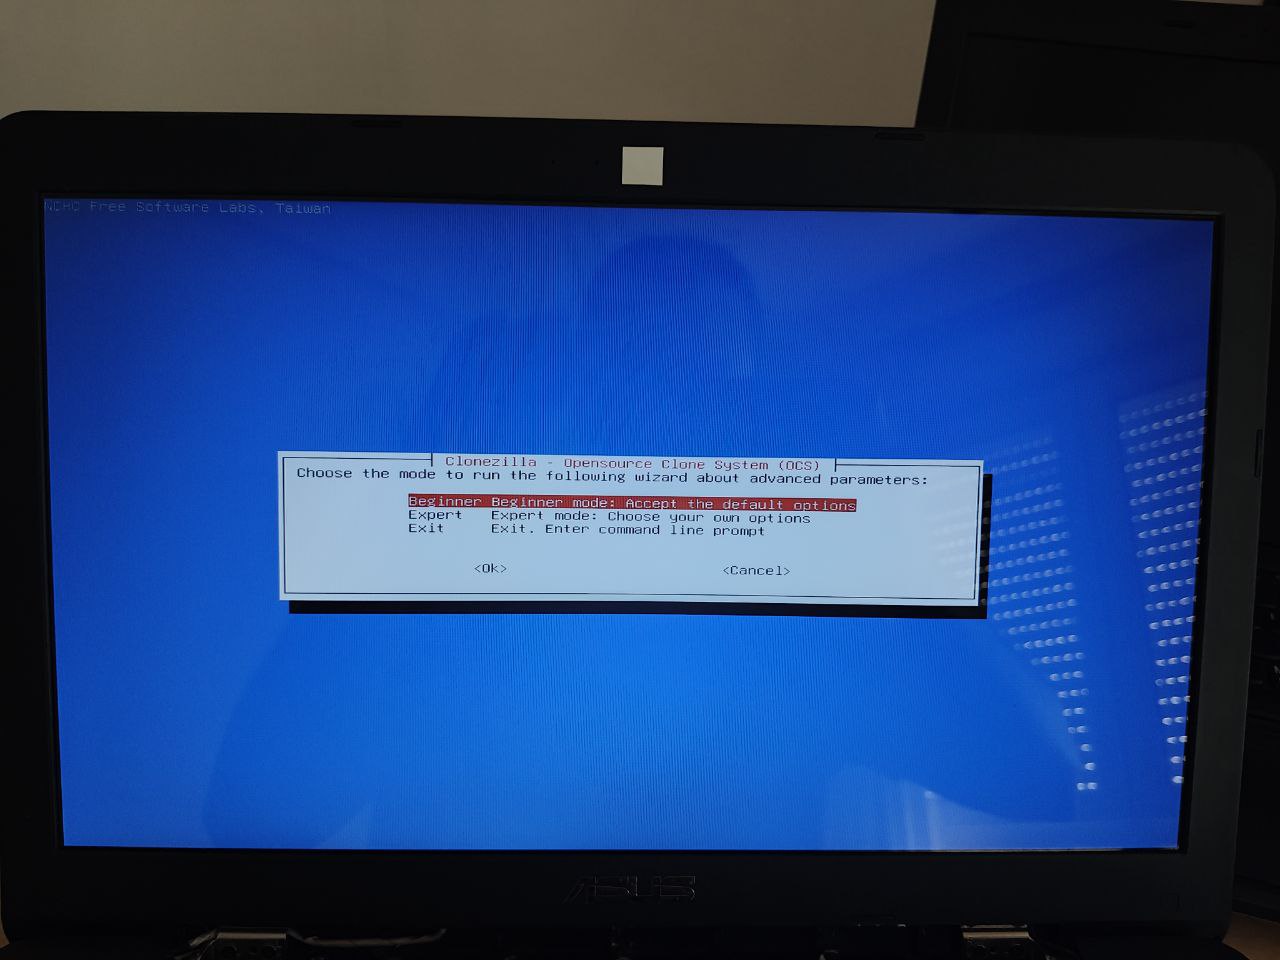
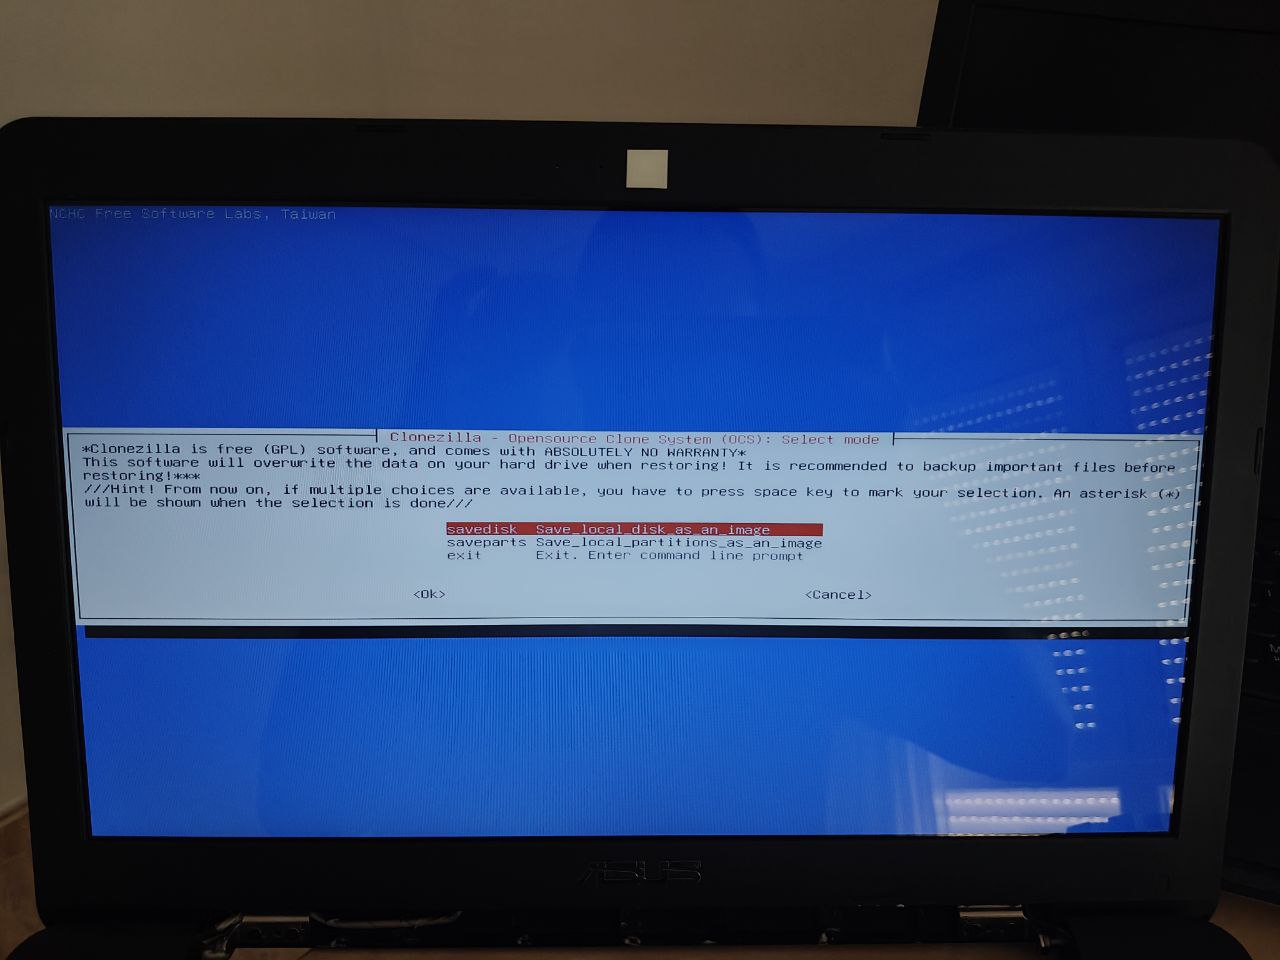
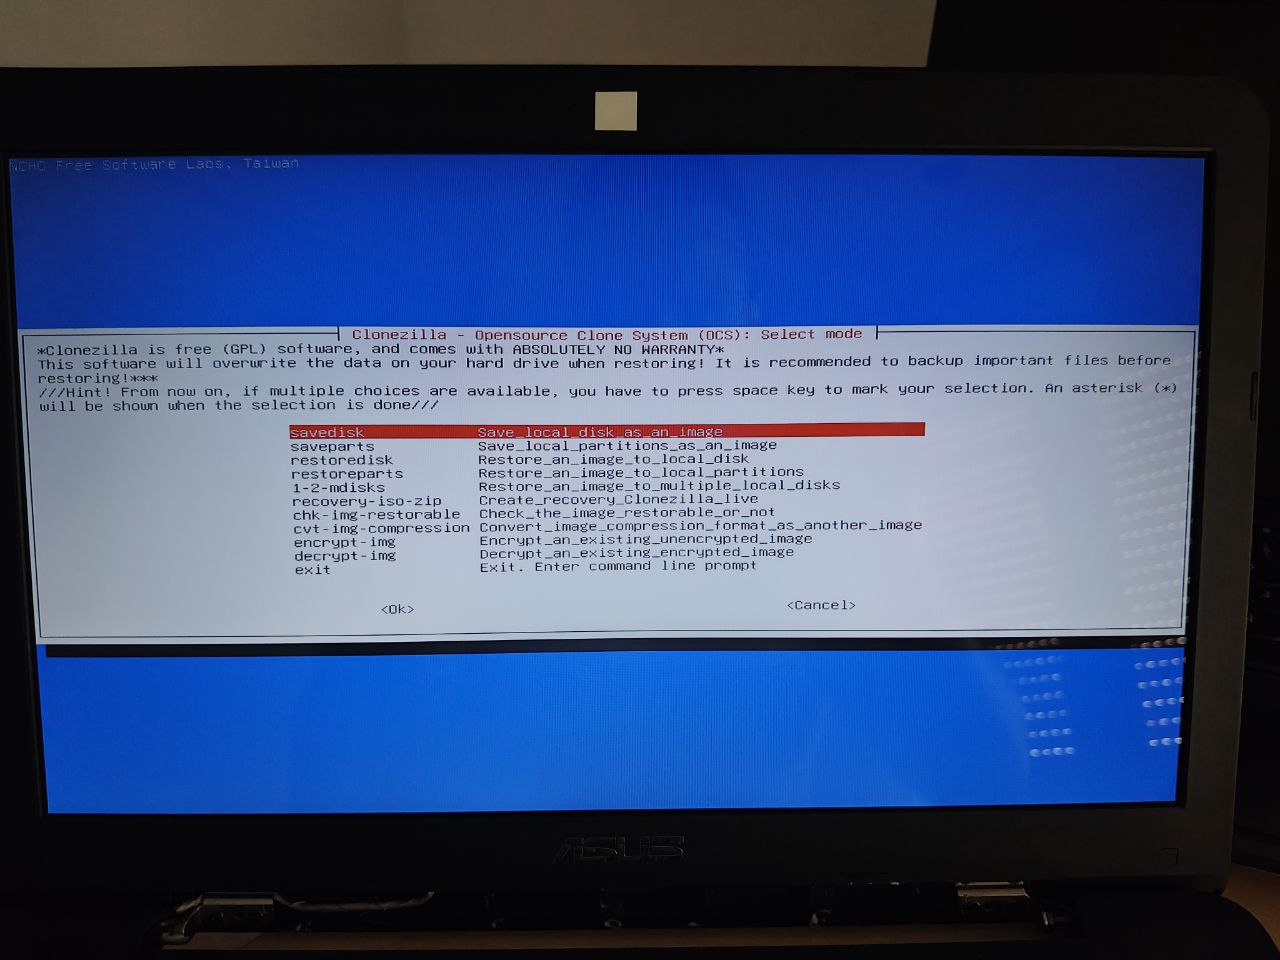
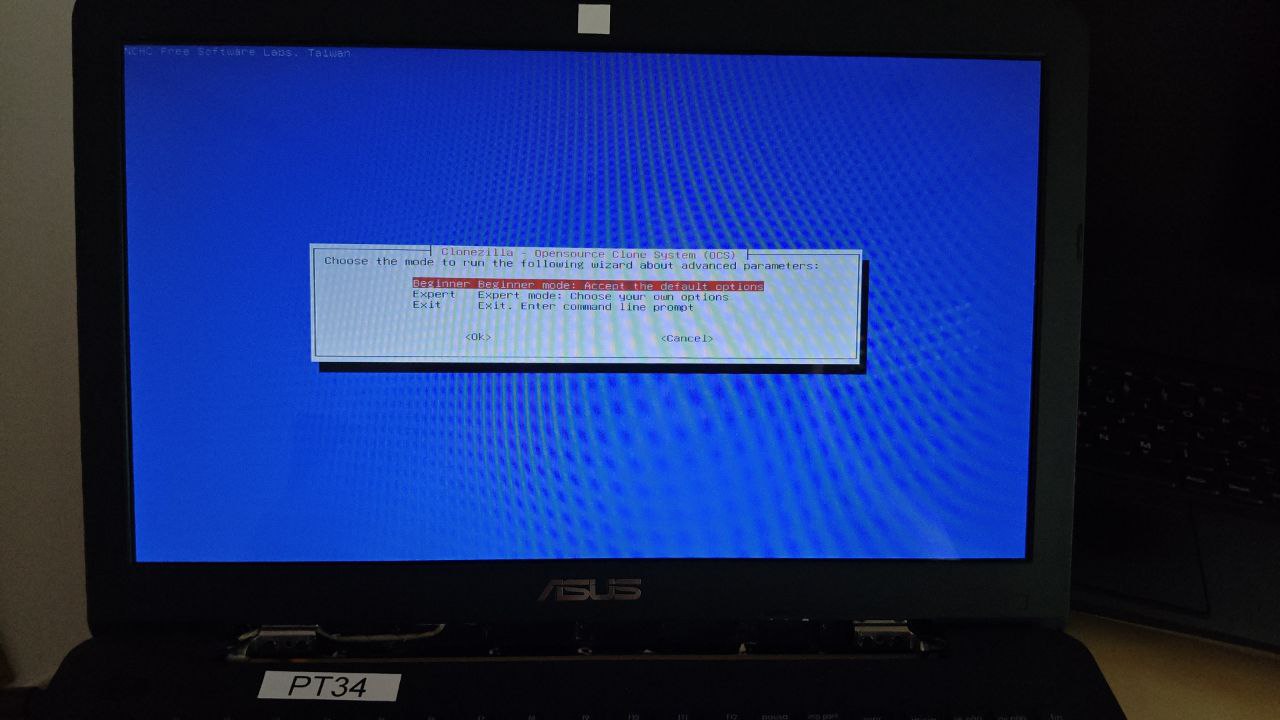
It asks what mode to operate in; Beginner is a good option if no fine-tuning is needed:
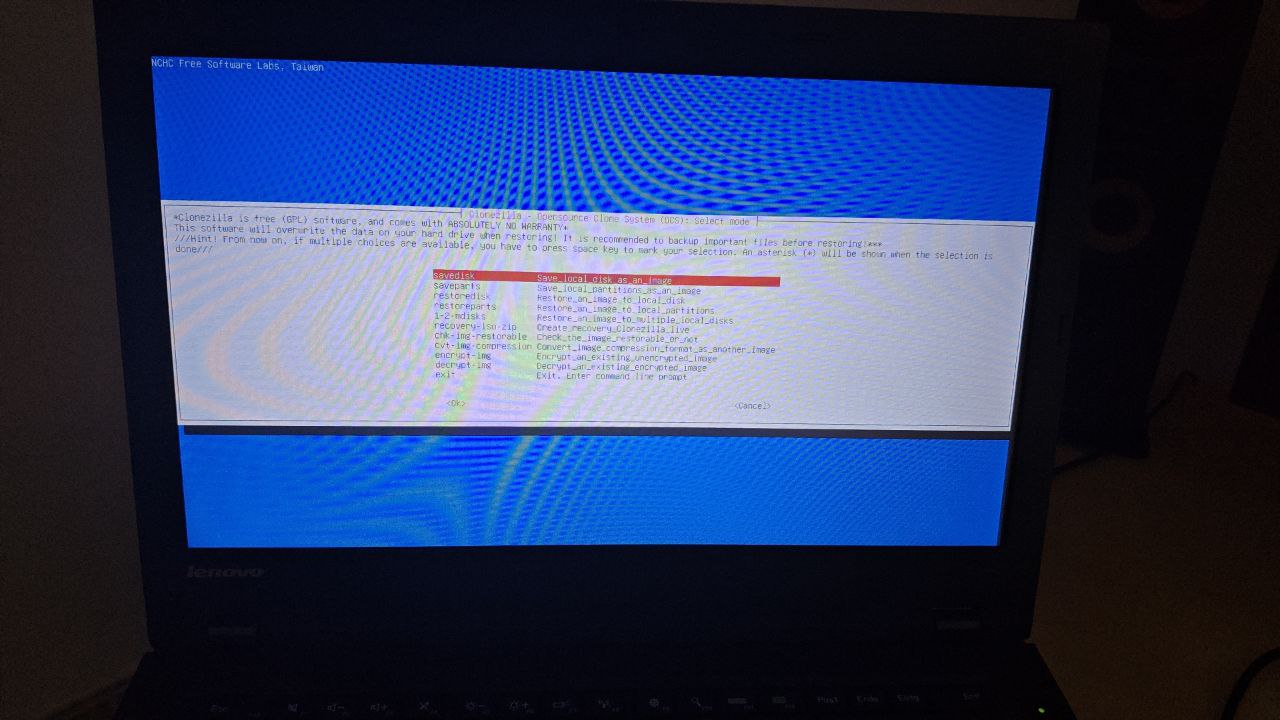
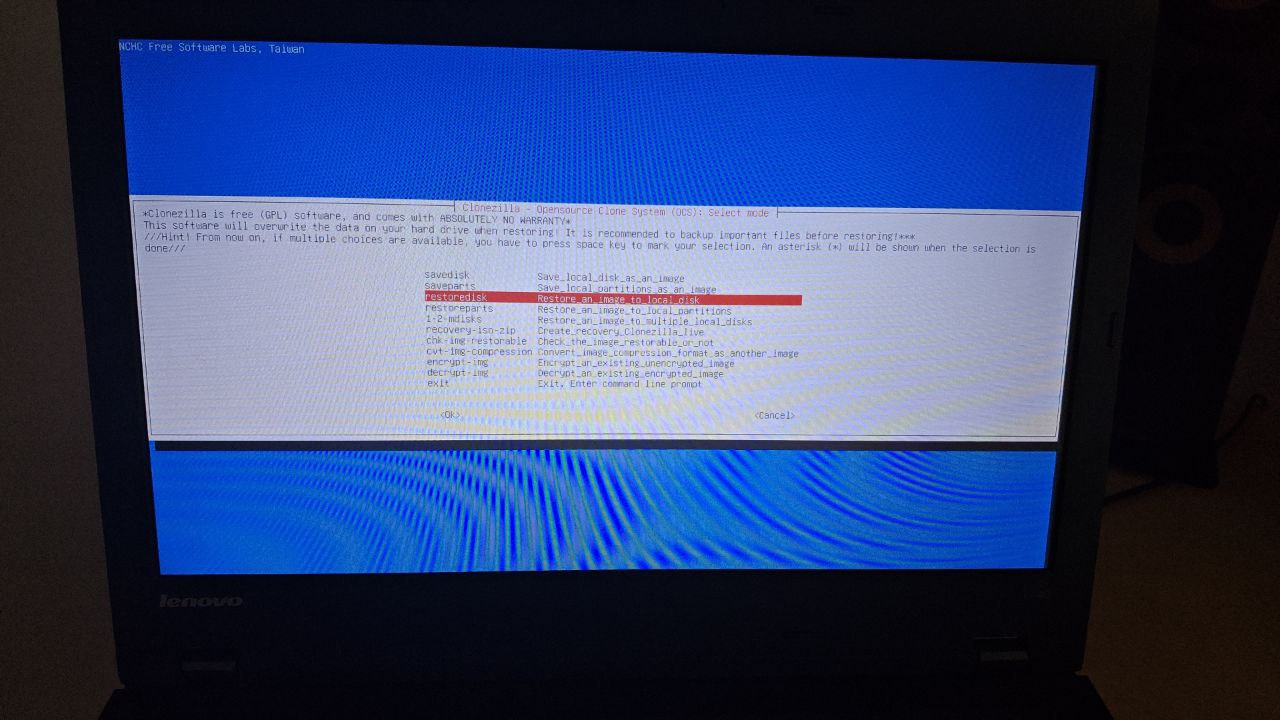
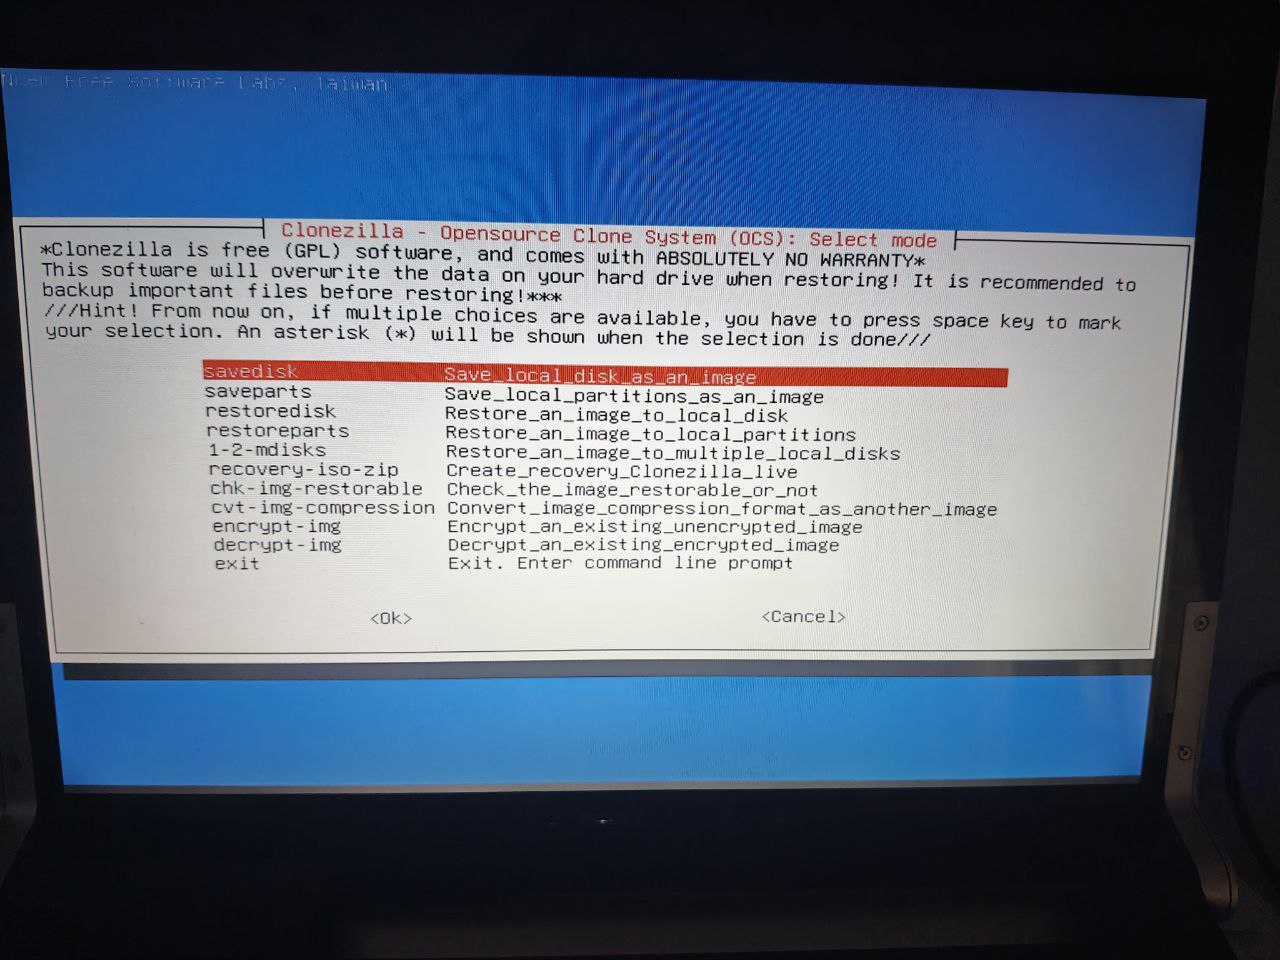
Depending on whether a backup already exists on the disk, you will see one of two menus. We want to back up the entire disk as an image with savedisk:
| No previous backup | With previous backup |
|---|---|
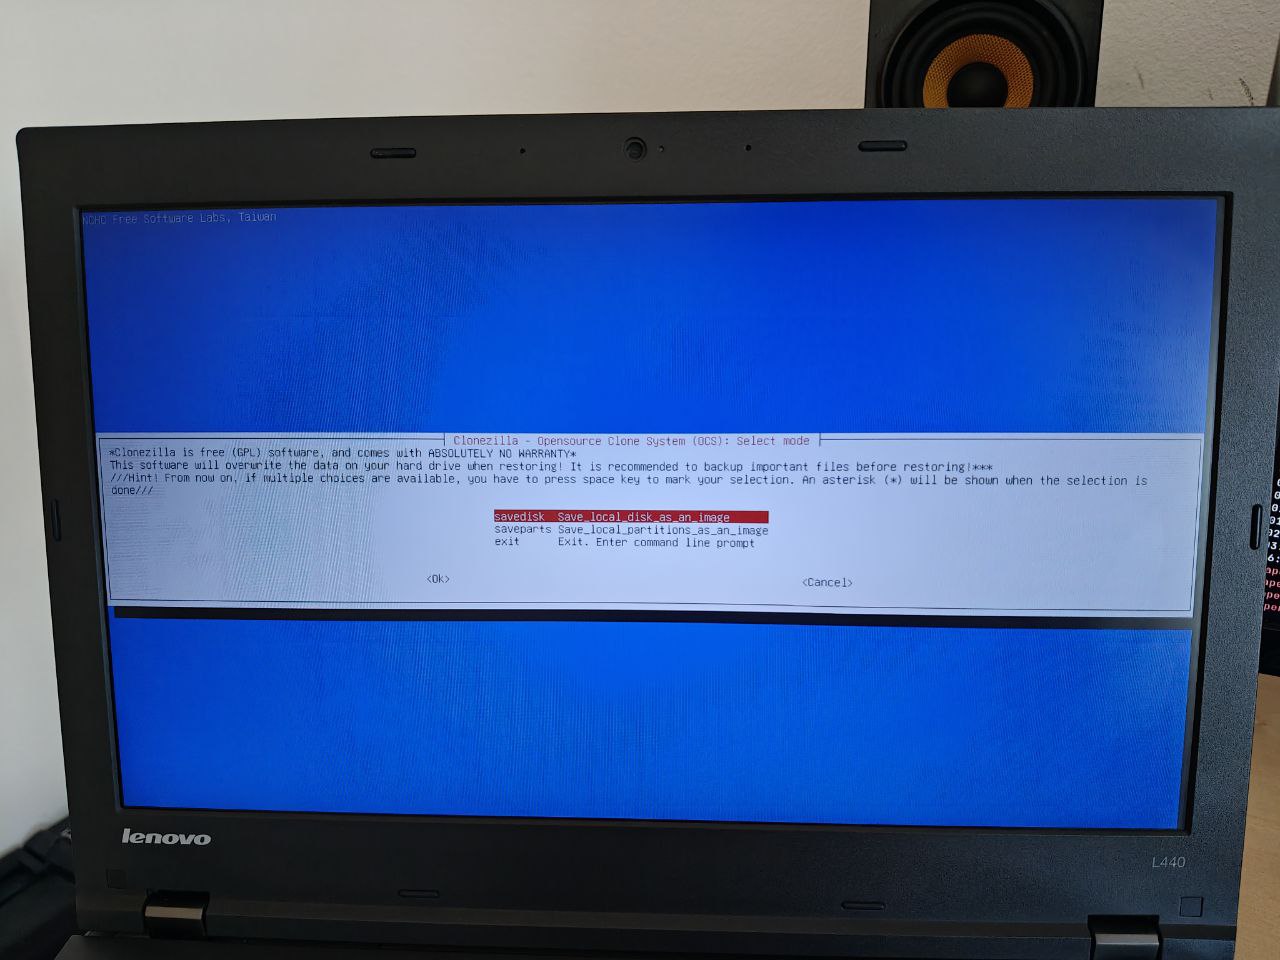
|
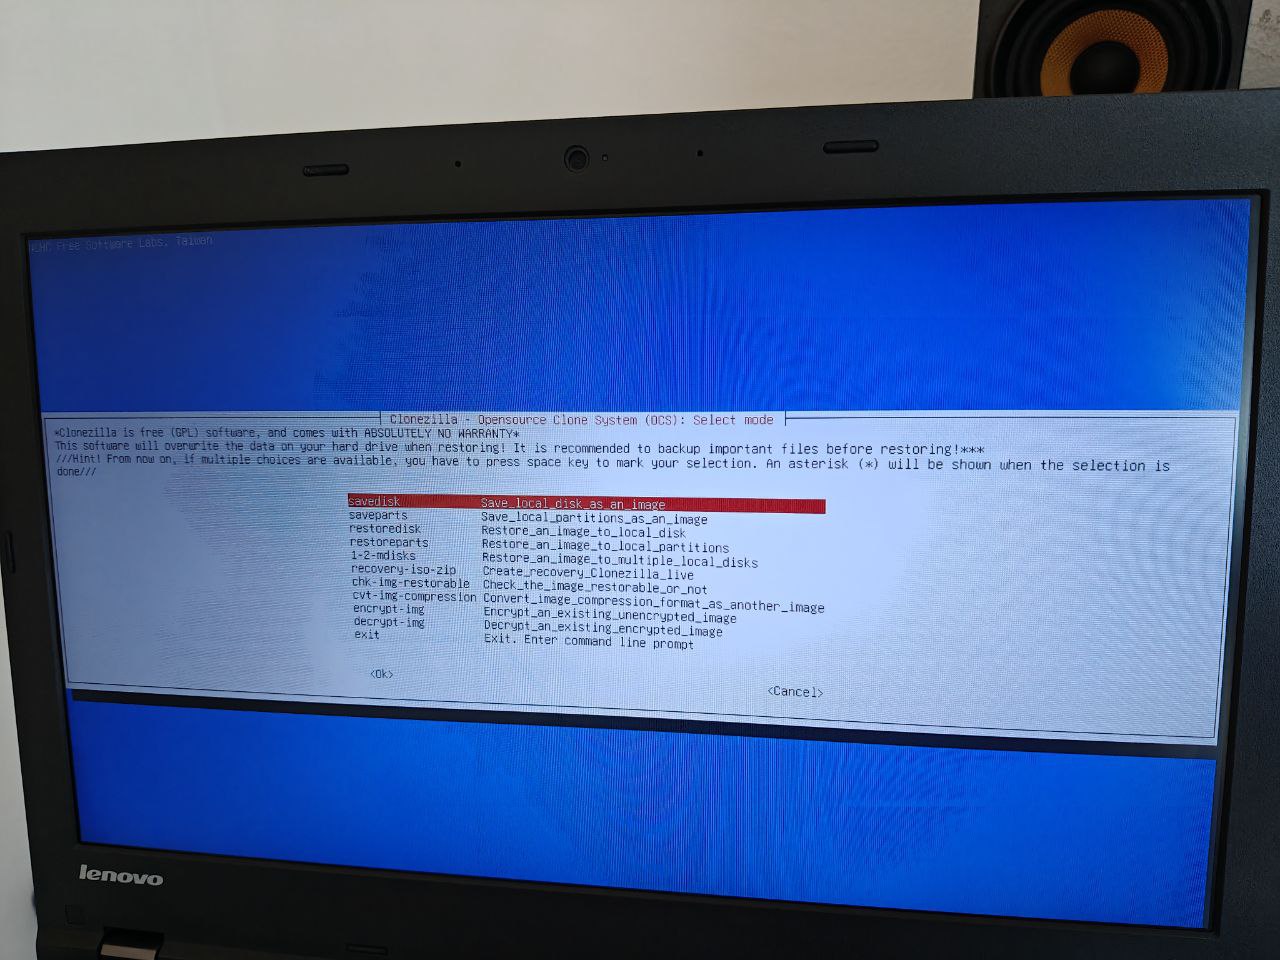
|
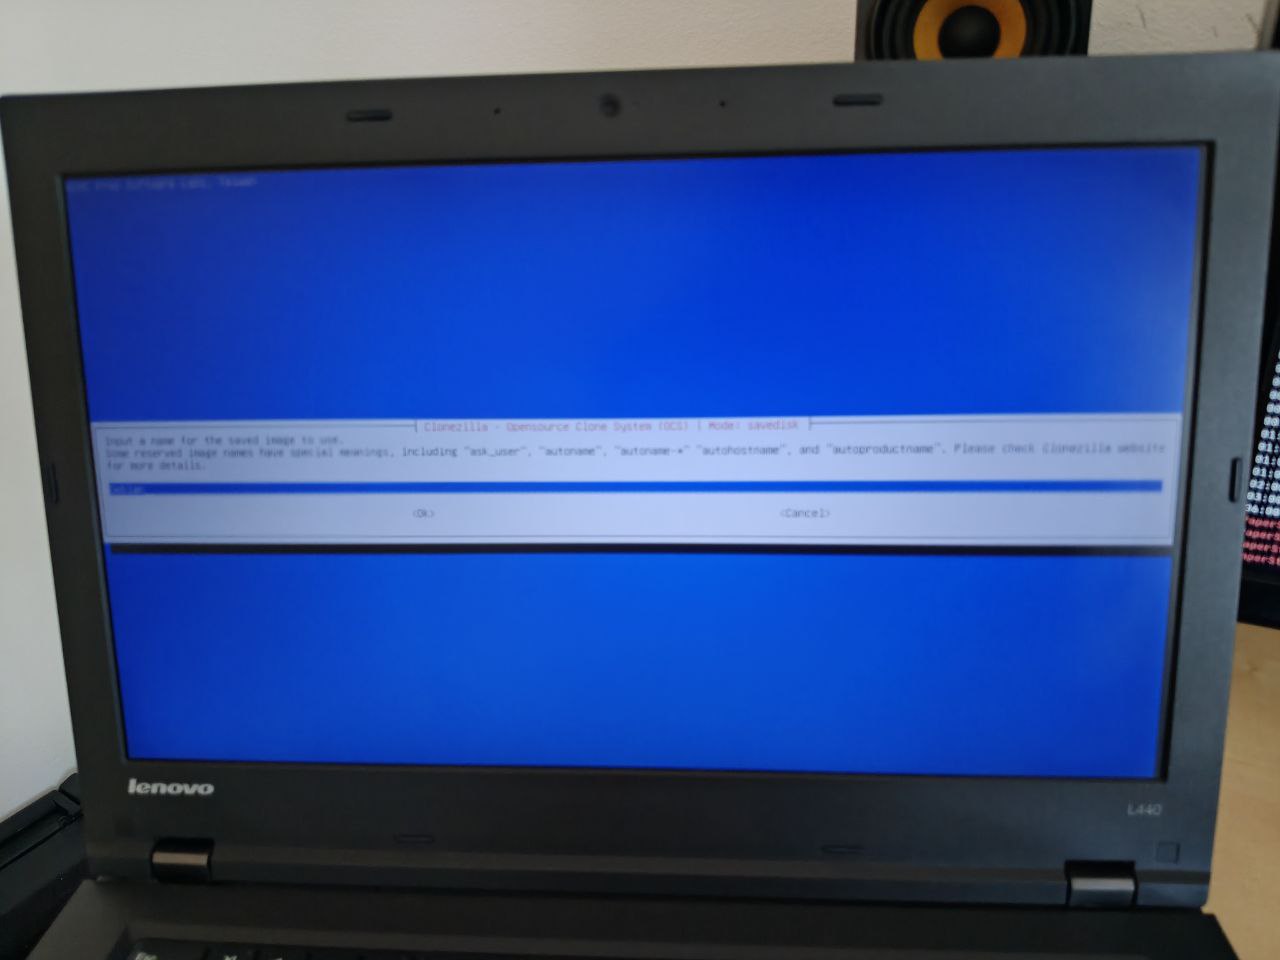
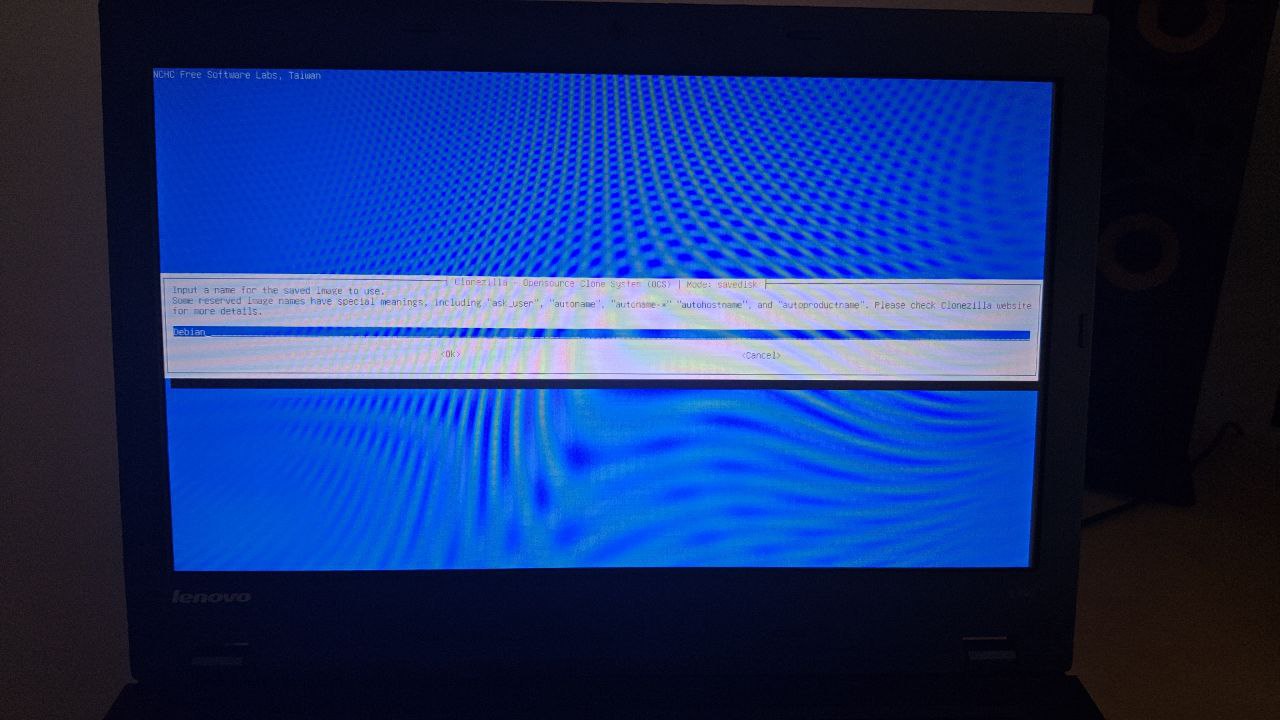
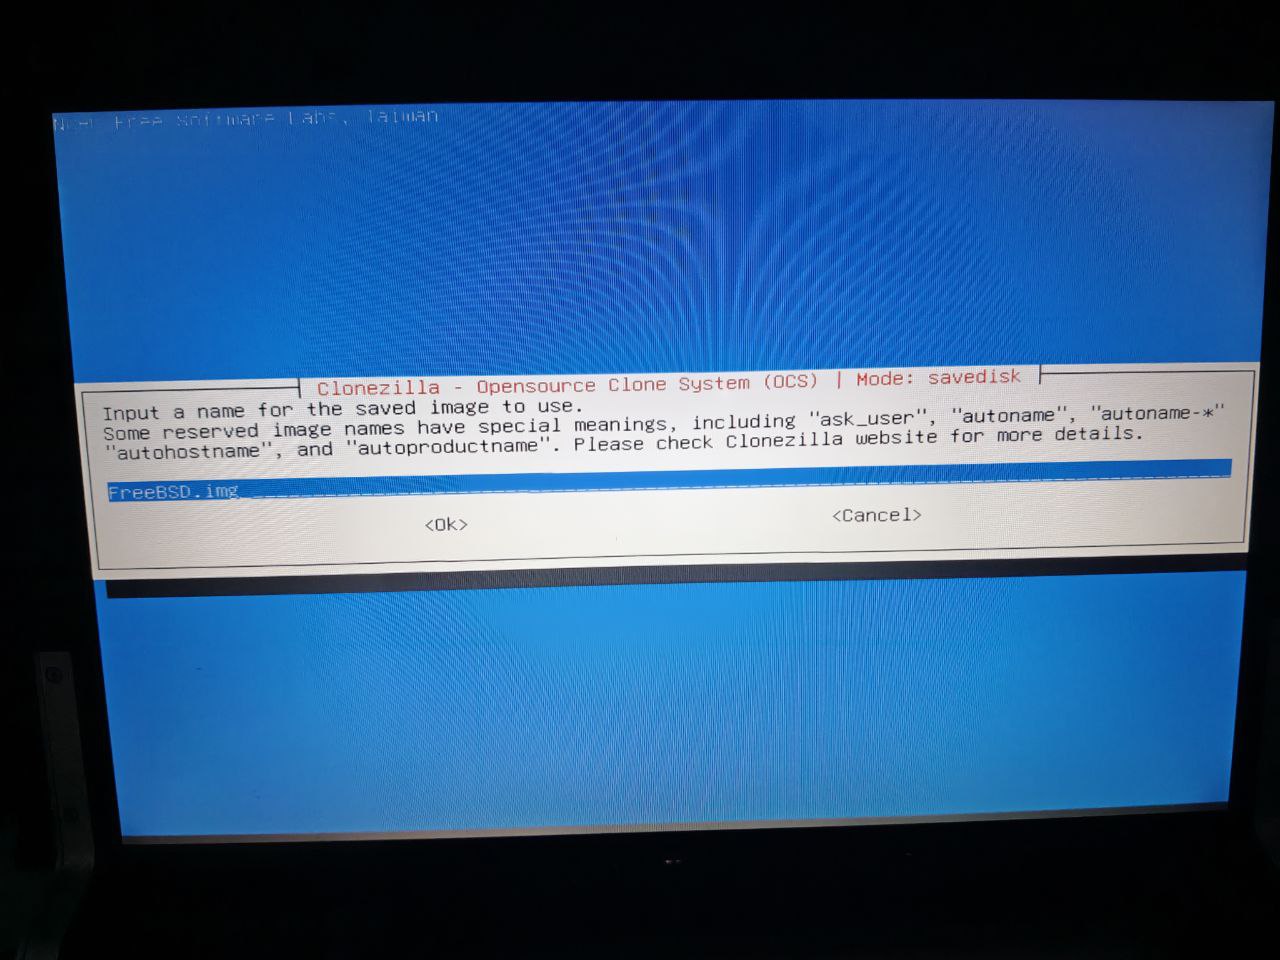
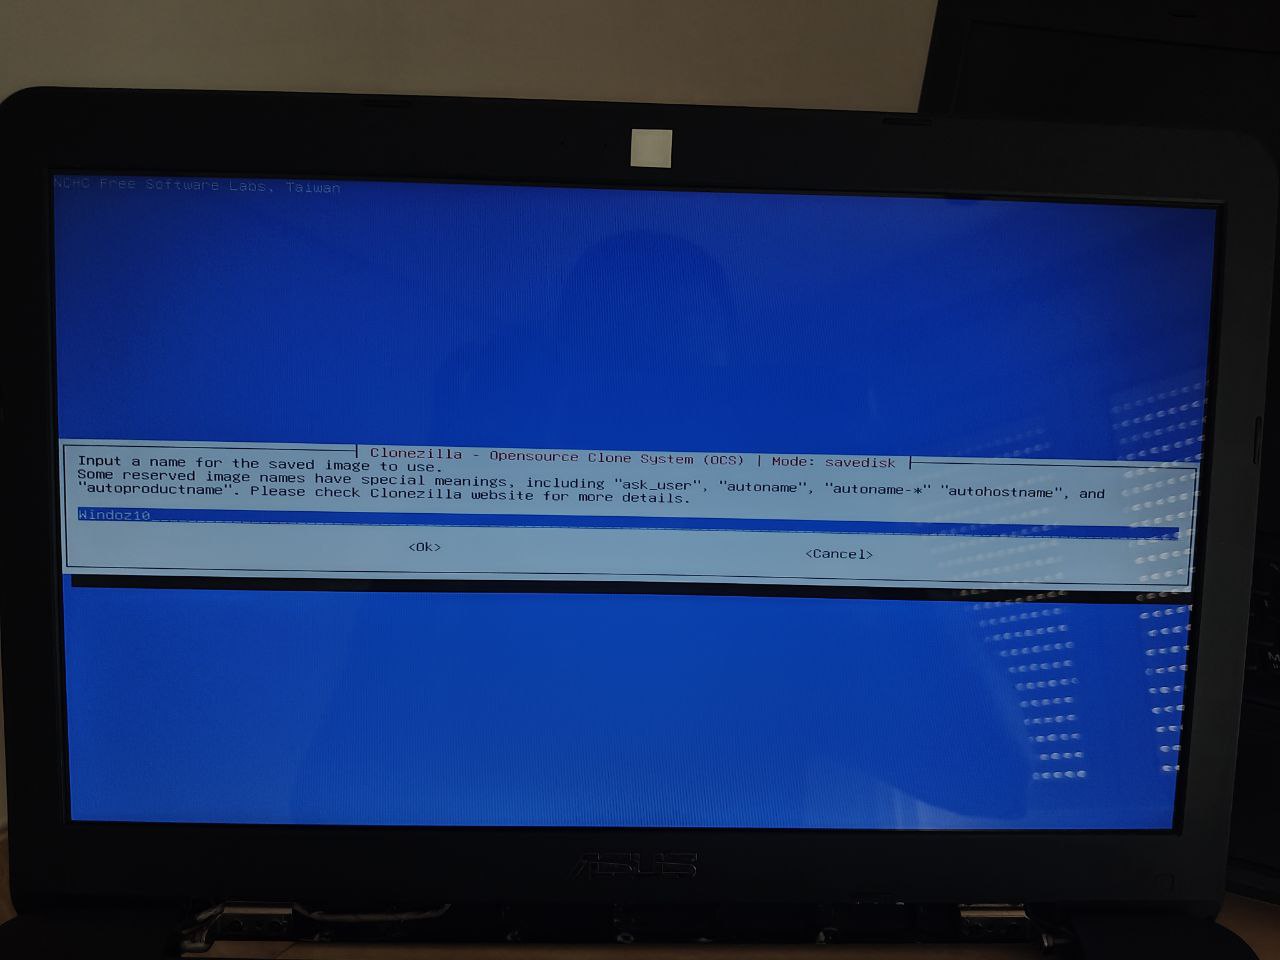
Enter the image name:
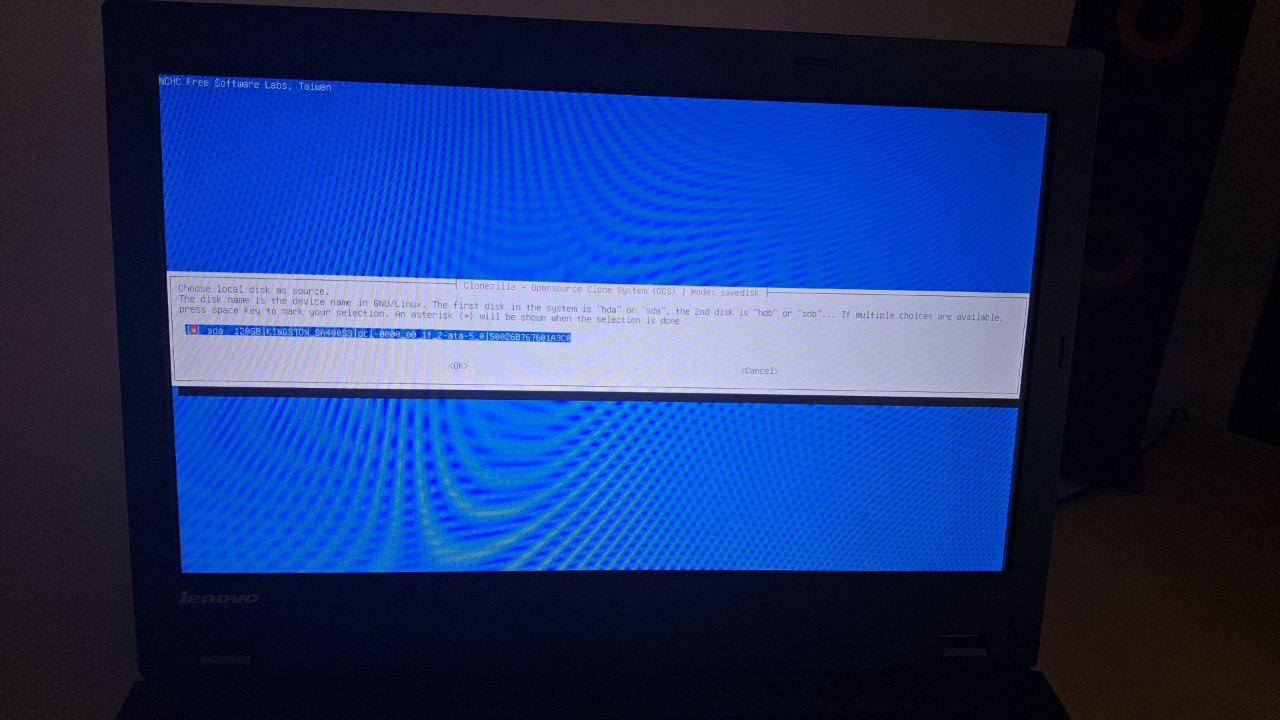
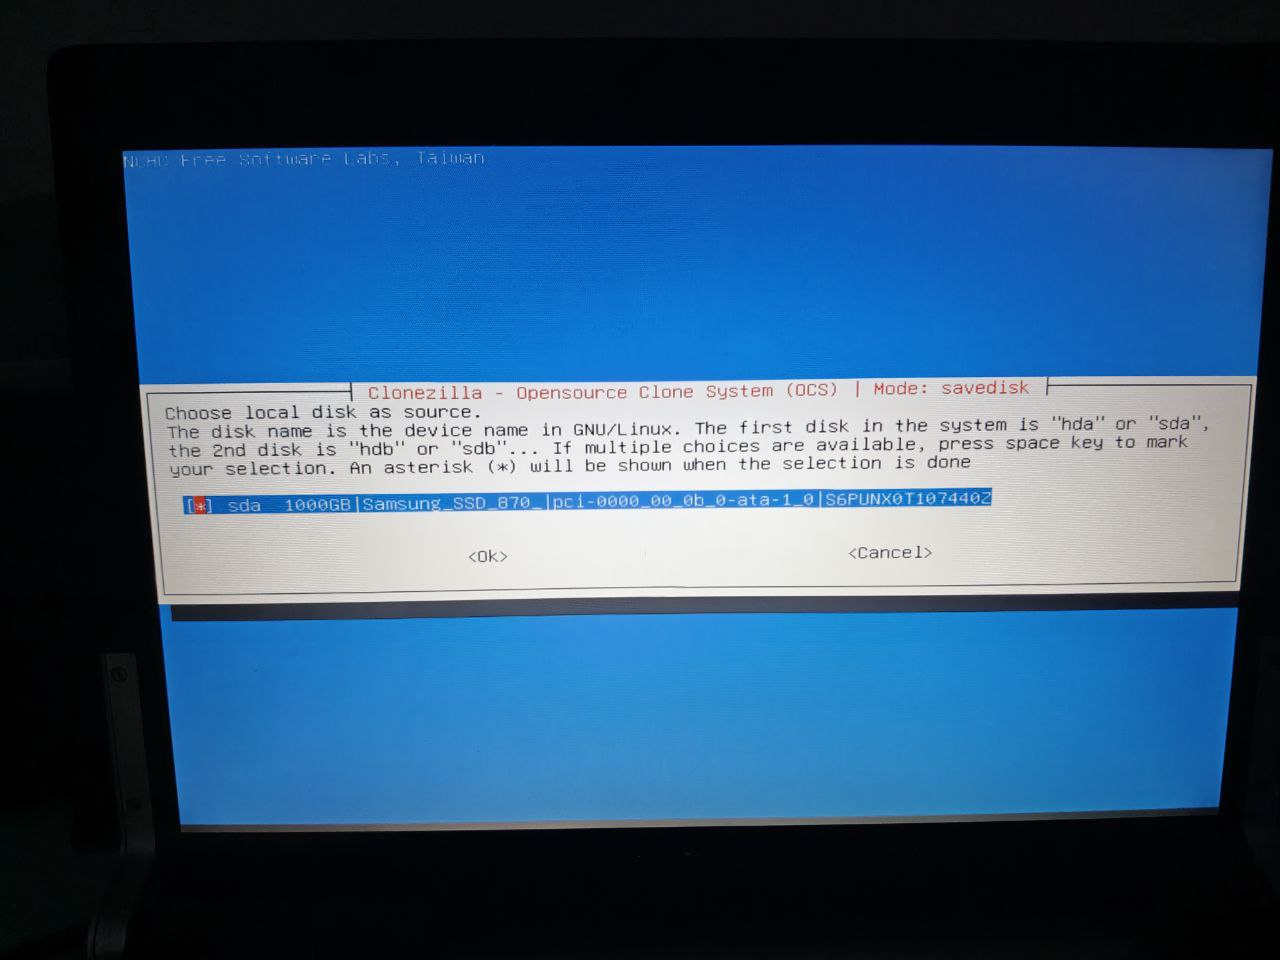
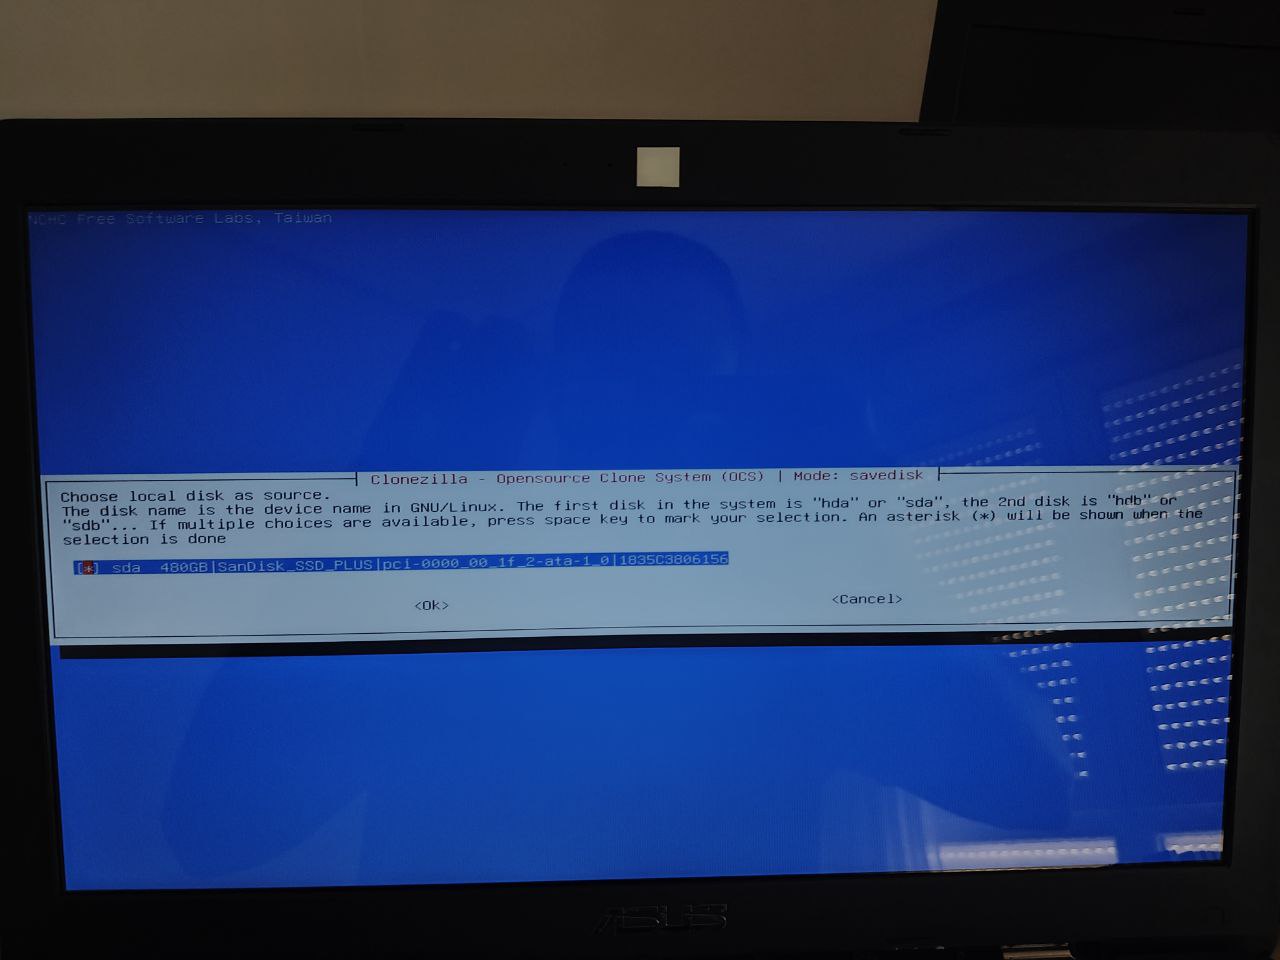
Select the source disk:
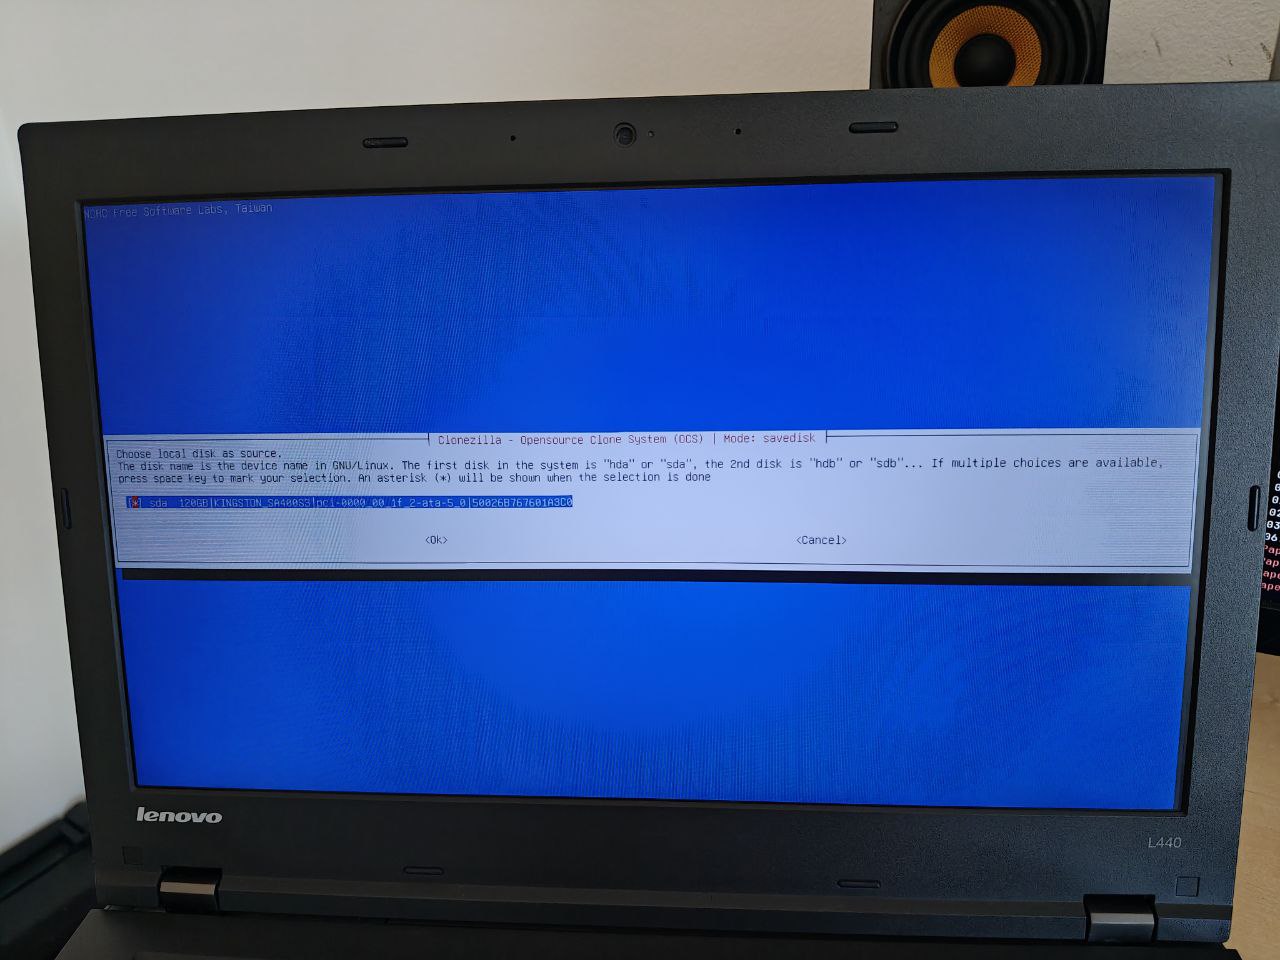
If the disk is encrypted like mine (LUKS), it asks if you want to open the device. Opening it lets you back up/restore only the used data (not empty space), which speeds up the process. 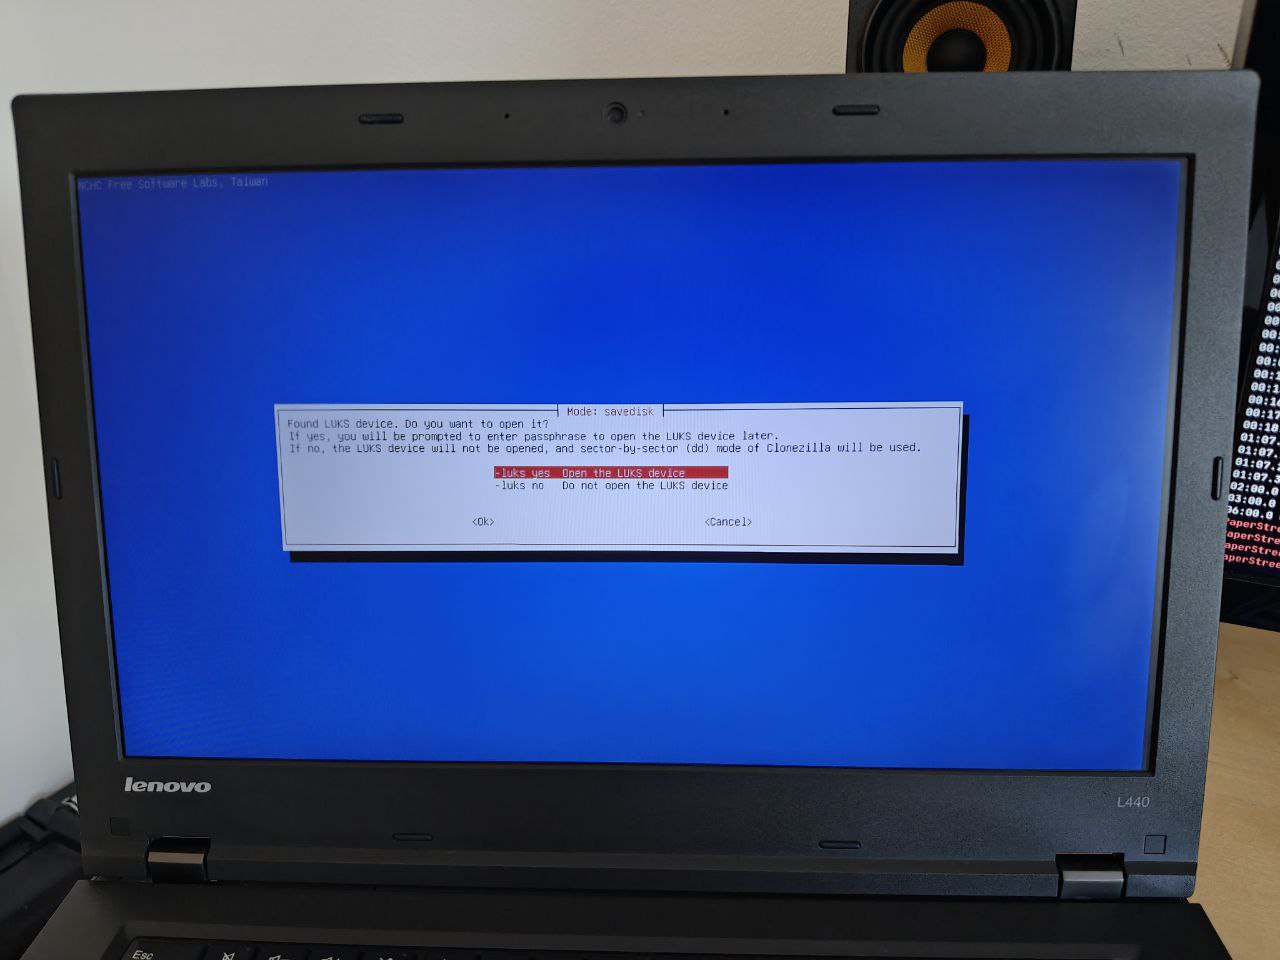
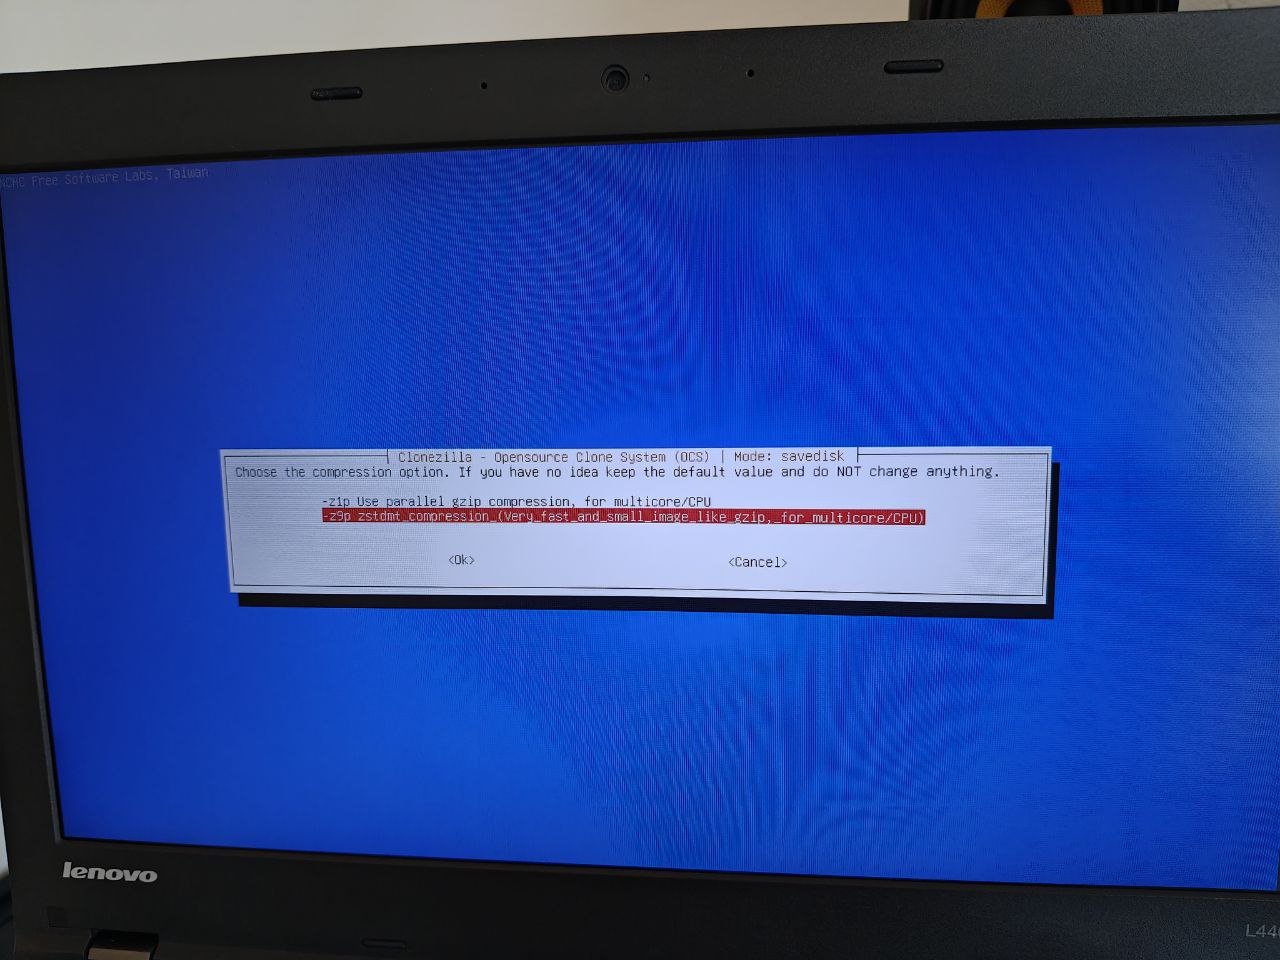
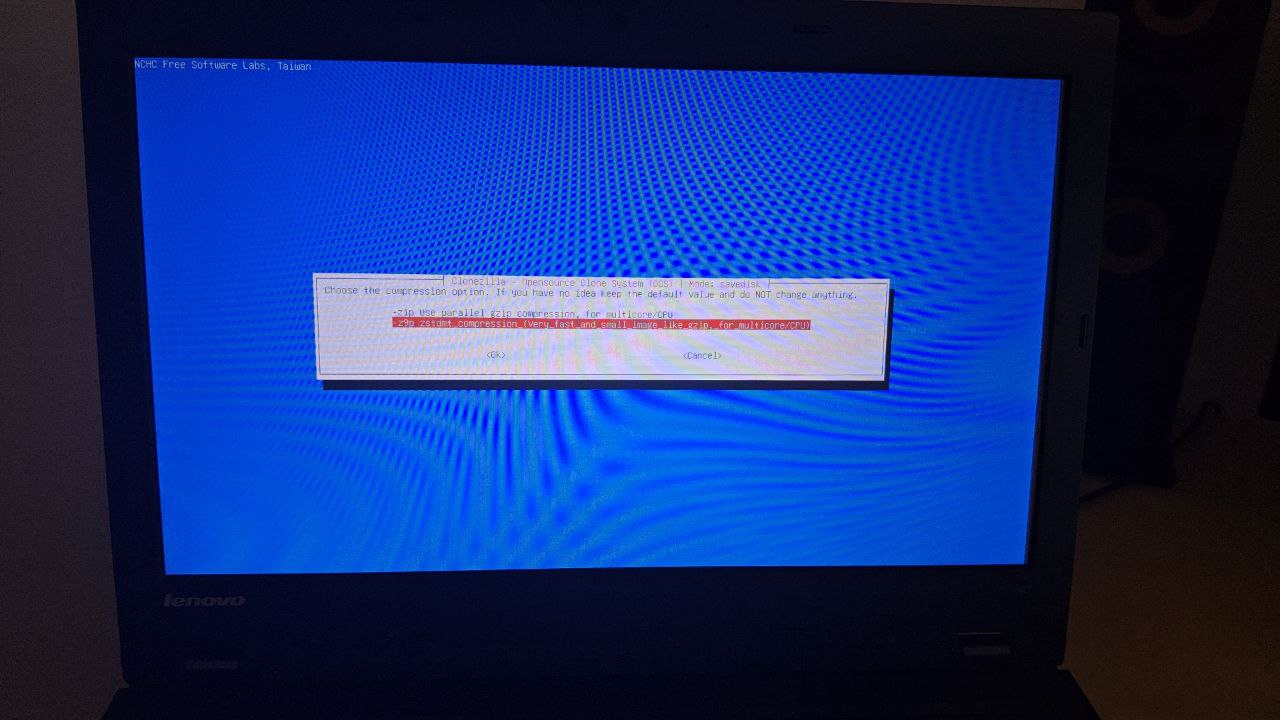
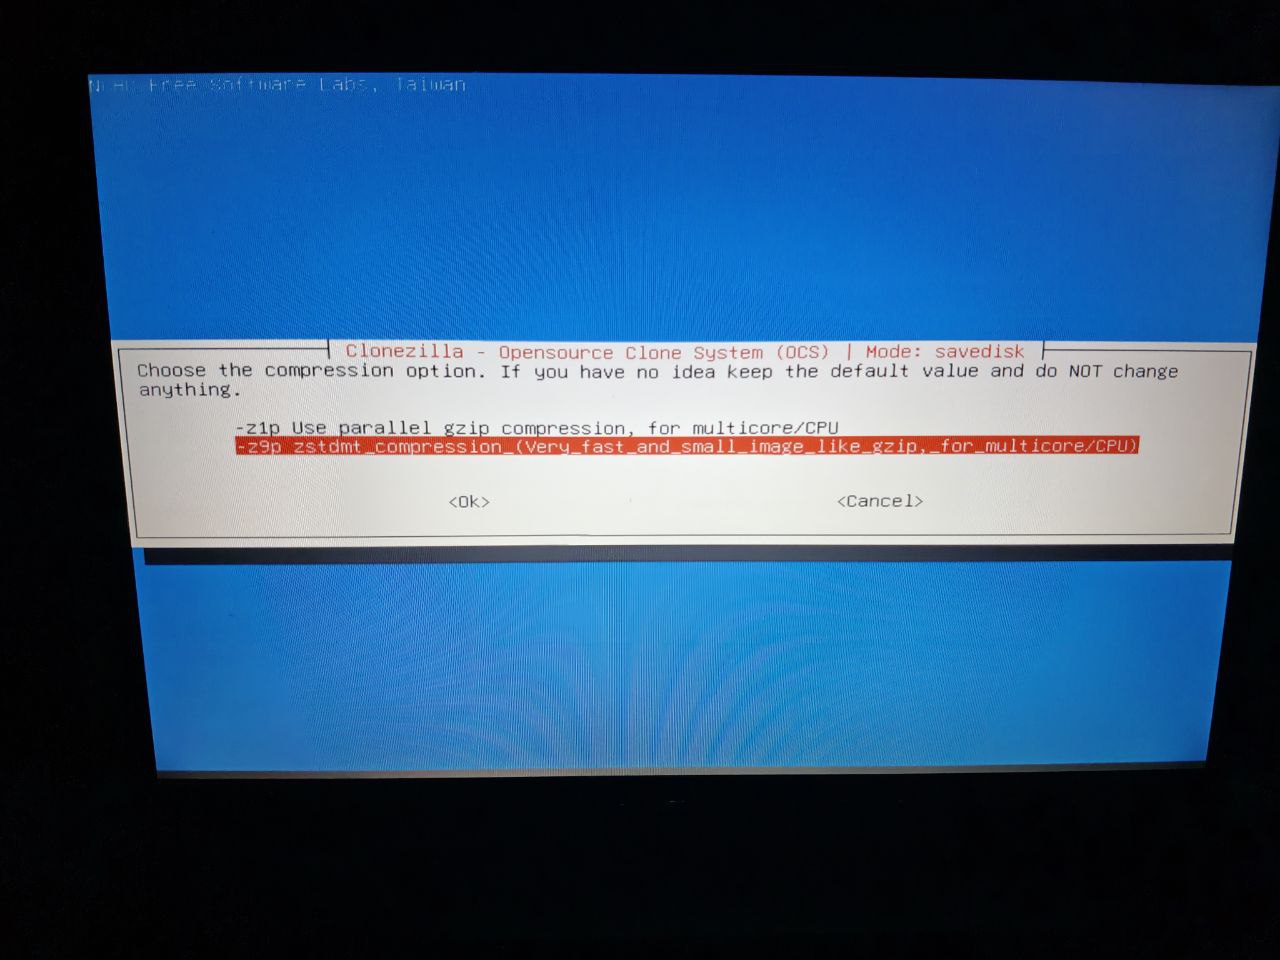
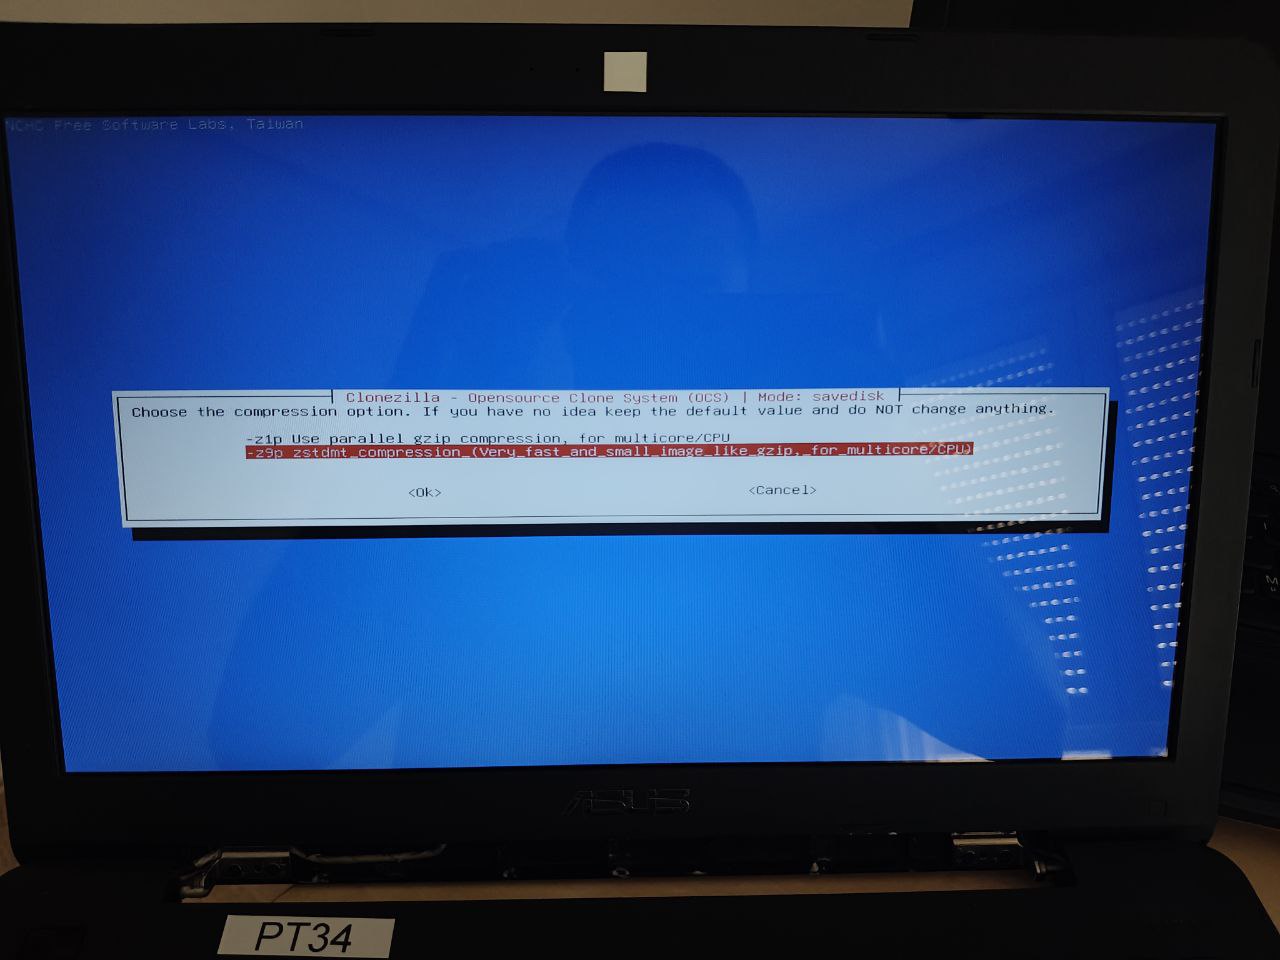
Choose the
compression method
for the image:
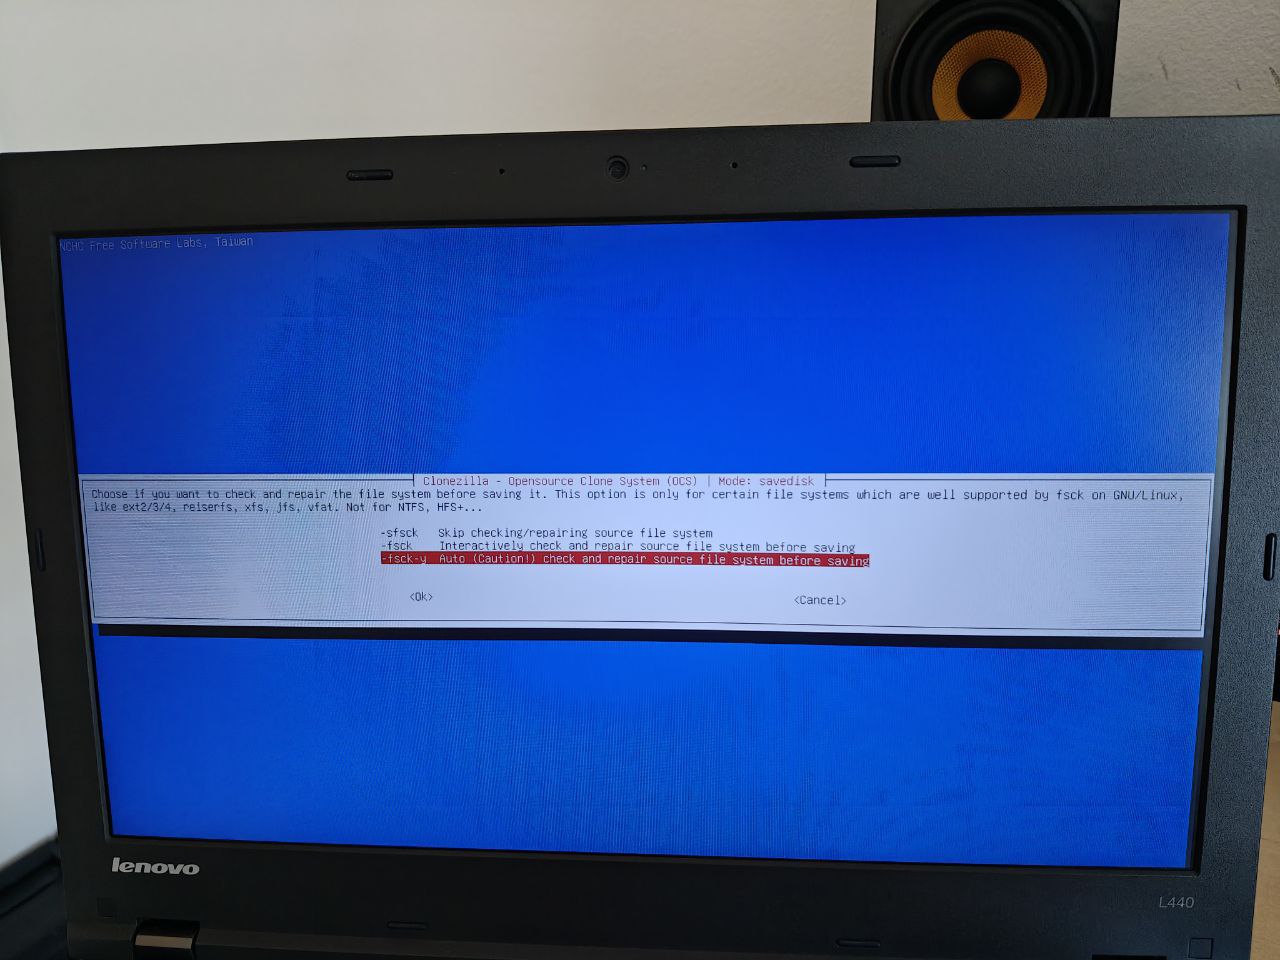
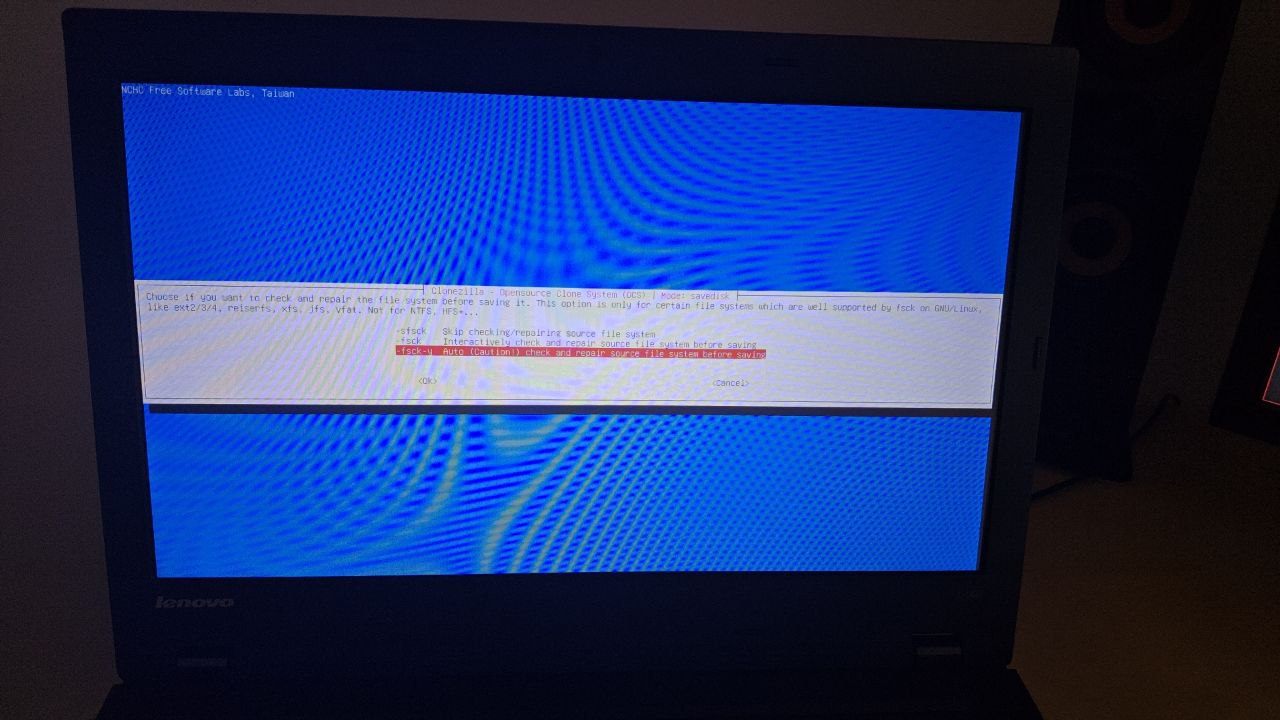
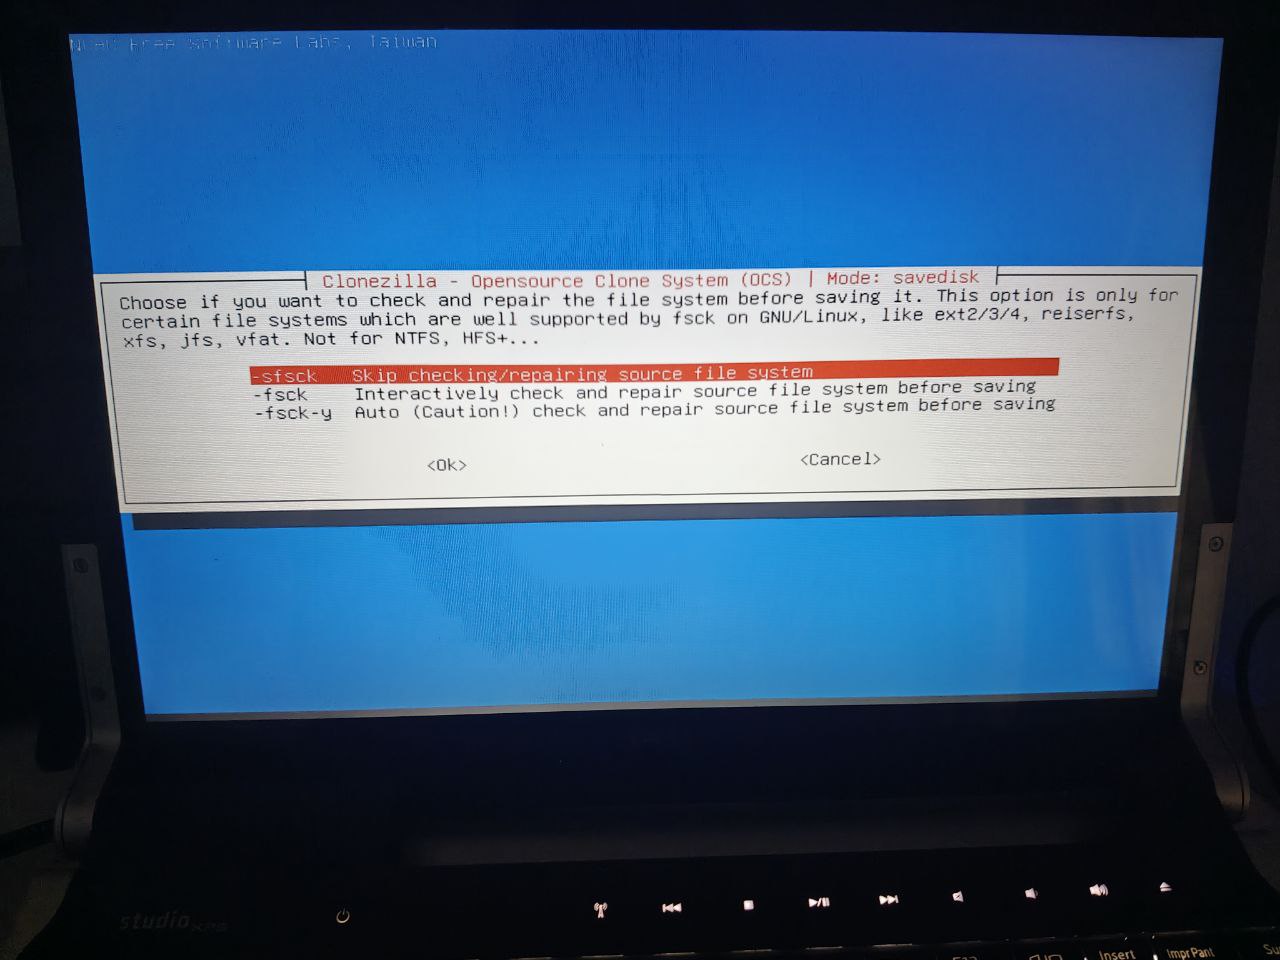
You’re asked whether to perform a fsck on the source file system:
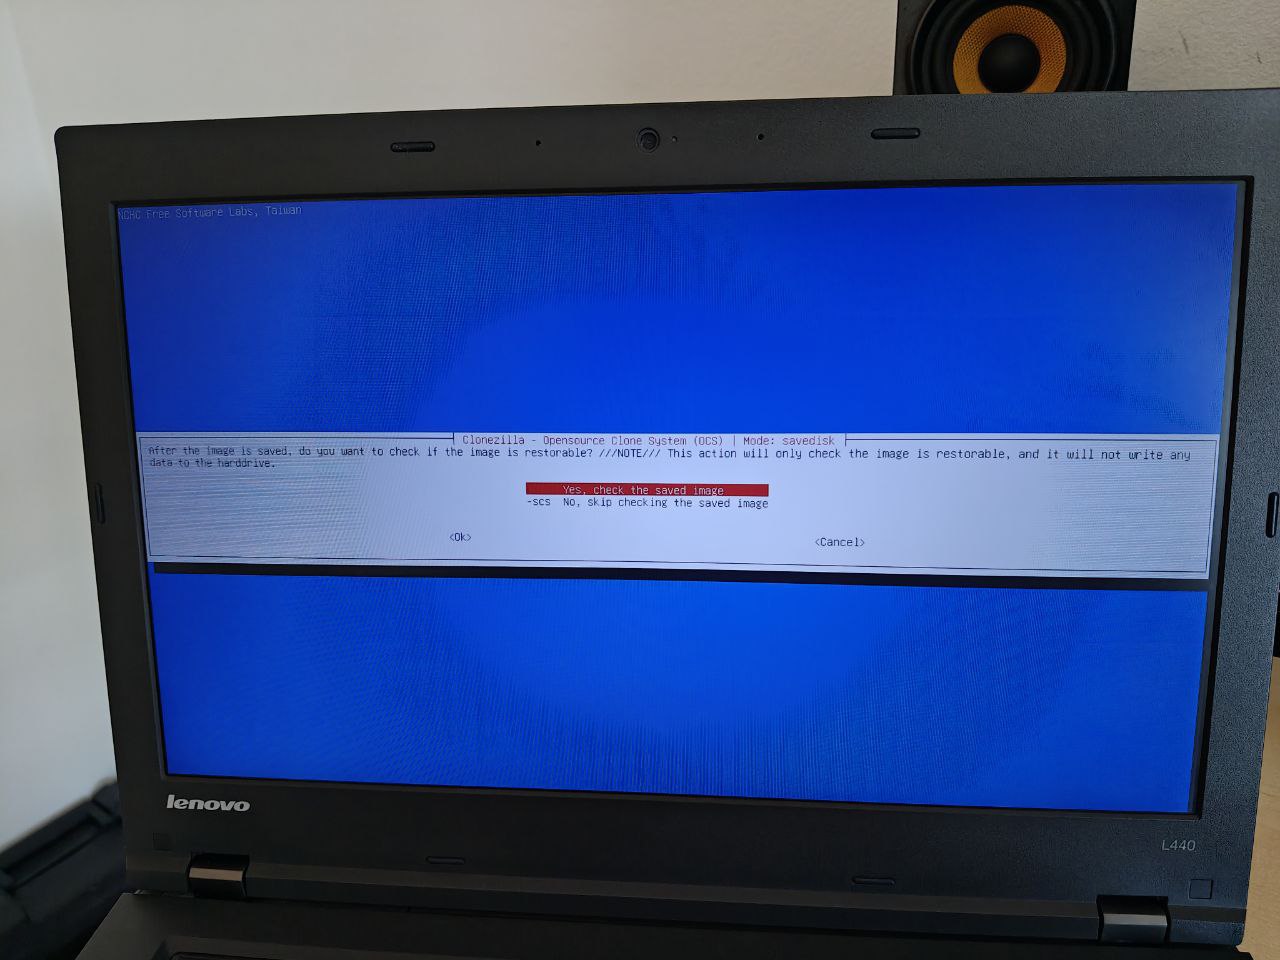
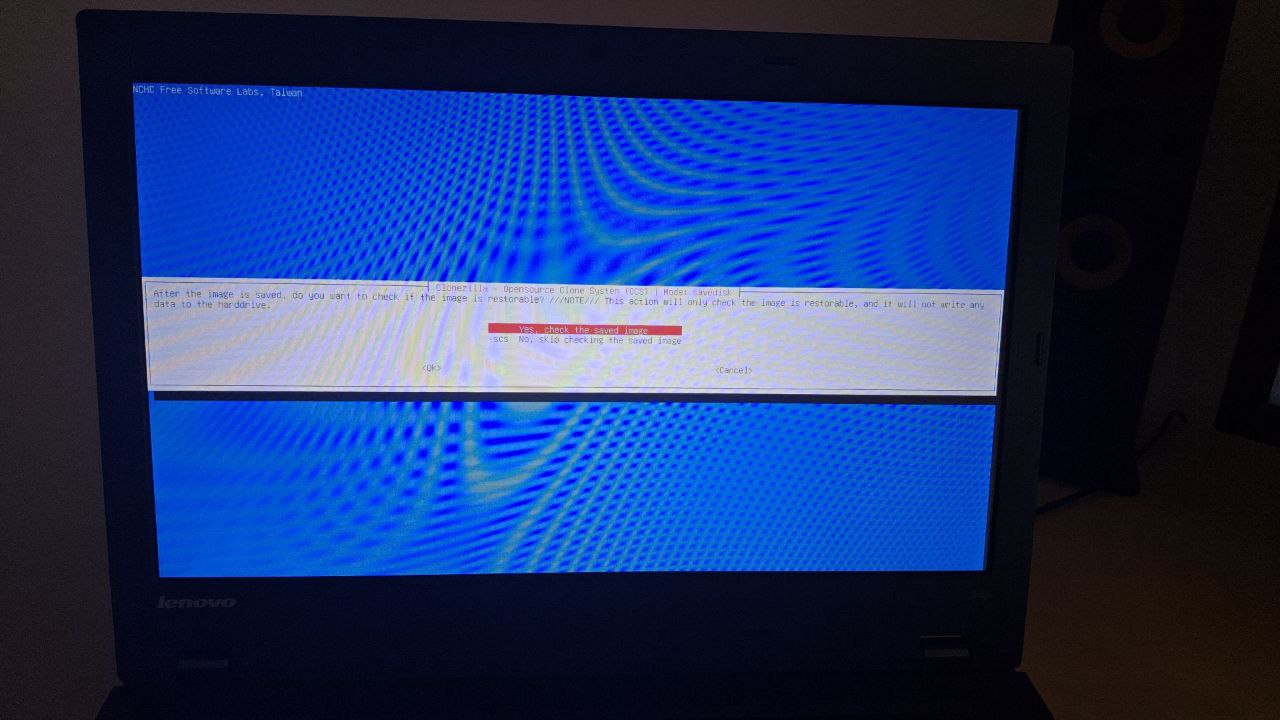
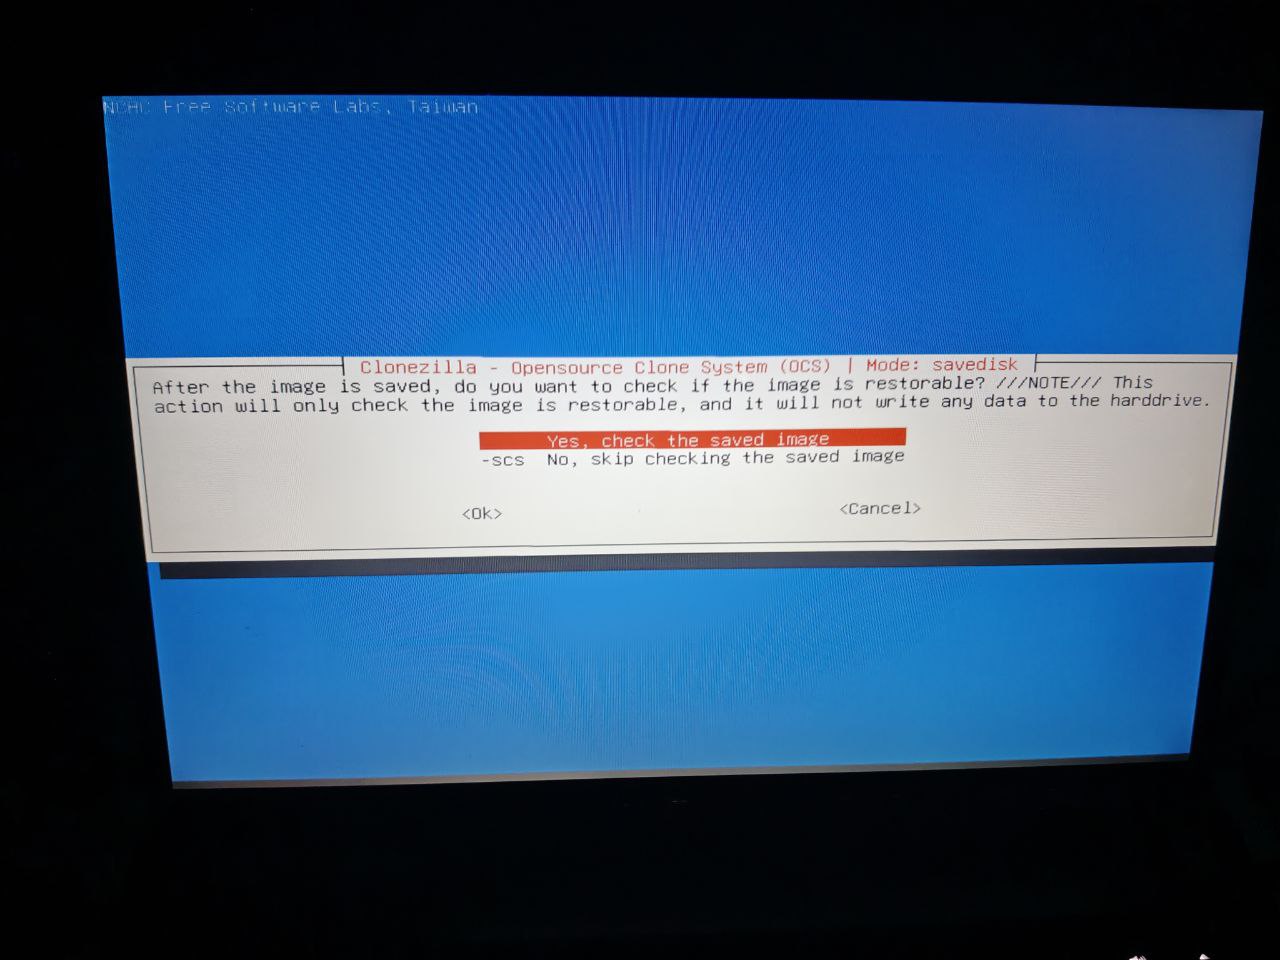
Check whether the image is restorable after it’s created:
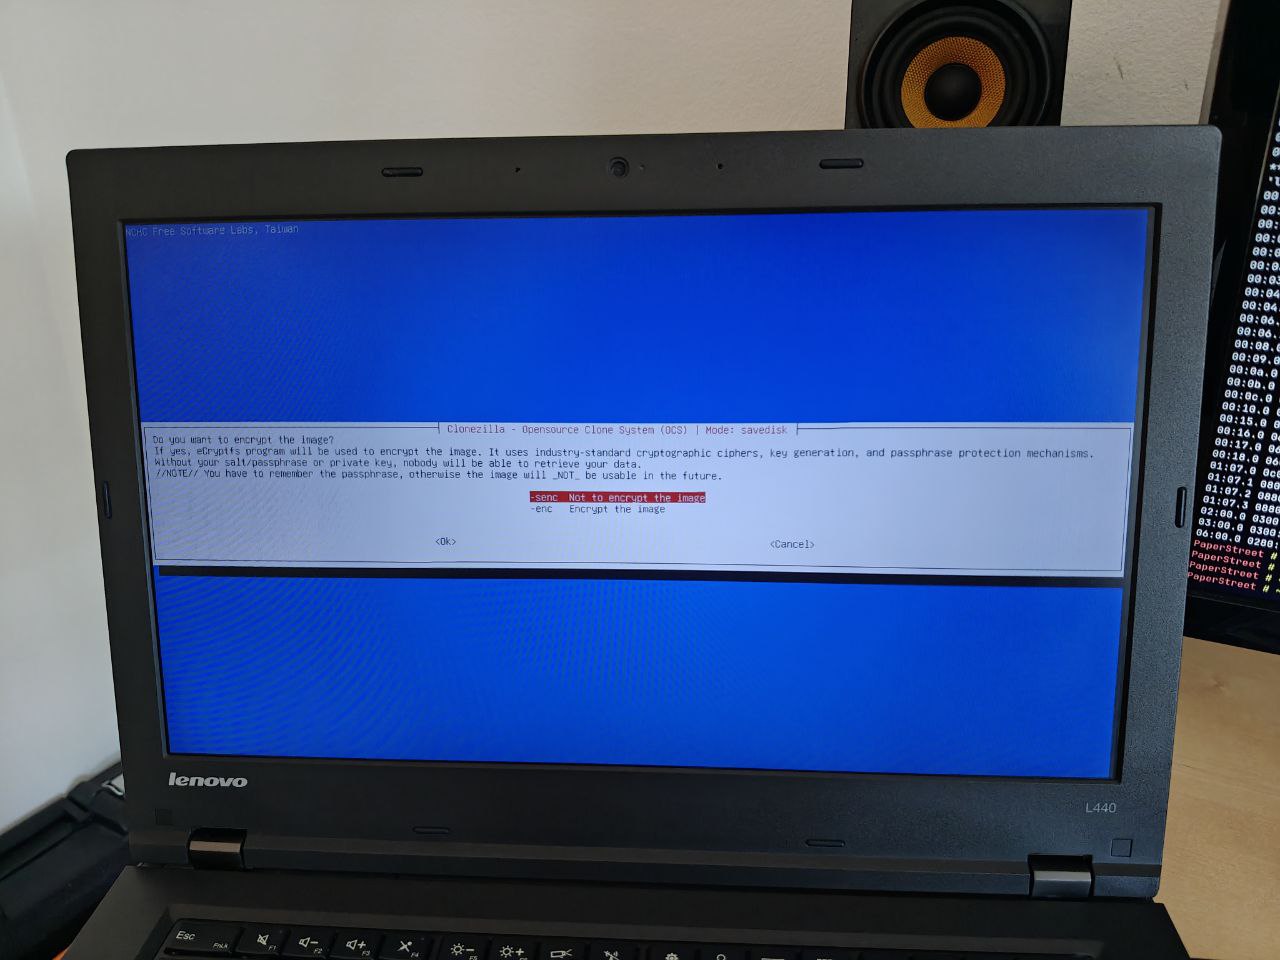
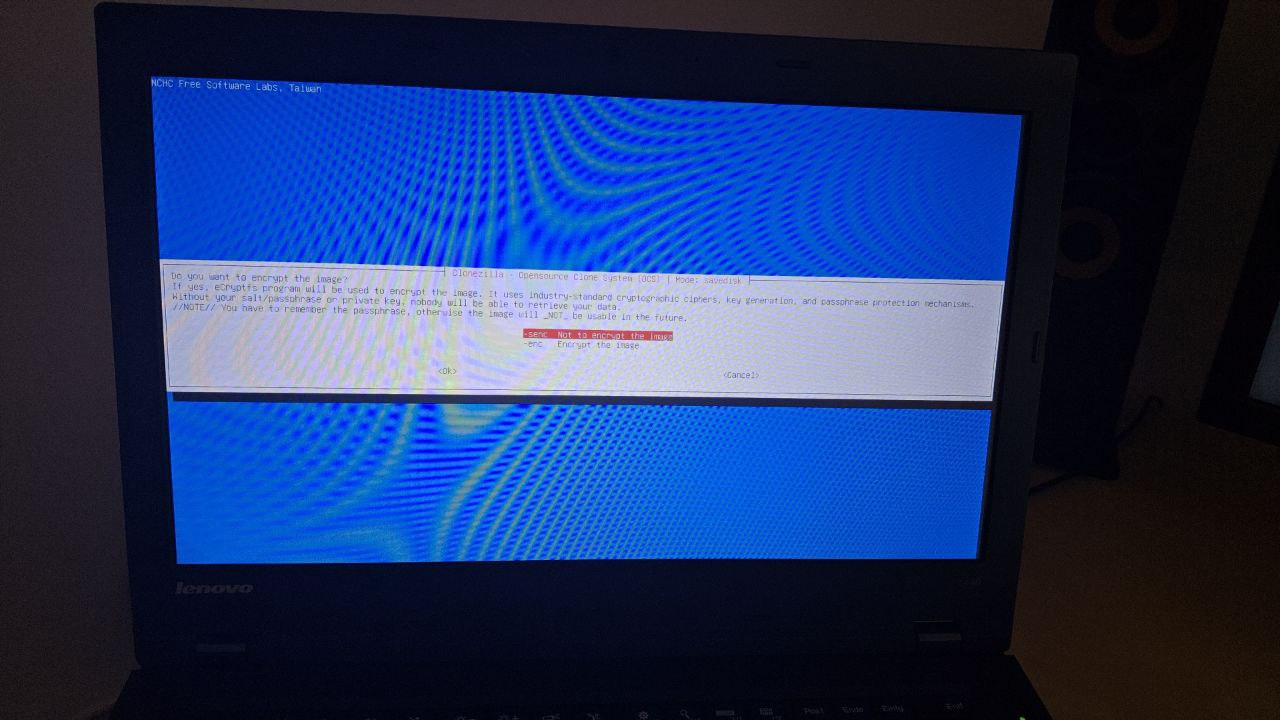
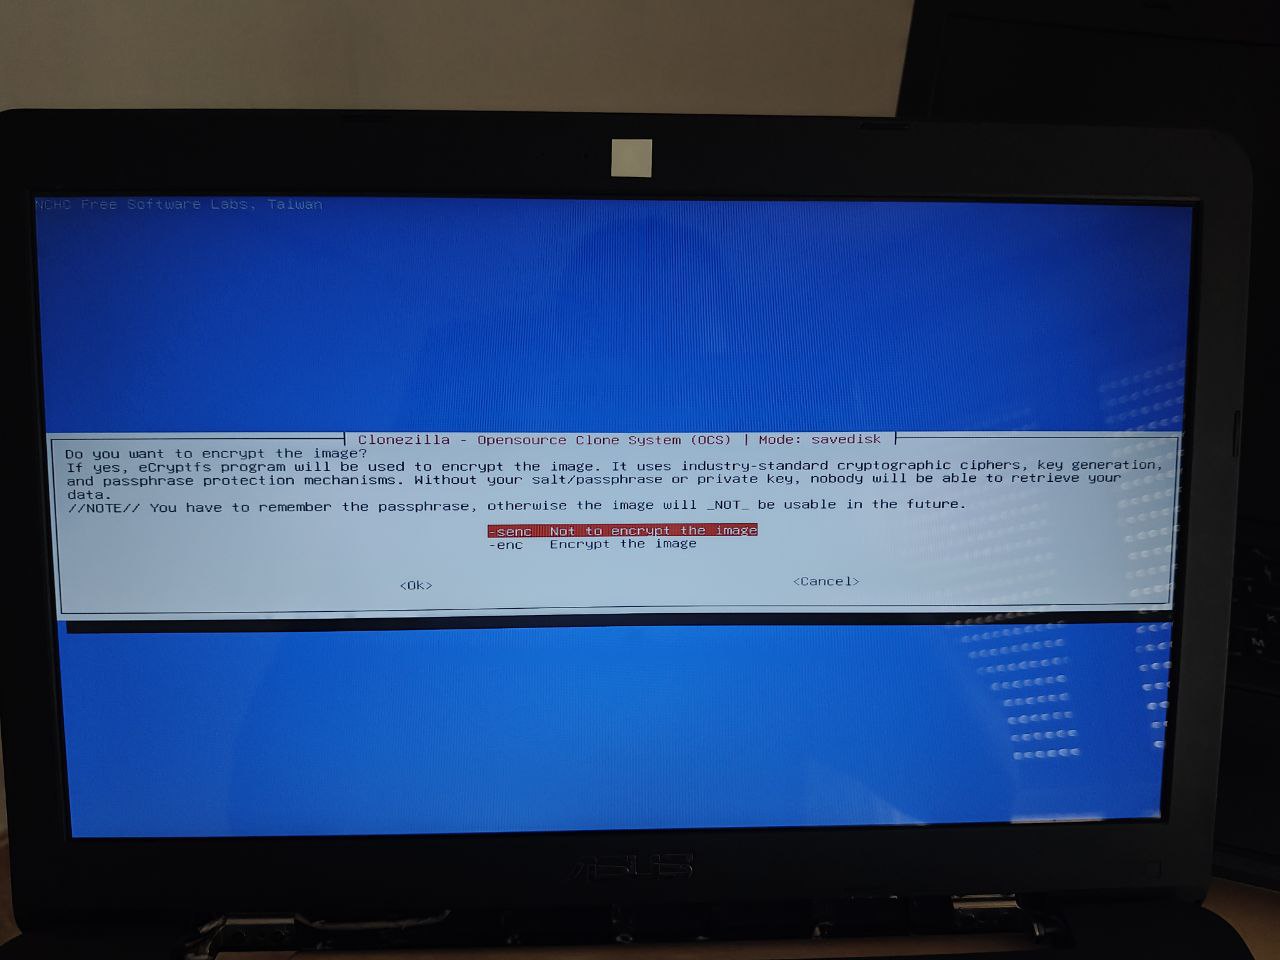
In my case, I won’t encrypt the image (don’t confuse Clonezilla’s encryption with the LUKS used in the OS):
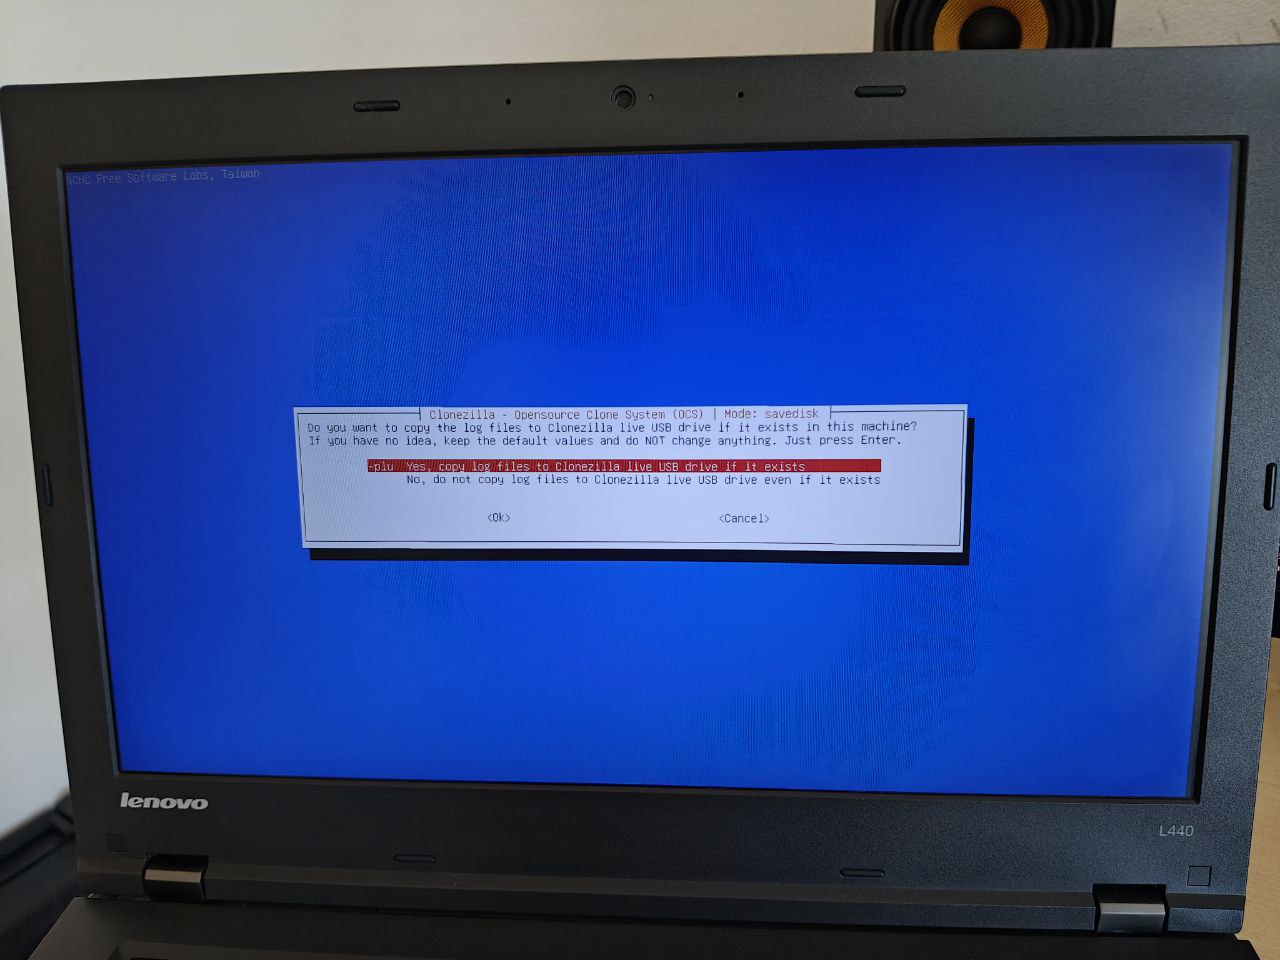
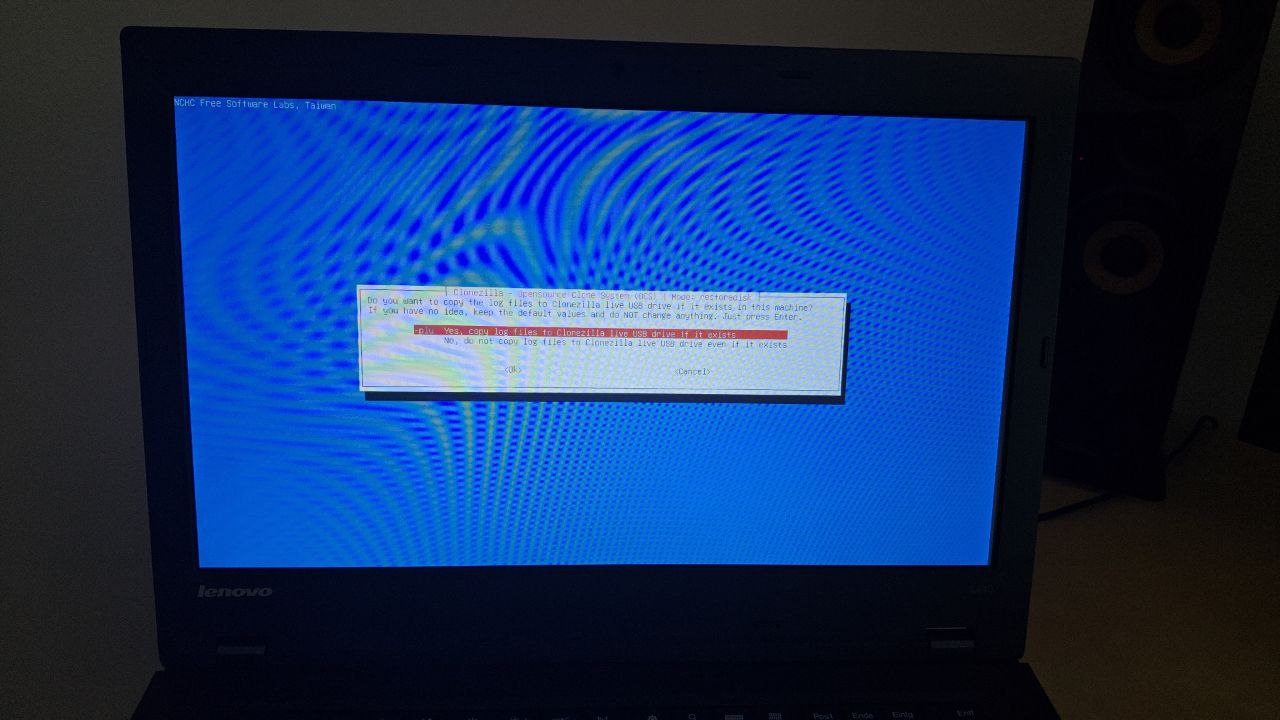
You’re asked whether to save logs of the performed operations:
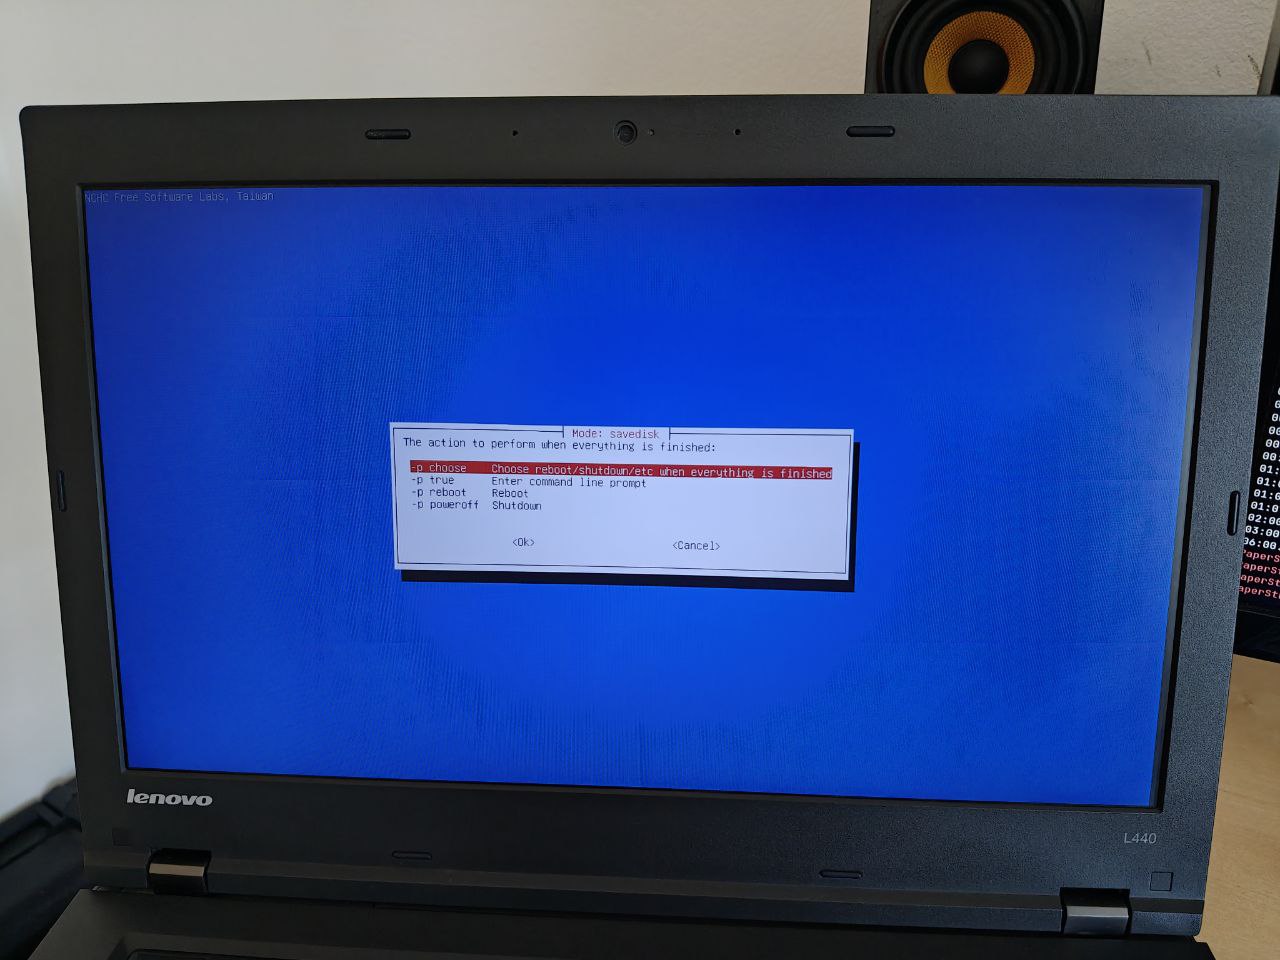
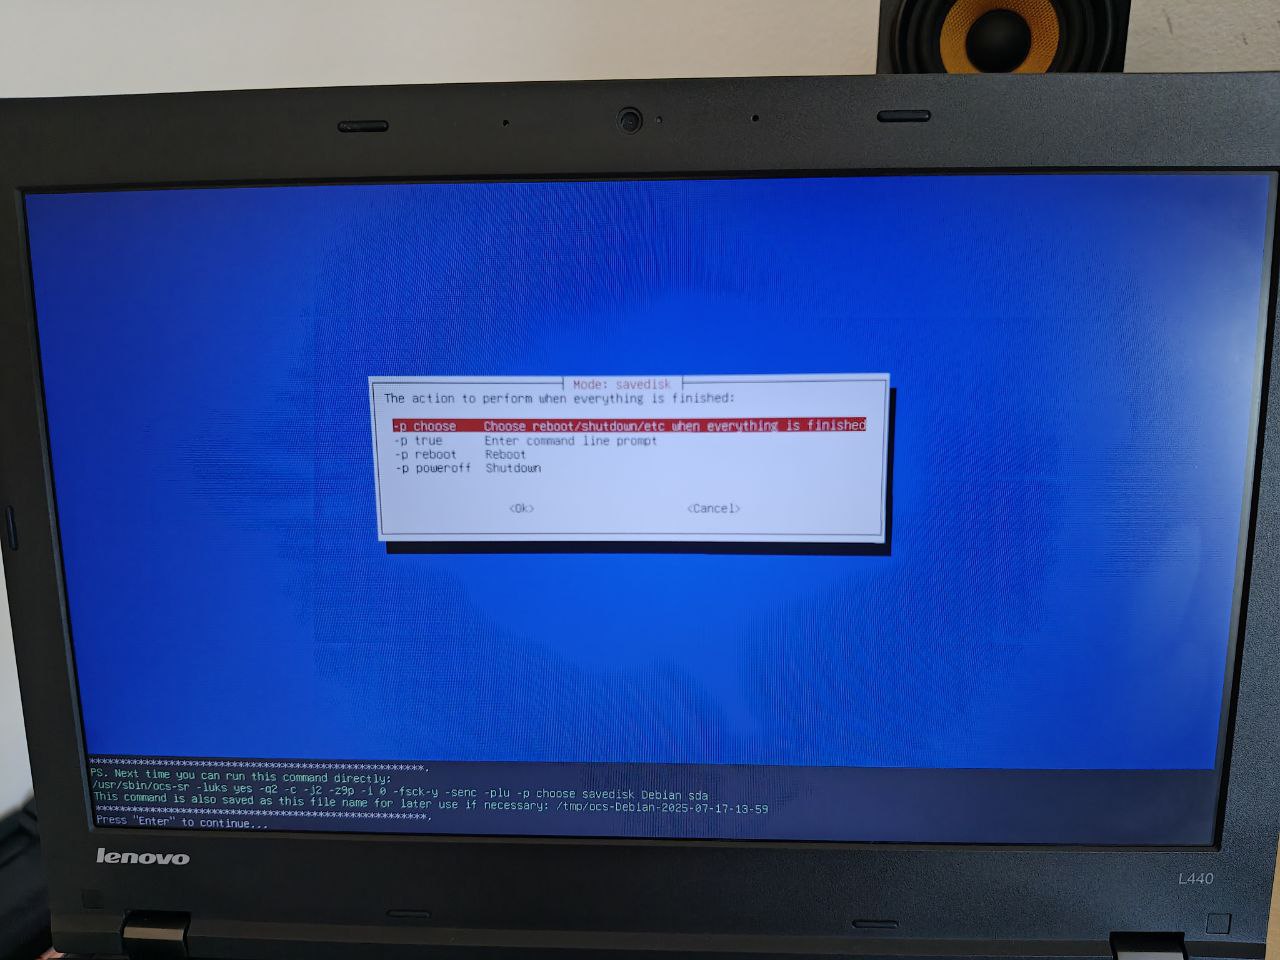
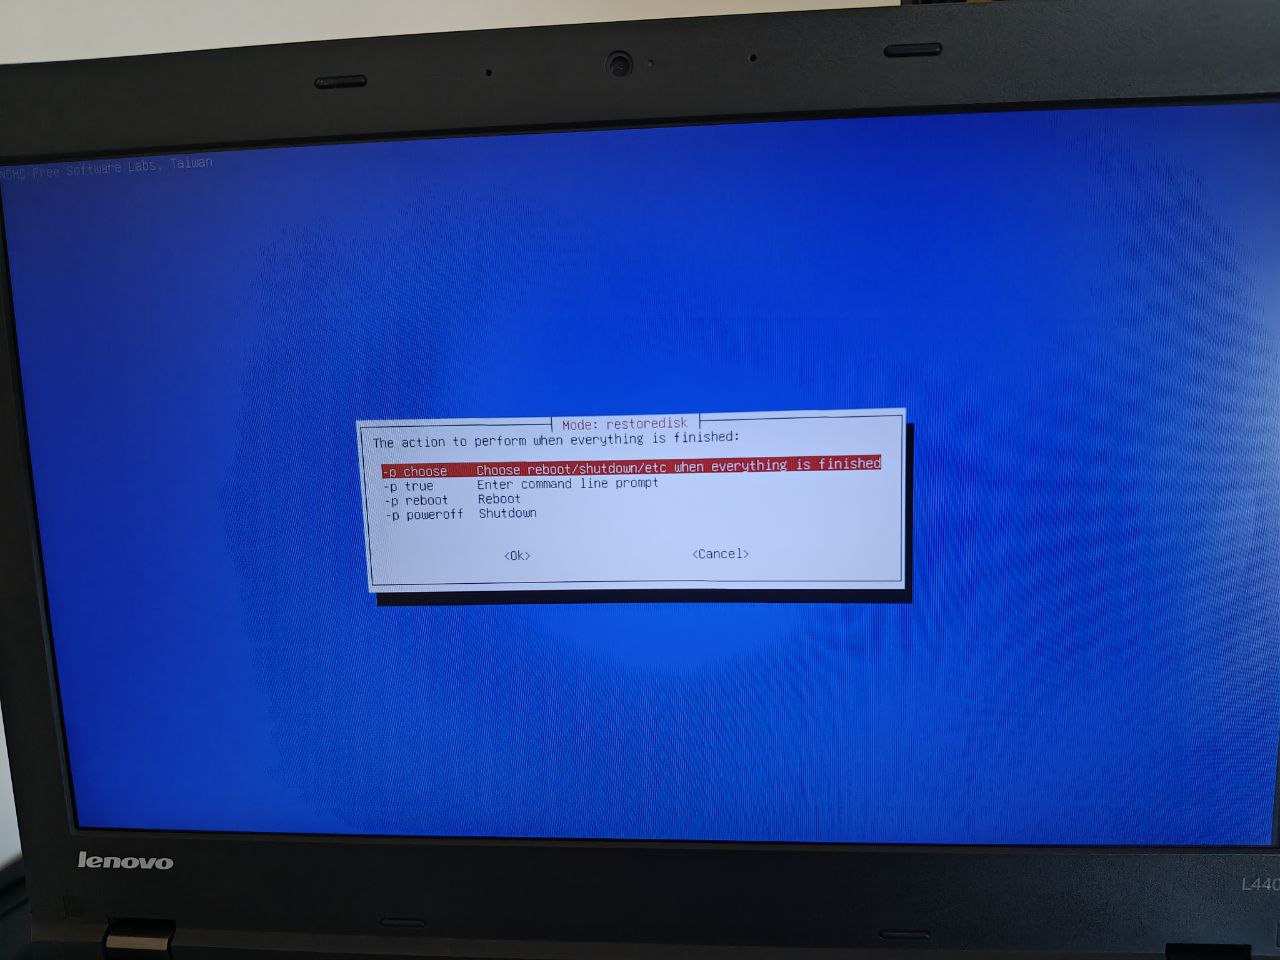
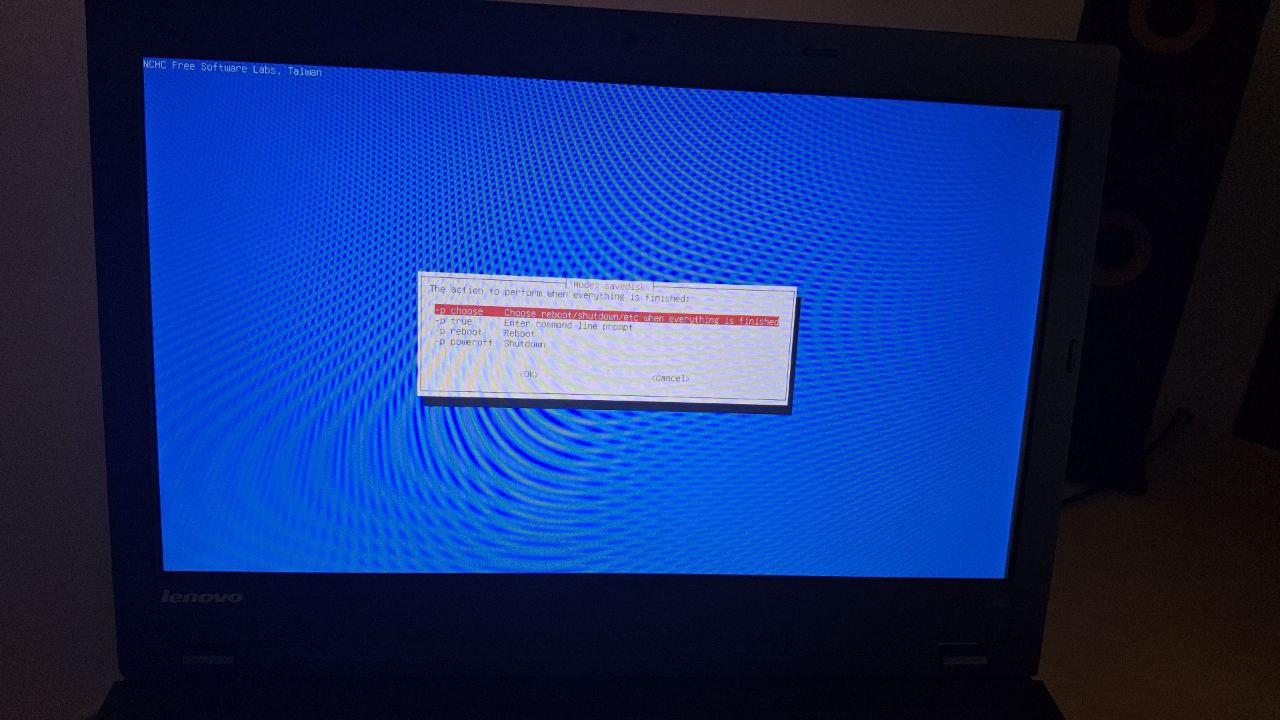
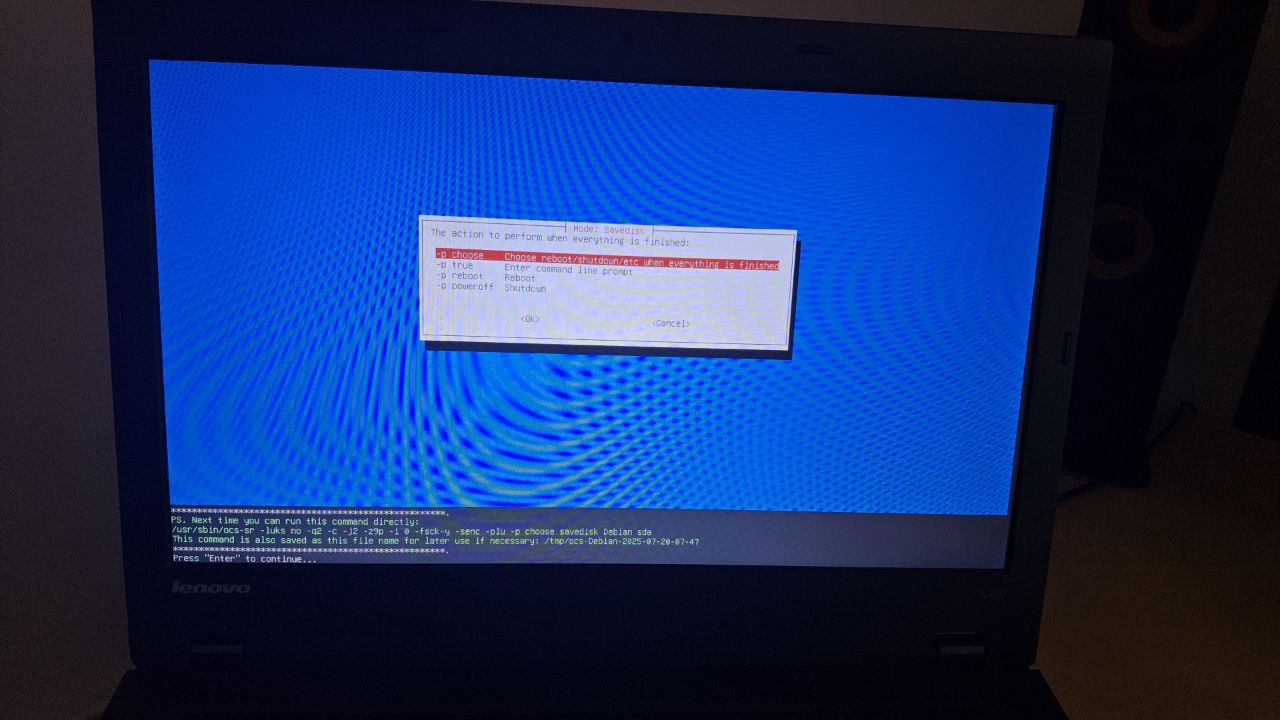
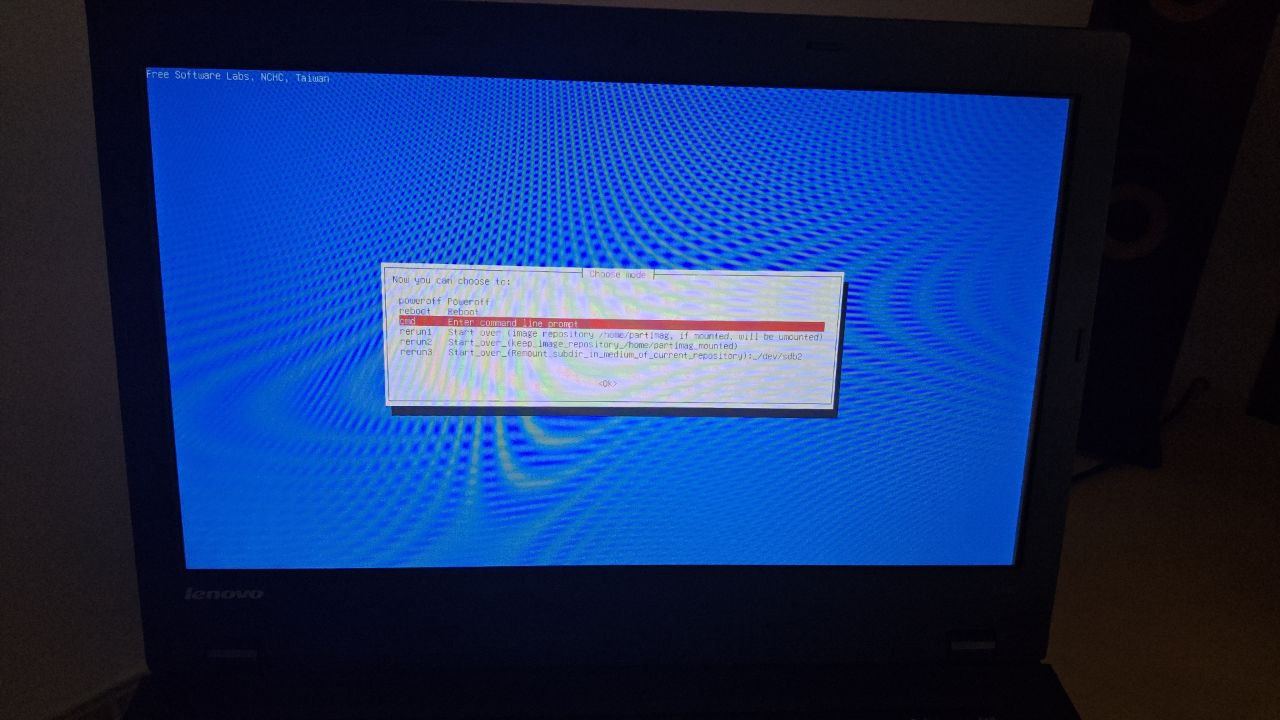
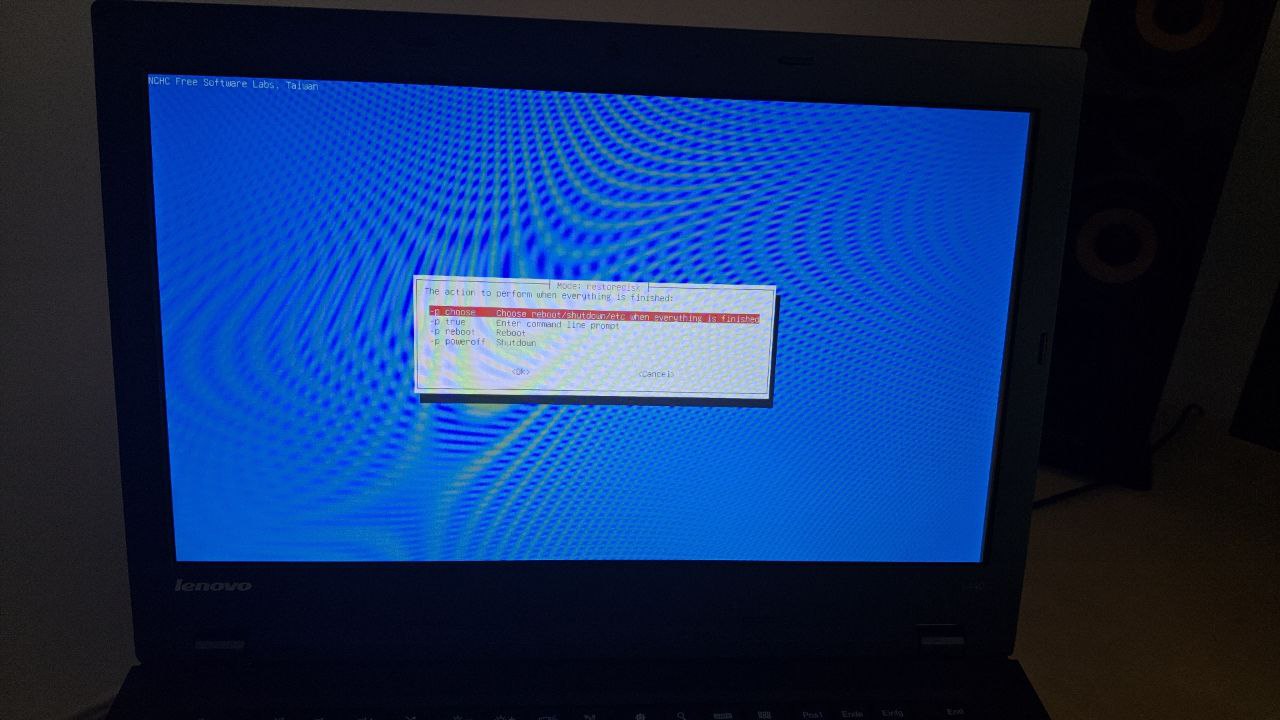
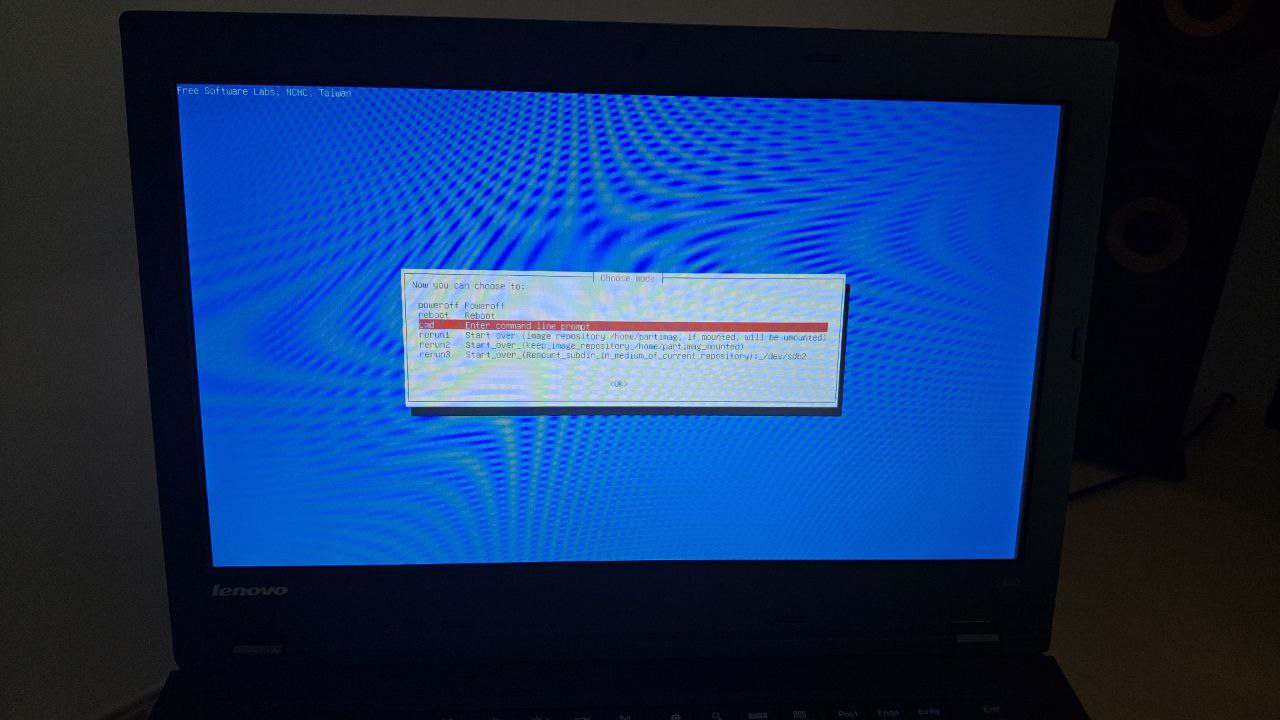
You’re asked what to do when the operations are finished:
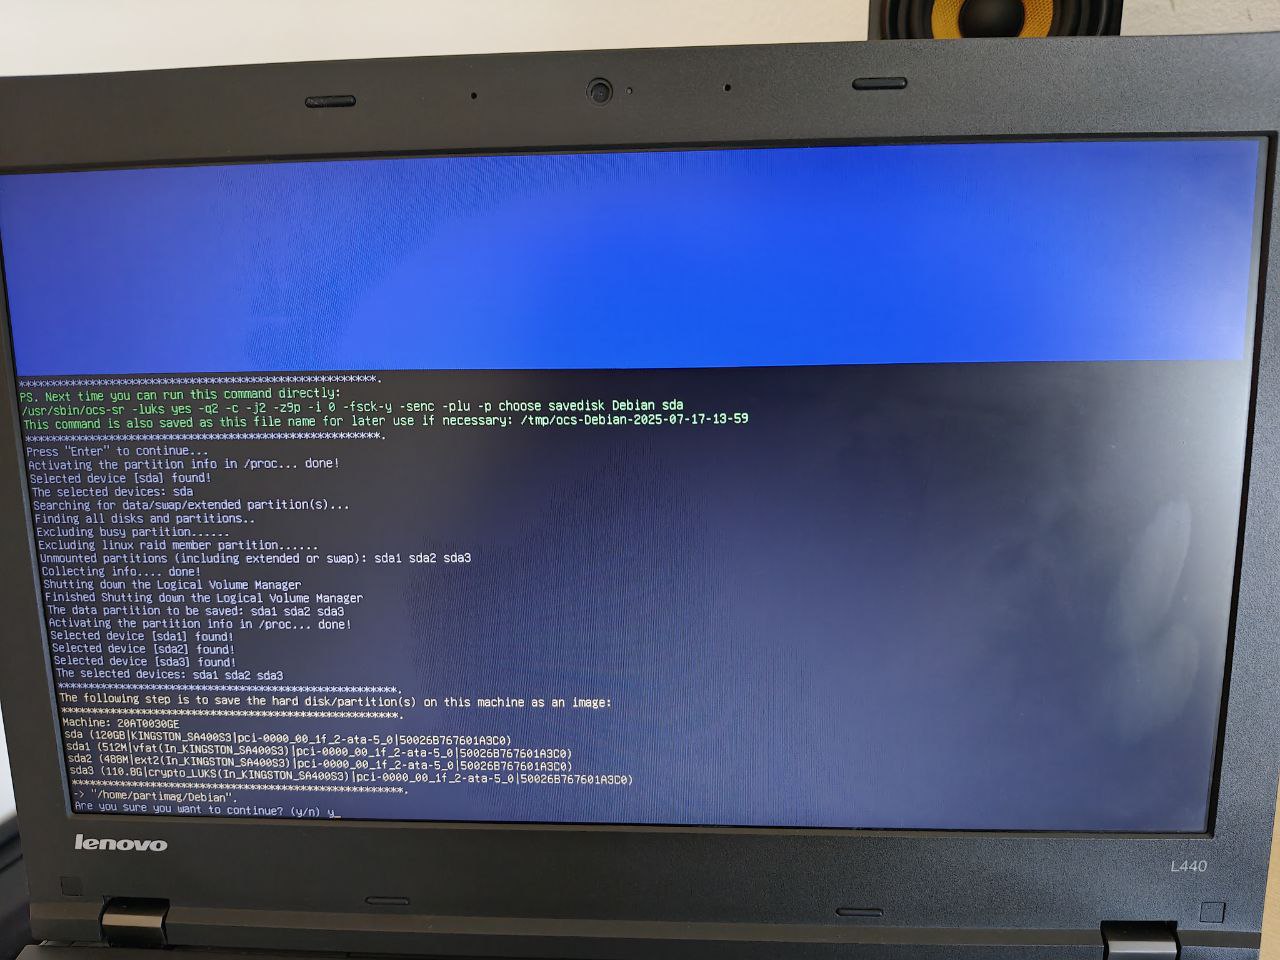
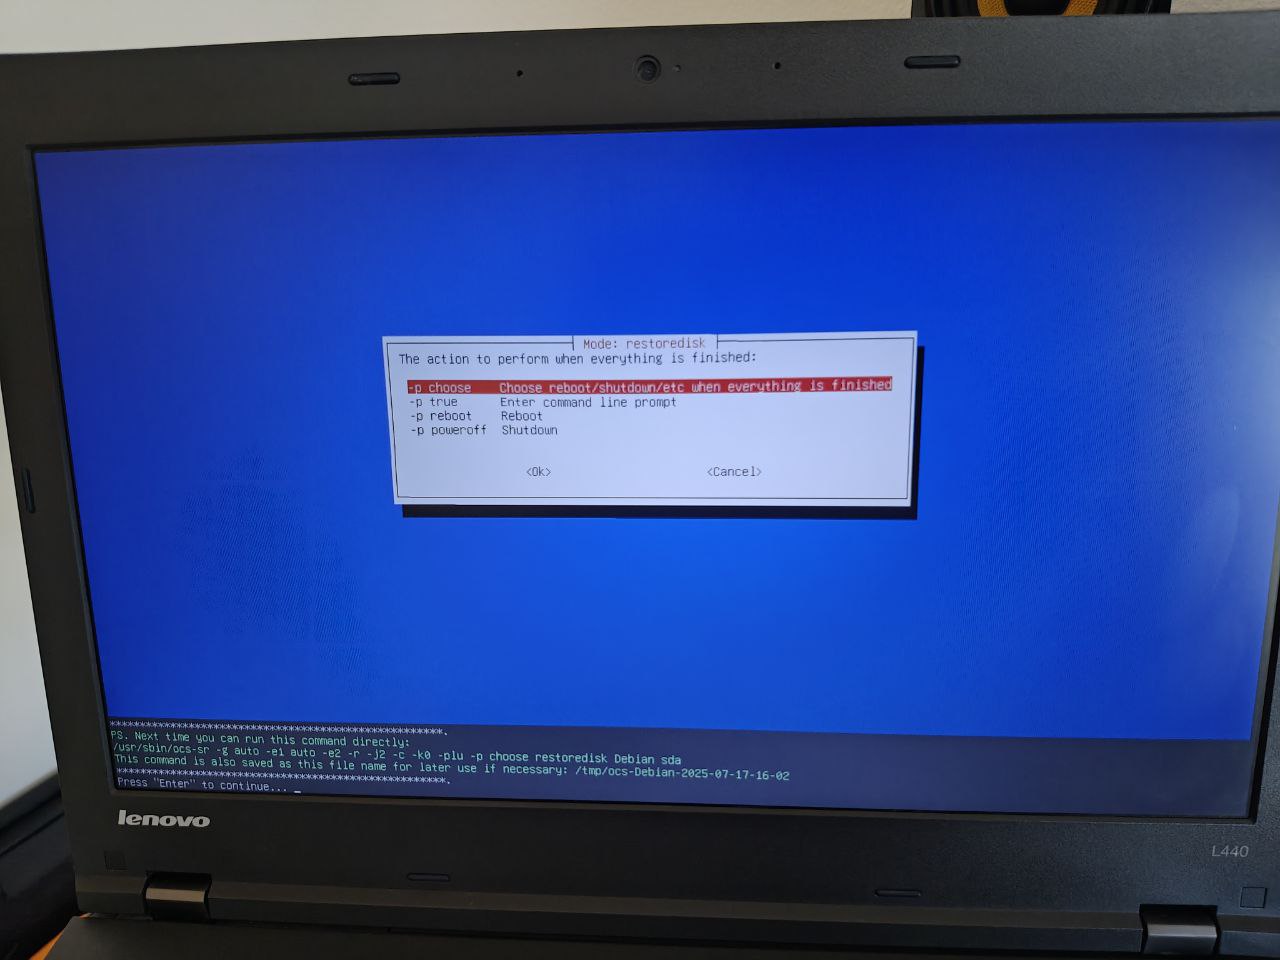
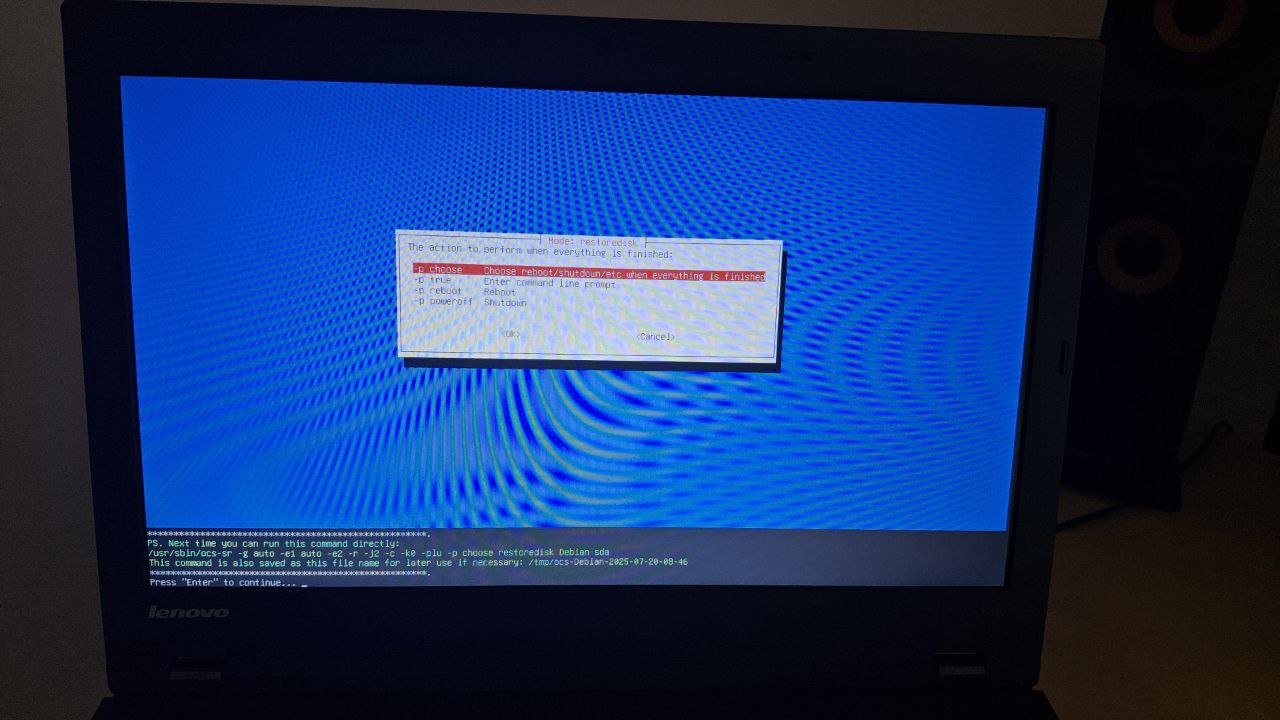
It displays the command it’s about to execute:
You’re asked to confirm:
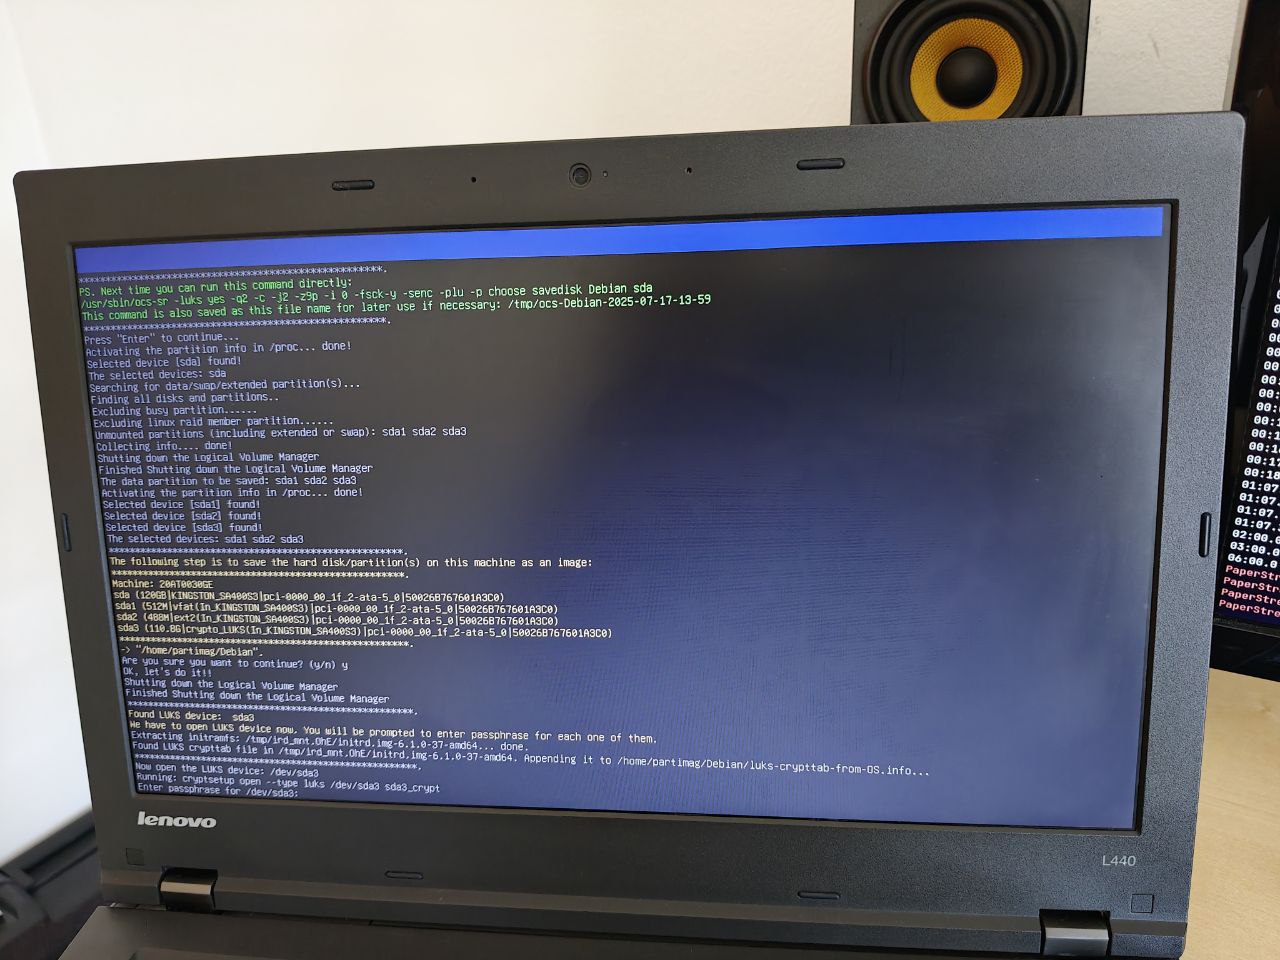
Enter the password to unlock the LUKS disk:
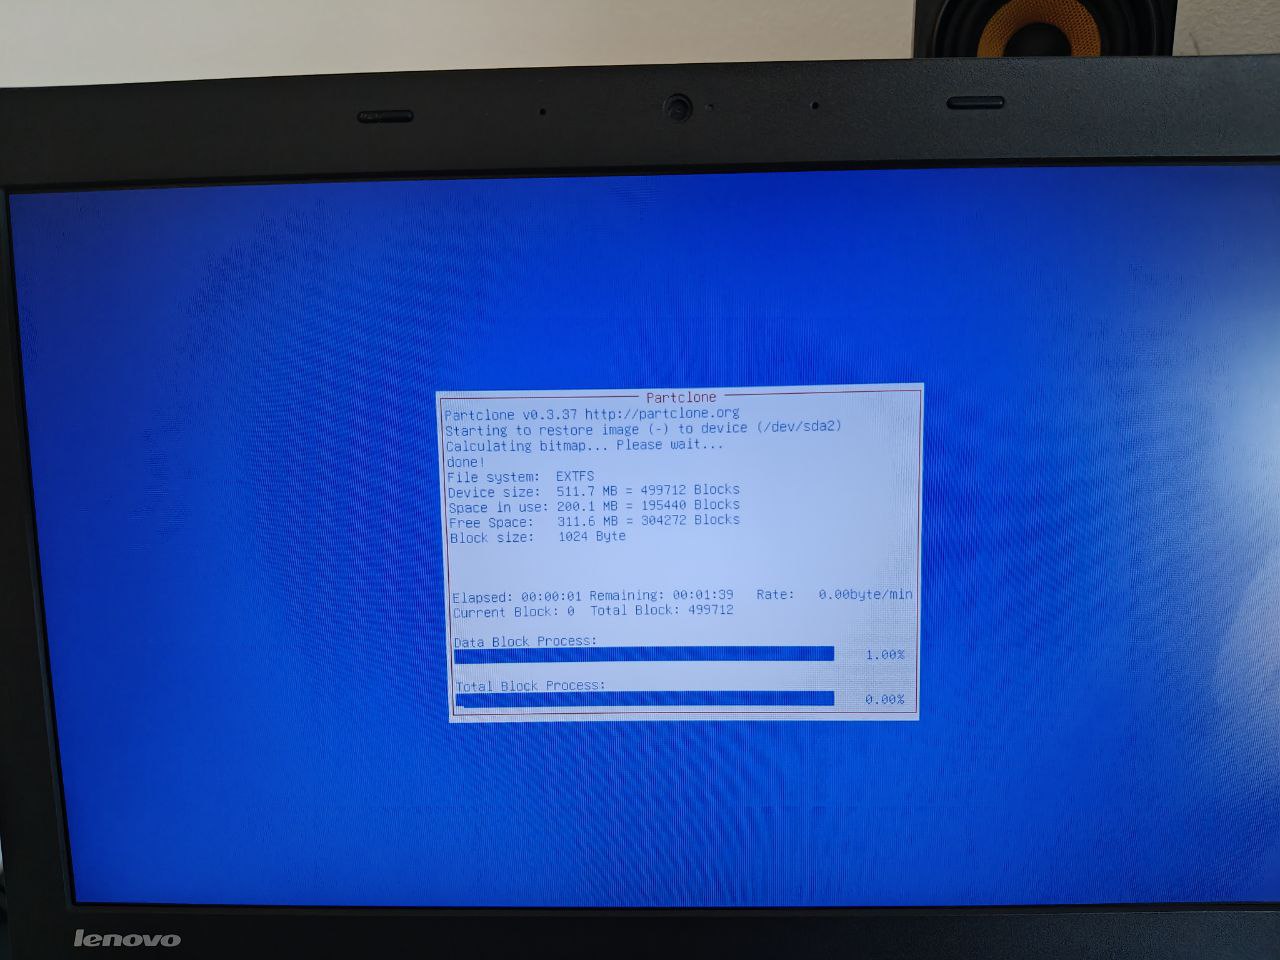
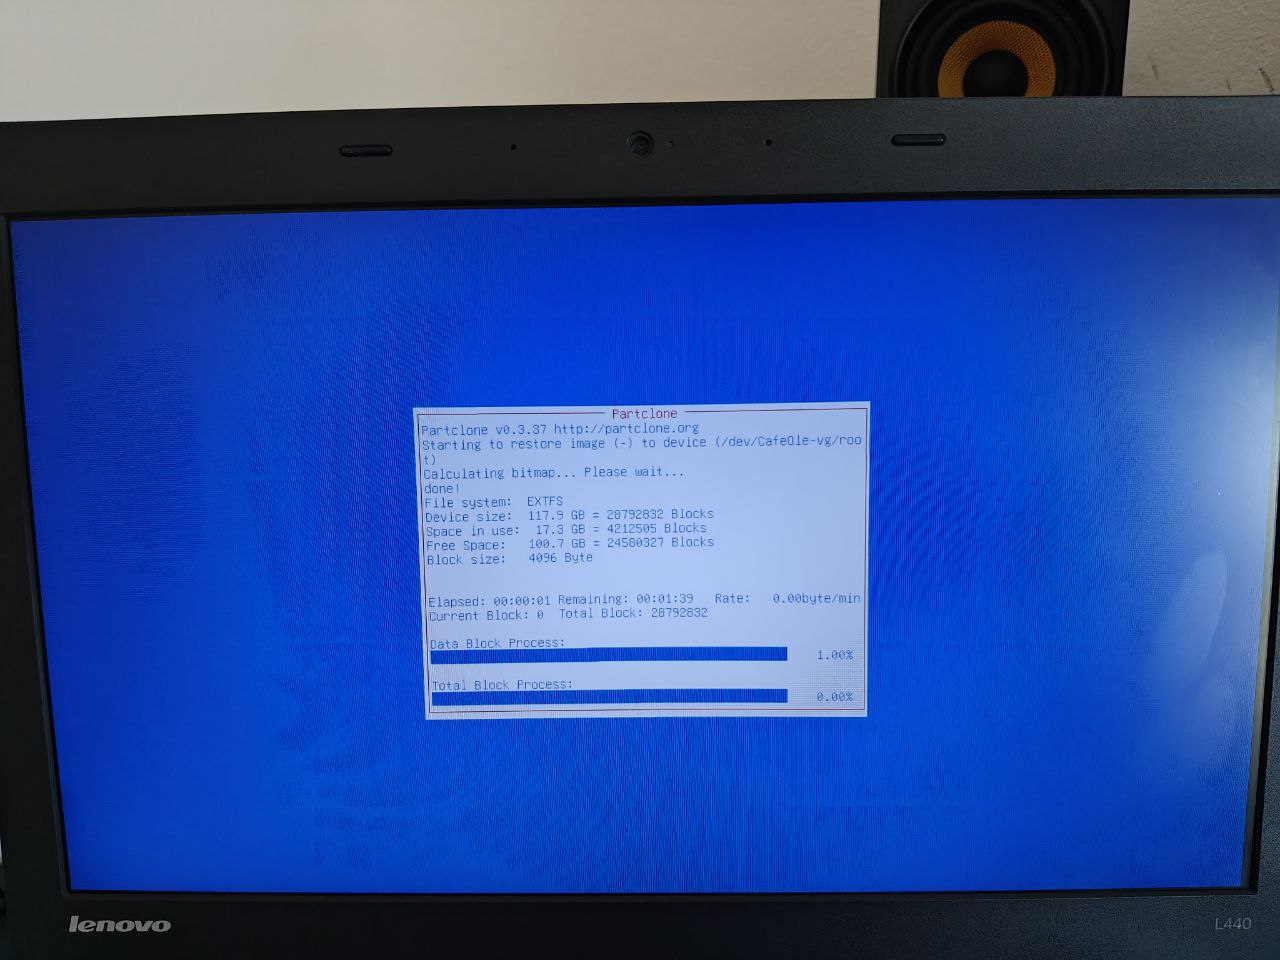
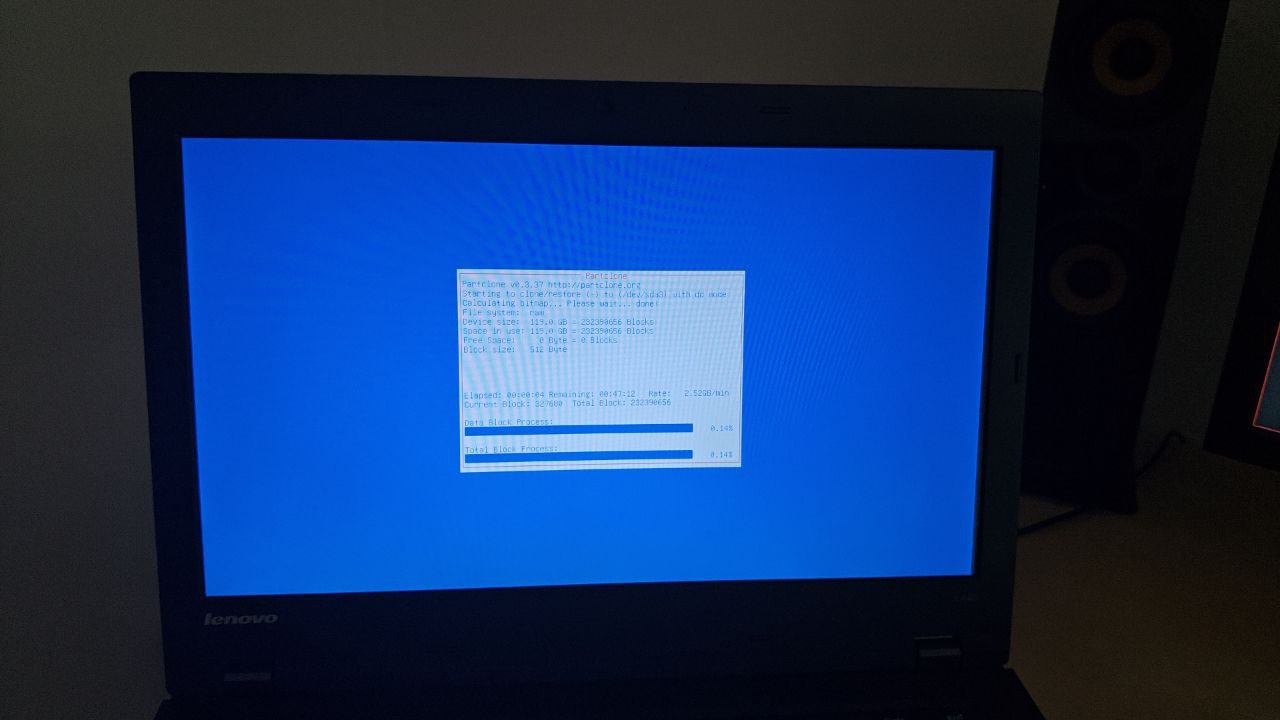
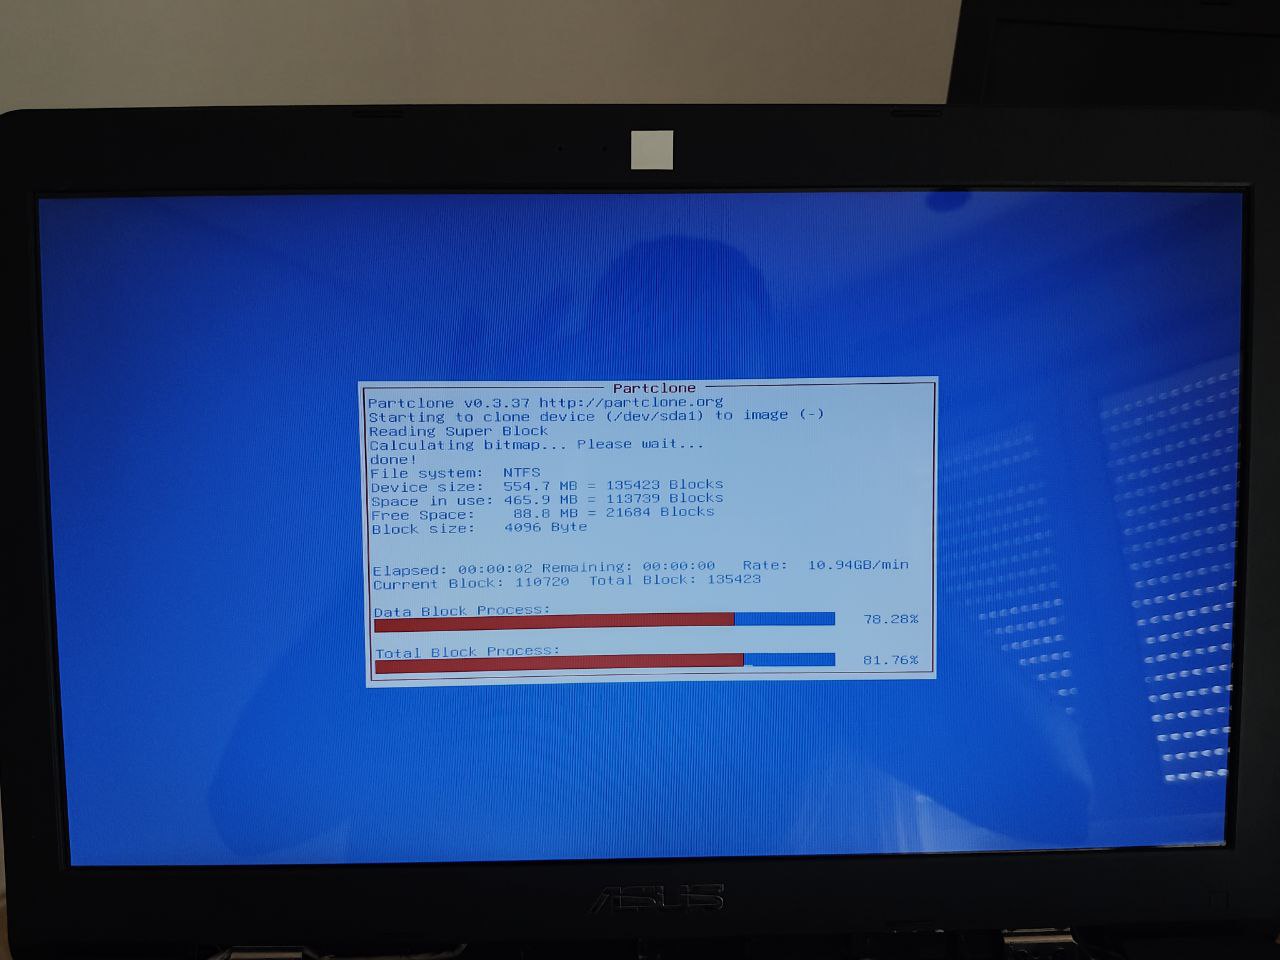
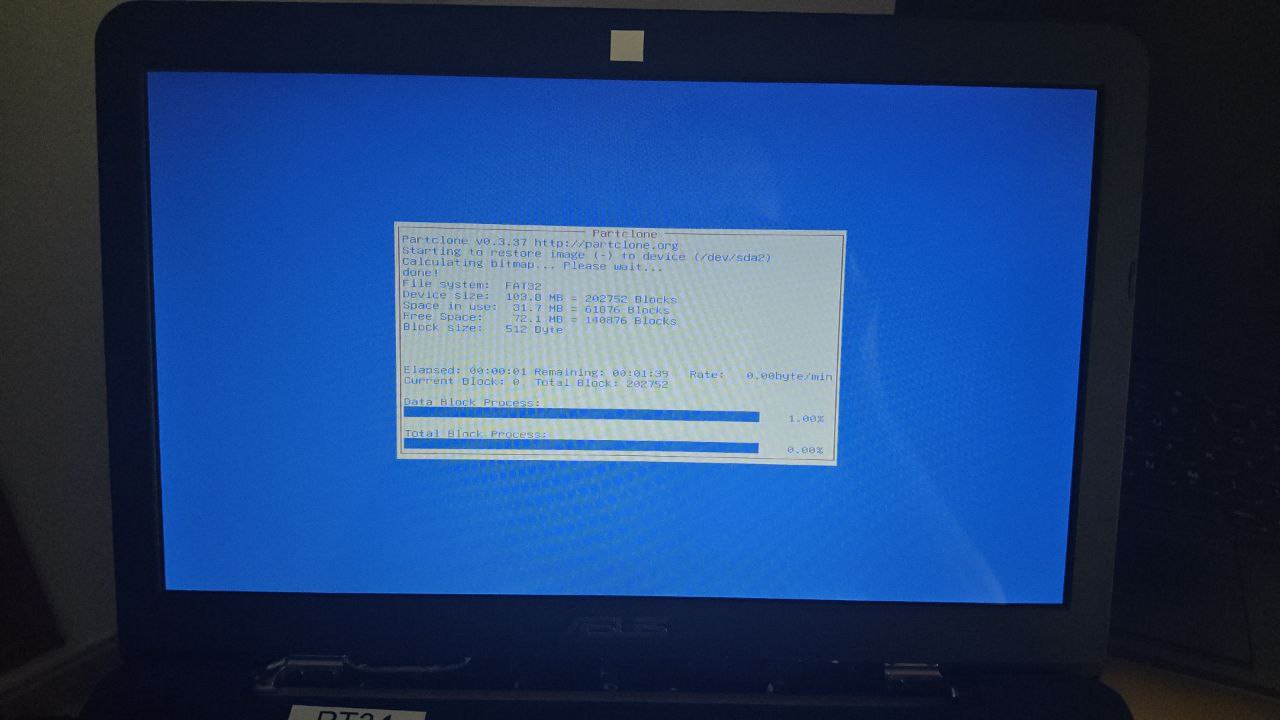
The disk has 3 partitions. Here are screenshots of each partition being backed up:
| Partition 1 | Partition 2 | Partition 3 |
|---|---|---|

|
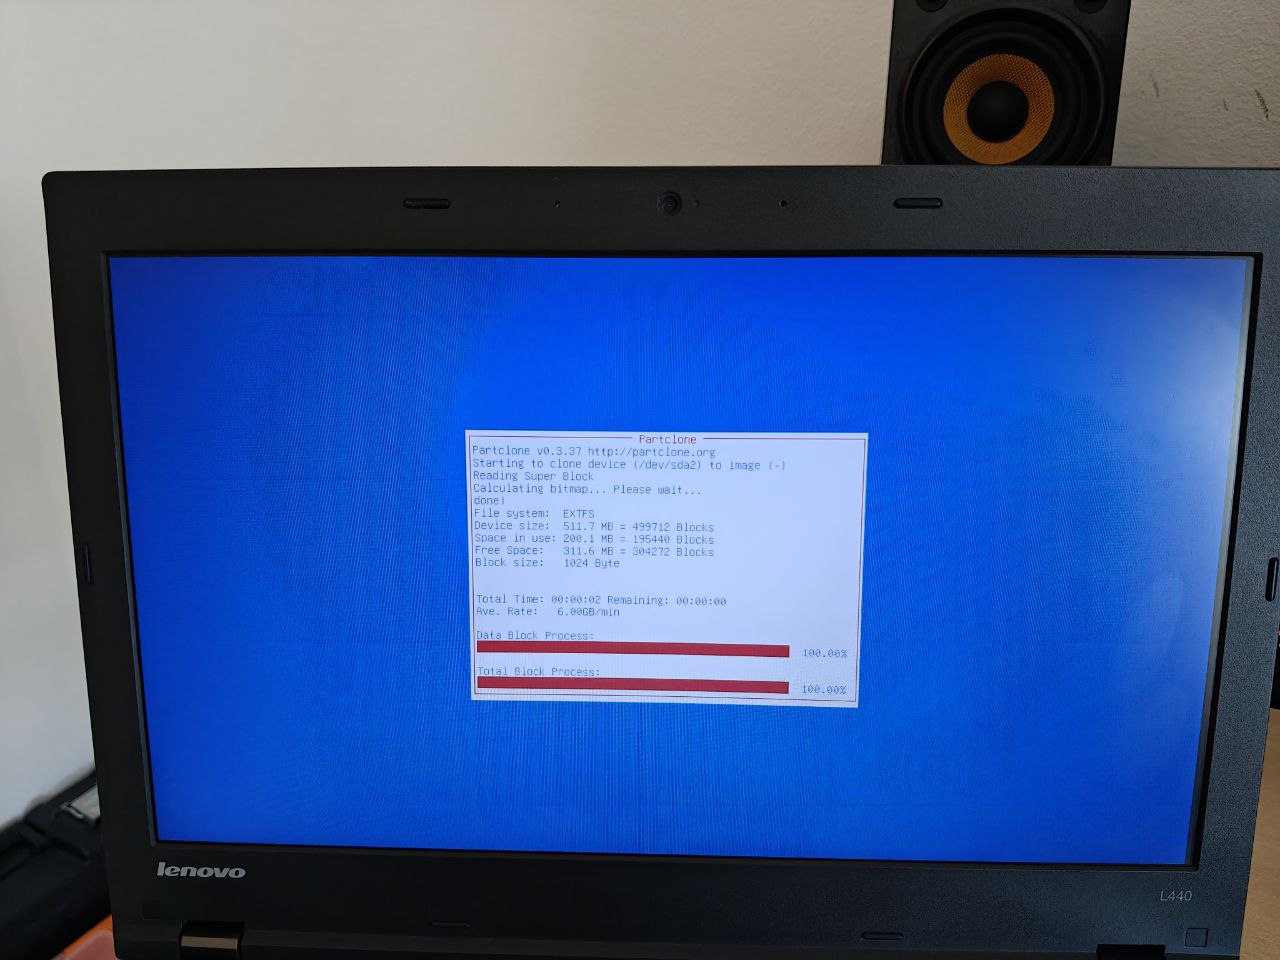
|
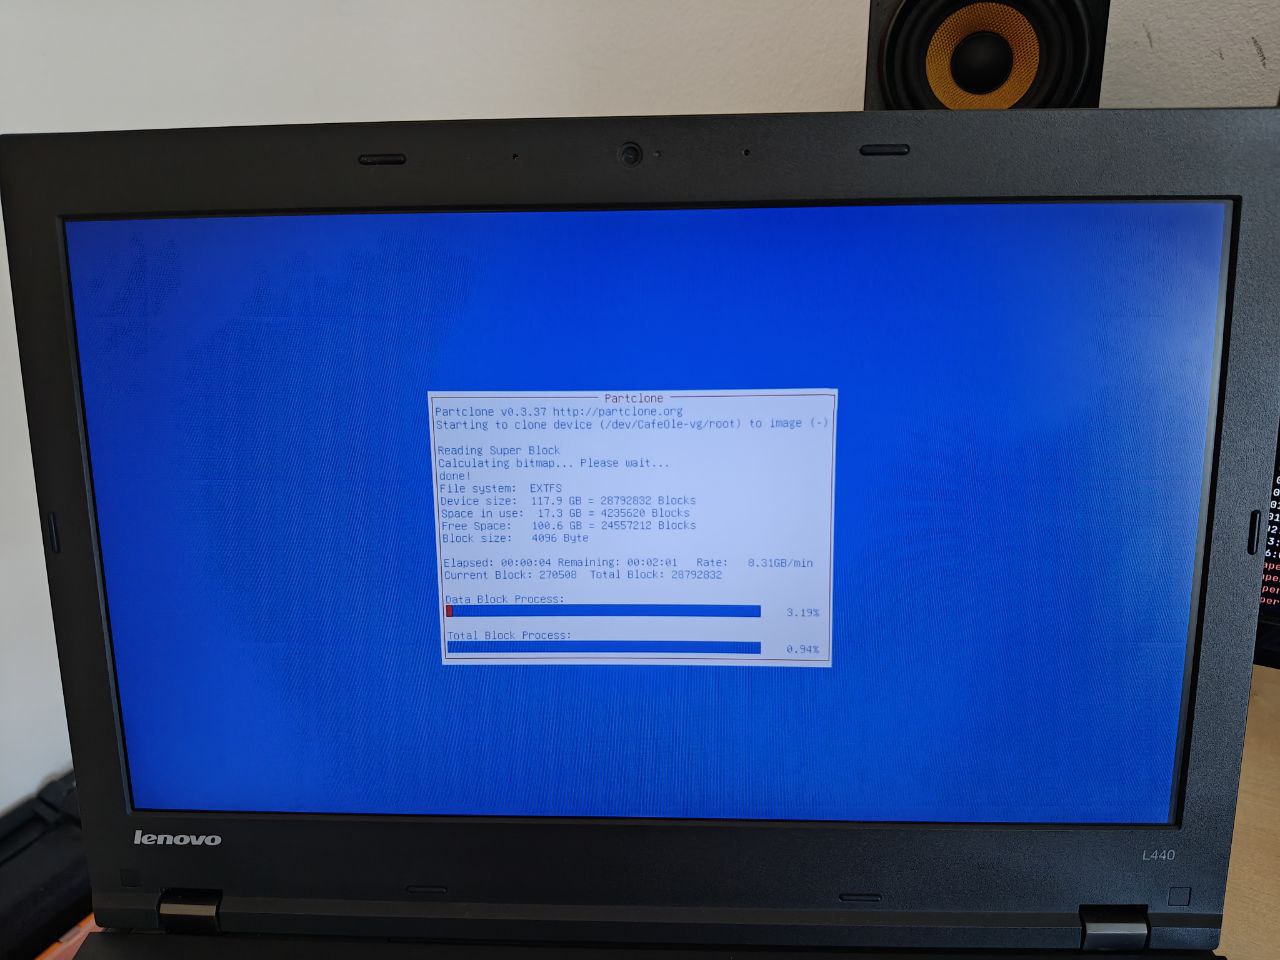
|
NOTE: In my case, it took about 8 minutes to dump a 120GB SSD (17.2GB used) to a 2.5" mechanical disk connected via external USB enclosure.
Verify each partition image:
| Check 1 | Check 2 | Check 3 |
|---|---|---|
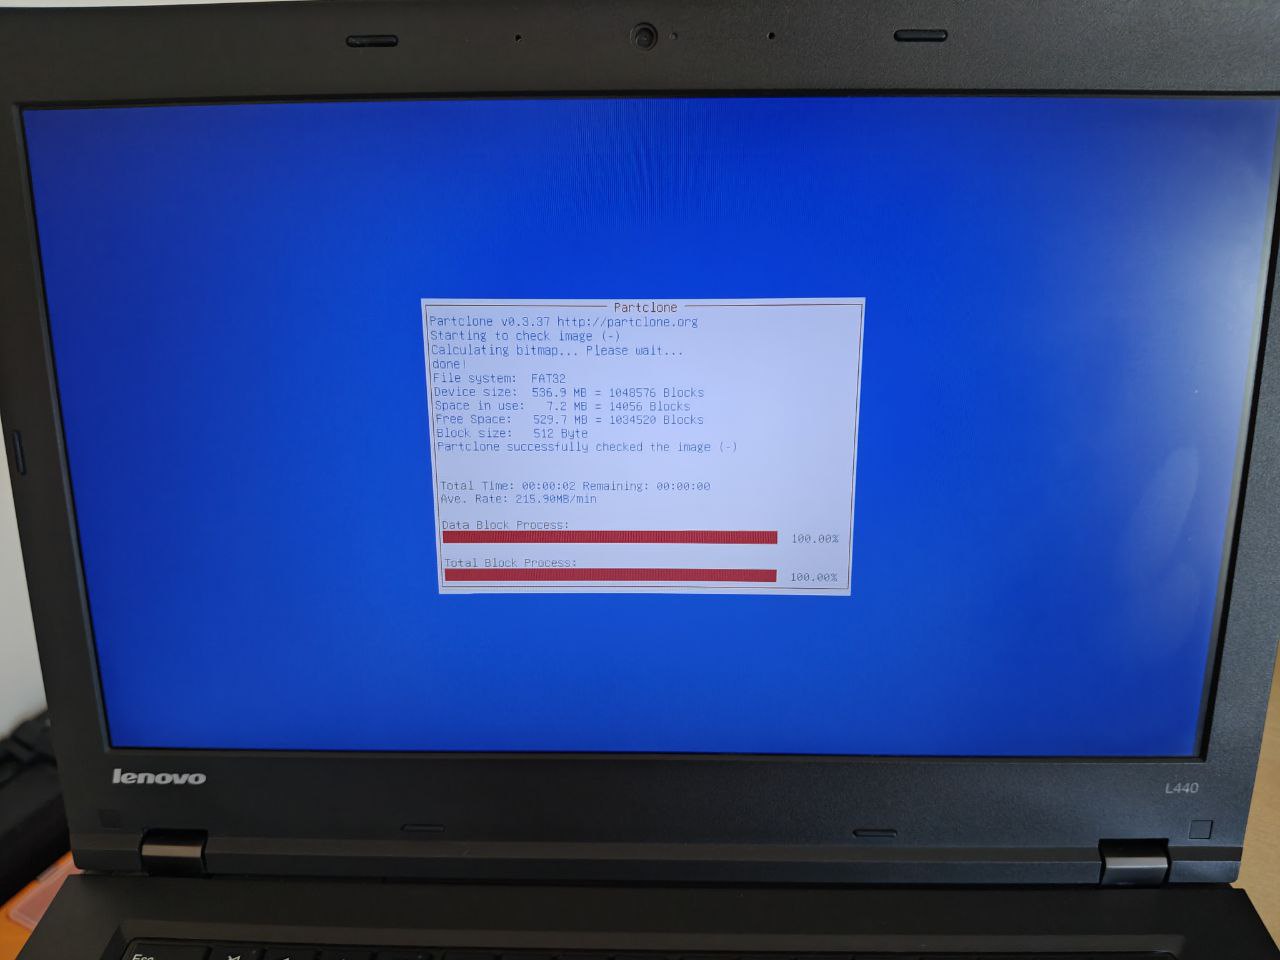
|
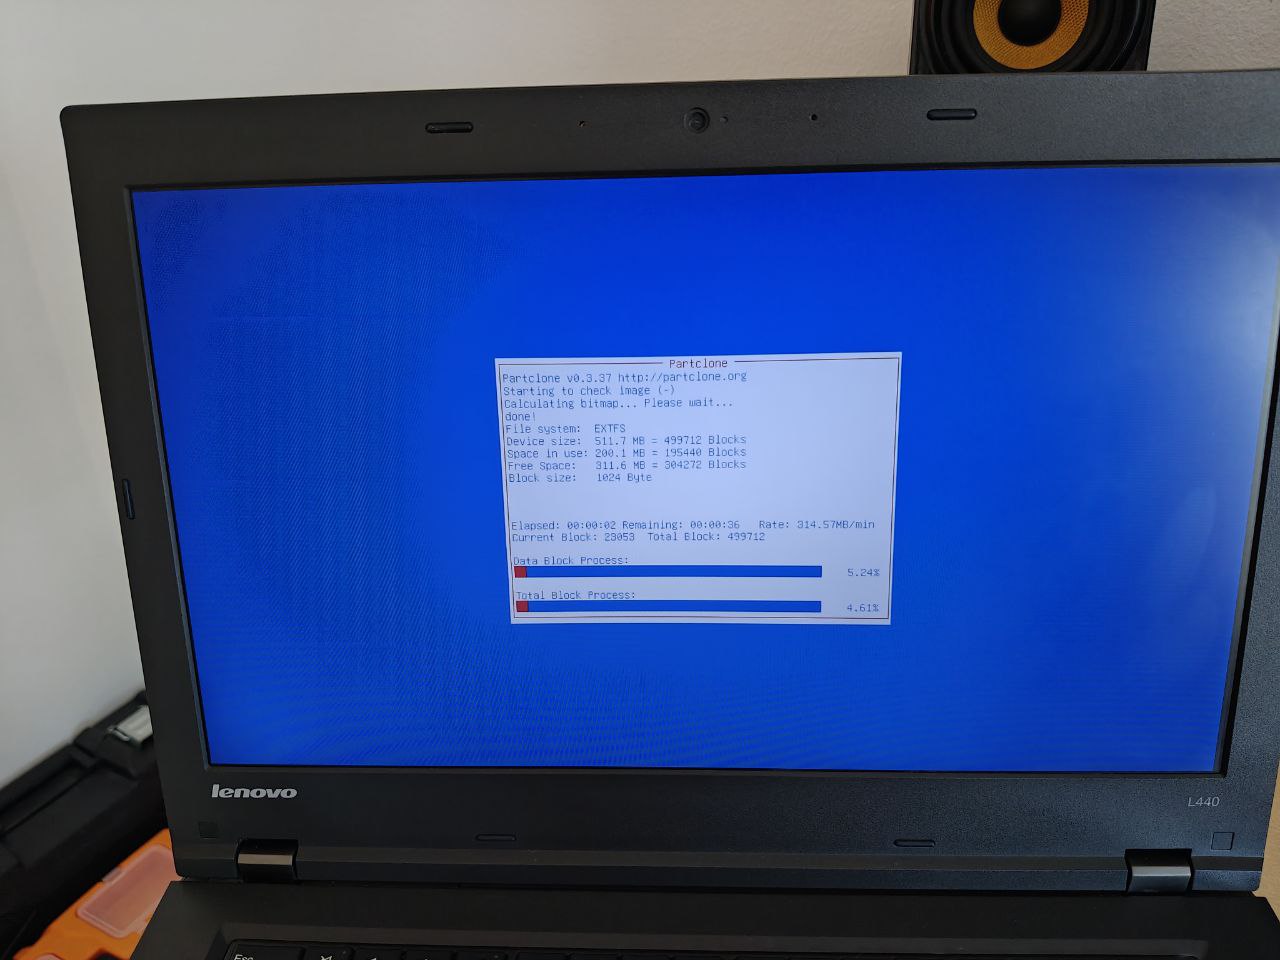
|
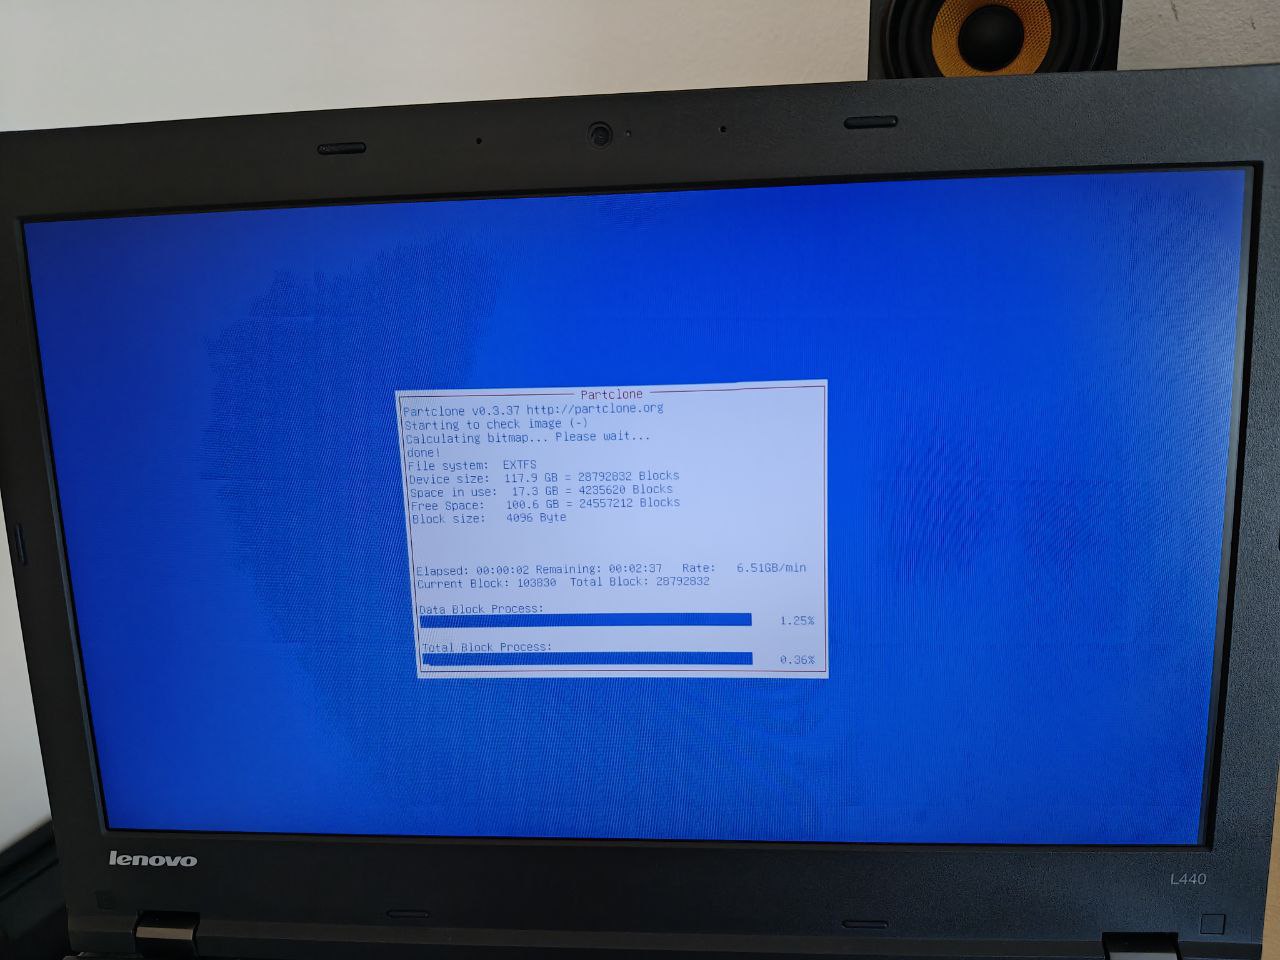
|
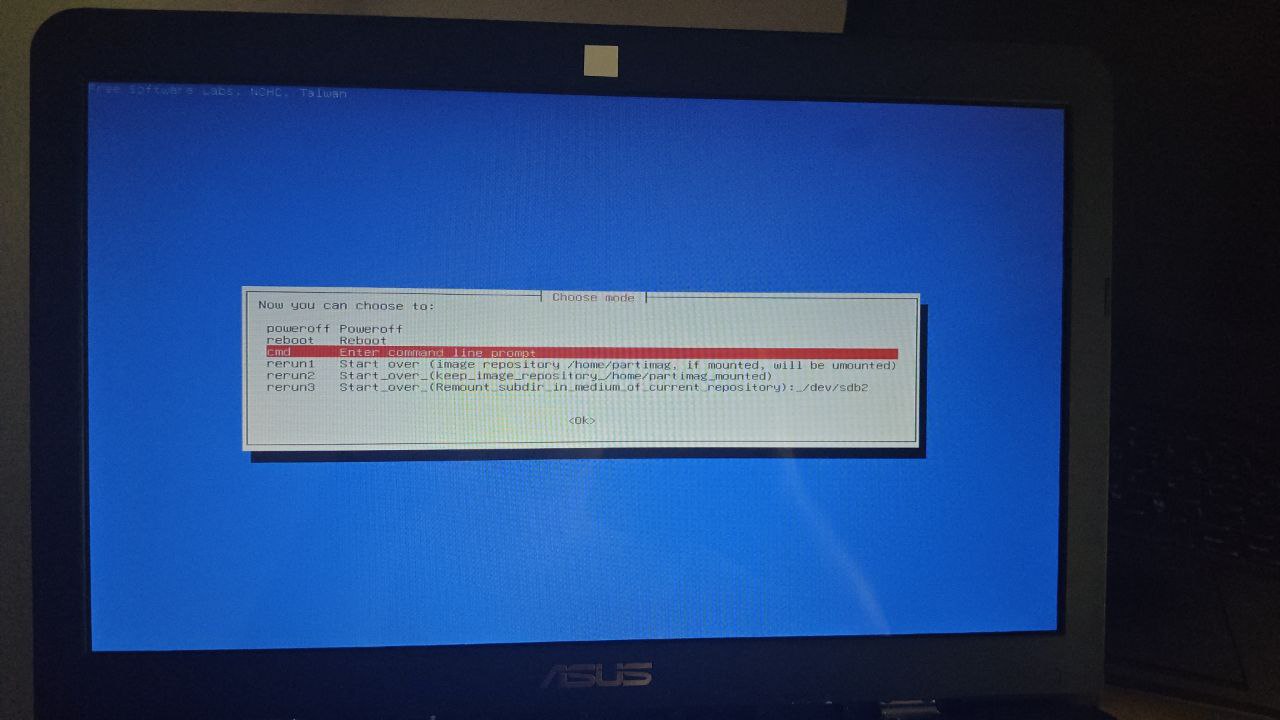
Summary of completed tasks:
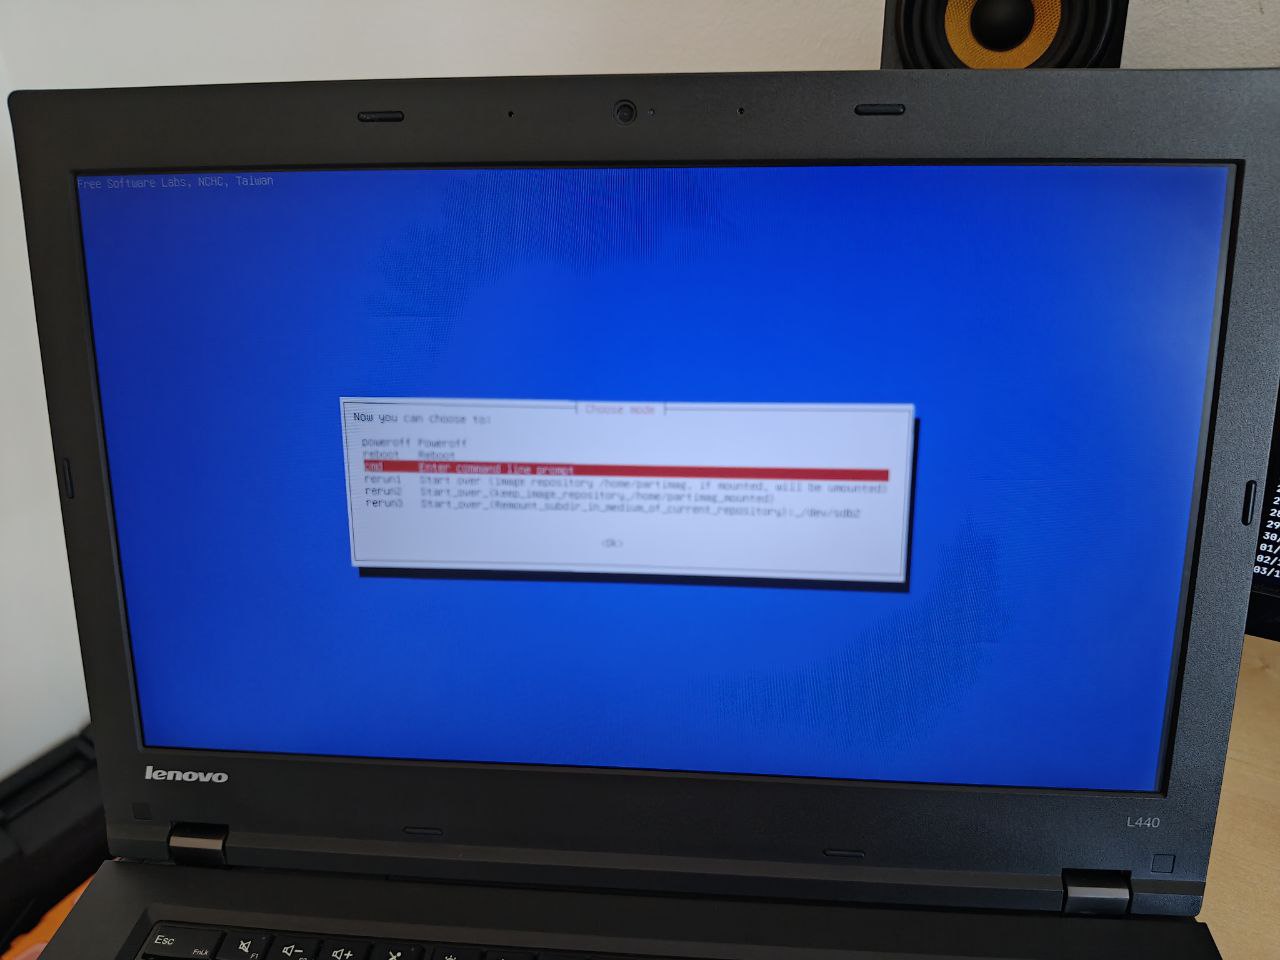
Once done, you’re asked what to do:
A useful detail: depending on the compression method , the backup size will vary:
z1p: 120GB → 8.3GBz9p: 120GB → 7.6GB
Restore: Linux + encryption (unlocked)
The restore process is very similar to the backup.
Configure the language:
Configure the keyboard layout:
You’re asked to choose between booting Clonezilla or opening a Linux shell. Boot Clonezilla:
Choose device-image:
Choose local_dev:
You’re informed that now is the time to connect any missing drives:
It displays system disks in real time:
Select the partition containing the
repository
:
Choose whether to run fsck on the repository file system:
If the repository is in a subdirectory, specify it here:
Path on the resource: /dev/sdb2[/] --> Displays Device+[Directory]: Device is locked from earlier, only the path may change.
Current selected dir name: "/" --> Directory path.
My
repository
is in root, so the path is /. Click Done:
We’re informed that /tmp/ocsroot_bind_root has been mounted to /home/partimag using --bind:
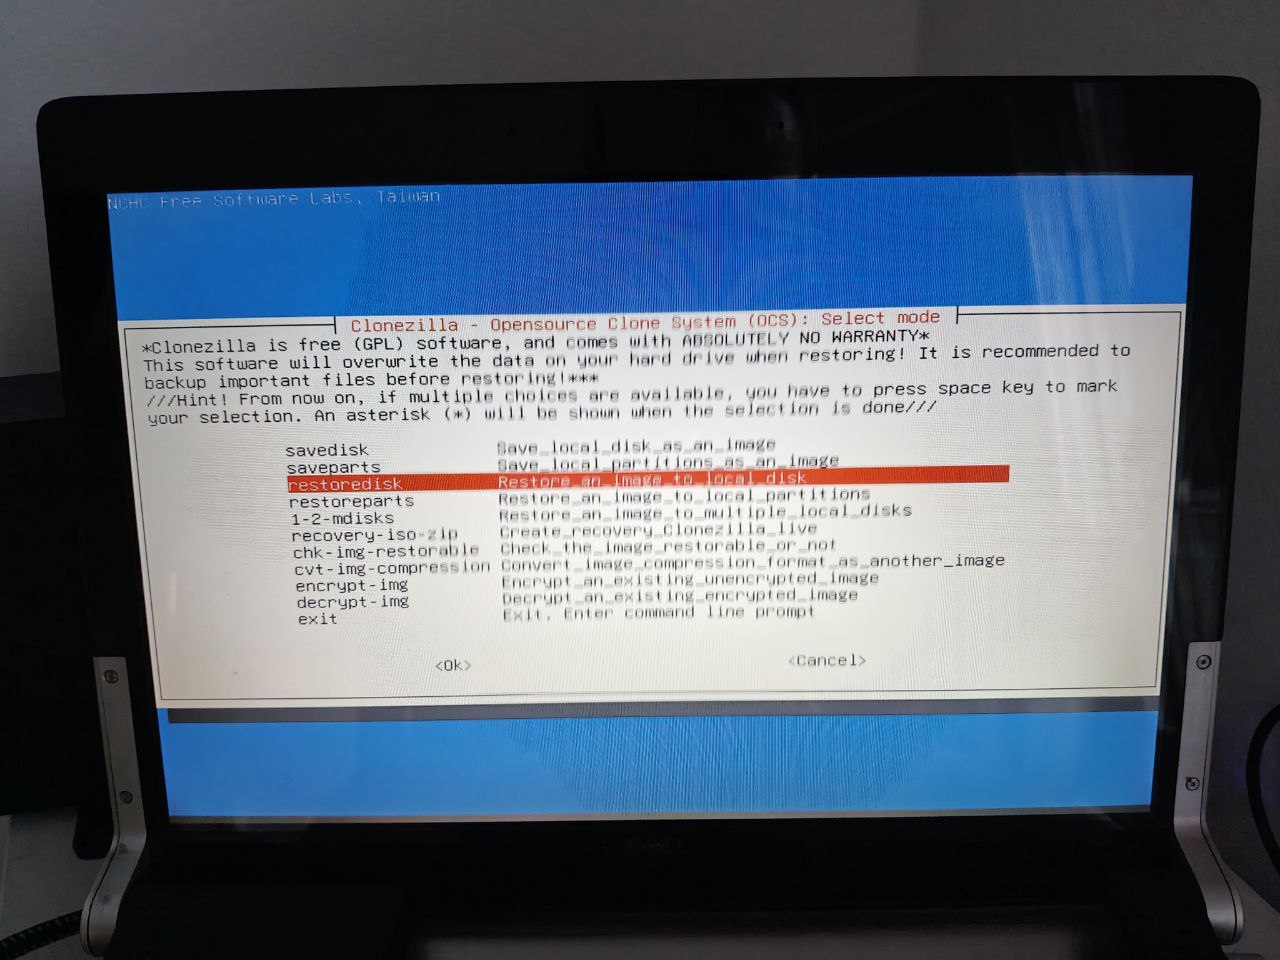
Select Beginner mode:
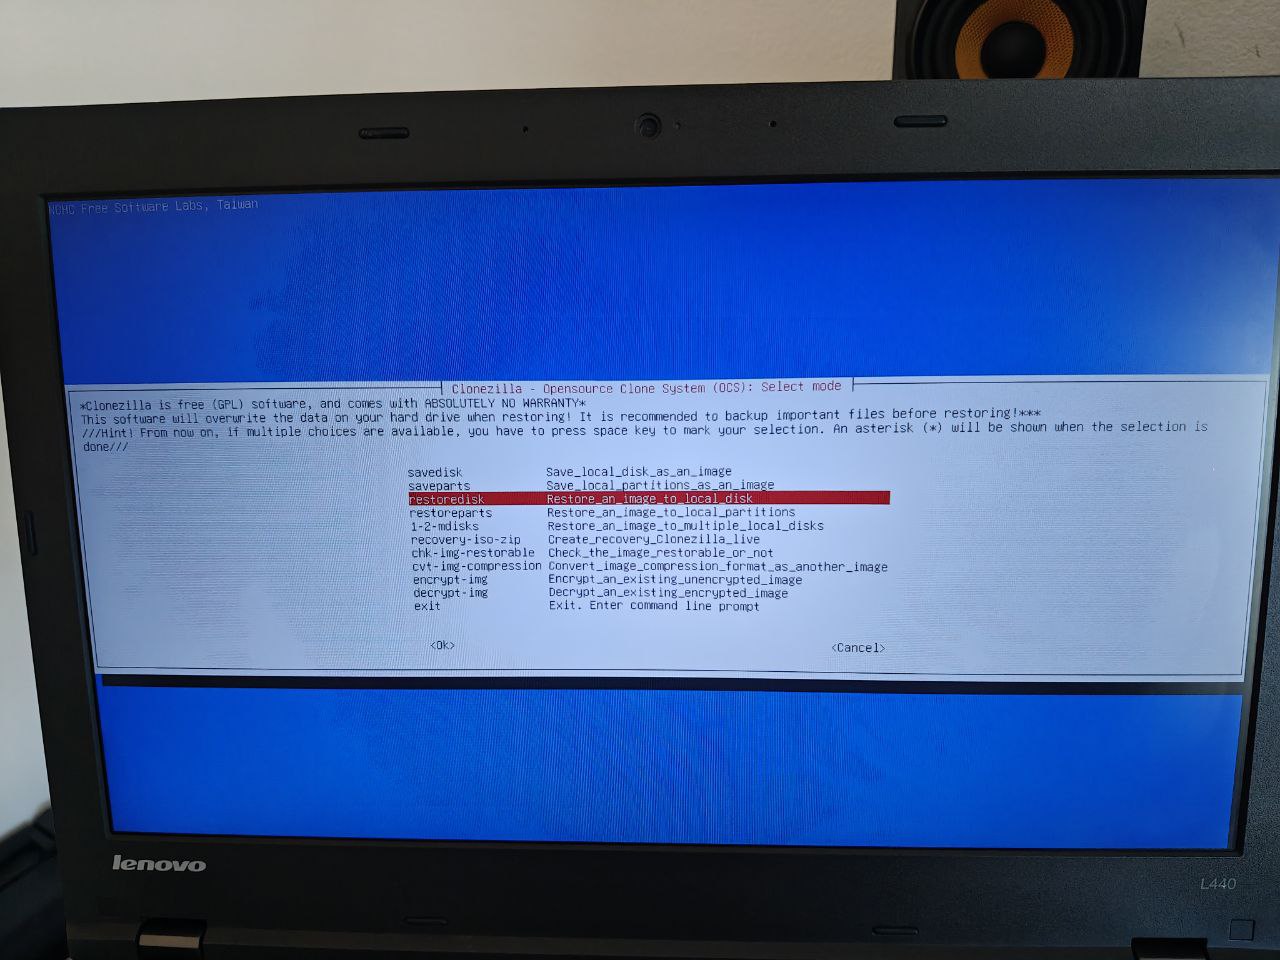
Select restoredisk to restore a full disk:
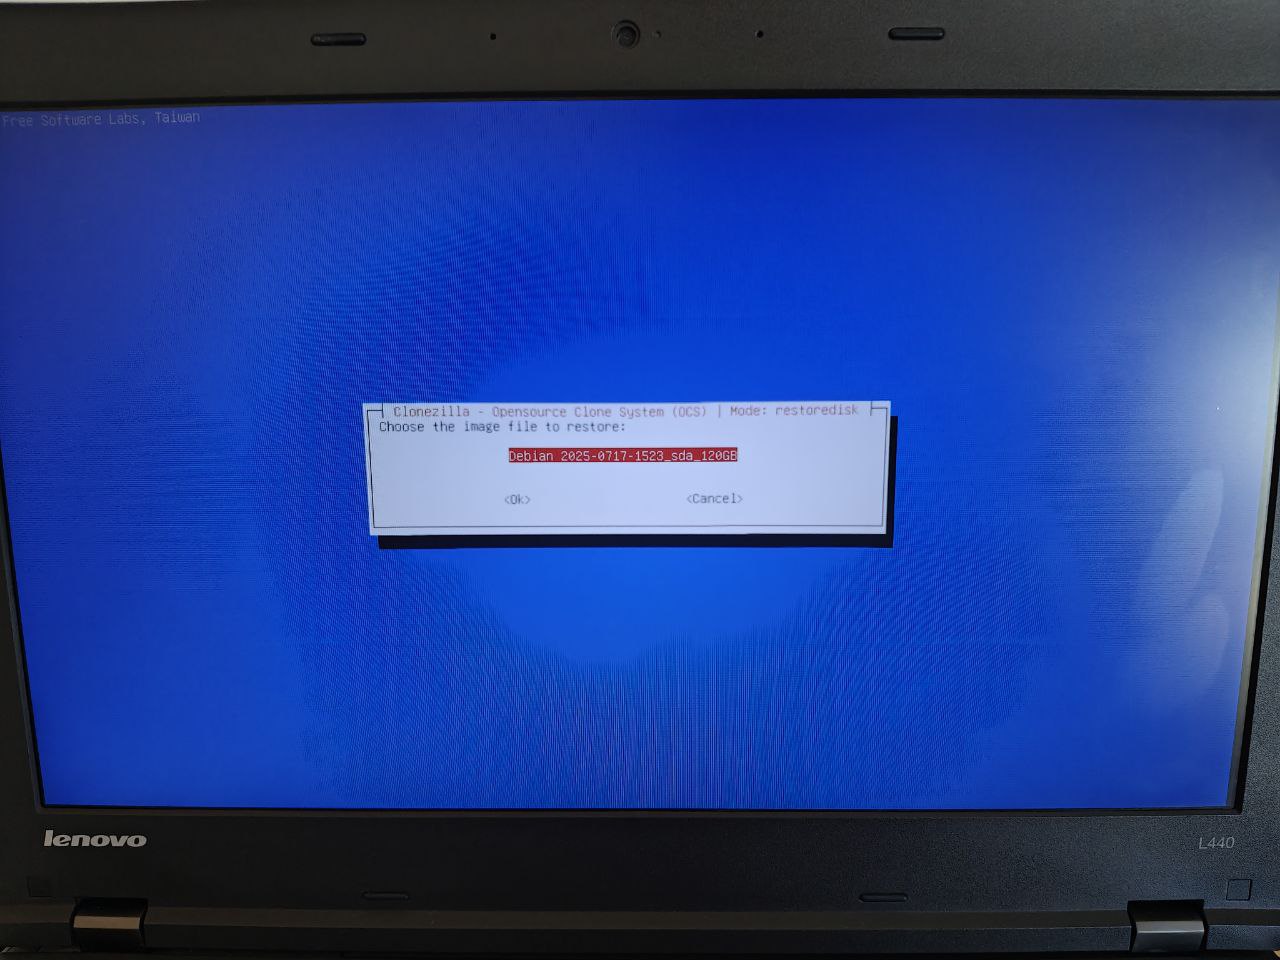
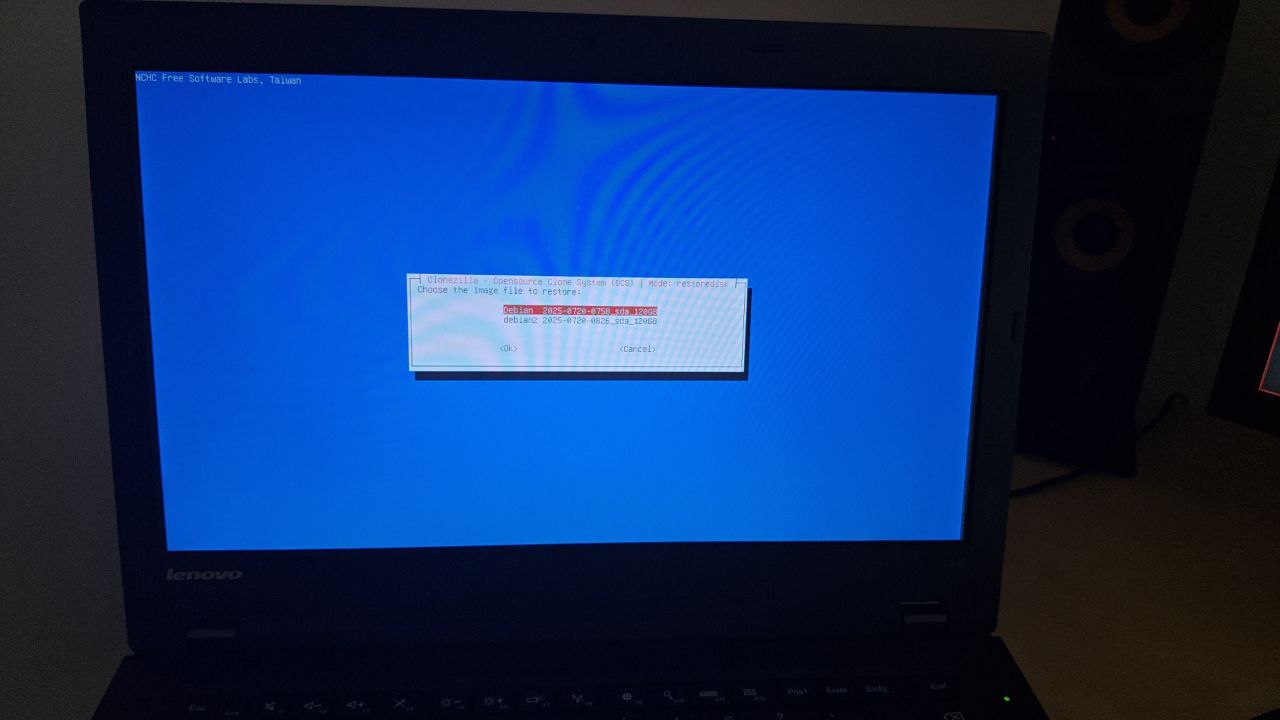
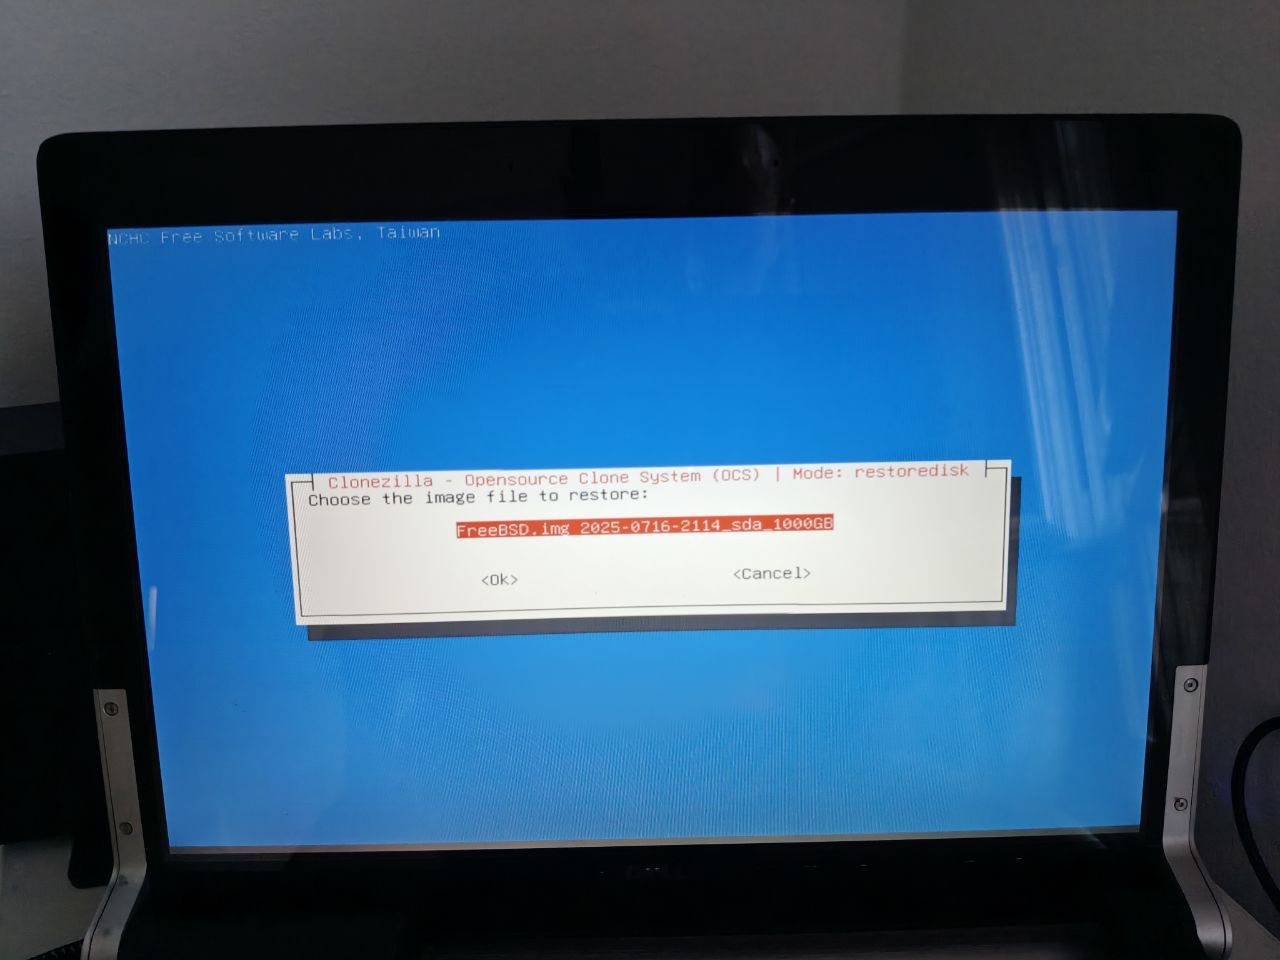
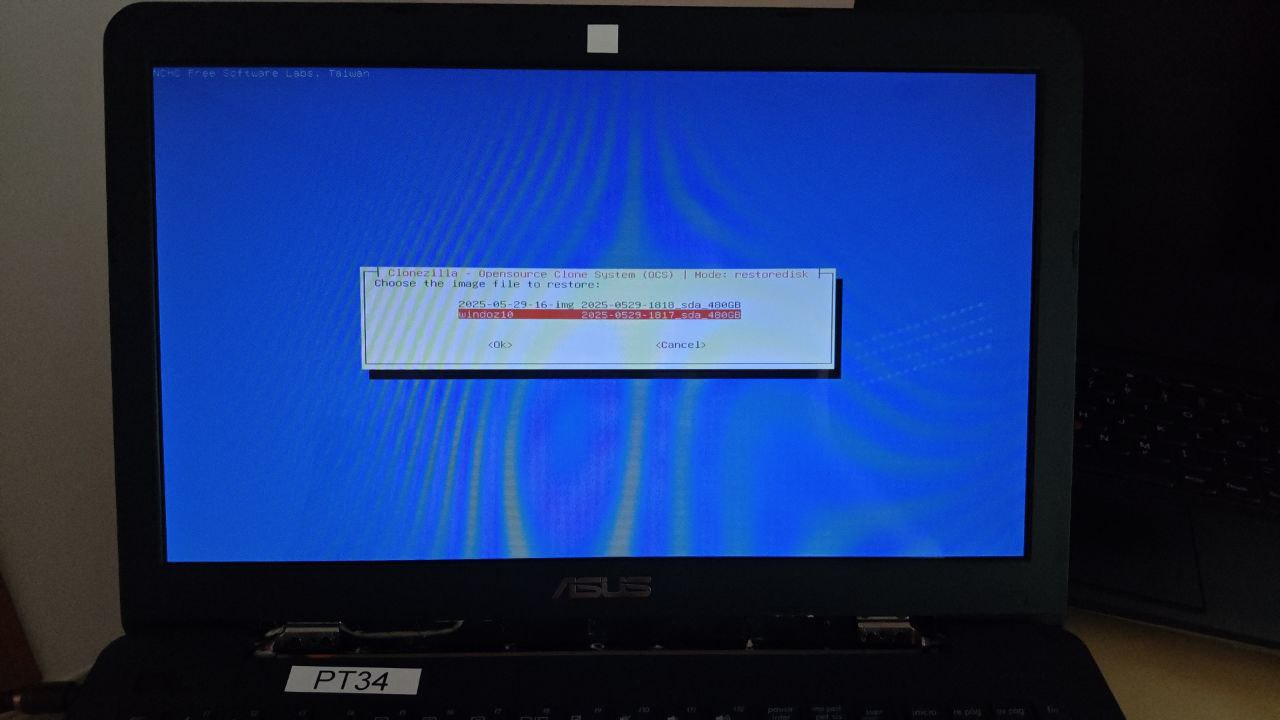
Choose the image name:
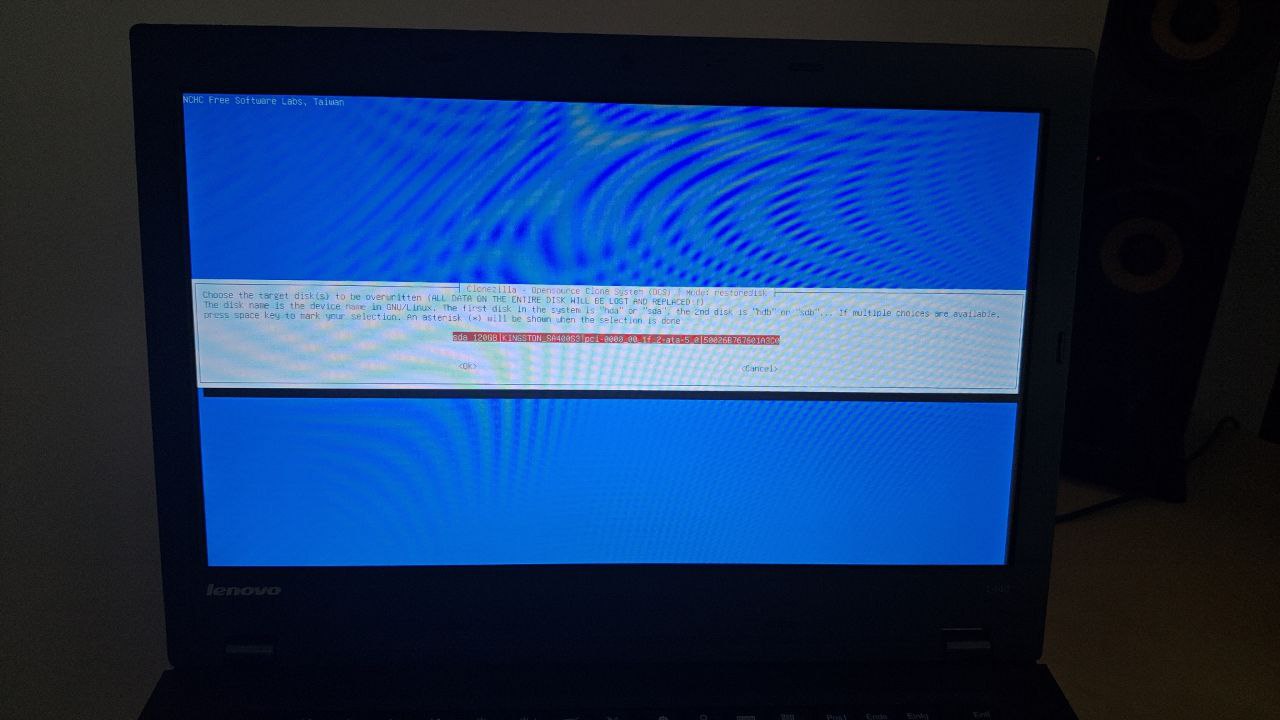
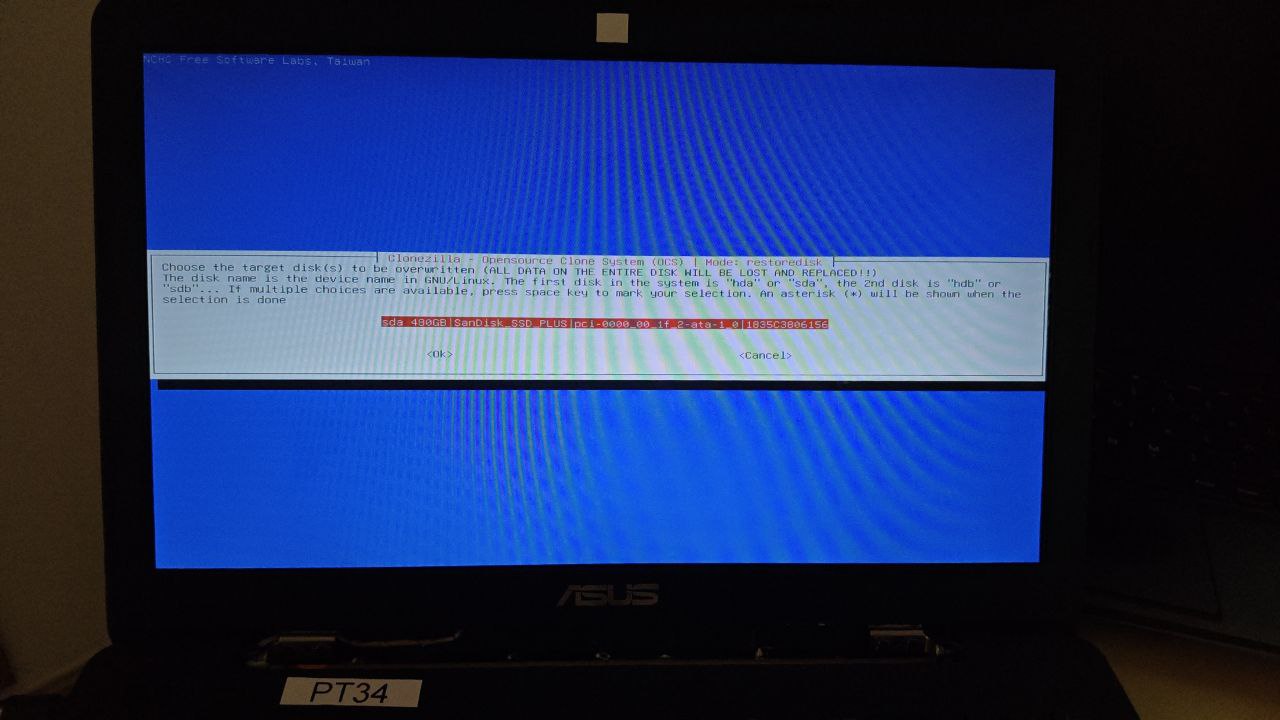
Select the target disk:
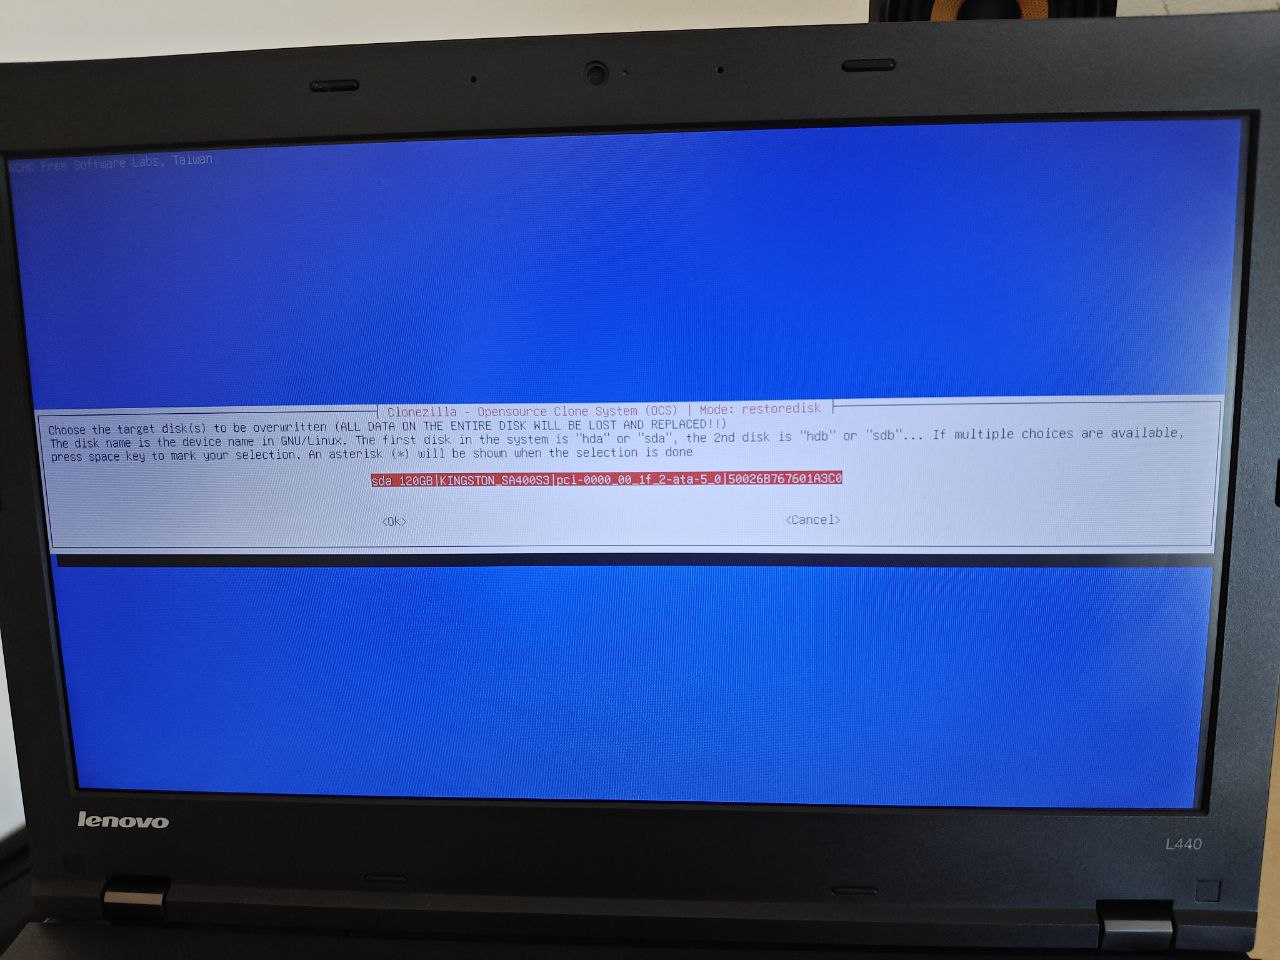
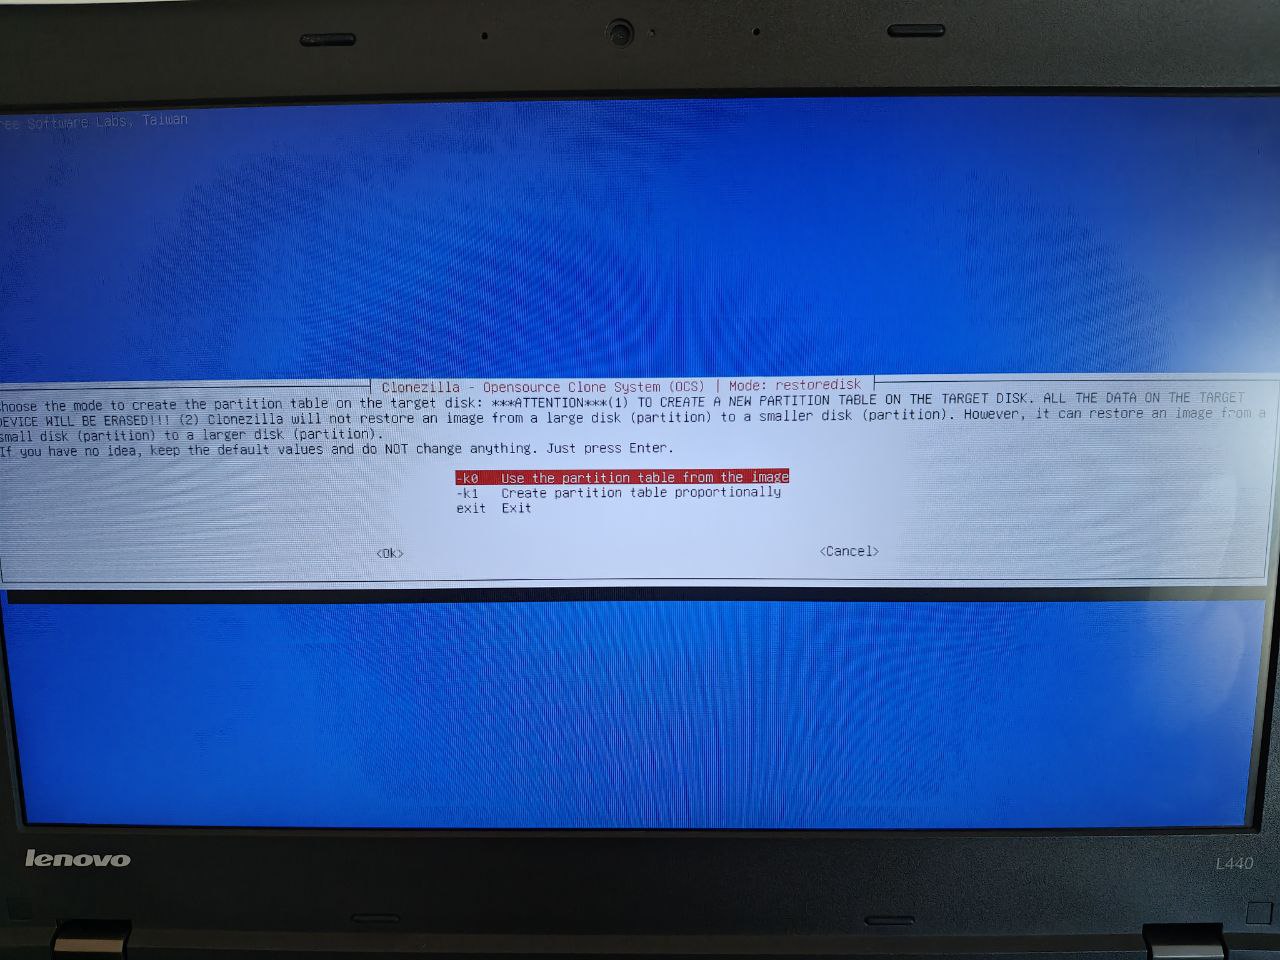
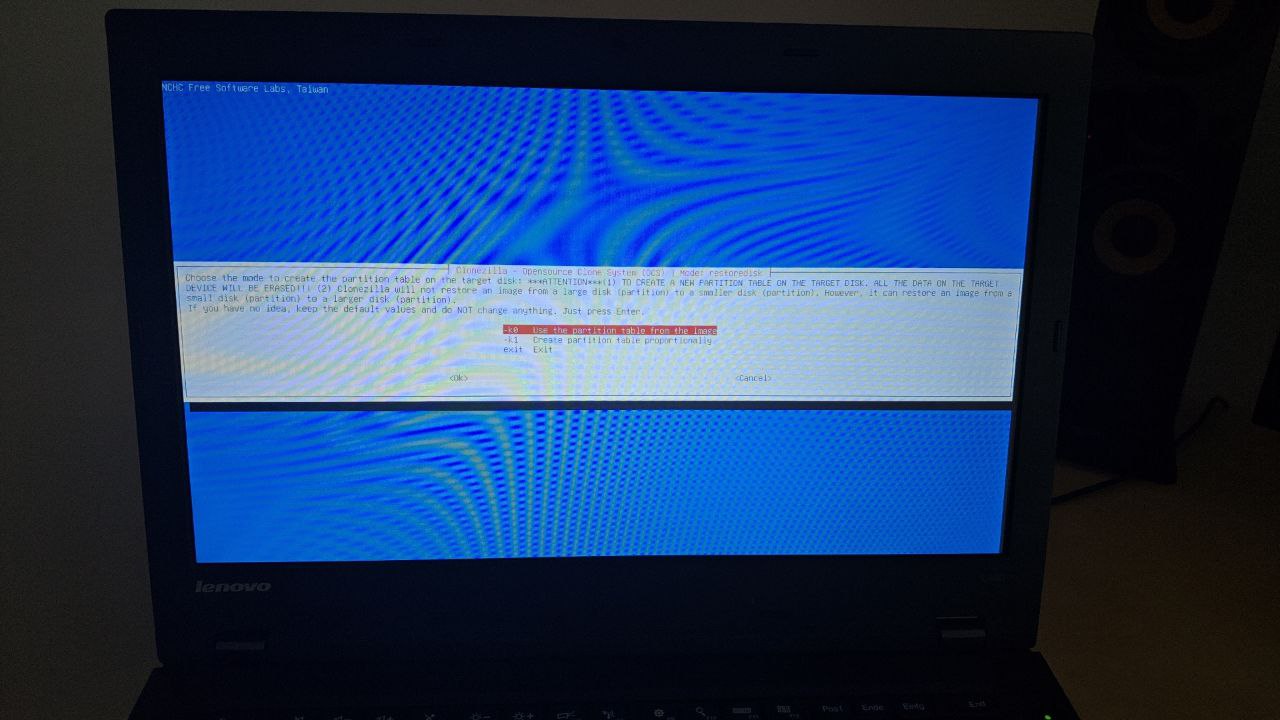
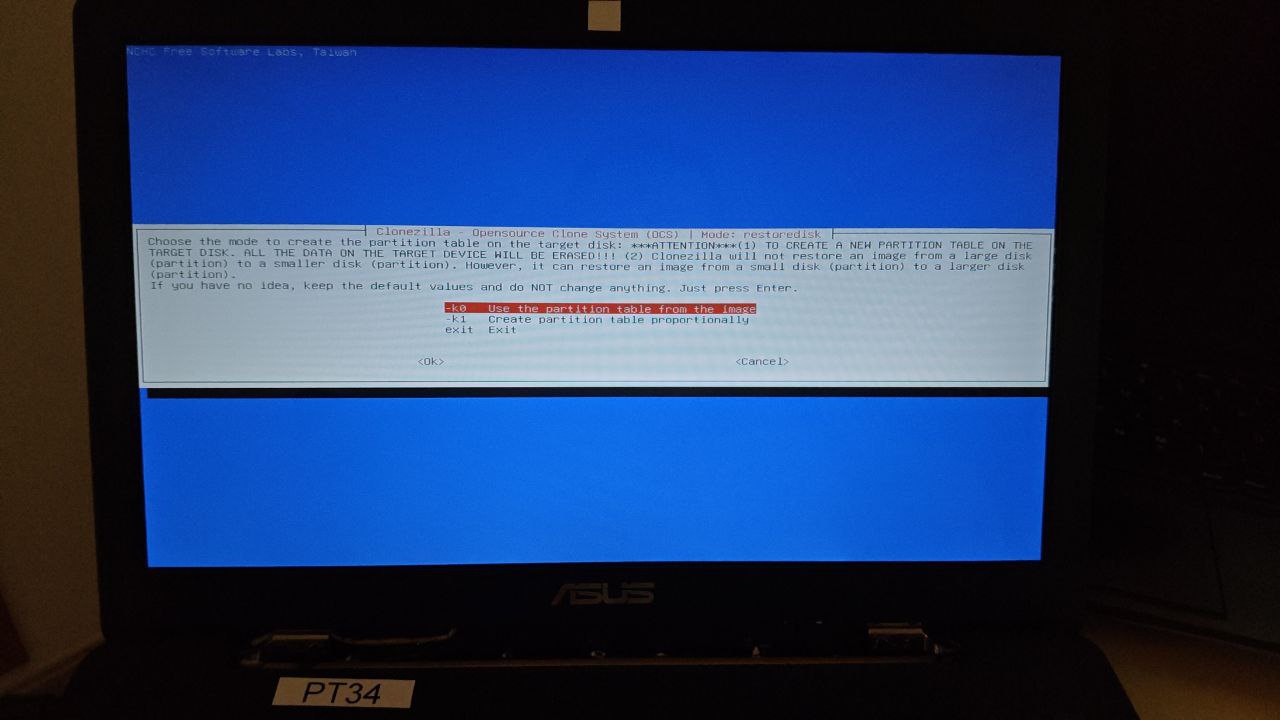
Choose the partition table option:
- Keep original.
- Create a new one: Useful for restoring to disks of different sizes.
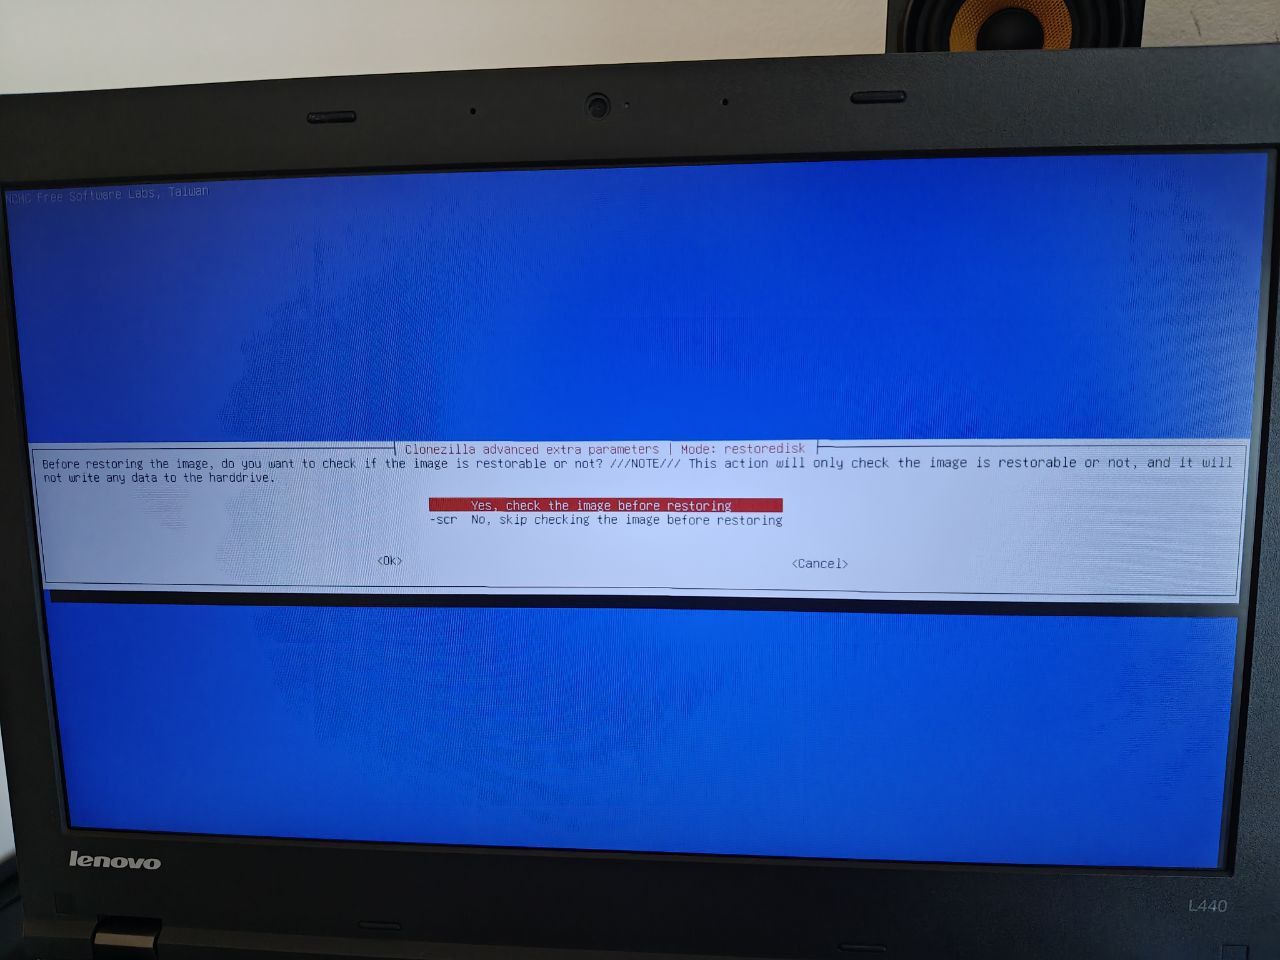
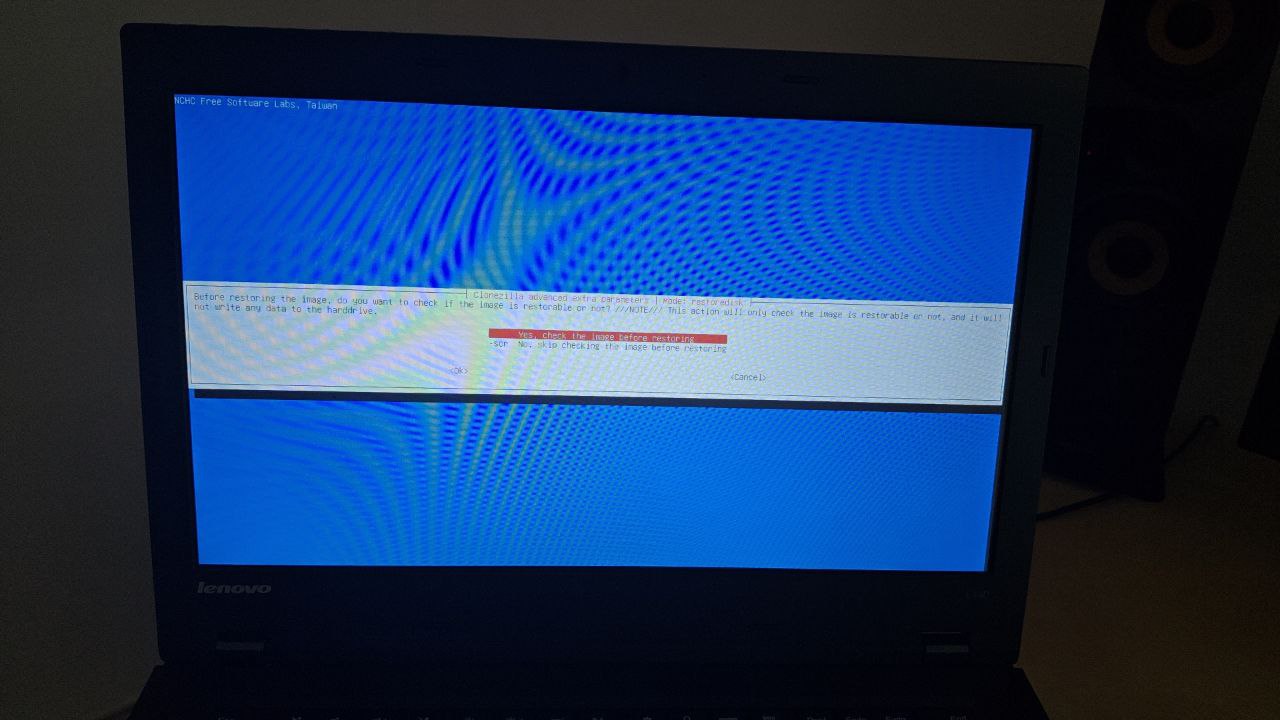
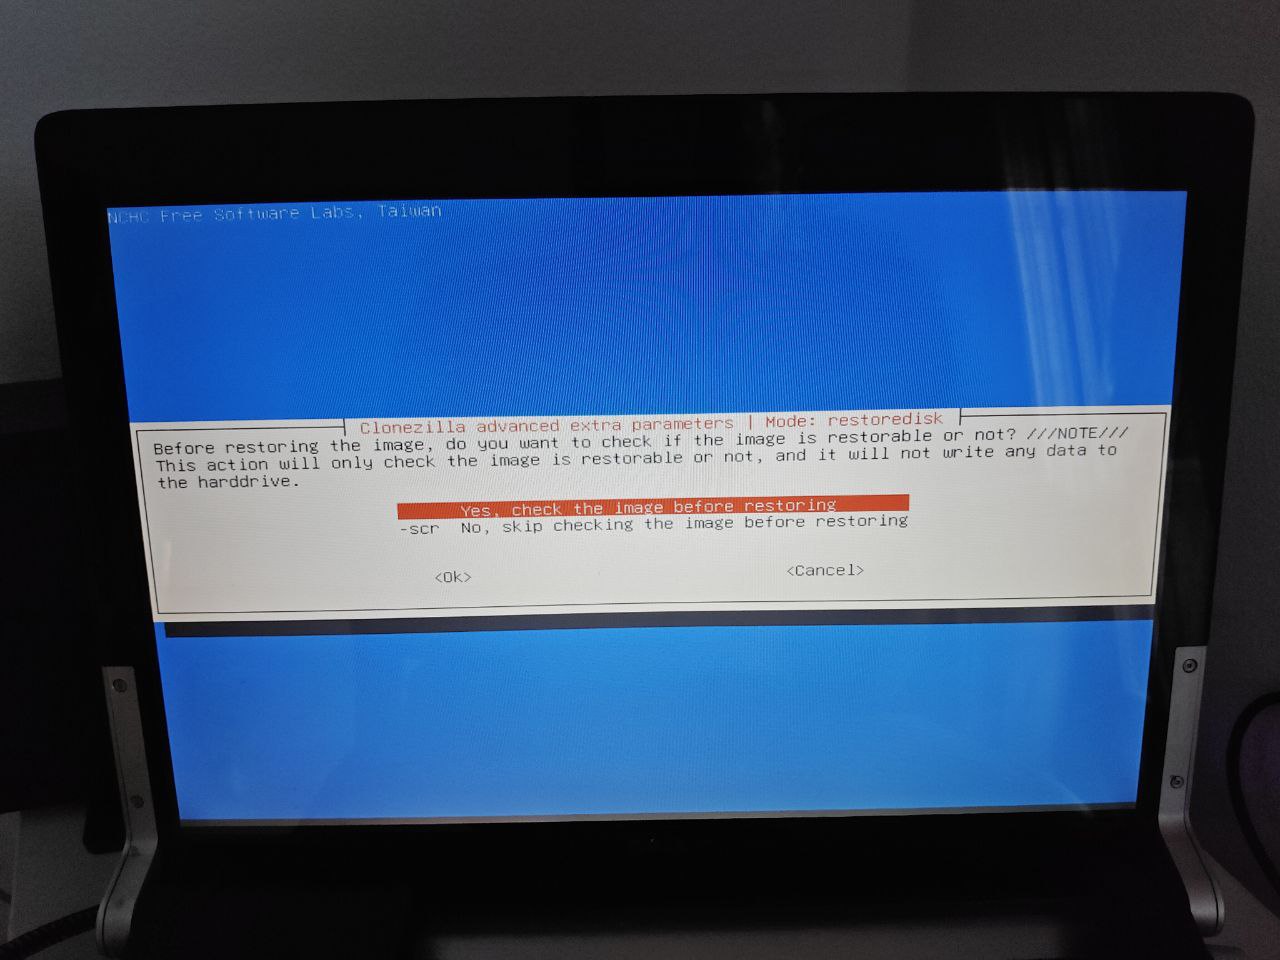
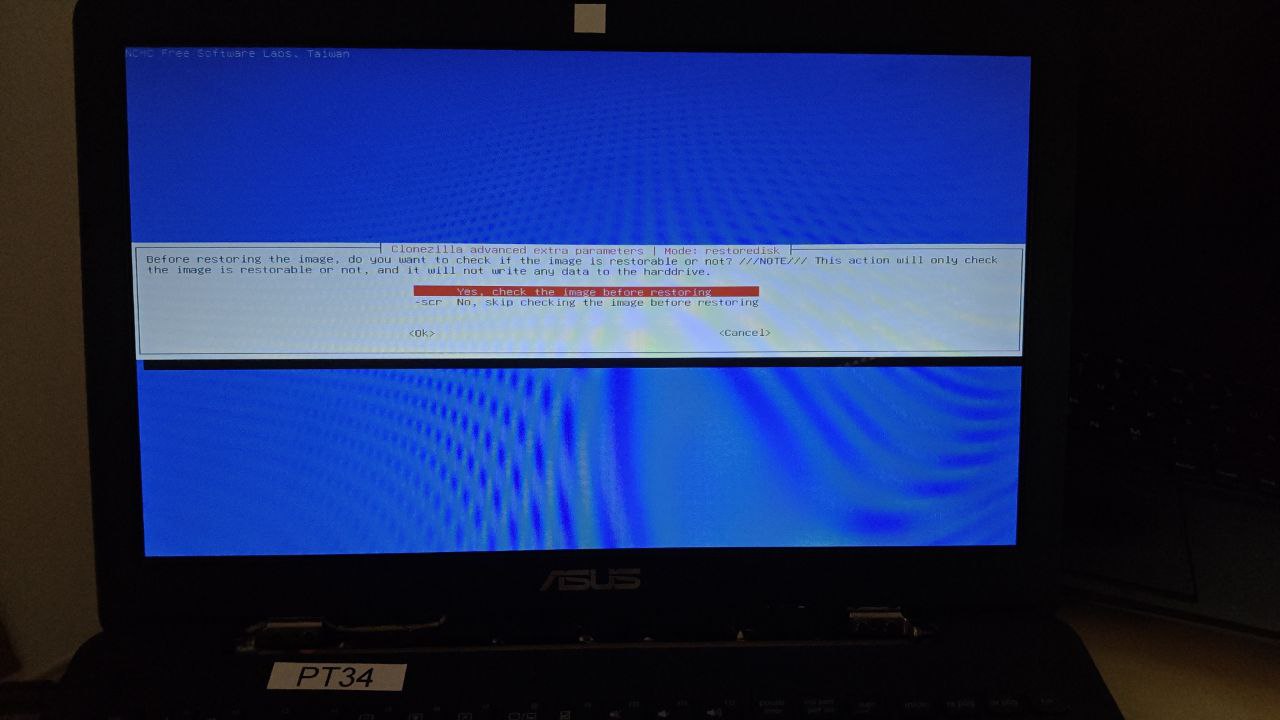
Decide whether to verify the image before restoring:
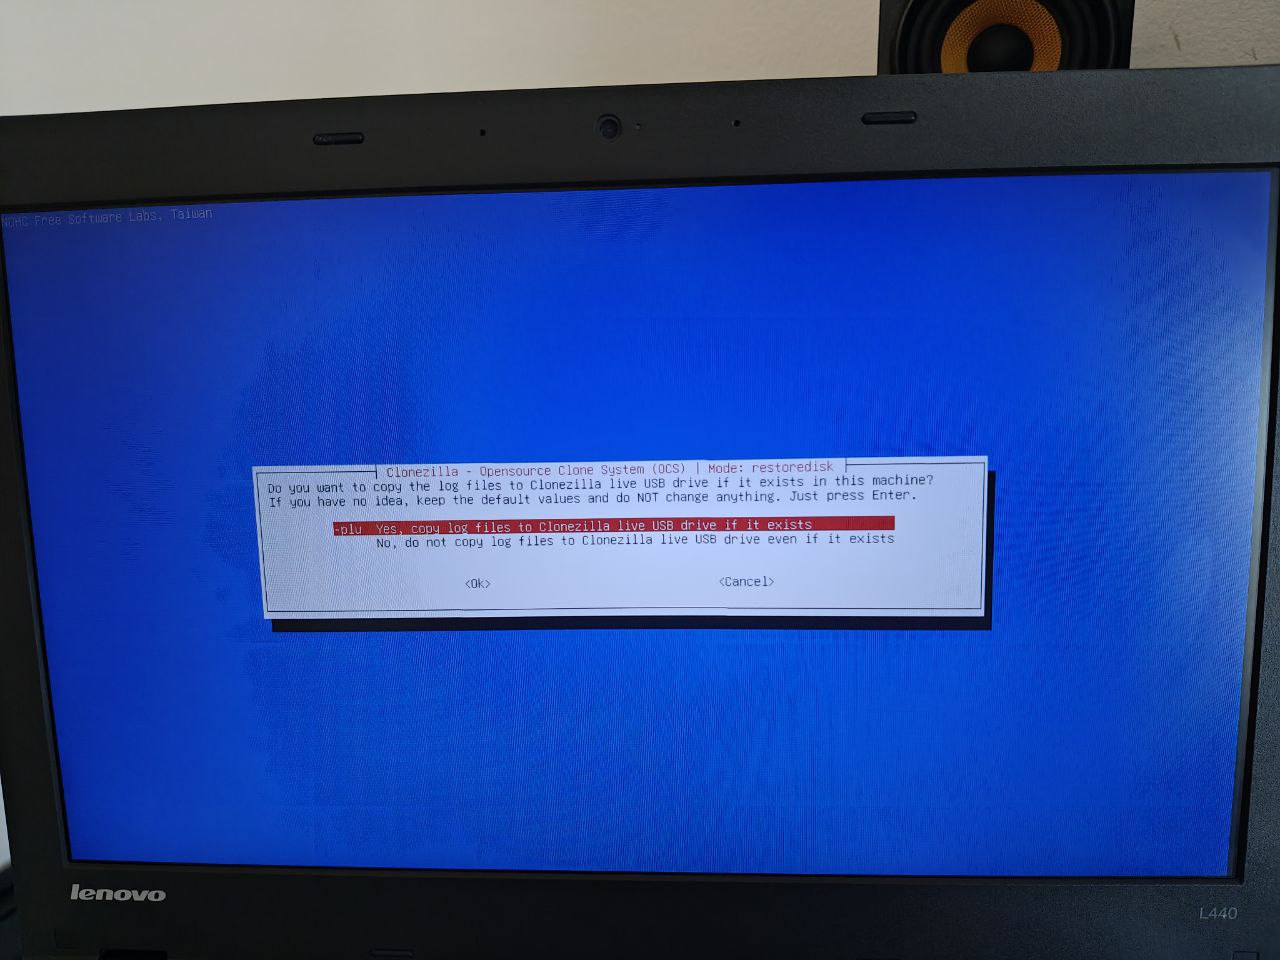
Choose whether to save logs:
Choose post-operation behavior:
It shows the command it’s about to run:
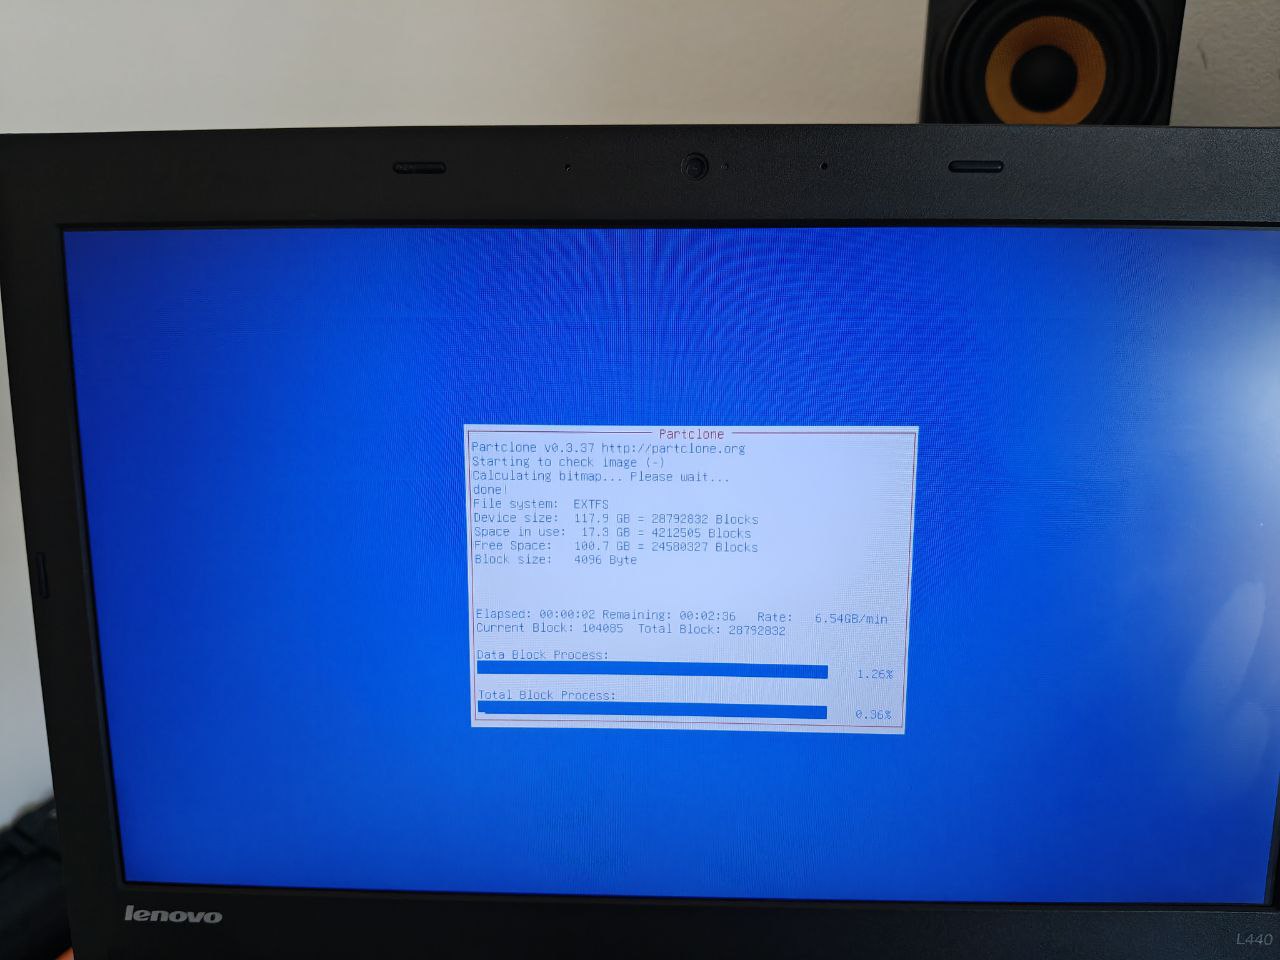
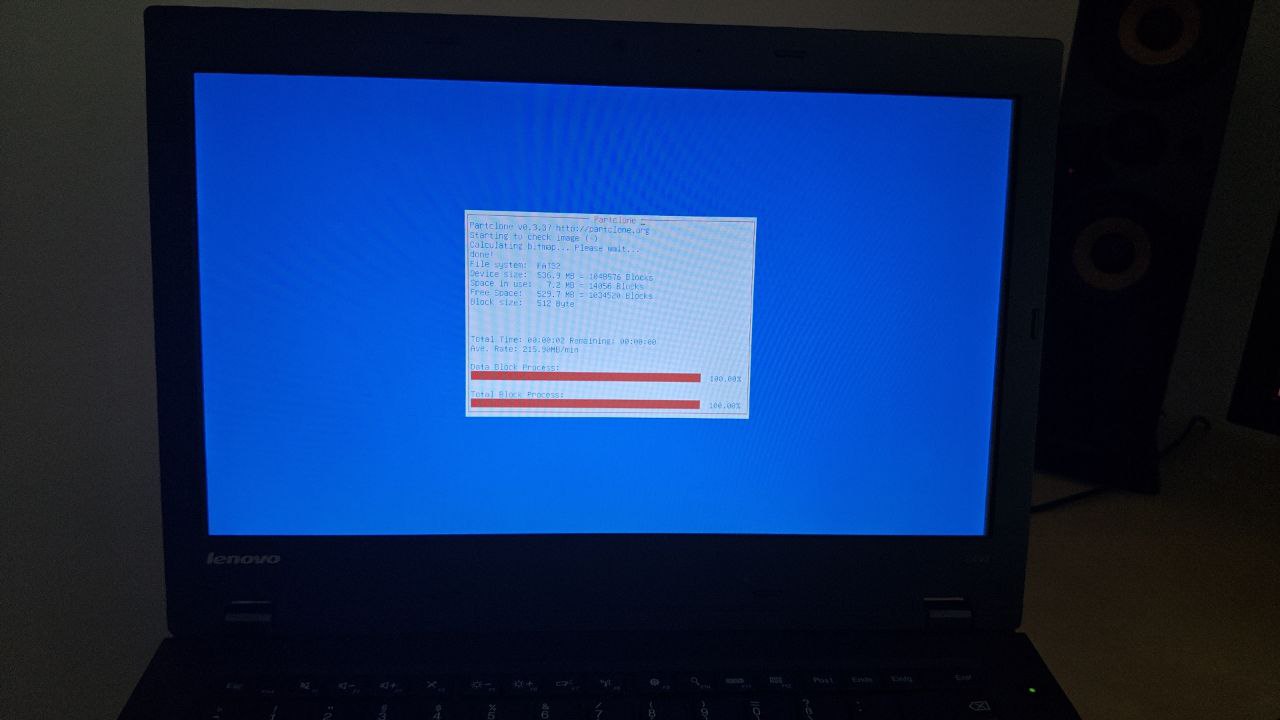
The disk has 3 partitions; verify each is restorable:
| Partition 1 | Partition 2 | Partition 3 |
|---|---|---|
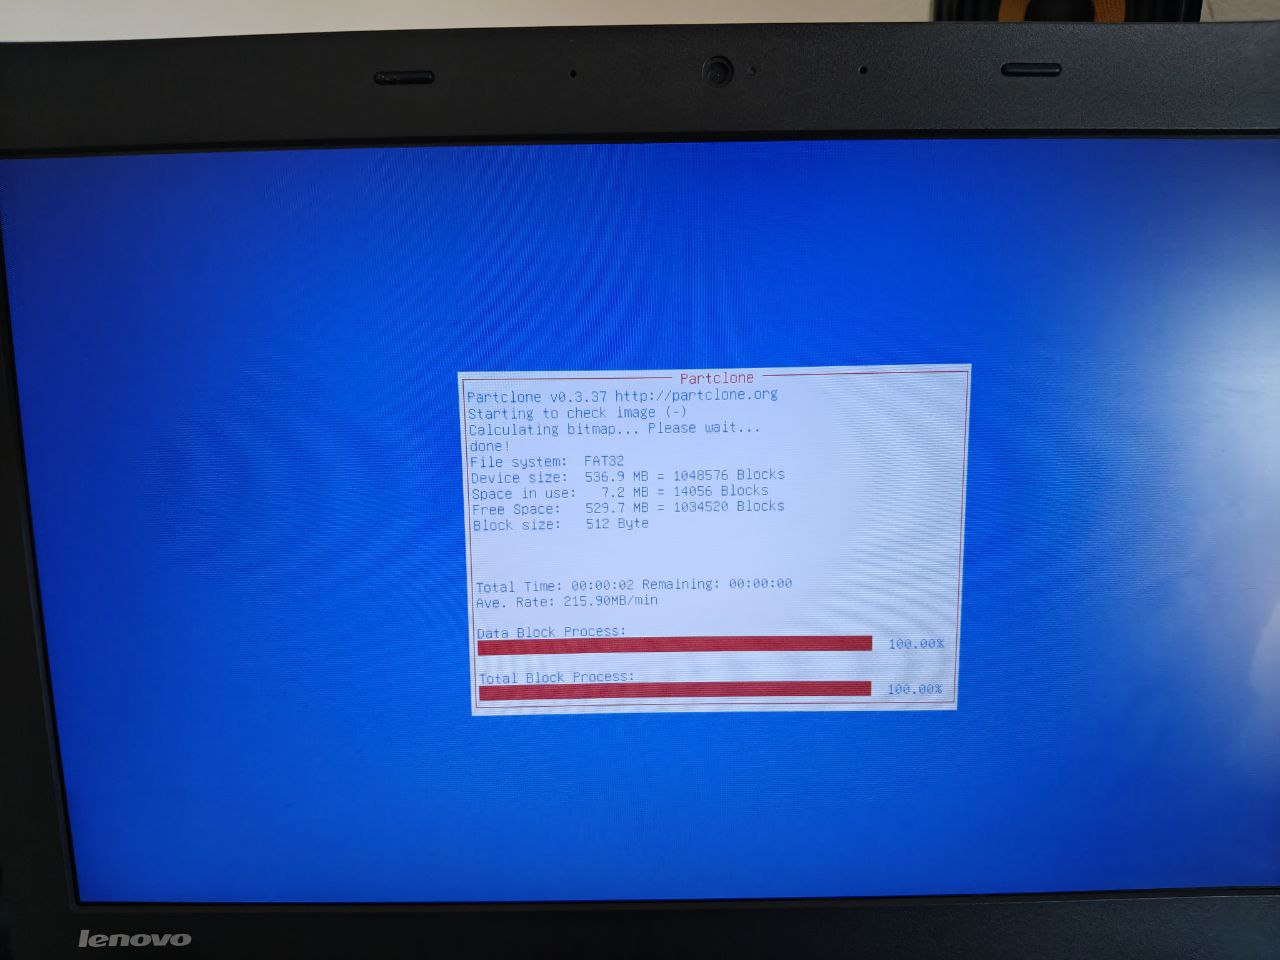
|
|
|
You’re asked for confirmation:
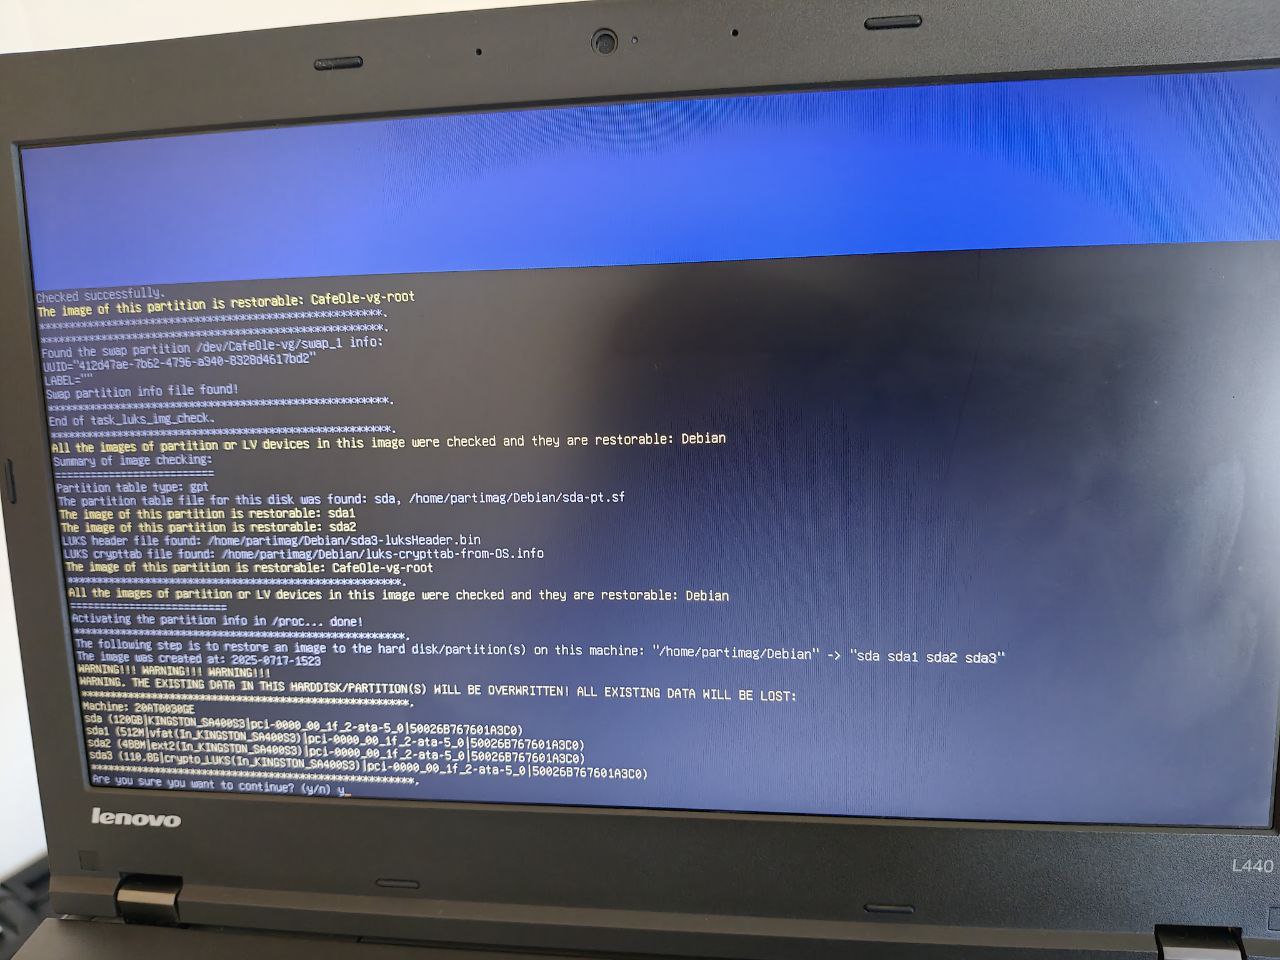
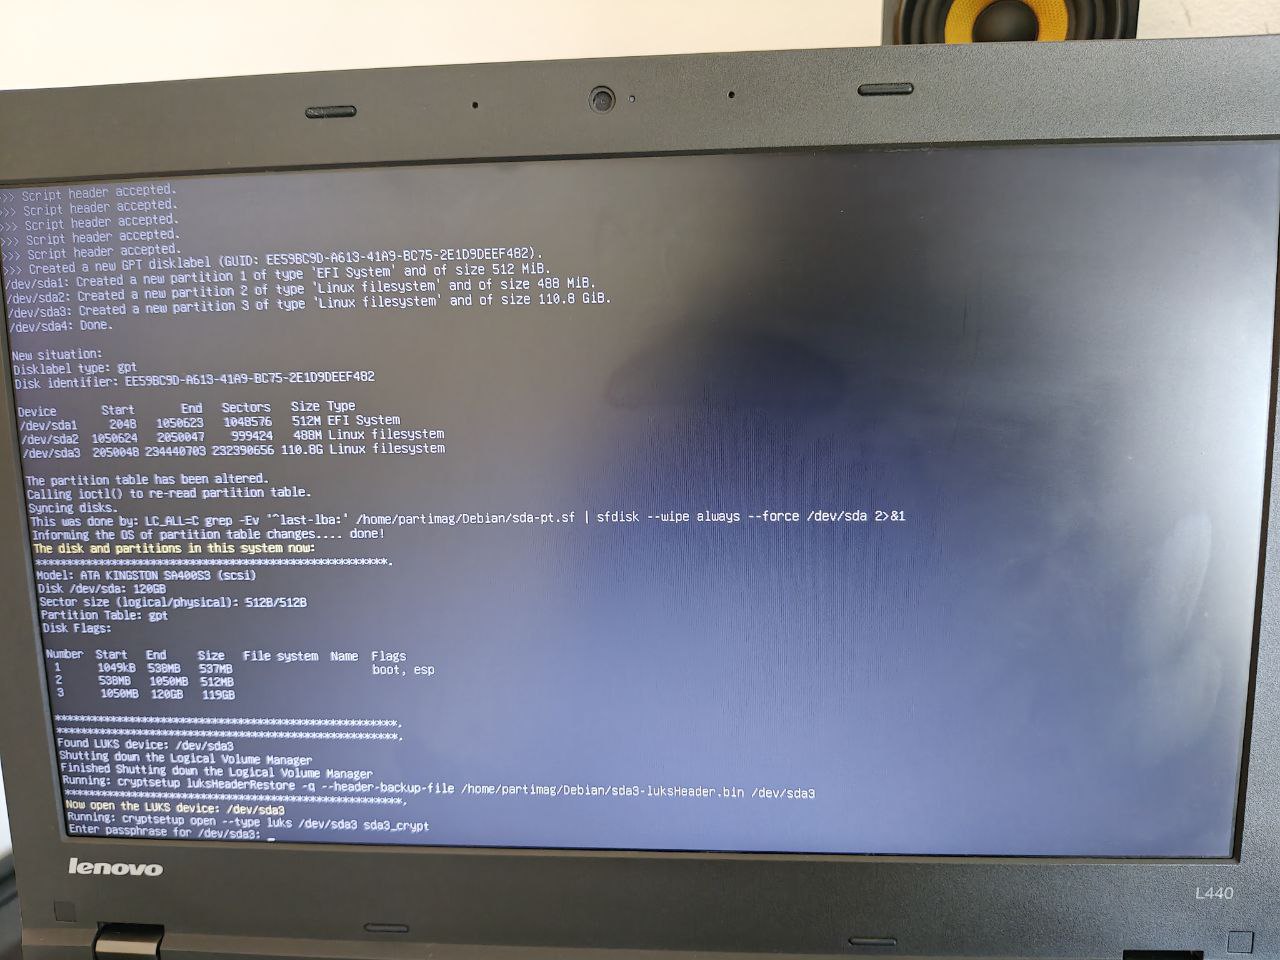
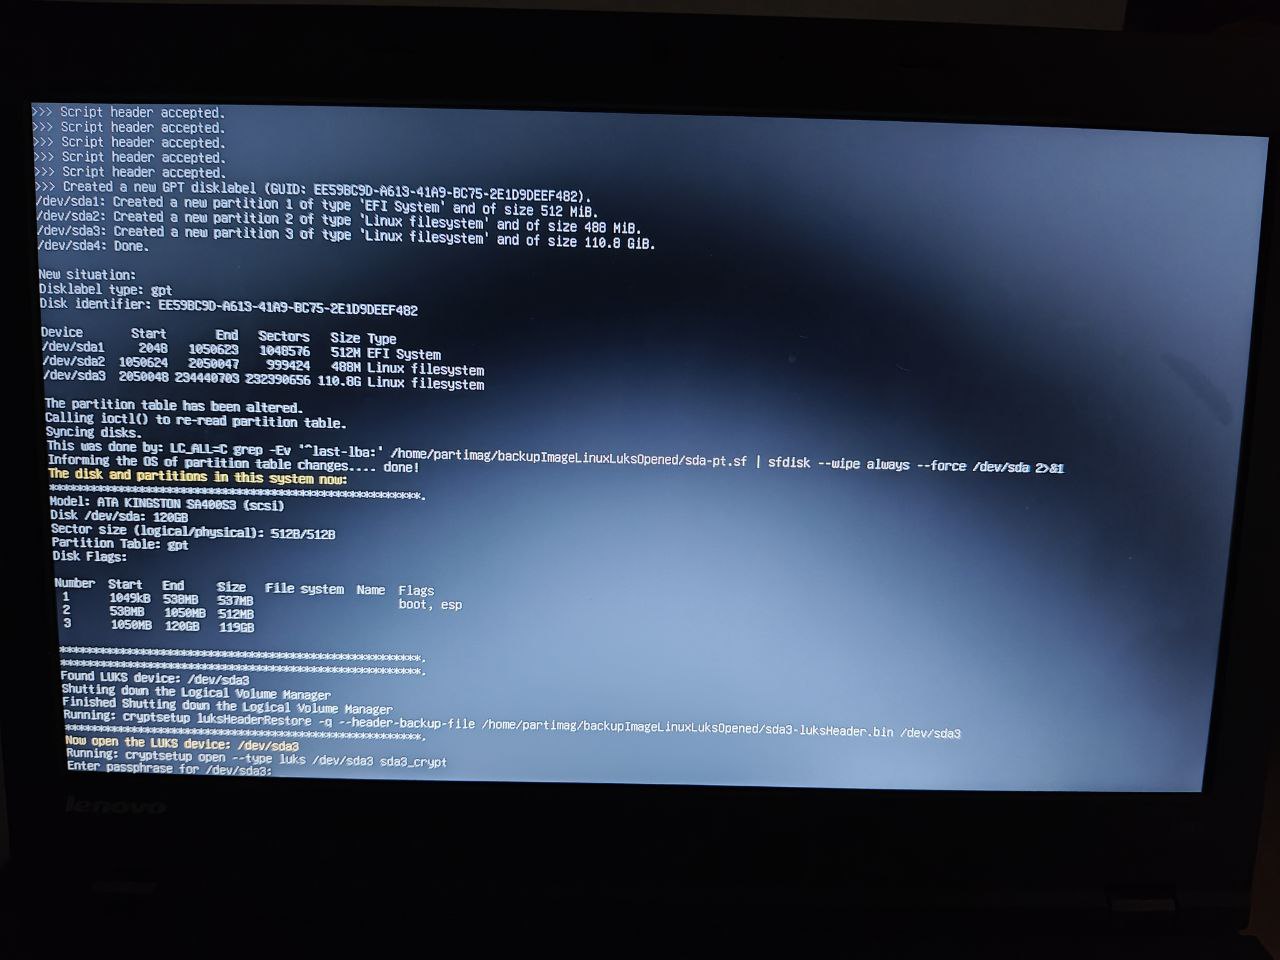
You’re asked for the password to unlock the LUKS disk—not because the backup data is encrypted, but because the target disk is:
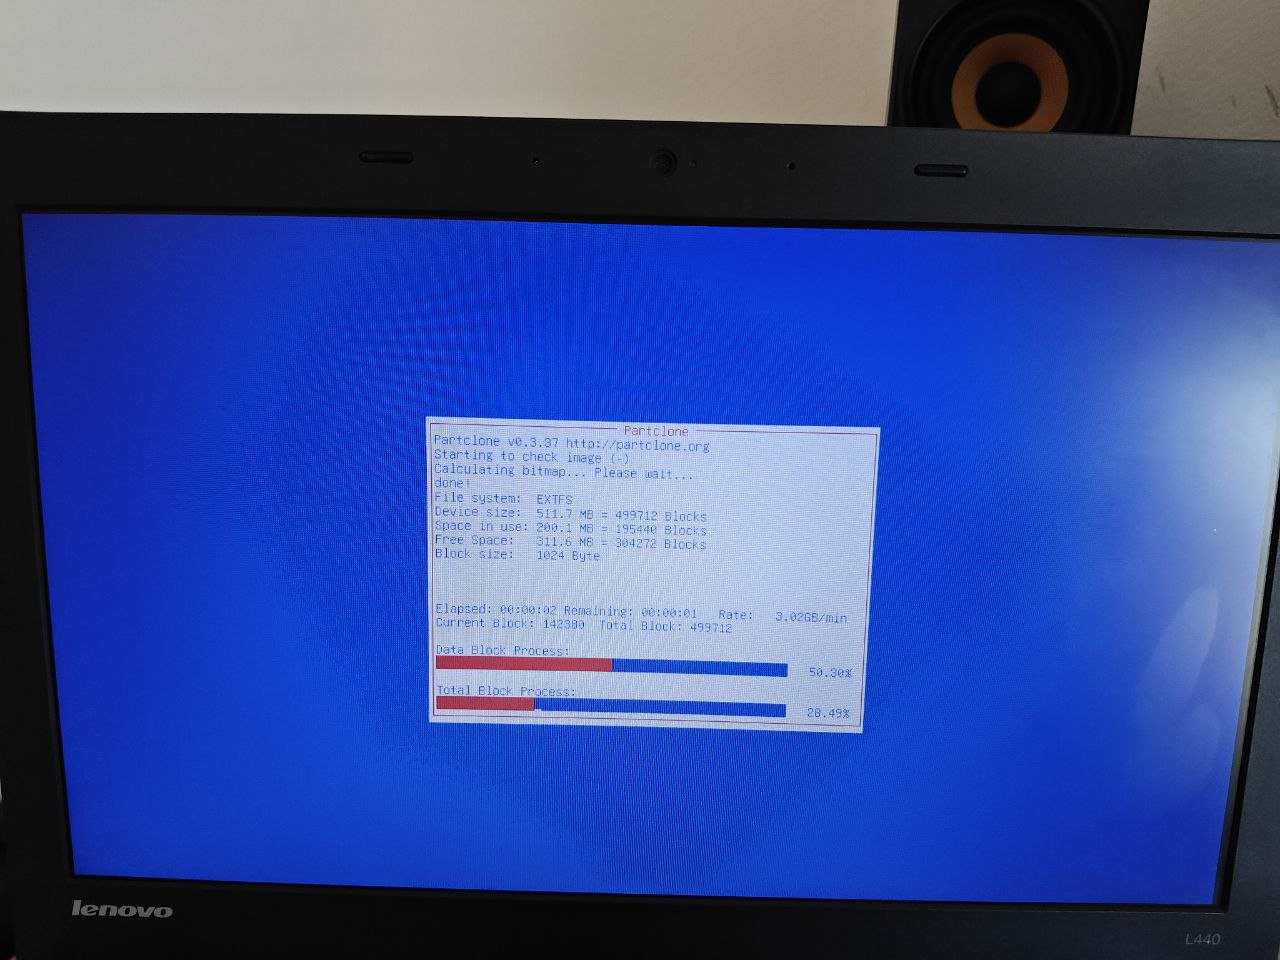
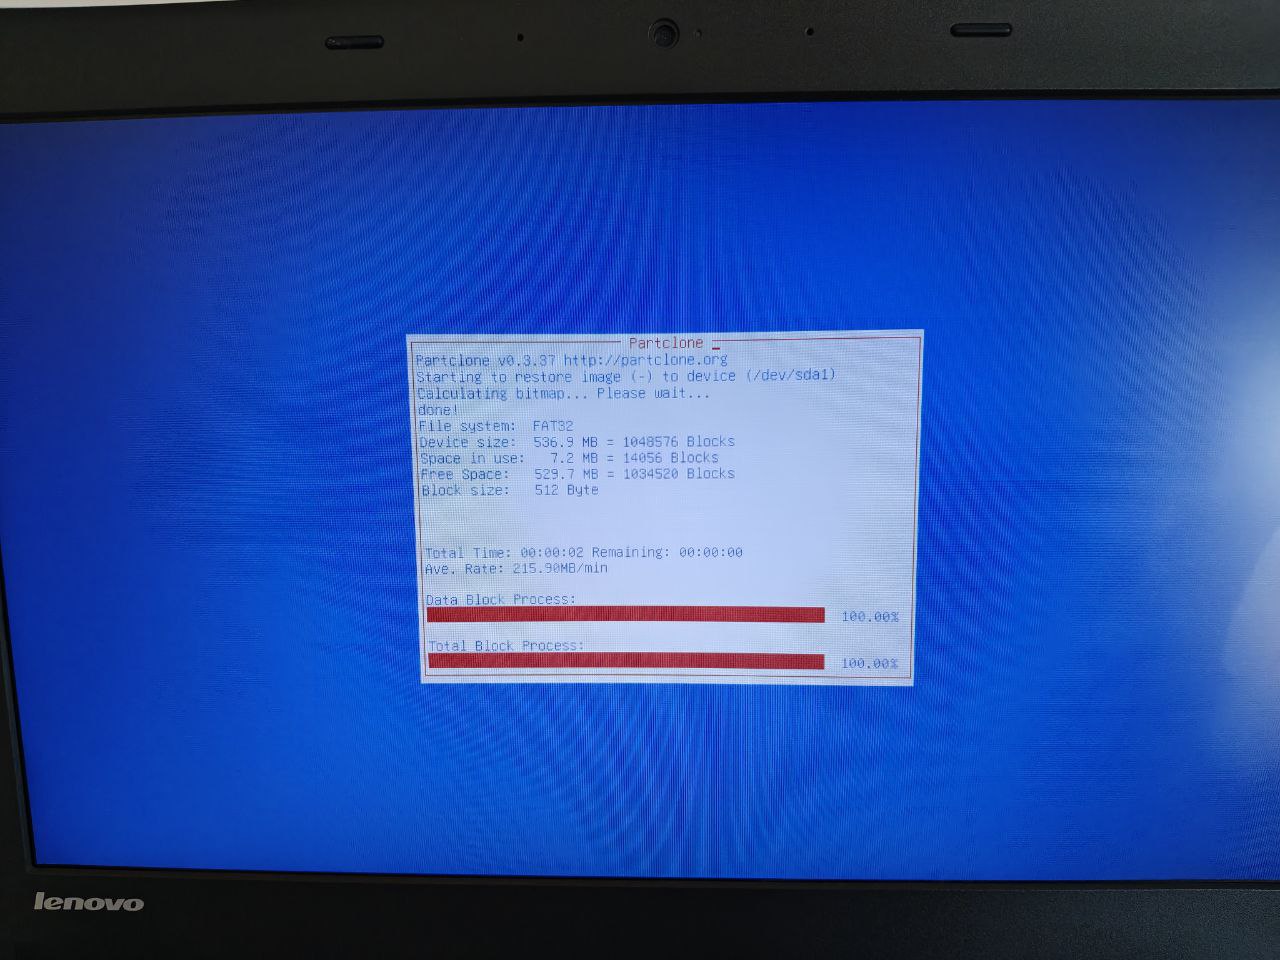
Screenshots of restoring each of the 3 partitions:
| Partition 1 | Partition 2 | Partition 3 |
|---|---|---|
|
|
|
NOTE: In my case, it took about 8 minutes to restore a 120GB SSD (17.3GB used) from a 2.5" mechanical disk connected via external USB enclosure.
Summary of completed tasks:
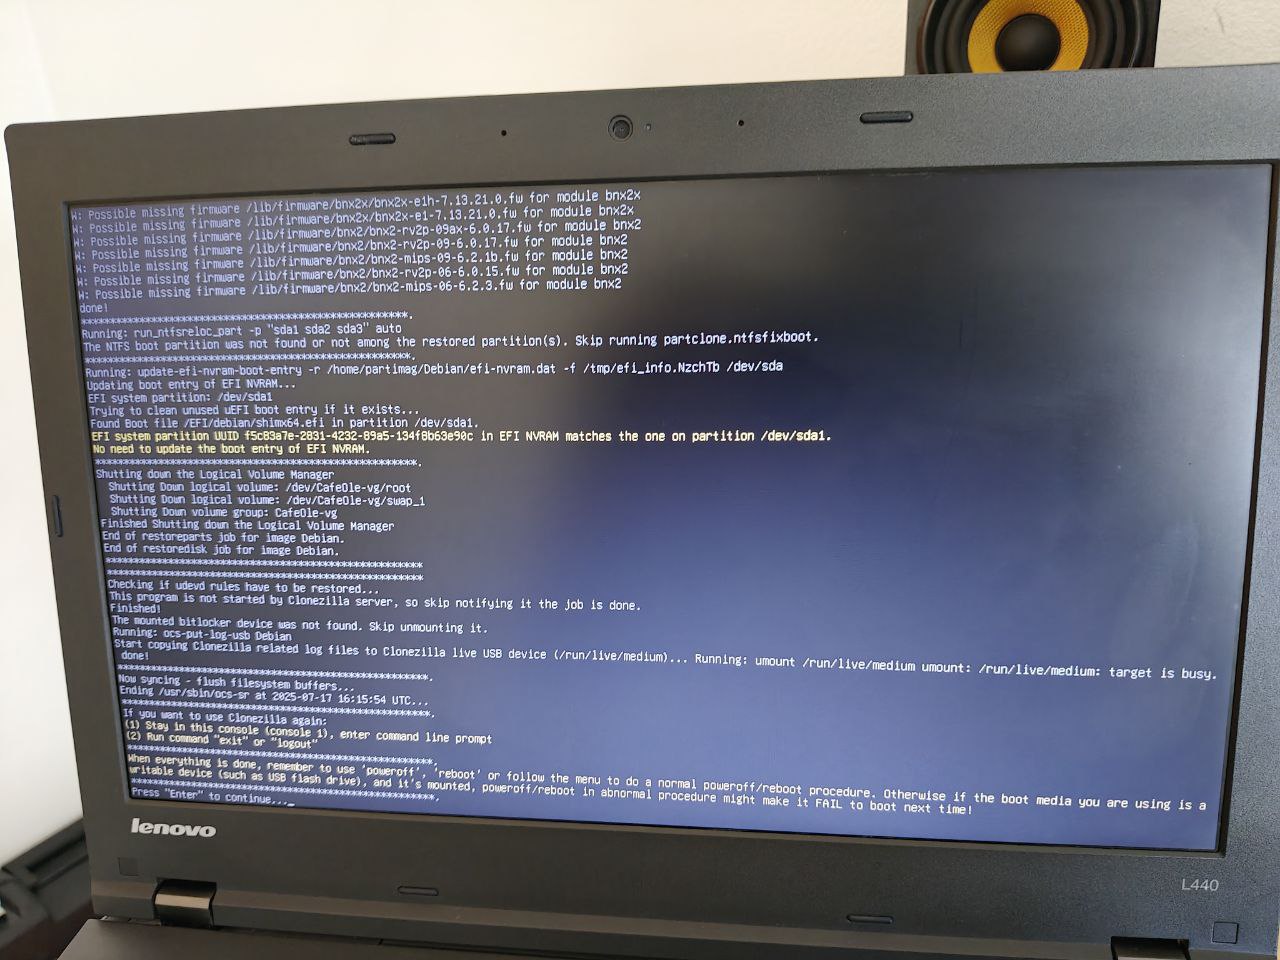
Once done, you’re asked what to do:

Backup: Linux+encryption (without unlocking)
We configure the language:
We configure the keyboard layout:
It offers us to start Clonezilla or open a Linux shell. We start Clonezilla:
Clonezilla allows us to operate in
various ways
. In our case we want to store the entire disk as an image, so we choose device-image:
Clonezilla supports
repositories
of
different types
, we choose local_dev because our
repository
is local:
It informs us that if we want to use a disk that is not yet connected, now is the time:
It shows us the system disks in real-time:
We select the partition where our
repository
is:
It asks whether we want to do a fsck of the repository’s filesystem. In my case it’s Ext4, and an extra check never hurts:
If the repository is in a subdirectory, we must indicate it here:
Path on the resource: /dev/sdb2[/] --> Shows Device+[Directory]: The device cannot change since it was selected in a previous step, only the directory path will change depending on what we select.
Current selected dir name: "/" --> Directory path.
My
repository
is directly in the root, so the path is /. We press Done:
It tells us that it has mounted /tmp/ocsroot_bind_root to /home/partimag using --bind (end of the photo):
It asks the operation mode. Beginner is a good choice if no fine-tuning is required, as in this case:
At this point, we’ll see one menu or another depending on whether any previous backup exists. We want to generate a full disk image: savedisk:
| No previous backup | With previous backup |
|---|---|

|
|
We set the name for the image:
We indicate the source of the data:
If the disk is encrypted as in my case (LUKS), it will ask whether we want to unlock the device. If we do, Clonezilla will back up only useful data (skipping empty space), which speeds up the process. But in this case, we want to test without unlocking it. 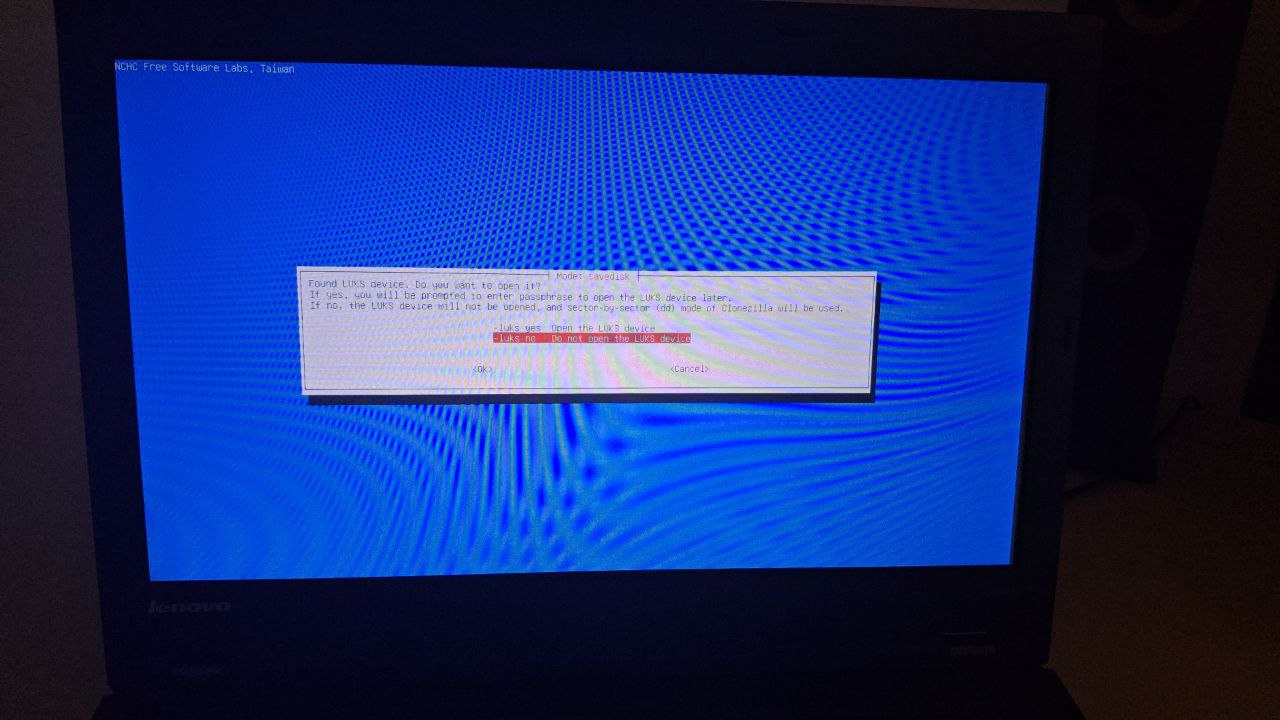
The
compression method
for the image:
It asks whether we want to run fsck on the source filesystem:
Check if the generated image is restorable:
In my case I won’t encrypt the image (don’t confuse Clonezilla encryption with the OS-level LUKS encryption):
This step asks if logs should be saved:

It asks what to do once the operation finishes:
It informs us of the command it is about to run:
It asks for confirmation to proceed:
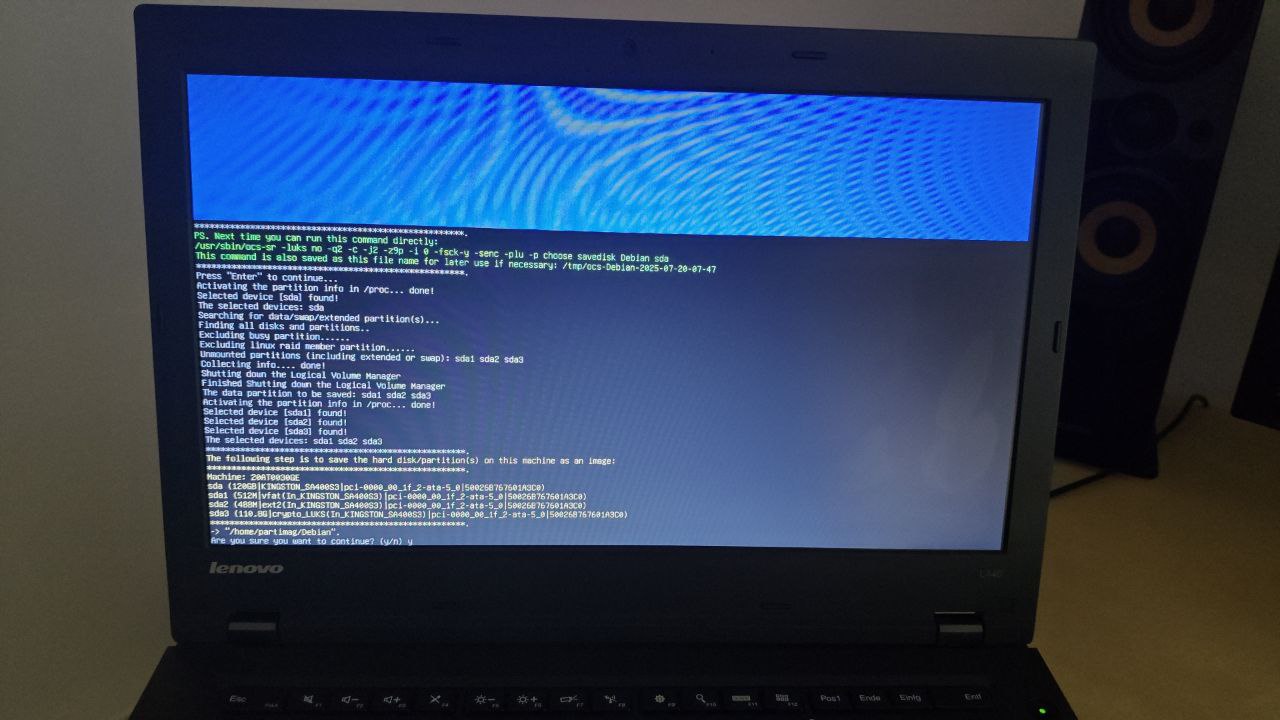
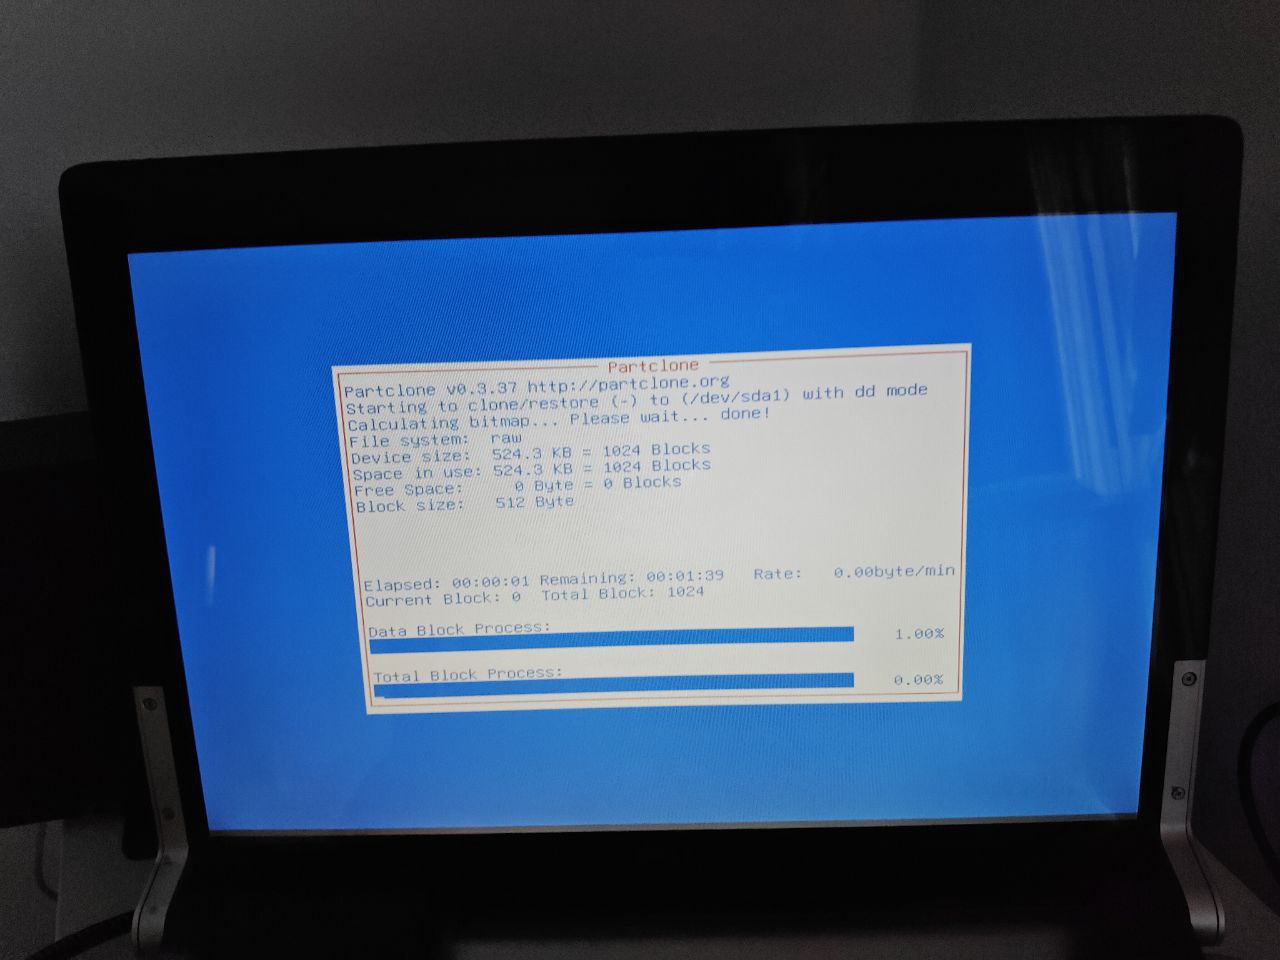
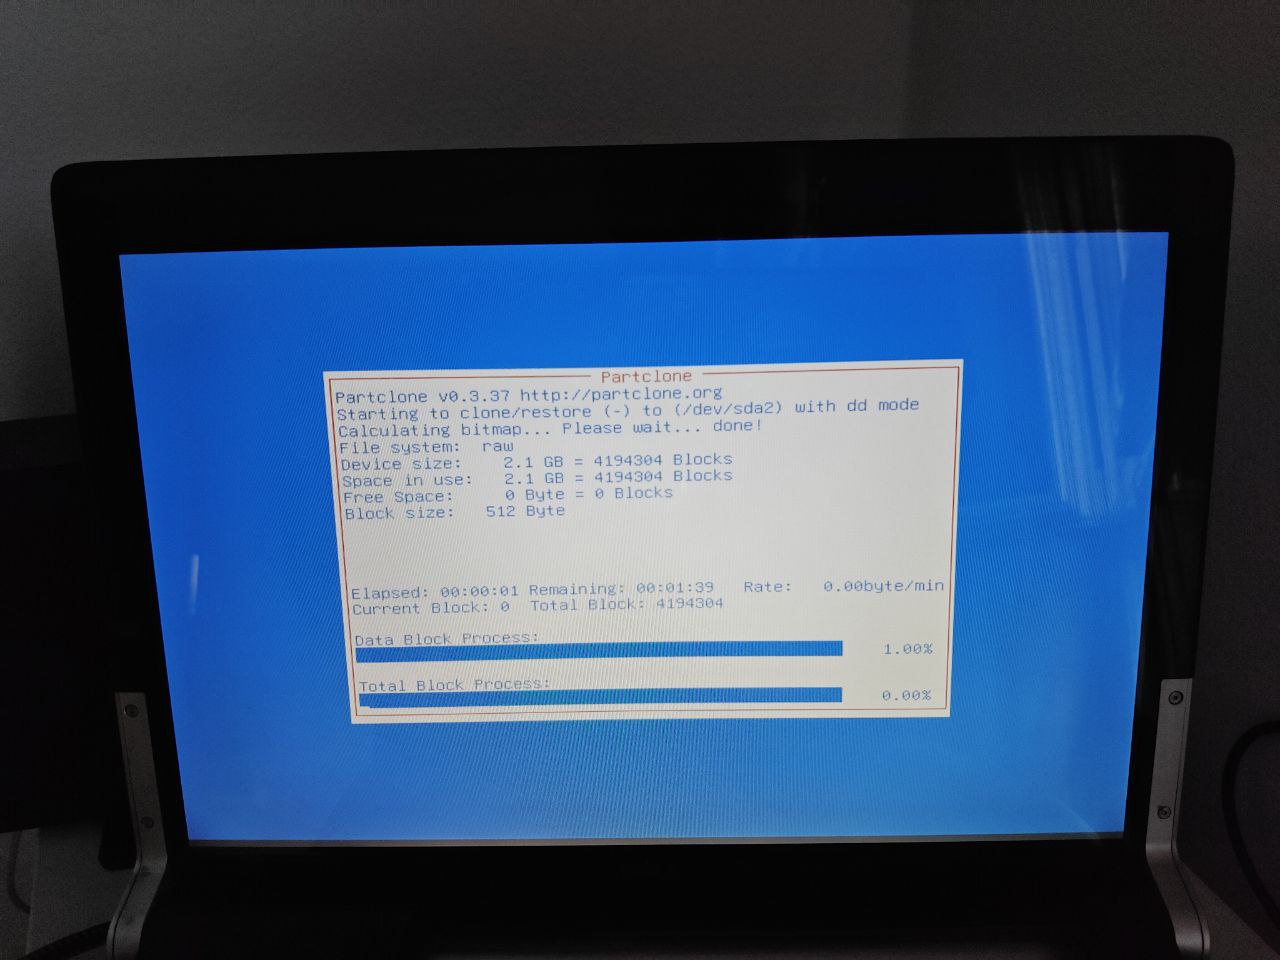
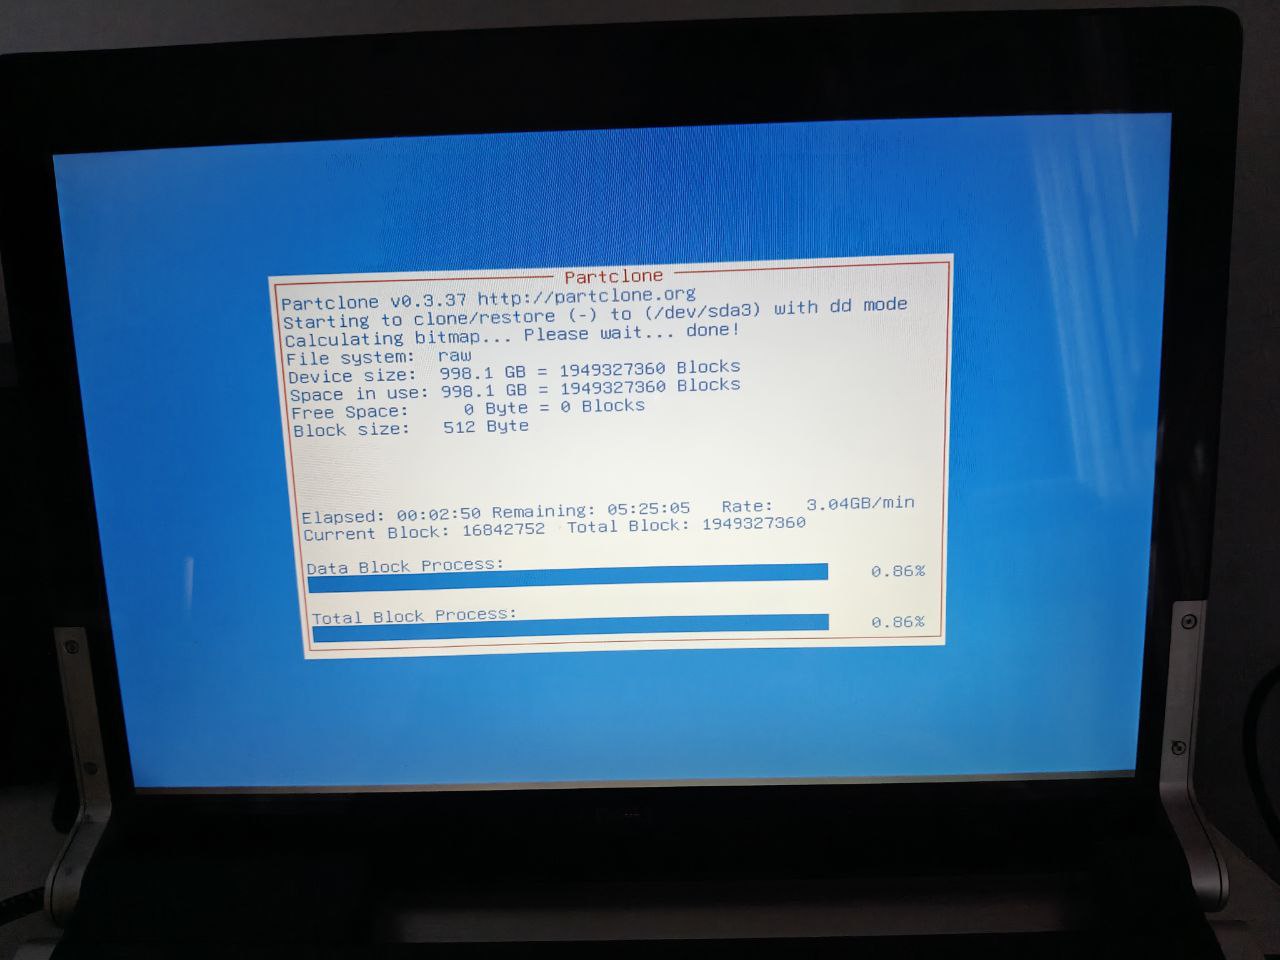
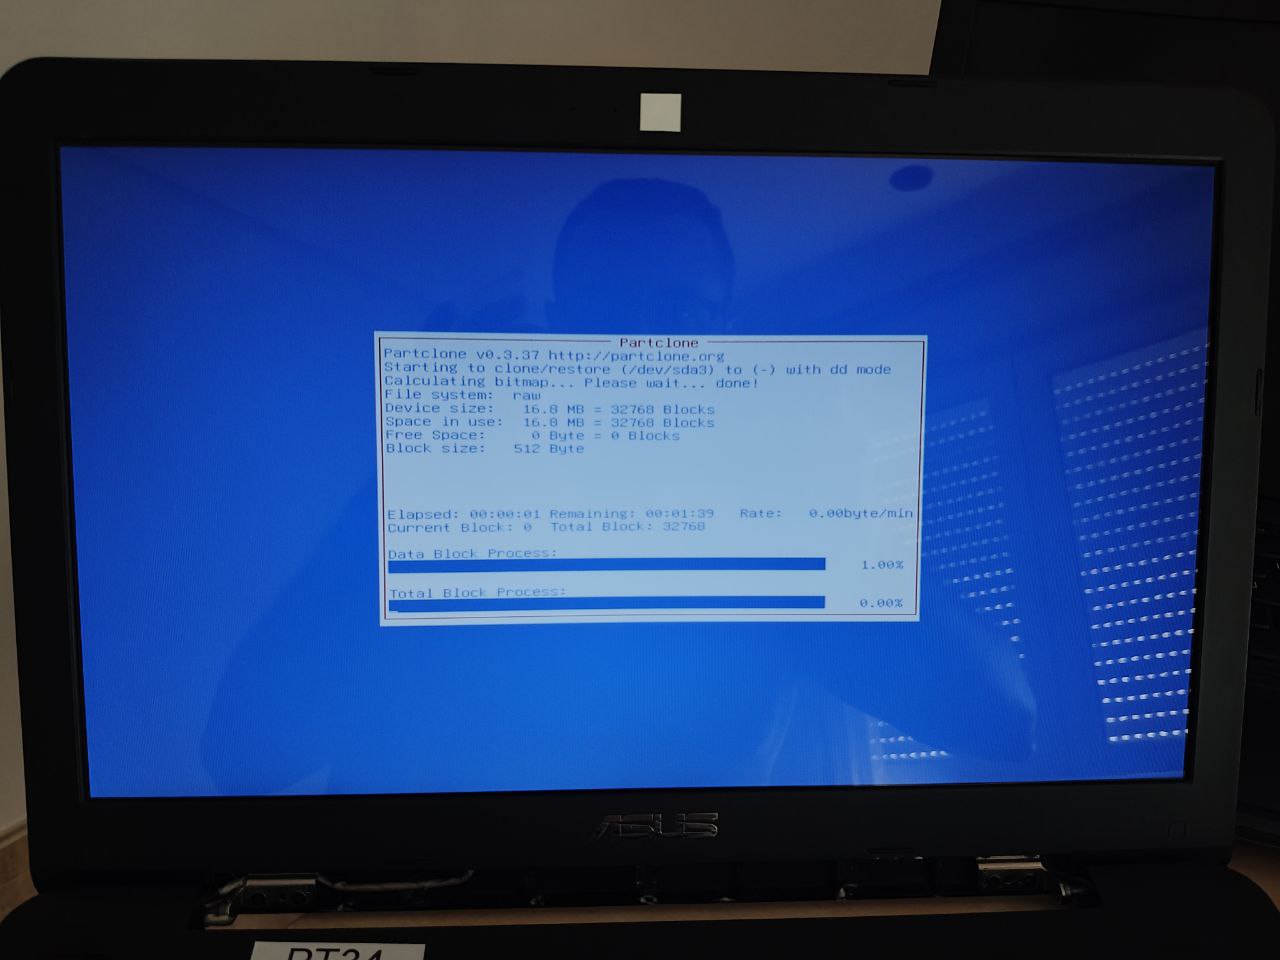
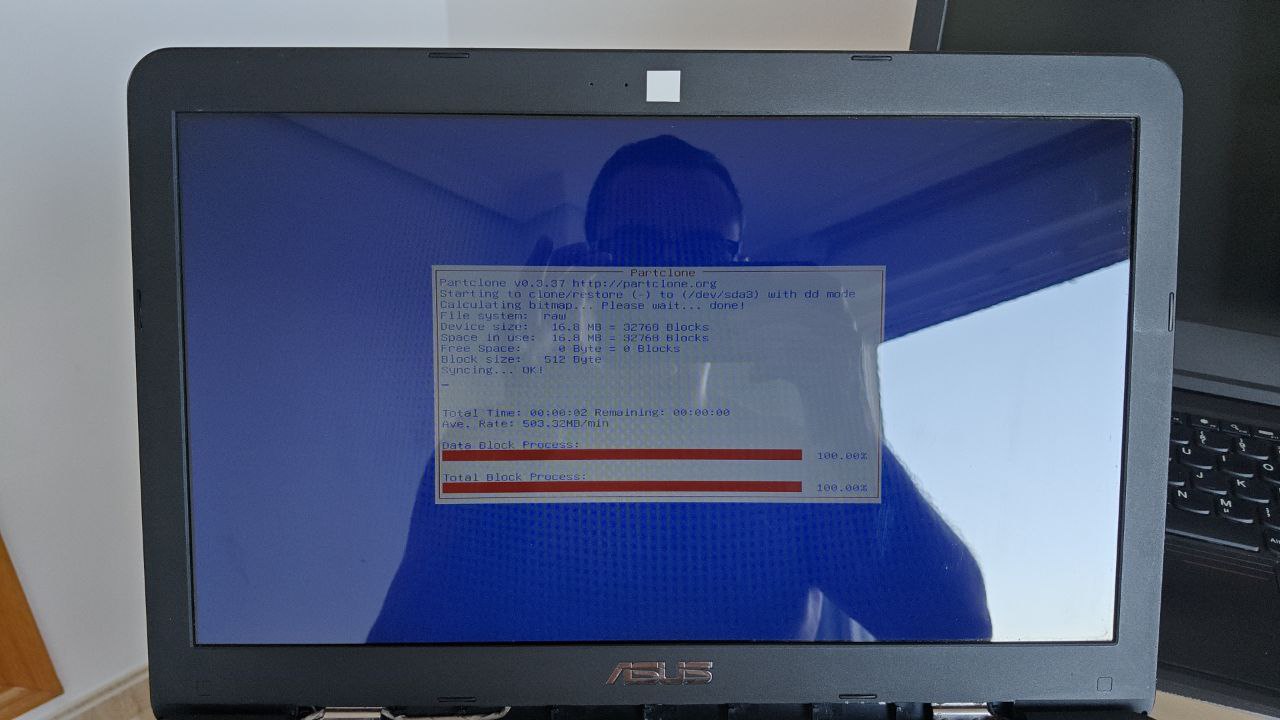
The disk contains 3 partitions. Below are screenshots of the backup process for each one:
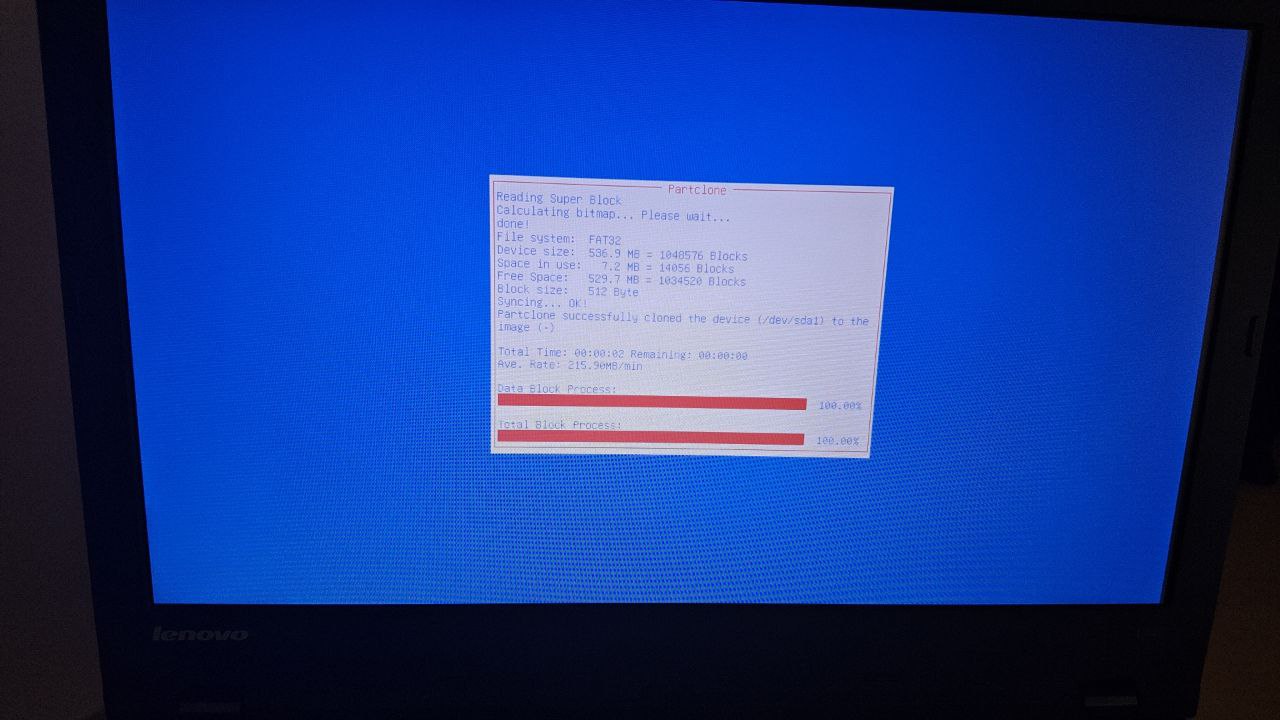
|
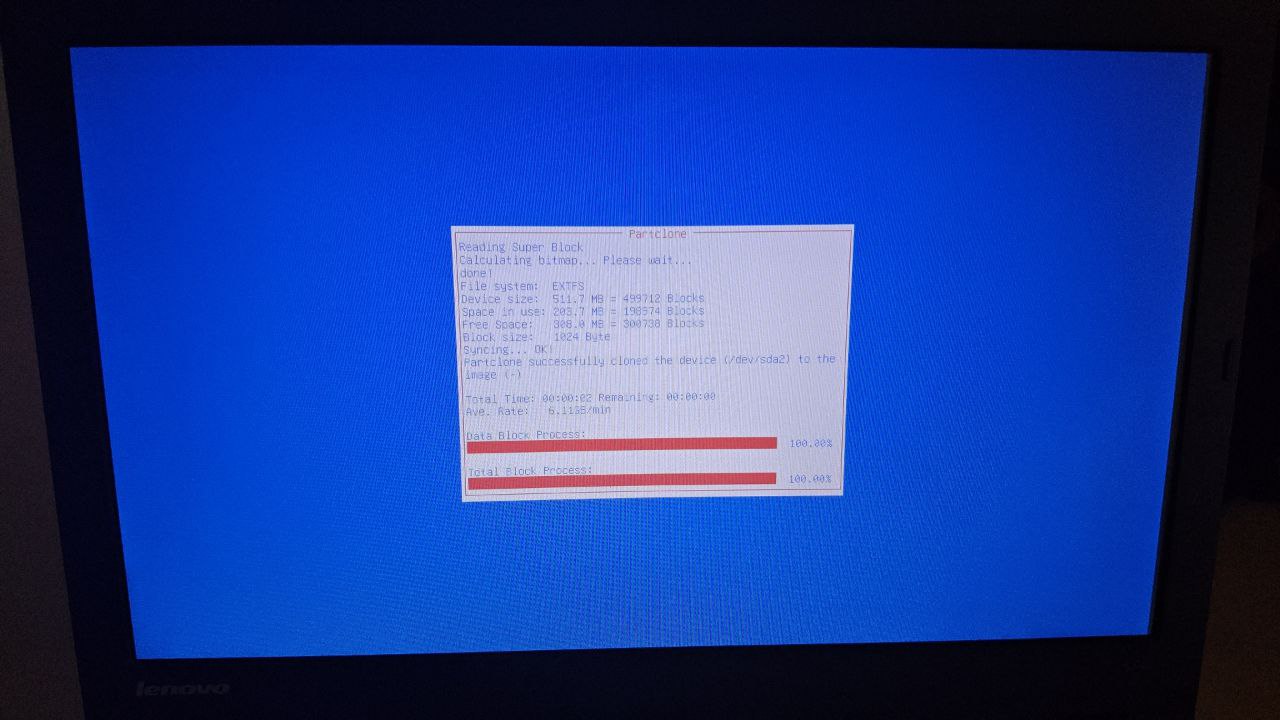
|
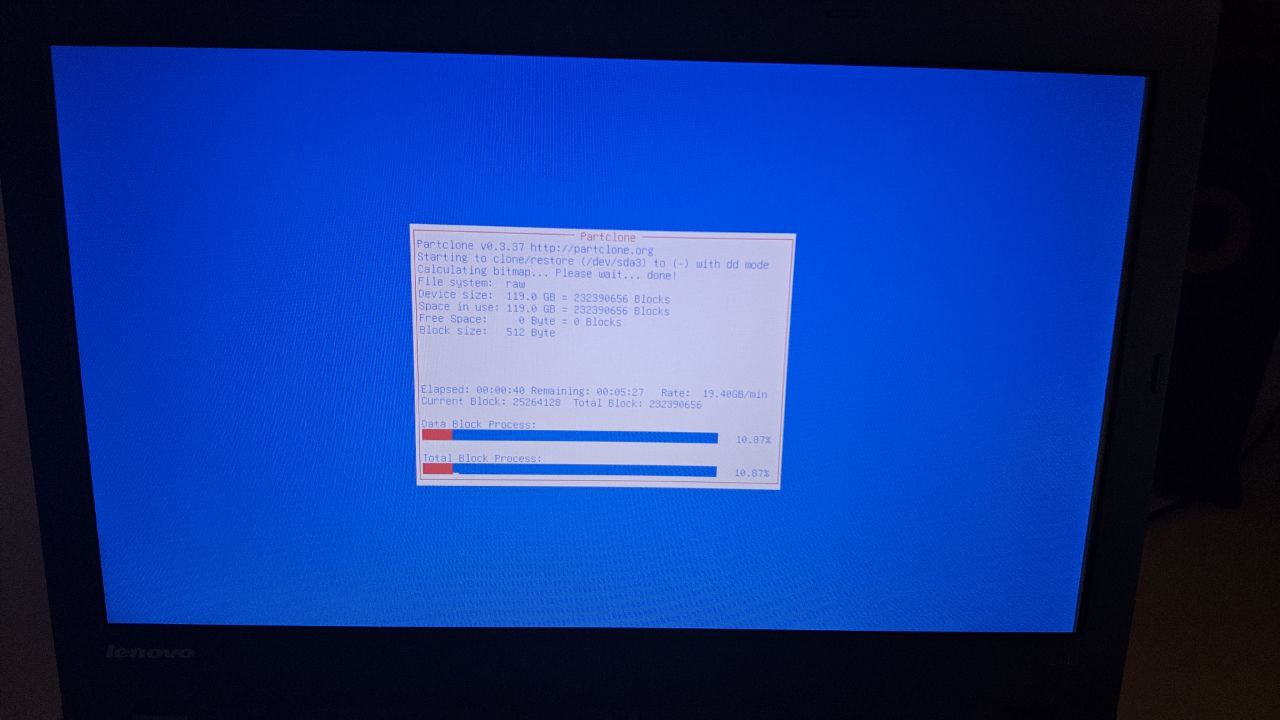
|
NOTE: We can see that the encrypted partition is being cloned using partclone.dd and is being copied entirely. In my case, dumping a 120G SSD to a 2.5” mechanical USB drive took about 11 minutes.
Checks the image for each partition except the one backed up with dd (because it’s encrypted):
Image was saved by dd or partclone.dd. No need or no way to check the file system integrity.
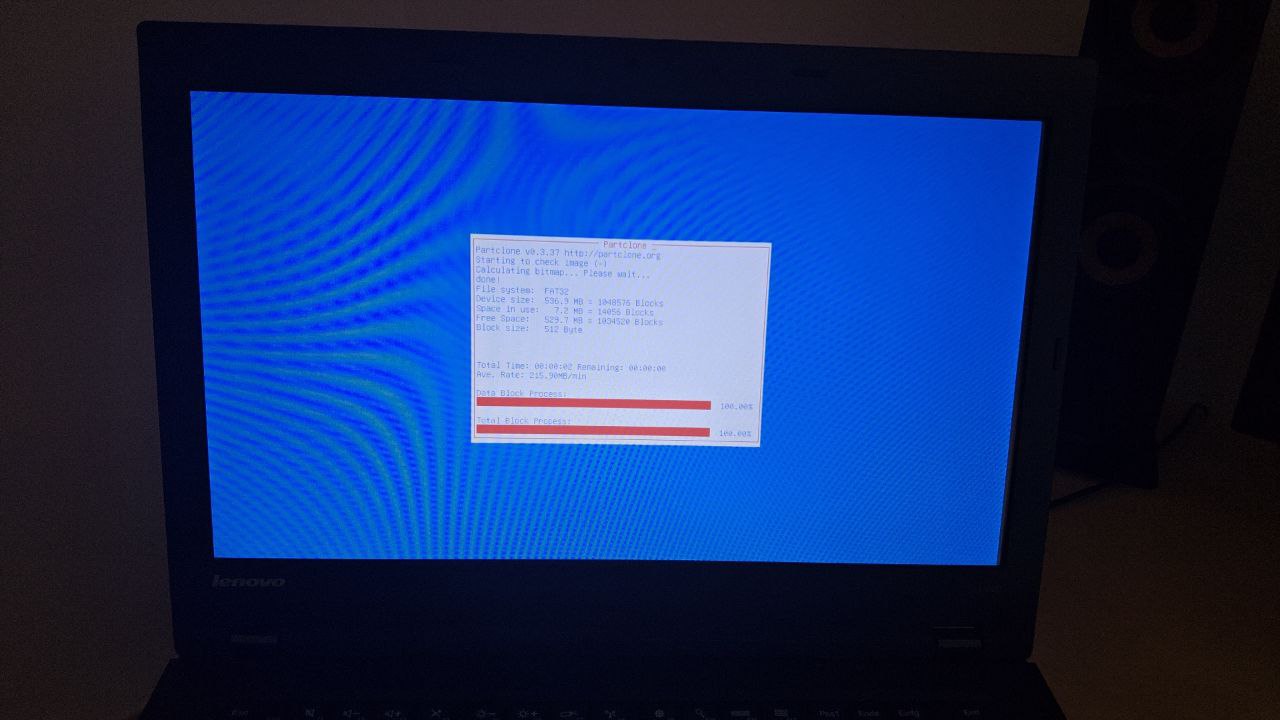
|
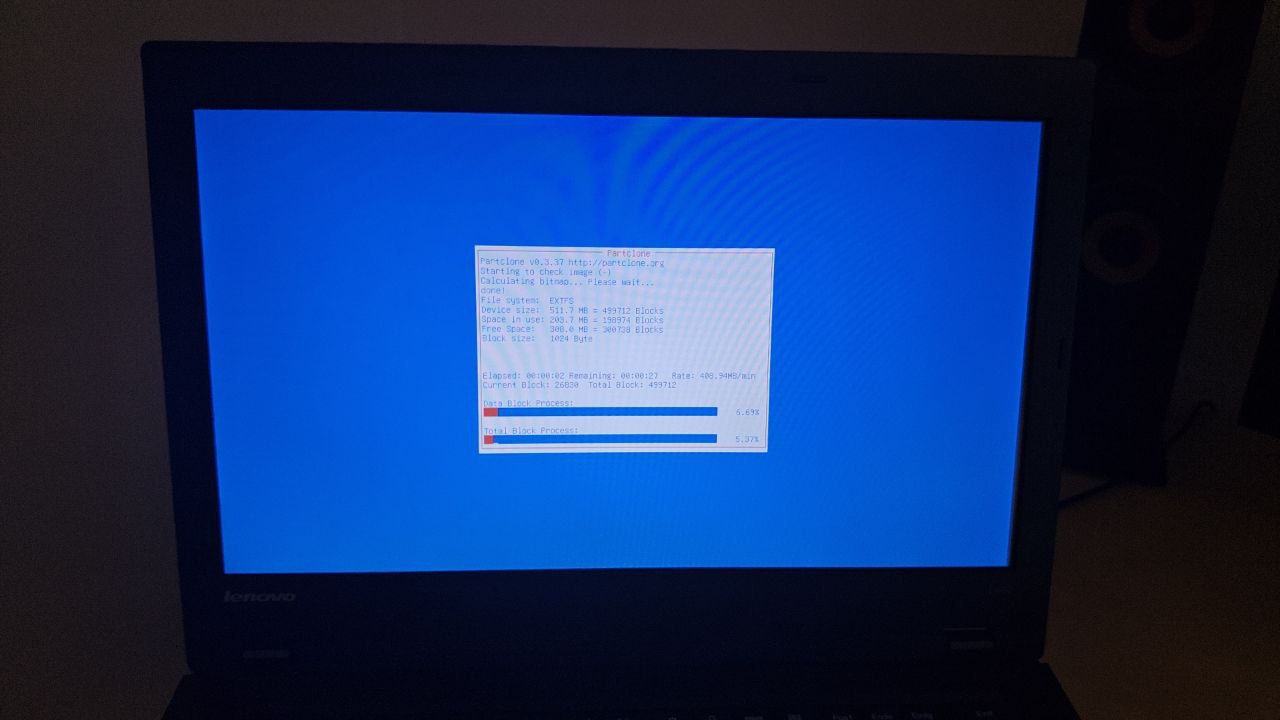
|
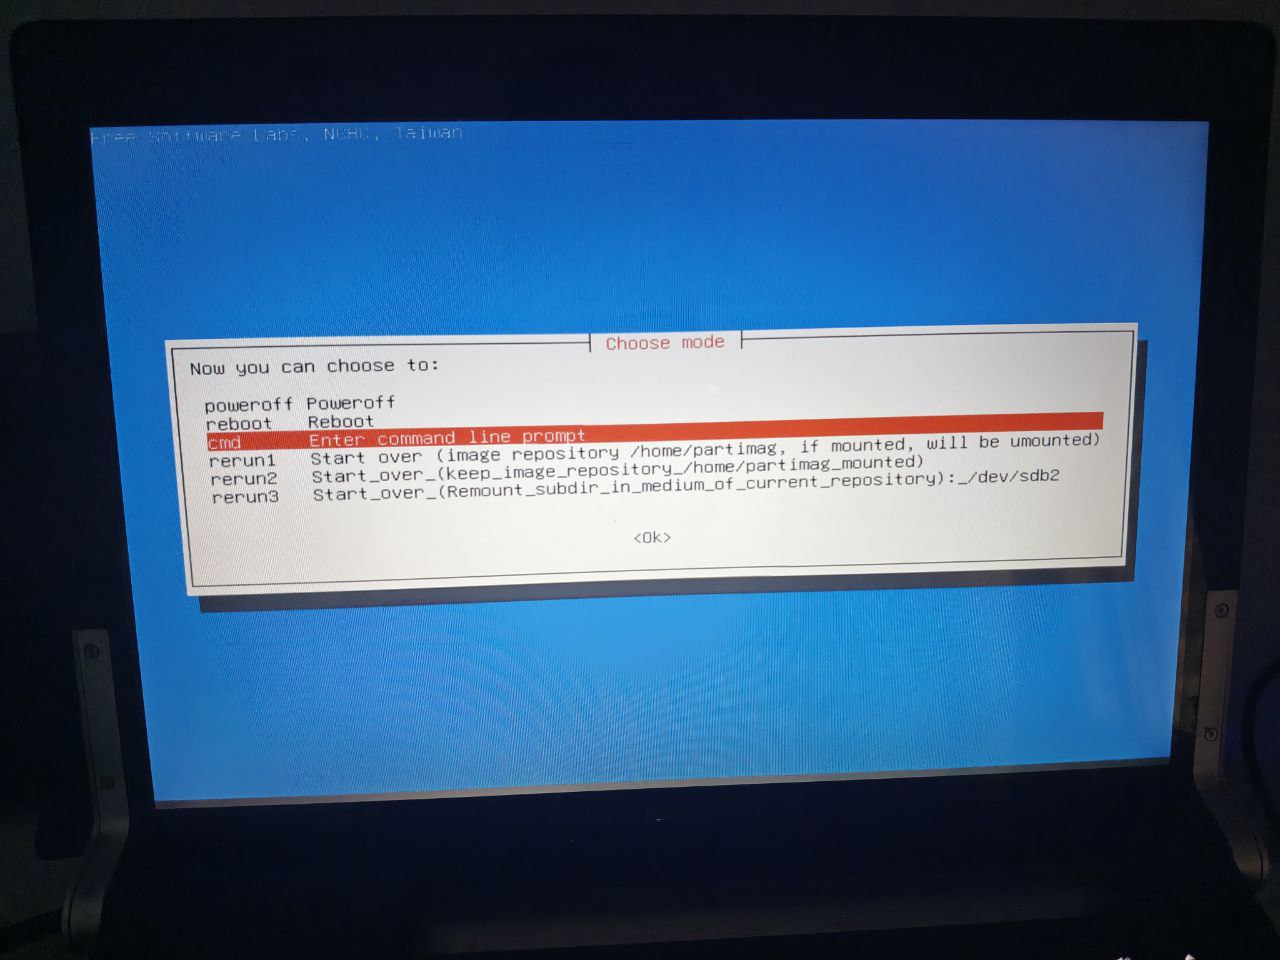
Summary of completed tasks:
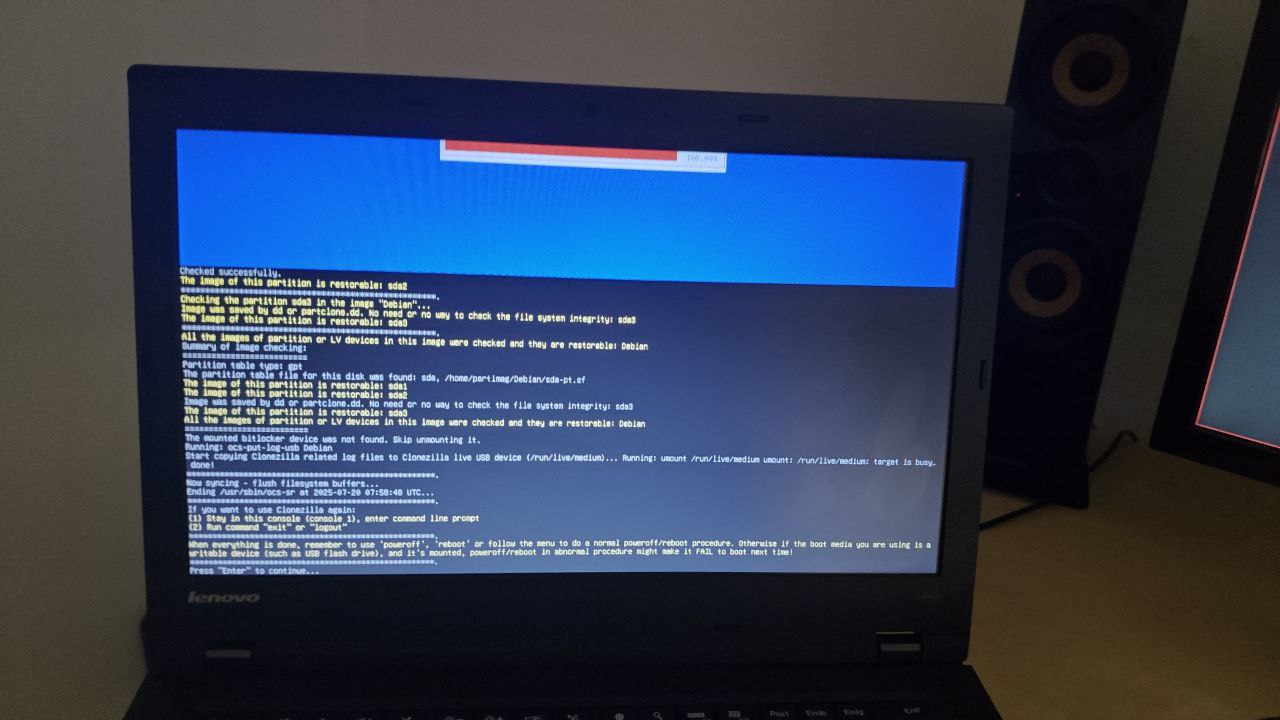
Once it finishes, it asks what to do:
An important detail is that the backup size depends on the chosen compression :
z1p: 120G → 20Gz9p: 120G → 20G
Comparing backing up with and without unlocking the LUKS device, we get:
| Unlocked | Locked (
partclone.dd
) |
|---|---|
z1p: 120G → 8.3G |
z1p: 120G → 20G |
z9p: 120G → 7.6G |
z9p: 120G → 20G |
Restore: Linux+encryption (without unlocking)
The restore process is very similar to the backup.
We configure the language:
We configure the keyboard layout:
It offers us to start Clonezilla or open a Linux shell. We start Clonezilla:

Clonezilla allows us to operate in
various ways
. In our case we want to store the entire disk as an image, so we choose device-image:
Clonezilla allows us to operate in
various ways
, and we choose device-image:
It informs us that if we want to use a disk not yet connected, now is the time:
It shows the system disks in real-time:
We select the partition where the
repository
is:
It asks whether to run fsck on the repository filesystem. In my case it’s Ext4, and extra checking never hurts:
If the repository is in a subdirectory, indicate it here:
Path on the resource: /dev/sdb2[/] --> Shows Device+[Directory]: The device cannot change, only the path.
Current selected dir name: "/" --> Directory path.
My
repository
is at the root, so the path is /, then press Done:
It informs us it mounted /tmp/ocsroot_bind_root to /home/partimag using --bind (end of photo):
We choose the operation mode. Beginner is fine in this case:
We choose to restore a disk image: restoredisk:
We indicate the image name:
We set the restore destination:
Which partition table we want to use:
-
Keep the original.
-
Create a new one: Useful for restores to disks of different sizes.
Choose whether to verify the image before restoring:
This step asks if logs should be saved:
It asks what to do after finishing:
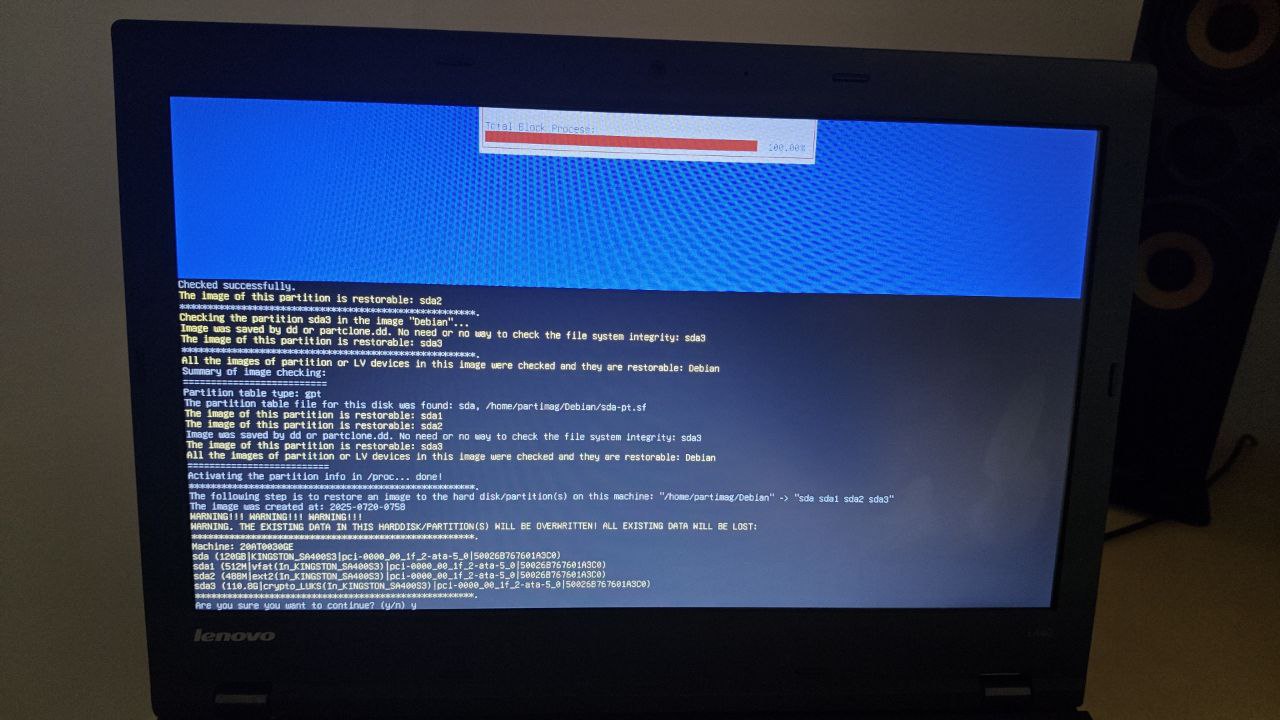
It shows the command it will execute:
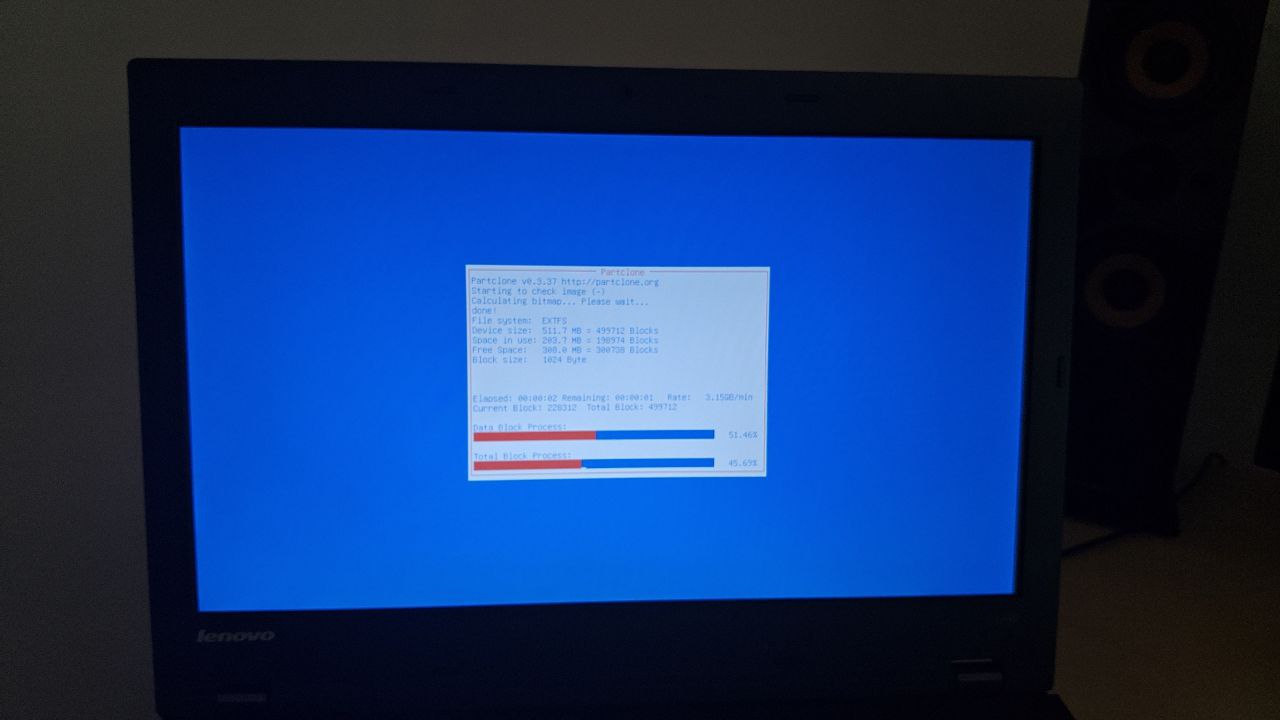
The disk has 3 partitions. It checks whether each can be restored, except for the one that’s encrypted:
Image was saved by dd or partclone.dd. No need or no way to check the file system integrity.
|
|
It asks for confirmation to proceed:
Screenshots of the restore process for each of the 3 partitions:
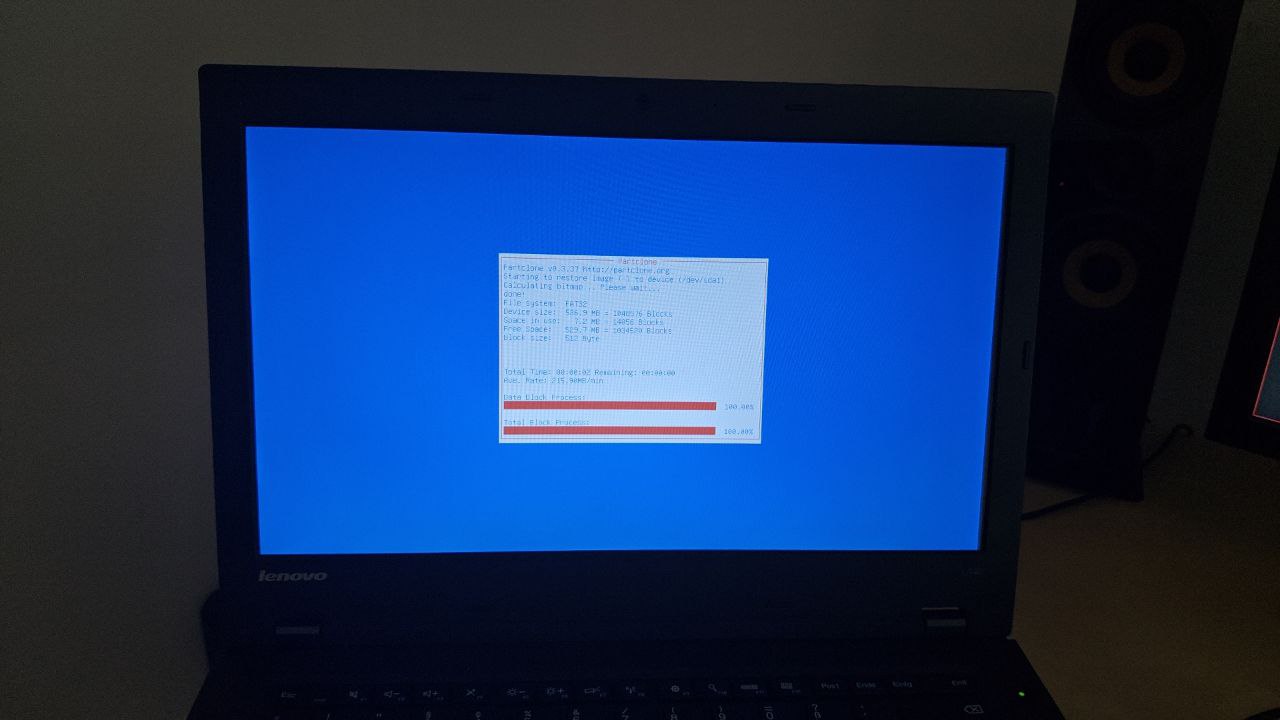
|
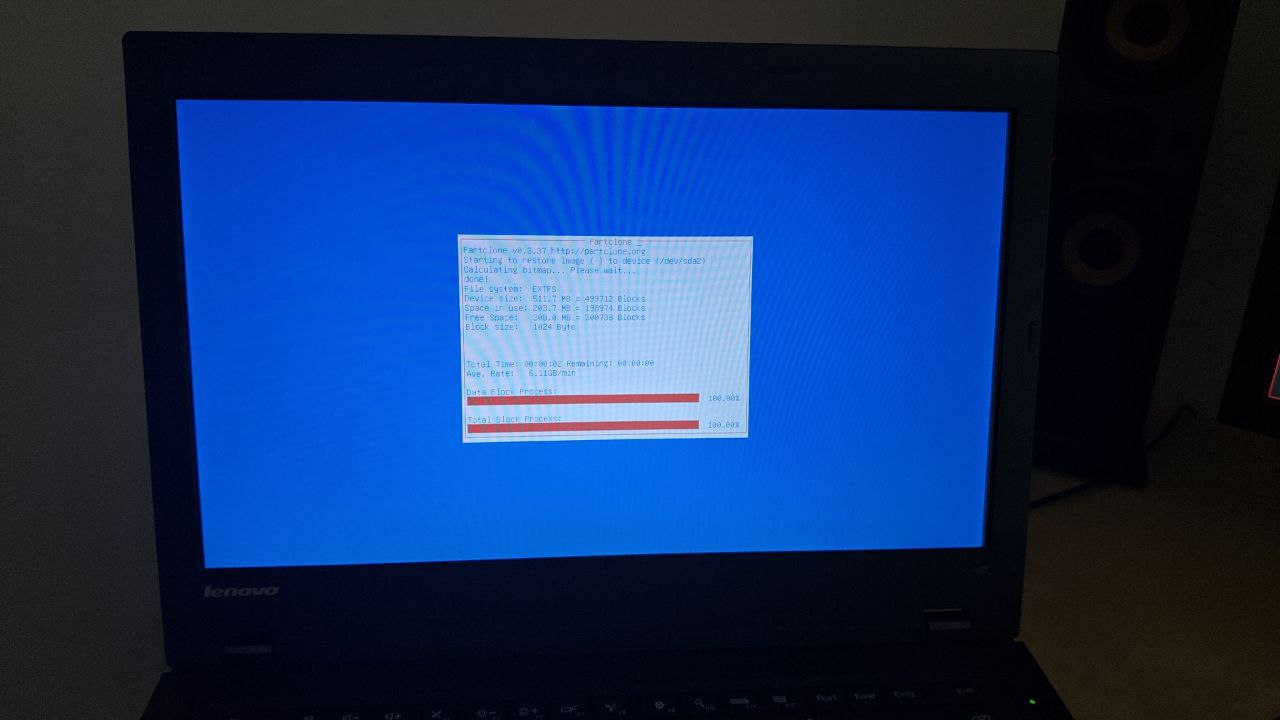
|
|
NOTE: In my case it took about 11 minutes to restore a 120G SSD from a 2.5” USB mechanical drive.
Summary of completed tasks:
When finished, it asks what to do:
Backup: FreeBSD-BIOS
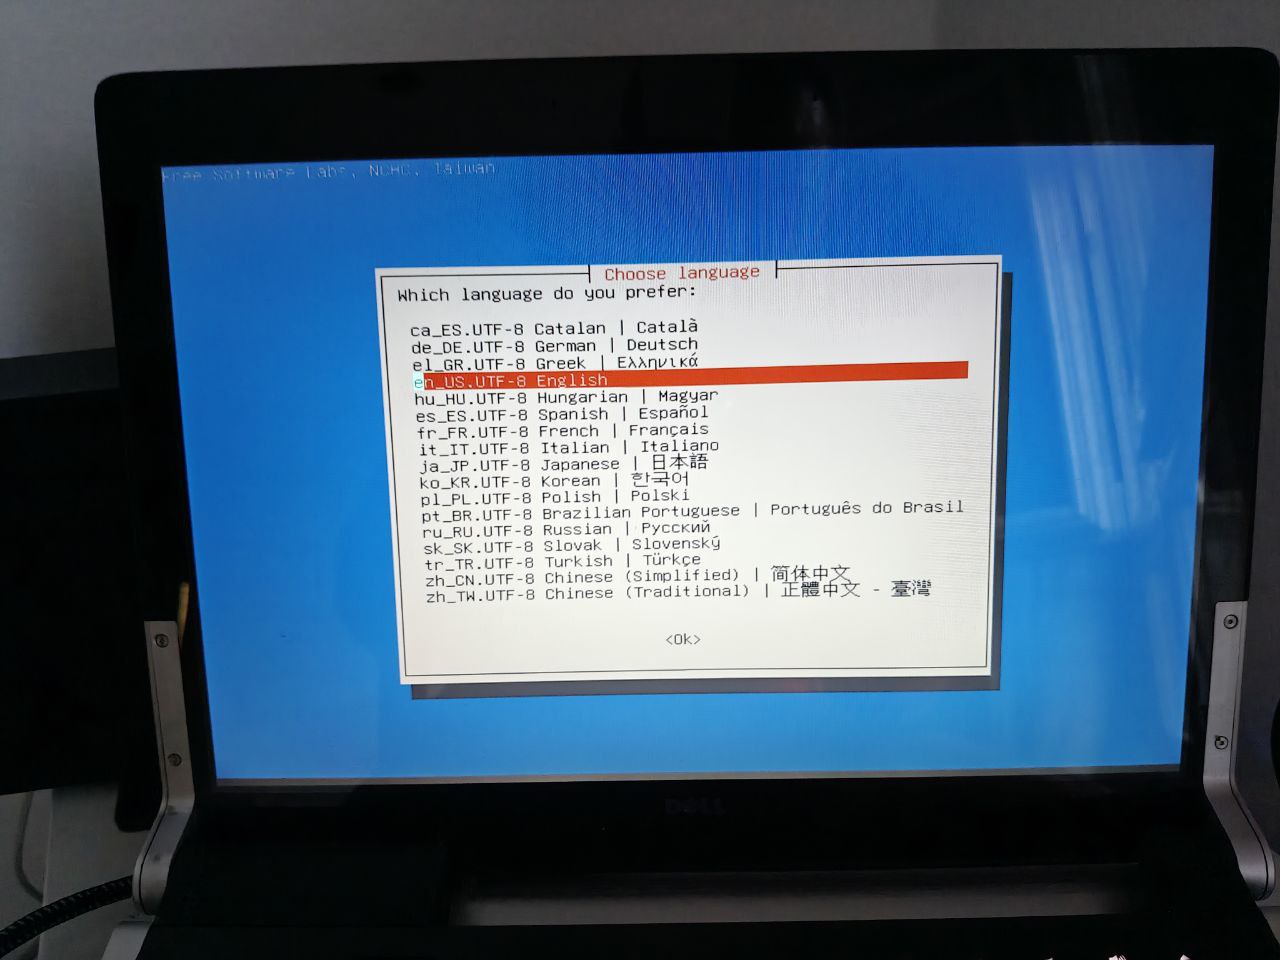
Configure the language:
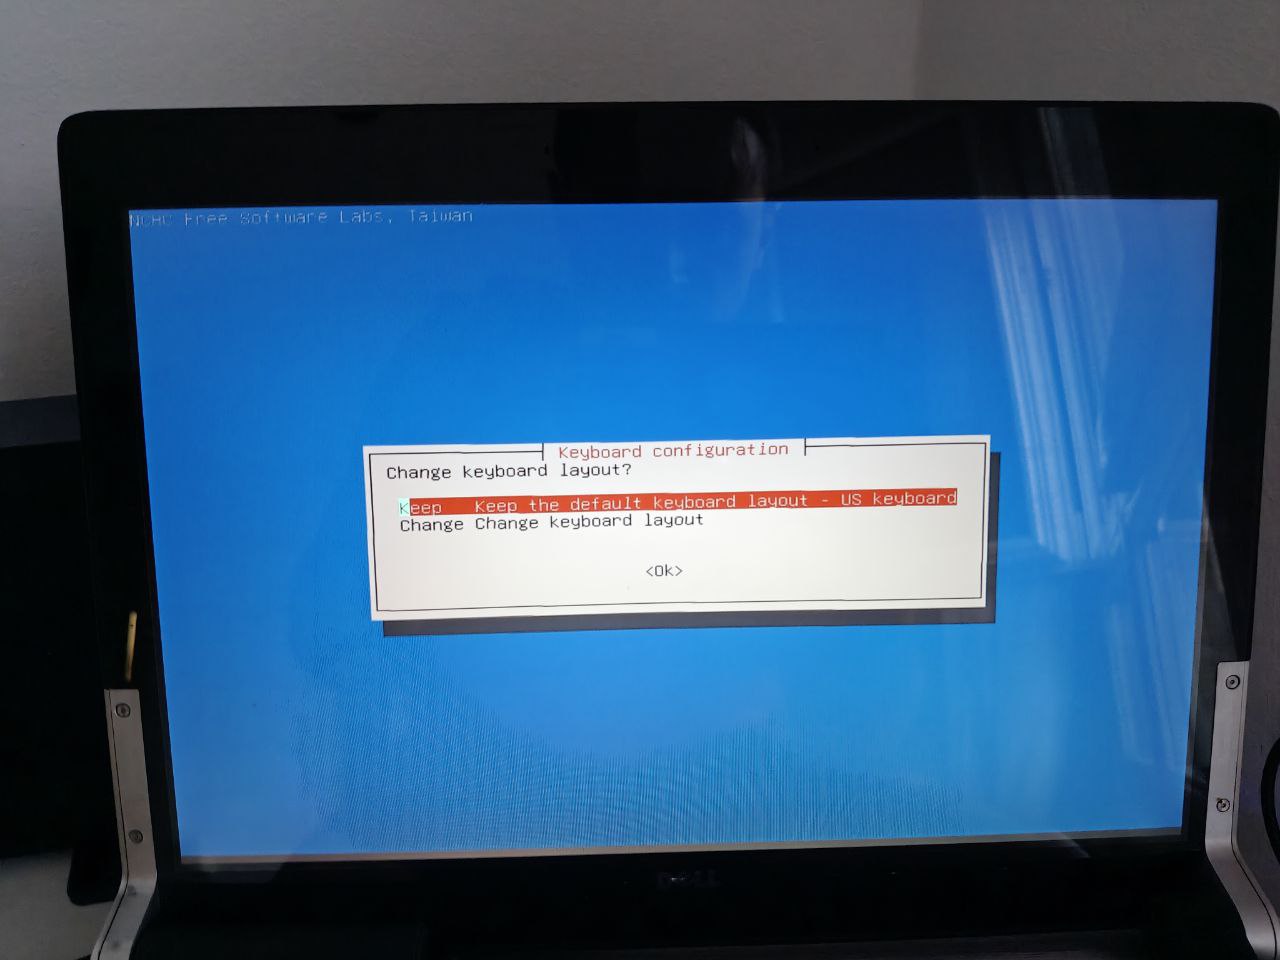
Set the keyboard layout:
It prompts whether to boot Clonezilla or open a Linux shell — we boot Clonezilla:
Clonezilla can operate in
various modes
; in our case we want to store the entire disk as an image, so we choose device-image:

Clonezilla supports
repositories
of
various types
; we go with local_dev since the
repository
is local:
It informs us that if we want to use a disk we haven’t yet connected, now is the time:
It shows the system’s disks in real time:
We select the partition where our
repository
is located:
It asks if we want to perform a fsck on the repository’s filesystem; in my case it’s Ext4 and an extra check doesn’t hurt:
If the repository is in a subdirectory, we must indicate it here:
Path on the resource: /dev/sdb2[/] --> Shows Device+[Directory]: The device cannot change as it was selected earlier, only the Directory path can vary.
Current selected dir name: "/" --> Directory path.
My
repository
is directly in the root, so the path is /, we press Done:
It notifies that it has mounted /tmp/ocsroot_bind_root to /home/partimag using --bind (as seen at the bottom of the image):
It asks which mode we want to operate in — Beginner is a good choice when no fine-tuning is required:
At this point, we’ll be shown different menus depending on whether any backup already exists. We want to create a full disk image — savedisk:
| No previous backup | With previous backup |
|---|---|

|
|
Enter the image name:
Select the source disk:
Select the
compression method
:
It asks whether to perform a fsck on the source filesystem; since it’s a
ZFS
system, we choose -sfsck:
Verify the image after it’s created to check if it can be restored:
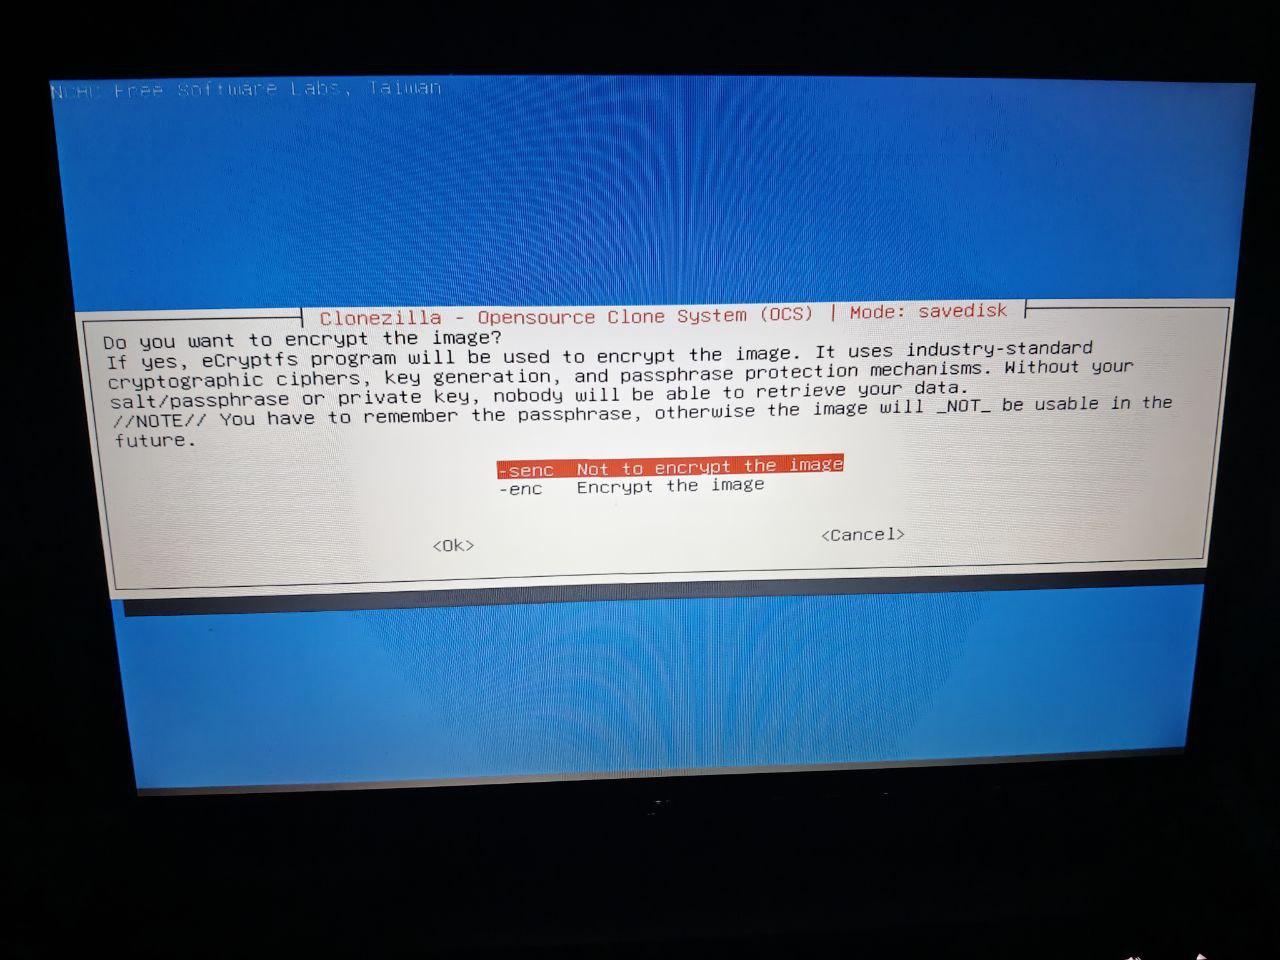
In my case, I won’t encrypt the image:
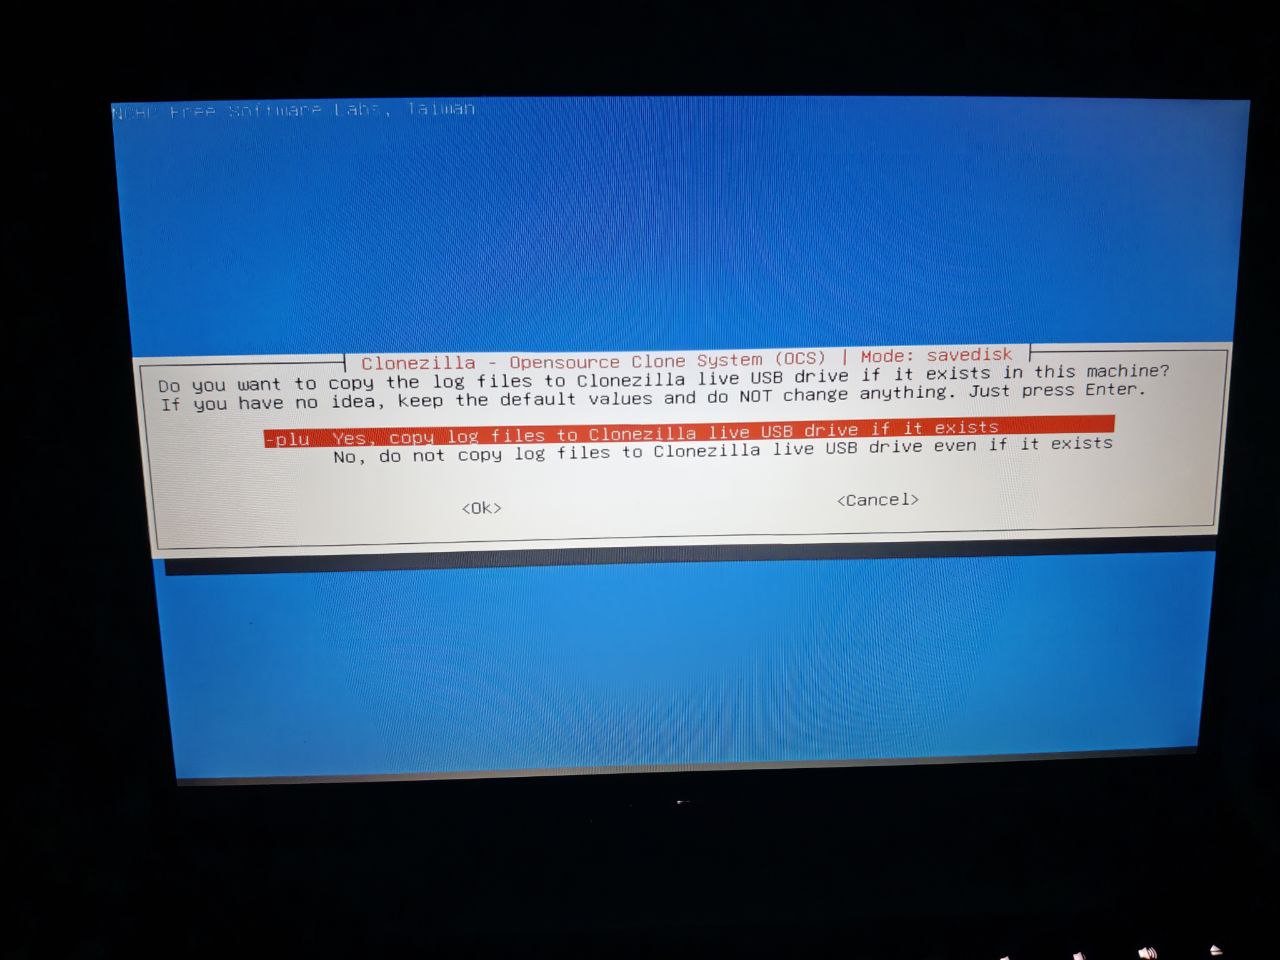
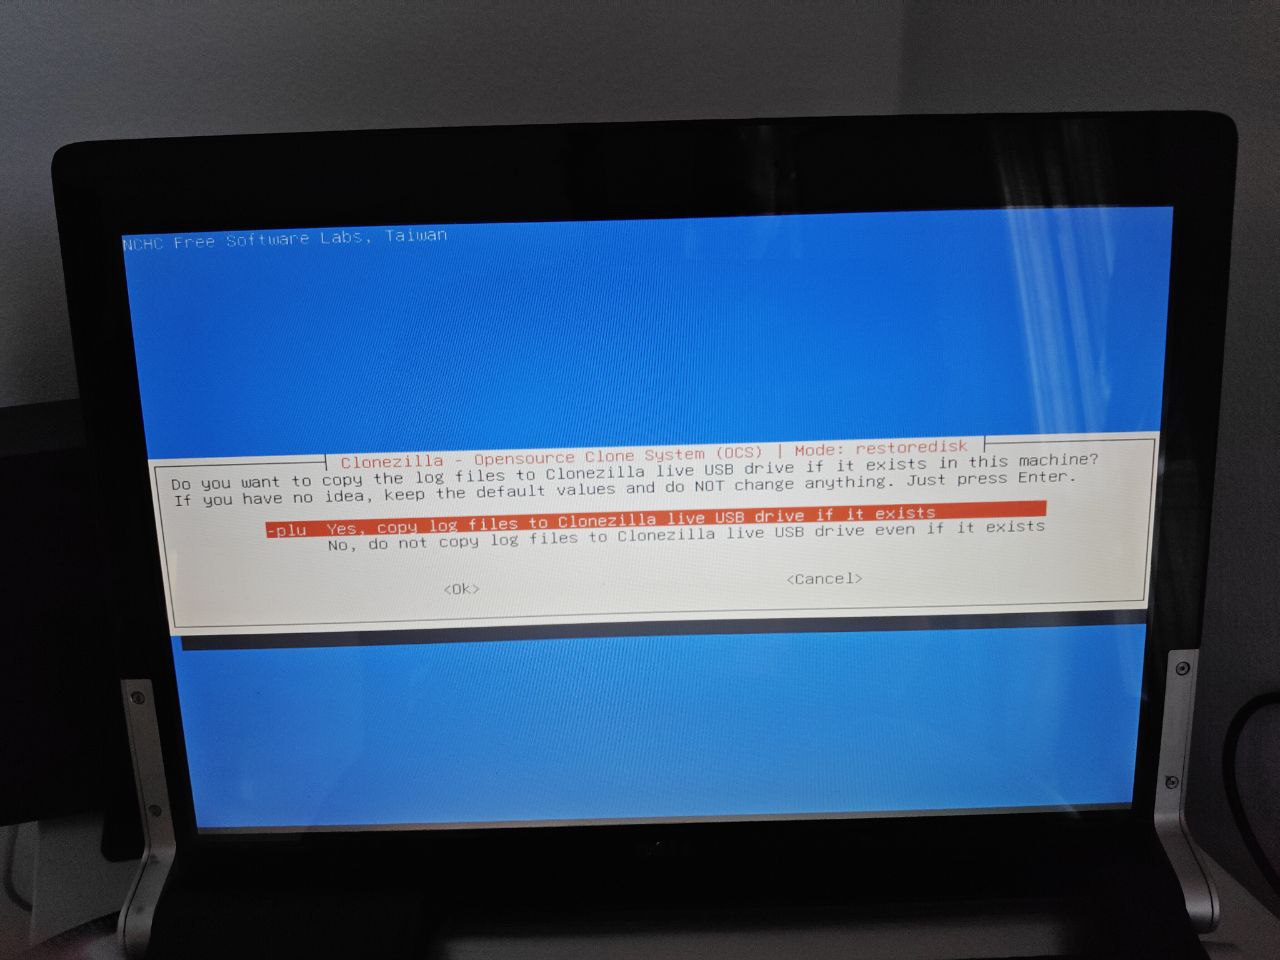
This step asks whether to save logs of the operations performed:
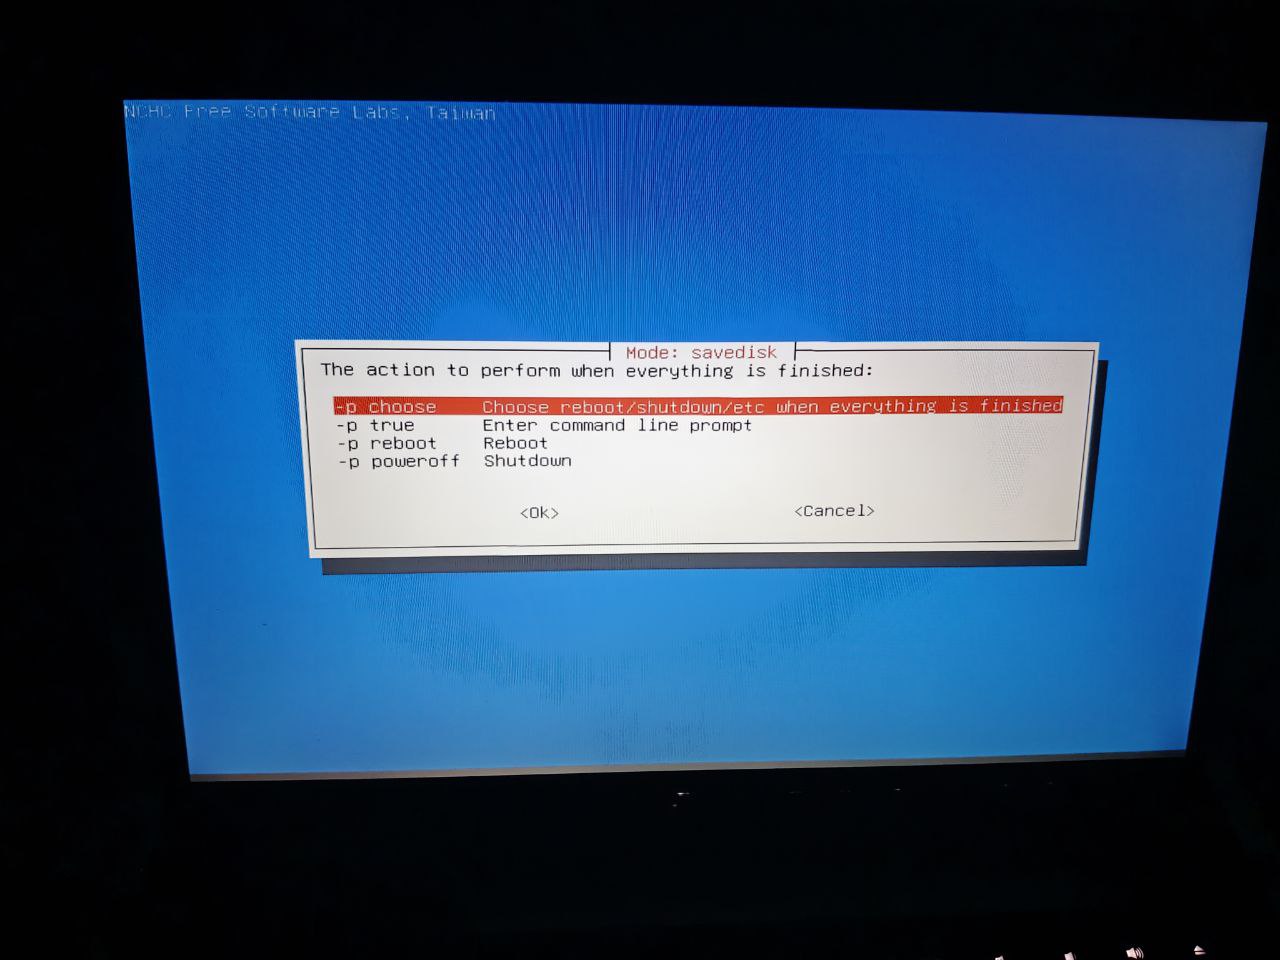
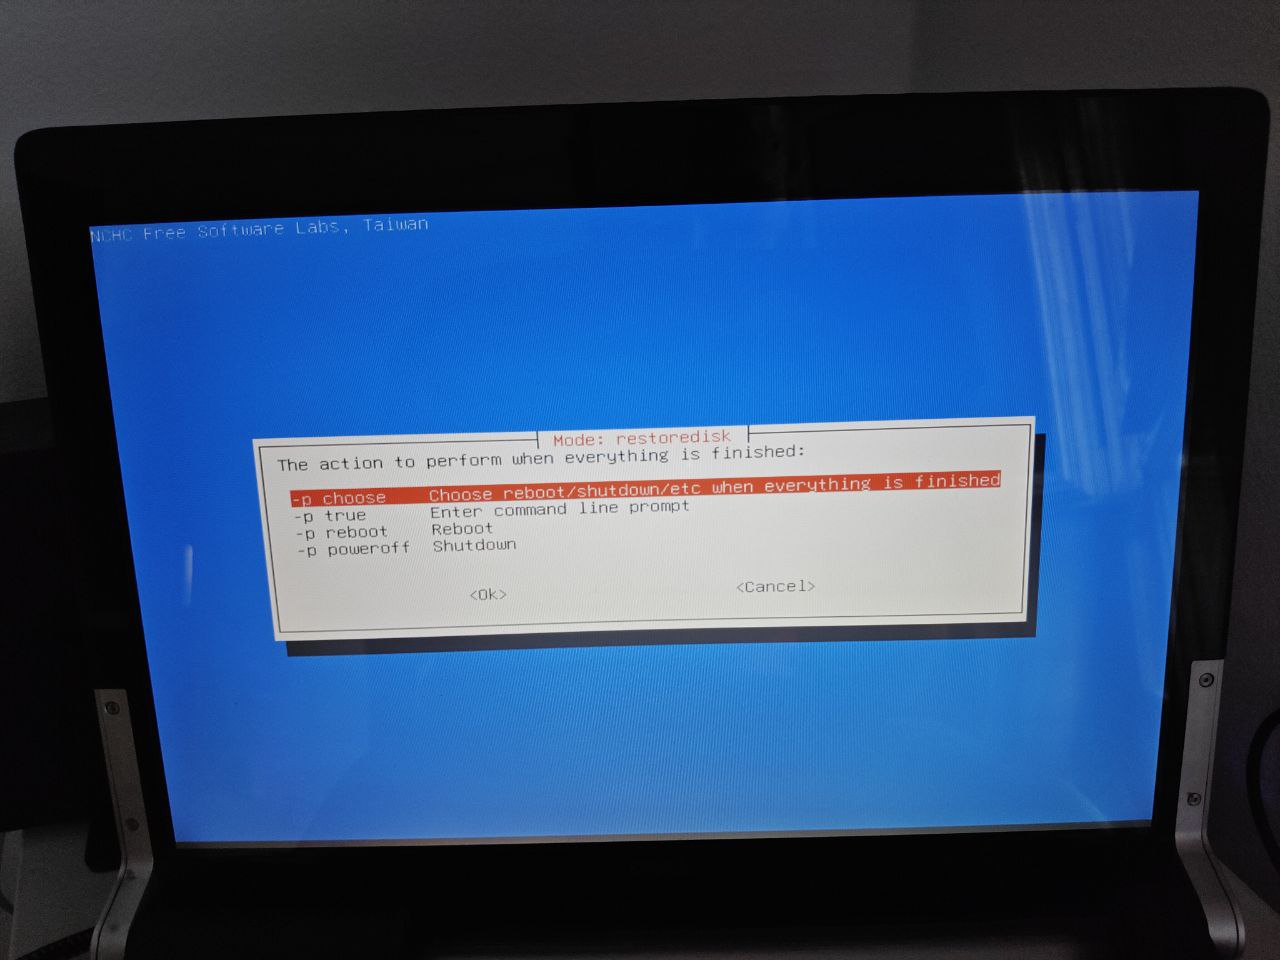
It asks what to do after all operations are complete:
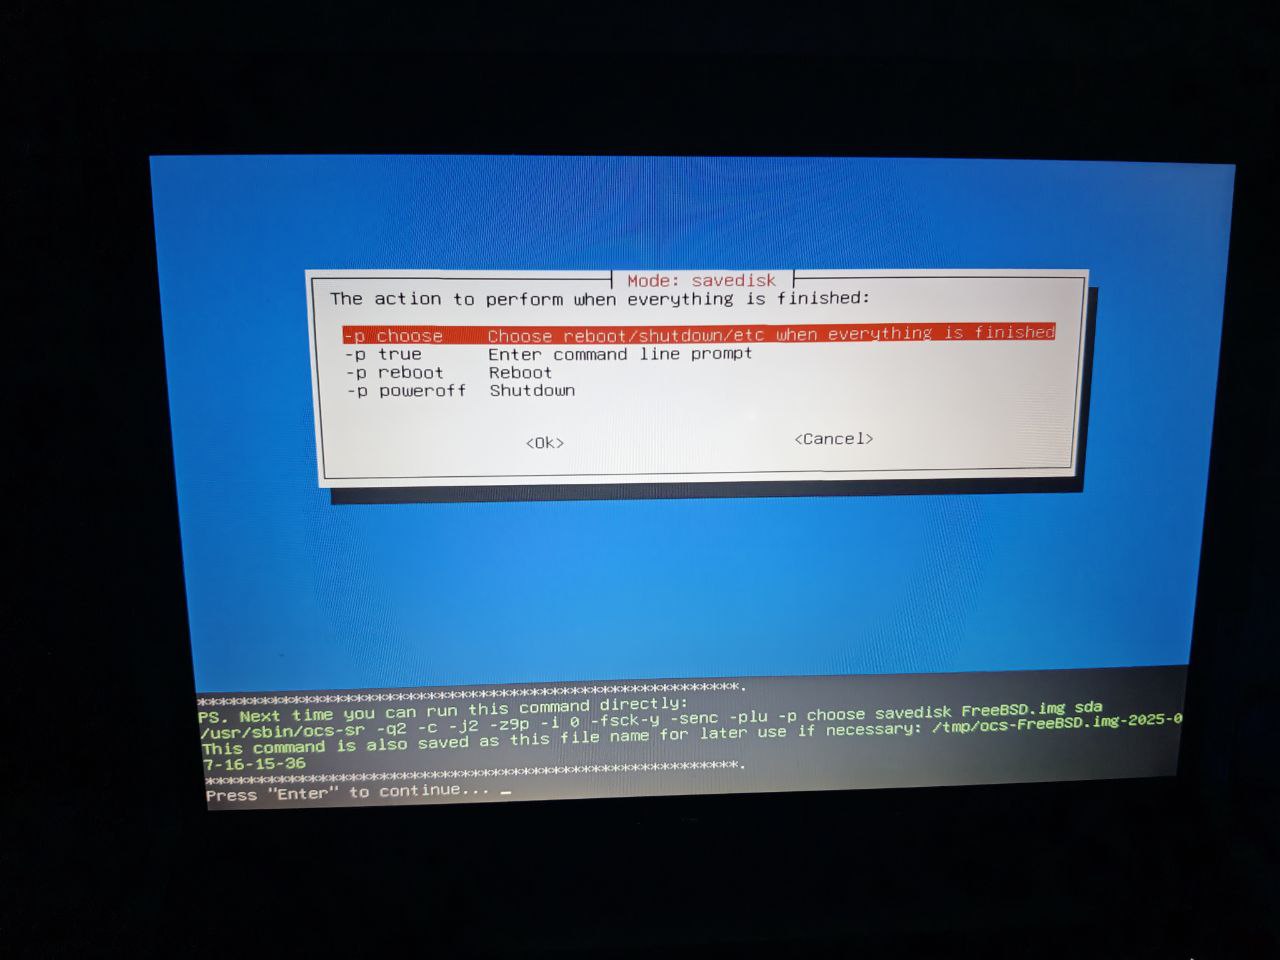
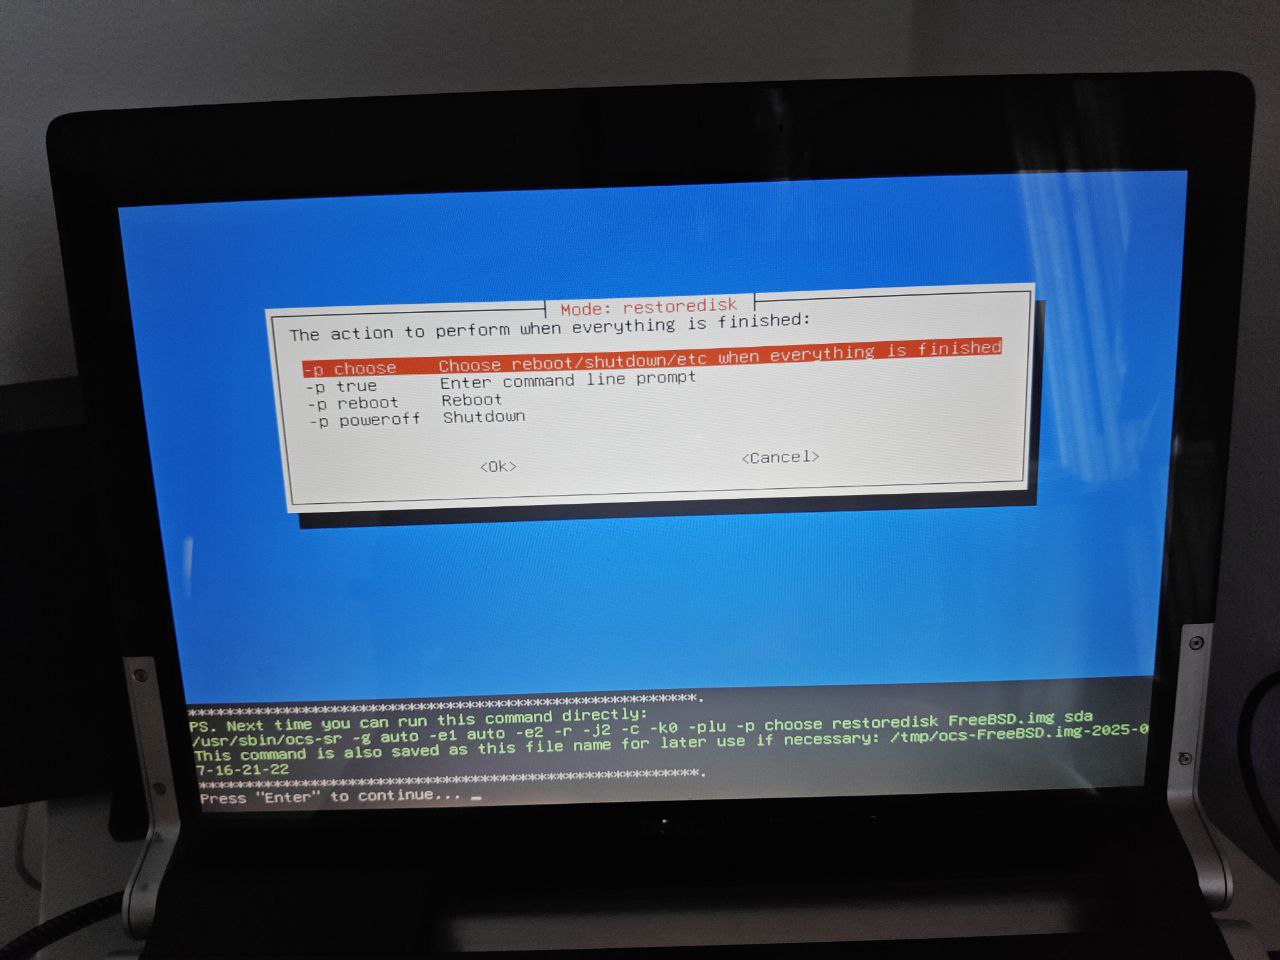
It informs us of the command that will be executed:
It asks for confirmation to proceed:
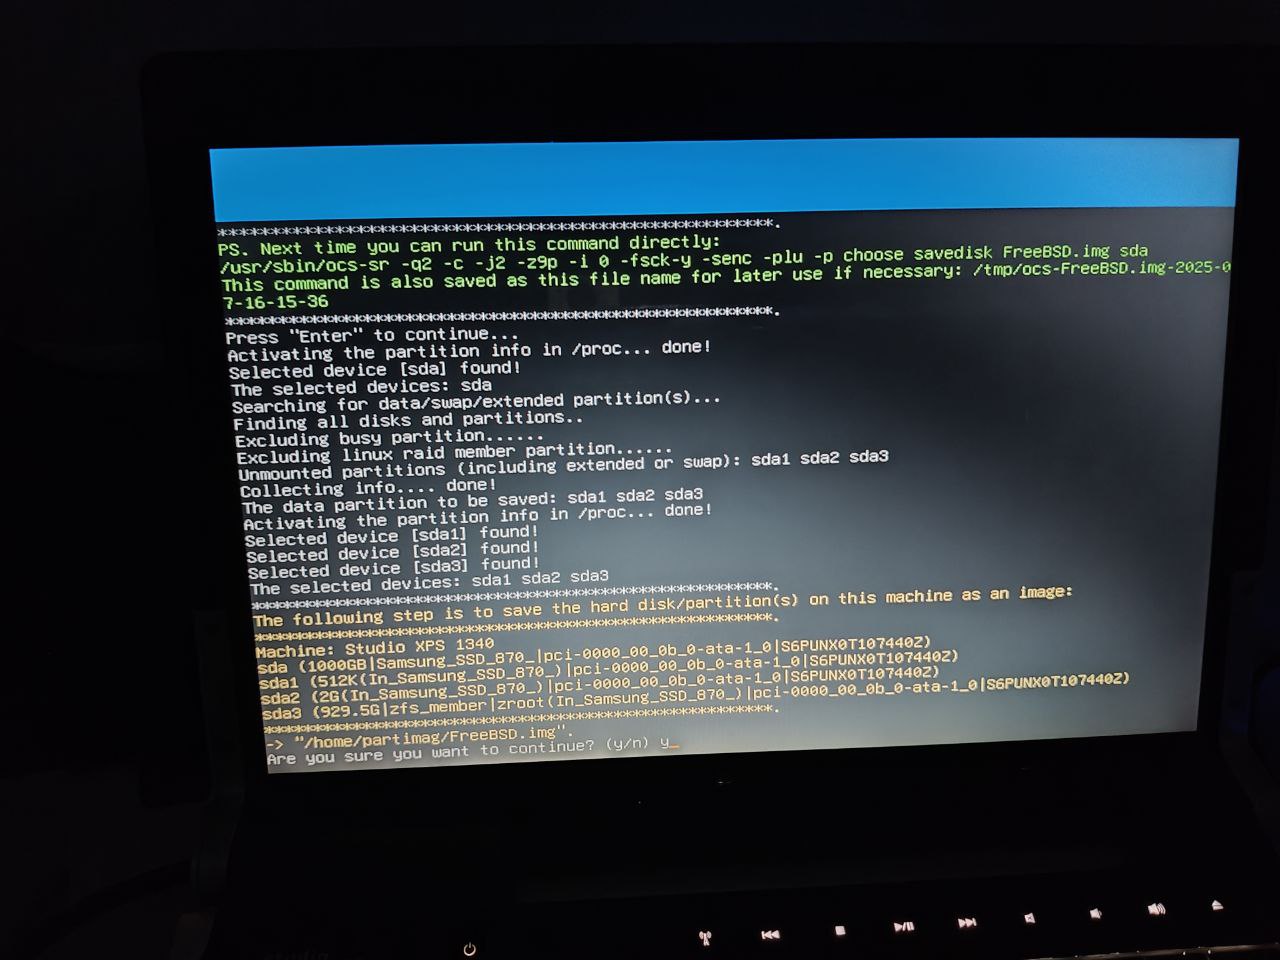
The disk has 3 partitions; here are screenshots of the backup of each one:
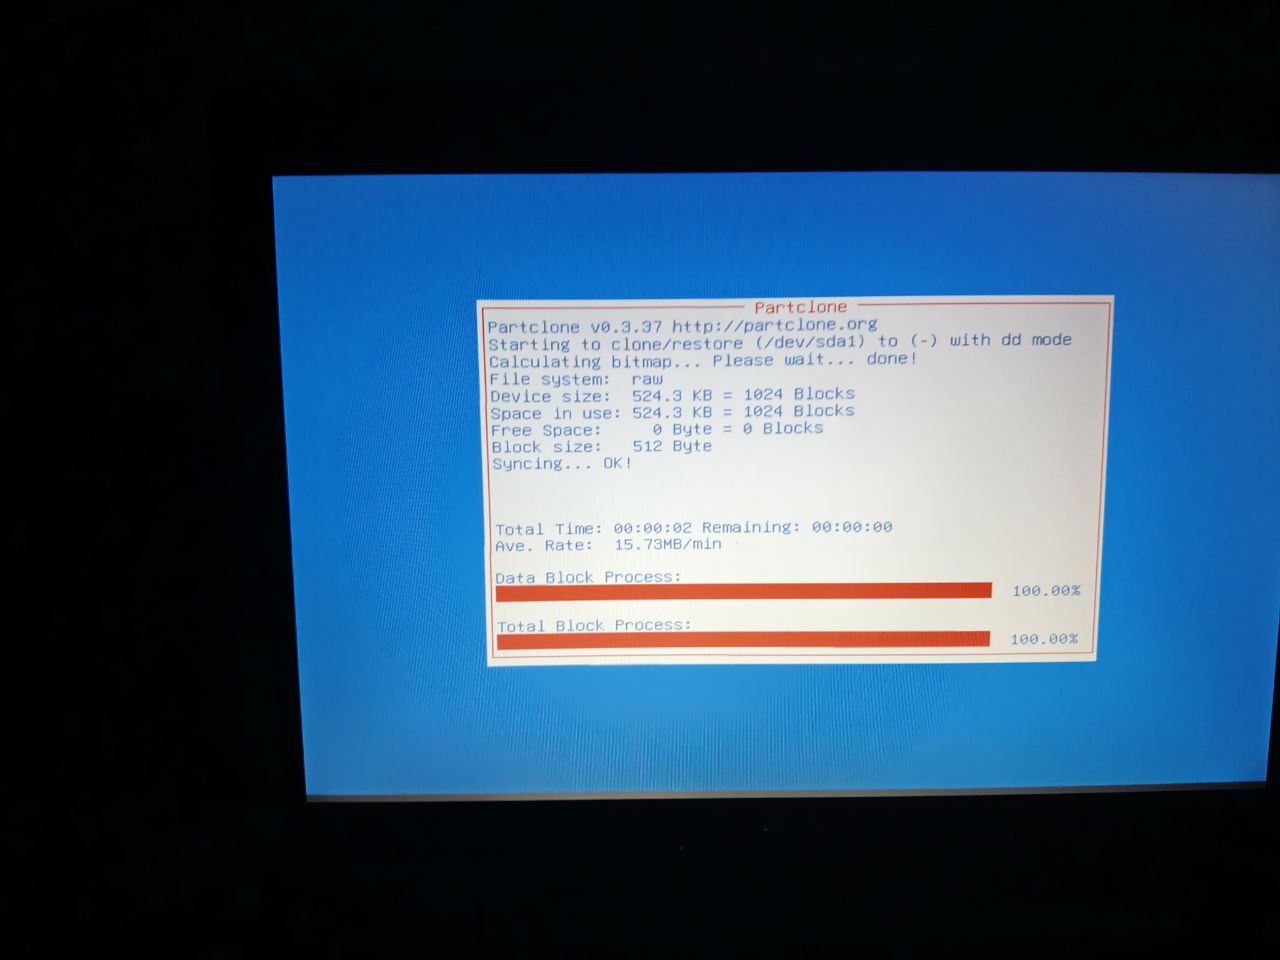
|
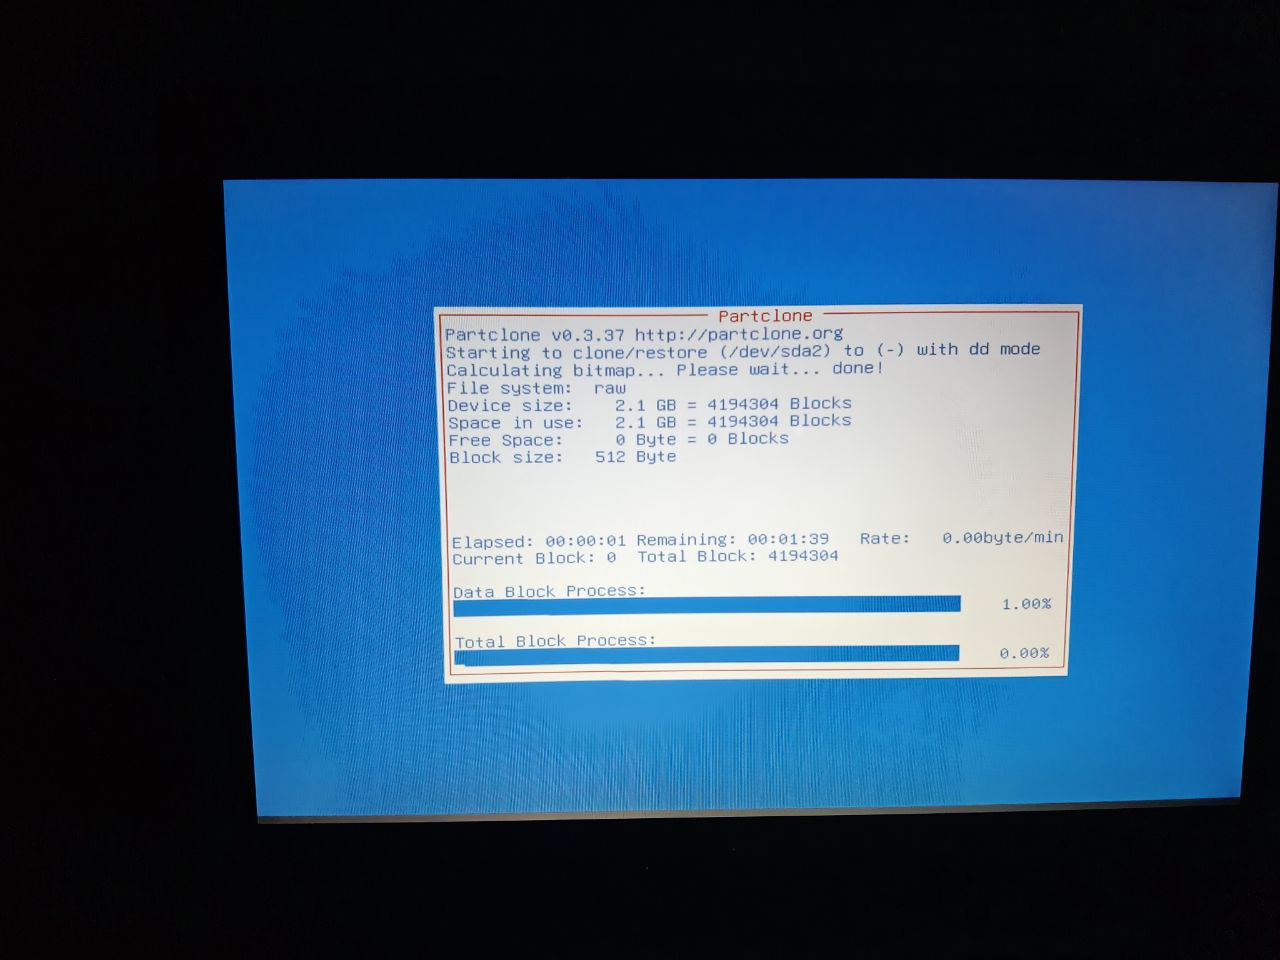
|
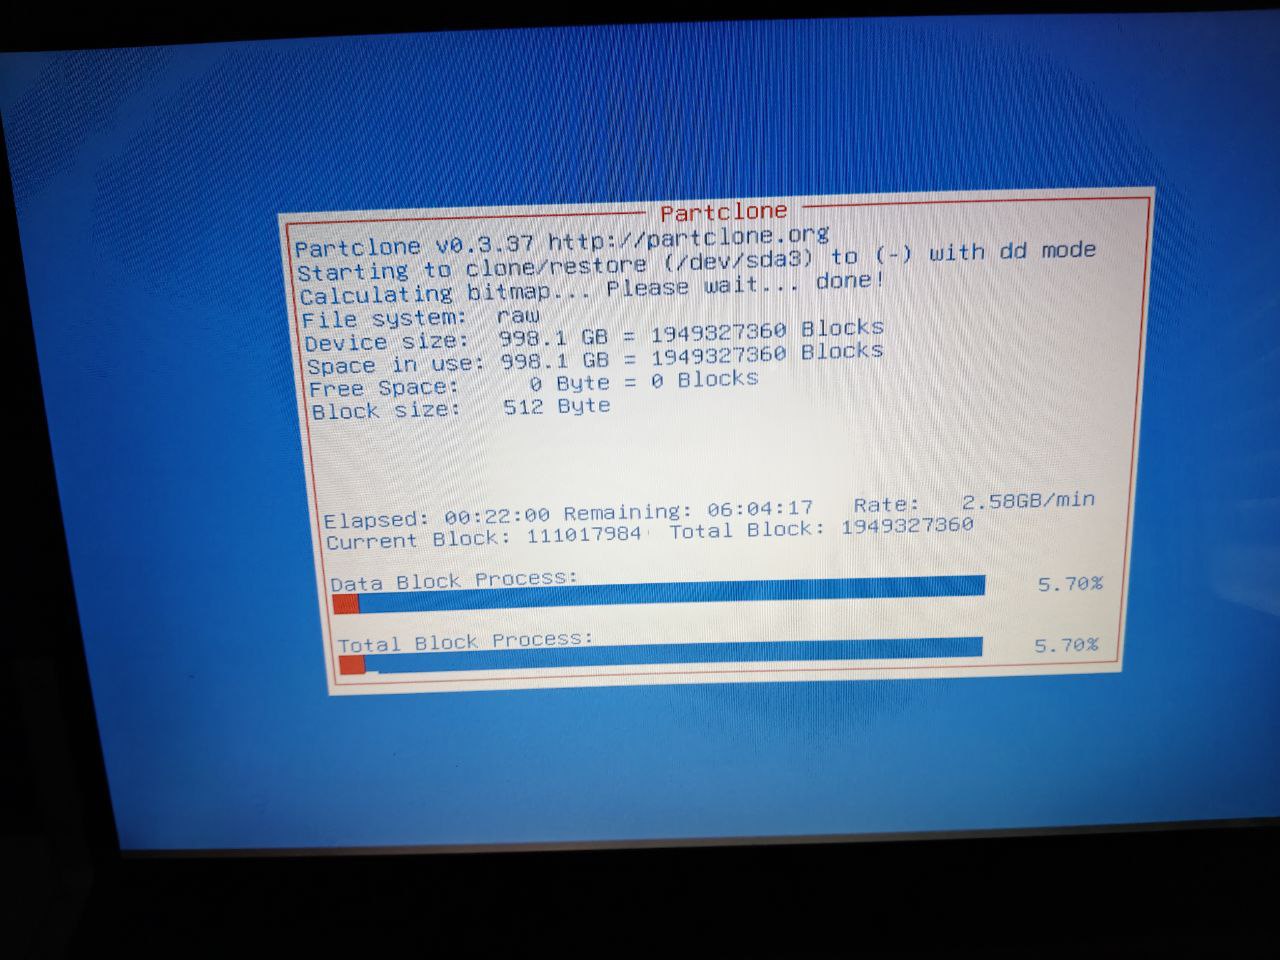
|
NOTE: In my case, it took around 5h30m to dump a 1TB SSD to a 2.5" mechanical drive connected via external USB enclosure.
We don’t see filesystem checking because it was done with dd, which doesn’t support it. The relevant message is:
Image was saved by dd or partclone.dd. No need or no way to check the file system integrity.
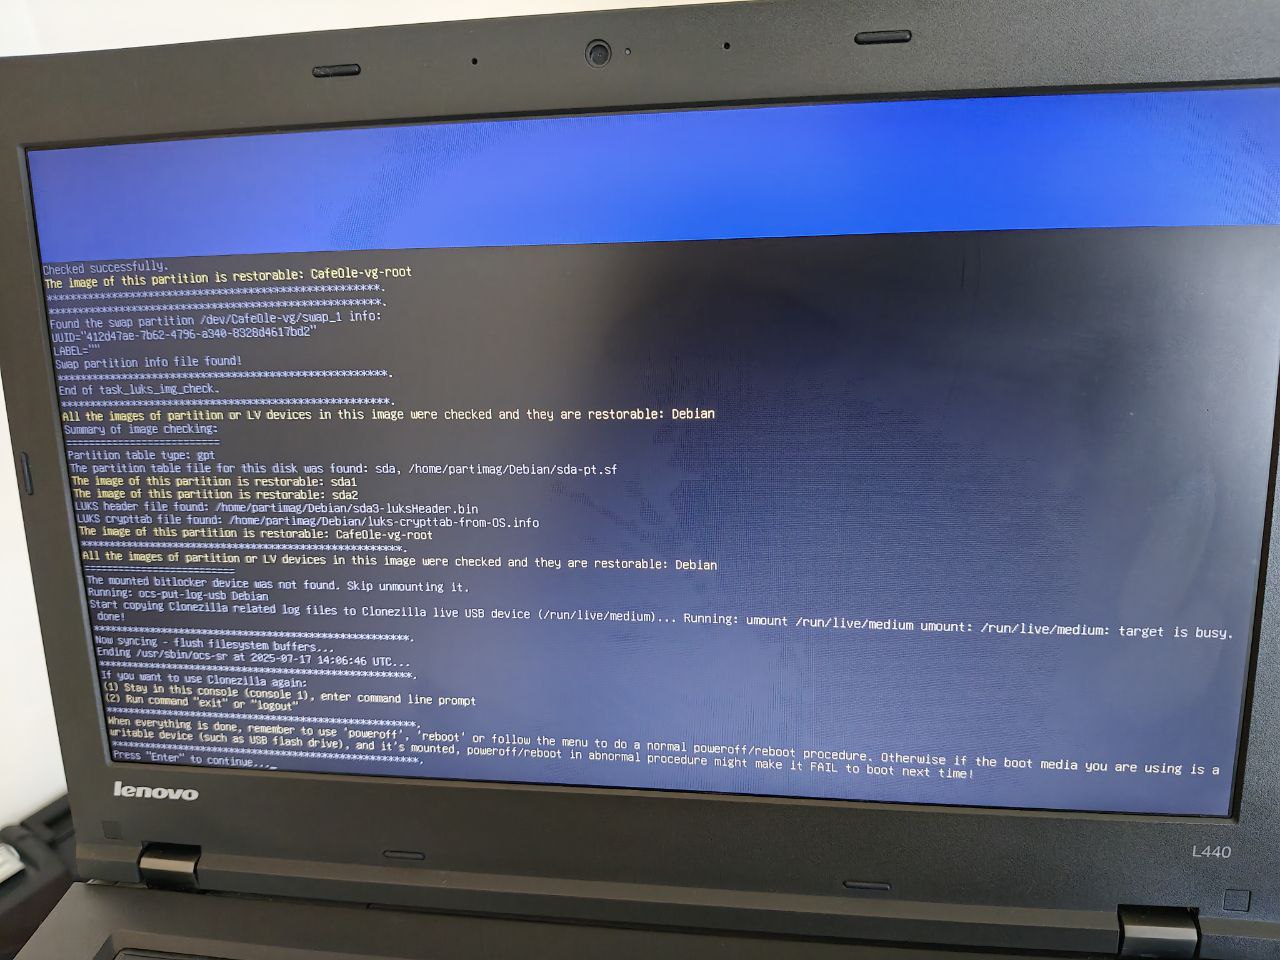
Summary of the completed tasks:
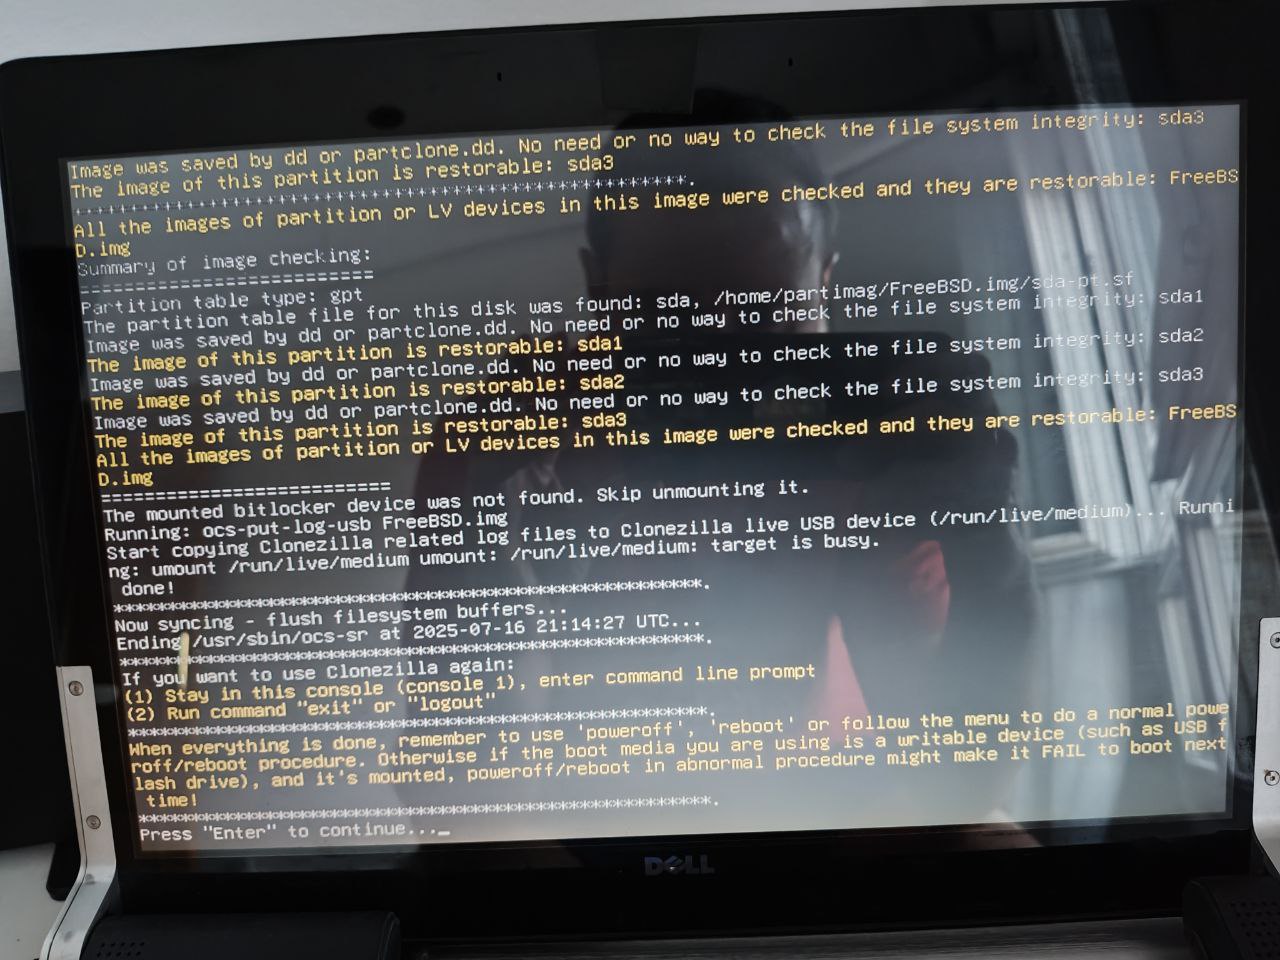
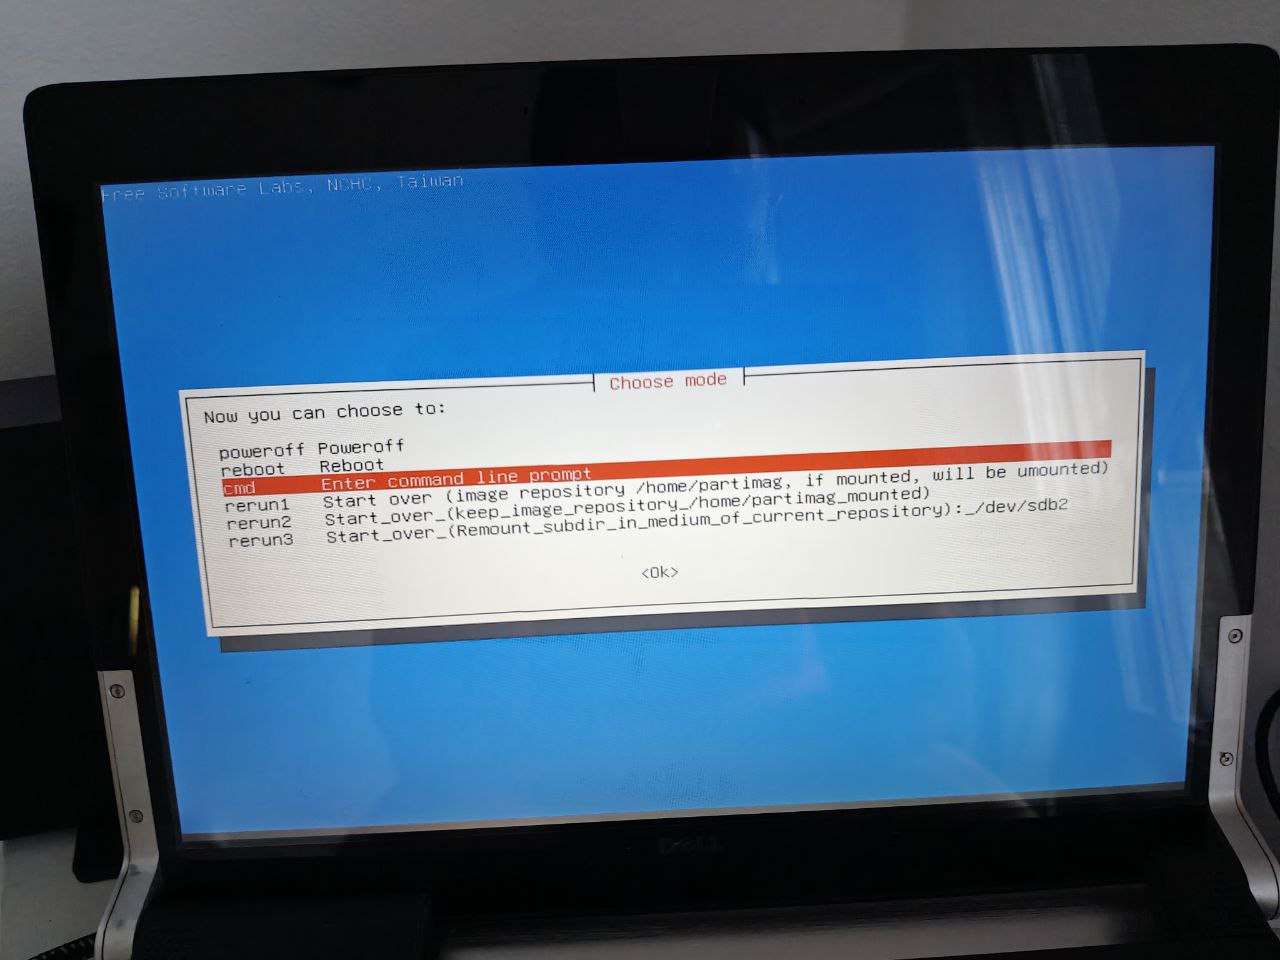
At the end, it will ask what to do next:
A key point is that depending on the chosen compression , the backup size will vary:
z1p: 1TB → 696Gz9p: 1TB → 599G
Restore: FreeBSD-BIOS
The restore process is very similar to the backup process.
Configure the language:
Set the keyboard layout:
It prompts whether to boot Clonezilla or open a Linux shell — we boot Clonezilla:
Clonezilla can operate in
various modes
; in our case, we want to restore the entire disk image, so we choose device-image:
Clonezilla supports the use of
repositories
of
various types
; we choose local_dev since the
repository
is local:
It informs us that if we want to use a disk we haven’t yet connected, now is the time:
It shows the system’s disks in real time:
We select the partition where our
repository
is located:
It asks if we want to perform a fsck on the repository’s filesystem; in my case it’s Ext4 and an extra check doesn’t hurt:
If the repository is in a subdirectory, we must indicate it here:
Path on the resource: /dev/sdb2[/] --> Shows Device+[Directory]: The device cannot change as it was selected earlier, only the Directory path can vary.
Current selected dir name: "/" --> Directory path.
My
repository
is directly in the root, so the path is /, we press Done:
It notifies that it has mounted /tmp/ocsroot_bind_root to /home/partimag using --bind (as seen at the bottom of the image):
It asks which mode we want to operate in — Beginner is a good choice when no fine-tuning is required:

We indicate that we want to restore a disk image — restoredisk:
We select the image name:
We indicate whether to verify the image before restoring it:
This step asks whether to save logs of the operations performed:
It asks what to do after all operations are complete:
It informs us of the command that will be executed:
It asks for confirmation to proceed:
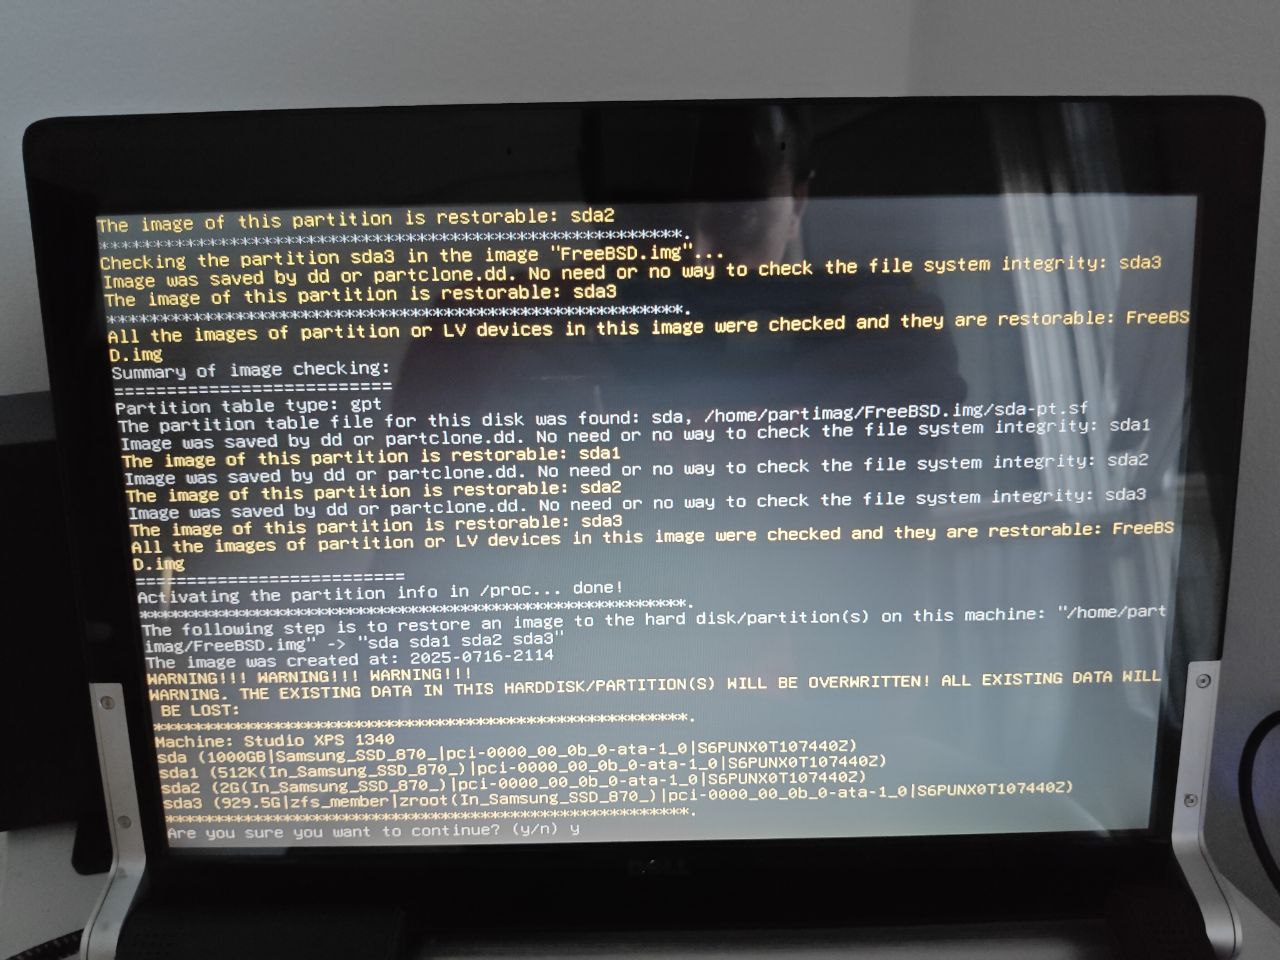
No filesystem check is performed because the image was created with dd, which doesn’t support it. The relevant message is:
Image was saved by dd or partclone.dd. No need or no way to check the file system integrity.
The disk has 3 partitions; here are screenshots of the restore of each one:
|
|
|
NOTE: In my case, it took around 5h30m to restore a 1TB SSD from a 2.5" mechanical drive connected via external USB enclosure.
Summary of the completed tasks:

At the end, it will ask what to do next:
Backup: Windows
Language Configuration:
Keyboard Layout Setup:
Choose between booting Clonezilla or opening a Linux shell - we select Clonezilla:
Clonezilla offers several
operation modes
. For a full disk image backup, we select device-image:
Clonezilla supports different
repository types
. We choose local_dev for our local repository:
The system reminds us to connect any additional disks now if needed:
Real-time display of system disks:
Select the partition containing our repository:
Filesystem check prompt (we select yes for Ext4 verification):
Repository path configuration (root directory in our case):
Path on the resource: /dev/sdb2[/] --> Shows Device+[Directory]: The device can't change as selected earlier, only the Directory path changes.
Current selected dir name: "/" --> Directory path.
System confirms mounting /tmp/ocsroot_bind_root to /home/partimag via --bind:
Operation mode selection (Beginner recommended for standard operations):
Menu varies depending on existing backups - we select full disk image (savedisk):
| No Existing Backup | With Existing Backup |
|---|---|
|
|
Image name specification:
Data source selection:
Compression method
selection:
Filesystem check prompt for NTFS (we select -sfsck):
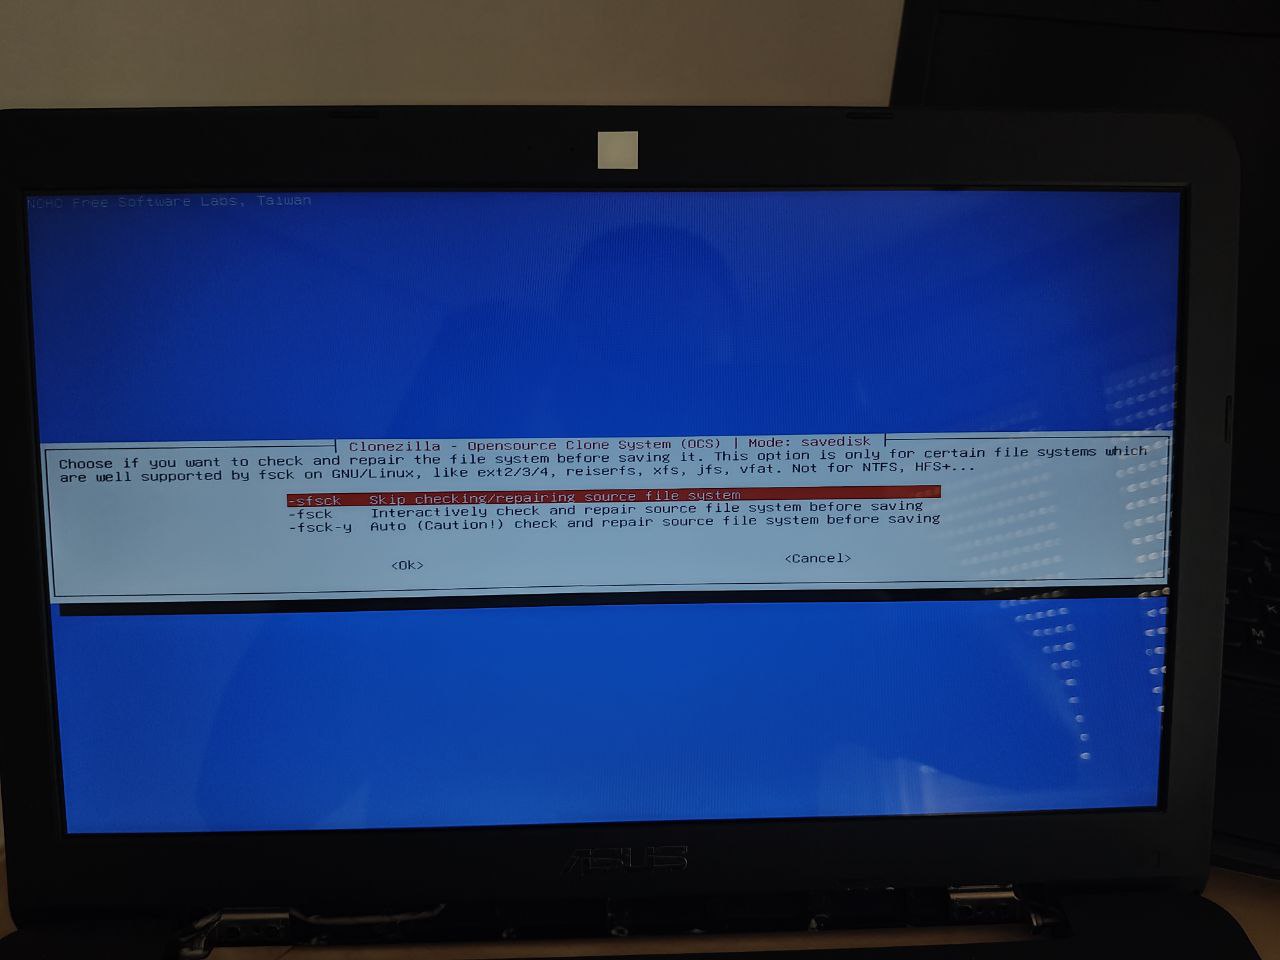
Image verification option post-creation:
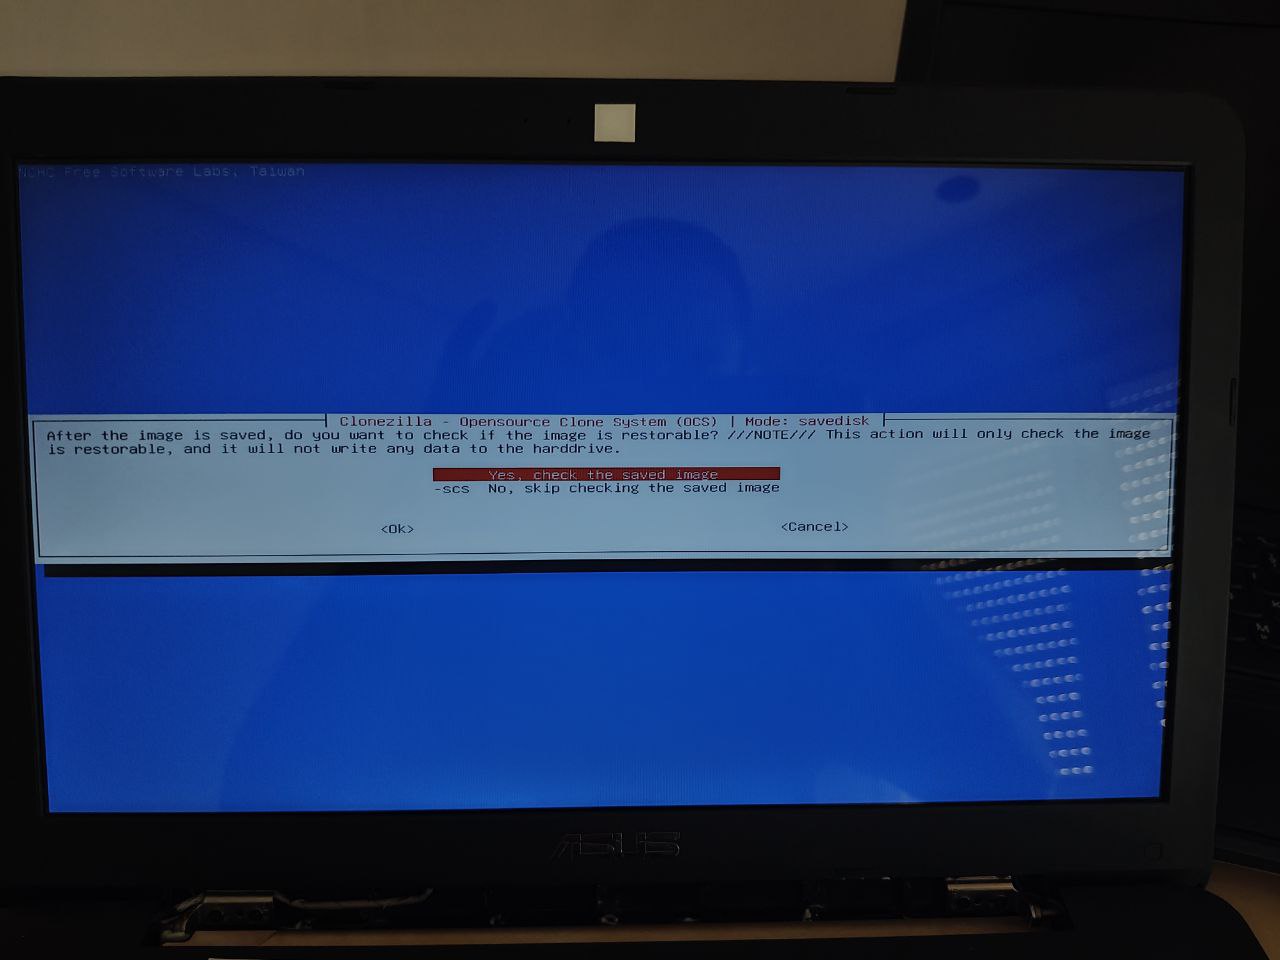
Image encryption option (we skip in this case):
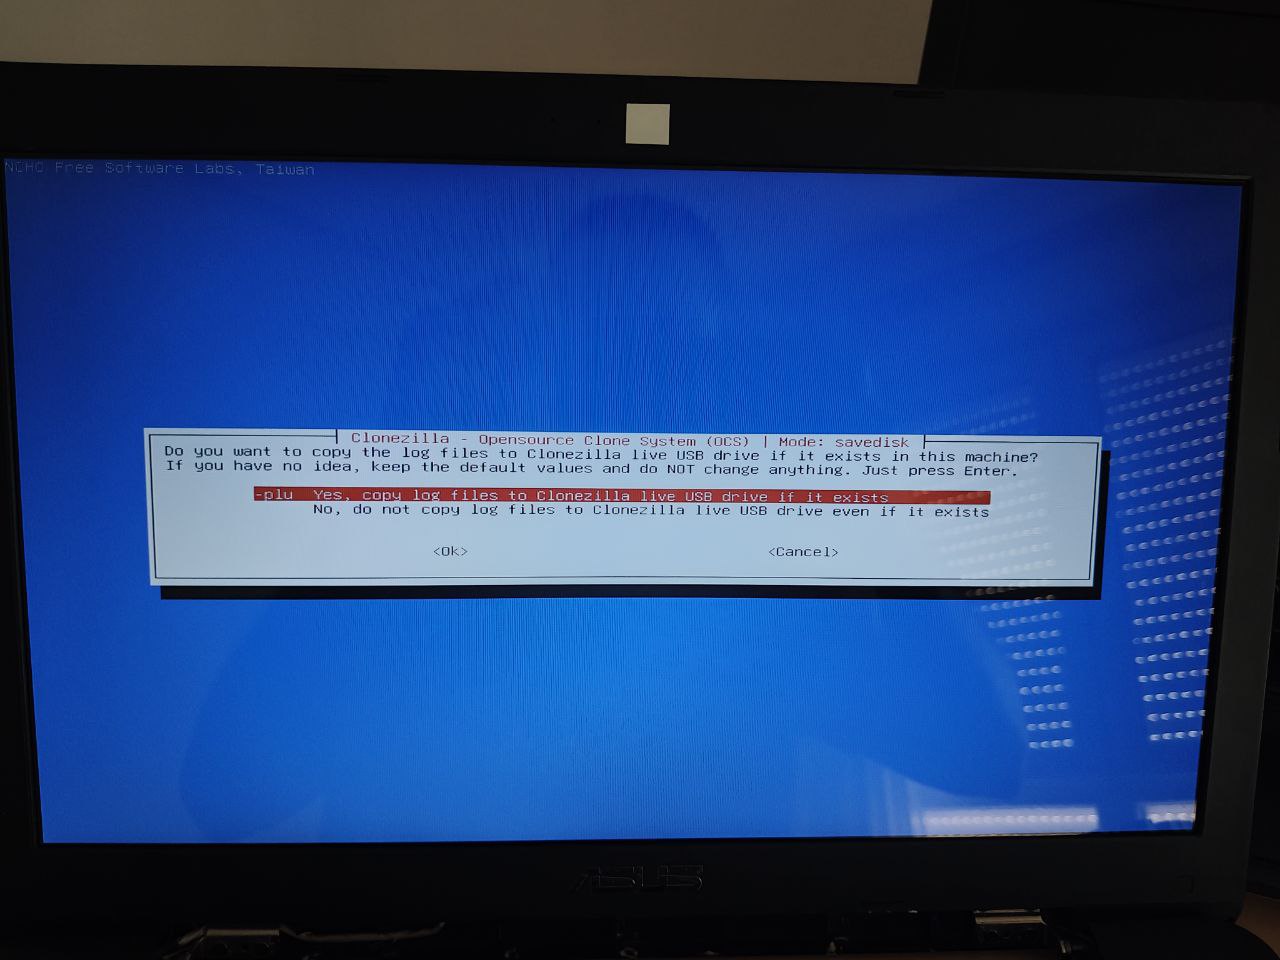
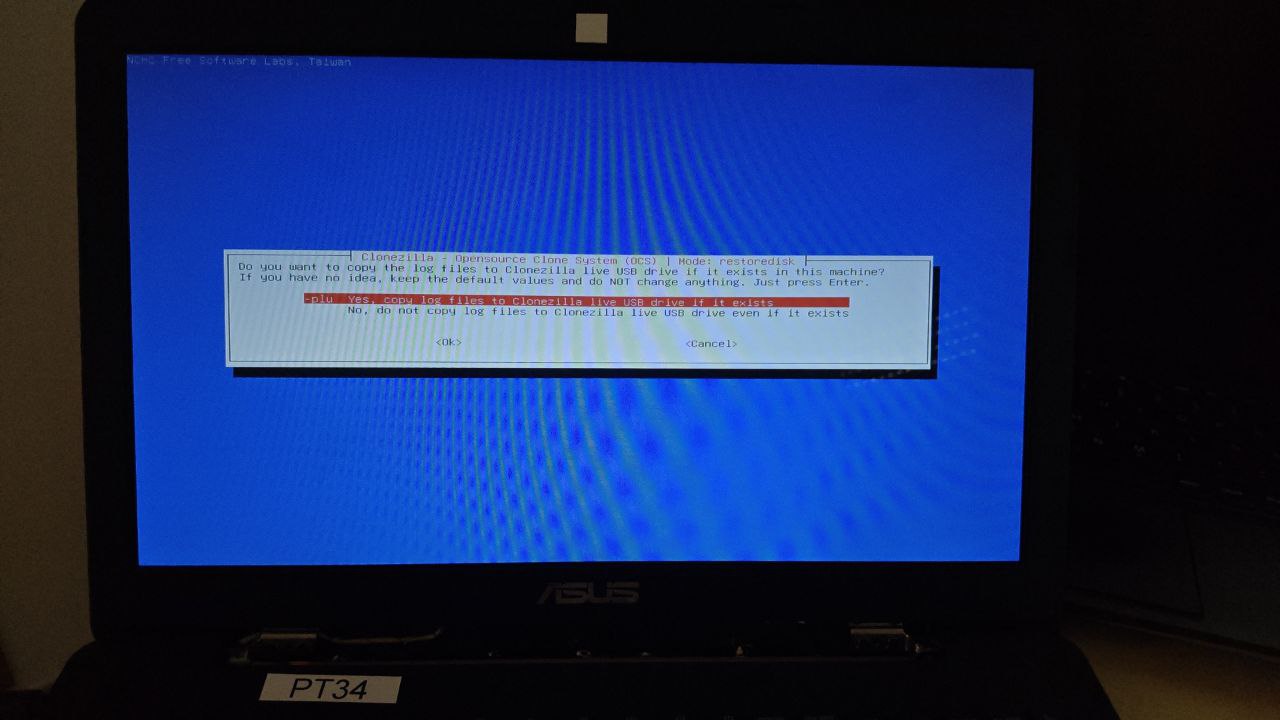
Operation logging prompt:
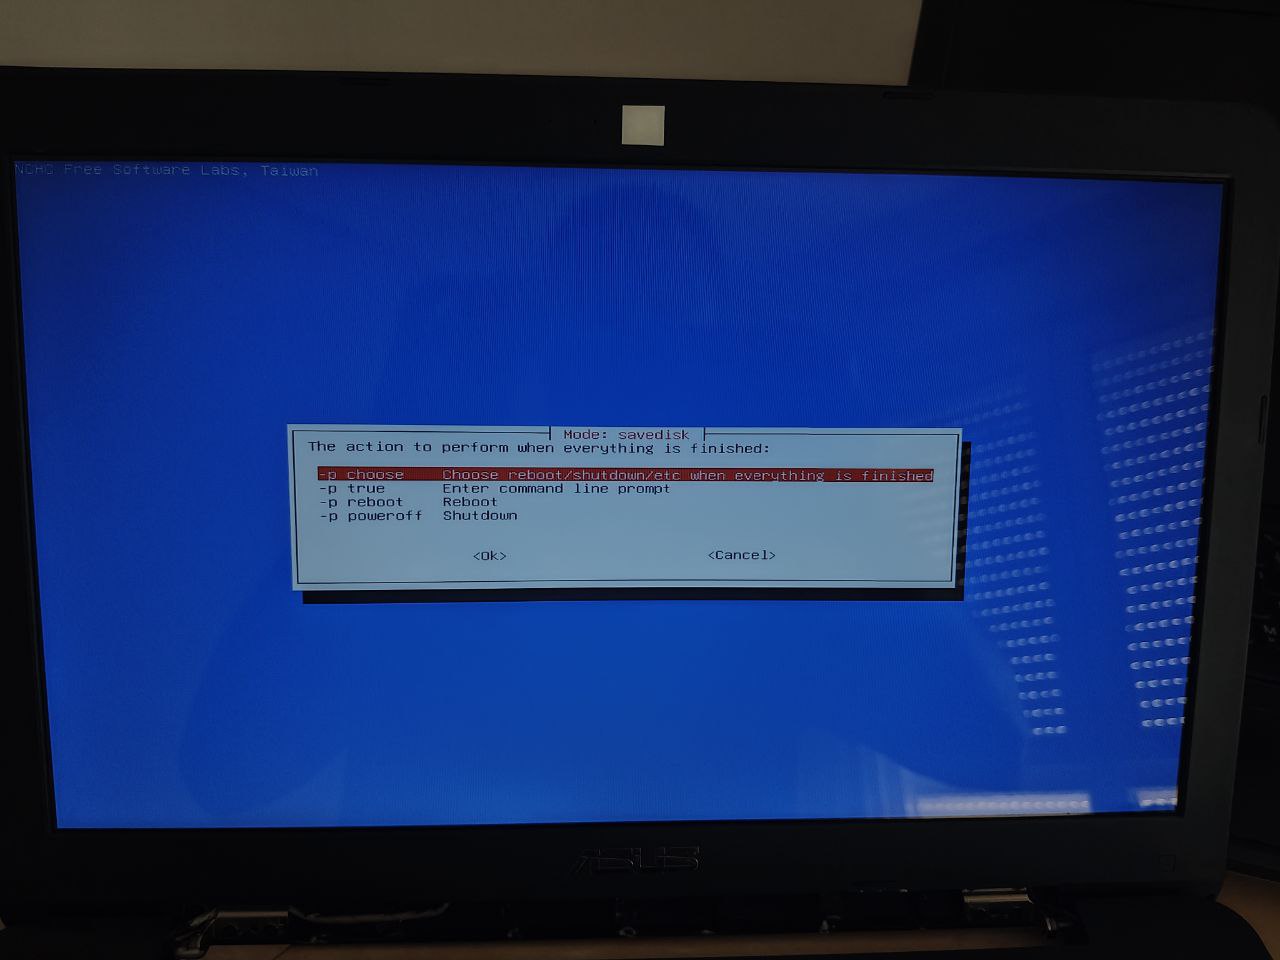
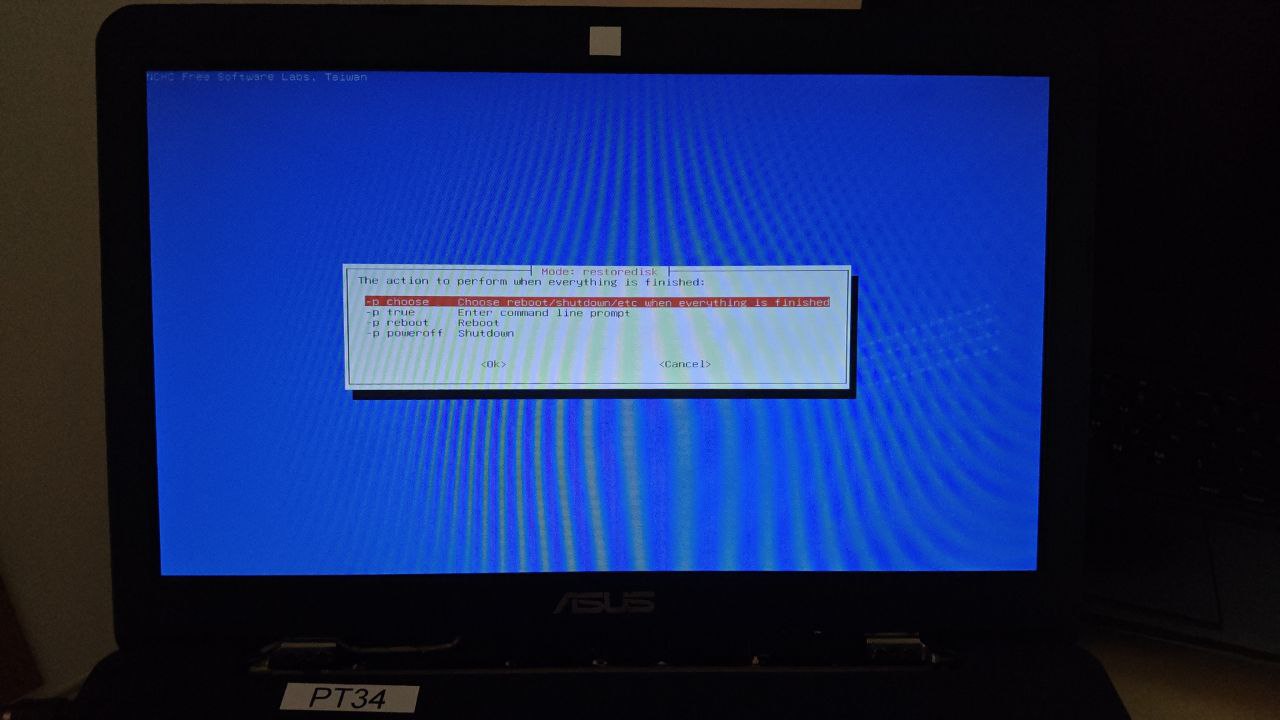
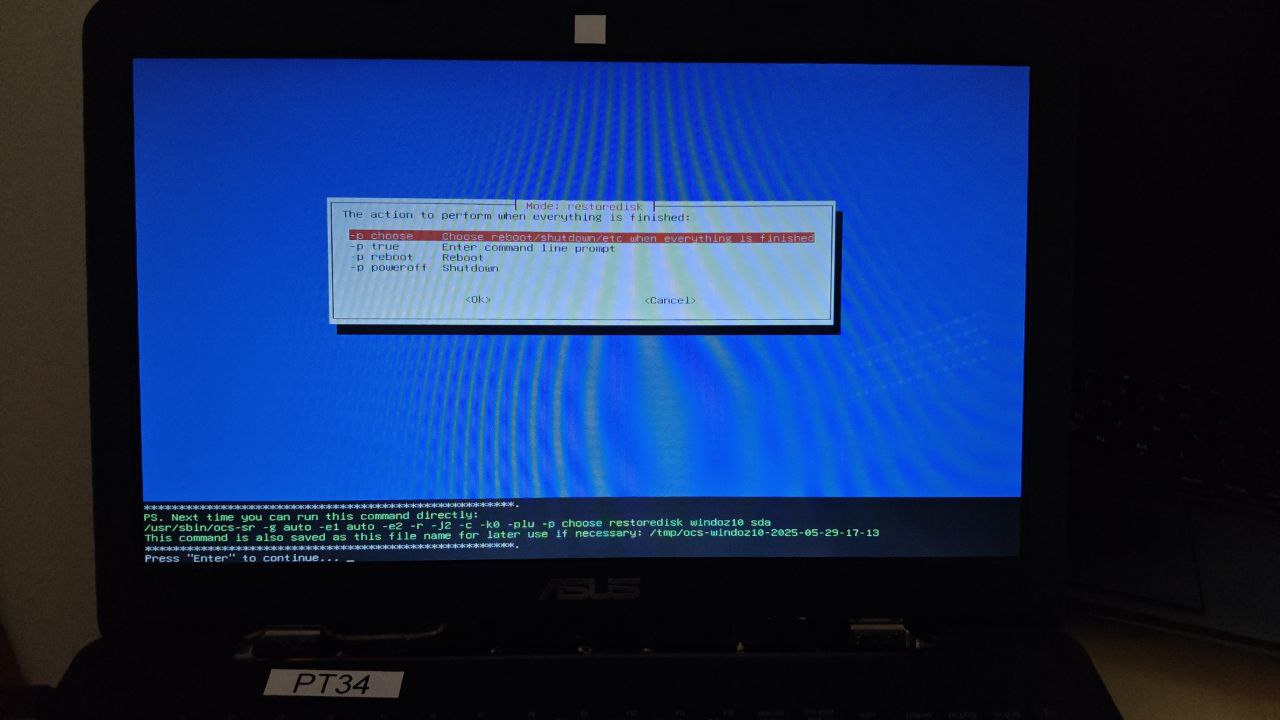
Post-operation action selection:
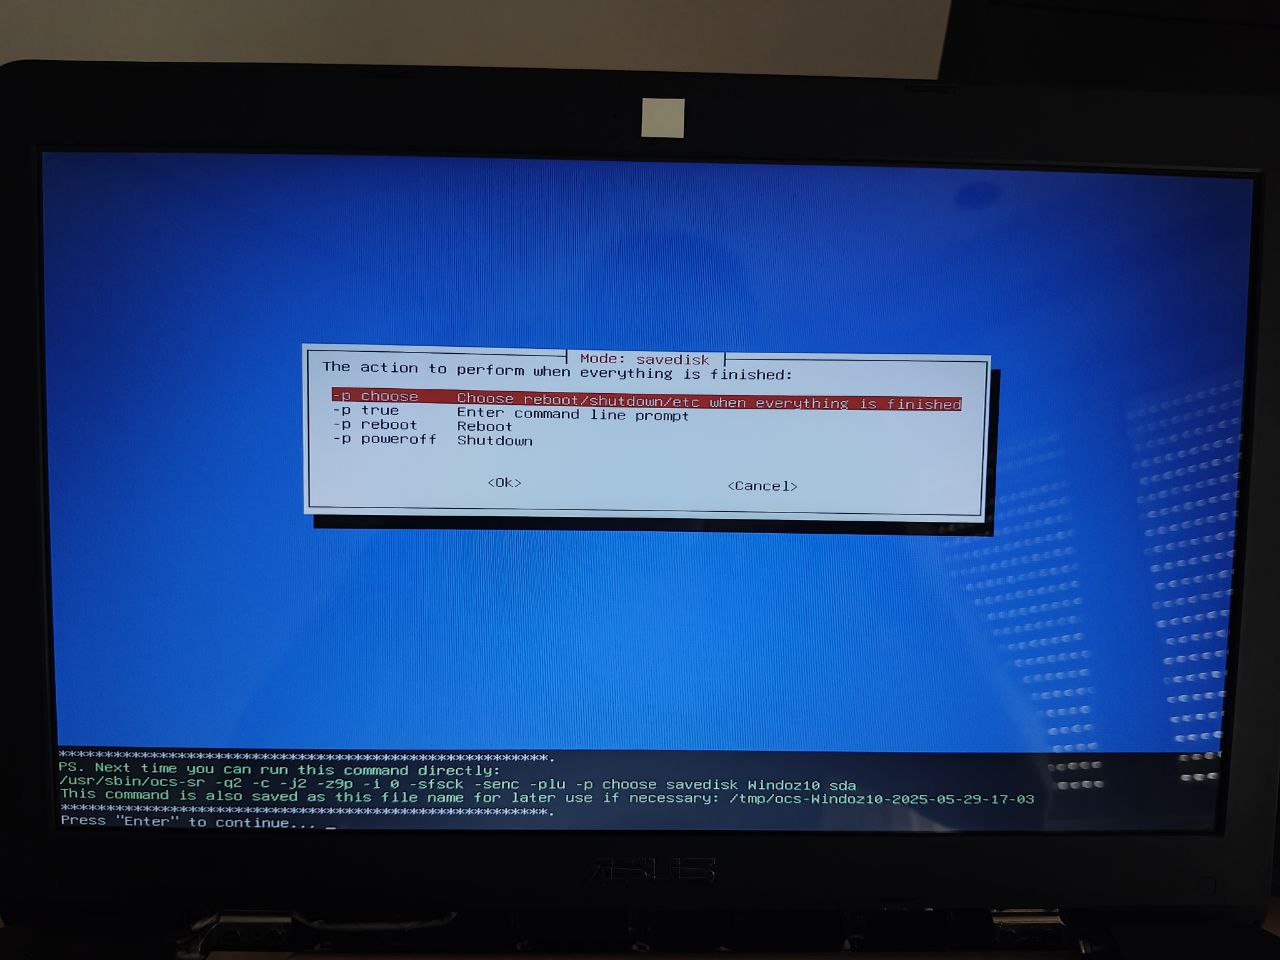
Command execution confirmation:
Final confirmation prompt:
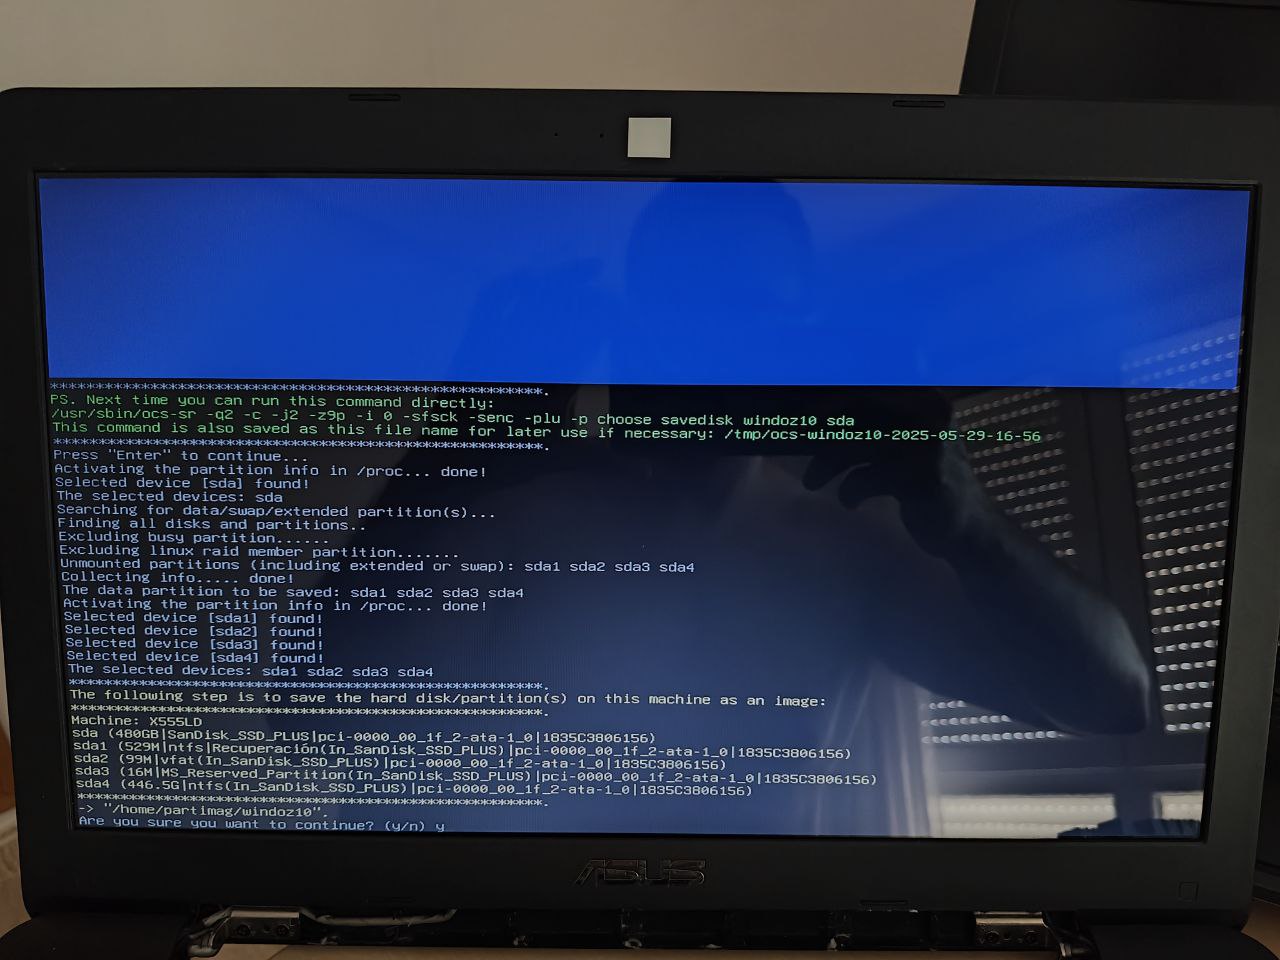
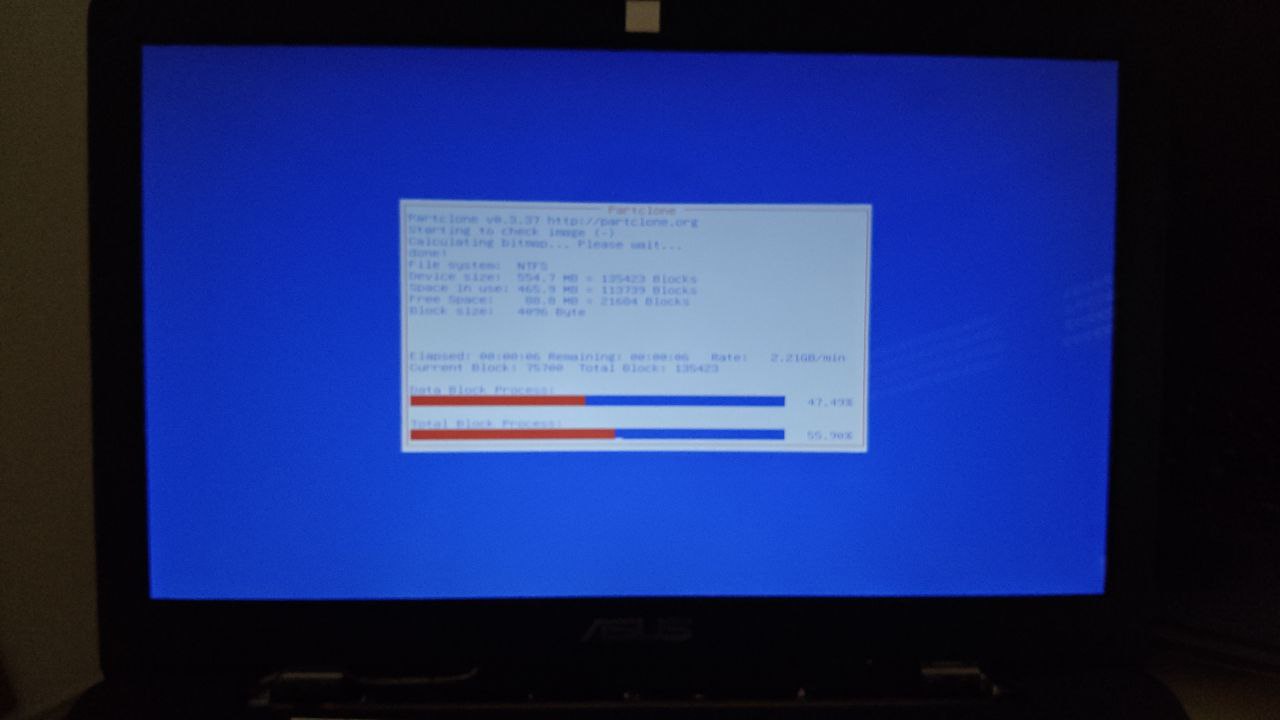
Backup progress for each of the 4 partitions:
|

|
|
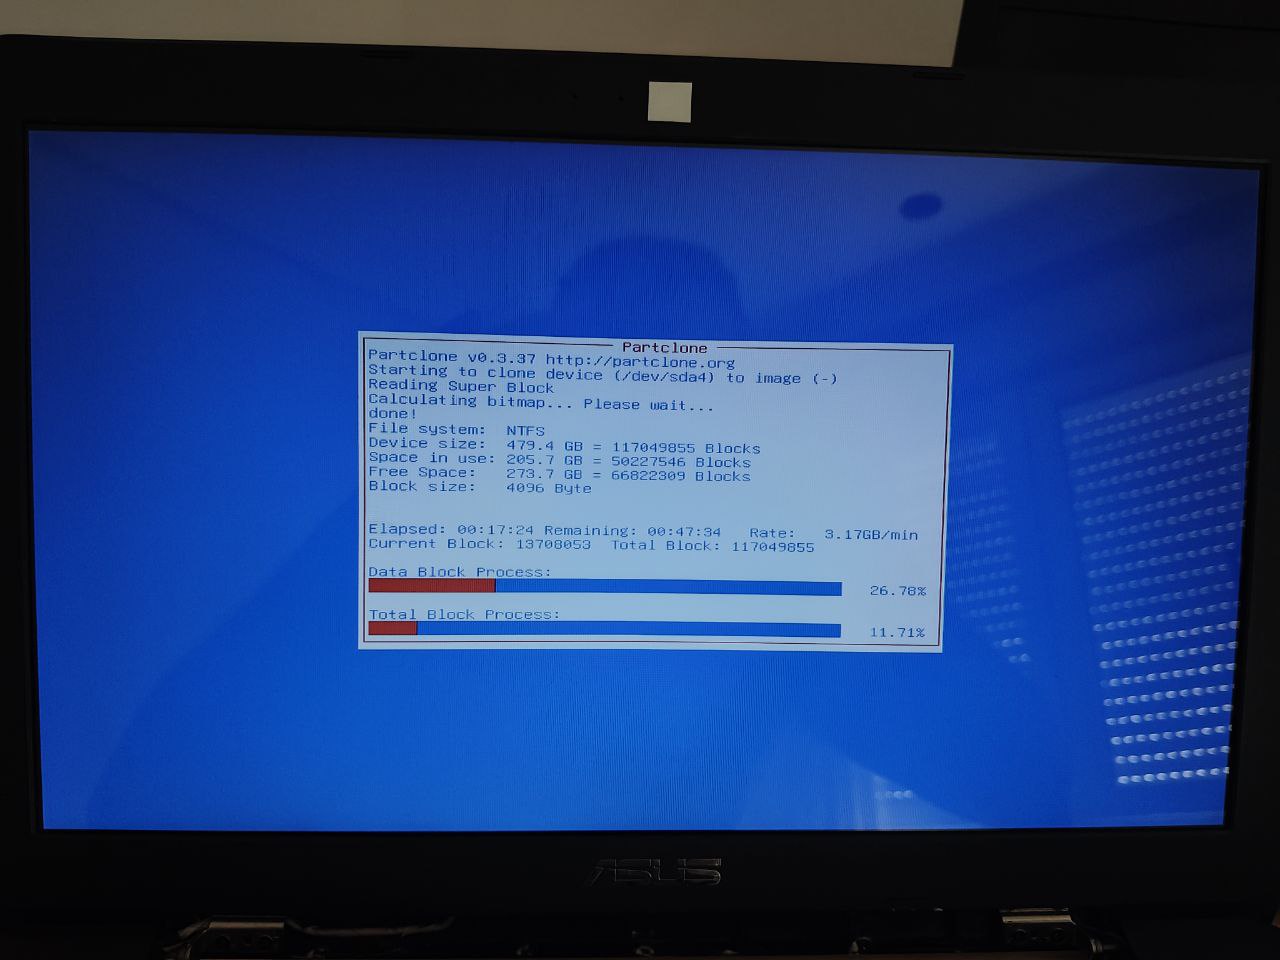
|
NOTE: In our test, backing up a 500GB SSD with 205.7GB used data to an external 2.5" HDD via USB took approximately 3 hours.
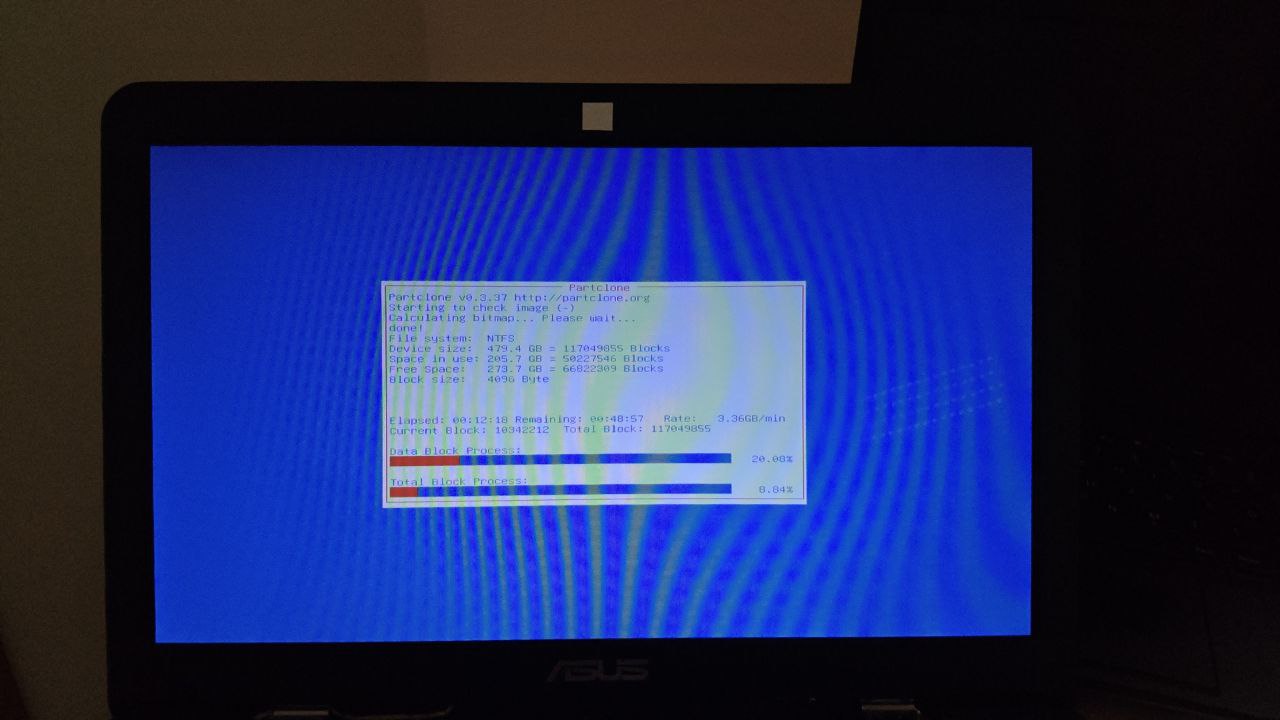
Image verification for each created backup:
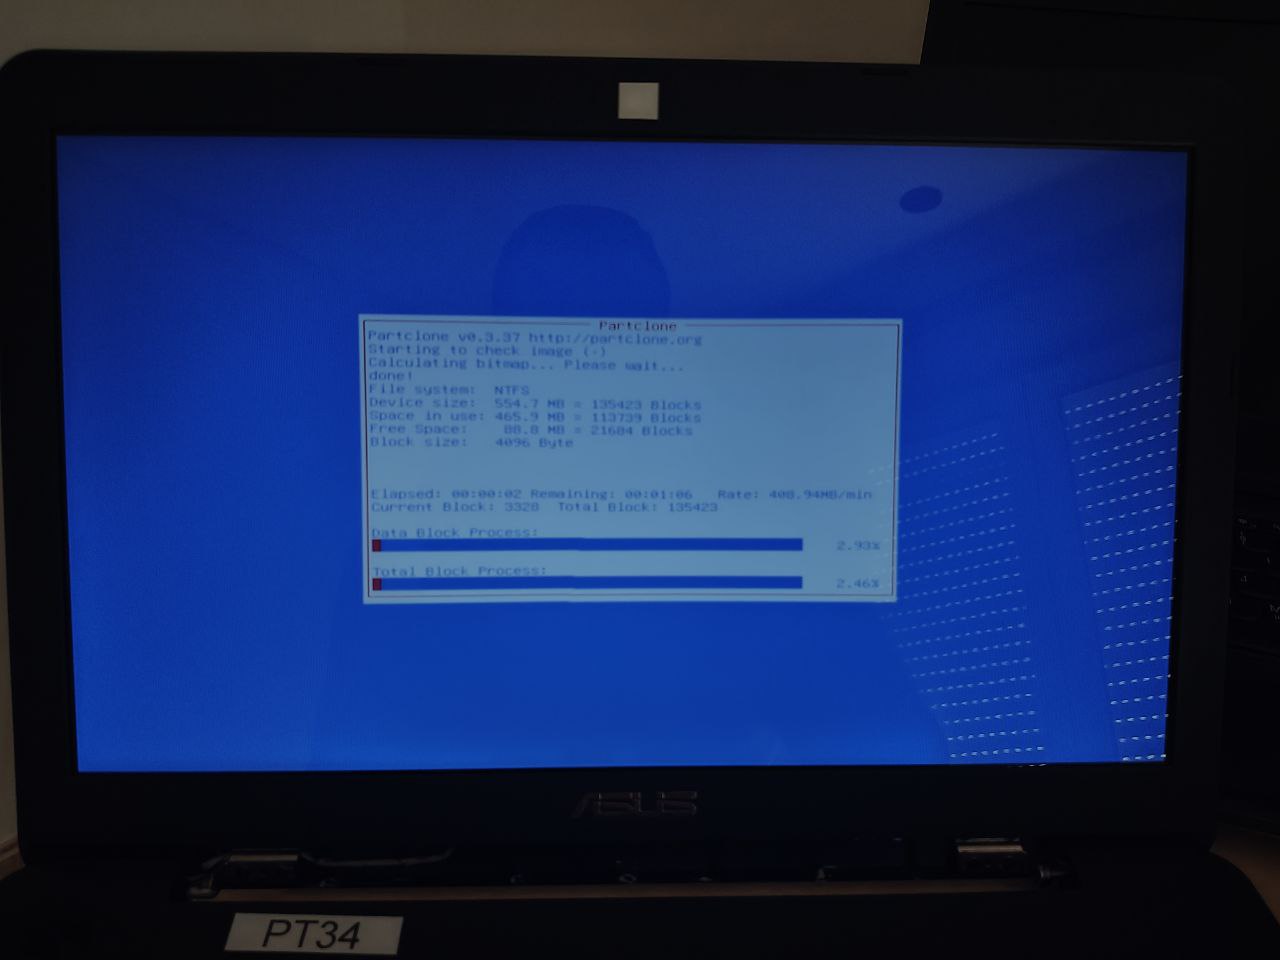
|
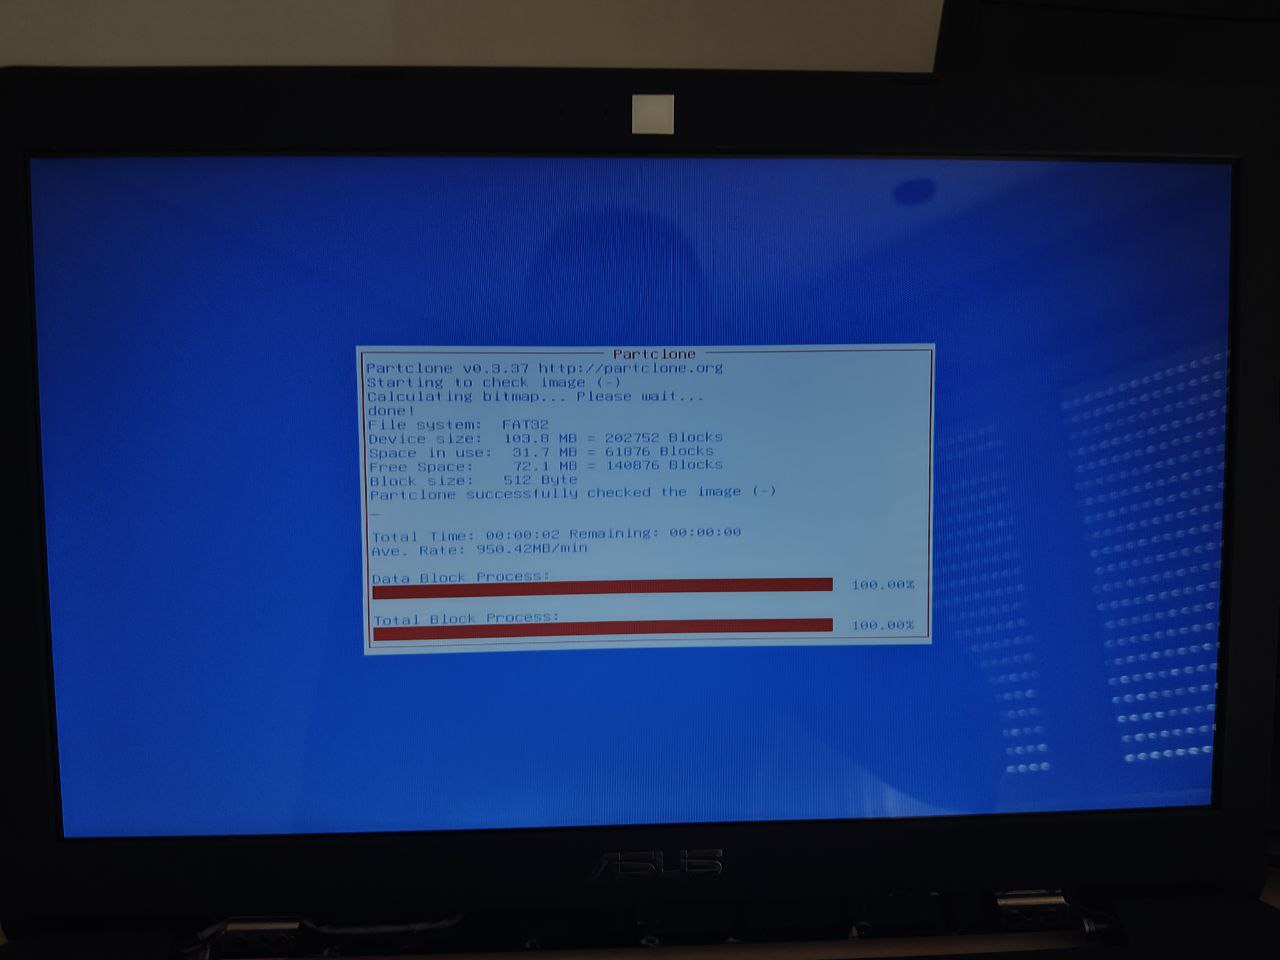
|
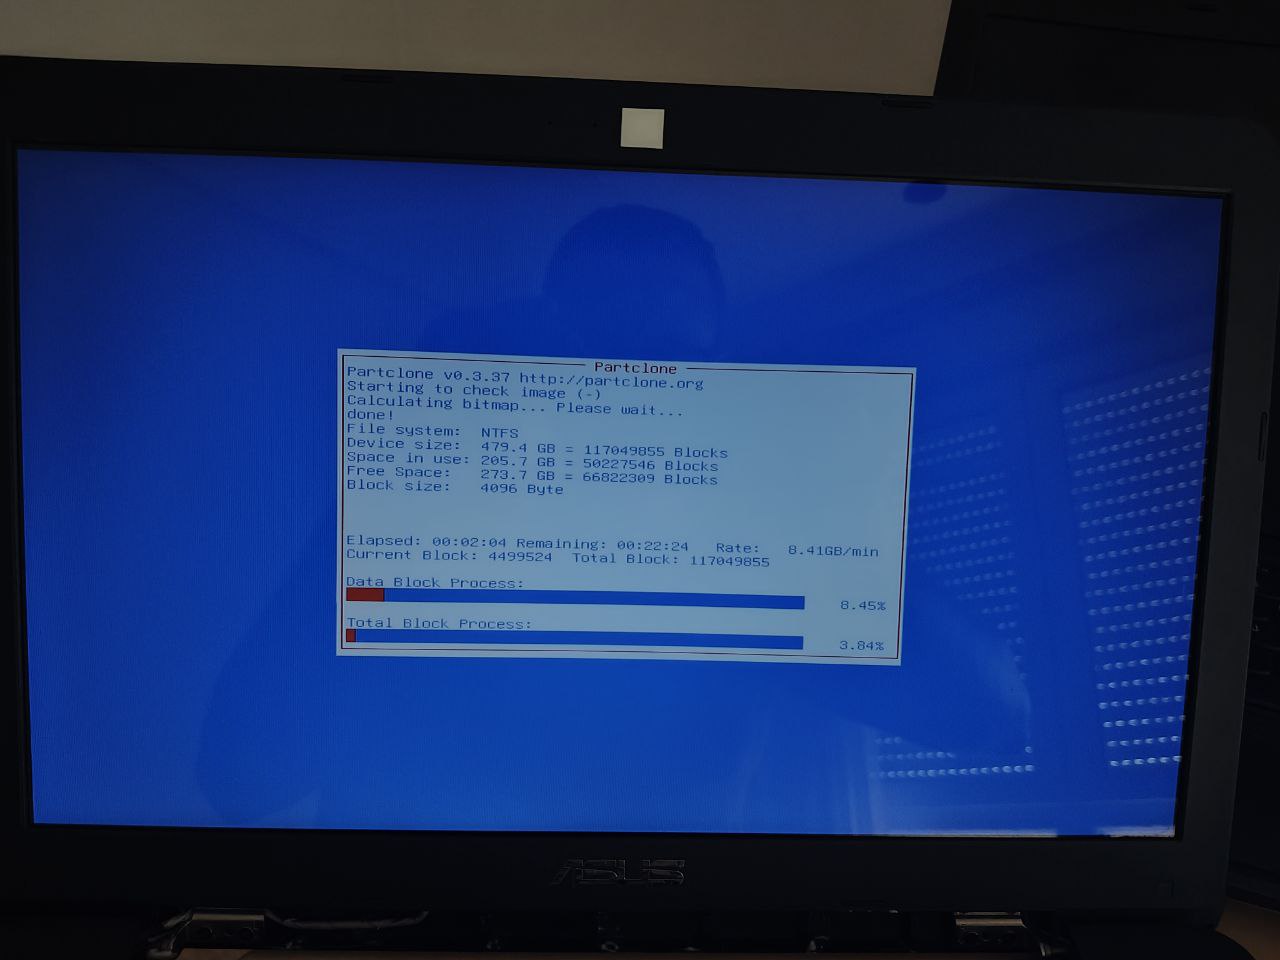
|
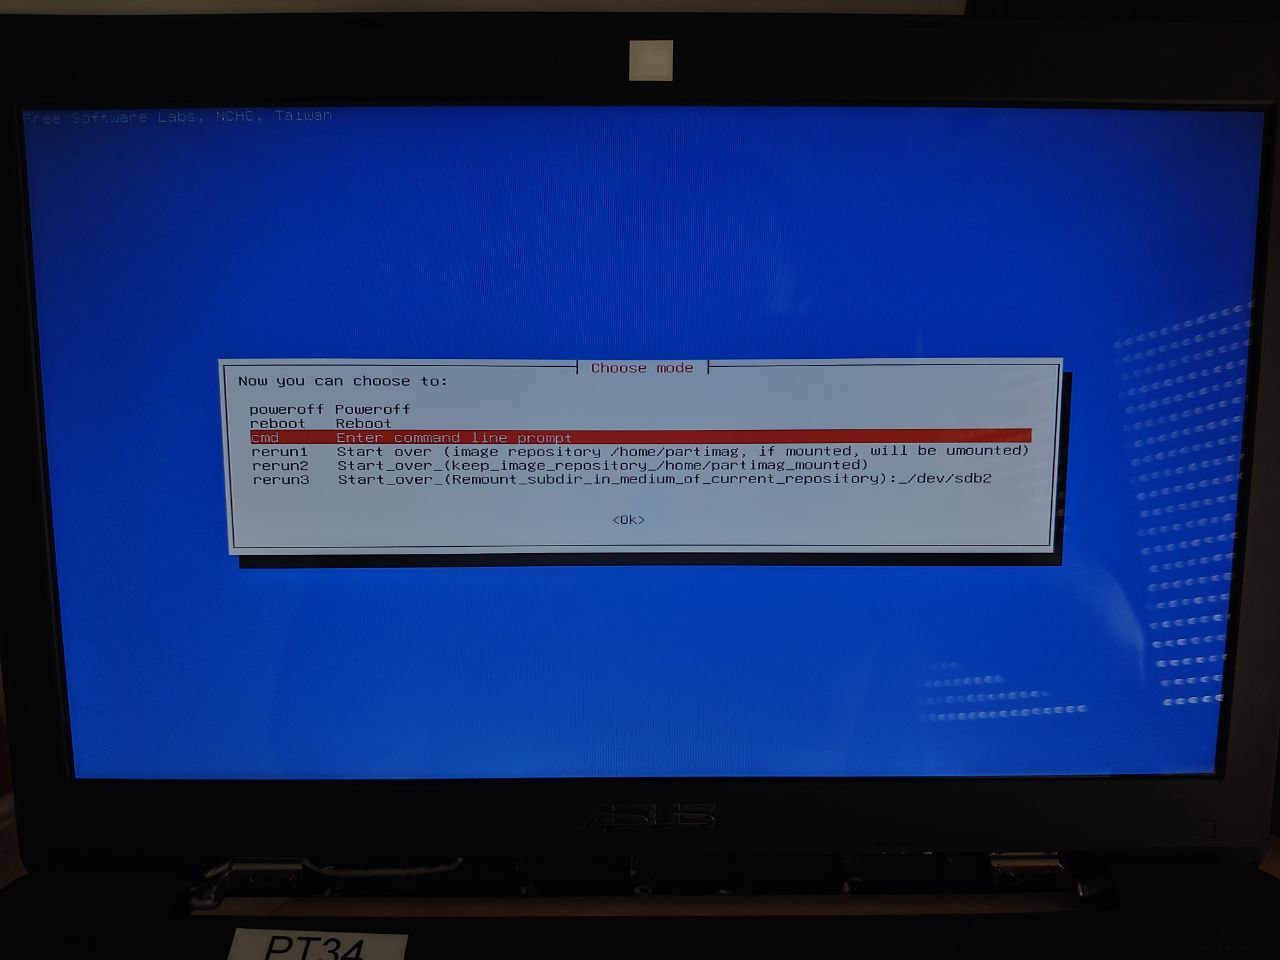
Operation summary:
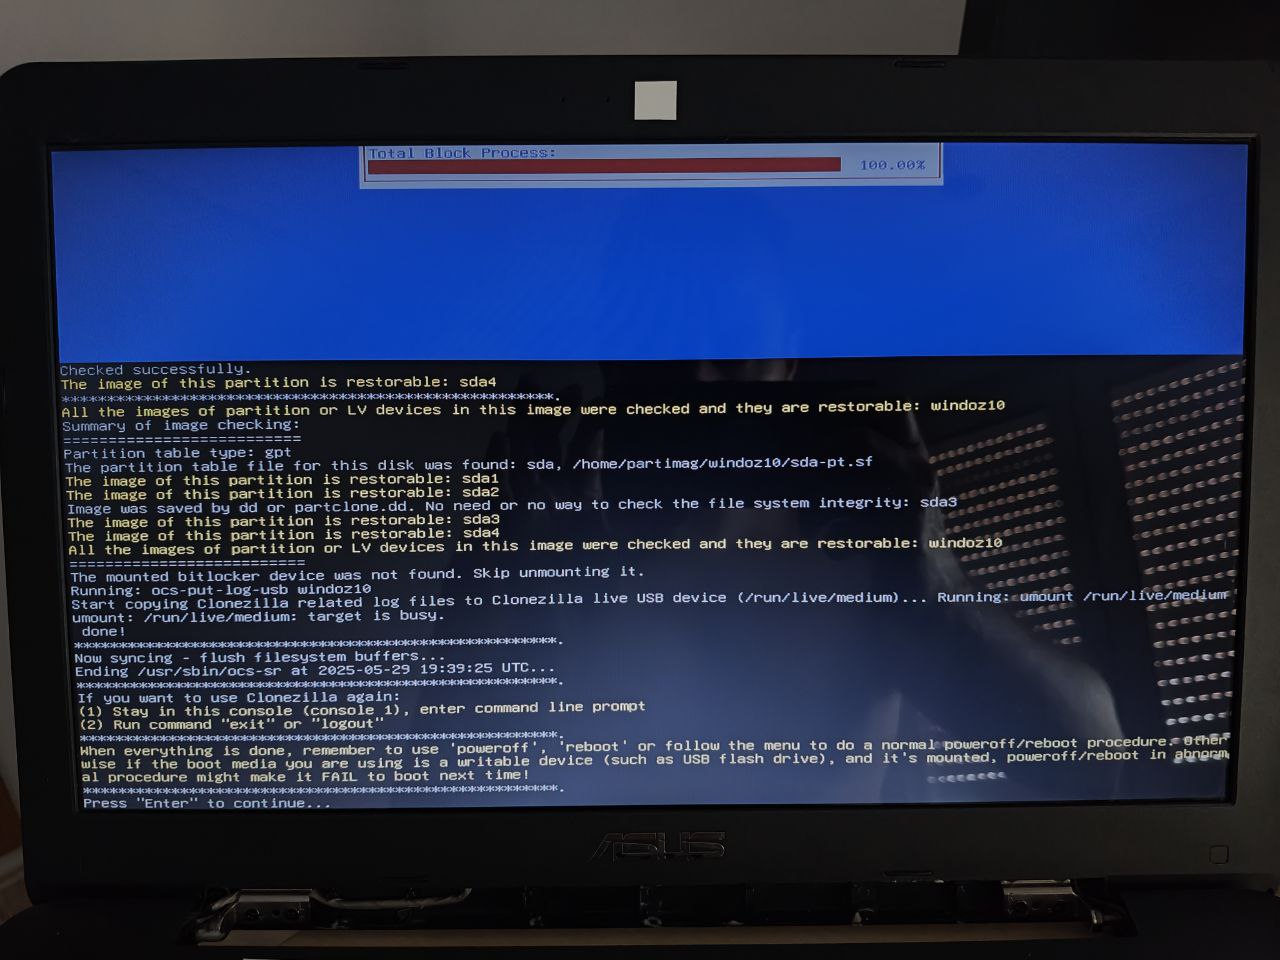
Completion prompt:
Important Note: The backup size varies based on the compression method selected:
z1p: 500GB → 180GBz9p: 500GB → 179GB
Restore: Windows
The restore process is very similar to the backup process.
We configure the language:
We configure the keyboard layout:
We choose between booting Clonezilla or opening a Linux shell - we boot Clonezilla:
Clonezilla can operate in
various ways
. For a full disk image, we select device-image:
Clonezilla supports different
repository types
. We choose local_dev since our
repository
is local:
It informs us that now is the time to connect any additional disks if needed:
It shows the system disks in real time:
We select the partition containing our
repository
:
It asks if we want to run fsck on the repository filesystem (Ext4 in our case):
If the repository is in a subdirectory, we specify it here:
Path on the resource: /dev/sdb2[/] --> Shows Device+[Directory]: The device can't change as selected earlier, only the Directory path changes.
Current selected dir name: "/" --> Directory path.
Our
repository
is at the root, so we select “/” and click Done:
It confirms mounting /tmp/ocsroot_bind_root to /home/partimag via --bind:
It asks for the operation mode - Beginner is good for basic operations:
We select disk image restoration restoredisk:

We specify the image name:
We select the target disk:
Partition table options:
- Keep original
- Create new: Useful when restoring to disks of different sizes
Option to verify image before restoring:
Option to save operation logs:
Post-operation action selection:
Command execution confirmation:
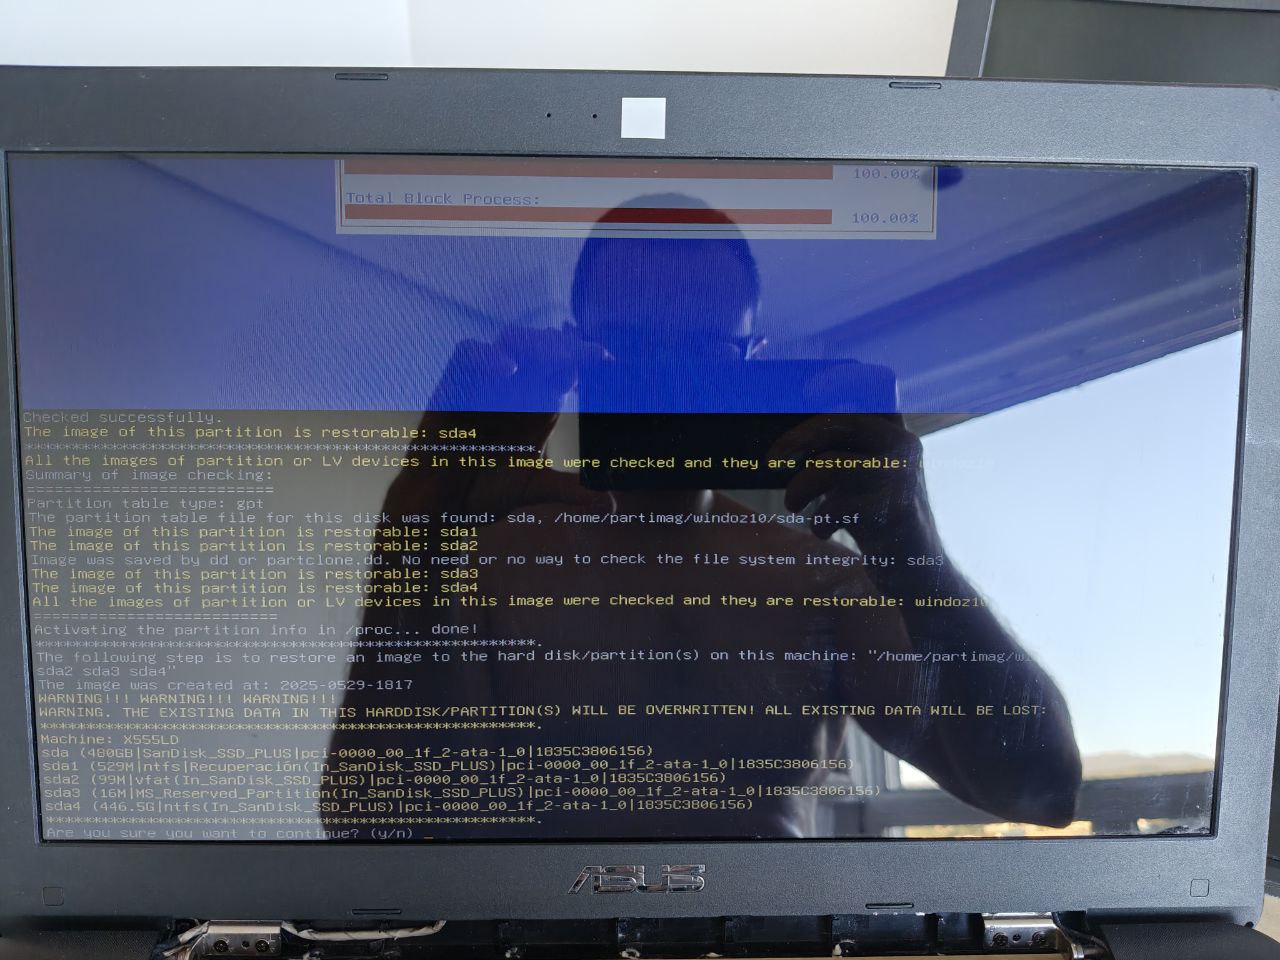
Pre-restoration verification for each of 4 partitions:
|
|
|
NOTE: Verification took 1 hour for a 500GB SSD with 205.7GB used data from a 2.5" USB HDD.
Final confirmation:
Restoration progress for each partition:
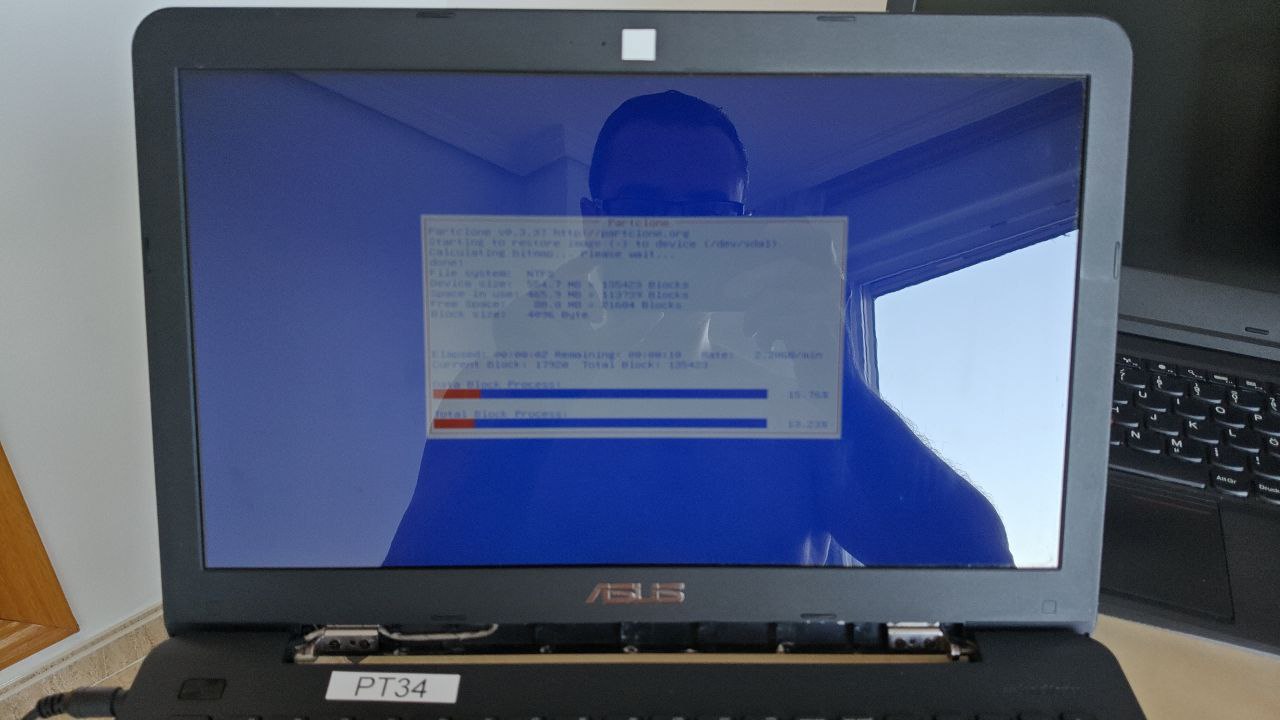
|
|
|

|
NOTE: Restoration took 3 hours for a 500GB SSD with 205.7GB used data from a 2.5" USB HDD.
Operation summary:

Completion prompt:
Compression algorithms:
Depending on the mode we are operating in, we can access different compression algorithms:
Beginner:
-z1p
-z9p
Expert:
| Option | Algorithm | Compression ratio (1=worst, 10=best) | Speed (1=slowest, 10=fastest) |
|---|---|---|---|
| -z0 | No compression | 1 | 10 |
| -z1 | gzip | 5 | 6 |
| -z1p | pigz (parallel gzip) | 5 | 8 |
| -z2 | bzip2 | 7 | 3 |
| -z2p | pbzip2 (parallel bzip2) | 7 | 5 |
| -z3 | LZO | 3 | 9 |
| -z4 | LZMA | 9 | 2 |
| -z5 | xz | 10 | 1 |
| -z5p | pxz (parallel xz) | 10 | 3 |
| -z6 | lzip | 9 | 2 |
| -z6p | plzip (parallel lzip) | 9 | 4 |
| -z7 | lrzip | 8-10* | 3-6* |
| -z8 | lz4 | 4 | 9 |
| -z8p | lz4mt | 4 | 10 |
| -z9 | zstd | 8 | 7 |
| -z9p | zstdmt | 8 | 8 |
Here are the results of some tests on a Windows system as reference:
z1p: 500G (205.7G used) -> 180G
z9p: 500G (205.7G used) -> 179G
z5p: 500G (205.7G used) -> 179G
Automation
When we run Clonezilla manually, we can see the commands it executes. This is very useful because to automate the process we only need to replay the same commands.
We mount the partition where Clonezilla was installed to edit the configuration:
mkdir /mnt/aux 2>/dev/null
mount /dev/sdX1 /mnt/aux
It is possible to do a preseed of the Clonezilla parameters to automate backups/restores. You can consult each of them in
the documentation
.
The parameters of ocs-sr can be seen
here
. Usually, we will use those shown by Clonezilla when doing the backup/restore manually, but with slight modifications.
Regional settings:
locales=en_US.UTF-8
Keyboard layout:
keyboard-layouts=us
Partition where the Clonezilla repository is located. We configure it by UUID to avoid problems if more USB drives are connected during the backup:
lsblk -o NAME,UUID,LABEL,FSTYPE
sde
├─sde1      C635-A671                                    vfat
└─sde2      7f4ae4a7-df39-4cab-a723-9fe57ec70fcf Backups ext4
ocs_prerun="mount UUID=7f4ae4a7-df39-4cab-a723-9fe57ec70fcf /mnt"
Directory where the repository is, in this case “/”:
ocs_prerun1="mount --bind /mnt /home/partimag/"
Command to execute, to backup/restore:
Backup:  ocs_live_run="ocs-sr --batch -luks yes -q2 -j2 -z9p -i 0 -fsck-y -senc -p poweroff savedisk backupImageLinuxLuksOpened sda"
Restore: ocs_live_run="ocs-sr --batch -g auto -e1 auto -e2 -r -j2 -k0 -p poweroff restoredisk backupImageLinuxLuksOpened sda"
Backup:  ocs_live_run="ocs-sr --batch -luks no -q2 -j2 -z9p -i 0 -fsck-y -senc -p poweroff savedisk backupImageLinuxLuksClosed sda"
Restore: ocs_live_run="ocs-sr --batch -g auto -e1 auto -e2 -r -j2 -k0 -p poweroff restoredisk backupImageLinuxLuksClosed sda"
Backup:  ocs_live_run="ocs-sr --batch -q2 -j2 -z9p -i 0 -sfsck -senc -p poweroff savedisk backupImageFreeBSD sda"
Restore: ocs_live_run="ocs-sr --batch -g auto -e1 auto -e2 -r -j2 -k0 -p poweroff restoredisk backupImageFreeBSD sda"
Backup:  ocs_live_run="ocs-sr --batch -q2 -j2 -z9p -i 0 -sfsck -senc -p poweroff savedisk backupImageWindoz sda"
Restore: ocs_live_run="ocs-sr --batch -g auto -e1 auto -e2 -r -j2 -k0 -p poweroff restoredisk backupImageWindoz sda"
If the system has the disk encrypted, the process can only be fully automated if we do not open the LUKS device, as in this case it won’t require a password or any user input.
Otherwise, the password must be entered both for backup and restore:
| Backup | Restore |
|---|---|
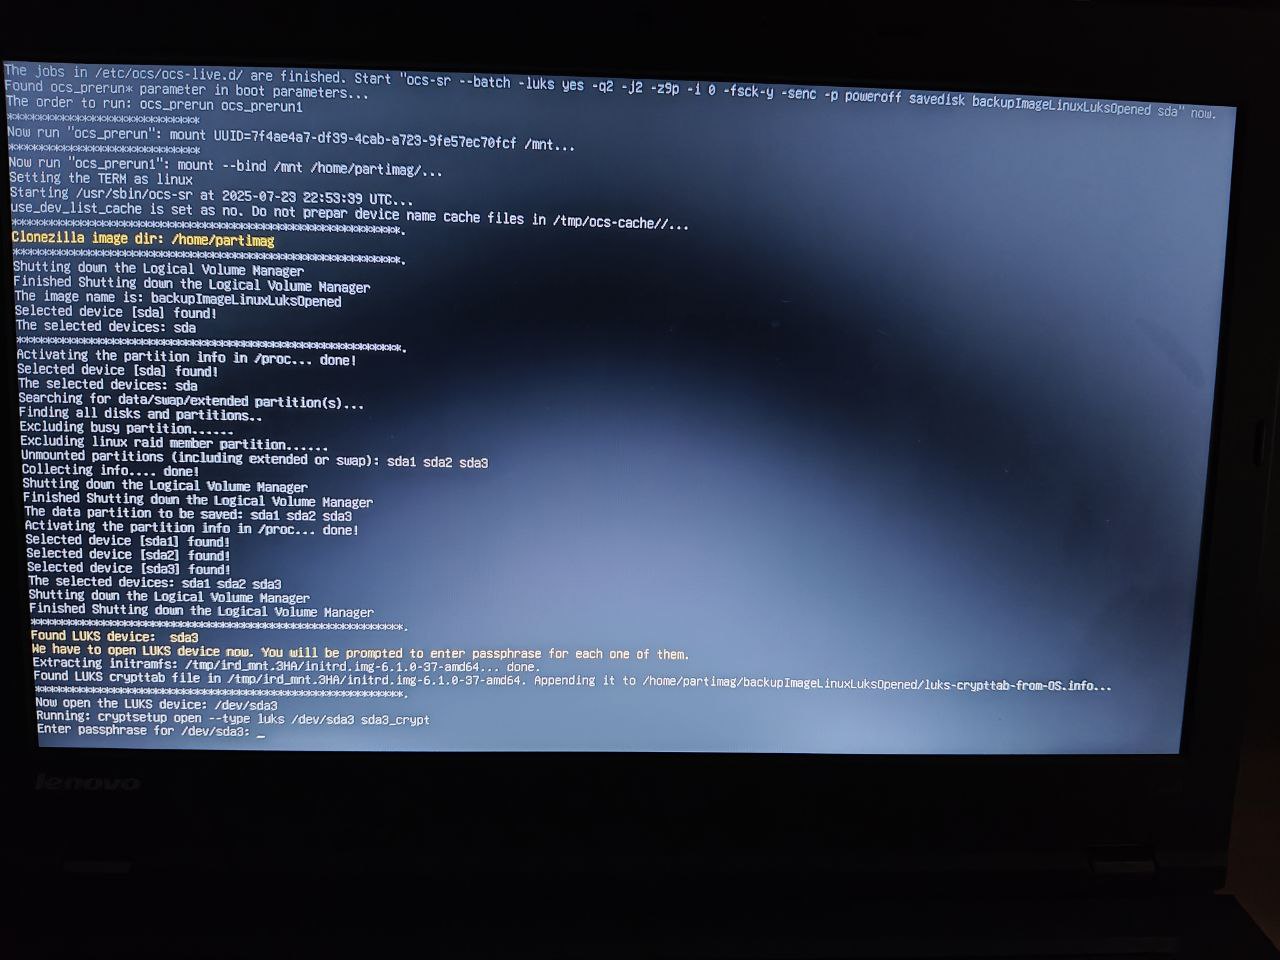
|
|
If we need to fine-tune the command provided by Clonezilla, we can see all the options in the
official documentation.
Below is the meaning of each parameter according to the system.
Backup:
ocs-sr [OPTION] {savedisk|saveparts|restoredisk|restoreparts} IMAGE DEVICE
-b, -batch, --batch (DANGEROUS!) Run program in batch mode, i.e. without any prompt or wait for pressing enter key. //NOTE// You have to use '-batch' instead of '-b' when you want to use it in the boot parameters. Otherwise the program init on system will honor '-b', too.
-luks, --enable-luks MODE Open LUKS device or not. MODE can be either yes or no.
-q2, --use-partclone Use partclone to save partition(s) (i.e. partclone > partimage > dd).
-j2, --clone-hidden-data Use dd to clone the image of the data between MBR (1st sector, i.e. 512 bytes) and 1st partition, which might be useful for some recovery tool.
-z9p, --zstdmt-compress Compress using zstdmt when saving.
-i, --image-size SIZE Set the split image file volume size SIZE (MB). When ocs-sr is run with -x, the default SIZE is set as 0, if without -x, we will not split it.
-fsck-y, --skip-fsck-src-part Skip running fsck on the source file system before saving it.
-senc, --skip-enc-ocs-img Skip encrypting the image with passphrase.
-p, --postaction [choose|poweroff|reboot|command|CMD] When save/restoration finishes, choose action in the client, poweroff, reboot (default), in command prompt or run CMD
ocs-sr [OPTION] {savedisk|saveparts|restoredisk|restoreparts} IMAGE DEVICE
-b, -batch, --batch (DANGEROUS!) Run program in batch mode, i.e. without any prompt or wait for pressing enter key. //NOTE// You have to use '-batch' instead of '-b' when you want to use it in the boot parameters. Otherwise the program init on system will honor '-b', too.
-q2, --use-partclone Use partclone to save partition(s) (i.e. partclone > partimage > dd).
-j2, --clone-hidden-data Use dd to clone the image of the data between MBR (1st sector, i.e. 512 bytes) and 1st partition, which might be useful for some recovery tool.
-z9p, --zstdmt-compress Compress using zstdmt when saving.
-i, --image-size SIZE Set the split image file volume size SIZE (MB). When ocs-sr is run with -x, the default SIZE is set as 0, if without -x, we will not split it.
-sfsck, --skip-fsck-src-part Skip running fsck on the source file system before saving it.
-senc, --skip-enc-ocs-img Skip encrypting the image with passphrase.
-p, --postaction [choose|poweroff|reboot|command|CMD] When save/restoration finishes, choose action in the client, poweroff, reboot (default), in command prompt or run CMD
Restore:
ocs-sr [OPTION] {savedisk|saveparts|restoredisk|restoreparts} IMAGE DEVICE
-b, -batch, --batch (DANGEROUS!) Run program in batch mode, i.e. without any prompt or wait for pressing enter key. //NOTE// You have to use '-batch' instead of '-b' when you want to use it in the boot parameters. Otherwise the program init on system will honor '-b', too.
-g, --grub-install GRUB_PARTITION Install grub in the MBR of the disk containing partition GRUB_PARTITION with root grub directory in the same GRUB_PARTITION when restoration finishes, GRUB_PARTITION can be one of "/dev/sda1", "/dev/sda2"... or "auto" ("auto" will let clonezilla detect the grub root partition automatically). If "auto" is assigned, it will work if grub partition and root partition are not in the same partition.
-e1, --change-geometry NTFS-BOOT-PARTITION Force to change the CHS (cylinders, heads, sectors) value of NTFS boot partition after image is restored. NTFS-BOOT-PARTITION can be one of "/dev/sda1", "/dev/sda2"... or "auto" ("auto" will let clonezilla detect the NTFS boot partition automatically)
-e2, --load-geometry-from-edd Force to use the CHS (cylinders, heads, sectors) from EDD (Enhanced Disk Device) when creating partition table by sfdisk
-r, --resize-partition Resize the partition when restoration finishes, this will resize the file system size to fit the partition size. It is normally used when when a small partition image is restored to a larger partition.
-j2, --clone-hidden-data Use dd to clone the image of the data between MBR (1st sector, i.e. 512 bytes) and 1st partition, which might be useful for some recovery tool. When this option is used, it only works for restoredisk mode, not the restoreparts one
-k0, Create partition table based on the partition table from the image. this is the same as as default. Just an option to let us explain the action easier.
-p, --postaction [choose|poweroff|reboot|command|CMD] When save/restoration finishes, choose action in the client, poweroff, reboot (default), in command prompt or run CMD
Depending on the boot system used by the system, we must configure one file or another. We make backups of both configuration files:
cp /mnt/aux/syslinux/syslinux.cfg /mnt/aux/syslinux/syslinux.cfg.ori
cp /mnt/aux/boot/grub/grub.cfg /mnt/aux/boot/grub/grub.cfg.ori
vi /mnt/aux/boot/grub/grub.cfg

menuentry "BackupLinuxLUKSOpened" --id BackupLinuxLUKSOpened {
  search --set -f /live/vmlinuz
  $linux_cmd /live/vmlinuz boot=live union=overlay username=user config components quiet loglevel=3 ocs_1_cpu_udev noswap edd=on nomodeset enforcing=0 noeject locales=en_US.UTF-8 keyboard-layouts=us ocs_prerun="mount UUID=7f4ae4a7-df39-4cab-a723-9fe57ec70fcf /mnt" ocs_prerun1="mount --bind /mnt /home/partimag/" ocs_live_batch="yes" ocs_live_run="ocs-sr --batch -luks yes -q2 -j2 -z9p -i 0 -fsck-y -senc -p poweroff savedisk backupImageLinuxLuksOpened sda" ocs_live_extra_param="" vga=788 net.ifnames=0 nosplash i915.blacklist=yes radeonhd.blacklist=yes nouveau.blacklist=yes vmwgfx.enable_fbdev=1 scsi_mod.use_blk_mq=0 nvme.poll_queues=1
  $initrd_cmd /live/initrd.img
}

menuentry "RestoreLinuxLUKSOpened" --id RestoreLinuxLUKSOpened {
  search --set -f /live/vmlinuz
  $linux_cmd /live/vmlinuz boot=live union=overlay username=user config components quiet loglevel=3 ocs_1_cpu_udev noswap edd=on nomodeset enforcing=0 noeject locales=en_US.UTF-8 keyboard-layouts=us ocs_prerun="mount UUID=7f4ae4a7-df39-4cab-a723-9fe57ec70fcf /mnt" ocs_prerun1="mount --bind /mnt /home/partimag/" ocs_live_batch="yes" ocs_live_run="ocs-sr --batch -g auto -e1 auto -e2 -r -j2 -k0 -p poweroff restoredisk backupImageLinuxLuksOpened sda" ocs_live_extra_param="" vga=788 net.ifnames=0 nosplash i915.blacklist=yes radeonhd.blacklist=yes nouveau.blacklist=yes vmwgfx.enable_fbdev=1 scsi_mod.use_blk_mq=0 nvme.poll_queues=1
  $initrd_cmd /live/initrd.img
}
vi /mnt/aux/boot/grub/grub.cfg

menuentry "BackupLinuxLUKSClosed" --id BackupLinuxLUKSClosed {
  search --set -f /live/vmlinuz
  $linux_cmd /live/vmlinuz boot=live union=overlay username=user config components quiet loglevel=3 ocs_1_cpu_udev noswap edd=on nomodeset enforcing=0 noeject locales=en_US.UTF-8 keyboard-layouts=us ocs_prerun="mount UUID=7f4ae4a7-df39-4cab-a723-9fe57ec70fcf /mnt" ocs_prerun1="mount --bind /mnt /home/partimag/" ocs_live_batch="yes" ocs_live_run="ocs-sr --batch -luks no -q2 -j2 -z9p -i 0 -fsck-y -senc -p poweroff savedisk backupImageLinuxLuksClosed sda" ocs_live_extra_param="" vga=788 net.ifnames=0 nosplash i915.blacklist=yes radeonhd.blacklist=yes nouveau.blacklist=yes vmwgfx.enable_fbdev=1 scsi_mod.use_blk_mq=0 nvme.poll_queues=1
  $initrd_cmd /live/initrd.img
}

menuentry "RestoreLinuxLUKSClosed" --id RestoreLinuxLUKSClosed {
  search --set -f /live/vmlinuz
  $linux_cmd /live/vmlinuz boot=live union=overlay username=user config components quiet loglevel=3 ocs_1_cpu_udev noswap edd=on nomodeset enforcing=0 noeject locales=en_US.UTF-8 keyboard-layouts=us ocs_prerun="mount UUID=7f4ae4a7-df39-4cab-a723-9fe57ec70fcf /mnt" ocs_prerun1="mount --bind /mnt /home/partimag/" ocs_live_batch="yes" ocs_live_run="ocs-sr --batch -g auto -e1 auto -e2 -r -j2 -k0 -p poweroff restoredisk backupImageLinuxLuksClosed sda" ocs_live_extra_param="" vga=788 net.ifnames=0 nosplash i915.blacklist=yes radeonhd.blacklist=yes nouveau.blacklist=yes vmwgfx.enable_fbdev=1 scsi_mod.use_blk_mq=0 nvme.poll_queues=1
  $initrd_cmd /live/initrd.img
}
vi /mnt/aux/syslinux/syslinux.cfg

label BackupFreeBSD
MENU DEFAULT
# MENU HIDE
MENU LABEL BackupFreeBSD
# MENU PASSWD
kernel /live/vmlinuz
append initrd=/live/initrd.img boot=live union=overlay username=user config components quiet noswap edd=on nomodeset enforcing=0 ocs_prerun="mount UUID=7f4ae4a7-df39-4cab-a723-9fe57ec70fcf /mnt" ocs_prerun1="mount --bind /mnt /home/partimag/" ocs_live_batch="yes" ocs_live_run="ocs-sr --batch -q2 -j2 -z9p -i 0 -sfsck -senc -p poweroff savedisk backupImageFreeBSD sda" ocs_live_extra_param="" keyboard-layouts=NONE locales=en_US.UTF-8 vga=788 ip= nosplash net.ifnames=0 splash i915.blacklist=yes radeonhd.blacklist=yes nouveau.blacklist=yes vmwgfx.enable_fbdev=1
TEXT HELP
* Backup FreeBSD system
ENDTEXT

label RestoreFreeBSD
# MENU DEFAULT
# MENU HIDE
MENU LABEL RestoreFreeBSD
# MENU PASSWD
kernel /live/vmlinuz
append initrd=/live/initrd.img boot=live union=overlay username=user config components quiet noswap edd=on nomodeset enforcing=0 ocs_prerun="mount UUID=7f4ae4a7-df39-4cab-a723-9fe57ec70fcf /mnt" ocs_prerun1="mount --bind /mnt /home/partimag/" ocs_live_batch="yes" ocs_live_run="ocs-sr --batch -g auto -e1 auto -e2 -r -j2 -k0 -p poweroff restoredisk backupImageFreeBSD sda" ocs_live_extra_param="" keyboard-layouts=NONE locales=en_US.UTF-8 vga=788 ip= nosplash net.ifnames=0 splash i915.blacklist=yes radeonhd.blacklist=yes nouveau.blacklist=yes vmwgfx.enable_fbdev=1
TEXT HELP
* Restore FreeBSD system
ENDTEXT
vi /mnt/aux/boot/grub/grub.cfg

menuentry "BackupWindoz" --id BackupWindoz {
  search --set -f /live/vmlinuz
  $linux_cmd /live/vmlinuz boot=live union=overlay username=user config components quiet loglevel=3 ocs_1_cpu_udev noswap edd=on nomodeset enforcing=0 noeject locales=en_US.UTF-8 keyboard-layouts=us ocs_prerun="mount UUID=7f4ae4a7-df39-4cab-a723-9fe57ec70fcf /mnt" ocs_prerun1="mount --bind /mnt /home/partimag/" ocs_live_batch="yes" ocs_live_run="ocs-sr --batch -q2 -j2 -z9p -i 0 -sfsck -senc -p poweroff savedisk backupImageWindoz sda" ocs_live_extra_param="" vga=788 net.ifnames=0 nosplash i915.blacklist=yes radeonhd.blacklist=yes nouveau.blacklist=yes vmwgfx.enable_fbdev=1 scsi_mod.use_blk_mq=0 nvme.poll_queues=1
  $initrd_cmd /live/initrd.img
}

menuentry "RestoreWindoz" --id RestoreWindoz {
  search --set -f /live/vmlinuz
  $linux_cmd /live/vmlinuz boot=live union=overlay username=user config components quiet loglevel=3 ocs_1_cpu_udev noswap edd=on nomodeset enforcing=0 noeject locales=en_US.UTF-8 keyboard-layouts=us ocs_prerun="mount UUID=7f4ae4a7-df39-4cab-a723-9fe57ec70fcf /mnt" ocs_prerun1="mount --bind /mnt /home/partimag/" ocs_live_batch="yes" ocs_live_run="ocs-sr --batch -g auto -e1 auto -e2 -r -j2 -k0 -p poweroff restoredisk backupImageWindoz sda" ocs_live_extra_param="" vga=788 net.ifnames=0 nosplash i915.blacklist=yes radeonhd.blacklist=yes nouveau.blacklist=yes vmwgfx.enable_fbdev=1 scsi_mod.use_blk_mq=0 nvme.poll_queues=1
  $initrd_cmd /live/initrd.img
}
NOTE: In GRUB-EFI the default entry is the first one in the list, while in SysLinux-BIOS we must specify it using the MENU DEFAULT parameter. We should remove it from Clonezilla’s default entry and assign it to the desired entry.
Unmount the partition:
umount /mnt/aux
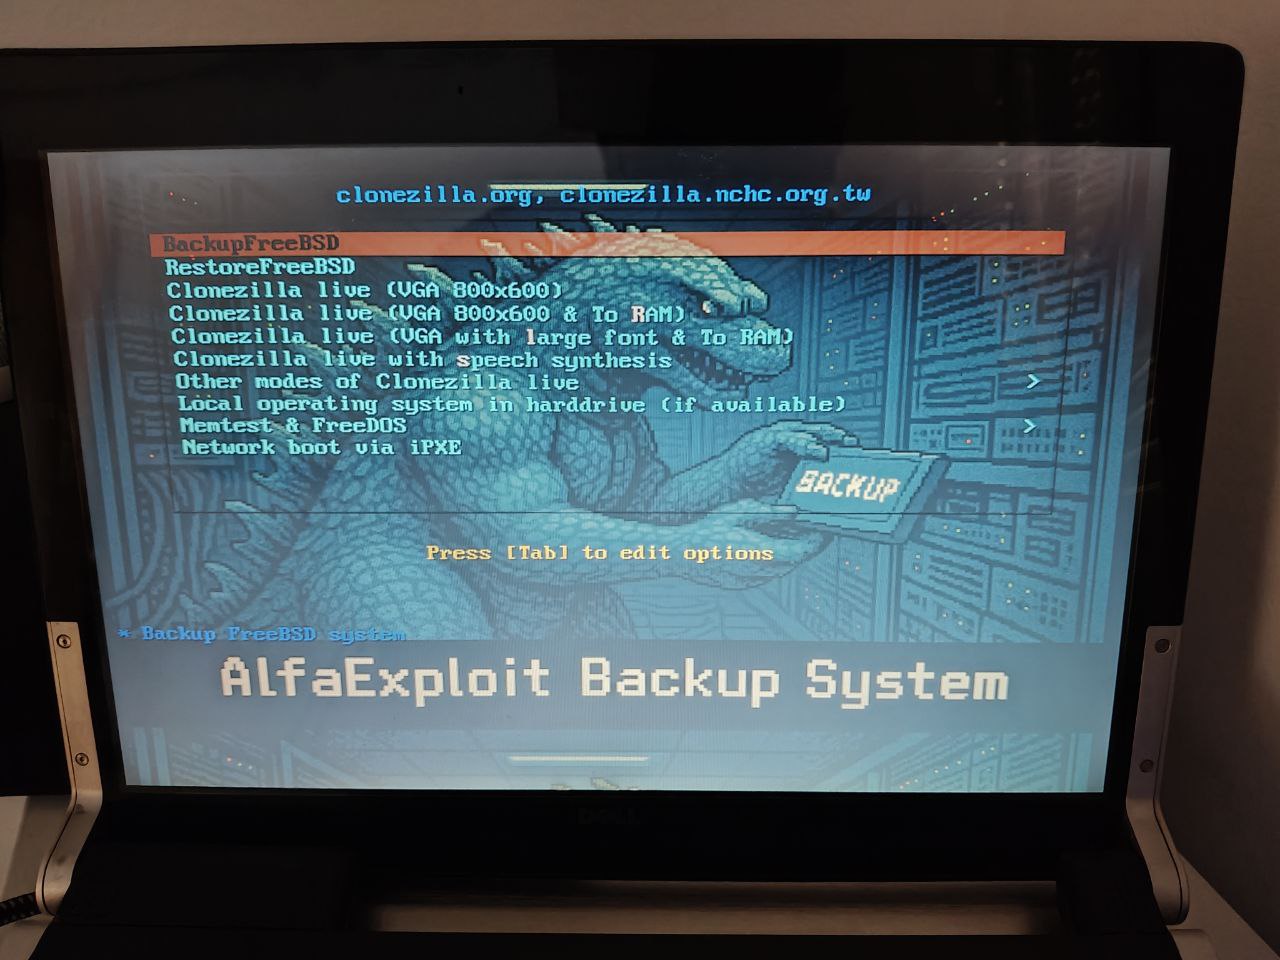
Now when booting, we should be able to see the new options for each OS:
| EFI | BIOS |
|---|---|
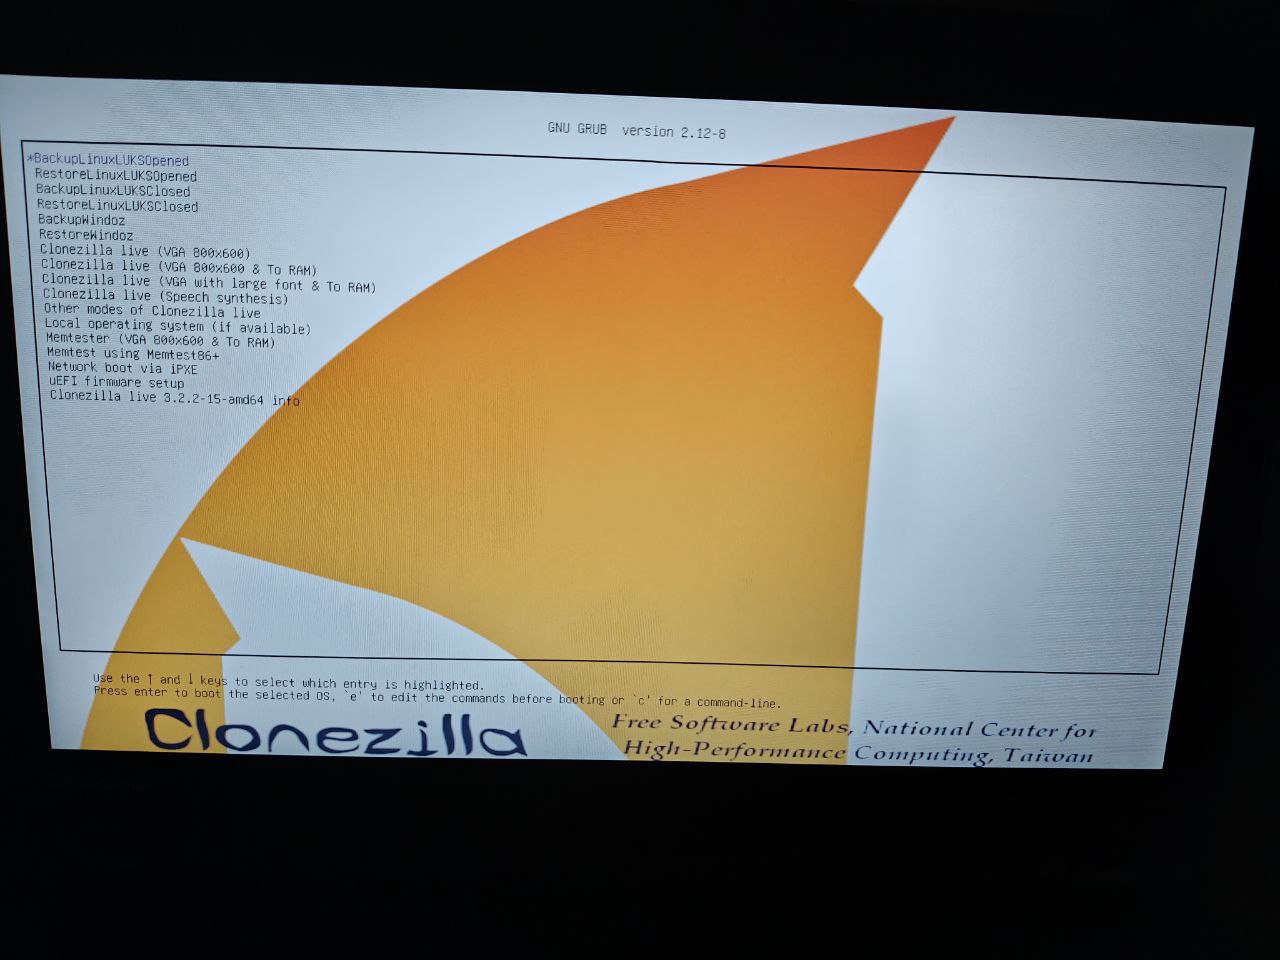
|
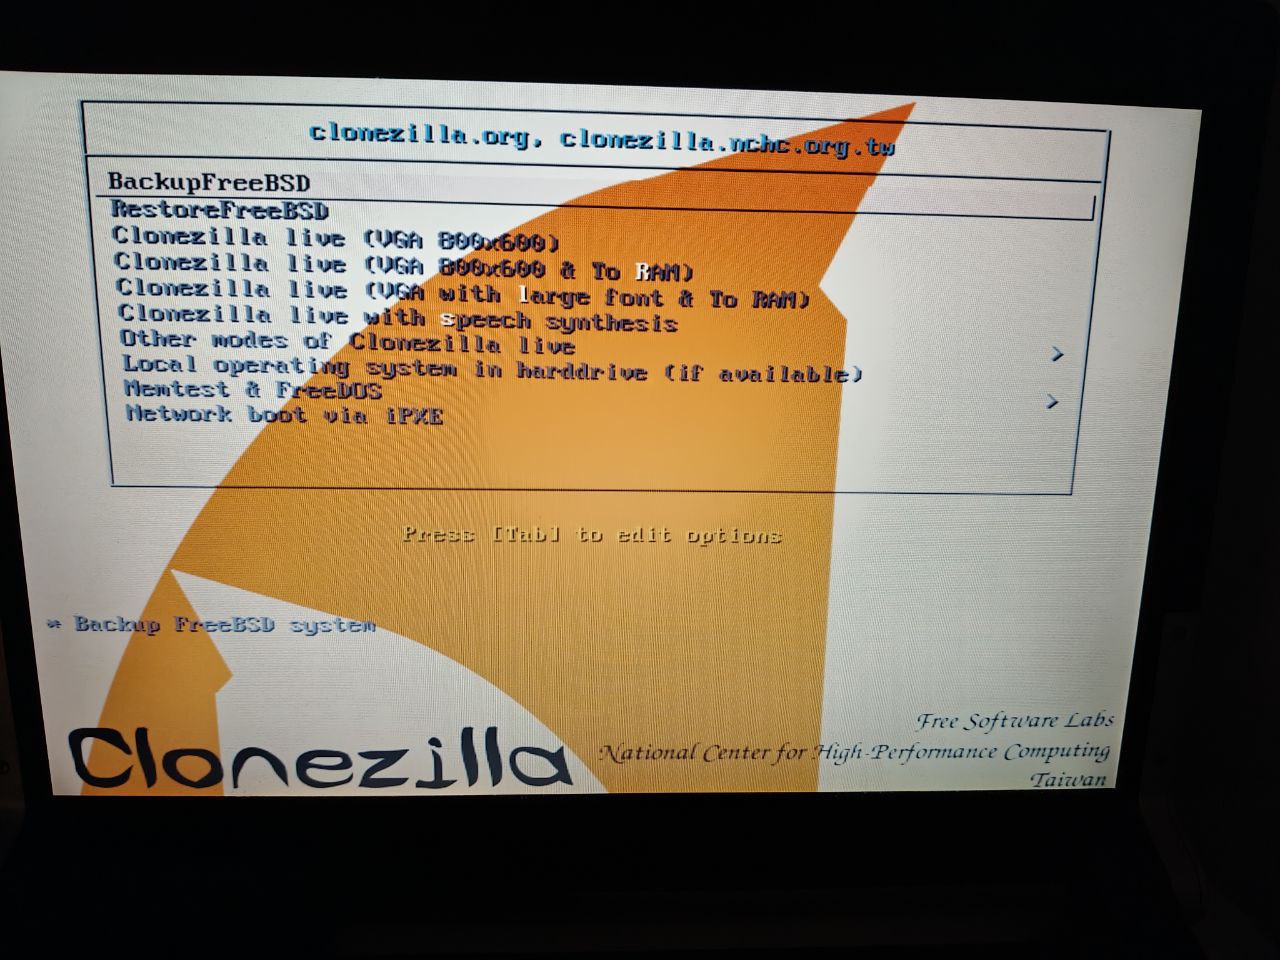
|
Here’s a sped-up video of the automatic backup execution for each system:
| Linux-EFI-LUKS-Opened | Linux-EFI-LUKS-Closed | FreeBSD-BIOS | Windoz-EFI |
|---|---|---|---|
Also of the automatic restore execution:
| Linux-EFI-LUKS-Opened | Linux-EFI-LUKS-Closed | FreeBSD-BIOS | Windoz-EFI |
|---|---|---|---|
Customization:
Bootloader Image:
Mount the partition where Clonezilla is installed to edit the GRUB/SysLinux configuration:
mkdir /mnt/aux 2>/dev/null
mount /dev/sdX1 /mnt/aux
Generate an image for each boot system, based on existing ones to make them as similar as possible:
convert /home/kr0m/clonezillaMenu.png -resize $(identify -format "%wx%h" /mnt/aux/boot/grub/ocswp-grub2.png) -quality $(identify -format "%Q" /mnt/aux/boot/grub/ocswp-grub2.png) /mnt/aux/boot/grub/CUSTOM_IMAGE.png
convert /home/kr0m/clonezillaMenu.png -resize $(identify -format "%wx%h" /mnt/aux/syslinux/ocswp.png) -quality $(identify -format "%Q" /mnt/aux/syslinux/ocswp.png) /mnt/aux/syslinux/CUSTOM_IMAGE.png
Configure GRUB for EFI systems or SysLinux for BIOS systems, changing the image and color scheme for a “cooler” look:
vi /mnt/aux/boot/grub/grub.cfg

if background_image $pref/CUSTOM_IMAGE.png; then
set color_normal=cyan/black
set color_highlight=magenta/black
else
set color_normal=cyan/blue
set color_highlight=white/blue
fi
vi /mnt/aux/syslinux/syslinux.cfg

MENU BACKGROUND CUSTOM_IMAGE.png
# Set the color for unselected menu item and timeout message
MENU COLOR UNSEL 7;32;41 #f904e9ff #00000000
MENU COLOR TIMEOUT_MSG 7;32;41 #c0000090 #00000000
MENU COLOR TIMEOUT 7;32;41 #c0000090 #00000000
MENU COLOR HELP 7;32;41 #c0000090 #00000000
Unmount the partition:
umount /mnt/aux
The final result is as follows:
| EFI | BIOS |
|---|---|
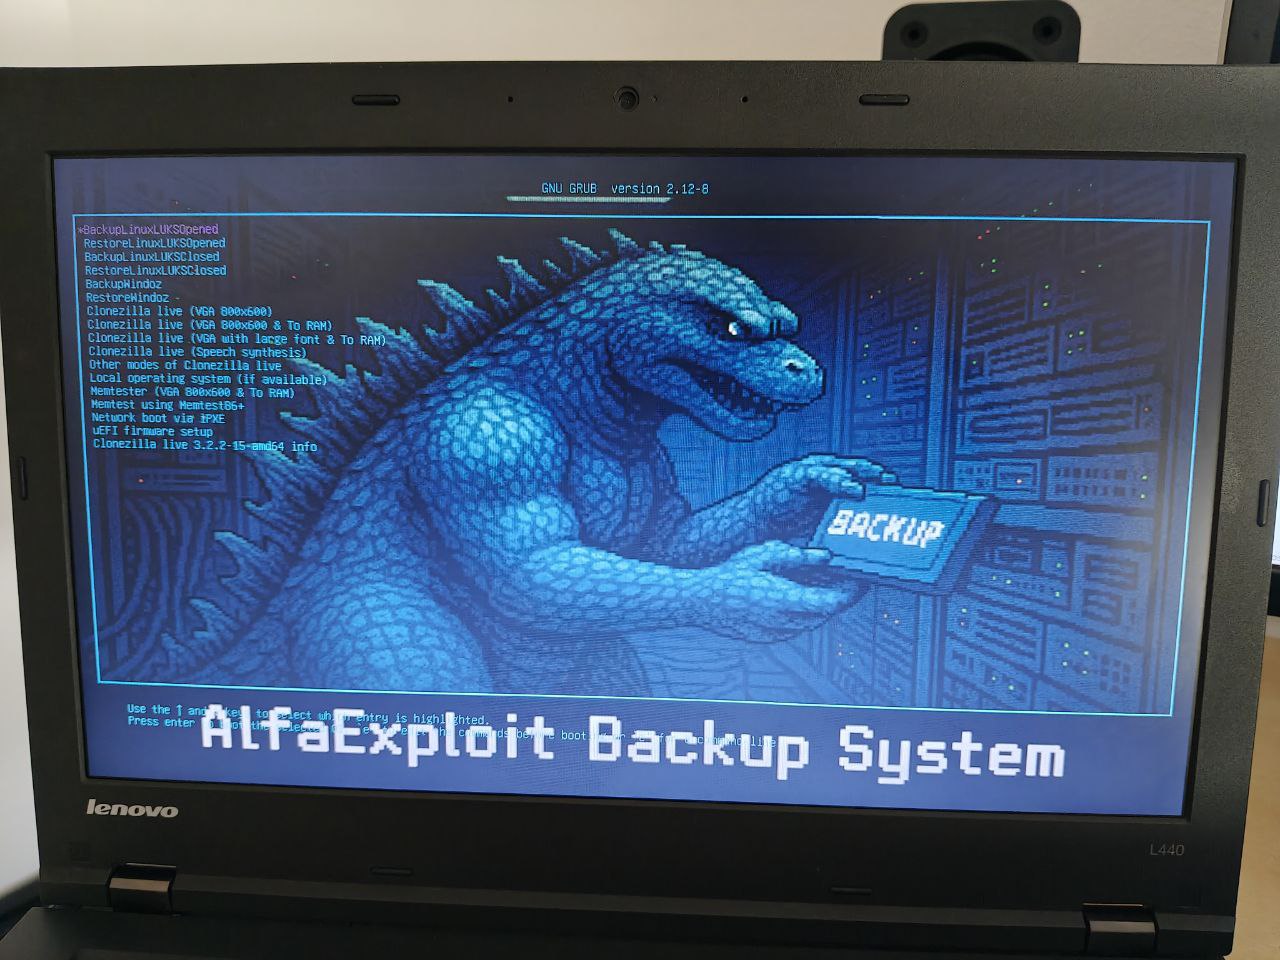
|
|
Lock Bootloader Entry Editing:
Mount the partition where Clonezilla is installed to edit the GRUB/SysLinux configuration:
mkdir /mnt/aux 2>/dev/null
mount /dev/sdX1 /mnt/aux
Configure GRUB for EFI systems or SysLinux for BIOS systems:
Generate the password hash for protecting edits:
grub-mkpasswd-pbkdf2 -> PBKDF2 hash of your password is grub.pbkdf2.sha512.10000.6369BC323B8D47700F030B95E6925711767A2FFBA42A15ECDA70F526FD168D26DCB10F678659C16BD35DF0755B0BBDD85C5BE6431B3FA096EF458483EAADBF8D.C6A72EB74DE77029677F2DDF159DCA09729B47B58D3A2089189AA4F7D77585AC304A1EB0C7DA5B91BF569C5F4D6915F65EEFF315A461D8FCE5BBE8D86E75251B

vi /mnt/aux/boot/grub/grub.cfg
# Add at the beginning of the file, after the first set commands:
set superusers="root"
password_pbkdf2 root grub.pbkdf2.sha512.10000.6369BC323B8D47700F030B95E6925711767A2FFBA42A15ECDA70F526FD168D26DCB10F678659C16BD35DF0755B0BBDD85C5BE6431B3FA096EF458483EAADBF8D.C6A72EB74DE77029677F2DDF159DCA09729B47B58D3A2089189AA4F7D77585AC304A1EB0C7DA5B91BF569C5F4D6915F65EEFF315A461D8FCE5BBE8D86E75251B

This will require a password for both editing and booting entries. If you want to allow booting without a password but still require it for editing, add `--unrestricted` to those entries:
menuentry "ENTRY_NAME" --unrestricted --id ENTRY_ID {
Generate the password hash for protecting edits:
openssl passwd -1 "PASSWORD" -> $1$4FDprPSy$HjmXr.TBbS8MVbGp.oFT/1

vi /mnt/aux/syslinux/syslinux.cfg
# Add at the beginning of the file, before menu entries:
MENU MASTER PASSWD $1$4FDprPSy$HjmXr.TBbS8MVbGp.oFT/1

This will only require a password for editing entries. To require a password for booting as well, add `MENU PASSWD` to those entries:
MENU PASSWD
Unmount the partition:
umount /mnt/aux
When attempting to edit entries, it will prompt for the password:
| EFI(user/pass) | BIOS(pass) |
|---|---|

|

|
HD vs SSD:
Below is a comparative table of backup/restore times for Linux/FreeBSD systems on a mechanical HD and an SSD.
NOTE: I couldn’t test this with Windows as the test machine was borrowed and no longer available.
| Operation | HD | SSD |
|---|---|---|
| Backup: Linux-EFI+encryption(unlocked) | 8m | 7m |
| Restore: Linux-EFI+encryption(unlocked) | 8m | 8m |
| Backup: Linux-EFI+encryption(locked) | 11m | 10m |
| Restore: Linux-EFI+encryption(locked) | 11m | 11m |
| Backup: FreeBSD-BIOS | 5h30m | 5h |
| Restore: FreeBSD-BIOS | 5h30m | 5h |
As we can see, there isn’t a significant difference, likely because the USB port is creating a bottleneck.
Troubleshooting:
MBR and GPT Detected Simultaneously:
If partitions are manipulated, it’s possible for the Windows backup to detect both an MBR and GPT partition:

It suggests two options that can be executed from the Clonezilla shell:
- For
BIOSsystems, destroy theGPTpartition:
sgdisk -z /dev/sdX
- For
EFIsystems, destroy theMBRpartition:
dd if=/dev/zero of=/dev/sdX bs=512 count=1
NOTE: Be very careful with these operations as they can easily render the system unusable.
Log Saving:
Always saving logs can be problematic as they accumulate in the partition where Clonezilla is installed:
drwxr-xr-x   2 kr0m kr0m  4096 May 29 18:27 ocslog-20250529-1827
drwxr-xr-x   2 kr0m kr0m  4096 May 29 18:18 ocslog-20250529-1939
drwxr-xr-x   2 kr0m kr0m  4096 May 29 18:20 ocslog-20250529-2005
drwxr-xr-x   2 kr0m kr0m  4096 May 29 20:09 ocslog-20250529-2010
drwxr-xr-x   2 kr0m kr0m  4096 May 29 22:58 ocslog-20250529-2258