Awx is the free equivalent of Ansible Tower, it is the latest version of Tower (unstable), although it should be noted that in the tests carried out it has worked without any problem. With AWX we will have various functionalities such as being able to delegate certain administrative tasks, access to playbook execution reports, schedule tasks, create workflows and automate tasks through its API.
The main features of awx are:
- Delegation: AWX allows us to create users, groups and teams. Access to inventories, credentials and playbooks can be filtered, allowing inexperienced users to execute complex automation tasks. A developer is able to set up the development servers he needs himself with just one click.
- Playbook execution reports: AWX allows us to view playbook executions on the dashboard, thus seeing if any playbook failed, when they were executed and by whom they were executed. We can see in one click why the execution failed on a specific host.
- Schedule tasks: Tasks can be scheduled to execute certain actions such as template execution and git repository pulls. Tasks can even be scheduled for a specific future date, allowing us to go on vacation and continue deploying servers in our absence without human intervention.
- Workflows: Templates allow us to chain the execution of playbooks, repository pulls and notifications through the workflow editor.
- Task automation through API: The entire system works based on the REST API, the web interface actually makes calls to this API, having the API can allow us to integrate tasks into scripts, third-party websites and more.
The easiest way to deploy AWX is through Docker, and this guide will explain how to do it for both Gentoo and Ubuntu:
-
Gentoo:
emerge -av app-emulation/docker app-admin/ansible dev-python/pip
/etc/init.d/docker start
rc-update add docker default
pip install docker --user -
Ubuntu:
apt install docker.io git ansible python-pip -y
pip uninstall -y docker docker-py
pip install docker
We clone the project’s repositories:
The entire service installation is based on Docker, and the Docker containers are installed using an Ansible playbook:
vi inventory
dockerhub_base=ansible
dockerhub_version=latest
awx_official=true
postgres_data_dir=/var/lib/pgdocker
docker_compose_dir=/var/lib/awxcompose
We run the playbook:
We can see the Docker containers:
CONTAINER ID IMAGE COMMAND CREATED STATUS PORTS NAMES
docker ps
CONTAINER ID        IMAGE                        COMMAND                  CREATED             STATUS              PORTS                                                 NAMES
b2070d0b4bed        ansible/awx_task:latest      "/tini -- /bin/sh -c…"   6 seconds ago       Up 6 seconds        8052/tcp                                              awx_task
0bcc0f360861        ansible/awx_web:latest       "/tini -- /bin/sh -c…"   8 seconds ago       Up 6 seconds        0.0.0.0:80->8052/tcp                                  awx_web
27e3ad73bc76        postgres:9.6                 "docker-entrypoint.s…"   12 seconds ago      Up 9 seconds        5432/tcp                                              awx_postgres
acbdeb1d0cc4        ansible/awx_rabbitmq:3.7.4   "docker-entrypoint.s…"   12 seconds ago      Up 9 seconds        4369/tcp, 5671-5672/tcp, 15671-15672/tcp, 25672/tcp   awx_rabbitmq
723a9595b52d        memcached:alpine             "docker-entrypoint.s…"   12 seconds ago      Up 10 seconds       11211/tcp                                             awx_memcached
We access the web interface with the default credentials admin/password:
http://ansible-awx.alfaexploit.com
admin
password
NOTE: The first thing we should do is change the admin password.
Once we have changed the admin password, we create an organization. Each organization can be understood as a company, client, or location:

Now we create a new inventory indicating the created organization, and we also add some hosts:
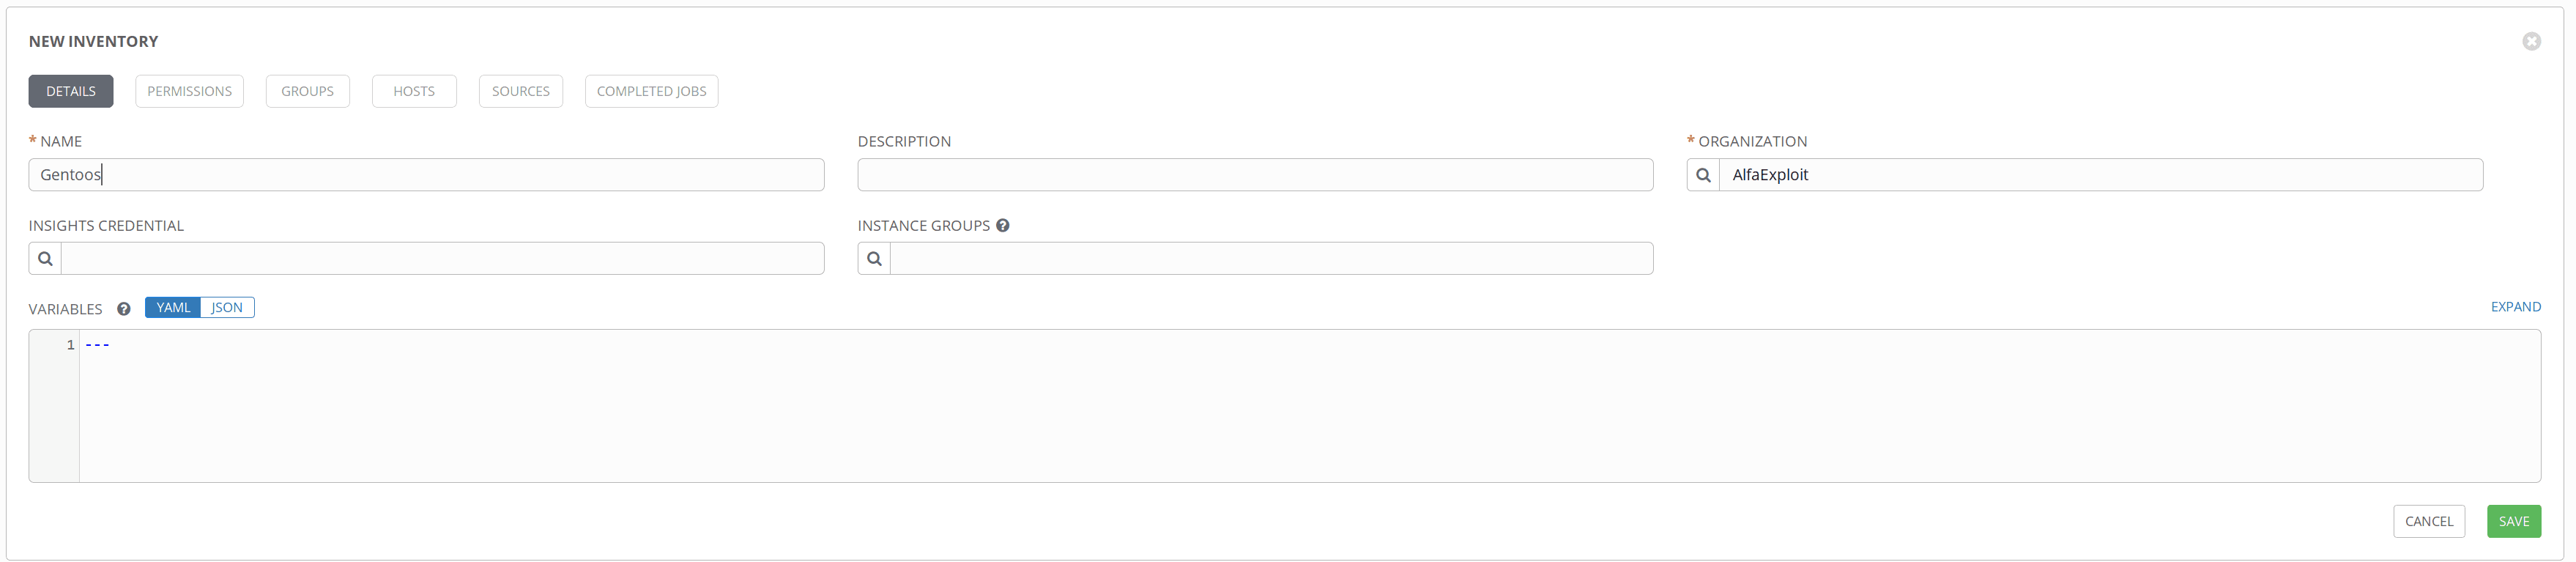
We add the hosts in the hosts tab:

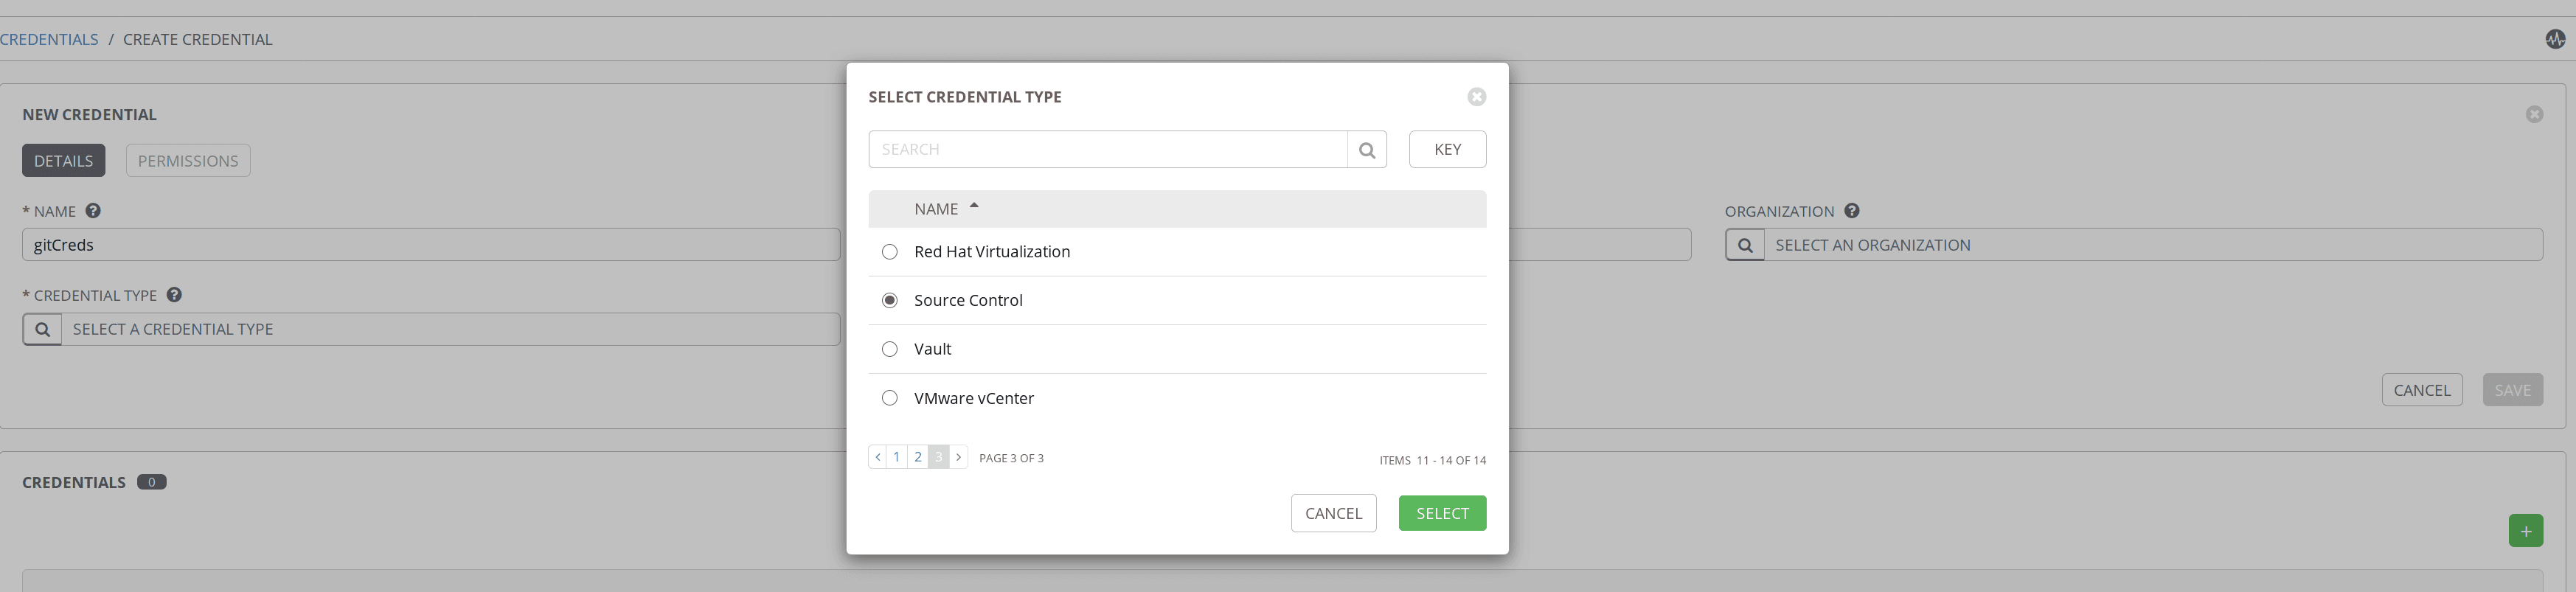
In my case, the playbooks are in a git repository. To be able to access them, we must create access credentials:
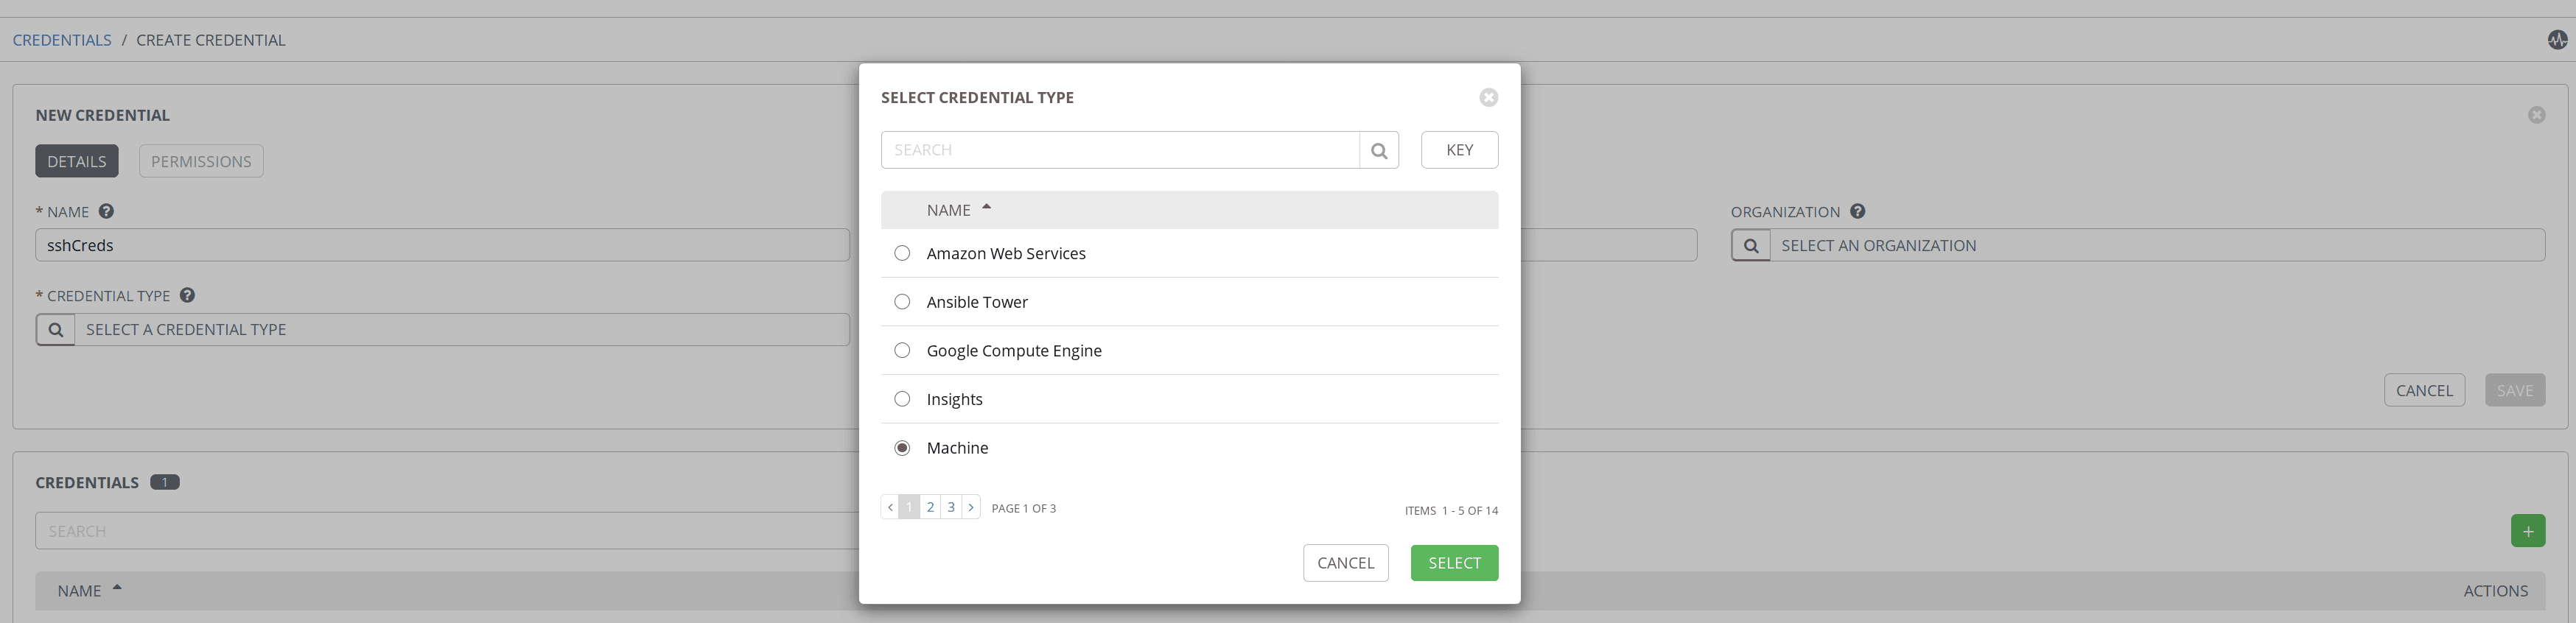
To access the hosts via ssh, we must also create credentials:
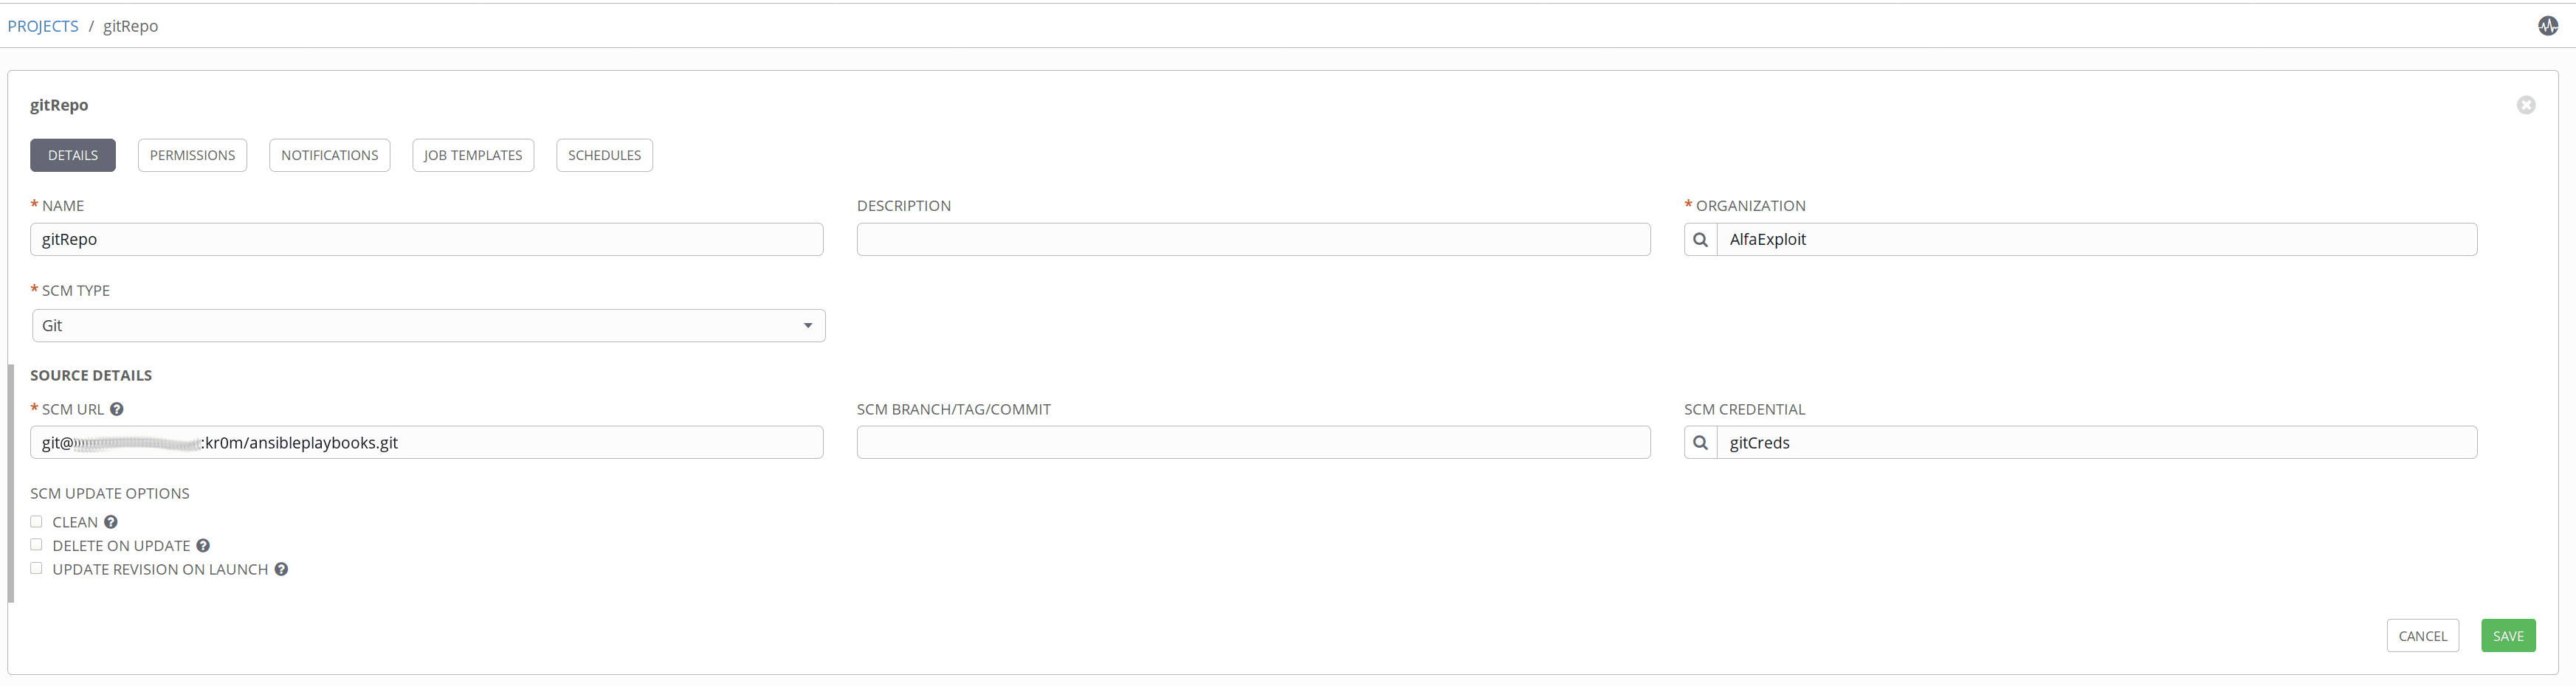
We create the repository indicating that it uses the previously configured credentials:
Now we are ready to create our first job template that will execute the baseGentoo.yml playbook.
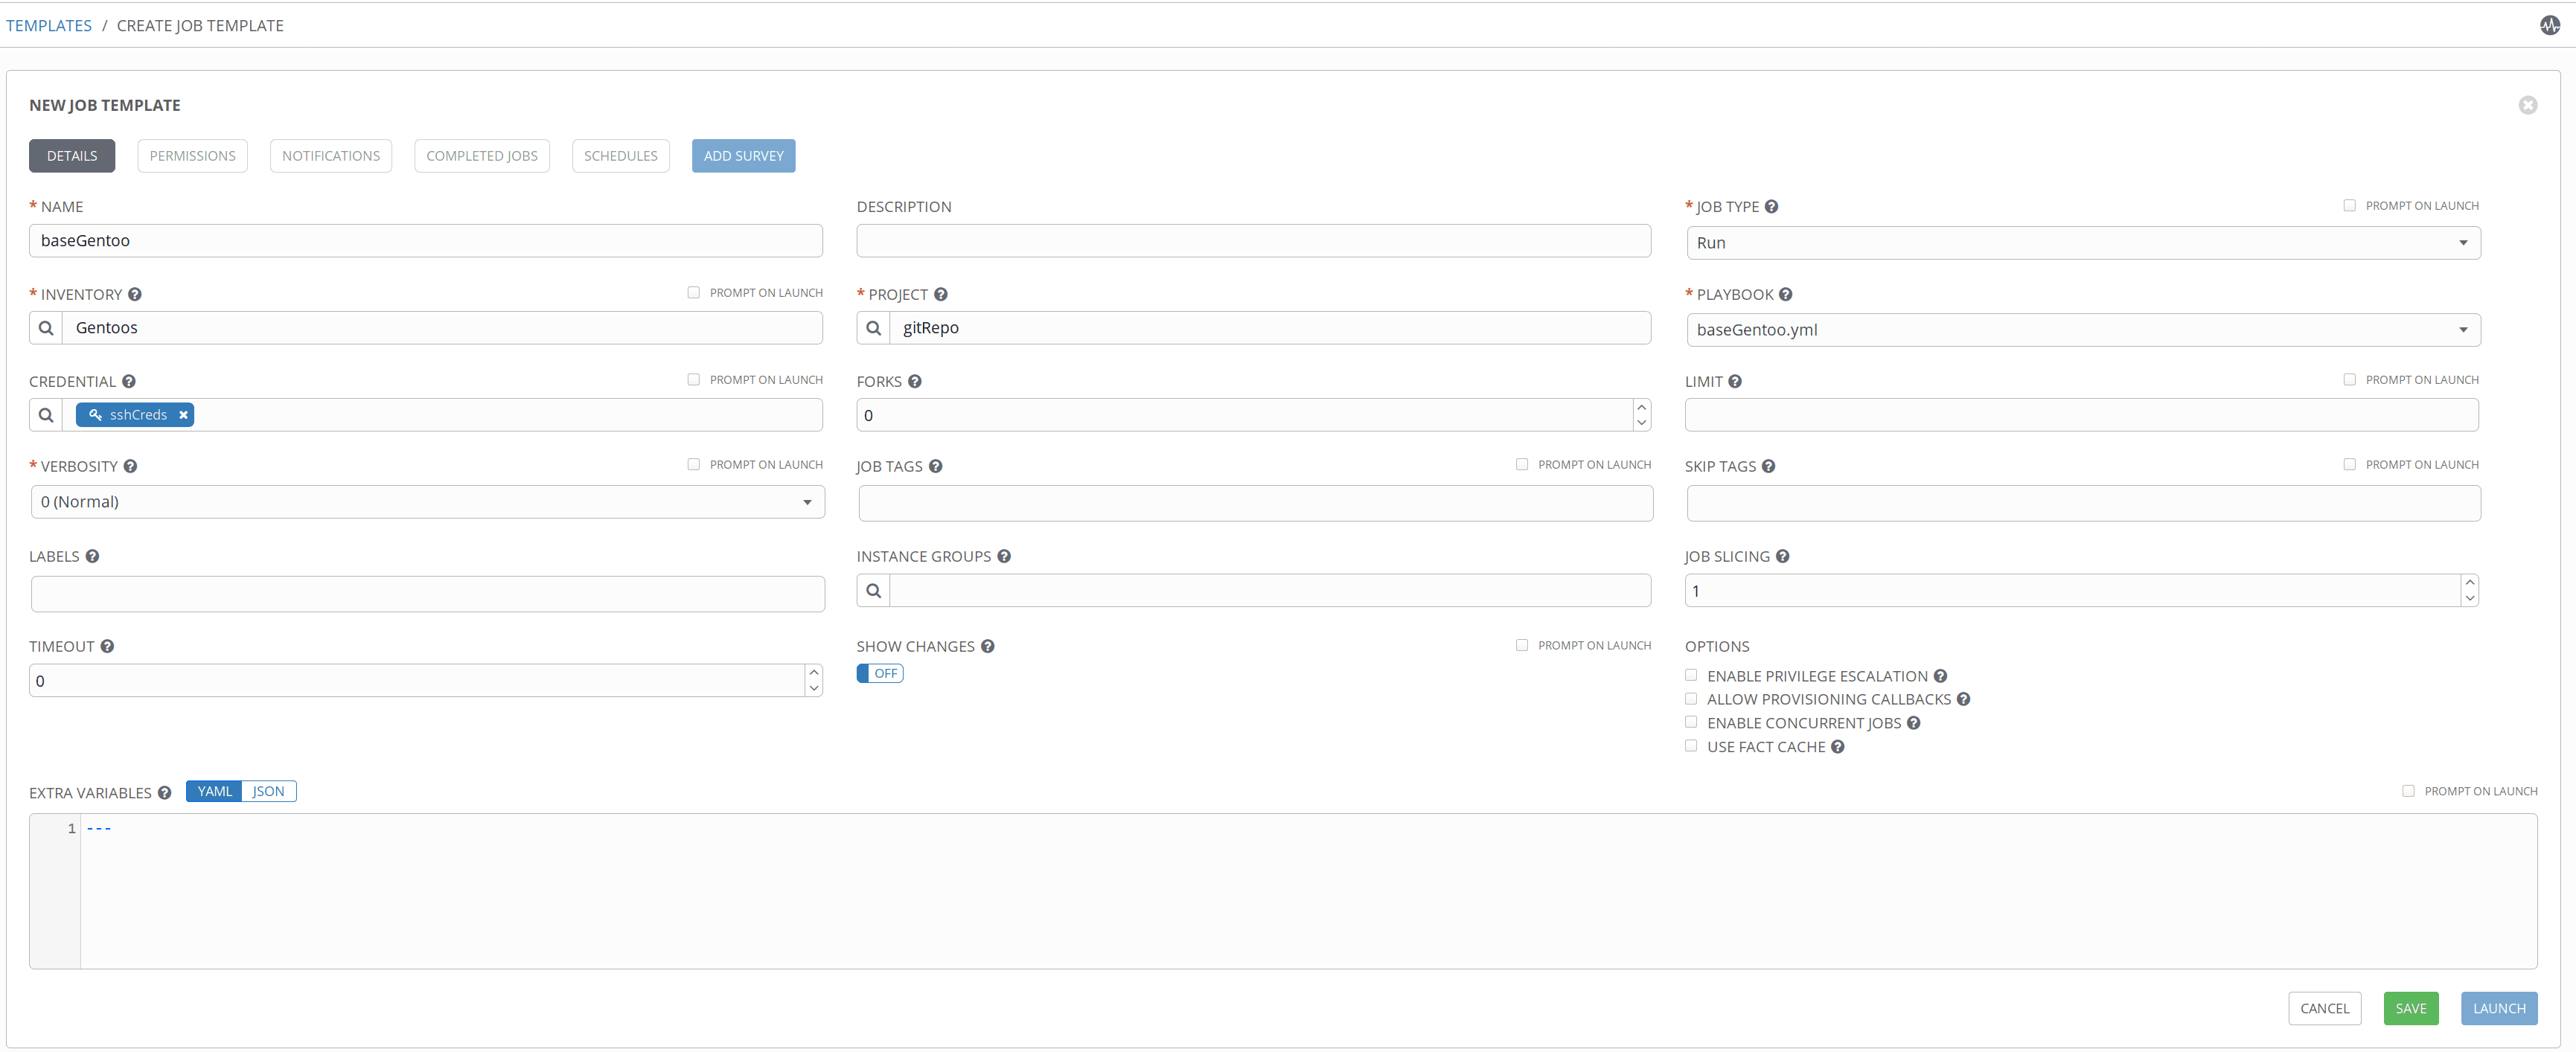
To execute the template, we must click on the rocket icon:

A very interesting feature of AWX is that we can schedule the execution of templates, for example, in this case, we schedule the execution of the Gentoo system update:
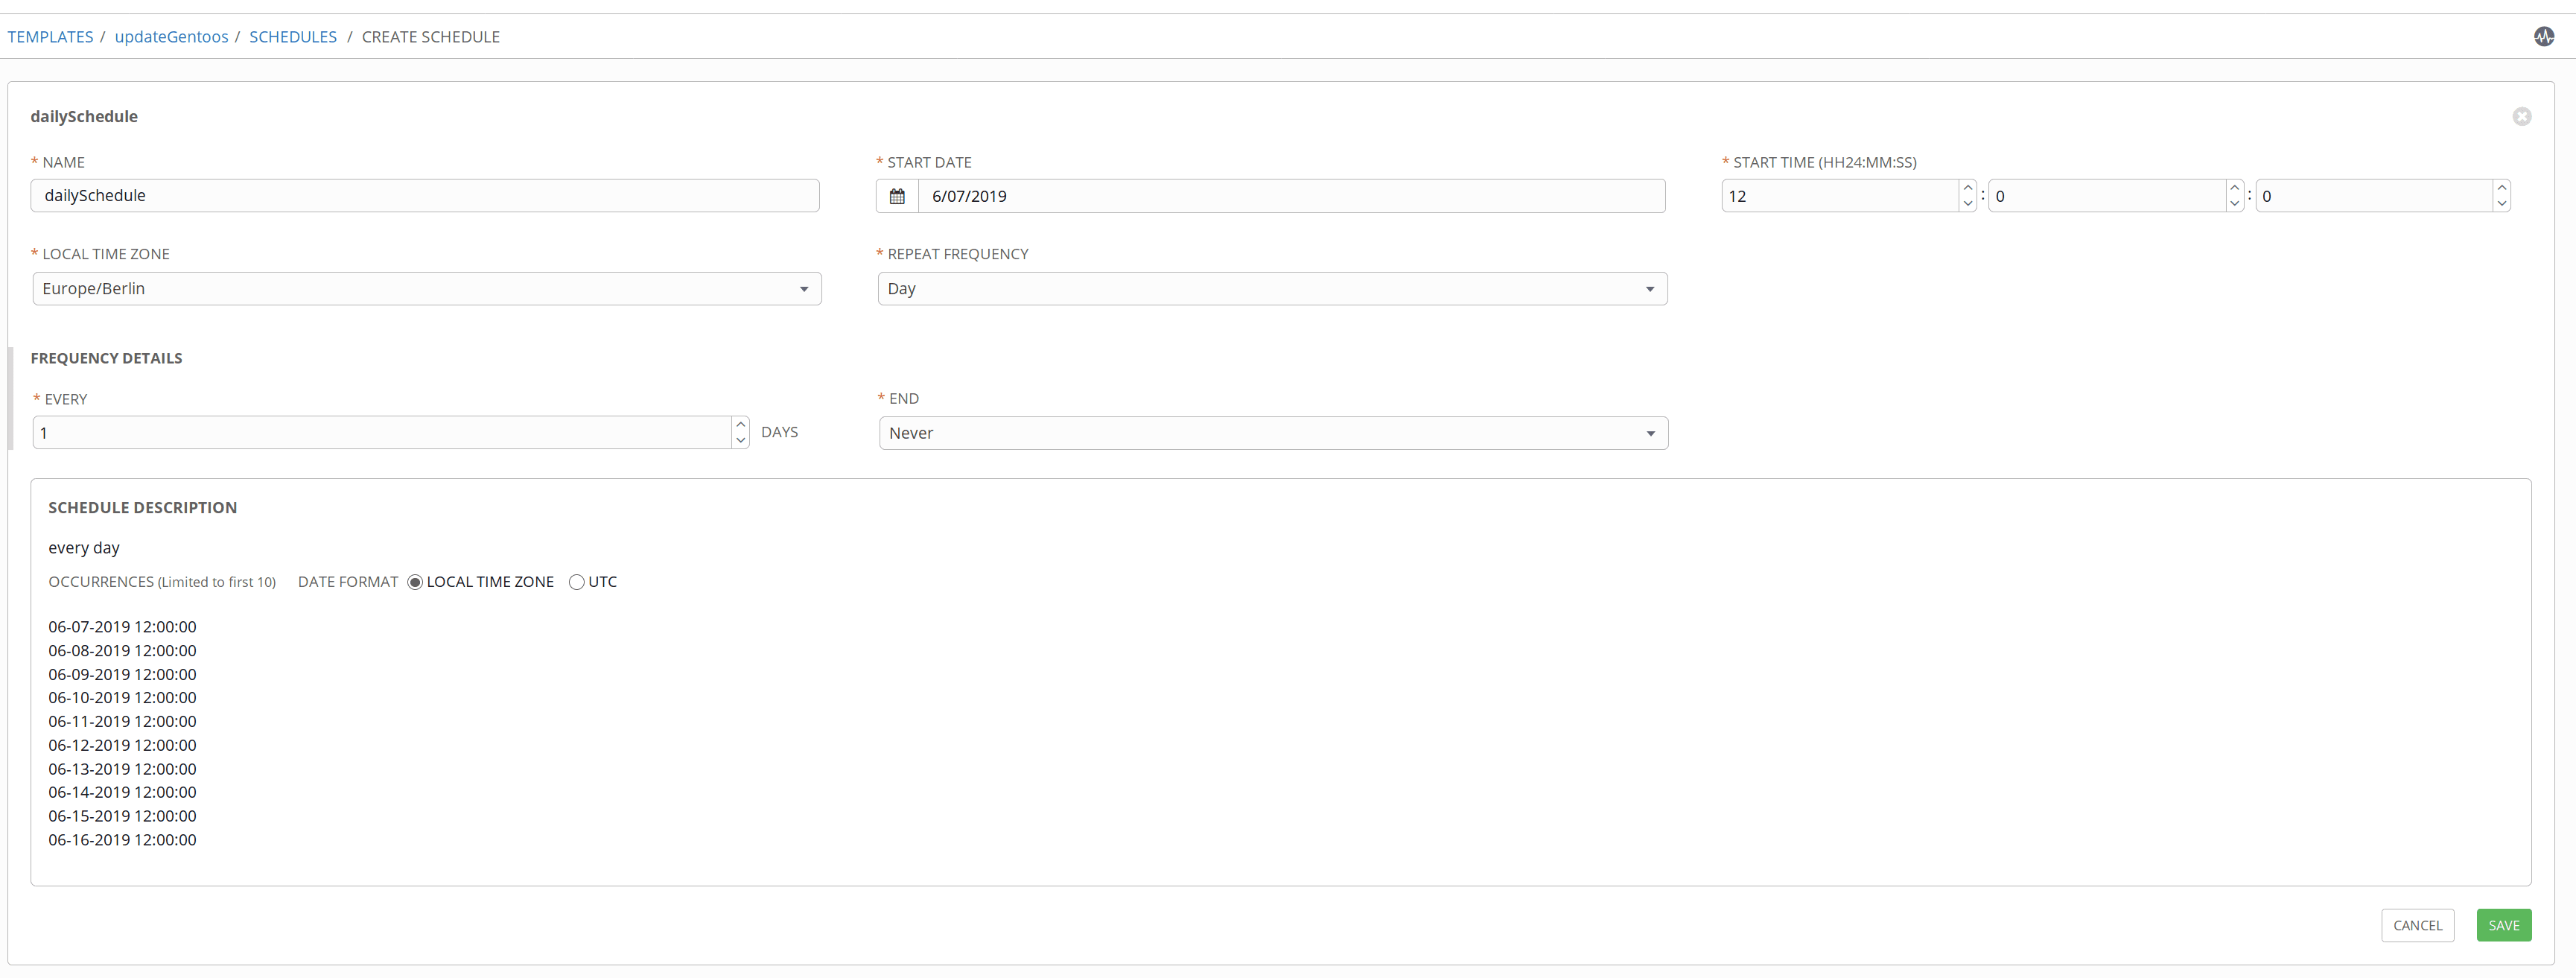

In the following screenshot, we can see the default schedules plus ours:

NOTE: Schedules can be used to execute playbooks, pull git repo, or even perform administrative tasks.
AWX allows us to be notified when a playbook is executed, either when it finishes successfully or when it fails.
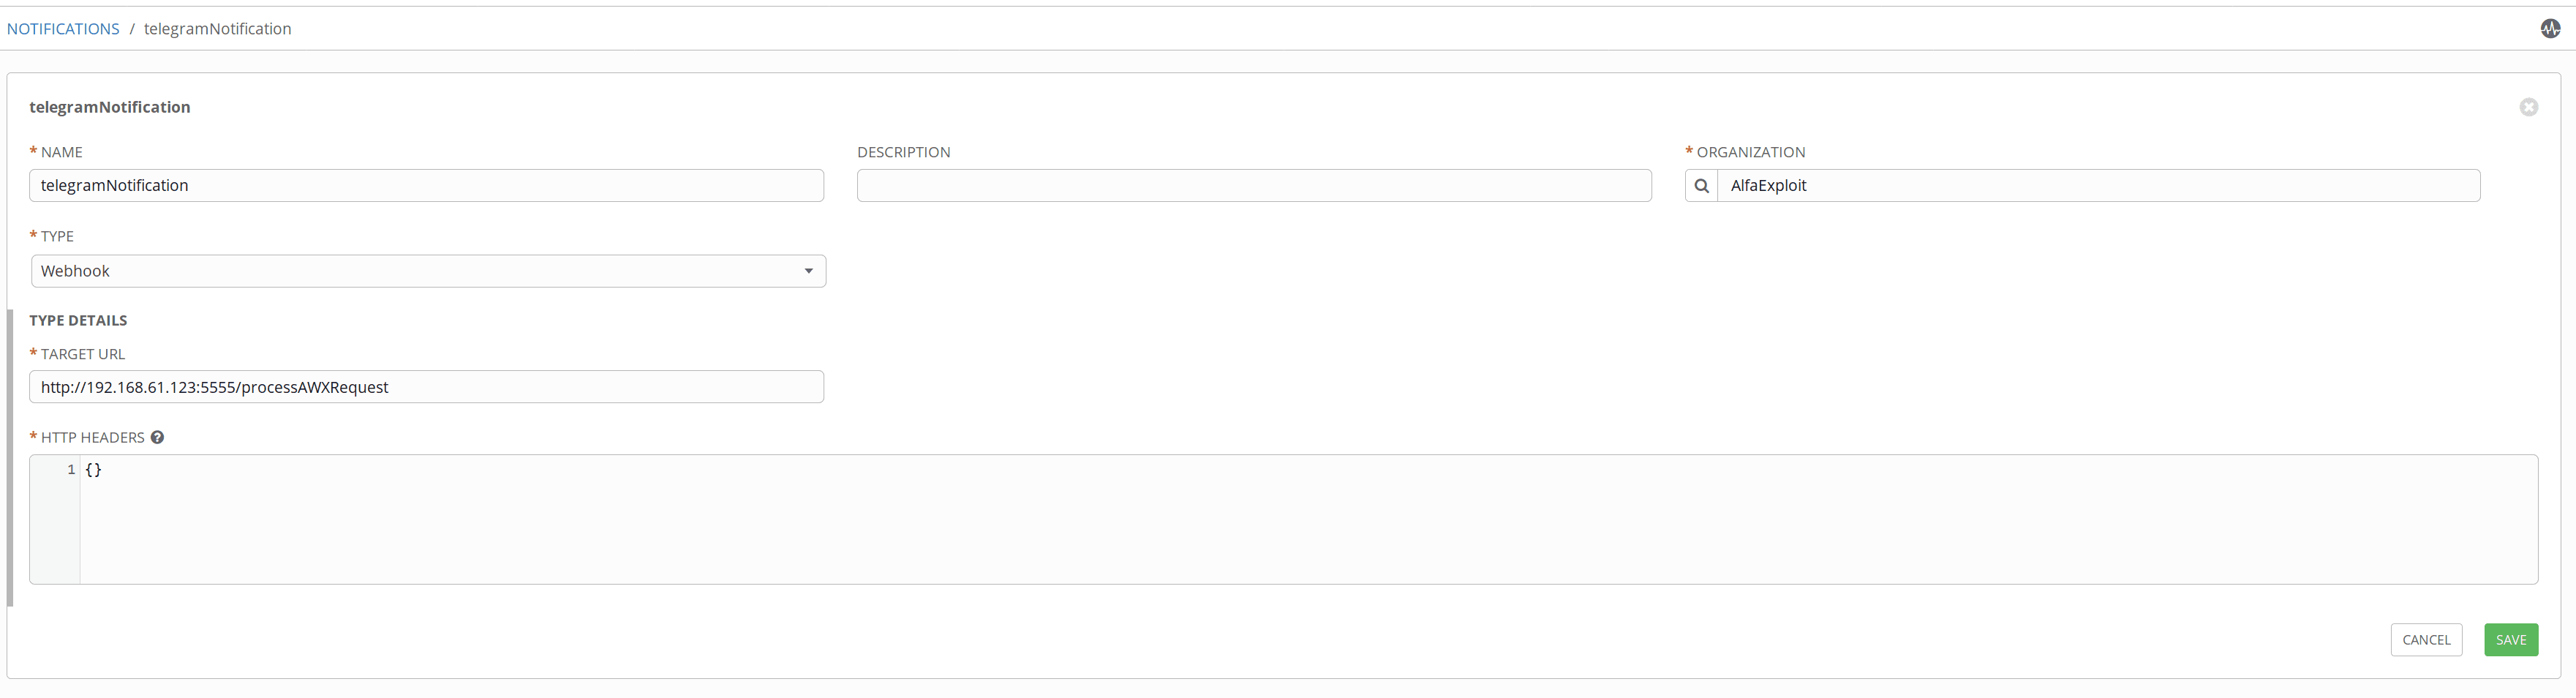
To test the notifications, we will create a small web API that will notify us via Telegram:
#!/bin/python

from apiAWX import Server

if __name__ == '__main__':
    Server().start()
#!/bin/python
from BaseHTTPServer import BaseHTTPRequestHandler
from BaseHTTPServer import HTTPServer
from SocketServer import ThreadingMixIn
import simplejson
import threading
import requests
import sys

def sendTelegram(msg):
    apiKey = "XXXXXXXXXXXXXXXXXXXXXXXXXXXXXXXX"
    url = "https://api.telegram.org/bot{}/sendMessage".format(apiKey)
    #print msg

    userId = "YYYYYYYYYYYYYY"
    data = {"chat_id":userId,"text":msg}
    r = requests.post(url,json=data)
    #print r

def processAWXRequest(requestObject):
    #print type(requestObject)
    contentLength = int(requestObject.headers.getheader('content-length', 0))
    data = requestObject.rfile.read(contentLength)
    data = simplejson.loads(data)
    #print type(data)
    #print data

    if 'body' in data and data['body'] == 'Ansible Tower Test Notification 1 https://towerhost':
        msg = 'AWX test message detected'
    else:
        playbookStart = data['started']
        playbookFinish = data['finished']
        playbookAffectedHosts = str(data['hosts'].keys())
        playbookStatus = data['status']
        playbookName = data['name']

        #print playbookStart
        #print playbookName
        #print playbookAffectedHosts
        #print playbookStatus
        #print playbookFinish
        msg = playbookStart + '\nPlaybook: ' + playbookName + '\nAffected Hosts: ' + playbookAffectedHosts + '\nStatus: ' + playbookStatus + '\n' + playbookFinish

    sendTelegram(msg)
    requestObject.send_response(200)

def handler_404(self):
    self.send_response(404)

# Routes array
ROUTES = {
    ('GET', "/"): lambda self: self.wfile.write("AWX-API by kr0m"),
    ('POST', "/processAWXRequest"): (processAWXRequest),
}

# Class handling GET/POST requests
class Handler(BaseHTTPRequestHandler):
    # Send request GET to function defined in ROUTES array
    def do_GET(self):
        ROUTES.get(('GET', self.path), handler_404)(self)

    # Send request POST to function defined in ROUTES array
    def do_POST(self):
        ROUTES.get(('POST', self.path), handler_404)(self)

class MultiThreadedHTTPServer(ThreadingMixIn, HTTPServer):
    pass

class Server(threading.Thread):
    def run(self):
        httpd = MultiThreadedHTTPServer(('', 5555), Handler)
        httpd.serve_forever()
We can verify that the notifications work by testing the notification bell.

To make our API start on Gentoo boot:
su kr0m -c "nohup python /home/kr0m/awxWebhook/main.py &"
NOTE: In Ubuntu, it would be creating a systemd unit.
We manually start the API using the local.d script:
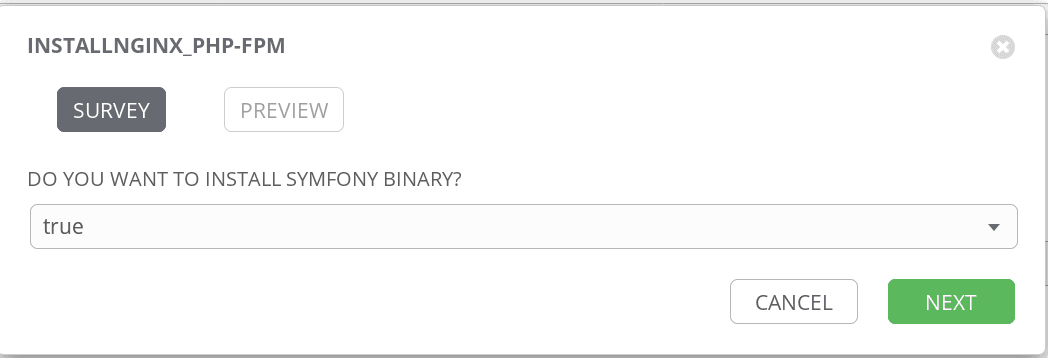
Another very interesting feature, especially if the team of developers will execute our playbooks, is surveys. These will allow them to deploy teams with specific parameters for their project, such as the name of the user who will deploy the code, the docRoot of the project, etc.
An example of a survey could be if you want to install the Symfony binary:
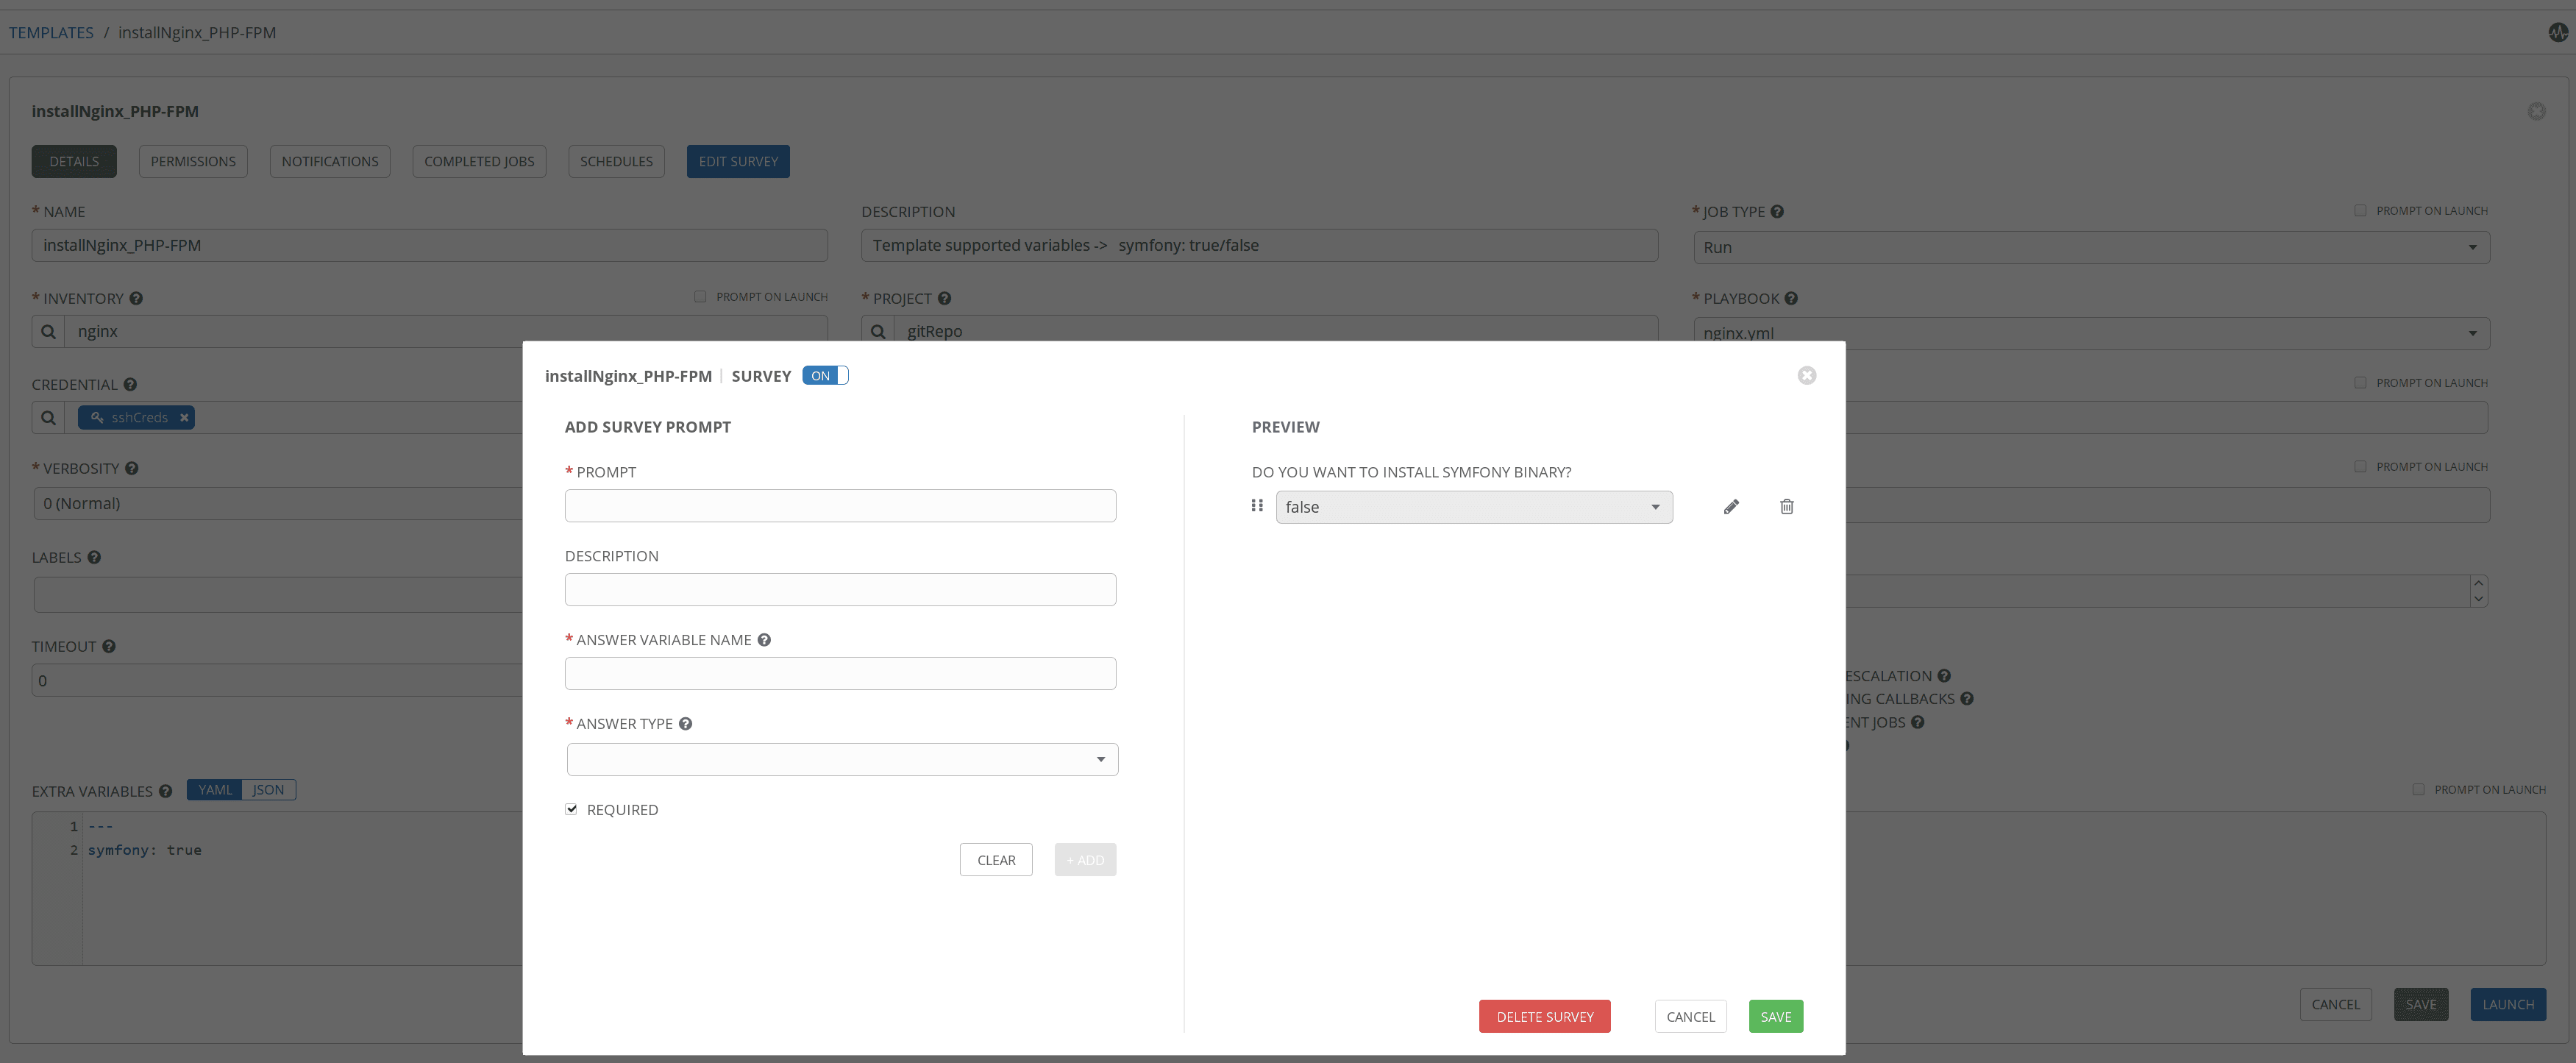
When running the playbook, a form will appear to fill in the survey data:
Another aspect to highlight about AWX is the ability to obtain lists of hosts based on queries about host data. To do this, instead of creating inventories, we will create smart inventories. Several filters can be used for this purpose:
exact: Exact match (default lookup if not specified).
iexact: Case-insensitive version of exact.
contains: Field contains value.
icontains: Case-insensitive version of contains.
startswith: Field starts with value.
istartswith: Case-insensitive version of startswith.
endswith: Field ends with value.
iendswith: Case-insensitive version of endswith.
regex: Field matches the given regular expression.
iregex: Case-insensitive version of regex.
gt: Greater than comparison.
gte: Greater than or equal to comparison.
lt: Less than comparison.
lte: Less than or equal to comparison.
isnull: Check whether the given field or related object is null; expects a boolean value.
in: Check whether the given field’s value is present in the list provided; expects a list of items.
Boolean values may be specified as True or 1 for true, False or 0 for false (both case-insensitive).
My favorite is through regular expressions, for example, to get all hosts whose name starts with test would be:
name.regex:^test.*
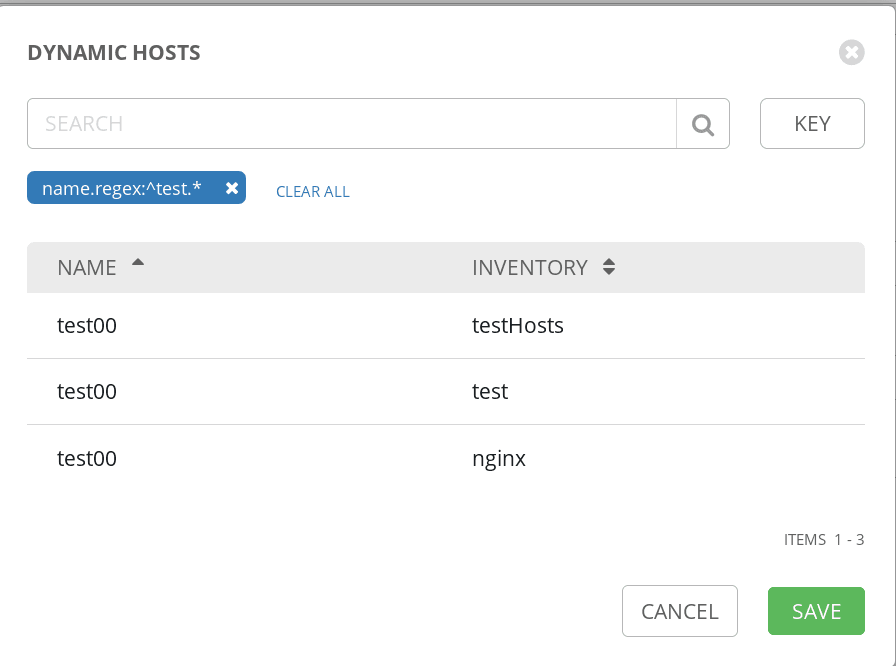
We can see the new smart inventory in the list of smart inventories:

NOTE: In my opinion, the best strategy is to create inventory lists based on COMPANY-TECH-PROJECT and name the servers in the same way to later create smart inventories more easily.
The process of uploading playbooks to production usually involves programming/testing locally. When the code is mature enough, it is uploaded to the repository, and finally, developers run the playbooks through AWX.
To be able to test the playbooks locally without uploading them to the repo, we can assign values to the variables that AWX would assign but from the cli:
All the functionalities of Ansible work by generating some Python files that will be copied via ssh to the server to be subsequently executed on it, and then they are deleted from the Ansible server.
If we need to debug these files, we can enable the ANSIBLE_KEEP_REMOTE_FILES option to keep them.
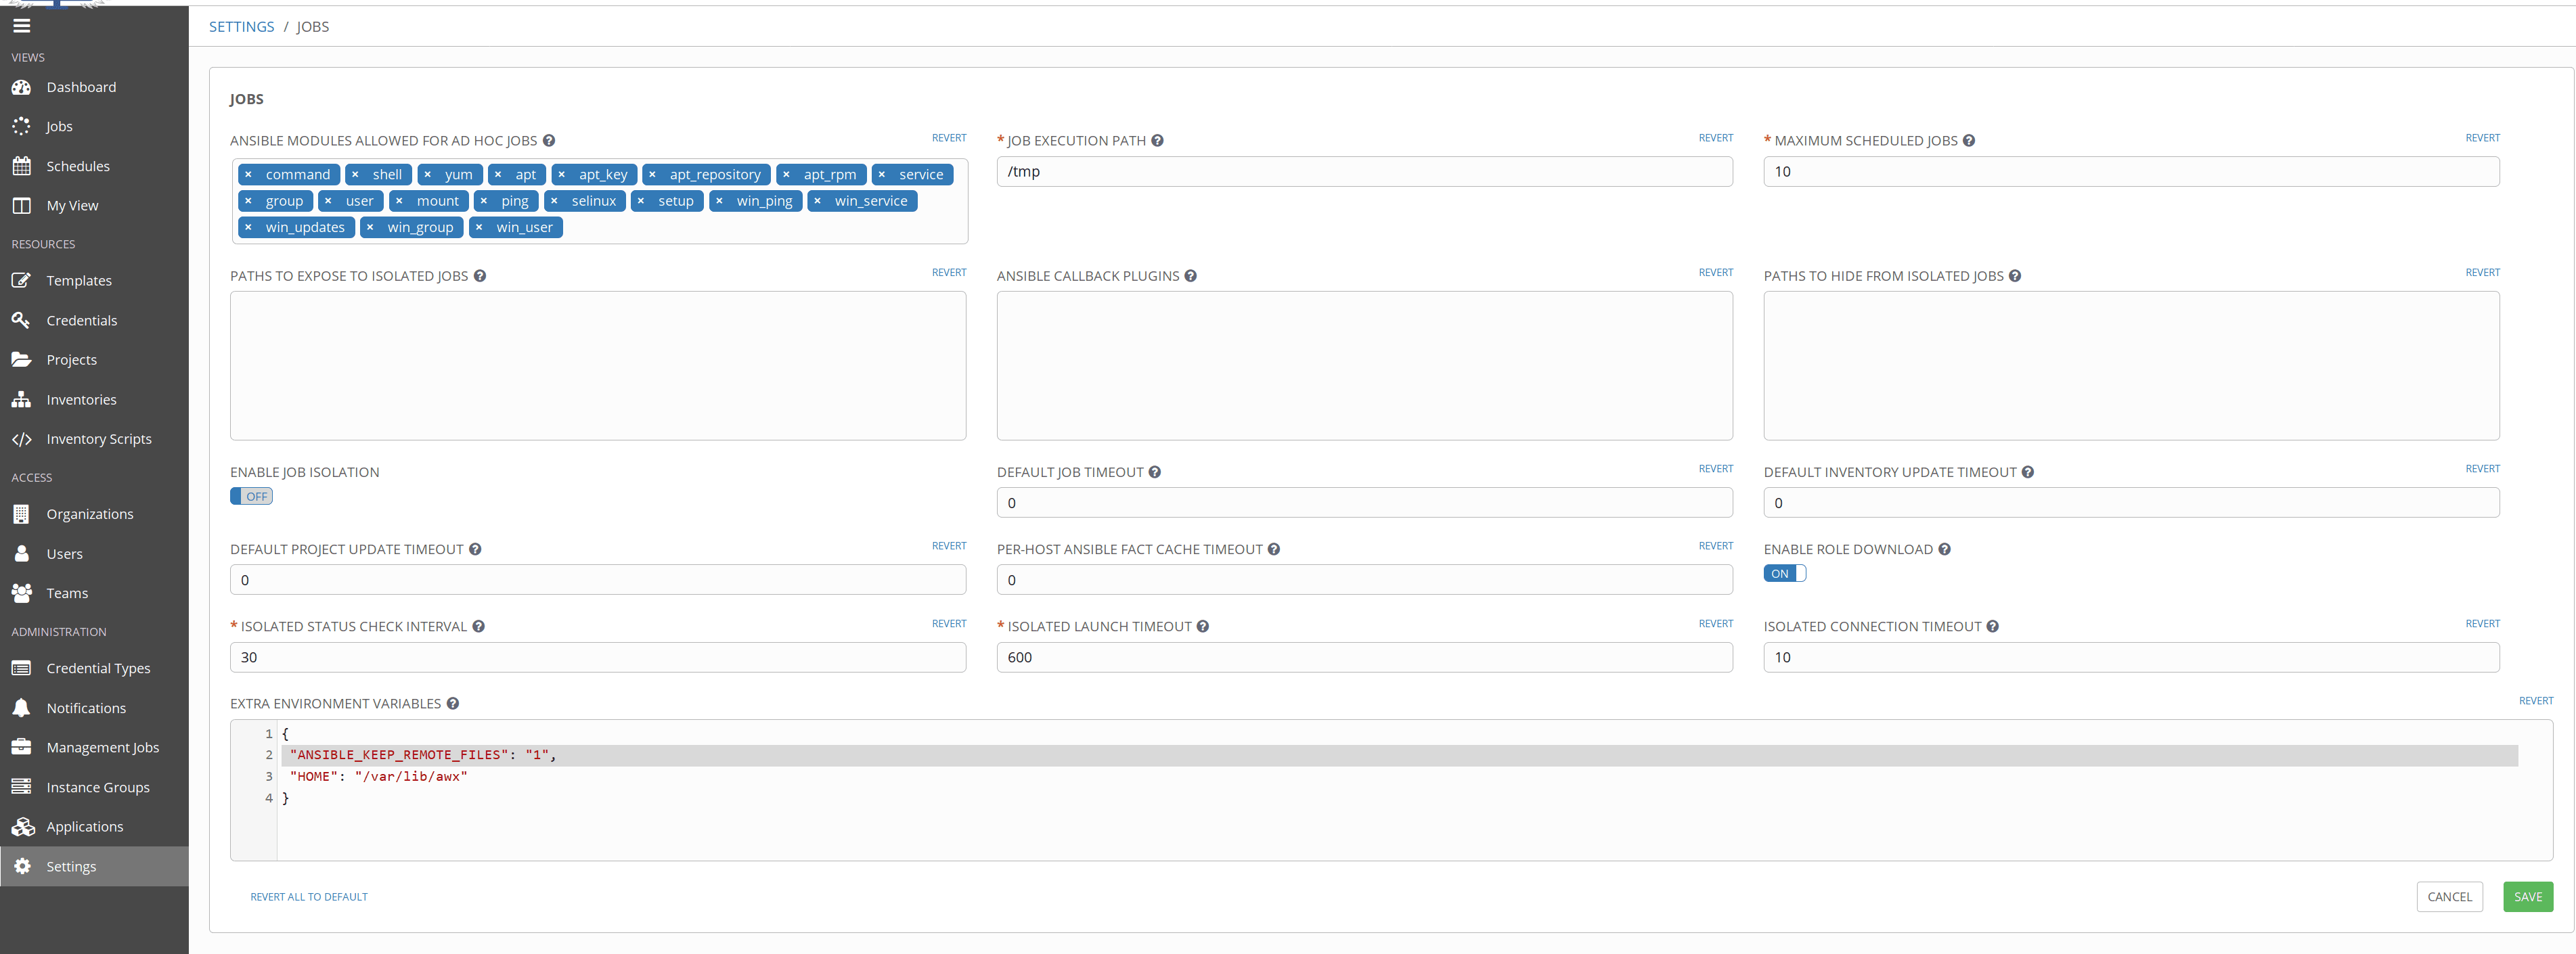
Then we just have to enter the Docker CT to see the files:
cat /root/.ansible/tmp/ansible-tmp-1560498029.06-113770163193085/AnsiballZ_git.py
tail -f /var/log/tower/dispatcher.log
Installing AWX via Docker DOES NOT install the web server with SSL support, but we can use socat to create an SSL frontend and redirect traffic to the AWX port:
CONTAINER ID        IMAGE                        COMMAND                  CREATED             STATUS              PORTS                                                 NAMES
c74cbb26f09e        ansible/awx_web:latest       "/tini -- /bin/sh -c…"   5 days ago          Up 4 minutes        0.0.0.0:80->8052/tcp                                  awx_web
First, we generate the certificate to present:
openssl req -new -key cert.key -x509 -days 36530 -out cert.crt
Country Name (2 letter code) [AU]:ES
State or Province Name (full name) [Some-State]:XXXX
Locality Name (eg, city) []:YYYY
Organization Name (eg, company) [Internet Widgits Pty Ltd]:IT
Organizational Unit Name (eg, section) []:IT
Common Name (e.g. server FQDN or YOUR name) []:localhost
Email Address []:kr0m@alfaexploit.com
We start socat listening on port 443, serving the certificate and forwarding traffic to localhost:80:
To make this automatic, we create a startup script. In Gentoo, it would be as follows, and in Ubuntu, we use a systemd unit:
nohup socat -v openssl-listen:443,cert=/home/kr0m/cert.pem,verify=0,reuseaddr,fork tcp4:localhost:80 &
We assign the necessary permissions:
We start it manually:
AWX allows us to back up the configuration using the ansible-tower-cli tool, which we install from pip:
We make it accessible from the $PATH:
Now we proceed with the tool configuration, which requires us to specify the host to connect to, the user/pass, and some extra parameters:
tower-cli config verify_ssl false
tower-cli config username admin
tower-cli config password XXXXXX
tower-cli config verbose True
The most basic backup dumps the entire configuration into a json file:
If we only want to dump the credentials:
To export all the configuration except for the objects of an organization:
As important as dumping is being able to restore the extracted data.
The basic restore would be:
To restore the config to a remote AWX:
To restore everything except for the data of a specific organization: