The R36S is a console(buy link) with a very affordable price but a lot to offer. Its price/performance ratio is unbeatable. We are talking about a Linux/ArkOS system with an ARM processor, 1GB of RAM, and EmulationStation / RetroArch pre-installed. This allows us to enjoy a wide range of classic titles from consoles such as NES, SNES, Sega Genesis, or PlayStation1. While its technical ceiling is PSX1, you can also play some N64, DreamCast, or even PSP games. The only things missing are WiFi, Bluetooth, vibration, and an HDMI output.
Below are the sections of this tutorial:
- Technical Specifications
- System software architecture:
- Dump chinese SD card
- Installing ArkOS
- USB OTG
- WiFi
- Updating ArkOS
- Scraping
- SSH/Web services
- Use a second SD card
- Playing videos
- ZX-Spectrum settings
- Accessing a terminal
- Accessing RetroArch
- Xorg
- PORTS
- MoonLight
- ThemeMaster
- BGMusic
- BootScreen
- Shortcuts and functions
- Debug
- Prosthetics
- Resources
Technical Specifications:
| Image: | Device hardware: |
|---|---|
 |
- CPU: Rockchip RK3326(1512MHz): ARM 64bit quad-core Cortex-A35 CPU - GPU: Mali-G31MP2 (520MHz), support OpenGL ES 3.2 - RAM: 1Gb DDR3L - Screen: 3.5-inch IPS OCA full lamination MIPI screen 640*480 - MicroSD cards: 16G-256G - Battery of 3000mAh, Up to 5 game hours - USB-OTG |
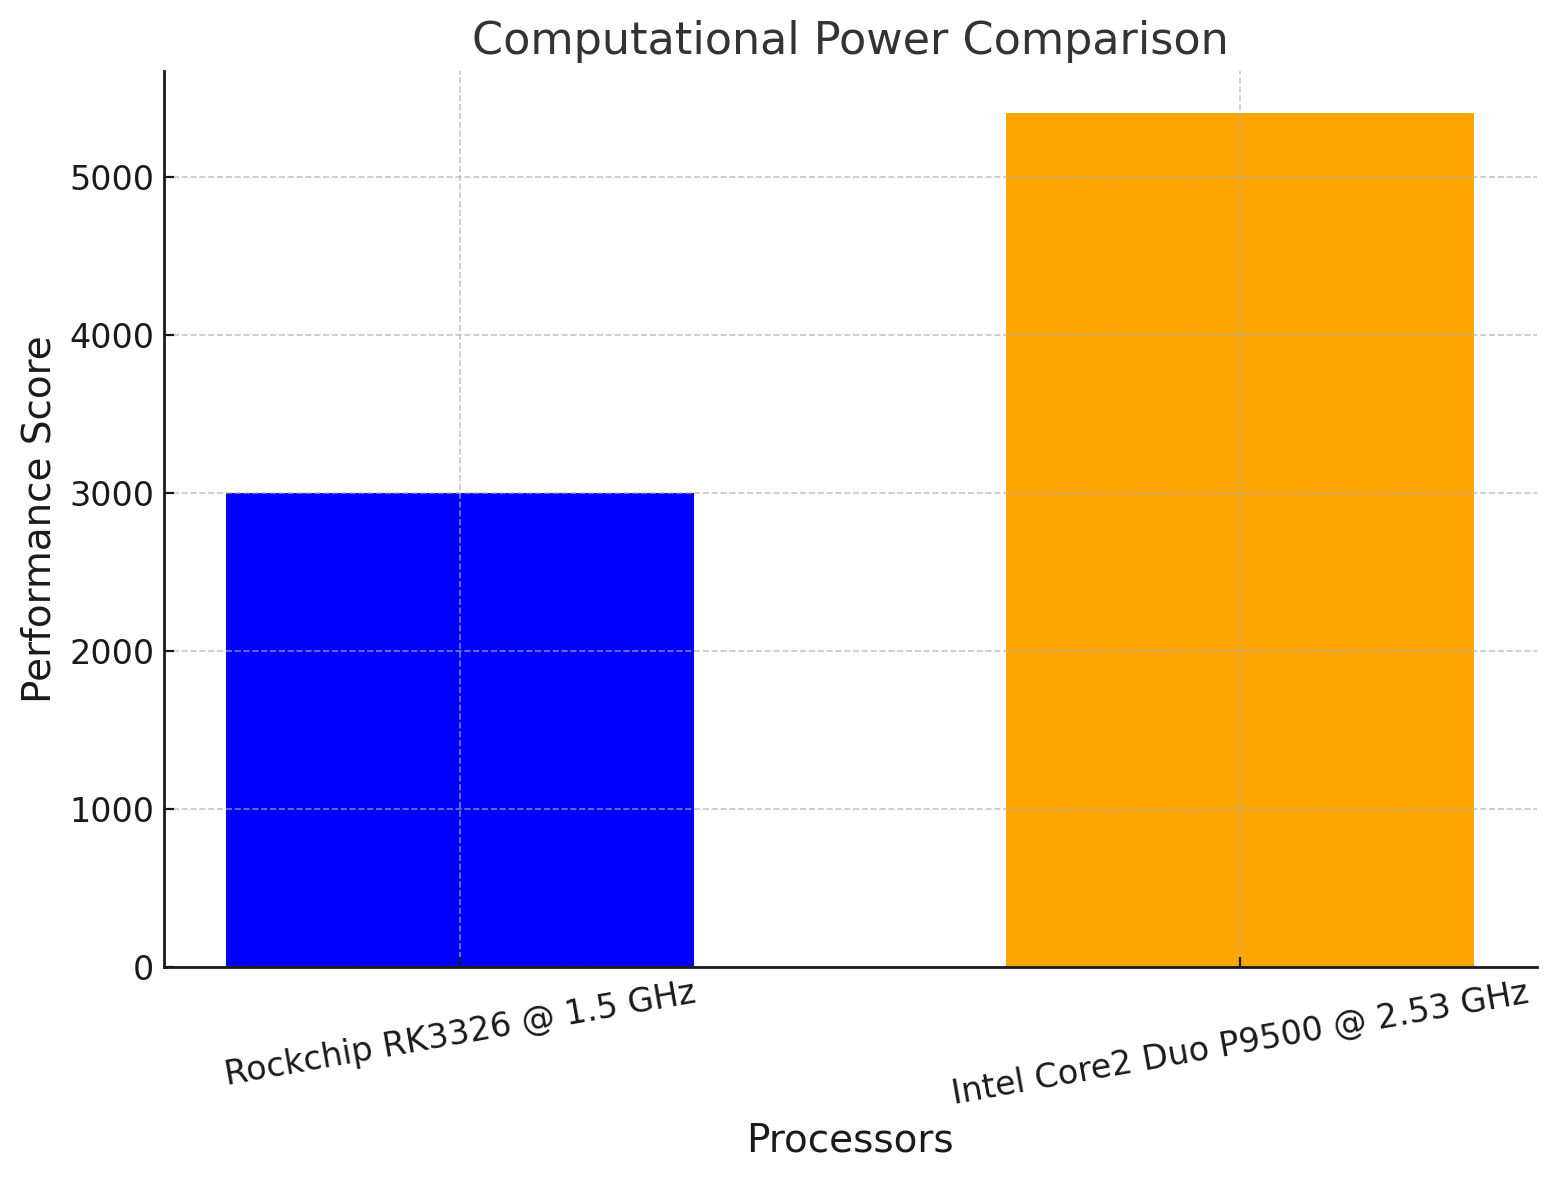
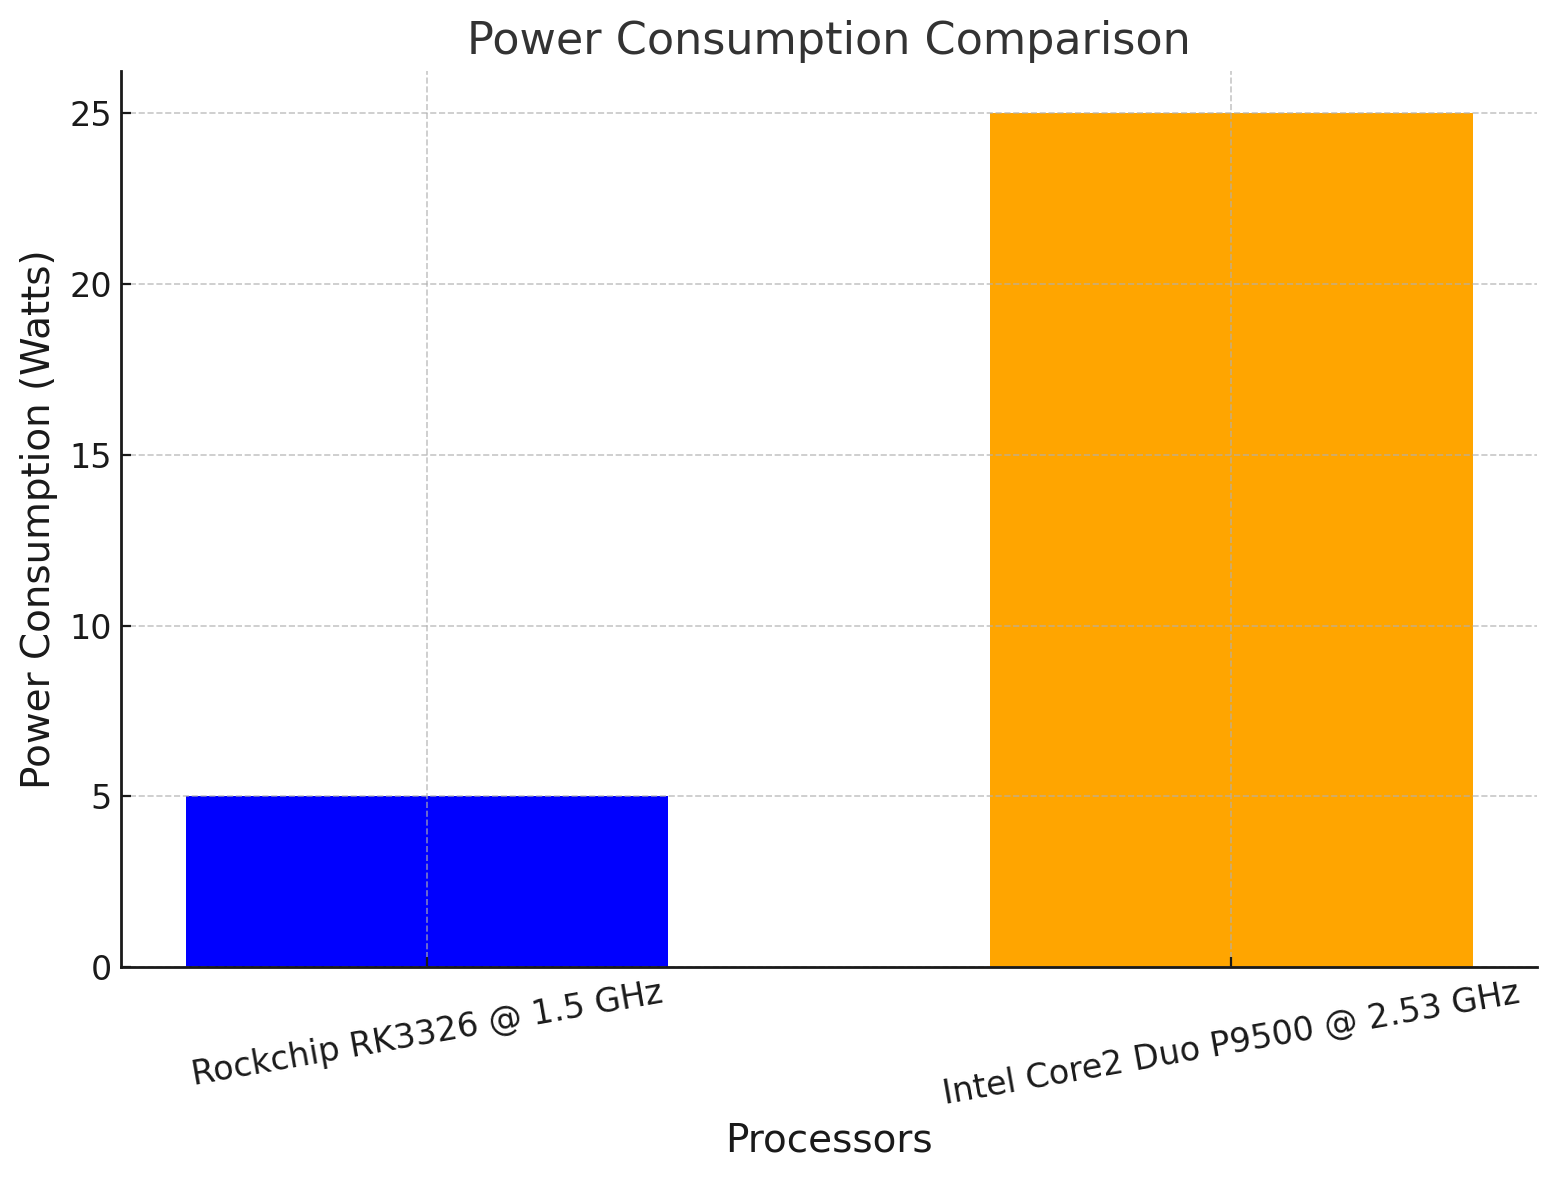
If we compare the processor with that of a 17-year-old laptop, we see that its power is not even half, but the energy efficiency is superior, a very important aspect in devices relying on a battery:
Rockchip RK3326 @ 1512 MHz      -> CPU Mark: 428
Intel Core2 Duo P9500 @ 2.53GHz -> CPU MArk: 993
|
|
As for the operating system, it runs ArkOS (Ubuntu):
Distributor ID:	Ubuntu
Description:	Ubuntu 19.10
Release:        19.10
Codename:       eoan
This allows us to perform any task Linux permits. For example, we can check the hardware in more detail:
Architecture:        aarch64
CPU op-mode(s):      32-bit, 64-bit
Byte Order:          Little Endian
CPU(s):              4
On-line CPU(s) list: 0-3
Thread(s) per core:  1
Core(s) per socket:  4
Socket(s):           1
Vendor ID:           ARM
Model:               2
Model name:          Cortex-A35
Stepping:            r0p2
CPU max MHz:         1512.0000
CPU min MHz:         1008.0000
BogoMIPS:            48.00
Flags:               fp asimd evtstrm aes pmull sha1 sha2 crc32
System Software Architecture:
- Linux: The operating system responsible for making the hardware and high-level applications work properly.
- EmulationStation: A graphical interface designed to organize and launch retro games using emulators. It does not emulate anything by itself, but instead launches games through external emulators.
- RetroArch: A program that consolidates many emulators into a single interface. It doesn’t emulate directly; instead, it uses
cores, which are small modules that act as emulators for each console. - Cores: The internal emulators used by
RetroArch. Each core emulates a specific console. - Standalone emulators: Independent programs that emulate a console without needing
RetroArch. They can be used separately, butEmulationStationcan also launch them directly if properly configured.
Dump chinese SD card:
The first step is to dump the SD card to an image file, as these Chinese cards are of very poor quality and don’t last long. Ideally, buy a good card , install a clean ArkOS, and transfer the contents of the ROMs and BIOS to the new card.
Connect the SD card via a USB adapter and locate the device by running dmesg:
dmesg
[440995.976260] scsi host8: usb-storage 2-4:1.0
[440996.990234] scsi 8:0:0:0: Direct-Access     SanDisk  SDDR-B531        2920 PQ: 0 ANSI: 6
[440996.990383] sd 8:0:0:0: Attached scsi generic sg4 type 0
[440997.246729] sd 8:0:0:0: [sdX] 250347520 512-byte logical blocks: (128 GB/119 GiB)
[440997.247320] sd 8:0:0:0: [sdX] Write Protect is off
[440997.247322] sd 8:0:0:0: [sdX] Mode Sense: 21 00 00 00
[440997.247974] sd 8:0:0:0: [sdX] Write cache: disabled, read cache: enabled, doesn't support DPO or FUA
[440997.250952]  sdX: sdX1 sdX2 sdX3
Proceed with the backup:
dd if=/dev/sdX of=/mnt/6T/R36S/00-R36S/kr0mImage.img
Mount the ROMs partition using a loop device:
losetup --find --partscan /mnt/6T/R36S/00-R36S/kr0mImage.img

lsblk
NAME        MAJ:MIN RM   SIZE RO TYPE MOUNTPOINTS
loop11        7:11   0  97.7G  0 loop
├─loop11p1  259:3    0   112M  0 part
├─loop11p2  259:4    0   6.5G  0 part
└─loop11p3  259:5    0  90.9G  0 part
mount /dev/loop11p3 /mnt/aux/
Copy the ROMs to a separate directory:
mkdir /mnt/6T/R36S/00-R36S/Kr0m-ROMs
rsync -av /mnt/aux/ /mnt/6T/R36S/00-R36S/Kr0m-ROMs/
NOTE: We use rsync instead of cp because sometimes defective files on the original SD card can crash Linux completely when copied. This doesn’t happen with rsync.
Unmount the loop device:
umount /mnt/aux/
Delete any game images since we’ll scrape them again:
find /mnt/6T/R36S/00-R36S/Kr0m-ROMs -type d \( -name "downloaded_images" -o -name "downloaded_videos" -o -name "video" -o -name "image" -o -name "images" -o -name "media" \) -exec rm -r {} +
Installing ArkOS:
ArkOS supports many devices, but for this specific case, it’s better to use the images from AeolusUX as they’re adapted for the R36S. The AeolusUX link can also be found in the official ArkOS wiki (R35S) .
You just need to know your screen version. There’s a
tool
that helps identify it, but you need to provide the DTB file. Depending on the console, its name may vary but it will always be something like rk3326-rg351mp-linux.dtb, rk3326-r35s-linux.dtb, or rk3326-evb-lp3-v12-linux.dtb.
Mount the boot partition from the image dumped in the previous step:
mount /dev/loop11p1 /mnt/aux/
And pass it the file. In my case, it’s a V3 screen:
This is Panel 3
If for any reason you can’t identify the screen, it’s not an issue; you can simply try each of the three images until the console boots with the screen working.
Write the image to the SD card:
dd if=/mnt/6T/R36S/00-R36S/ArkOS_R35S-R36S_XXXXX.img of=/dev/sdX bs=4M status=progress
The first time you boot the console, you’ll see it resizing the filesystem on the card. Wait for it to complete and reboot:
NOTE: If the console screen remains blank with the red LED flashing, we have purchased a clone console. In this case, we should follow this tutorial to load ArkOS .
Now, specify your console model:
Options -> Device Type: R35s Or R36S
And set the time and date:
Options -> Change time
Copy the ROMs and BIOS files from the original card, skipping conflicts:
rsync -av --ignore-existing /mnt/6T/R36S/00-R36S/Kr0m-ROMs/ /media/kr0m/EASYROMS/
USB OTG:
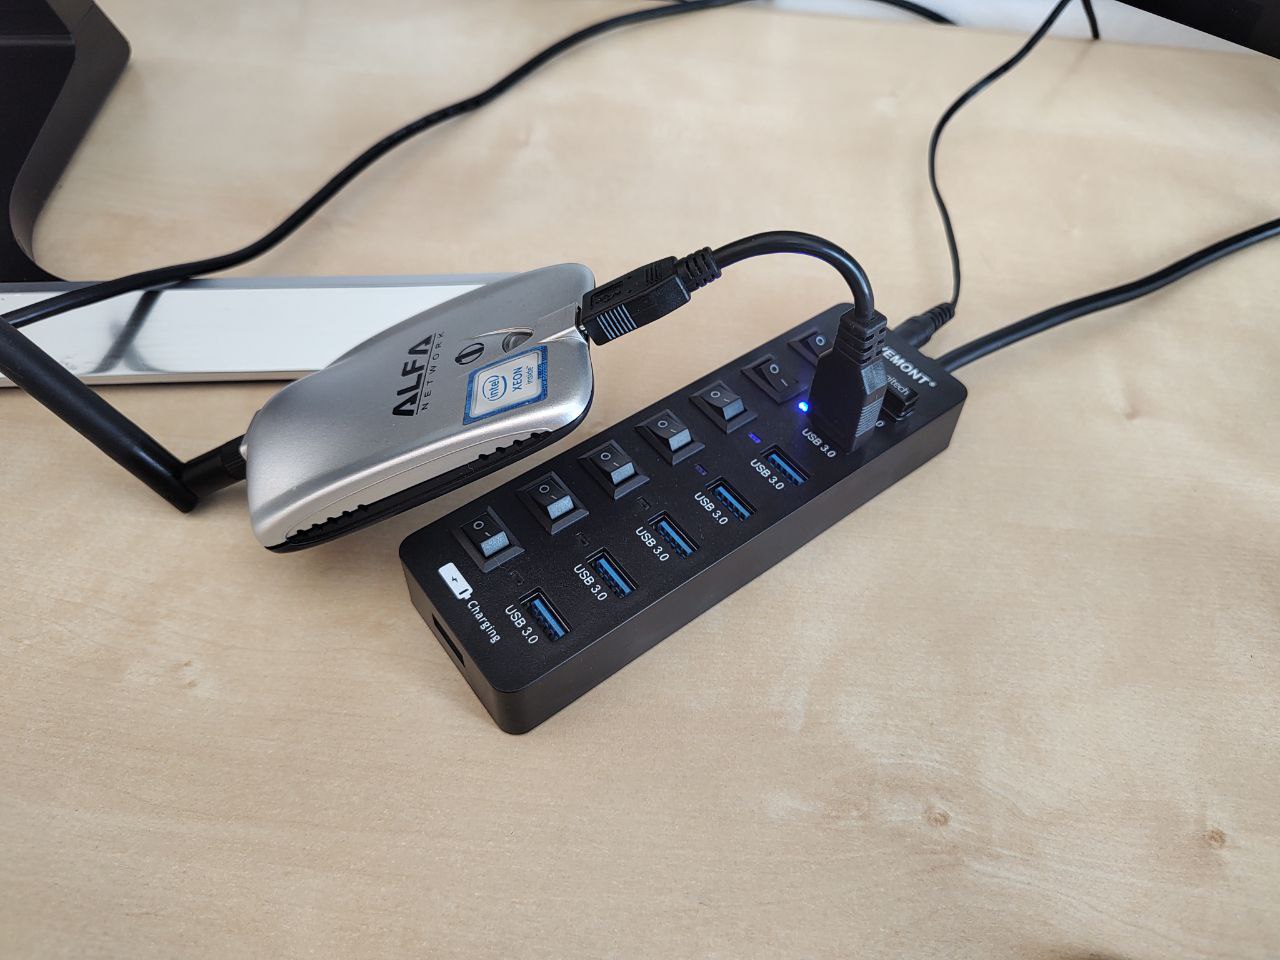
The console has two USB-C ports, one for battery charging and the other with OTG support, allowing you to connect all kind of devices, albeit with certain limitations. During my tests, connecting devices that require more than X power proved problematic, such as the Alfa WiFi adapter or a keyboard paired with a low-power WiFi adapter.
If you want to connect multiple devices or high-power devices, you must use a USB hub with external power. This ensures everything works seamlessly:
WiFi:
To connect the console via WiFi, follow these steps:
Options -> WiFi -> Connect to new WiFi connection
The WiFi connection may cause issues with adapters requiring too much power, leading to erratic behavior at random intervals:
| Scanning errors | Connection errors |
|---|---|
Using another WiFi adapter with lower power requirements works better. However, you might notice interference causing noise in the console’s speaker. On the other hand, if the previous adapter is connected through a powered hub, it functions correctly:
| WiFi noise | WiFi hub |
|---|---|
You can check the connection status in two ways:
Options -> WiFi -> Current network info
Options -> Network info
If we need to know the MAC address of the Wi-Fi card, we can obtain it by checking a system text file:
Options -> 351Files:
/sys/class/net/INTERFACE_NAME(wlan0)/address

Y -> Quit
Updating ArkOS:
Once the console is connected, it’s possible to update the OS without rewriting the SD card. In my case, there were no updates:
Options -> Update
Scraping:
It is possible to scrape using PC with Skraper but its a very bad idea as ArkOS only supports PNG miniature images and Skraper downloads the images in a wide sort of formats, besides the image names are named incorrectly, requiring a manual or script rename. So I advise against this method.
To scrape, we need an account at ScreenScraper and Internet access .
To perform scraping:
Start -> Scraper:
Scrape from: ScreenScraper
Username: XXXX
Password: YYYY

Scrape now
To display game screenshots, restart EmulationStation:
Start -> Quit -> Restart EmulationStation
The result is as follows:
As we can see, it is possible to scrape using both ScreenScraper and TheGameDB. The difference lies in the fact that ScreenScraper allows for 20,000 scrapes per day, whereas TheGameDB only allows 1,000 scrapes per month. Therefore, the most recommended approach is to use ScreenScraper and, if any title is not recognized, try with TheGameDB.
SSH/Web Services:
This console offers a wide range of possibilities. Remember, it’s a Linux-based system. One of its most useful features is SSH and HTTP access, allowing convenient file uploads and downloads.
Find the console’s IP:
Options -> Wifi -> Current network info
Options -> Network info
Enable the services:
Options -> Enable remote services
SSH:
ssh ark@IP -> ark / ark
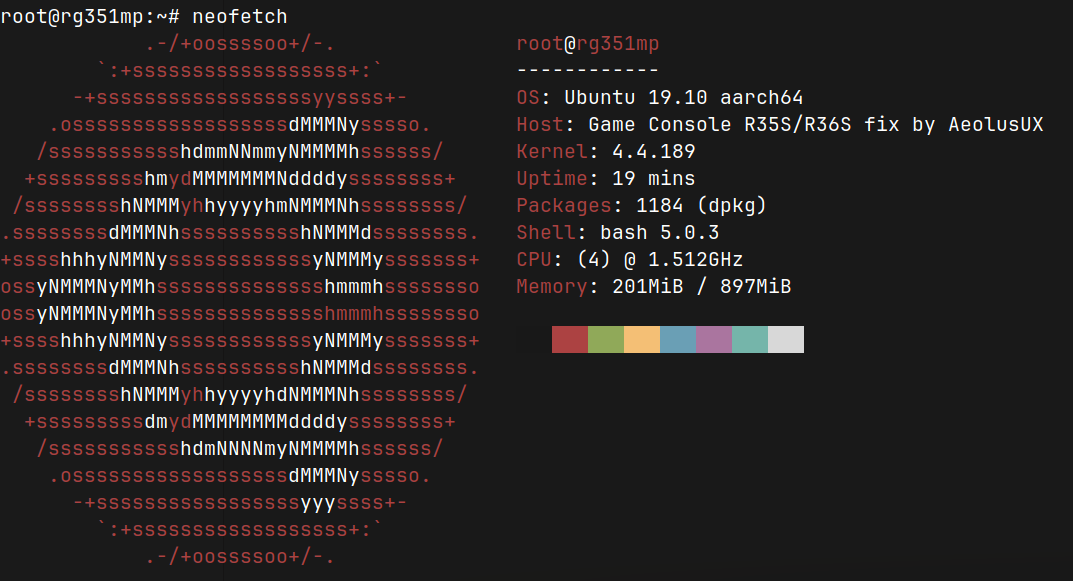
If we want to enable SSH permanently, we only need to enable the service:
sudo systemctl enable ssh
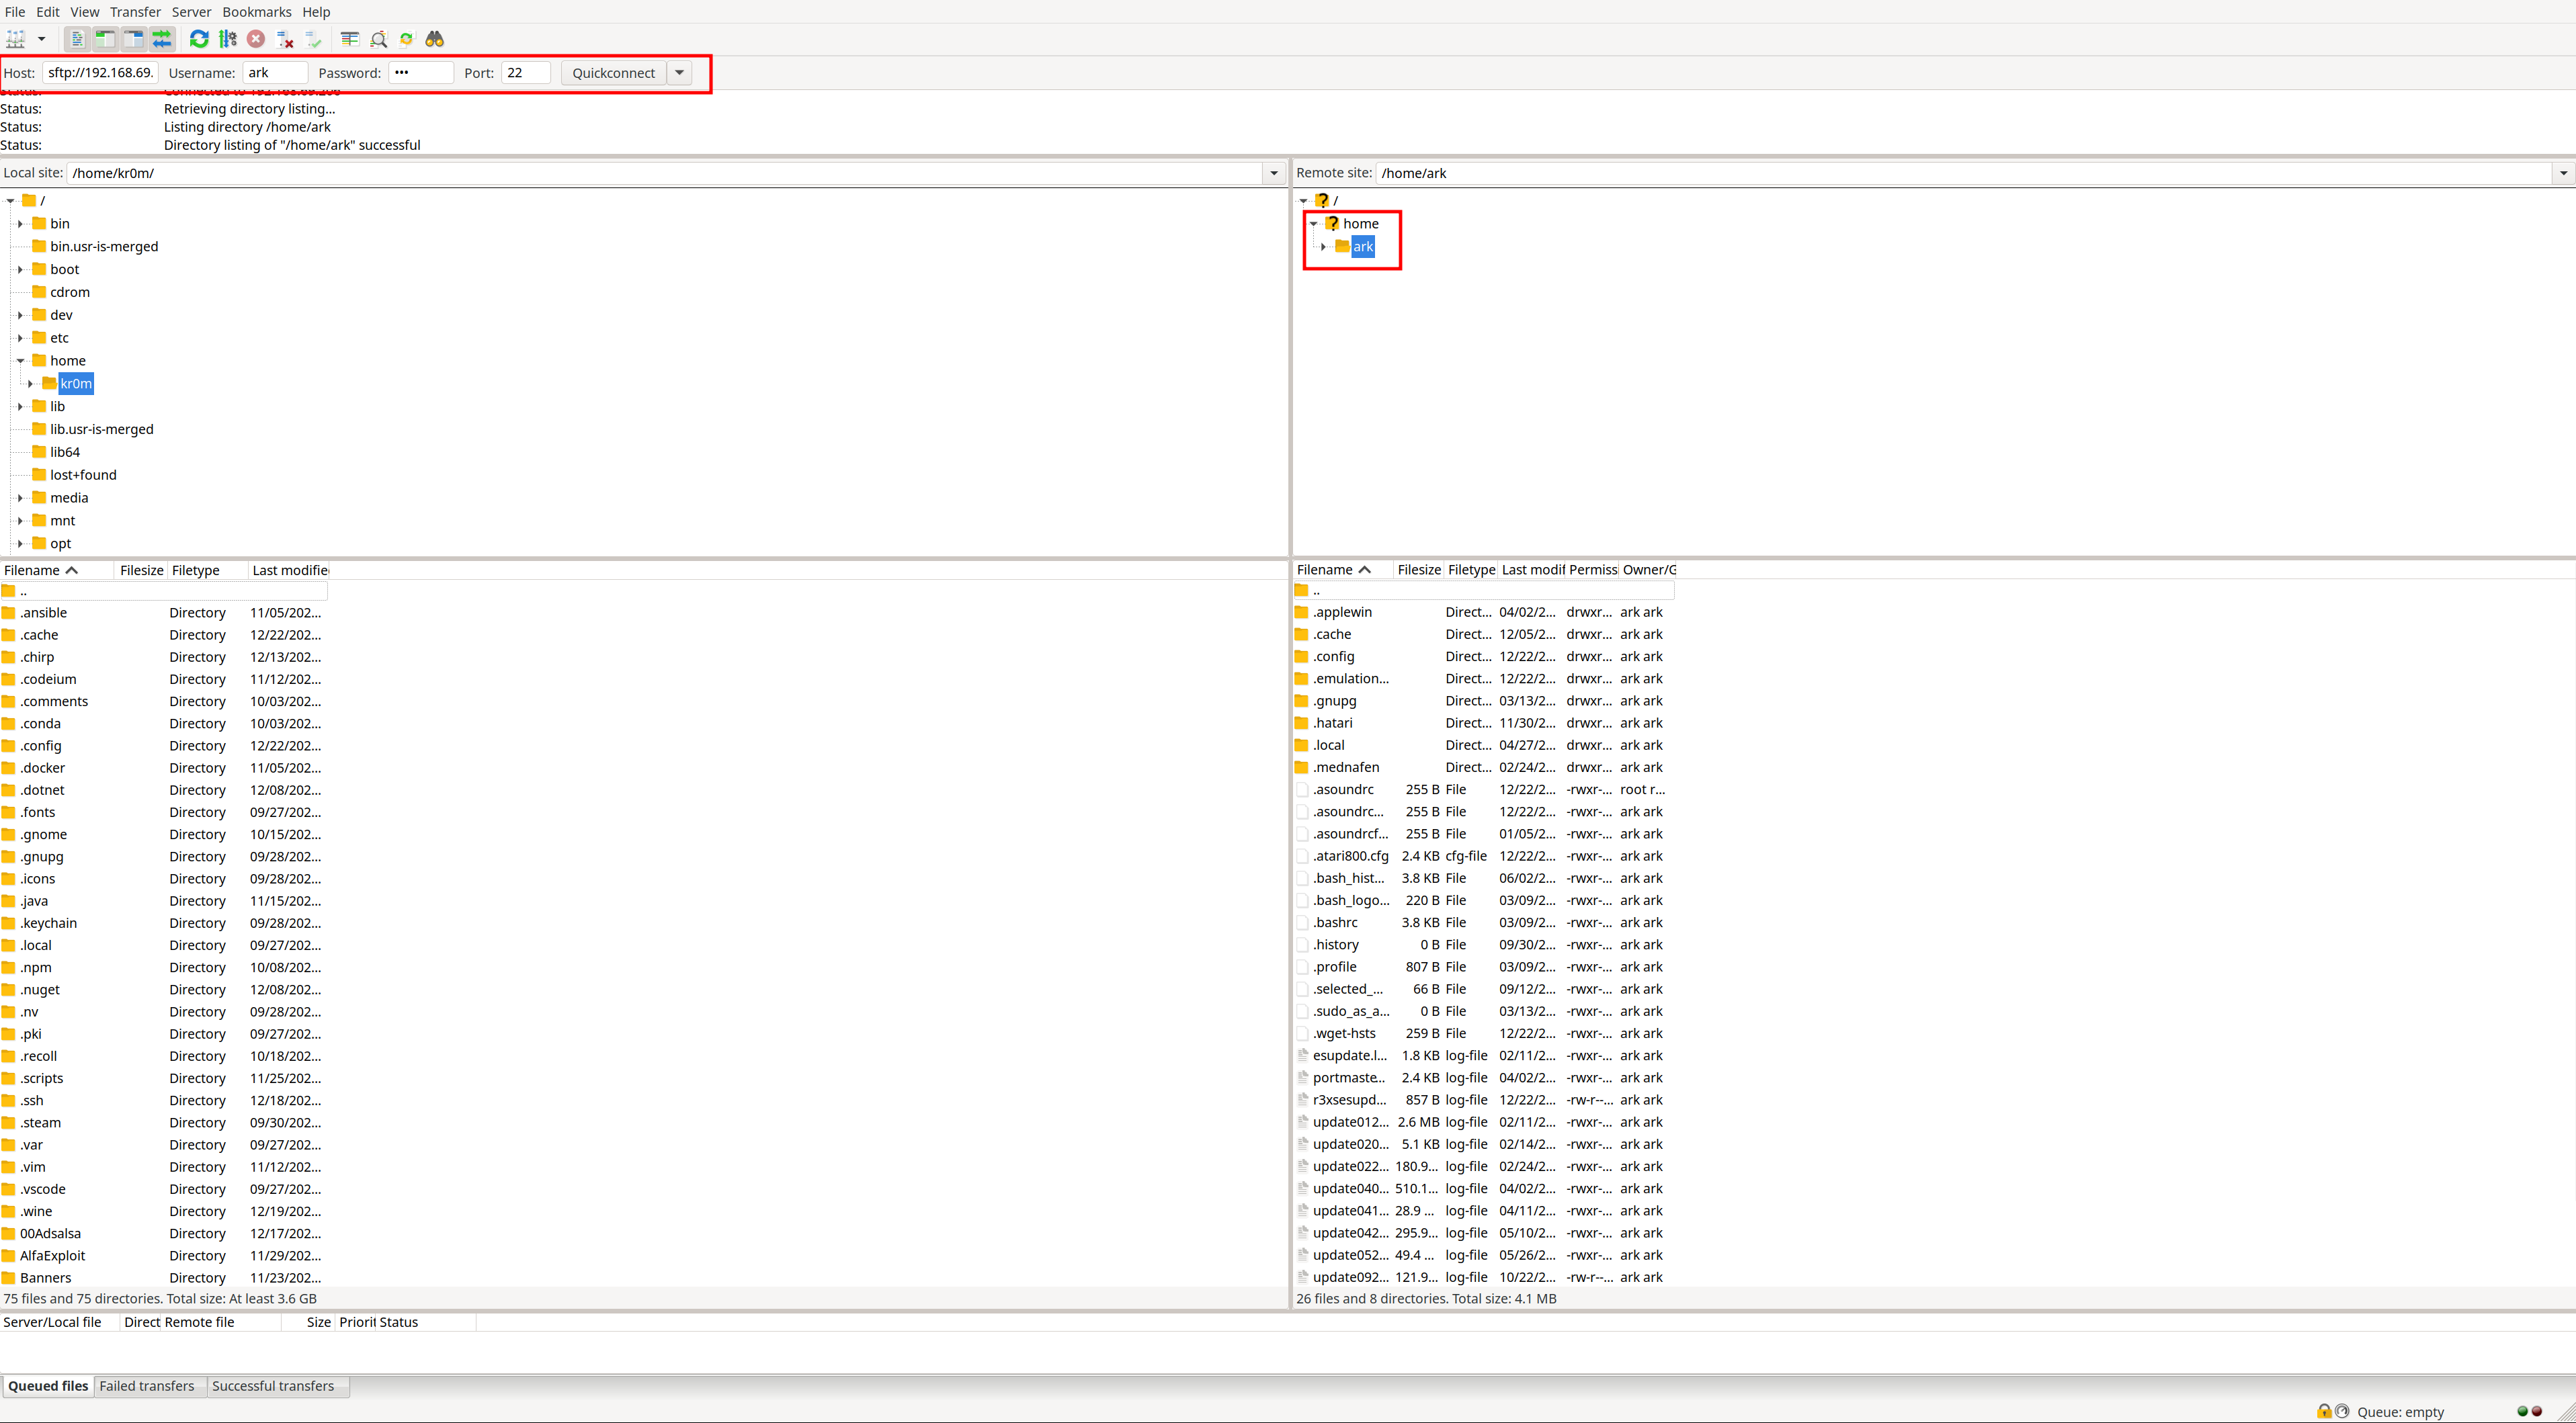
SCP: Accessing via SCP is also helpful:
filezilla -> ark / ark
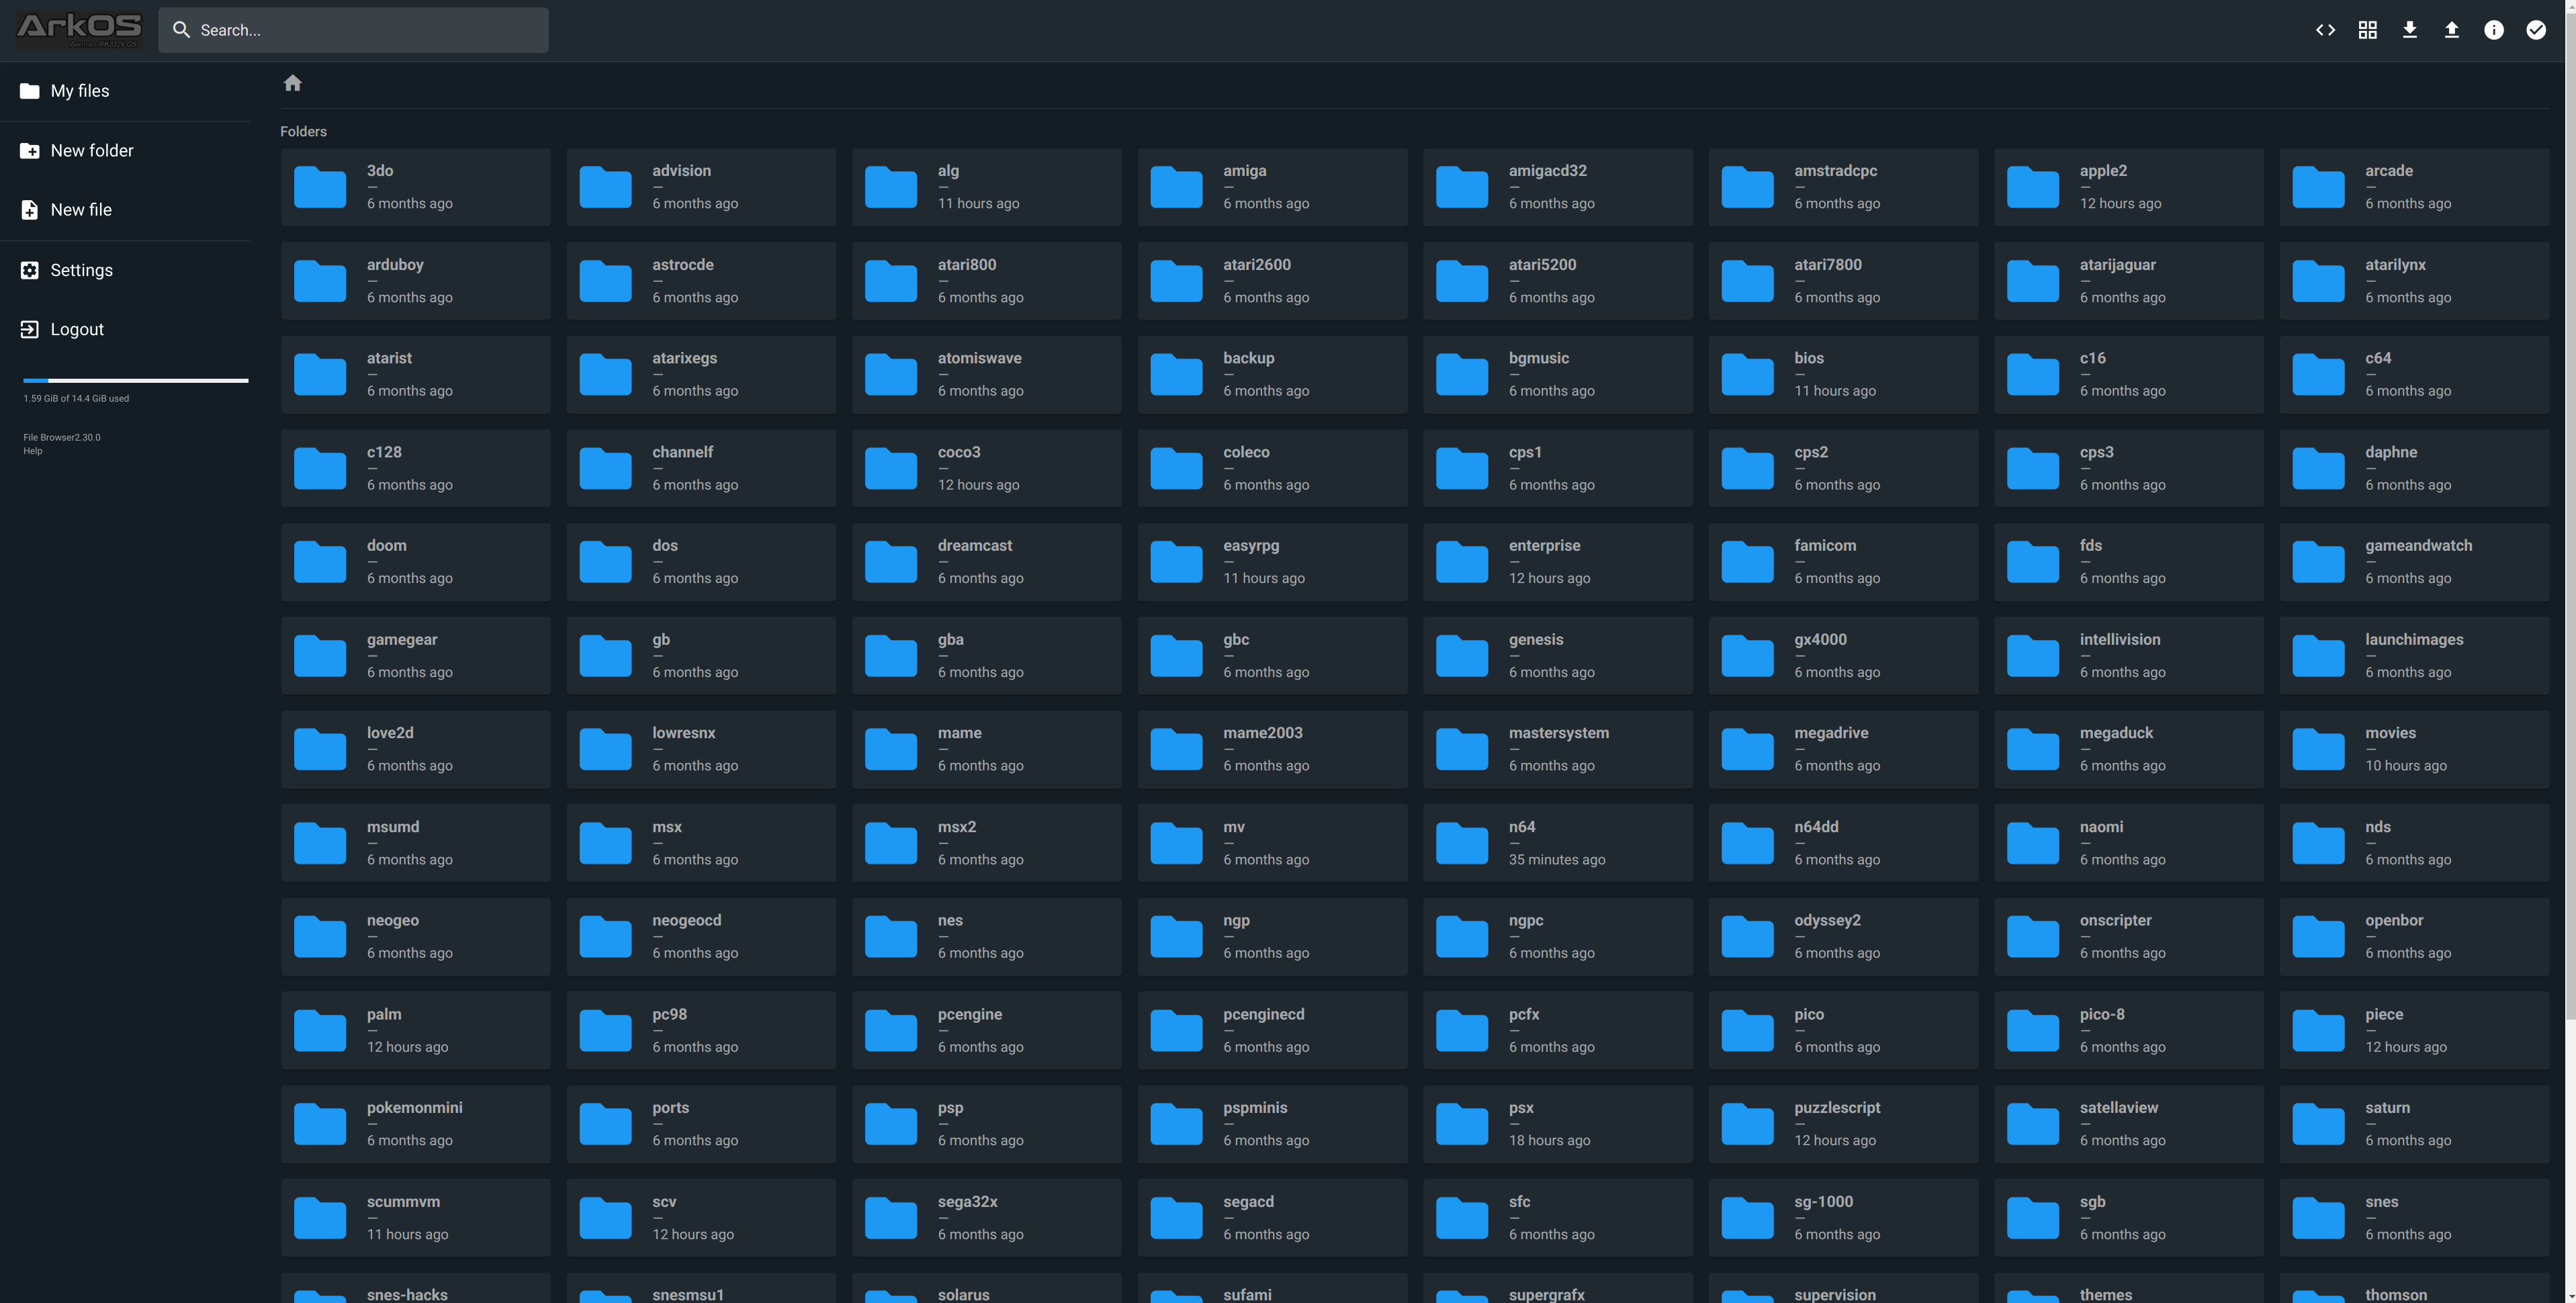
HTTP: Or use HTTP if preferred:
http://IP -> ark / ark

|
|
Use a Second SD2 Card:
If you have a second SD card, you can use it, but keep in mind that ROMs can only be read from one card at a time. Therefore, if you have games on both cards, you’ll need to switch between them.
The first step is to create an exFAT partition on the SD card:
fdisk /dev/sdX

Command (m for help): o
Created a new DOS (MBR) disklabel with disk identifier 0xa185f66d.

Command (m for help): n
Partition type
   p   primary (0 primary, 0 extended, 4 free)
   e   extended (container for logical partitions)
Select (default p):

Using default response p.
Partition number (1-4, default 1):
First sector (2048-30244863, default 2048):
Last sector, +/-sectors or +/-size{K,M,G,T,P} (2048-30244863, default 30244863):

Created a new partition 1 of type 'Linux' and of size 14.4 GiB.

Command (m for help): t
Selected partition 1
Hex code or alias (type L to list all): 07
Changed type of partition 'Linux' to 'HPFS/NTFS/exFAT'.

Command (m for help): p
Device     Boot Start      End  Sectors  Size Id Type
/dev/sde1        2048 30244863 30242816 14.4G  7 HPFS/NTFS/exFAT

Command (m for help): w
The partition table has been altered.
Calling ioctl() to re-read partition table.
Syncing disks.
Now create the file system:
mkfs.exfat -L "Kr0mGames" /dev/sdX1
Switch the ROMs directory to the second SD:
Options -> Advanced -> Switch to SD2 for roms
This will generate the platform directories for emulation. Simply copy the ROMs and BIOS files into the appropriate directories.
Perform the scraping process for the games on the second SD.
BIOS files are not shared between SDs. If you switch to the second SD, you must also copy the desired BIOS files to it:
rsync -av --ignore-existing /mnt/6T/R36S/00-R36S/Kr0m-ROMs/bios/ /media/kr0m/Kr0mGames/bios/
rsync -av --ignore-existing /mnt/6T/R36S/00-R36S/Extra-ROMs/ /media/kr0m/Kr0mGames/
Games on the primary SD will no longer be read. You can either access games and content from the OS SD or the second SD.
Once the second SD is enabled, you must always boot with it inserted. Otherwise, issues may occur, as seen in this video:
This can be a serious problem because there’s no way to switch back to the OS SD. The system will hang with a blinking cursor indefinitely, and a restart will only repeat the issue, effectively bricking the console and requiring a reinstallation of the OS.
Fortunately, there’s a manual way to fix this from a PC.
Since the Ext4 file system was improperly shut down, run fsck before manipulating the file system:
umount /media/kr0m/root
fsck /dev/sdX2
Mount the partition and edit the configuration file for ArkOS’s mount points:
sed -i 's/roms2/roms/g' /media/kr0m/root/etc/fstab
Unmount the partition, insert the card, and boot up. This will revert to the OS SD and unbrick the console.
There’s an option to read from both SDs, but it is bugged and doesn’t work, requiring a reboot to fix:
Options -> Advanced -> Read from SD1 and SD2 for roms
If using the secondary SD, all references in this tutorial to the path /media/kr0m/EASYROMS will change to /media/kr0m/Kr0mGames in your case.
To return to the OS SD card, we just need to follow the same procedure, but it seems to be bugged and requires a console reboot for it to apply correctly.
Playing Videos:
First, re-encode the videos for better playback and reduced storage usage on the SD card, as files re-encoded to 640x480 take up less space than the originals:
ffmpeg -i input.mp4 -vf "scale=640:480:force_original_aspect_ratio=decrease,pad=640:480:(ow-iw)/2:(oh-ih)/2" -c:v libx264 -preset slow -crf 23 -c:a aac -b:a 128k output_640x480.mp4
Copy the video to the SD:
cp output_640x480.mp4 /media/kr0m/EASYROMS/movies/
To play the video, access a new section called Videos that wasn’t visible before:
ZX-Spectrum Settings:
ZX-Spectrum is a peculiar system with its custom keyboard and functionalities. Some games may encounter issues when emulated. Here’s how to configure RetroArch so the game JetPack (my favorite for this platform) works correctly.
Ensure the joystick is set to Kempston joystick:
FN+X -> Controls -> Port 1 controls -> Device type: Kempston joystick
Some games like this one require both joystick and keyboard inputs. Pressing L2 allows keyboard inputs. First, select the joystick (4), then start the game (5):
Accessing a Terminal:
Accessing the Linux console can be useful in many situations. This can be done in two ways:
- Using any Linux Ncurses app and switching to a non-graphical terminal.
- Stopping EmulationStation and switching to a non-graphical terminal.
| Ncurses app | EmulationStation stop |
|---|---|
In both cases, to return to the graphical environment, run:
sudo systemctl restart emulationstation
RetroArch Access:
If we want to modify RetroArch’s functionality, this is also possible:
Xorg:
There is
a project
that simplifies the installation of X by providing pre-configured images, but only for the model with the V4 screen.
Keep in mind that the project is still in its early stages:
The process is not perfect; expect bugs, crashes, and softlocks. It is recommended to install on a secondary OS SD card.
In my case, I opted for manual installation since my screen is the V3. The first step is to clone the repository:
git clone https://github.com/OkJacket2022/R36S-Xorg
Copy the desired window manager to the SD card:
cp -r /home/kr0m/R36S-Xorg/XFCE /media/kr0m/EASYROMS/tools/
Insert the SD card into the console and access the installation script. Before proceeding, ensure you have an active Internet connection and sufficient battery; if both conditions are met, proceed with the installation:
Options -> Tools -> XFCE -> Install-XFCE.sh
NOTE: Apologies for the camera glitch.
To launch X:
Options -> Tools -> XFCE -> Launch-XFCE.sh
The GitHub project advises waiting about two minutes after booting the console before launching X, as ArkOS is still loading during this time. Launching earlier may cause errors:
Before launching any desktop environment, allow the device to complete loading the files (1-2 minutes after turning on).
I also noticed some strange behavior, such as error windows from X appearing within EmulationStation or installation windows (e.g., for PortMaster ) staying black without displaying console output. Installing X is interesting for testing the console’s capabilities, but I do not recommend it for daily use due to potential issues that may be difficult to debug.
PORTS:
PortMaster allows us to run Linux-ported games or apps . Games run in isolated environments, ensuring they don’t interfere with each other.
Some games are as simple as installing and playing, while others require copying specific files. In some cases, such as Doom3 , ARM binaries must be compiled using Docker. Each game has its own installation instructions. For this example, I installed Half-Life, one of my favorite games, which is currently available on Steam for €1.63.
Start by installing the latest version of PortMaster:
wget https://github.com/PortsMaster/PortMaster-GUI/releases/download/2024.12.21-0931/Install.Full.PortMaster.sh
Remove the default PortMaster installed on ArkOS:
rm -rf /media/kr0m/EASYROMS/tools/PortMaster*
cp Install.Full.PortMaster.sh /media/kr0m/EASYROMS/tools/
Launch the installer:
Options -> Tools: Install.Full.PortMaster
Ensure the console is connected to the Internet, launch PortMaster, and install one of the ready-to-play Ports:
Options -> Tools: PortMaster
To run the Half-Life port, specific files from the original game must be copied. Without owning the game, it cannot be played.
Install the Half-Life port from PortMaster:
Copy the Half-Life directory to the SD:
rm -rf /media/kr0m/EASYROMS/ports/Half-Life/valve/*
mkdir /media/kr0m/EASYROMS/ports/Half-Life/valve/save
cp -r ~/.steam/debian-installation/steamapps/common/Half-Life/valve/* /media/kr0m/EASYROMS/ports/Half-Life/valve/
Launch Half-Life:
Ports -> Half life
NOTE: Apologies again for the video glitches; the game runs perfectly. The issue is with the phone camera used for recording.
PortMaster, as a program itself, is installed in /media/kr0m/EASYROMS/tools/PortMaster, while the downloaded content of the ports is installed in /media/kr0m/EASYROMS/ports. Regardless of whether we are using the primary SD or the secondary one, it is necessary to install PortMaster on the primary SD. If we don’t, strange glitches may occur. When switching to the secondary SD, the system will automatically migrate the scripts.
We can see that I have PortMaster installed on the primary SD:
root@rg351mp:~# ls -la /roms/tools
total 432200
drwxrwxrwx   4 ark ark      8192 Jan  2 10:46 .
drwxrwxrwx 125 ark ark     16384 Jan  2 10:55 ..
-rwxrwxrwx   1 ark ark 442460868 Dec 30 22:12 Install.Full.PortMaster.sh
-rwxrwxrwx   1 ark ark     35129 Jan  1 19:33 LICENSE
drwxrwxrwx  17 ark ark      8192 Jan  2 10:48 PortMaster
-rwxrwxrwx   1 ark ark      4197 Dec 30 22:11 PortMaster.sh
-rwxrwxrwx   1 ark ark      1585 Jan  1 19:33 README.md
drwxrwxrwx   3 ark ark      8192 Jan  1 19:33 ThemeMaster
-rwxrwxrwx   1 ark ark       576 Jan  1 19:33 ThemeMaster.sh
Enabling the secondary SD, we can see that the files have been automatically copied:
root@rg351mp:~# ls -la /roms2/tools
total 768
drwxrwxrwx   4 ark ark 131072 Jan  2 10:58 .
drwxrwxrwx 129 ark ark 131072 Jan  2 11:01 ..
drwxrwxrwx   6 ark ark 131072 Jun 28  2024 PortMaster
-rwxrwxrwx   1 ark ark  25385 Jul 25  2023 PortMaster.sh
drwxrwxrwx   2 ark ark 131072 Jun 28  2024 ThemeMaster
-rwxrwxrwx   1 ark ark    385 Sep 23  2023 ThemeMaster.sh
Conclusion: Install PortMaster on the primary SD, and if we want to use the secondary SD to store the ports, we only need to switch the card without worrying about the content in the Tools directory.
MoonLight:
With the MoonLight port, you can stream games from your PC. First, install MoonLight via PortMaster:
Options -> Tools: PortMaster
Install
SunShine
on your PC. Click on the Assets dropdown from the GitHub link and download the version corresponding to your OS. Since I’m using Linux/Mint and there’s no specific package, I’ll use the AppImage version:
wget https://github.com/LizardByte/Sunshine/releases/download/v2024.1227.43619/sunshine.AppImage
chmod 700 sunshine.AppImage
./sunshine.AppImage
In the terminal, you can see the port SunShine is running on:
[2024-12-28 17:59:02.175]: Info: Configuration UI available at [https://localhost:47990]
A new icon will appear in the notification bar:

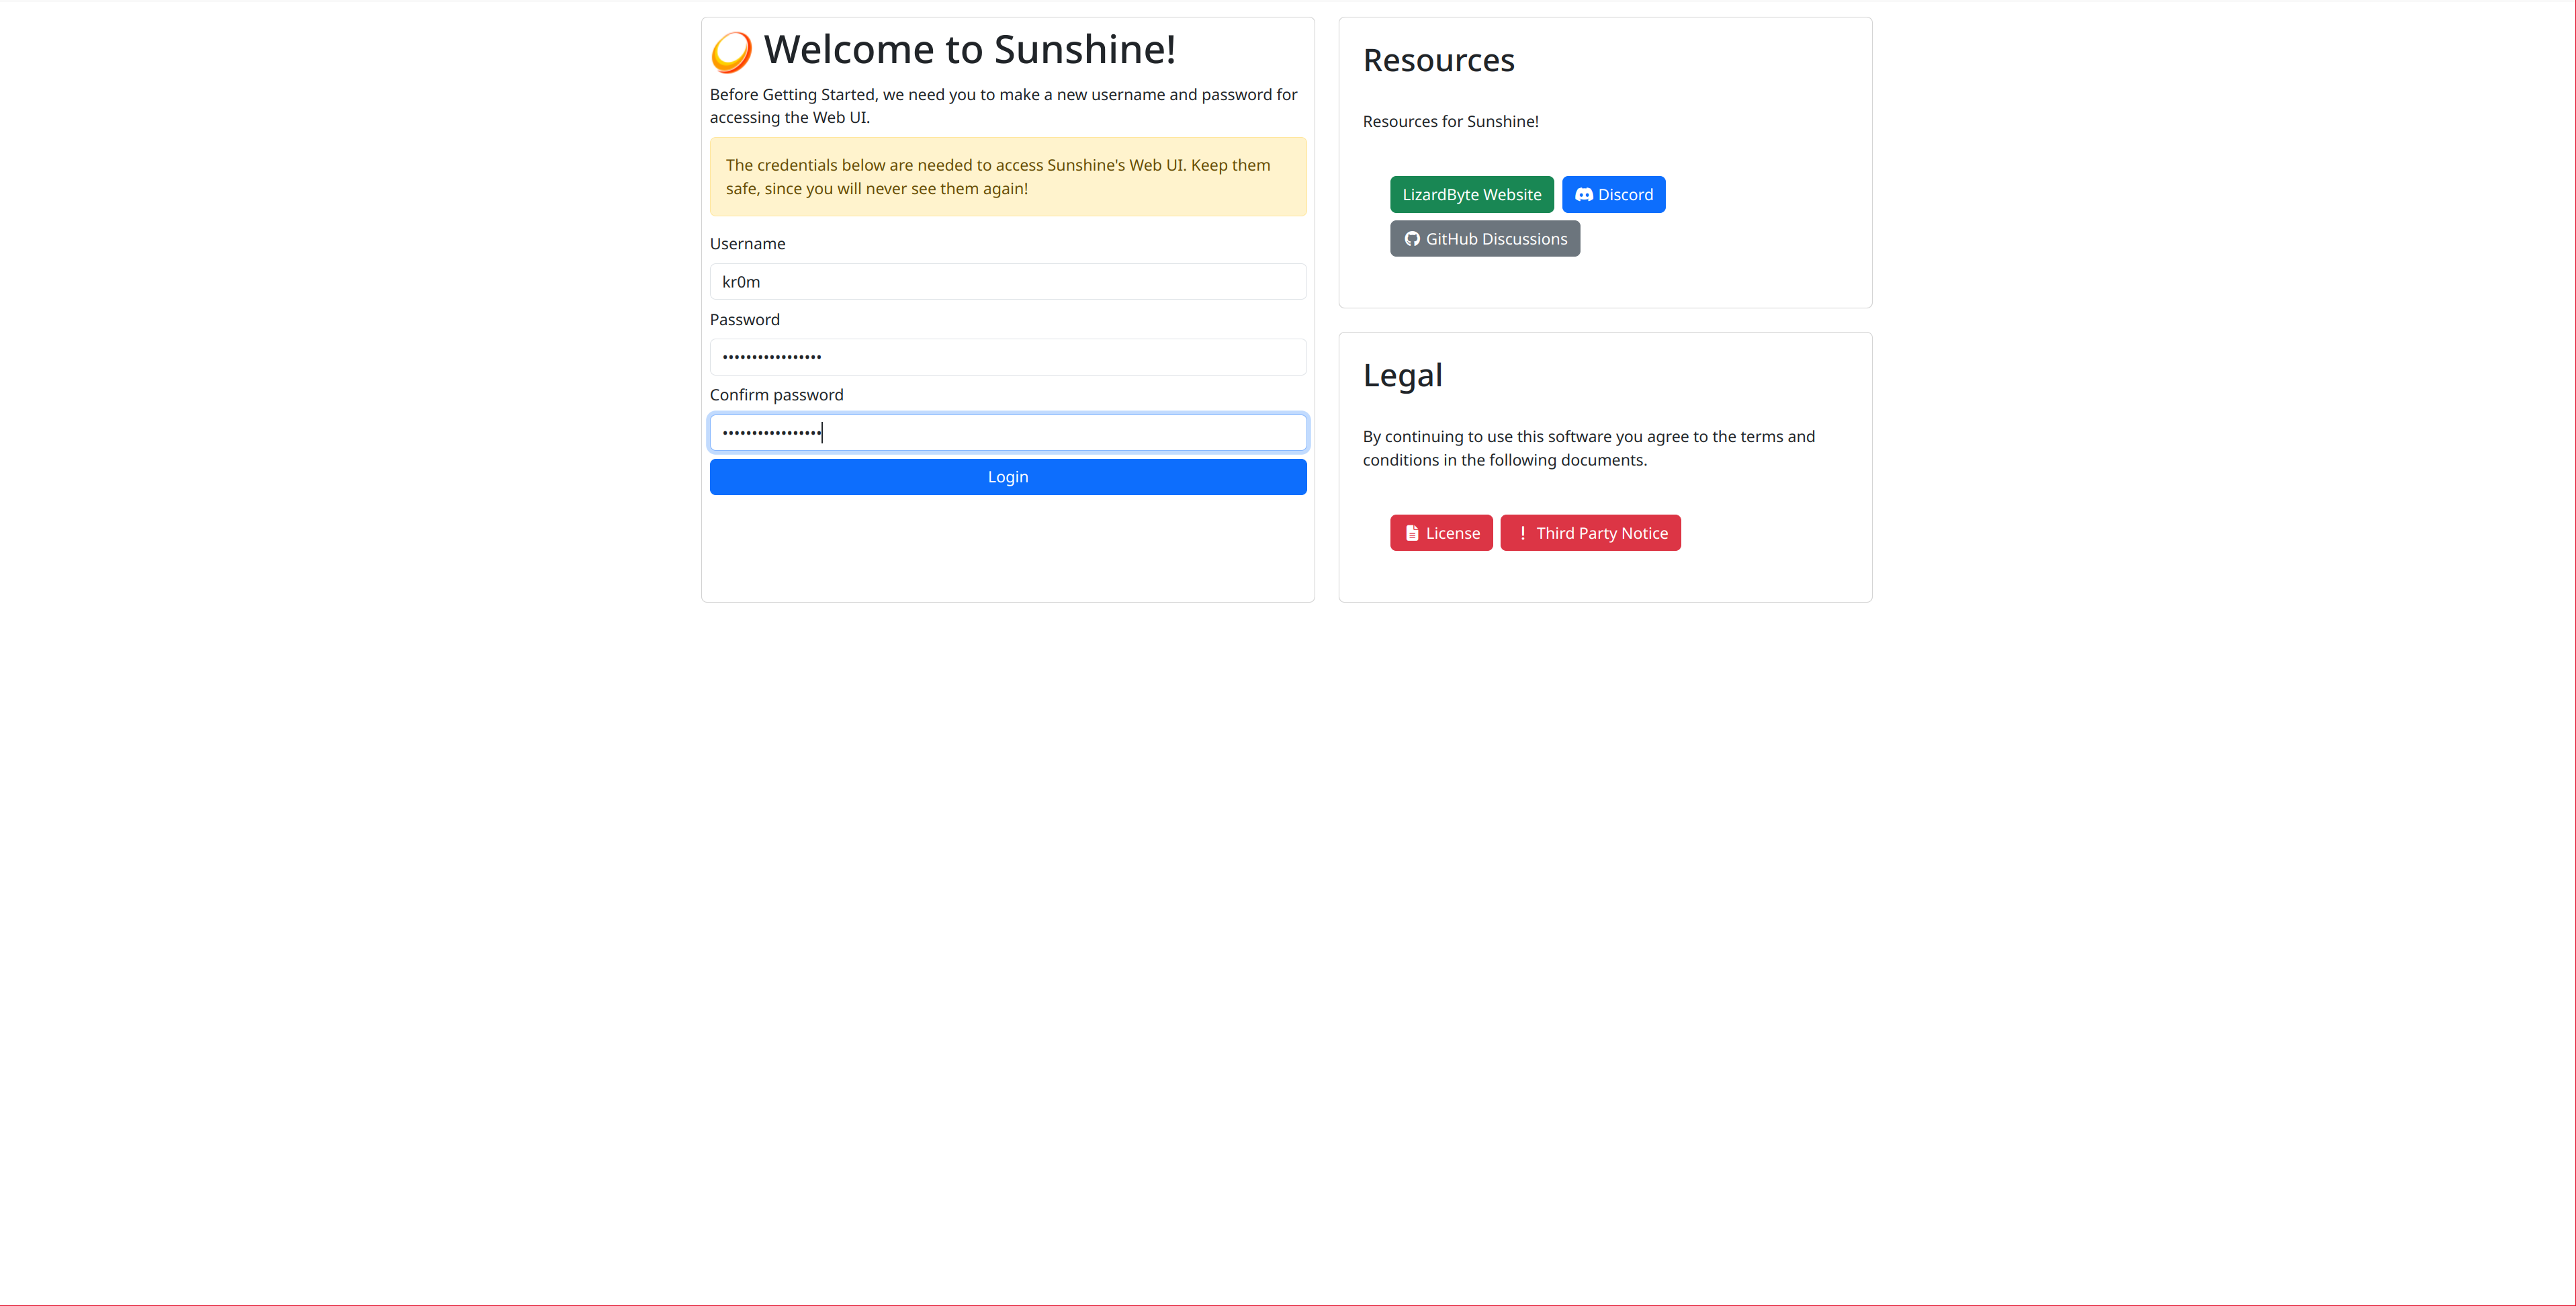
Click on it: Open Sunshine, which will open a web page to set up the access credentials for SunShine’s control panel (if you encounter certificate issues, choose to ignore them):
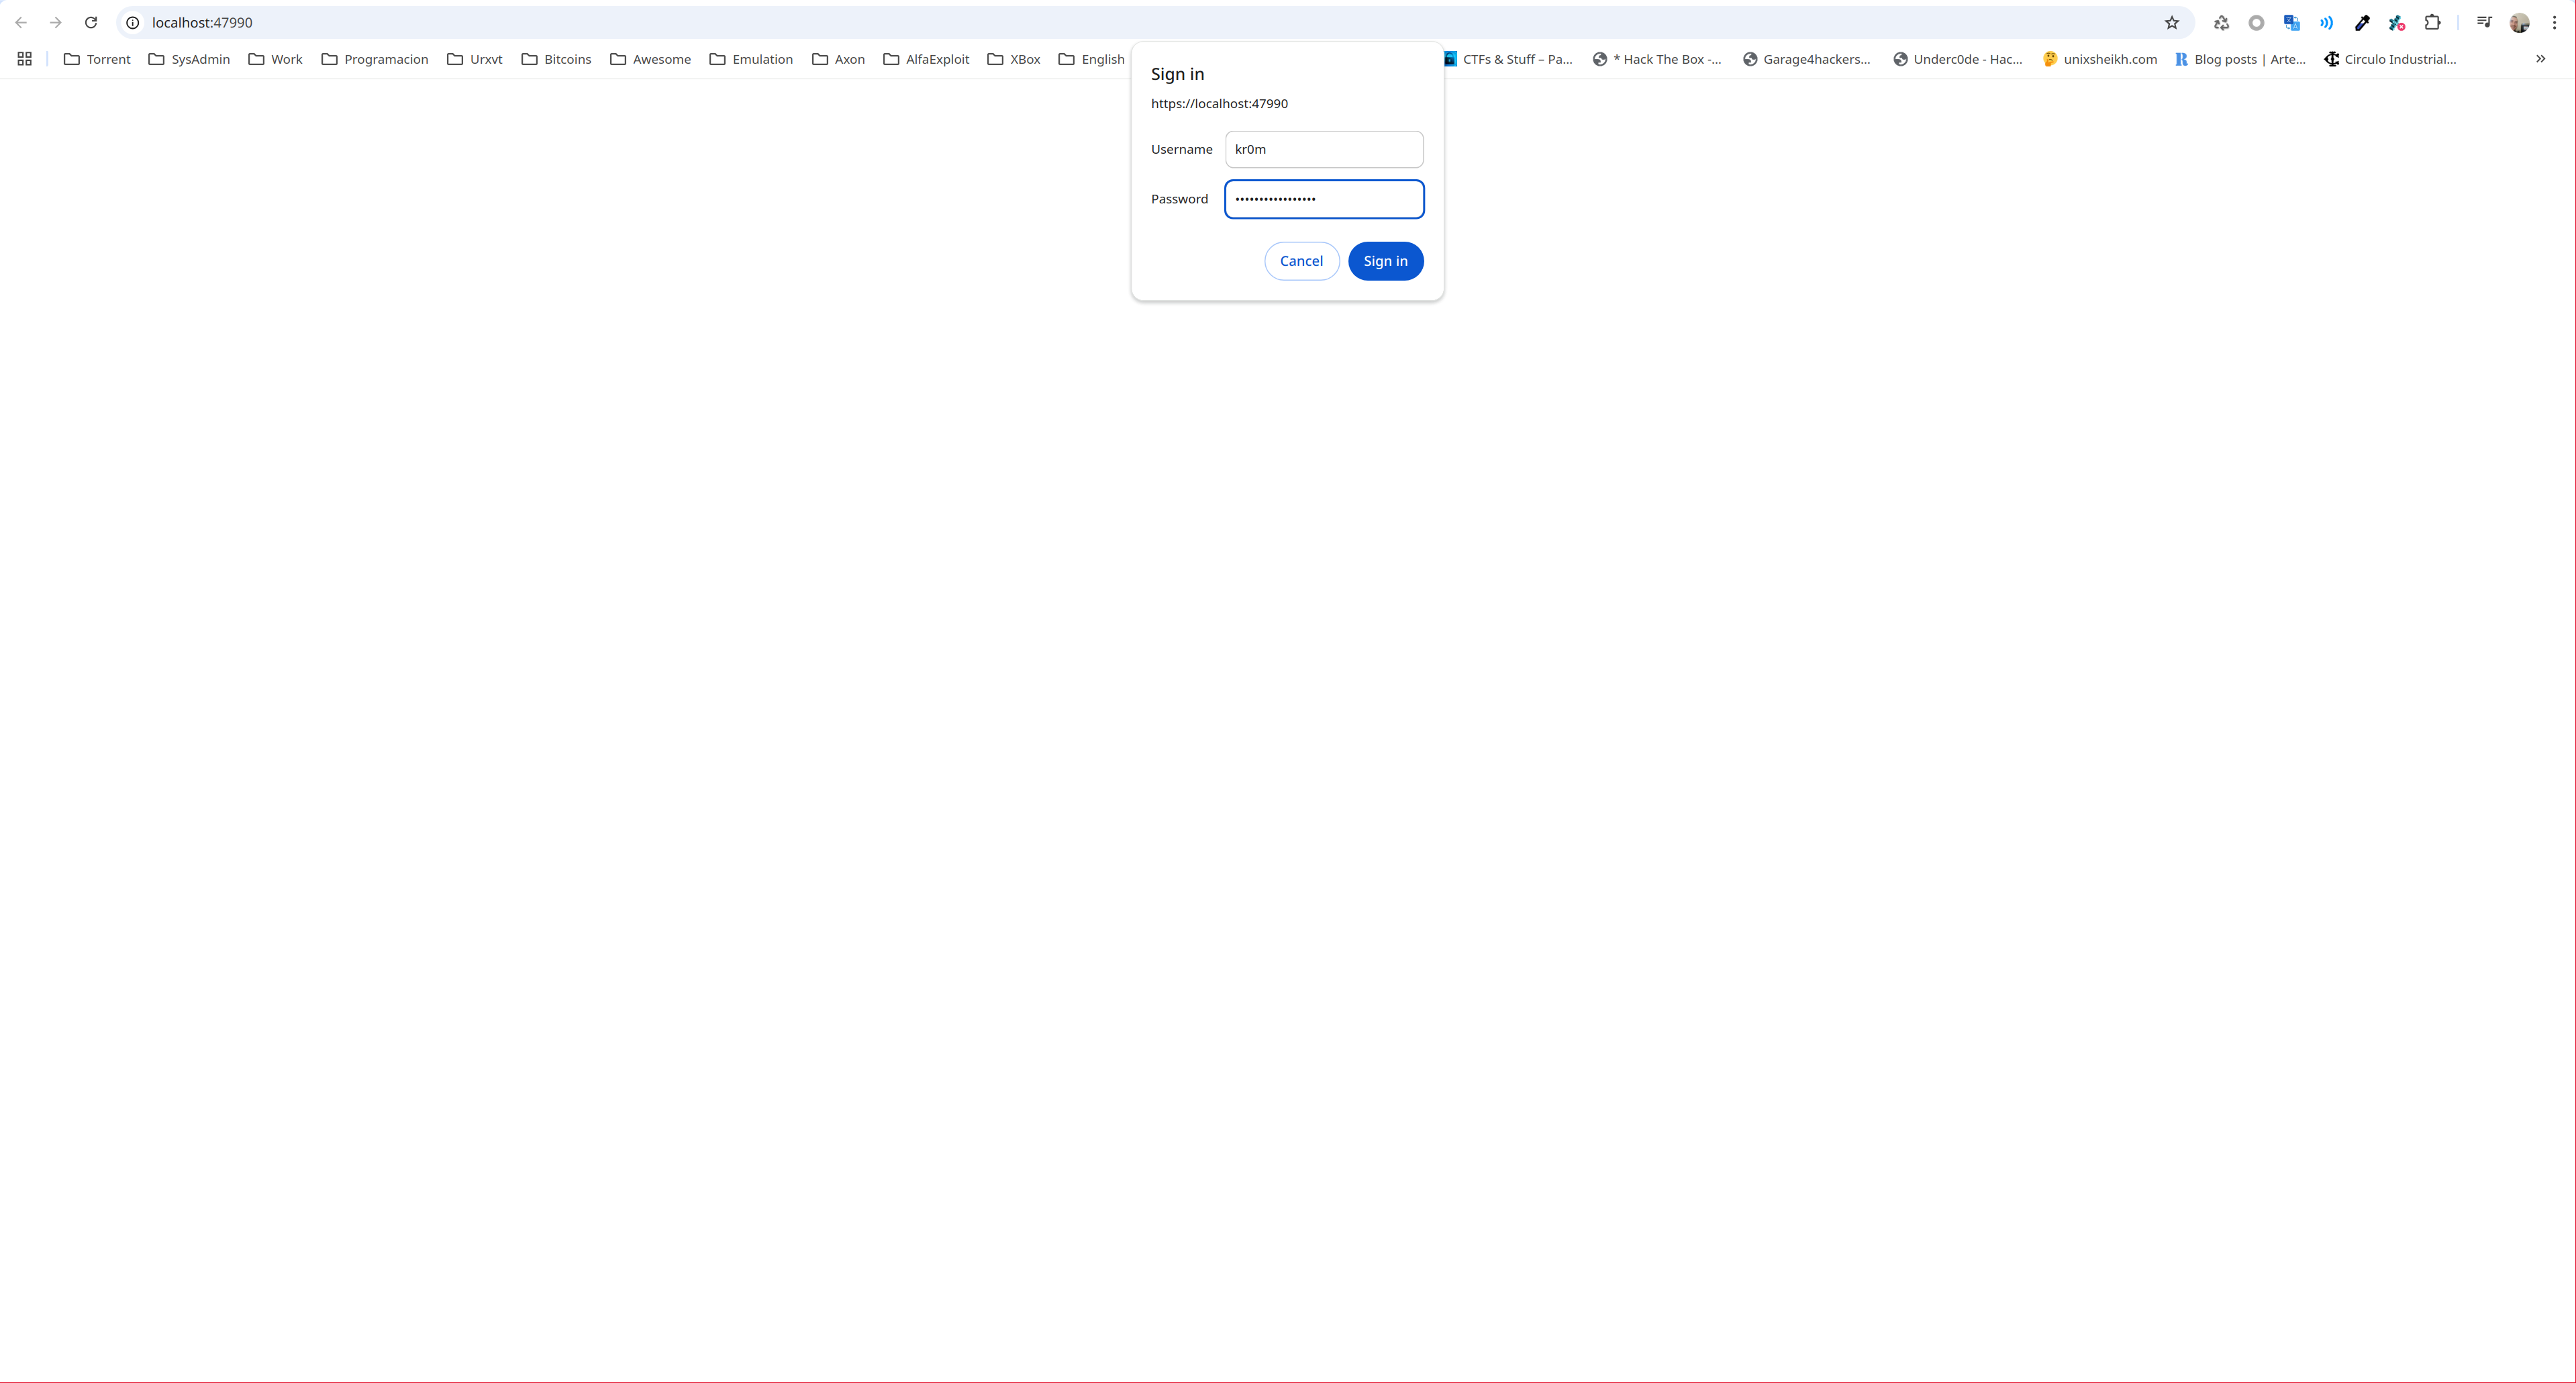
Next, a login screen will appear asking for the credentials you just set:
This will lead to this page:
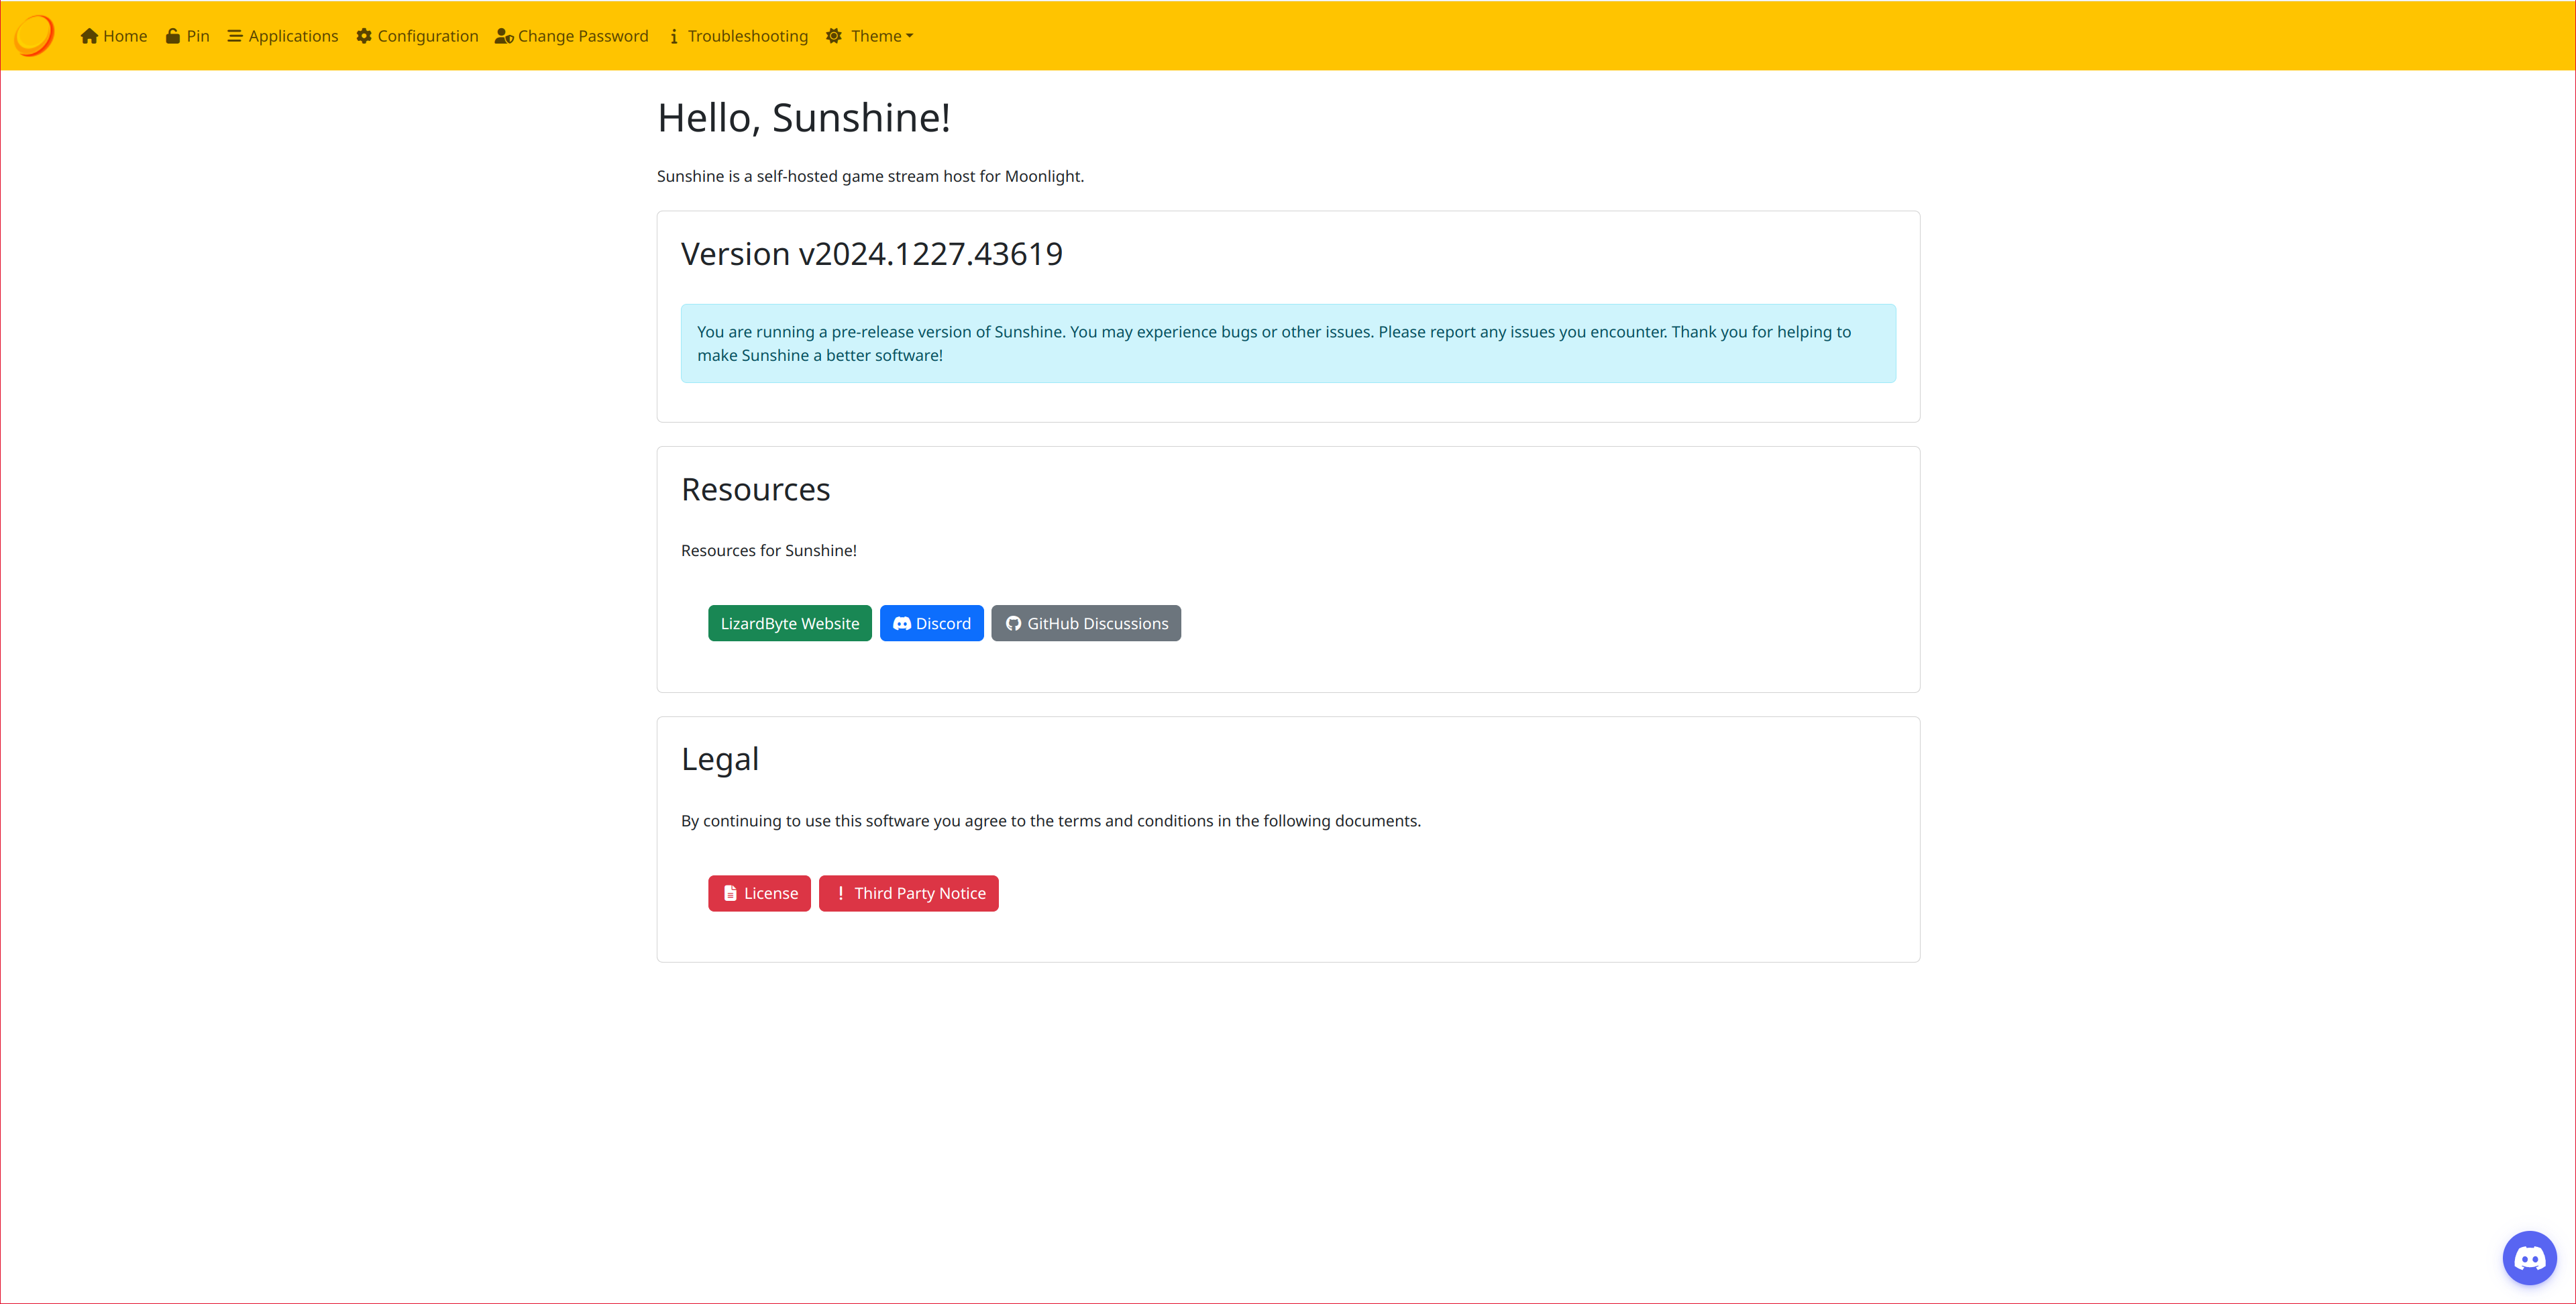
Launch MoonLight in the console and configure the connection to the PC:
Ports -> MoonLight -> Connect -> IP Address: 192.168.X.X
Generate a pairing PIN:
Ports -> MoonLight -> Connect -> Pair
On the PC, click PIN and enter the number shown on the console:
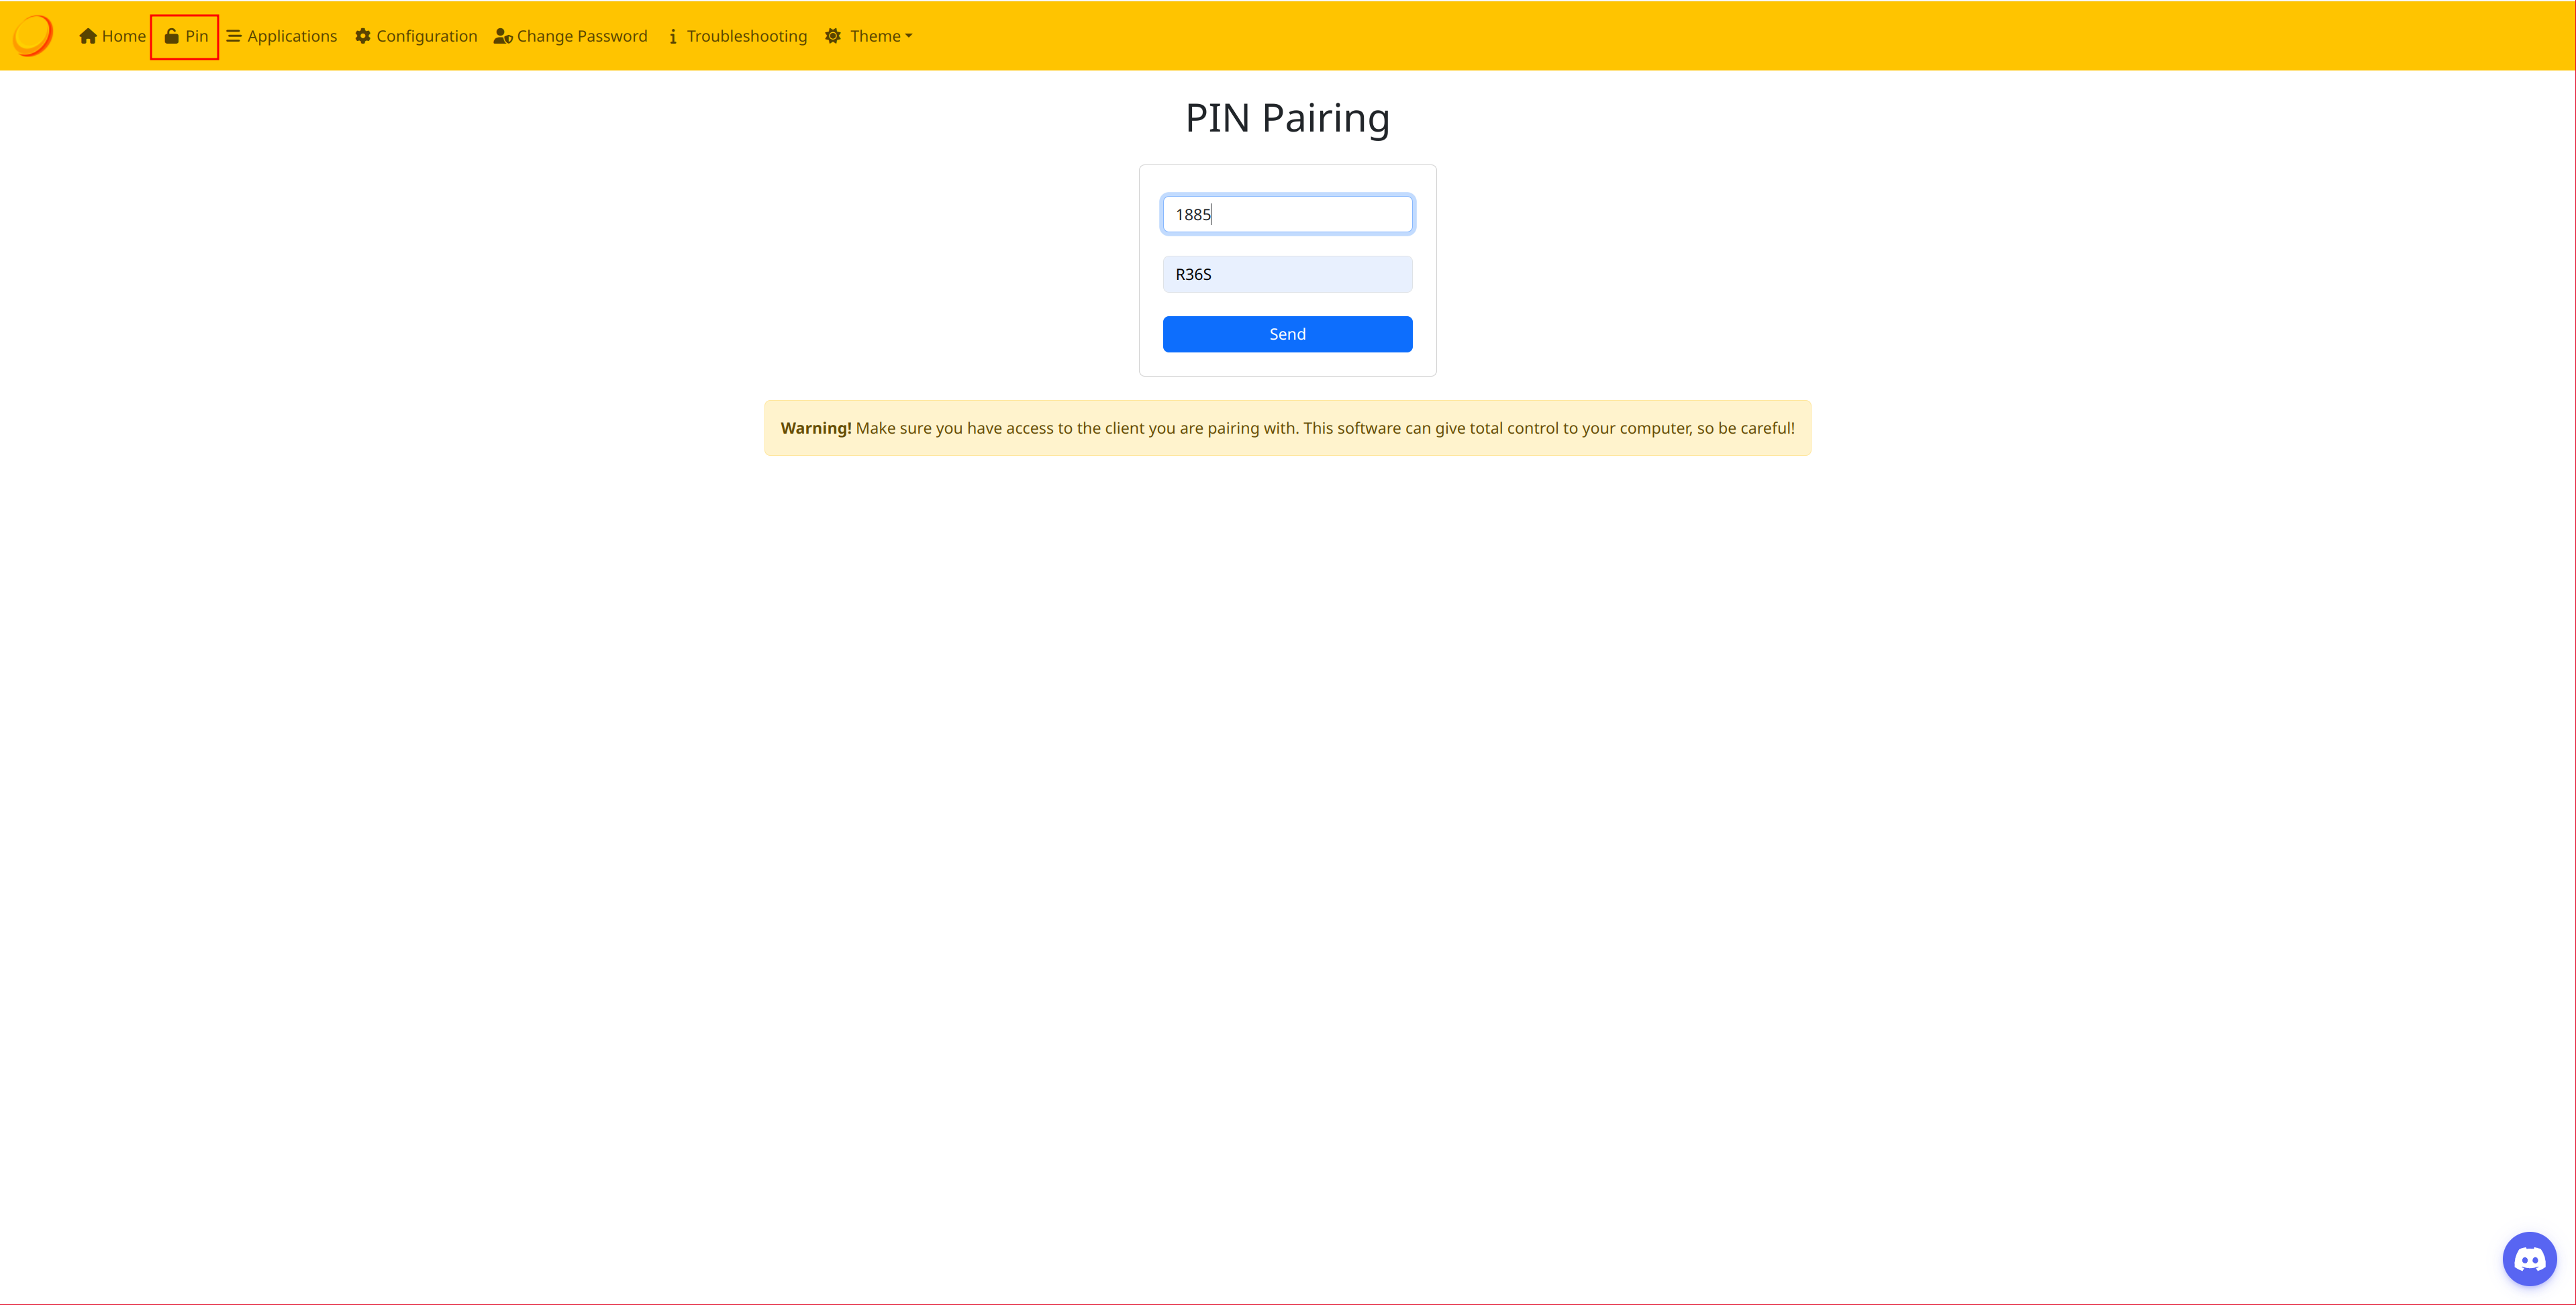
A success message should appear:
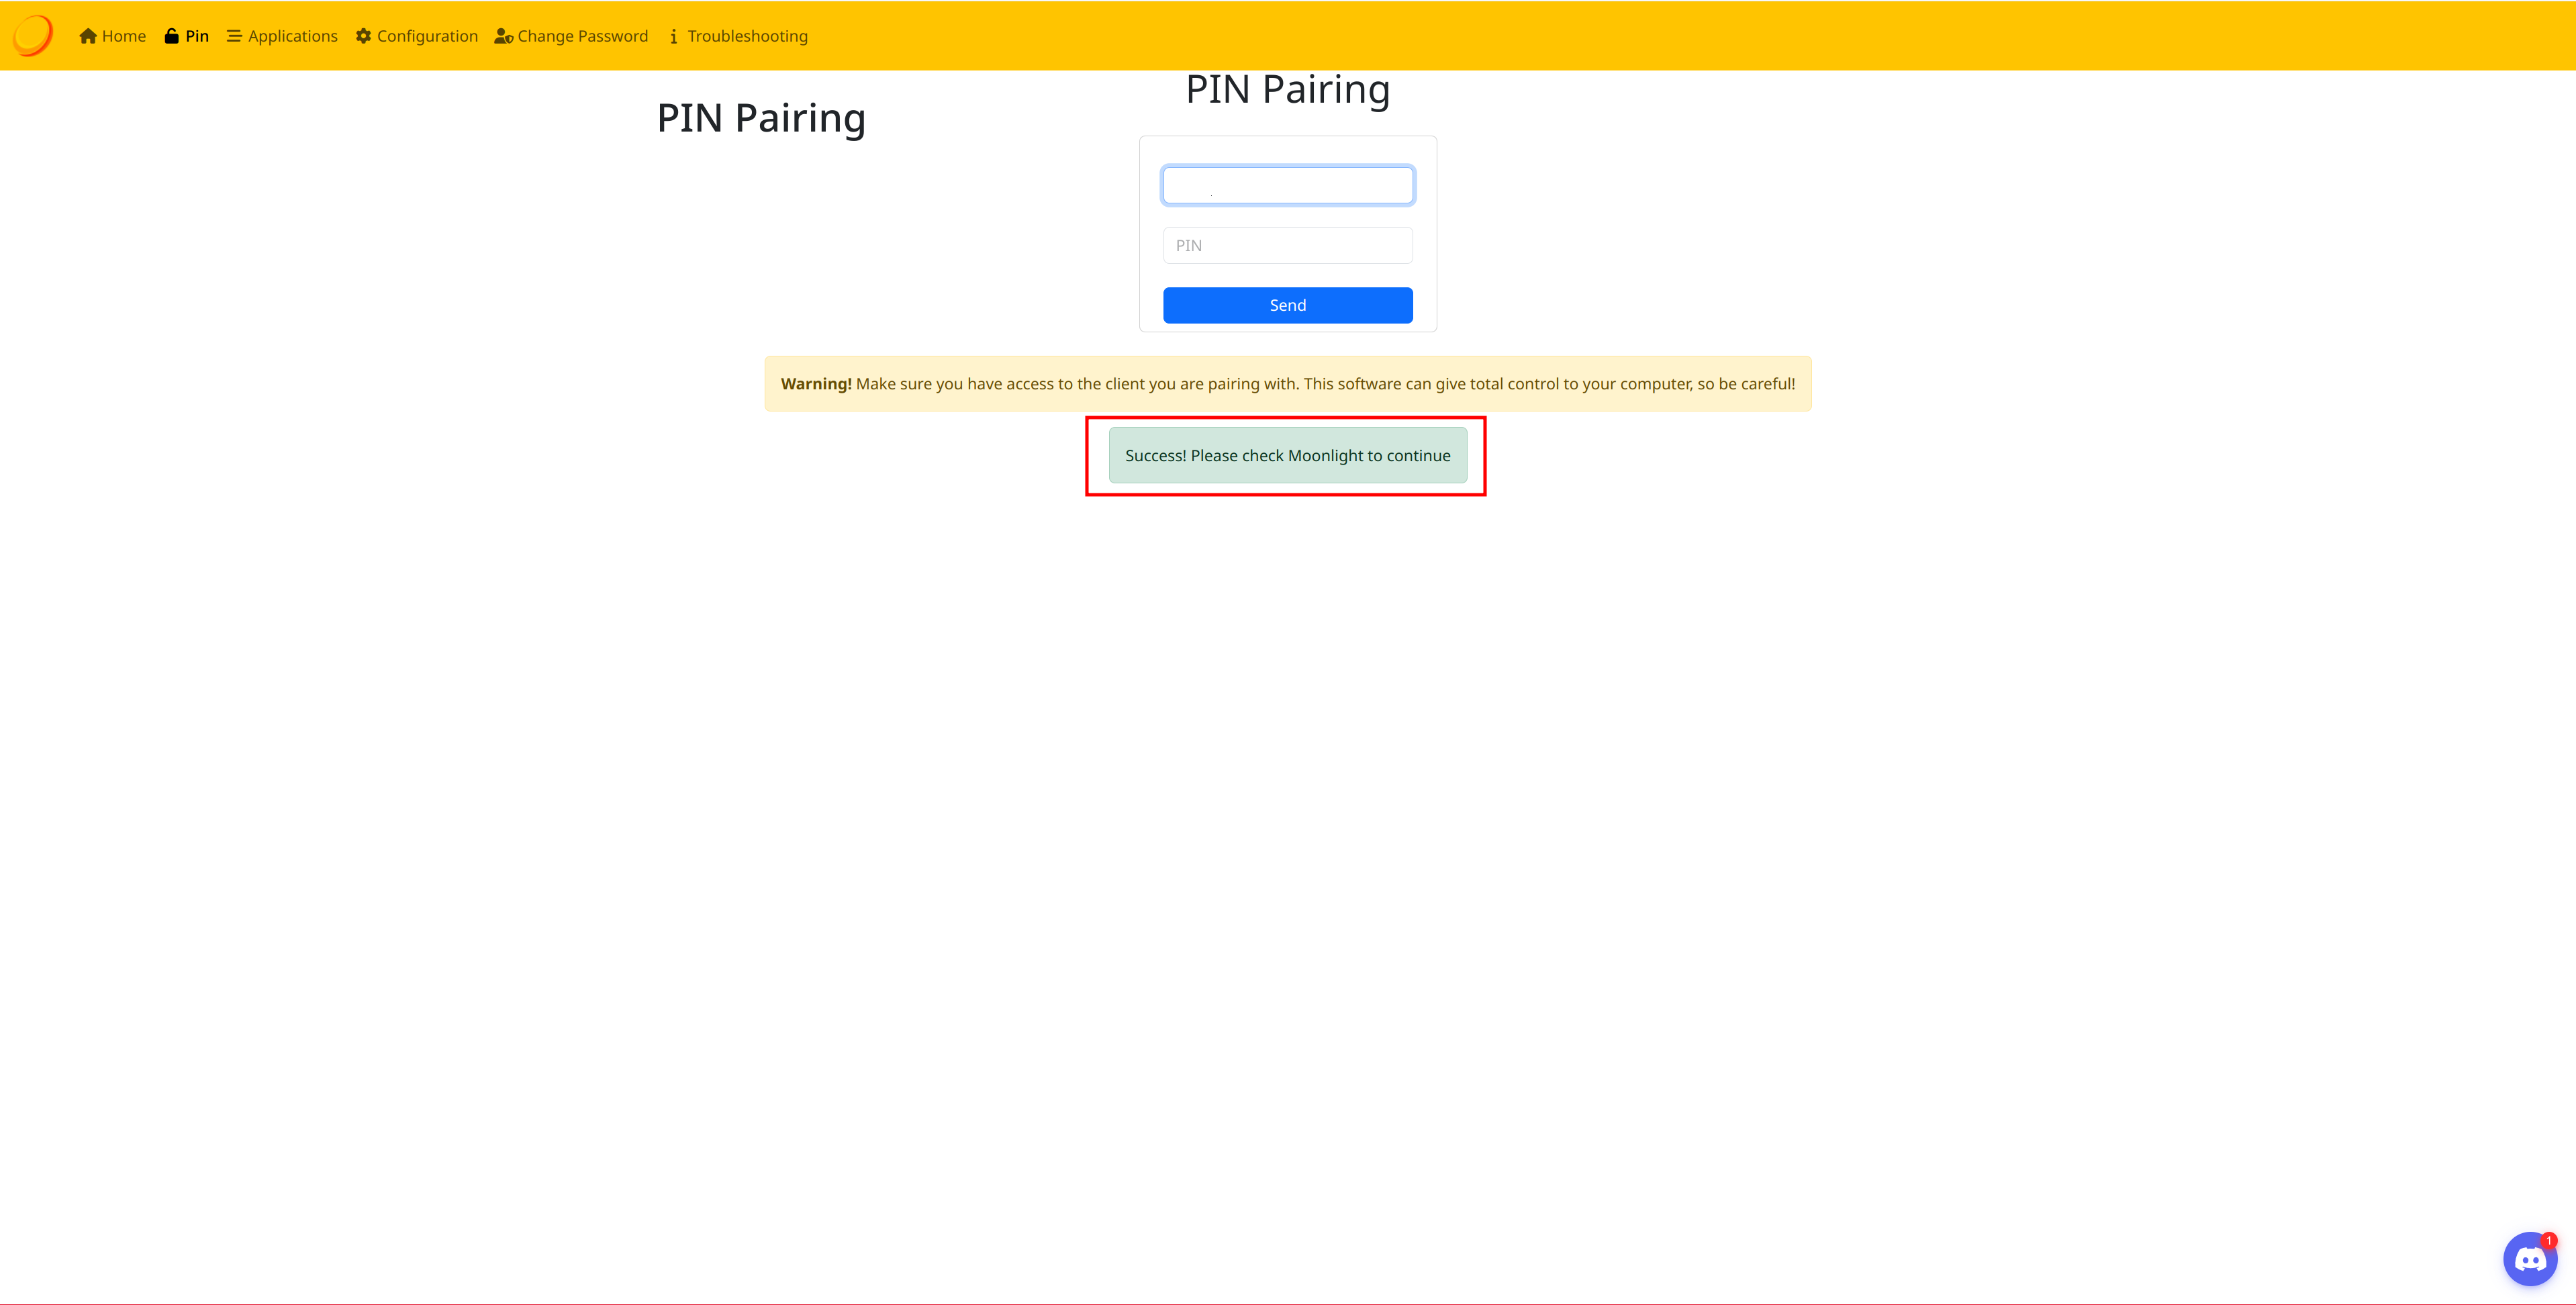
For some reason, I need to adjust the X resolution to the desired game resolution before launching the game, or it won’t work. I’ve tested this with the default Cinnamon window manager on Mint, and the behavior is the same. Since I’ll be playing at 1080p on an older system, I change the resolution using xrandr or the window manager’s tool and launch Steam:
xrandr -s 1920x1080
steam
On the console, reload the apps:
Ports -> MoonLight -> Connect -> Reload Apps
Go to the Play section and select Desktop:
Ports -> MoonLight -> Play -> Desktop
Now everything displayed on the PC can also be seen on the console, and control inputs will be sent to the PC, enabling remote play:
NOTE: I’ve only tested this with Steam, but it should work with any other gaming platform.
ThemeMaster:
ThemeMaster allows you to add additional themes for EmulationStation. Simply download the theme and apply it.
Start by downloading the latest version of ThemeMaster and extracting it:
unzip JohnIrvine1433-ThemeMaster-5.1.1-0-g6205c8a.zip
Delete any previous version of ThemeMaster:
rm -rf /media/kr0m/EASYROMS/tools/ThemeMaster*
Copy the files to the SD card:
cp JohnIrvine1433-ThemeMaster-6205c8a/ThemeMaster.sh /media/kr0m/EASYROMS/tools/
cp -r JohnIrvine1433-ThemeMaster-6205c8a/ThemeMaster /media/kr0m/EASYROMS/tools/
Ensure you have an Internet connection and launch ThemeMaster:
Options -> Tools: ThemeMaster
Download the themes. You can view previews in ThemeMaster or on
this website
:
My favorite themes are:
alekfull-solo-arkos
es-theme-epicaeolus
es-theme-epicnoir
es-theme-minimal-arkos
es-theme-pixel
Apply the new themes:
START -> UI Settings -> Theme
BGMusic:
You can listen to your favorite songs while in the EmulationStation menu. Just copy MP3 files to EASYROMS/bgmusic.
Enable music playback:
START -> Sound Settings -> Frontend Music: ON
You can find many copyright-free songs for download on this website: pixabay
Here’s a StarFox track:
BootScreen:
You can also edit the boot images in BOOT/BMPs.
In my case, I only made minor tweaks:
Shortcuts and Functions:
You can find all ArkOS shortcuts and functions for each emulator here.
Debug:
If some game/ports fails to start, we can increase EmulationStation's Log level:
Start -> Advanced settings -> Log level: Debug
Ports usually have their own log file: /roms/ports/PORT_NAME/log.txt
Some ports have issues accessing the audio device:
FATAL ERROR:
DynOS_Music_GetDevice: Could not open music device. (ALSA: Couldn't open audio device: Device or resource busy)
Launching the port from the file explorer resolves the conflict:
Options -> File manager -> ports -> render96ex.sh
A -> Execute
Prosthetics:
The console’s ergonomics leave much to be desired, but you can improve it somewhat by 3D printing an accessory (I don’t own a 3D printer) like this one:
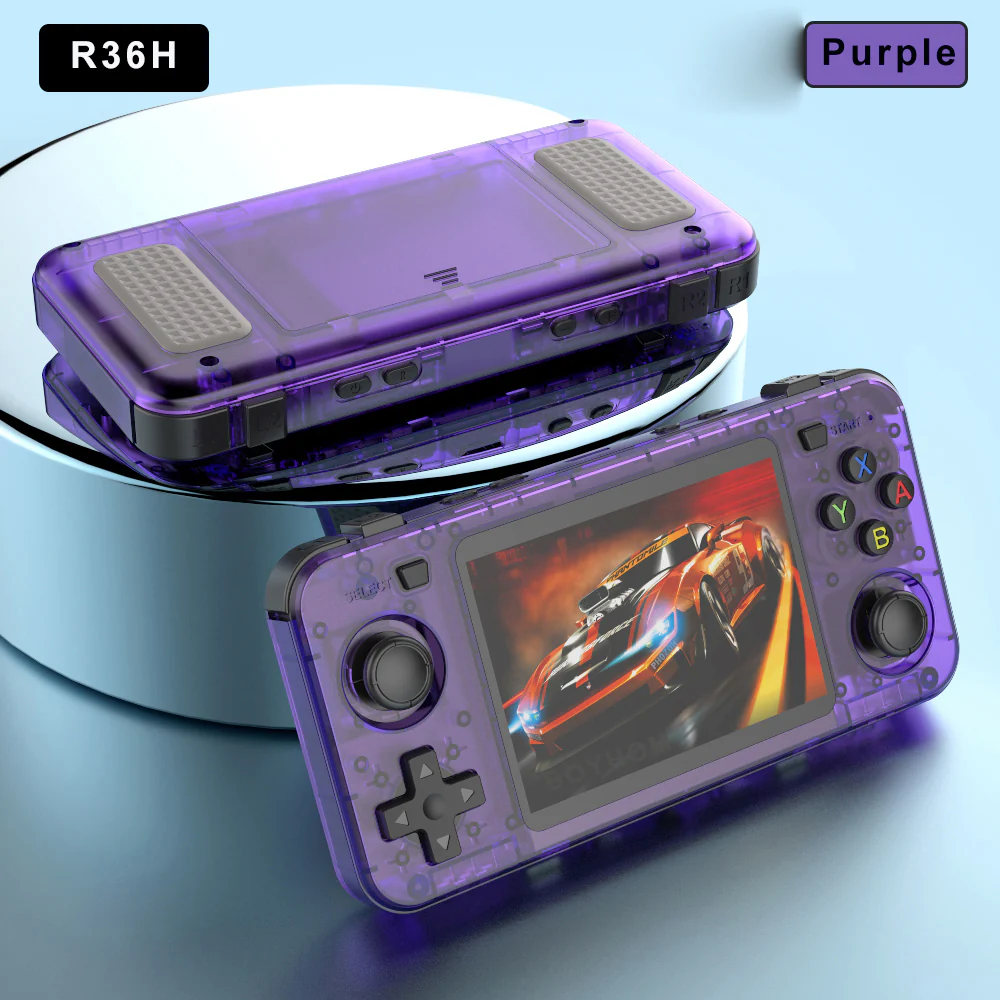
There is an
R36H model
that significantly improves ergonomics; the hardware is exactly the same but arranged horizontally(no rumble support).
Resources:
If you’re looking for ROMs, the Cylum lists are some of the best:
In this Telegram channel can be found a wide variety of resources:
https://t.me/R36Stelegram