The Chinese manufacturer Chuwi offers interesting products at very competitive prices. I personally purchased the
FreeBook model
with 16GB, which can be used both as a traditional PC and as a tablet.
Laptop:
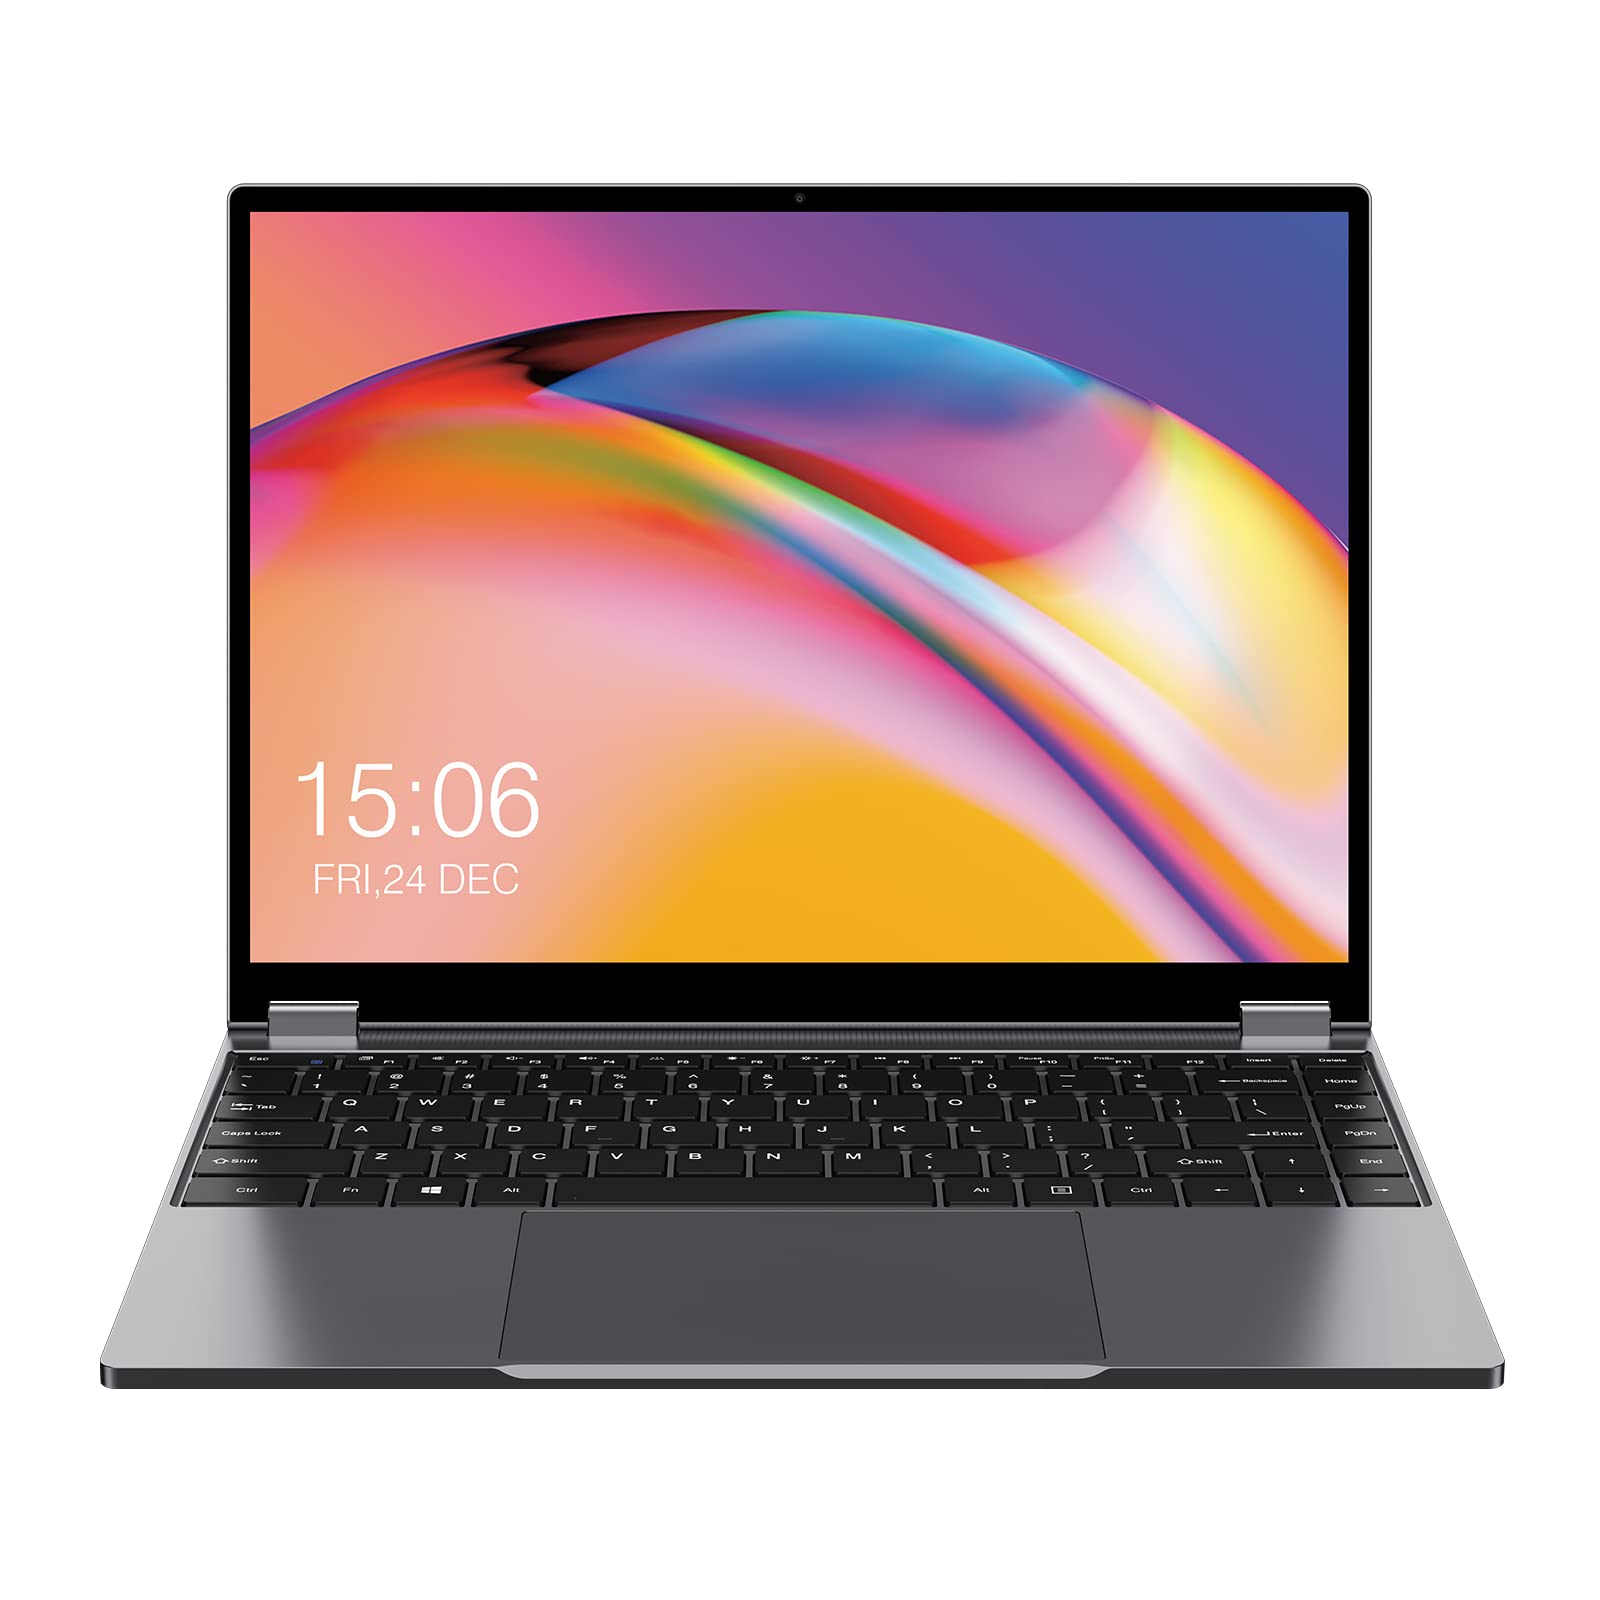 |
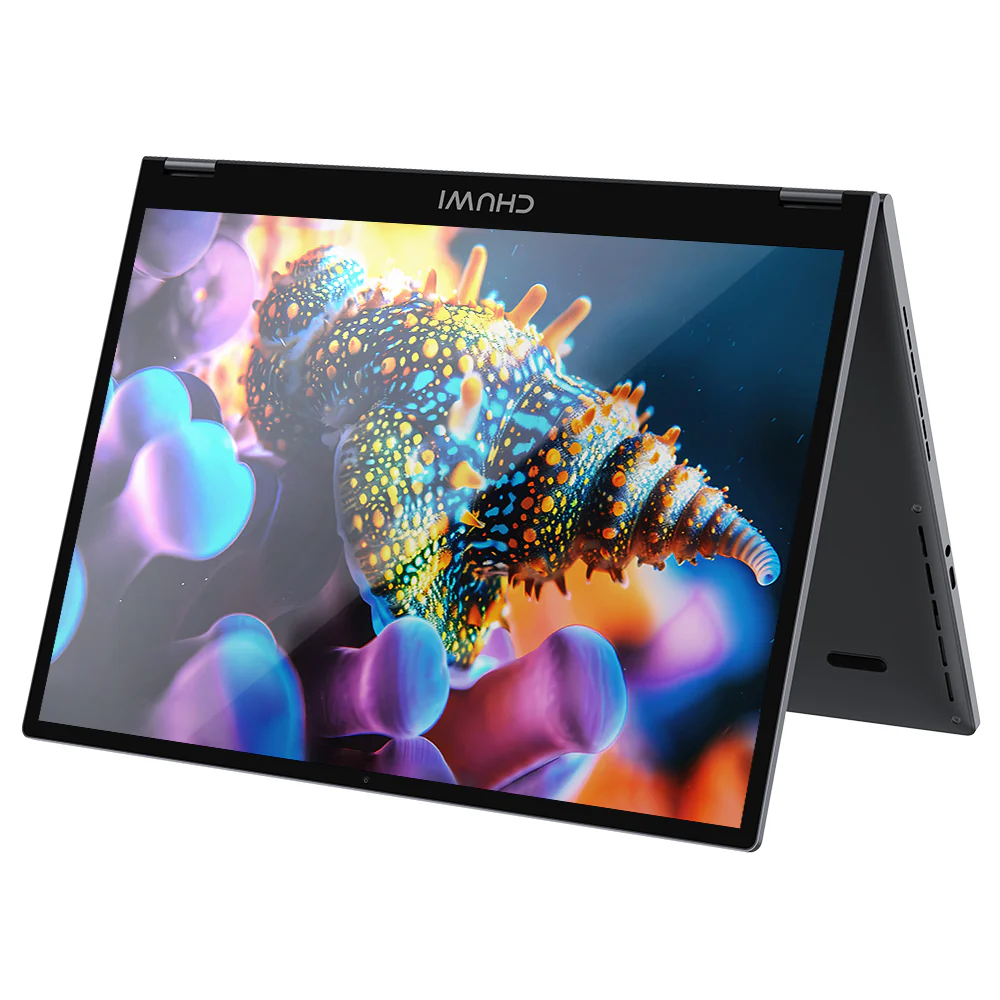 |
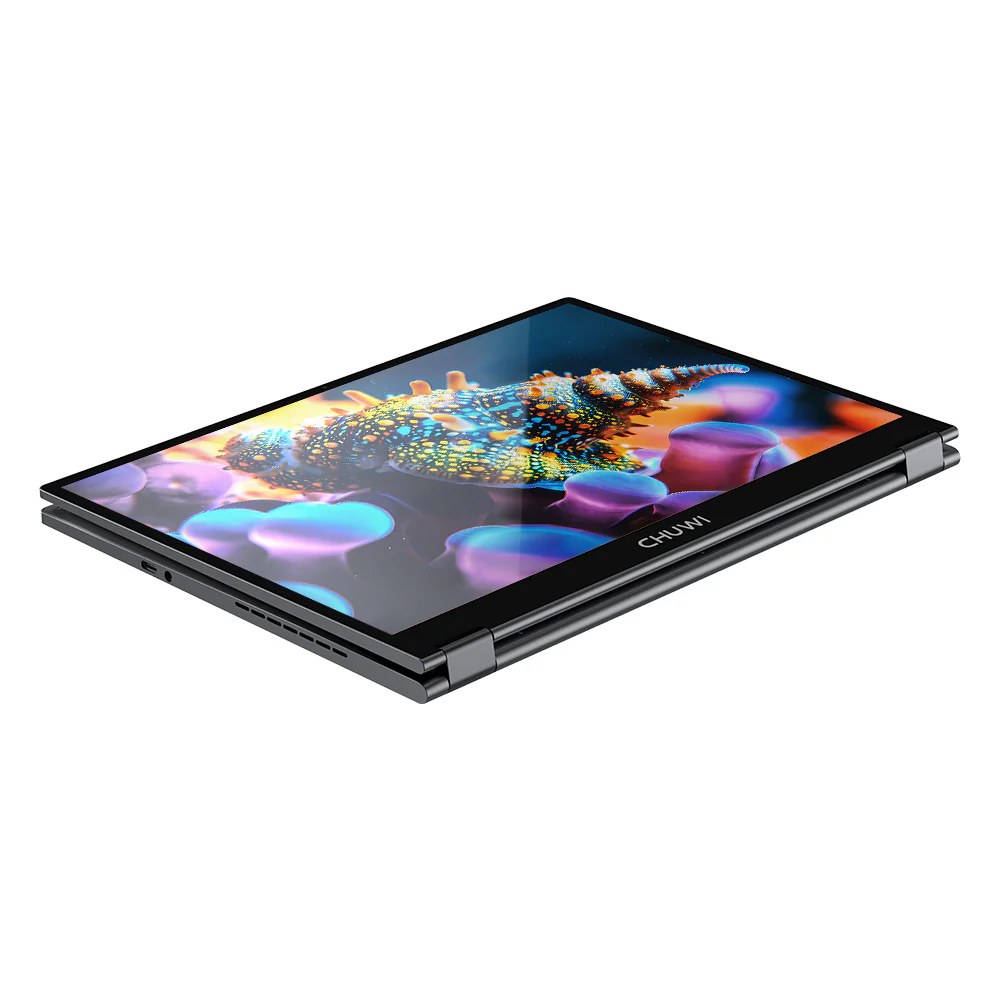 |
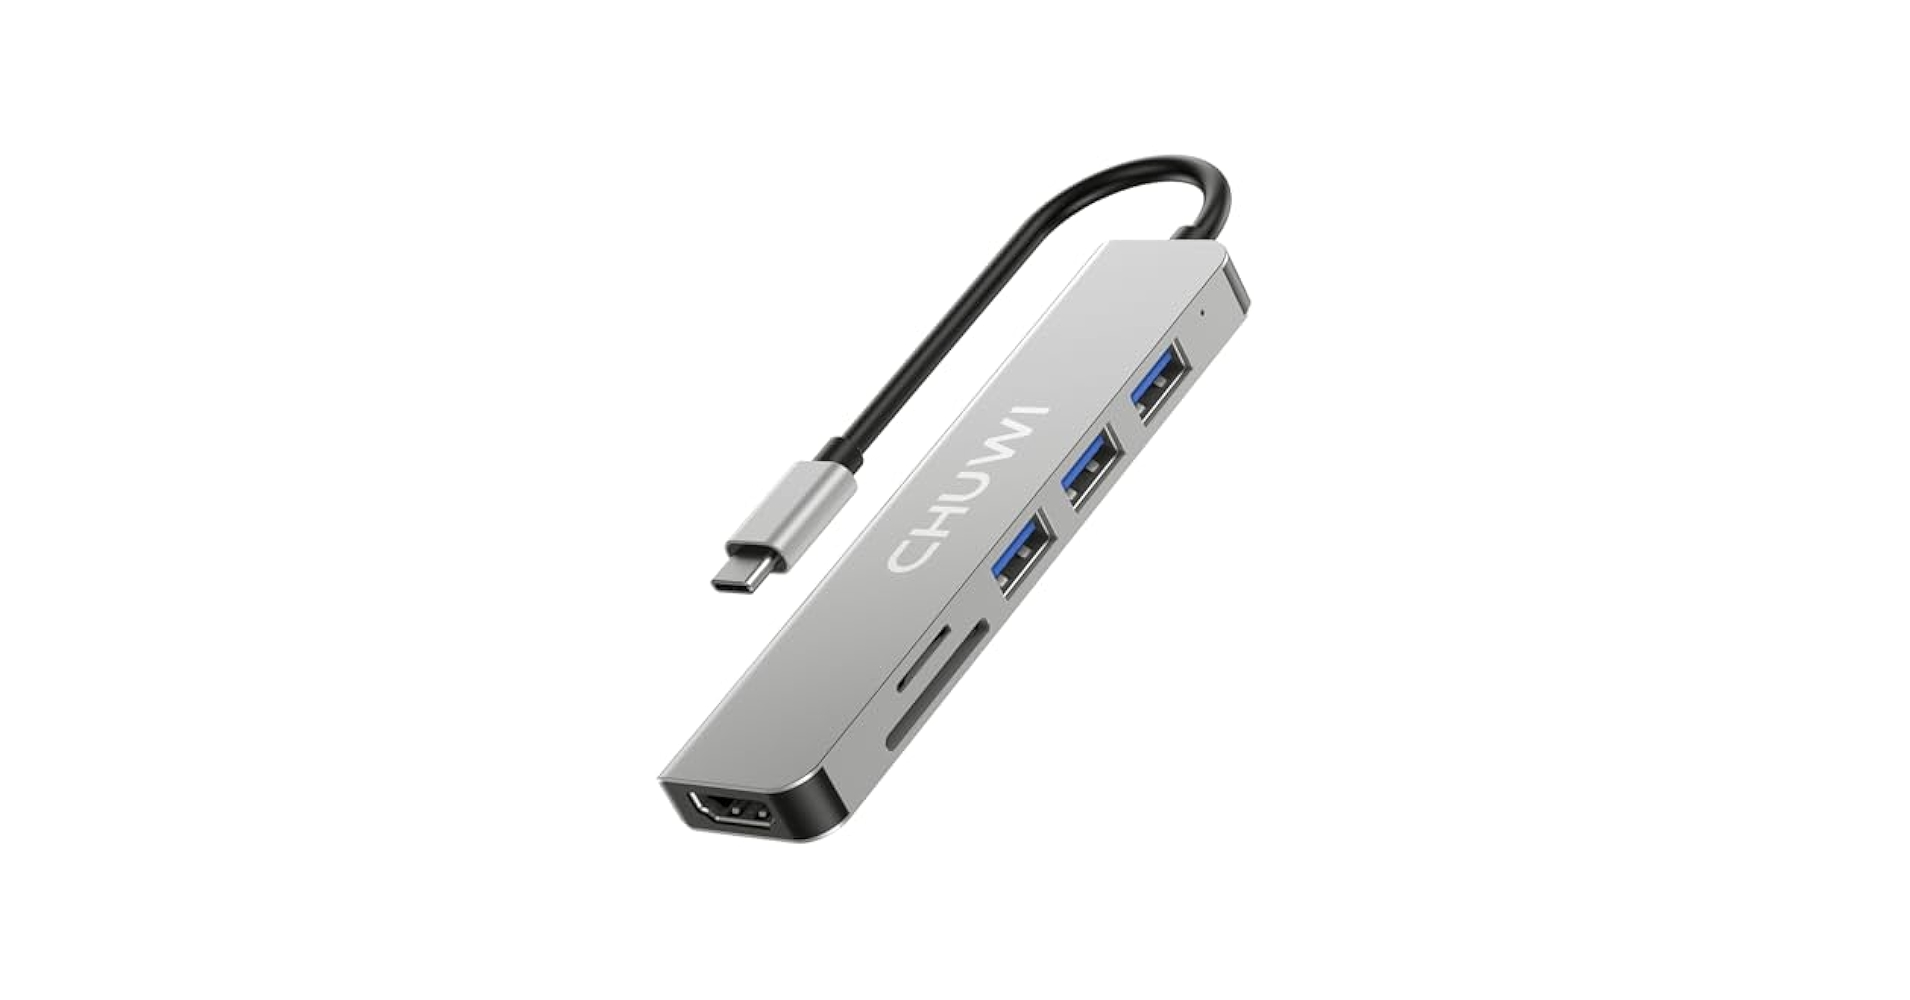
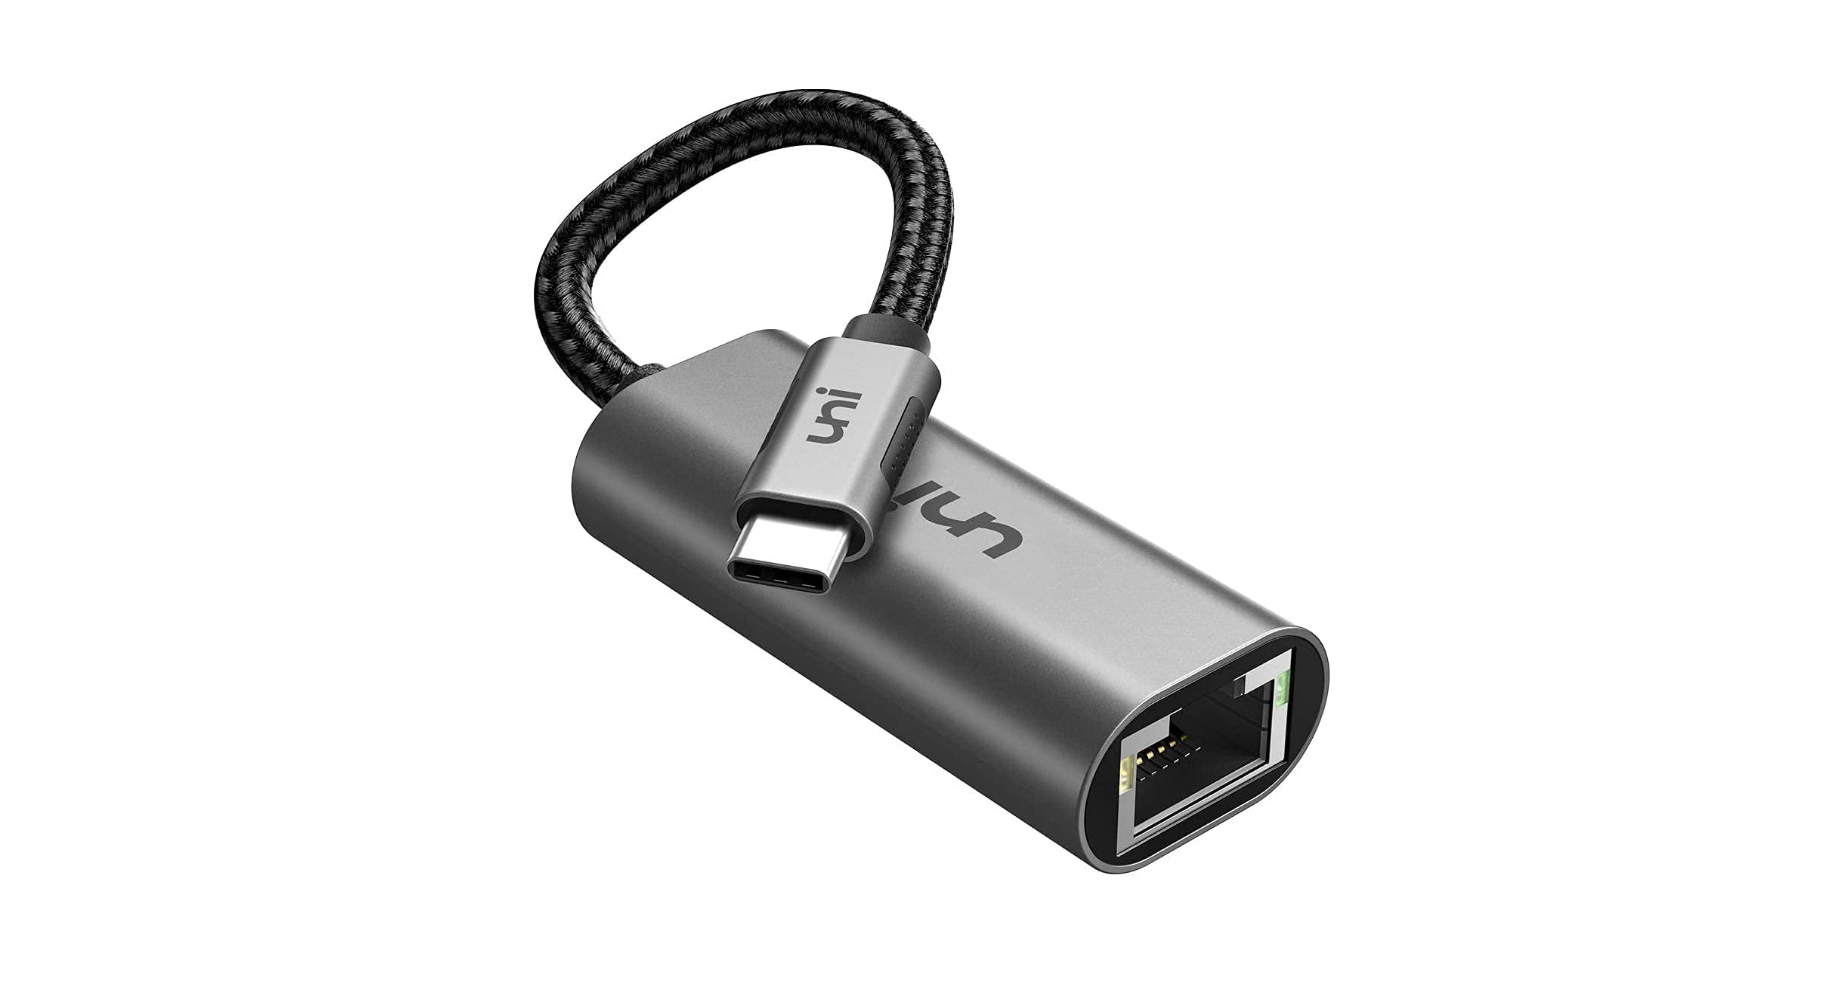
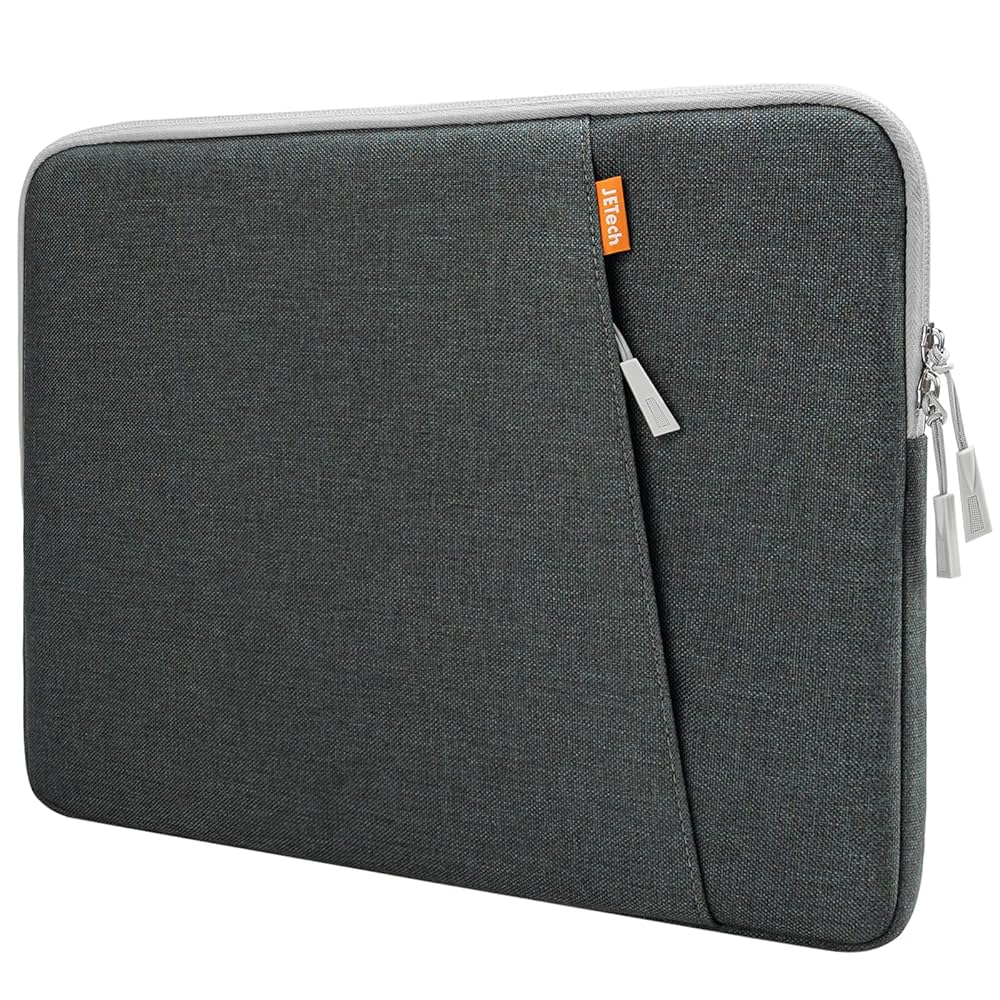
Accessories:
| HUB USB-C | MPP HiPen H7 | Non oficial Ethernet adapter | Non oficial Carry bag(13,3) |
|---|---|---|---|
 |
 |
 |
 |
The system specifications are as follows:
Display |
13.4-inch, 2.5K (2520RGB×1680) IPS Touchscreen, 3:2 |
Stylus Support |
Yes, Compatible with HiPen H7 |
CPU |
Intel Twin Lake N150 (4 Cores, 4 Threads, 6 MB Intel Smart Cache, up to 3.6 GHz) |
GPU |
Intel Graphics (1 GHz Max Dynamic Frequency, 24 Execution Units) |
Memory |
12/16GB LPDDR5 4000MHz |
Storage |
512GB PCIe SSD (1× M.2 2280 SSD Slot, Compatible with SATA 3 or PCIe 3.0×4, Expandable up to 1TB) |
Battery |
38 Wh (7.6V/5000mAh)(4h with regular use) |
I/O Ports |
2× Full-Featured USB 3.0 Type-C Ports (support data, charging and DisplayPort) / 1× USB 2.0 Type-C Port (data transfer) / 1× 3.5mm Audio Jack |
Wireless |
Wi-Fi 6(SpeedTest: 164.41/213.31 Mbit/s), Bluetooth 5.2 |
Webcam |
1 MP Front Camera |
Audio |
4× Speakers / 1× Microphone |
Power Adapter |
12V/3A USB-C Power Adapter |
Size |
301.4 × 224.3 × 18.4 mm |
Weight |
About 1360g |
In this article, we will cover everything from the base installation of the operating system to configuring AwesomeWM for a “normal” desktop use and KDE for a tablet-style experience:
- Debian Installation.
- Additional Software Installation.
- System Tweaks.
- Touchpad Configuration.
- Additional System Tweaks.
- External Software.
- Screen Control.
- Function Keys.
- AwesomeWM Graphical Applications Startup.
- AwesomeWM Configuration.
- Battery Alerts.
- Power Management.
- Tablet Mode.
- SSH-FS.
- Other Operating Systems
Debian Installation:
The installation is quite simple, we just burn the ISO-NetInstall onto a USB:
wget https://cdimage.debian.org/debian-cd/current/amd64/iso-cd/debian-13.1.0-amd64-netinst.iso
dd if=/home/kr0m/debian-13.1.0-amd64-netinst.iso of=/dev/sdX bs=4M status=progress oflag=sync
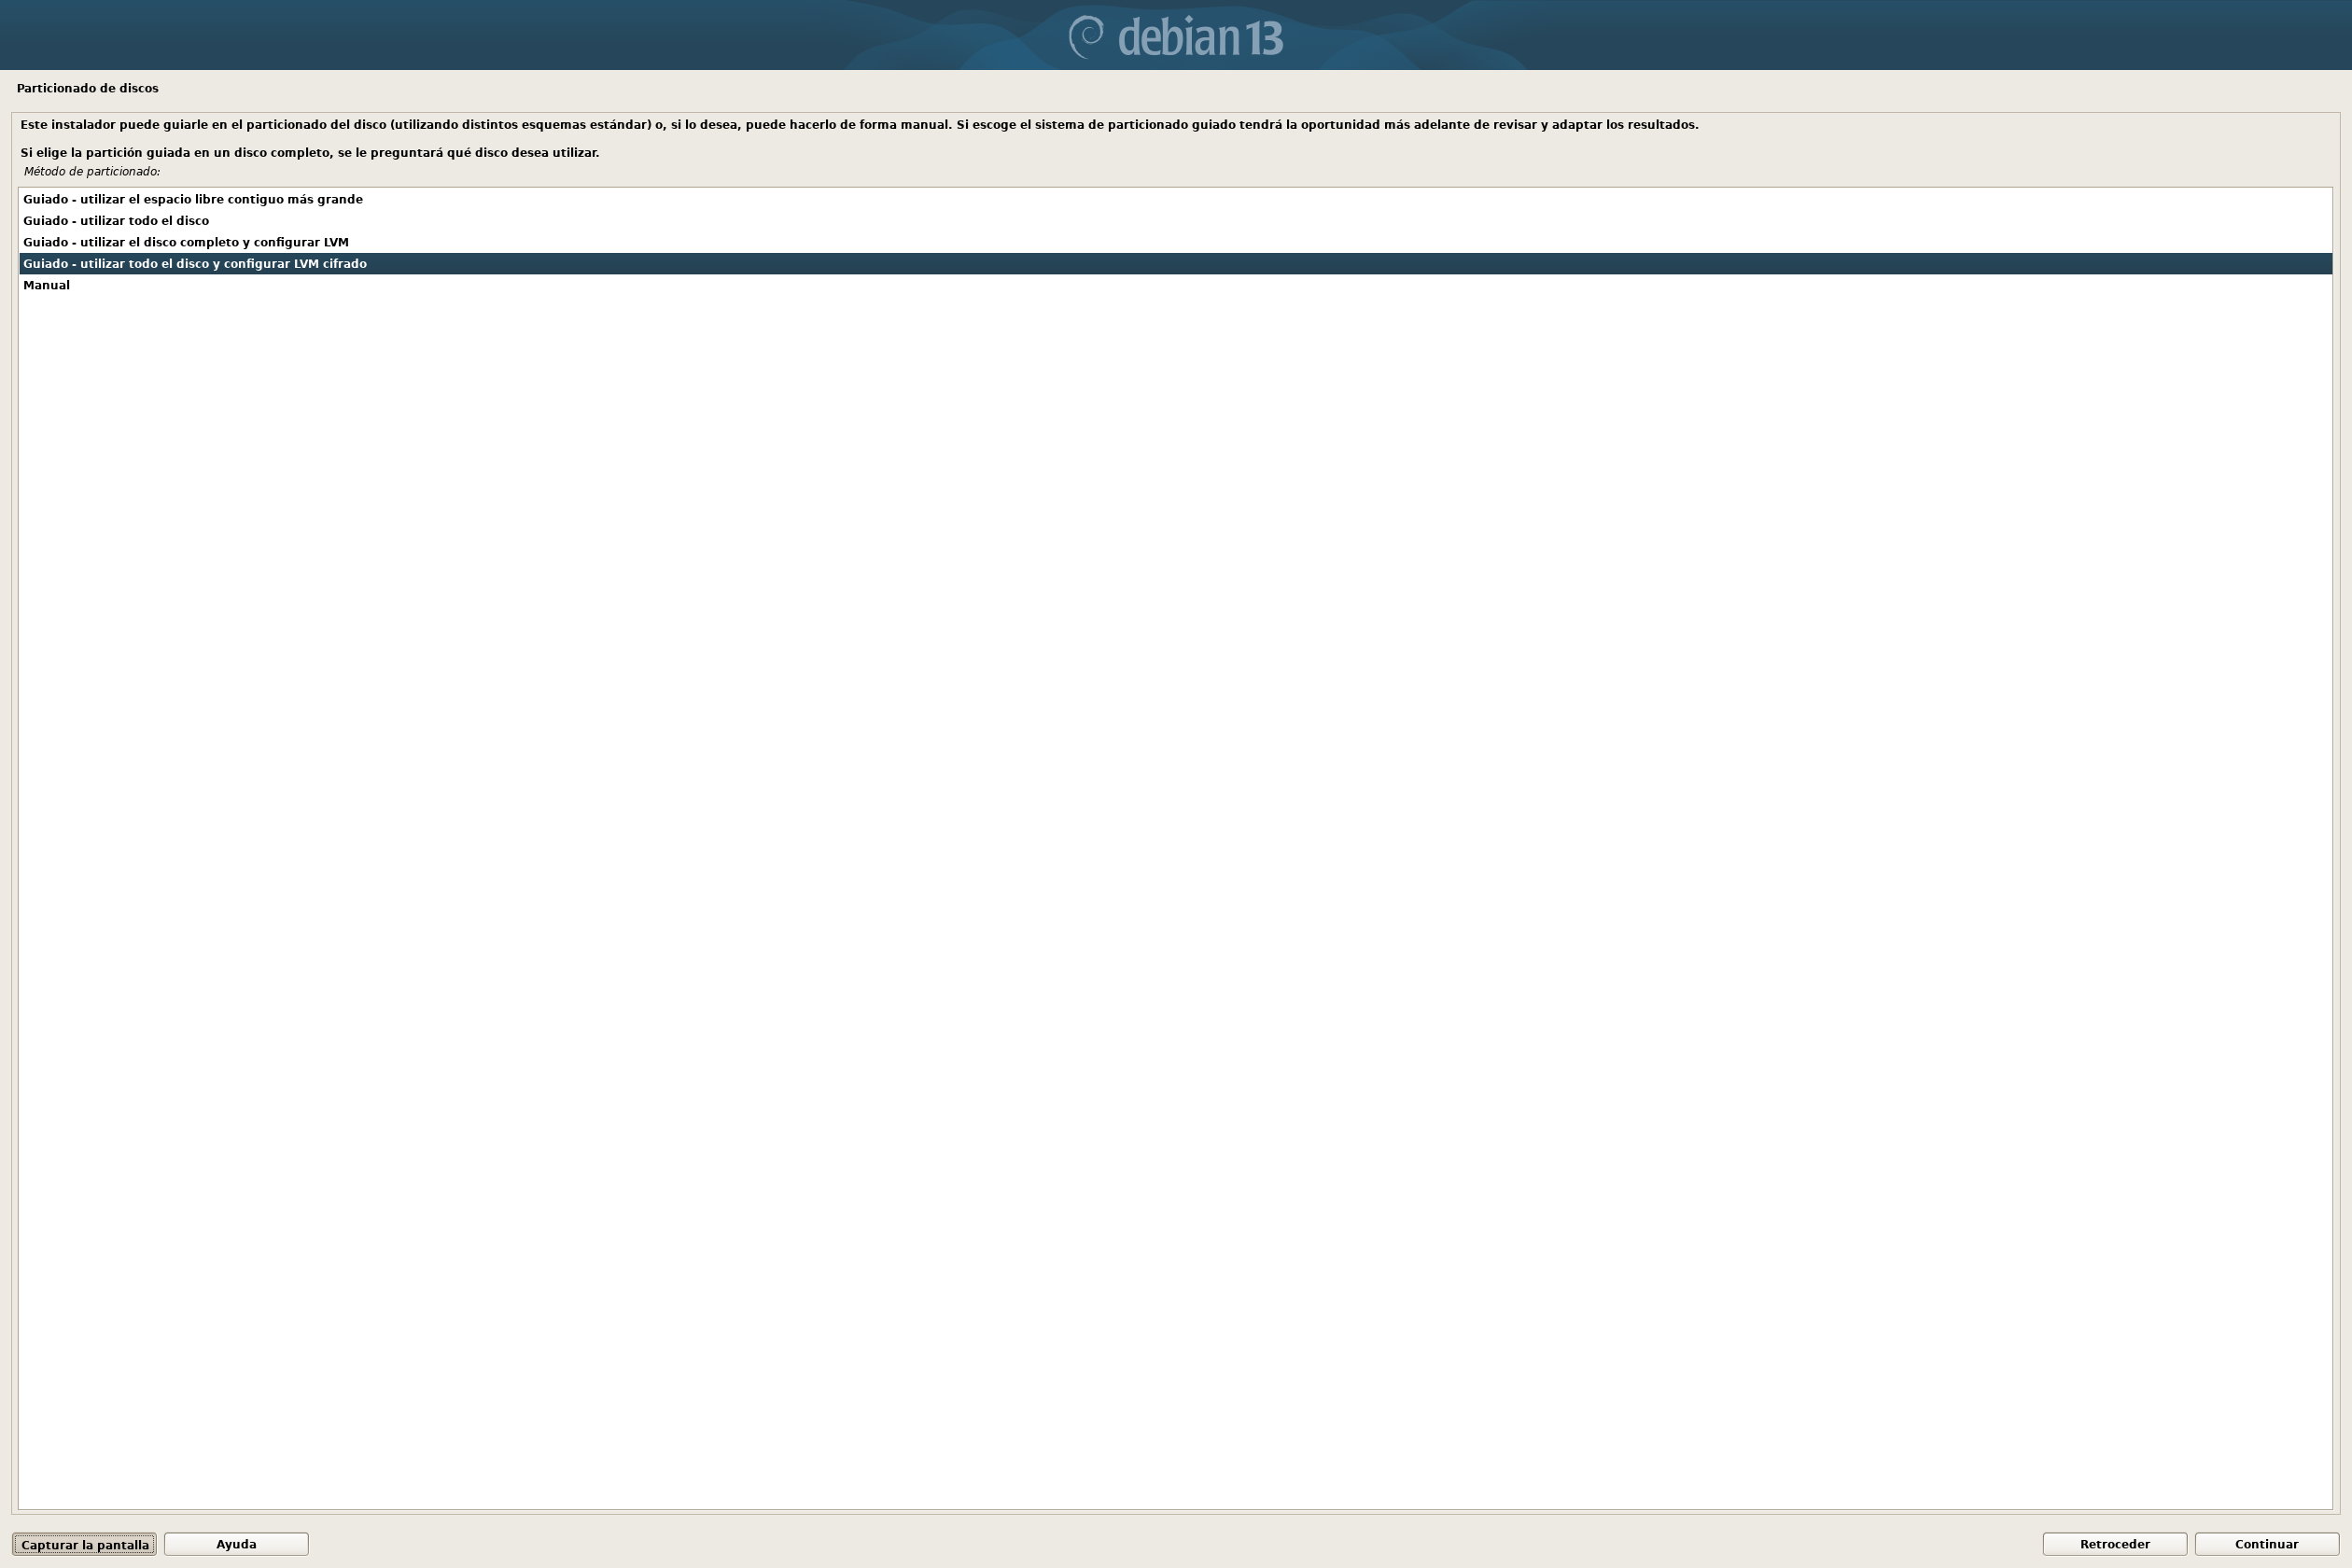
We boot in graphical mode, follow the basic configuration steps, encrypt the disk with the installer, and install the standard utilities, the SSH server, and the base graphical environment:
| Ciphered disk | Software installation |
|---|---|
|

|
Additional Software Installation:
We install everything necessary, along with some tools I consider useful:
apt install picom flameshot nextcloud-desktop net-tools tcpdump wireshark watch xautomation vim alsa-tools pcmanfm apt-transport-https ca-certificates curl mumble network-manager-gnome rofi xbindkeys brightnessctl acpi pulseaudio-utils awesome awesome-extra bat alacritty ssh-askpass blueman mpv evince okular gimp krita xournal inkscape kde-full maliit-keyboard pssh rdesktop screen ruby lshw inxi fastfetch tree rfkill gthumb syslog-ng cmake libcurl4-openssl-dev libavahi-compat-libdnssd-dev libxtst-dev qtbase5-dev qtbase5-dev-tools qt5-qmake qttools5-dev qttools5-dev-tools power-profiles-daemon filezilla eog yt-dlp fping nmap gobuster wifite hcxdumptool hcxtools macchanger bully hashcat john cowpatty lm-sensors python3.13-venv libgtk-3-dev libglib2.0-dev libgstreamer1.0-dev libgstreamer-plugins-base1.0-dev libjpeg-dev libtiff-dev libpng-dev libsm-dev libnotify-dev freeglut3-dev pkg-config build-essential python3-dev python3-venv python3-pip python3-wheel xss-lock slock btop khal vdirsyncer xdotool evtest wmctrl libinput-tools iio-sensor-proxy plocate deskflow speedtest-cli uuid-runtime pavucontrol libasound2-plugins htop xinput libnotify-bin
System Tweaks:
Syslog:
Syslog spams us with statistics from the logging system:
tail -f /var/log/syslog
Aug 22 21:35:12 MiniBeast syslog-ng[209099]: Log statistics; processed='destination(d_mail)=0', processed='destination(d_cron)=13', processed='destination(d_uucp)=0', processed='destination(d_error)=4', processed='global(payload_reallocs)=3770', processed='center(received)=1653', dropped='global(internal_source)=0', processed='global(internal_source)=16', queued='global(internal_source)=0', processed='destination(d_daemon)=599', processed='destination(d_messages)=937', processed='destination(d_newserr)=0', processed='destination(d_debug)=31', processed='destination(d_newscrit)=0', processed='center(queued)=4205', processed='destination(d_console)=0', processed='destination(d_kern)=884', processed='destination(d_user)=5', processed='source(s_src)=1653', stamp='src.journald(s_src#0,journal)=1755862498', processed='src.journald(s_src#0,journal)=1637', queued='global(scratch_buffers_bytes)=0', processed='src.internal(s_src#1)=16', processed='destination(d_syslog)=1551', processed='global(msg_clones)=6', stamp='src.internal(s_src#1)=1755862511', processed='global(sdata_updates)=0', processed='destination(d_lpr)=0', processed='destination(d_xconsole)=56', processed='destination(d_console_all)=56', queued='global(scratch_buffers_count)=2', processed='destination(d_newsnotice)=0', processed='destination(d_auth)=69'
We disable statistics:
echo "options { stats(freq(0)); };  # Disable statistics" > /etc/syslog-ng/conf.d/disable_stats.conf
/etc/init.d/syslog-ng restart
We can verify that logs are still coming in:
tail -f /var/log/syslog
crontab -l
KWallet:
KWallet is very annoying, constantly asking to save passwords that nobody requested, so we disable it:
KDE Control Panel -> KDE Wallet: Disable the KDE Wallet subsystem.
Sudoers:
We allow our user to run any command with sudo:
echo "kr0m ALL=(ALL) NOPASSWD: ALL" > /etc/sudoers.d/kr0m
Vim:
We tweak Vim configuration slightly:
echo "set clipboard=unnamedplus" > ~/.vimrc
echo "syntax enable" >> ~/.vimrc
Bash:
We define some aliases, disable the new console paste system, set the console language to English, and tweak the prompt:
vi ~/.bashrc
# kr0m config:
alias cat='batcat -p --paging=never'
alias su='su -l'
alias chirp='~/chirp/bin/python ~/chirp/bin/chirp'

if [[ $- == *i* ]]; then
	bind 'set enable-bracketed-paste off'
fi

export LANG=en_US.UTF-8
export PS1="\[\033[1;96m\]\h\[\033[1;93m\] $ \[\033[1;92m\]\w> \[\033[0m\]"

PATH=$PATH:$HOME/.scripts:$HOME/.local/bin
We perform a similar configuration for root:
echo "set clipboard=unnamedplus" > ~/.vimrc
echo "syntax enable" >> ~/.vimrc
vi ~/.bashrc
alias cat='batcat -p --paging=never'

if [[ $- == *i* ]]; then
	bind 'set enable-bracketed-paste off'
fi

export LANG=en_US.UTF-8
export PS1="\[\033[1;91m\]\h\[\033[1;93m\] # \[\033[1;92m\]\w> \[\033[0m\]"
Touchpad Configuration:
We configure X to have left-click, right-click, and middle-click with 1/2/3 finger taps:
vi /etc/X11/xorg.conf.d/90-touchpad.conf
Section "InputClass"
    Identifier "libinput touchpad"
    MatchIsTouchpad "on"
    Driver "libinput"
    Option "Tapping" "on"
    Option "ClickMethod" "buttonareas"
    Option "TappingDrag" "on"
    Option "DisableWhileTyping" "on"
EndSection
To prevent bypassing the screensaver, we disable switching to a VT or killing X with Ctrl+Alt+Backspace:
vi /etc/X11/xorg.conf.d/91-screensaver.conf
Section "ServerFlags"
        Option "DontVTSwitch" "True"
        Option "DontZap"      "True"
EndSection
For advanced gestures, we need libinput-gestures, installed as root:
git clone https://github.com/bulletmark/libinput-gestures.git
cd libinput-gestures
make install
Add our user to the input group:
gpasswd -a kr0m input
We perform the rest of the configuration with our regular user. First, locate the touchpad device:
libinput list-devices
Device:                  XXXX0000:04 36B6:C001 Touchpad
Kernel:                  /dev/input/event10
Id:                      i2c:36b6:c001
Group:                   6
Seat:                    seat0, default
Size:                    129x85mm
Capabilities:            pointer gesture
Tap-to-click:            disabled
Tap-and-drag:            enabled
Tap button map:          left/right/middle
Tap drag lock:           disabled
Left-handed:             disabled
Nat.scrolling:           disabled
Middle emulation:        disabled
Calibration:             n/a
Scroll methods:          *two-finger edge
Scroll button:           n/a
Scroll button lock:      n/a
Click methods:           *button-areas clickfinger
Clickfinger button map:  left/right/middle
Disable-w-typing:        enabled
Disable-w-trackpointing: enabled
Accel profiles:          flat *adaptive custom
Rotation:                n/a
Area rectangle:          n/a
We verify swipe detection:
libinput debug-events --device /dev/input/event10
Example configuration file is located at /etc/libinput-gestures.conf.
In my case, I want to associate the following gestures to certain actions:
- 3 fingers up:
Home - 3 fingers down:
F5 - 3 fingers right:
Alt+Right - 3 fingers left:
Alt+Left - 4 fingers up:
Super+m - 4 fingers down:
Super+Shift+c - 4 fingers right:
Next workspace - 4 fingers left:
Previous workspace
mkdir -p ~/.config
vi ~/.config/libinput-gestures.conf
# Web browsing:
# 3-finger swipe up → Home
gesture swipe up    3 xdotool key Home

# 3-finger swipe down → Reload
gesture swipe down    3 xdotool key F5

# 3-finger swipe right → Next
gesture swipe right    3 xdotool key alt+Right

# 3-finger swipe left → Previous
gesture swipe left    3 xdotool key alt+Left


# AwesomeWM:
# 4-finger swipe up → Super+m
gesture swipe up    4 xdotool key Super+m

# 4-finger swipe down → Super+Shift+c
gesture swipe down  4 xdotool key Super+Shift+c

# 4-finger swipe right → switch to next workspace
gesture swipe right 4 xdotool set_desktop --relative 1

# 4-finger swipe left → switch to previous workspace
gesture swipe left  4 xdotool set_desktop --relative -- -1
Start the service:
libinput-gestures-setup start
Reload configuration after changes:
libinput-gestures-setup restart
Additional System Tweaks:
Cursor size and DPI:
vi ~/.Xresources
Xcursor.size: 28
Xft.dpi: 140
Less-than and greater-than keys:
This laptop lacks </> keys, so we map them to the menu key with three horizontal lines.
vi ~/.Xmodmap
! Menu key mapping (keycode 135)
keycode 135 = less greater less greater
Icon theme:
git clone https://github.com/bikass/kora.git
cp -r kora/kora ~/.local/share/icons/
cp -r kora/kora-light ~/.local/share/icons/
cp -r kora/kora-light-panel ~/.local/share/icons/
cp -r kora/kora-pgrey ~/.local/share/icons/
rm -rf kora
AwesomeWM fonts:
wget https://pavelmakhov.com/awesome-wm-widgets/assets/fonts/awesomewm-font.ttf
gnome-font-viewer awesomewm-font.ttf
# Click "Install" (will stay there but the font is installed)
Nerd Font:
Download the font from
its GitHub repository.
FONT_DIR="$HOME/.local/share/fonts"
REPO="ryanoasis/nerd-fonts"
FONT="JetBrainsMono"

mkdir -p "$FONT_DIR"
cd "$FONT_DIR"

LATEST=$(curl -s https://api.github.com/repos/$REPO/releases/latest | grep '"tag_name":' | sed -E 's/.*"([^"]+)".*/\1/')
URL="https://github.com/$REPO/releases/download/$LATEST/$FONT.zip"
wget -q --show-progress "$URL" -O "$FONT.zip"
unzip -o "$FONT.zip"
rm "$FONT.zip"

fc-cache -fv
Avatar:
Download the avatar image and set it up:
wget https://alfaexploit.com/images/freebook/avatar.jpg

XDG_CURRENT_DESKTOP=GNOME gnome-control-center
System -> Users

rm avatar.jpg
External Software:
Chrome:
curl -fSsL https://dl.google.com/linux/linux_signing_key.pub | gpg --dearmor | tee /usr/share/keyrings/google-chrome.gpg >> /dev/null
echo deb [arch=amd64 signed-by=/usr/share/keyrings/google-chrome.gpg] http://dl.google.com/linux/chrome/deb/ stable main | tee /etc/apt/sources.list.d/google-chrome.list
apt update
apt install google-chrome-stable
VS-Code:
curl https://packages.microsoft.com/keys/microsoft.asc | gpg --dearmor > microsoft.gpg
install -o root -g root -m 644 microsoft.gpg /etc/apt/keyrings/microsoft-archive-keyring.gpg
sh -c 'echo "deb [arch=amd64,arm64,armhf signed-by=/etc/apt/keyrings/microsoft-archive-keyring.gpg] https://packages.microsoft.com/repos/code stable main" > /etc/apt/sources.list.d/vscode.list'
apt-get update
apt-get install code
Telegram:
Download the compressed package from
their website.
Extract and install as a regular user:
wget https://telegram.org/dl/desktop/linux
mv linux tsetup.tar.xz
tar -xf tsetup.tar.xz
cd Telegram/
mkdir -p ~/.local/bin
mv Telegram ~/.local/bin
mv Updater ~/.local/bin
cd
rm -rf Telegram tsetup.tar.xz
CHIRP:
Create a Python venv to install dependencies and the software itself:
python3 -m venv chirp
cd chirp
source bin/activate

pip install wxPython

wget https://archive.chirpmyradio.com/chirp_next/next-20250905/chirp-20250905-py3-none-any.whl
pip install chirp-20250905-py3-none-any.whl
GameboyCamera:
Download the .deb and install it:
wget https://github.com/lesserkuma/FlashGBX/releases/download/4.4/FlashGBX_4.4_Ubuntu-all.deb
dpkg -i FlashGBX_4.4_Ubuntu-all.deb
apt --fix-broken install
usermod -aG dialout kr0m
newgrp dialout
Connect with the visible board microcontroller and the GBC cartridge using the serial number above.
Not all cables work; use the one from the bag that we know works 100%.

flashgbx
Connect
Options -> Tools -> Game Boy Camera Album Viewer
Steam:
I’m not sure it’s worth installing Steam on such a limited system, but we can play some basic games:
dpkg --add-architecture i386
apt update
Add contrib and non-free:
vi /etc/apt/sources.list
deb http://deb.debian.org/debian/ trixie main contrib non-free non-free-firmware
deb-src http://deb.debian.org/debian/ trixie main contrib non-free non-free-firmware

deb http://security.debian.org/debian-security trixie-security main contrib non-free non-free-firmware
deb-src http://security.debian.org/debian-security trixie-security main contrib non-free non-free-firmware

deb http://deb.debian.org/debian/ trixie-updates main contrib non-free non-free-firmware
deb-src http://deb.debian.org/debian/ trixie-updates main contrib non-free non-free-firmware
apt update
apt install steam-installer
KVMs:
Accessing KVMs is usually problematic. The best way is to download javaws as a regular user from the
official website.
wget https://javadl.oracle.com/webapps/download/AutoDL?BundleId=252312_68ce765258164726922591683c51982c#xd_co_f=NjY1ZjExZWUtNDY2NC00ZGZlLTg2YmUtZGUyOTBkZWU1Nzgy~
mv AutoDL\?BundleId\=252312_68ce765258164726922591683c51982c jre-8u461-linux-x64.tar.gz
tar xvzf jre-8u461-linux-x64.tar.gz
rm jre-8u461-linux-x64.tar.gz
Then we can run jnlp files as follows:
cd ~/jre1.8.0_461/bin
./javaws ~/XXXXXXX.jnlp
Screen Control:
For using external monitors via HDMI, we need to acquire the
USB-HUB
.
Below are the necessary scripts to manage both video and audio outputs.
TV Output:
vi ~/.scripts/TV.sh
#!/usr/bin/env bash

EXT_MONITOR=$(xrandr --query | grep " connected" | grep -v "eDP-1" | awk '{print $1}')
if [ -n "$EXT_MONITOR" ]; then
    #xrandr --output "$EXT_MONITOR" --auto
    #xrandr --output eDP-1 --off
    xrandr --output "$EXT_MONITOR" --auto --right-of eDP-1

    pactl set-card-profile 48 output:hdmi-stereo
    pactl set-default-sink alsa_output.pci-0000_00_1f.3.hdmi-stereo
else
    echo "No external monitor detected"
fi
chmod 700 ~/.scripts/TV.sh
PC Output:
vi ~/.scripts/PC.sh
#!/usr/bin/env bash

EXT_MONITOR=$(xrandr --query | grep " connected" | grep -v "eDP-1" | awk '{print $1}')
if [ -n "$EXT_MONITOR" ]; then
    xrandr --output "$EXT_MONITOR" --off
fi

xrandr --output eDP-1 --auto
pactl set-card-profile 48 output:analog-stereo+input:analog-stereo
chmod 700 ~/.scripts/PC.sh
Disable Touchscreen:
vi ~/.scripts/disableTouchscreen.sh
#!/usr/bin/env bash

ids=$(xinput list | grep "GXTP7386:00 27C6:0118" | grep -o 'id=[0-9]\+' | cut -d= -f2)
for id in $ids; do
    xinput disable "$id" 2>/dev/null
done
chmod 700 ~/.scripts/disableTouchscreen.sh
Enable Touchscreen:
vi ~/.scripts/enableTouchscreen.sh
#!/usr/bin/env bash

ids=$(xinput list | grep "GXTP7386:00 27C6:0118" | grep -o 'id=[0-9]\+' | cut -d= -f2)
for id in $ids; do
    xinput enable "$id" 2>/dev/null
done
chmod 700 ~/.scripts/enableTouchscreen.sh
Screensaver:
vi ~/.scripts/screenLocker.sh
#!/usr/bin/env bash
slock &
systemctl suspend
chmod 700 ~/.scripts/screenLocker.sh
Function Keys:
We configure standard multimedia keys, Backward/Forward buttons to enable/disable HDMI output, and window close/maximize shortcuts for when using a mouse via Deskflow or a mouse with side buttons.
vi ~/.xbindkeysrc
# ===== VOLUME (ALSA) =====
"amixer sset Master 5%+"
    XF86AudioRaiseVolume
"amixer sset Master 5%-"
    XF86AudioLowerVolume
"amixer sset Master toggle"
    XF86AudioMute

# ===== BRIGHTNESS =====
"brightnessctl set 5%+"
    XF86MonBrightnessUp
"brightnessctl set 5%-"
    XF86MonBrightnessDown

# ===== MEDIA KEYS =====
"bash -c '$HOME/.scripts/TV.sh'"
    XF86AudioNext
"bash -c '$HOME/.scripts/PC.sh'"
    XF86AudioPrev

# ===== SIDE MOUSE BUTTONS: DESKFLOW CASE =====
"xte 'keydown Shift_R' 'keydown Super_R' 'key c' 'keyup Shift_R' 'keyup Super_R'"
b:8
"xte 'keydown Super_R' 'key m' 'keyup Super_R'"
b:9
AwesomeWM Graphical Applications Startup:
The recommended way to start applications in AwesomeWM is to call a single script that launches everything necessary:
vi ~/.scripts/x-init.sh
#!/usr/bin/env bash

picom -b --backend glx

xbindkeys
xmodmap ~/.Xmodmap
libinput-gestures-setup start

# KDE overwrites it, so reconfigure in each AwesomeWM start
sed -i 's/^gtk-icon-theme-name=.*/gtk-icon-theme-name=kora/' ~/.config/gtk-3.0/settings.ini
sed -i 's/^gtk-icon-theme-name=.*/gtk-icon-theme-name=kora/' ~/.config/gtk-4.0/settings.ini
sed -i 's/^gtk-icon-theme-name=.*/gtk-icon-theme-name="kora"/' ~/.gtkrc-2.0

nm-applet &
flameshot &
nextcloud &

# Start deskflow:
deskflow &
# Close it to send Deskflow to trayicon automatically
for i in {1..20}; do
  WINID=$(wmctrl -l | awk 'BEGIN{IGNORECASE=1} /Deskflow/ {print $1; exit}')
  if [ -n "$WINID" ]; then
    wmctrl -i -c "$WINID"
  fi
  sleep 0.1
done

# Screensaver:
xset s 600 0                              # Activate after 60s inactivity, second argument: if screensaver supports animations, time for looping animation. Slock doents support it -> 0.
xset +dpms                                # Activate power management.
xss-lock ~/.scripts/screenLocker.sh &     # Lock screen and suspend system to RAM.

~/.scripts/disableTouchscreen.sh
~/.scripts/powerManager.sh balanced

if [ -z "$SSH_AUTH_SOCK" ]; then
    eval $(ssh-agent -s)
fi

export DISPLAY=:0
export SSH_ASKPASS=ssh-askpass
ssh-add ~/.ssh/id_rsa < /dev/null

if [ ! -z "$(pgrep ssh-agent)" ]; then
    export SSH_AGENT_PID=$(pgrep ssh-agent)
    export SSH_AUTH_SOCK=/run/user/$UID/openssh_agent
fi

blueman-applet &
AwesomeWM Configuration:
Add battery management, CPU temperature monitoring, and calendar event widgets:
mkdir ~/.config/awesome
cd ~/.config/awesome
git clone https://github.com/ARPABoy/kr0mWidgets.git
Additional useful widgets from
streetturtle
:
cd ~/.config/awesome
git clone https://github.com/streetturtle/awesome-wm-widgets.git
Download a preconfigured setup with enabled widgets, power profile shortcut, and graphical applications startup script:
cd ~/.config/awesome/
wget https://alfaexploit.com/files/awesomeWMFiles.tar.gz
tar xvzf awesomeWMFiles.tar.gz
mv awesomeWMFiles/* ./
rm -rf awesomeWMFiles awesomeWMFiles.tar.gz
For calendar event widgets to work, configure khal as explained
here
and have a
calendar server running.
Battery Alerts:
It’s worth to keep battery between 20-80% to maximize lifespan. Since software charging limits are unsupported, we’ll use a script to alert at thresholds and shutdown at 1%:
vi ~/.scripts/batteryAlerts.sh
#!/usr/bin/env bash

export DISPLAY=:0
export DBUS_SESSION_BUS_ADDRESS="unix:path=/run/user/$(id -u)/bus"
export XDG_RUNTIME_DIR="/run/user/$(id -u)"

LOW_THRESHOLD=20
HIGH_THRESHOLD=80
MAX_ALERTS=10
CRITICAL_THRESHOLD=1
STATE_FILE="/tmp/battery_alerts_state"
ALERT_SOUND="/usr/share/sounds/freedesktop/stereo/dialog-warning.oga"

# Initialize state file if it doesn't exist
if [ ! -f "$STATE_FILE" ]; then
    echo "LOW=0" > "$STATE_FILE"
    echo "HIGH=0" >> "$STATE_FILE"
fi

# Read counters
source "$STATE_FILE"

# Get current battery percentage and charging status
BATTERY=$(acpi -b | grep -P -o '[0-9]+(?=%)')
STATUS=$(acpi -b | awk '{print $3}' | tr -d ',')

# Critical battery shutdown (only if discharging)
if [ "$BATTERY" -le "$CRITICAL_THRESHOLD" ] && [[ "$STATUS" == "Discharging" ]]; then
    paplay "$ALERT_SOUND" &
    notify-send -u critical -t 60000 "Critical Battery" \
        "Battery at ${BATTERY}%. Shutting down in 60 seconds!"
    sleep 60
    sudo /usr/sbin/shutdown -h now
fi

# Low battery warning (only if discharging)
if [ "$BATTERY" -le "$LOW_THRESHOLD" ] && [[ "$STATUS" == "Discharging" ]]; then
    if [ "$LOW" -lt "$MAX_ALERTS" ]; then
        paplay "$ALERT_SOUND" &
        notify-send -u critical -t 20000 \
            "Low Battery Healthy Charge Threshold Reached" \
            "Battery at ${BATTERY}%.\nPlease connect the charger in order to maintain it between 20-80%."
        LOW=$((LOW + 1))
    fi
else
    LOW=0
fi

# High battery warning (only if charging)
if [ "$BATTERY" -ge "$HIGH_THRESHOLD" ] && [[ "$STATUS" == "Charging" ]]; then
    if [ "$HIGH" -lt "$MAX_ALERTS" ]; then
        paplay "$ALERT_SOUND" &
        notify-send -u critical -t 20000 \
            "High Battery Healthy Charge Threshold Reached" \
            "Battery at ${BATTERY}%.\nPlease disconnect the charger in order to maintain it between 20-80%."
        HIGH=$((HIGH + 1))
    fi
else
    HIGH=0
fi

# Save updated counters
echo "LOW=$LOW" > "$STATE_FILE"
echo "HIGH=$HIGH" >> "$STATE_FILE"
chmod 700 ~/.scripts/batteryAlerts.sh
crontab -e
*/1 * * * * ~/.scripts/batteryAlerts.sh
Power Management:
Select the power profile and screen brightness:
vi ~/.scripts/powerManager.sh
#!/usr/bin/env bash

# Determine profile (parameter or menu)
if [ -n "$1" ]; then
    profile="$1"
else
    profile=$(powerprofilesctl list | grep -E "power-saver|balanced|performance" | cut -d ":" -f 1 | tr -d ' ' | rofi -dmenu -p "Select Power Profile")
fi

# Remove leading asterisk if present
profile="${profile#\*}"

# Apply selected profile
if [ -n "$profile" ]; then
    case "$profile" in
        "power-saver")
            powerprofilesctl set power-saver
            brightnessctl set 30%
            notify-send "🟢 Power-Saver Enabled" \
              "• Power Profile: Power-Saver\n• Brightness: 30%\n• Touchscreen: Disabled" \
              -i battery-caution
            ;;

        "balanced")
            powerprofilesctl set balanced
            brightnessctl set 50%
            notify-send "🟡 Balanced Mode" \
              "• Power Profile: Balanced\n• Brightness: 50%\n• Touchscreen: Disabled" \
              -i battery-balanced
            ;;

        "performance")
            powerprofilesctl set performance
            brightnessctl set 90%
            notify-send "🔴 Performance Mode" \
              "• Power Profile: Performance\n• Brightness: 90%\n• Touchscreen: Disabled" \
              -i battery-full
            ;;
        *)
            notify-send "⚠️ Invalid profile" "Valid options: power-saver, balanced, performance"
            echo "Selected profile: $profile"
            exit 1
            ;;
    esac
fi
chmod 700 ~/.scripts/powerManager.sh
Automatically switch profiles when plugging/unplugging power.
NOTE: udev does not allow $HOME or ~/; for multiple users, move the script to a common path.
vi /etc/udev/rules.d/99-power-profiles.rules
SUBSYSTEM=="power_supply", ATTR{type}=="Mains", ATTR{online}=="1", RUN+="/home/kr0m/.scripts/powerManager.sh performance"
SUBSYSTEM=="power_supply", ATTR{type}=="Mains", ATTR{online}=="0", RUN+="/home/kr0m/.scripts/powerManager.sh power-saver"
Load the configuration:
udevadm control --reload
udevadm trigger
Tablet mode:
In Tablet mode, the only decent option is KDE-Wayland but with the virtual keyboard Maliit:
KDE Control Panel -> Input Devices -> Keyboard: Virtual Keyboard: Maliit
When entering Tablet mode, the best approach is to leave the Maliit virtual keyboard configured and disable the touchpad/keyboard.
To disable the touchpad, we first need to locate its i2c-ID:
grep -E '^(N|P):' /proc/bus/input/devices
Now we can manage it via sys:
echo "i2c-XXXX0000:04" | tee /sys/bus/i2c/drivers/i2c_hid_acpi/unbind
echo "i2c-XXXX0000:04" | tee /sys/bus/i2c/drivers/i2c_hid_acpi/bind
As for the keyboard, we can identify it using:
udevadm info /dev/input/event0
Disabling it under Wayland is basically impossible, but we can keep it busy so it doesn’t respond:
evtest --grab /dev/input/event0
We create the following script to manage tablet mode:
vi ~/.scripts/screenRotator.sh
#!/usr/bin/env bash

SCREEN=$(xrandr | grep " connected" | awk '{print $1}')
STATE_FILE="/tmp/screen_rotation_state"
TOUCHPAD_DEV="i2c-XXXX0000:04"
KEYBOARD_EVENT="/dev/input/event0"

# Read current rotation state
if [ -f "$STATE_FILE" ]; then
    ROT=$(cat "$STATE_FILE")
else
    ROT="normal"
fi

# Function to manage touchpad state
toggle_touchpad() {
    local enable=$1

    if [[ "$enable" == "0" ]]; then
        echo "$TOUCHPAD_DEV" | sudo tee /sys/bus/i2c/drivers/i2c_hid_acpi/unbind >/dev/null
        notify-send -t 3000 "Touchpad disabled" -i input-touchpad
    else
        echo "$TOUCHPAD_DEV" | sudo tee /sys/bus/i2c/drivers/i2c_hid_acpi/bind >/dev/null
        notify-send -t 3000 "Touchpad enabled" -i input-touchpad
    fi
}

# Function to manage keyboard state
toggle_keyboard() {
    local enable=$1

    if [[ "$enable" == "0" ]]; then
        evtest --grab "$KEYBOARD_EVENT" &>/dev/null &
        echo $! > "/tmp/evtest_keyboard_pid"
        notify-send -t 3000 "Keyboard disabled" -i input-keyboard
    else
        killall -9 evtest 2>/dev/null
        notify-send -t 3000 "Keyboard enabled" -i input-keyboard
    fi
}

# Main rotation logic
if [ "$ROT" = "normal" ]; then
    # Rotate to left orientation (tablet mode)
    kscreen-doctor output.$SCREEN.rotation.left &>/dev/null
    echo "left" > "$STATE_FILE"

    # Disable touchpad and keyboard
    toggle_touchpad 0
    toggle_keyboard 0
else
    # Rotate back to normal orientation (laptop mode)
    kscreen-doctor output.$SCREEN.rotation.normal &>/dev/null
    echo "normal" > "$STATE_FILE"

    # Enable touchpad and keyboard
    toggle_touchpad 1
    toggle_keyboard 1
fi

# Final status notification
notify-send -t 3000 "Display rotation: $(cat "$STATE_FILE")" -i video-display
chmod 700 ~/.scripts/screenRotator.sh
To prevent KDE from interfering with the script, we must disable auto-rotation:
KDE Control Panel -> Input Devices -> Display and Monitor -> Screen Settings -> Orientation: Manual
For convenience, we create the following .desktop to leave on the KDE panel for quick access:
vi ~/.scripts/screenRotator.desktop
[Desktop Entry]
Comment[es_ES]=
Comment=
Exec=/home/kr0m/.scripts/screenRotator.sh
GenericName[es_ES]=
GenericName=
Icon=vokoscreen
MimeType=
Name[es_ES]=ScreenRotator
Name=ScreenRotator
Path=
StartupNotify=true
Terminal=false
TerminalOptions=
Type=Application
X-KDE-SubstituteUID=false
X-KDE-Username=
Tablet mode has a problem: when playing a video in full screen, it stays in vertical mode, whereas ideally it should display horizontally.
To fix this, we create the following script:
vi ~/.scripts/screenRotatorOnlyScreen.sh
#!/usr/bin/env bash

SCREEN=$(xrandr | grep " connected" | awk '{print $1}')
STATE_FILE="/tmp/screen_rotation_state"

# Read current rotation state
if [ -f "$STATE_FILE" ]; then
    ROT=$(cat "$STATE_FILE")
else
    ROT="normal"
fi

# Current state check:
if [ "$ROT" = "normal" ]; then
    # Rotate to left orientation
    kscreen-doctor output.$SCREEN.rotation.left &>/dev/null
    echo "left" > "$STATE_FILE"
else
    # Rotate to normal orientation
    kscreen-doctor output.$SCREEN.rotation.normal &>/dev/null
    echo "normal" > "$STATE_FILE"
fi
chmod 700 ~/.scripts/screenRotatorOnlyScreen.sh
Using
Touchegg
, we configure a 3-finger tap to change the screen orientation.
Install the software as root:
wget https://github.com/JoseExposito/touchegg/releases/download/2.0.18/touchegg_2.0.18_amd64.deb
dpkg -i touchegg_2.0.18_amd64.deb
And configure it as a regular user:
cat /usr/share/touchegg/touchegg.conf

mkdir -p ~/.config/touchegg
vi ~/.config/touchegg/touchegg.conf
<touchégg>

  <settings>
    <!--
      Delay, in milliseconds, since the gesture starts before the animation is displayed.
      Default: 150ms if this property is not set.
      Example: Use the MAXIMIZE_RESTORE_WINDOW action. You will notice that no animation is
      displayed if you complete the action quick enough. This property configures that time.
    -->
    <property name="animation_delay">150</property>

    <!--
      Percentage of the gesture to be completed to apply the action. Set to 0 to execute actions unconditionally.
      Default: 20% if this property is not set.
      Example: Use the MAXIMIZE_RESTORE_WINDOW action. You will notice that, even if the
      animation is displayed, the action is not executed if you did not move your fingers far
      enough. This property configures the percentage of the gesture that must be reached to
      execute the action.
    -->
    <property name="action_execute_threshold">20</property>

    <!--
      Global animation colors can be configured to match your system colors using HEX notation:

        <color>909090</color>
        <borderColor>FFFFFF</borderColor>

      You can also use auto:

        <property name="color">auto</property>
        <property name="borderColor">auto</property>

      Notice that you can override an specific animation color.
    -->
    <property name="color">auto</property>
    <property name="borderColor">auto</property>
  </settings>

  <!--
    Configuration for every application.
  -->
  <application name="All">
    <gesture type="TAP" fingers="3">
      <action type="RUN_COMMAND">
        <repeat>false</repeat>
        <command>~/.scripts/screenRotatorOnlyScreen.sh</command>
        <on>begin</on>
      </action>
    </gesture>
  </application>

</touchégg>
Additionally, we change the default virtual keyboard size, as it is excessively large by default:
vi /usr/share/maliit/keyboard2/devices/default.json
"keyboardHeightPortrait": 0.10,
"keyboardHeightLandscape": 0.19,
SSH-FS:
This device comes with a 512GB disk, which limits local storage, but we can use SSH-FS to transparently access content on a remote machine.
As root, allow regular users to manage FUSE filesystems:
vi /etc/fuse.conf
user_allow_other
Now, as a regular user, we can manage mounting/unmounting the remote directory:
vi ~/.scripts/paperstreetSSHfs.sh
#!/usr/bin/env bash

# Configuration
REMOTE_USER="kr0m"
REMOTE_HOST="192.168.69.4"
REMOTE_PATH="/mnt/6T/sdf"
MOUNT_POINT="/home/kr0m/PaperStreet-sshfs"

# Create mount directory if it does not exist
if [ ! -d "$MOUNT_POINT" ]; then
    mkdir -p "$MOUNT_POINT"
fi

# Check if already mounted
if mountpoint -q "$MOUNT_POINT"; then
    echo "Unmounting $MOUNT_POINT..."
    fusermount -u "$MOUNT_POINT"
    if [ $? -eq 0 ]; then
        notify-send "SSHFS" "Unmounted: $MOUNT_POINT"
    else
        notify-send "SSHFS" "Error: Failed to unmount $MOUNT_POINT"
        exit 1
    fi
else
    echo "Mounting via sshfs..."
    sshfs -o allow_other "${REMOTE_USER}@${REMOTE_HOST}:${REMOTE_PATH}" "$MOUNT_POINT"
    if [ $? -eq 0 ]; then
        notify-send "SSHFS" "Mounted at: $MOUNT_POINT"
        # Open Dolphin file manager in the mounted directory
        dolphin "$MOUNT_POINT" &
    else
        notify-send "SSHFS" "Error: Failed to mount $MOUNT_POINT"
        exit 1
    fi
fi
chmod 700 ~/.scripts/paperstreetSSHfs.sh
For convenience, we create the following .desktop to leave on the KDE panel for quick access:
vi ~/.scripts/paperstreetSSHfs.desktop
[Desktop Entry]
Comment[es_ES]=
Comment=
Exec=/home/kr0m/.scripts/paperstreetSSHfs.sh
GenericName[es_ES]=
GenericName=
Icon=drive-multidisk
MimeType=
Name[es_ES]=PaperStreet-sshfs
Name=PaperStreet-sshfs
Path=
StartupNotify=true
Terminal=false
TerminalOptions=
Type=Application
X-KDE-SubstituteUID=false
X-KDE-Username=
Other Operating Systems:
An attempt was made to install FreeBSD, but the installer did not recognize the Wi-Fi card. However, booting from NomadBSD works flawlessly, with performance comparable to Linux, even over USB-C.
This leads me to believe that if we install FreeBSD via the
Ethernet adapter
, we could make the Wi-Fi work by installing additional drivers.