CBSD is a management software for Jails, Bhyve virtual machines, Qemu virtual machines of other architectures, and Xen under FreeBSD. The project offers a single CLI to quickly and easily build and manage virtual environments. In addition, it is possible to install a web interface called Clonos, which may be attractive to some, but you know that the CLI will always be more powerful since it is possible to automate all kinds of tasks.
The article is composed of different parts:
Initial Configuration:
Before starting, it should be mentioned that in this manual we will not use Xen since it would imply replacing our operating system with the Xen hypervisor and installing FreeBSD as DOM0. In this link we can see FreeBSD as DOM0 managing the DOMU from CBSD.
The CBSD versions are composed of several parts, the first two numbers indicate the version of FreeBSD in which it was tested during its development, the third number indicates the version of CBSD. For example, with the CBSD v.12.1.13 version, it is the version of CBSD 13 that was tested on FreeBSD 12.1.
We install the necessary software from binary packages, we will use Vinagre as a VNC client since it is very easy to use:
To use Bhyve, we need to load the vmm (Virtual Machine Monitor) module, which we load at boot time:
vmm_load="YES"
To provide network to Jails, we will use aliases, and for Bhyve VMs, we will use tap interfaces and bridges. For TTY access to jails, we will use nmdm (null modem terminal driver).
We load the corresponding modules:
kld_list="vmm if_tap if_bridge nmdm"
We restart to apply the configuration:
We initialize the node:
In most cases, the default values are acceptable, so we simply press ENTER if we agree with them. If we want to modify any parameter later on, we can execute the commands cbsd initenv-tui, bsdconfig cbsd, modify the sqlite database ${workdir}/var/db/local.sqlite, or load the values from a configuration file.
-------[CBSD v.12.1.13]-------
 This is install/upgrade scripts for CBSD.
 Don't forget to backup.
-----------------------------
Do you want prepare or upgrade hier environment for CBSD now?
[yes(1) or no(0)]
yes

Shall i add cbsd user into /usr/local/etc/sudoers.d/cbsd_sudoers sudo file to obtain root privileges for the most cbsd commands?
[yes(1) or no(0)]
no

Shall i modify the /etc/rc.conf to sets cbsd_workdir="/usr/jails"?:
[yes(1) or no(0)]
yes

nat_enable: Enable NAT for RFC1918 networks?
[yes(1) or no(0)]
no

fbsdrepo: Use official FreeBSD repository? When no (0) the repository of CBSD is preferred (useful for stable=1) for fetching base/kernel?
[yes(1) or no(0)]
yes

zfsfeat: You are running on a ZFS-based system. Enable ZFS feature?
[yes(1) or no(0)]
yes

stable: Use STABLE branch instead of RELEASE by default? Attention: only the CBSD repository has a binary base for STABLE branch ?
(STABLE_X instead of RELEASE_X_Y branch for base/kernel will be used), e.g.: 0 (use release)
0

sqlreplica: Enable sqlite3 replication to remote nodes ?
(0 - no replica, 1 - try to replicate all local events to remote nodes) e.g: 1
0

statsd_bhyve_enable: Configure CBSD statsd services for collect RACCT bhyve statistics? ?
(EXPERIMENTAL FEATURE)? e.g: 0
0

statsd_jail_enable: Configure CBSD statsd services for collect RACCT jail statistics? ?
(EXPERIMENTAL FEATURE)? e.g: 0
0

statsd_hoster_enable: Configure CBSD statsd services for collect RACCT hoster statistics? ?
(EXPERIMENTAL FEATURE)? e.g: 0
0

Configure RSYNC services for jail migration?
[yes(1) or no(0)]
1

Do you want to enable RACCT feature for resource accounting?
[yes(1) or no(0)]
yes

Shall i modify the /etc/rc.conf to sets cbsdd_enable=YES ?
[yes(1) or no(0)]
yes

Shall i modify the /etc/rc.conf to sets rcshutdown_timeout="900"?
[yes(1) or no(0)]
yes

Shall i modify the /etc/sysctl.conf to sets kern.init_shutdown_timeout="900"?
[yes(1) or no(0)]
yes
NOTE: To know which version of FreeBSD we want to use, we can consult this previous article .
The added RC parameters should be:
# CBSD
# kld_list="vmm if_tap if_bridge nmdm"
# /boot/loader.conf: kern.racct.enable=1 vmm_load="YES"
cbsd_workdir="/usr/jails"
cbsdd_enable=\"yes\"
rcshutdown_timeout="900"
We start the service:
CBSD stores the entered data in a SQLite database, but it is also saved in a plain text file for quick reference.
If we want to change any of the configured parameters, we can execute one of the existing wizards:
bsdconfig cbsd
NOTE: There are parameters that cannot be modified from the wizards, but we can configure the parameters in a file and load them.
The complete list of parameters can be found here:
/usr/local/cbsd/share/initenv.conf
The best way to do it is by merging our current configuration with the parameters of the generic file:
echo “#——————-” » customConfig.txt
cat /usr/local/cbsd/share/initenv.conf » customConfig.txt
Now we edit the file to our liking:
Finally, we load the parameters:
We must keep in mind that every time the cbsd version is updated, we will have to execute:
cbsd initenv
If we install CBSD from precompiled packages, it may come with an outdated version of the templates, which are used to launch Bhyve virtual machines. If these are not updated, the template may refer to an old ISO that is no longer available on the image servers, and the download will fail.
We can update the templates from the assistant itself:
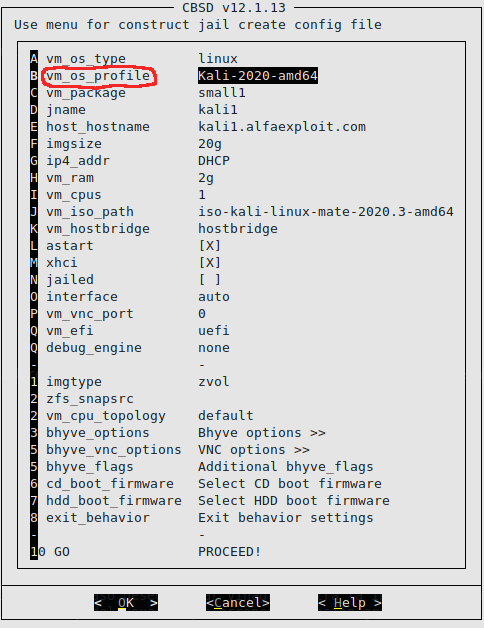
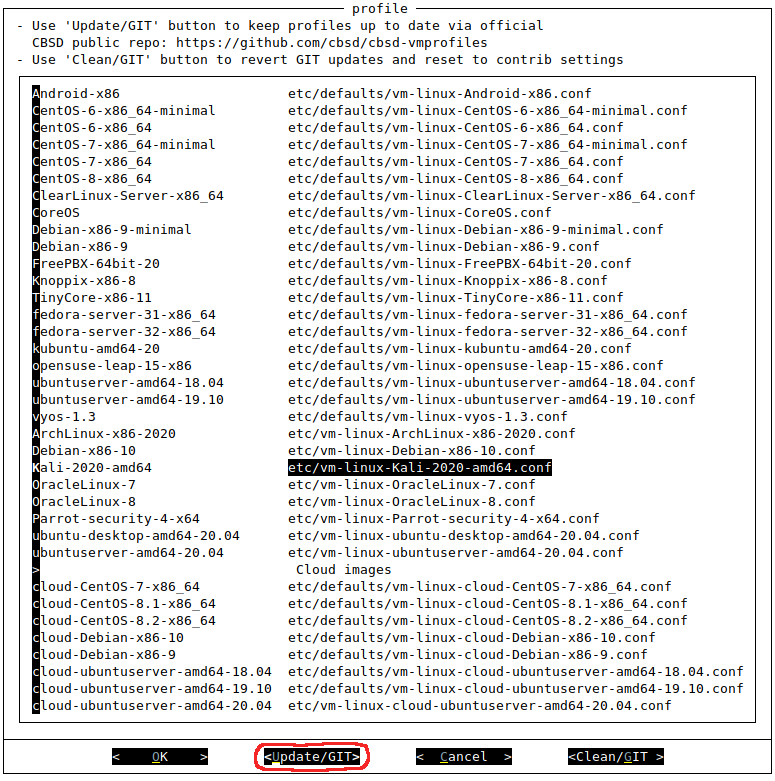
If a message appears warning us that our git configuration is incomplete and complains about the way to merge git changes, we will have to go to the repository directory and execute the configuration commands:
git config pull.rebase false
Now we can launch the assistant and it won’t complain.
If we prefer, we can do a direct pull, obtaining the same result as with the assistant:
git pull
The default configuration of CBSD is located in the directory: /usr/jails/etc/defaults/
If we want to modify any value, we will do it in the FreeBSD style, that is, generating the same file in a directory higher than the directory where the default file is located, this new file will contain only the parameters that we want to overwrite.
To change the domain name, we will edit the following files:
default_domain="alfaexploit.com"
default_domain="alfaexploit.com"
default_domain="alfaexploit.com"
default_domain="alfaexploit.com"
A very useful functionality if we are testing CBSD on our desktop PC is the blogin command, which allows us to specify the command to execute to log in to the Bhyve VM. In my case, I want to launch Vinagre against the loopback IP on the VNC port assigned to the VM. However, to do this from root, we will have to export the DISPLAY variable, define the path of the Xauthority file of the user who started the current graphical session, and finally launch Vinagre as that user.
login_cmd="export DISPLAY=:0.0 && export XAUTHORITY=/home/kr0m/.Xauthority && su -m kr0m -c \"xhost si:kr0m:root\" && su -m kr0m -c \"vinagre 127.0.0.1:${vnc_port}\""
NOTE: If we need to modify the login command for a specific VM, we must edit the file: /usr/jails/jails-system/VM_NAME/etc/blogin.conf
Of course, if the CBSD installation was done on a remote server, the blogin command is completely useless. We will have to configure the VNC parameters of the VM to be able to access it from the outside or bind VNC to the loopback and each VM on a different port. Access from outside would be done through SSH tunnels. Both procedures are detailed later in this same manual.
By default, the network of the jails is managed through aliases in the parent, while in Bhyve it is done through tap devices and a bridge. Let’s give an example of Jail and Bhyve to make it clearer.
Jail Management:
We start the construction assistant of a Jail:
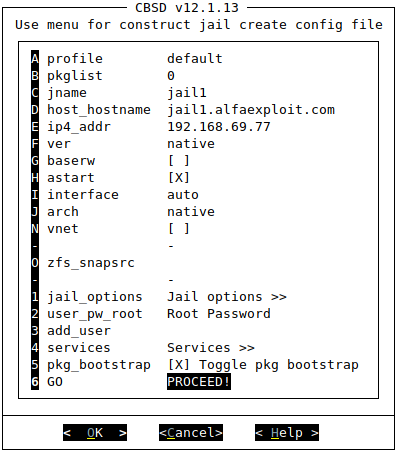

Starting the Jail:
cbsd jls
JNAME  JID  IP4_ADDR       HOST_HOSTNAME    PATH                    STATUS
jail1  4    192.168.69.77  jail1.alfaexploit.com  /usr/jails/jails/jail1  On
If we leave the IP address in DHCP, it will give us one from the range: 10.0.0.0/16. If we want to assign IPs by DHCP to Jails, we will have to use the VNET network mode, not alias.
If we assign an IP from our network range (192.168.69.77) to the parent, an alias will be created automatically:
em0: flags=8843<UP,BROADCAST,RUNNING,SIMPLEX,MULTICAST> metric 0 mtu 1500
 options=81249b<RXCSUM,TXCSUM,VLAN_MTU,VLAN_HWTAGGING,VLAN_HWCSUM,LRO,WOL_MAGIC,VLAN_HWFILTER>
 ether 34:97:f6:36:bf:45
 inet 192.168.69.4 netmask 0xffffff00 broadcast 192.168.69.255
 inet 192.168.69.77 netmask 0xffffffff broadcast 192.168.69.77
 media: Ethernet autoselect (1000baseT <full-duplex>)
 status: active
 nd6 options=29<PERFORMNUD,IFDISABLED,AUTO_LINKLOCAL>
We enter the Jail:
uname -a
FreeBSD jail1.alfaexploit.com 12.1-RELEASE-p10 FreeBSD 12.1-RELEASE-p10 GENERIC amd64
em0: flags=8843<UP,BROADCAST,RUNNING,SIMPLEX,MULTICAST> metric 0 mtu 1500
 options=81249b<RXCSUM,TXCSUM,VLAN_MTU,VLAN_HWTAGGING,VLAN_HWCSUM,LRO,WOL_MAGIC,VLAN_HWFILTER>
 ether 34:97:f6:36:bf:45
 inet 192.168.69.77 netmask 0xffffffff broadcast 192.168.69.77
 media: Ethernet autoselect (1000baseT <full-duplex>)
 status: active
To provide network to Jails, aliases are used on the parent interface. Since these are aliases, they are IPs of the parent and the Jail simultaneously, which implies certain problems if we bind the parent’s services to all available addresses. For example, if we do this with the Ssh service while the Jail has the service started, the Ssh of the Jail will be served on that IP. If the Ssh of the Jail is turned off, the Ssh of the parent will be served, which can be confusing.
Any service of the parent must be bound exclusively to its IP address. In the Jail, there is no problem since it only sees the assigned IP, and with a wildcard, it is bound to this single existing IP.
In the parent, we must avoid generic bindings like these:
ListenAddress 0.0.0.0
listen *
This could be avoided by using the VNET network technology, which will provide a complete TCP/IP stack to the Jail, but this is another story that I will explain in a future article.
We access the Jail via SSH:
jail1:/root@[19:04] #
If we are testing CBSD on a desktop computer, it is likely that the gvfs process is running, which can cause problems when we delete jails since the gvfs Trash process may be accessing the filesystem.
We check if any filesystem belongs to a deleted jail:
zroot/ROOT/default/jail1 88K 17.6G 88K /usr/jails/jails-data/jail1-data
To locate the problematic process, we will run lsof in a similar way to the following:
COMMAND     PID USER   FD   TYPE                DEVICE SIZE/OFF NODE NAME
gvfsd-tra 71064 kr0m   31r  VDIR 2588486123,3870875304        2    4 /usr/jails/jails-data/jail1-data
We kill the process:
We unmount the filesystem and destroy it:
zfs destroy zroot/ROOT/default/jail1
Bhyve VM Management:
We start the Bhyve VM construction wizard:
In the case of Bhyve, the network configuration will be governed by the configuration made through the guest OS installer, ignoring the parameters of the wizard. These parameters are simply stored in the SQLite database in case integration with an external service such as a DHCP server is necessary. In this way, we could run a DHCP configuration script based on the indicated IP and the VM’s MAC address just before starting it. In this article we can see a complete example.
When creating the VM, two tap interfaces are created in the parent, one for the VM and one for the parent, these two interfaces along with the physical interface are put into a bridge.
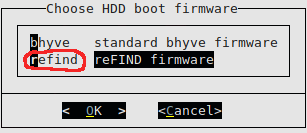
If we are creating a Linux machine, we must change the disk boot firmware to refind, in other systems such as DragonFlyBSD, it seems that the Bhyve firmware works without problems:

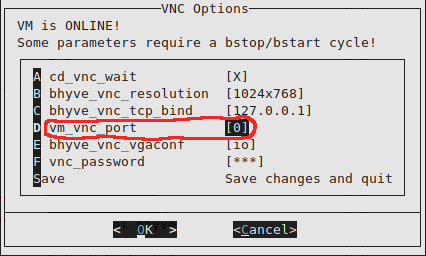
Now we must decide whether to sacrifice a network IP address for VNC access or bind the service to the loopback and access via Ssh tunnel. By using the loopback, access will be more secure since it will only be exposed when we mount the tunnel and we will not waste IP addresses, but we will have to configure a different VNC port for each VM.
Bhyve VNC-loopback:
We access the VNC options of the wizard:
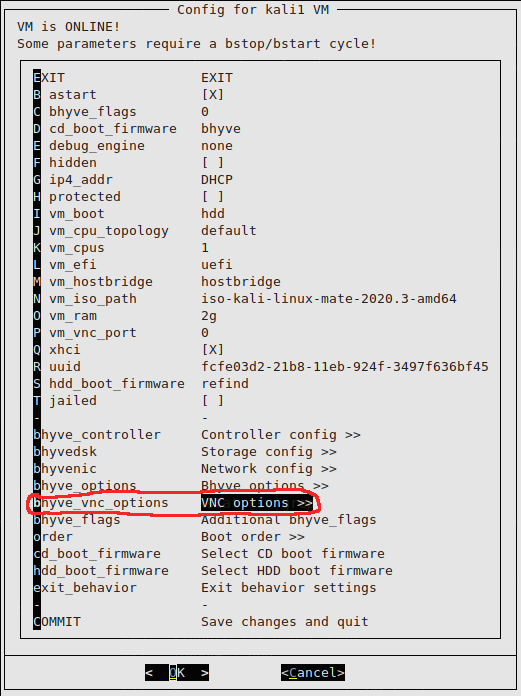
We configure a different port for each VM:
Bhyve VNC-Ip:
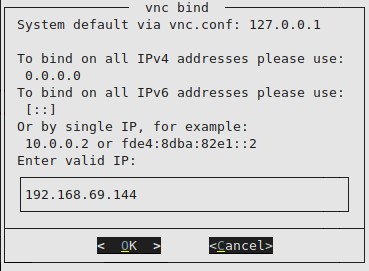
We access the VNC options of the wizard:

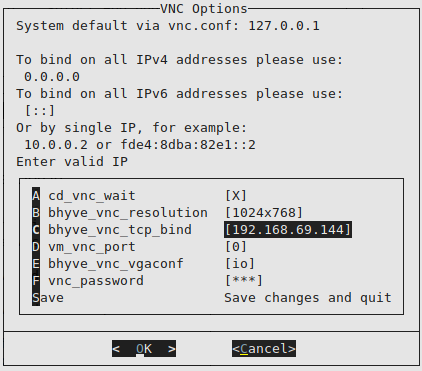
We configure an IP address:
Resulting in the following:
We configure the IP as an alias in the parent, we will leave it configured in the rc.conf and manually so that in case of a restart, the configuration will not be lost:
sysrc ifconfig_nfe0_alias0="inet IP_VM netmask NETMASK"
Manually:
We finish creating the VM:

If we want to modify any parameter, we just have to execute the bconfig command:
When we start the VM, it will ask us if we want to boot from the cdrom:
May be you want to boot from CD?
[yes(1) or no(0)]
1
Temporary boot device: cd
vm_iso_path: iso-kali-linux-mate-2020.2-amd64
No such media: /usr/jails/src/iso/cbsd-iso-kali-linux-2020.2-installer-amd64.iso in /usr/jails/src/iso
If the installation ISO image of the distro is not found, it will ask us if it should be downloaded from the mirrors:
Shall i download it from: https://gemmei.ftp.acc.umu.se/mirror/kali.org/kali-images/kali-2020.2/ https://cdimage.kali.org/kali-2020.2/ http://mirrors.dotsrc.org/kali-images/kali-2020.2/ http://mirror-1.truenetwork.ru/kali-images/kali-2020.2/ ?
[yes(1) or no(0)]
1
We check the available VMs, depending on how we configured the VNC access, we will get different outputs:
VNC-Loopback:
JNAME  JID    VM_RAM  VM_CURMEM  VM_CPUS  PCPU  VM_OS_TYPE  IP4_ADDR  STATUS  VNC
kali1  75966  2048    25         1        0     linux       DHCP      On      127.0.0.1:5900
VNC-Ip:
JNAME  JID    VM_RAM  VM_CURMEM  VM_CPUS  PCPU  VM_OS_TYPE  IP4_ADDR  STATUS  VNC
kali1  75903  2048    264        1        0     linux       DHCP      On      192.168.69.144:5900
We log in via VNC and proceed with the installation.
VNC-Loopback:
We mount the Ssh tunnel to access the VNC from outside:
We access through the tunnel:
VNC-Ip:
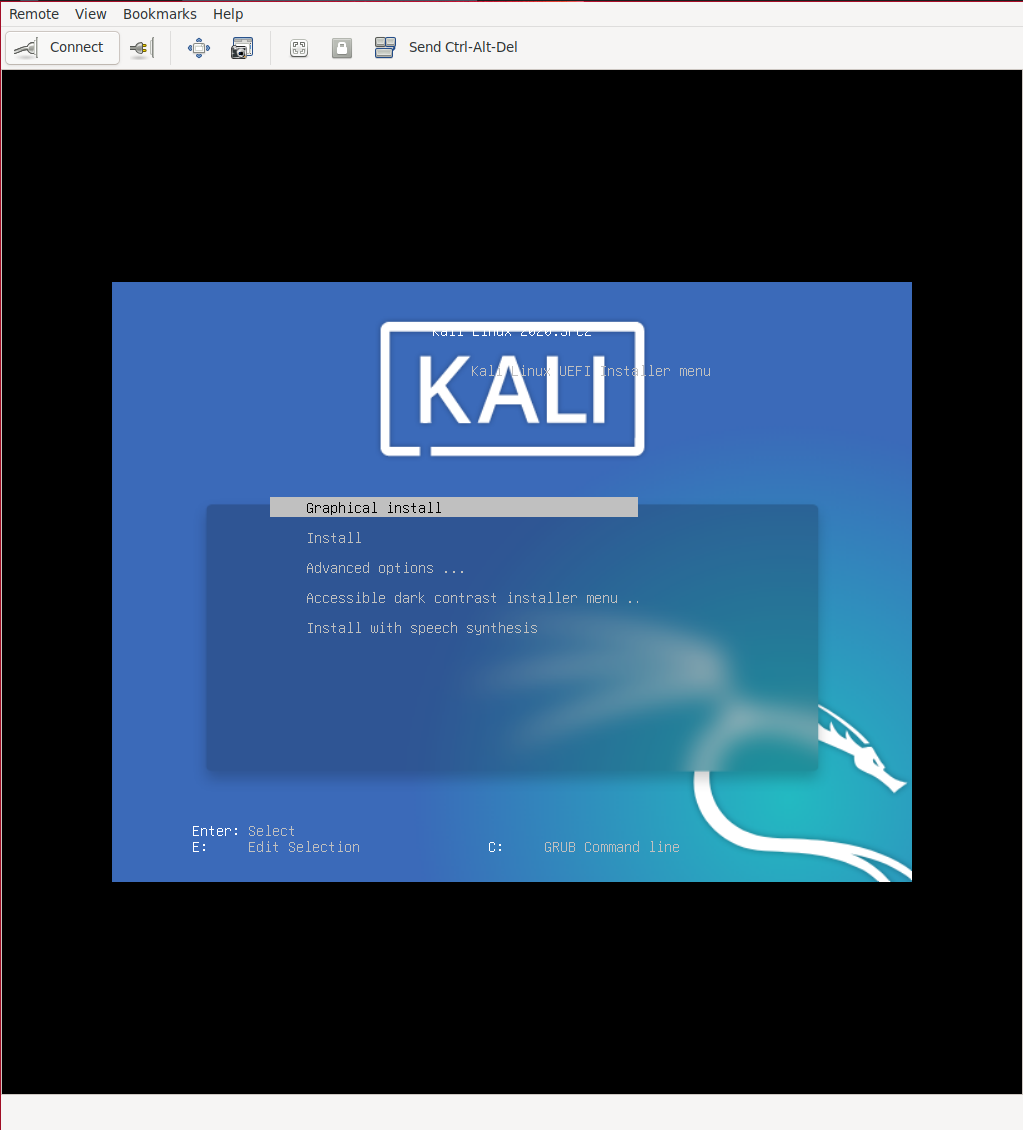
In the bridge we can see an interface for the parent, another for the VM, and the physical interface:
bridge1: flags=8843<UP,BROADCAST,RUNNING,SIMPLEX,MULTICAST> metric 0 mtu 1500
 description: em0
 ether 02:89:af:f3:c6:01
 id 00:00:00:00:00:00 priority 32768 hellotime 2 fwddelay 15
 maxage 20 holdcnt 6 proto rstp maxaddr 2000 timeout 1200
 root id 00:00:00:00:00:00 priority 32768 ifcost 0 port 0
 member: tap2 flags=143<LEARNING,DISCOVER,AUTOEDGE,AUTOPTP>
         ifmaxaddr 0 port 5 priority 128 path cost 2000000
 member: tap1 flags=143<LEARNING,DISCOVER,AUTOEDGE,AUTOPTP>
         ifmaxaddr 0 port 4 priority 128 path cost 2000000
 member: em0 flags=143<LEARNING,DISCOVER,AUTOEDGE,AUTOPTP>
         ifmaxaddr 0 port 1 priority 128 path cost 20000
 groups: bridge
 nd6 options=9<PERFORMNUD,IFDISABLED>
tap1: flags=8903<UP,BROADCAST,PROMISC,SIMPLEX,MULTICAST> metric 0 mtu 1500
 description: CBSDSYSTEM0
 options=80000<LINKSTATE>
 ether 00:bd:3a:47:f7:01
 groups: tap
 media: Ethernet autoselect
 status: no carrier
 nd6 options=29<PERFORMNUD,IFDISABLED,AUTO_LINKLOCAL>
tap2: flags=8943<UP,BROADCAST,RUNNING,PROMISC,SIMPLEX,MULTICAST> metric 0 mtu 1500
 description: kali1-nic0
 options=80000<LINKSTATE>
 ether 00:bd:15:46:c5:02
 groups: tap vm-port
 media: Ethernet autoselect
 status: active
 nd6 options=29<PERFORMNUD,IFDISABLED,AUTO_LINKLOCAL>
 Opened by PID 43480
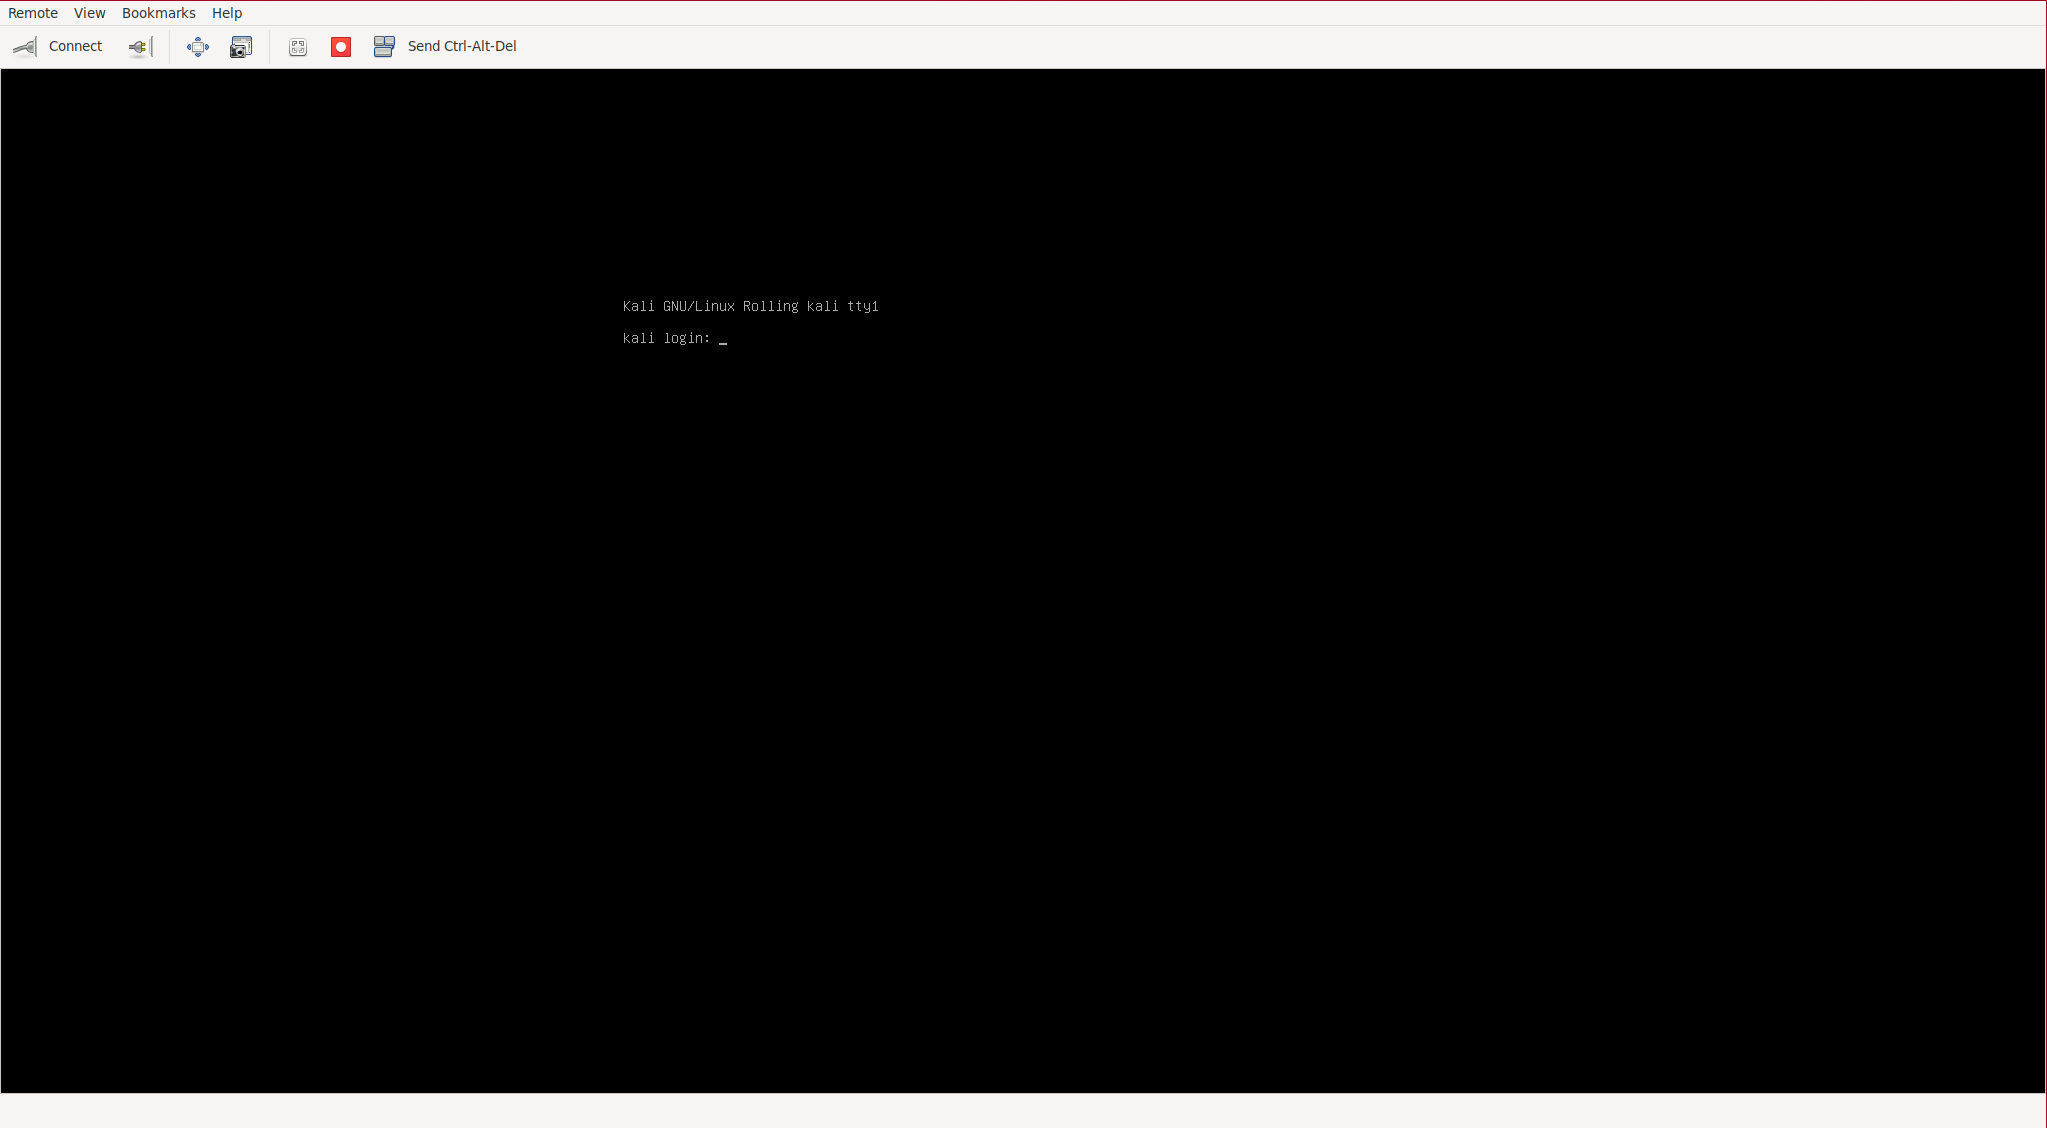
If the X’s have been installed, they are buggy ( 1 , 2 ). The bug in question presents the following window when trying to start the X:

To solve it, we will have to enter through Ssh and uninstall the xserver-xorg-video-vesa package. The problem is that when we start the graphical environment, it hangs due to the bug, and when we press Ctrl+Alt+F1, we are sending the keystrokes to our FreeBSD. To be able to do this within the VNC client, we must first disable the keys in our OS.
Now we can log in from the non-graphical tty and start the Ssh service to uninstall the conflicting package:
We access the VM via Ssh:
We uninstall the package:
reboot
We re-enable Ctrl+Alt+FX:
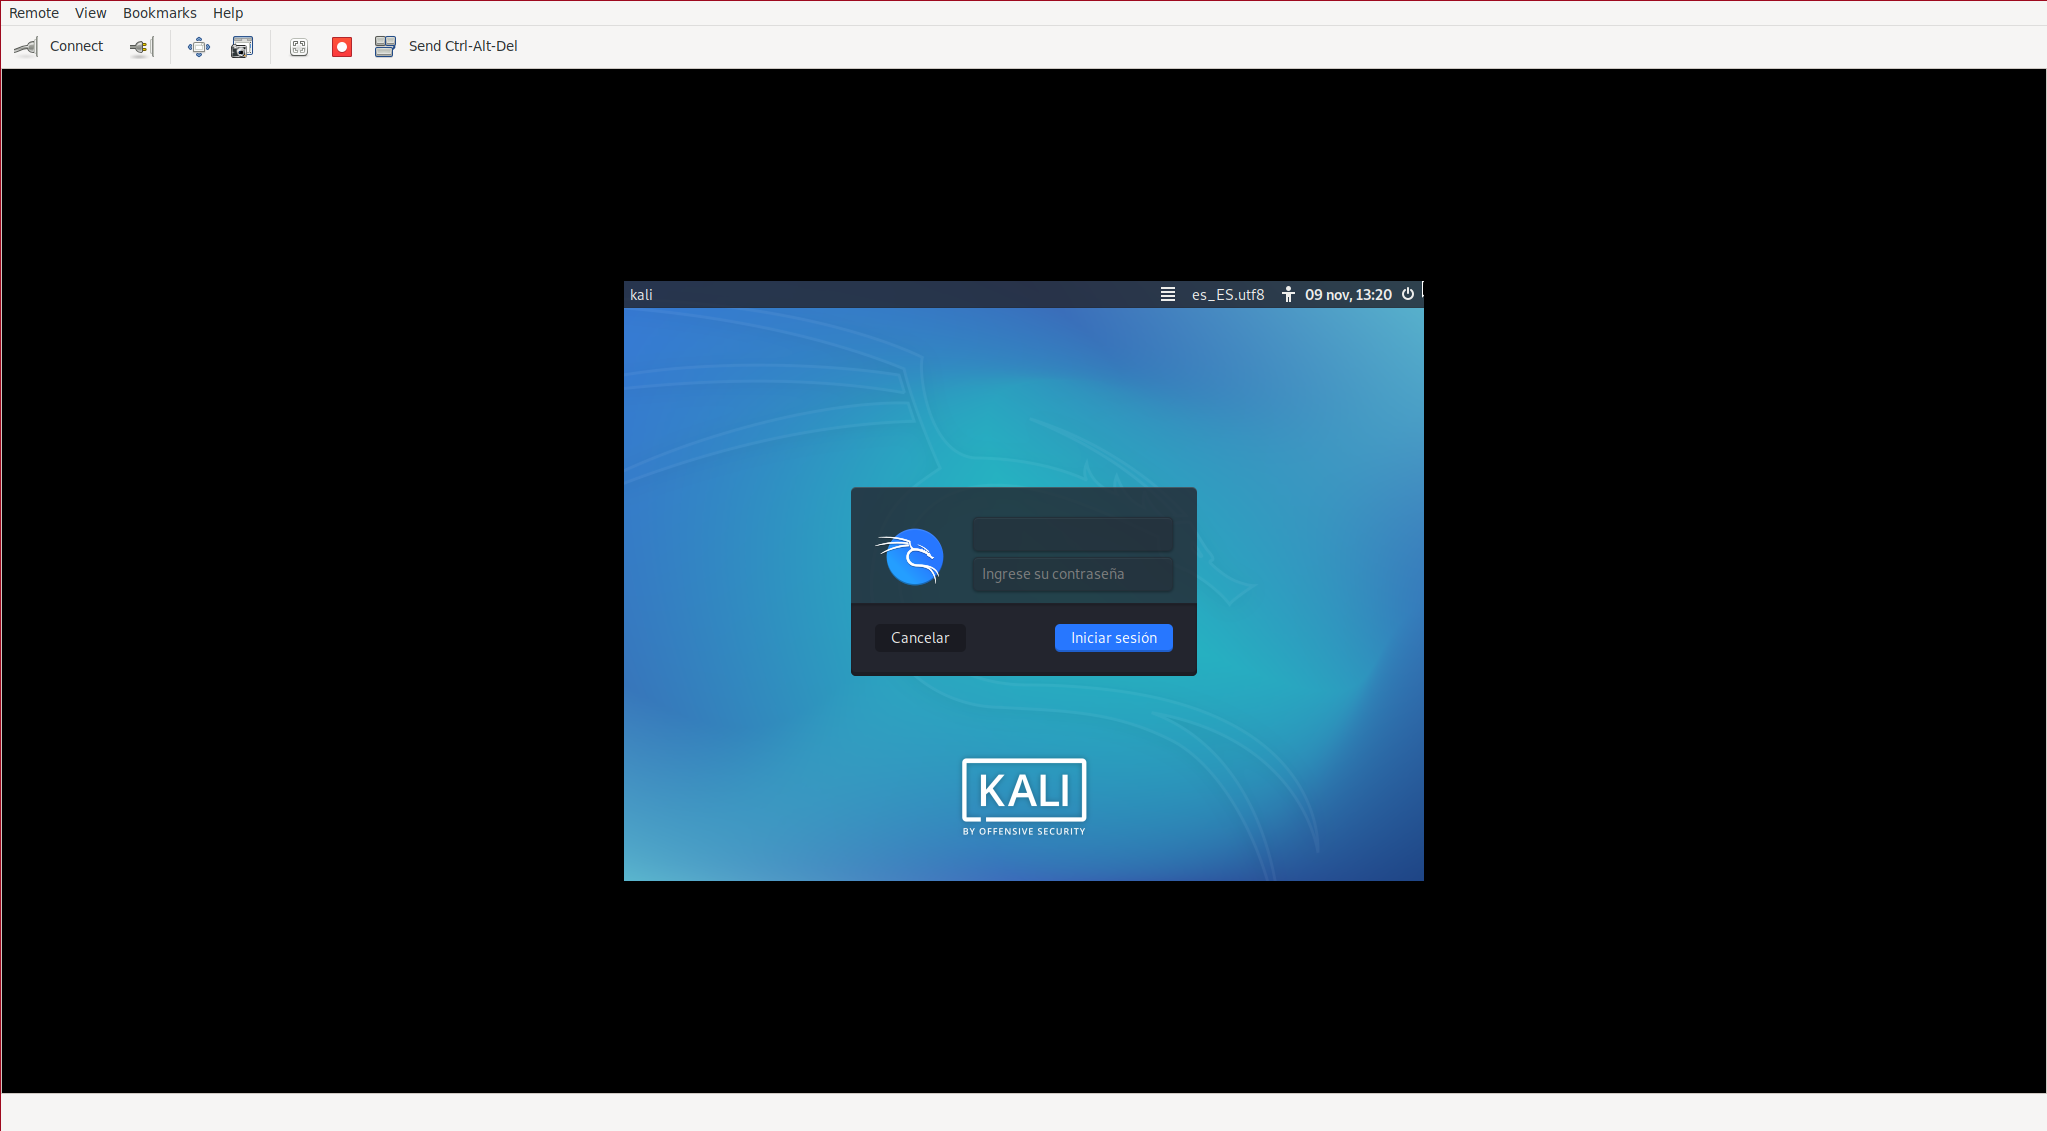
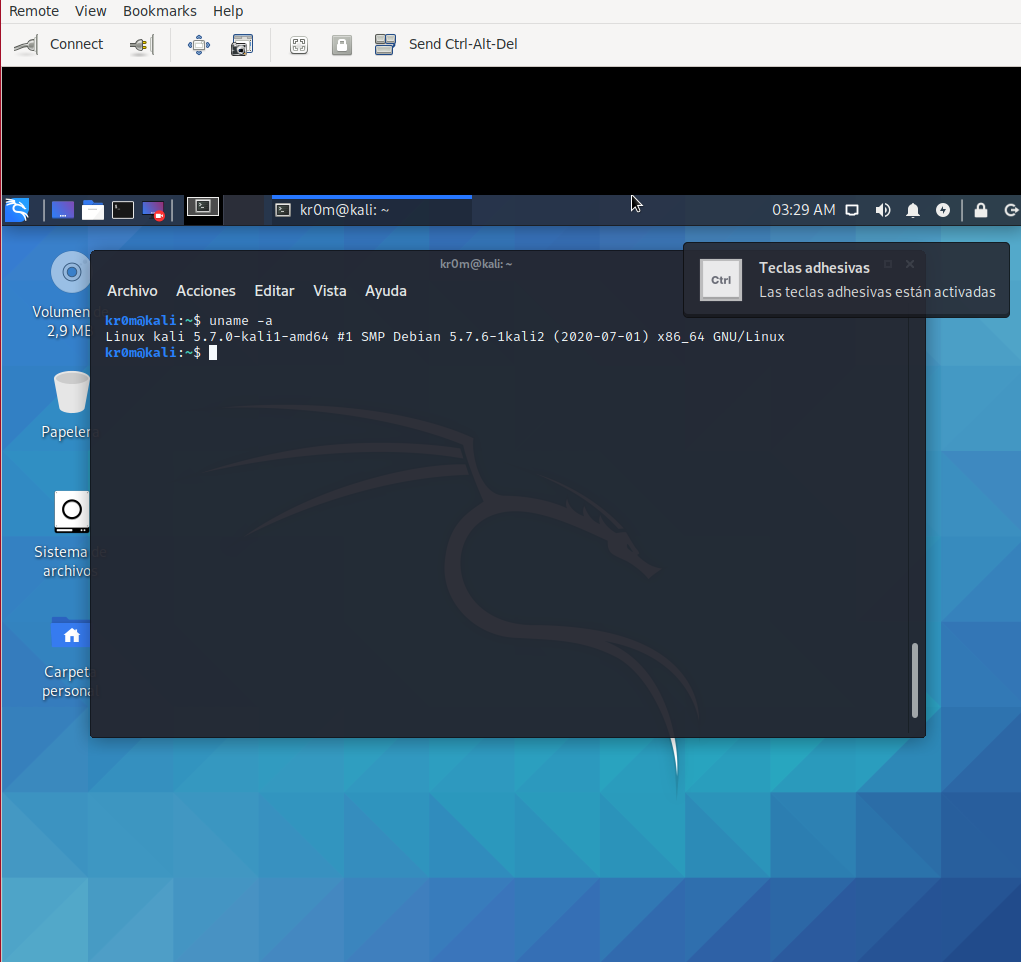
As we can see, Kali starts X normally, and if we log in, we will see that the graphical environment works without problems:
Another way to have X working is to install the OS through CBSD’s VNC and then access the VM via SSH to install a VNC server inside it, so we would no longer depend on Bhyve’s VNC.
As a final note, if we only want to start certain graphical applications, we can do so through ssh-xforward without the need to start the entire X.
We authorize the Kali IP to launch applications locally over the network, connect via SSH, and remotely launch the application:
ssh -vYC kr0m@192.168.69.99 burpsuite